e mail marketing campaign overview
TRANSCRIPT
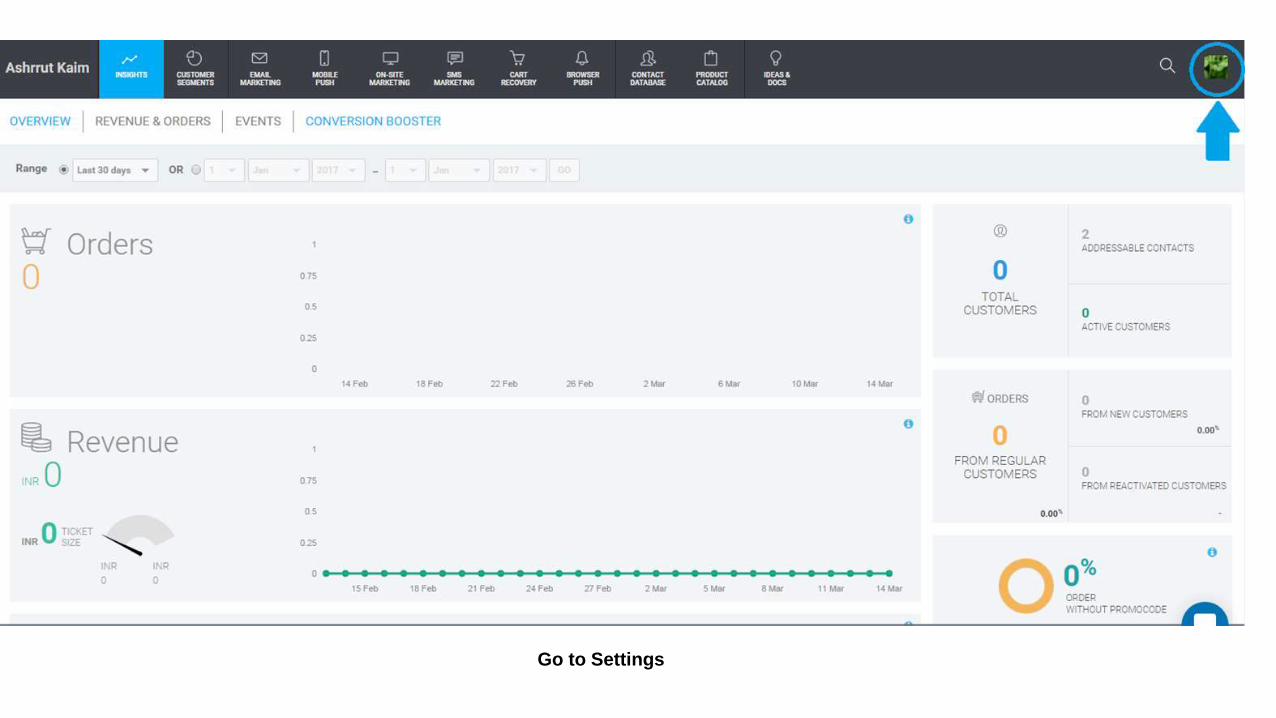
Go to Settings
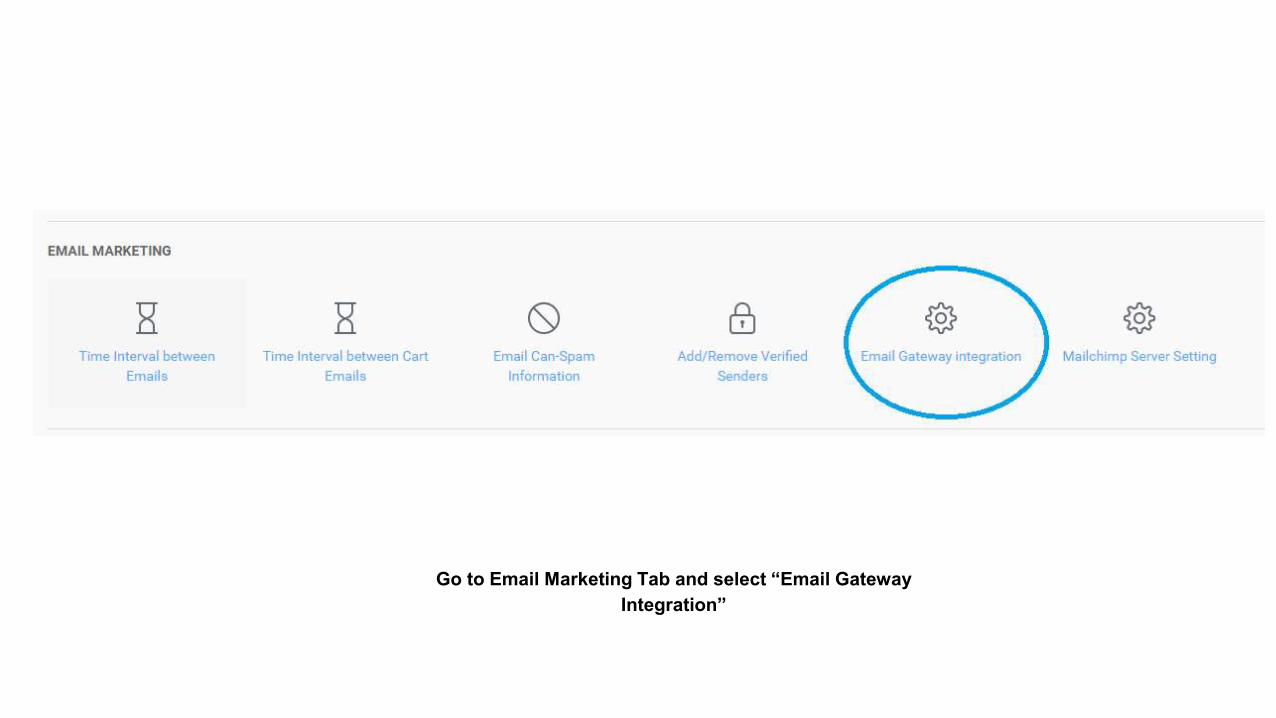
Go to Email Marketing Tab and select “Email Gateway
Integration”
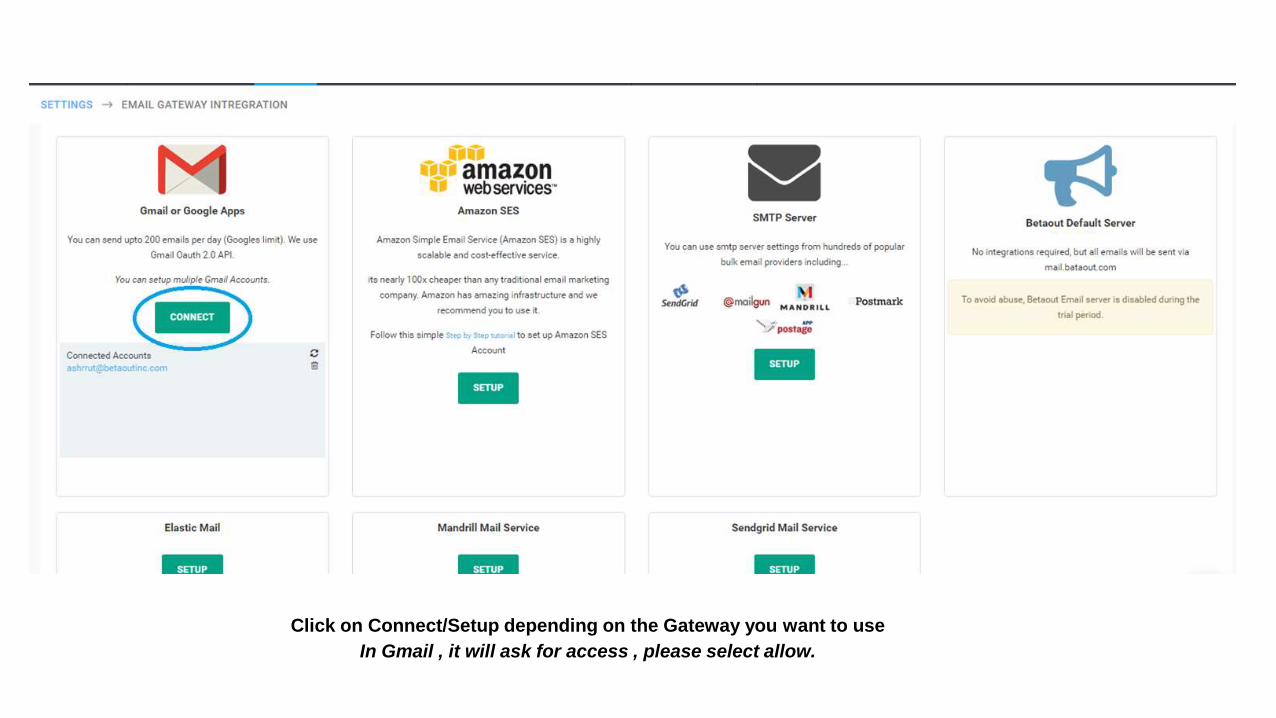
Click on Connect/Setup depending on the Gateway you want to use
In Gmail , it will ask for access , please select allow.

Click on Email Marketing and click Campaigns
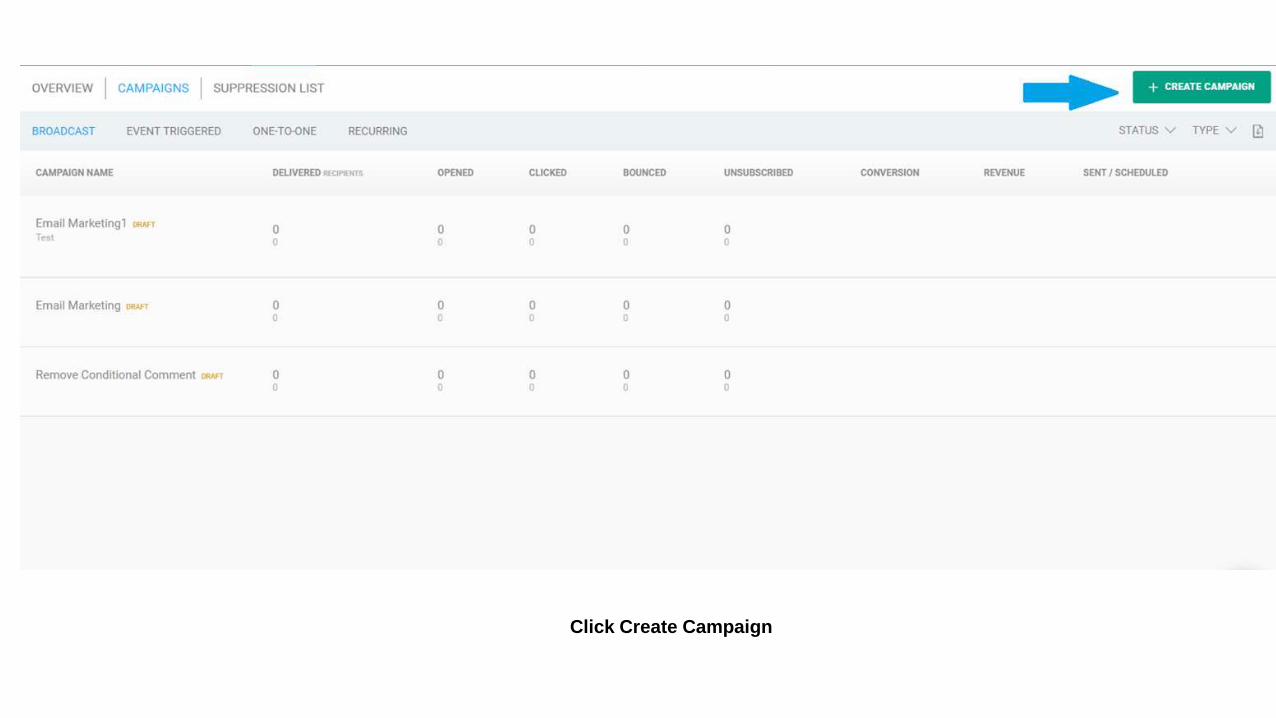
Click Create Campaign
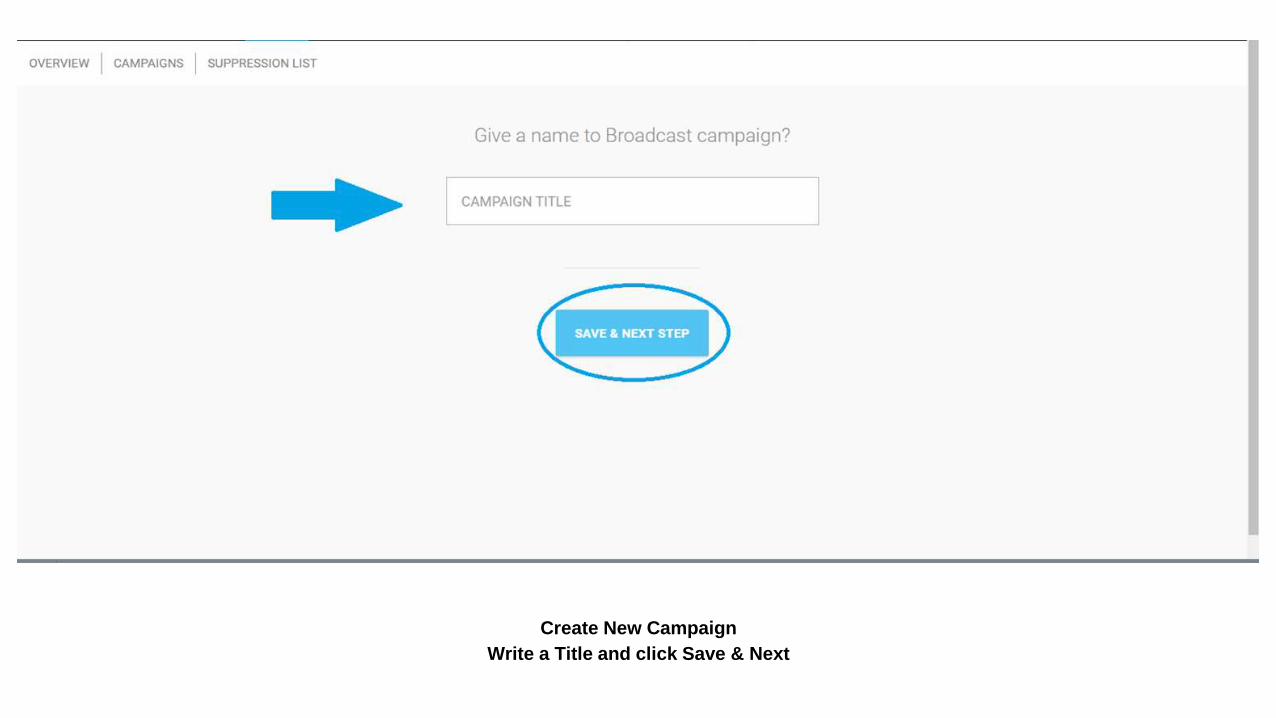
Create New Campaign
Write a Title and click Save & Next

You have 5 templates to choose from ie. Custom
Drag HTML, Blank Template, Fashion, Watches &
Furnish. We choose Blank Template.

Write Subject and Sender ID(Both Mandatory)
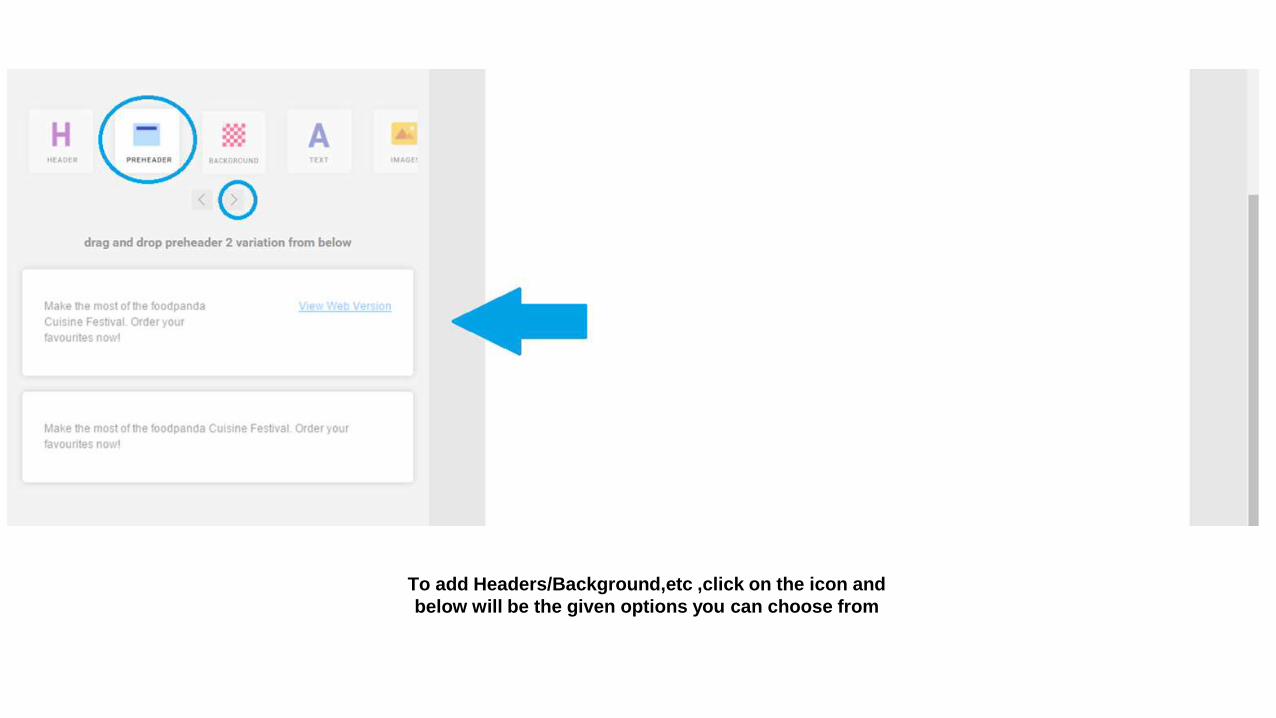
To add Headers/Background,etc ,click on the icon and
below will be the given options you can choose from
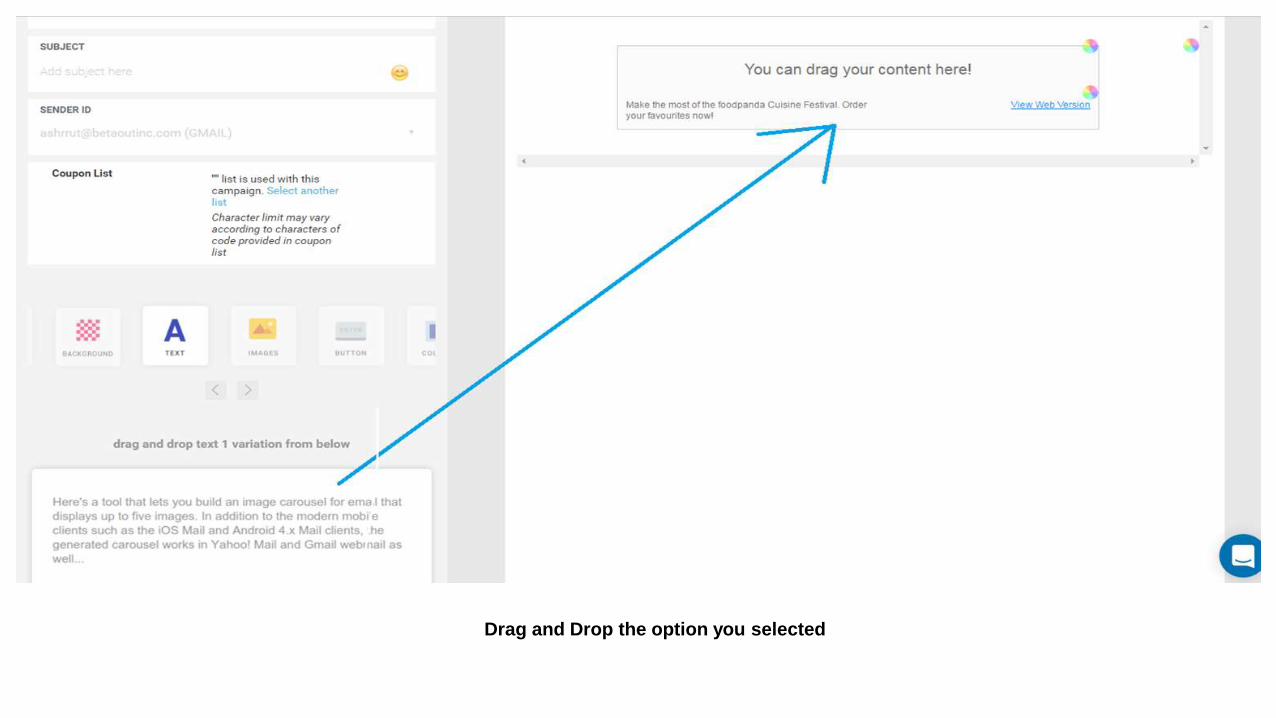
Drag and Drop the option you selected
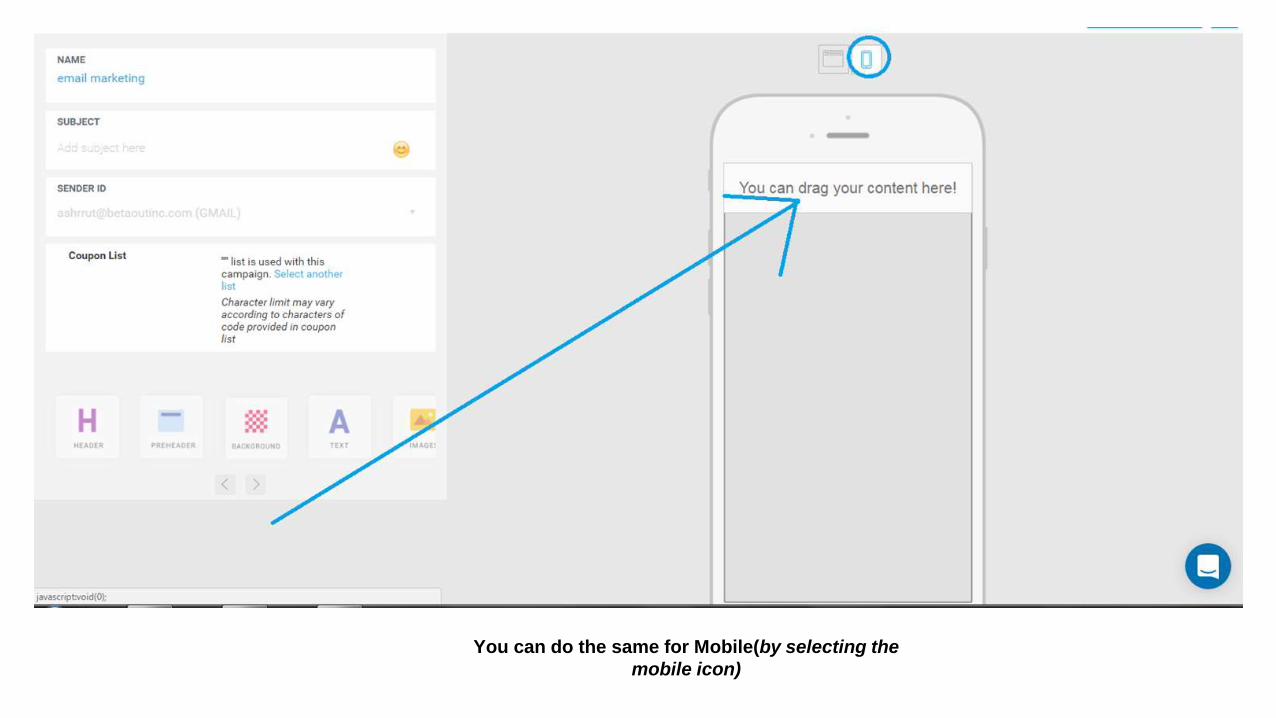
You can do the same for Mobile(by selecting the
mobile icon)

If you want to go back to the Template page , click on
the 3 dots and select Change Template
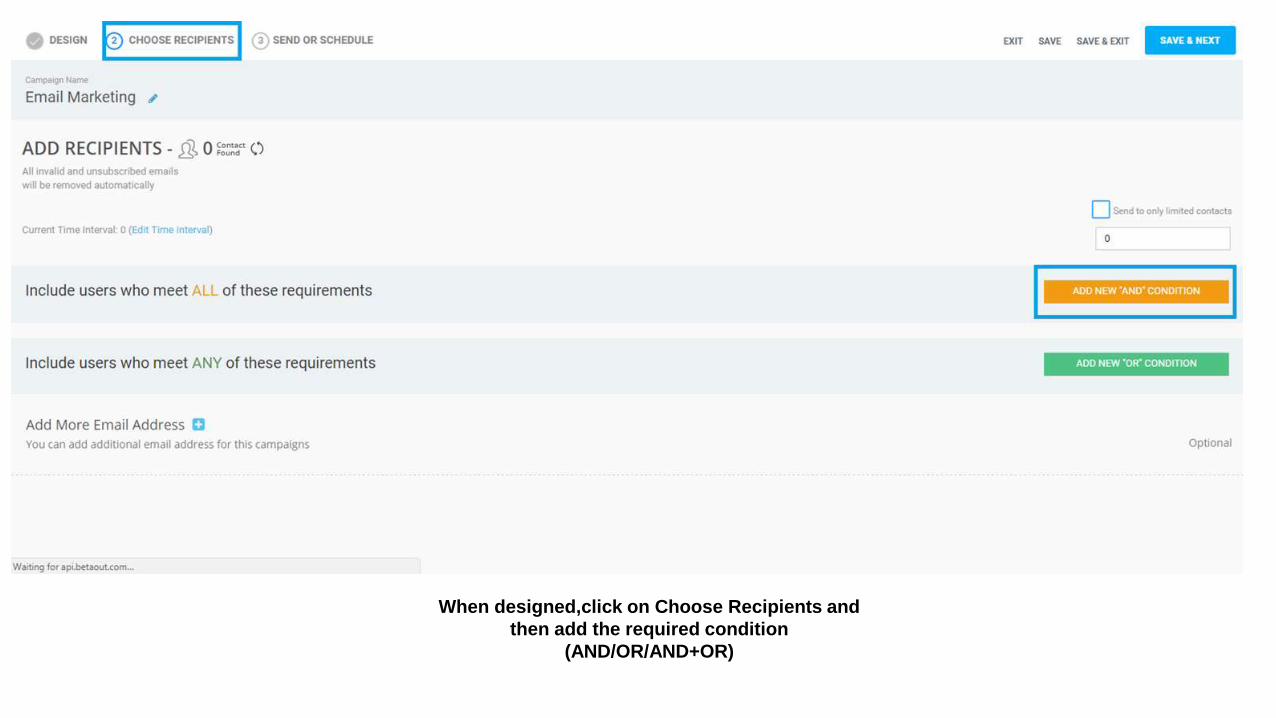
When designed,click on Choose Recipients and
then add the required condition
(AND/OR/AND+OR)

Add the required properties and click on
the two round arrow icon (this will fetch
the contacts to whom the email will be
sent)
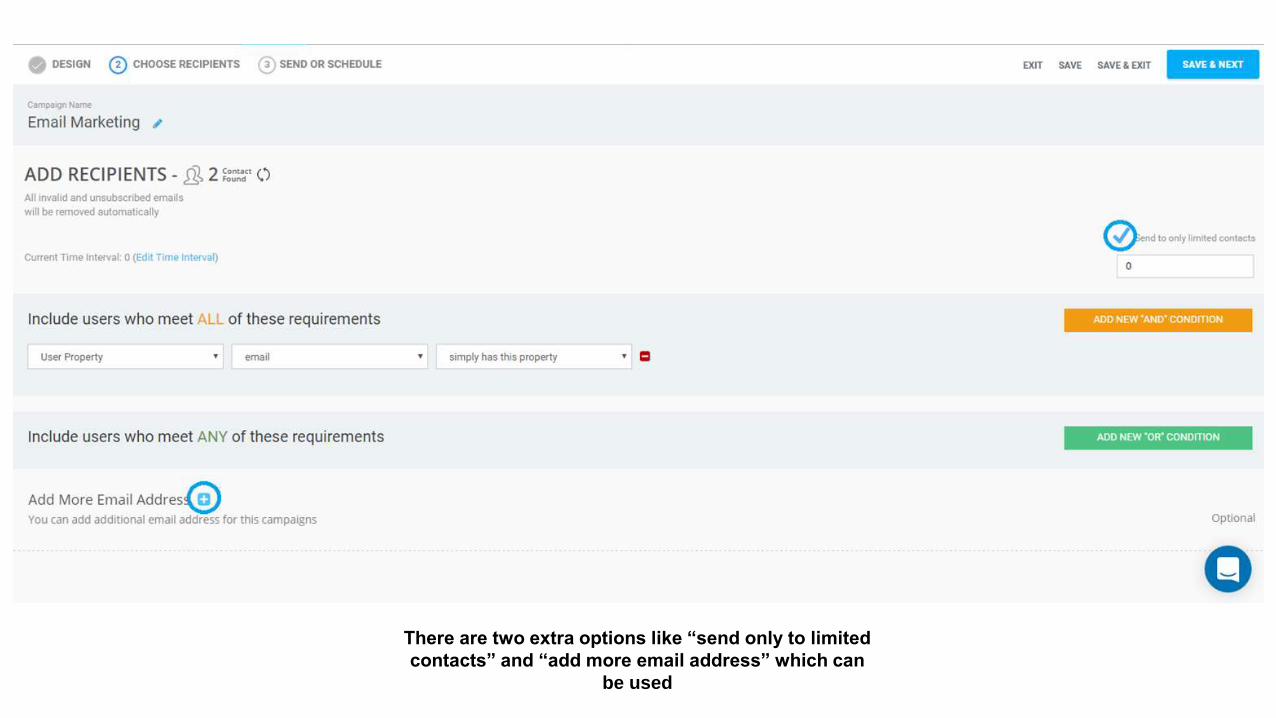
There are two extra options like “send only to limited
contacts” and “add more email address” which can
be used
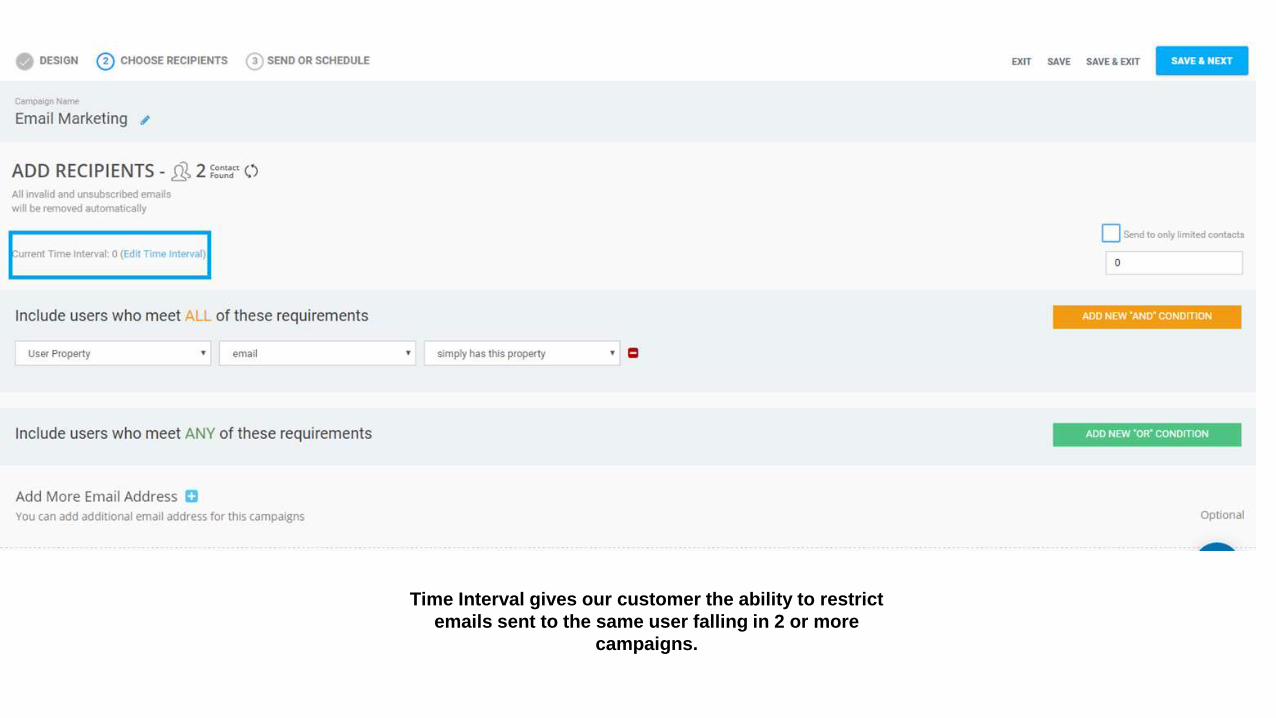
Time Interval gives our customer the ability to restrict
emails sent to the same user falling in 2 or more
campaigns.
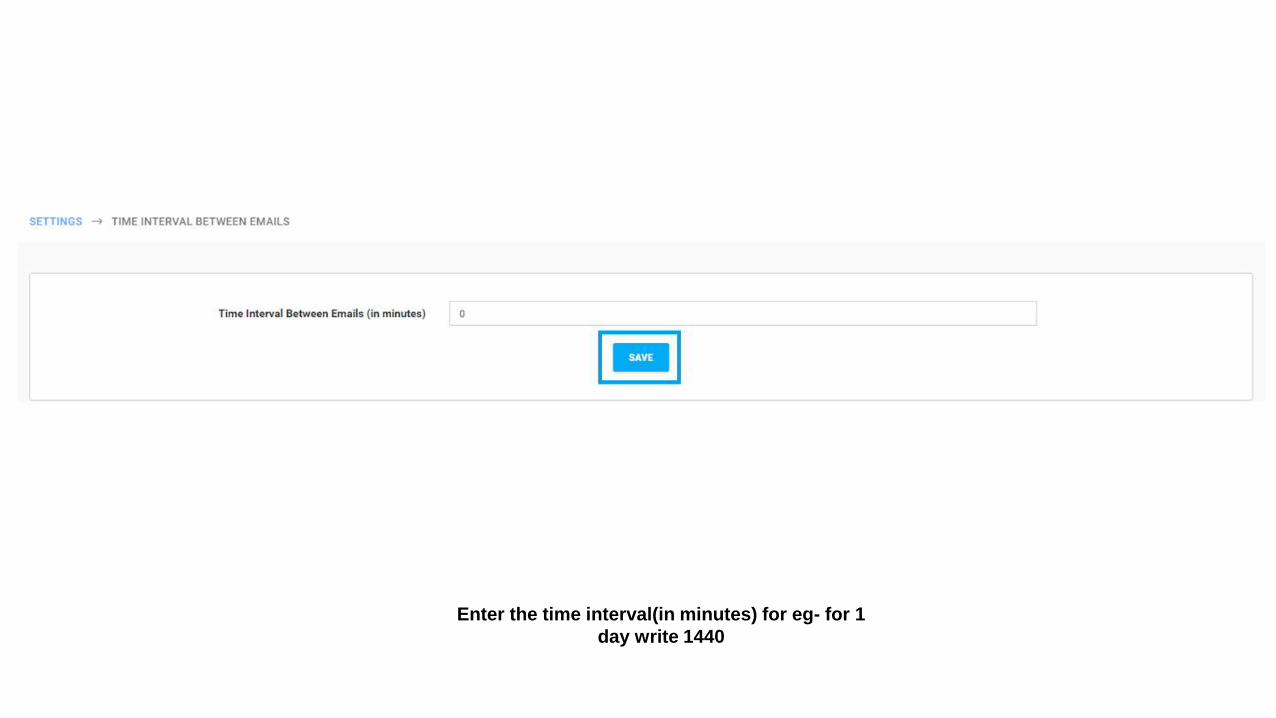
Enter the time interval(in minutes) for eg- for 1
day write 1440
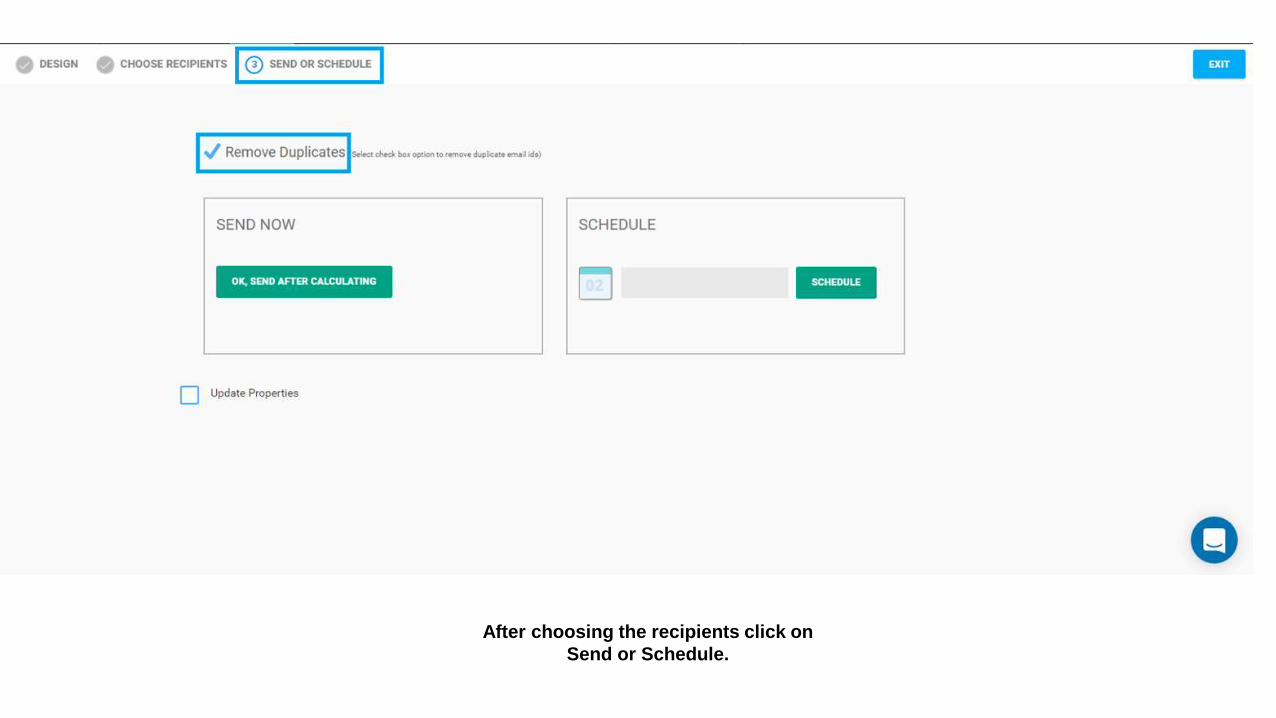
After choosing the recipients click on
Send or Schedule.
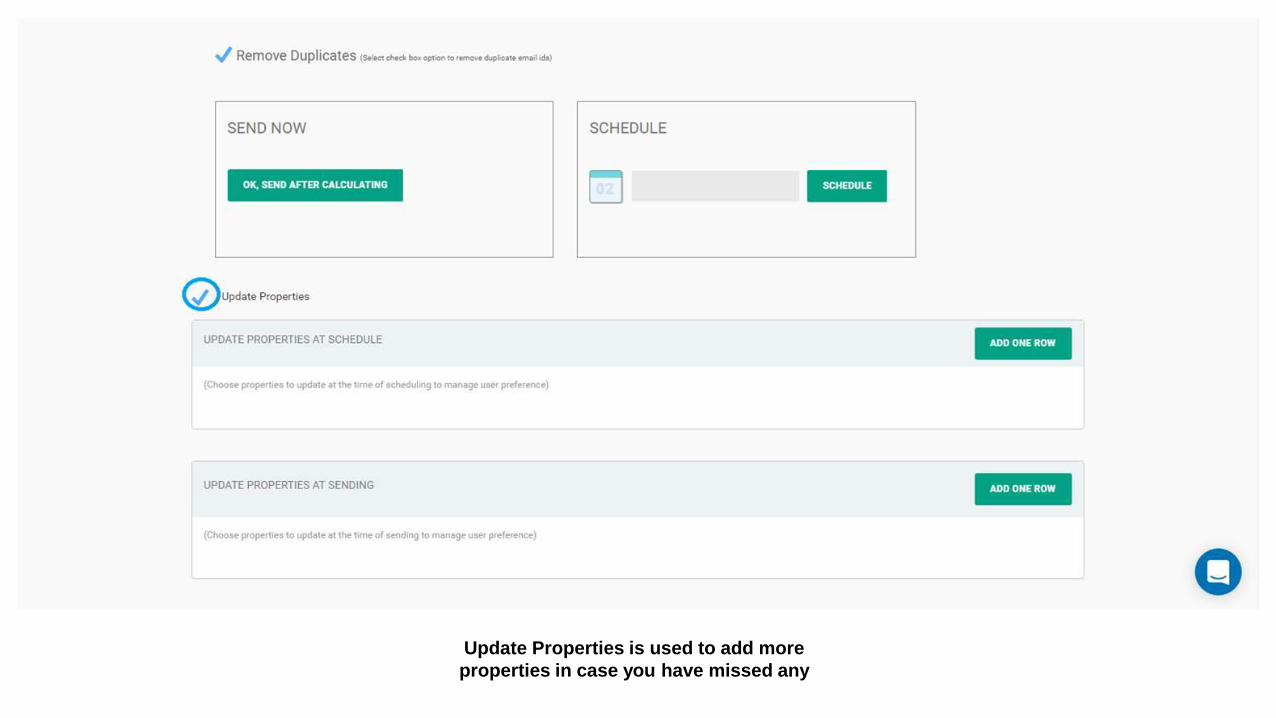
Update Properties is used to add more
properties in case you have missed any

You can choose from Send Now or Schedule
Note: Schedule time cannot be empty
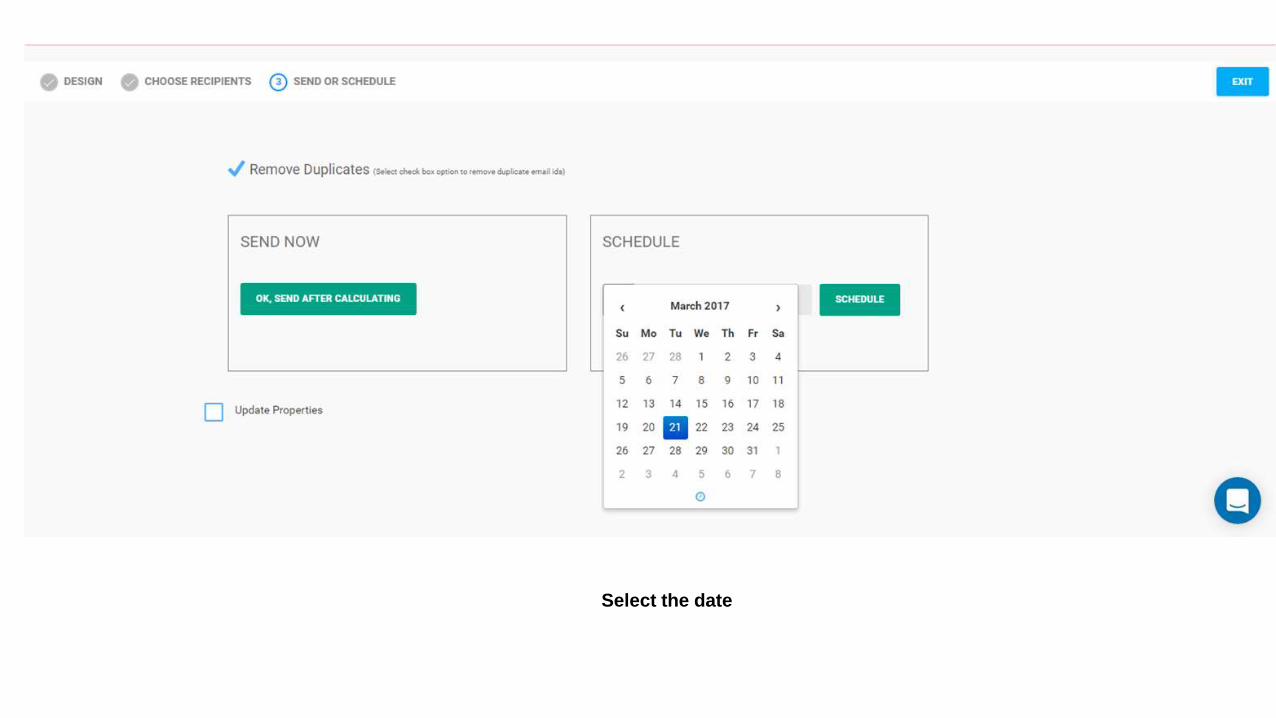
Select the date
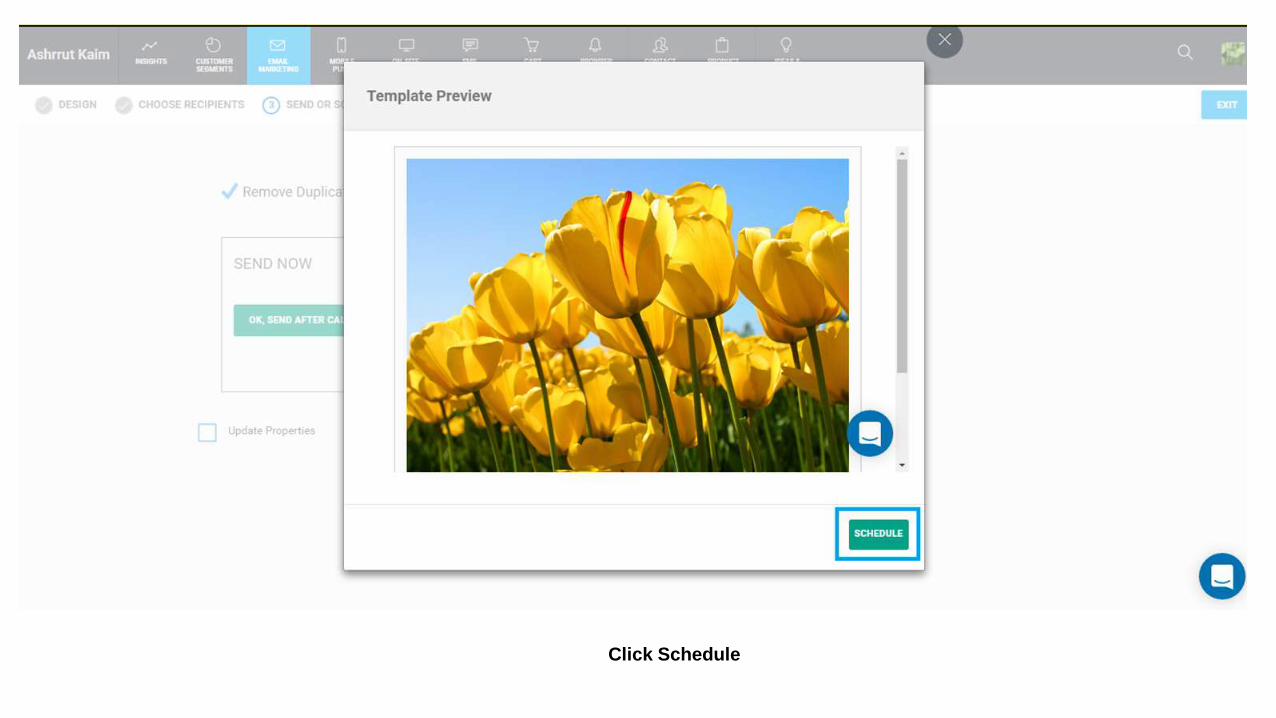
Click Schedule