dx11
TRANSCRIPT

DirectX
®11 Games Programming
By Tony McMahon ©2009
Page | 2
Introduction
The goal of this book is to learn DirectX 11 and to make some cool fun games. There were many options to choose
from to make a game, I chose DirectX 11, its new, feature packed and useful in the industry. XNA is an option if you
want to make XBOX 360 games, OpenGL is a good option for other platforms.
I like the impressive nature of graphics and games, virtual worlds, that fact you can race a F1 car on some far away
track and have fun doing it. I think like many DOOM was the start of the interest in games, the fact it was 3D amazed
me, it was a game once you started you just had to keep playing. Back then it was the game everyone was playing in
the office at lunch or at home. There was that question many of us have "how do they do that?" and more
importantly "how can I do that?" hence this book. There is allot to learn, the language for a start not just C++ but the
language of graphics and windows, such terms as "rendering" and "device context". A good book as hopefully this is
will go through step by step explaining all these things making it simple, I believe a complicated task like making a
game is lots of simple tasks. I didn't want to write a game engine or put everything in C++ classes, mostly I just want
to show you how the code works.
I've been tapping away at the keyboard since I got a ZX Spectrum way back when, since then I've been making
various programs, nearly always graphics related.
There is a website for this book http://www.dx11.org.uk containing various articles and links.
DirectX is a registered trademark of Microsoft
All other trademarks are property of their respective owners

Page | 3
Using Windows
Firstly most of our programs we write will create a "window" such as below. The window is made up of a title bar,
borders and a client area ( the grey area ) we need to be aware there is the size of the whole window and the size of
the client area, when we create a window we might want to have a specific size of client area to draw in. Windows
can also have a menu bar and a tool bar and a status bar. When we go full-screen the whole screen becomes our
"client area" as the borders and title bar disappear. We may write graphics programs that only uses part of the client
area, such as a CAD program or a program to display graphs.

Page | 4
Visual Studio and the DirectX 11 SDK
To make the latest 3D applications such as games you will need a few things such as:
1) A PC running Vista or Windows 7
2) Ideally a DirectX 11 graphics card, for this book I used a Sapphire ATI 5750 card
3) A development tool such as Visual Studio 2008, for this book I used C++, Visual Studio 2008, a free “express”
version can be downloaded from http://www.microsoft.com/express
4) The DirectX software development kit ( SDK ) which can be downloaded from
http://msdn.microsoft.com/directx
5) I would recommend two monitors, it speeds up productivity amazingly, one to do your programming in and
the other for the MSDN help or writing notes.
Also helpful will be a basic understanding of geometry, maths and having used C and C++ before. This book will not
cover in depth Windows Programming as that is a whole book on its own, it will cover the basics needed for DirectX
11.
The links above contain instructions on how to download and install the software you'll need. Remember to install
Visual Studio or Express before you install the DirectX SDK. Right we're ready to get programming.

Page | 5
Introducing Windows programming
Let’s begin with a simple “hello world” Windows program. All these programs are in the zip file with the book and on
the website.
Start Visual Studio, from the File menu select New Project, you will see the dialog below. We want a Visual C++,
Win32 project, so click “Win32 Project” and then type in the name “messagebox” in the Name edit box, then click
OK.
Another dialog will appear, click on “Application Settings” and the dialog will change to the one below and then click
on “Empty Project”. Finally click on “Finish”

Page | 6
Next thing to do is create a C++ file and type in some code, to do that you will usually to the top left see some
folders, right click on “Source Files” then select “Add” then “New Item”
The dialog below will appear, we want a C++ file, you can select “C++ File (.cpp)” and then type “messagebox.cpp”
then click “Add”. And now we can type in some code!
The screen will change showing you the empty file messagebox.cpp, you can now type in the code below, to run the
code use the Debug menu and select “Start without Debugging”.
#include <windows.h>
int WINAPI WinMain(HINSTANCE hInst,HINSTANCE,LPSTR,int)
{
MessageBox(NULL,L"Hello World!",L"Win32",MB_ICONINFORMATION);
return 0;
}
You should see a message box as seen in the next image. That is as simple as it gets to make a windows program but
it shows us a few useful things every windows program has, such as the WinMain() function. From here we can move
on to more useful programs, such as making a simple window that we can build our DirectX 11 programs on top of. A

Page | 7
great book on windows programming is Charles Petzold's "Programming Windows" 5th Edition if you want to get in
to making Windows programs.
A little overview of the code, firstly since we are writing a windows program we include the windows header (
windows.h ) , with windows we use WinMain() rather than main() as our start. Each program is given a number
known as a "instance", HINSTANCE hInst ( handle to the instance ) tells us that number, here we don't need to use
"hInst" but we will when making our next windows program. You can think of "handle" as a something like a
reference or pointer. There is a second HINSTANCE number which was used in older windows programs, you won't
need to use that hence I don't add a variable name. There is LPSTR ( long pointer to a string ) which contains a string,
if you used the command line messagebox.exe "string" then "string" would be contained in the variable you assign to
LPSTR, again something you will probably never need. Finally there is an int variable this contains the way the user
wants to show the window maybe minimized, maximized or normal, as before we ignore this and won't use it.
The MessageBox() function simply displays a message box as seen above, it creates a very simple window. That's our
"hello world" program, on to something more useful. As with any function you use you can double click it to
highlight it and then press F1 to get the help about that function ( remember to highlight it ). Another really helpful
hint is to use debugging, let's say you have a variable or structure "msg" and you want to know the value of it at a
certain point, you can right click at the point in the code where you want to know the value of msg and choose "run
to cursor" then once the program reaches that point it will pause and you can hover over "msg" to see its values.

Page | 8
A more useful windows program
Ok, let's move on to something we can use as a basis to build upon for DirectX 11. For now we will be making
windowed programs as opposed to full-screen. The code below can be used to make a simple window. So as before
we need to make a new Win32 C++ project, this time we will call it "window" and create a "window.cpp" file.
#undef UNICODE // keep text simple
#include <windows.h>
LRESULT CALLBACK WndProc(HWND,UINT,WPARAM,LPARAM);
HWND hwnd=NULL;
int width=640,height=480;
int WINAPI WinMain(HINSTANCE hInst,HINSTANCE,LPSTR,int)
{
WNDCLASS wc={0,WndProc,0,0,hInst,LoadIcon(NULL,IDI_APPLICATION),
LoadCursor(NULL,IDC_ARROW),(HBRUSH)COLOR_APPWORKSPACE+1,NULL,"app"};
RegisterClass(&wc);
RECT r={0,0,width,height};
AdjustWindowRect(&r,WS_OVERLAPPEDWINDOW,FALSE);
hwnd=CreateWindow("app","Window",WS_OVERLAPPEDWINDOW|WS_VISIBLE,
100,100,r.right-r.left,r.bottom-r.top,NULL,NULL,hInst,NULL);
MSG msg;
while(GetMessage(&msg,NULL,0,0))
{
TranslateMessage(&msg);
DispatchMessage(&msg);
}
return msg.wParam;
}
LRESULT CALLBACK WndProc(HWND hwnd,UINT message,WPARAM wParam,LPARAM lParam)
{
switch(message)
{
case WM_DESTROY:
PostQuitMessage(0);
return 0;
}
return DefWindowProc(hwnd,message,wParam,lParam);
}

Page | 9
Once you run this program you will have a window you can resize, maximize, minimize and play around with as you
might with any windows program. Right let's explain the code above, firstly I use "#undef UNICODE" to keep the text
simple, this is a personal preference it just saves having to type L or use the TEXT macro before every bit of text.
Windows programs are sent messages when things like the mouse moves or a user clicks on the close box, to handle
these messages we have a "callback" function called WndProc(), you can name it whatever you like. In the
WndProc() function above we see the message WM_DESTROY being processed, it occurs when our window is being
destroyed, so when we get a WM_DESTROY message it calls the function PostQuitMessage(0) which creates a
WM_QUIT message.
The while loop receives messages with the GetMessage() function and then they are processed, when it gets a
WM_QUIT message the function GetMessage() returns 0 and hence ends the while loop and ends the program. Any
functions we don't choose to process are handled with the default windows function DefWindowProc().
By using the structure WNDCLASS and the function CreateWindow() we can define exactly how our window will look.
With WNDCLASS we can define such things as the name of our callback function ( WndProc ) also we choose the icon
and cursor and the background colour of our window. With the CreateWindow() function we choose the style of our
window and it's size and the visible title. To keep it simple I have chosen the style WS_OVERLAPPEDWINDOW and
made it visible with WS_VISIBLE, for a full screen window we might use the style WS_POPUPWINDOW and
WS_MAXIMIZE as it is more appropriate, you can try that now if you want to see how a full screen window might
look.
The function AdjustWindowRect() gives us values to ensure the window's client area ( the grey area ) of the window
is the size we want. As mentioned before for drawing we tend to want to define the client area size rather than the
whole window size.
We can also send our window messages from within our program or to and from other programs as well, our
window has a "handle" to it "HWND" hwnd, this is different from HINSTANCE as we might create a few windows
from one program if we wanted to. We could use a function like SendMessage(hwnd,WM_CLOSE,0,0); to close our
window.
As we learn about Direct3D 11 we will need to process other windows messages like WM_SIZE when the user resizes
the window, we shall look at that later.
So let's review where we are at so far, we can use Visual C++ to make a simple window, next thing then is to move
on to drawing otherwise known as rendering. We will start with some simple GDI lines and a bitmap, doing this will
be helpful in understanding later how Direct3D is used.
Folders created by Visual Studio
Once you have made your project, you might wonder about the folders and files Visual Studio created, typically you
have the main folder say "window" where the .sln file is and a sub folder "window\window" where your c++ file and
any resources you use will go. If you double click the .sln file it will open the project. If you double click your c++ file
it will just open the c++ file to view. There is also a "window\Debug" folder and often a "window\Release" folder
where the executable is. There is also a "window\window\Debug" and a "window\window\Release" where there is a
build log and manifest file, you usually don't need to bother with these.

Page | 10
Bitmaps and lines with GDI
Ok so we've created a window, let's draw some lines and a bitmap using GDI ( Graphics Device Interface ). Here is
some code from the zip file gdi.cpp. One thing to note is the actual paradise.bmp file needs to be in the same
directory as the executable to be loaded. While using Visual Studio to run the program files in the source code
directory are considered as being in the executables directory, this can be confusing. Another point is so far we have
made "debug" versions of our program, to distribute our programs to other people we tend to provide "release"
versions, to produce a release version we simply select "release" from the drop down box that is usually just under
the menu bar. Usually people only make release version once they've got the program fully debugged and working.
#undef UNICODE // keep text simple
#include <windows.h>
LRESULT CALLBACK WndProc(HWND,UINT,WPARAM,LPARAM);
HWND hwnd=NULL;
HBITMAP hBmp;
int WINAPI WinMain(HINSTANCE hInst,HINSTANCE,LPSTR,int)
{
WNDCLASS wc={0,WndProc,0,0,hInst,LoadIcon(NULL,IDI_APPLICATION),
LoadCursor(NULL,IDC_ARROW),(HBRUSH)COLOR_APPWORKSPACE+1,NULL,"app"};
RegisterClass(&wc);
hwnd=CreateWindow("app","GDI",WS_OVERLAPPEDWINDOW|WS_VISIBLE,
100,100,600,400,NULL,NULL,hInst,NULL);
hBmp=(HBITMAP)LoadImage(NULL,"paradise.bmp",IMAGE_BITMAP,0,0,LR_LOADFROMFILE);
MSG msg;
while(GetMessage(&msg,NULL,0,0))
{
TranslateMessage(&msg);
DispatchMessage(&msg);
}
return msg.wParam;
}
LRESULT CALLBACK WndProc(HWND hwnd,UINT message,WPARAM wParam,LPARAM lParam)
{
PAINTSTRUCT ps;
HDC hdc,memdc;
switch(message)
{
case WM_PAINT:
hdc=BeginPaint(hwnd,&ps);
// draw some lines
for(int y=0;y<400;y+=50)
{
MoveToEx(hdc,0,y,NULL);
LineTo(hdc,512,y);
}
// draw a bitmap
memdc=CreateCompatibleDC(hdc);
SelectObject(memdc,hBmp);
BitBlt(hdc,20,20,256,256,memdc,0,0,SRCCOPY);
DeleteDC(memdc);
EndPaint(hwnd,&ps);
return 0;
case WM_DESTROY:
DeleteObject(hBmp);
Page | 11
PostQuitMessage(0);
return 0;
}
return DefWindowProc(hwnd,message,wParam,lParam);
}
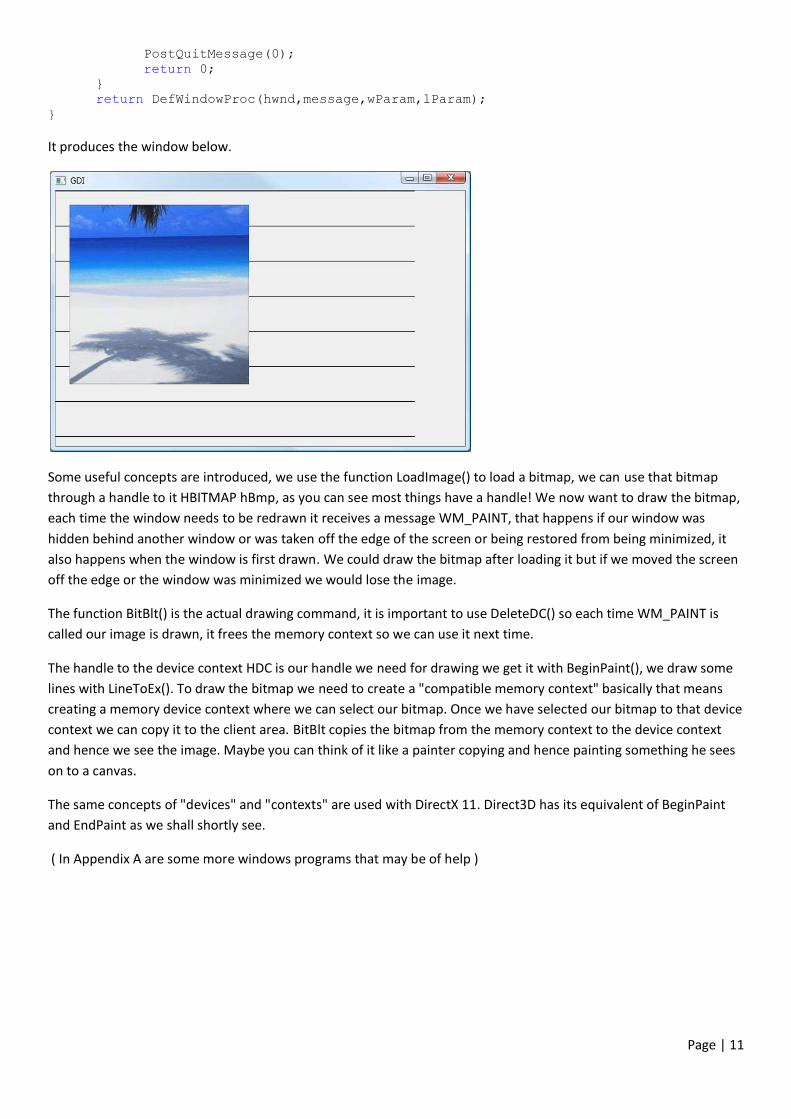
It produces the window below.
Some useful concepts are introduced, we use the function LoadImage() to load a bitmap, we can use that bitmap
through a handle to it HBITMAP hBmp, as you can see most things have a handle! We now want to draw the bitmap,
each time the window needs to be redrawn it receives a message WM_PAINT, that happens if our window was
hidden behind another window or was taken off the edge of the screen or being restored from being minimized, it
also happens when the window is first drawn. We could draw the bitmap after loading it but if we moved the screen
off the edge or the window was minimized we would lose the image.
The function BitBlt() is the actual drawing command, it is important to use DeleteDC() so each time WM_PAINT is
called our image is drawn, it frees the memory context so we can use it next time.
The handle to the device context HDC is our handle we need for drawing we get it with BeginPaint(), we draw some
lines with LineToEx(). To draw the bitmap we need to create a "compatible memory context" basically that means
creating a memory device context where we can select our bitmap. Once we have selected our bitmap to that device
context we can copy it to the client area. BitBlt copies the bitmap from the memory context to the device context
and hence we see the image. Maybe you can think of it like a painter copying and hence painting something he sees
on to a canvas.
The same concepts of "devices" and "contexts" are used with DirectX 11. Direct3D has its equivalent of BeginPaint
and EndPaint as we shall shortly see.
( In Appendix A are some more windows programs that may be of help )

Page | 12
Direct3D 11
Ok, let's start using Direct3D, just like we used WNDCLASS and CreateWindow() to create a window we use a similar
concept to use Direct3D, this time we use a structure called DXGI_SWAP_CHAIN_DESC and a function called
D3D11CreateDeviceAndSwapChain().
Before we look at that though we need to grasp the concept of a pixel and how our screen is formed.
The Screen
Our screen is made up of pixels, as I type my screen has 1920 by 1080 pixels, each pixel on my screen is represented
as 32 bit colour. Each pixel has a format, in this case 8 bits for Red, Green, Blue and "Alpha" it is often written as
R8G8B8A8. "Alpha" is used to describe how transparent the pixel is, transparency has become commonly used since
Windows Vista. Back in the good old days my first computer was the ZX Spectrum it had 256 by 192 pixels and 15
colours and they were not per pixel colours, things have changed amazingly since then, yet I remember writing some
fun games for it. Although we have amazing technology it is essential to keep the fun aspect of it.
Also a screen is physically 2D, my screen is 1920 pixels wide and 1080 pixels high, we can call that our x and y axis, to
display a 3D scene on a 2D screen requires the use of matrices and other maths which will look at shortly. A 3D scene
has x, y and a z axis ( depth ). Our x and y axis has an origin 0,0 it maybe at the centre of the screen or top left or
bottom left or anywhere on the screen we choose, suffice to say we need to be aware how we define our axes.
Looking back at our GDI program we could see 0,0 was the top left of the client area, x increasing to the right and y
increasing downwards.
So if we understand the concept of axes and pixels and a pixel having a format we can move on and create our first
Direct3D program, we can set a goal of making a spinning 3D cube, there are though quite a few steps to achieve
that.
The Direct3D device
We will need to learn a few terms before we look at the code. "Buffer" is usually some memory on the graphics card
that represents data, maybe x,y,z data relating to the points on an F1 car, that is known as "vertices", or maybe a
bitmap representing the screen, maybe a bitmap texture we use, we can use textures to wrap images on our F1 car.
"Swap chain", when we draw otherwise known as rendering with GDI we draw to the screen, with Direct3D we write
to a "buffer" bitmap that is not visible, it's known as the back buffer, we then swap that back buffer with the front
buffer to make it visible. Imagine if you will our painter very quickly painting a picture and once it is done showing
you, he swaps the current picture you are looking at erases it and begins to paint again, once done he swaps them
again, hence we have animation! This is known also as double-buffering, we can have more than one back buffer
In a similar way as HWND is used as a reference for a window we have a reference to use the Direct3D 11 device. A
"device" is needed to create objects such as a 3D cube, our "buffers" and to use to draw i.e. render. Let's have a look
at some code, this is a part of the file d3d.cpp
DXGI_SWAP_CHAIN_DESC sd;
ZeroMemory( &sd, sizeof( sd ) );
sd.BufferCount = 1;
sd.BufferDesc.Width = width;
sd.BufferDesc.Height = height;
sd.BufferDesc.Format = DXGI_FORMAT_R8G8B8A8_UNORM;
sd.BufferDesc.RefreshRate.Numerator = 0; // leave at users current rate
sd.BufferDesc.RefreshRate.Denominator = 1;
Page | 13
sd.BufferUsage = DXGI_USAGE_RENDER_TARGET_OUTPUT;
sd.OutputWindow = hwnd;
sd.SampleDesc.Count = 1;
sd.SampleDesc.Quality = 0;
sd.Windowed=windowed;
D3D_FEATURE_LEVEL FeatureLevels = D3D_FEATURE_LEVEL_11_0;
D3D_FEATURE_LEVEL* pFeatureLevel = NULL;
if(FAILED(D3D11CreateDeviceAndSwapChain(NULL,D3D_DRIVER_TYPE_HARDWARE,NULL,
0,&FeatureLevels,1,D3D11_SDK_VERSION,&sd,&pSwapChain,&pD3DDevice,
pFeatureLevel,&pDeviceContext )))
{
MessageBox(hwnd,"Failed to create D3D11 device","",MB_ICONERROR);
return;
}
I'd recommend looking in the SDK help file to go in to depth about each of the above parameters. Firstly let's look at
our DXGI_SWAP_CHAIN_DESC structure, it defines the number of pixels ( width and height ) of our screen, the
format of those pixels, the frequency of the screen and multi-sampling and if our screen is windowed or full-screen.
Also it defines with DXGI_USAGE_RENDER_TARGET_OUTPUT that we are using the "buffer" to be visible on our
window, it is as described our render target output.
Next let's look at the D3D11CreateDeviceAndSwapChain() function, using NULL as the first parameter means we are
using the primary monitor, we could use multiple adaptors across multiple screens if we wanted. To do that we need
to enumerate those adaptors and screens. The function also selects a hardware driver, and feature level 11_0. A
driver is some software that can use the graphics card or software to do all our rendering. With Direct3D 11 we have
"Feature levels" from 9_0 to 11_0 that means we can use older DirectX 9 or 10 or 10.1 graphics cards.
The BufferCount value is the number of buffers in addition to our front buffer, so value 1 creates 2 buffers. When we
swap the 2 buffers the old front buffer becomes the back buffer, we clear the back buffer and begin drawing again.
If you don't have DirectX 11 graphics hardware then you can use the slow reference driver. There is also the up to
10_1 level "Warp" driver which is a fast software device for rendering.
The width and height in windowed mode should match the client area of our window, our window's client area is the
area we do all our drawing. When the user resizes the client area we will need to resize our buffers, we will look at
that later, if we don't resize the buffers the image is often stretched and looks blocky or pixelated.
The function D3D11CreateDeviceAndSwapChain() creates a pointer to our device, a pointer to our swap chain and a
pointer to our device context, our device context is a bit like using Windows GDI with the HDC ( handle to device
context ), there are two types of device context, immediate and deferred, immediate renders directly to the driver,
deferred produces a command list which is used mainly for multithreading, we will use immediate context.
Ok, so now we've created a Direct3D 11 device what's next? We create the "render target view" and define a
"viewport". Here's more code from d3d.cpp , so a render target view, what's that you may ask, effectively we have
made two buffers the back buffer and the front buffer, we need to assign the front buffer to the screen. What we
can do is as well as have a front buffer say of the format R8G8B8A8 we usually need for 3D another buffer called a
depth buffer and optionally a stencil buffer. A depth buffer is used so when we render things with depth maybe one
F1 car behind another F1 car, a depth buffer will ensure the one behind stays behind and no pixels are overwritten.
We will look at depth and stencil buffers later. Here's some more code from d3d.cpp
if(FAILED(pSwapChain->GetBuffer( 0, __uuidof( ID3D11Texture2D ),
( LPVOID* )&pBackBuffer )))
{

Page | 14
MessageBox(hwnd,"Failed to GetBuffer","",MB_ICONERROR);
return;
}
if(FAILED(pD3DDevice->CreateRenderTargetView( pBackBuffer,
NULL, &pRenderTargetView )))
{
MessageBox(hwnd,"Failed to CreateRenderTargetView","",MB_ICONERROR);
return;
}
pBackBuffer->Release();
// bind the render target
pDeviceContext->OMSetRenderTargets( 1, &pRenderTargetView, NULL );
// the viewable area
D3D11_VIEWPORT vp;
vp.Width = (FLOAT)width;
vp.Height = (FLOAT)height;
vp.MinDepth = 0.0f;
vp.MaxDepth = 1.0f;
vp.TopLeftX = 0;
vp.TopLeftY = 0;
pDeviceContext->RSSetViewports( 1, &vp );
The viewport is our way of defining our axes. So now what? All that is left to do is render something, for now we will
simply clear the screen.
float clearColor[4]={0,0,1,0}; // RGBA
pDeviceContext->ClearRenderTargetView(pRenderTargetView, clearColor);
// drawing goes here
pSwapChain->Present(0,0);
Here is the complete d3d.cpp code, some things have been done deliberately such as the screen not automatically
repainting itself, unlike the GDI example. If we want the program to repaint we have a few options, we could put
code at WM_PAINT or we could paint when there are no messages, that is known as painting in the "idle time".
#undef UNICODE
#include <windows.h>
#include <d3d11.h> // direct3d header
#pragma comment(lib,"d3d11.lib")// direct3d library
#define SafeRelease(x) if(x){x->Release(); x=NULL;}
LRESULT CALLBACK WndProc(HWND,UINT,WPARAM,LPARAM);
void InitD3D();
void CloseD3D();
void ClearScreen();
int width=512,height=512; // make a square window
BOOL windowed,ready=FALSE;
HWND hwnd=NULL;
ID3D11Device *pD3DDevice=NULL;
IDXGISwapChain *pSwapChain=NULL;
ID3D11DeviceContext *pDeviceContext=NULL;
ID3D11RenderTargetView *pRenderTargetView=NULL;
ID3D11Texture2D *pBackBuffer=NULL;
int WINAPI WinMain(HINSTANCE hInst,HINSTANCE,LPSTR,int)
{
Page | 15
// ask the user if they want fullscreen
if(IDYES==MessageBox(NULL,"Fullscreen YES or Windowed NO ?","D3D11",
MB_YESNO|MB_ICONQUESTION)) windowed=FALSE; else windowed=TRUE;
// create a windowclass
WNDCLASS wc={0,WndProc,0,0,hInst,LoadIcon(NULL,IDI_APPLICATION),
LoadCursor(NULL,IDC_ARROW),(HBRUSH)COLOR_APPWORKSPACE+1,NULL,"dx11"};
RegisterClass(&wc);
RECT r={0,0,width,height};
if(windowed)
{
AdjustWindowRect(&r,WS_OVERLAPPEDWINDOW,FALSE); // adjust window to client size
hwnd=CreateWindow("dx11","DirectX 11",WS_OVERLAPPEDWINDOW|WS_VISIBLE,
100,100,r.right-r.left,r.bottom-r.top,NULL,NULL,hInst,NULL);
}
else
{
width=GetSystemMetrics(SM_CXSCREEN); // for primary monitor
height=GetSystemMetrics(SM_CYSCREEN);
hwnd=CreateWindow("dx11","DirectX 11",WS_POPUPWINDOW|WS_VISIBLE,
0,0,width,height,NULL,NULL,hInst,NULL);
ShowCursor(FALSE); // hide cursor in fullscreen mode
}
InitD3D(); // start direct3d
MSG msg;
while(GetMessage(&msg,NULL,0,0))
{
TranslateMessage(&msg);
DispatchMessage(&msg);
}
return msg.wParam;
}
LRESULT CALLBACK WndProc(HWND hwnd,UINT message,WPARAM wParam,LPARAM lParam)
{
switch(message)
{
case WM_KEYDOWN:
switch(wParam)
{
case VK_F1:
ClearScreen();
break;
case VK_ESCAPE:
SendMessage(hwnd,WM_CLOSE,0,0);
break;
}
return 0;
case WM_DESTROY:
PostQuitMessage(0);
CloseD3D(); // end direct3d
return 0;
}
return DefWindowProc(hwnd,message,wParam,lParam);
}
void InitD3D()
{

Page | 16
DXGI_SWAP_CHAIN_DESC sd;
ZeroMemory( &sd, sizeof( sd ) );
sd.BufferCount = 1;
sd.BufferDesc.Width = width;
sd.BufferDesc.Height = height;
sd.BufferDesc.Format = DXGI_FORMAT_R8G8B8A8_UNORM;
sd.BufferDesc.RefreshRate.Numerator = 0; // leave at users current rate
sd.BufferDesc.RefreshRate.Denominator = 1;
sd.BufferUsage = DXGI_USAGE_RENDER_TARGET_OUTPUT;
sd.OutputWindow = hwnd;
sd.SampleDesc.Count = 1;
sd.SampleDesc.Quality = 0;
sd.Windowed=windowed;
D3D_FEATURE_LEVEL FeatureLevels = D3D_FEATURE_LEVEL_11_0;
D3D_FEATURE_LEVEL* pFeatureLevel = NULL;
if(FAILED(D3D11CreateDeviceAndSwapChain(NULL,D3D_DRIVER_TYPE_HARDWARE,NULL,
0,&FeatureLevels,1,D3D11_SDK_VERSION,&sd,&pSwapChain,&pD3DDevice,
pFeatureLevel,&pDeviceContext )))
{
MessageBox(hwnd,"Failed to create D3D11 device","",MB_ICONERROR);
return;
}
if(FAILED(pSwapChain->GetBuffer( 0, __uuidof( ID3D11Texture2D ),
( LPVOID* )&pBackBuffer )))
{
MessageBox(hwnd,"Failed to GetBuffer","",MB_ICONERROR);
return;
}
if(FAILED(pD3DDevice->CreateRenderTargetView( pBackBuffer, NULL,
&pRenderTargetView )))
{
MessageBox(hwnd,"Failed to CreateRenderTargetView","",MB_ICONERROR);
return;
}
pBackBuffer->Release();
// bind the render target
pDeviceContext->OMSetRenderTargets( 1, &pRenderTargetView, NULL );
// the viewable area
D3D11_VIEWPORT vp;
vp.Width = (FLOAT)width;
vp.Height = (FLOAT)height;
vp.MinDepth = 0.0f;
vp.MaxDepth = 1.0f;
vp.TopLeftX = 0;
vp.TopLeftY = 0;
pDeviceContext->RSSetViewports( 1, &vp );
ready=TRUE;
ClearScreen();
}
void ClearScreen()
{
if(ready==FALSE) return;
float clearColor[4]={0,0,1,0}; // RGBA
pDeviceContext->ClearRenderTargetView(pRenderTargetView, clearColor);
// drawing goes here

Page | 17
pSwapChain->Present(0,0);
}
void CloseD3D()
{
// clear state and flush commands
pDeviceContext->ClearState();
pDeviceContext->Flush();
// release the render target view
SafeRelease(pRenderTargetView)
// release the swap chain
SafeRelease(pSwapChain)
// release the immediate context
SafeRelease(pDeviceContext)
// release the device
SafeRelease(pD3DDevice)
}
Ok there's a few things to look at, we define a macro SafeRelease() with DirectX and other COM objects and
interfaces we need to "release" them so we don't get memory errors and other problems. I added a variable "ready"
we need to make sure our initialisation was 100% ok before we render anything hence ready only becomes true
once everything is ok. With full-screen applications we usually hide the mouse.
To do a manual refresh or repaint press "F1" this shows why automatic refreshing is useful! Here's a screenshot
showing what happens if you drag the window to the sides and move it back again.
Error handling, handy hints
With this program the error handling is a bit basic, it shows a dialog such as "Failed to create D3D11 device" and
continues to run, what we want ideally is something a bit more advanced, there are various options. We could create
a text file that logs every significant event and/or we could stop the program and destroy the window if an error
occurs. What we don't want to happen is a crash, thankfully with Vista it usually displays a dialog box when thing go

Page | 18
wrong. With developing software we usually do get crashes, we might have left out a line of code, but ideally our
release version should be as crash proof as time allows.
With developing software often there are deadlines, things get rushed, mistakes are made, hence programs go out
not perfect, some programs automatically check their websites for updates that is often a good option. Good error
messages help also maybe you can add things like a line number and which file "Load failed line 1323 loader.cpp" to
a text log.
There are often two types of errors, things not doing what you expect or typing mistakes, tracking down bugs can be
a frustrating experience, you need to persevere!
Another thing that helps is commenting code and calling variables and functions sensible names, for simple
programs you can get away with allot, when multiple C++ files get to be thousands of lines long, we often can't
remember exactly what a function should be doing hence commenting helps. Certainly for a game, a design
document is handy, notes along the way describing how you formulated a solution to a problem help. I find a A4 pad
very handy for notes and solutions.
With programming big projects like a game, eternal backups are essential also.
Page | 19
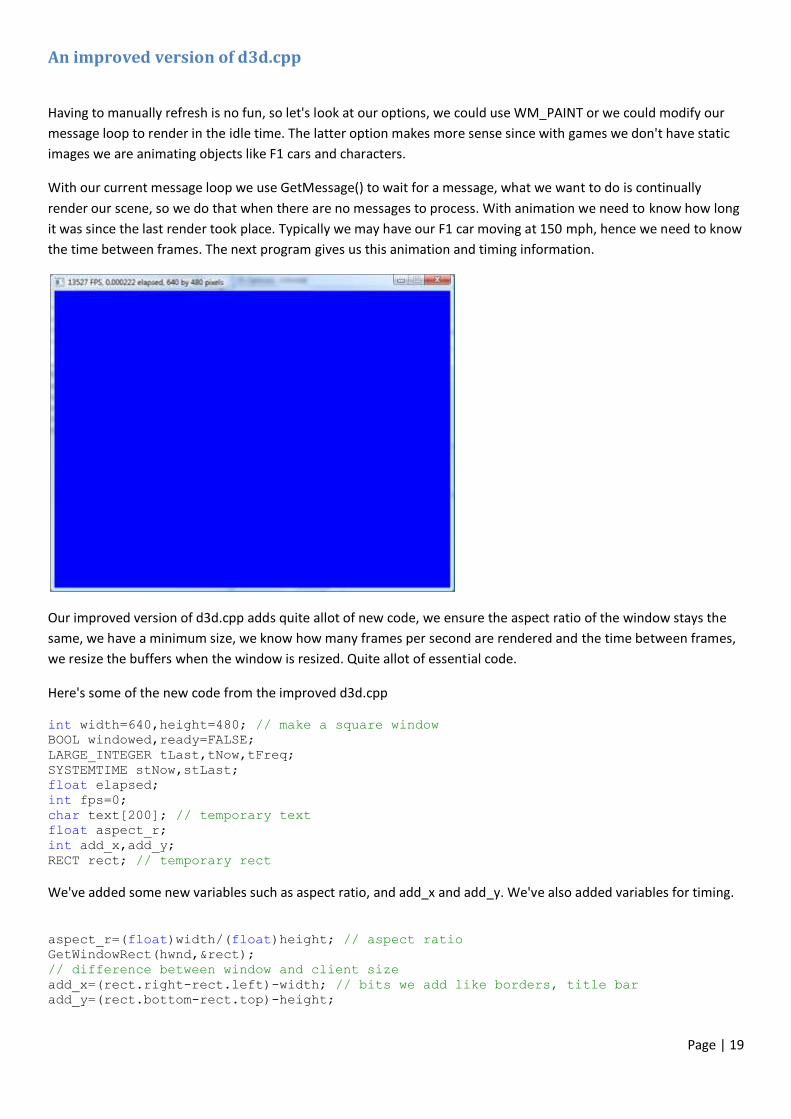
An improved version of d3d.cpp
Having to manually refresh is no fun, so let's look at our options, we could use WM_PAINT or we could modify our
message loop to render in the idle time. The latter option makes more sense since with games we don't have static
images we are animating objects like F1 cars and characters.
With our current message loop we use GetMessage() to wait for a message, what we want to do is continually
render our scene, so we do that when there are no messages to process. With animation we need to know how long
it was since the last render took place. Typically we may have our F1 car moving at 150 mph, hence we need to know
the time between frames. The next program gives us this animation and timing information.
Our improved version of d3d.cpp adds quite allot of new code, we ensure the aspect ratio of the window stays the
same, we have a minimum size, we know how many frames per second are rendered and the time between frames,
we resize the buffers when the window is resized. Quite allot of essential code.
Here's some of the new code from the improved d3d.cpp
int width=640,height=480; // make a square window
BOOL windowed,ready=FALSE;
LARGE_INTEGER tLast,tNow,tFreq;
SYSTEMTIME stNow,stLast;
float elapsed;
int fps=0;
char text[200]; // temporary text
float aspect_r;
int add_x,add_y;
RECT rect; // temporary rect
We've added some new variables such as aspect ratio, and add_x and add_y. We've also added variables for timing.
aspect_r=(float)width/(float)height; // aspect ratio
GetWindowRect(hwnd,&rect);
// difference between window and client size
add_x=(rect.right-rect.left)-width; // bits we add like borders, title bar
add_y=(rect.bottom-rect.top)-height;
Page | 20
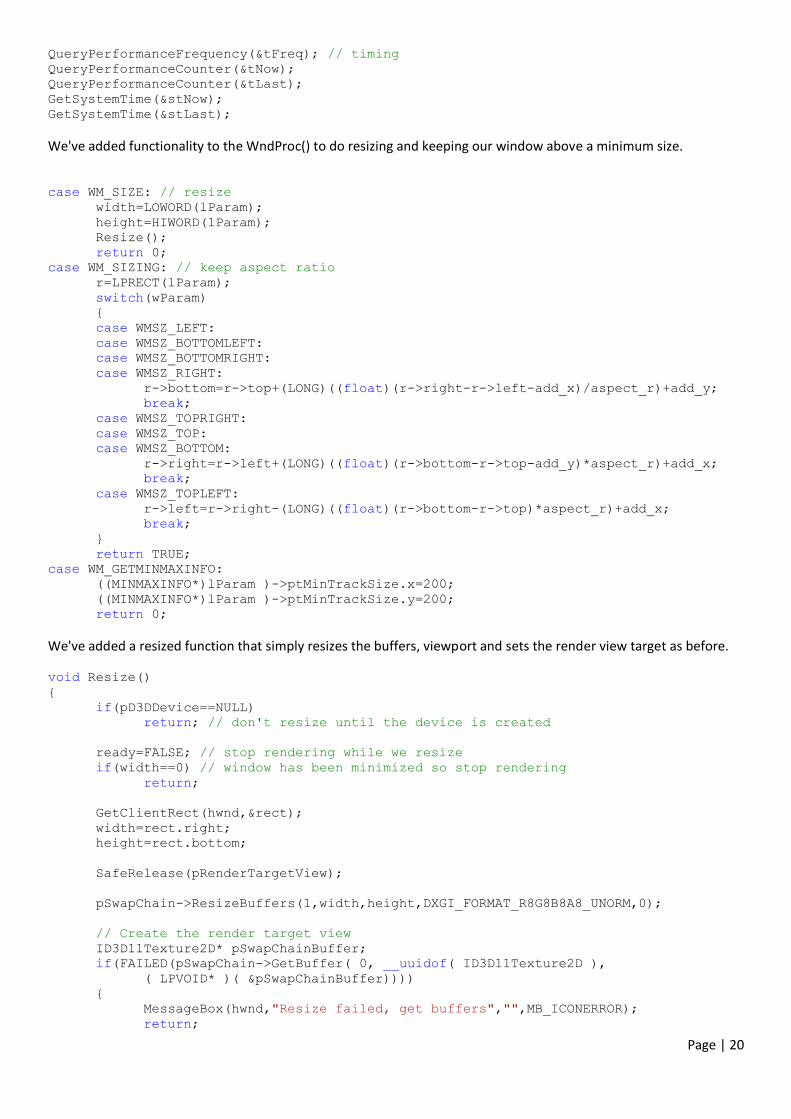
QueryPerformanceFrequency(&tFreq); // timing
QueryPerformanceCounter(&tNow);
QueryPerformanceCounter(&tLast);
GetSystemTime(&stNow);
GetSystemTime(&stLast);
We've added functionality to the WndProc() to do resizing and keeping our window above a minimum size.
case WM_SIZE: // resize
width=LOWORD(lParam);
height=HIWORD(lParam);
Resize();
return 0;
case WM_SIZING: // keep aspect ratio
r=LPRECT(lParam);
switch(wParam)
{
case WMSZ_LEFT:
case WMSZ_BOTTOMLEFT:
case WMSZ_BOTTOMRIGHT:
case WMSZ_RIGHT:
r->bottom=r->top+(LONG)((float)(r->right-r->left-add_x)/aspect_r)+add_y;
break;
case WMSZ_TOPRIGHT:
case WMSZ_TOP:
case WMSZ_BOTTOM:
r->right=r->left+(LONG)((float)(r->bottom-r->top-add_y)*aspect_r)+add_x;
break;
case WMSZ_TOPLEFT:
r->left=r->right-(LONG)((float)(r->bottom-r->top)*aspect_r)+add_x;
break;
}
return TRUE;
case WM_GETMINMAXINFO:
((MINMAXINFO*)lParam )->ptMinTrackSize.x=200;
((MINMAXINFO*)lParam )->ptMinTrackSize.y=200;
return 0;
We've added a resized function that simply resizes the buffers, viewport and sets the render view target as before.
void Resize()
{
if(pD3DDevice==NULL)
return; // don't resize until the device is created
ready=FALSE; // stop rendering while we resize
if(width==0) // window has been minimized so stop rendering
return;
GetClientRect(hwnd,&rect);
width=rect.right;
height=rect.bottom;
SafeRelease(pRenderTargetView);
pSwapChain->ResizeBuffers(1,width,height,DXGI_FORMAT_R8G8B8A8_UNORM,0);
// Create the render target view
ID3D11Texture2D* pSwapChainBuffer;
if(FAILED(pSwapChain->GetBuffer( 0, __uuidof( ID3D11Texture2D ),
( LPVOID* )( &pSwapChainBuffer))))
{
MessageBox(hwnd,"Resize failed, get buffers","",MB_ICONERROR);
return;

Page | 21
}
if(FAILED(pD3DDevice->CreateRenderTargetView( pSwapChainBuffer, NULL,
&pRenderTargetView)))
{
MessageBox(hwnd,"Resize failed, create render target view",
"",MB_ICONERROR);
return;
}
SafeRelease(pSwapChainBuffer);
pDeviceContext->OMSetRenderTargets( 1, &pRenderTargetView, NULL );
vp.Width = (FLOAT)width;
vp.Height = (FLOAT)height;
vp.MinDepth = 0.0f;
vp.MaxDepth = 1.0f;
vp.TopLeftX = 0;
vp.TopLeftY = 0;
pDeviceContext->RSSetViewports( 1, &vp );
ready=TRUE;
}
We've added functionality to the ClearScreen() function to display some useful information such as the frame rate, and size of the client area.
void ClearScreen()
{
if(ready==FALSE) return;
// timing information
QueryPerformanceCounter(&tNow);
elapsed=((float)tNow.QuadPart-(float)tLast.QuadPart)/(float)tFreq.QuadPart;
tLast.QuadPart=tNow.QuadPart;
// frames per second
GetSystemTime(&stNow);
if(stNow.wSecond!=stLast.wSecond)
{
GetClientRect(hwnd,&rect);
sprintf_s(text,"%d FPS, %f elapsed, %d by %d pixels",
fps,elapsed,rect.right,rect.bottom);
SetWindowText(hwnd,text);
fps=0;
}
fps++;
stLast.wSecond=stNow.wSecond;
float clearColor[4]={0,0,1,0}; // RGBA
pDeviceContext->ClearRenderTargetView(pRenderTargetView, clearColor);
// drawing goes here
pSwapChain->Present(0,0);
}
Let's explain firstly what we do when we get a WM_SIZING message, the RECT *r gives us the size of the dragging rectangle of the window. We have already calculated with add_x and add_y the difference between the size of the client area and the window size, for Vista it might be add_x is 16 pixels and add_y is 36 pixels. When we resize the window by dragging the left or right we create a new desired window width, so we can with a simple formula calculate the height of a new window. We know the width of the window, we take off the borders ( add_x ) to get our client size width, then we divide the client size width by the aspect ratio to get a client size height, finally we add on add_y to get a window height. We do similar for resizing using the bottom and top drag borders.

Page | 22
The message WM_GETMINMAXINFO is used to keep a minimum or maximum size of the window. To calculated the elapsed time again is a formula, we can call QueryPerformanceCounter() to get the current "now" time and we have saved the previous "now" time as the "last" time, hence we know the time between calls to that function. We can divide that value by the frequency of the counter to get in seconds the time elapsed. To calculate the frames per second we use GetSystemTime() and see what value the "seconds" variable is, again as with calculating the elapsed time we make the "now" seconds the "last" seconds. If they are different then we know we have ticked over to a new second. By increasing or resetting the fps variable we know how many times the ClearScreen() function has run each second. With 2D animation let's say each pixel represents 1cm, if we are drawing a person walking at 1 meter per second and our elapsed time is 20ms then we would move that person 2 pixels to represent a fraction of movement. After 1 second of animation our person would have moved 1m and 100 pixels. With 3D things are similar though we don't measure by pixels we measure by units along the x or y or z axis. Let's review what we have looked at. Our latest d3d.cpp program creates a window of a specified client area, initialises Direct3D 11, clears the screen, and correctly resizes. That's good progress, next comes putting something on the screen.

Page | 23
The 3D rotating cube
So finally we get to our first goal, the rotating 3D cube. We will add various things to our last program, the improved
d3d.cpp code. You can use that d3d.cpp file as a starting point to build other Direct3D programs on top of. We will
add vertices, these are x,y,z locations in 3D space to describe the shape of the cube. We will add indices, they tell us
how to build the cube out of triangles. We also need to talk about "shaders", they are the language we use to
describe how to process our vertices and indices, to produce our rotating 3D cube.
A depth stencil view
First thing we are going to add is a depth buffer, basically when we render the triangles that make our cube, we want
the triangles nearest us not to be overwritten by the triangles further away. A depth buffer will pixel by pixel ensure
the parts of the cube nearest us will be visible. This code is added in InitD3D() just before we setup the viewport
// depth buffer
D3D11_TEXTURE2D_DESC depthBufferDesc;
depthBufferDesc.Width = width;
depthBufferDesc.Height = height;
depthBufferDesc.MipLevels = 1;
depthBufferDesc.ArraySize = 1;
depthBufferDesc.Format = DXGI_FORMAT_D32_FLOAT;
depthBufferDesc.SampleDesc.Count = 1;
depthBufferDesc.SampleDesc.Quality = 0;
depthBufferDesc.Usage = D3D11_USAGE_DEFAULT;
depthBufferDesc.BindFlags = D3D11_BIND_DEPTH_STENCIL;
depthBufferDesc.CPUAccessFlags = 0;
depthBufferDesc.MiscFlags = 0;
if(FAILED(pD3DDevice->CreateTexture2D(&depthBufferDesc, NULL, &pDepthStencil )))
{
MessageBox(hwnd,"Failed to Create Depth Texture","",MB_ICONERROR);
return;
}
if(FAILED(pD3DDevice->CreateDepthStencilView(pDepthStencil, NULL,
&pDepthStencilView )))
{
MessageBox(hwnd,"Failed to Create Depth View","",MB_ICONERROR);
return;
}
D3D11_DEPTH_STENCIL_DESC dsDesc;
ZeroMemory( &dsDesc, sizeof( D3D11_DEPTH_STENCIL_DESC ) );
dsDesc.DepthEnable = TRUE;
dsDesc.DepthWriteMask = D3D11_DEPTH_WRITE_MASK_ALL;
dsDesc.DepthFunc = D3D11_COMPARISON_LESS;
dsDesc.StencilEnable = FALSE;
if(FAILED(pD3DDevice->CreateDepthStencilState( &dsDesc, &pDepthStencilState )))
{
MessageBox(hwnd,"Failed to Create Depth State","",MB_ICONERROR);
return;
}
pDeviceContext->OMSetDepthStencilState( pDepthStencilState, 0 );
// bind the render target and the depth
pDeviceContext->OMSetRenderTargets( 1, &pRenderTargetView, pDepthStencilView );
Page | 24
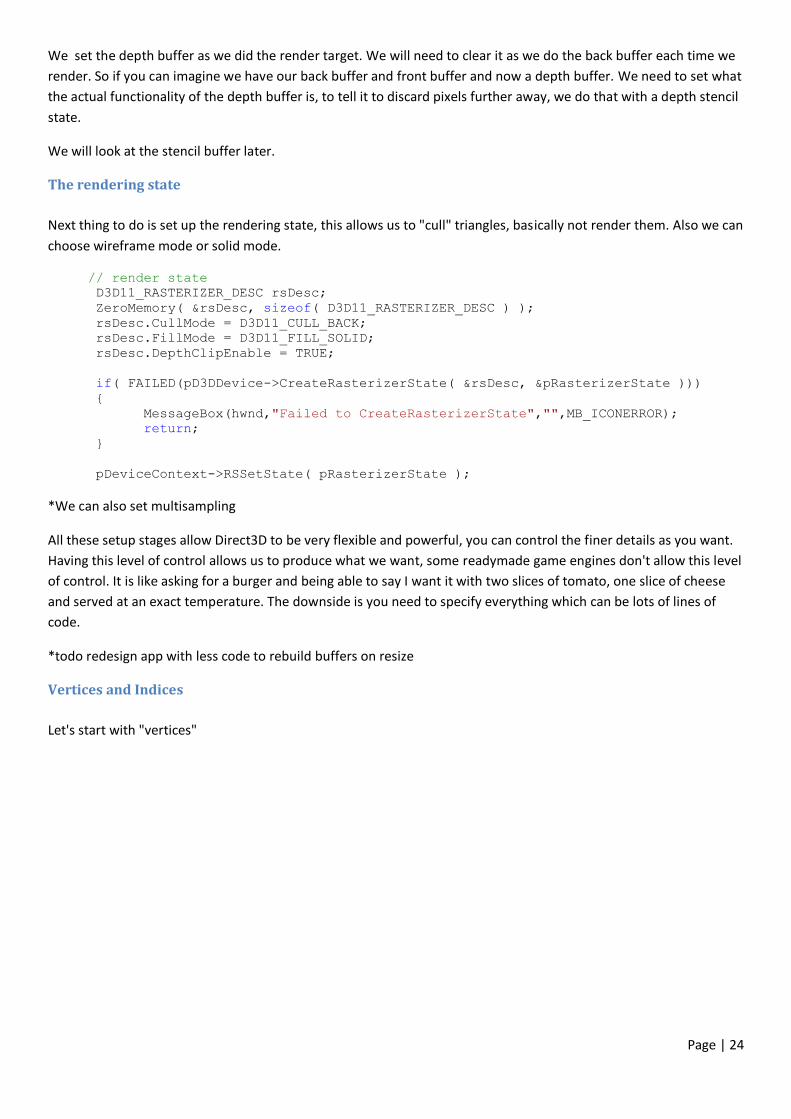
We set the depth buffer as we did the render target. We will need to clear it as we do the back buffer each time we
render. So if you can imagine we have our back buffer and front buffer and now a depth buffer. We need to set what
the actual functionality of the depth buffer is, to tell it to discard pixels further away, we do that with a depth stencil
state.
We will look at the stencil buffer later.
The rendering state
Next thing to do is set up the rendering state, this allows us to "cull" triangles, basically not render them. Also we can
choose wireframe mode or solid mode.
// render state
D3D11_RASTERIZER_DESC rsDesc;
ZeroMemory( &rsDesc, sizeof( D3D11_RASTERIZER_DESC ) );
rsDesc.CullMode = D3D11_CULL_BACK;
rsDesc.FillMode = D3D11_FILL_SOLID;
rsDesc.DepthClipEnable = TRUE;
if( FAILED(pD3DDevice->CreateRasterizerState( &rsDesc, &pRasterizerState )))
{
MessageBox(hwnd,"Failed to CreateRasterizerState","",MB_ICONERROR);
return;
}
pDeviceContext->RSSetState( pRasterizerState );
*We can also set multisampling
All these setup stages allow Direct3D to be very flexible and powerful, you can control the finer details as you want.
Having this level of control allows us to produce what we want, some readymade game engines don't allow this level
of control. It is like asking for a burger and being able to say I want it with two slices of tomato, one slice of cheese
and served at an exact temperature. The downside is you need to specify everything which can be lots of lines of
code.
*todo redesign app with less code to rebuild buffers on resize
Vertices and Indices
Let's start with "vertices"

Page | 25
<todo shaders, tessellation , those wonderful things called effects, the pipeline, totally rewrite how to make devices
/ resources , rewrite for use with VS2010beta2>

Page | 26
Appendix A
Useful windows programs
Menu bar Toolbar Status bar
Screen savers
Messages between widows WM_COPY?
File Handling
Window Vista Task Dialog

Page | 27
Appendix B
Multisampling