
ASP.NET CoreVisual Studio 2017
White papers
By Hamida REBAI
Cross-Platform Framework

Goal
With this you will be able to understand ASP.NET Core and Angular 2.0 to build powerful and
dynamic applications from the scratch and guide you to cutting-edge web development.

Agenda
• .NET Core is ?
• Getting Ready

.NET Core is …
• A reimplementation of the .NET framework.
• Multi-platform, with applications that can be Written, compiled and executed on Windows, Linux and
MacOS.
• Open-source, hosted on GitHub and open to community contributions. (https://github.com/dotnet/core)
• Modular, where each API is distributed in an independent NuGet package.
• The ability to create MVC ASP sites and Web APIs
• Quick to get started with simple command-line utilities.
• Compatible with traditional .NET Framework and .NET Xamarin through .NET Standard.
• Powerful: .NET Core-based websites are faster than those based on the .NET Framework.

Getting Ready
Windows
• Preparing the workspace
Download Visual Studio 2017
.NET Core tools are included in Visual Studio 2017..NET Core for Visual
https://www.visualstudio.com/thank-you-downloading-visual-
studio/?sku=community
Install the .NET Core workload
Make sure you installed the workload ".NET Core cross-platform development". You
can check and install workloads by launching the Visual Studio Installer.

Getting Ready
MacOS
Preparing the workspace
Install Pre-requisites • Homebrew and OpenSSL
After installing brew, do the following:
.NET Core SDK for OS X
https://go.microsoft.com/fwlink/?linkid=843444
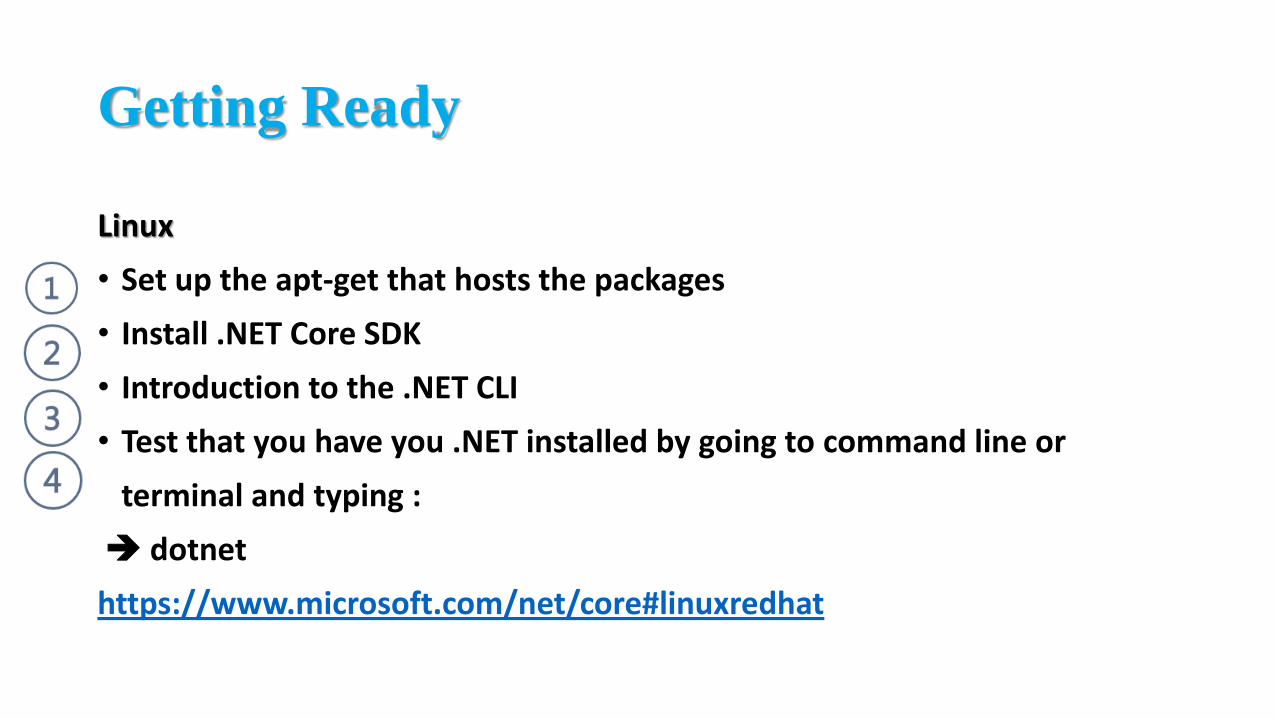
Getting Ready
Linux
• Set up the apt-get that hosts the packages
• Install .NET Core SDK
• Introduction to the .NET CLI
• Test that you have you .NET installed by going to command line or
terminal and typing :
dotnet
https://www.microsoft.com/net/core#linuxredhat
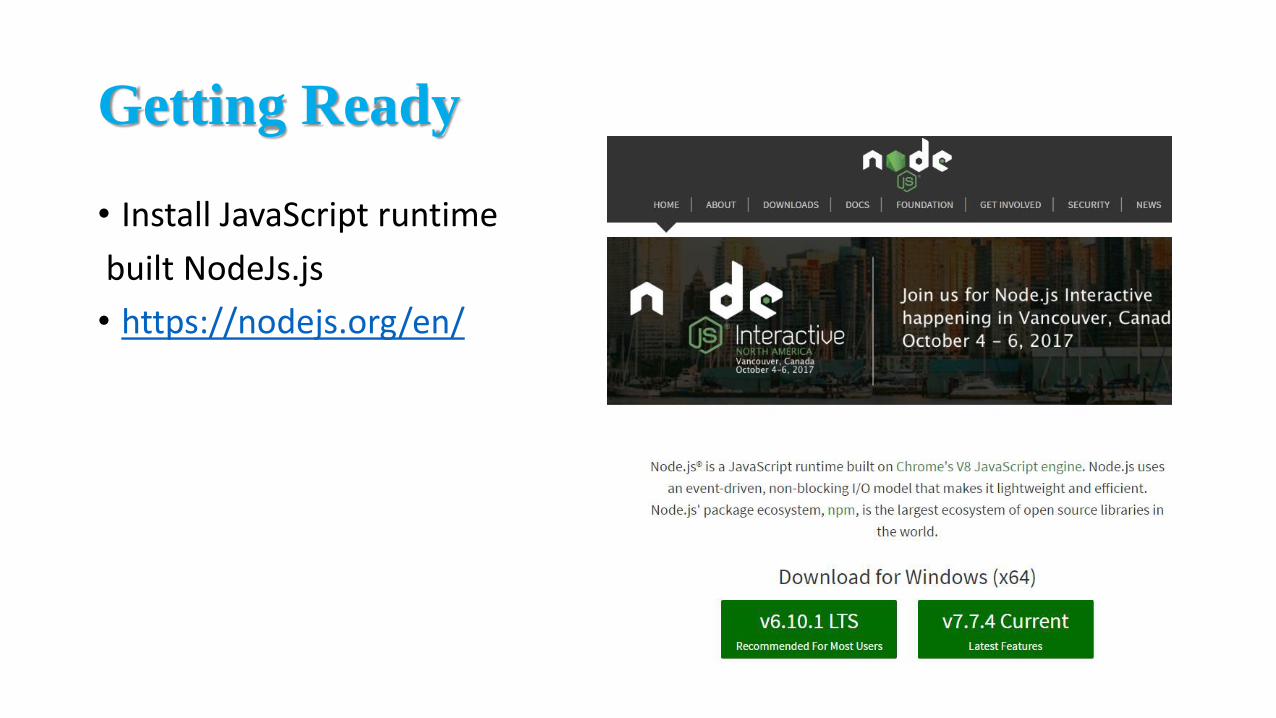
Getting Ready
• Install JavaScript runtime
built NodeJs.js
• https://nodejs.org/en/

Setting up the project
• Open Visual Studio 2017, Click on File / New / Project and select the project template Visual C# / .NET Core / Console App (.NET Core).
• From the Templates tree, expand the Visual C# node and select the Web
• subfolder: the right section of the modal window will be populated by a number
• of available project templates

Setting up the project

Setting up the project
• Select the ASP.NET Core Web Application (.NET Framework) template and fill in the relevant Name, Location, and Solution name fields.
• In the next modal window, we can further customize our template by choosing the default contents to include in our project (Empty, Web API, or Web Application) and the authentication mechanism, should we want to use one.
• Choose Web API and No authentication, then click the OK button to create the project.


Package and resource managers
• In Visual studio 2015:
• The solution's projects are nowcreated in a /src/ folder by default.This is just a convention, though, asthey can be placed anywhere.
• There is a new folder calledwwwroot, which will contain thecompiled, ready-to publishcontents of our application, whileeverything else will be the projectsource code.

Package and resource managers
• In Visual studio 2017:
• The solution's projects are nowanymore created in a /src/ folder, it’slike before under the projectdirectory.Different.
• There is a new folder called wwwroot,which will contain the compiled,ready-to publish contents of ourapplication, while everything else willbe the project source code. Thesame.
• Dependencies are the Referencesused in our project and it’s ordered bySDK and Nuget.

Package and resource managers
• Startup.cs
• This class was introduced in OWIN-based applications to replace mostof the tasks previously was handled in Global.asax.
• In ASP.NET Core this class serve for the same role, it is the placewhere we can add services, choose which application modules andmiddleware functions to load, handle dependency injection tasks, andconfigure the pipeline.
• Gloabal.asax of today named Startup.cs has been completelyrewritten to be as pluggable and lightweight as possible, meaningthat it will include and load only what's strictly necessary to fulfill ourapplication's tasks.

Testing the HTTP request pipeline
• If we run our application again, we should now be welcomed with the following:
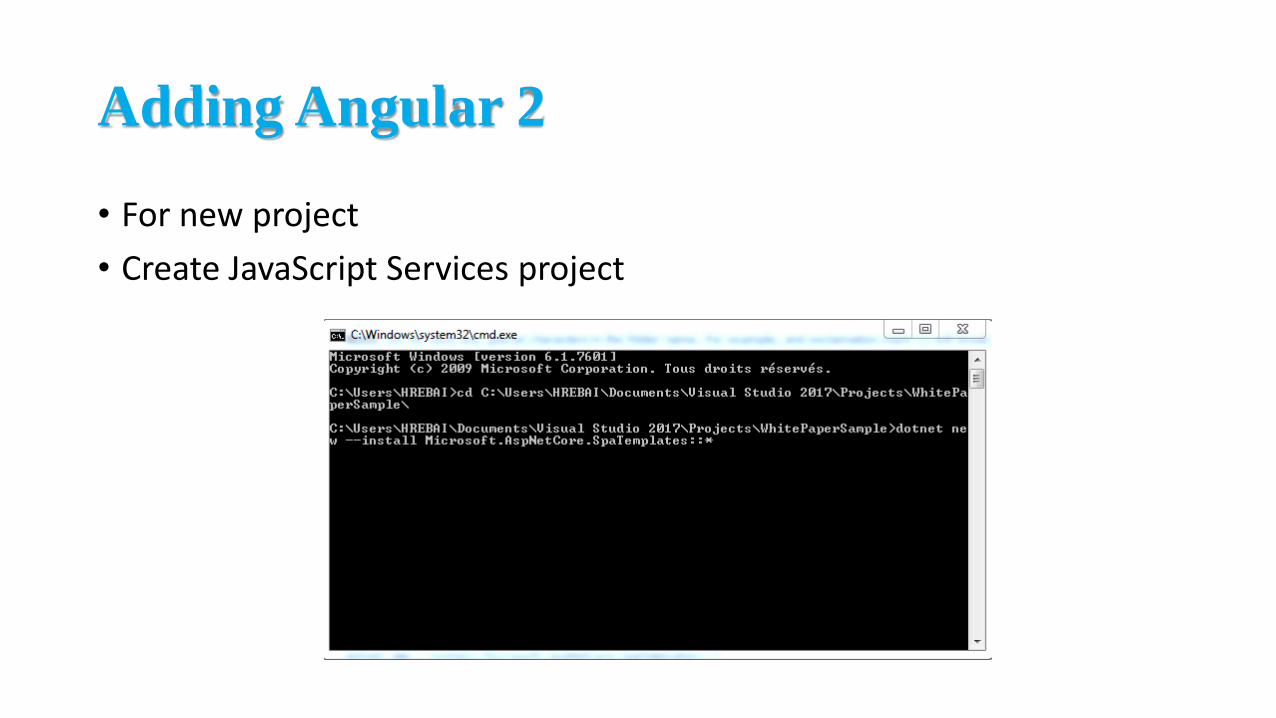
Adding Angular 2
• For new project
• Create JavaScript Services project

Adding Angular 2

Launch angular project
• If you have already a project you can force the creation like this :
• dotnet new angular –all

PrimeNG
• PrimeNG is a collection of rich UI components for Angular 2. PrimeNGis a sibling of the popular JavaServer Faces Component Suite, PrimeFaces.

Add PrimeNG - package.json

Add PrimeNG – webpack.config.vendor.js

Add PrimeNG – webpack.config.vendor.js PrimeNg does not support pre-rendering so in ..\Views\Home\Index.cshtml, change:
<app asp-prerender-module="ClientApp/dist/main-server">Loading...</app>
to:
<app>Loading...</app>

Install webpack
• npm install -g webpack

Update webpack.config.vendor.js
• We modified the webpack.config.vendor.js file (to add PrimeNg and Font Awesome) but it is not updated by the classic build process.
• So, We have to run its configuration manually whenever we alter it.
• In a command prompt, at the project root, run:
• webpack --config webpack.config.vendor.js

Add new page HTML
• Create a folder called prime in the components folder and add the following code to ..\ClientApp\app\components\prime\prime.component.html:

Add new TS file
• Create the file and add the following code to ..\ClientApp\app\components\prime\prime.component.ts:

Update app.module.ts
Update the file at: ..\ClientApp\app\app.module.ts to add:

Update navmenu.component.html
• Add the following code to ..\ClientApp\app\components\navmenu\navmenu.component.html:

Launch Prime part


![[IT기술칼럼 #4] 고급자바스크립트 for AngularJS, React_고급자바스크립트,AngularJS,React전문교육학원](https://cdn.vdocuments.mx/doc/165x107/58effc4f1a28ab79688b45d7/it-4-for-angularjs-reactangularjsreact.jpg)
