ULTRA QUIET & OIL FREE
AIR COMPRESSOR
OwnER'S MAnUAL
A6L1-A
1.0 HP
3.80 CFM @ 40 PSI
2.35 CFM @ 90 PSI
1.6 GALLOn ALUMInUM TAnk
Table of ConTenTSIntroductIon __________________________________2
Important Safety InStructIonS _______________3
LocatIonS of Important LabeLS _______________6
aIr compreSSor componentS__________________9
pre-operatIon checkLISt _____________________14
package contents & assembly___________________14
Inspect for damage ____________________________15
Save packaging _______________________________15
compressor Location __________________________15
electrical power _______________________________16
operatIng the aIr compreSSor _______________16
Introduction __________________________________16
assembly ____________________________________16
test run & break-in period______________________17
daily operation________________________________17
maIntenance _________________________________18
draining the air tank ___________________________18
changing the air filter__________________________18
testing for Leaks ______________________________18
adjusting the pressure Switch ___________________18
cleaning _____________________________________18
Storage______________________________________18
troubLeShootIng ____________________________19
SpecIfIcatIonS________________________________20
electrical circuit_______________________________20
air passage drawing ___________________________20
Warranty ____________________________________21
product regIStratIon________________________22
InTroduCTIon
record the model and serial numbers indicated on yourair compressor’s nameplate:
model no. ________________________________________
Serial no. ________________________________________
date of purchase: _________________________________
2 Customer Support: 1-866-409-4581
AIR COMPRESSOR
3Customer Support: 1-866-409-4581
AIR COMPRESSOR
how to find a local service center:
even quality built equipment might need service or repair parts.Contact the Customer Service department:
Phone: 1-866-409-4581
please provide the information below:
n Model number and Serial number and specifications shown on theModel number/Serial number plate.
n Part number or numbers shown in the parts list section of theowner’s manual for your air compressor model.
n a brief description of the trouble with the air compressor.
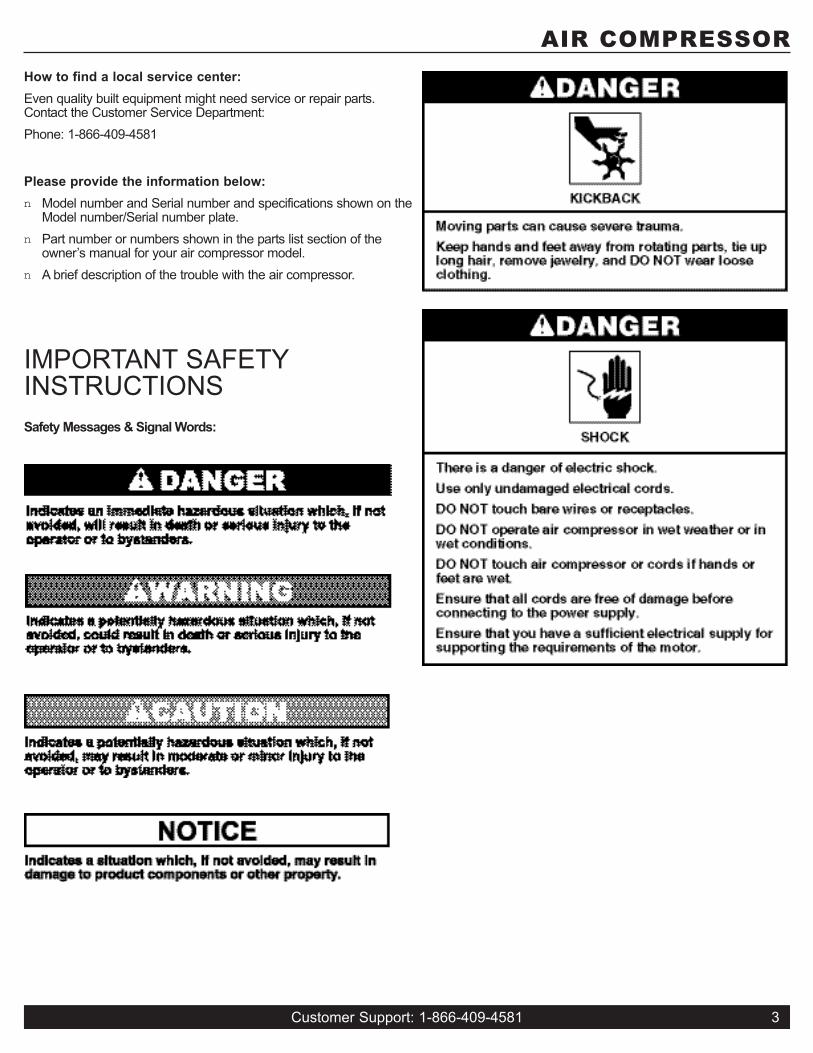
IMPorTanT SafeTyInSTruCTIonS
Safety messages & Signal Words:
4 Customer Support: 1-866-409-4581
AIR COMPRESSOR

5Customer Support: 1-866-409-4581
AIR COMPRESSOR

6
AIR COMPRESSOR
no. description no. description no. description no. description
1 fan Cover 20 Metal Strengthen Sheet 39 Shock Strut 58 Washer
2 fan 21 fan 40 nut 59 nut
3 Crank Case 22 Crank 41 Quick Connect 60 Handle Cover
4 Connecting rod 23 bearing 42 regulator 61 nut
5 Piston ring 24 Holding Screw 43 Pressure Gauge/Small 62 Washer
6 Plate Pinch 25 Cheese Head Screw 44 Pressure Gauge/large 63 foot Cushion
7 Pressure Plate Screw 26 Crank Case 45 Pressure Gauge 64 bolt
8 Cylinder 27 leading-out line Guard 46 Connecting bar 65 Power Cord with Plug
9 Cylinder obturating ring 28 rotor Pin 47 Safety Valve
10 Cylinder Head obturating ring 29 Motor Screw 48 Pressure Switch
11 Cylinder Head 30 Spring Washer 49 Capacitor
12 Cylinder Head Screw 31 Stator 50 Capacitor Cover
13 Connecting Hose obturating 32 lock nut 51 Check Valve
14 Connecting Hose 33 rotor 52 unloading Pipe
15 Pan Head Screw 34 bearing 53 exhaust Pipe
16 limited block 35 bolt 54 drain Valve
17 Gassing Valve Plate 36 bolt 55 Tank
18 Valve Plate 37 elbow exhaust 56 frame (1600)
19 air Inflow Valve Plate 38 air filter 57 bolt
7
AIR COMPRESSOR
Pre-oPeraTIonCHeCklIST
package contents & assembly
model: a6l1-a
package contents:
n air Compressor
n owner's Manual
n air filter
assembly:
n attach the air filter to the top left side of motor head.
Screw air filter into the motor head
.
8 Customer Support: 1-866-409-4581
AIR COMPRESSOR
Inspect for damagebefore using the air compressor, make sure the air tank is notdamaged, inspect all parts for damage, and check that all pipesare firmly connected.
do not use the air compressor if any damage is found. Ifdamaged, have an authorized service center inspect and test theair compressor to ensure that is working properly.
Save packagingSave all outside packaging in case you ever need to return theproduct for service or repair.
compressor Location
use on flat Surface
for proper operation, the air compressor must be placed on a flatsurface with an incline no greater than 15 degrees.
maintain a clear area
It is very important that the air compressor is positioned so thatthere is adequate airflow around the machine. There must be atleast 2 feet of obstacle-free space surrounding and above the aircompressor.
use in areas with clean air
for proper operation and to maximize the longevity of the aircompressor, it is very important that the air drawn into the aircompressor is clean. The air compressor should not be used inareas where dust or particulates are in the air. This will damagethe motor and impair proper operation.
Important: always use the air filter, properly installed.

9Customer Support: 1-866-409-4581
AIR COMPRESSOR
electrical power
electrical power requirements
n before using the air compressor, refer to the serial label forvoltage and amperage requirements. Make sure you have asufficient electrical supply for supporting the motor'srequirements.
n use a dedicated circuit for the best results.
n low voltage and/or an overload circuit can cause the motor'soverload protection system circuit breaker to trip.
electrical extension cords
n Inspect all electrical extension cords to ensure that they arefree of damage.
n When using an extension cord, use a heavy-duty cord that isno more than 25 feet long and at least 14 gauge.
n use only a 3-wire extension cord that has a 3-blade groundingplug.
oPeraTInG THe aIrCoMPreSSor
Save this manual for future reference.
Introductionn This air compressor features a compact structure, stable
performance, a high airflow rate, and easy operation andmaintenance. because the air compressor produces no oil inthe airflow, it can be used as an independent air supplymachine for situations in which oil in the airflow is an issue.
n The motor directly drives the eccentric wheel-connecting barsystem, making the piston move reciprocally. The piston ismade from a high-temperature-resistant and abrasion-resistantnonmetallic material, and is able to function without lubricationfor a long time.
n Compressed air discharges in the air tank. a pressure meterdisplays the pressure inside the tank. When the pressureinside the tank rises to 8 bar, the power is automatically cut offby the pressure-control switch. When the pressure inside thetank lowers to 6 bar, the power is turned back on by thepressure-control switch. This gradually raises the pressure inthe air tank. This procedure happens repeatedly.
assembly1. Connect your air supply hose to the the quick-connect
coupling.
2. Make sure the drainage valve is off and that the pressureswitch is in the off position.
3. ensure that the power supply you are going to use is operatingnormally.
4. Insert the power supply cord into the power supply socket.

10 Customer Support: 1-866-409-4581
AIR COMPRESSOR
test runbefore using the air compressor for the first time, complete a testrun as follows:
1. Turn the power switch to the off position. Plug the powersupply cord into a power supply socket. Start the aircompressor by turning the power switch to the on position.The pressure gauge reading will slowly rise as pressureincreases inside the air tank. When the gauge reading reaches120 PSI, the pressure switch will automatically turn the poweroff. This indicates that the compressor is working normally.
2.
daily operation
Starting the compressor:
1. Turn the power switch to the off position.
2. attach the air hose to the quick connect valve.
3. Close the drainage valve.
4. Turn the regulator knob completely to the left.
This will turn down the pressure at the air hose before starting.
5. Plug the power supply cord into a power supply socket.
6. Turn the power switch to the on position.
7. let the motor run and tank fill until motor turns off.
8. Turn the regulator knob to the right increasing the
pressure at the hose. Turn the pressure up until the
desired pressure at the air hose is reached.
9. operate air tool normally.
10. only operate continously for 1 hour maximum.
allow compressor to cool down before restarting.
Shutting down the compressor:
1. Turn the power switch to the off position.
2. unplug the power supply cord.
3. reduce the pressure in the air tank through the air supplyhose.
note: If the air Compressor is not working properly, thepressure gauge will indicate that there is a decrease inpressure in the air tank. If there is an air leak from thecompressor the pressure in the air tank decreases, thepressure switch resets and the motor automatically turnsback on.
If you detect an air leakage, turn the power switch to theoff position, release the air from the tank by pulling onthe safety valve. unplug the power supply cord and contactCustomer Support for assistance.
Turn the power switch to the off position, unplug the powersupply cord and release the air in the tank by pulling on thesafety valve. at this point proceed to the next step (dailyoperations) starting the air compressor to continue to use.

11Customer Support: 1-866-409-4581
AIR COMPRESSOR
MaInTenanCe
draining the air tankThe frequency at which you should drain the air tank depends onthe environmental conditions and the amount of operating timelogged. The average draining frequency is every 2 to 3 days.
1. Place the air compressor above a container capable of holdingwater.
2. With compressed air in the air tank, slowly turn the drain valveknob counterclockwise. The water in the air tank will drain out.
3. after all of the accumulated water has drained out, turn thedrain valve knob clockwise until it is tight, in order to avoidleakage.
changing the air filterThe air filter is designed to reduce noise and help preventparticulates in the air from entering and damaging the aircompressor.
after being used for a period of time, the air filter will becomeclogged. This will reduce the air intake capabilities of the aircompressor, reducing performance. Therefore, the air filter mustbe replaced regularly.
1. open the lid on the air filter, then remove the old filter.
2. replace it with a new filter, then close the lid.
testing for LeaksMake sure all connections are tight. do not overtighten.
a small leak in any hose or pipe connection will reduce the aircompressor's performance.
To test for small leaks, spray a small amount of soapy water onthe area suspected of leaking. If the soap bubbles, replace thebroken part.
cleaningClean items with a soft brush, or wipe with a moistened clothusing a biodegradable solvent.
do not use flammable liquids such as gasoline or alcohol. alwayskeep parts clean from dirt and dust for better performance.
adjusting the pressure SwitchThe pressure switch is used to control the automatic stop-and-start function of the air compressor, ensuring the correct pressureof the compressed air in the air tank is maintained.
If the pressure of the compressed air in the air tank is found not tobe in the standard range set by the manufacturer, the pressureswitch must be adjusted to correctly set the activation valve. (Thepressure at which the air compressor will stop running is 8 bar,and the pressure at which the air compressor will start runningagain is 6 bar.)
adjust the pressure switch as follows:
1. open the casing to access the pressure switch.
2. adjust the setting screw for the maximum pressure. Turningthe setting screw clockwise makes the activation pressurehigher, so the pressure at which the air compressor stopsrunning will be higher.
3. adjust the setting screw for pressure difference. Turning thesetting screw clockwise makes for a larger pressure difference,so the difference between the pressure at which the aircompressor starts and the pressure at which the aircompressor stops is larger.
Gradual adjustments should make the activation pressures withinthe range set by the manufacturer.
SToraGebefore storing for a prolonged period of time:
1. Turn off the power supply.
2. disconnect the power cord from the power supply.
3. Pull the relief valve and release all the pressure from the airtank.
4. Clean the air compressor to remove all dirt and dust.
5. Cover the air compressor with a cover to protect the unit fromdust and moisture.
6. do not stack or store any items on top of or around the aircompressor. damage could occur.
12 Customer Support: 1-866-409-4581
AIR COMPRESSOR
TroubleSHooTInG
probLem poSSIbLe cauSe poSSIbLe SoLutIonS
Pressure drop in the tank. air leaks at connections.
let the compressor build pressure in the tank, tothe maximum pressure if possible. brush soapywater on air connections and look carefully for airbubbles. Tighten leaky connections. If the problempersists, contact the seller for further advice.
The solenoid valve leaks whenthe compressor is idle.
non-return valve seal is defective.
let the air in the tank flow out until all the pressureis released. Then remove the non-return valve plugand clean the valve seal. If necessary, replace theseal and then reinstall all components.
The compressor stopped anddoes not start.
overload cutout operated because ofmotor overheating.
Check that the main voltage corresponds tospecifications. an extension cord that is too thin ortoo long can cause a voltage drop and cause themotor to overheat. allow the motor to cool down.use heavy duty extension cords. ensure that thecompressor is plugged into a socket as close aspossible to the consumer unit or fuse box.
Motor windings are burned out. Contact Customer Support.
The motor does not start andmakes a humming noise.
Capacitor is burned out. replace starter capacitor.
The motor does not start or startsslowly.
low voltage supply to the motor.
Check that the main voltage corresponds tospecifications. an extension cord that is too thin ortoo long can cause a voltage drop and cause themotor to overheat. allow the motor to cool down.use heavy duty extension cords. ensure that thecompressor is plugged into a socket as close aspossible to the consumer unit or fuse box.
The compressor is noisy withmetallic clangs.
Compressor head gasket broken orvalve faulty.
Stop the compressor and contact the dealer.
The compressor does not reachthe maximum pressure.
Compressor head gasket broken orvalve faulty.
Stop the compressor and contact the dealer.
The compressor doesn't seem toprovide as much air as it didwhen new and/or the compressorcuts off within a much shortertime period.
The pressure switch needs adjusting. Stop the compressor and contact the dealer.
The tank is full of water due tocondensation.
open the ball valve and release the pressure.open the drain valve and release the water withinthe tank.
The motor pump unit does notstop when the tank pressurereaches its maximum workingpressure (8 bar or 116 PSI) andthe safety valve vents air.
Pressure switch defective or needsadjusting.
Stop the compressor immediately and contactCustomer Support.

13Customer Support: 1-866-409-4581
SPeCIfICaTIonS
electrical circuit
air passage drawing
AIR COMPRESSOR
14 Customer Support: 1-866-409-4581
AIR COMPRESSOR
CalIfornIa aIr ToolS InC. lIMITed WarranTyThis warranty is limited to air Compressors distributed by:
California air Tools, Inc.
8560 Siempre Viva road, unit 3
San diego, Ca 92154
Limited WarrantyCalifornia air Tools Inc. will repair or replace, free of charge, to the original retail customer who purchased a California air Tools, Inc.air Compressor from an authorized dealer, distributor or distributor’s dealer in north america.
This warranty does not transfer to subsequent owners.
California air Tools Inc. will repair or replace, at its option, any parts of the portable air compressor that are proven by an authorizedservice center to be defective in material or workmanship under normal use during the applicable warranty time period as stated below.This limited warranty covers the cost of the replacement parts and labor for all defects when installed by an authorized service center.Transportation charges are the responsibility of the customer. any part replaced under warranty becomes the property of California airTools Inc.
all parts replaced under warranty will be considered as part of original product, and any warranty on those parts will expire coincident withthe original product warranty.
Limited Warranty periodsnon-commercial / non-rental (personal use by a retail customer): 1 year parts and laborCommercial / rental (usage for income, business use): 1 year parts and labor
The limited warranty period begins on the date of retail purchase by the original purchaser.
disclaimers, Limitations of remedies & exclusionsThis warranty gives you specific legal rights, and you may also have other rights which may vary from state to state.
disclaimer of other Warranties
To the fullest extent permitted by applicable law, this limited warranty is exclusive and expressly in lieu of any and all other warranties,including, without limitation, any implied warranties of merchantability or fitness for a particular purpose or any other implied warrantiesthat may arise from the course of dealing or usage of the trade. California air Tools Inc. hereby declaims and excludes all otherwarranties. To the extent that California air Tools Inc. products are consumer products under applicable federal and state law with respectto any customer, the duration of any implied warranties (including but not limited to implied warranties of merchantability or fitness for aparticular purpose) are limited to the shortest duration permitted by applicable law or the limited Warranty period provided herein,whichever is longer.
Limitations of remedies
California air Tools Inc. shall not be liable to customer, or anyone claiming under customer, for any other obligations or liabilities, includingbut not limited to, obligations or liabilities airing out of breach of contract or warranty, negligence or other tort or any theory of strict liability,with respect to the air compressor or California air Tools Inc. acts or omissions or otherwise. To the fullest extent permitted by applicablelaw, California air Tools Inc. shall not in any event be liable for incidental, compensatory, punitive, consequential, indirect, special or otherdamages, including but not limited to loss of use, loss of income, loss of time, loss of sales, injury to personal property, or liabilitycustomer incurs with respect to any other person, or any other type or form of consequential damage or economic loss.
15Customer Support: 1-866-409-4581
AIR COMPRESSOR
exclusions
In addition to the foregoing disclaimers, limitations and terms, this limited warranty shall not apply to and does not cover accessories, nordoes it cover products that are in any way subject to any of the following:
1. Improper setup, installation or storage.
2. lack of proper maintenance and service.
3. accident, damage, abuse or misuse.
4. abnormal operating conditions or applications.
5. repair or modification by customer or any third party without written consent of California air Tools Inc.
6. use under operating conditions or in applications not recommended by California air Tools Inc.
7. normal wear.
8. The use of accessories or attachments not recommended by California air Tools Inc.
9. acts of God.
The application of these exclusions will be determined at the sole discretion of California air Tools Inc.
registrationWarranty is also available by keeping and showing your original receipt from the date of purchase to an authorized California air ToolsService Center.
Servicedo not return your air compressor to the place of purchase.
for all customer service inquiries call Customer Service at 1-866-409-4581


