
Get up and Running Quickly with Drupal
Distributions!
by Melissa Piper
1
Who am I?• My name is Melissa Piper
• I’ve been a front-end developer for 7+ years
• Front End/Drupal Developer at Beyond Spots & Dots (now hiring Drupal developers!)
You can follow me at:!
@mfpiper
linkedin.com/in/melissapiper
github.com/empee3
2

What is a Distribution?• A pre-packaged Drupal installation that typically
addresses a specific use case (blog, portfolio, publishing website, mobile-first website, etc.)
• Allows the developer to begin development with pre-set configurations, modules, and themes already in place at installation
• Useful to create if you find yourself always using the same modules and themes when starting a new Drupal project.
3

Example Distributions
!
OpenPublish - Distribution packaged for the online news industry (journals, onlinenewsp apers, trade publications)
4

Example Distributions (cont…)
!
!
!
!
Openfolio - A web portfolio distribution for photographers and artists
5

Distribution Components
6

What’s Inside a Distribution?• Drupal Core
• Projects (contributed modules, themes, patches)
• Third party libraries (CKEditor, TinyMCE)
• Installation profile
• Configurations (settings originally stored in the database)
7

Main Components in Creating a Distribution
• Drush Make File - Pulls in core, projects, and third-party libraries - Description of the code base - A list of all contributed files that will be used in the distribution
• Profile - Configuration, installation profile, features - Profiles are used when you first install Drupal - default profiles are Minimal and Standard
8

4 Files Generated in a Distribution
• .info
• .install
• .make
• .profile
9

Let’s Create a Distribution!
10

• You are a Drupal developer, and find yourself installing the same modules and themes, and setting the same configurations at the beginning of each new project
• You decide to create a distribution, so that all of these modules, themes, libraries, and configurations will be ready to go for your next Drupal project. But where do you begin?
11
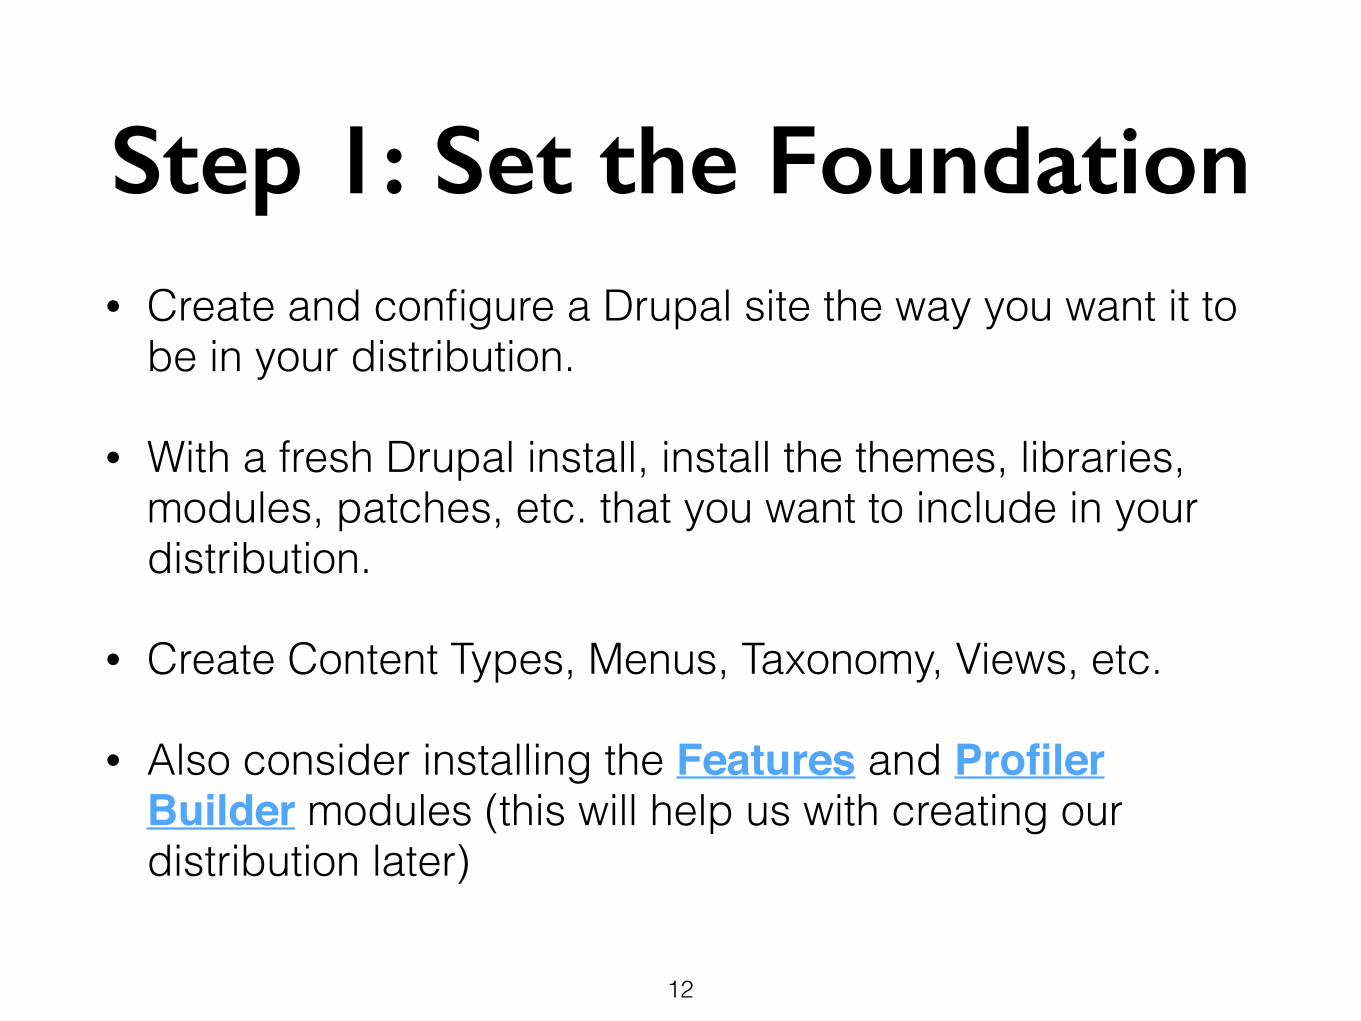
Step 1: Set the Foundation• Create and configure a Drupal site the way you want it to
be in your distribution.
• With a fresh Drupal install, install the themes, libraries, modules, patches, etc. that you want to include in your distribution.
• Create Content Types, Menus, Taxonomy, Views, etc.
• Also consider installing the Features and Profiler Builder modules (this will help us with creating our distribution later)
12

Typical contributed modules might include:
• Views and dependencies such as CTools!
• Google Analytics!
• Admin Toolbar!
• Date!
• Entity Reference!
• IMCE!
• WYSIWYG!
• Webform
13

Typical views and content types might include:
• Featured News view and News content type!
• Event registration view and event content type!
• Taxonomies to categorize news and events by type!
• Slideshow view
14

Step 1.5: Features• The Features module can be used to save some of the
configurations that you want to include in your distribution (such as WYSIWYG profiles, created content types and views)
• These configurations are stored in the database and are NOT automatically included in your make file or installation profile
• Without Features, you’ll need to create these configurations using the Drupal API (coding each with PHP)
15

Features allows you to export most of your configurations as a module that can be included in your Make file
16

Step 2: Generate the Make File
• Once your Drupal site is configured the way you want it to be in your distribution, it’s time to generate a Make file
• The Make file is generated with Drush to allow for the creation of a ready-to-use Drupal site
• A flat text file that pulls in core, contributed modules, themes, and libraries
17
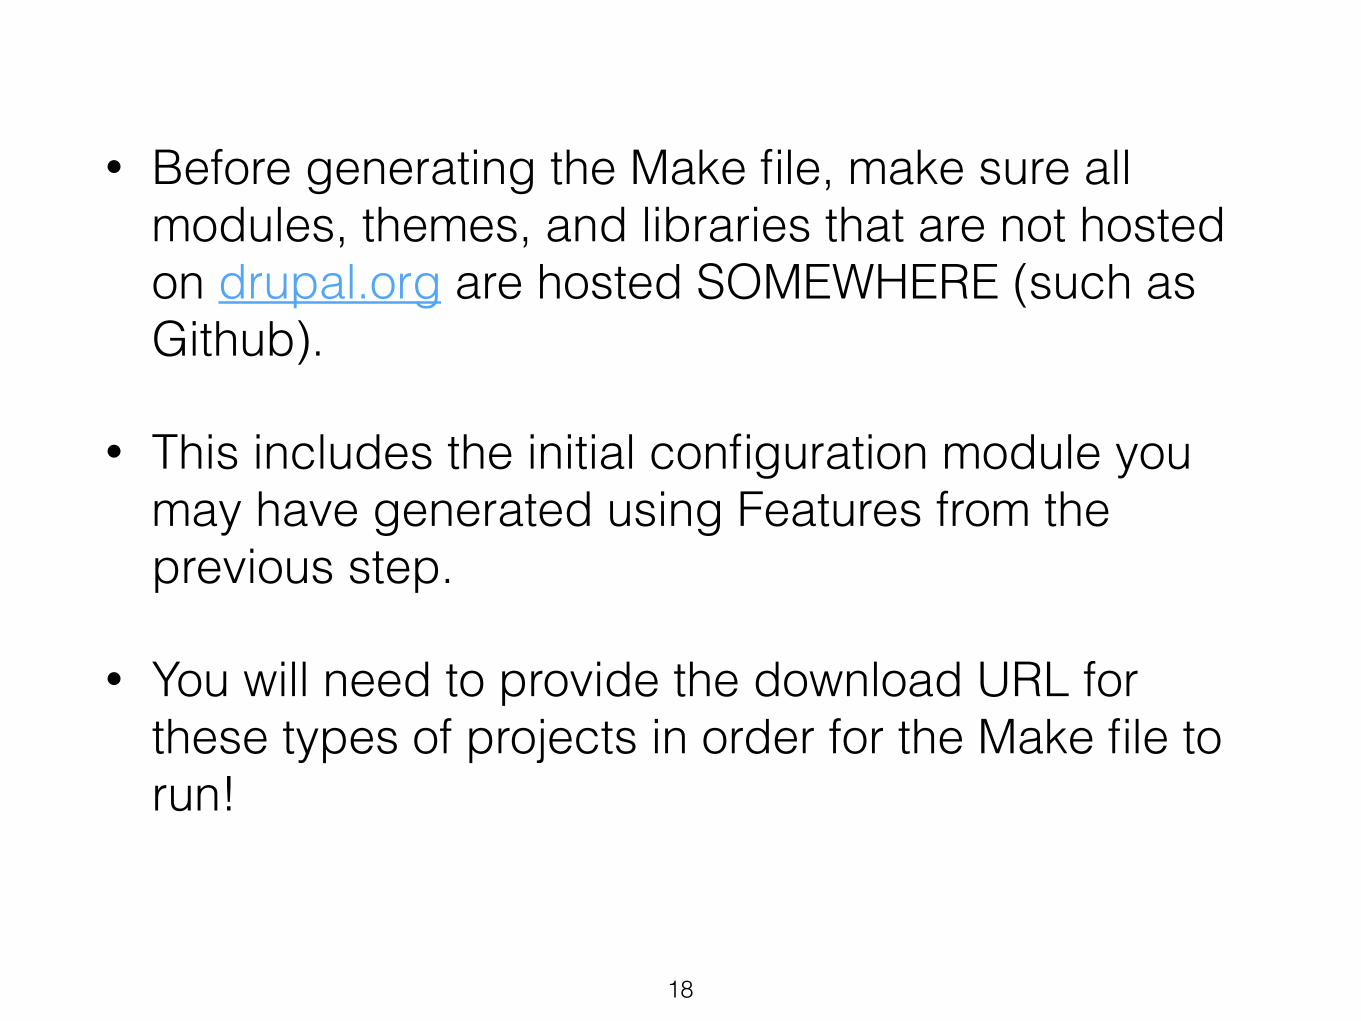
• Before generating the Make file, make sure all modules, themes, and libraries that are not hosted on drupal.org are hosted SOMEWHERE (such as Github).
• This includes the initial configuration module you may have generated using Features from the previous step.
• You will need to provide the download URL for these types of projects in order for the Make file to run!
18

• To generate the Make file, run the following Drush command:drush generate-makefile drupal-org.make!
• You can also include the —exclude-versions flag to prevent the Make file from including version numbers for all modules and themes
• Note* - Name your Make file drupal-org.make if you plan to share your distribution with the Drupal community, as this is a requirement on drupal.org
19

Generated Make file example
20

• In some cases, Drush will not be able to find all of the libraries, modules, or themes you want to use (often when the projected is not hosted on drupal.org).
• When this happens, Drush will generate placeholder information in the Make file and prompt you to fill in the missing information (such as download URL and download type)
21

Example of generated Make file with missing information
22

Step 3: Generate Profile
• You can use the Profiler Builder module to generate the .info, .install, and .profile files
• Note* - Profile Builder also generates the Make file, but I find it more efficient to generate my own Make file if I’m including projects not hosted on drupal.org
23
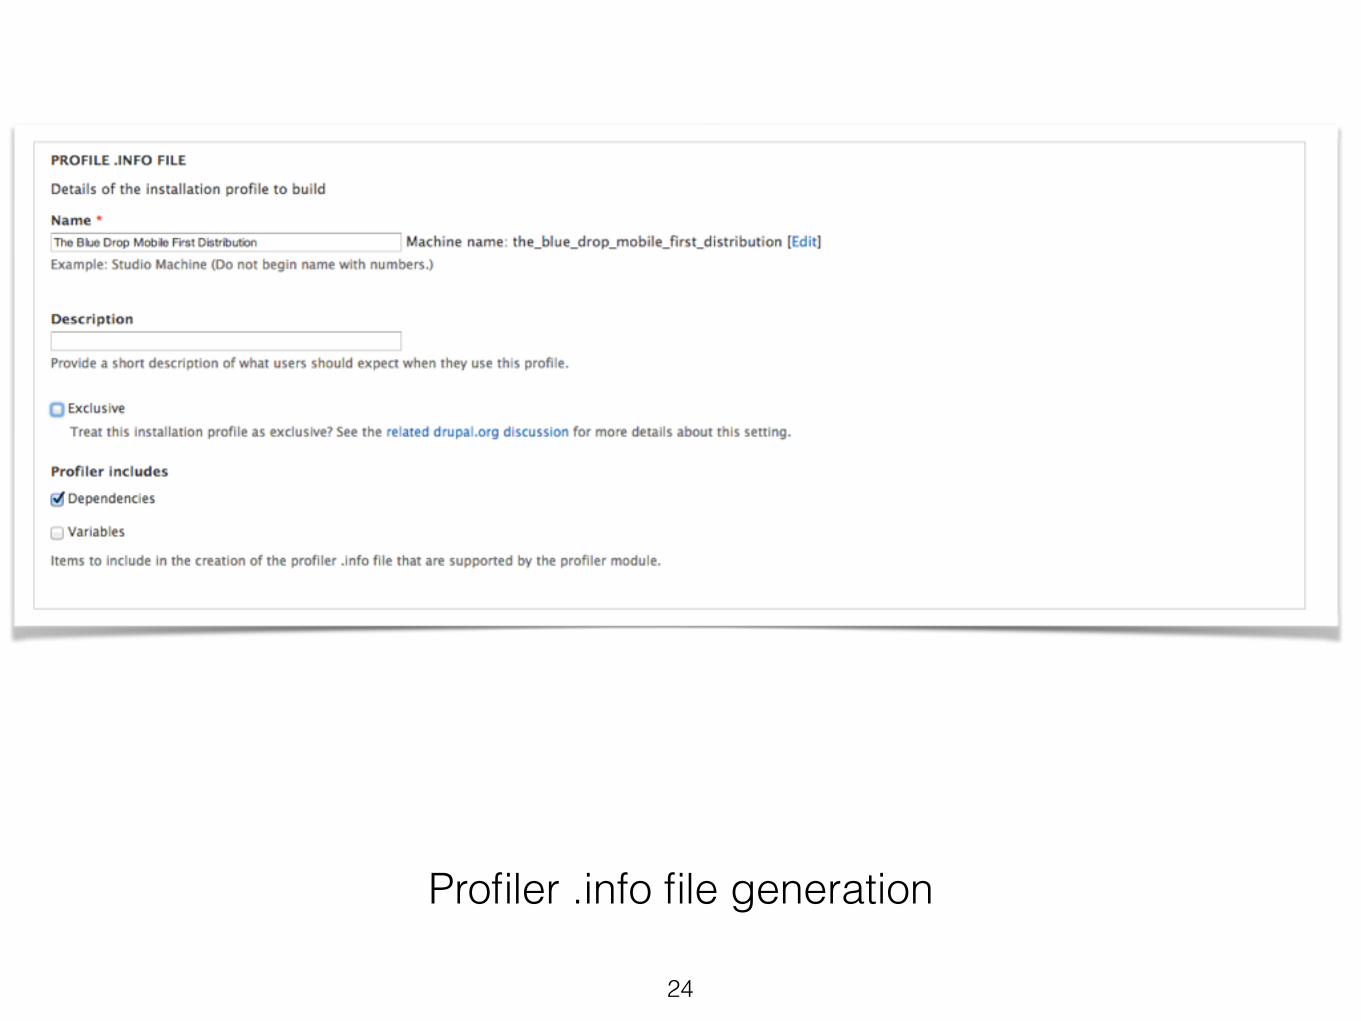
Profiler .info file generation
24

• The Profiler Builder module will generate and automatically download the .info, .install, .profile, and .make files into a tarbell (tar.gz) download
25
Step 4: Making the Make File• Once you have generated your make and profile
files, you’re ready to test your new distribution!
• Create a new directory and database for your test site
• Copy and paste your drupal-org.make Make file into the new directory
• In your new directory, run the Drush command: drush make drupal-org.make
26

• Running the Make file will ask if you want to create a new site in this present directory
• After entering “y” (yes), you will Drupal core, contributed modules, themes, and libraries being downloaded into the current directory
• If all downloads complete successfully, you will have a ready-to-install download of Drupal core in your new directory. If any errors are encountered along the way, the download will stop
27

Step 5: Adding the Profile• In your new directory, navigate to the Profiles directory
• In the Profiles directory, create a new directory named the same as the .profile, .install, and .info files that were generated from the Profiler Builder module (for instance, if your .info file is named blue_drop_dist.info, name your directory blue_drop_dist)
• Copy and paste your .profile, .install, and .info files into this directory
28

Step 6: Install Your Distribution!
• Navigate to your distribution directory in your browser. You will be redirected to the Drupal installation screen
• When selecting your profile, in addition to the default Standard and Minimal profiles, you should see the name and description of your distribution!
29

Example of a distribution profile ready for install
30

• With your distribution selected, continue with installation as normal
• As your distribution installs, you will see the modules and themes that you included in your Make file being installed as well
31
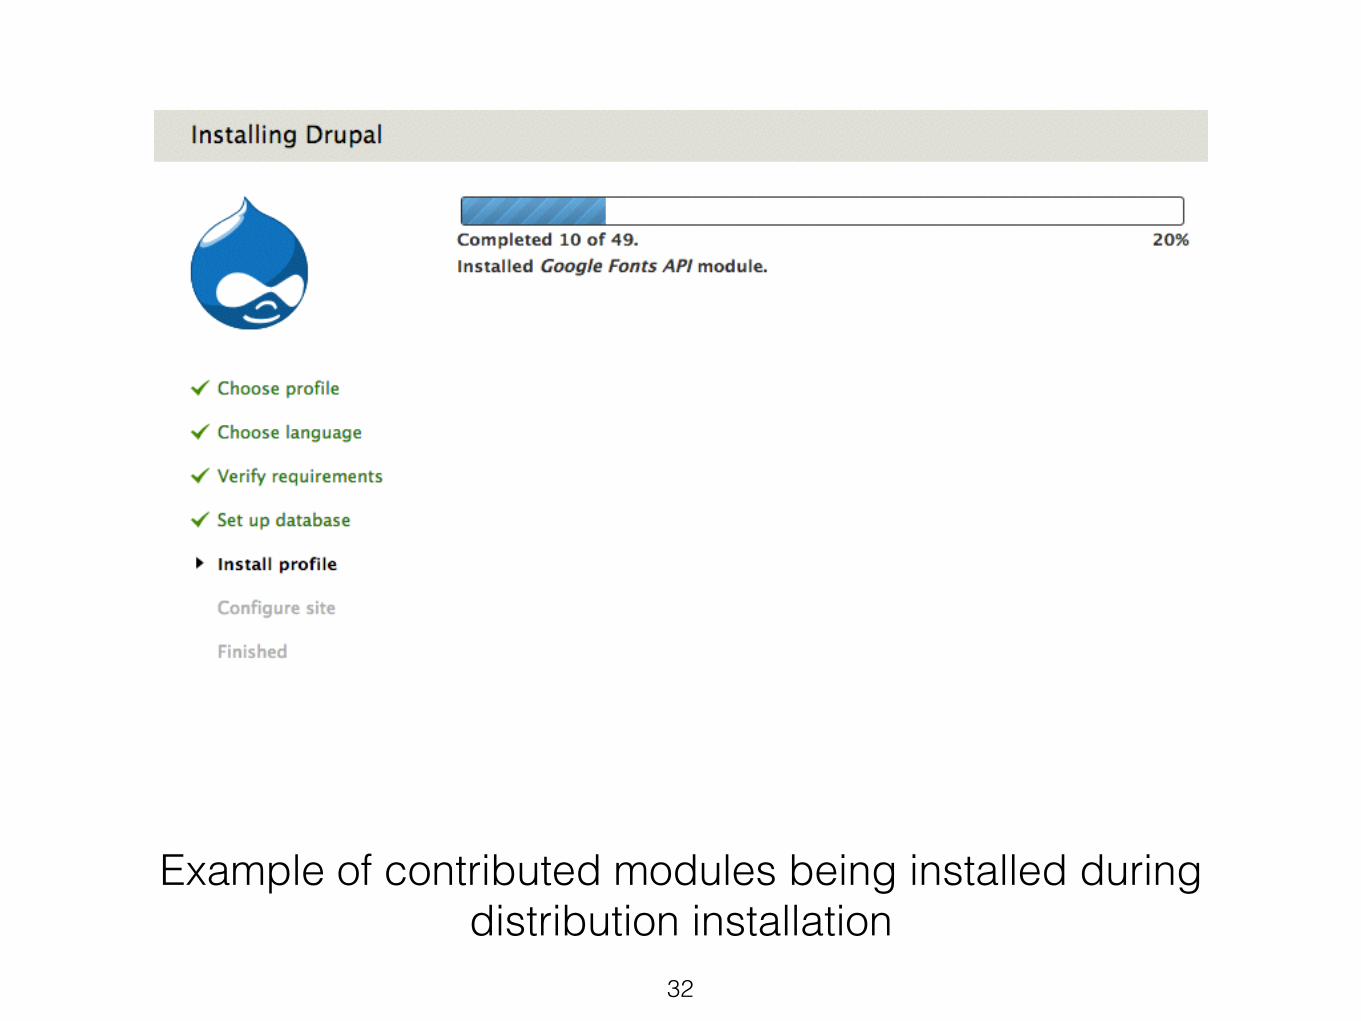
Example of contributed modules being installed during distribution installation
32
• Once installation is complete, you should be able to use the new site with the modules, themes, and libraries that you included in your distribution.
33

A Note on Contribution
34

Sharing Your Distribution• You can share your finished distribution on sites
such as Github, or contribute your distribution on drupal.org
• If sharing your contribution on drupal.org, there are a few guidelines that you must follow, such as:
35

• Name your make file “drupal-org.make”
• Install drupal.org drush extension (https://www.drupal.org/project/drupalorg_drush)
• Verify the make file drush verify-makefile
• Create a sandbox project page on drupal.org
• Push your distribution to the sandbox project page with Git
36
• If this is your first time contributing on drupal.org, you will need to submit your project for approval before it can be released to the community as a full project.
37

Example Distribution
• The distribution used as an example in this presentation, The Blue Drop MFD (mobile-first distribution), can be downloaded from my Github account:
• https://github.com/empee3/the_blue_drop_mobile_first_distribution
38

Thank You!
39


