Download - FalconNet Wireless

FalconNet Wireless Windows 7 / Vista
Wireless Instructions - Windows 7 1
Click on “Manage Wireless Networks”
STEP 2:
Choose “Manually create a network profile”
STEP 4:
On your desktop, look for the network icon at the
bottom right of your screen. Right click on it and
choose “Open Network and Sharing Center”
STEP 1:
Make sure you don’t have any old entries for
Falcon or old FalconNet on this screen. If you do,
remove them.
Then click “Add”
STEP 3:
Enter “FalconNet” into Network name, and
change Security type to “WPA-2 Enterprise”
Then Click “Next”
STEP 5:
Click on “Change connection settings”
STEP 6:
FalconNet Wireless Windows 7 / Vista
Wireless Instructions - Windows 7 2
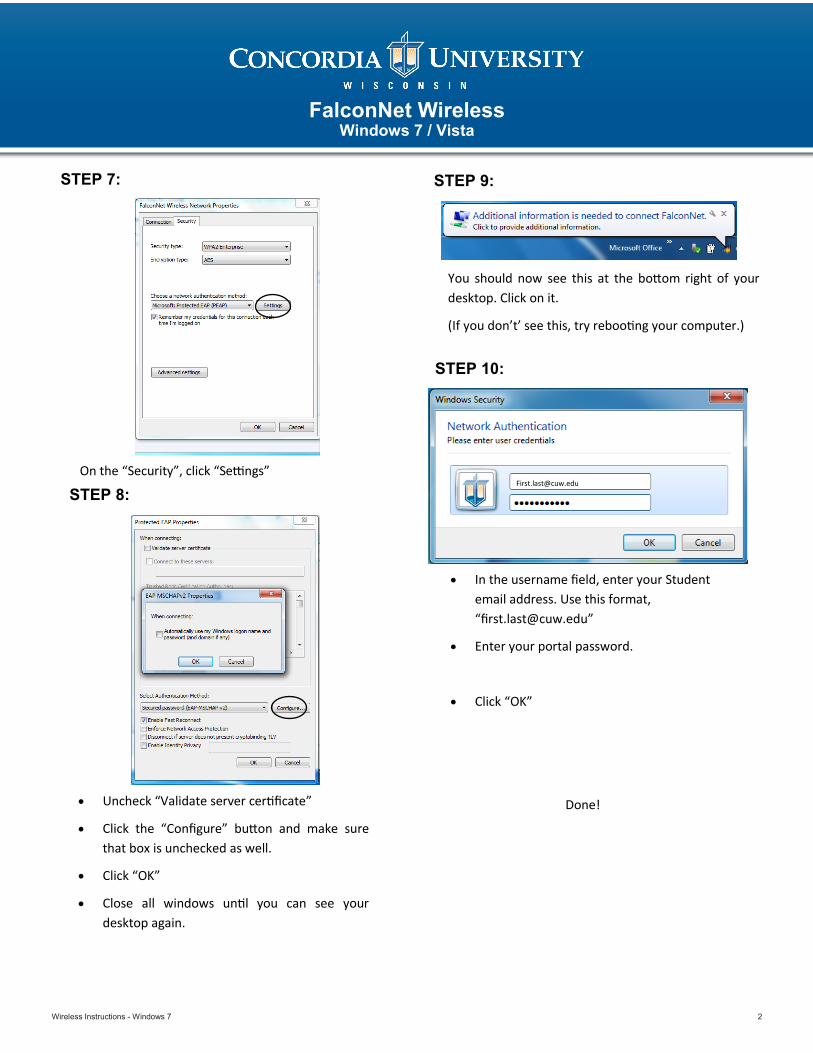
On the “Security”, click “Settings”
STEP 7:
STEP 8:
STEP 10:
In the username field, enter your Student
email address. Use this format,
Enter your portal password.
Click “OK”
Done!
You should now see this at the bottom right of your
desktop. Click on it.
(If you don’t’ see this, try rebooting your computer.)
Uncheck “Validate server certificate”
Click the “Configure” button and make sure
that box is unchecked as well.
Click “OK”
Close all windows until you can see your
desktop again.
STEP 9:


