Download - Azure Point to Site Configuration
Requirement:
1) Visual Studio Express (I used Express 2013)2) Temporary Admin rights on machine while configuring the Point to Site network.
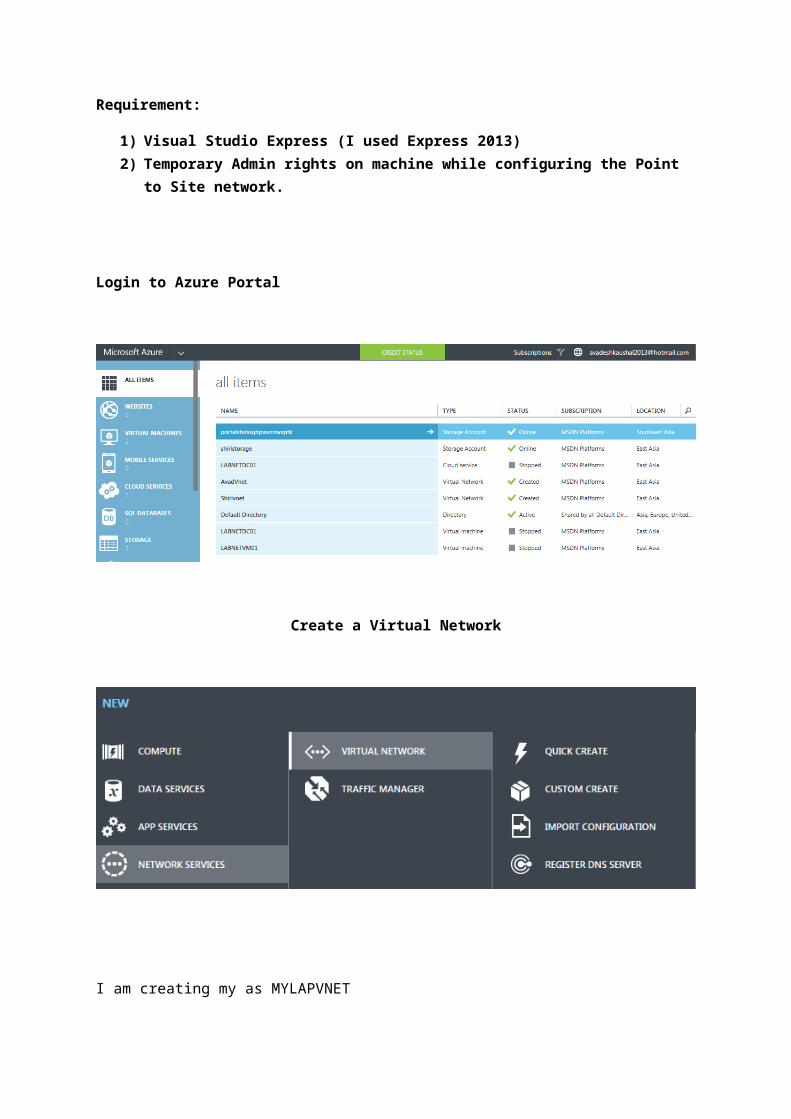
Login to Azure Portal
Create a Virtual Network
I am creating my as MYLAPVNET


1) You can add DNS Server of your Cloud machine if already configured. Since I do not have one I decided to create one.
2) Configure the Point to Site Network. ( Remember this is your local network on the machine)3) You Can also Add the DNS Server after the creation of PTS
Note: I am using the 192.168.2.0 as this is the one I have on my home Network With Router (See Below my home machine IP Details)
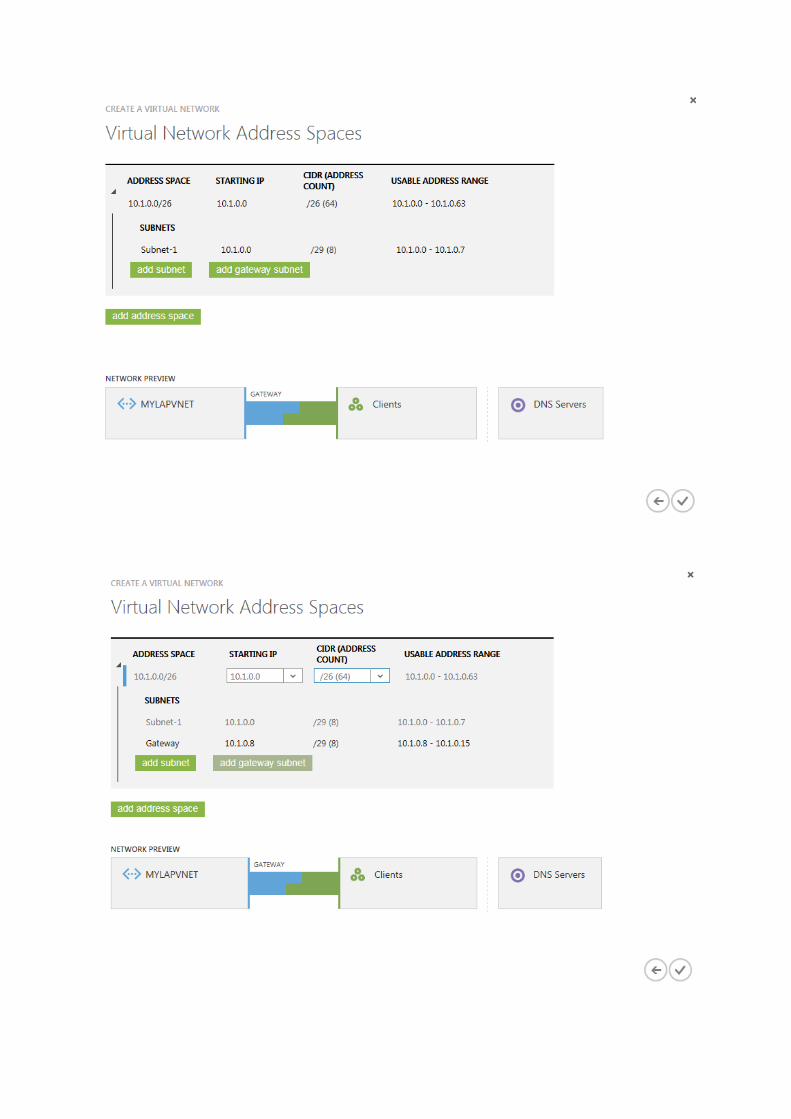
NOTE: ADDED AFTER THE Completion of POC
You need to be very careful while calculating the subnets. Or else add the DNS later. I by mistake Created MYLAPDC1 on wrong network so it did not work in first go. So I added proper subnet after I created the Point to Site Network.
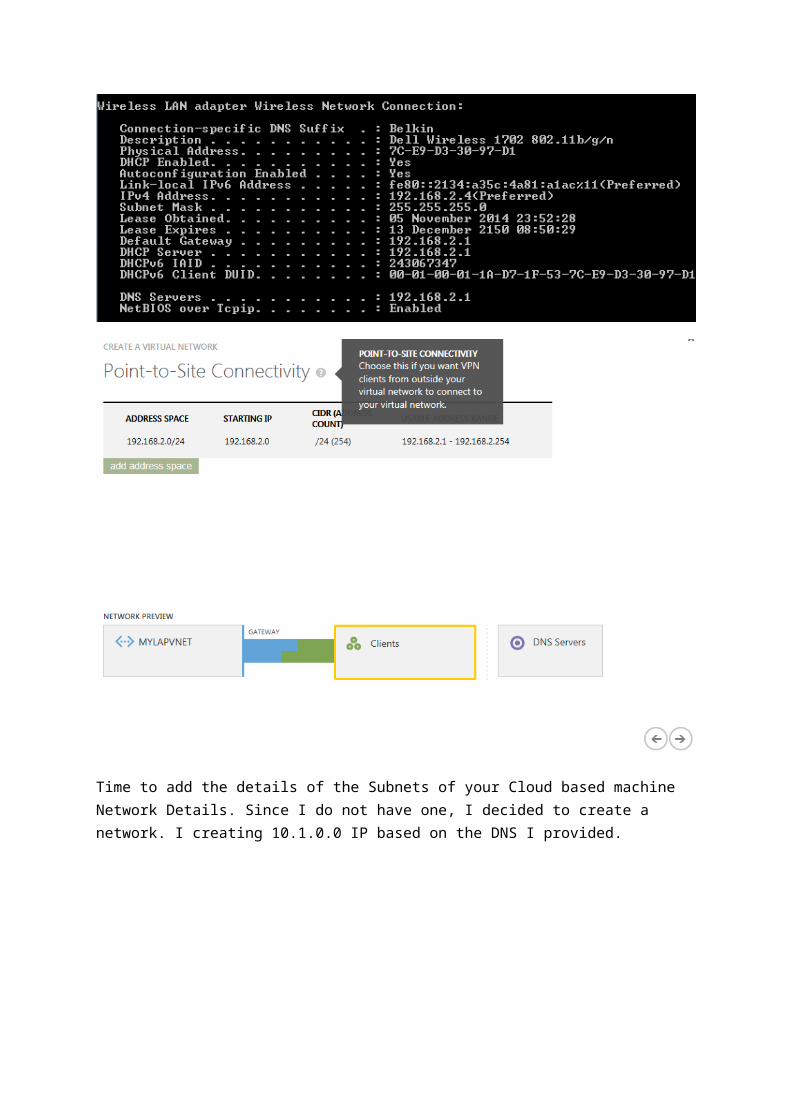
Time to add the details of the Subnets of your Cloud based machine Network Details. Since I do not have one, I decided to create a network. I creating 10.1.0.0 IP based on the DNS I provided.


Time to create Certificate for the Portal and Machine.
Open the Command prompt from Visual studio.
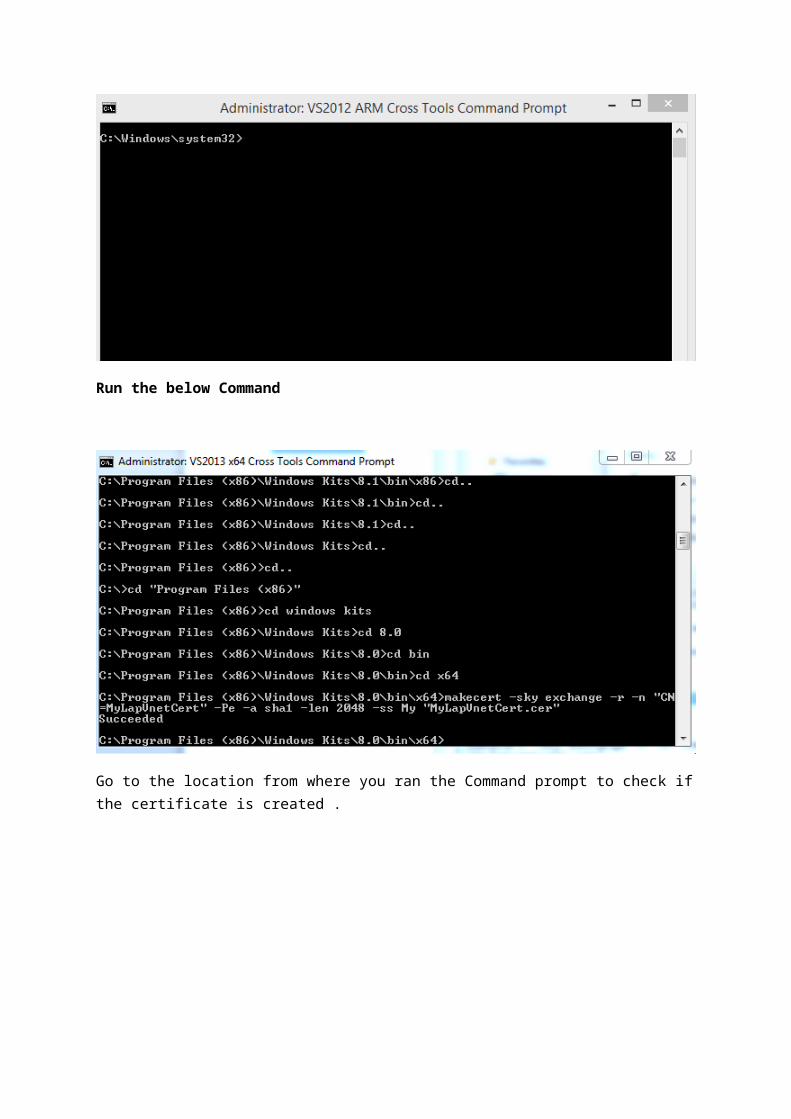
Run the below Command
Go to the location from where you ran the Command prompt to check if the certificate is created .
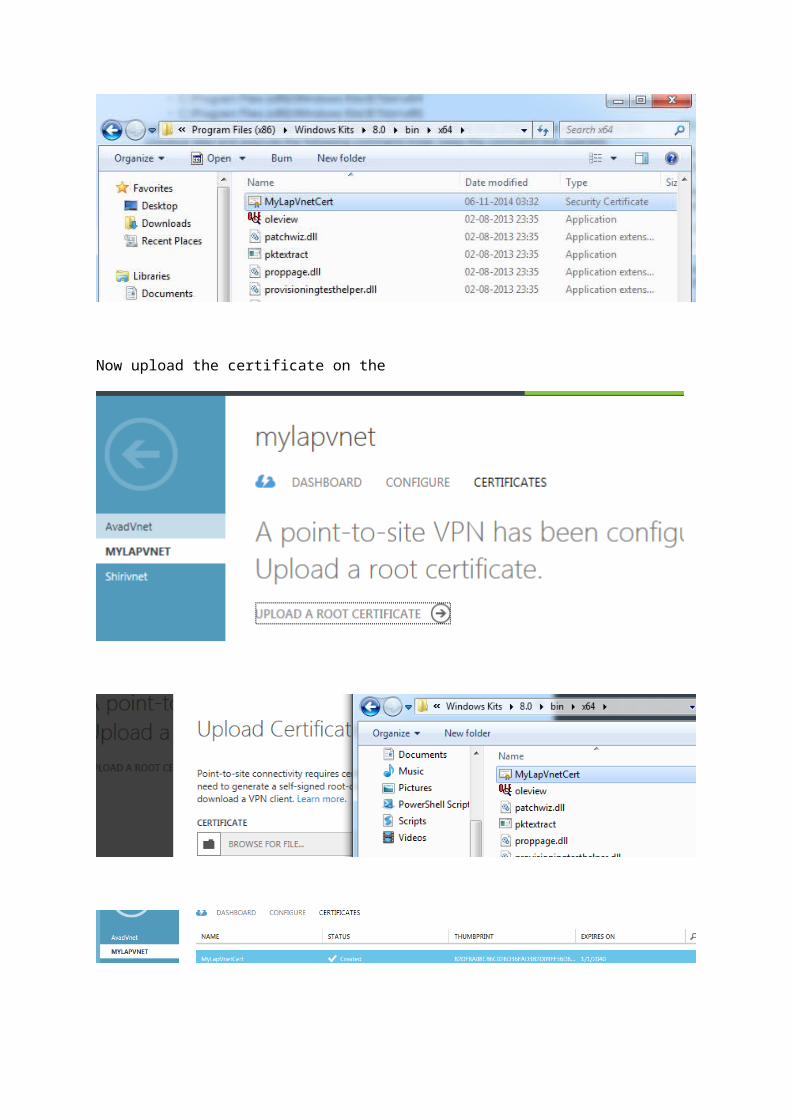
Now upload the certificate on the

Now we need to create a Client Certificate
Run the command again in the command prompt as shown below:
Open the console and download the certificate if you need to use the same one on other machine. I will not do that as I have single laptop.This step is just to show how you can use same certificate on multiple machines.

You can also download the certificate from the Azure Potal as well. I am using this method to save time.

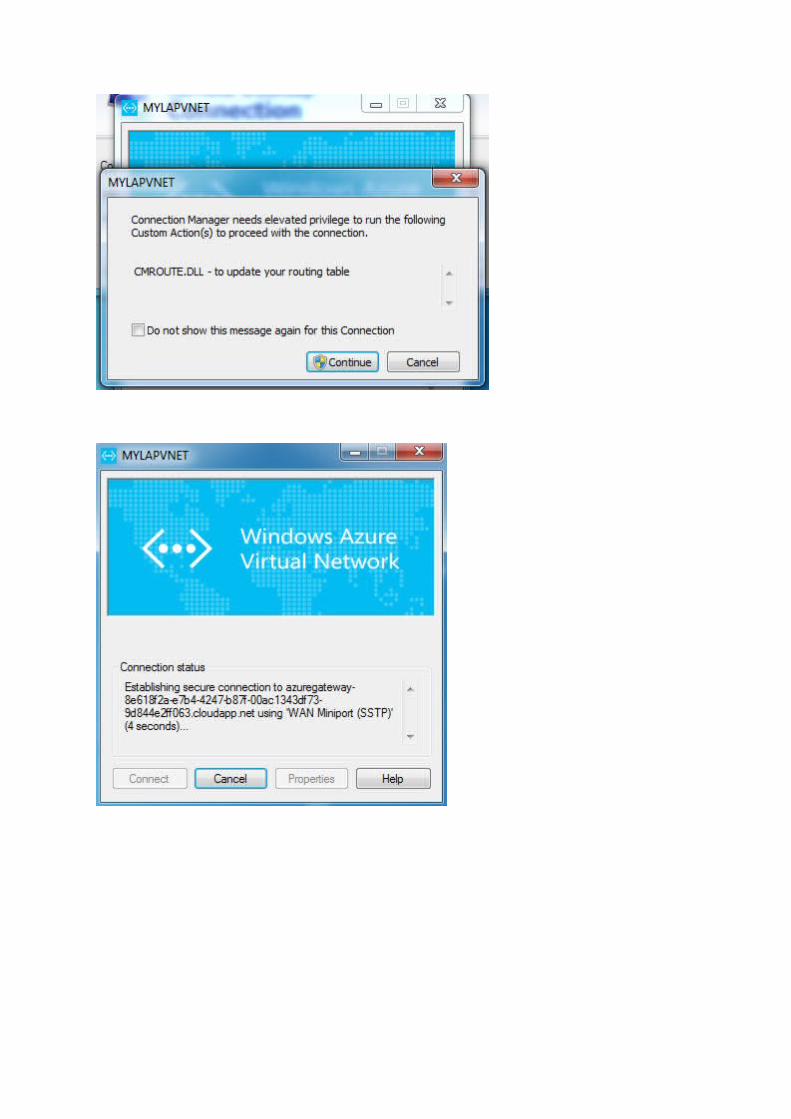
Once downloaded open the location and run the certificat./VPN Clinet
Once Installd check the network connection window.

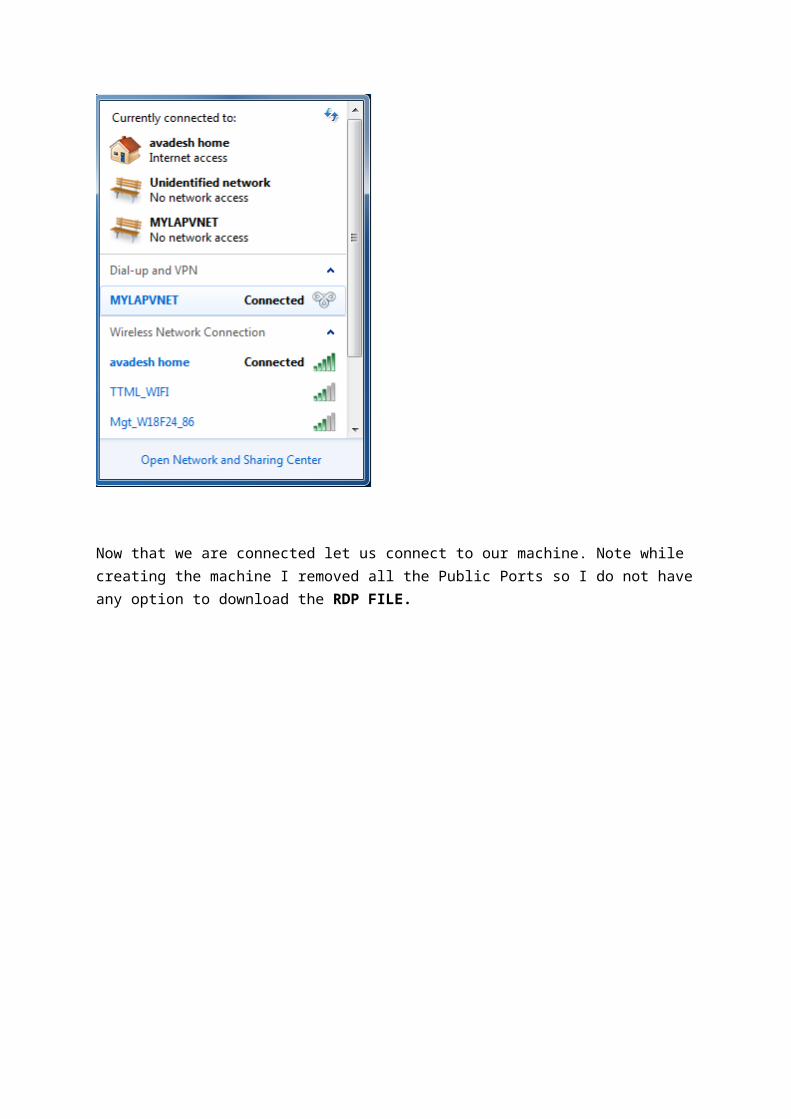
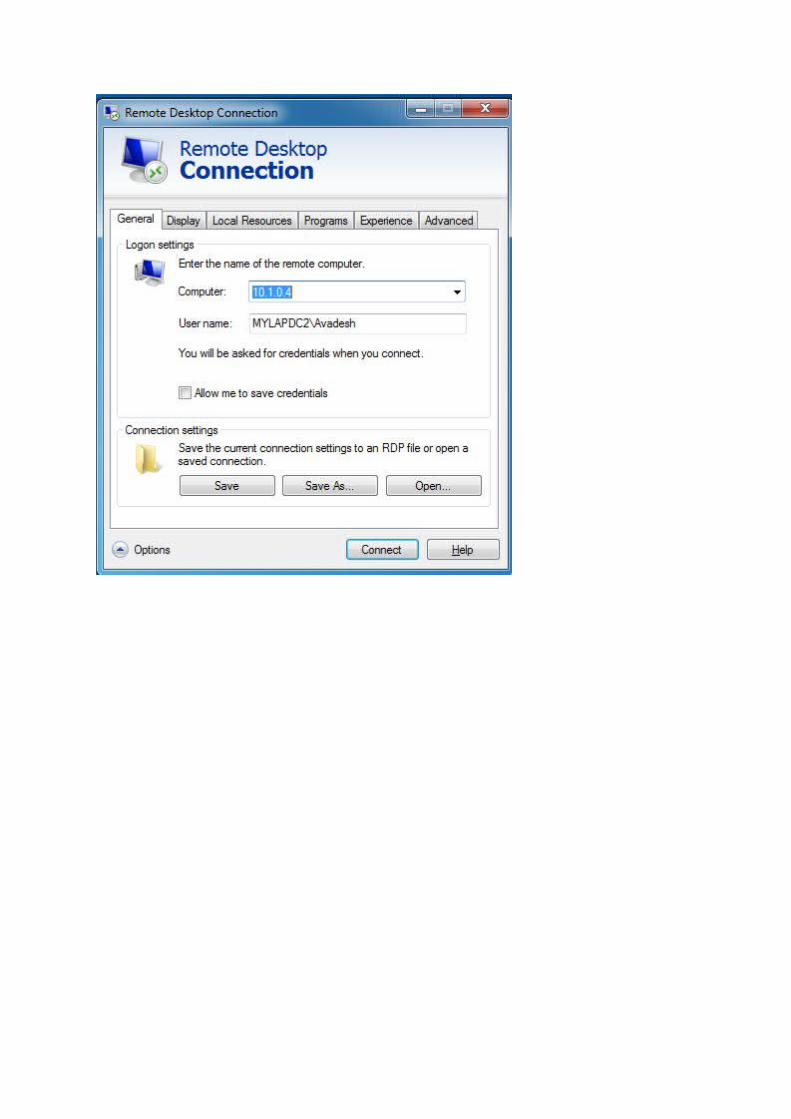
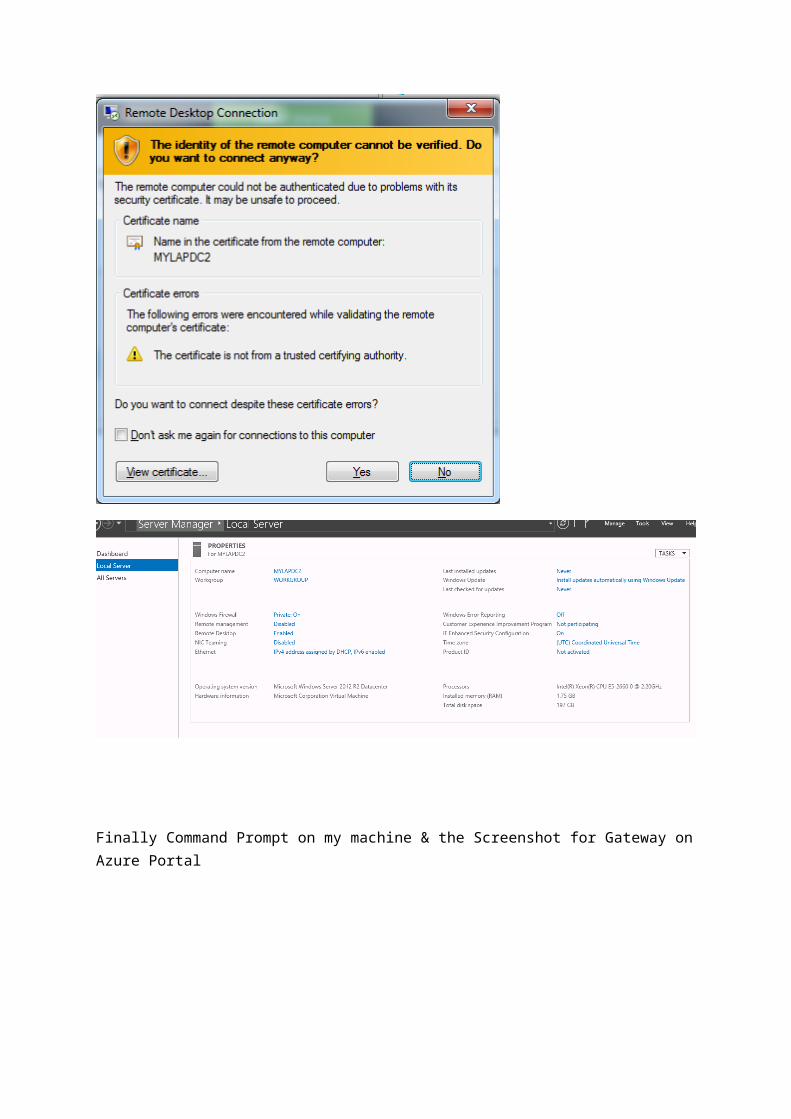
Now that we are connected let us connect to our machine. Note while creating the machine I removed all the Public Ports so I do not have any option to download the RDP FILE.
Finally Command Prompt on my machine & the Screenshot for Gateway on Azure Portal
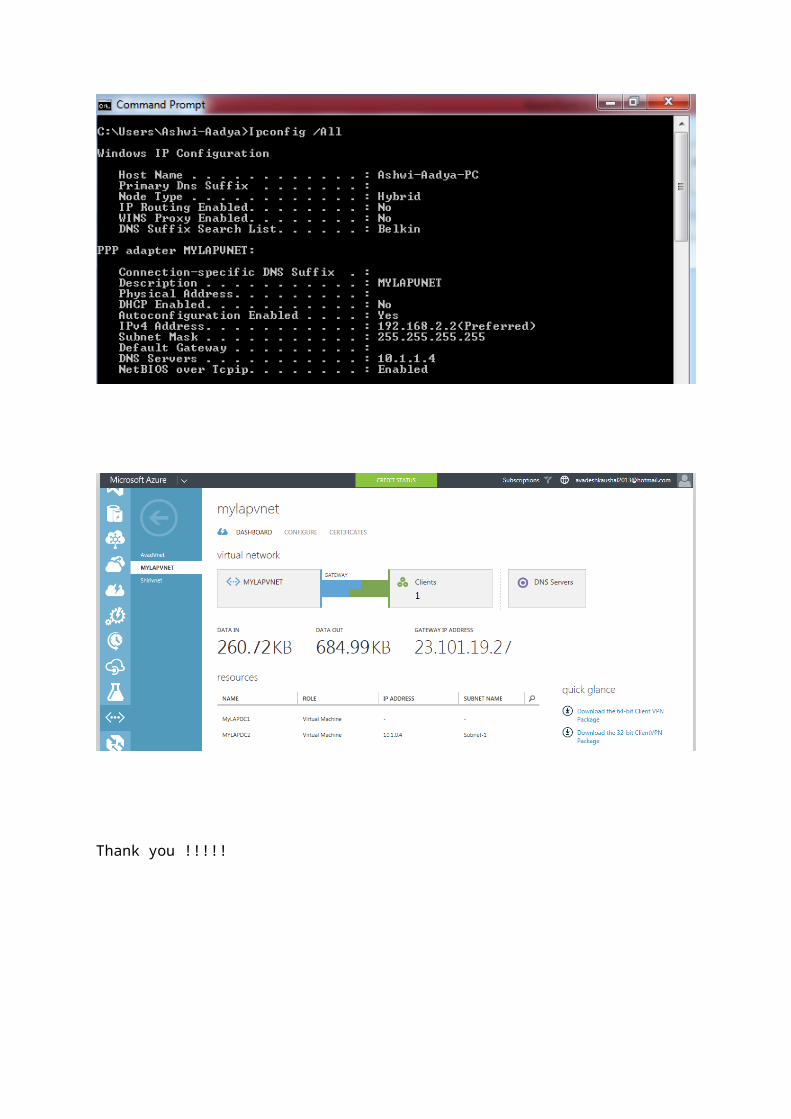
Thank you !!!!!


