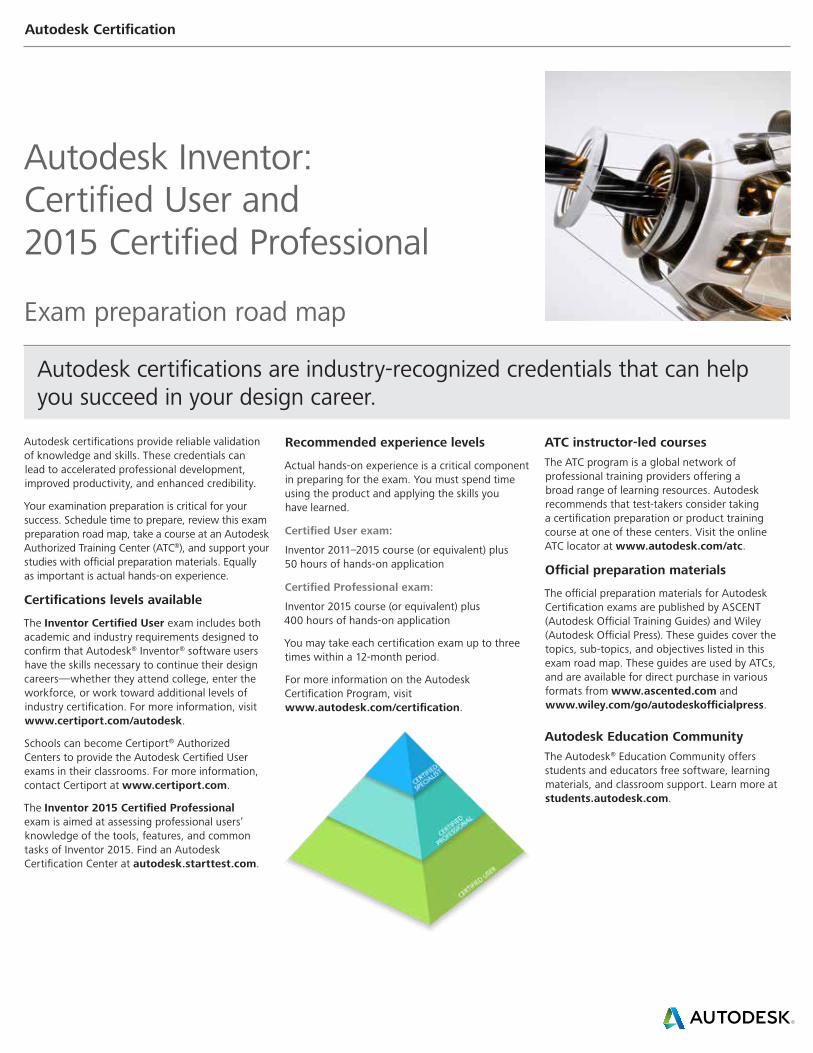
Autodesk Inventor: Certified User and 2015 Certified Professional
Exam preparation road map
Autodesk certifications provide reliable validation of knowledge and skills. These credentials can lead to accelerated professional development, improved productivity, and enhanced credibility.
Your examination preparation is critical for your success. Schedule time to prepare, review this exam preparation road map, take a course at an Autodesk Authorized Training Center (ATC®), and support your studies with official preparation materials. Equally as important is actual hands-on experience.
Certifications levels available
The Inventor Certified User exam includes both academic and industry requirements designed to confirm that Autodesk® Inventor® software users have the skills necessary to continue their design careers—whether they attend college, enter the workforce, or work toward additional levels of industry certification. For more information, visit www.certiport.com/autodesk.
Schools can become Certiport® Authorized Centers to provide the Autodesk Certified User exams in their classrooms. For more information, contact Certiport at www.certiport.com.
The Inventor 2015 Certified Professional exam is aimed at assessing professional users’ knowledge of the tools, features, and common tasks of Inventor 2015. Find an Autodesk Certification Center at autodesk.starttest.com.
ATC instructor-led coursesThe ATC program is a global network of professional training providers offering a broad range of learning resources. Autodesk recommends that test-takers consider taking a certification preparation or product training course at one of these centers. Visit the online ATC locator at www.autodesk.com/atc.
Official preparation materials
The official preparation materials for Autodesk Certification exams are published by ASCENT (Autodesk Official Training Guides) and Wiley (Autodesk Official Press). These guides cover the topics, sub-topics, and objectives listed in this exam road map. These guides are used by ATCs, and are available for direct purchase in various formats from www.ascented.com and www.wiley.com/go/autodeskofficialpress.
Autodesk Education CommunityThe Autodesk® Education Community offers students and educators free software, learning materials, and classroom support. Learn more at students.autodesk.com.
Recommended experience levels
Actual hands-on experience is a critical component in preparing for the exam. You must spend time using the product and applying the skills you have learned.
Certified User exam:
Inventor 2011–2015 course (or equivalent) plus 50 hours of hands-on application
Certified Professional exam:
Inventor 2015 course (or equivalent) plus 400 hours of hands-on application
You may take each certification exam up to three times within a 12-month period.
For more information on the Autodesk Certification Program, visit www.autodesk.com/certification.
Autodesk Certification
Autodesk certifications are industry-recognized credentials that can help you succeed in your design career.
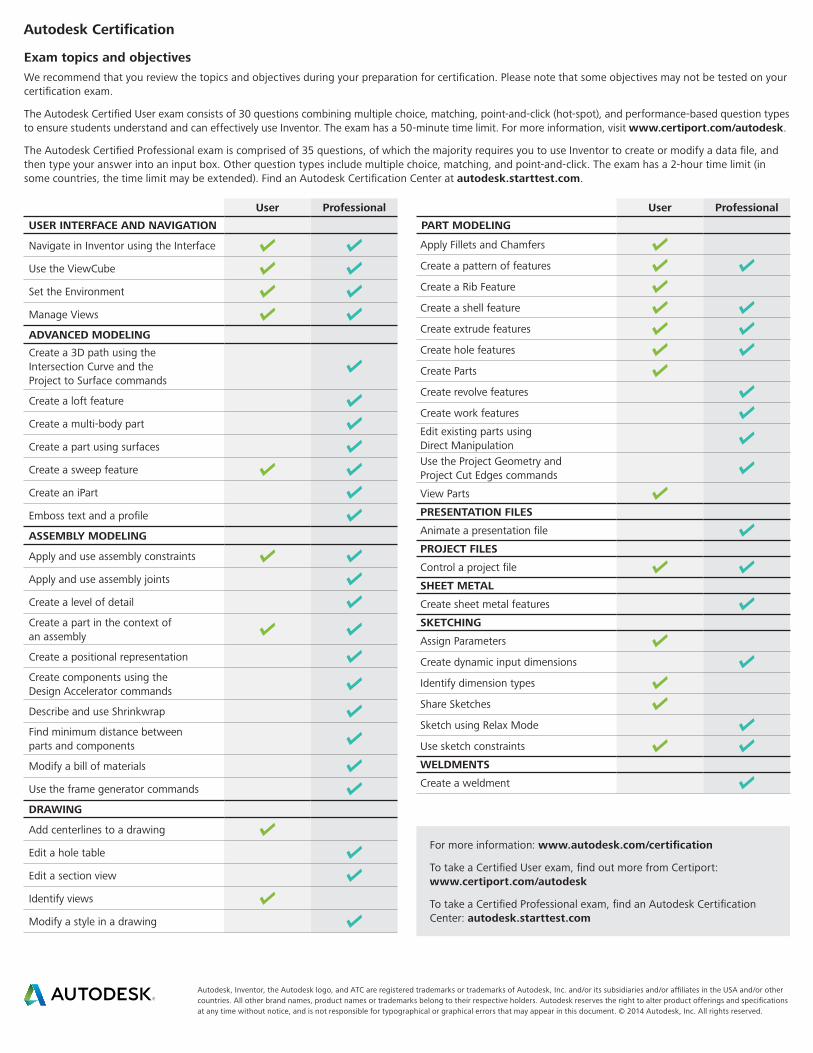
Exam topics and objectivesWe recommend that you review the topics and objectives during your preparation for certification. Please note that some objectives may not be tested on your certification exam.
The Autodesk Certified User exam consists of 30 questions combining multiple choice, matching, point-and-click (hot-spot), and performance-based question types to ensure students understand and can effectively use Inventor. The exam has a 50-minute time limit. For more information, visit www.certiport.com/autodesk.
The Autodesk Certified Professional exam is comprised of 35 questions, of which the majority requires you to use Inventor to create or modify a data file, and then type your answer into an input box. Other question types include multiple choice, matching, and point-and-click. The exam has a 2-hour time limit (in some countries, the time limit may be extended). Find an Autodesk Certification Center at autodesk.starttest.com.
Autodesk, Inventor, the Autodesk logo, and ATC are registered trademarks or trademarks of Autodesk, Inc. and/or its subsidiaries and/or affiliates in the USA and/or other countries. All other brand names, product names or trademarks belong to their respective holders. Autodesk reserves the right to alter product offerings and specifications at any time without notice, and is not responsible for typographical or graphical errors that may appear in this document. © 2014 Autodesk, Inc. All rights reserved.
Autodesk Certification
For more information: www.autodesk.com/certification
To take a Certified User exam, find out more from Certiport: www.certiport.com/autodesk
To take a Certified Professional exam, find an Autodesk Certification Center: autodesk.starttest.com
User Professional
USER INTERFACE AND NAVIGATION
Navigate in Inventor using the Interface
Use the ViewCube
Set the Environment
Manage Views
ADVANCED MODELING
Create a 3D path using the Intersection Curve and the Project to Surface commands
Create a loft feature
Create a multi-body part
Create a part using surfaces
Create a sweep feature
Create an iPart
Emboss text and a profile
ASSEMBLY MODELING
Apply and use assembly constraints
Apply and use assembly joints
Create a level of detail
Create a part in the context of an assembly
Create a positional representation
Create components using the Design Accelerator commands
Describe and use Shrinkwrap
Find minimum distance between parts and components
Modify a bill of materials
Use the frame generator commands
DRAWING
Add centerlines to a drawing
Edit a hole table
Edit a section view
Identify views
Modify a style in a drawing
User Professional
PART MODELING
Apply Fillets and Chamfers
Create a pattern of features
Create a Rib Feature
Create a shell feature
Create extrude features
Create hole features
Create Parts
Create revolve features
Create work features
Edit existing parts using Direct ManipulationUse the Project Geometry and Project Cut Edges commands
View Parts
PRESENTATION FILES
Animate a presentation file
PROJECT FILES
Control a project file
SHEET METAL
Create sheet metal features
SKETCHING
Assign Parameters
Create dynamic input dimensions
Identify dimension types
Share Sketches
Sketch using Relax Mode
Use sketch constraints
WELDMENTS
Create a weldment


