download color images from the book
TRANSCRIPT
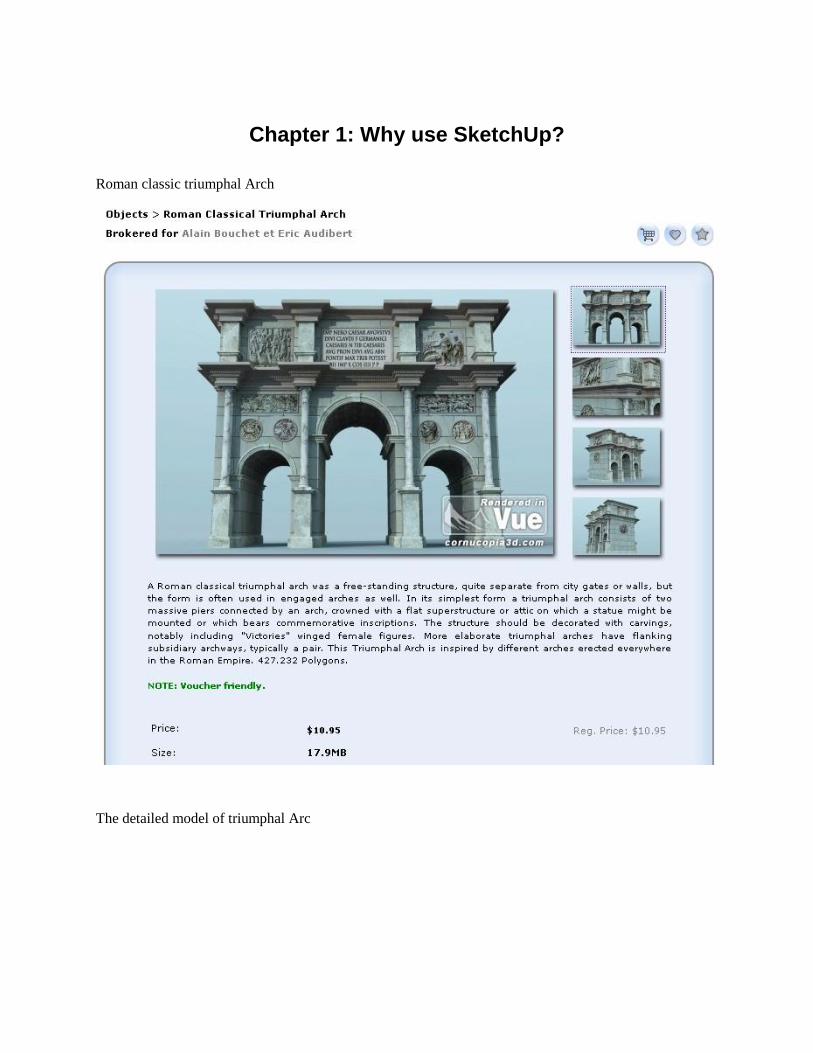
Chapter 1: Why use SketchUp?
Roman classic triumphal Arch
The detailed model of triumphal Arc


Chapter 2: Tools that Grow on Trees
Time for action – research what's hot and what's not Step 2
Step 3
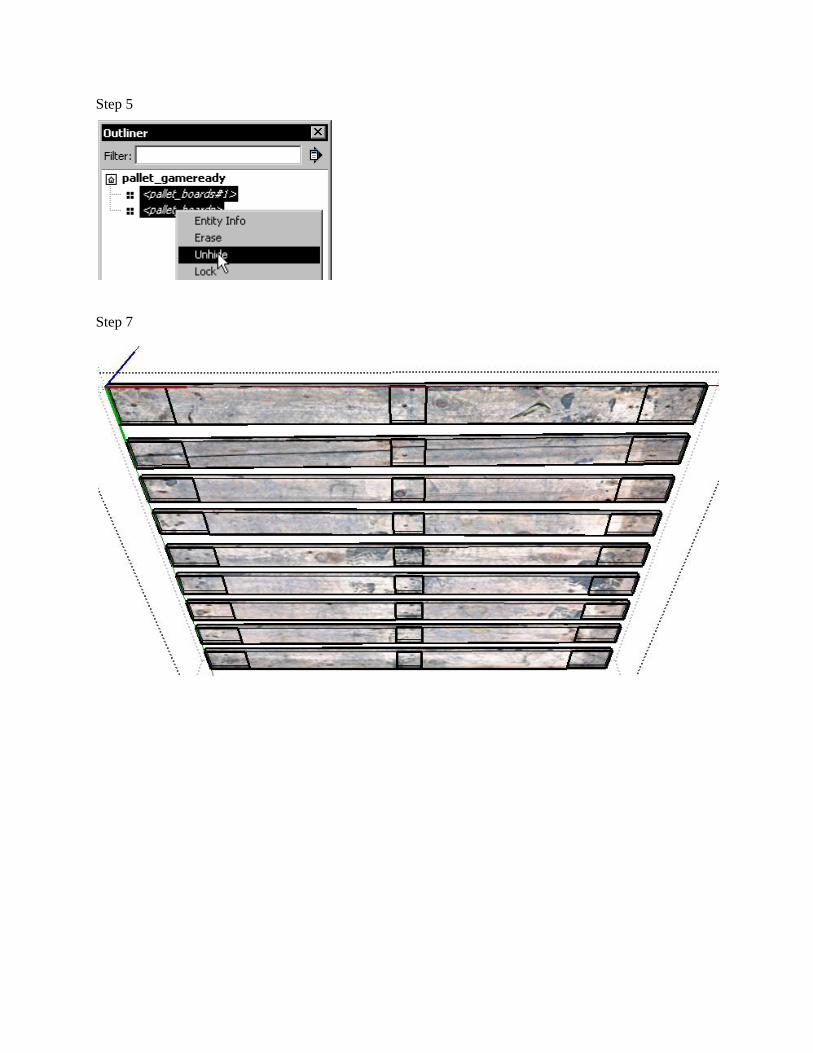
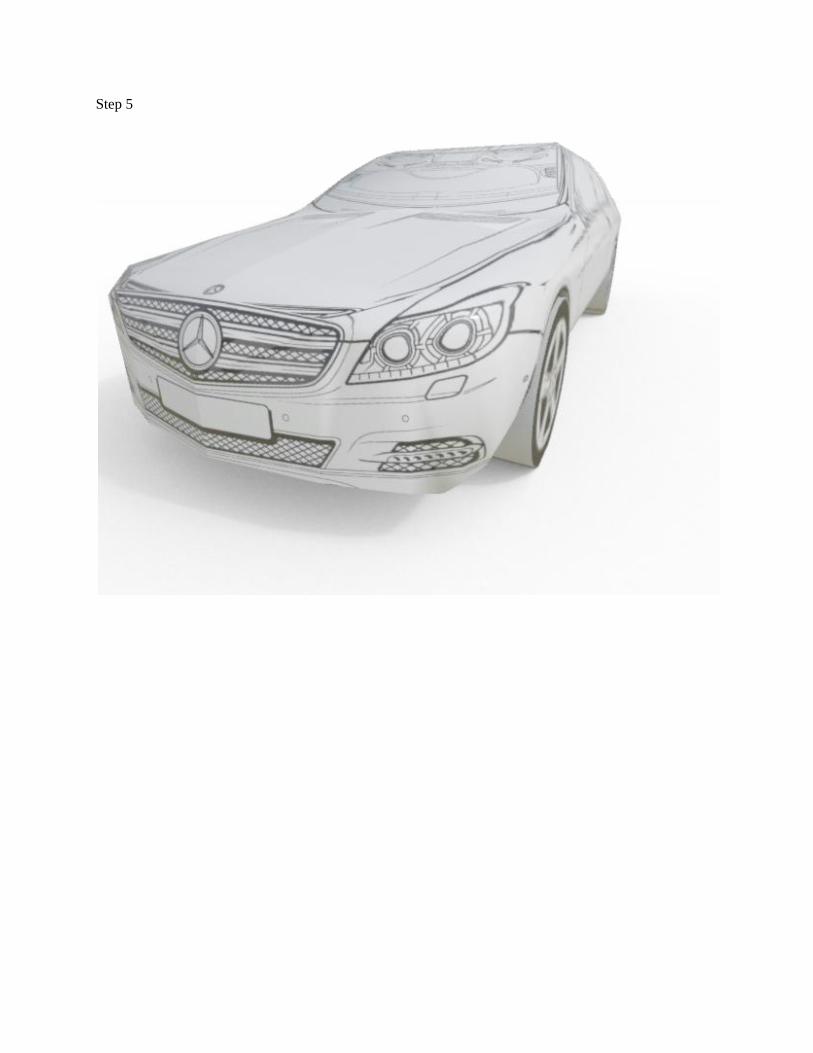
Step 5

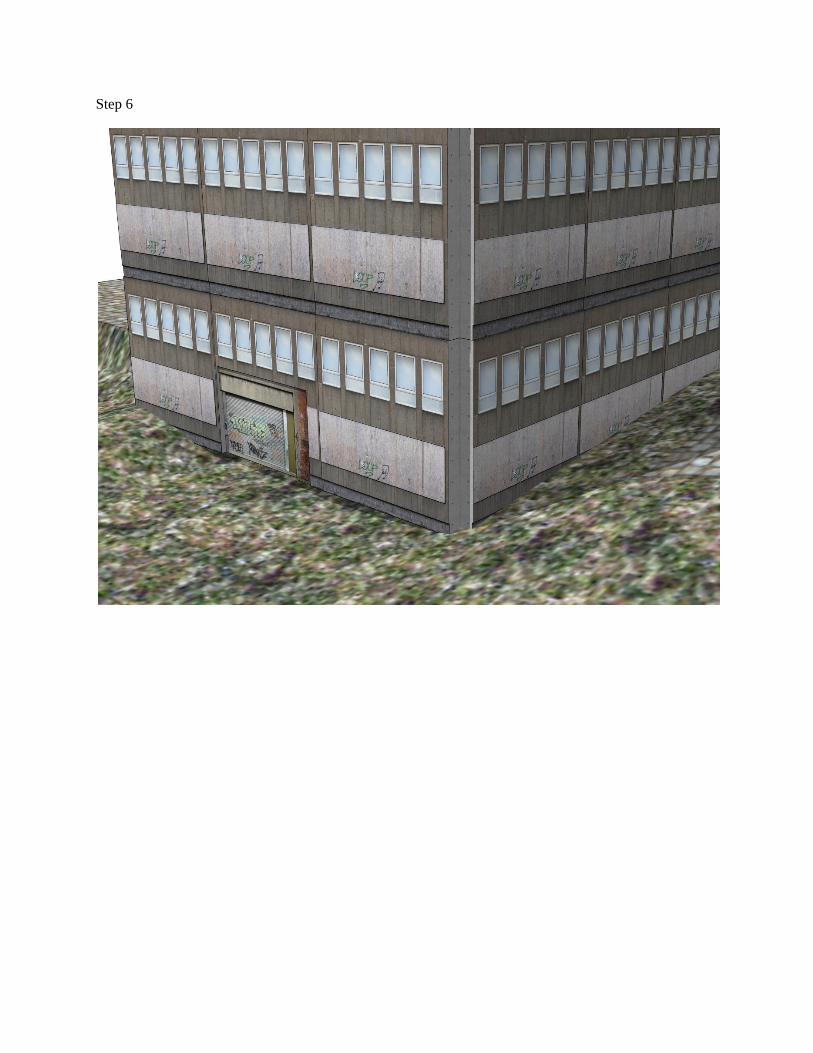
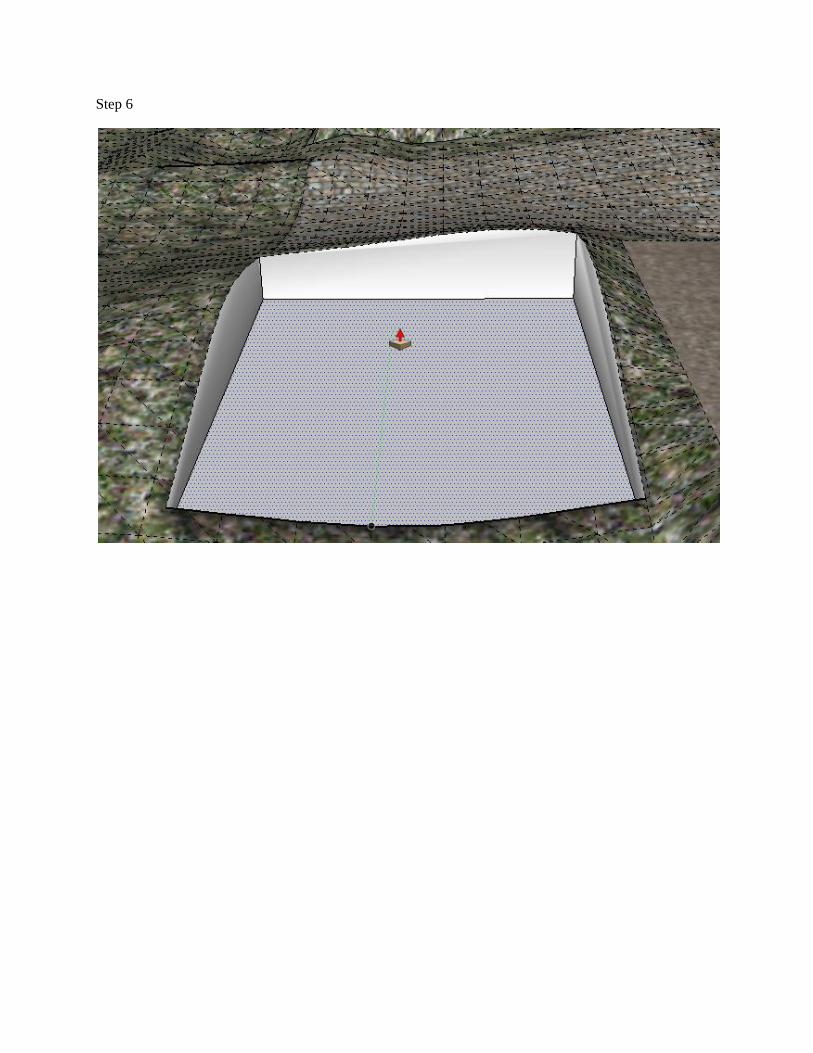
Step 6
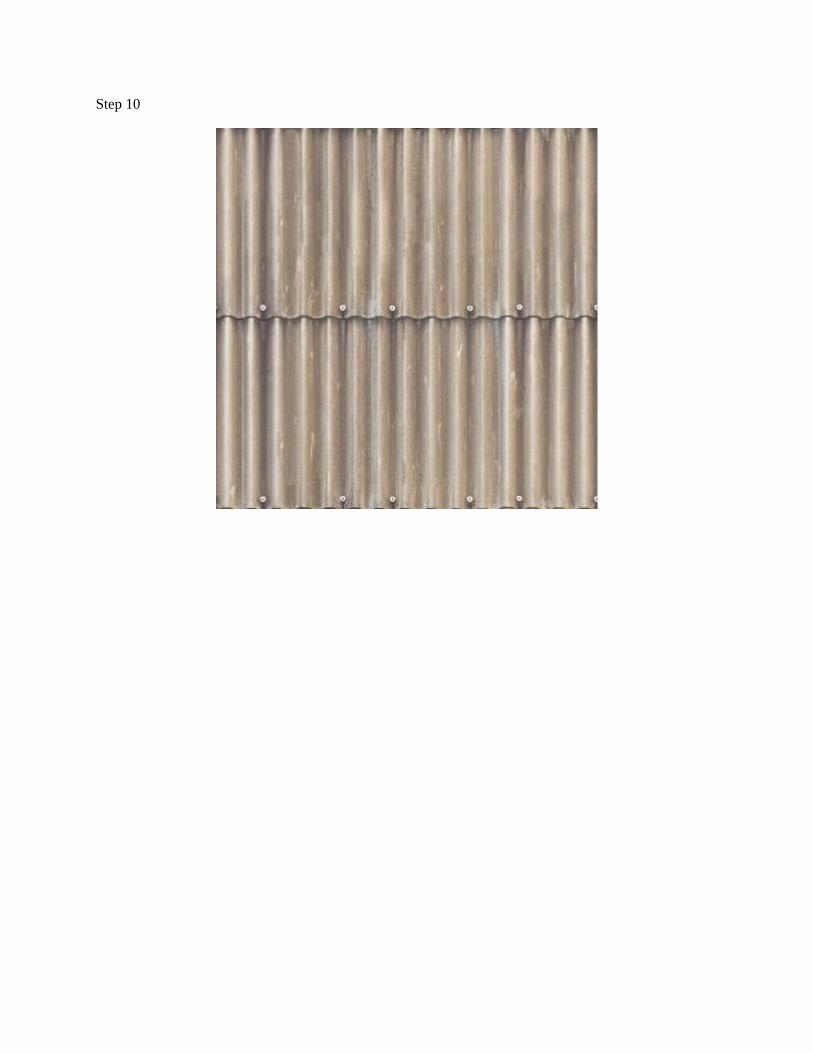
Step 10
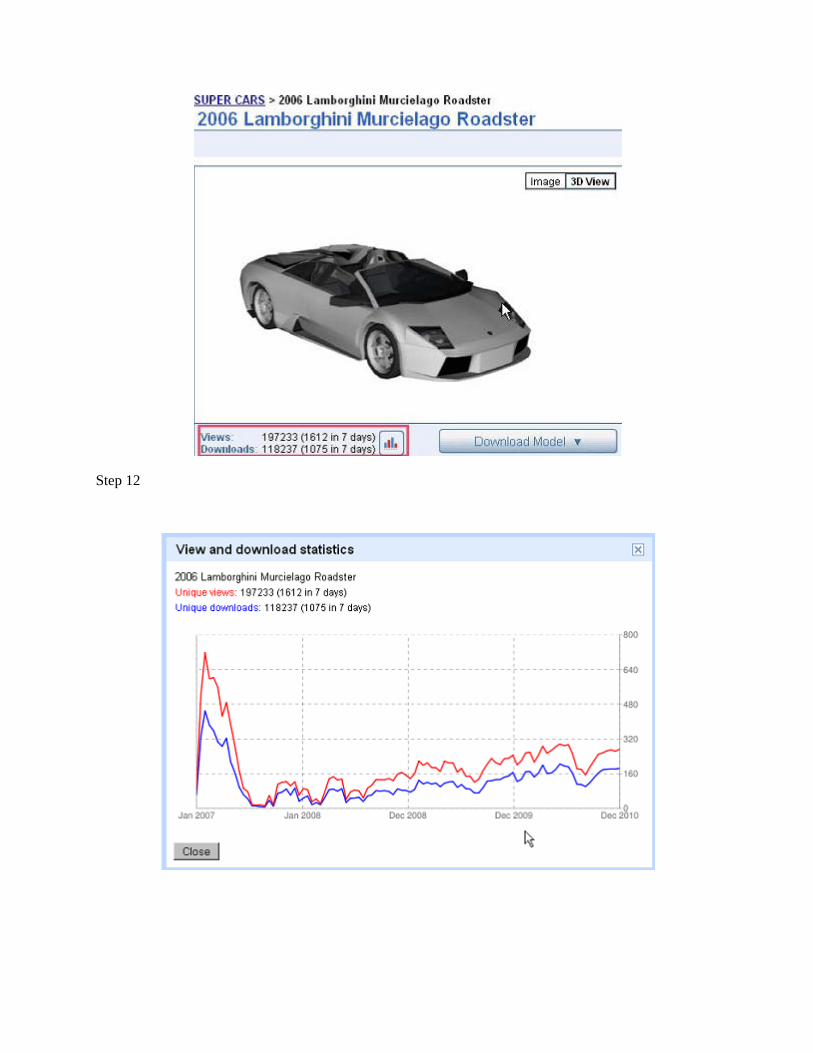
Step 12

Signing up to CGTextures.com Step 7
Grainy looking image
Folder tree stucture

Here's the download link for Meshlab Software
After you install the software and run it, you'll get the following screen


Time for action – learning about 3D meshes in MeshLab Step 2
Step 3
Step 4
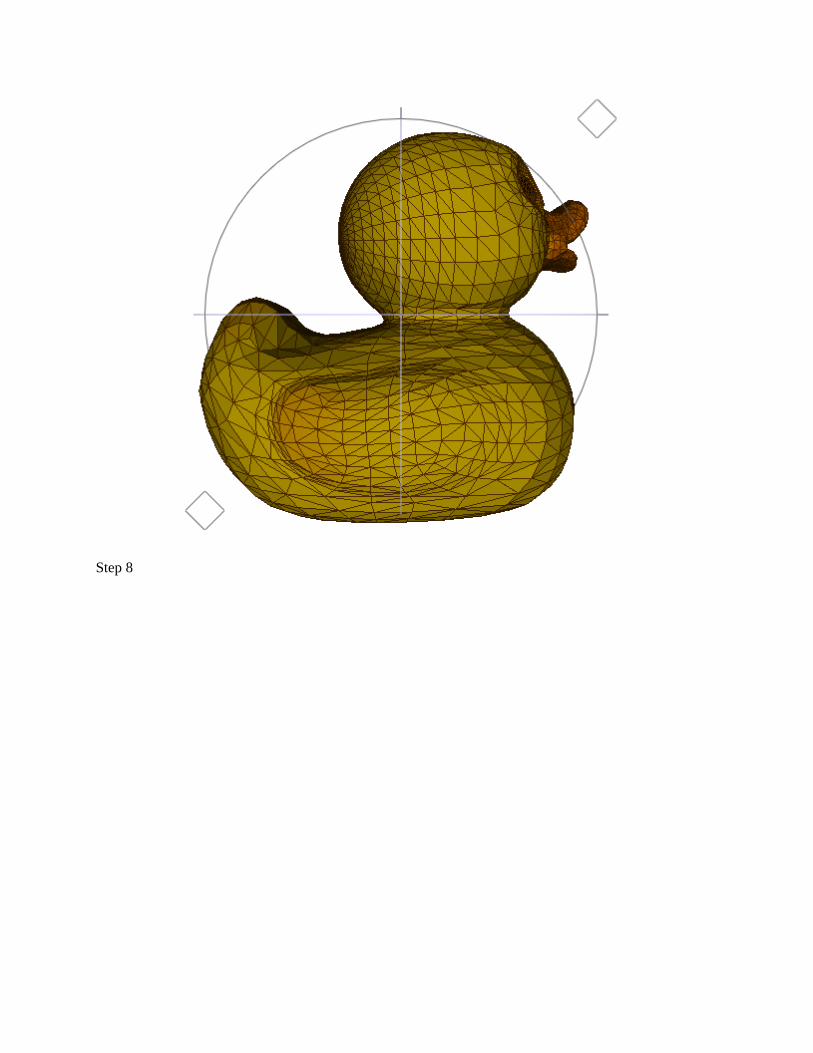
Step 8

Step 2

Time for action – obtaining Unity 3D for free
The Documentation link for Unity 3D
Step 7
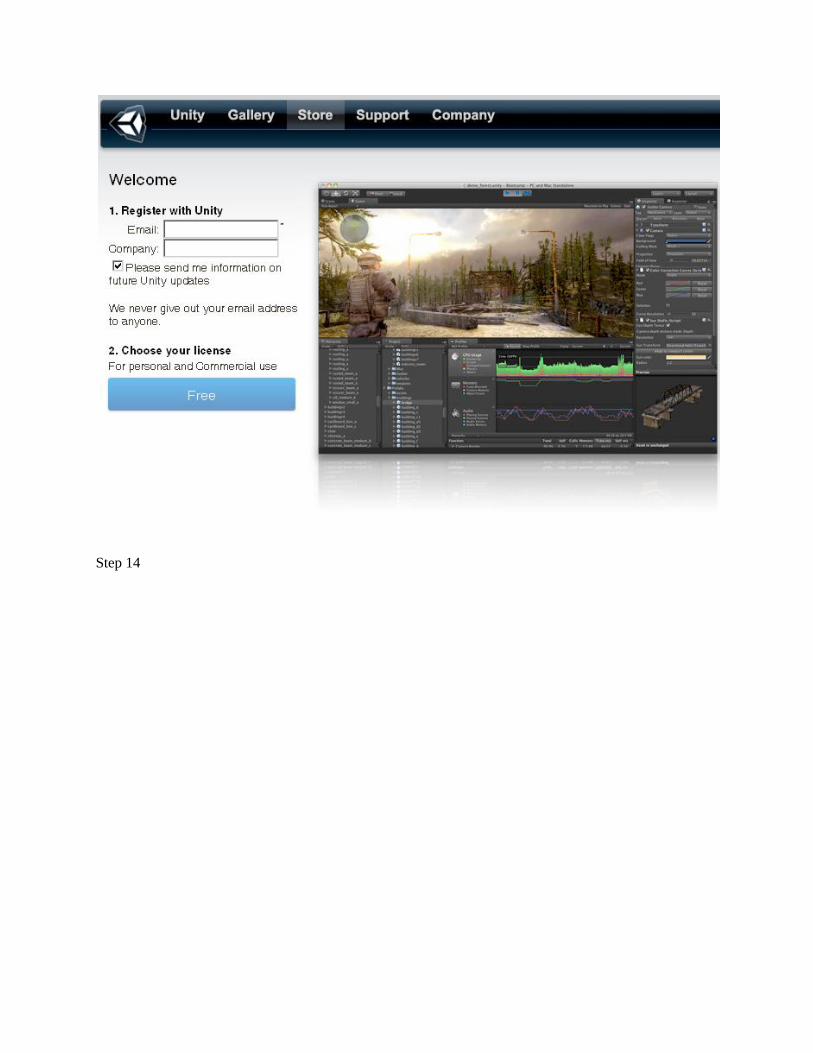
Step 14

Step 16
Step 18
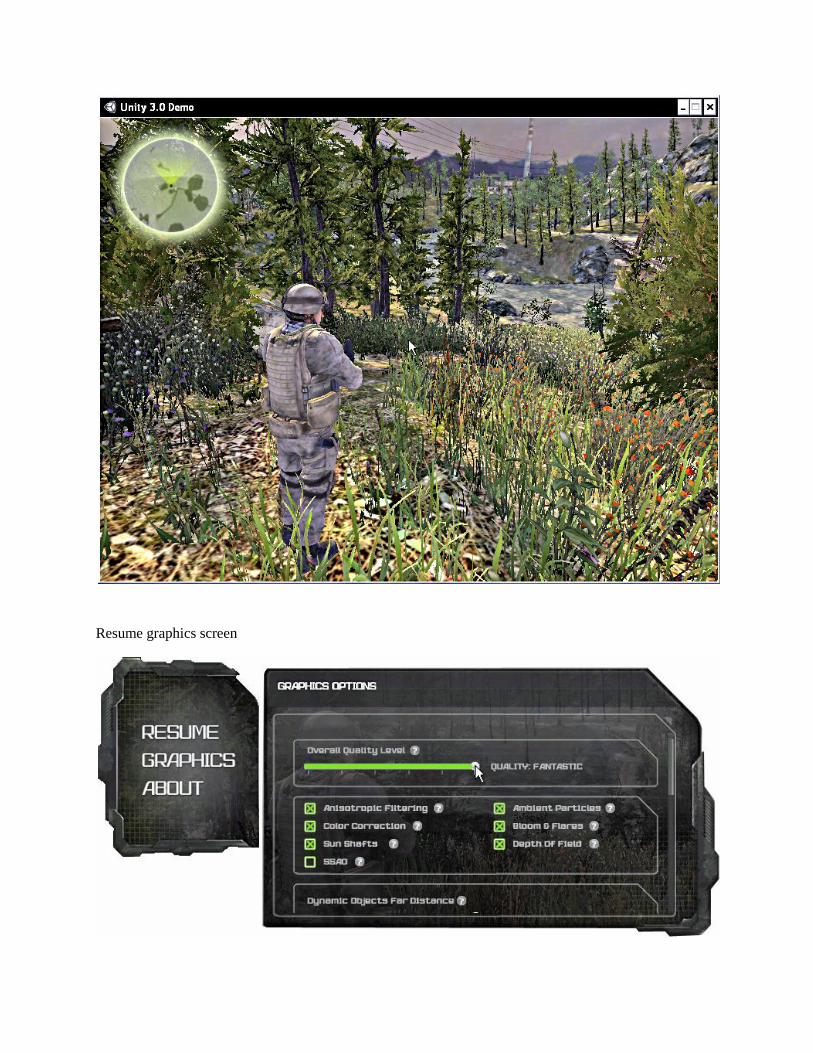
Resume graphics screen

The final image

The texture packs
Google SketchUp's installation wizard

Materials pallet
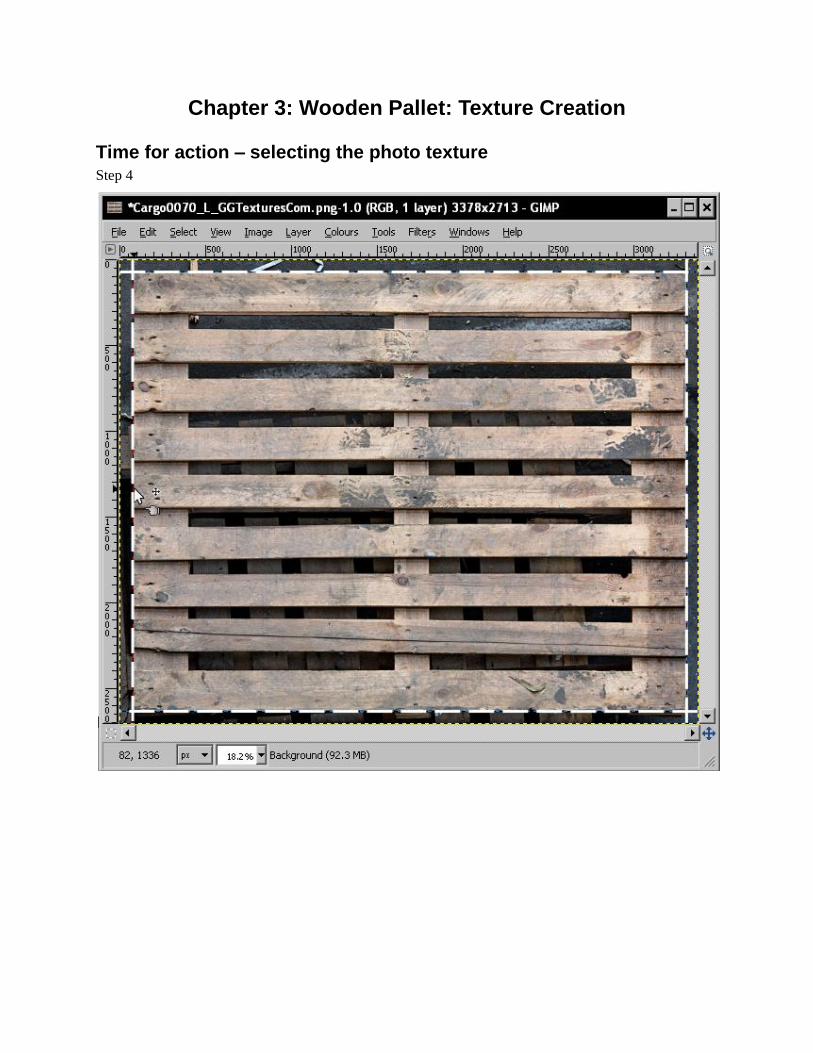
Chapter 3: Wooden Pallet: Texture Creation
Time for action – selecting the photo texture Step 4

Step 9

Time for action – cropping and enhancing Step 3

Step 10
Step 17

The blurry image output

1024x1024 image
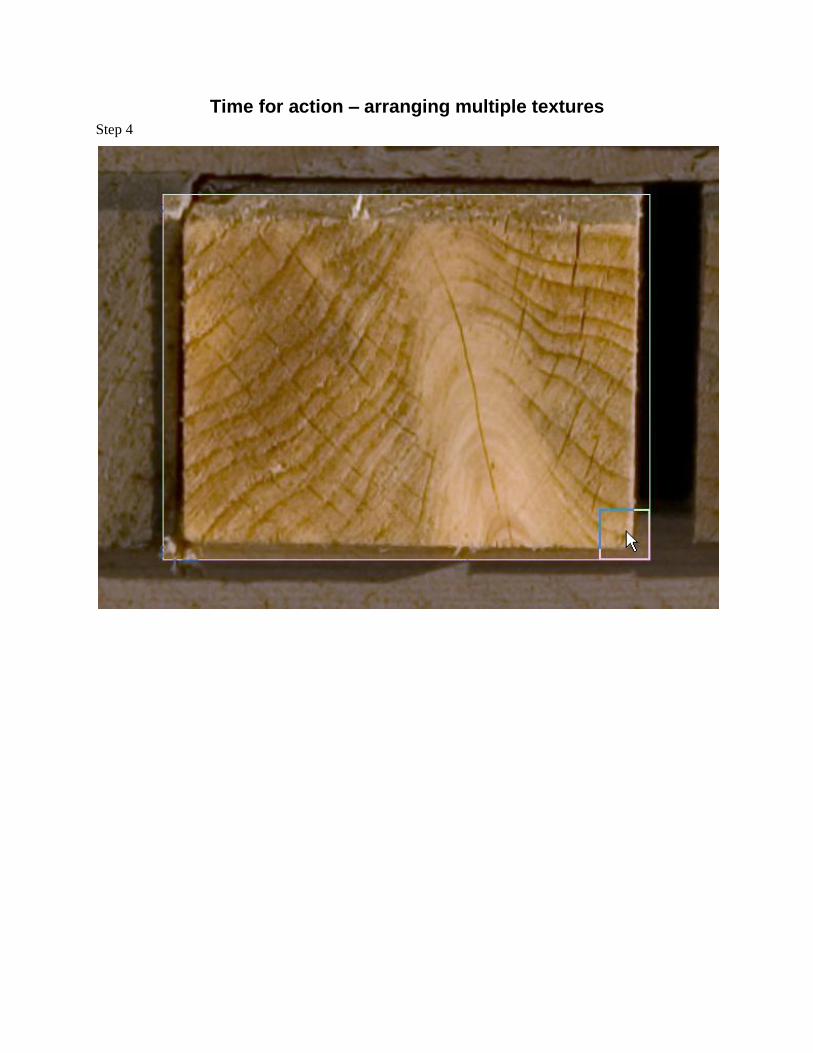
Time for action – arranging multiple textures Step 4

Step 6

Step 8
Step 17

Step 21

Time for action – final touches Step 5

The wooden pallet's final image
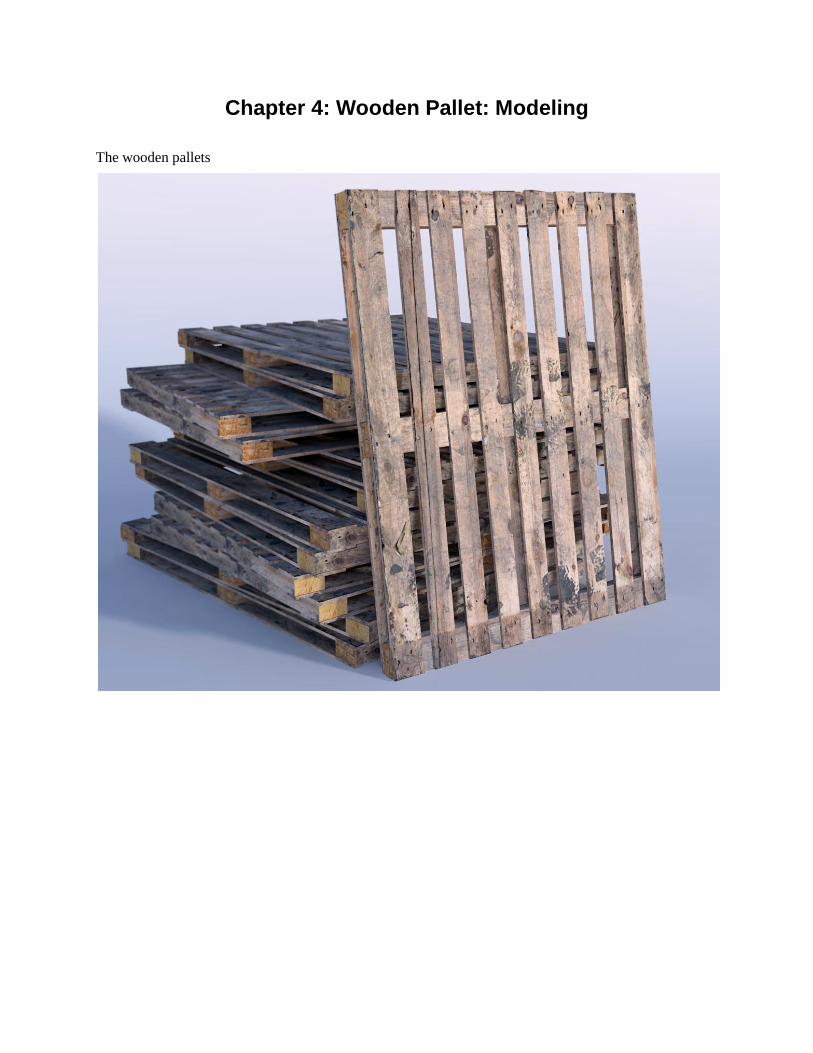
Chapter 4: Wooden Pallet: Modeling
The wooden pallets
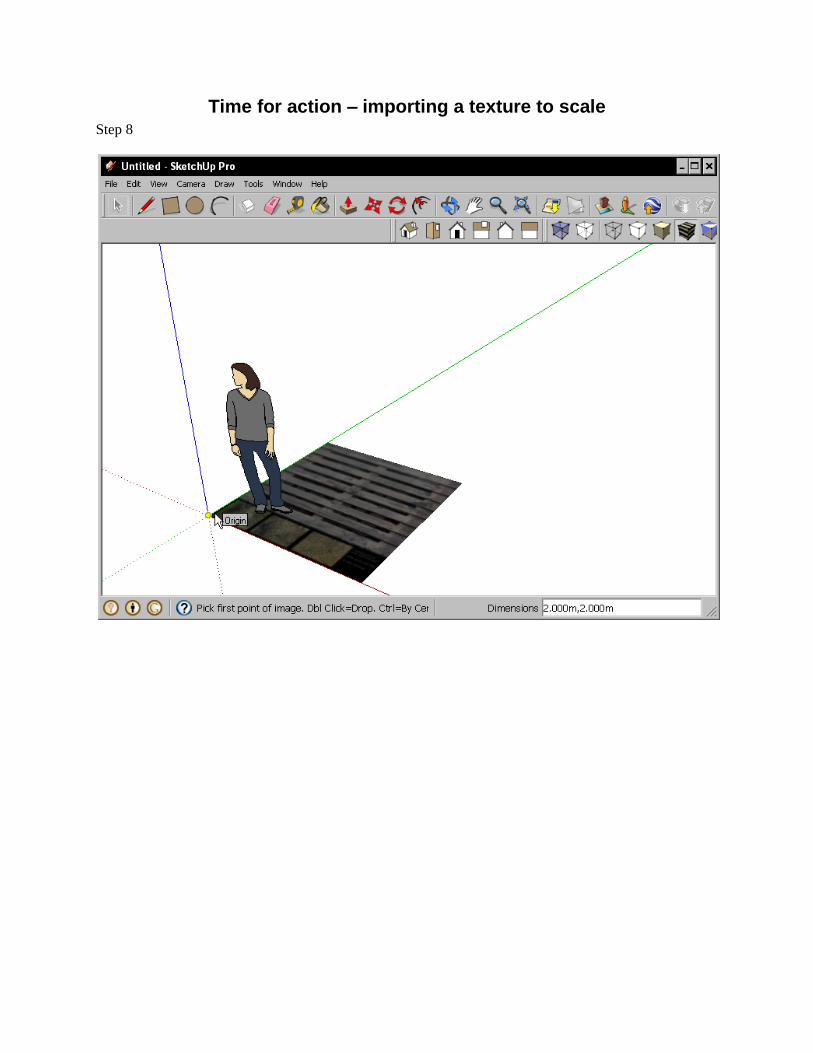
Time for action – importing a texture to scale Step 8

Time for action – basic 3D geometry Step 2
Step 10
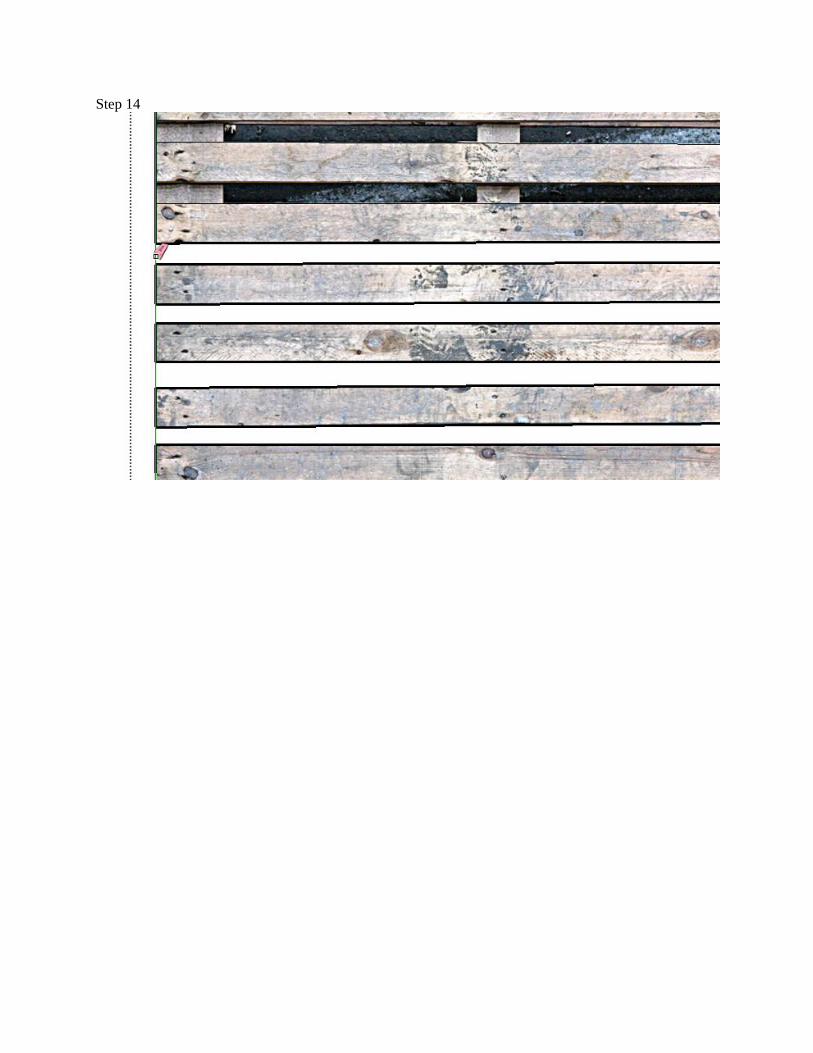
Step 14

Step 16
Time for action – Push/Pull, Move, and Copy Step 2

Step 8
Step 12

Step 13

Time for action – multiple copies
Step 2
Step 4

Step 5
Step 8

Time for action – completing texturing Step 2
Step 5

Step 9

Step 12

Step 15
Step 16
Step 19

Time for action – recycling textures for use on non-vital faces
Step 4
Step 6

Step 9
Removing unseen images Step 4
Step 5
Step 7

Compressing and resizing textures Step 1

Chapter 5: Game Levels in SketchUp
The terrain texture
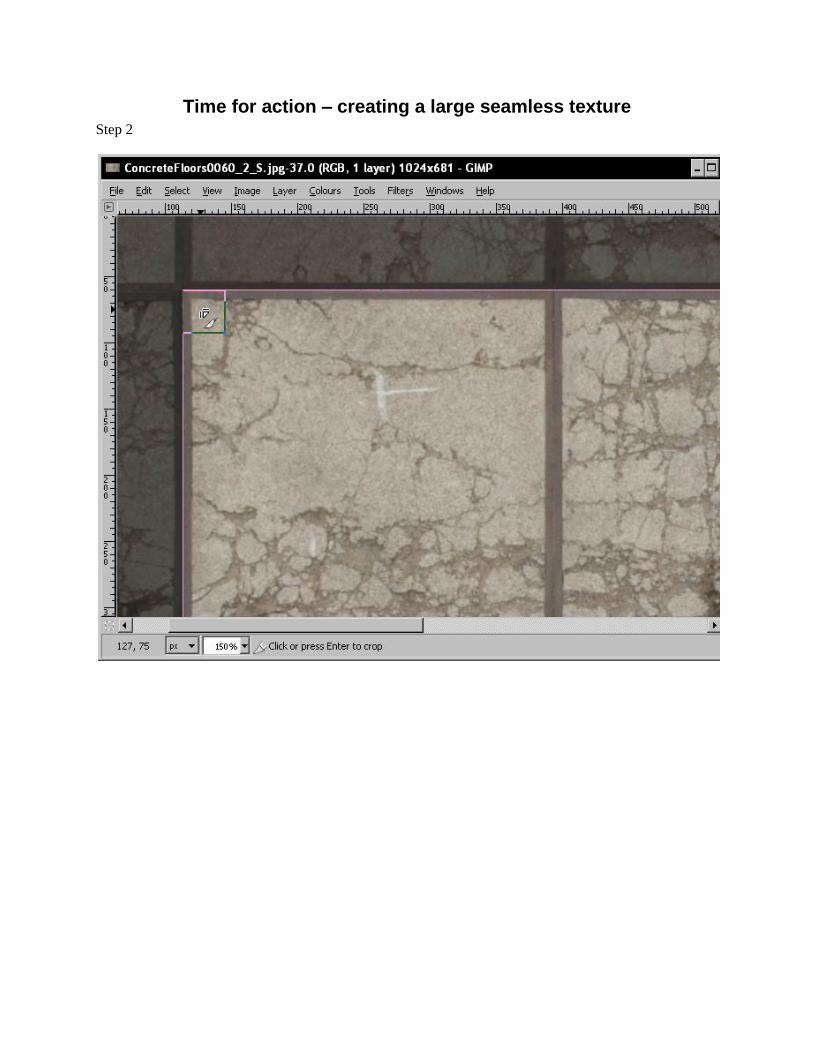
Time for action – creating a large seamless texture Step 2

Step 6

Step 8
Step 10

Step 12
Time for action – creating a tiled texture Step 2
Step 5

Step 6
Step 11
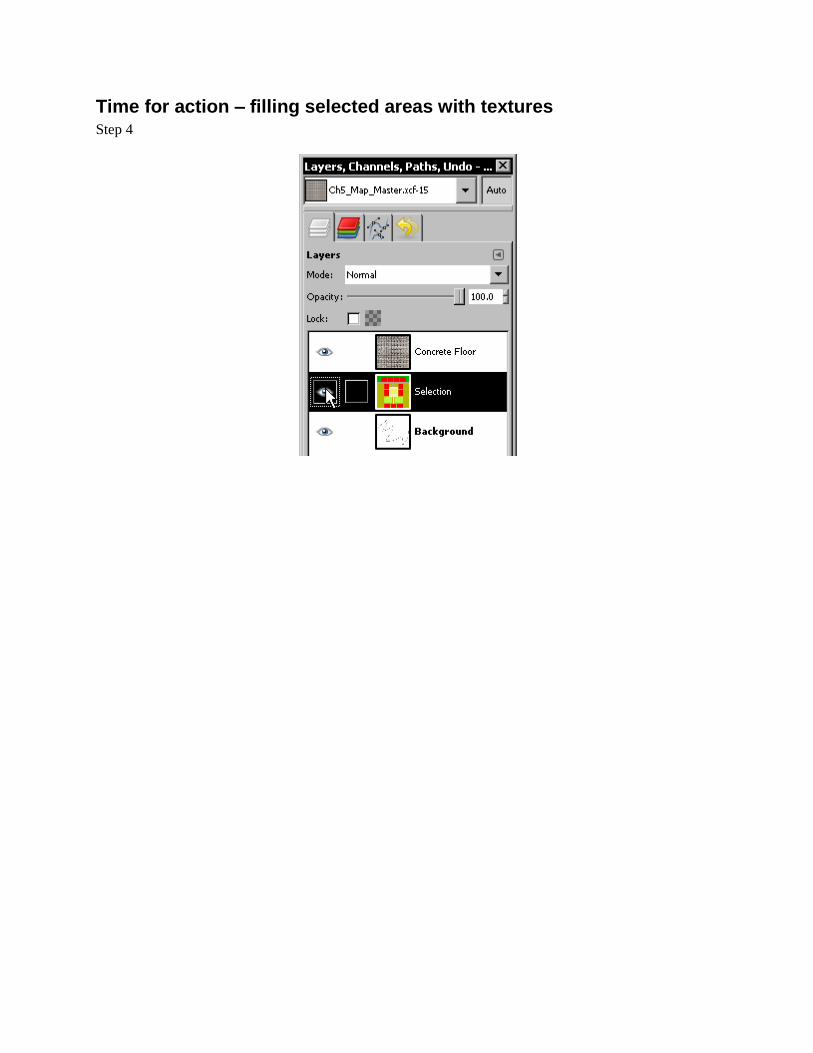
Time for action – filling selected areas with textures Step 4

Step 8
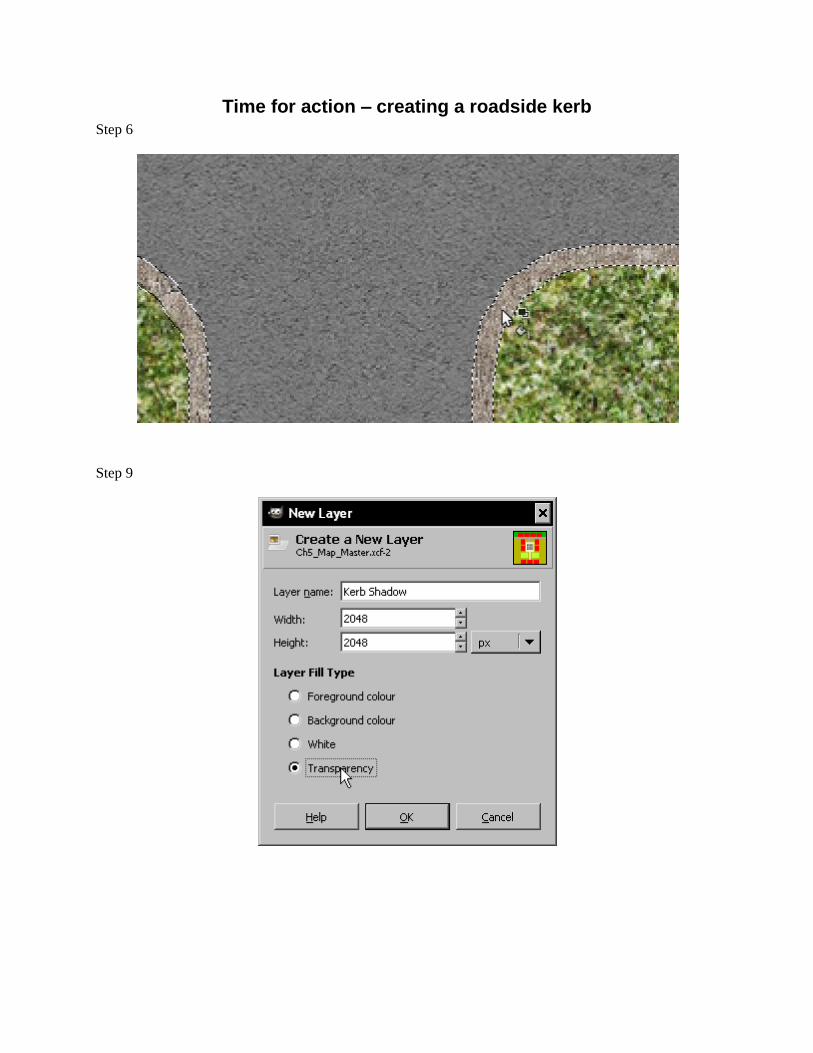
Time for action – creating a roadside kerb Step 6
Step 9

Step 11
Step 18

Time for action – removing white edges Step 4
Selecting the affected areas

Working with layers
Time for action – adding height to a flat terrain
Step 7

Step 9
Step 12

Step 13
Step 15

Time for action – stamping detail onto the terrain Step 4
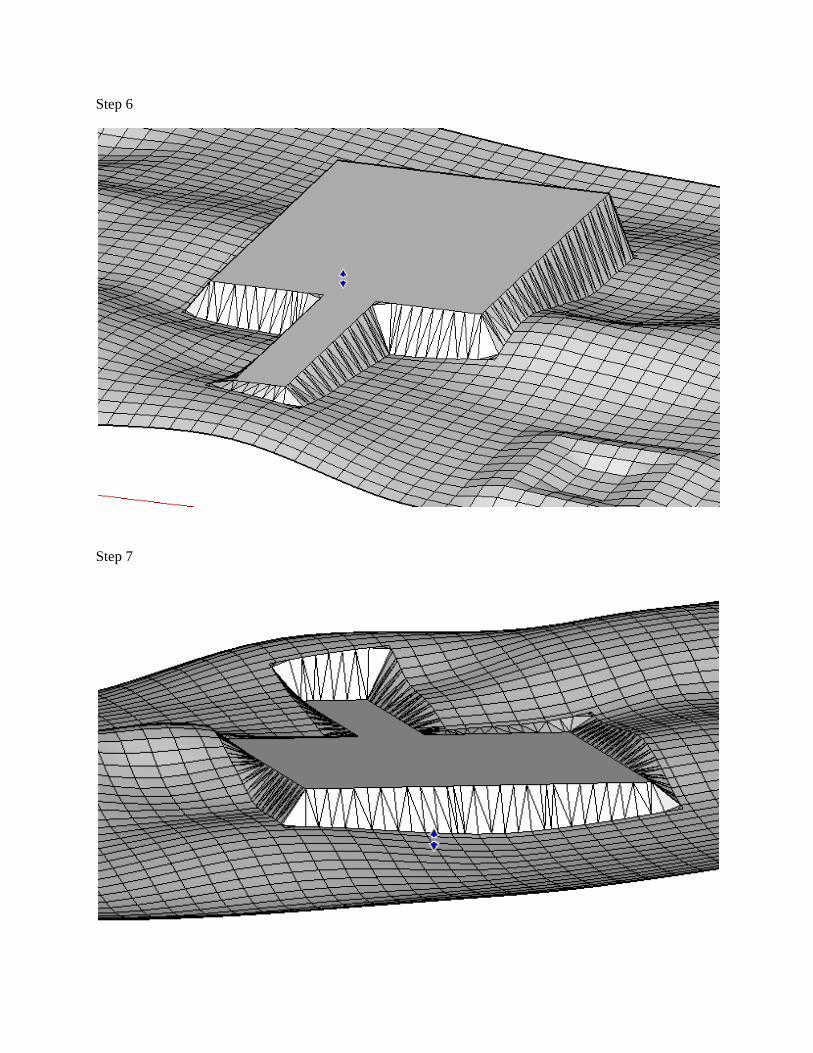
Step 6
Step 7

Step 8
Step 9

Step 11
Step 12

Smooved terrain
Time for action – using the Drape tool Step 1
Uniting terrain geometry with texture Step 2

Step 7
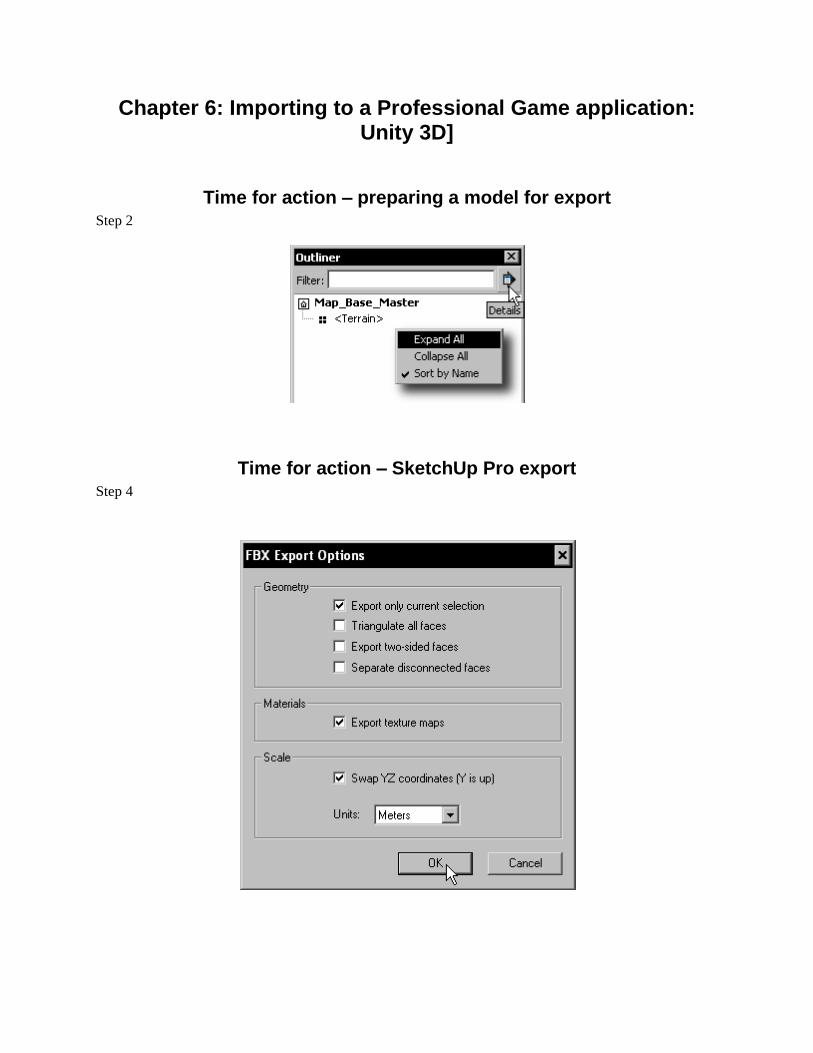
Chapter 6: Importing to a Professional Game application: Unity 3D]
Time for action – preparing a model for export Step 2
Time for action – SketchUp Pro export Step 4
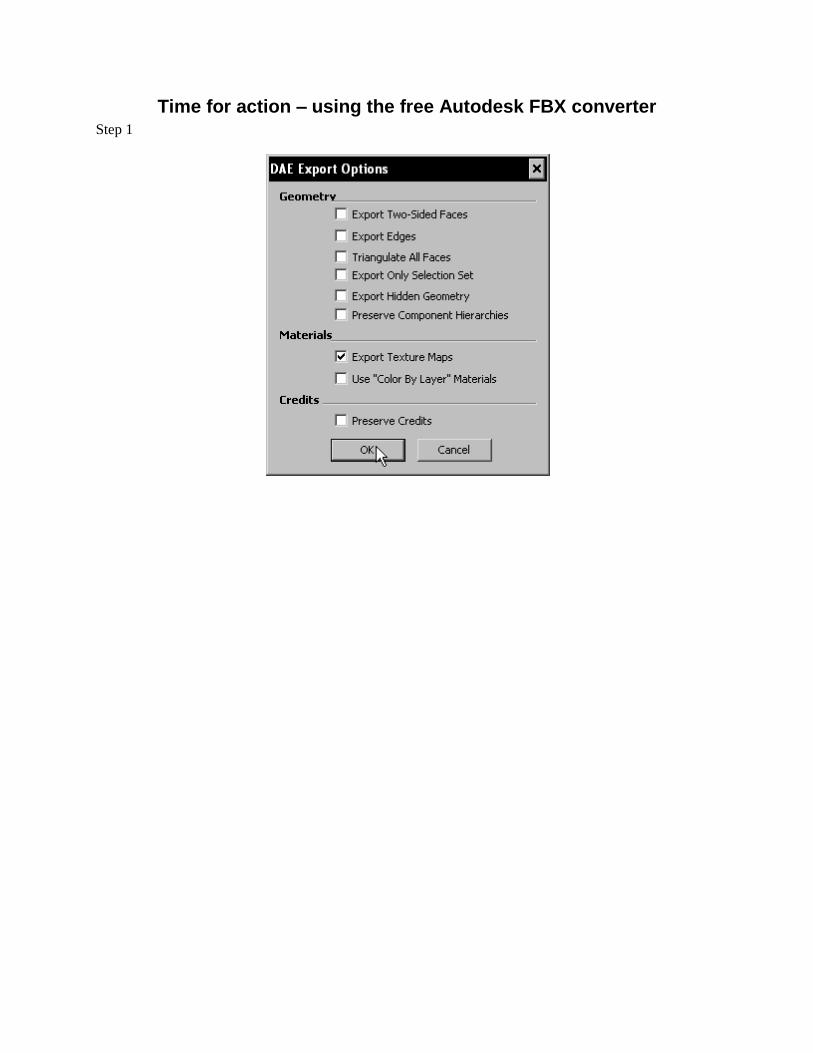
Time for action – using the free Autodesk FBX converter Step 1

Step 6
Time for action – importing your terrain in to Unity

Step 2
Step 12

Step 13
Step 15

Step 17
Time for action – using a high-resolution terrain texture in Unity
Screenshot showing the preview of the texture image

Step 3
Time for action – creating Sunlight in Unity Step 2

Step 3

Step 4
Step 7
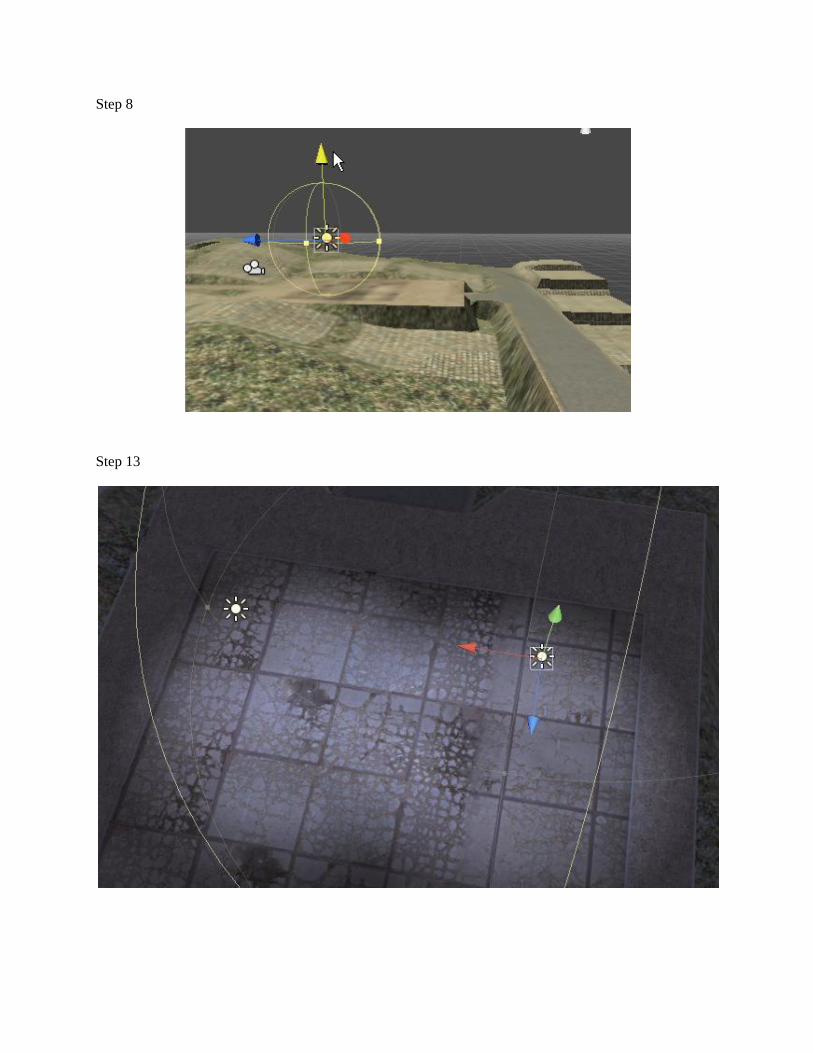
Step 8
Step 13

Time for action – setting up a fi rst-person shooter style
controller Step 2
Step 5

Time for action – playing the level Step 3

Time for action – creating a web playable walkthrough Step 1

The 3D image of the wooden pallet
Time for action – copying and pasting the pallet multiple times Step 4

Step 7

Step 10

Step 12

Chapter 7: Quick Standard Assets
Time for action – making fencing with SketchUp's materials Step 5

Step 12
Step 13

Time for action – making several unique variations Step 13
Step 16

Time for action – fencing large areas Step 3

Step 4
Step 6

Step 8

Step 10
Step 13

The side view of the fence
Time for action – creating a building from two images Step 2
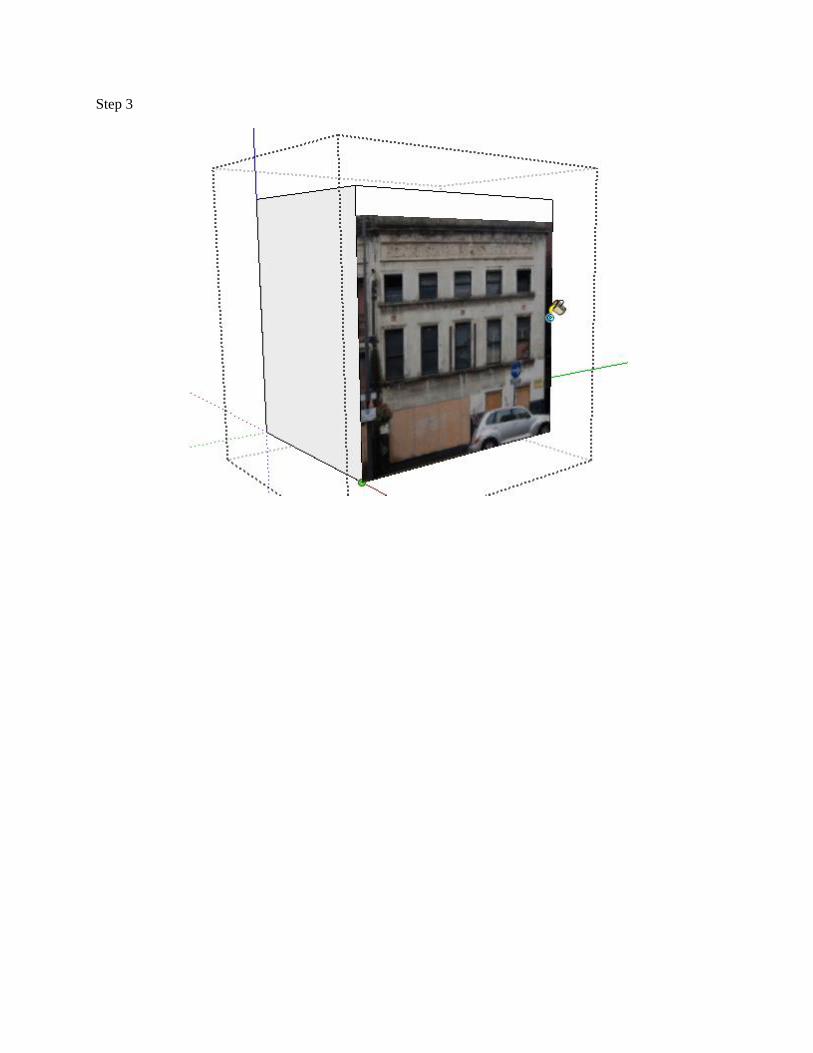
Step 3

Step 5

Step 9

Step 12
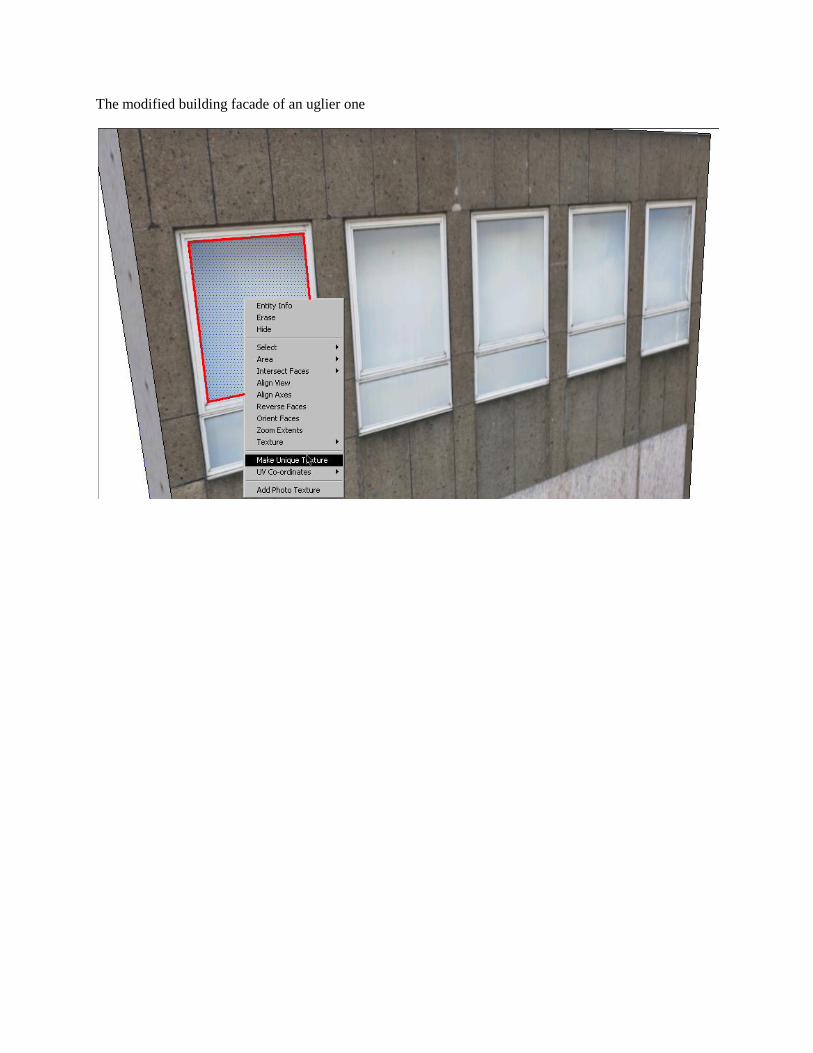
The modified building facade of an uglier one

The resultant building view
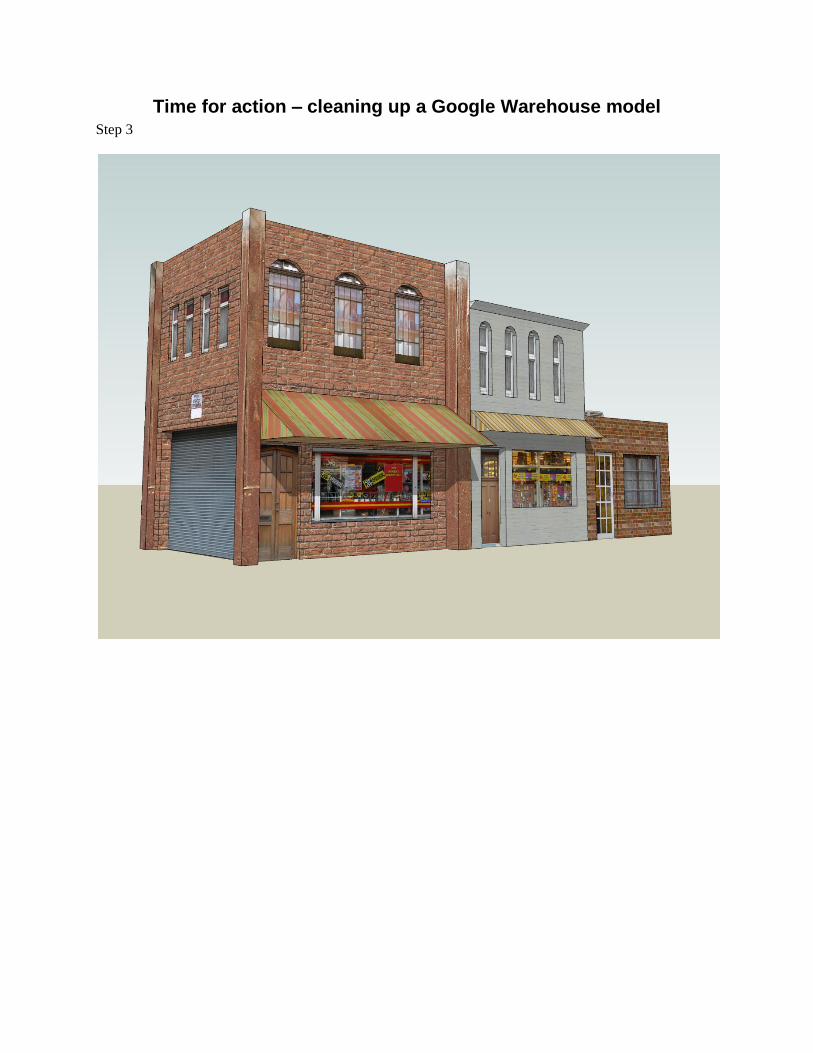
Time for action – cleaning up a Google Warehouse model Step 3

Fixing the origin and removing hidden geometry Step 10
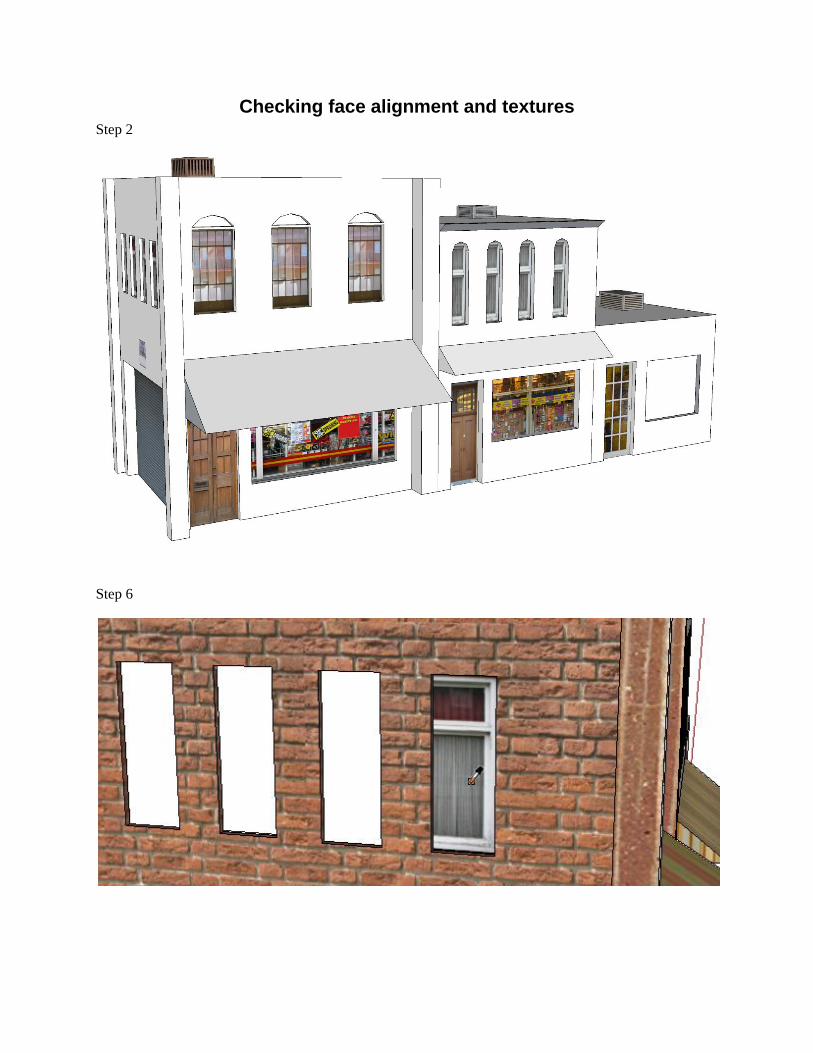
Checking face alignment and textures Step 2
Step 6

The ten-minute oil barrel Step 2
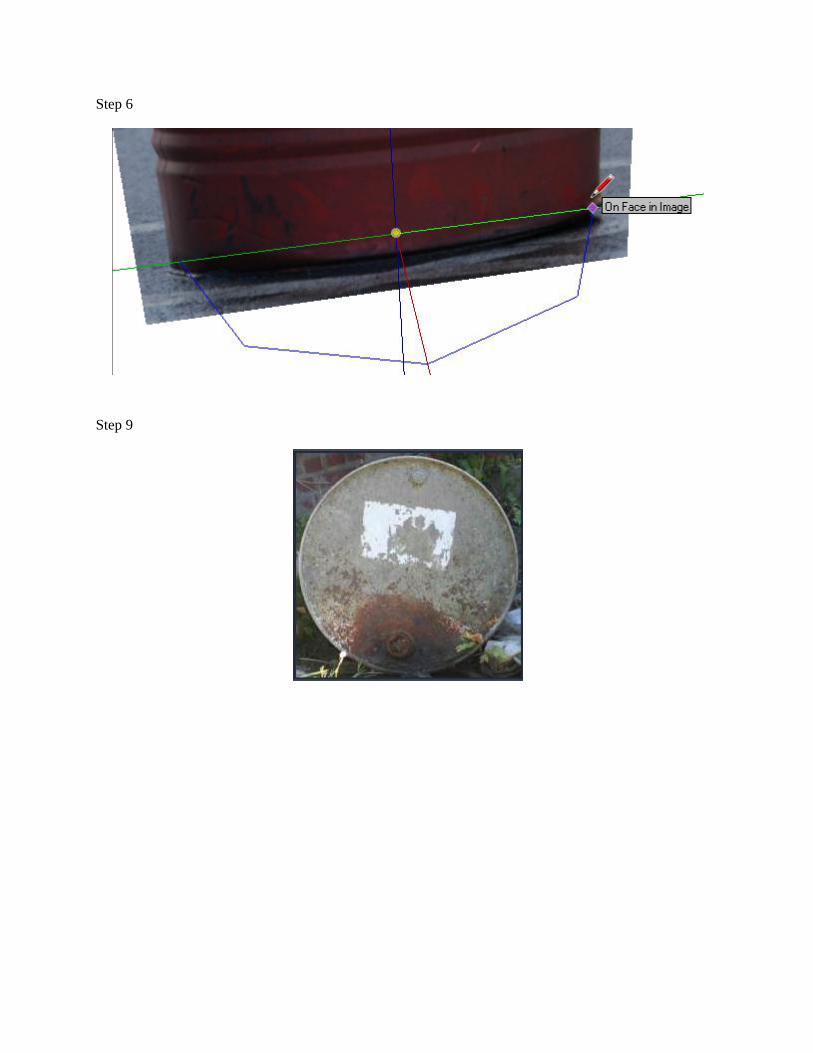
Step 6
Step 9

Step 11
Time for action – modeling a low polygon wrench Step 1
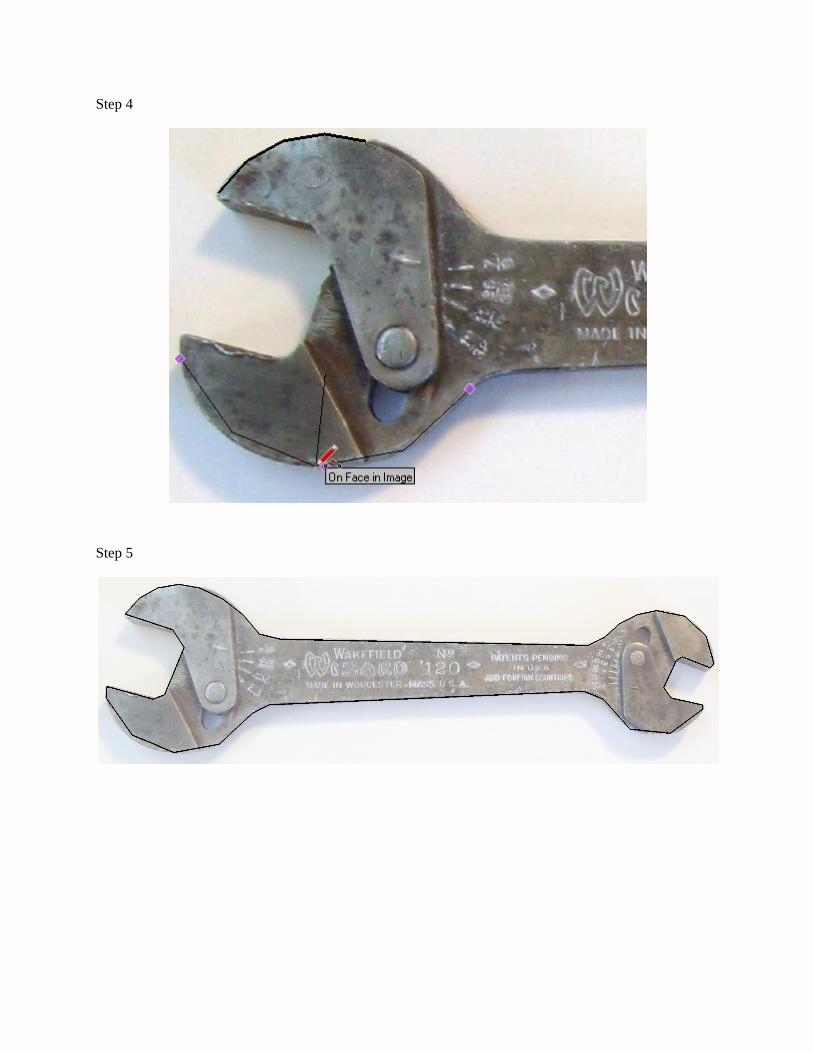
Step 4
Step 5
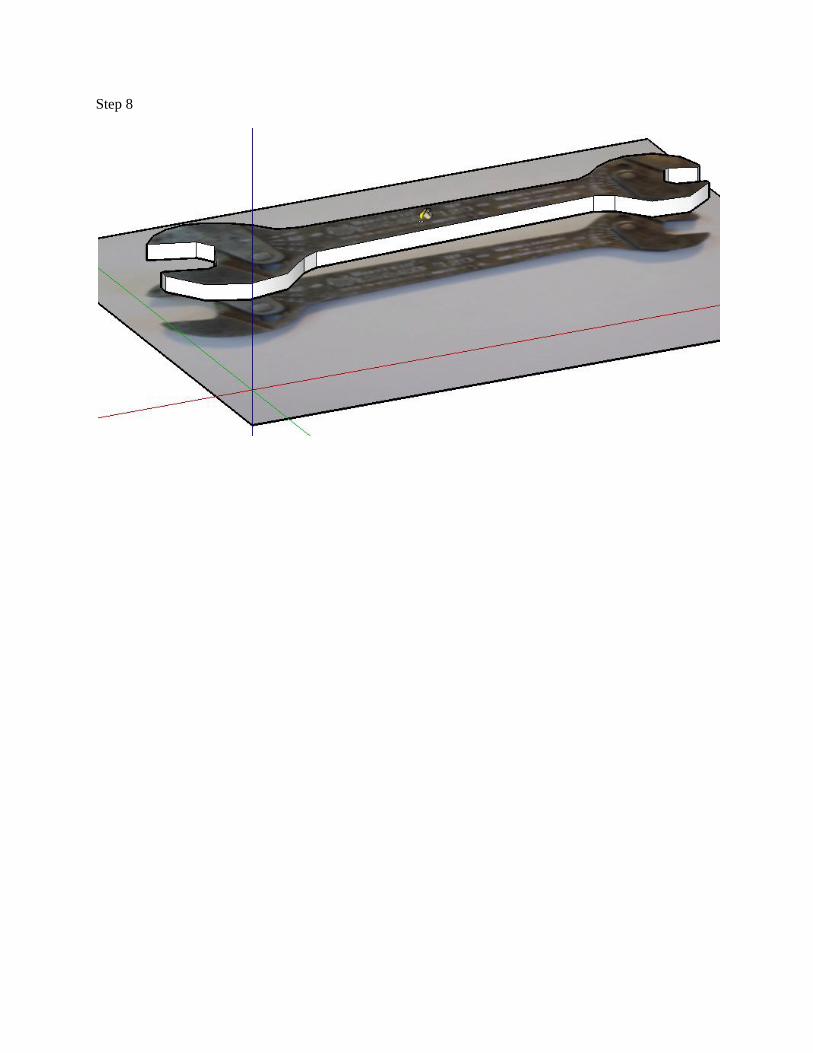
Step 8

Step 9
Step 11
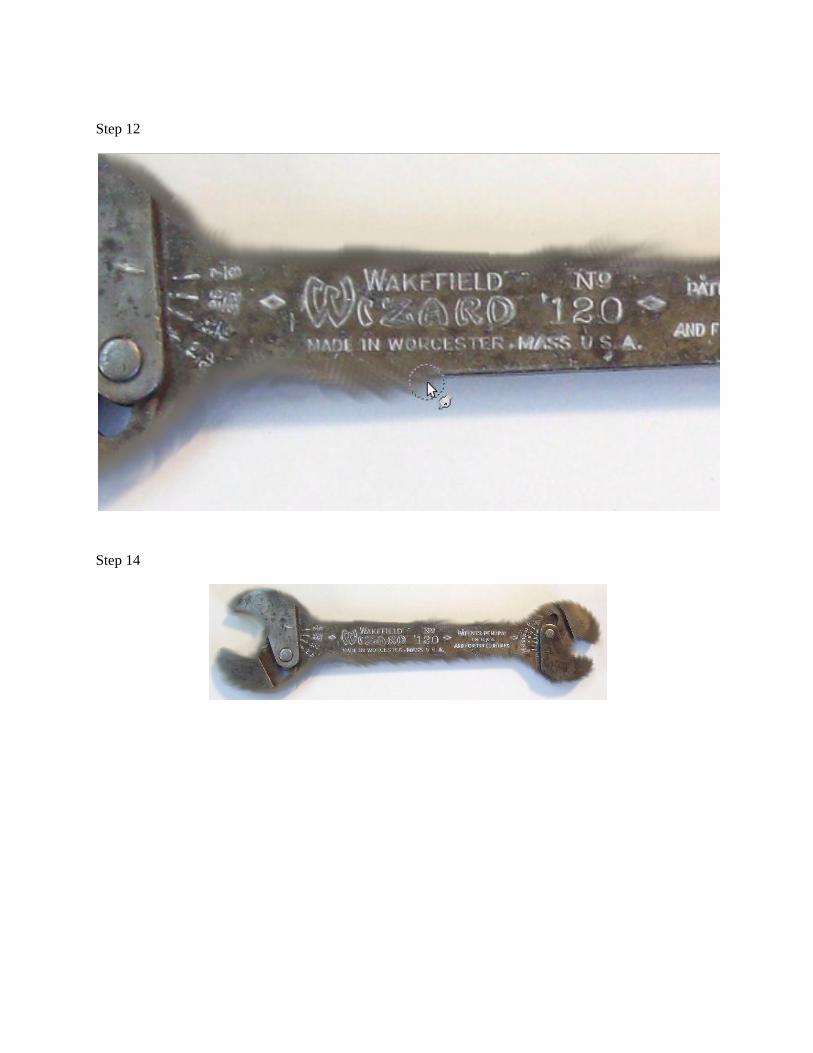
Step 12
Step 14
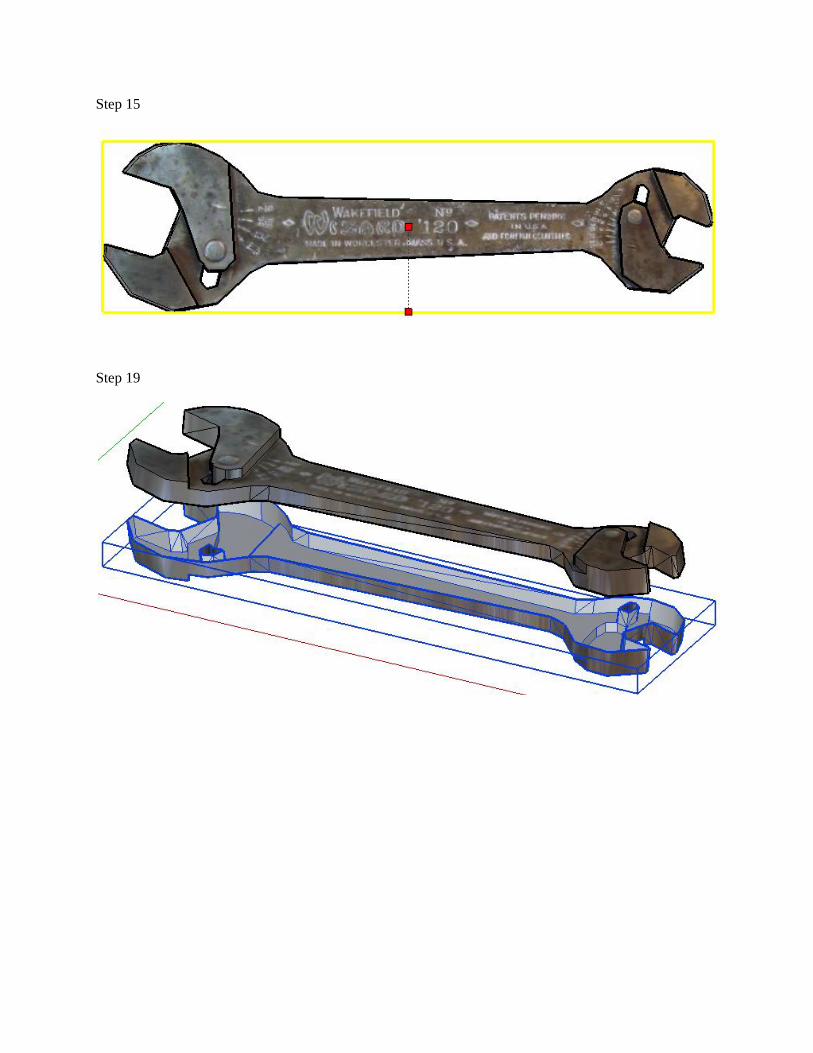
Step 15
Step 19

Step 20 (image 1)
Step 20 (image 2)

The neatly-placed barrels

Chapter 8: Advanced Modeling: Create a Realistic Car in Easy Steps
A posh car!

Time for action – creating a car texture Step 2

Step 9

Step 11
Step 12

Step 15
Step 17

Time for action – creating a 3D car outline Step 1
Step 2
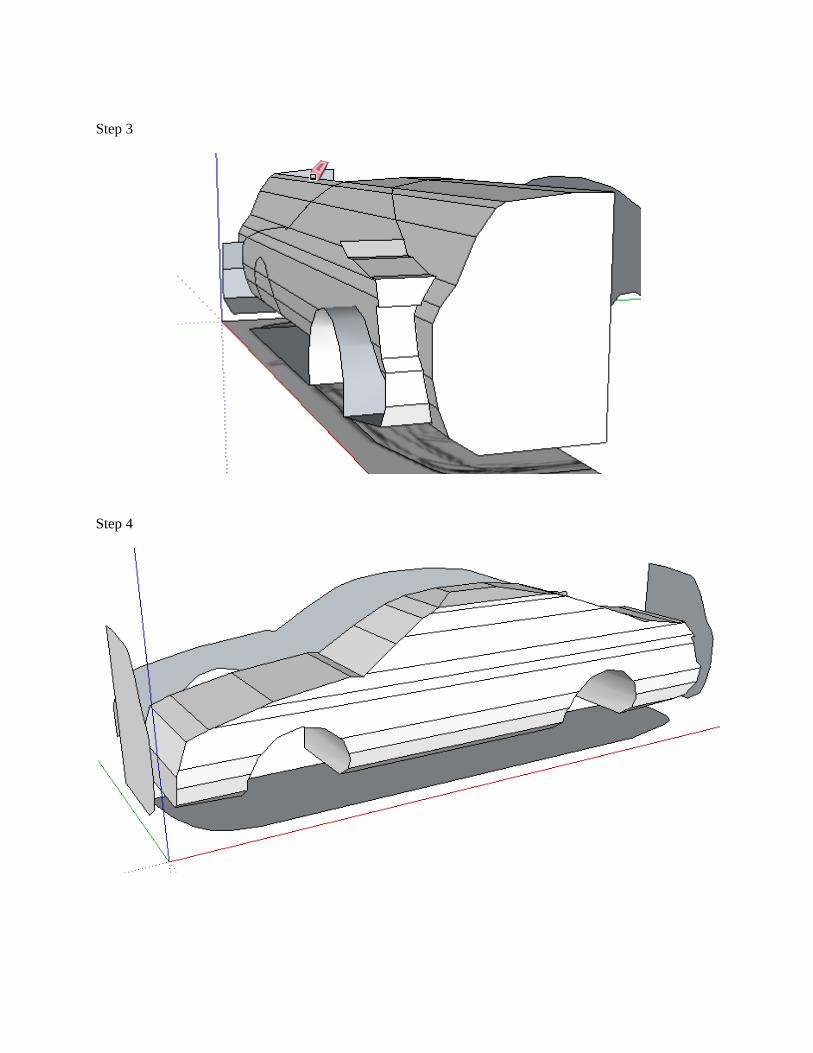
Step 3
Step 4

Step 6
Step 7

Time for action – sitting on the hood Step 1
Step 3

Step 4

Step 6
Step 7

Step 9

Step 10
Step 15

Step 16

Time for action – applying a car body fi ller with the pencil tool
Step 1
Step 3

Step 5

Step 6
Have a go hero – reinvent the wheel
Step 5

Time for action Step 6
Step 9

Step 12
Step 15

Step 17
Step 19
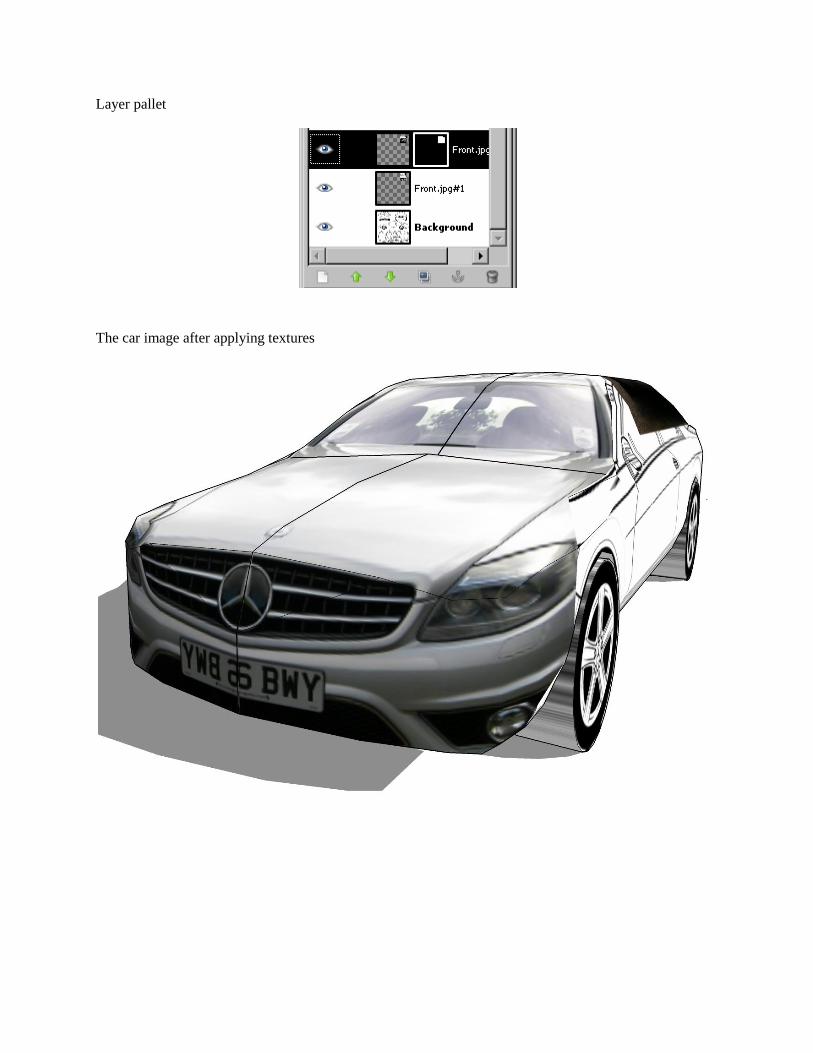
Layer pallet
The car image after applying textures

Time for action – painting over the rear view Step 4
Step 7
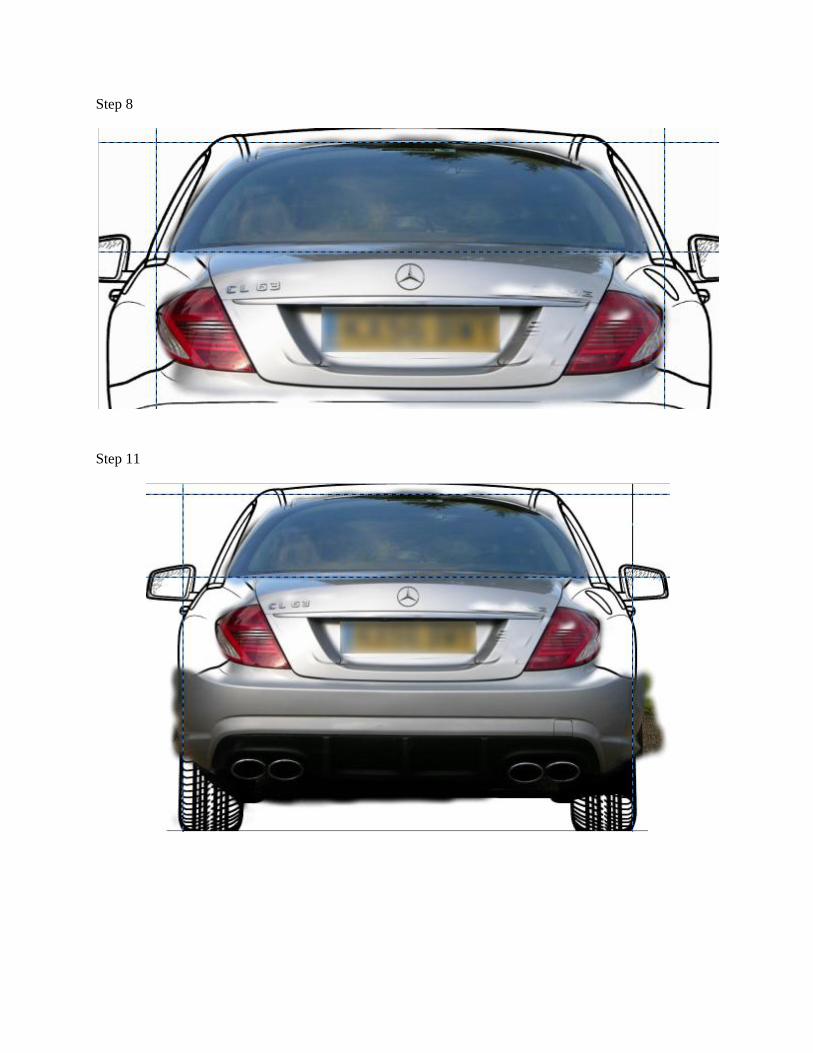
Step 8
Step 11
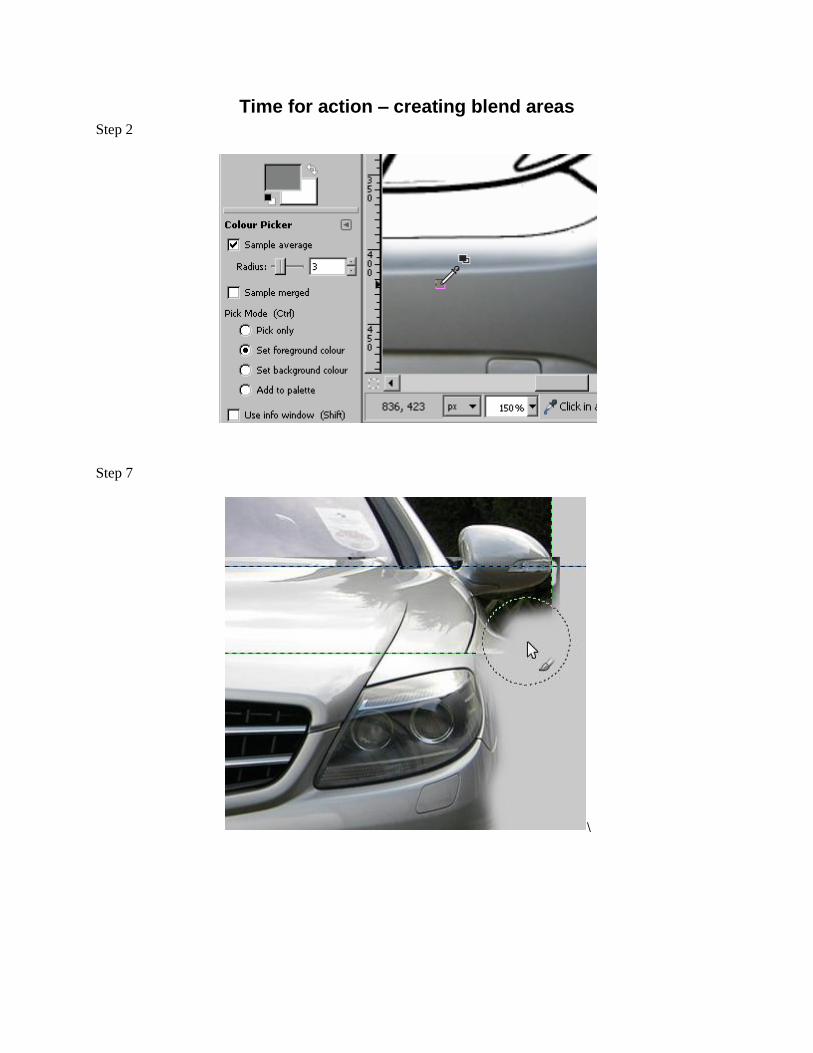
Time for action – creating blend areas Step 2
Step 7
\

Step 9
Step 10

A car section

Modified car geometry
UV unwrap plugins Bullet 1
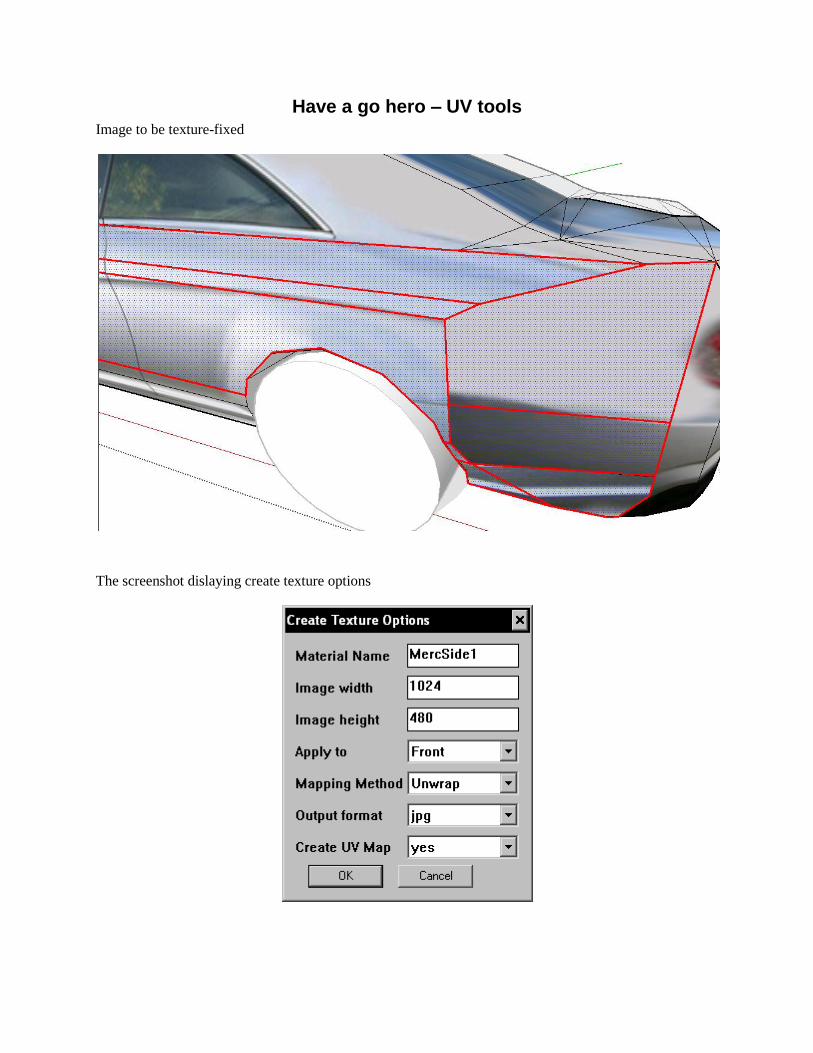
Have a go hero – UV tools Image to be texture-fixed
The screenshot dislaying create texture options

The texture being edited in Gimp

The final car image

Chapter 9: The Main Building—Inside and Out
The main building
Step 2

Step 4

Step 5
Step 8
Step 10

Step 15

Step 20

Step 23

Step 26

Step 28

Step 30

Modeling the interior Step 3

Step 4

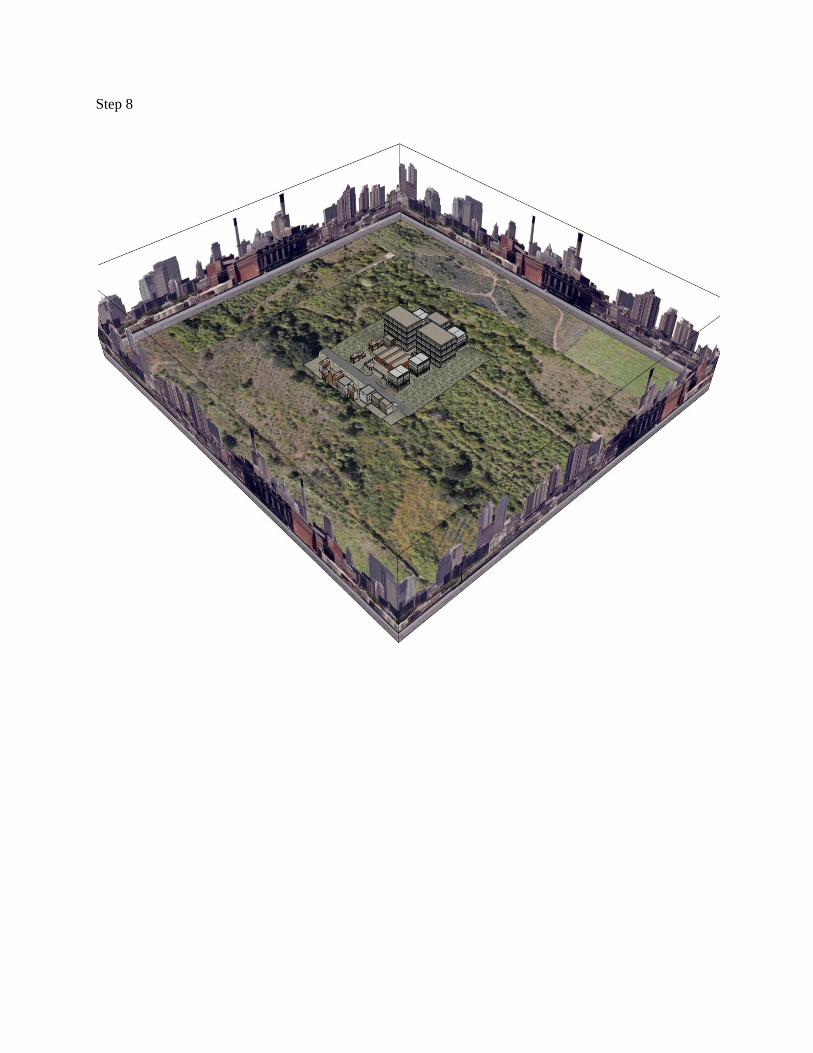
Time for action – setting up a playable game level layout Step 3

Step 4

Step 5
Step 6

Step 8
Step 10

Step 12

Time for action – digging out a terrain Step 3

Step 5
Step 6

The neighborhood

Time for action – exporting buildings to Unity 3D Step 10
Time for action – creating see-through textures Step 4

Step 5
Step 7

Time for action – creating a backdrop Step 2
Step 8

Time for action – enabling see-through materials (Alpha
Channel) Step 3
Time for action – enabling a skybox Step 1

Step 2

Step 4
Render settings pallet

Time for action – ambient light Step 4

The final view

Time for action – who said you can't have your game and play it?
Step 1

Step 3

Appendix A: MakeHuman
MakeHuman Software

Time for action – making a human Step 3

Step 5

Step 7

Step 8

Step 9

Step 11

The final image