students management system user manual
TRANSCRIPT

STUDENTS MANAGEMENT SYSTEM
USER MANUAL

MAIN PARTS OF THE SYSTEM
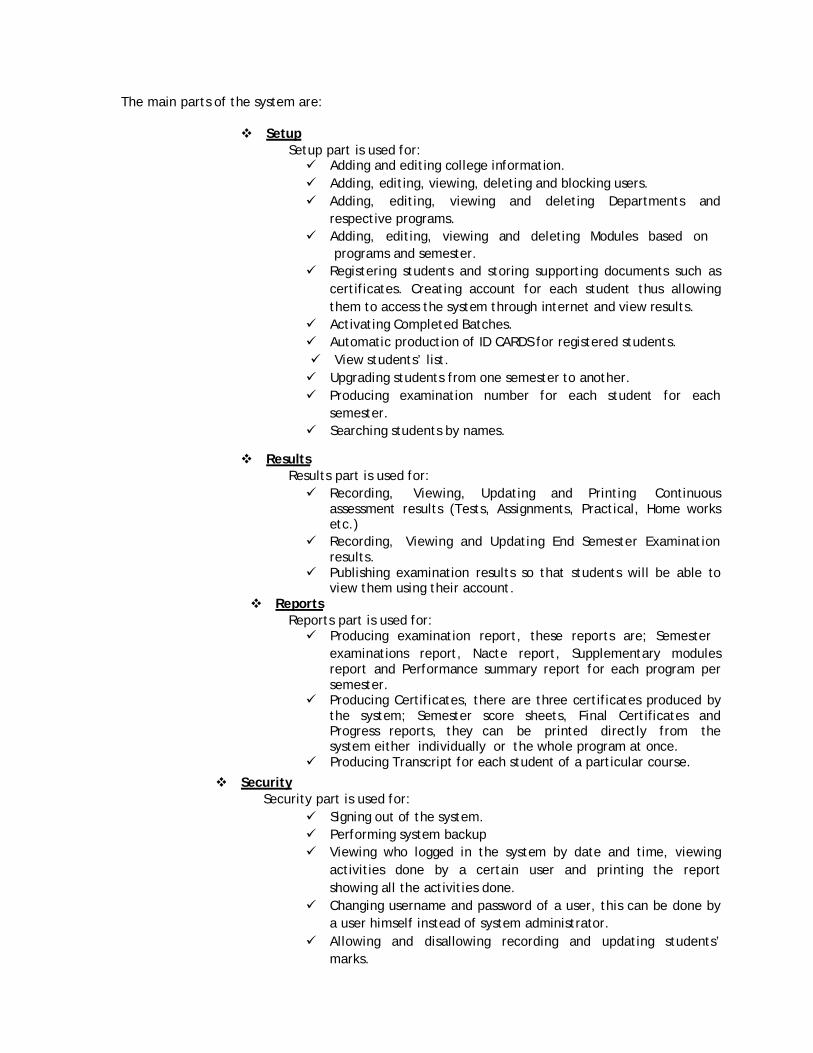
The main parts of the system are:
Setup Setup part is used for: Adding and editing college information. Adding, editing, viewing, deleting and blocking users. Adding, editing, viewing and deleting Departments and
respective programs. Adding, editing, viewing and deleting Modules based on
programs and semester. Registering students and storing supporting documents such as
certificates. Creating account for each student thus allowing them to access the system through internet and view results.
Activating Completed Batches. Automatic production of ID CARDS for registered students. View students’ list. Upgrading students from one semester to another. Producing examination number for each student for each
semester. Searching students by names.
Results
Results part is used for: Recording, Viewing, Updating and Printing Continuous
assessment results (Tests, Assignments, Practical, Home works etc.)
Recording, Viewing and Updating End Semester Examination results.
Publishing examination results so that students will be able to view them using their account.
Reports Reports part is used for: Producing examination report, these reports are; Semester
examinations report, Nacte report, Supplementary modules report and Performance summary report for each program per semester.
Producing Certificates, there are three certificates produced by the system; Semester score sheets, Final Certificates and Progress reports, they can be printed directly from the system either individually or the whole program at once.
Producing Transcript for each student of a particular course.
Security Security part is used for:
Signing out of the system. Performing system backup Viewing who logged in the system by date and time, viewing
activities done by a certain user and printing the report showing all the activities done.
Changing username and password of a user, this can be done by a user himself instead of system administrator.
Allowing and disallowing recording and updating students’ marks.

HOWTOs
1. Add or Edit college information and upload logo
Go to Setup -> College info-> Add or Edit college details and upload its logo.

USERS
i. Add users
Go to Setup -> Users ->Add users->you can now create a user by filling the full name, the full name is important as users will be identified by the system using their full names and not their usernames, fill username, specify title and position of user and create a password. Then click save and you will get a confirmation that a user has been created.

ii. Edit / Delete users
Go to Setup -> Users ->View users->click a user from a list of users-> you can update or delete a user


DEPARTMENTS
i. Add Department
Go to Setup -> Departments ->View departments -> Click Add new -> you can add a new department and assign HOD for it.


ii. Edit/Delete Department
Go to Setup -> Departments ->View departments -> From a List of departments select the department you would like to edit or delete -> to edit click delete and change the required details, to remove click remove and confirm removal.

iii. Add Program
Go to Setup -> Departments ->View departments -> Select the department in which you would like to add a program -> Add a program.

iv. Edit / Delete Programs
Go to Setup -> Departments ->View departments -> Select the department in which you would like to edit a program -> Edit a program.

MODULES
i. Add modules
Go to Setup -> Modules ->Add module -> you can add a module based on program, nta level and semester.

ii. Edit / Delete a module
Go to Setup -> Modules ->View modules ->Select program and semester from Modules-View -> Edit or Delete a module selected.


REGISTRATION
i. Register a student
Go to Setup -> Student’s Registration ->Register student -> you can add student’s personal information, academic records (uploading certificates), and contacts.


ii. Edit / Delete registered student
Go to Setup -> Student’s Registration ->View Registered students ->Select
program, nta level and semester from Students-View -> Select a student from a list of students -> Edit or Delete a student selected. You need to be an administrator to do all this.


iii. View students’ List
Go to Setup -> Student’s Registration ->Students’ List ->you can print and view a list of all students.

UPGRADE
Go to Setup -> Upgrade Manager ->Enter username, password and select position. Select program, nta level, semester and academic year of students whom you would like to upgrade. You can also downgrade by selecting the downgrade check box.

SEARCH A STUDENT
Go to Setup -> Search -> you can search a student by name, select a student whom you want his/her information.

RESULTS
i. Add results
Go to Results -> Record results ->Choose the module based on program and semester and then click next -> Select results category -> For Continuous assessments you should specify type of assessment ->Fill maximum weight for the assessment specified -> Add marks for one student and press enter key or click save button to save. Students whose marks have been saved into the database will not appear in the list for the specified assessment.


For adding semester examination results, follow all the previous steps but in results categories select semester examination,set maximum allocated marks for each question and add marks for one student and press enter key or click save button to save. Students whose marks have been saved into the database will not appear in the list. The same process will be done for Supplementary examinations and Special examinations. At this stage is where the examination number is going to be used instead of registration number.

ii. View / Edit / Print results
Go to Results -> View results -> Select results category (i.e. continuous assessment, Semester examination, Special examination, Supplementary examination), Program ,Semester ,academic year and Module ->Click next ->You can edit marks and save by clicking update button or print by clicking the printer image ->Use next and back buttons to view marks of different continuous assessments of the same module.


For viewing or editing semester examination results, select results for Semester Exam then follow all the previous steps but semester examination results cannot be printed separately, they are seen in the final report of results.

iii. Print Semester Examination results for a particular program
Go to Results -> Exam Reports ->In report creation Choose report for semester exam, select program, Semester and academic year ->Click next to generate a PDF file and print. The same procedures will be followed for printing Supplementary subjects report, Nacte report and Summary of performance


Publish/Hide Results
Go to Results -> Publish results -> Fill in your username and password ->Click publish. To hide results select hide check box. You need to be HOD or Deputy-HOD to do this, otherwise it is impossible. Publishing results will make them available to students if they log in to view their results.

CERTIFICATES
To produce Semester score sheet or Final certificate go to Results->Certificates ->Then select type of certificate that you want based on program, semester and academic year. From a list selected certificates you can print one by one or print all at once


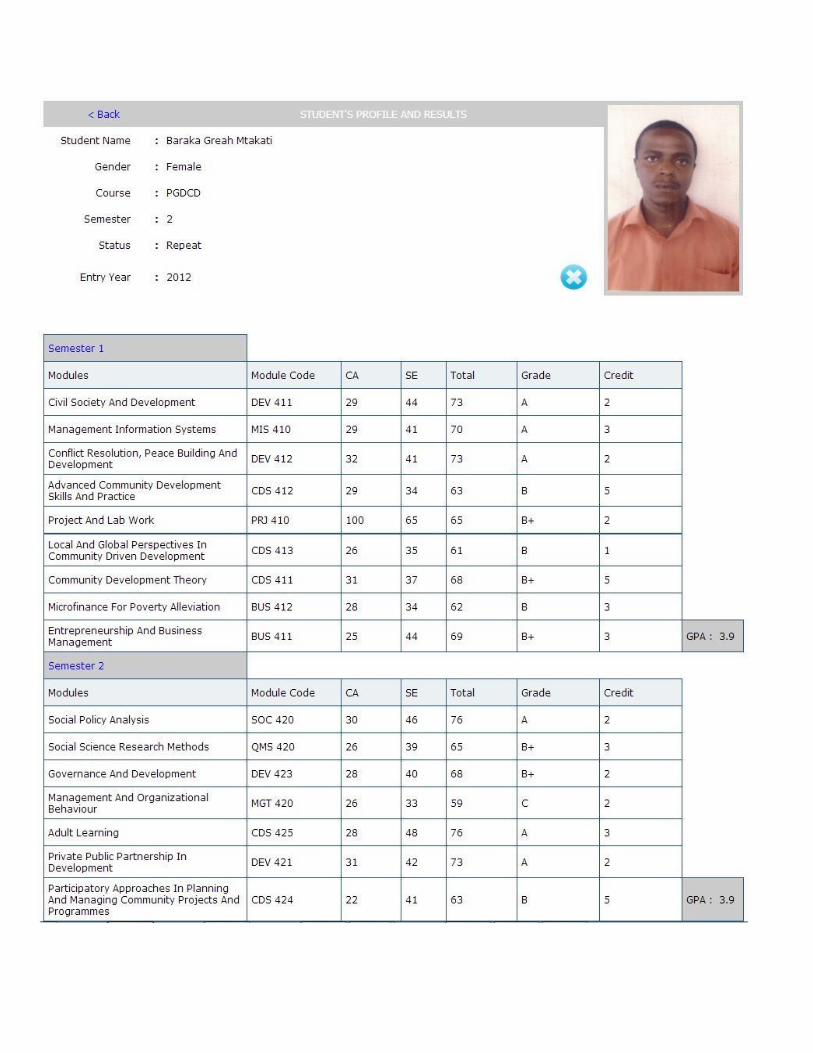
TRANSCRIPTS
To produce Transcripts go to Results->Transcripts ->Then select students that you want based on program, semester and academic year. From a list selected transcripts you can print one by one or print all at once.


SECURITY
i. Current user identifier
It shows software name, full name of the current user and his / her title. While creating a user, full name is very important as it will help in identification purpose, you use a username bob but your fullname is Juma k Juma, so they has opted to use full names instead of username in identifying its users
ii. Log out
To secure the Students Management System it is advised to log out when you are not using the system or if you will be away from your computer for some time.
To log out Go to Security -> Log out or click the Students Management System image.

iii. Backup
Go to Security -> Backup System ->Click this link and the system will backup your database and download a text file called SMS-db-backup-ATC.sql, keep this file in a safe place, it will be useful in case there is any damage or lost of data in your system.

iv. Who logged in?
If you are the system administrator, to view who managed to log in and use the system go to Security -> who logged in? ->Select a user whom you want to see what he/she has been doing in the system. You can even view by date and print this report from the system

CHANGING PASSWORD
To change your password go to Security->Change password->fill
in your current password then type your new password and confirm it, the system will give a confirmation if the operation was successful or not.


AVAILABLE REPORTS
List of Students ID Cards Continuous assessment results Semester examination Supplementary subjects Nacte report Semester score sheet Final certificate Transcript System usage report Summary of results by module Internal examiner report External examiner report Summary of semester examinations