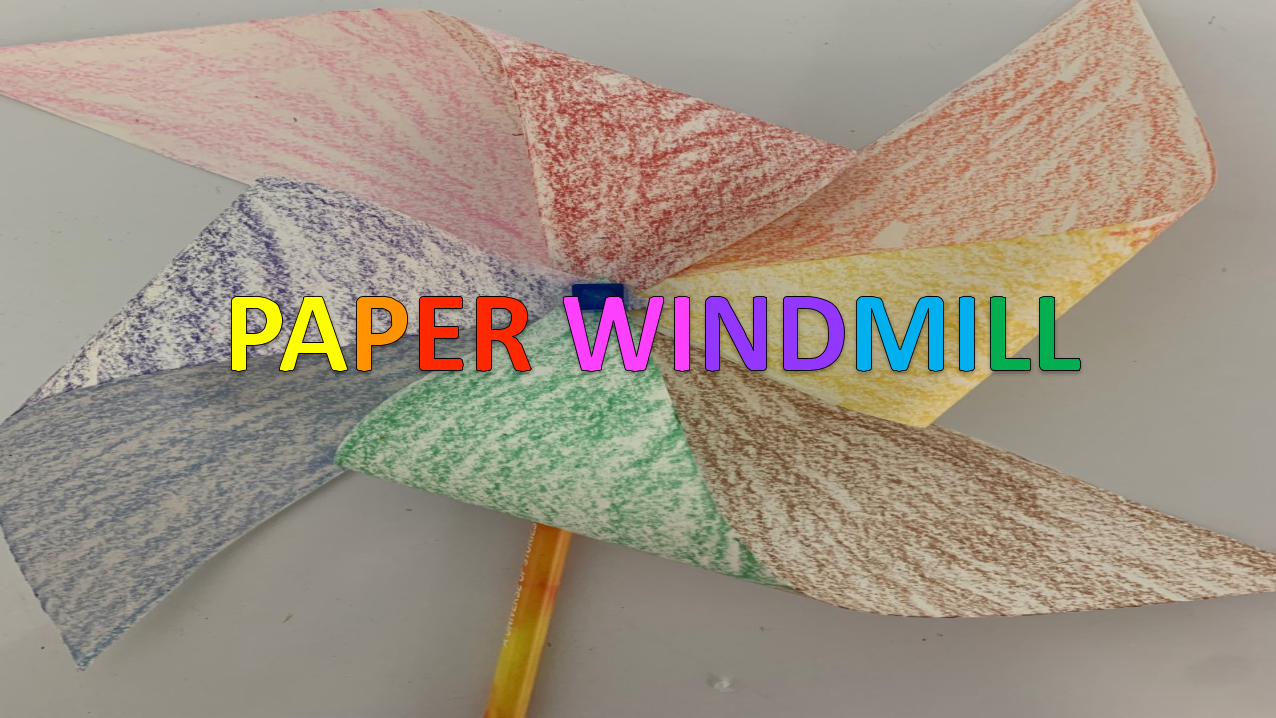
paper windmill
TRANSCRIPT
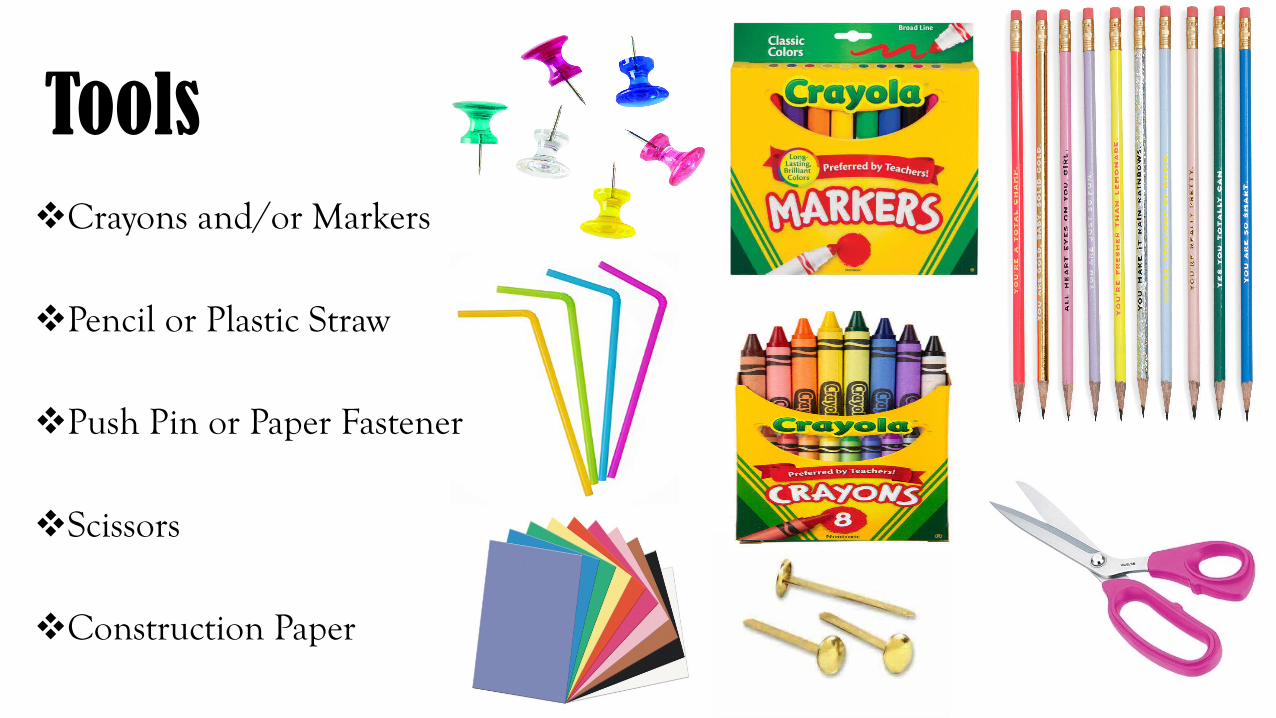
vCrayons and/or Markers
vPencil or Plastic Straw
vPush Pin or Paper Fastener
vScissors
vConstruction Paper
Tools
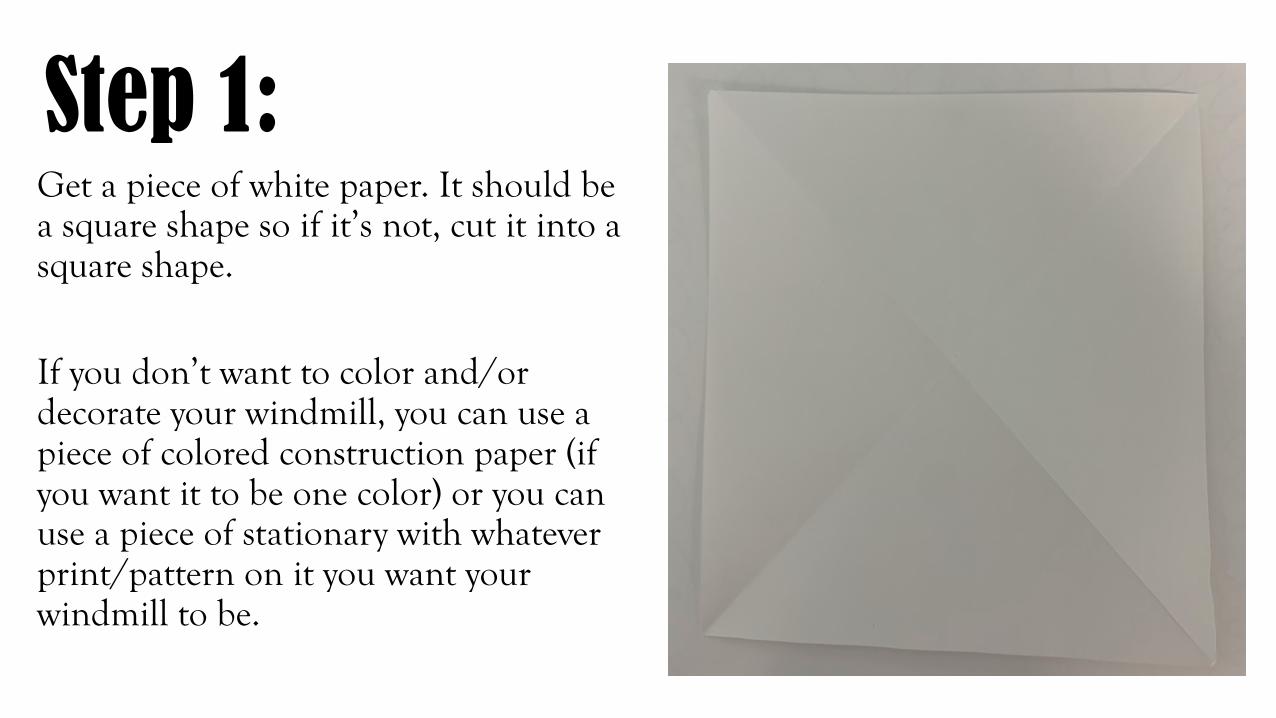
Step 1:Get a piece of white paper. It should be a square shape so if it’s not, cut it into a square shape.
If you don’t want to color and/or decorate your windmill, you can use a piece of colored construction paper (if you want it to be one color) or you can use a piece of stationary with whatever print/pattern on it you want your windmill to be.

Step 2:Fold the square piece of paper in half, sideways, so it makes the shape of a big triangle. Make sure to push down on the line so it can be seen on the paper.
Open the paper back into a square shape. Now fold the paper again in half, sideways, but the other way, so it makes another triangle, but an X when you open the paper. You should see an X or 4 triangles once you open the paper back up.
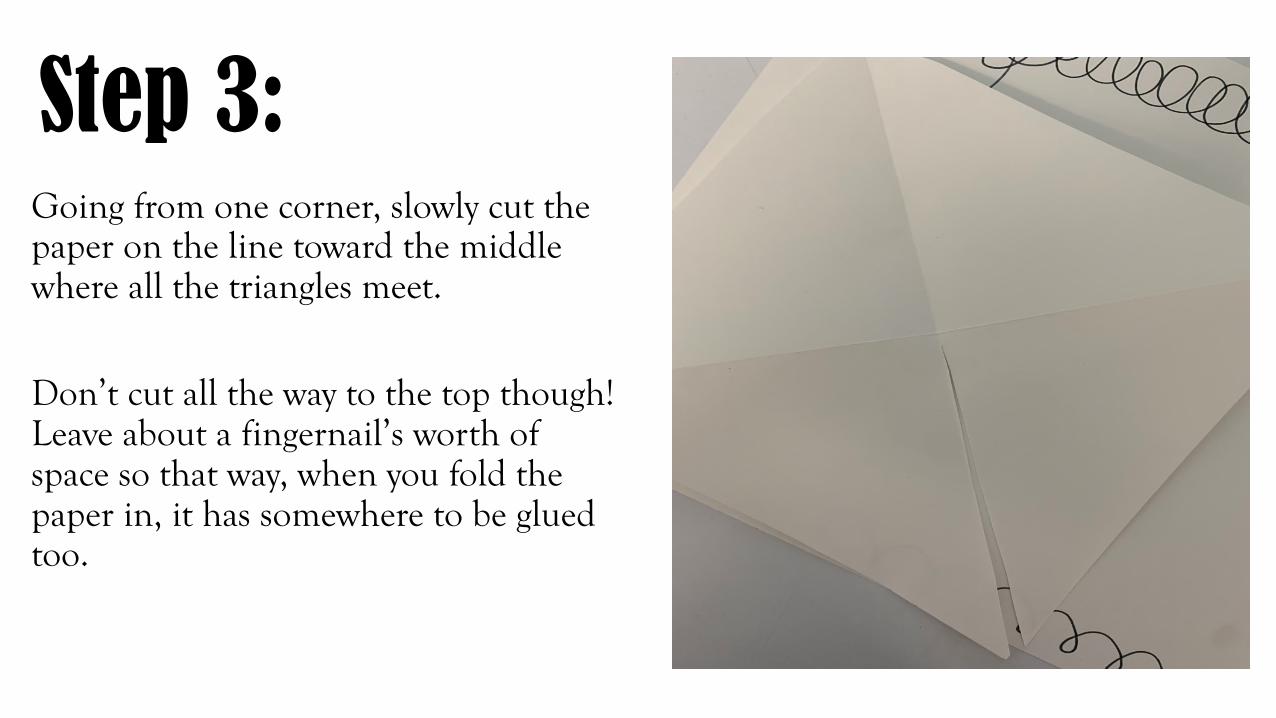
Step 3:Going from one corner, slowly cut the paper on the line toward the middle where all the triangles meet.
Don’t cut all the way to the top though! Leave about a fingernail’s worth of space so that way, when you fold the paper in, it has somewhere to be glued too.
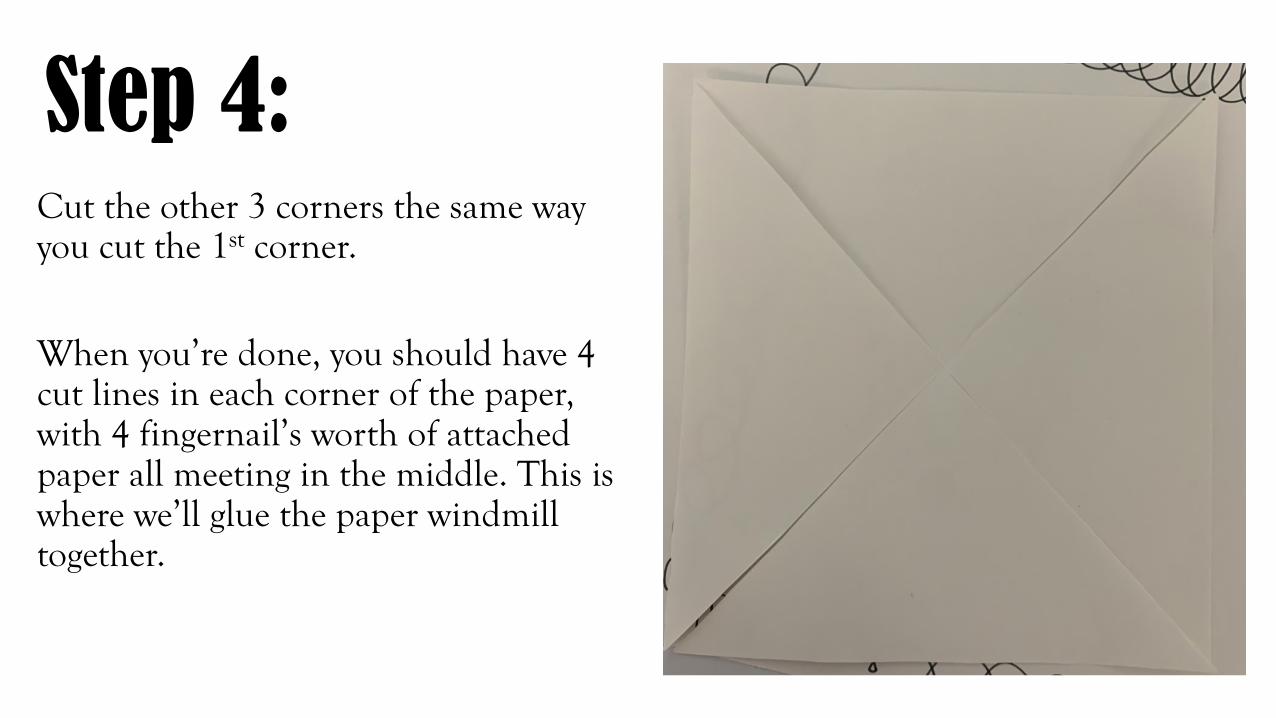
Step 4:Cut the other 3 corners the same way you cut the 1st corner.
When you’re done, you should have 4 cut lines in each corner of the paper, with 4 fingernail’s worth of attached paper all meeting in the middle. This is where we’ll glue the paper windmill together.
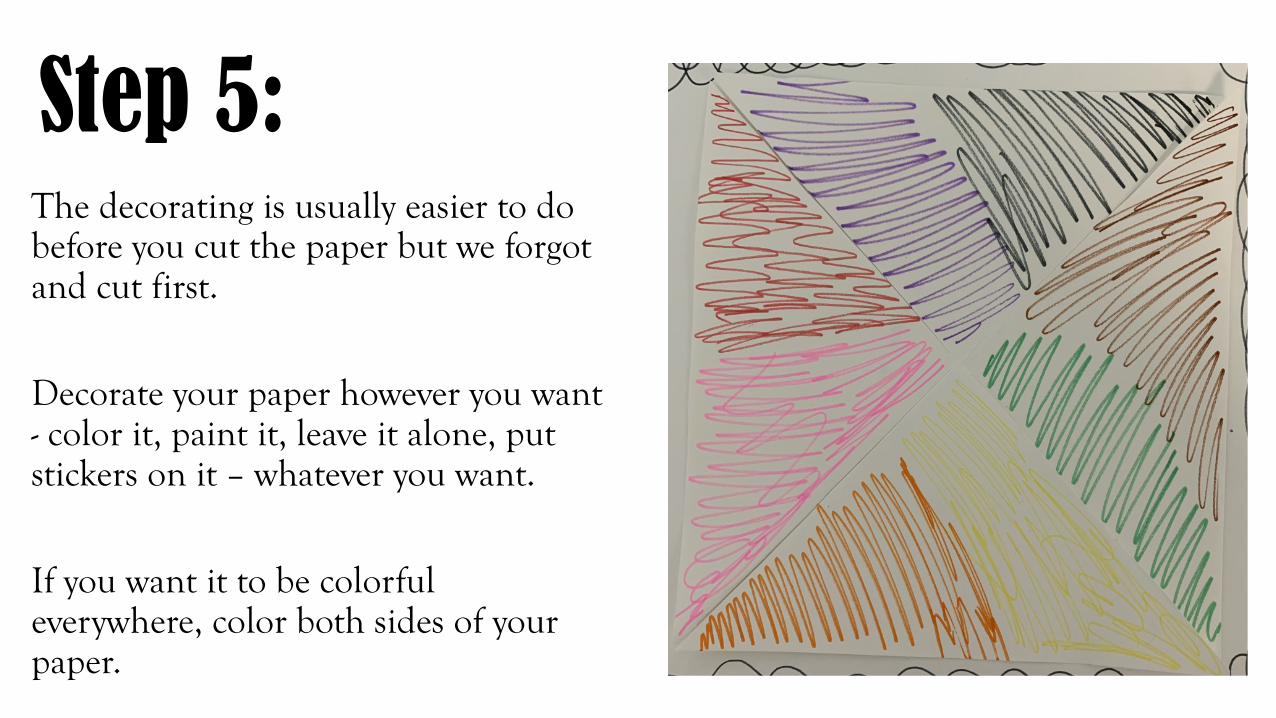
Step 5:The decorating is usually easier to do before you cut the paper but we forgot and cut first.
Decorate your paper however you want - color it, paint it, leave it alone, put stickers on it – whatever you want.
If you want it to be colorful everywhere, color both sides of your paper.
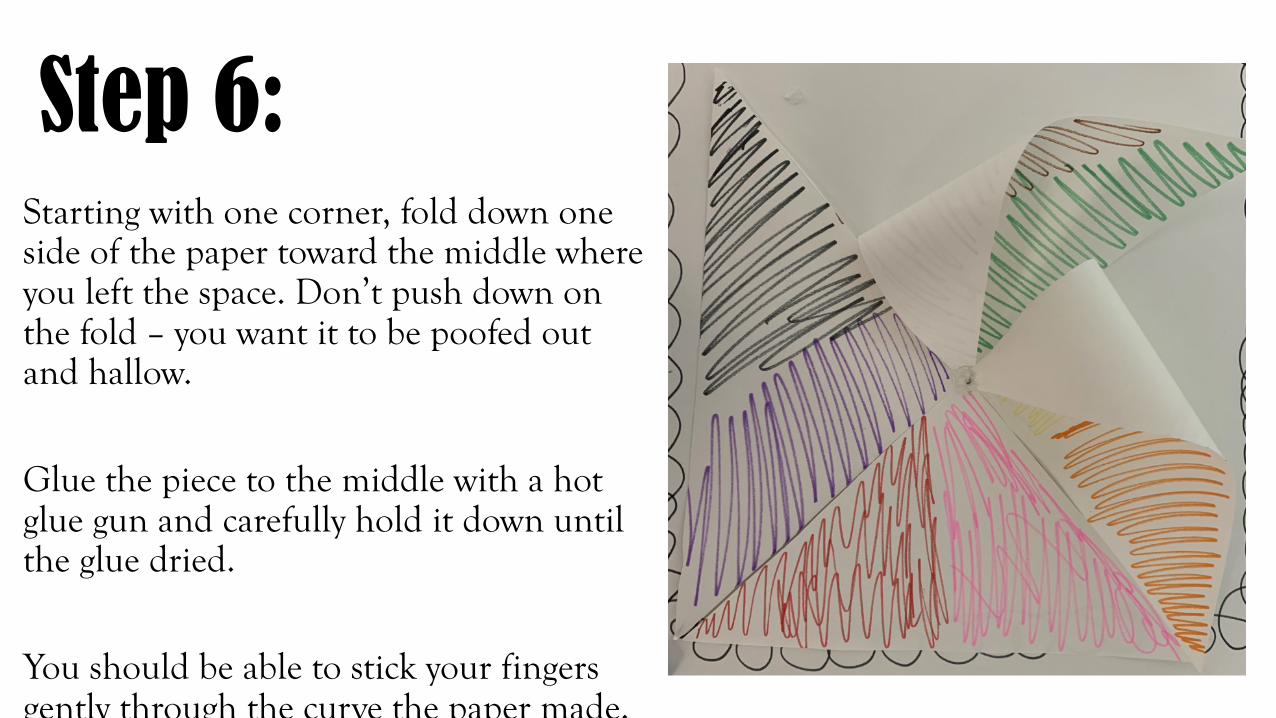
Step 6:Starting with one corner, fold down one side of the paper toward the middle where you left the space. Don’t push down on the fold – you want it to be poofed out and hallow.
Glue the piece to the middle with a hot glue gun and carefully hold it down until the glue dried.
You should be able to stick your fingers gently through the curve the paper made.
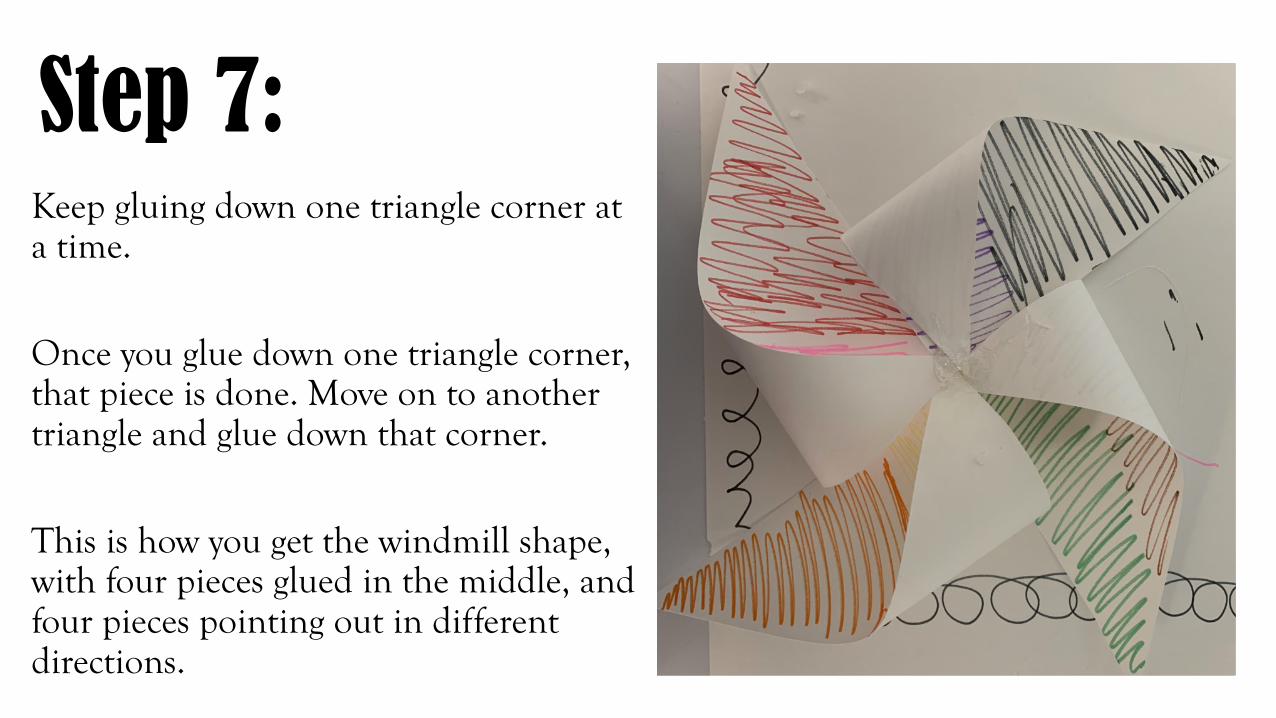
Step 7:Keep gluing down one triangle corner at a time.
Once you glue down one triangle corner, that piece is done. Move on to another triangle and glue down that corner.
This is how you get the windmill shape, with four pieces glued in the middle, and four pieces pointing out in different directions.
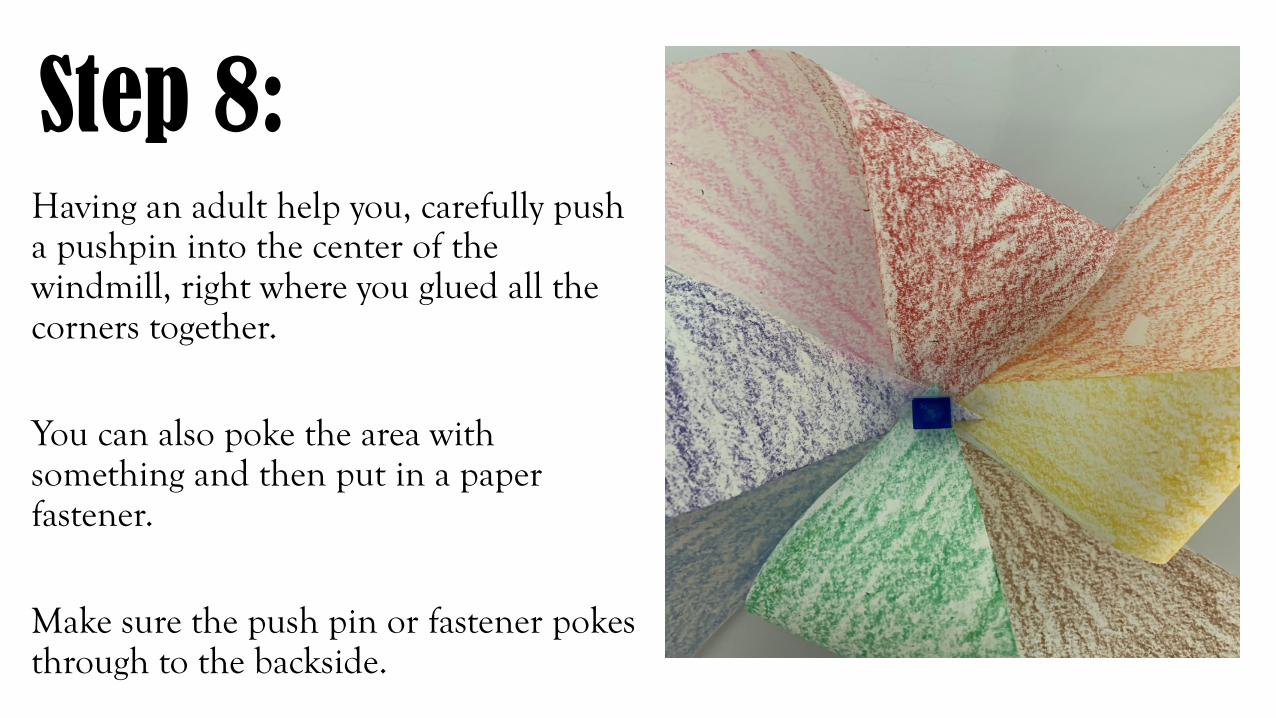
Step 8:Having an adult help you, carefully push a pushpin into the center of the windmill, right where you glued all the corners together.
You can also poke the area with something and then put in a paper fastener.
Make sure the push pin or fastener pokes through to the backside.
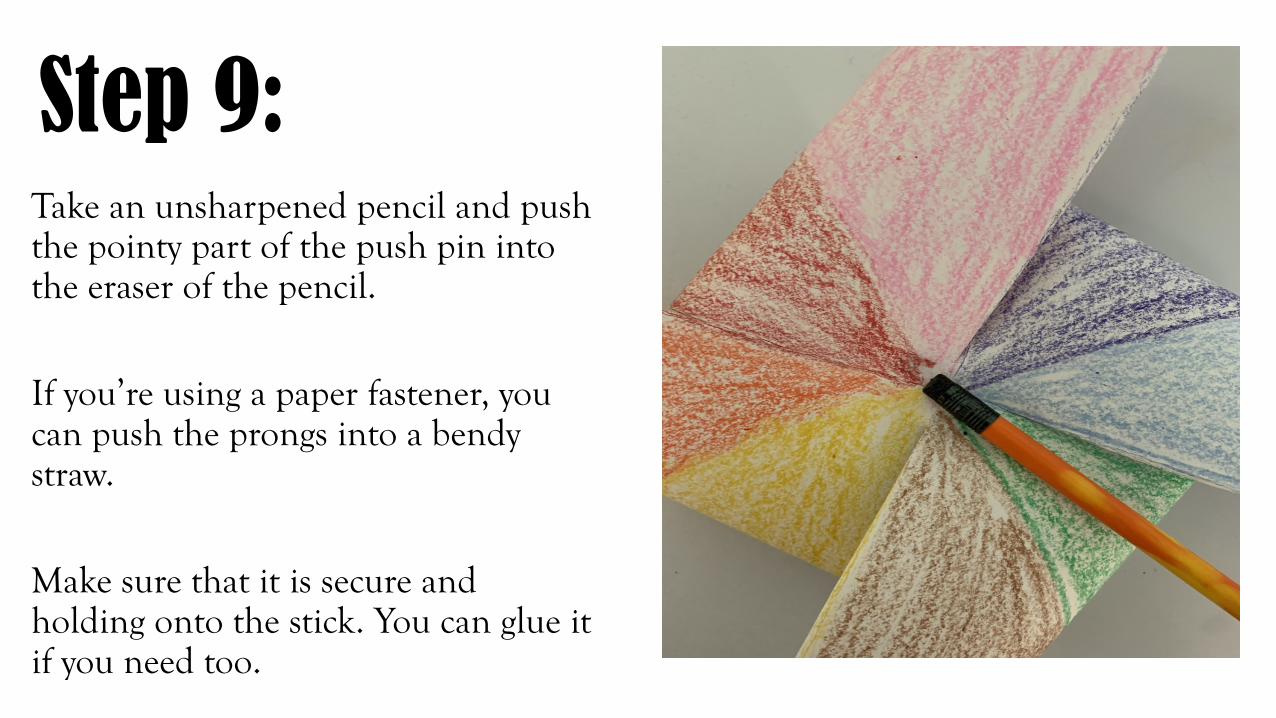
Step 9:Take an unsharpened pencil and push the pointy part of the push pin into the eraser of the pencil.
If you’re using a paper fastener, you can push the prongs into a bendy straw.
Make sure that it is secure and holding onto the stick. You can glue it if you need too.
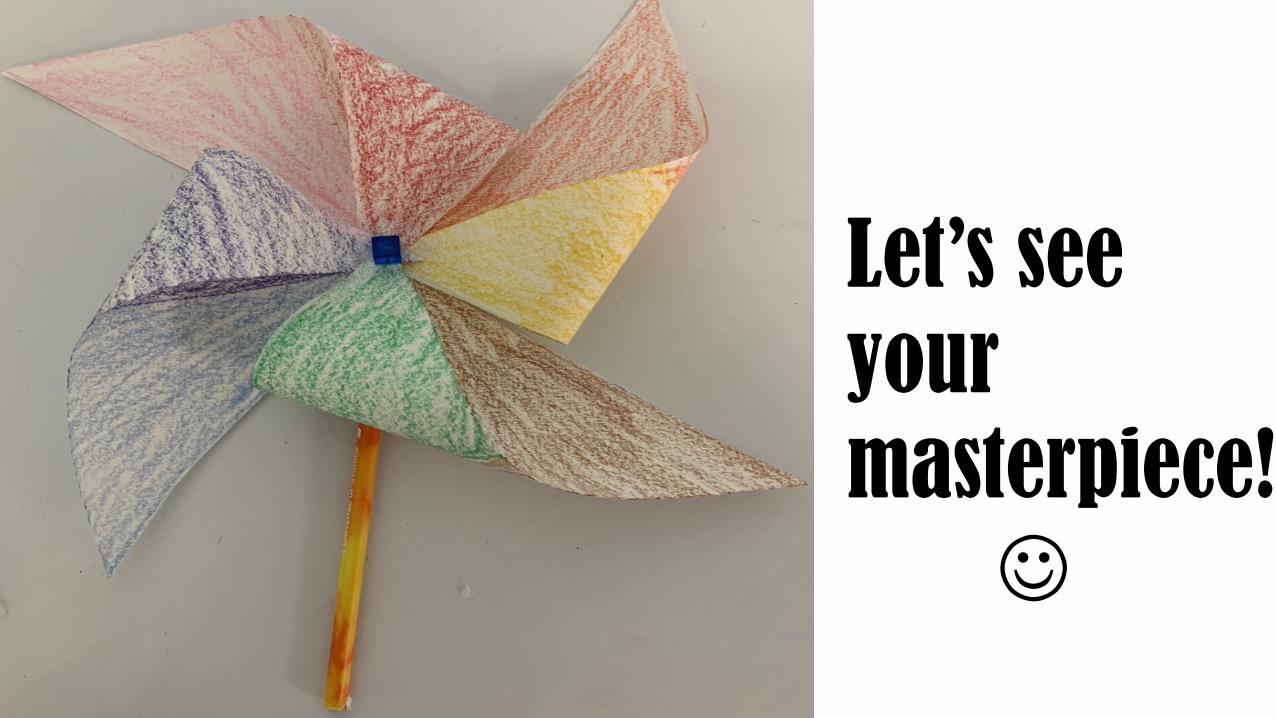
Let’s see your masterpiece!
J