overlocker threading overview - bernina
TRANSCRIPT
BERNINAeBook Series
JUST OVERLOCK IT!Overlocker Threading OverviewBERNINA L 450 / L 460 Threading
Written by:Jaime David, BERNINA Educator, Overlocker Specialist
Threading Aids § Threading Steps § Machine Overview
Stitch Chart
© 2018 BERNINA of America bernina.com
OVERLOCKER THREADING OVERVIEW
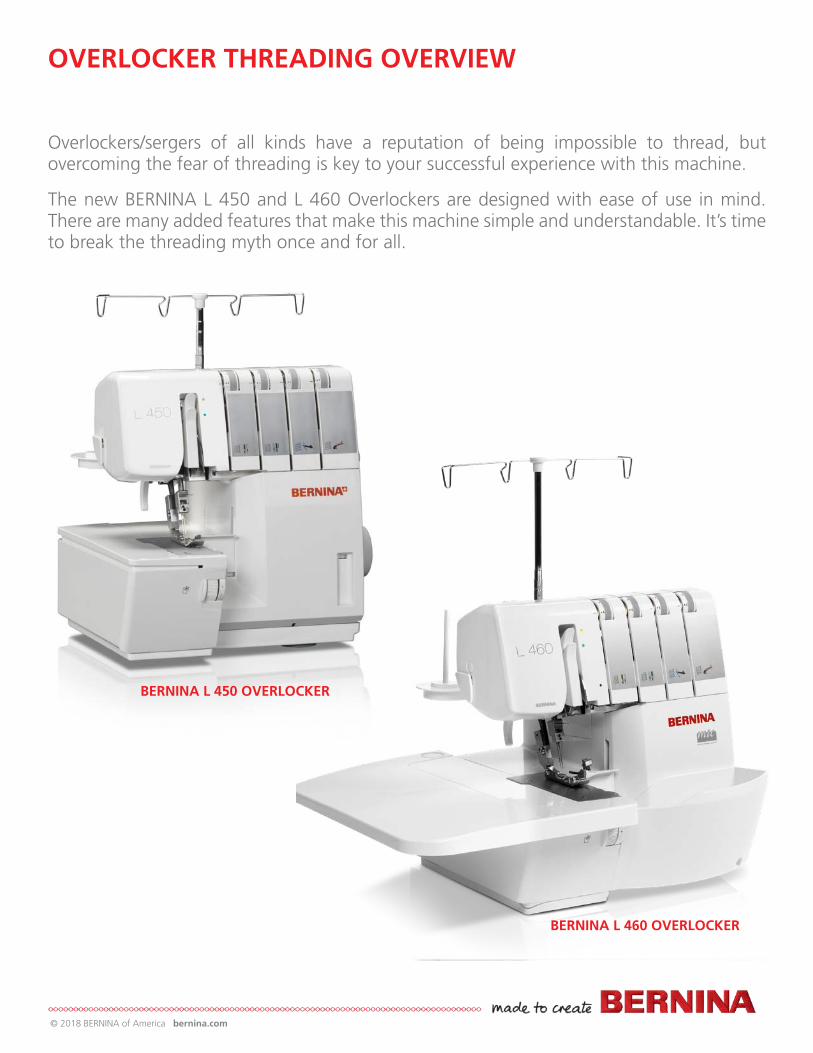
Overlockers/sergers of all kinds have a reputation of being impossible to thread, but overcoming the fear of threading is key to your successful experience with this machine.
The new BERNINA L 450 and L 460 Overlockers are designed with ease of use in mind. There are many added features that make this machine simple and understandable. It’s time to break the threading myth once and for all.
BERNINA L 450 OVERLOCKER
BERNINA L 460 OVERLOCKER
© 2018 BERNINA of America bernina.com
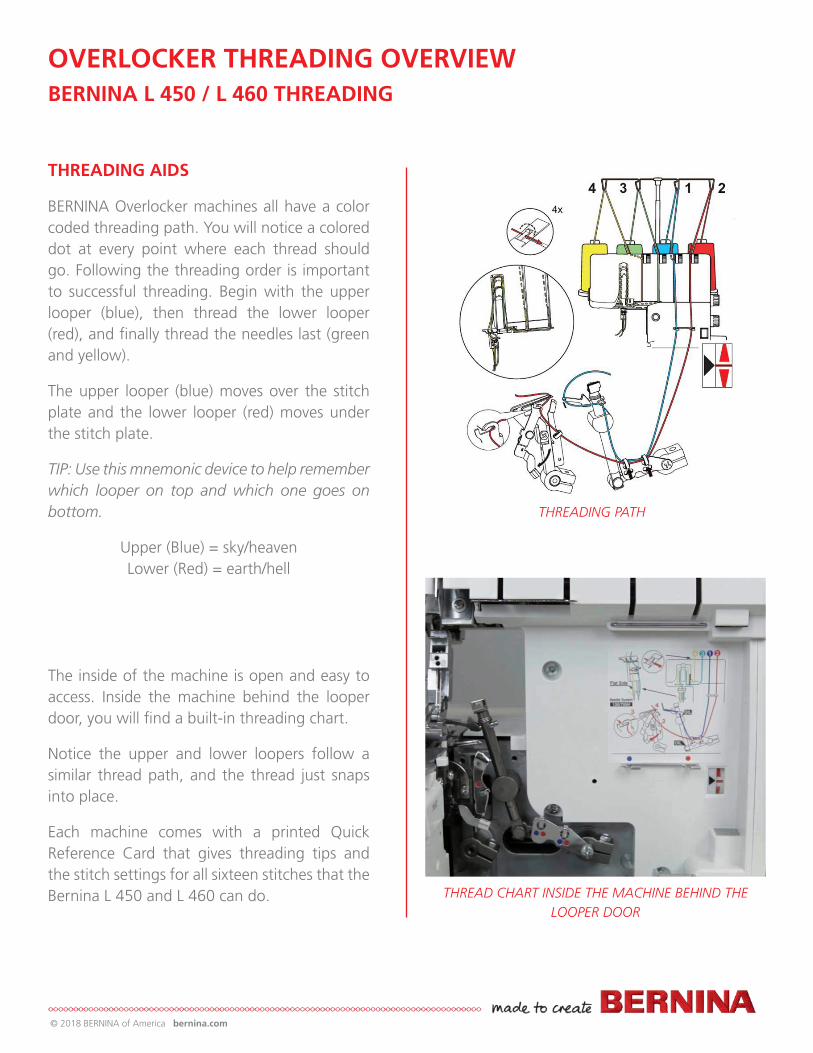
THREADING PATH
OVERLOCKER THREADING OVERVIEWBERNINA L 450 / L 460 THREADING
THREADING AIDS
BERNINA Overlocker machines all have a color coded threading path. You will notice a colored dot at every point where each thread should go. Following the threading order is important to successful threading. Begin with the upper looper (blue), then thread the lower looper (red), and finally thread the needles last (green and yellow).
The upper looper (blue) moves over the stitch plate and the lower looper (red) moves under the stitch plate.
TIP: Use this mnemonic device to help remember which looper on top and which one goes on bottom.
Upper (Blue) = sky/heavenLower (Red) = earth/hell
The inside of the machine is open and easy to access. Inside the machine behind the looper door, you will find a built-in threading chart.
Notice the upper and lower loopers follow a similar thread path, and the thread just snaps into place.
Each machine comes with a printed Quick Reference Card that gives threading tips and the stitch settings for all sixteen stitches that the Bernina L 450 and L 460 can do. THREAD CHART INSIDE THE MACHINE BEHIND THE
LOOPER DOOR
© 2018 BERNINA of America bernina.com
BERNINA L 450 / L 460 THREADING
THREADING STEPS
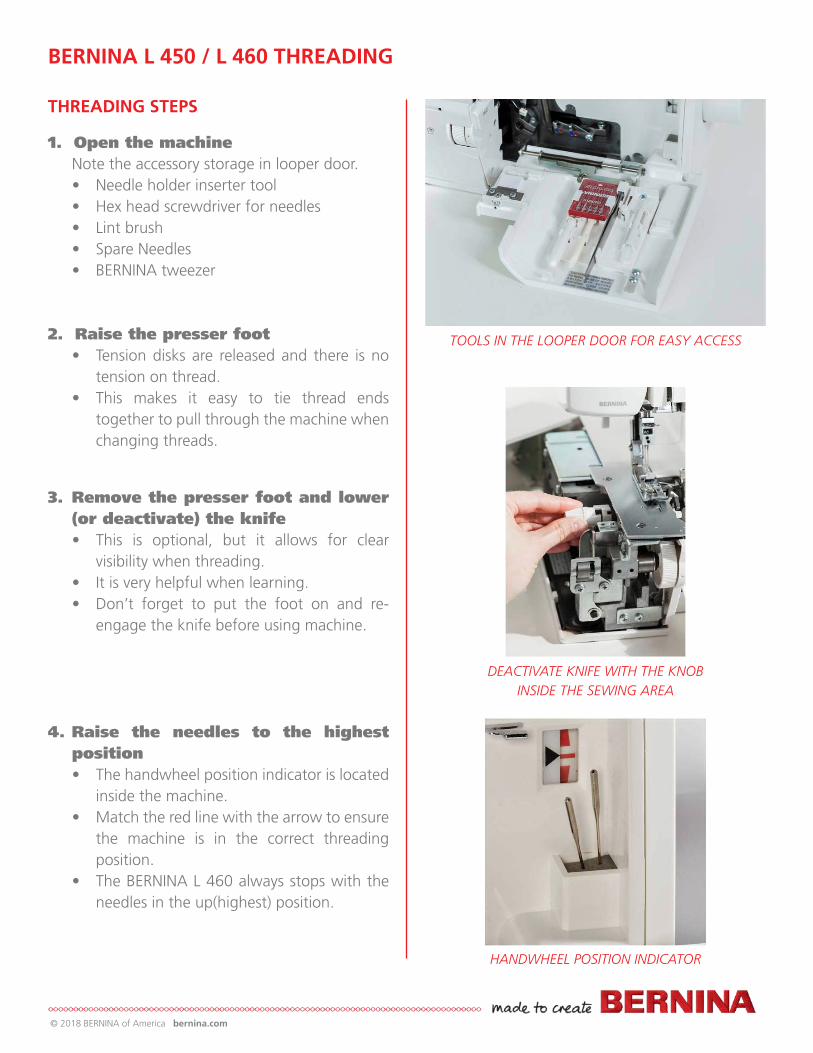
1. Open the machineNote the accessory storage in looper door.• Needle holder inserter tool• Hex head screwdriver for needles• Lint brush• Spare Needles• BERNINA tweezer
2. Raise the presser foot• Tension disks are released and there is no
tension on thread.• This makes it easy to tie thread ends
together to pull through the machine when changing threads.
3. Remove the presser foot and lower (or deactivate) the knife• This is optional, but it allows for clear
visibility when threading.• It is very helpful when learning.• Don’t forget to put the foot on and re-
engage the knife before using machine.
4. Raise the needles to the highest position• The handwheel position indicator is located
inside the machine.• Match the red line with the arrow to ensure
the machine is in the correct threading position.
• The BERNINA L 460 always stops with the needles in the up(highest) position.
TOOLS IN THE LOOPER DOOR FOR EASY ACCESS
DEACTIVATE KNIFE WITH THE KNOB INSIDE THE SEWING AREA
HANDWHEEL POSITION INDICATOR
© 2018 BERNINA of America bernina.com
BERNINA L 450 / L 460 THREADING: THREADING STEPS
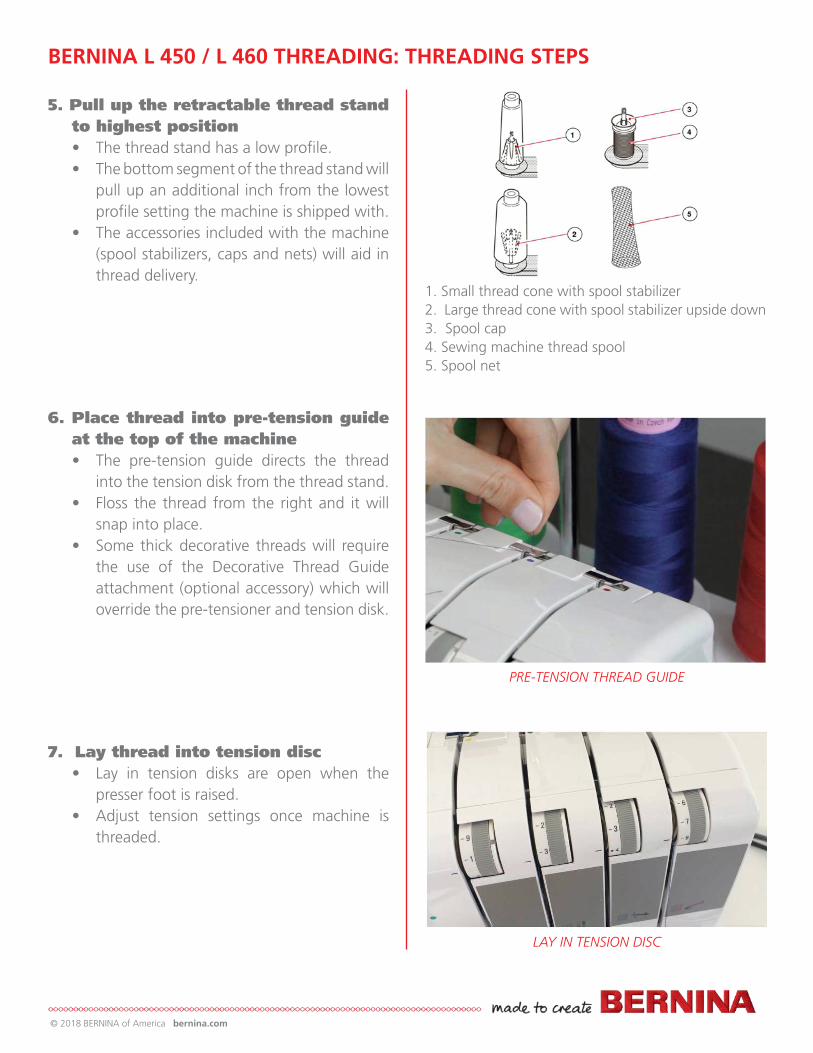
5. Pull up the retractable thread stand to highest position• The thread stand has a low profile.• The bottom segment of the thread stand will
pull up an additional inch from the lowest profile setting the machine is shipped with.
• The accessories included with the machine (spool stabilizers, caps and nets) will aid in thread delivery.
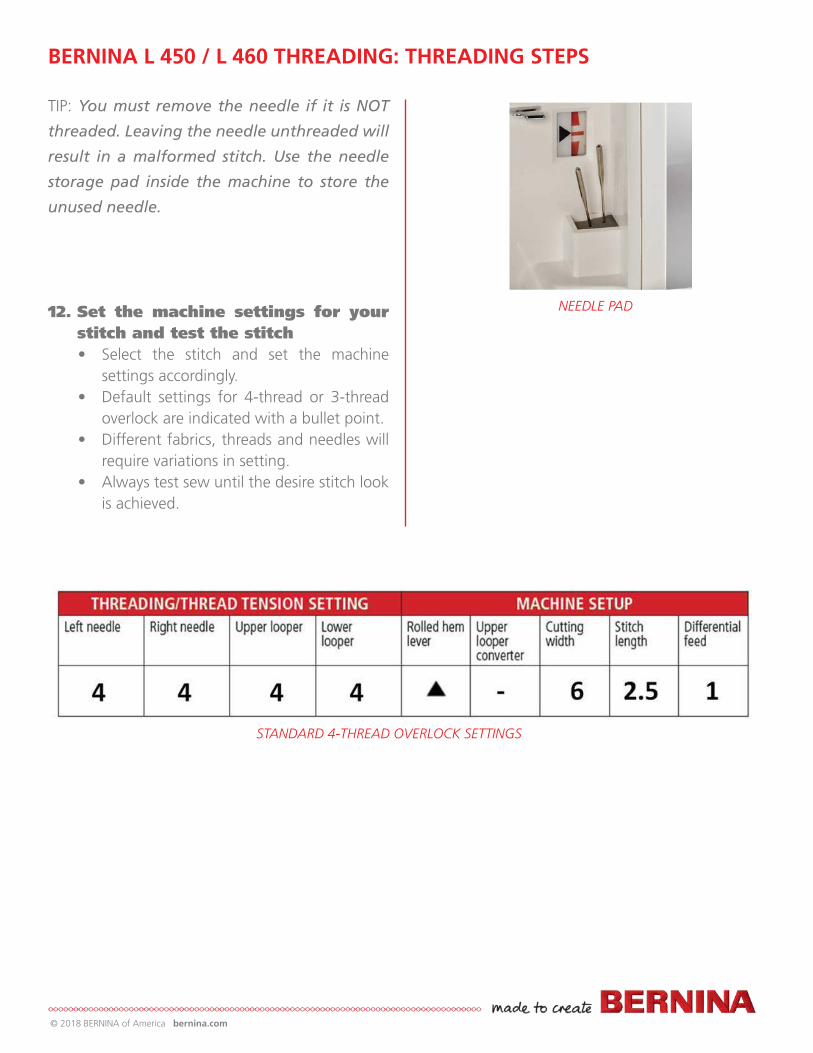
6. Place thread into pre-tension guide at the top of the machine• The pre-tension guide directs the thread
into the tension disk from the thread stand.• Floss the thread from the right and it will
snap into place.• Some thick decorative threads will require
the use of the Decorative Thread Guide attachment (optional accessory) which will override the pre-tensioner and tension disk.
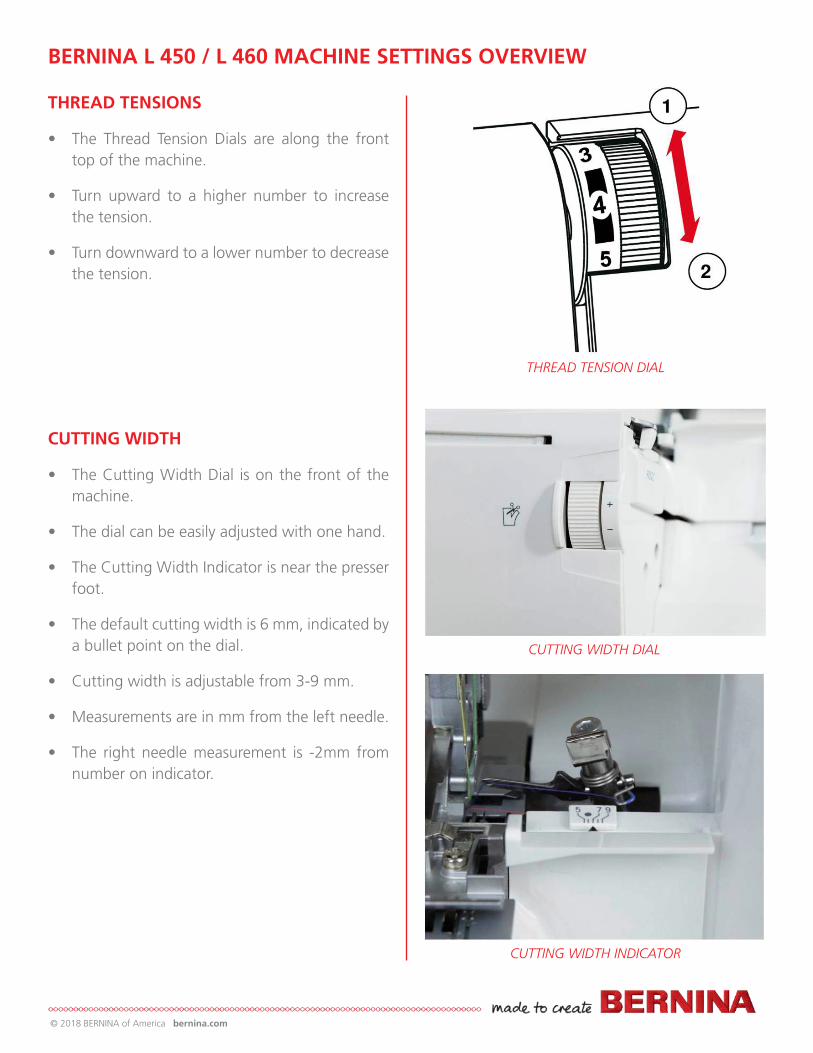
7. Lay thread into tension disc• Lay in tension disks are open when the
presser foot is raised.• Adjust tension settings once machine is
threaded.
1. Small thread cone with spool stabilizer2. Large thread cone with spool stabilizer upside down3. Spool cap4. Sewing machine thread spool5. Spool net
LAY IN TENSION DISC
PRE-TENSION THREAD GUIDE

© 2018 BERNINA of America bernina.com
8. Place thread into all guides marked with color-coded marks• Follow the color-coded marks for the
thread you are using.• Start with the upper looper (blue).• Then thread the lower looper (red).• Thread the needle(s) last (green, yellow).
9. Lower looper threader lever • There is a thread guide for the lower
looper underneath the stitch plate.• Access this looper by pressing the lower
looper threader lever down.• Turn the handwheel through a full rotation
to put the looper back in position.
10. Thread the looper eye• Tweezers are a helpful tool for threading
the looper eye and are included with the machine.
11. Use the needle threader/inserter tool to thread the needles(A) A small wire will push the thread
through the needle eye.(B) Place thread across the threader
horizontally, with hook side pointing up.
(C) Slowly move the thread down the needle shaft.
(D) At the needle eye, the wire will push the thread through the eye.
(E) A loop will remain on the back side of the needle.
(F) Use the hook on the threader to help pull the thread through the needle.
LOWER LOOPER THREAD LEVER
NEEDLE THREADER
BERNINA L 450 / L 460 THREADING: THREADING STEPS
© 2018 BERNINA of America bernina.com
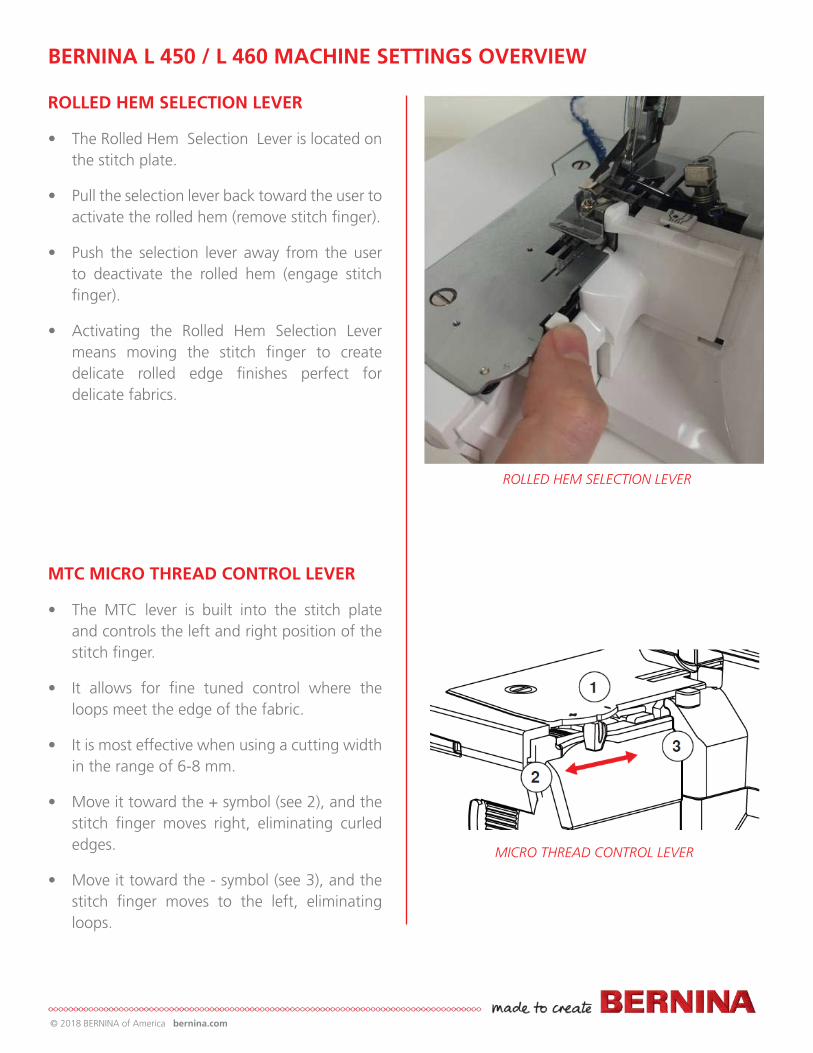
TIP: You must remove the needle if it is NOT
threaded. Leaving the needle unthreaded will
result in a malformed stitch. Use the needle
storage pad inside the machine to store the
unused needle.
12. Set the machine settings for your stitch and test the stitch• Select the stitch and set the machine
settings accordingly.• Default settings for 4-thread or 3-thread
overlock are indicated with a bullet point.• Different fabrics, threads and needles will
require variations in setting.• Always test sew until the desire stitch look
is achieved.
STANDARD 4-THREAD OVERLOCK SETTINGS
BERNINA L 450 / L 460 THREADING: THREADING STEPS
NEEDLE PAD
© 2018 BERNINA of America bernina.com
THREAD TENSIONS
• The Thread Tension Dials are along the front top of the machine.
• Turn upward to a higher number to increase the tension.
• Turn downward to a lower number to decrease the tension.
CUTTING WIDTH
• The Cutting Width Dial is on the front of the machine.
• The dial can be easily adjusted with one hand.
• The Cutting Width Indicator is near the presser foot.
• The default cutting width is 6 mm, indicated by a bullet point on the dial.
• Cutting width is adjustable from 3-9 mm.
• Measurements are in mm from the left needle.
• The right needle measurement is -2mm from number on indicator.
BERNINA L 450 / L 460 MACHINE SETTINGS OVERVIEW
THREAD TENSION DIAL
CUTTING WIDTH DIAL
CUTTING WIDTH INDICATOR
© 2018 BERNINA of America bernina.com
ROLLED HEM SELECTION LEVER
• The Rolled Hem Selection Lever is located on the stitch plate.
• Pull the selection lever back toward the user to activate the rolled hem (remove stitch finger).
• Push the selection lever away from the user to deactivate the rolled hem (engage stitch finger).
• Activating the Rolled Hem Selection Lever means moving the stitch finger to create delicate rolled edge finishes perfect for delicate fabrics.
MTC MICRO THREAD CONTROL LEVER
• The MTC lever is built into the stitch plate and controls the left and right position of the stitch finger.
• It allows for fine tuned control where the loops meet the edge of the fabric.
• It is most effective when using a cutting width in the range of 6-8 mm.
• Move it toward the + symbol (see 2), and the stitch finger moves right, eliminating curled edges.
• Move it toward the - symbol (see 3), and the stitch finger moves to the left, eliminating loops.
BERNINA L 450 / L 460 MACHINE SETTINGS OVERVIEW
ROLLED HEM SELECTION LEVER
MICRO THREAD CONTROL LEVER
© 2018 BERNINA of America bernina.com
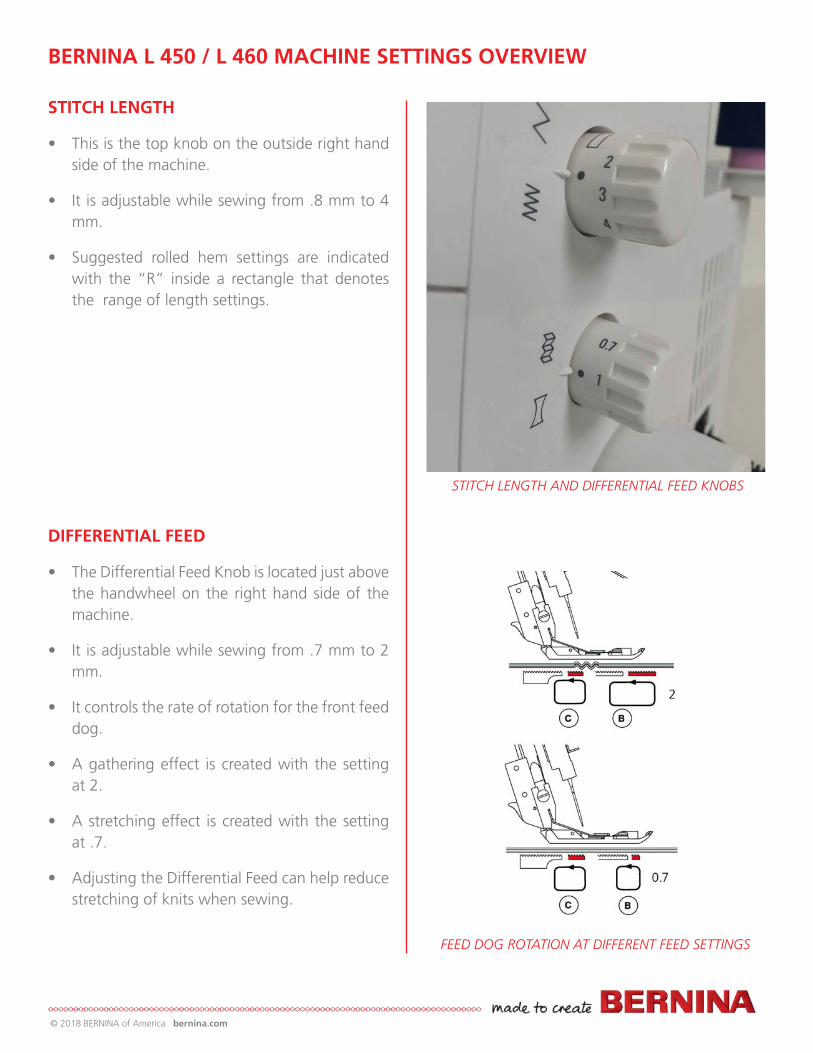
STITCH LENGTH
• This is the top knob on the outside right hand side of the machine.
• It is adjustable while sewing from .8 mm to 4 mm.
• Suggested rolled hem settings are indicated with the “R” inside a rectangle that denotes the range of length settings.
DIFFERENTIAL FEED
• The Differential Feed Knob is located just above the handwheel on the right hand side of the machine.
• It is adjustable while sewing from .7 mm to 2 mm.
• It controls the rate of rotation for the front feed dog.
• A gathering effect is created with the setting at 2.
• A stretching effect is created with the setting at .7.
• Adjusting the Differential Feed can help reduce stretching of knits when sewing.
BERNINA L 450 / L 460 MACHINE SETTINGS OVERVIEW
STITCH LENGTH AND DIFFERENTIAL FEED KNOBS
FEED DOG ROTATION AT DIFFERENT FEED SETTINGS
© 2018 BERNINA of America bernina.com
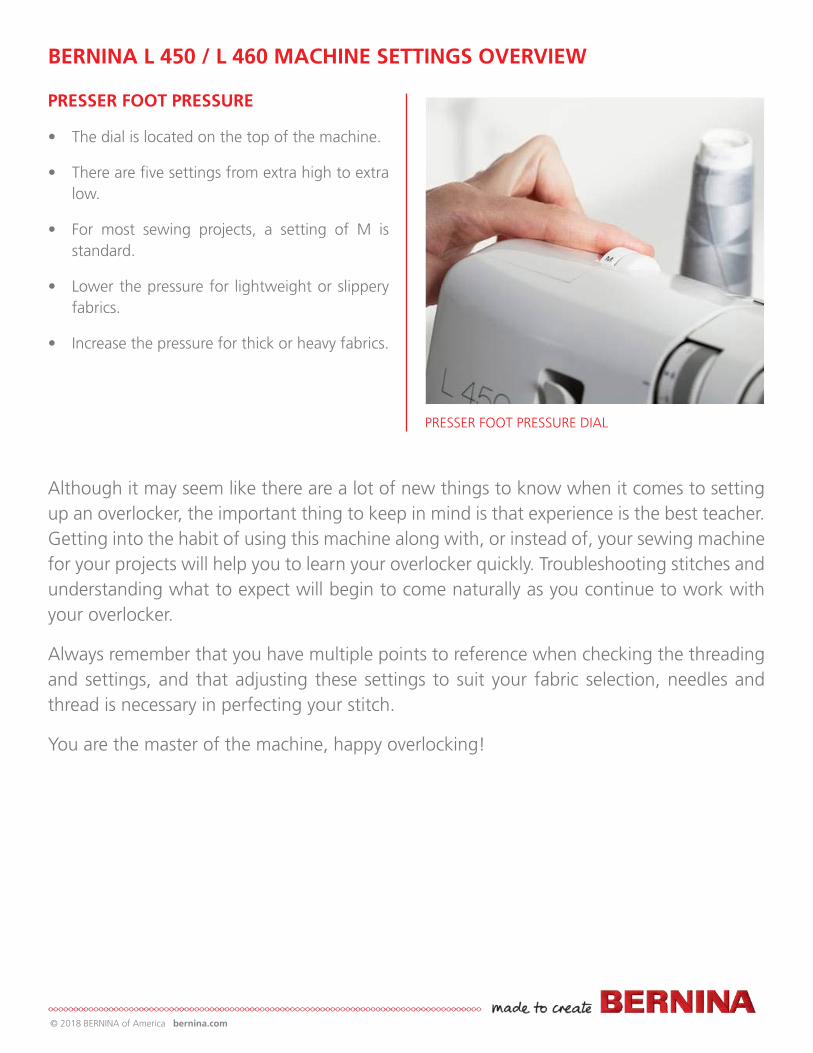
PRESSER FOOT PRESSURE
• The dial is located on the top of the machine.
• There are five settings from extra high to extra low.
• For most sewing projects, a setting of M is standard.
• Lower the pressure for lightweight or slippery fabrics.
• Increase the pressure for thick or heavy fabrics.
BERNINA L 450 / L 460 MACHINE SETTINGS OVERVIEW
PRESSER FOOT PRESSURE DIAL
Although it may seem like there are a lot of new things to know when it comes to setting up an overlocker, the important thing to keep in mind is that experience is the best teacher. Getting into the habit of using this machine along with, or instead of, your sewing machine for your projects will help you to learn your overlocker quickly. Troubleshooting stitches and understanding what to expect will begin to come naturally as you continue to work with your overlocker.
Always remember that you have multiple points to reference when checking the threading and settings, and that adjusting these settings to suit your fabric selection, needles and thread is necessary in perfecting your stitch.
You are the master of the machine, happy overlocking!
© 2018 BERNINA of America bernina.com
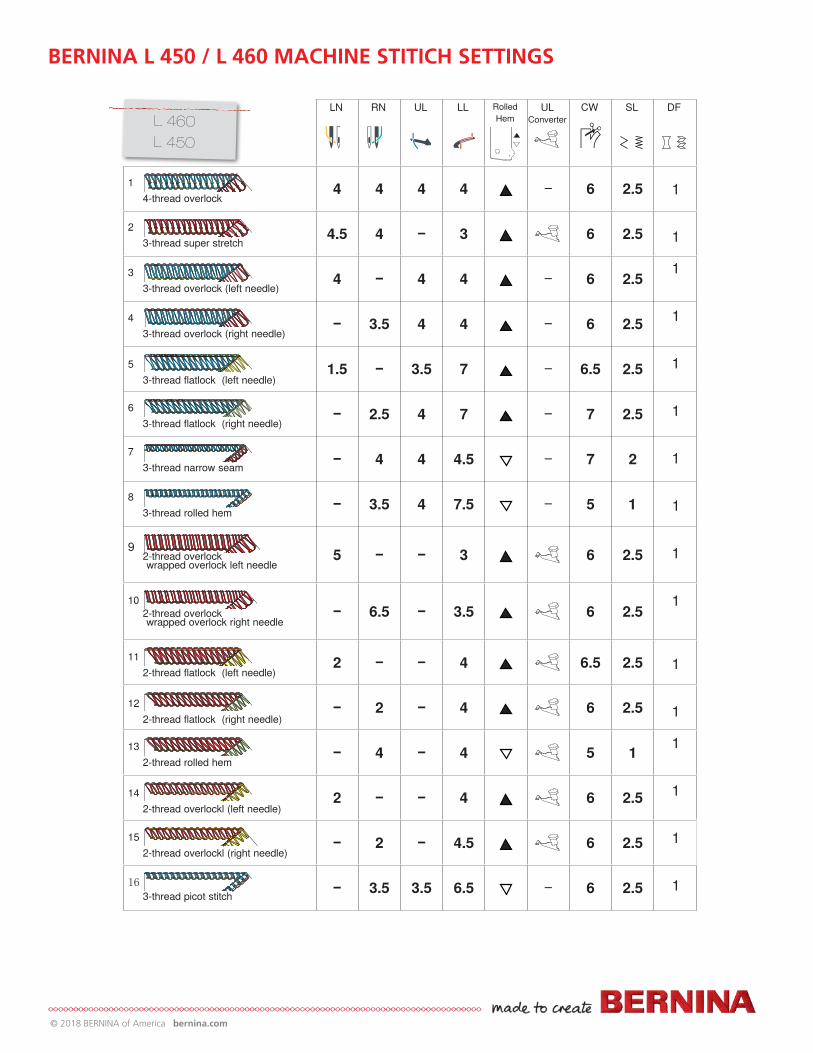
BERNINA L 450 / L 460 MACHINE STITICH SETTINGS
LN RN UL LL Rolled Hem
UL Converter
CW SL DF
1 4-thread overlock
4 4 4 4 - 6 2.5 1
2 3-thread super stretch
4.5 4 - 3 6 2.5 1
3 3-thread overlock (left needle)
4 - 4 4 - 6 2.5 1
4 3-thread overlock (right needle)
- 3.5 4 4 - 6 2.5 1
5 3-thread flatlock (left needle)
1.5 - 3.5 7 - 6.5 2.5 1
6 3-thread flatlock (right needle)
- 2.5 4 7 - 7 2.5 1
7 3-thread narrow seam - 4 4 4.5 - 7 2 1
8 3-thread rolled hem - 3.5 4 7.5 - 5 1 1
9 2-thread overlock wrapped overlock left needle
5 - - 3 6 2.5 1
10 2-thread overlock
wrapped overlock right needle- 6.5 - 3.5 6 2.5
1
11 2-thread flatlock (left needle)
2 - - 4 6.5 2.5 1
12 2-thread flatlock (right needle)
- 2 - 4 6 2.5 1
13 2-thread rolled hem
- 4 - 4 5 1 1
14 2-thread overlockl (left needle)
2 - - 4 6 2.5 1
15 2-thread overlockl (right needle)
- 2 - 4.5 6 2.5 1
16 3-thread picot stitch - 3.5 3.5 6.5 - 6 2.5 1
L 450
L 460