one key recovery - icp deutschland
TRANSCRIPT

One Key Recovery
Page 1
Appendix
A
A One Key Recovery

One Key Recovery
Page 2
A.1 One Key Recovery Introduction
The IEI one key recovery is an easy-to-use front end for the Norton Ghost system backup
and recovery tool. The one key recovery provides quick and easy shortcuts for creating a
backup and reverting to that backup or for reverting to the factory default settings.
The IEI One Key Recovery tool menu is shown below.
Figure A-1: IEI One Key Recovery Tool Menu
Prior to using the IEI One Key Recovery tool (as shown in Figure A-1) to backup or
restore Windows system, five setup procedures are required.
1. Hardware and BIOS setup (see Section A.2.1)
2. Create partitions (see Section A.2.2)
3. Install operating system, drivers and system applications (see Section A.2.3)
4. Build-up recovery partition (see Section A.2.4)
5. Create factory default image (see Section A.2.5)
After completing the five initial setup procedures as described above, users can access
the recovery tool by pressing <F3> while booting up the system. The detailed information
of each function is described in Section A.4.
NOTE:
The initial setup procedures for Linux system are described in
Section A.3.
One Key Recovery
Page 3
A.1.1 System Requirement
NOTE:
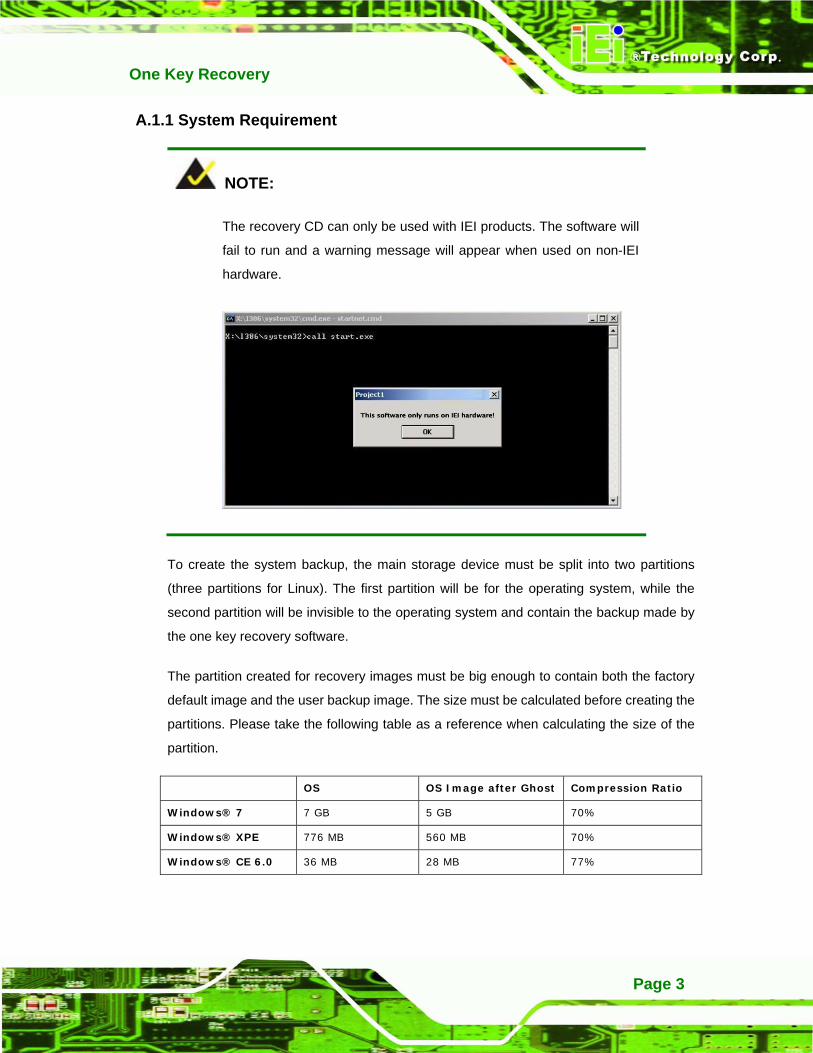
The recovery CD can only be used with IEI products. The software will
fail to run and a warning message will appear when used on non-IEI
hardware.
To create the system backup, the main storage device must be split into two partitions
(three partitions for Linux). The first partition will be for the operating system, while the
second partition will be invisible to the operating system and contain the backup made by
the one key recovery software.
The partition created for recovery images must be big enough to contain both the factory
default image and the user backup image. The size must be calculated before creating the
partitions. Please take the following table as a reference when calculating the size of the
partition.
OS OS Image after Ghost Compression Ratio
Windows® 7 7 GB 5 GB 70%
Windows® XPE 776 MB 560 MB 70%
Windows® CE 6.0 36 MB 28 MB 77%
One Key Recovery
Page 4
NOTE:
Specialized tools are required to change the partition size if the
operating system is already installed.
A.1.2 Supported Operating System
The recovery CD is compatible with both Microsoft Windows and Linux operating system
(OS). The supported OS versions are listed below.
Microsoft Windows
o Windows XP (Service Pack 2 or 3 required)
o Windows Vista
o Windows 7
o Windows CE 5.0
o Windows CE 6.0
o Windows XP Embedded
Linux
o Fedora Core 12 (Constantine)
o Fedora Core 11 (Leonidas)
o Fedora Core 10 (Cambridge)
o Fedora Core 8 (Werewolf)
o Fedora Core 7 (Moonshine)
o RedHat RHEL-5.4
o RedHat 9 (Ghirke)
o Ubuntu 8.10 (Intrepid)
o Ubuntu 7.10 (Gutsy)
o Ubuntu 6.10 (Edgy)
o Debian 5.0 (Lenny)
o Debian 4.0 (Etch)
o SuSe 11.2
o SuSe 10.3

One Key Recovery
Page 5
NOTE:
Installing unsupported OS versions may cause the recovery tool to fail.
A.2 Setup Procedure for Windows
Prior to using the recovery tool to backup or restore Windows system, a few setup
procedures are required.
Step 1: Hardware and BIOS setup (see Section A.2.1)
Step 2: Create partitions (see Section A.2.2)
Step 3: Install operating system, drivers and system applications (see Section A.2.3)
Step 4: Build-up recovery partition (see Section A.2.4)
Step 5: Create factory default image (see Section A.2.5) Step 0:
The detailed descriptions are described in the following sections.
NOTE:
The setup procedures described below are for Microsoft Windows
operating system users. For Linux system, most setup procedures are
the same with Microsoft Windows except for several steps which is
described in Section A.3.
A.2.1 Hardware and BIOS Setup
Step 1: Make sure the system is powered off and unplugged.
Step 2: Install a hard drive or SSD in the system. An unformatted and unpartitioned disk
is recommended.
Step 3: Connect an optical disk drive to the system and insert the recovery CD.
One Key Recovery
Page 6
Step 4: Turn on the system.
Step 5: Press the <DELETE> key as soon as the system is turned on to enter the BIOS.
Step 6: Select the connected optical disk drive as the 1st boot device. (Boot Boot
Device Priority 1st Boot Device).
Step 7: Save changes and restart the computer. Continue to the next section for
instructions on partitioning the internal storage. Step 0:
A.2.2 Create Partitions
To create the system backup, the main storage device must be split into two partitions
(three partitions for Linux). The first partition will be for the operating system, while the
second partition will be invisible to the operating system and contain the backup made by
the one key recovery software.
Step 1: Put the recovery CD in the optical drive of the system.
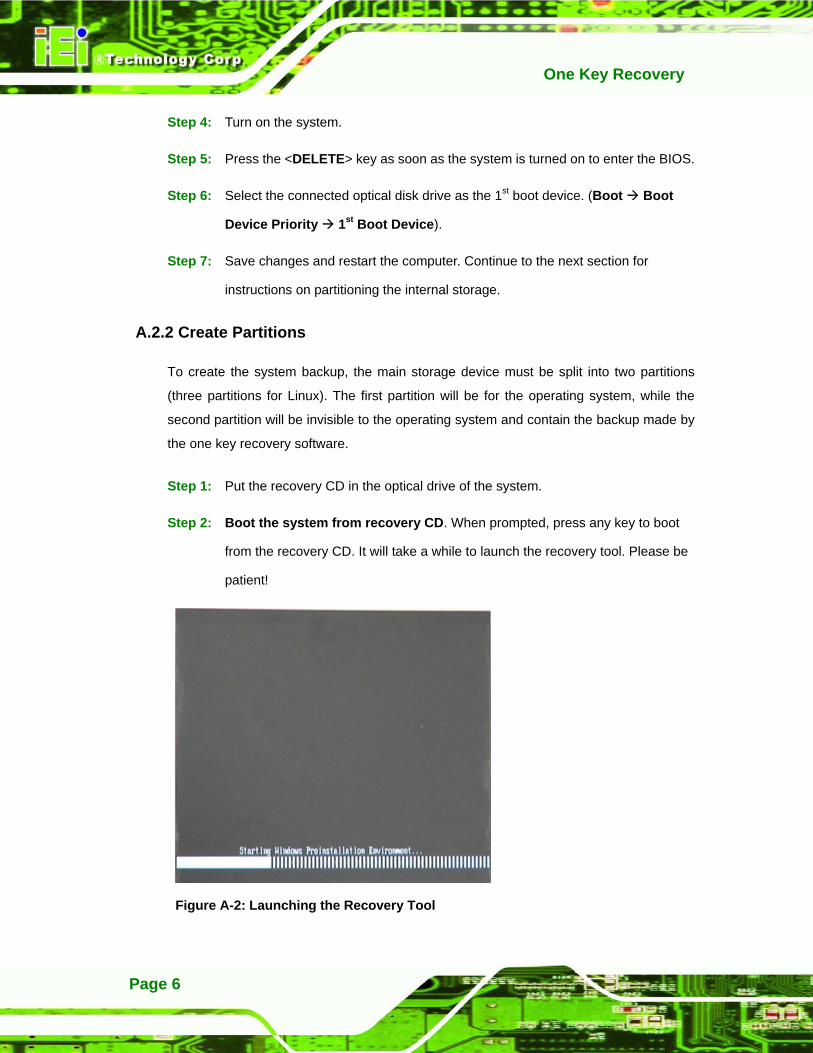
Step 2: Boot the system from recovery CD. When prompted, press any key to boot
from the recovery CD. It will take a while to launch the recovery tool. Please be
patient!
Figure A-2: Launching the Recovery Tool

One Key Recovery
Page 7
Step 3: The recovery tool setup menu is shown as below.
Figure A-3: Recovery Tool Setup Menu
Step 4: Press <5> then <Enter>.
Figure A-4: Command Mode
Step 5: The command prompt window appears. Type the following commands (marked
in red) to create two partitions. One is for the OS installation; the other is for
saving recovery files and images which will be an invisible partition.
(Press <Enter> after entering each line below)
system32>diskpart
DISKPART>list vol
DISKPART>sel disk 0
DISKPART>create part pri size= ___
DISKPART>assign letter=N
DISKPART>create part pri size= ___
DISKPART>assign letter=F
DISKPART>exit
system32>format N: /fs:ntfs /q /y

One Key Recovery
Page 8
system32>format F: /fs:ntfs /q /v:Recovery /y
system32>exit
Figure A-5: Partition Creation Commands

One Key Recovery
Page 9
NOTE:
Use the following commands to check if the partitions were created
successfully.
Step 6: Press any key to exit the recovery tool and automatically reboot the system.
Please continue to the following procedure: Build-up Recovery Partition.Step 0:
A.2.3 Install Operating System, Drivers and Applications
Install the operating system onto the unlabelled partition. The partition labeled as
"Recovery" is for use by the system recovery tool and should not be used for installing the
operating system or any applications.
NOTE:
The operating system installation program may offer to reformat the
chosen partition. DO NOT format the partition again. The partition has
already been formatted and is ready for installing the new operating
system.
To install the operating system, insert the operating system installation CD into the optical
drive. Restart the computer and follow the installation instructions.
One Key Recovery
Page 10
A.2.4 Build-up Recovery Partition
Step 1: Put the recover CD in the optical drive.
Step 2: Start the system.
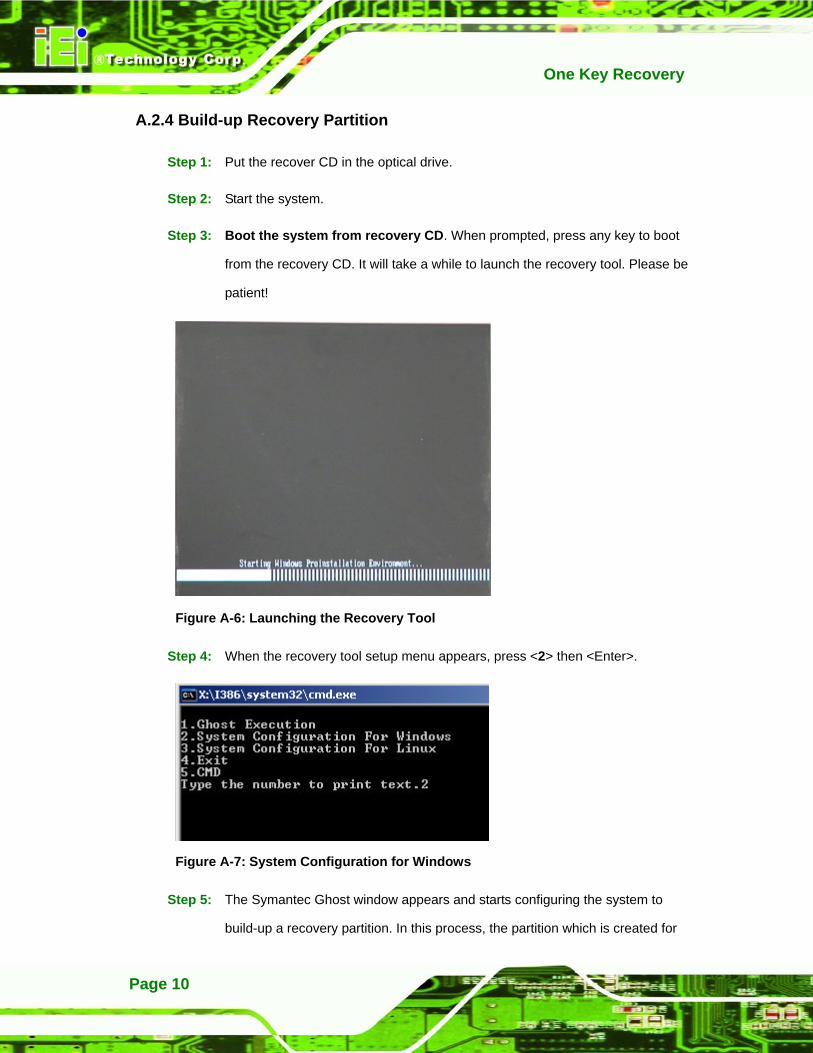
Step 3: Boot the system from recovery CD. When prompted, press any key to boot
from the recovery CD. It will take a while to launch the recovery tool. Please be
patient!
Figure A-6: Launching the Recovery Tool
Step 4: When the recovery tool setup menu appears, press <2> then <Enter>.
Figure A-7: System Configuration for Windows
Step 5: The Symantec Ghost window appears and starts configuring the system to
build-up a recovery partition. In this process, the partition which is created for
One Key Recovery
Page 11
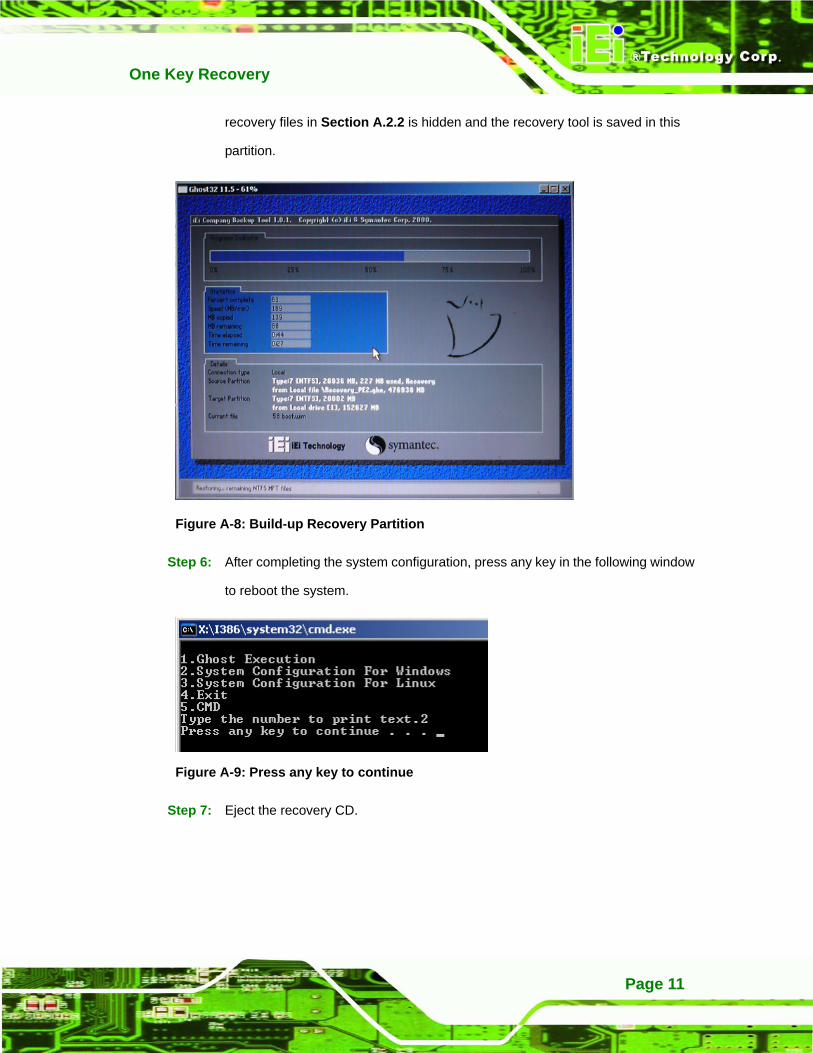
recovery files in Section A.2.2 is hidden and the recovery tool is saved in this
partition.
Figure A-8: Build-up Recovery Partition
Step 6: After completing the system configuration, press any key in the following window
to reboot the system.
Figure A-9: Press any key to continue
Step 7: Eject the recovery CD. Step 0:

One Key Recovery
Page 12
A.2.5 Create Factory Default Image
NOTE:
Before creating the factory default image, please configure the system
to a factory default environment, including driver and application
installations.
To create a factory default image, please follow the steps below.
Step 1: Turn on the system. When the following screen displays (Figure A-10), press
the <F3> key to access the recovery tool. The message will display for 10
seconds, please press F3 before the system boots into the operating system.
Figure A-10: Press F3 to Boot into Recovery Mode
Step 2: The recovery tool menu appears. Type <4> and press <Enter>. (Figure A-11)
Figure A-11: Recovery Tool Menu
Step 3: The About Symantec Ghost window appears. Click OK button to continue.

One Key Recovery
Page 13
Figure A-12: About Symantec Ghost Window
Step 4: Use mouse to navigate to the option shown below (Figure A-13).
Figure A-13: Symantec Ghost Path
Step 5: Select the local source drive as shown in Figure A-14. Then click OK.
One Key Recovery
Page 14
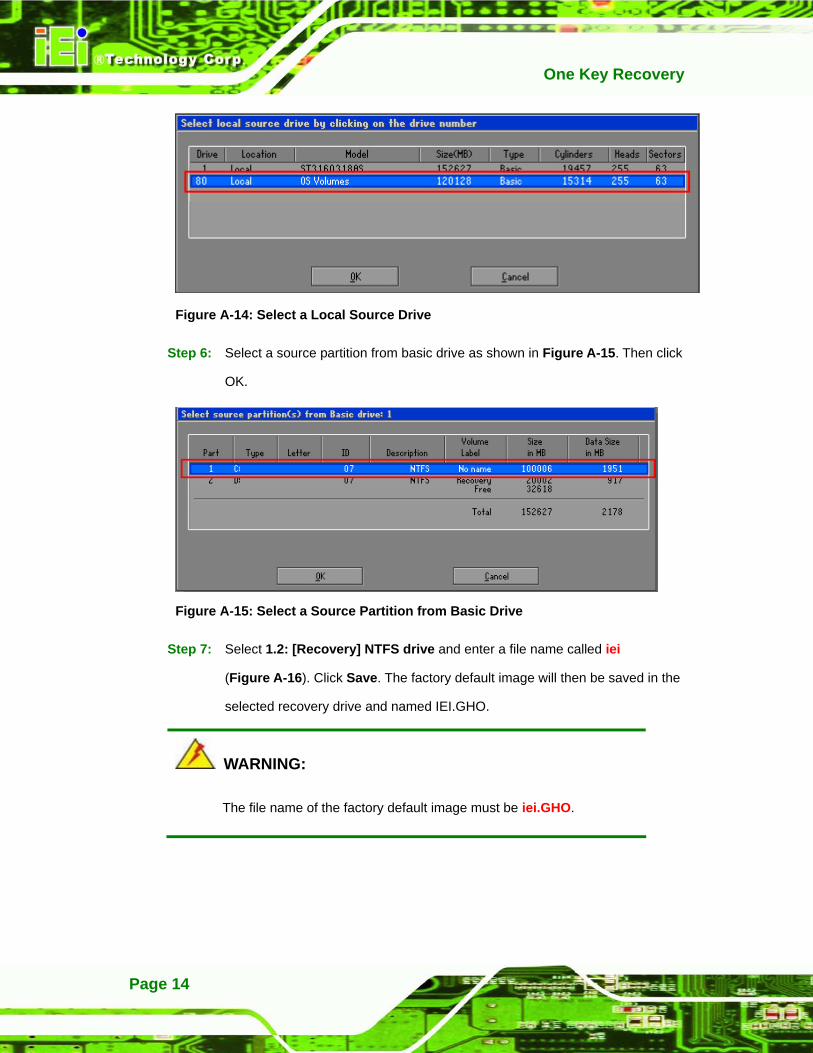
Figure A-14: Select a Local Source Drive
Step 6: Select a source partition from basic drive as shown in Figure A-15. Then click
OK.
Figure A-15: Select a Source Partition from Basic Drive
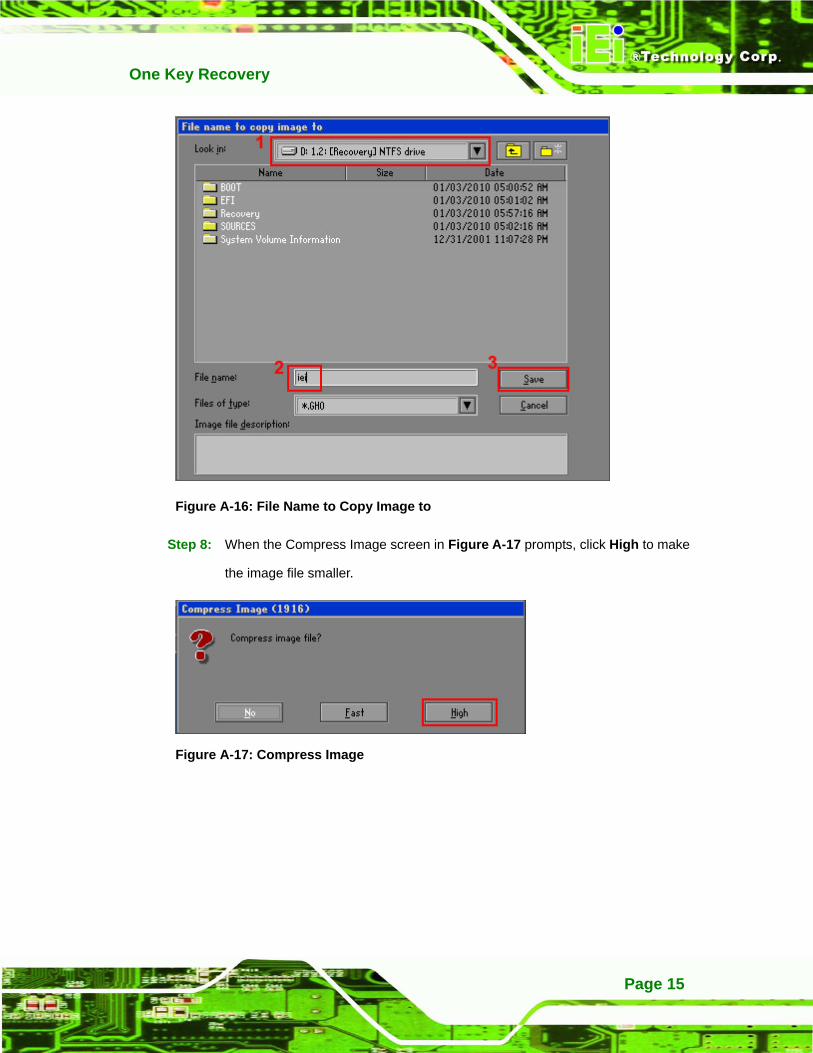
Step 7: Select 1.2: [Recovery] NTFS drive and enter a file name called iei
(Figure A-16). Click Save. The factory default image will then be saved in the
selected recovery drive and named IEI.GHO.
WARNING:
The file name of the factory default image must be iei.GHO.
One Key Recovery
Page 15
Figure A-16: File Name to Copy Image to
Step 8: When the Compress Image screen in Figure A-17 prompts, click High to make
the image file smaller.
Figure A-17: Compress Image

One Key Recovery
Page 16
Step 9: The Proceed with partition image creation window appears, click Yes to
continue.
Figure A-18: Image Creation Confirmation
Step 10: The Symantec Ghost starts to create the factory default image (Figure A-19).
Figure A-19: Image Creation Complete
Step 11: When the image creation completes, a screen prompts as shown in Figure A-20.
Click Continue and close the Ghost window to exit the program.
Figure A-20: Image Creation Complete
One Key Recovery
Page 17
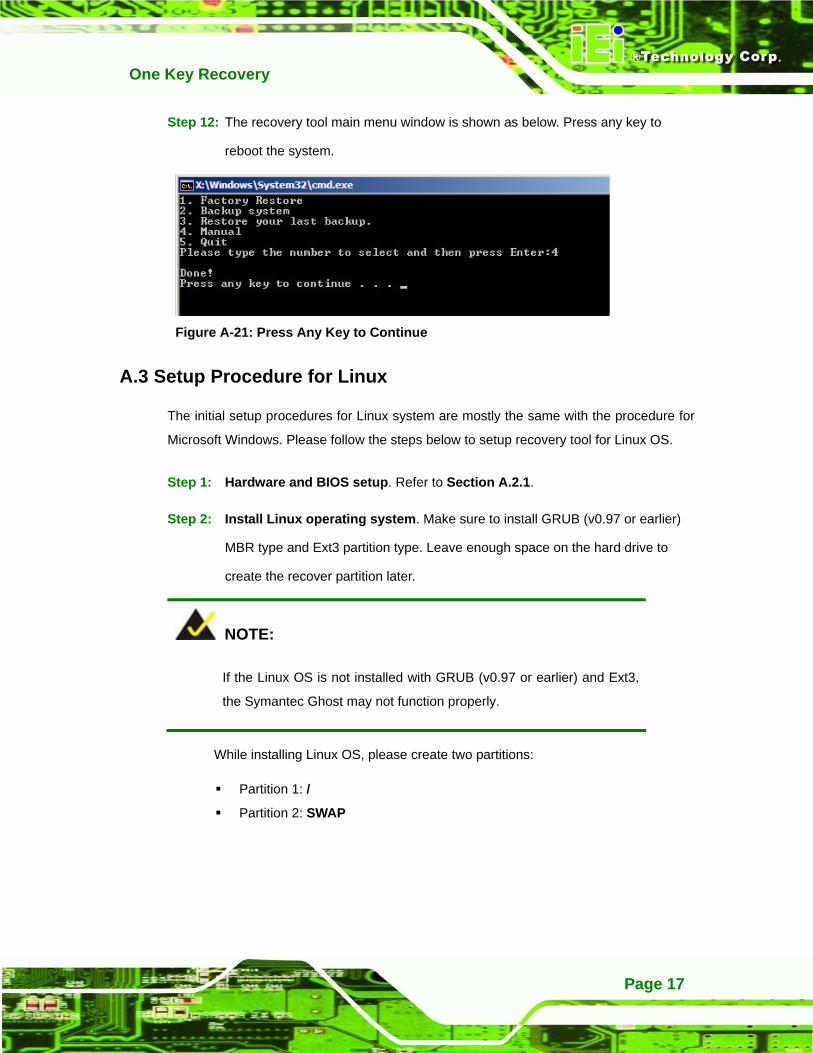
Step 12: The recovery tool main menu window is shown as below. Press any key to
reboot the system. Step 0:
Figure A-21: Press Any Key to Continue
A.3 Setup Procedure for Linux
The initial setup procedures for Linux system are mostly the same with the procedure for
Microsoft Windows. Please follow the steps below to setup recovery tool for Linux OS.
Step 1: Hardware and BIOS setup. Refer to Section A.2.1.
Step 2: Install Linux operating system. Make sure to install GRUB (v0.97 or earlier)
MBR type and Ext3 partition type. Leave enough space on the hard drive to
create the recover partition later.
NOTE:
If the Linux OS is not installed with GRUB (v0.97 or earlier) and Ext3,
the Symantec Ghost may not function properly.
While installing Linux OS, please create two partitions:
Partition 1: /
Partition 2: SWAP

One Key Recovery
Page 18
NOTE:
Please reserve enough space for partition 3 for saving recovery
images.
Figure A-22: Partitions for Linux
Step 3: Create a recovery partition. Insert the recovery CD into the optical disk drive.
Follow Step 1 ~ Step 3 described in Section A.2.2. Then type the following
commands (marked in red) to create a partition for recovery images.
system32>diskpart
DISKPART>list vol
DISKPART>sel disk 0
DISKPART>create part pri size= ___
DISKPART>assign letter=N
DISKPART>exit
system32>format N: /fs:ntfs /q /v:Recovery /y
system32>exit
Step 4: Build-up recovery partition. Press any key to boot from the recovery CD. It will
take a while to launch the recovery tool. Please be patient. When the recovery
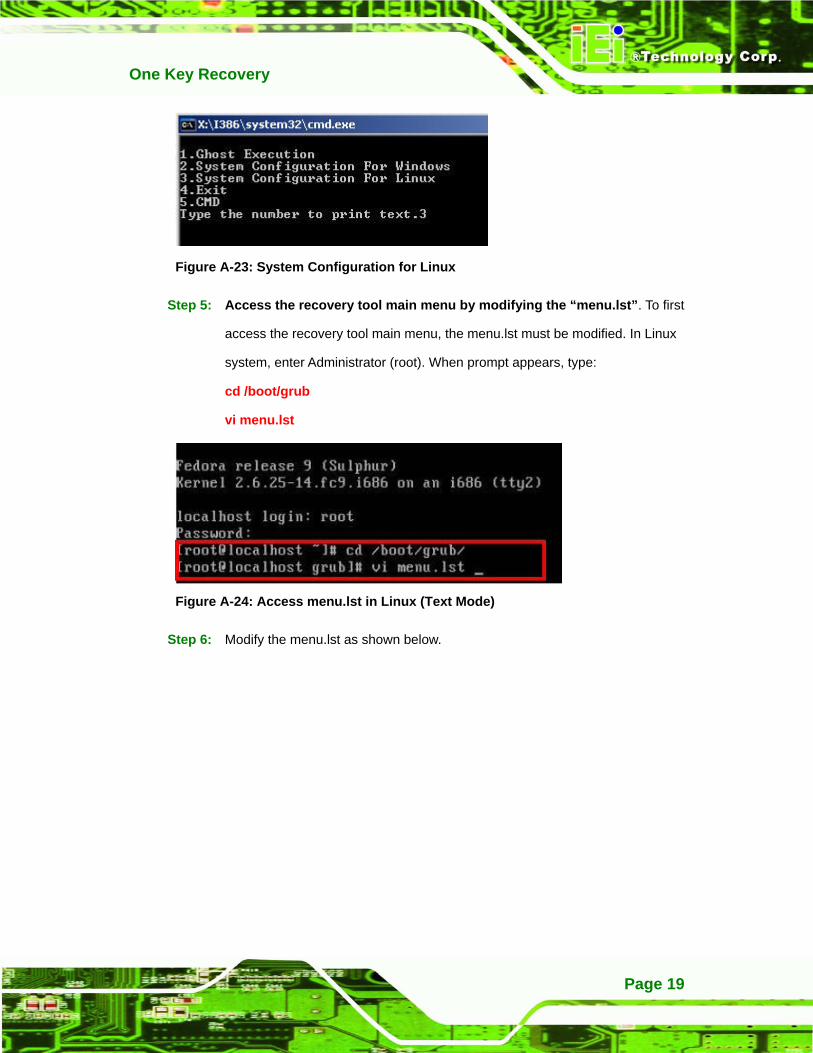
tool setup menu appears, type <3> and press <Enter> (Figure A-23). The
Symantec Ghost window appears and starts configuring the system to build-up a
recovery partition. After completing the system configuration, press any key to
reboot the system. Eject the recovery CD.
One Key Recovery
Page 19
Figure A-23: System Configuration for Linux
Step 5: Access the recovery tool main menu by modifying the “menu.lst”. To first
access the recovery tool main menu, the menu.lst must be modified. In Linux
system, enter Administrator (root). When prompt appears, type:
cd /boot/grub
vi menu.lst
Figure A-24: Access menu.lst in Linux (Text Mode)
Step 6: Modify the menu.lst as shown below.

One Key Recovery
Page 20
Step 7: The recovery tool menu appears. (Figure A-25)
Figure A-25: Recovery Tool Menu
Step 8: Create a factory default image. Follow Step 2 ~ Step 12 described in Section
A.2.5 to create a factory default image. Step 0:
A.4 Recovery Tool Functions
After completing the initial setup procedures as described above, users can access the
recovery tool by pressing <F3> while booting up the system. The main menu of the
recovery tool is shown below.

One Key Recovery
Page 21
Figure A-26: Recovery Tool Main Menu
The recovery tool has several functions including:
6. Factory Restore: Restore the factory default image (iei.GHO) created in
Section A.2.5.
7. Backup system: Create a system backup image (iei_user.GHO) which will be
saved in the hidden partition.
8. Restore your last backup: Restore the last system backup image
9. Manual: Enter the Symantec Ghost window to configure manually.
10. Quit: Exit the recovery tool and restart the system.
WARNING:
Please do not turn off the system power during the process of system
recovery or backup.
WARNING:
All data in the system will be deleted during the system recovery.
Please backup the system files before restoring the system (either
Factory Restore or Restore Backup).
One Key Recovery
Page 22
A.4.1 Factory Restore
To restore the factory default image, please follow the steps below.
Step 1: Type <1> and press <Enter> in the main menu.
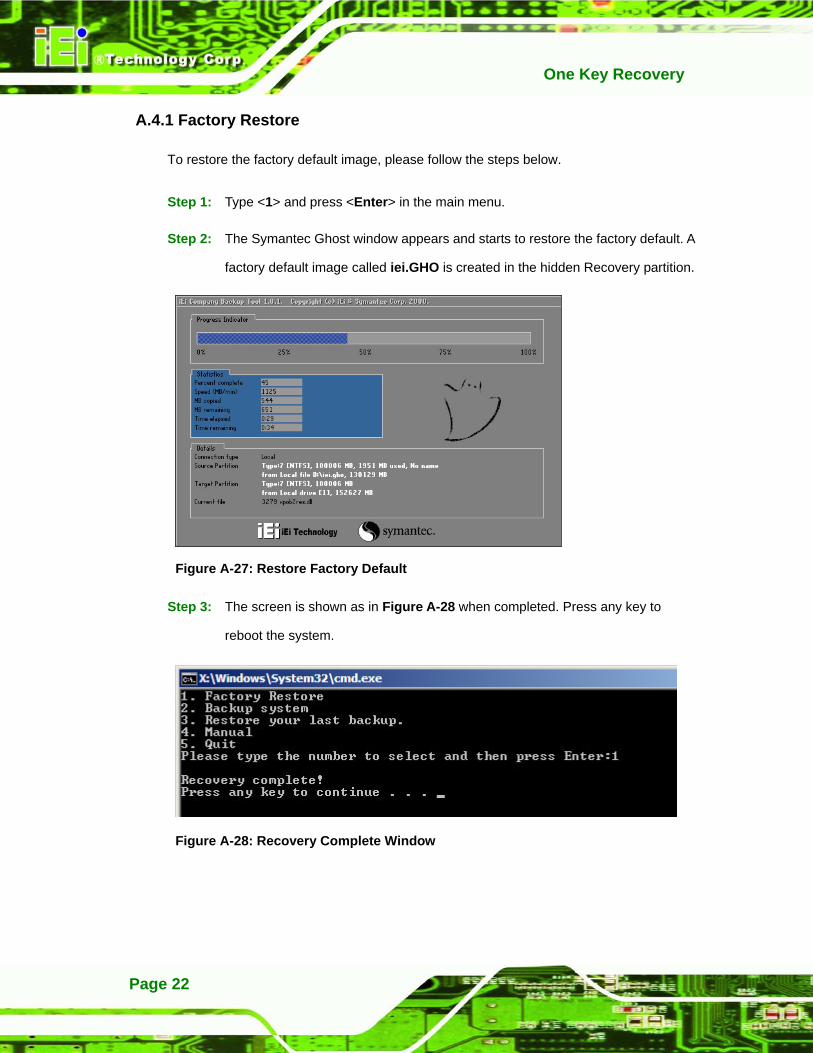
Step 2: The Symantec Ghost window appears and starts to restore the factory default. A
factory default image called iei.GHO is created in the hidden Recovery partition.
Figure A-27: Restore Factory Default
Step 3: The screen is shown as in Figure A-28 when completed. Press any key to
reboot the system. Step 0:
Figure A-28: Recovery Complete Window
One Key Recovery
Page 23
A.4.2 Backup System
To backup the system, please follow the steps below.
Step 1: Type <2> and press <Enter> in the main menu.
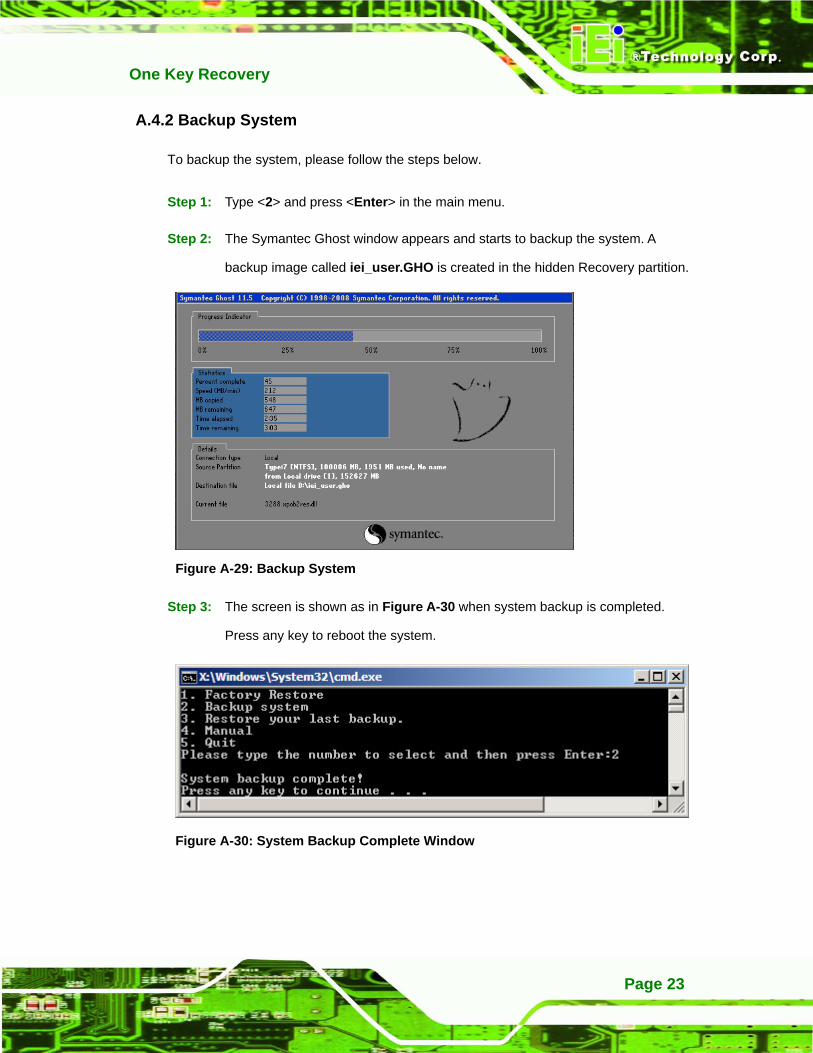
Step 2: The Symantec Ghost window appears and starts to backup the system. A
backup image called iei_user.GHO is created in the hidden Recovery partition.
Figure A-29: Backup System
Step 3: The screen is shown as in Figure A-30 when system backup is completed.
Press any key to reboot the system. Step 0:
Figure A-30: System Backup Complete Window
One Key Recovery
Page 24
A.4.3 Restore Your Last Backup
To restore the last system backup, please follow the steps below.
Step 1: Type <3> and press <Enter> in the main menu.
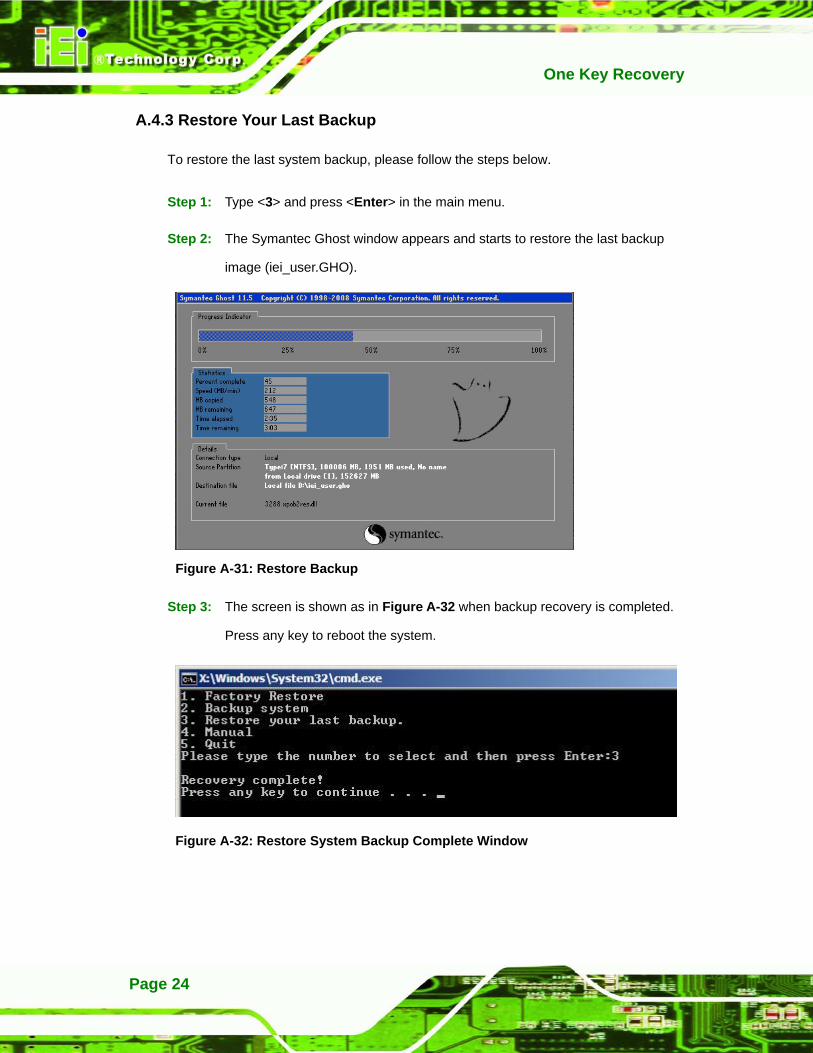
Step 2: The Symantec Ghost window appears and starts to restore the last backup
image (iei_user.GHO).
Figure A-31: Restore Backup
Step 3: The screen is shown as in Figure A-32 when backup recovery is completed.
Press any key to reboot the system. Step 0:
Figure A-32: Restore System Backup Complete Window

One Key Recovery
Page 25
A.4.4 Manual
To restore the last system backup, please follow the steps below.
Step 1: Type <4> and press <Enter> in the main menu.
Step 2: The Symantec Ghost window appears. Use the Ghost program to backup or
recover the system manually.
Figure A-33: Symantec Ghost Window
Step 3: When backup or recovery is completed, press any key to reboot the system.
Step 0:
One Key Recovery
Page 26
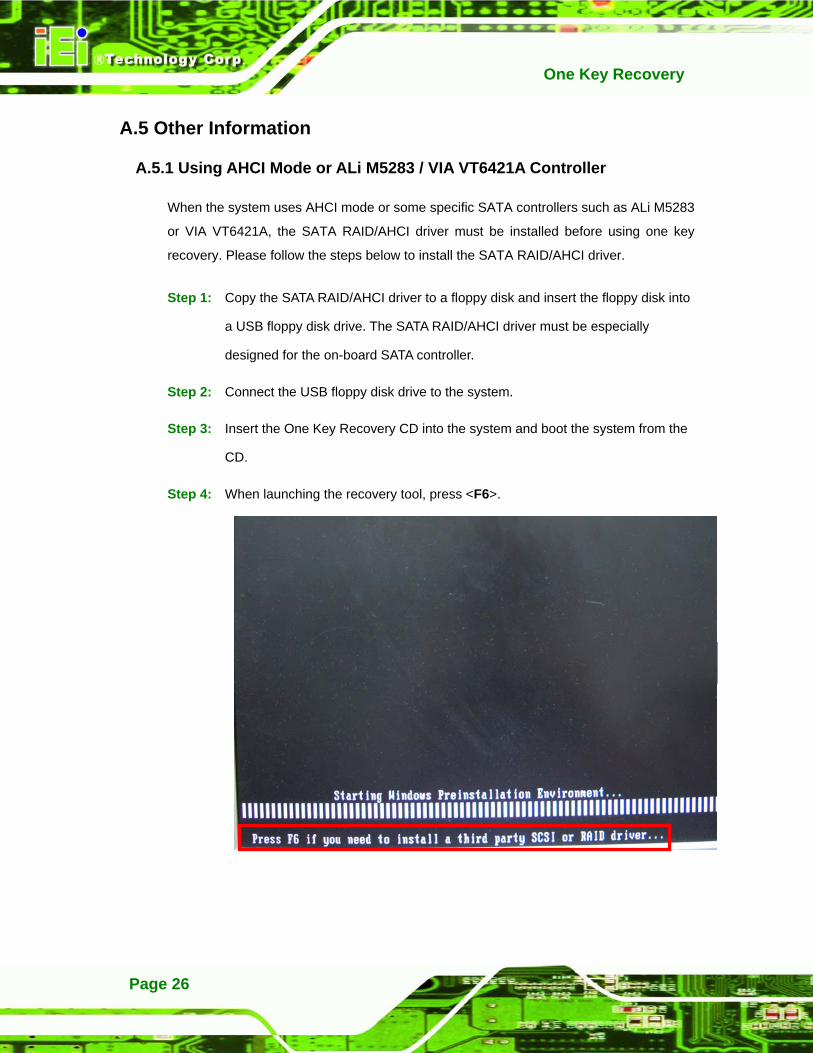
A.5 Other Information
A.5.1 Using AHCI Mode or ALi M5283 / VIA VT6421A Controller
When the system uses AHCI mode or some specific SATA controllers such as ALi M5283
or VIA VT6421A, the SATA RAID/AHCI driver must be installed before using one key
recovery. Please follow the steps below to install the SATA RAID/AHCI driver.
Step 1: Copy the SATA RAID/AHCI driver to a floppy disk and insert the floppy disk into
a USB floppy disk drive. The SATA RAID/AHCI driver must be especially
designed for the on-board SATA controller.
Step 2: Connect the USB floppy disk drive to the system.
Step 3: Insert the One Key Recovery CD into the system and boot the system from the
CD.
Step 4: When launching the recovery tool, press <F6>.
One Key Recovery
Page 27
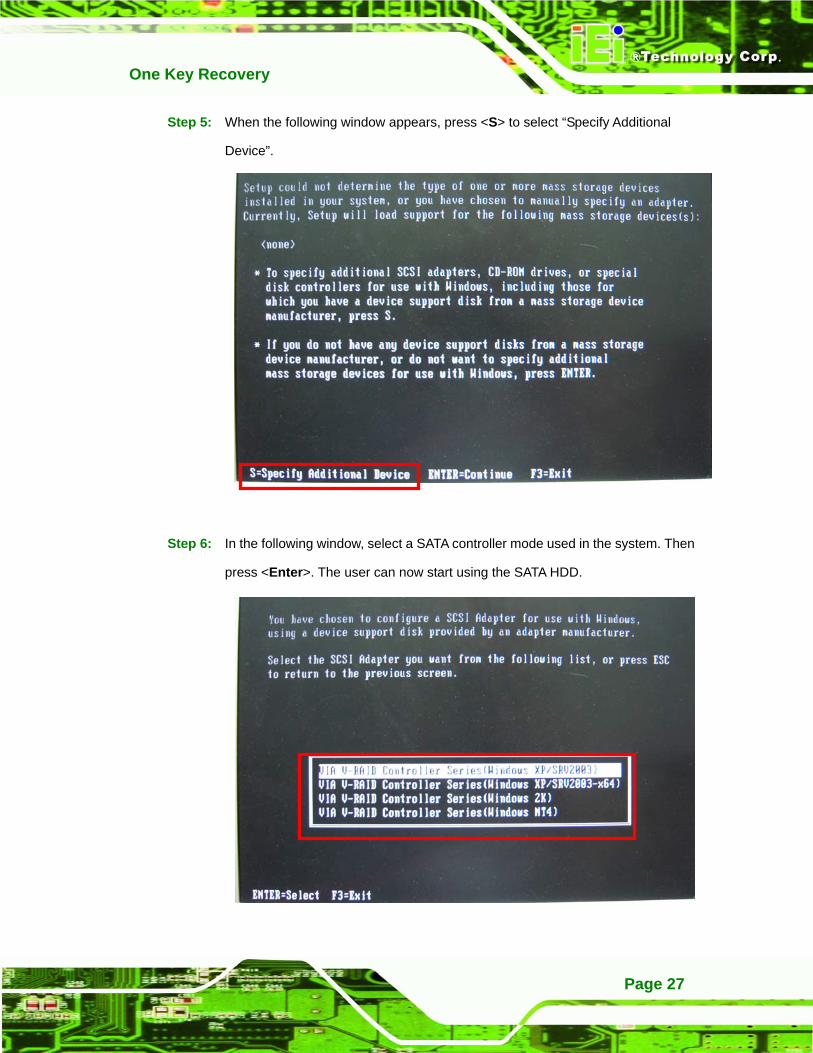
Step 5: When the following window appears, press <S> to select “Specify Additional
Device”.
Step 6: In the following window, select a SATA controller mode used in the system. Then
press <Enter>. The user can now start using the SATA HDD.

One Key Recovery
Page 28
Step 7: After pressing <Enter>, the system will get into the recovery tool setup menu.
Continue to follow the setup procedure from Step 4 in Section A.2.2 Create
Partitions to finish the whole setup process. Step 0:
A.5.2 System Memory Requirement
To be able to access the recovery tool by pressing <F3> while booting up the system,
please make sure to have enough system memory. The minimum memory requirement is
listed below.
Using Award BIOS: 128 MB system memory
Using AMI BIOS: 512 MB system memory.