jd edwards enterpriseone tools ibm ... - oracle help center
TRANSCRIPT
JD Edwards EnterpriseOne ToolsIBM WebSphere Portal for IBM i for Power Systems Guide
Release 9.1
E24295-01
December 2011

JD Edwards EnterpriseOne Tools IBM WebSphere Portal for IBM i for Power Systems Guide, Release 9.1
E24295-01
Copyright © 2011, Oracle and/or its affiliates. All rights reserved.
This software and related documentation are provided under a license agreement containing restrictions on use and disclosure and are protected by intellectual property laws. Except as expressly permitted in your license agreement or allowed by law, you may not use, copy, reproduce, translate, broadcast, modify, license, transmit, distribute, exhibit, perform, publish, or display any part, in any form, or by any means. Reverse engineering, disassembly, or decompilation of this software, unless required by law for interoperability, is prohibited.
The information contained herein is subject to change without notice and is not warranted to be error-free. If you find any errors, please report them to us in writing.
If this is software or related documentation that is delivered to the U.S. Government or anyone licensing it on behalf of the U.S. Government, the following notice is applicable:
U.S. GOVERNMENT RIGHTS Programs, software, databases, and related documentation and technical data delivered to U.S. Government customers are "commercial computer software" or "commercial technical data" pursuant to the applicable Federal Acquisition Regulation and agency-specific supplemental regulations. As such, the use, duplication, disclosure, modification, and adaptation shall be subject to the restrictions and license terms set forth in the applicable Government contract, and, to the extent applicable by the terms of the Government contract, the additional rights set forth in FAR 52.227-19, Commercial Computer Software License (December 2007). Oracle America, Inc., 500 Oracle Parkway, Redwood City, CA 94065.
This software or hardware is developed for general use in a variety of information management applications. It is not developed or intended for use in any inherently dangerous applications, including applications that may create a risk of personal injury. If you use this software or hardware in dangerous applications, then you shall be responsible to take all appropriate fail-safe, backup, redundancy, and other measures to ensure its safe use. Oracle Corporation and its affiliates disclaim any liability for any damages caused by use of this software or hardware in dangerous applications.
Oracle and Java are registered trademarks of Oracle and/or its affiliates. Other names may be trademarks of their respective owners.
Intel and Intel Xeon are trademarks or registered trademarks of Intel Corporation. All SPARC trademarks are used under license and are trademarks or registered trademarks of SPARC International, Inc. AMD, Opteron, the AMD logo, and the AMD Opteron logo are trademarks or registered trademarks of Advanced Micro Devices. UNIX is a registered trademark of The Open Group.
This software or hardware and documentation may provide access to or information on content, products, and services from third parties. Oracle Corporation and its affiliates are not responsible for and expressly disclaim all warranties of any kind with respect to third-party content, products, and services. Oracle Corporation and its affiliates will not be responsible for any loss, costs, or damages incurred due to your access to or use of third-party content, products, or services.
iii
Contents
Preface ................................................................................................................................................................. v
Audience....................................................................................................................................................... vDocumentation Accessibility ..................................................................................................................... vRelated Documents ..................................................................................................................................... vConventions ................................................................................................................................................. vi
1 Overview
1.1 Before You Begin......................................................................................................................... 1-11.2 Understanding the Installation Methodology ........................................................................ 1-21.3 Preparing the IBM i Server for IBM WebSphere Portal......................................................... 1-2
2 Installing the WebSphere Portal Server
2.1 Prerequisites ................................................................................................................................ 2-12.1.1 Minimum Technical Requirements................................................................................... 2-12.1.2 Installing WebSphere Application Server 7.0.................................................................. 2-12.1.3 References ............................................................................................................................. 2-12.2 Retrieving WebSphere Portal 7.0 Software from Oracle JD Edwards Update Center...... 2-22.3 Installing the Portal Server ........................................................................................................ 2-3
3 Database Configuration for WebSphere Portal
4 Preparing DB2 for IBM i
4.1 Prerequisites ................................................................................................................................ 4-14.2 Verifying Database Connections .............................................................................................. 4-94.3 Configuring WebSphere Portal to Use a User Registry on IBM i ..................................... 4-104.4 Configuring a Standalone LDAP User Registry on IBM i.................................................. 4-114.4.1 Standalone LDAP without SSL....................................................................................... 4-124.4.2 Standalone LDAP over SSL............................................................................................. 4-154.5 Configuring an External HTTP Server for WebSphere Portal v7.0 (IBM i HTTP Server only)
4-264.5.1 Creating a Webserver Definition.................................................................................... 4-264.5.2 Adding a Virtual Host Definition................................................................................... 4-354.5.3 Generate the Web Server Plug-in for wp_profile......................................................... 4-374.5.4 Installing the JD Edwards Collaborative Portal ........................................................... 4-38
iv
A Start and Stop Portal Servers
A.1 Overview..................................................................................................................................... A-1A.2 Starting and Stopping the WebSphere Portal Administration Server (server1)............... A-1A.2.1 Starting server1 (Portal Administration Server) ............................................................ A-2A.2.2 Stopping server1 (Portal Administration Server) .......................................................... A-2A.3 Starting and Stopping the WebSphere Portal Server............................................................ A-2A.3.1 Starting the WebSphere Portal Server ............................................................................. A-2A.3.2 Stopping WebSphere Portal Server.................................................................................. A-2
B Example of a PortalUsers.ldif File
v
Preface
Welcome to the JD Edwards EnterpriseOne Tools IBM Websphere Portal for IBM i Guide.
AudienceThis guide is intended for system administrators and technical consultants who are responsible for configuring portal content.
This guide assumes you have a working knowledge of the following:
• Setting up and configuring portals.
• The principles and customary practices of your business area.
• Computer desktop application usage and terminology.
Documentation AccessibilityFor information about Oracle's commitment to accessibility, visit the Oracle Accessibility Program website at http://www.oracle.com/pls/topic/lookup?ctx=acc&id=docacc.
Access to Oracle SupportOracle customers have access to electronic support through My Oracle Support. For information, visit http://www.oracle.com/pls/topic/lookup?ctx=acc&id=info or visit http://www.oracle.com/pls/topic/lookup?ctx=acc&id=trs if you are hearing impaired.
Related DocumentsYou can access related documents from the JD Edwards EnterpriseOne Release Documentation Overview pages on My Oracle Support. Access the main documentation overview page by searching for the document ID, which is 876932.1, or by using this link:
https://support.oracle.com/CSP/main/article?cmd=show&type=NOT&id=876932.1
To navigate to this page from the My Oracle Support home page, click the Knowledge tab, and then click the Tools and Training menu, JD Edwards EnterpriseOne, Welcome Center, Release Information Overview.
This guide contains references to server configuration settings that JD Edwards EnterpriseOne stores in configuration files (such as jde.ini, jas.ini, jdbj.ini,
vi
jdelog.properties, and so on). Beginning with the JD Edwards EnterpriseOne Tools Release 8.97, it is highly recommended that you only access and manage these settings for the supported server types using the Server Manager program. See the Server Manager Guide.
ConventionsThe following text conventions are used in this document:
Convention Meaning
Bold Indicates field values.
Italics Indicates emphasis and JD Edwards EnterpriseOne or other book-length publication titles.
Monospace Indicates a JD Edwards EnterpriseOne program, other code example, or URL.
1
Overview 1-1
1Overview
This chapter contains the following topics:
■ Section 1.1, "Before You Begin"
■ Section 1.2, "Understanding the Installation Methodology"
■ Section 1.3, "Preparing the IBM i Server for IBM WebSphere Portal"
1.1 Before You BeginThis document describes the process of installing and configuring WebSphere Portal Server v7.0 on a single IBM i machine. This document steps the installer through the installation, upgrade, and configuration of the WebSphere Portal Server environment and its related components. The document includes sections on databases transfer, security, and LDAP.
Starting with WebSphere Portal v7.0, the initial configuration is stored in the embedded Apache Derby database. You need to transfer this database to the native IBM i database.
Before you begin:
■ The IBM i operating system must be on the i7 or V6R1 level.
■ Refer to the JD Edwards EnterpriseOne Minimum Technical Requirements for EnterpriseOne Collaborative Portal, and install an updated group PTF, if necessary. See Minimum Technical Requirements in this guide for information on how to access the Minimum Technical Requirements document for Collaborative Portal v7.0.
■ Install a Windows workstation on the same LAN Segment as your IBM i machine.
■ During this installation process, you will IPL your IBM i machine to activate the Group PTFs. Check with your system administrator before you begin. Use the wrkptfgrp command to verify all PTF levels before installing any software. Verify you have all require PTFs media.
■ During the installation, you will be prompted for the LDAP Administrator's password. This is the IBM Directory Server (LDAP) Administrator account, not the QSECOFR account. Obtain the password from your system administrator.
■ Stop all WebSphere Application Server jobs which are running, such as QEJBSVR or QWAS7, it is recommended to stop the QWAS70 sub system before proceeding with the installation.
Understanding the Installation Methodology
1-2 IBM WebSphere Portal for IBM i for Power Systems Guide
1.2 Understanding the Installation MethodologyThe recommended installation method is the same for JD Edwards EnterpriseOne as for IBM. The installation includes this sequence of tasks:
1. Install WebSphere Application Server 7.0 (WAS 7.0)
2. Install WebSphere Fix Pack 11 (or higher as listed in the MTR)
3. Install and configure the WebSphere Portal Server v7.0
4. Transfer Apache Derby database to DB2 for IBM i/400 (optional)
5. Enable security (optional)
6. Verify the installation
1.3 Preparing the IBM i Server for IBM WebSphere PortalThis section includes information for setting up the operating system of your IBM i server for IBM WebSphere Portal v7.0. Other components might require additional steps; see the product documentation for the specific components you want to install for information.
WebSphere Portal can be installed locally or remotely using a Windows workstation (recommended).
You need the following information to install remotely:
■ Microsoft Windows 2003 or Windows 2008, 2008 R2 or Windows XP, Windows 7
■ Workstation CD-ROM drive (optional)
■ TCP/IP connection to the i5/OS system where you will install WebSphere Portal v7.0
■ The IBM i server must be in an unrestricted state
■ A valid user ID and password on the IBM i system
■ A user profile with a user type (user class) of *ALLOBJ and *SECADM to install and configure WebSphere Portal v7.0
You need the following information to install locally:
■ IBM i/OS CD-ROM drive (optional)
■ The IBM i server must be in an unrestricted state
■ A valid IBM i user ID and password
■ A user profile with a user type (user class) of *ALLOBJ and *SECADM to install and configure WebSphere Portal v7.0
2
Installing the WebSphere Portal Server 2-1
2Installing the WebSphere Portal Server
This chapter contains the following topics for installing the WebSphere Portal Server:
■ Section 2.1, "Prerequisites"
■ Section 2.2, "Retrieving WebSphere Portal 7.0 Software from Oracle JD Edwards Update Center"
■ Section 2.3, "Installing the Portal Server"
2.1 PrerequisitesYou must follow the prerequisites in the section before installing the WebSphere Portal Server.
2.1.1 Minimum Technical RequirementsBefore you install Portal v7.0, you must first install WebSphere Application Server 7.0 and the latest supported fix pack listed in the JD Edwards EnterpriseOne HTML Web Server Minimum Technical Requirements (MTRs). These MTRs are available on My Oracle Support in document ID 705409.1 and can be accessed at this link:
https://metalink3.oracle.com/od/faces/secure/km/DocumentDisplay.jspx?id=705409.1
2.1.2 Installing WebSphere Application Server 7.0To install WebSphere Application Server 7.0, refer to Chapter 3: Installing and Configuring WebSphere Application Server 7.0 in the JD Edwards EnterpriseOne HTML Web Server Reference Guide for iSeries -Based Systems and WebSphere Application Server 7.0. This document is available on My Oracle Support in document ID 705495.1 and can be accessed at this link:
https://metalink3-dr.oracle.com/od/faces/secure/km/DocumentDisplay.jspx?id=705495.1
If you are using same single physical machine for both the Portal and the HTML Server, you cannot install the JD Edwards EnterpriseOne HTML Web Server (also called JAS) to the same profile as that of Portal. By default, WebSphere Portal v7.0 creates a separate profile called wp_profile.
2.1.3 ReferencesIBM product documentation for Portal v7.0:
Retrieving WebSphere Portal 7.0 Software from Oracle JD Edwards Update Center
2-2 IBM WebSphere Portal for IBM i for Power Systems Guide
http://www-10.lotus.com/ldd/portalwiki.nsf/xpViewCategories.xsp?lookupName=IBM%20WebSphere%20Portal%207%20Product%20Documentation&SessionID=CWFHNIG8CY
IBM WebSphere Application Server 7.0 Info Center:
http://publib.boulder.ibm.com/infocenter/wasinfo/v7r0/index.jsp
IBM Portal v7.0 Hardware and Software Requirements:
http://www-01.ibm.com/support/docview.wss?uid=swg27007791
2.2 Retrieving WebSphere Portal 7.0 Software from Oracle JD Edwards Update Center
To retrieve WebSphere Portal 7.0 Software from the Oracle JD Edwards Update Center:
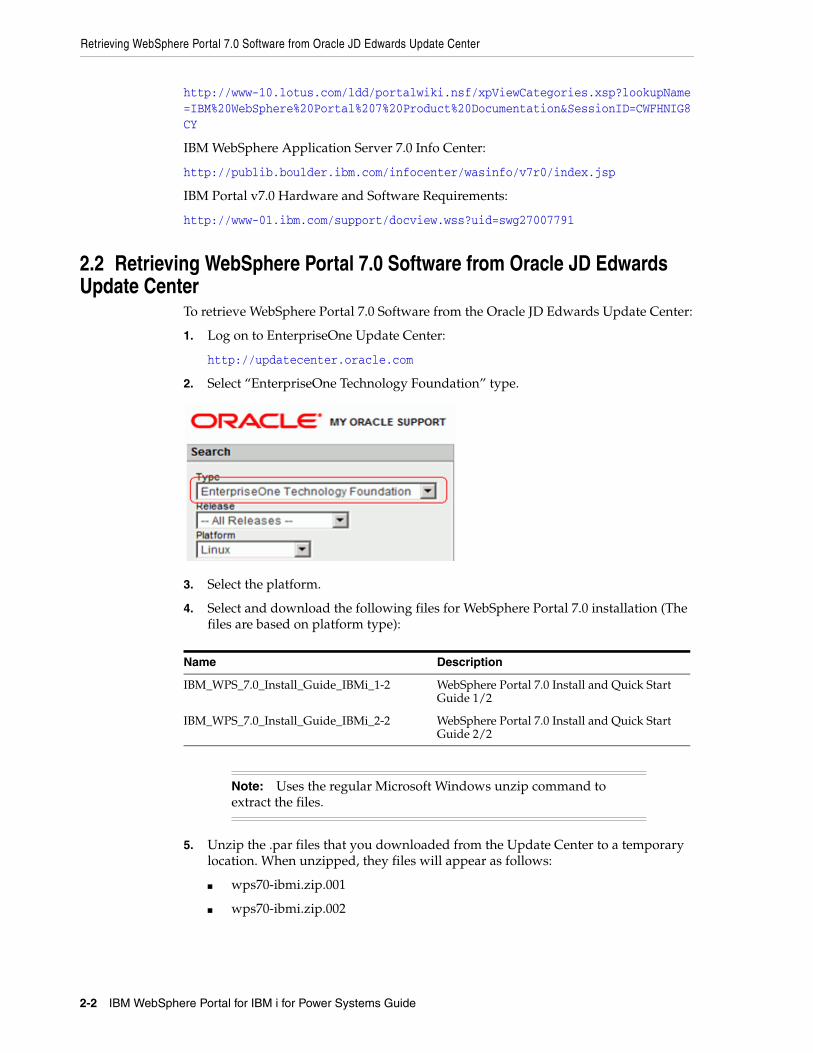
1. Log on to EnterpriseOne Update Center:
http://updatecenter.oracle.com
2. Select “EnterpriseOne Technology Foundation” type.
3. Select the platform.
4. Select and download the following files for WebSphere Portal 7.0 installation (The files are based on platform type):
5. Unzip the .par files that you downloaded from the Update Center to a temporary location. When unzipped, they files will appear as follows:
■ wps70-ibmi.zip.001
■ wps70-ibmi.zip.002
Name Description
IBM_WPS_7.0_Install_Guide_IBMi_1-2 WebSphere Portal 7.0 Install and Quick Start Guide 1/2
IBM_WPS_7.0_Install_Guide_IBMi_2-2 WebSphere Portal 7.0 Install and Quick Start Guide 2/2
Note: Uses the regular Microsoft Windows unzip command to extract the files.
Installing the Portal Server
Installing the WebSphere Portal Server 2-3
Extracting WebSphere Portal 7.0 Software To extract WebSphere Portal 7.0 Software on IBM i from a Microsoft Windows machine:
1. Move both wps70-ibmi.zip* files to a “WPS70” folder.
2. Extract wps70-ibmi..zip.001 using the 7zip product.
3. The extract process will process both files.
2.3 Installing the Portal ServerTo begin the installation:
1. From either the Setup CD or directory, you can use various methods to launch the installer, as shown in this table:
Installation Method Command and Description
Graphical user interface install400.bat
Optional attribute: WebSphere Application Server profiles and configurations are performed with the Classic 64-bit JVM, which allows for a faster installation but slower runtime performance. To achieve better performance, add the -W enableClassicJVM.active=false attribute to your installation command to install with J9 32-bit JVM.
Console mode remote install400.bat -console
Console mode local install.sh
Optional attribute: WebSphere Application Server profiles and configurations are performed with the Classic 64-bit JVM, which allows for a faster installation but slower runtime performance. To achieve better performance, add the -W enableClassicJVM.active=false attribute to your installation command to install with J9 32-bit JVM.
Silent install remote install400.bat -options "path_to_file\response_filename" where path_to_file is the full path to the response file, and where response_filename is the name of the file.
A sample install response file (installresponse.txt) and a sample uninstall response file (uninstallresponse.txt) are located in the setup CD root directory.
Important: Do not place the response file in a path that contains a space and do not put a space in the file name.
Silent install local install.sh -options "path_to_file\response_filename" where path_to_file is the full path to the response file, and where response_filename is the name of the file.
A sample install response file (installresponse.txt) and a sample uninstall response file (uninstallresponse.txt) are located in the setup CD root directory.
Important: Do not place the response file in a path that contains a space and do not put a space in the file name.
Installing the Portal Server
2-4 IBM WebSphere Portal for IBM i for Power Systems Guide
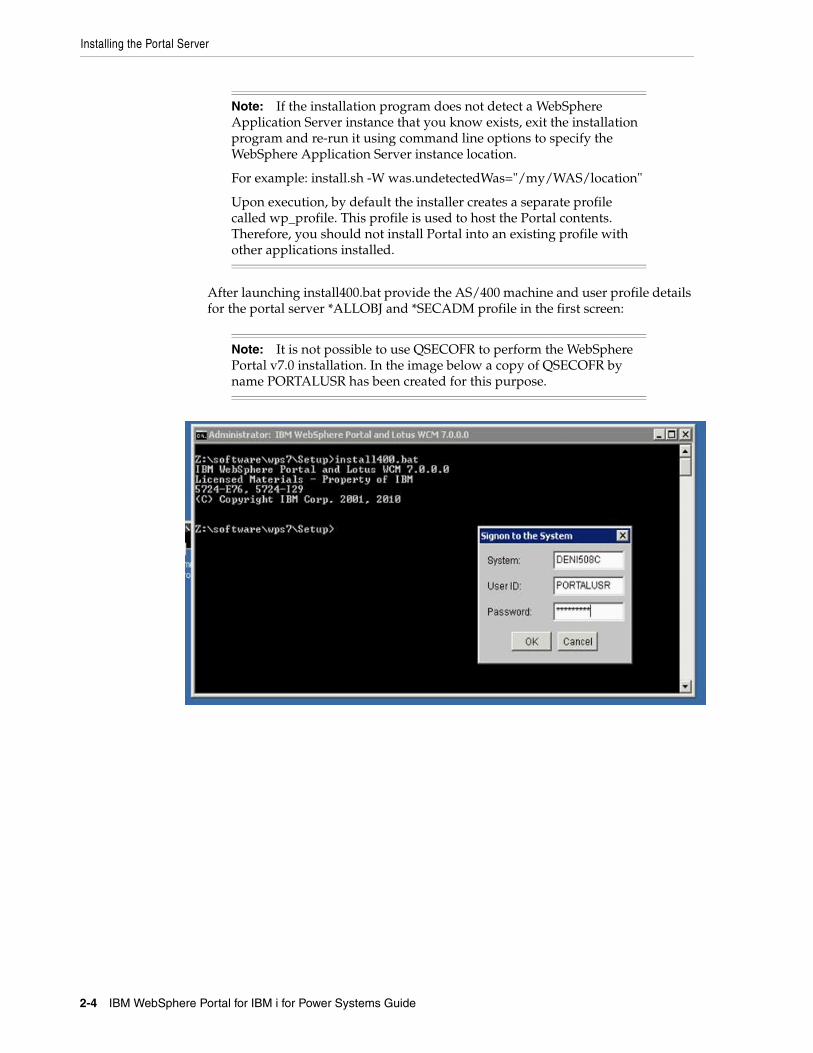
After launching install400.bat provide the AS/400 machine and user profile details for the portal server *ALLOBJ and *SECADM profile in the first screen:
Note: If the installation program does not detect a WebSphere Application Server instance that you know exists, exit the installation program and re-run it using command line options to specify the WebSphere Application Server instance location.
For example: install.sh -W was.undetectedWas="/my/WAS/location"
Upon execution, by default the installer creates a separate profile called wp_profile. This profile is used to host the Portal contents. Therefore, you should not install Portal into an existing profile with other applications installed.
Note: It is not possible to use QSECOFR to perform the WebSphere Portal v7.0 installation. In the image below a copy of QSECOFR by name PORTALUSR has been created for this purpose.
Installing the Portal Server
Installing the WebSphere Portal Server 2-5
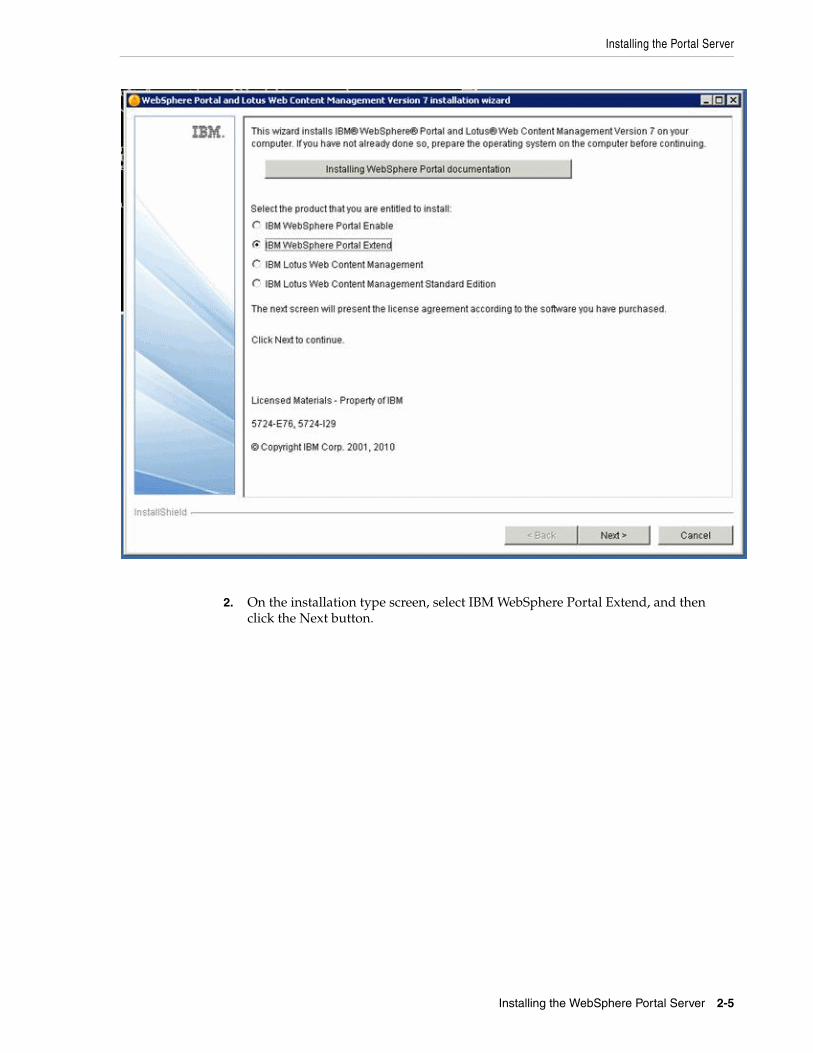
2. On the installation type screen, select IBM WebSphere Portal Extend, and then click the Next button.
Installing the Portal Server
2-6 IBM WebSphere Portal for IBM i for Power Systems Guide
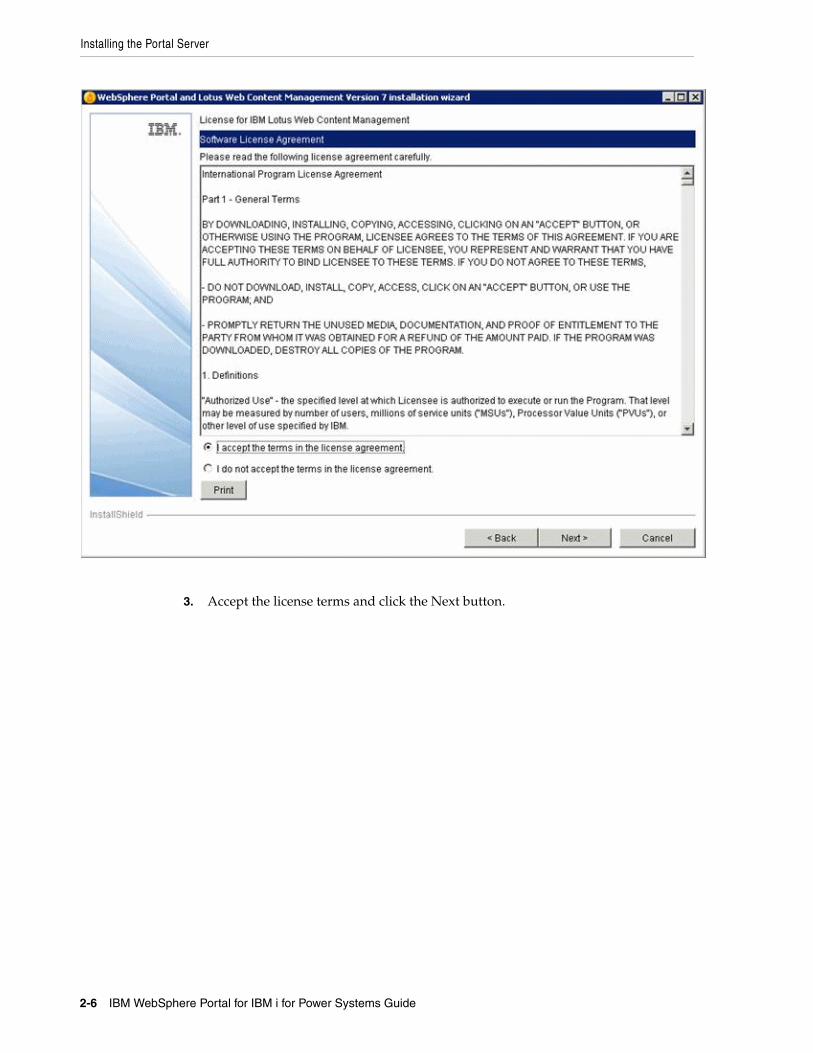
3. Accept the license terms and click the Next button.
Installing the Portal Server
Installing the WebSphere Portal Server 2-7
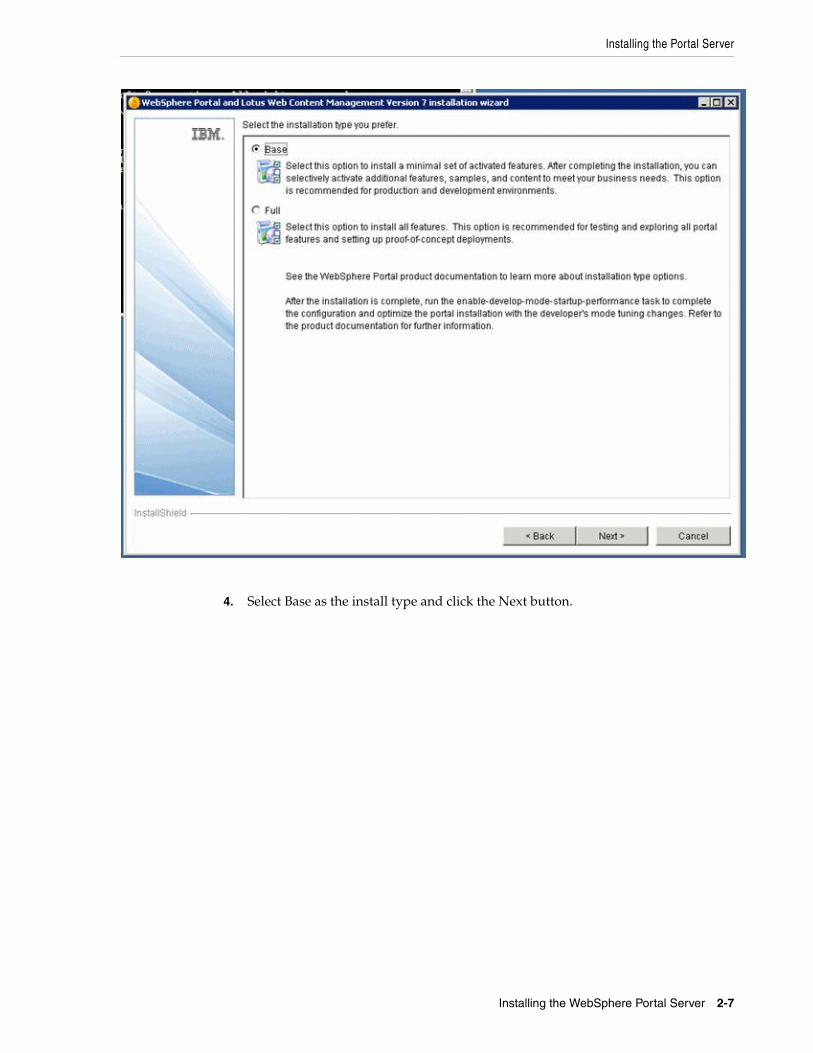
4. Select Base as the install type and click the Next button.
Installing the Portal Server
2-8 IBM WebSphere Portal for IBM i for Power Systems Guide
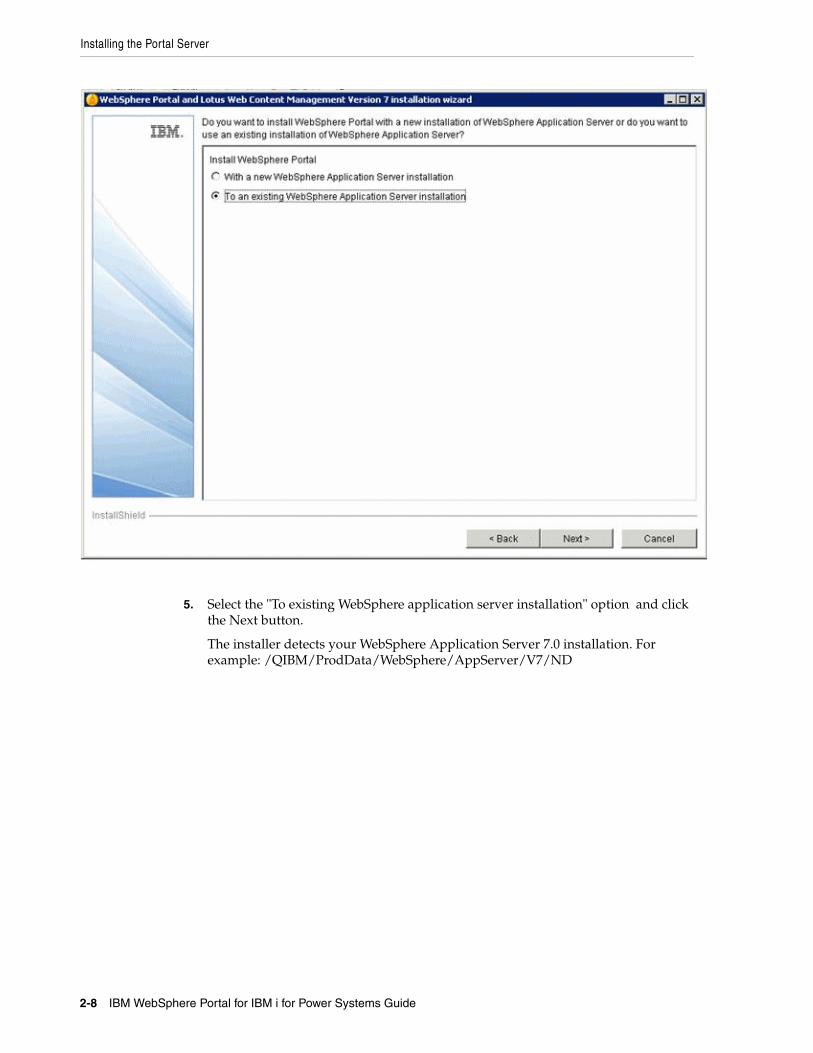
5. Select the "To existing WebSphere application server installation" option and click the Next button.
The installer detects your WebSphere Application Server 7.0 installation. For example: /QIBM/ProdData/WebSphere/AppServer/V7/ND
Installing the Portal Server
Installing the WebSphere Portal Server 2-9
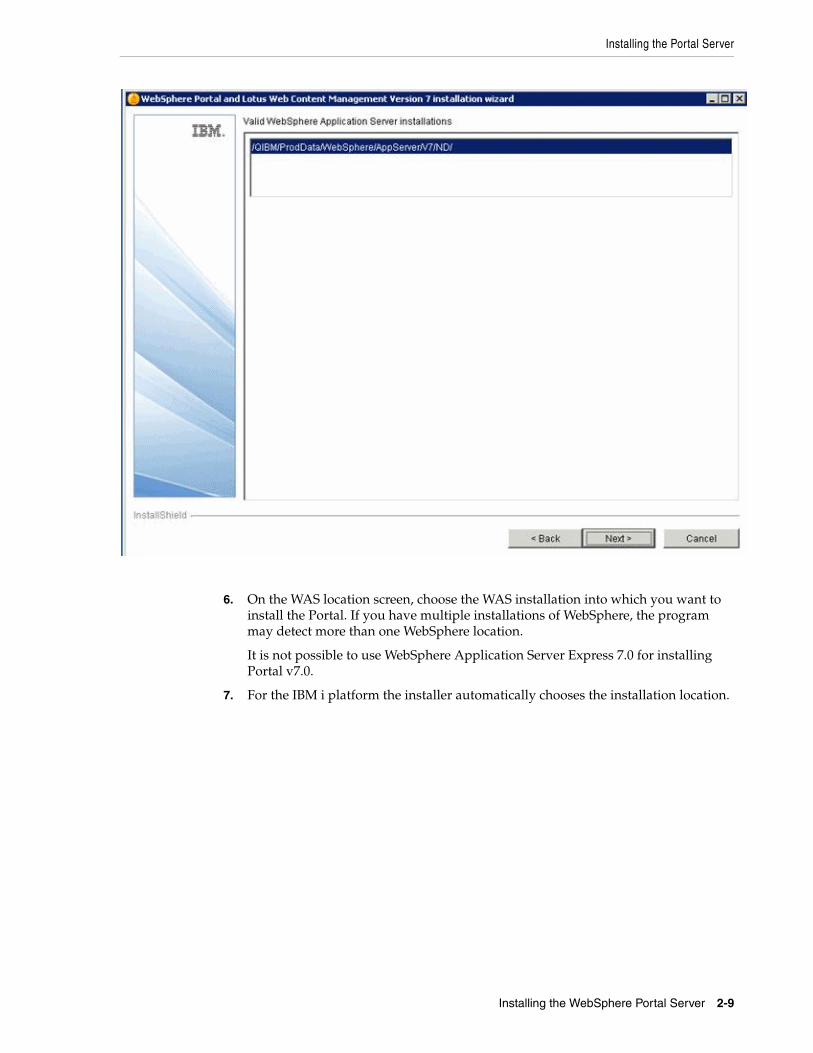
6. On the WAS location screen, choose the WAS installation into which you want to install the Portal. If you have multiple installations of WebSphere, the program may detect more than one WebSphere location.
It is not possible to use WebSphere Application Server Express 7.0 for installing Portal v7.0.
7. For the IBM i platform the installer automatically chooses the installation location.
Installing the Portal Server
2-10 IBM WebSphere Portal for IBM i for Power Systems Guide
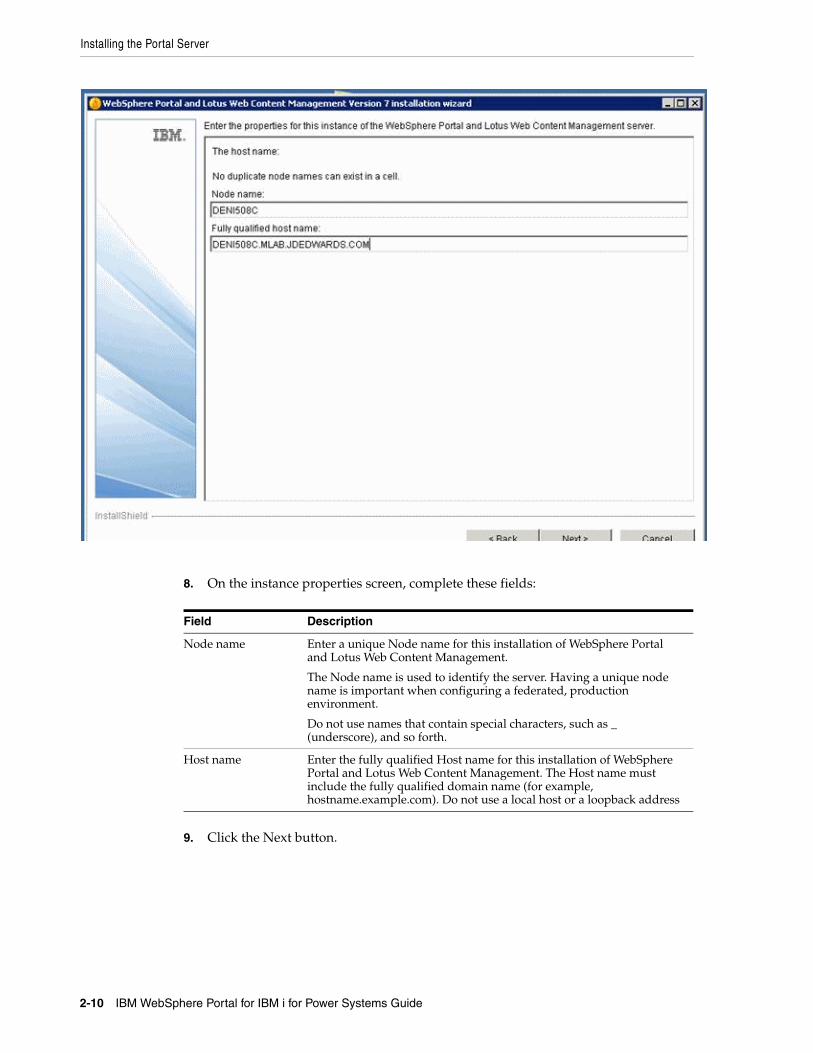
8. On the instance properties screen, complete these fields:
9. Click the Next button.
Field Description
Node name Enter a unique Node name for this installation of WebSphere Portal and Lotus Web Content Management.
The Node name is used to identify the server. Having a unique node name is important when configuring a federated, production environment.
Do not use names that contain special characters, such as _ (underscore), and so forth.
Host name Enter the fully qualified Host name for this installation of WebSphere Portal and Lotus Web Content Management. The Host name must include the fully qualified domain name (for example, hostname.example.com). Do not use a local host or a loopback address
Installing the Portal Server
Installing the WebSphere Portal Server 2-11
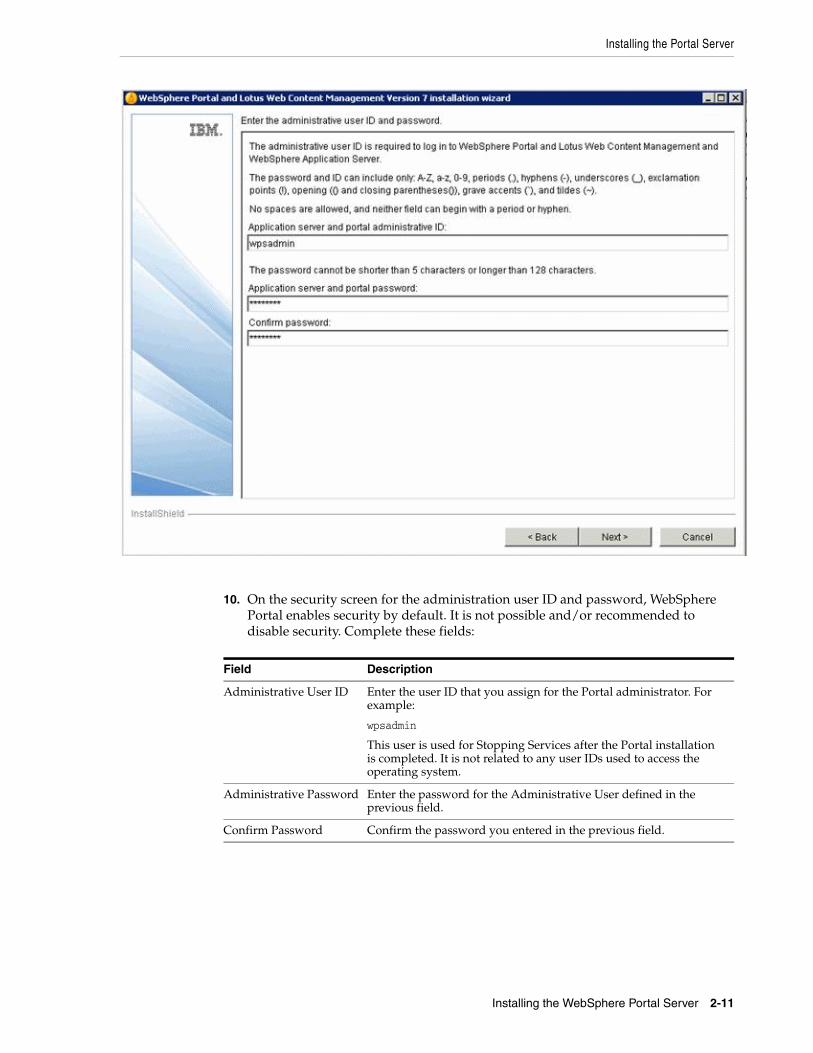
10. On the security screen for the administration user ID and password, WebSphere Portal enables security by default. It is not possible and/or recommended to disable security. Complete these fields:
Field Description
Administrative User ID Enter the user ID that you assign for the Portal administrator. For example:
wpsadmin
This user is used for Stopping Services after the Portal installation is completed. It is not related to any user IDs used to access the operating system.
Administrative Password Enter the password for the Administrative User defined in the previous field.
Confirm Password Confirm the password you entered in the previous field.
Installing the Portal Server
2-12 IBM WebSphere Portal for IBM i for Power Systems Guide
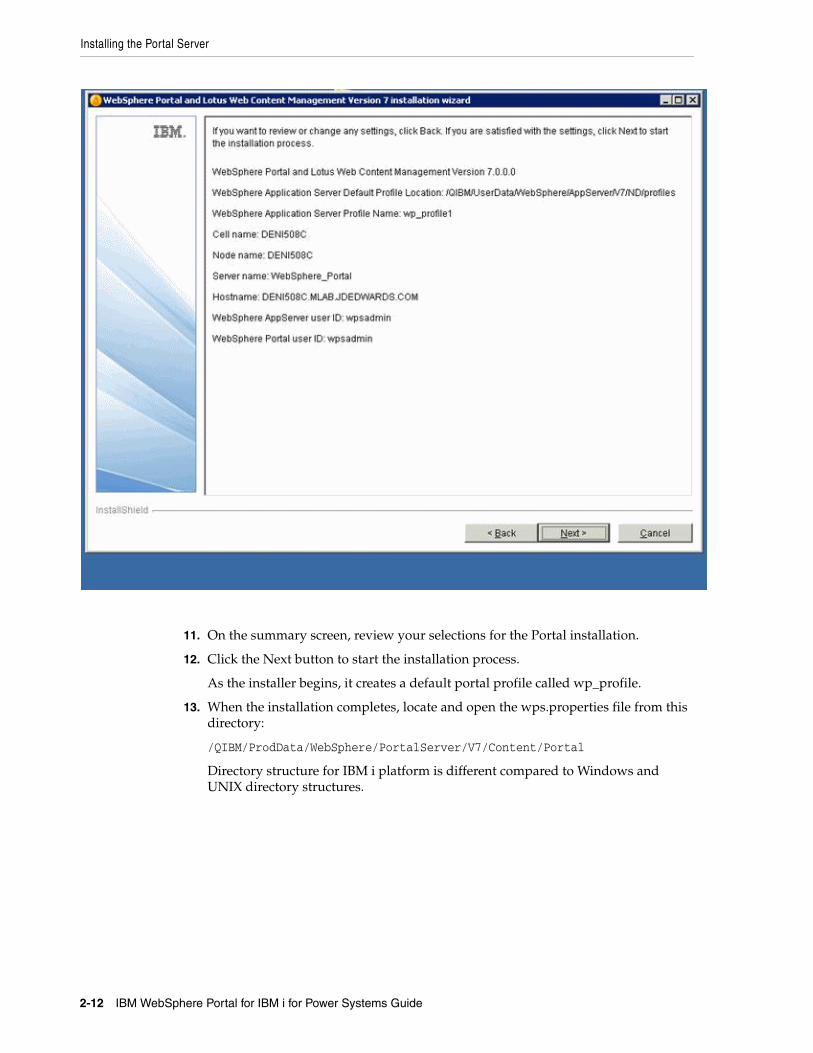
11. On the summary screen, review your selections for the Portal installation.
12. Click the Next button to start the installation process.
As the installer begins, it creates a default portal profile called wp_profile.
13. When the installation completes, locate and open the wps.properties file from this directory:
/QIBM/ProdData/WebSphere/PortalServer/V7/Content/Portal
Directory structure for IBM i platform is different compared to Windows and UNIX directory structures.
Installing the Portal Server
Installing the WebSphere Portal Server 2-13
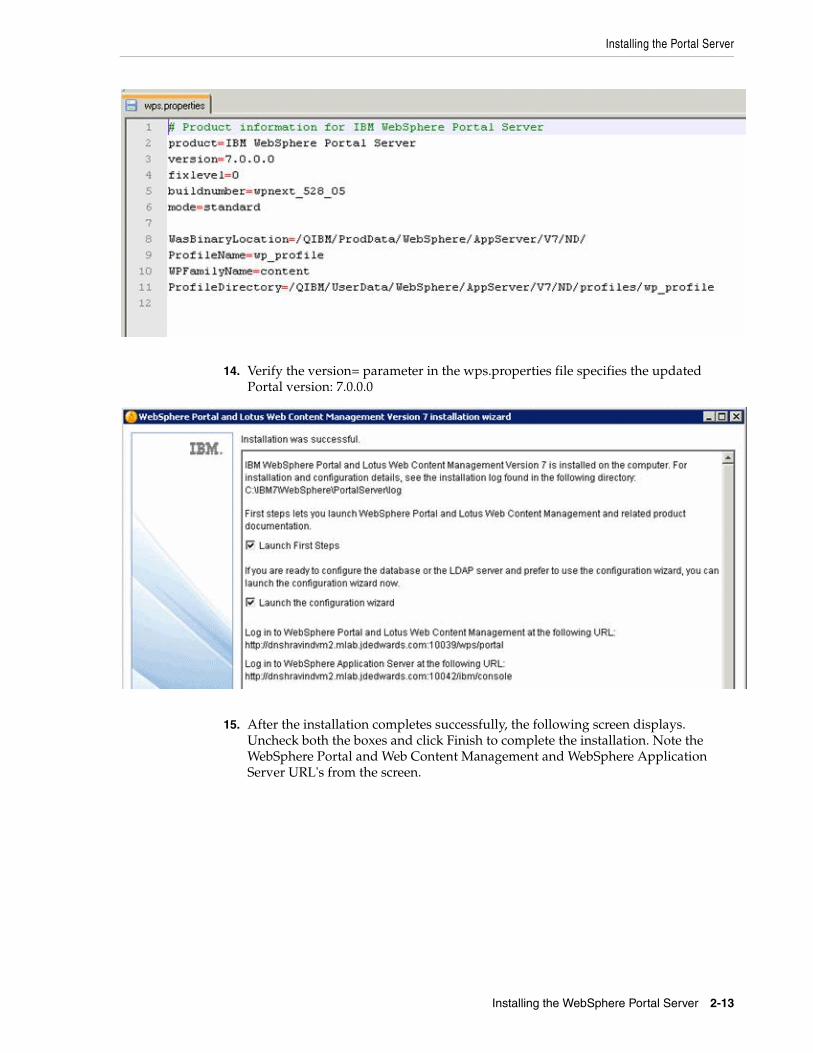
14. Verify the version= parameter in the wps.properties file specifies the updated Portal version: 7.0.0.0
15. After the installation completes successfully, the following screen displays. Uncheck both the boxes and click Finish to complete the installation. Note the WebSphere Portal and Web Content Management and WebSphere Application Server URL's from the screen.
Installing the Portal Server
2-14 IBM WebSphere Portal for IBM i for Power Systems Guide
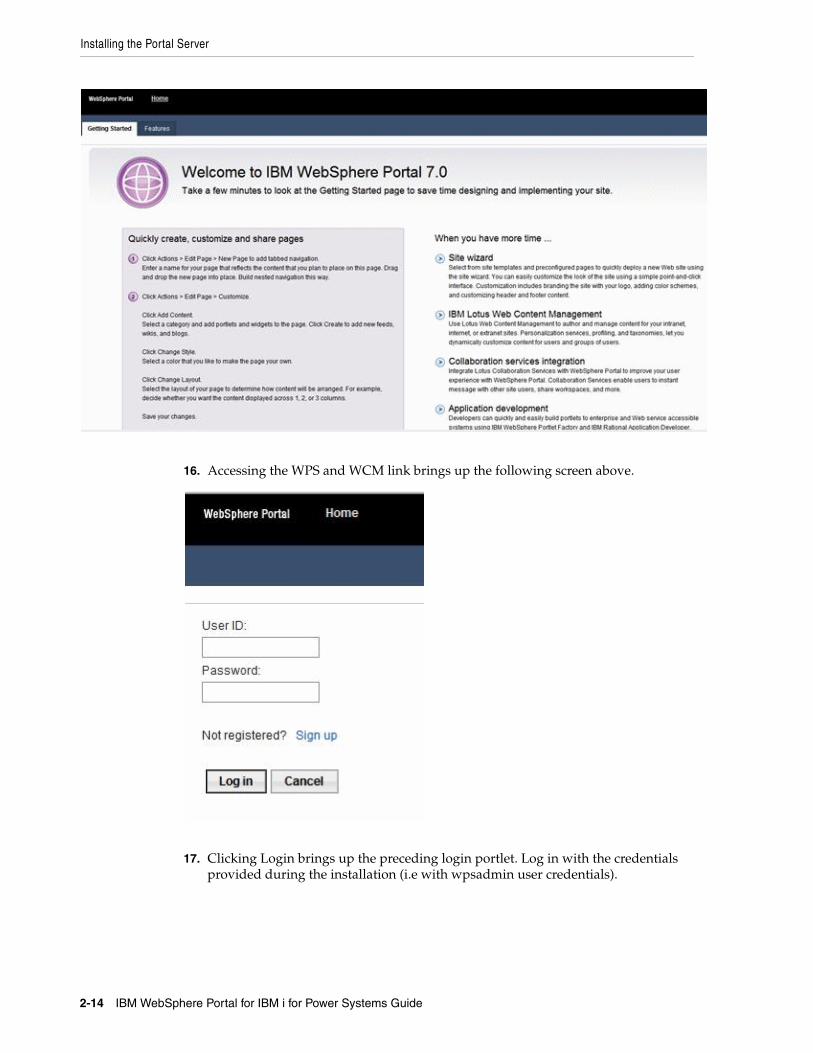
16. Accessing the WPS and WCM link brings up the following screen above.
17. Clicking Login brings up the preceding login portlet. Log in with the credentials provided during the installation (i.e with wpsadmin user credentials).
Installing the Portal Server
Installing the WebSphere Portal Server 2-15
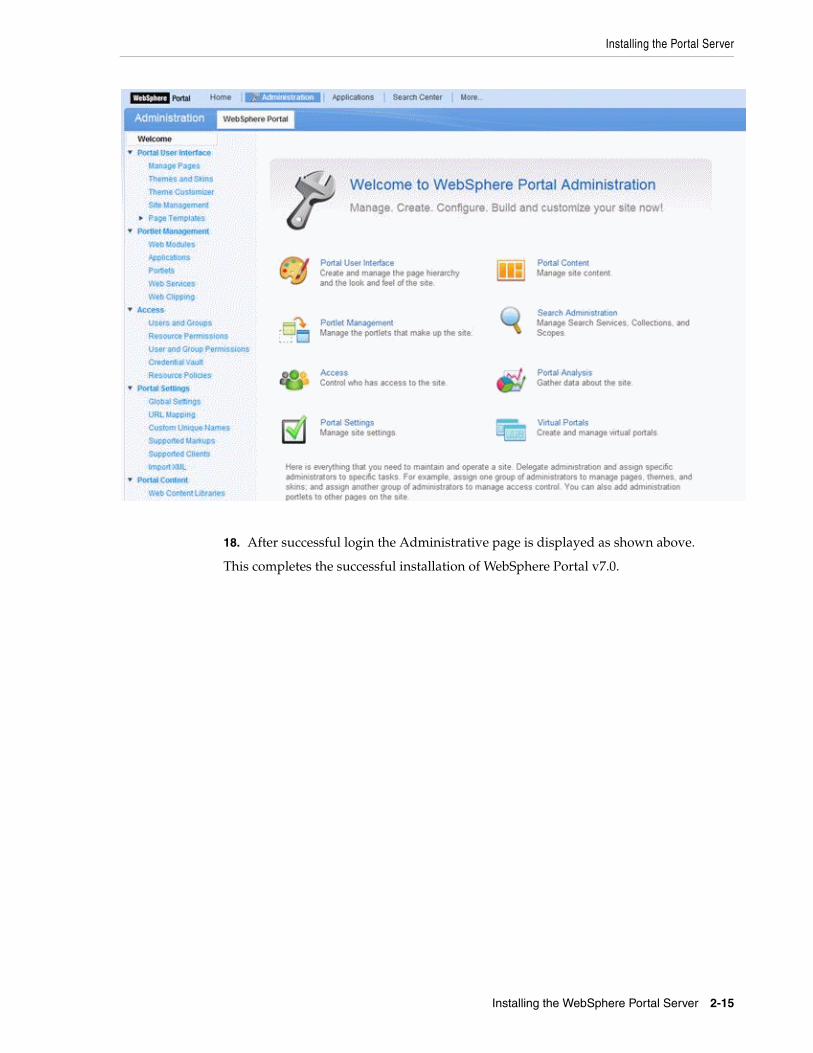
18. After successful login the Administrative page is displayed as shown above.
This completes the successful installation of WebSphere Portal v7.0.

Installing the Portal Server
2-16 IBM WebSphere Portal for IBM i for Power Systems Guide
3
Database Configuration for WebSphere Portal 3-1
3Database Configuration for WebSpherePortal
By default, IBM WebSphere Portal v7.0 installs and uses an Apache Derby database. Installing with Apache Derby lets you quickly get WebSphere Portal installed and running in a proof-of-concept environment. Before using the product extensively, you should visit the IBM Information Center for Portal v7.0 to learn the advantages and disadvantages of using Apache Derby and determine how transferring to another database affects the capacity and scalability of a production environment. Please refer to the following link from IBM: https://www-304.ibm.com/support/docview.wss?uid=swg27019558#Databases_C-worksWith
The Apache Derby database that is installed by default is not intended for use in a production environment or for authoring Web content. Derby does not support clustered environments, enabling security in a database-only mode, or vertical cloned environments in which multiple application servers are configured on a single server. Use one of the other supported databases in a production environment or when authoring Web content because they are better able to handle large amounts of data and can be tuned for performance.
When you choose to transfer data to another supported database such as Oracle or SQL Server or IBM DB2 for LUW (Linux, UNIX, Windows) or DB2 for IBM i, perform the database transfer before you use the portal extensively. Large amounts of data in the databases can cause the database transfer to fail if your Java heap size is not large enough. Because information is added to the databases as you use the Portal, perform the database transfer as soon as it is practical to avoid problems in a production environment.
Data can be transferred from a Derby database, but cannot be transferred to a Derby database. If you are transferring from a database other than the default database, you will need to edit the wkplc.properties, wkplc_dbdomain.properties and wkplc_dbtype.properties files to update the source and target database information.
You can install the database server on the same system as WebSphere Portal, or you can install the database server on a different, also referred to as a remote system.
Using a remote database can have performance benefits. When you are deploying a large scale environment, you can dedicate a server specifically to your database. As more users are accessing the portal, the portal application becomes database intensive. Database activity can take up CPU utilization and disk I/O time. You can increase capacity by separating the database from the server that the Portal is running on increases capacity.

3-2 IBM WebSphere Portal for IBM i for Power Systems Guide
If you install the database server on a remote system, you may be required to install database client software on the WebSphere Portal system so the Portal can communicate with the remote database server.
Documentation in this section is taken directly from IBM WebSphere Portal v7.0 Infocenter.
4
Preparing DB2 for IBM i 4-1
4Preparing DB2 for IBM i
This chapter contains the following topics:
■ Section 4.1, "Prerequisites"
■ Section 4.2, "Verifying Database Connections"
■ Section 4.3, "Configuring WebSphere Portal to Use a User Registry on IBM i"
■ Section 4.4, "Configuring a Standalone LDAP User Registry on IBM i"
■ Section 4.5, "Configuring an External HTTP Server for WebSphere Portal v7.0 (IBM i HTTP Server only)"
4.1 PrerequisitesBefore beginning the database configuration, verify that a supported version of DB2 for IBM i Database software is installed. Refer to the Minimum Technical Requirements for this information. In addition, it is strongly recommended that you visit the IBM WebSphere Portal Version v7.0 Information Center and review the "Configuring WebSphere Portal to use a database" section (http://www-10.lotus.com/ldd/portalwiki.nsf/dx/Windows_standalone_Configuring_WebSphere_Portal_to_use_a_database_wp7 ).
To modify the wkplc.properties, wkplc_dbdomain.properties, and wkplc_dbtype.properties files to work with your database. Modify these property files before running tasks to create databases, create users, or transfer data.
Working with Properties Files■ The WebSphere Portal database can be used to hold information for applications
such as Personalization (Feedback) and LikeMinds. To prepare the database to hold such application information, you should use similar naming conventions for property values such as release.DbName. Here are some examples:
– release.DbName=hostname/WP70REL
– community.DbName=hostname/WP70COM
– customization.DbName=hostname/WP70CUS
– jcr.DbName=hostname/WP70JCR
– feedback.DbName=hostname/WP70FBK
– likeminds.DbName=hostname/WP70LKM
■ If you are using a remote database, enter the values for the remote server.
Prerequisites
4-2 IBM WebSphere Portal for IBM i for Power Systems Guide
■ Regardless of the operating system, use a forward slash (/) instead of a backslash (\) in the property files for file system paths.
■ There might be additional database properties other than those listed here. Only change the properties within this task and skip all other properties.
■ Some values, shown here in italics, might need to be modified to your specific environment.
■ Password Considerations
For security reasons, you should not store passwords in the wkplc.properties,wkplc_dbdomain.properties, and wkplc_dbtype.properties files. It is recommended that you edit each of the properties files before running a configuration task, inserting the passwords needed for that task. Then, after the task has run, you should delete all passwords from each file.
■ The recommended value listed for each property represents the specific information that is required to configure WebSphere Portal to your target database.
■ Depending on which database domain has to be configured, replace dbdomain with:
– release
– customization
– community
– jcr
– feedback
– likeminds
■ The values for at least one of the following properties must be unique for the release, customization, community, and JCR domains:
– dbdomain.DbName
– dbdomain.DbUrl
– dbdomain.DbSchema
■ If you use the same values for all three properties across the release, customization, community, and JCR domains, the database-transfer task fails due to ambiguous database object names.
■ If DbUser, DbUrl, and DbPassword are not the same across domains, the value for DataSourceName must differ from the DataSourceName of the other domains. In other words, this value must be unique for the database domain.
■ When you create a schema, you must use the following schema naming conventions on the IBM® i system:
■ Length cannot exceed 10 characters
■ All alphanumeric characters are allowed ("A" through "Z" and "1" through "0")
■ The following characters are invalid:
– spaces
Note: The default schema names may be used with the product.
Prerequisites
Preparing DB2 for IBM i 4-3
– null values
– asterisk (*)
– quotation marks (")
– colon (:)
– greater than symbol (>)
– less than symbol (<)
– vertical bar (|)
– plus sign (+)
– semicolon (;)
– single quotation mark (')
– question mark (?)
1. Locate the following files and create a backup copy of each before changing any values:
■ wp_profile_root/ConfigEngine/properties/wkplc.properties
■ wp_profile_root/ConfigEngine/properties/wkplc_dbdomain.properties
■ wp_profile_root/ConfigEngine/properties/wkplc_dbtype.properties
■ If you are transferring from a database other than Derby: wp_profile_root/ConfigEngine/properties/wkplc_sourceDb.properties
Default values are listed in these files. Unless otherwise noted, all values are of type alphanumeric text string. Print out the steps below for reference before modifying the properties files. Make sure to enter the appropriate values for each instance of each property. In wkplc_dbdomain.properties, most properties are repeated for each domain.
2. Use a text editor to open the properties files and enter the values that are appropriate for your environment. You can also modify each properties file locally on your System i5 system by typing the following on an OS/400 command line in a 5250 session:
EDTF 'wp_profile_root/ConfigEngine/properties/property filename.properties'
Note: Make sure you know what valid schema names are and do not use a schema name which already exists on the local or remote system. Follow the documentation of the target database management system in order to define a valid schema name as restrictions apply. Note that the Create WebSphere Portal wizard will automatically check schema names for you.
For more information on database and schema naming conventions, refer to the DB2 for IBM i Universal Database for System i5 content in the System i5 information center.
Note: This step only applies when WebSphere Portal is installed on IBM i, and you are transferring to IBM DB2 for IBM i.
Prerequisites
4-4 IBM WebSphere Portal for IBM i for Power Systems Guide
where property filename is wkplc_dbdomain, wkplc, or wkplc_dbtype.
3. Use a text editor to open the properties file wkplc_dbdomain.properties and modify the values to correspond to your environment.
a. For dbdomain.DbType, type db2_iseries.
b. For dbdomain.DbName, type the name of the WebSphere Portal domain database.
c. For dbdomain.DbSchema, type the schema name of the database domain.
d. For dbdomain.DataSourceName, type the name of the data source that WebSphere Portal uses to communicate with its databases.
Do not use the following reserved words:
– releaseDS
– communityDS
– customizationDS
– jcrDS
– lmdbDS
– feedback
e. For dbdomain.DbUrl, type the database URL used to access the WebSphere Portal database with JDBC. The value must conform to the JDBC URL syntax specified by the database. The connection property metadata source=1 must be specified for databases running on systems older than IBM i V7R1. Refer to the following example when WebSphere Portal is installed on IBM i and you transferring data remotely or locally to DB2 for IBM i:
Note: You must have a user profile on the IBM i server and must have at least *USE special authority to edit the properties file.
Tip: The steps for transferring data to another supported database section provide instructions for manually transferring data. Instead of performing the following steps, you can use the configuration wizard, which is a graphical user interface, to transfer data to another supported database.
Properties must be changed before creating a database name and schema on a local or remote IBM i server.
Note: This value is also the database element in the dbdomain.DbUrl property.
Note: Review your target database management system documentation to define a valid schema name. Some database management systems have schema name restrictions that you need to understand.
Prerequisites
Preparing DB2 for IBM i 4-5
dbdomain.DbUrl="jdbc:as400:daisy.mycorp.com/WPDBREL;metadata source=1"
Refer to the following example when WebSphere Portal is installed on Windows and you transferring data remotely to DB2 for IBM i for idbdomain:
DbUrl="jdbc:as400:daisy.mycorp.com/WPDBREL;metadata source=1"
Refer to the following example when WebSphere Portal is installed on a UNIX platform, and you are transferring data to DB2 for IBM i for i:dbdomain:
DbUrl="jdbc:as400:daisy.mycorp.com/WPDBREL;metadata source=1;prompt=false"
If the X11 DISPLAY is set and active, do not add the ;prompt=false to the URL.
f. For dbdomain.DbUser, type the user ID for the database configuration user.
g. For dbdomain.DbPassword, type the password for the database configuration user.
h. For dbdomain.DbConfigRoleName, type the name of the group for database configuration users. Database rights are granted to this group instead of individuals. The user specified for dbdomain.DbUser must be assigned to this group.
i. Optional: For dbdomain.DbRuntimeUser, type the user ID of the database user that should be used by WebSphere Portal to connect to the database at runtime. If no value is specified for this setting, the database configuration user will be used to connect to the databases at runtime.
j. If dbdomain.DbRuntimeUser is specified, you must set dbdomain.DbRuntimePassword to be the password of the runtime database user.
k. For dbdomain.DbRuntimeRoleName, type the name of the group for database runtime users. Database rights are granted to this group instead of individuals. The user specified for dbdomain.DbRuntimeUser must be assigned to this group.
l. Optional: For dbdomain.DBA.DbUser, type the database administrator user ID for privileged access operations during database creation. If you do not need this parameter, you can either accept the default value or leave blank.
m. Optional: For dbdomain.DBA.DbPassword, type the database administrator password for privileged access operations during database creation. If you do not need this parameter, you can either accept the default value or leave blank.
4. Save and close the file.
5. Update the following properties in the file wkplc_dbtype.properties.
a. For db2_iseries.DbDriver, type the name of the JDBC driver class.
Note: The database element of this value should match the value of DbName.
Note: You must download the jt400.jar file before database transfer. Refer to wkplc_dbtype.properties for more information on downloading the jt400.jar file.
Prerequisites
4-6 IBM WebSphere Portal for IBM i for Power Systems Guide
b. For db2_iseries.DbLibrary, type the directory and name of the .zip or .jar file that contains the JDBC driver class.
c. For db2_iseries.JdbcProviderName, type the name of the JDBC provider that WebSphere Portal uses to communicate with its databases.
d. For db2_iseries.DbDriverType, type the number representing the driver type for the database.
6. Save and close the file.
7. Update the WasPassword value in the wkplc.properties file. This value is the password for the WebSphere Application Server security authentication used in your environment.
8. Save and close the file.
View information on setting up user profiles for DB2 for IBM i to work with WebSphere Portal.
Before you begin:
■ The user profile for the database owner should be different from the administrator user profile used to perform the installation. The administrator user profile may have more authority than is required and usually belongs to an individual, where as the database user profile may have minimal authority and can be shared.
■ Create a database user profile that does not require a password change over a period of time. If the password for the database user profile changes, WebSphere Portal must be reconfigured to use the new password.
■ Create users in an environment that has the same settings as the actual runtime environment. For example, avoid creating a user in an English environment if you plan to use that user in a Turkish environment.
A remote database resides on a different system than WebSphere Portal. When you use a remote server, you must manually create the databases that are required by WebSphere Portal.
Before you begin:
■ The user ID and password used must have the authority to create database libraries on the remote System i5 machine.
■ For every property instance of a database that uses *LOCAL/schema, replace it with HostName/schema.
For example, the default database and database library name for WebSphere Portal release domain is release.DbName=wpsdb. If you wanted to create this database library on a remote database, change the default value to release.DbName=hostname/wpsdb
To create all the domain database libraries, perform the following steps:
1. Start a 5250 session on the remote database machine.
2. Type the i command WRKRDBDIRE to display the Relational Database Directory Entry for Remote Location *LOCAL and make a note of the value displayed.
3. Sign off from the 5250 session.
4. Start a 5250 session on the local machine where WebSphere Portal is installed.
5. Create a Relational Database Directory Entry on the local system for the remote system using i command WRKRDBDIRE.
6. Add an entry with the following values:
■ Relational database
Prerequisites
Preparing DB2 for IBM i 4-7
The remote relational database. Use the value noted from the prior step.
■ Relational database alias
The hostname. Use the short TCP/IP hostname of the remote system
■ Remote location
The domain qualified hostname. Use the full TCP/IP hostname of the remote system
■ Type
IP
■ Port number or service name
DRDA
■ Remote authentication method
Preferred method: ENCRYPTED
Allow lower authentication: ALWLOWER
7. Create the required DB2 for IBM i packages on the remote database machine by running the following command from the local machine:
JAVA CLASS (com.ibm.db2.jdbc.app.DB2PackageCreator) PARM('rdb_alias' 'userid' 'password') PROP((jdbc.drivers 'com.ibm.as400.access.AS400JDBCDriver'))where rdb_alias matches the name of the Relational Database Entry you created in step 2, where userid is the database administrator user ID on the remote machine, and where password is the database administrator password on the remote machine.
The output should be: Java program completed
8. Press F3 to exit Java Shell Display.
9. Sign off from the 5250 session.
10. Start a 5250 session on the remote database machine.
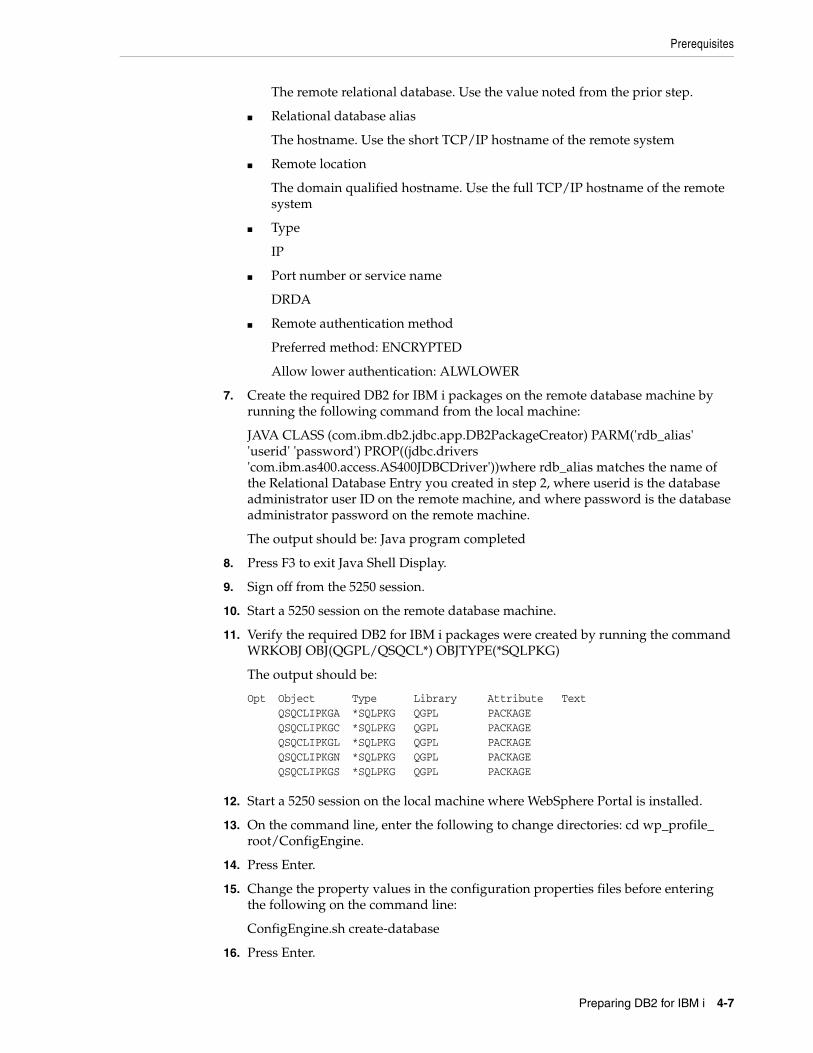
11. Verify the required DB2 for IBM i packages were created by running the command WRKOBJ OBJ(QGPL/QSQCL*) OBJTYPE(*SQLPKG)
The output should be:
Opt Object Type Library Attribute Text QSQCLIPKGA *SQLPKG QGPL PACKAGE QSQCLIPKGC *SQLPKG QGPL PACKAGE QSQCLIPKGL *SQLPKG QGPL PACKAGE QSQCLIPKGN *SQLPKG QGPL PACKAGE QSQCLIPKGS *SQLPKG QGPL PACKAGE
12. Start a 5250 session on the local machine where WebSphere Portal is installed.
13. On the command line, enter the following to change directories: cd wp_profile_root/ConfigEngine.
14. Press Enter.
15. Change the property values in the configuration properties files before entering the following on the command line:
ConfigEngine.sh create-database
16. Press Enter.
Prerequisites
4-8 IBM WebSphere Portal for IBM i for Power Systems Guide
View the steps to manually transfer data to the IBM® DB2 for IBM i Universal Database™ database you have set up. As an alternative to the manual database transfer procedure described here, you can use the configuration wizard to complete the database transfer task. However, you cannot specify all settings through the configuration wizard. For example, regardless of the method used to transfer data, you must run a configuration task to create JMS resources as described in this topic.
Before you begin, ensure that the following prerequisites are met:
■ Supported database software is installed.
■ Databases and users are set up.
1. Stop both the server1 and WebSphere_Portal servers:
■ stopServer server1 -username admin_userid -password admin_password
■ stopServer WebSphere_Portal -username admin_userid -password admin_password
2. Validate configuration properties using the ConfigEngine.sh validate-database -DWasPassword=password command.
3. Transfer the database:
a. Enter the following command:
ConfigEngine.sh database-transfer -DWasPassword=password
b. After running the task, a message is added to the following log file for you to verify the task ran successfully: wp_profile_root/ConfigEngine/log/ConfigTrace.log
If the configuration fails, verify the values in the wkplc.properties, wkplc_dbdomain.properties, andwkplc_dbtype.properties files and then repeat this step.
Tip: Add the -DTransferDomainList parameter to the above validating task to specify the domains you want to validate; for example: -DTransferDomainList=jcr. If you want to validate all domains, you do not need to specify this parameter on the command line.
Note: To select specific database domains to transfer, modify the -DTransferDomainList specified in the command to include only the domains that you want to transfer. For example, to transfer only the JCR domain you can enter the following command:
./ConfigEngine.sh database-transfer -DTransferDomainList=jcr -DWasPassword=password
This note only applies when transferring databases from DB2 for IBM i to another server with DB2 for IBM i. If you are transferring databases from a database other than DB2 for IBM i, you can skip this note. Use SBMJOB to submit the Qshell script as a batch job to run in *BASE pool when *INTERACT pool does not have 1GB or more of allocated memory. For example: SBMJOB CMD(STRQSH CMD(ConfigEngine.sh database-transfer -DWasPassword=password))
Verifying Database Connections
Preparing DB2 for IBM i 4-9
4. Run the ConfigEngine.sh create-jcr-jms-resources-post-dbxfer -DWasPassword=password command to create JMS resources in the new database.
5. Start the WebSphere Portal server.
See Starting and stopping servers, deployment managers, and node agents for instructions.
Compare the following file on all nodes with the file from the primary node. Ensure all instances of the file are identical: wp_profile_root/PortalServer/jcr/lib/com/ibm/icm/icm.properties. If the files are not identical, copy icm.properties from the primary node on which you ran the database-transfer task to the node.
1. Stop the portal server on the secondary node.
2. Copy wp_profile_root/PortalServer/jcr/lib/com/ibm/icm/icm.properties from the primary node and replaceicm.properties on the secondary node.
3. Start the portal server on the secondary node.
4.2 Verifying Database ConnectionsAfter WebSphere Portal is configured to work with your database, test the database connection to ensure that it operates correctly. You can verify the connection from a browser or from a command line.
To verify that WebSphere Portal is running from a browser, open the portal in a Web browser: http://hostname.yourco.com:port_number/wps/portal, where hostname.yourco.com is the fully qualifiedhost name of the machine where WebSphere Portal is running and port_number is the transport port that is created by IBM® WebSphere® Application Server.
There may be an error if any of the following conditions appear:
■ When trying to access the portal you get a 503 error.
■ If you had any locale problems with your database, you could see invalid characters, such as ????, after logging in. This may happen if the character set of the database is not UTF-8 compliant.
■ If something went wrong with the data that was transferred, you may not be able to log in. WebSphere Portal will indicate you entered an invalid user ID and password even though you know it is valid.
Verify the connection from a command line by completing the following steps:
1. Open a command line on the local machine where WebSphere Portal is installed.
2. For WebSphere Portal on WebSphere Application Server (UserData path), enter the following on the command line: cd wp_profile_root/ConfigEngine.
3. Enter the following command:
ConfigEngine.sh validate-database-connection -DTransferDomainList=release,community,customization,jcr,feedback,likeminds -DWasPassword=password
Note: Regardless of the method used to transfer data (configuration wizard or the steps in this topic), you must run this task to create JMS resources.
Configuring WebSphere Portal to Use a User Registry on IBM i
4-10 IBM WebSphere Portal for IBM i for Power Systems Guide
For security reasons, you should not leave passwords in the wkplc_dbdomain.properties file. Edit the file before running a configuration task and insert the passwords that are needed for that task. After the task has run, delete all passwords from the file. Alternatively, you can specify the password on the command line rather than update the wkplc_dbdomain.properties file. For example: ConfigEngine.sh -DPortalAdminPwd=password -DWasPassword=password validate-database When installing WebSphere Portal, the passwords in the wkplc_dbdomain.properties file are automatically removed after configuration.
4.3 Configuring WebSphere Portal to Use a User Registry on IBM iIf you plan to use a Tivoli Directory Server as an LDAP user registry, you must install and set up the server so that it will communicate with IBM WebSphere Portal.
Perform the following steps to prepare Tivoli Directory Server:
1. Customize the LDAP directory servers settings using the Directory Services Configuration Wizard. You must have *ALLOBJ and *IOSYSCFG special authority to use the wizard. Go to IBM System i and i5/OS Information Center, select the appropriate Information Center version and navigate to e-business and Web serving > Security and Directory Server > IBM Directory Server for IBM i for information.
2. Perform the following steps to create the WebSphere Portal administrative user:
a. Optional: Perform the following steps to create a new directory suffix:
– Go to IBM System i and i5/OS Information Center, select the appropriate Information Center version and navigate to Networking > TCP/IP applications, protocols, and services > IBM Directory Server for IBM i (LDAP) > Administering Directory Server > Adding and Removing Directory Server suffixes for information.
– Stop and restart the LDAP server.
b. Open the appropriate LDIF file, located in the root directory of the CD setup, with a text editor:
– Use the PortalUsers.ldif file as a working example and adapted appropriately to work with your LDAP server.
– Use the ContentUsers.ldif file for the DB2 for IBM i Content Manager group and user IDs if you configured DB2 for IBM i Content Manager.
c. Replace every dc=yourco,dc=com with your suffix.
d. Replace any prefixes and suffixes that are unique to your LDAP server.
e. You can specify user names other than wpsadmin and wpsbind. For security reasons, specify nontrivial passwords for these administrator accounts.
f. Optional: If using IBM Tivoli® Access Manager for e-business Version 5.1, set the objectclasses to accessGroup. If using Tivoli Access Manager Version 6, set the objectclasses to groupOfNames.
Note: Due to a restriction in Tivoli Directory Server, users or groups must not contain a Turkish uppercase dotted I or lowercase dotted i in the DN as this will prevent correct retrieval of that user or group.
Configuring a Standalone LDAP User Registry on IBM i
Preparing DB2 for IBM i 4-11
g. Save your changes.
h. Follow the instructions provided with your directory server to import the LDIF file.
i. Stop and restart the LDAP server.
4.4 Configuring a Standalone LDAP User Registry on IBM iIf you plan to use a Tivoli Directory Server as an LDAP user registry, you must install and set up the server so that it will communicate with IBM® WebSphere® Portal.
Perform the following steps to prepare Tivoli Directory Server:
1. Customize the LDAP directory servers settings using the Directory Services Configuration Wizard. You must have *ALLOBJ and*IOSYSCFG special authority to use the wizard. Go to IBM System i and i5/OS Information Center, select the appropriate Information Center version and navigate to e-business and Web serving -> Security and IBM Tivoli Directory Server for i5/OS (LDAP) -> IBM Tivoli Directory Server for i5/OS (LDAP) for information.
2. Perform the following steps to create the WebSphere Portal administrative user:
1. Optional: Perform the following steps to create a new directory suffix:
– Go to IBM System i and i5/OS Information Center, select the appropriate Information Center version and navigate to Networking -> TCP/IP applications, protocols, and services -> IBM Directory Server for IBM i (LDAP) -> Administering Directory Server -> General administration tasks -> Adding and Removing Directory Server suffixes for information.
– Stop and restart the LDAP server.
2. Open the appropriate LDIF file, located in the root directory of the CD setup, with a text editor:
Use the PortalUsers.ldif file as a working example and adapted appropriately to work with your LDAP server. Use the ContentUsers.ldif file for the DB2 for IBM i® Content Manager group and user IDs if you configured DB2 for IBM i Content Manager.
3. Replace every dc=yourco,dc=com with your suffix.
4. Replace any prefixes and suffixes that are unique to your LDAP server.
5. You can specify user names other than wpsadmin and wpsbind. For security reasons, specify nontrivial passwords for these administrator accounts.
6. Optional: If using IBM Tivoli® Access Manager Version 5.1, set the objectclasses to accessGroup. If using Tivoli Access Manager Version 6, set the objectclasses to groupOfNames.
7. Save your changes.
8. Follow the instructions provided with your directory server to import the LDIF file.
9. Stop and restart the LDAP server.
Note: Due to a restriction in Tivoli Directory Server, users or groups must not contain a Turkish uppercase dotted I or lowercase dotted i in the DN as this will prevent correct retrieval of that user or group.
Configuring a Standalone LDAP User Registry on IBM i
4-12 IBM WebSphere Portal for IBM i for Power Systems Guide
4.4.1 Standalone LDAP without SSLConfigure IBM® WebSphere® Portal to use a standalone LDAP user registry to store all user account information for authorization.
In a single server environment the following task does not have a dependency on the server status; therefore, the WebSphere_Portal and server1 servers can be either stopped or started. In a clustered environment you must stop all application servers on the system including WebSphere_Portal and server1 and then start the nodeagent and deployment manager servers before starting the following task.
If you need to rerun the wp-modify-ldap-security task to change the LDAP repositories or because the task failed, you must choose a new name for the realm using the standalone.ldap.realm parameter or you can set ignoreDuplicateIDs=true in thewklpc.properties file, before rerunning the task.
Perform the following steps to configure a standalone LDAP user registry:
1. Use a text editor to open the wkplc.properties file, located in the wp_profile_root/ConfigEngine/properties directory.
2. Required: Enter a value for the following required parameters in the wkplc.properties file under the Stand-alone security heading:
standalone.ldap.idstandalone.ldap.hoststandalone.ldap.portstandalone.ldap.bindDNstandalone.ldap.bindPasswordstandalone.ldap.ldapServerTypestandalone.ldap.userIdMapstandalone.ldap.groupIdMapstandalone.ldap.groupMemberIdMapstandalone.ldap.userFilterstandalone.ldap.groupFilterstandalone.ldap.serverIdstandalone.ldap.serverPasswordstandalone.ldap.realmstandalone.ldap.primaryAdminIdstandalone.ldap.primaryAdminPasswordstandalone.ldap.primaryPortalAdminIdstandalone.ldap.primaryPortalAdminPasswordstandalone.ldap.primaryPortalAdminGroupstandalone.ldap.baseDN
Note: Use the wp_security_xxx.properties helper file, located in the wp_profile_root/ConfigEngine/config/helpersdirectory, when performing this task to ensure the correct properties are entered. In the instructions below, when the step refers to thewkplc.properties file, you will use your wp_security_xxx.properties helper file.
Note: See the properties file for specific information about the required parameters and for advanced parameters.
Configuring a Standalone LDAP User Registry on IBM i
Preparing DB2 for IBM i 4-13
3. Required: Enter a value for the following required entity types parameters in the wkplc.properties file under the LDAP entity types heading:
standalone.ldap.et.group.objectClassesstandalone.ldap.et.group.objectClassesForCreatestandalone.ldap.et.group.searchBasesstandalone.ldap.et.personaccount.objectClassesstandalone.ldap.et.personaccount.objectClassesForCreatestandalone.ldap.et.personaccount.searchBases
4. Required: Enter a value for the following required group member parameters in the wkplc.properties file under the Group member attributes heading:
standalone.ldap.gm.groupMemberNamestandalone.ldap.gm.objectClassstandalone.ldap.gm.scopestandalone.ldap.gm.dummyMember
5. Required: Enter a value for the following required relative distinguished name (RDN®) parameters in the wkplc.propertiesfile under the Default parent, RDN attribute heading:
standalone.ldap.personAccountParentstandalone.ldap.groupParentstandalone.ldap.personAccountRdnPropertiesstandalone.ldap.groupRdnProperties
6. Save your changes to the wkplc.properties file.
7. Run the ConfigEngine.sh validate-standalone-ldap -DWasPassword=password task to validate your LDAP server settings.
8. Run the ConfigEngine.sh wp-modify-ldap-security -DWasPassword=password task, from the wp_profile_root/ConfigEngine directory, to set the standalone LDAP user registry.
Note: See the properties file for specific information about the required parameters and for advanced parameters.
Note: See the properties file for specific information about the required parameters and for advanced parameters.
Note: See the properties file for specific information about the required parameters and for advanced parameters.
Attention: If you have not deleted the default file repository, WasPassword is the value entered during installation and not a value found in your LDAP user registry.
Note: During the validation task, you may receive the following prompt: Add signer to the trust store now? Press y, then Enter.
Configuring a Standalone LDAP User Registry on IBM i
4-14 IBM WebSphere Portal for IBM i for Power Systems Guide
9. Stop and restart the appropriate servers to propagate the changes. For specific instructions, see the following link under Related tasks: Starting and stopping servers, deployment managers, and node agents.
10. Run the ConfigEngine.sh wp-validate-standalone-ldap-attribute-config -DWasPassword=password task, from the wp_profile_root/ConfigEngine directory, to check that all defined attributes are available in the configured LDAP user registry.
11. Optional: Run the Member Fixer task to update the member names used by Web Content Management with the corresponding members in the LDAP directory. This step ensures that access to the Web content libraries for the Intranet and Internet Site Templates for the contentAuthors group is correctly mapped to the appropriate group in the LDAP directory.
a. Edit the wp_profile_root/PortalServer/wcm/shared/app/config/wcmservices/MemberFixerModule.properties file.
b. Add the following lines to the file:
uid=xyzadmin,o=defaultWIMFileBasedRealm -> portal_admin_DN
cn=contentauthors,o=defaultWIMFileBasedRealm -> content_authors_group_DN
Where portal_admin_DN is the distinguished name of the portal administrator and content_authors_group_DN is the distinguished name of the content authors group used during LDAP configuration.
Important:
Important: When you finish configuring your LDAP user registry, see "Adapting the attribute configuration" for information about adding and mapping attributes to ensure proper communication between WebSphere Portal and the LDAP server.
Note: This step is only needed if you have installed the product with Web Content Management and intend to use the Intranet and Internet Site Templates that were optionally installed with the product by running the configure-express task.
Important:
■ Ensure the portal administrator you specify for portal_admin_DN is a member of the group you specify forcontent_authors_group_DN, otherwise the portal administrator cannot access the Web content libraries for the Intranet and Internet Site Templates.
■ If you plan to run the express-memberfixer task in an environment with multiple realms, remove the cn=contentauthors,o=defaultWIMFileBasedRealm group if it exists. If this group exists in an environment with multiple realms, the Member Fixer task does not have any effect.
Configuring a Standalone LDAP User Registry on IBM i
Preparing DB2 for IBM i 4-15
c. Save your changes and close the file.
d. Run the ConfigEngine.sh express-memberfixer -DmemberfixerRealm=realm_name -DPortalAdminPwd=password -DWasPassword=password task, located in the wp_profile_root/ConfigEngine directory.
The following tables describes the value for realm_name when running the Member Fixer task to update the member names used by Web Content Management:
12. Optional: Assign access to the Web content libraries.
a. Log in as a portal administrator.
b. Navigate to Administration -> Portal Content -> Web Content Libraries.
c. Click the Set permissions icon for the Web library.
d. Click the Edit Role icon for Editor.
e. Add the group you specified for content_authors_group_DN as an Editor for the Intranet and Internet libraries.
f. Click Apply then Done.
g. If you have created any additional Web Content Management libraries, run the Web content member fixer task to update the member names used by the libraries.
4.4.2 Standalone LDAP over SSLConfigure IBM® WebSphere® Portal to use a standalone LDAP user registry over SSL to store all user account information for secure authorization.
In a single server environment the following task does not have a dependency on the server status; therefore, the WebSphere_Portal and server1 servers can be either stopped or started. In a clustered environment you must stop all application servers on the system including WebSphere_Portal and server1 and then start the nodeagent and deployment manager servers before starting the following task.
Perform the following steps to configure a standalone LDAP user registry over SSL:
1. Complete the following steps to add the SSL certificate for the LDAP server to the server trust store and the client trust store:
Note: Choose the appropriate value to enter for realm_name depending on the type of LDAP user registry you configured.
Type of LDAP Value
Standalone LDAP The value specified for realm_name should match the value forstandalone.ldap.realm in the wkplc.properties file.
Note: Use the wp_security_xxx.properties helper file, located in the wp_profile_root/ConfigEngine/config/helpersdirectory, when performing this task to ensure the correct properties are entered. In the instructions below, when the step refers to thewkplc.properties file, you will use your wp_security_xxx.properties helper file.
Configuring a Standalone LDAP User Registry on IBM i
4-16 IBM WebSphere Portal for IBM i for Power Systems Guide
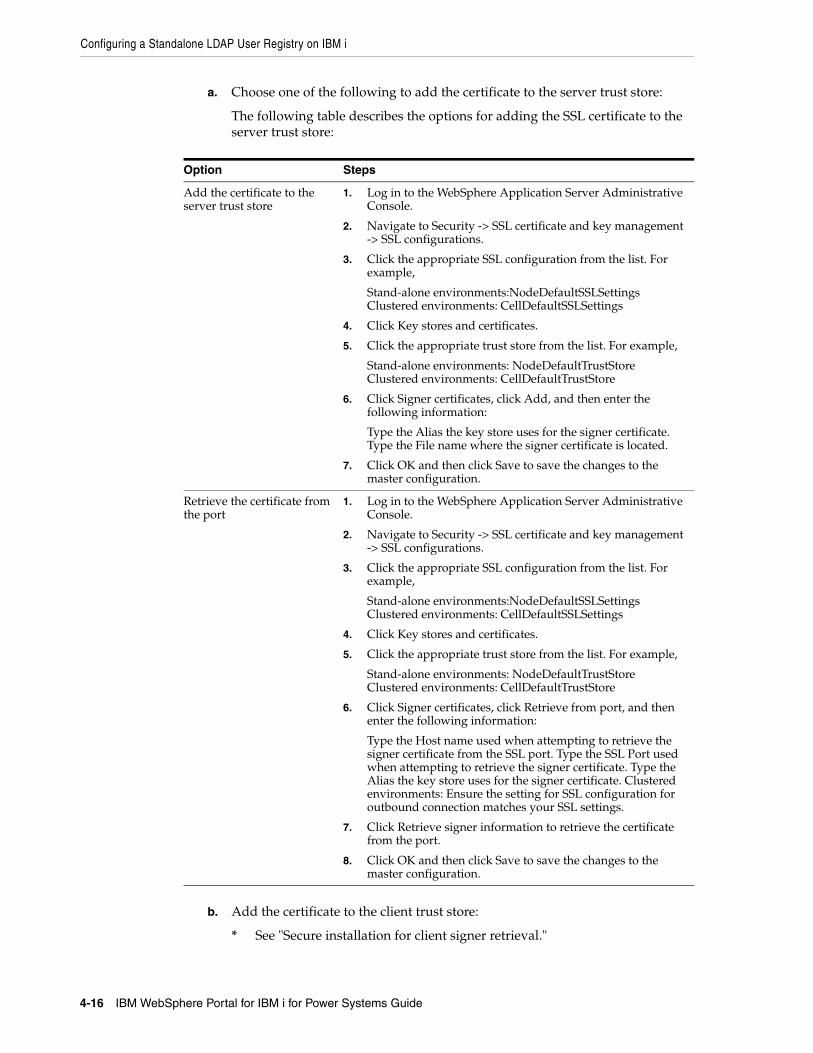
a. Choose one of the following to add the certificate to the server trust store:
The following table describes the options for adding the SSL certificate to the server trust store:
b. Add the certificate to the client trust store:
* See "Secure installation for client signer retrieval."
Option Steps
Add the certificate to the server trust store
1. Log in to the WebSphere Application Server Administrative Console.
2. Navigate to Security -> SSL certificate and key management -> SSL configurations.
3. Click the appropriate SSL configuration from the list. For example,
Stand-alone environments:NodeDefaultSSLSettings Clustered environments: CellDefaultSSLSettings
4. Click Key stores and certificates.
5. Click the appropriate trust store from the list. For example,
Stand-alone environments: NodeDefaultTrustStore Clustered environments: CellDefaultTrustStore
6. Click Signer certificates, click Add, and then enter the following information:
Type the Alias the key store uses for the signer certificate. Type the File name where the signer certificate is located.
7. Click OK and then click Save to save the changes to the master configuration.
Retrieve the certificate from the port
1. Log in to the WebSphere Application Server Administrative Console.
2. Navigate to Security -> SSL certificate and key management -> SSL configurations.
3. Click the appropriate SSL configuration from the list. For example,
Stand-alone environments:NodeDefaultSSLSettings Clustered environments: CellDefaultSSLSettings
4. Click Key stores and certificates.
5. Click the appropriate trust store from the list. For example,
Stand-alone environments: NodeDefaultTrustStore Clustered environments: CellDefaultTrustStore
6. Click Signer certificates, click Retrieve from port, and then enter the following information:
Type the Host name used when attempting to retrieve the signer certificate from the SSL port. Type the SSL Port used when attempting to retrieve the signer certificate. Type the Alias the key store uses for the signer certificate. Clustered environments: Ensure the setting for SSL configuration for outbound connection matches your SSL settings.
7. Click Retrieve signer information to retrieve the certificate from the port.
8. Click OK and then click Save to save the changes to the master configuration.

Configuring a Standalone LDAP User Registry on IBM i
Preparing DB2 for IBM i 4-17
* Run the retrieveSigners task from the wp_profile_root/bin directory; see retrieveSigners command for information. In a deployed environment, you will need to run the retrieveSigners task, for any federated node, against the Deployment Manager.
Example task:
Stand-alone environments
retrieveSigners.sh NodeDefaultTrustStore ClientDefaultTrust-Store -autoAcceptBootstrapSigner -conntype SOAP -port port_num-ber
Clustered environments
retrieveSigners.sh CellDefaultTrustStore ClientDefaultTrust-Store -autoAcceptBootstrapSigner -conntype SOAP -port port_num-ber
When prompted, enter the following:
Realm/Cell Name: name
Username: user_ID
Password: password
The following message displays: CWPKI0308I: Adding signer alias "alias_name" to local keystore "ClientDefaultTrustStore" with the following SHA digest: ssl_certificate_fingerprint
* Update the trust store properties file.
Clustered environments:
Perform the following steps on the primary node then resynchronize through the Deployment Manager to propagate the changes.
Check each node to ensure that ssl.client.props contains the same values as on the primary node. If the values in ssl.client.props are not identical for a particular node, restart that server to synchronize the changes.
Open ssl.client.props with any text editor in the following directory: wp_profile_root/properties
Change the com.ibm.ssl.trustStore parameter and the related trust store parameters to match the trust file specified in the SSL configuration. For example,
Stand-alone environments:
To use the default trust store, enter the following: com.ibm.ssl.trust-Store=wp_profile_root\\config\\cells\\cell_name\\nodes\\node_name\\trust.p12
Clustered environments:
To use the default trust store, enter the following: com.ibm.ssl.trust-Store=wp_profile_root/config/cells/cell_name/trust.p12
Save your changes.
Note: This task might report an error, but it does successfully update the trust store. You can ignore the error message.
Configuring a Standalone LDAP User Registry on IBM i
4-18 IBM WebSphere Portal for IBM i for Power Systems Guide
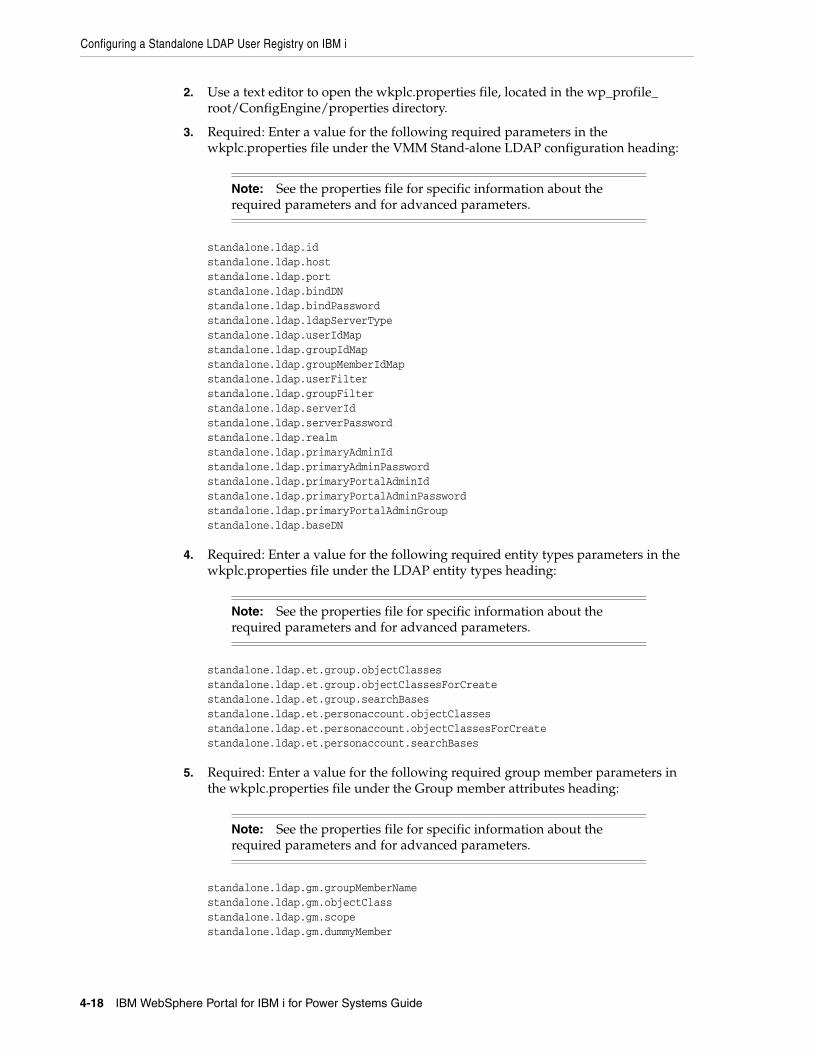
2. Use a text editor to open the wkplc.properties file, located in the wp_profile_root/ConfigEngine/properties directory.
3. Required: Enter a value for the following required parameters in the wkplc.properties file under the VMM Stand-alone LDAP configuration heading:
standalone.ldap.idstandalone.ldap.hoststandalone.ldap.portstandalone.ldap.bindDNstandalone.ldap.bindPasswordstandalone.ldap.ldapServerTypestandalone.ldap.userIdMapstandalone.ldap.groupIdMapstandalone.ldap.groupMemberIdMapstandalone.ldap.userFilterstandalone.ldap.groupFilterstandalone.ldap.serverIdstandalone.ldap.serverPasswordstandalone.ldap.realmstandalone.ldap.primaryAdminIdstandalone.ldap.primaryAdminPasswordstandalone.ldap.primaryPortalAdminIdstandalone.ldap.primaryPortalAdminPasswordstandalone.ldap.primaryPortalAdminGroupstandalone.ldap.baseDN
4. Required: Enter a value for the following required entity types parameters in the wkplc.properties file under the LDAP entity types heading:
standalone.ldap.et.group.objectClassesstandalone.ldap.et.group.objectClassesForCreatestandalone.ldap.et.group.searchBasesstandalone.ldap.et.personaccount.objectClassesstandalone.ldap.et.personaccount.objectClassesForCreatestandalone.ldap.et.personaccount.searchBases
5. Required: Enter a value for the following required group member parameters in the wkplc.properties file under the Group member attributes heading:
standalone.ldap.gm.groupMemberNamestandalone.ldap.gm.objectClassstandalone.ldap.gm.scopestandalone.ldap.gm.dummyMember
Note: See the properties file for specific information about the required parameters and for advanced parameters.
Note: See the properties file for specific information about the required parameters and for advanced parameters.
Note: See the properties file for specific information about the required parameters and for advanced parameters.
Configuring a Standalone LDAP User Registry on IBM i
Preparing DB2 for IBM i 4-19
6. Required: Enter a value for the following required relative distinguished name (RDN®) parameters in the wkplc.properties file under the Default parent, RDN attribute heading:
standalone.ldap.personAccountParentstandalone.ldap.groupParentstandalone.ldap.personAccountRdnPropertiesstandalone.ldap.groupRdnProperties
7. Enter a value for the following parameters to enable Secure Socket Layers (SSL):
Required parameters:
standalone.ldap.sslEnabledstandalone.ldap.sslConfiguration
Optional parameters:
standalone.ldap.certificateMapModestandalone.ldap.certificateFilter
8. Save your changes to the wkplc.properties file.
9. Run the ConfigEngine.sh validate-standalone-ldap -DWasPassword=password task to validate your LDAP server settings.
10. Run the ConfigEngine.sh wp-modify-ldap-security -DWasPassword=password task, from thewp_profile_root/ConfigEngine directory, to set the standalone LDAP user registry.
11. Stop and restart the appropriate servers to propagate the changes. For specific instructions, see the following link under Related tasks:
Starting and stopping servers, deployment managers, and node agents.
12. Run the ConfigEngine.sh wp-validate-standalone-ldap-attribute-config -DWasPassword=password task, from thewp_profile_root/ConfigEngine directory, to check that all defined attributes are available in the configured LDAP user registry.
Note: See the properties file for specific information about the required parameters and for advanced parameters.
Note: See the properties file for specific information about the required parameters and for advanced parameters.
Attention: If you have not deleted the default file repository, WasPassword is the value entered during installation and not a value found in your LDAP user registry.
Note: During the validation task, you may receive the following prompt: Add signer to the trust store now?. Press y and then Enter.
Configuring a Standalone LDAP User Registry on IBM i
4-20 IBM WebSphere Portal for IBM i for Power Systems Guide
After installing IBM® WebSphere® Portal and configuring your LDAP user registries, you can query the defined attributes to see what attributes are flagged as unsupported or if the attribute is mapped to a different LDAP attribute.
Run the ConfigEngine.sh wp-query-attribute-config -DWasPassword=password task, from thewp_profile_root/ConfigEngine directory, any time during the configuration process or at runtime to query an overview of the currently defined attributes. This task creates the availableAttributes.html report, located in the wp_profile_root/ConfigEngine/logdirectory. The report contains one table that lists the available attributes for Users (PersonAccount) and one table that lists the available attributes for Groups. For each configured repository there is a column that indicates if the attribute is flagged as unsupported or if the attribute is mapped to a different LDAP attribute.
The VMM is configured with a default attribute schema that might not be compatible with your LDAP server. If this is the case, extend the VMM attribute schema by adding new attributes that you can map between IBM® WebSphere® Portal and your user registry.
Perform the following steps to add new attributes to your user registry:
1. Install the required Enterprise Archive (.ear) file on WebSphere Application Server.
a. Open a command prompt.
b. Navigate to the wp_profile_root/ConfigEngine directory.
c. Run the ConfigEngine.sh wp-la-install-ear -DWasPassword=password task.
2. Stop and restart the appropriate servers to propagate the changes. For specific instructions, see the following link under Related tasks: Starting and stopping servers, deployment managers, and node agents.
3. Use a text editor to open the wkplc.properties file, located in the wp_profile_root/ConfigEngine/properties directory.
4. Enter a value for the following required parameters in the wkplc.properties file under the VMM Property Extension Properties heading:
la.providerURLla.propertyNamela.entityTypesla.dataTypela.multiValued
5. Save your changes to the wkplc.properties file.
Important: When you finish configuring your LDAP user registry, see "Adapting the attribute configuration" for information about adding and mapping attributes to ensure proper communication between WebSphere Portal and the LDAP server.
Note: This task does not validate the existence of attributes in the LDAP schema.
Note: See the properties file for specific information about the required parameters and for advanced parameters.
Configuring a Standalone LDAP User Registry on IBM i
Preparing DB2 for IBM i 4-21
6. Run the ConfigEngine.sh wp-add-property -DWasPassword=password task to add the attribute to the user registry.
7. Stop and restart the appropriate servers to propagate the changes.
After you install and configure your LDAP user registry and after you query the defined attributes, you can map the attributes so they match the configured LDAP servers and your business needs.
Perform the following steps to map attributes between WebSphere Portal and your LDAP server; if you have multiple LDAP servers, you will need to perform these steps for each LDAP server:
1. Use a text editor to open the wkplc.properties file, located in the wp_profile_root/ConfigEngine/properties directory.
2. Enter a value for one of the following sets of parameters in the wkplc.properties file to identify your LDAP server:
The following table contains information on how to identify your LDAP server in the wkplc.properties file:
3. Run one of the following tasks to check that all defined attributes are available in the configured LDAP user registry.
The following table describes the task to check that all defined attributes are available in the configured LDAP user registry.
Note: This task performs an EJB call to WebSphere Application Server, which must authenticate against WebSphere Application Server. Depending on the configuration in the sas.client.props file, you may receive a popup window or a command line prompt asking for user identity and password. Enter the WebSphere Application Server user ID and password.
Remember, if you have multiple properties to add, repeat all steps, except for the wp-la-install-ear task, until all new attributes are added.
Note: Make sure you use the same values you used to configure your LDAP server.
Repository type Parameters
Stand-alone The following parameters are found under the LDAP attribute configuration heading:
Note: See the properties file for specific information about the required parameters and for advanced parameters.
standalone.ldap.idstandalone.ldap.hoststandalone.ldap.portstandalone.ldap.sslEnabledstandalone.ldap.bindDNstandalone.ldap.bindPasswordstandalone.ldap.baseDN
Configuring a Standalone LDAP User Registry on IBM i
4-22 IBM WebSphere Portal for IBM i for Power Systems Guide
4. Open the ConfigTrace.log file, located in the wp_profile_root\\ConfigEngine\\log directory, to review the following output for the PersonAccount and Group entity type:
The following attributes are defined in WebSphere Portal but not in the LDAP server:
This list contains all attributes that are defined in WebSphere Portal but not available in the LDAP. Flag attributes that you do not plan to use in WebSphere Portal as unsupported. Map the attributes that you plan to use to the attributes that exist in the LDAP; you must also map the uid, cn, firstName, sn, preferredLanguage, and ibm-primaryEmail attributes if they are contained in the list.
The following attributes are flagged as required in the LDAP server but not in WebSphere Portal:
This list contains all attributes that are defined as "MUST" in the LDAP server but not as required in WebSphere Portal. You should flag these attributes as required within WebSphere Portal; see the step below about flagging an attribute as either unsupported or required.
The following attributes have a different type in WebSphere Portal and in the LDAP server:
This list contains all attributes that WebSphere Portal might ignore because the data type within WebSphere Portal and within the LDAP server do not match.
5. Use a text editor to open the wkplc.properties file, located in the wp_profile_root/ConfigEngine/properties directory.
6. Enter a value for one of the following sets of parameters in the wkplc.properties file to correct any issues found in the config trace file.
The following table describe the parameters that you can define in the wkplc.properties file to correct any issues found in the config trace file.
Repository type Task
Stand-alone ConfigEngine.sh wp-validate-standalone-ldap-attribute-config -DWasPassword=password task, from the wp_profile_root/ConfigEngine directory.
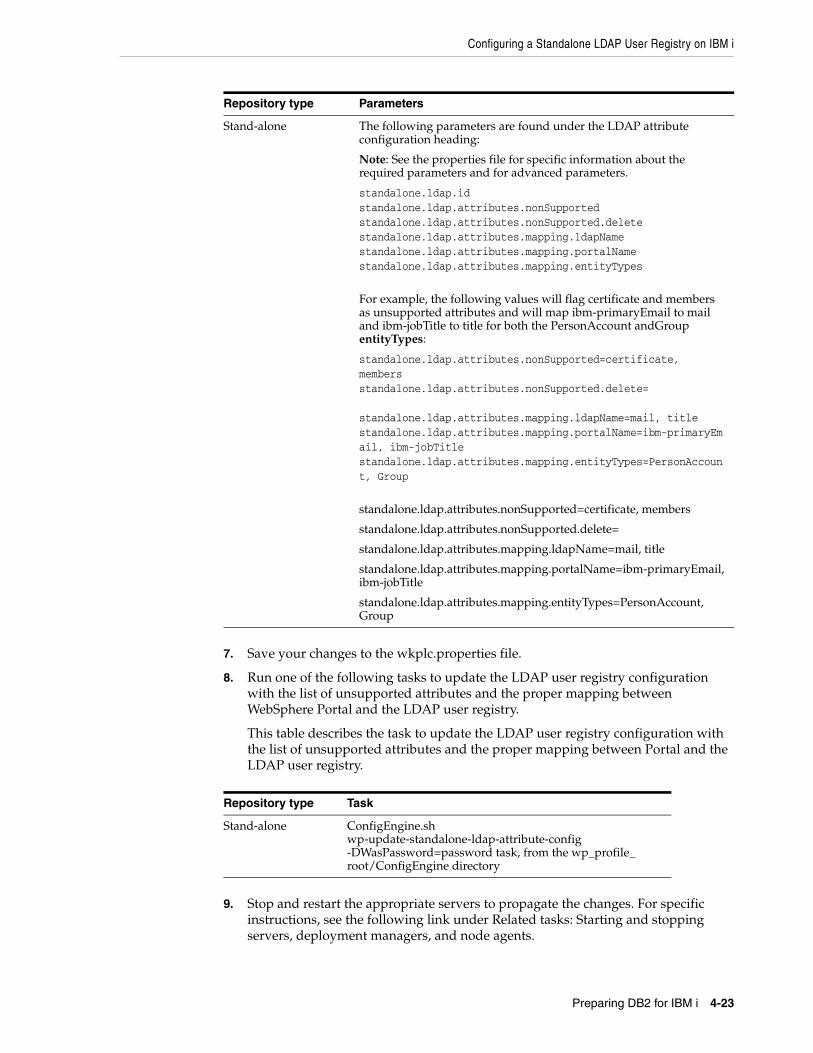
Configuring a Standalone LDAP User Registry on IBM i
Preparing DB2 for IBM i 4-23
7. Save your changes to the wkplc.properties file.
8. Run one of the following tasks to update the LDAP user registry configuration with the list of unsupported attributes and the proper mapping between WebSphere Portal and the LDAP user registry.
This table describes the task to update the LDAP user registry configuration with the list of unsupported attributes and the proper mapping between Portal and the LDAP user registry.
9. Stop and restart the appropriate servers to propagate the changes. For specific instructions, see the following link under Related tasks: Starting and stopping servers, deployment managers, and node agents.
Repository type Parameters
Stand-alone The following parameters are found under the LDAP attribute configuration heading:
Note: See the properties file for specific information about the required parameters and for advanced parameters.
standalone.ldap.idstandalone.ldap.attributes.nonSupportedstandalone.ldap.attributes.nonSupported.deletestandalone.ldap.attributes.mapping.ldapNamestandalone.ldap.attributes.mapping.portalNamestandalone.ldap.attributes.mapping.entityTypes
For example, the following values will flag certificate and members as unsupported attributes and will map ibm-primaryEmail to mail and ibm-jobTitle to title for both the PersonAccount andGroup entityTypes:
standalone.ldap.attributes.nonSupported=certificate, membersstandalone.ldap.attributes.nonSupported.delete= standalone.ldap.attributes.mapping.ldapName=mail, titlestandalone.ldap.attributes.mapping.portalName=ibm-primaryEmail, ibm-jobTitlestandalone.ldap.attributes.mapping.entityTypes=PersonAccount, Group
standalone.ldap.attributes.nonSupported=certificate, members
standalone.ldap.attributes.nonSupported.delete=
standalone.ldap.attributes.mapping.ldapName=mail, title
standalone.ldap.attributes.mapping.portalName=ibm-primaryEmail, ibm-jobTitle
standalone.ldap.attributes.mapping.entityTypes=PersonAccount, Group
Repository type Task
Stand-alone ConfigEngine.sh wp-update-standalone-ldap-attribute-config -DWasPassword=password task, from the wp_profile_root/ConfigEngine directory
Configuring a Standalone LDAP User Registry on IBM i
4-24 IBM WebSphere Portal for IBM i for Power Systems Guide
10. Optional: Perform the following steps to flag an attribute as either unsupported or required for the entire WebSphere Portal environment instead of just for the specified LDAP:
a. Enter a value for the following required parameters in the wkplc.properties file:
– user.attributes.required
– user.attributes.nonsupported
b. Save your changes to the wkplc.properties file.
c. Run the ConfigEngine.sh wp-update-attribute-config -DWasPassword=password task, from thewp_profile_root/ConfigEngine directory.
d. Stop and restart all necessary servers to propagate your changes.
Due to a Virtual Member Manager (VMM) limitation, there is currently no task to update an attribute. Therefore, if you added an attribute to your property extension database or when adapting attributes to match your LDAP server that were spelled incorrectly or already added due to migration, you must remove the attribute from the database. Use caution when performing these steps.
Perform the following steps to remove an attribute from your database:
1. Open the tool you use to edit your database.
2. Verify that your attribute name is available in the LAPROP table.
3. Delete the required attributes from the LAPROP table.
4. Open the wimxmlextension.xml file, located in the wp_profile_root/config/cells/cellname/wim/model directory.
5. Locate and delete the propertySchema definition for the attributes that you deleted from the LAPROP table; for example:
<wim:propertySchema nsURI="http://www.ibm.com/websphere/wim" dataType="String" multiValued="true" propertyName="attribute_name"> <wim:applicableEntityTypeNames>PersonAccount</wim:applicableEntityTypeNames> </wim:propertySchema>
6. Save your changes to the wimxmlextension.xml file.
7. Open the wimconfig.xml file, located in the wp_profile_root/config/cells/cellname/wim/config directory.
Note: See the properties file for specific information about the required parameters and for advanced parameters.
Important: Do not remove attributes that have already been populated with user values because this can cause database inconsistencies.
Cluster note: In a clustered environment, perform the following steps on the deployment manager and then resynch the nodes.
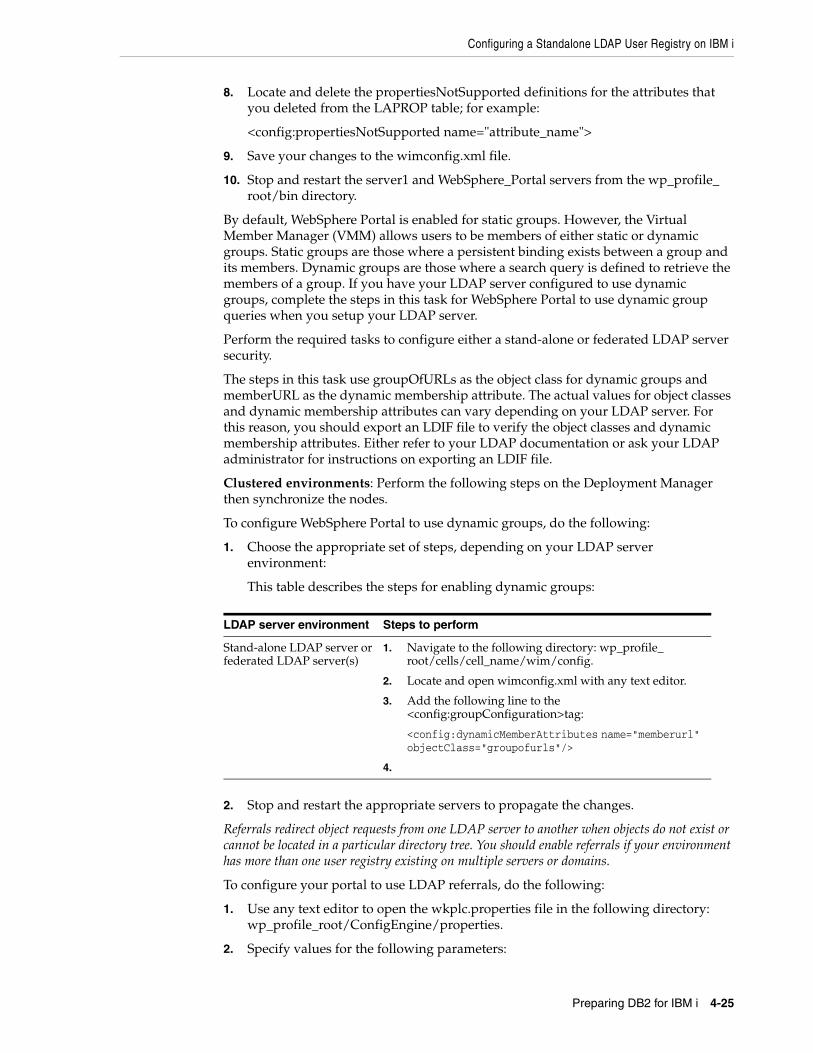
Configuring a Standalone LDAP User Registry on IBM i
Preparing DB2 for IBM i 4-25
8. Locate and delete the propertiesNotSupported definitions for the attributes that you deleted from the LAPROP table; for example:
<config:propertiesNotSupported name="attribute_name">
9. Save your changes to the wimconfig.xml file.
10. Stop and restart the server1 and WebSphere_Portal servers from the wp_profile_root/bin directory.
By default, WebSphere Portal is enabled for static groups. However, the Virtual Member Manager (VMM) allows users to be members of either static or dynamic groups. Static groups are those where a persistent binding exists between a group and its members. Dynamic groups are those where a search query is defined to retrieve the members of a group. If you have your LDAP server configured to use dynamic groups, complete the steps in this task for WebSphere Portal to use dynamic group queries when you setup your LDAP server.
Perform the required tasks to configure either a stand-alone or federated LDAP server security.
The steps in this task use groupOfURLs as the object class for dynamic groups and memberURL as the dynamic membership attribute. The actual values for object classes and dynamic membership attributes can vary depending on your LDAP server. For this reason, you should export an LDIF file to verify the object classes and dynamic membership attributes. Either refer to your LDAP documentation or ask your LDAP administrator for instructions on exporting an LDIF file.
Clustered environments: Perform the following steps on the Deployment Manager then synchronize the nodes.
To configure WebSphere Portal to use dynamic groups, do the following:
1. Choose the appropriate set of steps, depending on your LDAP server environment:
This table describes the steps for enabling dynamic groups:
2. Stop and restart the appropriate servers to propagate the changes.
Referrals redirect object requests from one LDAP server to another when objects do not exist or cannot be located in a particular directory tree. You should enable referrals if your environment has more than one user registry existing on multiple servers or domains.
To configure your portal to use LDAP referrals, do the following:
1. Use any text editor to open the wkplc.properties file in the following directory: wp_profile_root/ConfigEngine/properties.
2. Specify values for the following parameters:
LDAP server environment Steps to perform
Stand-alone LDAP server or federated LDAP server(s)
1. Navigate to the following directory: wp_profile_root/cells/cell_name/wim/config.
2. Locate and open wimconfig.xml with any text editor.
3. Add the following line to the <config:groupConfiguration>tag:
<config:dynamicMemberAttributes name="memberurl" objectClass="groupofurls"/>
4.
Configuring an External HTTP Server for WebSphere Portal v7.0 (IBM i HTTP Server only)
4-26 IBM WebSphere Portal for IBM i for Power Systems Guide
■ et.ldap.id=ID_of_your_LDAP_server
■ et.ldap.host=hostname_of_your_LDAP_server
■ et.ldap.referral=follow
3. Save and close wkplc.properties.
4. Run the following task from the wp_profile_root/ConfigEngine directory to create an LDAP entity type:
UNIX: ./ConfigEngine.sh wp-update-et-ldap -DWasPassword=password Windows: ConfigEngine.bat wp-update-et-ldap -DWasPassword=password i: ConfigEngine.sh wp-update-et-ldap -DWasPassword=password
5. Stop and restart the appropriate servers to propagate the changes.
4.5 Configuring an External HTTP Server for WebSphere Portal v7.0 (IBM i HTTP Server only)
By default, the installation configures the WebSphere Portal v7.0 to use the internal HTTP transport within the WebSphere Application Server to handle requests (i.e port 10039). Portal also supports the use of an external Web server which is the recommended configuration for production Portals. For Portal Server v7.0 on IBM i only the native IBM i HTTP Server is supported.
This section explains how you can configure an external web server port to communicate with the WebSphere Portal, which includes these tasks:
■ Creating a webserver definition for the wp_profile
■ Remapping the WebSphere portal to the external web server
■ Adding the external port
■ Generating the webserver plugin for the wp_profile
■ Propagating webserver plugin
4.5.1 Creating a Webserver DefinitionWhen WebSphere Application Server was initially installed, a webserver definition was created for the WebSphere Application Server profile, known as the default profile. The installation of the WebSphere Portal Server creates a new profile, wp_profile. This profile is a non-default profile. Non-default profiles do not have web server definitions or plugin files created for them at the time of install. To use an external http server with portal, a second webserver definition and its corresponding plugin-cfg.xml file must be created manually for the wp_profile. This can be created from the Admin Console (i.e server1 console) of the wp_profile.
To create the new definition:
1. Log in to the IBM i HTTP Series admin console as the PORTALUSR userprofile
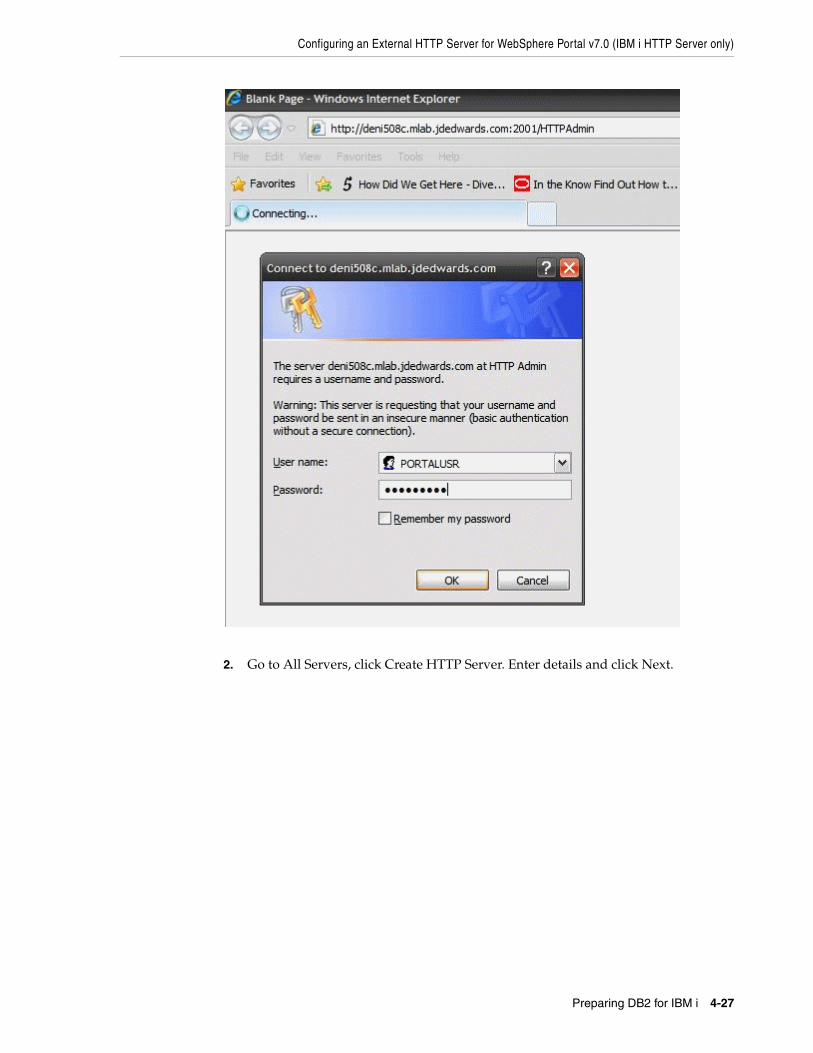
Configuring an External HTTP Server for WebSphere Portal v7.0 (IBM i HTTP Server only)
Preparing DB2 for IBM i 4-27
2. Go to All Servers, click Create HTTP Server. Enter details and click Next.
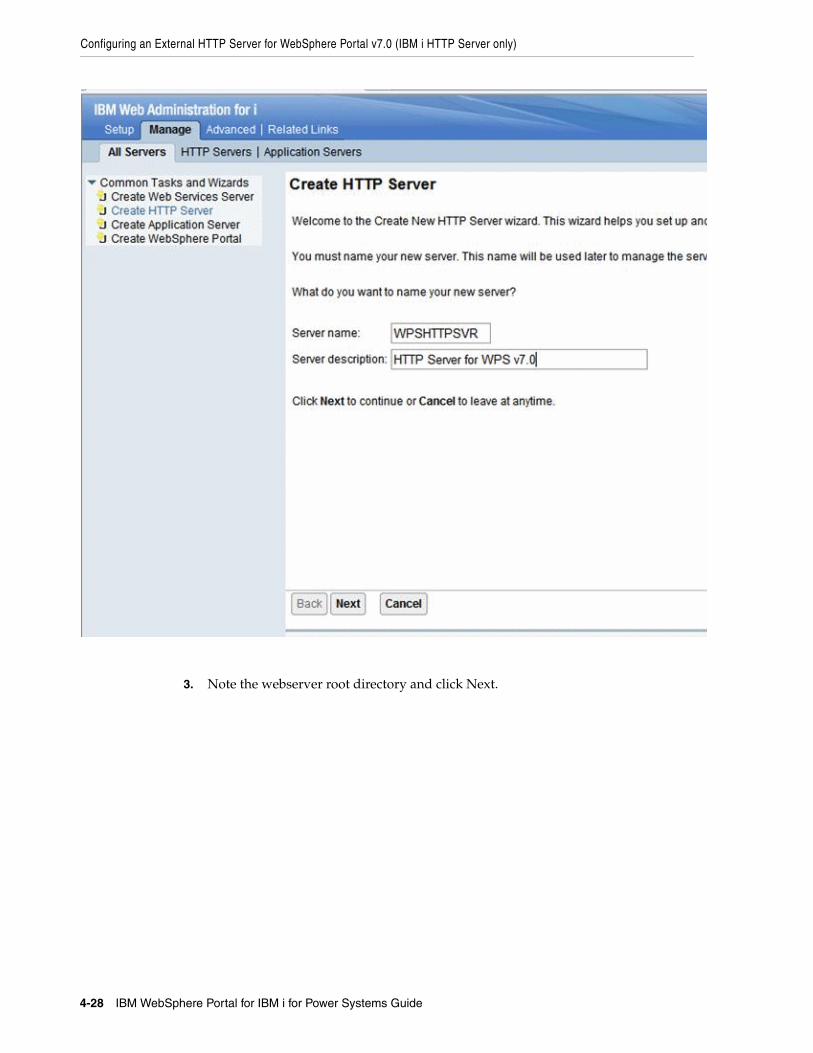
Configuring an External HTTP Server for WebSphere Portal v7.0 (IBM i HTTP Server only)
4-28 IBM WebSphere Portal for IBM i for Power Systems Guide
3. Note the webserver root directory and click Next.
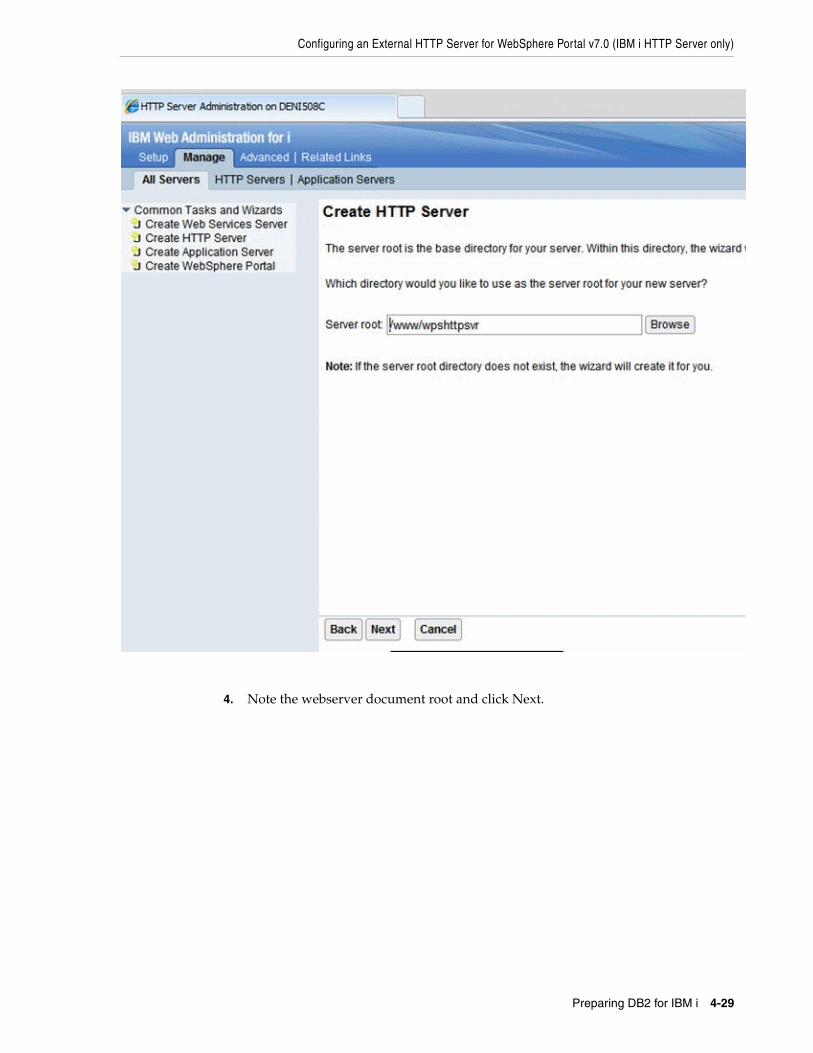
Configuring an External HTTP Server for WebSphere Portal v7.0 (IBM i HTTP Server only)
Preparing DB2 for IBM i 4-29
4. Note the webserver document root and click Next.
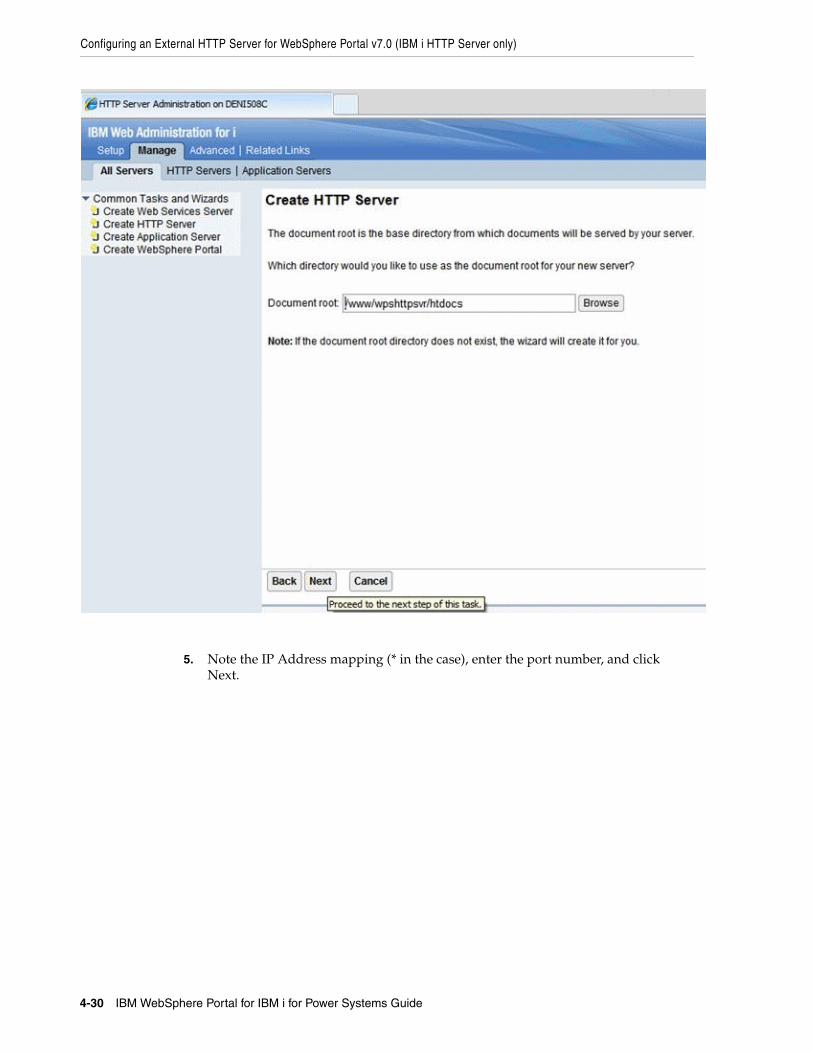
Configuring an External HTTP Server for WebSphere Portal v7.0 (IBM i HTTP Server only)
4-30 IBM WebSphere Portal for IBM i for Power Systems Guide
5. Note the IP Address mapping (* in the case), enter the port number, and click Next.
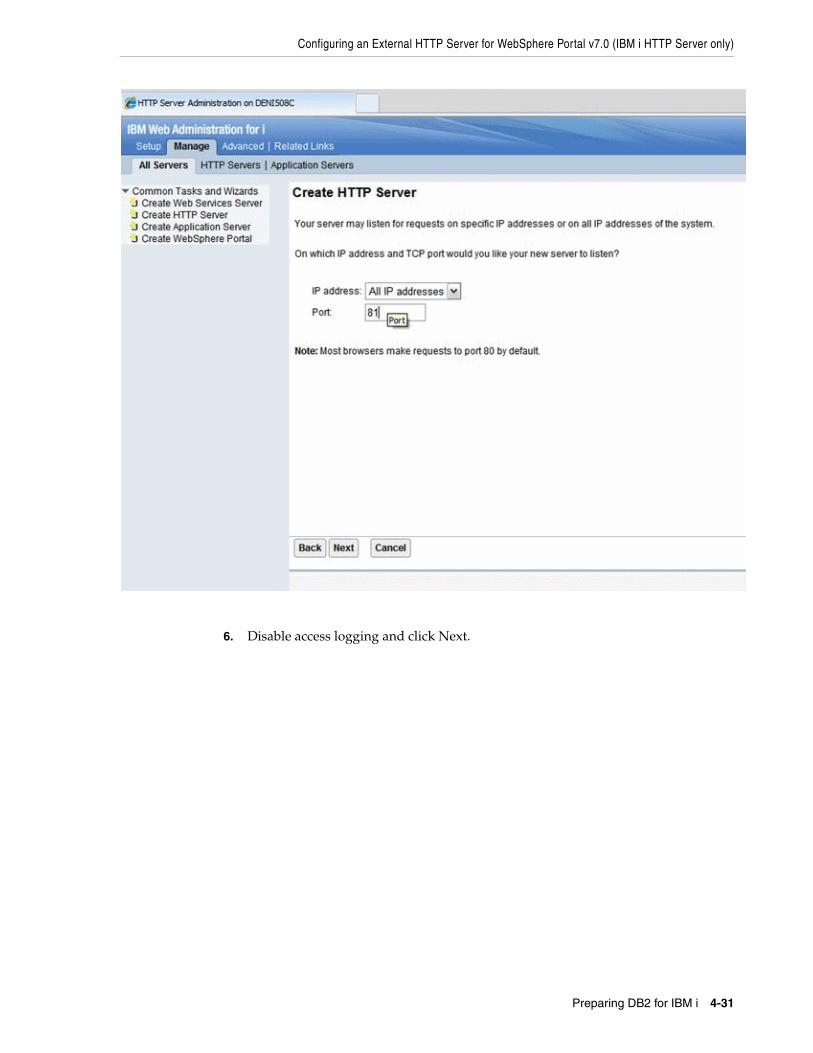
Configuring an External HTTP Server for WebSphere Portal v7.0 (IBM i HTTP Server only)
Preparing DB2 for IBM i 4-31
6. Disable access logging and click Next.
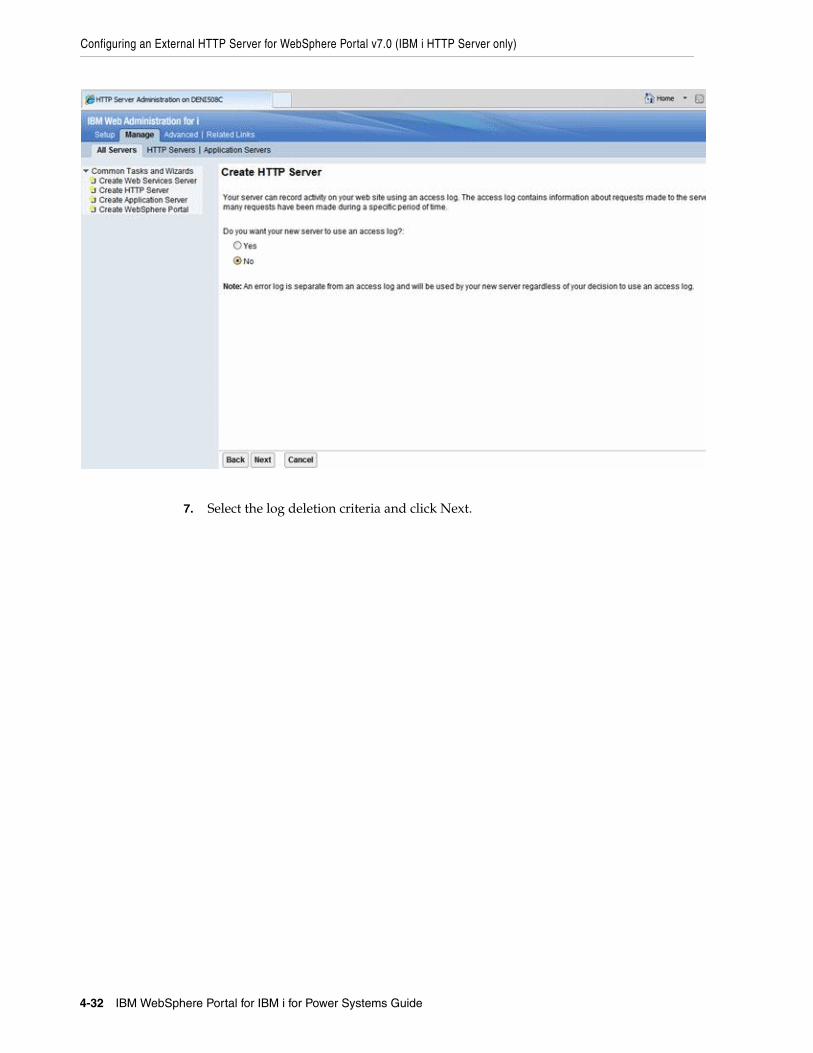
Configuring an External HTTP Server for WebSphere Portal v7.0 (IBM i HTTP Server only)
4-32 IBM WebSphere Portal for IBM i for Power Systems Guide
7. Select the log deletion criteria and click Next.
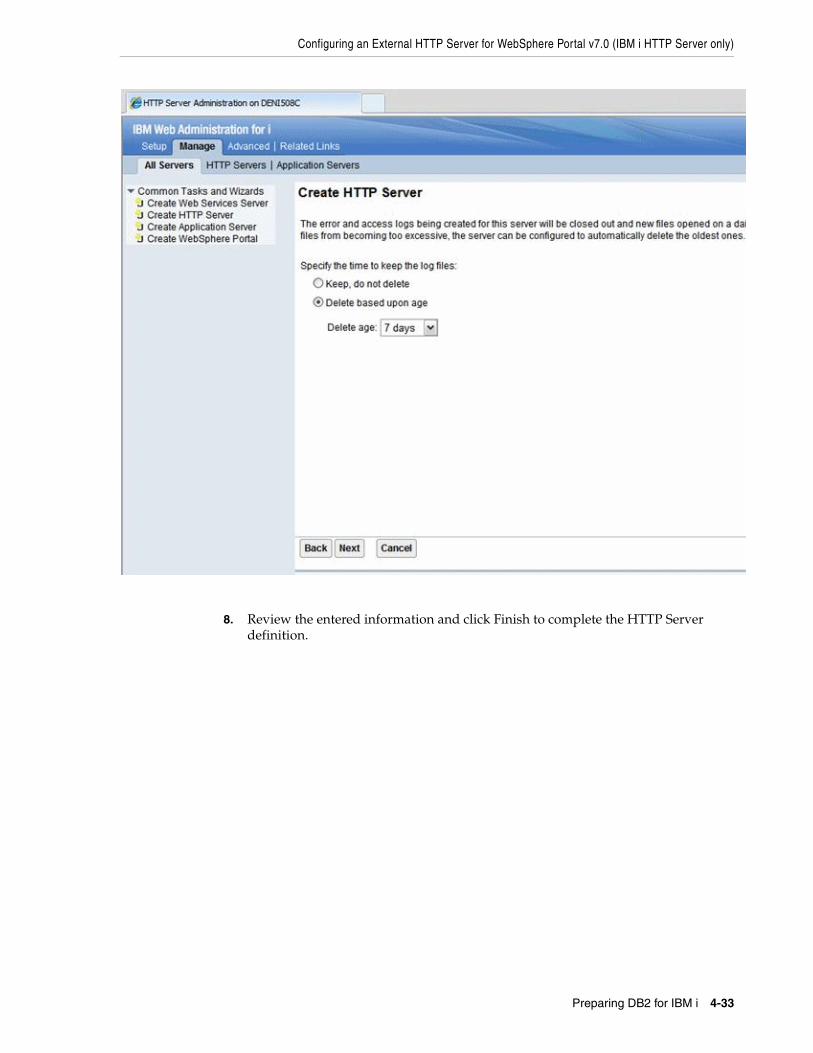
Configuring an External HTTP Server for WebSphere Portal v7.0 (IBM i HTTP Server only)
Preparing DB2 for IBM i 4-33
8. Review the entered information and click Finish to complete the HTTP Server definition.
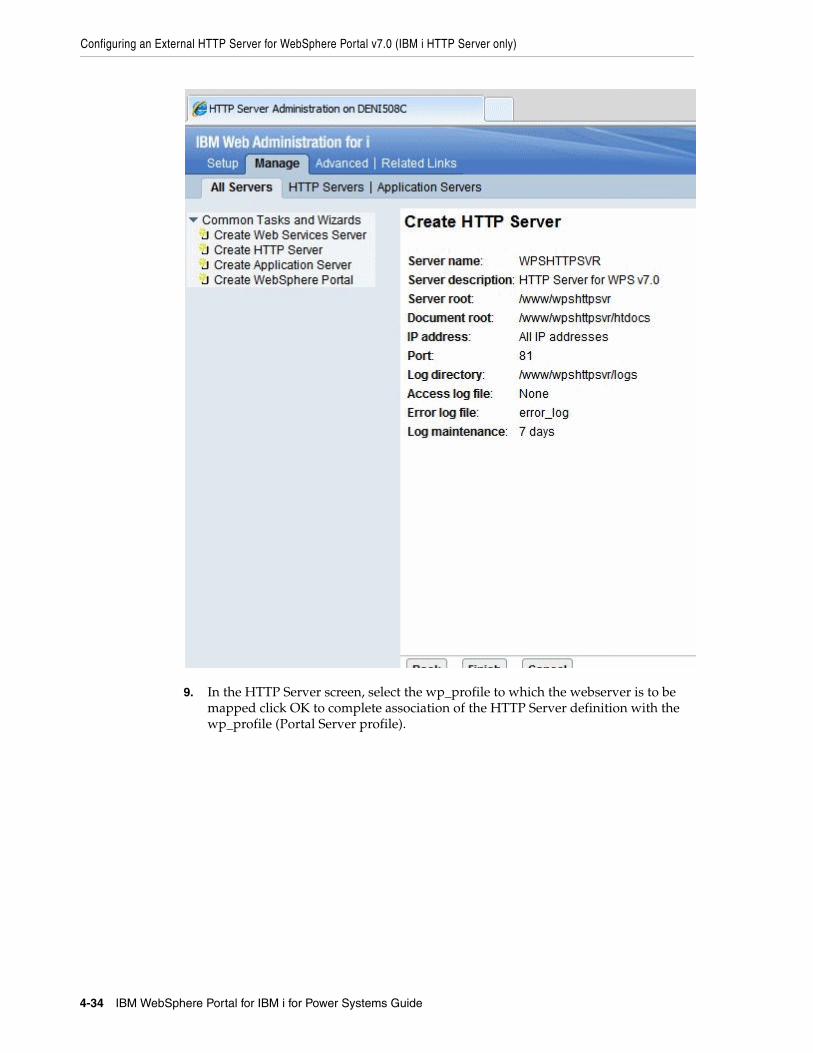
Configuring an External HTTP Server for WebSphere Portal v7.0 (IBM i HTTP Server only)
4-34 IBM WebSphere Portal for IBM i for Power Systems Guide
9. In the HTTP Server screen, select the wp_profile to which the webserver is to be mapped click OK to complete association of the HTTP Server definition with the wp_profile (Portal Server profile).
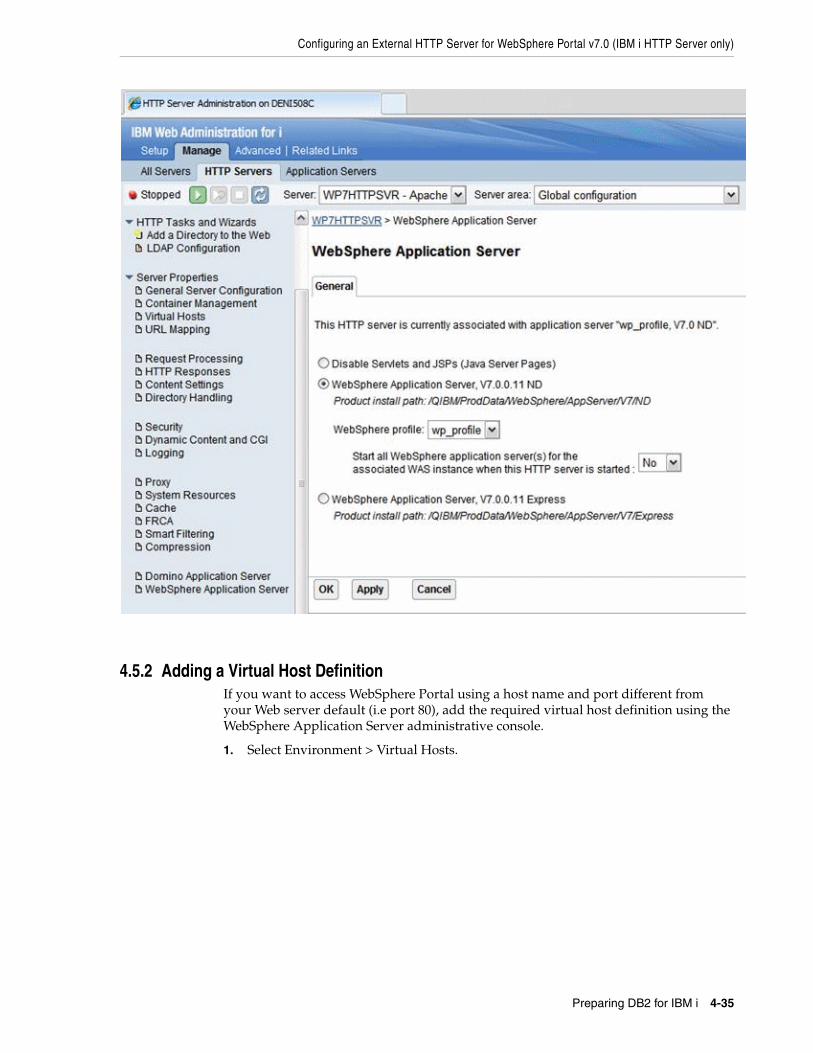
Configuring an External HTTP Server for WebSphere Portal v7.0 (IBM i HTTP Server only)
Preparing DB2 for IBM i 4-35
4.5.2 Adding a Virtual Host DefinitionIf you want to access WebSphere Portal using a host name and port different from your Web server default (i.e port 80), add the required virtual host definition using the WebSphere Application Server administrative console.
1. Select Environment > Virtual Hosts.
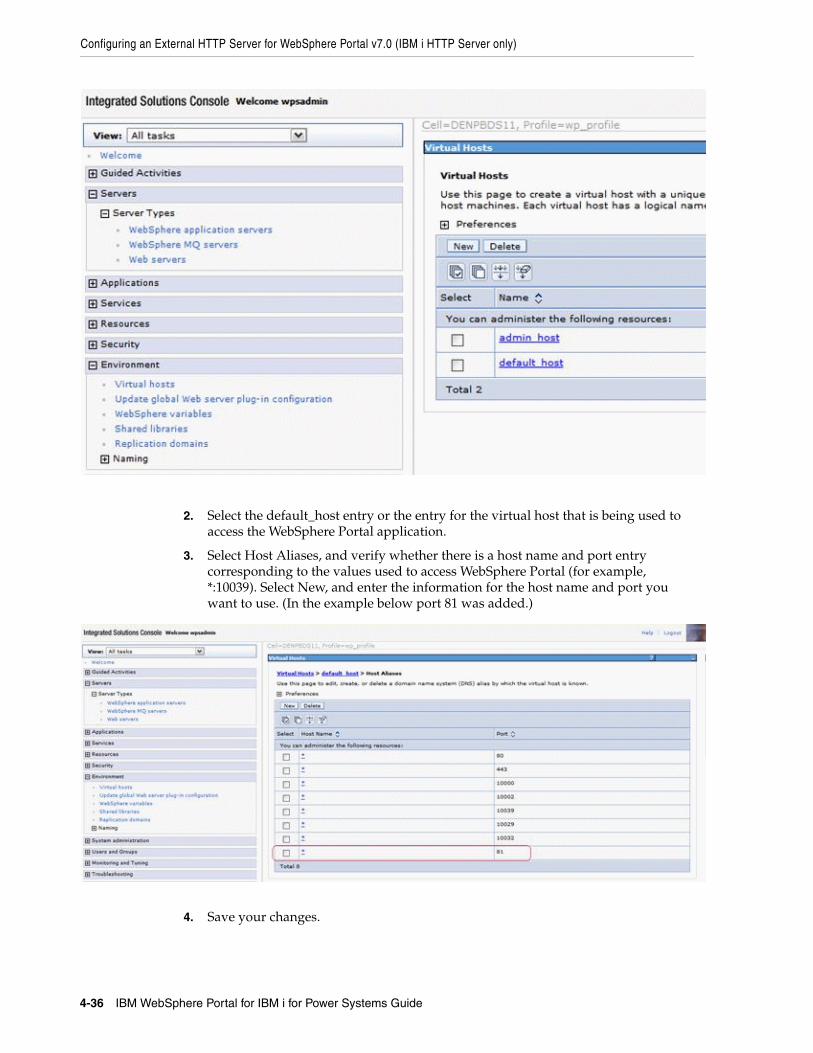
Configuring an External HTTP Server for WebSphere Portal v7.0 (IBM i HTTP Server only)
4-36 IBM WebSphere Portal for IBM i for Power Systems Guide
2. Select the default_host entry or the entry for the virtual host that is being used to access the WebSphere Portal application.
3. Select Host Aliases, and verify whether there is a host name and port entry corresponding to the values used to access WebSphere Portal (for example, *:10039). Select New, and enter the information for the host name and port you want to use. (In the example below port 81 was added.)
4. Save your changes.
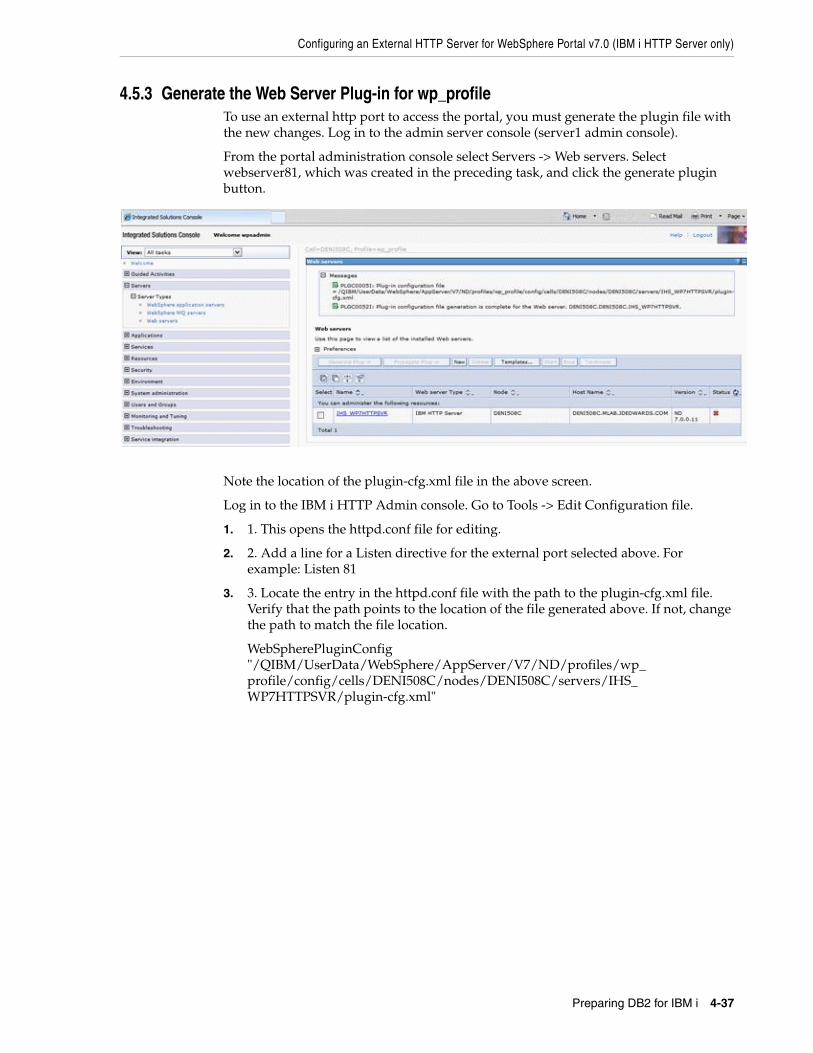
Configuring an External HTTP Server for WebSphere Portal v7.0 (IBM i HTTP Server only)
Preparing DB2 for IBM i 4-37
4.5.3 Generate the Web Server Plug-in for wp_profileTo use an external http port to access the portal, you must generate the plugin file with the new changes. Log in to the admin server console (server1 admin console).
From the portal administration console select Servers -> Web servers. Select webserver81, which was created in the preceding task, and click the generate plugin button.
Note the location of the plugin-cfg.xml file in the above screen.
Log in to the IBM i HTTP Admin console. Go to Tools -> Edit Configuration file.
1. 1. This opens the httpd.conf file for editing.
2. 2. Add a line for a Listen directive for the external port selected above. For example: Listen 81
3. 3. Locate the entry in the httpd.conf file with the path to the plugin-cfg.xml file. Verify that the path points to the location of the file generated above. If not, change the path to match the file location.
WebSpherePluginConfig "/QIBM/UserData/WebSphere/AppServer/V7/ND/profiles/wp_profile/config/cells/DENI508C/nodes/DENI508C/servers/IHS_WP7HTTPSVR/plugin-cfg.xml"

Configuring an External HTTP Server for WebSphere Portal v7.0 (IBM i HTTP Server only)
4-38 IBM WebSphere Portal for IBM i for Power Systems Guide
4. Restart both the Web server (for example webserver81) and the WebSphere_Portal servers.
4.5.4 Installing the JD Edwards Collaborative PortalOnce the Portal Server is running, you must install the Collaborative Portal for WebSphere Portal Server v7.0, which provides the JD Edwards EnterpriseOne Interface and Portlet Deployment Structure.
Refer to the JD Edwards EnterpriseOne Tools IBM WebSphere Portal Reference Guide.
A
Start and Stop Portal Servers A-1
AStart and Stop Portal Servers
This appendix contains the following topics:
■ Section A.1, "Overview"
■ Section A.2, "Starting and Stopping the WebSphere Portal Administration Server (server1)"
■ Section A.3, "Starting and Stopping the WebSphere Portal Server"
A.1 OverviewBeginning with Tools release 8.97, management of the application servers can be performed through the JD Edwards EnterpriseOne Server Manager application. This is the recommended method for starting, stopping and configuring application and portal servers. For additional information about Server Manager, refer to the Server Manager Guide for Tools Release 9.1, which is available on My Oracle Support.
The collaborative portal can also be managed through the WebSphere Administration Server and command line commands like previous releases. This remains the only option for JD Edwards EnterpriseOne Xe and ERP8 installations.
Refer to the following Knowledge Document E1: SVM: WebSphere 7.0.0.11 Secure Profile, Server Manager Unable to Detect Status of Servers Correctly (Doc ID 1262748.1) inorder for Server Manager to detect the status of WebSphere_Portal server correctly.
A.2 Starting and Stopping the WebSphere Portal Administration Server (server1)
To locate the scripts to start and stop the WebSphere Portal Administration Server (server1), navigate to this directory:
Log in to the Green Screen as PORTALUSR, type STRQSH,
/QIBM/UserData/WebSphere/AppServer/V7/ND/profiles/<PROFILE_NAME>/bin
Caution: The Portal is installed with its own profile which, by default, is wp_profile. When starting and stopping server1 for portal and the WebSphere_Portal server, it is necessary to be in the wp_profile/bin directory. Portal services cannot be managed using the WAS default profile from the profiles/default/bin directory.
Starting and Stopping the WebSphere Portal Server
A-2 IBM WebSphere Portal for IBM i for Power Systems Guide
A.2.1 Starting server1 (Portal Administration Server)From the above specified /bin directory, you can start server1 by entering this command:
startServer server1 -user wpsadmin -password wpsadmin
A.2.2 Stopping server1 (Portal Administration Server)From the above specified /bin directory, you can stop server1 by entering this command:
stopServer server1 -user wpsadmin -password wpsadmin
A.3 Starting and Stopping the WebSphere Portal ServerTo locate the scripts to start and stop the WebSphere Portal Server, navigate to this directory:
Log in to the Green Screen as PORTALUSR, type STRQSH,
/QIBM/UserData/WebSphere/AppServer/V7/ND/profiles/<PROFILE_NAME>/bin
A.3.1 Starting the WebSphere Portal ServerFrom the above specified /bin directory, you can start the WebSphere Portal Server by entering this command:
startServer WebSphere_Portal
A.3.2 Stopping WebSphere Portal ServerFrom the above specified /bin directory, you can stop the WebSphere Portal Server by entering this command:
stopServer WebSphere_Portal -user wasadmin -password wasadmin
Note: The security user credentials will not be required if you have correctly configured the credentials in the soap.client.props file. This is also a pre-requisite for Server Manager.
Note: The security user credentials will not be required if you have correctly configured the credentials in the soap.client.props file. This is also a pre-requisite for Server Manager.
Note: The security user credentials will not be required if you have correctly configured the credentials in the soap.client.props file. This is also a pre-requisite for Server Manager.
Note: The security user credentials are not required if you correctly configured the credentials in the soap.client.props file. This is also a pre-requisite for Server Manager.
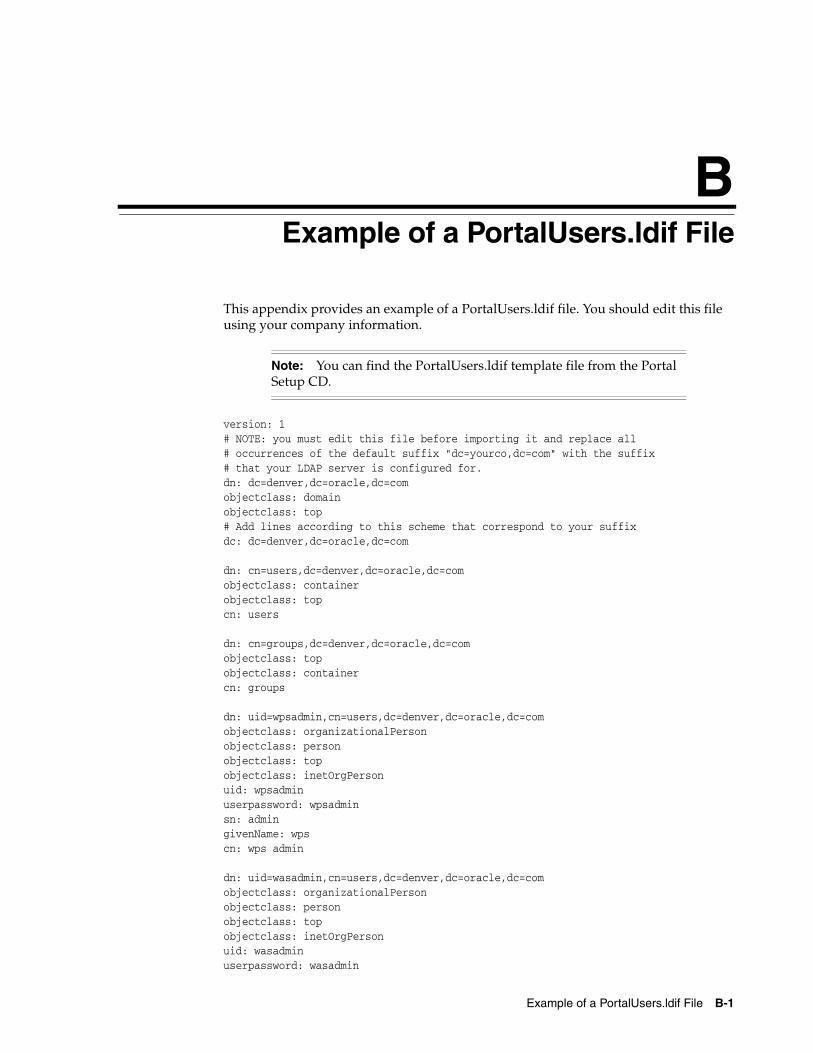
B
Example of a PortalUsers.ldif File B-1
BExample of a PortalUsers.ldif File
This appendix provides an example of a PortalUsers.ldif file. You should edit this file using your company information.
version: 1# NOTE: you must edit this file before importing it and replace all# occurrences of the default suffix "dc=yourco,dc=com" with the suffix# that your LDAP server is configured for.dn: dc=denver,dc=oracle,dc=comobjectclass: domainobjectclass: top# Add lines according to this scheme that correspond to your suffixdc: dc=denver,dc=oracle,dc=com dn: cn=users,dc=denver,dc=oracle,dc=comobjectclass: containerobjectclass: topcn: users dn: cn=groups,dc=denver,dc=oracle,dc=comobjectclass: topobjectclass: containercn: groups dn: uid=wpsadmin,cn=users,dc=denver,dc=oracle,dc=comobjectclass: organizationalPersonobjectclass: personobjectclass: topobjectclass: inetOrgPersonuid: wpsadminuserpassword: wpsadminsn: admingivenName: wpscn: wps admin dn: uid=wasadmin,cn=users,dc=denver,dc=oracle,dc=comobjectclass: organizationalPersonobjectclass: personobjectclass: topobjectclass: inetOrgPersonuid: wasadminuserpassword: wasadmin
Note: You can find the PortalUsers.ldif template file from the Portal Setup CD.
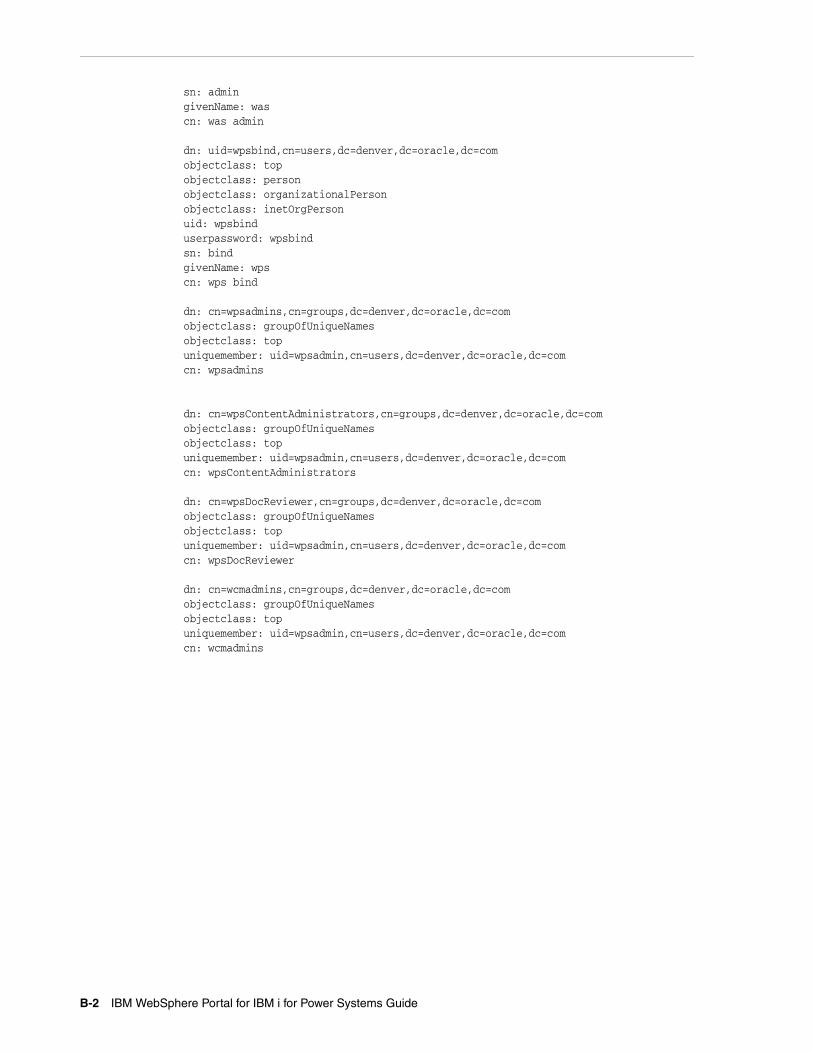
B-2 IBM WebSphere Portal for IBM i for Power Systems Guide
sn: admingivenName: wascn: was admin dn: uid=wpsbind,cn=users,dc=denver,dc=oracle,dc=comobjectclass: topobjectclass: personobjectclass: organizationalPersonobjectclass: inetOrgPersonuid: wpsbinduserpassword: wpsbindsn: bindgivenName: wpscn: wps bind dn: cn=wpsadmins,cn=groups,dc=denver,dc=oracle,dc=comobjectclass: groupOfUniqueNamesobjectclass: topuniquemember: uid=wpsadmin,cn=users,dc=denver,dc=oracle,dc=comcn: wpsadmins dn: cn=wpsContentAdministrators,cn=groups,dc=denver,dc=oracle,dc=comobjectclass: groupOfUniqueNamesobjectclass: topuniquemember: uid=wpsadmin,cn=users,dc=denver,dc=oracle,dc=comcn: wpsContentAdministrators dn: cn=wpsDocReviewer,cn=groups,dc=denver,dc=oracle,dc=comobjectclass: groupOfUniqueNamesobjectclass: topuniquemember: uid=wpsadmin,cn=users,dc=denver,dc=oracle,dc=comcn: wpsDocReviewer dn: cn=wcmadmins,cn=groups,dc=denver,dc=oracle,dc=comobjectclass: groupOfUniqueNamesobjectclass: topuniquemember: uid=wpsadmin,cn=users,dc=denver,dc=oracle,dc=comcn: wcmadmins
Glossary-1
Glossary
DBCA
An abbreviation for Database Configuration Assistant.
JAR file
JAR files are a Java Archive and are built based on the ZIP file format and use the .jar file extension. This format is typically used to combine Java class files and associated metadata and resources into one file that can distribute application software or libraries for the Java platform.
JDBC
An abbreviation for Java Database Connectivity. The JDBC Connector is a program that allows different databases to be accessed by Java application servers that are run on the J2EE platform.
LDAP directory
LDAP is an abbreviation for Lightweight Directory Access Protocol. This directory is a data store for user data, such as the user ID, password, and user name.
MTR
An abbreviation for Minimum Technical Requirements.
WAR file
A WAR file is a Web application ARchive is a JAR file used to for the distribution of JavaServer Pages, Java Servlets, Java classes, XML files, tag libraries and static Web pages that comprise a Web application.
WAS
An abbreviation for WebSphere Application Server.

WAS
Glossary-2