installing, migrating, and configuring - ibm
TRANSCRIPT

Installing, migrating, and configuring
IBM

ii Installing, migrating, and configuring

Contents
Overview of the environment . . . . . 1Deployment on Windows, Linux, and AIX systems . 1Installation overview . . . . . . . . . . . 1Installation package preparation . . . . . . . . 2
Planning the installation. . . . . . . . 5Definitions for HOME and other directory variables 5Hardware and software requirements . . . . . . 7
Hardware requirements. . . . . . . . . . 7Operating system requirements . . . . . . . 8Software requirements . . . . . . . . . . 12
Administrator user IDs and passwords . . . . . 14Audit files . . . . . . . . . . . . . . . 17User roles . . . . . . . . . . . . . . . 17Available permissions . . . . . . . . . . . 18
Types of installation . . . . . . . . . 21Graphical mode installation . . . . . . . . . 21
Installation and migration panels . . . . . . 21Silent installation . . . . . . . . . . . . 22
Migration planning . . . . . . . . . 25Before migration. . . . . . . . . . . . . 26Migration restrictions and requirements forEncryption Key Manager . . . . . . . . . . 26
Migration for Encryption Key Manager from IBMi systems . . . . . . . . . . . . . . 27Migration restrictions for Encryption KeyManager . . . . . . . . . . . . . . 28After migration of Encryption Key Manager . . 28Data objects and properties migrated fromEncryption Key Manager . . . . . . . . . 29
Restrictions and requirements to migrate from anearlier IBM Security Key Lifecycle Manager version . 31Migration from unsupported operating systems . . 32After migrating IBM Security Key LifecycleManager . . . . . . . . . . . . . . . 32Data objects and properties migrated from IBMSecurity Key Lifecycle Manager . . . . . . . 34
Preinstallation worksheets . . . . . . 35General installation parameters . . . . . . . . 35Db2 configuration parameters . . . . . . . . 36WebSphere Application Server and IBM SecurityKey Lifecycle Manager server configurationparameters . . . . . . . . . . . . . . 37
Installing and migrating IBM SecurityKey Lifecycle Manager . . . . . . . . 39Installation guidelines . . . . . . . . . . . 39Installation images and fix packs . . . . . . . 40Installing IBM Security Key Lifecycle Manager ingraphical mode . . . . . . . . . . . . . 40
Installing IBM Security Key Lifecycle Manager insilent mode . . . . . . . . . . . . . . 42
Encrypted password for response file elements 43Db2 configuration during installation . . . . . . 44
Db2 password security issues on Windowssystems. . . . . . . . . . . . . . . 46Db2 password security issues on Linux or AIXsystems. . . . . . . . . . . . . . . 48
Db2 user ID restrictions and requirements . . . . 50WebSphere Application Server and IBM SecurityKey Lifecycle Manager server configuration duringinstallation . . . . . . . . . . . . . . 51Migrating Encryption Key Manager configuration 52Migrating IBM Security Key Lifecycle Manager insilent inline mode . . . . . . . . . . . . 53Setting up Multi-Master cluster on a cross-migratedIBM Security Key Lifecycle Manager version 3.0.1server . . . . . . . . . . . . . . . . 57Errors during installation . . . . . . . . . . 57Non-root installation of IBM Security Key LifecycleManager on Linux systems . . . . . . . . . 58
Installing IBM Security Key Lifecycle Manager onLinux systems as a non-root user . . . . . . 60Db2 configuration during non-root installation . 61
Post-installation steps . . . . . . . . 63Login URL . . . . . . . . . . . . . . 63Services, ports, and processes . . . . . . . . 64Post-installation security . . . . . . . . . . 66
Specifying a certificate for browser access . . . 66Changing the WebSphere Application Serverkeystore password . . . . . . . . . . . 67WebSphere Application Server security . . . . 68
Critical backup . . . . . . . . . . . . . 69Automatic services enablement . . . . . . . . 69Setting the session timeout interval . . . . . . 70Setting the maximum transaction timeout . . . . 71IBM Security Key Lifecycle Manager system hostname change . . . . . . . . . . . . . . 72
Changing the Db2 server host name . . . . . 72Changing an existing WebSphere ApplicationServer host name . . . . . . . . . . . 72
Stopping the Db2 server . . . . . . . . . . 72Configuring SSL . . . . . . . . . . . . . 73Checking the current port number. . . . . . . 74Installation verification . . . . . . . . . . 75Enabling scripting settings for Internet Explorer,Version 9.0, 10, and 11 . . . . . . . . . . . 75Restarting the IBM Security Key Lifecycle Managerserver . . . . . . . . . . . . . . . . 76
Enabling global security . . . . . . . . . 77Disabling global security . . . . . . . . . 78
iii

Recovery from migration failure . . . . 79Recovery from Encryption Key Manager migrationfailure . . . . . . . . . . . . . . . . 79Migration recovery script for Encryption KeyManager . . . . . . . . . . . . . . . 79Recovery from migration failure for IBM SecurityKey Lifecycle Manager . . . . . . . . . . 80Migration recovery script for IBM Security KeyLifecycle Manager . . . . . . . . . . . . 81Starting Db2 automatically . . . . . . . . . 83Migration status properties file . . . . . . . . 83
Uninstallation of IBM Security KeyLifecycle Manager . . . . . . . . . . 85Uninstalling on Windows systems . . . . . . . 85
Uninstalling in graphical mode . . . . . . . 85Uninstalling in silent mode . . . . . . . . 86
Recovering from a failed uninstallation on Windowssystems. . . . . . . . . . . . . . . . 87Uninstalling on Linux and AIX systems . . . . . 88
Uninstalling in graphical mode . . . . . . . 89Uninstalling in silent mode . . . . . . . . 90
Recovering from a failed uninstallation on Linux orAIX systems . . . . . . . . . . . . . . 90Encrypted password for response file elements . . 91Reinstalling previous version if migration repeatedlyfails . . . . . . . . . . . . . . . . . 92
Optional removal of Db2 . . . . . . . 93Db2 uninstallation . . . . . . . . . . . . 93
Disassociation of a user ID from the Db2 instance 94Removal of user ID from the Db2 instance owner 95
Disablement of automatic services . . . . . . . 96
Installation and migration log files . . . 99Background information . . . . . . . . . . 99Important log files and locations . . . . . . . 99
Log files to troubleshoot problems . . . . . . 101Migration log file names and location . . . . . 102Examining an error log file . . . . . . . . . 102Other information to gather . . . . . . . . 102
Installation error messages . . . . . 105Message format . . . . . . . . . . . . 105Error and warning messages . . . . . . . . 105
Sample response files . . . . . . . 115New installation of version 3.0.1 on Windowssystems . . . . . . . . . . . . . . . 115New installation of version 3.0.1 on Linux systems 116New installation of version 3.0.1 on Linux forSystem z . . . . . . . . . . . . . . . 117New installation of version 3.0.1 on Linux PPCsystems . . . . . . . . . . . . . . . 119New installation of version 3.0.1 on AIX systems 120Earlier versions 2.5, 2.6, 2.7, and 3.0 to version 3.0.1migration on Windows systems . . . . . . . 121Earlier versions 2.5, 2.6, 2.7, and 3.0 to version 3.0.1migration on Linux systems . . . . . . . . 127Earlier versions 2.5, 2.6, 2.7, and 3.0 to version 3.0.1migration on Linux for System z . . . . . . . 132Earlier versions 2.5, 2.6, 2.7, and 3.0 to version 3.0.1migration on AIX systems . . . . . . . . . 138Uninstallation on Windows systems . . . . . . 144Uninstallation on Linux systems . . . . . . . 144Uninstallation on Linux for System z . . . . . 145Uninstallation on Linux PPC systems . . . . . 145Uninstallation on AIX systems. . . . . . . . 145
Notices . . . . . . . . . . . . . . 147Terms and conditions for product documentation 149Trademarks . . . . . . . . . . . . . . 150
Index . . . . . . . . . . . . . . . 151
iv Installing, migrating, and configuring

Overview of the environment
IBM Security Key Lifecycle Manager delivers simplified key lifecycle managementcapabilities in a solution that is easy to install, deploy, and manage.
This document focuses on the tasks that you must complete to install andconfigure IBM Security Key Lifecycle Manager.
Deployment on Windows, Linux, and AIX systemsDeployment of IBM Security Key Lifecycle Manager consists of an installationprocess that gathers information for database preparation, user ID configuration,and optional data migration from the Encryption Key Manager.
On Windows, Linux or AIX systems, the IBM Security Key Lifecycle Managerinstallation program deploys the IBM Security Key Lifecycle Manager server andrequired middleware components on the same computer. You must ensure that thecomputer has the required memory, processor speed, and available disk space tomeet the workload.
IBM Security Key Lifecycle Manager can run on a member server in a domaincontroller environment, but is not supported on a primary or backup domaincontroller.
Installation overviewIBM Security Key Lifecycle Manager installation involves preparing the softwareand then running the installation program.
Installation of IBM Security Key Lifecycle Manager includes the following majorsteps:1. Plan your installation and complete the preinstallation worksheets. See
“Planning the installation” on page 5 and “Preinstallation worksheets” on page35 for details.
2. Install and configure IBM Security Key Lifecycle Manager. The installation fallsinto these phases:a. Introductory that includes the introduction and language selection window,
install packages selection window, license agreement window, and diskspace information window.
b. DB2®, WebSphere® Application Server, and IBM Security Key LifecycleManager installations that include windows for gathering information. After
Figure 1. Main components on Windows, Linux, and AIX systems
1

you enter the information, the installation program installs DB2, WebSphereApplication Server, and IBM Security Key Lifecycle Manager during thisphase.
3. Log in and verify the installation. Resolve the installation problems, if any. See“Login URL” on page 63 and “Installation verification” on page 75 for details.
Note: Installation might take more than half an hour.
Installation package preparationThe installation package is available on a DVD, or as one or more compressed filesthat you download.
Installing from a DVD1. Insert or mount the DVD, as required by the operating system.2. Locate the installation scripts in the root directory of the DVD.
Installing from downloaded packages
The installation package files are archive files that contain the files that are usedfor the installation. Packages that are labeled “eImage <integer>” require assemblyinto a temporary installation directory on your computer. For example, a packagelabel might be eImage 1. Paths to temporary installation directories cannot containspaces or special characters.
To install from eImage images, follow these assembly steps:1. Download the eImage package files to a convenient temporary directory.2. Expand all the compressed files from the eImage packages into a different
temporary directory.
Windows systems
Extract the first eImage package into a temporary subdirectory thatmatches the first eImage package name. Extract subsequent packagesinto the subdirectory that matches the first eImage package name, notthe subsequent package name.
For example, by using temporary directory C:\mysklmV301download,follow these steps:a. First, extract eImage package 1 into a subdirectory such as
C:\mysklmV301download\partNumberOfLatestBuild.b. Next, extract package 2 into the same subdirectory that eImage
package 1 created, which in this example is C:\mysklmV301download\partNumberOfLatestBuild.
c. Extract subsequent packages into the eImage package 1subdirectory, which in this example is C:\mysklmV301download\partNumberOfLatestBuild.
Linux systemsOn Linux systems, the compressed files are expanded automaticallyinto the temporary directory without having to specify package names.
AIX systems
On AIX systems, the compressed files are expanded automatically intothe temporary directory without the addition of package names.
2 Installing, migrating, and configuring

You must use a GNU tar utility to extract the eImage packages. Runthese steps:a. Download and install the GNU tar utility from this address:
ftp://ftp.software.ibm.com/aix/freeSoftware/aixtoolbox/RPMS/ppc/tar/tar-1.22-1.aix6.1.ppc.rpm
b. Extract each package. For example, to extract a first eImage namedCZJD7ML.tar, run this command:/usr/bin/gtar -xvf CZJD7ML.tar
c. Repeat the command by specifying each of the additional eImages.3. Locate and run the installation files in the temporary directory into which you
expanded the installation packages. For example, locate:v Windows systems: launchpad.batv Other systems: launchpad.sh
To upgrade to a fix pack, follow the readme file instructions on the IBM FixCentral website at http://www.ibm.com/support/fixcentral. Use the followingsteps to access the website:1. Click Select product.2. From the Product Group drop-down list, select IBM Security.3. From the Select from IBM Security drop-down list, select IBM Security Key
Lifecycle Manager.
Overview of the environment 3

4 Installing, migrating, and configuring

Planning the installation
Before you install IBM Security Key Lifecycle Manager, understand theprerequisites and plan your environment accordingly.
Before you install IBM Security Key Lifecycle Manager, consider the followingsteps:v Use the worksheet in “Preinstallation worksheets” on page 35 to assist with your
planning.v Determine the IBM Security Key Lifecycle Manager topology, described in
“Deployment on Windows, Linux, and AIX systems” on page 1.v Ensure that the system meets hardware requirements. For more information, see
“Hardware requirements” on page 7.v Ensure that the operating system is at the correct level, with all the required
patches in place. See “Operating system requirements” on page 8 for informationon required operating system versions.
v Ensure that kernel settings are correct for those operating systems that requiresupdating. See “Db2 kernel settings” on page 14 for details.
v If you intend to use your own previously installed version of Db2, ensure thatthe copy of Db2 is at the required software level. See “Software requirements”on page 12 for information on supported versions of Db2.
v Determine whether you want to migrate the configuration from an earlierversion of Encryption Key Manager. For more migration information, see“Migration planning” on page 25.
v Decide what installation mode you want to use to install IBM Security KeyLifecycle Manager: graphical mode or silent mode. See “Types of installation” onpage 21 for a description of the installation modes.
Definitions for HOME and other directory variablesYou can customize the HOME directory for your specific implementation.Substitute the definition of the directory variable appropriately.
The following table contains default definitions that are used in this information torepresent the HOME directory level for various product installation paths.
Table 1. HOME and other directory variables
Directory variable Default definition Description
DB_HOMEWindows systems
drive:\ProgramFiles\IBM\DB2SKLMV301
AIX and Linux systems/opt/IBM/DB2SKLMV301
The directory that contains the Db2application for IBM Security KeyLifecycle Manager.
5

Table 1. HOME and other directory variables (continued)
Directory variable Default definition Description
DB_INSTANCE_HOMEWindows
drive\db2adminID
For example, if the value ofdrive is C: and the default Db2administrator is sklmdb31,DB_INSTANCE_HOME isC:\SKLMDB301.
Linux and AIX®
/home/db2adminID
The directory that contains the Db2database instance for IBM SecurityKey Lifecycle Manager.
WAS_HOMEWindows
drive:\ProgramFiles\IBM\WebSphere\AppServer
Linux and AIXpath/IBM/WebSphere/AppServer
For example: /opt/IBM/WebSphere/AppServer
The WebSphere Application Serverhome directory.
SKLM_HOMEWindows
WAS_HOME\products\sklm
Linux and AIXWAS_HOME/products/sklm
The IBM Security Key LifecycleManager home directory.
SKLM_INSTALL_HOMEWindows
drive:\ProgramFiles\IBM\SKLMV301
Linux and AIXpath/IBM/SKLMV301
The directory that contains the IBMSecurity Key Lifecycle Managerlicense and migration files.
SKLM_DATAWindows
WAS_HOME\products\sklm\data
C:\ProgramFiles\IBM\WebSphere\AppServer\products\sklm\data
Linux and AIXWAS_HOME\products\sklm/data
/opt/IBM/WebSphere/AppServer/products/sklm/data
The directory that contains the filesthat are exported from IBM SecurityKey Lifecycle Manager such asbackup files, exported certificates,and device group export files. Also,you must save the files that you wantto import into IBM Security KeyLifecycle Manager in this directory.
IM_INSTALL_DIRWindows
drive:\ProgramFiles\IBM\InstallationManager
Linux and UNIX/opt/ibm/InstallationManager
The directory where IBM InstallationManager is installed.
6 Installing, migrating, and configuring

Table 1. HOME and other directory variables (continued)
Directory variable Default definition Description
IM_DATA_DIRWindows
drive:\ProgramData\IBM\Installation Manager
Linux and UNIX/var/ibm/InstallationManager
The data directory, which is used tostore information about products thatare installed with InstallationManager.Note: ProgramData\ is a hiddenfolder, and to see it you must modifyyour view preferences in Explorer toshow hidden files and folders.
Hardware and software requirementsYour environment must meet the minimum system requirements to install IBMSecurity Key Lifecycle Manager.
The hardware and software requirements that are published are accurate at thetime of publication.
Alternatively, see the detailed system requirements document athttp://www-969.ibm.com/software/reports/compatibility/clarity/softwareReqsForProduct.html.1. Specify IBM Security Key Lifecycle Manager.2. Select the product version. For example, 3.0.3. Select the operating system.4. Click Submit.
Hardware requirementsYou must ensure that the system has the required memory, processor speed, andavailable disk space to install IBM Security Key Lifecycle Manager.
Table 2. Hardware requirements
System components Minimum values* Recommended values**
System memory (RAM) 4 GB 8 GB
Processor speedLinux and Windows systems
1.0 GHz singleprocessor
AIX systems1.5 GHz (2-way)
Linux and Windows systems3.0 GHz dualprocessors
AIX systems1.5 GHz (4-way)
Disk space free for IBMSecurity Key LifecycleManager andprerequisite productssuch as DB2
16 GB 30 GB
Disk space free in /tmpor C:\temp
4 GB 4 GB
DB2 Disk space free in/home directory orsystem drive for DB2
7 GB 25 GB
Disk space free in /vardirectory for DB2
1 GB on Linux and UNIXoperating systems
1 GB on Linux and UNIXoperating systems
Planning the installation 7

Table 2. Hardware requirements (continued)
System components Minimum values* Recommended values**
All file systems must be writable.
* Minimum values: These values enable a basic use of IBM Security Key Lifecycle Manager.
** Recommended values: You must use larger values that are appropriate for yourproduction environment. The most critical requirements are to provide adequate systemmemory, and free disk and swap space. Processor speed is less important.
On Linux and UNIX operating systems, you must install your DB2 product in an emptydirectory. If the directory that you specify as the installation path contains sub-directoriesor files, your DB2 installation might fail.
On Linux and UNIX operating systems, 4 GB of free space is required in the “$HOME”directory.
On Linux and UNIX operating systems, minimum 16 GB of free space is required in the“/” and “/opt” directory.
Installing into mapped network drives/mounted partitions is not supported.
If installation locations of more than one system component fall on the same Windowsdrive/UNIX partition, the cumulative space to contain all those components must beavailable in that drive/partition.
Operating system requirementsIBM Security Key Lifecycle Manager is supported on multiple operating systems.To install IBM Security Key Lifecycle Manager, ensure that your system meets theoperating system requirements.
Table 3. Operating system requirements
Operating system
Use Db2 AdvancedWorkgroup ServerEdition Version 11.1.2.2
AIX version 7.1 and version 7.2 in 64-bit mode. POWER7 processor-based servers aresupported.
v A 64-bit AIX kernel is required.
v Use AIX 7.1 Technology Level 4 , Service Pack 6. The minimum XL C/C++ runtimelevel requires the xlC.rte 12.1.2.0 files.
Windows Server 2012 on x86 64–bit mode for:
v Standard Edition
Windows Server 2012 R2 on x86 64–bit mode for:
v Standard Edition
Windows Server 2016 on x86 64–bit mode for:
v Standard Edition
Red Hat Enterprise Linux Version 6.7 on x86 64–bit mode
Red Hat Enterprise Linux Version 7.1 on x86 64–bit mode
Red Hat Enterprise Linux Version 7.1 (IBM Z) on x86 64–bit mode
Red Hat Enterprise Linux Version 7.1 (PowerPC Little Endian (LE)) on x86 64–bit mode
8 Installing, migrating, and configuring

Table 3. Operating system requirements (continued)
Operating system
Use Db2 AdvancedWorkgroup ServerEdition Version 11.1.2.2
Ubuntu 16 on x86 64-bit mode
SuSE Linux Enterprise Server Version 12 on x86 64–bit mode
SuSE Linux Enterprise Server Version 12 (IBM Z) on x86 64–bit mode
Do not install IBM Security Key Lifecycle Manager on systems with hardenedoperating system.
Ensure that Bash shell (bash) is installed before you install IBM Security KeyLifecycle Manager on AIX operating systems.
Ensure that C shell (csh) is installed before you install IBM Security Key LifecycleManager on Linux operating systems.
Before you install IBM Security Key Lifecycle Manager on Red Hat EnterpriseLinux operating system, ensure that the necessary libraries that are described inthis technote are installed: https://www-304.ibm.com/support/docview.wss?uid=swg21459143
Before you install IBM Security Key Lifecycle Manager on AIX operating system,ensure that the necessary libraries that are described in this technote are installed:http://www-01.ibm.com/support/docview.wss?uid=swg21631478
Access requirements
Install IBM Security Key Lifecycle Manager as an administrator (root user).
You can also install IBM Security Key Lifecycle Manager as a non-root user only onLinux operating system.
Linux packagesOn Linux operating systems, IBM Security Key Lifecycle Manager requires thecompat-libstdc++ package, which contains libstdc++.so.6. It also requires thelibaio package, which contains the asynchronous library that is required for Db2database servers.v libstdc package
To determine whether you have the package, run this command:rpm -qa | grep -i "libstdc"
If the package is not installed, locate the rpm file on your original installationmedia and install it.find installation_media -name compat-libstdc++*rpm -ivh full_path_to_compat-libstdc++_rpm_file
v libaio packageTo determine whether you have the package, run this command:rpm -qa | grep -i "libaio"
Planning the installation 9

If the package is not installed, locate the rpm file on your original installationmedia and install it.find installation_media -name libaio*rpm -ivh full_path_to_libaio_rpm_file
On Red Hat Enterprise Linux 64-bit systems, DB2 installation requires that twoseparate libaio packages must be installed before running db2setup. Thesepackages are both named libaio. However, there are two different RPM files toinstall: one of which is an i386 RPM file, and the other is an x86_64 RPM file.
To install IBM Security Key Lifecycle Manager on Red Hat Enterprise Linux 6.7,you must upgrade 32 bit glib library to version 7.3 or above.1. Configure the system with Red Hat Enterprise Linux 6.7, to get the libraries.
For the steps on how to register and subscribe a system to the Red HatCustomer Portal by using Red Hat Subscription-Manager, seehttps://access.redhat.com/solutions/253273.
2. Upgrade the glib libraries.yum install glibc-2.12-1.166.el6_7.3.i686
3. Execute IBM Security Key Lifecycle Manager installation.
Installing required libraries on Red Hat Enterprise Linux systems:
Before you run the installation commands for graphical or silent mode installation,you must install the required libraries on x86-64-bit Red Hat Enterprise LinuxVersion 6.0 and Red Hat Enterprise Linux Version 7.0 systems.
Procedure
1. Mount the Red Hat Enterprise Linux distribution DVD to the system. Insert theDVD into the DVD drive.
2. Select open a terminal window as a root.3. Execute the commands:
[root@localhost]# mkdir /mnt/cdrom[root@localhost]# mount -o ro /dev/cdrom /mnt/cdrom
4. Create the text file server.repo in the /etc/yum.repos.d directory.
Note: To use gedit:a. execute the command:
[root@localhost]# gedit /etc/yum.repos.d/server.repo
b. Add the following text to the file:[server]name=serverbaseurl=file:///mnt/cdrom/Workstationenabled=1
Where baseurl depends on the mounting point and the Red Hat EnterpriseLinux distribution.In the example, the mounting point is cdrom and the Red Hat EnterpriseLinux distribution is Workstation, but can be sever.
5. Execute the command:[root@localhost]# yum clean all
6. Execute the command to import related public keys:[root@localhost]# rpm --import /mnt/cdrom/*GPG*
10 Installing, migrating, and configuring

7. Execute the commands to install the required libraries:[root@localhost]# yum install gtk2.i686[root@localhost]# yum install libXtst.i686
If you received the missing libstdc++ message above, install the libstdc++library:[root@localhost]# yum install compat-libstdc++
During the install you might receive prompts similar to the example. Answerwith ’y’.Example:Total download size: 15 MInstalled size: 47 MIs this ok [y/N]: y
Note: The package name extension (.i686) might change in the commanddepending on the hardware platform that you use. The table lists valid valuesfor the package name extension. Red Hat Enterprise Linux 6.0 package nameson different platforms:
Platform 32-bit 64-bit
x86/x86_64 i686 x86_64
ppc/ppc64 ppc ppc64
s390/s390x s390 s390x
Requirements for Linux on System z operating systemBefore you install IBM Security Key Lifecycle Manager on Linux on System zoperating system, ensure that your system meets the requirements.1. Check whether the following libraries are present on the system, which are
necessary for DB2 installation.v libpam.so.0v libaio.so.1v libstdc++.so.6.0.8v libstdc++33v ksh93If the system does not contain the necessary libraries, run the followingcommand.yum install <library_name>
You can use the following command to remove a library if any problem withthe libraries.yum remove <library_name>
For more information, see DB2 documentation http://www.ibm.com/support/knowledgecenter/en/SSEPGG_11.1.0/com.ibm.db2.luw.qb.server.doc/doc/r0008865.html.
2. Install IBM XL/XL C++ environment.a. Extract the setup.b. Run ./install.c. Run the following command if an error message is displayed about missing
libraries.yum install <missing_lib_name>
Planning the installation 11

3. After you install the package, create a link between the libraries that areinstalled by running the following steps.ln -s /opt/ibm/lib/* /usr/lib/ln -s /opt/ibm/lib64/* /usr/lib64/
4. Set the LD_LIBRARY_PATH by using the following command.LD_LIBRARY_PATH=/opt/ibm/lib:/opt/ibm/lib64:/usr/lib64;export LD_LIBRARY_PATH
5. Before you start the installation process, ensure that the /tmp directory has allthe permissions. To provide the permissions, run the following command.chmod 777 /tmp
Requirements for Linux on PowerPC operating systemBefore you install IBM Security Key Lifecycle Manager on Linux on PowerPC LittleEndian (LE) operating system, ensure that your system meets the requirements.1. Install IBM XL/XL C++ environment.
a. Extract the setup in a directory.tar -xvf <setup_name>
b. Run ./install.2. After you install the package, create a link between the libraries that are
installed by running the following steps.ln -s /opt/ibm/lib/* /usr/lib/ln -s /opt/ibm/lib64/* /usr/lib64/
3. Set the LD_LIBRARY_PATH by using the following command.LD_LIBRARY_PATH=/opt/ibm/lib:/opt/ibm/lib64:/usr/lib64;export LD_LIBRARY_PATH
4. Before you start the installation process, ensure that the /tmp directory has allthe permissions. To provide the permissions, run the following command.chmod 777 /tmp
Disabling Security Enhanced LinuxIBM Security Key Lifecycle Manager on Linux operating systems might havefunctional problems when the Security Enhanced Linux (SELINUX) setting isenabled.
About this task
For example, a problem might occur with the TCP/IP connections on the serverports. Follow the steps provided in the Linux documentation to disable SecurityEnhanced Linux.
Software requirementsIBM Security Key Lifecycle Manager requires middleware programs and othersoftware for its operations. IBM Security Key Lifecycle Manager installs themiddleware programs such as WebSphere Application Server, Java RuntimeEnvironment (JRE), and DB2 and are bundled with the IBM Security Key LifecycleManager package.
If you have Db2 already installed on the system, see the details in “DB2requirements” on page 13.
WebSphere Application Server requirementsIBM Security Key Lifecycle Manager requires WebSphere Application Server 9.0and any applicable fix pack or APAR requirements.
12 Installing, migrating, and configuring

IBM Security Key Lifecycle Manager includes and installs WebSphere ApplicationServer. During installation, IBM Security Key Lifecycle Manager customizesWebSphere Application Server configuration and profiles to suit its operations. Thiscustomization might cause problems with products that use the same server whenyou uninstall IBM Security Key Lifecycle Manager. Therefore, you must considerthe following aspects to avoid the issues:v Do not install IBM Security Key Lifecycle Manager in a WebSphere Application
Server instance that another product provides.v Do not install another product in the instance of WebSphere Application Server
that IBM Security Key Lifecycle Manager provides.
Java Runtime Environment (JRE) requirementsIBM Security Key Lifecycle Manager requires Java Runtime Environment. IBM JavaRuntime Environment is included with WebSphere Application Server.
Use of an independently installed development kit for Java™, from IBM® or othervendors, is not supported. For more details, see http://www.ibm.com/support/knowledgecenter/SSEQTP_9.0.0/com.ibm.websphere.base.doc/ae/covr_javase8.html.
DB2 requirementsThe database stores the data of IBM Security Key Lifecycle Manager. Before youinstall IBM Security Key Lifecycle Manager, ensure that the database requirementsare met.
IBM Security Key Lifecycle Manager requires Db2 Advanced Workgroup ServerEdition, Version 11.1.2.2 and the future fix packs on the same system on which theIBM Security Key Lifecycle Manager server runs.
Note:
v You must use IBM Security Key Lifecycle Manager to manage the database. Toavoid data synchronization problems, do not use tools that the databaseapplication might provide.
v For improved performance of Db2 Version 11.1.2.2 on AIX systems, ensure thatyou install and configure the I/O completion ports (IOCP) package that isdescribed in the Db2 documentation (http://www-01.ibm.com/support/knowledgecenter/SSEPGG_11.1.0/com.ibm.db2.luw.admin.perf.doc/doc/t0054518.html).
v If an existing copy of Db2 Advanced Workgroup Server Edition was installed asthe root user at the correct version for the operating system, you can use theexisting Db2 Advanced Workgroup Server Edition. IBM Security Key LifecycleManager installer does not detect the presence of Db2. You must specify the Db2installation path.
SuSE Linux Enterprise Server Version 12 (System z) systems contain thelibstdc++.6.so package. But, IBM Security Key Lifecycle Manager requires thelibstdc++.5.so package for DB2 installation.
For more information about Db2 prerequisites, see DB2 documentation(http://www-01.ibm.com/support/knowledgecenter/SSEPGG_11.1.0/com.ibm.db2.luw.admin.cmd.doc/doc/r0059710.html).
Planning the installation 13

Db2 kernel settings:
Ensure that kernel settings are correct for the operating system, such as the Linuxoperating system, that might require updates.
AIX systemsNone required.
Linux systemsFor more information about kernel settings, see DB2 documentationhttp://www-01.ibm.com/support/knowledgecenter/SSEPGG_11.1.0/com.ibm.db2.luw.qb.server.doc/doc/t0008238.html.
Window systemsNone required.
XL C/C++ runtime requirements for Linux systemsIBM Security Key Lifecycle Manager requires XL C/C++ runtime environmentpackage for Linux systems.
For more information, see,
http://www-01.ibm.com/support/docview.wss?uid=swg24041489
https://www.ibm.com/support/knowledgecenter/en/SSEPGG_11.1.0/com.ibm.db2.luw.apdv.gs.doc/doc/r0023468.html
Browser requirementsYou must enable the session cookies and Java Script in the browser to establish asession with IBM Security Key Lifecycle Manager.
Supported browsers are not included with the product installation. You can accessIBM Security Key Lifecycle Manager graphical user interface by using any of thesupported browsers from any system.
Table 4. Supported browsers
Browser Fix pack AIX WindowsServer 2012
WindowsServer 2012 R2
Red HatEnterpriseLinux
SuSE LinuxEnterprise Server
Microsoft InternetExplorer, Version 9.0
None
Microsoft InternetExplorer, Version 10.0
None
Microsoft InternetExplorer, Version 11.0
None
Firefox ESR, version24.0
None
Firefox ESR, version31.0
None
Firefox ESR, version38.0
None
Administrator user IDs and passwordsThe default administrator user IDs are created when you install IBM Security KeyLifecycle Manager with necessary permissions for administering the product.
14 Installing, migrating, and configuring

Installation of IBM Security Key Lifecycle Manager provides default administratoruser IDs of WASAdmin, SKLMAdmin, and sklmdb31.
The installation must be run by a local administrative ID, which is root for AIX orLinux systems or a member of the Administrators group on Windows systems. Donot use a domain user ID to install IBM Security Key Lifecycle Manager.
The following table describes the user IDs.
Table 5. Administrator user IDs and passwords
Program User ID Password
IBM Security Key LifecycleManager administrator
SKLMAdmin
As the primary administrator with fullaccess to all operations, this user ID hasthe klmSecurityOfficer super user role,in the group that is namedklmSecurityOfficerGroup. This user IDis not case-sensitive. Alternatively, usesklmadmin. Use the SKLMAdmin user ID toadminister IBM Security Key LifecycleManager.
With the SKLMAdmin user ID, you can:
v View and use the IBM Security KeyLifecycle Manager interface.
v Change the password for the IBMSecurity Key Lifecycle Manageradministrator.
However, you cannot:
v Create one or more extra IBM SecurityKey Lifecycle Manager administratoruser IDs.
v Do WebSphere Application Serveradministrator tasks such as creating orassigning a role.
v Start or stop the server.
Specify and securely store a passwordduring installation.
Planning the installation 15

Table 5. Administrator user IDs and passwords (continued)
Program User ID Password
WebSphere Application Serveradministrator
WASAdmin
This user ID is not case-sensitive.Alternatively, use wasadmin or a user IDthat you specify during installation.
Do not use the:
v SKLMAdmin user ID to administerWebSphere Application Server.
v WASAdmin user ID to administer IBMSecurity Key Lifecycle Manager. TheWASAdmin user ID has no roles to useIBM Security Key Lifecycle Manager.
This administrator user ID is theWebSphere Application Serveradministrator user ID.
With the wasadmin user ID, you can:
v View and use only the WebSphereApplication Server interface.
v Create one or more extra IBM SecurityKey Lifecycle Manager administratoruser IDs, groups, and roles.
v Reset the password of any IBMSecurity Key Lifecycle Manager userID, including the SKLMAdminadministrator.
v Start and stop the server.
However, you cannot:
v Use the IBM Security Key LifecycleManager to complete tasks. Forexample, you cannot create IBMSecurity Key Lifecycle Manager devicegroups.
v Do other tasks that require access toIBM Security Key Lifecycle Managerdata. The wasadmin user ID does nothave access to IBM Security KeyLifecycle Manager data as asuperuser.
Specify and securely store a passwordduring installation.
Protect the WASAdmin user ID in the sameway that you protect the use of theSKLMAdmin user ID. The WASAdmin user IDhas authority to reset the SKLMAdminpassword and to create and assignpermissions to new IBM Security KeyLifecycle Manager users.
The IBM Security Key Lifecycle Manager Db2 database
16 Installing, migrating, and configuring

Table 5. Administrator user IDs and passwords (continued)
Program User ID Password
Instance owner of the database Windows, Linux, or AIX systems: Thedefault value is sklmdb31. You mightspecify a different value duringinstallation. The ID is the installationdefault user ID for the instance owner ofthe database.
Do not specify a user ID greater thaneight characters in length.
The instance name is also sklmdb31.
If Db2 is on AIX or Linux, your user IDmust be in the bin or root group, or in aseparate group in which root is amember.
If you use an existing user ID asinstance owner of the IBM Security KeyLifecycle Manager database, the user IDcannot own another database instance.Note: Do not use a hyphen (-) orunderscore character (_) when youspecify a user ID for an existing copy ofDb2.
Specify and securely store a passwordduring installation. This password is anoperating system password. If youchange the password on the operatingsystem, you must change this password.
For more information, see Resetting apassword..
Database instance The administrator ID sklmdb31 owns aDb2 instance named sklmdb31.
Audit filesIBM Security Key Lifecycle Manager has a default directory for audit data. The filelocation depends on the value of Audit.handler.file.name property inSKLM_DATA/config/SKLMConfig.properties file.
The default value is shown in the following example.Audit.handler.file.name=logs/audit/sklm_audit.log
User rolesIBM Security Key Lifecycle Manager provides a super user (klmSecurityOfficerand klmGUICLIAccessGroup) role and the means to specify more limitedadministrative roles to meet the needs of your organization. By default, theSKLMAdmin user ID has the klmSecurityOfficer role.
For backup and restore tasks, IBM Security Key Lifecycle Manager also installs theklmBackupRestoreGroup to which no user IDs initially belong. Installing IBMSecurity Key Lifecycle Manager creates predefined administrator, operator, andauditor groups to manage LTO tape drives.
The WASAdmin user ID has the authority to create and assign these roles, and tochange the password of any IBM Security Key Lifecycle Manager administrator. Toset administration limits for IBM Security Key Lifecycle Manager, use the WASAdminuser ID on the WebSphere Integrated Solutions Console to create roles, users, andgroups. Assign roles and users to a group. For example, you might create a group
Planning the installation 17

and assign both users and a role that limits user activities to administer only LTOtape drives. You must assign a role to a new user before that user attempts to login to IBM Security Key Lifecycle Manager.
Before you begin, complete the following tasks:v Determine the limits on device administration that your organization requires.
For example, you might determine that a specific device group has its ownadministration.
v Estimate how many administrative users might be needed over an interval oftime. For ease of use, consider specifying a group and a role to specify theirtasks.For example, you might specify a group that has a limited range of permissionsto manage only 3592 tape drives.
Available permissionsInstalling IBM Security Key Lifecycle Manager creates the SKLMAdmin user ID,which has the klmSecurityOfficer role as the default super user. The installationprocess also deploys predefined permissions to the WebSphere Application Serverlist of administrative roles.
A permission from IBM Security Key Lifecycle Manager enables an action or the useof a device group. A role in IBM Security Key Lifecycle Manager is one or morepermissions. However, in the WebSphere Application Server graphical userinterface, the term role includes both IBM Security Key Lifecycle Managerpermissions and roles.
IBM Security Key Lifecycle Manager installation creates the following defaultgroups.
klmSecurityOfficerGroupInstallation assigns the klmSecurityOfficer role to this group. TheklmSecurityOfficer role replaces the previous klmApplicationRole role inthe group that was named klmGroup. klmSecurityOfficerGroup replacesklmGroup.
The klmSecurityOfficer role has:v Root access to the entire set of permissions and device groups that are
described in Table 6 on page 19 and Table 7 on page 20.v Permission to any role or device group that might be created.v The suppressmonitor role.
The WebSphere Application Server provides the suppressmonitor role tohide tasks in the left pane of the WebSphere Integrated SolutionsConsole that an IBM Security Key Lifecycle Manager administrator doesnot use. Hidden items are associated with the application server,including WebSphere Application Server administrative tasks in theSecurity, Troubleshooting, and Users and Groups folders.
klmBackupRestoreGroupBack up and restore IBM Security Key Lifecycle Manager.
LTOAdminAdminister devices in the LTO device family with actions that includecreate, view, modify, delete, get (export), back up, and configure.
18 Installing, migrating, and configuring

LTOOperatorOperate devices in the LTO device family with actions that include create,view, modify, and back up.
LTOAuditorAudit devices in the LTO device family with actions that include view andaudit.
klmGUICLIAccessGroupProvides IBM Security Key Lifecycle Manager graphical user interface andcommand-line interface access to the users. Every product user must be apart of this group.
Note: Along with this access to the group, the users must be providedother accesses to be a functional product user.
A user who has any one of the permissions in Table 6 can view:v IBM Security Key Lifecycle Manager global configuration parameters that are
defined in the SKLMConfig.properties file.v The key server status and last backup date.
Table 6. Permissions for actions
Permission Enables these actions
Unrelated todevicegroups
Associatedwith devicegroups
klmCreate Create but not view, modify, ordelete objects.
klmDelete Delete objects, but not view,modify, or create objects.
klmGet Export a key or certificate for aclient device.
klmModify Modify objects, but not view,create, or delete objects.
klmView View objects, but not create,delete, or modify objects. Forexample, you must have thispermission to see the tasks youwant to do on the graphicaluser interface.
klmAdminDeviceGroup Administer. Create a devicegroup, set default parameters,view, delete an empty devicegroup. This permission doesnot provide access to devices,keys, or certificates.
klmAudit View audit data by using thetklmServedDataList command.
klmBackup Create and delete a backup ofIBM Security Key LifecycleManager data.
klmConfigure Read and change IBM SecurityKey Lifecycle Managerconfiguration properties, or acton SSL certificate. Add, view,update, or delete the keystore.
Planning the installation 19

Table 6. Permissions for actions (continued)
Permission Enables these actions
Unrelated todevicegroups
Associatedwith devicegroups
klmRestore Restore a previous backup copyof IBM Security Key LifecycleManager data.
The klmSecurityOfficer role also has root access to permissions for all devicegroups.
Table 7. Device groups
Permission Allows actions on these objects
LTO LTO device family
TS3592 3592 device family
DS5000 DS5000 device family
DS8000 DS8000 device family
BRCD_ENCRYPTOR BRCD_ENCRYPTOR device group
ONESECURE ONESECURE device group
ETERNUS_DX ETERNUS_DX device group
XIV XIV device group
IBM_SYSTEM_X_SED IBM_SYSTEM_X_SED device group
GPFS (IBM Spectrum Scale) GPFS device family
GENERIC Objects in the GENERIC device family.
userdevicegroup A user-defined instance such as myLTO that you manuallycreate, based on a predefined device family such as LTO.
20 Installing, migrating, and configuring

Types of installation
You can install IBM Security Key Lifecycle Manager in graphical user interface orsilent mode.v A graphical user interface-based installation that is driven by a wizard.v A silent installation that runs unattended, using response files for the
configuration options.
Notes:
v IBM Security Key Lifecycle Manager does not support a console modeinstallation.
v Do not install IBM Security Key Lifecycle Manager from a network drive ormounted drive. For example, do not specify either of these net use statements asthe directory location and attempt installation:net use z: \\server\sharenet use \\server\share
Graphical mode installationIBM Security Key Lifecycle Manager provides a graphical user interface installationprogram. IBM Installation Manager is used to install IBM Security Key LifecycleManager and its components. It presents a series of panels that prompt for theinformation that is required for installation.
Run the following steps to install IBM Security Key Lifecycle Manager in graphicalmode.v Start the installation wizard.v Complete the installation wizard pages by entering the configuration options.
For details, see “Installing IBM Security Key Lifecycle Manager in graphicalmode” on page 40.
v Verify that IBM Security Key Lifecycle Manager server is operational. For details,see “Installation verification” on page 75.
Installation and migration panelsInstalling IBM Security Key Lifecycle Manager in graphical mode requires you tostart the installation wizard, navigate through a series of installation panels, andsupply the requisite information.
You must select the locale that you want to use for the installation process. Thelocale determines the language that the installer runs in. Type the number that isdisplayed next to your locale and press Enter.
You might see these panels during installation:1. Installation Manager window with installation packages such as IBM
Installation Manager, IBM DB2, IBM WebSphere Application Server, and IBMSecurity Key Lifecycle Manager
2. Software license agreement3. Installation directory selection for IBM Installation Manager and the other
installation packages.
21

4. Language selection for package translation5. Package features selection for installation6. Db2 configuration options7. IBM Security Key Lifecycle Manager configuration options8. Encryption Key Manager migration selection9. Installation package preview
10. Installation progress for IBM Security Key Lifecycle Manager11. Installation summary
Notes:
v When you install IBM Security Key Lifecycle Manager, retain the default pathfor Shared Resources Directory. IBM Installation Manager uses this location todownload artifacts and to store information about the installed packages.
v When the installation is complete, a page displays the status of the installationand the list of packages that are installed. You must select None to instruct theinstaller not to create a profile and click Finish.
You might see these panels when migration occurs during installation:1. Introduction2. Software license agreement3. Db2 directory4. Migration information
5. Migration summary
6. Summary of prerequisites7. Installation progress for Db28. Beginning IBM Security Key Lifecycle Manager installation9. Installation directory for IBM Security Key Lifecycle Manager and WebSphere
Application Server10. WebSphere Application Server information11. SKLMAdmin password12. Pre-installation summary13. Migration progress for IBM Security Key Lifecycle Manager14. Installation summary
Silent installationA silent installation is a noninteractive installation, which is driven by a responsefile that provides installation settings.
No user input is needed during a silent installation. This type of installation isuseful in environments where IBM Security Key Lifecycle Manager is to beinstalled on multiple identical systems, such as in a data center. For moreinformation about silently installing IBM Security Key Lifecycle Manager, see“Installing IBM Security Key Lifecycle Manager in silent mode” on page 42.
Note: Silent mode installation uses a response file that contains passwordinformation. For more security, delete the response file immediately after theinstallation of IBM Security Key Lifecycle Manager.
22 Installing, migrating, and configuring

IBM Security Key Lifecycle Manager includes sample response files that you canuse as a template for creating your own response file. The sample file must bemodified for the specifics of your environment before it can be used. The sampleresponse files are in the directory in which your installation package is located. Formore information, see Sample response files.
Types of installation 23

24 Installing, migrating, and configuring

Migration planning
Before you install IBM Security Key Lifecycle Manager at this version, check theversion of the previously installed IBM Security Key Lifecycle Manager on thesystem. IBM Security Key Lifecycle Manager supports two methods of migratingdata, such as, inline migration and cross-platform migration.
Inline migrationDuring IBM Security Key Lifecycle Manager, Version 3.0.1 installation, youcan migrate data from the earlier IBM Security Key Lifecycle Managerversion, such as 2.5, 2.6, 2.7, 3.0, and Encryption Key Manager 2.1.
Cross-platform migrationAfter the IBM Security Key Lifecycle Manager, Version 3.0.1 installation,use the cross-platform backup utility to migrate data from the followingearlier versions:v IBM Security Key Lifecycle Manager, Version 2.5, 2.6, and 2.7v Encryption Key Manager, Version 2.1v IBM Tivoli Key Lifecycle Manager, Version 1.0, 2.0, and 2.0.1
Cross-migration of IBM Tivoli Key Lifecycle Manager, Version 1.0, 2.0,and 2.0.1 data to IBM Security Key Lifecycle Manager, Version 3.0.1consists of the following two stages:1. Migrating IBM Tivoli Key Lifecycle Manager, Version 1.0, 2.0, and
2.0.1 data on a system where IBM Security Key Lifecycle Manager,Version 2.7 is installed.
2. Migrating IBM Security Key Lifecycle Manager, Version 2.7 data on asystem where IBM Security Key Lifecycle Manager, Version 3.0.1 isinstalled.
For more information, see Backup and restore operations for earlierversions of IBM Security Key Lifecycle Manager and IBM Tivoli KeyLifecycle Manager.
The following table lists the supported migration method for earlier versions ofIBM Security Key Lifecycle Manager, IBM Tivoli Key Lifecycle Manager, andEncryption Key Manager.
VersionMinimum RequiredLevel Inline Migration
Cross-platformMigration
Encryption KeyManager, Version 2.1
IBM Tivoli KeyLifecycle Manager,Version 1.0
Fix pack 7
IBM Tivoli KeyLifecycle Manager,Version 2.0
Fix pack 6
IBM Tivoli KeyLifecycle Manager,Version, 2.0.1
Fix pack 5
25

VersionMinimum RequiredLevel Inline Migration
Cross-platformMigration
IBM Security KeyLifecycle Manager,Version 2.5
Fix pack 3
IBM Security KeyLifecycle Manager,Version 2.6
Fix pack 2
IBM Security KeyLifecycle Manager,Version 2.7
2.7 GeneralAvailability (GA)version
IBM Security KeyLifecycle Manager,Version 3.0
3.0 GeneralAvailability (GA)version
If migration fails from the installer, you can manually run the IBM Security KeyLifecycle Manager, Version 3.0.1 migration utility from the SKLM_HOME\migration\bin directory after you exit the installation.v Run migrate.bat or migrate.sh to migrate Encryption Key Manager, Version 2.1
to IBM Security Key Lifecycle Manager. On Linux or AIX systems, ensure thatyou are logged in as the root user before you run migrate.sh.
v Run migrateToSKLM.bat or migrateToSKLM.sh in the <SKLM_INSTALL_HOME>\migration directory to migrate IBM Security Key Lifecycle Manager earlierversion to version 3.0.1. On Linux or AIX systems, ensure that you are logged inas the root user before you run migrateToSKLM.sh.
Do not run other *.bat utilities that you might see in this directory. The utilitiesare for use only by the automatic installation process.
Before migrationBefore you begin, ensure that your enterprise allows a time interval for atemporary halt to key serving activity.
A window of time for testing is also required to ensure that the new IBM SecurityKey Lifecycle Manager has the expected keys and other configuration attributesthat you intended to migrate.
Disk space requirements
Before you migrate data from earlier versions to IBM Security Key LifecycleManager, Version 3.0.1, ensure that there is sufficient disk space on your system.These disk space requirements are in addition to disk space requirements identifiedby the installer for installing IBM Security Key Lifecycle Manager, Version 3.0.1,and its prerequisite software.
The additional disk space is required for the migration program to move users,keys, and other meta data in database from the old system to IBM Security KeyLifecycle Manager, Version 3.0.1.
Migration restrictions and requirements for Encryption Key ManagerYou must follow certain rules and guidelines before you can migrate fromEncryption Key Manager to IBM Security Key Lifecycle Manager.
26 Installing, migrating, and configuring

v IBM Security Key Lifecycle Manager supports migration of Encryption KeyManager, Version 2.1 only.
v Copy the Encryption Key Manager configuration file and all other related files toa destination system where IBM Security Key Lifecycle Manager, Version 3.0.1 isinstalled.
v Edit the Encryption Key Manager configuration file to change from relative filepath to absolute path for the parameters.
v Migrate only one Encryption Key Manager server to one IBM Security KeyLifecycle Manager server. To migrate a second Encryption Key Manager, use asecond IBM Security Key Lifecycle Manager server.
v Both the Encryption Key Manager server and the IBM Security Key LifecycleManager server that receives migrated data must be on the same host. Aftermigration, IBM Security Key Lifecycle Manager server uses the keystore, TCPport, and SSL port that Encryption Key Manager server previously used.
v You must set the following two properties the migration:– config.keystore.file
Absolute path of the keystore. For example, C:/EKM21/test.keys.jceks.– TransportListener.ssl.keystore.name
SSL keystore name of Encryption Key Manager. For example, C:/EKM21/test.keys.ssl.
v To migrate key groups, if your Encryption Key Manager was configured withkey groups to work with LTO tape drives, ensure that theconfig.keygroup.xml.file property exists in the Encryption Key Managerproperties file and is specified as an absolute path.This property might not be in the properties file because Encryption KeyManager might use the file from a default directory from which the EncryptionKey Manager was started.
v The Encryption Key Manager component supports only the English locale.Therefore, you must do the migration from Encryption Key Manager to IBMSecurity Key Lifecycle Manager in the English locale.
Migration for Encryption Key Manager from IBM i systemsYou must relocate Encryption Key Manager from a IBM i system to an IBMSecurity Key Lifecycle Manager supported operating system before you canmigrate Encryption Key Manager to IBM Security Key Lifecycle Manager.1. On an IBM i system, the keys must be in a JCEKS keystore. Otherwise, you
must first move the keys to a JCEKS keystore.2. Move the JCEKS keystore and Encryption Key Manager properties file, which
you must update for the new operating system, from the IBM i system to asystem that IBM Security Key Lifecycle Manager, Version 3.0.1 supports.
3. Use the keystore and modified properties file that you moved to set upEncryption Key Manager on the system that IBM Security Key LifecycleManager, Version 3.0.1 supports.
4. Ensure that Encryption Key Manager is functional on the new system.5. Migrate from the new Encryption Key Manager to IBM Security Key Lifecycle
Manager, Version 3.0.1 as part of installing IBM Security Key Lifecycle Manager,Version 3.0.1. For the installation steps, see Installation of IBM Security KeyLifecycle Manager. You can migrate only Version 2.1 of Encryption KeyManager.
Migration planning 27

Note: To obtain Encryption Key Manager, Version 2.1, contact IBM SoftwareSupport at: http://www.ibm.com/software/support
Migration restrictions for Encryption Key ManagerYou can migrate only version 2.1 of Encryption Key Manager to IBM Security KeyLifecycle Manager, Version 3.0.1.
If you are using earlier versions of Encryption Key Manager, upgrade to version2.1. To obtain Encryption Key Manager, version 2.1, contact IBM Software Supportat: http://www.ibm.com/software/support
There are certain restrictions on what you can migrate from Encryption KeyManager.v Migration of Administrator SSL keystores and truststores is not supported. IBM
Security Key Lifecycle Manager server does not support Administrator synccapability.
v Migration of PKCS11Impl keystores and truststores is not supported. IBMSecurity Key Lifecycle Manager server does not support PKCS11Impl keystores.
v IBM Security Key Lifecycle Manager does not support the use of a key inmultiple groups, unlike Encryption Key Manager, which supports the use of akey in multiple groups.When you migrate key data in KeyGroup.xml from Encryption Key Manager toIBM Security Key Lifecycle Manager, each key is attached to one group. A keythat was previously in multiple groups in Encryption Key Manager is created inonly one group in IBM Security Key Lifecycle Manager.The migration process logs the event that the key is not created in multiplegroups, and continues. If the symmetricKeySet property specifies a list or rangeor keys, and not a group, all keys that are specified by symmetricKeySet aremigrated into a key group named DefaultMigrateGroup. If the keys fromsymmetricKeySet are created as a part of other groups, and the key group namedDefaultMigrateGroup is empty, IBM Security Key Lifecycle Manager does notcreate the DefaultMigrateGroup key group, and also does not migrate thesymmetricKeySet property.To work around the problem, use the IBM Security Key Lifecycle Managergraphical or command-line interface to define a default key group, for example,for LTO tape drives.
After migration of Encryption Key ManagerAfter Encryption Key Manager is migrated, you must validate the configurationand protect data.v Do not run Encryption Key Manager. After migration, the Encryption Key
Manager retains its ability to serve keys.v Resolve possible problems with certificates and keys.
Encryption Key Manager does not restrict device groups to which a certificateand its keys can be associated. Certificates and keys that belong to multipledevice types are marked as CONFLICTED after migration to IBM Security KeyLifecycle Manager, Version 3.0.1. You cannot change their device group toanother device group. IBM Security Key Lifecycle Manager can use a certificateor key that is marked as CONFLICTED for both read and write operations.Migration might also cause a certificate to appear with an UNKNOWN label in theIBM Security Key Lifecycle Manager graphical user interface.
28 Installing, migrating, and configuring

– Unknown certificates can be used as rollover certificates. Once scheduled as arollover, the unknown certificate is updated to the specific device group of therollover. An SSL server certificate with an UNKNOWN label is updated to be anSSL certificate.
– Pending certificates might be listed on the graphical user interface with adevice group that has an UNKNOWN status. First, accept the pending certificate,which then has an UNKNOWN status. Next, use the tklmCertUpdate command toupdate the certificate usage to a specific device group. The update changesthe certificate status to a state such as active.
– After migration completes, one or more devices might be associated with theUNKNOWN device group. You can assign the device group for UNKNOWN devices toa new group, or allow the group to be determined when the devices make afirst key service request.
Use the tklmCertList command to find certificates that are marked asCONFLICTED or UNKNOWN. Specify no value for the -usage parameter, or specify aparameter value of 3592, DS8000, or SSLSERVER. For example, thisJython-formatted command lists all certificates for the 3592 device group:print AdminTask.tklmCertList(’[-usage 3592 -v y]’)
v Verify that the migrated Encryption Key Manager configuration is in the statethat you expect before making any updates or any configuration changes to IBMSecurity Key Lifecycle Manager.The Encryption Key Manager configuration keystore becomes the IBM SecurityKey Lifecycle Manager keystore after migration is complete. You cannot migrateEncryption Key Manager server data a second time to the same IBM SecurityKey Lifecycle Manager server.If migration fails and you choose to complete the remaining IBM Security KeyLifecycle Manager installation process, there is a stand-alone migration-recoveryscript that you can start only if you are not made any updates or changes to theIBM Security Key Lifecycle Manager configuration. For more information, see“Recovery from migration failure” on page 79.
Data objects and properties migrated from Encryption KeyManager
The data objects and properties are also migrated from Encryption Key Manager.
Properties that must be in the Encryption Key Manager configuration file include:v Audit.metadata.file.name
File must exist in the same directory as the configuration file itself and must beread enabled.
v config.drivetable.file.url
File must exist in the same directory as the configuration file itself and must beread enabled.
v config.keystore.file
File must exist in the same directory as the configuration file itself and must beread and write enabled.
v config.keystore.password.obfuscated
v config.keystore.type
The keystore type must not be PKCS11IMPLKS.v TransportListener.ssl.keystore.name
File must exist in the same directory as the configuration file itself and must beread enabled.
Migration planning 29

v TransportListener.ssl.keystore.password.obfuscated
v TransportListener.ssl.keystore.type
The keystore type must not be PKCS11IMPLKS.v TransportListener.ssl.port
The value must be a positive integer between 1 and 65535 and must not beidentical to the value for TransportListener.tcp.port.
v TransportListener.ssl.truststore.type
The truststore type must not be PKCS11IMPLKS.v TransportListener.tcp.port
The value must be a positive integer between 1 and 65535 and must not beidentical to the value for TransportListener.ssl.port.
Migration includes the following data objects:
KeystoresIBM Security Key Lifecycle Manager stores all keys and certificates in thedatabase. During migration, the keys and certificates from the twoEncryption Key manager keystores, Config, and TransportListner are allcopied to the IBM Security Key Lifecycle Manager database. Keys andcertificates are copied from the Config keystore. The certificates are copiedfrom the TransportListner truststore.
A certificate from the TransportListener keystore is set as the SSLcertificate for IBM Security Key Lifecycle Manager. Theconfig.keystore.ssl.certalias property is updated with the alias of thiscertificate.
Other Encryption Key Manager keystores are not used.
DevicesAll the device information is read from the drive table pointed at by theconfig.drivetable.file.url property, and is entered in an IBM Security KeyLifecycle Manager database. If the drive has the symalias property that isdefined, the drive type is set to LTO. If the drive has aliases that aredefined, the drive type is set to 3592. Migration sets a type of UNKNOWNfor a drive that has none of these properties that are defined and that hasno type that can be determined.
Key groupsThe keygroup.xml file that is pointed at by the config.keygroup.xml.fileproperty, is parsed, and the key group information is stored in an IBMSecurity Key Lifecycle Manager database. All the group members andgroup relationships are also migrated.
If the symmetricKeySet property has a list of aliases or range of aliases, adefault key group named DefaultMigrationGroup is created with all thealiases as members of the group. In this case, the symmetricKeySet propertyis set to DefaultMigrationGroup. If the symmetricKeySet property is alreadya group alias, the default migration group is not created.
MetadataAll the metadata information that is pointed at by theAudit.metadata.file.name property is migrated into an IBM Security KeyLifecycle Manager database.
The properties that are migrated from the Encryption Key Manager configurationfile to the SKLMConfig.properties file might include:
30 Installing, migrating, and configuring

v Audit.eventQueue.max
v Audit.handler.file.size
v Audit.event.outcome
v Audit.event.types
v config.keystore.name (set to defaultKeyStore)v cert.valiDATE
v drive.acceptUnknownDrives is migrated to the database as the default entry inthe specified device group.
v fips
v TransportListener.ssl.ciphersuites
v TransportListener.ssl.clientauthentication
v TransportListener.ssl.port
v TransportListener.ssl.protocols
v TransportListener.ssl.timeout
v TransportListener.tcp.port
v TransportListener.tcp.timeout
v useSKIDefaultLabels
v zOSCompatibility
These properties are migrated from the Encryption Key Manager configuration fileto the IBM Security Key Lifecycle Manager database:v drive.default.alias1
v drive.default.alias2
v symmetricKeySet (set to an already-specified group alias, otherwise set toDefaultMigrationGroup)
Restrictions and requirements to migrate from an earlier IBM SecurityKey Lifecycle Manager version
Before migrating your earlier version of IBM Security Key Lifecycle Manager suchas version 2.5, 2.6, 2.7, 3.0 to version 3.0.1, you must follow certain rules andguidelines.v Ensure that the minimum required fix pack is applied for IBM Security Key
Lifecycle Manager for the version that you are migrating. For more informationabout minimum required fix pack level, see Migration planning.
v Back up the IBM Security Key Lifecycle Manager earlier version. Also, back upany replica. If migration fails, restore IBM Security Key Lifecycle Manager fromthe backup copy.
Note: After you migrate IBM Security Key Lifecycle Manager, earlier versionbackup files that are created by using the CLI command, graphical userinterface, or REST interface cannot be used to restore IBM Security Key LifecycleManager at version 3.0.1.
You can use the backup utility of IBM Security Key Lifecycle Manager, Version3.0.1 to create the cross-platform compatible backup files for earlier versions.Then, you can restore these backup files from earlier versions on an IBMSecurity Key Lifecycle Manager, Version 3.0.1 system.
Migration planning 31

v Migration does not remove the earlier version of IBM Security Key LifecycleManager. To remove, follow the uninstall instructions for the version of IBMSecurity Key Lifecycle Manager you have migrated from.
Note: Since the IP ports are shared between the two versions, do not run bothversions at the same time.
v Stop IBM Security Key Lifecycle Manager and any replica server. Key servingcannot be active during migration.
v During migration, examine the IM_DATA_DIR/logs/sklmLogs/migration.log filefrequently to determine how far migration is progressed. If migration fails, runthe migration utility to print messages to the migration.log file and to thecommand-line interface.
v To avoid errors while migration is in progress, do not start or stop the Db2server or the WebSphere Application Server outside of the migration process. Donot interrupt the migration process.
v When you are migrating IBM Security Key Lifecycle Manager in silent mode,ensure that the correct admin password is specified in the response file.
v When an earlier version of IBM Security Key Lifecycle Manager system withLDAP configured is migrated to version 3.0.1, all the LDAP users from theearlier version system are not migrated. Only the LDAP user who is used for theIBM Security Key Lifecycle Manager Administrator role during the installationprocess is migrated. You must explicitly add all other LDAP users after theinstallation. To add the users, run the addLDAPUserToGroup LDAP configurationscript as described in Step 3 of the Running the LDAP configuration scriptstopic.
Migration from unsupported operating systemsUse the cross-platform backup utility to migrate data from IBM Security KeyLifecycle Manager, IBM Tivoli Key Lifecycle Manager, and Encryption KeyManager that are running on the operating systems that version 3.0.1 does notsupport.
You can restore the backup files on IBM Security Key Lifecycle Manager, Version3.0.1 to an operating system that is different from the one it was backed up from.For more information, see Backup and restore operations for earlier versions ofIBM Security Key Lifecycle Manager and IBM Tivoli Key Lifecycle Manager.
After migrating IBM Security Key Lifecycle ManagerAfter IBM Security Key Lifecycle Manager is migrated, you must validate theconfiguration and protect the data.v Immediately after you install IBM Security Key Lifecycle Manager, Version 3.0.1,
run the backup operation for IBM Security Key Lifecycle Manager, Version 3.0.1.Migration to version 3.0.1 does not remove the earlier version of IBM SecurityKey Lifecycle Manager. You must not run two versions simultaneously to avoidport conflict.If migration fails and you choose to complete the remaining IBM Security KeyLifecycle Manager installation process, there is a stand-alone migration-recoveryscript that you can start only if you have not made any updates or changes tothe IBM Security Key Lifecycle Manager configuration. For more information,see “Recovery from migration failure” on page 79. You must complete themigration recovery process before you can use IBM Security Key LifecycleManager, Version 3.0.1.
32 Installing, migrating, and configuring

v Retain a replica of IBM Security Key Lifecycle Manager previous version, but donot run. Retaining replica of the previous version ensures that you have anenvironment and data in case validation determines that there is a problem withversion 3.0.1.
v Resolve possible problems with certificates and keys.IBM Security Key Lifecycle Manager earlier version 2.5, 2.6, 2.7, and 3.0 does notrestrict device groups to which a certificate and its keys can be associated.Certificates and keys that belong to multiple device types in the earlier IBMSecurity Key Lifecycle Manager versions are marked as CONFLICTED at version3.0.1. You cannot change their device group to another device group. IBMSecurity Key Lifecycle Manager can use a certificate or key that is marked asCONFLICTED for both read and write operations.
v After migration completes, one or more devices might be associated with theUNKNOWN device group. You can assign the device group for UNKNOWN devices to anew group, or allow the group to be determined when the devices make a firstkey service request.
v After you complete migration of IBM Security Key Lifecycle Manager earlierversion to version 3.0.1, the migration program will not remove the previousversion. To remove, follow the uninstall instructions for the version of theproduct you have migrated from.
Note: Because the IP ports are shared between the two versions, do not runboth versions at the same time. If migration cannot complete these steps,migration process issues a warning and a successful completion message.Examine the <IM_DATA_DIR>/logs/sklmLogs/migration.log file for messages andtake the appropriate manual actions.
v For future administrative use in IBM Security Key Lifecycle Manager previousversion, you might have marked a certificate for use as a 3592 rollover or a keygroup as an LTO rollover. If the scheduled future date for rollover is earlier thanthe time of migration, the migration program adds an appropriate message anddoes not migrate these rollover entries. After successfully installing IBM SecurityKey Lifecycle Manager, Version 3.0.1, use the command-line interface orgraphical user interface to manually add these rollover entries.
v You cannot use the graphical user interface to delete a migrated rollover thatyou added with the command-line interface by using thetklmCertDefaultRolloverAdd or the tklmKeyGroupDefaultRolloverAdd command.Use the command-line interface to delete a migrated rollover that you created byusing the command-line interface.
v After you ensure that the primary IBM Security Key Lifecycle Manager atversion 3.0.1 is configured and running correctly, back up the version 3.0.1 IBMSecurity Key Lifecycle Manager server and install the backup on a replicacomputer.– Validate that the version 3.0.1 replica computer is configured and running
correctly.– Retain a copy of version 3.0.1 backup files in a location that is not in the IBM
Security Key Lifecycle Manager, Version 3.0.1 directory path. The separatelocation ensures that other processes cannot remove backup files if IBMSecurity Key Lifecycle Manager is removed.Additionally, retain the <IM_DATA_DIR>/logs/sklmLogs/migration.log files forfuture reference.
For the definition of <IM_DATA_DIR>, see “Definitions for HOME and otherdirectory variables” on page 5.
Migration planning 33

Data objects and properties migrated from IBM Security Key LifecycleManager
The data objects and properties are also migrated from IBM Security Key LifecycleManager earlier versions, such as 2.5, 2.6, 2.7, and 3.0.
KeystoreThe keystore, including all certificates and metadata from earlier versions,are added to the IBM Security Key Lifecycle Manager, Version 3.0.1database. The keystore is identified by the config.keystore.name propertyin the SKLMConfig.properties file.
DevicesAll the device information is read from the IBM Security Key LifecycleManager database.
Key groupsThe key group information is read from the IBM Security Key LifecycleManager database.
Rollover certificates and key groupsCertificates and key groups from the earlier versions might be marked forfuture 3592 tape drive administration. The migration program detects andmarks these rollovers for future administration with IBM Security KeyLifecycle Manager, Version 3.0.1.
MetadataAll the metadata information is migrated from earlier version database andmade usable by the IBM Security Key Lifecycle Manager, Version 3.0.1database.
PropertiesProperties in the SKLMConfig.properties file are migrated from the IBMSecurity Key Lifecycle Manager database. The datastore.properties file ismigrated.
These properties are replaced in the version 3.0.1 SKLMConfig.propertiesfile:v ds8k.acceptUnknownDrives
The device.AutoPendingAutoDiscovery property replaces this property.v drive.acceptUnknownDrives
The device.AutoPendingAutoDiscovery attribute in the IBM Security KeyLifecycle Manager database replaces this property.
These properties are migrated from the version 3.0.1SKLMConfig.properties file to the IBM Security Key Lifecycle Managerdatabase:v drive.default.alias1
v drive.default.alias2
v symmetricKeySet (removed from the SKLMConfig.properties file andreplaced with an entry for the device group in the IBM Security KeyLifecycle Manager database)
34 Installing, migrating, and configuring

Preinstallation worksheets
Before you install and configure IBM Security Key Lifecycle Manager, you cancomplete the preinstallation worksheets to define the configuration parameters thatare required to complete the IBM Security Key Lifecycle Manager installation.
The preinstallation worksheets list all of the values that you must specify duringan IBM Security Key Lifecycle Manager installation process. Completing thepreinstallation worksheets before you install the components can help you planyour installation, save time, and enforce consistency during the installation andconfiguration process.
General installation parametersUse the worksheet to record general installation parameters.
Table 8. General installation parameters
Option DescriptionDefault or examplevalue Your value
Installationmode
Mode in which torun the installationprogram.
gui (default)silent
Important Step:
Check theavailable freedisk space.
Ensure that youhave enough freedisk spaceavailable.
See “Hardwarerequirements” on page 7for values.
InstallationDirectory - IBMInstallationManager
Directory in whichto install IBMInstallationManager.
Windowsdrive:\ProgramFiles\IBM\InstallationManager\eclipse
AIX and Linux/opt/ibm/InstallationManager/eclipse
InstallationDirectory - IBMDB2
Directory in whichto install IBM DB2. Windows
drive:\ProgramFiles\IBM\DB2SKLMV301
AIX and Linux/opt/ibm/DB2SKLMV301
35

Table 8. General installation parameters (continued)
Option DescriptionDefault or examplevalue Your value
InstallationDirectory - IBMWebSphereApplicationServer
Directory in whichto installWebSphereApplication Server.
Windowsdrive:\ProgramFiles\IBM\WebSphere\AppServer
AIX and Linux/opt/IBM/WebSphere/AppServer
InstallationDirectory - IBMSecurity KeyLifecycleManager
Directory in whichto install IBMSecurity KeyLifecycle Manager.
Windowsdrive:\ProgramFiles\IBM\SKLMV301
AIX and Linux/opt/ibm/SKLMV301
Db2 configuration parametersUse the worksheet to record your entries that are related to the installation andconfiguration of Db2.
Table 9. Db2 configuration parameters
Field name DescriptionDefault or examplevalue Your value
InstallationDirectory - Db2
Directory in whichto install Db2. Windows
drive:\ProgramFiles\IBM\DB2SKLMV301
AIX and Linux/opt/IBM/DB2SKLMV301
Install DB2 orUse an existinginstallation ofDB2
Specify whether touse an existingDB2 instance or anew DB2installation.
If an existing DB2instance is used, youmust specify the DB2installation location andthe other details.
Db2Administrator ID
User ID for theIBM Security KeyLifecycle Managerdatabaseadministrator (alsocalled the instanceowner).
SKLMDB31
Db2AdministratorPassword
Password for thedatabaseadministrator userID.
36 Installing, migrating, and configuring

Table 9. Db2 configuration parameters (continued)
Field name DescriptionDefault or examplevalue Your value
Database Name Name of the IBMSecurity KeyLifecycle Managerdatabase.
SKLMDB31
Db2 Port Db2 servicelistening port.
50050
Administrator /Database Home
Directory wherethe databaseinstance andformatted tablesare created.
WindowsC:
Linux and AIX/home/sklmdb301
Administratorgroup
Operating systemuser group inwhich the instanceowner of thedatabase is amember on Linuxor AIX systems.
If Db2 is on AIX orLinux, your user IDmust be in the bin orroot group, or in aseparate group in whichroot is a member.
WebSphere Application Server and IBM Security Key LifecycleManager server configuration parameters
Use the configuration worksheet to record your entries for installation andconfiguration of the application server, which is used to host your IBM SecurityKey Lifecycle Manager server.
Table 10. WebSphere Application Server configuration parameters
Field name DescriptionDefault or examplevalue Your value
User Name Specifies theWebSphereApplication Serverlogin user ID forthe IBM SecurityKey LifecycleManagerAdministratorprofile.
wasadmin
Password Specifies theWebSphereApplication Serverpassword for theIBM Security KeyLifecycle Managerprofile.
Preinstallation worksheets 37

Table 10. WebSphere Application Server configuration parameters (continued)
Field name DescriptionDefault or examplevalue Your value
HTTPS AdminPort
Specifies theWebSphereApplication Serverport for the IBMSecurity KeyLifecycle Managerprofile.
9083
Table 11. IBM Security Key Lifecycle Manager configuration parameters
Field name DescriptionDefault or examplevalue Your value
User Name Specifies the userID to administerIBM Security KeyLifecycle Manager.
SKLMAdmin
Password Specifies thepassword for theIBM Security KeyLifecycle Manageradministrator.
HTTPS PortNumber
Specifies the secureport to access IBMSecurity KeyLifecycle Manager.
443
HTTP PortNumber
Specifies thenon-secure port toaccess IBMSecurity KeyLifecycle Manager.
80
38 Installing, migrating, and configuring

Installing and migrating IBM Security Key Lifecycle Manager
The IBM Security Key Lifecycle Manager installer can run in two modes, such asgraphical mode and silent mode. Select a mode that suits your requirements whenyou install or migrate IBM Security Key Lifecycle Manager.
Installation guidelinesFor a successful installation, ensure that you understand and follow the rules andguidelines to install IBM Security Key Lifecycle Manager.v Installation can take more than an hour.v Do not install from a network drive or mounted drive.v Ensure that you select the correct language at prompts during installation.
Correcting a locale error requires uninstalling and reinstalling IBM Security KeyLifecycle Manager and Db2.
v When you install IBM Security Key Lifecycle Manager, the DB2 password thatyou specify must comply with the password policy of the underlying operatingsystem.
v If you are using an existing user as DB2 Administrator, ensure that the passwordis correctly specified.
v When you install IBM Security Key Lifecycle Manager on Linux, certain Db2configuration changes made during installation might require that you restartthe system. Close any other applications before you restart the system. After thesystem restarts, run the installation program again.
v Ensure that the host name of the system is set correctly.v Entries for all fields are restricted to alphabetical characters (A-Z and a-z),
numeric characters (0-9), and the underscore character (_). The restriction alsoapplies to the values in the response file that is used for silent installations.
v Ensure that the installation path does not contain Unicode characters.v Ensure that there are no non-ASCII characters in the installation path.v When you install IBM Security Key Lifecycle Manager, retain the default path
for Shared Resources Directory. IBM Installation Manager uses this location todownload artifacts and to store information about the installed packages.
v Do not install IBM Security Key Lifecycle Manager on systems with hardenedoperating system.In a hardened system, you might have restricted access to the specificdirectories, or you might not be a part of the administrator group. On Windows,you might not have access to certain directories in the system even if you arepart of the administrator group. To install IBM Security Key Lifecycle Manager,you must have access to all the installation directories with Read, Write, andExecute permissions.
v Ensure that Bash Shell is installed before you install IBM Security Key LifecycleManager on UNIX operating systems.
v If you have IBM Security Key Lifecycle Manager earlier version in yourenvironment, consider the following guidelines before you install and migrate toversion 3.0.1:– Obtain the administrative passwords for your earlier version of IBM Security
Key Lifecycle Manager.
39

– Apply the most current fix pack to your earlier version of IBM Security KeyLifecycle Manager.
– On Windows systems, ensure that the IBM ADE Service is started.On Windows systems, open the Services console. Verify that the IBM ADEService is started. If the service is not started, select and start the service.
Installation images and fix packsObtain IBM Security Key Lifecycle Manager installation files from the IBMPassport Advantage® website and fix packs from Fix Central. You can also obtainthe files by another means, such as a DVD as provided by your IBM salesrepresentative.
The Passport Advantage website provides packages, referred to as eAssemblies, forvarious IBM products at http://www-01.ibm.com/software/passportadvantage/pao_customer.html.
You can use Fix Central to find the fixes that are provided by IBM Support forvarious products, including IBM Security Key Lifecycle Manager athttps://www-945.ibm.com/support/fixcentral. With Fix Central, you can search,select, order, and download fixes for your system with a choice of delivery options.A IBM Security Key Lifecycle Manager product fix might be available to resolveyour problem.
Installing IBM Security Key Lifecycle Manager in graphical modeUse the IBM Installation Manager installation wizard to install IBM Security KeyLifecycle Manager and its components in a graphical user interface mode.
Before you beginv Download and extract the files for IBM Security Key Lifecycle Manager to a
directory. These files are available for download from the IBM PassportAdvantage website. See the Installation images and fix packs topic for details.
v Review the Installation guidelines topic to know the considerations andrestrictions for installing and configuring IBM Security Key Lifecycle Manager.
v Review the Planning the installation topic to understand the requirements.
About this task
When you start the installation process from the Launchpad program, IBMInstallation Manager is automatically installed if it is not already on your system.When the installation task is complete, IBM Security Key Lifecycle Manager isinstalled along with the installation of required middleware components, such asWebSphere Application Server and DB2 on the same system.
Procedure1. Go to the directory of your installation package and open disk1. For example:
download_path/disk1
2. Start the installation program.
Operating system Command to run
Windows launchpad.bat
Linux or AIX launchpad.sh
40 Installing, migrating, and configuring

3. Select the locale that you want to use for the installation process. The localedetermines the language that the installer runs in. Type the number that isdisplayed next to your locale and press Enter. The Installation Managerwizard is displayed.
4. In the Install Packages window, click each of the product packages tohighlight them. The description of the package is displayed in the Detailssection at the bottom of the window. To fully understand the package that youare installing, review all information.
5. Select the product packages to install. All the packages are selected forinstallation by default.
6. Click Next. The prerequisite checks verify the prerequisite requirements forthe installation.
7. Select I accept the terms in the license agreements and click Next.8. Select a location for the shared resources directory and click Next.
Note: Retain the default path for shared resources directory, for example,C:\Program Files\IBM\IBMIMShared. IBM Installation Manager uses thislocation to download artifacts and to store information about the installedpackages.
9. On the Location page, the location of the package group into which eachproduct is installed is displayed. Click each product to see its package grouplocation. Click Next.
10. On the next page, select the translation packages to install and click Next.11. On the Features page, select the package features to install.
a. To see the dependency relationships between features, select Showdependencies.
b. Click a feature to view its brief description under Details.c. When you are finished selecting features, click Next.
12. On the Configuration for IBM DB2 page, specify the database configurationinformation and click Next.For more details about DB2 configuration, see DB2 configuration parametersand DB2 configuration during installation.
13. On the Configuration for IBM Security Key Lifecycle Manager page, specifythe configuration information for IBM Security Key Lifecycle Manager andWebSphere Application Server. Then, click Next.For more configuration details, see WebSphere Application Server and IBMSecurity Key Lifecycle Manager server configuration parameters andConfiguration during installation.
14. On the next page, to migrate an existing Encryption Key Managerconfiguration, select Migrate Encryption Key Manager, and specify theproperty file location. Then, click Next.For more information and guidelines about Encryption Key Managerconfiguration, see Migrating Encryption Key Manager configuration.
15. On the Summary page, review your choices before you install the productpackage. To change a selection, click Back to return to your selections.
16. To begin the installation, click Install.A progress indicator shows the percentage of the installation that iscompleted. When the installation process is complete, a message confirms thecompletion of the process.
17. Click View Log File to open the installation log file and to verify that all ofthe components were installed properly.
Installing and migrating IBM Security Key Lifecycle Manager 41

18. In the Install Package wizard, select None to instruct the installer not to createa profile.
19. Click Finish to complete the installation task and to close the wizard.
What to do next
Before you use IBM Security Key Lifecycle Manager, run the postinstallation tasksthat are described in Postinstallation steps.
Installing IBM Security Key Lifecycle Manager in silent modeYou can install IBM Security Key Lifecycle Manager in silent installation mode.This installation method is useful if you want identical installation configurationson multiple workstations. Silent installation requires a response file that defines theinstallation configuration.
Before you beginv Download and extract the files for IBM Security Key Lifecycle Manager to a
directory. These files are available for download from the IBM PassportAdvantage website. See the Installation images and fix packs topic for details.
v Review the Installation guidelines topic to know the considerations andrestrictions for installing and configuring IBM Security Key Lifecycle Manager.
v Review the Planning the installation topic to understand the requirements.v IBM Security Key Lifecycle Manager includes sample response files that you can
use as a template for creating your own response file. The sample response filesare in the directory in which your installation package is located. Modify thesample file for the specifics of your environment before it can be used.
About this task
Before installation, you must also read and agree to the license terms for thisproduct. To locate the response files and license term files, look in the rootdirectory of the installation image files. The/license subdirectory has the licensefiles in text format.
Installation fails unless you take these steps.
In the response file, make following changes to the line that specifies the license:v Set the default value to true to indicate that you agree with the terms of the
license.v Uncomment the line by removing the pound sign (#) character at the beginning
of the line.
Procedure1. Edit the repository location information and other details in the response file.
The sample response files are in the directory in which your installationpackage is located.
Note: If you enter an invalid value for the full_path_to_response_fileparameter, such as an incomplete path, the installation program exits. No errormessage is displayed or logged.You must update the response file with the correct repository location. Therepository location is the place where your installation package is located.
42 Installing, migrating, and configuring

<repository location=’<user repository location>\im’/><repository location=’<user repository location>\’/>
If you have extracted the installation package in C:\sklm301, update repositorylocation in the SKLM_install_Win_Resp.xml response file as shown in thefollowing example.<repository location=’<C:\sklm301\disk1\im’>\im’/><repository location=’<C:\sklm301\disk1\’/>
2. To add the encrypted passwords to the relevant elements of the response file,use the IBM Installation Manager utility to create encrypted passwords.For information about how to encrypt the password, see Encrypted passwordfor response file elements.
3. Open a command prompt and run the silent installation command.
WindowsGo to the <installation package directory>\disk1 directory and runthe following command.silent_install.bat SKLM_Silent_Win_Resp.xml
Linux Go to the <installation package directory>/disk1 directory and runthe following command.silent_install.sh SKLM_Silent_Linux_Resp.xml
4. Verify that the installation was successful by reviewing the log files. You canview the Installation Manager logs at the following locations.
Windowsdrive:\<IM_DATA_DIR>\logs\native.
For example, C:\ProgramData\IBM\Installation Manager\logs\native.
drive:\<IM_DATA_DIR>\logs\sklmLogs\.For example, C:\ProgramData\IBM\Installation Manager\logs\sklmLogs\.
Linux /<IM_DATA_DIR>/logs/native.
For example, /var/ibm/installationmanager/logs/native.
/<IM_DATA_DIR>/logs/sklmLogs/.For example, /var/ibm/InstallationManager/logs/sklmLogs/.
For the definition of <IM_DATA_DIR>, see “Definitions for HOME and otherdirectory variables” on page 5.
What to do next
Before you use IBM Security Key Lifecycle Manager, run the postinstallation tasksthat are described in Postinstallation steps.
Encrypted password for response file elementsYou must add the encrypted passwords to the relevant elements of the responsefile. Use the IBM Installation Manager utility to create an encrypted password.
You must add the encrypted passwords to the relevant elements of the responsefile. Use the IBM Installation Manager utility to create an encrypted password.
WindowsFor example, if you extract the IBM Security Key Lifecycle Managerproduct image to the C:\SKLM\disk1 directory, run the following commandto create an encrypted password.
Installing and migrating IBM Security Key Lifecycle Manager 43

cd C:\SKLM\disk1\im\toolsimcl.exe encryptString password
Add the encrypted password that you created in the response file asshown in the following example.<data key=’user.DB2_ADMIN_PWD,com.ibm.sklm301.db2.win.ofng’value=’<encrypted password>’/><data key=’user.CONFIRM_PASSWORD,com.ibm.sklm301.db2.win.ofng’value=’<encrypted password>’/>...<data key=’user.WAS_ADMIN_PASSWORD,com.ibm.sklm301.win’value=’<encrypted password>’/><data key=’user.WAS_ADMIN_CONF_PWD,com.ibm.sklm301.win’value=’<encrypted password>’/>...<data key=’user.SKLM_ADMIN_PASSWORD,com.ibm.sklm301.win’value=’<encrypted password>’/><data key=’user.SKLM_ADMIN_CONF_PWD,com.ibm.sklm301.win’value=’<encrypted password>’/>
Linux For example, if you extract the IBM Security Key Lifecycle Managerproduct image to the /SKLM/disk1 directory, run the following command tocreate an encrypted password.cd /SKLM/disk1/im/tools./imcl encryptString password
Add the encrypted password that you created in the response file asshown in the following example.<data key=’user.DB2_ADMIN_PWD,com.ibm.sklm301.db2.lin.ofng’value=’<encrypted password>’/><data key=’user.CONFIRM_PASSWORD,com.ibm.sklm301.db2.lin.ofng’value=’<encrypted password>’/>...<data key=’user.WAS_ADMIN_PASSWORD,com.ibm.sklm301.linux’value=’<encrypted password>’/><data key=’user.WAS_ADMIN_CONF_PWD,com.ibm.sklm301.linux’value=’<encrypted password>’/>...<data key=’user.SKLM_ADMIN_PASSWORD,com.ibm.sklm301.linux’value=’<encrypted password>’/><data key=’user.SKLM_ADMIN_CONF_PWD,com.ibm.sklm301.linux’value=’<encrypted password>’/>
You can create a different encrypted password for each user.
Db2 configuration during installationIBM Security Key Lifecycle Manager requires Db2 Advanced Workgroup ServerEdition at a version 11.1.2.2 level.
The installation program runs one of the following actions:v If an existing copy of Db2 Advanced Workgroup Server Edition is installed as
the root user at the correct version for the operating system, you can use theexisting Db2 Advanced Workgroup Server Edition. IBM Security Key LifecycleManager installer does not detect the presence of Db2. You must specify the Db2installation path.You can also install a new copy of Db2 Advanced Workgroup Server Edition. Anexisting Db2 must be locally installed on the system and not on a network orshared drive.
44 Installing, migrating, and configuring

On a Windows system, if a new copy of Db2 is installed, the DB2_COPY_NAME isset to DBSKLMV31.
v If IBM Security Key Lifecycle Manager earlier version and an earlier version ofDb2 exist on the system, the process installs Db2 Advanced Workgroup ServerEdition at a version 11.1.2.2 level that depends on the operating system. You canalso use another existing, installed version of Db2 11.1.2.2 that is at the correctlevel.The process also migrates data from the previous version of IBM Security KeyLifecycle Manager to the new version. For example:– The new copy of Db2 Advanced Workgroup Server Edition uses the previous
db2admin user ID and password.– On a Windows system, if a new copy of Db2 is installed, the DB2_COPY_NAME is
set to DBSKLMV31.v If no IBM Security Key Lifecycle Manager exists on the system and there is
either no copy or an earlier version of Db2, the installation process installs at aversion 11.1.2.2 level that depends on the operating system.No Db2 upgrade occurs.
During Db2 configuration, you are prompted for the following information, whichmight differ from this list, depending on the operating system and on whether IBMSecurity Key Lifecycle Manager is installing Db2 or by using an existing copy:
Db2 SelectionThe directory for the Db2 installation.
On Linux or AIX systems, the entry must start from the root directory. Thefirst character in the entry must be a forward slash ('/').
The installation process provides a default value. See “Definitions forHOME and other directory variables” on page 5.
Db2 Administrator IDThe local Db2 administrator user ID. The installation process provides adefault Administrator user ID with the necessary permissions. Do not use adomain user ID as the Db2 administrator. Do not specify a user ID greaterthan eight characters in length.
Note: Do not use a hyphen (-) or underscore character (_) when youspecify a user ID for an existing copy of Db2.
On a Windows system, the Db2 Administrator user ID must be a memberof the Administrator group. The user ID is subject to the security policyactive on the Windows system.
On a Linux or AIX system, the user ID of the IBM Security Key LifecycleManager Db2 instance owner must be a member of a group in which theroot user ID is also a member. If it is available, use bin as the group. If binis not available, ask the system administrator for the name of ageneral-purpose group to use.
Db2 Administrator PasswordThe password for the administrator. The maximum length is 20 characters.
The password for the Db2 Administrator user ID is subject to the securitypolicy active on the system. In addition, the login password for the Db2Administrator user ID and the Db2 password for the user ID must be thesame. When you change one, you must change the other.
Installing and migrating IBM Security Key Lifecycle Manager 45

Note: If you are using an existing user as DB2 Administrator, ensure thatthe password is correctly specified during installation.
Database NameName of the IBM Security Key Lifecycle Manager database, SKLMDB31.
Db2 PortThe port that Db2 uses.
Administrator's GroupAccess group in which the Administrator user ID exists. If Db2 is on AIXor Linux, your user ID must be in the bin or root group, or in a separategroup in which root is a member.
Administrator / Database HomeThe directory (AIX or Linux systems) or drive (Windows systems) in whichthe database instance and the formatted tables that are used by IBMSecurity Key Lifecycle Manager are created.
Notes:
v Entries for all fields are restricted to alphabetical characters (A-Z and a-z),numeric characters (0-9), and the underscore character (_). The restriction alsoapplies to the values in the response file that is used for silent installations.
v Do not specify spaces in any of the directory paths or file names.v The name of the computer on which you install Db2 cannot start with "ibm,"
"sql," or "sys," in lowercase or uppercase. The name of the computer also cannotcontain the underscore character (_).
v If you are using an existing user as Db2 Administrator, ensure that the passwordis correctly specified during installation.
v The Db2 admin group name cannot be longer than 8 characters.
Db2 password security issues on Windows systemsOn Windows systems, the Db2 Administrator user ID and password are subject tothe security policy that is active on the system.
If there is a password expiration restriction in effect, you must change the loginpassword and Db2 password for the Administrator user ID before the expirationperiod expires.
In addition, the login password for the Db2 Administrator user ID and the Db2data source password that is used by WebSphere Application Server must be thesame. When you change one, you must change the other.
Run the following steps to change the Db2 database password:1. Stop the WebSphere Application Server and all Windows services that are
related to Db2.2. Open the Windows user management tool by opening the Control Panel and
clicking Administrative tools > Computer Management > Local Users andGroups > Users.
3. Change the password for the IBM Security Key Lifecycle Manager databaseowner.
4. Open the Windows Services console by opening the Control Panel and clickingAdministrative Tools > Computer Management.
5. On the following services, change the password by using the Logon tab of theProperties dialog box:
46 Installing, migrating, and configuring

v DB2 - DB2SKLMV301 - sklminstance
For example, with the default instance name, the value of sklminstance is:DB2 - DBSKLMV301 - SKLMDB31
When the passwords are changed for all the services, restart the services.The following services must be stopped and restarted. Password change is notrequired:v Db2 License Server (DBSKLMV31)v Db2 Management Service (DBSKLMV31)v Db2 Governor (DBSKLMV31)v DB Remote Command Server (DBSKLMV31)
6. Start the WebSphere Application Server.7. Using the wsadmin interface that the WebSphere Application Server provides,
specify the Jython syntax.
Windowswsadmin.bat -username WASAdmin -password mypwd -lang jython
Linux./wsadmin.sh -username WASAdmin -password mypwd -lang jython
8. Use the wsadmin command to change the password of the WebSphereApplication Server data source:a. The following command lists JAASAuthData entries:
wsadmin>print AdminConfig.list(’JAASAuthData’)
The result might be:(cells/SKLMCell|security.xml#JAASAuthData_1379859888963)
b. Identify the data source ID with the alias that matches the string sklm_db.Also, identify the data source ID with the alias that matches the stringsklmdb:print AdminConfig.showAttribute(’JAASAuthData_list_entry’,’alias’)
For example, type on one line:print AdminConfig.showAttribute(’(cells/SKLMCell|security.xml#JAASAuthData_1379859888963)’,’alias’)
The result is:sklm_db
c. Change the password of the sklm_db alias, entering this command on oneline:print AdminConfig.modify(’JAASAuthData_list_entry’,’[[password passw0rd]]’)
If you specify special characters in the password, use quotation marks asdelimiters when you specify the password value.For example, type on one line:print AdminConfig.modify(’(cells/SKLMCell|security.xml#JAASAuthData_1379859888963)’,’[[password passw0rd]]’)
d. Save the changes:print AdminConfig.save()
e. Stop and restart the IBM Security Key Lifecycle Manager server by usingthe stopServer and startServer commands.Alternatively, stop and restart the IBM Security Key Lifecycle Managerserver by using Windows Computer Management.1) Open the Control Panel and click Administrative Tools > Computer
Management > Services and Applications > Services.
Installing and migrating IBM Security Key Lifecycle Manager 47

2) Stop and start the IBM Security Key Lifecycle Manager server service,which has a name like IBM WebSphere Application Server V9.0 -SKLM301Server.
f. Verify that you can connect to the database by using the WebSphereApplication Server data source.1) First, type:
print AdminConfig.list(’DataSource’)
The result might be:"Default Datasource(cells/SKLMCell/nodes/SKLMNode/servers/server1|resources.xml#DataSource_1183122153625)""SKLM DataSource(cells/SKLMCell/nodes/SKLMNode/servers/server1|resources.xml#DataSource_1379859893896)""SKLM scheduler XA Datasource(cells/SKLMCell/nodes/SKLMNode/servers/server1|resources.xml#DataSource_1379859896273)"DefaultEJBTimerDataSource(cells/SKLMCell/nodes/SKLMNode/servers/server1|resources.xml#DataSource_1000001
2) Test the connection on the first data source. For example, type:print AdminControl.testConnection('SKLM DataSource(cells....)')
For example, type on one line:print AdminControl.testConnection(’SKLM DataSource(cells/SKLMCell/nodes/SKLMNode/servers/server1|resources.xml#DataSource_1379859893896)’)
3) Test the connection on the remaining data source. For example, type:print AdminControl.testConnection(’SKLM scheduler XA Datasource(cells/SKLMCell/nodes/SKLMNode/servers/server1|resources.xml#DataSource_1379859896273)’)
4) In both cases, you receive a message that the connection to the datasource was successful. For example:WASX7217I: Connection to provided datasource was successful.
Now you can run an IBM Security Key Lifecycle Manager operation.
Db2 password security issues on Linux or AIX systemsOn Linux or AIX systems, you might want to change the password for the Db2Administrator user ID. The login password for the Db2 Administrator user ID andthe Db2 password for the user ID must be the same.
The IBM Security Key Lifecycle Manager installation program installs Db2 andprompts the installing person for a password for the user named sklmdb31.Additionally, the Db2 application creates an operating system user entry namedsklmdb31. For example, the password for this user might expire, requiring you toresynchronize the password for both user IDs.
Before you can change the password of the Db2 Administrator user ID, you mustchange the password for the user at the operating system level.1. Log on to IBM Security Key Lifecycle Manager server as root.2. Change user to the sklmdb31 system user entry. Type:
su sklmdb31
3. Change the password. Type:passwd
Specify the new password.4. Exit back to root.
exit
48 Installing, migrating, and configuring

5. In the WAS_HOME/bin directory, use the wsadmin interface that the WebSphereApplication Server provides to specify the Jython syntax../wsadmin.sh -username WASAdmin-password mypwd -lang jython
6. Change the password for the WebSphere Application Server data source:a. The following command lists the JAASAuthData entries:
wsadmin>print AdminConfig.list(’JAASAuthData’)
The result might like this example:(cells/SKLMCell|security.xml#JAASAuthData_1228871756187)(cells/SKLMCell|security.xml#JAASAuthData_1228871757843)
b. Type the AdminConfig.showall command for each entry to locate the aliassklm_db. For example, type on one line:print AdminConfig.showall(’(cells/SKLMCell|security.xml#JAASAuthData_1228871756187)’)
The result is like this example:{alias sklm_db}{description "SKLM database user j2c authentication alias"}{password *****}{userId sklmdb31}
And also type on one line:print AdminConfig.showall(’(cells/SKLMCell|security.xml#JAASAuthData_1228871757843)’)
The result is like this example:{alias sklmdb}{description "SKLM database user J2C authentication alias"}{password *****}{userId sklmdb31}
c. Change the password for the sklm_db alias that has the identifierJAASAuthData_1228871756187:print AdminConfig.modify(’JAASAuthData_list_entry’,’[[password passw0rd]]’)
For example, type on one line:print AdminConfig.modify(’(cells/SKLMCell|security.xml#JAASAuthData_1228871756187)’,’[[password passw0rd]]’)
d. Change the password for the sklmdb alias that has the identifierJAASAuthData_1228871757843:print AdminConfig.modify(’JAASAuthData_list_entry’,’[[password passw0rdc]]’)
For example, type on one line:print AdminConfig.modify(’(cells/SKLMCell|security.xml#JAASAuthData_1228871757843)’,’[[password passw0rd]]’)
e. Save the changes:print AdminConfig.save()
f. Exit back to root.exit
g. In the WAS_HOME/bin directory, stop the WebSphere Application Serverapplication. For example, as WASAdmin, type on one line:stopServer.sh server1 -username wasadmin -password passw0rd
The result is like this example:ADMU0116I: Tool information is being logged in file//opt/IBM/WebSphere/AppServer/profiles/KLMProfile/logs/server1/stopServer.logADMU0128I: Starting tool with the WASProfile profileADMU3100I: Reading configuration for server: server1ADMU3201I: Server stop request issued. Waiting for stop status.ADMU4000I: Server server1 stop completed.
Installing and migrating IBM Security Key Lifecycle Manager 49

h. Start the WebSphere Application Server application. As the WebSphereApplication Server administrator, type on one line:startServer.sh server1
i. In the WAS_HOME/bin directory, use the wsadmin interface that theWebSphere Application Server provides to specify the Jython syntax../wsadmin.sh -username wasadmin -password mypwd -lang jython
j. Verify that you can connect to the database by using the WebSphereApplication Server data source.1) First, query for a list of data sources. Type:
print AdminConfig.list(’DataSource’)
The result might be like this example:"SKLM DataSource(cells/SKLMCell/nodes/SKLMNode/servers/server1|resources.xml#DataSource_1228871762031)"
"SKLM scheduler XA Datasource(cells/SKLMCell/nodes/SKLMNode/servers/server1|resources.xml#DataSource_1228871766562)"
"Tivoli Common Reporting Data Source(cells/SKLMCell|resources.xml#DataSource_1227211230078)"
DefaultEJBTimerDataSource(cells/SKLMCell/nodes/SKLMNode/servers/server1|resources.xml#DataSource_1000001)
ttssdb(cells/SKLMCell|resources.xml#DataSource_1227211144390)
2) Type:print AdminControl.testConnection(’SKLM DataSource(cells....)’)
For example, type on one line:print AdminControl.testConnection(’SKLMDataSource(cells/SKLMCell/nodes/SKLMNode/servers/server1|resources.xml#DataSource_1228871762031)’)
3) Test the connection on the remaining data source. For example, type:print AdminControl.testConnection(’SKLM scheduler XA Datasource(cells/SKLMCell/nodes/SKLMNode/servers/server1|resources.xml#DataSource_1228871766562)’)
4) In both cases, you receive a message that the connection to the datasource was successful. For example:WASX7217I: Connection to provided data source was successful.
Db2 user ID restrictions and requirementsYou must ensure that the DB2 administrator user ID meets the specificrequirements and restrictions.v Must have a primary group other than guests, admins, users, and local.v Can include lowercase letters (a-z), numbers (0-9), and the underscore character (
_ ).v Cannot be longer than eight characters.v Cannot begin with IBM, SYS, SQL, or a numberv Cannot be a DB2 reserved word (USERS, ADMINS, GUESTS, PUBLIC, or LOCAL), or an
SQL reserved wordv Cannot use any User IDs with root privilege for the DB2 instance ID, DAS ID or
fenced ID.v Cannot include accented characters.
50 Installing, migrating, and configuring

WebSphere Application Server and IBM Security Key LifecycleManager server configuration during installation
The installation wizard gathers configuration information for IBM Security KeyLifecycle Manager and for the WebSphere Application Server runtime environment.
Application Server Administration
User NameSpecifies the WebSphere Application Server login user ID for the IBMSecurity Key Lifecycle Manager administrator profile.
PasswordSpecifies the WebSphere Application Server password for the IBM SecurityKey Lifecycle Manager profile.
HTTPS Admin PortSpecifies the HTTPS port to access WebSphere Integrated Solutions Consolefor the IBM Security Key Lifecycle Manager profile.
Default value is 9083.
IBM Security Key Lifecycle Manager Application Administration
User NameSpecifies the user ID to administer IBM Security Key Lifecycle Manager.
PasswordSpecifies the password for the IBM Security Key Lifecycle Manageradministrator.
HTTPS Port NumberSpecifies the secure port to access IBM Security Key Lifecycle Manager.
Default value is 443.
HTTP Port NumberSpecifies the non-secure port to access IBM Security Key LifecycleManager.
Default value is 80.
Note:
The User Name string cannot contain leading and trailing spaces, and cannotcontain the following characters:
/ forward slash\ backslash* asterisk, comma: colon; semi-colon= equal sign+ plus sign? question mark| vertical bar< left angle bracket> right angle bracket& ampersand (and sign)
Installing and migrating IBM Security Key Lifecycle Manager 51

% percent sign' single quotation mark" double quotation mark]]> No specific name exists for this character combination.. period (not valid if first character; valid if a later character)# Hash mark$ Dollar sign~ Tilde( Left parenthesis) Right parenthesis
Migrating Encryption Key Manager configurationInstallation provides an option to migrate an existing Encryption Key Managerconfiguration to IBM Security Key Lifecycle Manager.
Before you begin, obtain the password to log in to the Encryption Key Managerserver.
To migrate an existing configuration, select this option:
Migrate Encryption Key ManagerCheck this box if you have an old Encryption Key Manager properties fileto migrate to IBM Security Key Lifecycle Manager. If you select the checkbox, you must specify the properties file from the previous Encryption KeyManager system.
You can migrate from Version 2.1 of Encryption Key Manager.
Encryption Key Manager must not be active when you are doing the migration. Tostop a running Encryption Key Manager process, complete these steps:1. Start an administrative session. At version 2.1, enter this command:
java com.ibm.keymanager.KMSAdminCmd KeyManagerConfig.properties -i
2. After the administrative session starts, complete these steps:a. Authenticate to the Encryption Key Manager server by using the login
command. Type:login -ekmuser EKMAdmin -password password
b. Stop the server. Type:stopekm
3. Exit the session.
For restrictions on migration, see “Migration restrictions and requirements forEncryption Key Manager” on page 26.
Back up the server that has the configuration data that you intend to migrate.Migrated data includes the following files:v A configuration properties filev Keys and certificates that are referenced by the configuration properties filev Drive tablesv An optional metadata file pointed at by the configuration properties filev An optional key groups file
52 Installing, migrating, and configuring

Note: You can also use the cross-platform backup utility to run backup operationon Encryption Key Manager 2.1 to back up critical data. You can restore thebackup files on IBM Security Key Lifecycle Manager, Version 3.0 to an operatingsystem that is different from the one it was backed up from. For more information,see Backup and restore operations for earlier versions of IBM Security KeyLifecycle Manager and IBM Tivoli Key Lifecycle Manager.
Migrating IBM Security Key Lifecycle Manager in silent inline modeThe process of migrating IBM Security Key Lifecycle Manager in silent inline modeis similar to the process of installing the product silently. With this type ofmigration, you can upgrade IBM Security Key Lifecycle Manager on the server andmigrate data from the CURRENT (currently installed) version to the NEW (later)version. To migrate in silent inline mode, you need a response file that defines themigration configuration.
Before you beginv Download and extract the files for IBM Security Key Lifecycle Manager to a
directory. These files are available for download from the IBM PassportAdvantage website. See the Installation images and fix packs topic for details.
v Review the Installation guidelines topic to know the considerations andrestrictions for installing and configuring IBM Security Key Lifecycle Manager.
v Review the Migration planning topic to understand the requirements.v Read the license terms for this product. To locate the license term files, in the
root directory in which the installation package is located, navigate to thedisk1/im/license subdirectory. The/license subdirectory has the license files intext format.
v Select the appropriate sample response file.Use the SKLM_Silent_platform_Mig_version_Resp.xml response file, where– platform is the operating system that is running on the server.– version is the CURRENT IBM Security Key Lifecycle Manager version.IBM Security Key Lifecycle Manager includes platform-specific sample responsefiles that you can use as a template for creating your own response file. Thesesample response files exist in the directory in which your installation package islocated.For example, if the server is running on Linux and the CURRENT version ofIBM Security Key Lifecycle Manager is 3.0, then use theSKLM_Silent_Linux_Mig_30_Resp.xml response file.
v Obtain the encrypted values of the passwords for these administrators: IBMSecurity Key Lifecycle Manager, WebSphere Application Server, and CURRENTdatabase.Also, create an encrypted password for the administrator of the NEW database,which is the new database instance that will be installed as part of themigration.These passwords are used in the silent inline migration procedure.To create the encrypted password, use the IBM Installation Manager utility. Formore information, see Encrypted password for response file elements.
About this task
To migrate IBM Security Key Lifecycle Manager in silent inline mode:
Installing and migrating IBM Security Key Lifecycle Manager 53

Procedure1. Open the sample response file in edit mode and update the following
parameters:
repository locationSpecify the full path to the directory in which the installation packageis located.
Note: If you enter an invalid value for this parameter, the installationprogram exits without an error message. Also, the error is not logged.
The file has two instances of this parameter and both must be updated.Specify the values as shown here:<repository location=’myRepositoryLocation\im’/><repository location=’myRepositoryLocation\’/>
where myRepositoryLocation is the full path to the installation packagedirectory.For example, if the installation package exists in the C:\sklm301directory, update this parameter as follows:<repository location=’/SKLM301/disk1/im’/><repository location=’/SKLM301/disk1/’/>
user.DB2_ADMIN_PWD,com.ibm.sklm301.db2.platform.ofngSpecify the encrypted password for the NEW database administrator.
For example:<data key=’user.DB2_ADMIN_PWD,com.ibm.sklm301.db2.linux.ofng’ value=’QTh/0AiFacssjhs9gnOYkGA==’/>
user.CONFIRM_PASSWORD,com.ibm.sklm301.db2.platform.ofngSpecify the same password that you provided in theuser.DB2_ADMIN_PWD,com.ibm.sklm301.db2.platform.ofng parameter.
For example:<data key=’user.CONFIRM_PASSWORD,com.ibm.sklm301.db2.linux.ofng’ value=’QTh/0AiFacssjhs9gnOYkGA==’/>
user.WAS_HOME,com.ibm.sklm301.platformSpecify the WAS_HOME directory path for the NEW WebSphereApplication Server. For the definition of WAS_HOME, see “Definitions forHOME and other directory variables” on page 5.
For example:<data key=’user.WAS_HOME,com.ibm.sklm301.linux’ value=’/opt/IBM/WebSphere/AppServer’/>
user.WAS_ADMIN_ID,com.ibm.sklm301.platformSpecify the user ID for the CURRENT WebSphere Application Serveradministrator.
For example:<data key=’user.WAS_ADMIN_ID,com.ibm.sklm301.linux’ value=’tipadmin’/>
user.WAS_ADMIN_PASSWORD,com.ibm.sklm301.platformSpecify the encrypted password for the CURRENT WebSphereApplication Server administrator. This password will be used for theNEW WebSphere Application Server administrator.
For example:<data key=’user.WAS_ADMIN_PASSWORD,com.ibm.sklm301.linux’ value=’e9PjN93MeQxyzSs9VXJFMw==’/>
user.WAS_ADMIN_CONF_PWD,com.ibm.sklm301.platformSpecify the same password that you provided in theuser.WAS_ADMIN_CONF_PWD,com.ibm.sklm301.platform parameter.
54 Installing, migrating, and configuring

For example:<data key=’user.WAS_ADMIN_CONF_PWD,com.ibm.sklm301.linux’ value=’e9PjN93MeQxyzSs9VXJFMw==’/>
user.SKLM_ADMIN_USER,com.ibm.sklm301.platformSpecify the user ID for the CURRENT IBM Security Key LifecycleManager administrator.
For example:<data key=’user.SKLM_ADMIN_USER,com.ibm.sklm301.linux’ value=’TKLMAdmin’/>
user.SKLM_ADMIN_PASSWORD,com.ibm.sklm301.platformSpecify the encrypted password for the CURRENT IBM Security KeyLifecycle Manager administrator. This password will apply to the NEWIBM Security Key Lifecycle Manager administrator.
For example:<data key=’user.SKLM_ADMIN_PASSWORD,com.ibm.sklm301.linux’ value=’9YTRJMRIydDSdfhaHPs1mn==’/>
user.SKLM_ADMIN_CONF_PWD,com.ibm.sklm301.platformSpecify the same password that you provided in theuser.SKLM_ADMIN_PASSWORD,com.ibm.sklm301.platform parameter.
For example:<data key=’user.SKLM_ADMIN_CONF_PWD,com.ibm.sklm301.linux’ value=’9YTRJMRIydDSdfhaHPs1mn==’/>
user.TKLM_VERSION,com.ibm.sklm301.platformSpecify the CURRENT IBM Security Key Lifecycle Manager version.
For example, if you are migrating from version 3.0 on a server that isrunning on Linux, update this parameter as follows:<data key=’user.TKLM_VERSION,com.ibm.sklm301.linux’ value=’3.0.0.0’/>
user.TKLM_TIP_HOME,com.ibm.sklm301.platformFor IBM Security Key Lifecycle Manager 2.5 and later, specify theWAS_HOME directory path for the CURRENT WebSphere ApplicationServer. For the definition of WAS_HOME, see “Definitions for HOME andother directory variables” on page 5.
For example:<data key=’user.TKLM_TIP_HOME,com.ibm.sklm301.linux’ value=’/opt/IBM/WebSphere/AppServer’/>
For versions earlier than IBM Security Key Lifecycle Manager 2.5, checkand specify the WebSphere Application Server installation directory. Forexample:<data key=’user.TKLM_TIP_HOME,com.ibm.sklm301.linux’ value=’/opt/IBM/tivoli/tiptklmV2’/>
user.TKLM_INSTALLED,com.ibm.sklm301.platformEnsure that the value is true, which indicates that an earlier version ofIBM Security Key Lifecycle Manager is already installed on the server.
For example:<data key=’user.TKLM_INSTALLED,com.ibm.sklm301.linux’ value=’true’/>
user.TKLM_DB_PWD,com.ibm.sklm301.platformSpecify the encrypted password for the CURRENT database.
For example:<data key=’user.TKLM_DB_PWD,com.ibm.sklm301.linux’ value=’SwIhGBTDHcJok80Ux4Sb3g==’/>
user.SKLM_APP_PORT,com.ibm.sklm301.platformSpecify the port number that the NEW IBM Security Key LifecycleManager server listens on for HTTPS requests.
For example:
Installing and migrating IBM Security Key Lifecycle Manager 55

<data key=’user.SKLM_APP_PORT,com.ibm.sklm301.linux’ value=’8443’/>
user.WAS_ADMIN_PORT,com.ibm.sklm301.platformSpecify the port number that the NEW WebSphere Application Serverlistens on for requests.
For example:<data key=’user.WAS_ADMIN_PORT,com.ibm.sklm301.linux’ value=’8083’/>
user.SKLM_APP_NS_PORT,com.ibm.sklm301.platformSpecify the port number that the NEW IBM Security Key LifecycleManager server listens on for HTTP requests.
For example:<data key=’user.SKLM_APP_NS_PORT,com.ibm.sklm301.linux’ value=’8080’/>
2. Save the response file and close it.3. Check whether the Db2 JAR file db2jcc.jar exists in the installation directory.
If not, copy the file from the installation package into the installation directory.For example, copy the file from disk1/im/jre_7.0.9040.20160504_1613/jre/lib/ext into /opt/IBM/InstallationManager/eclipse/jre_7.0.9040.20160504_1613/jre/lib/ext.
4. Open command line and run the silent installation command as follows:./silent_install.sh myResponseFile -acceptLicense
Where, myResponseFile is the response file that you want to use. For example,SKLM_Silent_Linux_30_Resp.xml.By specifying the -acceptLicense parameter, you agree to and accept thelicense terms for this product.
5. Verify that the installation was successful by reviewing the log files. You canview the IBM Installation Manager logs at the following locations.
Windowsdrive:\<IM_DATA_DIR>\logs\native.
For example, C:\ProgramData\IBM\Installation Manager\logs\native.
drive:\<IM_DATA_DIR>\logs\sklmLogs\.For example, C:\ProgramData\IBM\Installation Manager\logs\sklmLogs\.
Linux /<IM_DATA_DIR>/logs/native.
For example, /var/ibm/installationmanager/logs/native.
/<IM_DATA_DIR>/logs/sklmLogs/.For example, /var/ibm/InstallationManager/logs/sklmLogs/.
For the definition of <IM_DATA_DIR>, see “Definitions for HOME and otherdirectory variables” on page 5.
What to do next
Before you use IBM Security Key Lifecycle Manager, run the postinstallation tasksthat are described in Postinstallation steps.
56 Installing, migrating, and configuring

Setting up Multi-Master cluster on a cross-migrated IBM Security KeyLifecycle Manager version 3.0.1 server
You can set up a Multi-Master cluster on an IBM Security Key Lifecycle Managerversion 3.0.1 server that is cross-migrated from any of the earlier versions.
Before you begin
Ensure that the IBM Security Key Lifecycle Manager server on which you want toset up the Multi-Master cluster is cross-migrated to version 3.0.1.
Procedure1. In the SKLMConfig.properties file, update the
TransportListener.ssl.protocols property to the value: TLSv1.2.TransportListener.ssl.protocols=TLSv1.2
You can use the Update Config Property REST Service or thetklmConfigUpdateEntry CLI command to update the property.
2. Stop the IBM Security Key Lifecycle Manager Agent.3. Restart the IBM Security Key Lifecycle Manager server.4. During the restore process, if you specified the RESTORE_USER_ROLES property as
RESTORE_USER_ROLES=y in the restoreVversion utility (For example,restoreV25.bat), refresh the user credentials on the IBM Security Key LifecycleManager server:a. Log on to the IBM Security Key Lifecycle Manager graphical user interface.b. Click Administration > Multi-Master.c. On the page, click the Multi-Master link and in the Confirm dialog box,
click OK.d. In the Masters table, select the master server and click Modify Master.e. In the Multi-Master Configuration - Modify Master window, specify the
values for the IBM Security Key Lifecycle Manager password andWebSphere Application Server password.
f. Click Accept host certificate automatically and click Update.g. In the information message dialog box with the message Successfully
modified the master, click Close.h. Click Cancel.
The IBM Security Key Lifecycle Manager master server is setup as the primarymaster.
What to do next
You can now add standby and non-HADR master servers to the cluster. For moreinformation, see Adding a standby master to the cluster and Adding a master tothe cluster.
Errors during installationErrors that you must correct can occur during installation. Many error messagescontain enough information to correct the situation that caused the error. However,some error conditions require more information.
Installing and migrating IBM Security Key Lifecycle Manager 57

Silent installation might exit with no error message displayed, but errors doexist in the log file.
If silent installation exits with a zero return code, also check the log file forerror messages.
Windows\<IM_DATA_DIR>\logs
Linux or AIX/<IM_DATA_DIR>/logs
For the definition of <IM_DATA_DIR>, see “Definitions for HOME andother directory variables” on page 5.
If you get an error message about a disk or file system not having enough diskspace available:
Remove files to free up space, or add storage to the system to expand thesize of the file system.
Do not correct the problem while the installation program is running. Exitthe installation program before you make the corrections, and restart theprogram after the corrections are made.
See “Hardware requirements” on page 7 for information about disk spaceand other hardware requirements.
If you install IBM Security Key Lifecycle Manager using an Exceed X Server ona local machine while exporting the display from a Linux system to the localmachine, do not decline the license agreement.
If you decline the license agreement, the installation program can berendered unresponsive. Accept the license agreement, or use a Cygwin XServer or a Virtual Network Connection instead.
Removing the sklmdb31 administrator using Windows user and groupmanagement tool requires removing the previous sklmdb301 subdirectory beforereinstalling IBM Security Key Lifecycle Manager and Db2.
During IBM Security Key Lifecycle Manager installation, you mightencounter a problem if you used the Windows user and groupmanagement tool to previously delete the sklmdb31 user ID as the Db2administrator. Reinstalling IBM Security Key Lifecycle Manager then failsto install Db2.
To fix the problem, take these steps:1. Change to the appropriate subdirectory:v Windows Server 2012: drive:\Users
2. Remove the sklmdb301 subdirectory.3. Reinstall IBM Security Key Lifecycle Manager. The sklmdb301
subdirectory is not automatically removed when you use the Windowsuser and group management tool to delete the user account sklmdb301.
Non-root installation of IBM Security Key Lifecycle Manager on Linuxsystems
You can install IBM Security Key Lifecycle Manager as a non-root user on Linuxoperating systems.
58 Installing, migrating, and configuring

Best practices and guidelines for a non-root installation of IBMSecurity Key Lifecycle Manager on Linux systems
When you plan your non-root installation of IBM Security Key Lifecycle Manageron Linux systems, there are a number of best practices to consider. Review thesebest practices before you start your installation.v Ensure that the non-root user belongs to a non-root primary group. The non-root
user must have a primary group other than guests, admins, users, and local.v The home directory for non-root user ($HOME) must point to the correct location.
For example: /home/<user_name>v Verify that the previous installation (if any) of IBM Security Key Lifecycle
Manager and Db2 in the system are removed without any remnants.v When you install IBM Security Key Lifecycle Manager, Prerequisite Scanner for
non-root installation might fail. Ensure that all the prerequisites that areindicated in the Prerequisite Scanner check are met except for the requirementfor Administrator privileges before you proceed with the installation.To continue with the installation, skip running Prerequisite Scanner. To skip theprerequisite scan, create sklmInstall.properties file in the /tmp directory withthe following property.SKIP_PREREQ=true
v Ensure that the kernel settings at the operating-system level are correct for Db2installation. For more information about Db2 kernel settings, see Db2documentation at: http://www.ibm.com/support/knowledgecenter/SSEPGG_11.1.0/com.ibm.db2.luw.qb.server.doc/doc/t0008238.html
v During the installation, ensure that the database Administrator ID is the same asthe non-root user who is logged on to the system for running the installationprocess. Ensure the following requirements for the database Administrator ID:– Maximum length of the database Administrator ID is 8 characters.– Password for the database Administrator ID is the same as the operating
system level password for the non-root user.– Database Administrator group is the same as the primary group of the
non-root user at the operating system level.– Database home points to the home directory of the non-root user.
v You cannot install IBM Security Key Lifecycle Manager as a non-root user insilent mode.
v Migration from the earlier versions of IBM Security Key Lifecycle Manager (1.0,2.0, 2.0.1, 2.5, 2.6, 2.7, and Encryption Key Manager) to non-root installation ofversion 3.0.1 is not supported.
v Db2 might not start on system boot when installed as a non-root user. Correctby starting Db2 before WebSphere Application Server starts. Run thenonrootconfig.sh script after installer completed the installation.
v The Db2 admin group name cannot be longer than 8 characters.v After you run the nonrootconfig.sh command, and when WebSphere Application
Server is started, you might get the error message No DB connected on IBMSecurity Key Lifecycle Manager user interface. To resolve this issue, restart Db2and WebSphere Application Server.
Installing and migrating IBM Security Key Lifecycle Manager 59

Installing IBM Security Key Lifecycle Manager on Linuxsystems as a non-root user
You can install IBM Security Key Lifecycle Manager as a non-root user on Linuxoperating system. Non-root installation of IBM Security Key Lifecycle Managerinstalls both Db2 and WebSphere Application Server as a non-root user.
About this task
Before you install IBM Security Key Lifecycle Manager on Linux systems as anon-root user, review the best practices information in the “Non-root installation ofIBM Security Key Lifecycle Manager on Linux systems” on page 58 topic.
Procedure1. Ensure that your target environment meets the IBM Security Key Lifecycle
Manager installation prerequisites. See “Planning the installation” on page 5.2. Create a non-root User ID. Ensure that the User ID has a primary group other
than guests, admins, users, and local.3. Skip running Prerequisite Scanner by creating sklmInstall.properties file in
the /tmp directory with the following property.SKIP_PREREQ=true
4. Go to the directory of your installation package and open disk1. For example,download_path/disk1.
5. Open a command line window and run launchpad.sh.6. Specify the Db2 configuration parameters. See “Db2 configuration during
non-root installation” on page 61.7. Specify the WebSphere Application Server configuration parameters.8. After the IBM Security Key Lifecycle Manager installation process is complete,
open the command line window.9. Stop WebSphere Application Server and Db2.
Note: Ensure that you perform this step as the non-root user that you createdin step 2.Run the following command to stop WebSphere Application Server.cd <WAS_HOME>/bin./stopServer.sh <server name> -username <WAS Admin User ID> -password <WAS Admin password>
./stopServer.sh server1 -username wasadmin -password wasadmin_pwd
Run the following command to stop Db2.cd ~/sqllib/adm./db2stop
10. Open a new shell and run the following command under/home/username/sklm301properties/scripts.Non-root Db2 installation requires root access to configure Db2 instance witha specific port number and service name.sudo nonrootconfig.sh <DB_INST_HOME> <DB_INST_NAME> <PORT> <DB_USER> <DB_PASSWORD> <WAS_HOME> <WAS_USER> <WAS_PASSWORD>
For example, sudo nonrootconfig.sh /home/testuser testuser 50050testuser mydbpwd /home/testuser/IBM/WebSphere/AppServer wasadmin mypwd .Where,<DB_INST_HOME> - the directory that contains the Db2 database instance.For example, /home/testuser.<DB_INST_NAME> - the Db2 instance name. For example, testuser.
60 Installing, migrating, and configuring

<PORT> - Db2 service listening port. For example, 50050.<DB_USER> - Db2 user name. For example, testuser.<DB_PASSWORD> - Db2 password. For example, mydbpwd.<WAS_HOME> - the WebSphere Application Server home directory. Forexample, /home/testuser/IBM/WebSphere/AppServer.<WAS_USER> - WebSphere Application Server user name. For example,wasadmin.<WAS_PASSWORD> - WebSphere Application Server password. For example,mypwd.When you run the script, you are prompted to provide password for theDb2 user name to continue with installation.
11. Restart WebSphere Application Server.
Note: Ensure that you perform this step as the non-root user that you createdin step 2.cd WAS_HOME/bin./startServer.sh server name
./startServer.sh server1
What to do nextv In the SKLM_HOME/config/SKLMConfig.properties file, update the SSL port
number to be greater than 1024 by using the graphical user interface,command-line interface, or REST interface. For example,TransportListener.ssl.port=441
v Restart the IBM Security Key Lifecycle Manager server.After the installation, you must log in as a non-root user to start or stop IBMSecurity Key Lifecycle Manager server and Db2 server.
Db2 configuration during non-root installationIBM Security Key Lifecycle Manager requires Db2 Advanced Workgroup ServerEdition at a version 11.1.2.2 level that depends on the operating system.
During Db2 configuration, you are prompted for the following information:
Db2 Administrator IDThe local Db2 administrator user ID. Because non-root Db2 user can have asingle instance, the Db2 administrator ID must be the same as the User IDwho is logged on to the system. Ensure that the maximum length of the IDis 8 characters.
Db2 Administrator PasswordThe password for the administrator. Ensure that the maximum length ofthe password is 20 characters.
The password for the Db2 Administrator user ID is subject to the securitypolicy active on the system. Password for Db2 Administrator ID must besame as the operating system level password for the non-root user who islogged on to the system. When you change one, you must change theother.
Database NameThe name of the IBM Security Key Lifecycle Manager database, which isSKLMDB31.
Db2 PortThe port that Db2 uses.
Installing and migrating IBM Security Key Lifecycle Manager 61

Administrator's GroupAccess group in which the Administrator user ID exists. DatabaseAdministrator group must be same as the primary group for the non-rootuser at operating system level.
Administrator / Database HomeThe directory in which the database instance and the formatted tables thatare used by IBM Security Key Lifecycle Manager are created. Databasehome must point to the home directory of the non-root user.
Notes:
1. Entries for all fields are restricted to alphabetical characters (A-Z and a-z),numeric characters (0-9), and the underscore character (_). The restriction alsoapplies to the values in the response file that is used for silent installations.
2. Do not specify spaces in any of the directory paths or file names.3. The name of the computer on which you install Db2 cannot start with “ibm”,
“sql”, or “sys” in lowercase or uppercase. The name of the computer alsocannot contain the underscore character (_).
4. The Db2 admin group name cannot be longer than 8 characters.
For more information about how to modify kernel parameters and non-rootinstallation, see Db2 documentation.v http://www-01.ibm.com/support/knowledgecenter/SSEPGG_11.1.0/
com.ibm.db2.luw.qb.server.doc/doc/t0008238.htmlv http://www-01.ibm.com/support/knowledgecenter/SSEPGG_11.1.0/
com.ibm.db2.luw.qb.server.doc/doc/t0050571.html
62 Installing, migrating, and configuring

Post-installation steps
After you install IBM Security Key Lifecycle Manager, ensure that the Db2 andWebSphere Application Server services are correctly configured.
Login URLTo get started after you install IBM Security Key Lifecycle Manager, obtain thelogin URL and the initial IBM Security Key Lifecycle Manager administrator userID and password.
Login URL for IBM Security Key Lifecycle Manager
Use login URL to access the IBM Security Key Lifecycle Manager web interface.The login URL for the IBM Security Key Lifecycle Manager administrative consoleis:https://ip-address:port/ibm/SKLM/login.jsp
The value of ip-address is an IP address or DNS address of the IBM Security KeyLifecycle Manager server.
The value of port is the port number that IBM Security Key Lifecycle Managerserver listens on for requests.
By default, IBM Security Key Lifecycle Manager server listens to non-secure port80 (HTTP) and secure port 443 (HTTPS) for communication. During IBM SecurityKey Lifecycle Manager installation, you can modify these default ports. If you areusing the default port for HTTP or HTTPS, the port is an optional part of the URL.For example:https://ip-address/ibm/SKLM/login.jsp
Do not use a port value greater than 65520.
On Windows systems, the information is on the Start screen:1. On the desktop, hover the mouse cursor in the lower left corner of the screen,
and click when the thumbnail of the Start screen appears.2. Click the down arrow in the lower-left corner of the Start screen.3. Click IBM Security Key Lifecycle Manager > Launch IBM Security Key
Lifecycle Manager Application.
Short login URL for IBM Security Key Lifecycle Manager
IBM Security Key Lifecycle Manager has a short login URL as well that you caneasily remember.
Short login URL to access IBM Security Key Lifecycle Manager when standarddefault port 80 (HTTP) and port 443 (HTTPS) are used:https://ip-address/
Short login URL to access IBM Security Key Lifecycle Manager when you usecustom ports instead of standard default ports 80 and 443:
63

https://ip-address:port/
Login URL for WebSphere Application Server
Login URL for the WebSphere Application Server administrative console:https://ip-address:port/ibm/console/logon.jsp
The value of ip-address is an IP address or DNS address of the WebSphereApplication Server.
The value of port is the port number that WebSphere Application Server listens onfor requests.
The default port on the WebSphere Application Server information panel is 9093.You can modify the default port during IBM Security Key Lifecycle Managerinstallation. During migration, or if the default port has a conflict for other reasons,WebSphere Application Server automatically selects another free port.
The Windows start menu contains an entry to connect to the WebSphereApplication Server with the correct port number.
Click IBM WebSphere > Administrative console.
For information about initial IBM Security Key Lifecycle Manager administratoruser ID and password, see Administrator user IDs and passwords.
Services, ports, and processesAfter you install IBM Security Key Lifecycle Manager server, validate that requiredservices, ports, and processes are running.
Windows
Services
Component Service Name
WebSphere Application Server IBM WebSphere ApplicationServer V9.0 - SKLM301Server
Db2 DB2SKLMV301 - SKLMDB31
Ports The following ports must be open for communication and not used by anyother processes.
Description Port Number
FCM (Fast Communication Manager) port.
You cannot configure this port. Its value is fixed. IBMSecurity Key Lifecycle Manager requires this port forDb2 installation.
60050
Default HTTPS port to access IBM Security KeyLifecycle Manager graphical user interface and RESTservices.
You can configure this port at the time of IBM SecurityKey Lifecycle Manager installation.
443
64 Installing, migrating, and configuring

Description Port Number
Default HTTP port to access IBM Security Key LifecycleManager graphical user interface.
You can configure this port at the time of IBM SecurityKey Lifecycle Manager installation.
80
Default HTTPS port to access WebSphere IntegratedSolutions Console.
You can configure this port at the time of IBM SecurityKey Lifecycle Manager installation.
9083
Default port for Db2.
You can configure this port at the time of IBM SecurityKey Lifecycle Manager installation. This value might beanother port number, depending on the installationsettings. There are other ports, which are associated withthe default port number.
50050
Default installation time SSL port that listens for KMIPmessages.
5696
SSL port for device messages. 441
TCP port for device messages. 3801
WebSphere Application Server installation requires theseports for various services it provides.
9080 - 9099
User configured replication ports in the replicationconfiguration file for master and clone servers. If afirewall is used between the master and clone servers,the firewall must be configured to pass Internet ControlMessage Protocol (ICMP).
-
Default port for IBM Security Key Lifecycle Manageragent.
60015
Processes
Name Process
IBM Security Key Lifecycle Manager WASService.exe and java.exe
Db2 db2fmp64.exe and db2syscs.exe
Linux
Ports The following ports must be open for communication and not used by anyother processes.
Description Port Number
FCM (Fast Communication Manager) port.
You cannot configure this port. Its value is fixed. IBMSecurity Key Lifecycle Manager requires this port for Db2installation.
60050
Default HTTPS port to access IBM Security Key LifecycleManager graphical user interface and REST services.
You can configure this port at the time of IBM Security KeyLifecycle Manager installation.
443
Post-installation steps 65

Description Port Number
Default HTTP port to access IBM Security Key LifecycleManager graphical user interface.
You can configure this port at the time of IBM Security KeyLifecycle Manager installation.
80
Default HTTPS port to access WebSphere IntegratedSolutions Console.
You can configure this port at the time of IBM Security KeyLifecycle Manager installation.
9083
Default port for Db2.
You can configure this port at the time of IBM Security KeyLifecycle Manager installation. This value might be anotherport number, depending on the installation settings. Thereare other ports, which are associated with the default portnumber.
50050
Default installation time SSL port that listens for KMIPmessages.
5696
SSL port for device messages. 441
TCP port for device messages. 3801
WebSphere Application Server installation requires theseports for various services it provides.
9080 - 9099
User configured replication ports in the replicationconfiguration file for master and clone servers. If a firewallis used between the master and clone servers, the firewallmust be configured to pass Internet Control MessageProtocol (ICMP).
Default port for IBM Security Key Lifecycle Manager agent. 60015
Processes
Component Process
IBM Security Key Lifecycle Manager WebSphere ApplicationServer and Java
Db2 db2fmp64 and db2syscs
Post-installation securityAfter you install IBM Security Key Lifecycle Manager, you must take several stepsto ensure certificate recognition by your browser, and protect sensitive user IDsand passwords.
Specifying a certificate for browser accessAll browsers trigger a certificate error that you must overwrite to gain access toWebSphere Application Server.
About this task
The error occurs because the owner of the internal certificate is not in the list oftrusted signing authorities. Install the certificate into each browser that you use to
66 Installing, migrating, and configuring

access IBM Security Key Lifecycle Manager. You can use the WebSphereApplication Server user interface to overwrite the certificate.
To configure the certificate, follow these steps:
Procedure1. Using the WASAdmin user ID, log in to the IBM Security Key Lifecycle
Manager server.2. On the Security tab, click SSL certificate and key management.3. On the SSL certificate and key management page, click Manage endpoint
security configuration -> server1. In the local topology tree, you might need toclick SKLMCell > nodes > SKLMNode > servers > server1 to expand the treeand locate server1 in the outbound branch.
4. To set the specific SSL configuration for this endpoint, click ManageCertificates.
5. Extract the certificate.The browser needs only the certificate. Extract retrieves the certificate (thepublic key) and stores it into a file. Do not export the certificate, which obtainsboth the public and the private key.
6. Import the certificate into your browser.v Firefox
a. Click Tools > Options > Advanced > Encryption.b. Select View Certificates > Import buttons.c. Navigate to the directory from which the certificate is exported. Select the
certificate and click Open.d. On the Certificate Manager dialog, select the imported certificate and
click Edit.e. On the Edit website certificate trust settings dialog, select Trust the
authenticity of this certificate and click OK.f. On the Certificate Manager dialog, click OK.g. On the Options dialog, click OK.
v Internet Explorera. Click Tools > Internet Options.b. Select the Content tab and click the Certificates button.c. Select the Trusted Root Certification Authorities tab and click the Import
button.d. On the Certificate Import Wizard dialog, click Next.e. Browse to locate the certificate and click Next.f. Type the password for the certificate and click Next.g. Complete the remaining steps that the wizard provides.h. On the Security Warning dialog, read the warning. If you agree, click Yes.
7. On the browser address field, enter the fully qualified Universal ResourceLocator to point to the IBM Security Key Lifecycle Manager server. Press Enter.
Changing the WebSphere Application Server keystorepassword
SSL certificates for the browser are stored in WebSphere Application Serverkeystores. On WebSphere Application Server, these keystore passwords are publicand must be changed.
Post-installation steps 67

About this task
When you install the application server, each server creates a keystore andtruststore for the default SSL configuration with the default password value ofWebAS.
Procedure1. Change the password by using the graphical user interface:
a. Using the WASAdmin user ID, log in to the WebSphere Integrated SolutionsConsole.https://localhost:9083/ibm/console/logon.jsp
b. On the Security tab, click SSL certificate and key management.c. On the SSL certificate and key management page, click Key stores and
certificates > NodeDefaultKeyStore.d. Change the keystore password.e. On the SSL certificate and key management page, click Key stores and
certificates > NodeDefaultTrustStore.f. Change the truststore password.
2. Save the password in a secure location.
WebSphere Application Server securityYou must take several steps to ensure WebSphere Application Server security forsensitive information.
Support might determine that tracing is required to debug an issue in a functionthat the WASService.exe command runs. Turning on tracing for this functionwrites potentially sensitive trace information to the WASService.Trace file in theWindows root directory. Use information protection steps that are appropriate foryour site to protect the WASService.Trace file.
Additionally, use caution when you run the stopServer command. Do not put thepassword directly on the command line. Instead, enter the user name andpassword for the WebSphere Application Server administrator when prompted.
For example, to stop all processes that are bound to WAS_HOME, type:stopServer server1
Enter the user name and password at the prompts.
Avoid including the user ID and password in the command. For example, do nottype:
WindowsstopServer.bat server1 -username wasadmin -password mypwd
Linux or AIX./stopServer.sh server1 -username wasadmin -password mypwd
After the ps -aef command is run to display information about the active process,can potentially display the WebSphere Application Server password.
68 Installing, migrating, and configuring

Critical backupYou must take the backup of critical data for future reference.
To back up data, run the following tasks:1. Back up the following folders and ensure that they are stored in a safe place.v <WAS_HOME>\configuration
For example, C:\Program Files\IBM\WebSphere\AppServer\configuration
v <WAS_HOME>\productsFor example, C:\Program Files\IBM\WebSphere\AppServer\products
2. Remove *.tss files from the <WAS_HOME>\configuration folder.
Automatic services enablementThe IBM Security Key Lifecycle Manager installation process starts the Db2 andWebSphere Application Server services that IBM Security Key Lifecycle Managerrequires. The installation process also sets the services to start automatically.However, you might want to correct error conditions with the automatic starting ofservices.
Windows systems
On Windows systems, use the Windows Services console to configure the servicesto start automatically.
Locate the services in the following list. For each service in the list, open theProperties dialog box for the service, and ensure that the Startup Type is set toAutomatic. If the Service status field has a value of Stopped, click Start to start theservice.
Db2 - db2 copy name - SKLM_INSTANCE_OWNERFor example, DB2 - DBSKLMV301 - SKLMDB31
Db2 Governor (db2 copy name)For example, Db2 Governor (DB2SKLMV301)
Db2 License Server (db2 copy name)For example, Db2 License Server (DB2SKLMV301)
Db2 Management Service (db2 copy name)For example, Db2 Management Service (DB2SKLMV301)
Db2 Remote Command Server (db2 copy name)For example, Db2 Remote Command Server (DB2SKLMV301)
DB2DAS - DB2DAS_entryFor example, DB2DAS - DB2DAS00
Note: Disable Db2 Administration Server (DAS) only if DAS service ishosted in Windows service.
WAS Service- IBM Security Key Lifecycle ManagerFor example, IBM WebSphere Application Server V9.0 - SKLM301Server
Linux systems
On Linux systems, enter the following commands to configure the IBM SecurityKey Lifecycle Manager Db2 instance owner to start automatically:
Post-installation steps 69

<DB_home_dir>/sqllib/db2profileDB_HOME/instance/db2iauto -on sklmdb31
Where sklmdb31 is the default instance owner user ID. If you changed the valueduring installation, use that user ID instead.
Installing IBM Security Key Lifecycle Manager on Linux systems adds command tostart the WebSphere Application Server to the /etc/inittab file. On Linux systems,the installer creates the SecurityKeyLifecycleManager_was.init file in /etc/init.d.You can add similar command into the /etc/initttab file:slp:2345:wait:/bin/sleep 60tt:23456789:wait:WAS_HOME/bin/startServer.sh server1
AIX systems
On AIX systems, enter the following commands to configure the IBM Security KeyLifecycle Manager Db2 instance owner to start automatically:<DB_home_dir>/sqllib/db2profileDB_HOME/instance/db2iauto -on sklmdb31
Where sklmdb31 is the default instance owner user ID. If you changed it duringinstallation, use that user ID instead.
Installing IBM Security Key Lifecycle Manager on AIX systems adds commands tostart the WebSphere Application Server to the /etc/inittab file. You might editthese commands in the /etc/inittab file:sl:2345:wait:/bin/sleep 60tt:23456:wait:WAS_HOME/bin/startServer.sh server1
To configure the WebSphere Application Server to start automatically, follow thesteps that are described in the section that describes creating an SMF servicedefinition, in the IBM WebSphere Application Server V6.1 on the Solaris 10 OperatingSystem Redbooks publication. This document is available at: http://www.redbooks.ibm.com/abstracts/sg247584.html.
Adapt the information from the web page with values based on your IBM SecurityKey Lifecycle Manager installation. For example, use the directories from yoursystem in the script:WAS_DIR="//opt/IBM/WebSphere/AppServer/profiles/KLMProfile"
On some systems, it might be necessary to increase the timeout value in themanifest file from 60 to 300.
Setting the session timeout intervalThe IBM Security Key Lifecycle Manager user interface session can be configuredto time out after thirty minutes (default) of inactivity or to stay alive with no timerestriction.
Procedure1. You can set the session timeout interval by using the graphical user interface:
a. Using the WASAdmin user ID, log in to the WebSphere Integrated SolutionsConsole.https://localhost:9083/ibm/console/logon.jsp
70 Installing, migrating, and configuring

b. On the Applications tab, click Application Types > WebSphere enterpriseapplications.
c. On the Enterprise Applications page, click sklm_kms.d. In the Web Module Properties section, click Session management.e. In the General Properties section, select Override session management .f. In the Session timeout section, select No timeout to stay alive with no
timeout.g. To set the inactivity timeout in minutes, select Set timeout and specify the
desired inactivity timeout value.2. Click Apply.3. Click OK.
Setting the maximum transaction timeoutThe total transaction timeout value is set to 600 seconds by default. Depending onthe setting, some long running IBM Security Key Lifecycle Manager operationsmight timeout.
About this task
Long running IBM Security Key Lifecycle Manager operations might timeout withan error message like this example:[10/21/08 14:28:41:693 CDT] 00000020 TimeoutManage IWTRN0006W: Transaction 00000110001 has timed out after xxx seconds.
To configure the transaction timeout interval to a larger value, take these steps:
Procedure1. Stop the server.v Windows systems:
In the WAS_HOME\bin directory, type:stopServer.bat server1
v AIX and Linux systems:In the WAS_HOME/bin directory, type:./stopServer.sh server1
2. Edit this file:..\profiles\KLMProfile\config\cells\SKLMCell\nodes\SKLMNode\
servers\server1\server.xml
3. Change the propogatedOrBMTTranLifetimeTimeout parameter to a larger value.4. Save the file.5. Start the server.v Windows systems:
In the WAS_HOME\bin directory, type:startServer.bat server1
v AIX and Linux systems:In the WAS_HOME/bin directory, type:./startServer.sh server1
Post-installation steps 71

IBM Security Key Lifecycle Manager system host name changeYou must change the host name of WebSphere Application Server and Db2 whenthe IBM Security Key Lifecycle Managersystem host name is changed.
Changing the Db2 server host nameAfter you change the IBM Security Key Lifecycle Manager system host name, youmust change the host name of the Db2 server.
About this task
Obtain the current steps to change the host name for your level of the Db2 serverfrom the technote at this web address: http://www.ibm.com/support/docview.wss?rs=71&context=SSEPGG&context=SSEPDU&context=SSVGXH&context=SSVGZB&context=SSFHEG&context=SSYK8P&context=SSTLZ9&q1=db2+change+hostname&uid=swg21258834&loc=en_US&cs=utf-8&lang=en
Changing an existing WebSphere Application Server hostname
You must change the host name of WebSphere Application Server before youchange the system host name.
Procedure1. Change the host name of WebSphere Application Server. For more information
about how to change the host name, see IBM WebSphere Application Serverdocumentation (http://www.ibm.com/support/knowledgecenter/SSEQTP_9.0.0/com.ibm.websphere.base.doc/ae/tagt_hostname.html).
2. When this task succeeds, change the host name of the DB2 server. For moreinformation, see “Changing the Db2 server host name.”
Stopping the Db2 serverSome operational procedures might require you to stop the Db2 server server. Youmust stop WebSphere Application Server before you stop the Db2 server server.
About this task
You must be the database instance owner on AIX or Linux systems, or the LocalAdministrator on Windows systems.
Procedure1. Log in as the database instance owner on AIX or Linux systems, or log in as
Local Administrator on Windows systems.2. Run the following command to stop WebSphere Application Server.
Windowscd C:\Program Files\IBM\WebSphere\AppServer\bin.\stopServer.bat server1 -username wasadmin -password mysecretpwd
AIX or Linux/opt/IBM/WebSphere/AppServer/bin/stopServer.sh server1 -username wasadmin-password mysecretpwd
3. Run the following command to stop the Db2 server.
72 Installing, migrating, and configuring

Windowsset DB2INSTANCE=sklmdb31db2stop
AIX or Linuxsu -sklmdb31db2stop
Configuring SSLAfter you install IBM Security Key Lifecycle Manager, you must configure securecommunication by using SSL.
About this task
This option is controlled by the config.keystore.ssl.certalias property in theSKLM_DATA/config/SKLMConfig.properties file.
If transport ports are specified, this alias points at an existing certificate that isused for SSL authentication for secure communication between a drive and theIBM Security Key Lifecycle Manager server.
If you migrate data from Encryption Key Manager, all the certificates from theTransportListener truststore are imported into the IBM Security Key LifecycleManager keystore.
A certificate from the TransportListener keystore is set as the SSL certificate forIBM Security Key Lifecycle Manager. The config.keystore.ssl.certalias propertyis updated with the alias of this certificate.
To configure SSL for secure communication, follow these steps:
Procedure1. Navigate to the appropriate page or directory.v Graphical user interface:
Log on to the graphical user interface. You can select either of these paths:– Click IBM Security Key Lifecycle Manager > Configuration >
SSL/KMIP.– IBM Security Key Lifecycle Manager > Advanced Configuration >
Server Certificates.v Command-line interface
a. Go to the <WAS_HOME>/bin directory. For example,
Windowscd drive:\Program Files\IBM\WebSphere\AppServer\bin
Linux cd /opt/IBM/WebSphere/AppServer/bin
b. Start the wsadmin interface by using an authorized user ID, such asSKLMAdmin. For example,
Windowswsadmin.bat -username SKLMAdmin -password mypwd -lang jython
Linux./wsadmin.sh -username SKLMAdmin -password mypwd -lang jython
2. Specify the certificate that is used for SSL communication.v Graphical user interface:
Post-installation steps 73

Specify a certificate as the SSL certificate:– On the SSL/KMIP for Key Serving page, select the option to use an
existing certificate from the keystore as the SSL certificate. Select acertificate and click OK.
– Alternatively, on the Administer Server Certificates page, select an existingcertificate and click Modify. Specify that the certificate is the currentlyused certificate and click Modify Certificate.
v Command-line interface:– To see the value of the property, use the tklmConfigGetEntry command.
For example, you might want to validate that a migrated certificate is setas the SSL certificate.This Jython-formatted command obtains the current value of theconfig.keystore.ssl.certalias property.wsadmin>print AdminTask.tklmConfigGetEntry(’[-name config.keystore.ssl.certalias]’)
– To change the value of the property, use the tklmConfigUpdateEntrycommand to specify the certificate that the IBM Security Key LifecycleManager server uses.
For example, this Jython-formatted command example changes the value ofthe config.keystore.ssl.certalias property.print AdminTask.tklmConfigUpdateEntry
(’[-name config.keystore.ssl.certalias-value mycert]’)
3. A success indicator varies, depending on the interface:v Graphical user interface:
On the Success page, under Next Steps, click a related task that you want tocarry out.
v Command-line interface:A completion message indicates success.
Checking the current port numberAfter IBM Security Key Lifecycle Manager server installation, you might want todetermine the secure and non-secure port numbers for the IBM Security KeyLifecycle Manager server and the WebSphere Integrated Solutions Console.
About this task
The value of the port numbers is specified by the WC_adminhost_secure,WC_defaulthost, and the WC_defaulthost_secure, property in theWAS_HOME/profiles/KLMProfile/properties/portdef.props file. For example, thefile might specify these values:WC_adminhost_secure=9083WC_defaulthost=80WC_defaulthost_secure=443
The WC_adminhost_secure property value corresponds to the WebSphere IntegratedSolutions Console secure port. The WC_defaulthost property value corresponds tothe IBM Security Key Lifecycle Manager server non-secure port andWC_defaulthost_secure corresponds to secure port.
74 Installing, migrating, and configuring

Installation verificationAfter the installation, verify that the IBM Security Key Lifecycle Managerinstallation was successful.1. Start and stop the server. See “Restarting the IBM Security Key Lifecycle
Manager server” on page 76 for details.2. Open IBM Security Key Lifecycle Manager in a web browser.
a. Use login URL to access the IBM Security Key Lifecycle Manager webinterface.https://ip-address:port/ibm/SKLM/login.jsp
The value of ip-address is an IP address or DNS address of the IBM SecurityKey Lifecycle Manager server.The value of port is the port number that IBM Security Key LifecycleManager server listens on for requests.By default, IBM Security Key Lifecycle Manager server listens to non-secureport 80 (HTTP) and secure port 443 (HTTPS) for communication. DuringIBM Security Key Lifecycle Manager installation, you can modify thesedefault ports. If you are using the default port for HTTP or HTTPS, the portis an optional part of the URL. for example:https://ip-address/ibm/SKLM/login.jsp
IBM Security Key Lifecycle Manager has a short login URL as well that youcan easily remember. Short login URL to access IBM Security Key LifecycleManager when default ports are used is:https://ip-address/
On Windows systems, the information is on the Start screen:1) On the desktop, hover the mouse cursor in the lower left corner of the
screen, and click when the thumbnail of the Start screen appears.2) Click the down arrow in the lower-left corner of the Start screen.3) Click IBM Security Key Lifecycle Manager 3.0.1 > Launch IBM
Security Key Lifecycle Manager Application.b. Log in with your credentials and ensure that the IBM Security Key Lifecycle
Manager welcome page is displayed.3. Use the command-line interface to list the IBM Security Key Lifecycle Manager
command group. For example, from WAS_HOME/bin, enter:./wsadmin.sh -username <sklmadmin id> -password <sklmadmin passwd> -lang jython
When the wsadmin tool prompts you, enter this command:wsadmin>print AdminTask.help("-commandGroups")
The IBM Security Key Lifecycle Manager command groups are displayed. Forexample, the list contains backup commands and other command groups:TKLMBackupCommands - IBM Security Key Lifecycle Manager backup/restore commands
Enabling scripting settings for Internet Explorer, Version 9.0, 10, and11
Ensure that scripting settings for Internet Explorer, version 9.0, 10, and 11 areenabled.
Post-installation steps 75

About this task
Unless some scripting settings are enabled for Internet Explorer, version 9.0, 10,and 11.0, you might later be unable to create an IBM Security Key LifecycleManager user.
Ensure that these browser settings are enabled:v Allow status bar updates through scriptsv Active Scriptingv Scripting of Java applets
Procedure1. Open the browser and click Tools > Internet Options > Security.2. Scroll the list of security settings to the Scripting options and ensure that these
settings are enabled:v Allow status bar updates through scriptsv Active Scriptingv Scripting of Java applets
3. Click OK.
Restarting the IBM Security Key Lifecycle Manager serverRestart of the server causes the server to read its configuration and accept theconfiguration changes, if any. To restart the IBM Security Key Lifecycle Managerserver, you can run the server restart scripts, REST service, or use the graphicaluser interface.
About this task
To restart server, use the <IBM Security Key Lifecycle Manager User> link onwelcome page header bar, Restart Server REST Service, or run the stopServerand startServer scripts.
Procedure1. Go to the appropriate page or directory.
Graphical user interface
a. Log on to the graphical user interface.b. On the welcome page header bar, click the <IBM Security Key
Lifecycle Manager User> link. For example, click the SKLMAdminlink.
Server restart scripts
a. Go to the <WAS_HOME>\bin directory.
WindowsC:\Program Files\IBM\WebSphere\AppServer\bin
Linux /opt/IBM/WebSphere/AppServer/bin
REST interfaceOpen a REST client.
2. Restart the server.
Graphical user interface
76 Installing, migrating, and configuring

a. Click Restart Server.b. Click OK.
Note: The IBM Security Key Lifecycle Manager server is unavailablefor a few minutes while the restart operation is in progress.
Server restart scripts
a. Stop the server.
WindowsstopServer.bat server1
Linux./stopServer.sh server1
Global security is enabled by default. Enter the user ID andpassword of the WebSphere Application Server administrator asparameters to the stopServer script. The script prompts for theseparameters when they are omitted, but you can specify them on thecommand line:
WindowsstopServer.bat server1 -username wasadmin -password mypwd
Linux./stopServer.sh server1 -username wasadmin -password mypwd
b. Start the server.
WindowsstartServer.bat server1
Linux./startServer.sh server1
REST interface
a. Obtain a unique user authentication identifier to access IBMSecurity Key Lifecycle Manager REST services. For moreinformation about the authentication process, see Authenticationprocess for REST services.
b. To run Restart Server REST Service, send the HTTP POST request.Pass the user authentication identifier that you obtained in Step aalong with the request message as shown in the following example.POST https://localhost:<port>/SKLM/rest/v1/ckms/servermanagement/restartServerContent-Type: application/jsonAccept: application/jsonAuthorization: SKLMAuth userAuthId=139aeh34567m
What to do next
Determine whether IBM Security Key Lifecycle Manager is running. For example,open IBM Security Key Lifecycle Manager in a web browser and log in.
Enabling global securityConditions might occur in which you must enable global security.
About this task
Do not disable global security when you use IBM Security Key Lifecycle Manager.
Post-installation steps 77

Procedure1. To enable global security, log in as the WebSphere Application Server
administrator WASAdmin.2. In the navigation bar, click Security > Global security.3. Check the Enable administrative security check box.
Ensure that Enable application security is also selected and that Use Java 2security to restrict application access to local resources is not selected.
4. Click Apply.5. Click Save in the Messages box.6. Click Logout.7. Stop and restart the server.8. Reload the IBM Security Key Lifecycle Manager login page. Verify that the page
requires a password.
Disabling global securityConditions might occur in which you must disable global security.
About this task
Do not disable global security when you use IBM Security Key Lifecycle Manager.
Procedure1. To disable global security, log in as the WebSphere Application Server
administrator WASAdmin.2. In the navigation bar, click Security > Global security.3. Clear the Enable administrative security check box.4. Click Apply.5. Click Save in the Messages box.6. Click Logout.7. Stop and restart the server.8. Reload the IBM Security Key Lifecycle Manager login page. Verify that the page
does not require a password.
78 Installing, migrating, and configuring

Recovery from migration failure
During inline migration process for Encryption Key Manager or IBM Security KeyLifecycle Manager earlier versions to version 3.0.1, you might encounter migrationfailure. You can run the migration recovery steps in case of a migration failure.
Recovery from Encryption Key Manager migration failureDuring inline migration process for Encryption Key Manager, you might encountermigration failure. If the migration failure occurs, run the migration recovery steps.
The installation process completes the installation step for IBM Security KeyLifecycle Manager and starts a migration process to migrate data from EncryptionKey Manager to IBM Security Key Lifecycle Manager.v When the migration process starts, an error might occur during the installation
program is validating the values in the Encryption Key Manager properties filefor the following conditions:– The properties file cannot be read because of inadequate access permissions.– A required property does not exist or does not have a value.– The value of a property is malformed.– The file that a property points to does not exist or cannot be read because of
inadequate access permissions.v An error might occur after the migration operation completes significant
activities. In this case, review the error log file:
Windows<IM_DATA_DIR>\logs\sklmLogs\migration.log
AIX and Linux<IM_DATA_DIR>/logs/sklmLogs/migration.log
If Encryption Key Manager migration fails and you choose to complete theremaining migration process, you can start a migration-recovery script if you donot make changes or otherwise configure IBM Security Key Lifecycle Managerserver before you run the script. For information about how to run the script, seeMigration recovery script for Encryption Key Manager.
If Encryption Key Manager migration fails, and no data were migrated, remove thetklmKeystore.jceks file to start the migration process again. You can locate the filein the <WAS_HOME>\products\sklm\keystore directory.
For the definition of <IM_DATA_DIR> and <WAS_HOME>, see “Definitions forHOME and other directory variables” on page 5.
Migration recovery script for Encryption Key ManagerYou can start a migration-recovery script for Encryption Key Manager if you donot make any changes or otherwise configure IBM Security Key Lifecycle Managerserver before you run the script. For example, do not significantly change theavailable disk space on the system.
79

The migration script is in the <SKLM_INSTALL_HOME>\migration\bin directory. Thecommands to run the script are:
Windows systems:cd <SKLM_INSTALL_HOME>\migration\bin.\migrate.bat sklm_instance_owner_password
Linux and AIX systems:cd <SKLM_INSTALL_HOME>/migration/bin./migrate.sh sklm_instance_owner_password
On Linux or AIX systems, ensure that you are logged in as the root userbefore you run migrate.sh.
Where the sklm_instance_owner_password parameter is the password for the IBMSecurity Key Lifecycle Manager server Db2 instance owner.
The <SKLM_INSTALL_HOME> parameter is only used on Windows systems andmust be enclosed in quotation marks.
Windows systems:cd "C:\Program Files\IBM\SKLMV301\migration\bin".\bin\migrate.bat passwordecho %ERRORLEVEL%
Note:
v If you do not want to specify the password as an argument, omit thepassword. The recovery script prompts you for the value. The passwordis not in clear text. For example:migrate.batecho $?
v During its runtime progress, the migration recovery script creates amigration.log file.
v If migrate.bat or migrate.sh is not available,1. Copy migrate.bat.template or migrate.sh.template to migrate.bat
or migrate.sh.2. Specify the required parameters.3. Run the file.
Linux and AIX systems:cd /opt/IBM/SKLMV301/migration/bin./bin/migrate.sh passwordecho $?
On Linux or AIX systems, ensure that you are logged in as the root userbefore you run migrate.sh.
Recovery from migration failure for IBM Security Key LifecycleManager
These error scenarios might occur during migration for IBM Security Key LifecycleManager:v As migration starts, an error message might be caused by one or more of the
following conditions:– Inadequate access permissions prevent reading required files, or properties or
files are missing.– Other applications are using a required file.
80 Installing, migrating, and configuring

– During Db2 server migration, WebSphere Application Server unexpectedlystopped running.
v After migration is complete, or has performed significant activities, An errormight occur after the migration operation has begun.The installation program displays an error message. In this case, review the errorlog file:
Windows systems:<IM_DATA_DIR>\logs\sklmLogs\migration.log
AIX and Linux systems:<IM_DATA_DIR>/logs/sklmLogs/migration.log
If repeated running of the migration program fails and you choose to go back toearlier version, complete these tasks for a new version of Db2:– Uninstall IBM Security Key Lifecycle Manager earlier version. On AIX or
Linux systems, navigate to the home directory of the instance owner such as/home/SKLMDB301. If the sqllib_v91 directory exists, remove the directory.
– Restart the computer.– Reinstall IBM Security Key Lifecycle Manager previous version and restore
the most recent backup. Apply the most recent fix pack.
Migration recovery script for IBM Security Key Lifecycle ManagerYou can start a migration-recovery script for IBM Security Key Lifecycle Manager ifyou do not make any changes or otherwise configure IBM Security Key LifecycleManager server before you run the script. For example, do not significantly changethe available disk space on the system.
The migration utility creates a migration.log file in the <IM_DATA_DIR>\logs\sklmLogs directory.
The migration script is in the <SKLM_INSTALL_HOME>\migration directory. Before yourun the migration script, ensure that JAVA_HOME is set correctly. Following exampleshows the path for JAVA_HOME:
Windows systemsC:\Program Files\IBM\WebSphere\AppServer\java\jre
Linux and AIX systems/opt/IBM/WebSphere/AppServer/java/jre
Commands to run the migration scripts
Windows systemscd <SKLM_INSTALL_HOME>\migration.\migrateToSKLM.bat
For example,cd "C:\Program Files\IBM\SKLMV27\migration".\migrateToSKLM.bat
You must specify value for the migration parameters in themigration.properties file, which exists under the <SKLM_INSTALL_HOME>\migration directory.
Linux and AIX systems
Recovery from migration failure 81

Note: On Linux or AIX systems, ensure that you are logged in as the rootuser before you run migrateToSKLM.sh.cd <SKLM_INSTALL_HOME>/migration./migrateToSKLM.sh
For example,cd /opt/IBM/SKLMV301/migration./migrateToSKLM.sh
You must specify value for the migration parameters in themigration.properties file, which exists under the <SKLM_INSTALL_HOME>/migration directory.
After you run the migration recovery script, restart IBM Security Key LifecycleManager server. For more information about how to restart the server, see“Restarting the IBM Security Key Lifecycle Manager server” on page 76.
For the definition of <IM_DATA_DIR> and <SKLM_INSTALL_HOME>, see“Definitions for HOME and other directory variables” on page 5.
Parameters in the migration.properties file
WAS_HOMEThe directory where WebSphere Application Server for IBM Security KeyLifecycle Manager, Version 3.0.1 is installed.
TKLM_TIP_HOMEUse this parameter to set <WAS_HOME> for earlier version, such as 2.5, 26,and 2.7.
WAS_ADMIN_IDThe WebSphere Application Server administrator user name for the earlierversion.
WAS_ADMIN_PASSWORDPassword for the WebSphere Application Server administrator user name.
SKLM_INSTALL_PATHThe directory where IBM Security Key Lifecycle Manager is installed.
SKLM_ADMIN_USERAdministrator user name, for the earlier version of IBM Security KeyLifecycle Manager. The user name must be SKLMAdmin.
SKLM_ADMIN_USER_PASSWORDPassword for the IBM Security Key Lifecycle Manager administrator username.
MIG_LOG_PATHThe file path where the migration.log is stored.
TKLM_VERSIONThe version number of IBM Security Key Lifecycle Manager that isinstalled on the system.
TKLM_DB_PWDThe DB2 administrator password for IBM Security Key Lifecycle Manager.
KEYSTORE_PWDThis parameter is not needed for version 2.5, 2.6, and 2.7.
82 Installing, migrating, and configuring

IM_INSTALL_DIRThe directory where IBM Installation Manager is installed.
Note: All the values except passwords are pre-filled in the properties file. Do notmodify any values except for the fields that are blank.
Sample migration.properties fileWAS_HOME=C:\Program Files\IBM\WebSphere\AppServer_1TKLM_TIP_HOME=C:\Program Files\IBM\WebSphere\AppServerWAS_ADMIN_ID=wasadminWAS_ADMIN_PASSWORD=WAS@admin123SKLM_INSTALL_PATH=C:\Program Files\IBM\SKLMV301SKLM_ADMIN_USER=SKLMAdminSKLM_ADMIN_USER_PASSWORD=SKLM@admin123MIG_LOG_PATH=C:\Program Files\IBM\SKLMV301\migration\migration.logTKLM_VERSION=2.7.0.0TKLM_DB_PWD=SKLM@db2KEYSTORE_PWD=noneIM_INSTALL_DIR=C:\Program Files\IBM\Installation Manager\eclipse
Starting Db2 automaticallyIf you completed a failed migration by running the migration script in recoverymode, you must enable Db2 to start automatically when the computer restarts.
Windows systems
On Windows systems, take these steps to start Db2 automatically:1. Open the Control Panel and click Start > Control Panel > Administrative Tools
> Services.2. Right-click the DB2 - DBSKLMV301 - SKLMDB31 service and right-click
Properties.3. On the Properties dialog, on the General tab, change the Startup Type to
Automatic and click Apply.4. Restart the system to verify that the database server starts automatically.
AIX and Linux systems
If you enabled crontab in IBM Security Key Lifecycle Manager, type this commandto enable Db2 to start automatically:. <DB_home_dir>/sqllib/db2profileDB_HOME/instance/db2iauto -on sklmdb31
Where sklmdb31 is the default instance owner user ID. If you changed the valueduring installation, use that user ID instead.
Migration status properties fileThe IBM Security Key Lifecycle Manager server migration utility maintains a<SKLM_INSTALL_HOME>\migration\migratestatus.properties file to track thecompleted tasks.
If migration fails, the properties file is retained for debugging purposes. Themigration utility also uses the retained file to determine at what point to start anew migration process. If you accidentally run migration again, the utility uses theproperties file to determine whether migration already succeeded.
Recovery from migration failure 83

84 Installing, migrating, and configuring

Uninstallation of IBM Security Key Lifecycle Manager
You must consider a few factors to successfully uninstall IBM Security KeyLifecycle Manager.v The default uninstallation mode is the same as the mode used to install IBM
Security Key Lifecycle Manager.v Uninstalling IBM Security Key Lifecycle Manager does not uninstall Db2 if it is
installed before you install IBM Security Key Lifecycle Manager. This task aseparate, optional step. For more information, see “Db2 uninstallation” on page93.In addition, although uninstalling IBM Security Key Lifecycle Managerdisassociates the Db2 database instance from the user ID used for the IBMSecurity Key Lifecycle Manager Db2 instance owner, the deletion of the user IDis a separate step. For more information, see “Removal of user ID from the Db2instance owner” on page 95.Unsuccessful uninstallation might indicate the need to return to a known state ofIBM Security Key Lifecycle Manager, see “Reinstalling previous version ifmigration repeatedly fails” on page 92.
v On Linux systems, when you uninstall IBM Security Key Lifecycle Manager, theDB2 user, for example, sklmdb31, is not removed. The users created by IBMSecurity Key Lifecycle Manager installer or existing users are not removed bythe uninstaller. If needed, you can manually remove such users.However, the klmfcuser is removed during IBM Security Key Lifecycle Manageruninstallation.
v In graphical mode of uninstallation, iff WebSphere Application Server is notstopped before you uninstall IBM Security Key Lifecycle Manager, the followingfalse message is displayed.Running processes have been detected that may interfere with the currentoperation. Stop all WebSphere and related processes before continue.
Click Recheck Status to proceed with the uninstallation task.
Uninstalling on Windows systemsUninstall IBM Security Key Lifecycle Manager and its components when you nolonger need them on your Windows systems.
Uninstalling in graphical modeUninstall IBM Security Key Lifecycle Manager and its components when you nolonger need them on your Windows systems in graphical mode.
Procedure1. From the command prompt, go to the disk1 directory of your installation
package. For example, download_path/disk1.2. Run the following command.
uninstallSKLM.bat IM_INSTALL_LOCATION WAS_INSTALL_LOCATION SKLM_INSTALL_HOMEWAS_ADMIN WAS_PASSWORD
IM_INSTALL_LOCATION - Installation Manager directory for IBM Security KeyLifecycle Manager.
85

WAS_INSTALL_LOCATION - WebSphere Application Server directory for IBMSecurity Key Lifecycle Manager.SKLM_INSTALL_HOME - IBM Security Key Lifecycle Manager installation directory.WAS_ADMIN - User name of WebSphere Application Server for IBM Security KeyLifecycle Manager.WAS_PASSWORD - Password of WebSphere Application Server user name.For example:uninstallSKLM.bat "C:\Program Files\IBM\Installation Manager""C:\Program Files\IBM\WebSphere\AppServer""C:\Program Files\IBM\SKLMV301" wasadmin WAS@admin123
3. In IBM Installation Manager, click Uninstall.4. Select the check boxes to uninstall IBM Security Key Lifecycle Manager, Db2,
and WebSphere Application Server.
Note: If WebSphere Application Server is not stopped before you uninstall IBMSecurity Key Lifecycle Manager, the following false message is displayed.Running processes have been detected that may interfere with the currentoperation. Stop all WebSphere and related processes before continue.
Click Recheck Status to proceed with the uninstallation task.5. Click Next. Type the WebSphere Application Server Administrator user ID and
the password.6. Click Next. The Summary panel window opens.7. Review the software packages to be uninstalled and their installation
directories.8. Click Uninstall.
After IBM Security Key Lifecycle Manager uninstallation, if DB2 services arestill running, manually uninstall DB2 and its components. For more informationabout DB2 uninstallation, see http://www-01.ibm.com/support/docview.wss?uid=swg21104569.
What to do next
Verify the uninstallation summary and the log files that are atC:\ProgramData\IBM\InstallationManager\logs\sklmLogs\.
After you uninstall IBM Security Key Lifecycle Manager, delete the C:\ProgramFiles\IBM\WebSphere and C:\Program Files\DB2SKLMV301 directories if not alreadyremoved.
Uninstalling in silent modeUninstall IBM Security Key Lifecycle Manager and its components when you nolonger need them on your Windows systems in silent mode.
Procedure1. Edit the response file to add encrypted passwords to the relevant elements of
the file. The sample response files are in the directory in which yourinstallation package is located.You can use the IBM Installation Manager utility to create encryptedpasswords. For information about how to encrypt the password, see Encryptedpassword for response file elements.
86 Installing, migrating, and configuring

2. From the command prompt, go to the disk1 directory of your installationpackage. For example, download_path/disk1.
3. Run the following command.silent_uninstallSKLM.bat IM_INSTALL_LOCATION WAS_INSTALL_LOCATION SKLM_INSTALL_HOMEWAS_ADMIN WAS_PASSWORD
IM_INSTALL_LOCATION - Installation Manager directory for IBM Security KeyLifecycle Manager.WAS_INSTALL_LOCATION - WebSphere Application Server directory for IBMSecurity Key Lifecycle Manager.SKLM_INSTALL_HOME - IBM Security Key Lifecycle Manager installation directory.WAS_ADMIN - User name of WebSphere Application Server for IBM Security KeyLifecycle Manager.WAS_PASSWORD - Password of WebSphere Application Server user name.For example:silent_uninstallSKLM.bat "C:\Program Files\IBM\Installation Manager""C:\Program Files\IBM\WebSphere\AppServer""C:\Program Files\IBM\SKLMV301" wasadmin WAS@admin123
After IBM Security Key Lifecycle Manager uninstallation, if DB2 services arestill running, manually uninstall DB2 and its components. For more informationabout DB2 uninstallation, see http://www-01.ibm.com/support/docview.wss?uid=swg21104569.
What to do next
Verify the uninstallation summary and the log files that are atC:\ProgramData\IBM\InstallationManager\logs\sklmLogs\.
After you uninstall IBM Security Key Lifecycle Manager, delete the C:\ProgramFiles\IBM\WebSphere and C:\Program Files\DB2SKLMV301 directories if not alreadyremoved.
Recovering from a failed uninstallation on Windows systemsYou must recover a failed attempt to uninstall IBM Security Key Lifecycle Manageron a Windows system.
About this task
This task assumes that the uninstallation program failed to complete successfully.Take these recovery steps:
Procedure1. Stop the WebSphere Application Server service.
a. Open the Windows Services Console by opening the Control Panel andclicking Administrative Tools > Services.
b. Locate the WebSphere Application Server service.For example: IBM WebSphere Application Server V9.0 - SKLM301Server
c. Open the Properties dialog box for the service. If the Service status is notStopped, click Stop.
d. Click OK to close the dialog box and exit the Windows Services Console.
Uninstallation of IBM Security Key Lifecycle Manager 87
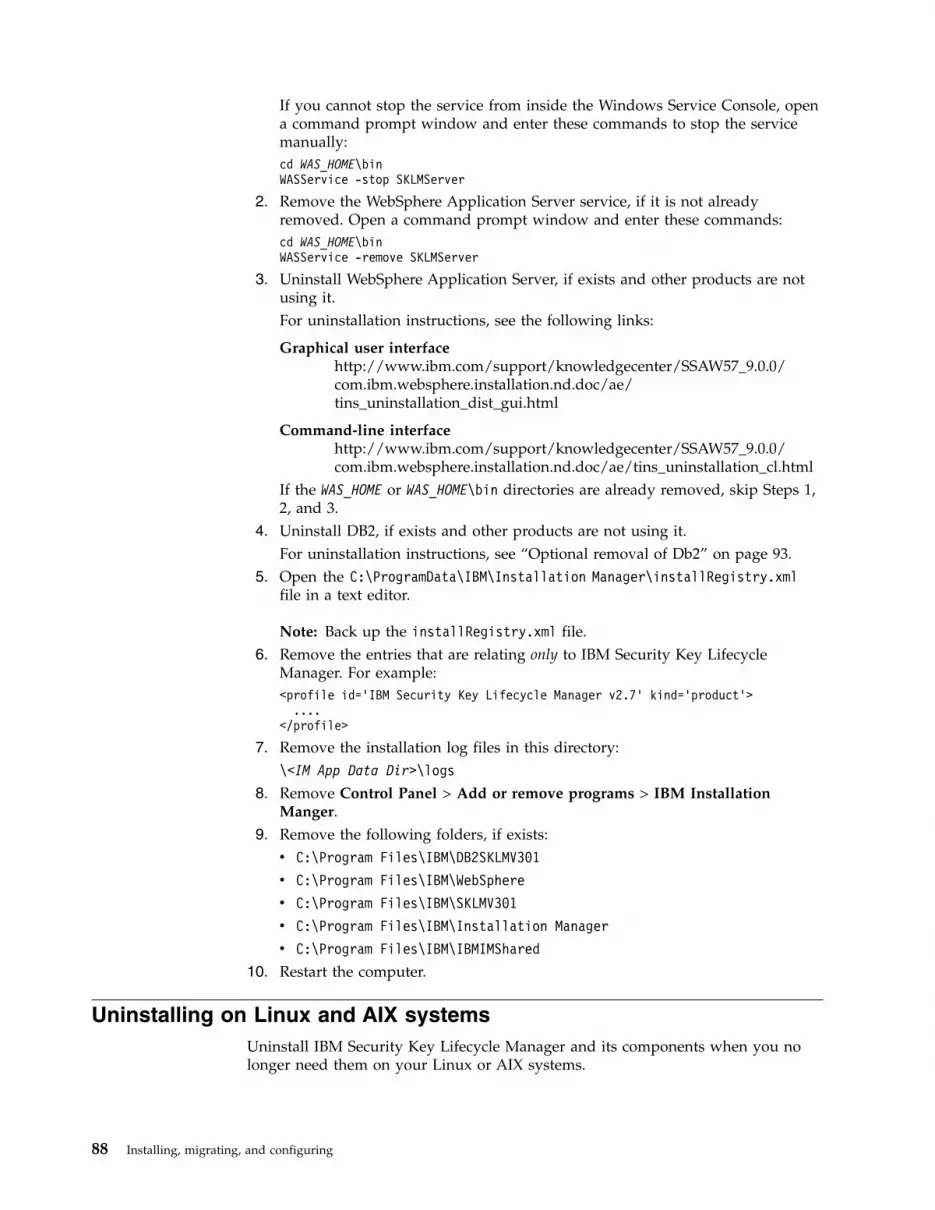
If you cannot stop the service from inside the Windows Service Console, opena command prompt window and enter these commands to stop the servicemanually:cd WAS_HOME\binWASService -stop SKLMServer
2. Remove the WebSphere Application Server service, if it is not alreadyremoved. Open a command prompt window and enter these commands:cd WAS_HOME\binWASService -remove SKLMServer
3. Uninstall WebSphere Application Server, if exists and other products are notusing it.For uninstallation instructions, see the following links:
Graphical user interfacehttp://www.ibm.com/support/knowledgecenter/SSAW57_9.0.0/com.ibm.websphere.installation.nd.doc/ae/tins_uninstallation_dist_gui.html
Command-line interfacehttp://www.ibm.com/support/knowledgecenter/SSAW57_9.0.0/com.ibm.websphere.installation.nd.doc/ae/tins_uninstallation_cl.html
If the WAS_HOME or WAS_HOME\bin directories are already removed, skip Steps 1,2, and 3.
4. Uninstall DB2, if exists and other products are not using it.For uninstallation instructions, see “Optional removal of Db2” on page 93.
5. Open the C:\ProgramData\IBM\Installation Manager\installRegistry.xmlfile in a text editor.
Note: Back up the installRegistry.xml file.6. Remove the entries that are relating only to IBM Security Key Lifecycle
Manager. For example:<profile id=’IBM Security Key Lifecycle Manager v2.7’ kind=’product’>
....</profile>
7. Remove the installation log files in this directory:\<IM App Data Dir>\logs
8. Remove Control Panel > Add or remove programs > IBM InstallationManger.
9. Remove the following folders, if exists:v C:\Program Files\IBM\DB2SKLMV301
v C:\Program Files\IBM\WebSphere
v C:\Program Files\IBM\SKLMV301
v C:\Program Files\IBM\Installation Manager
v C:\Program Files\IBM\IBMIMShared
10. Restart the computer.
Uninstalling on Linux and AIX systemsUninstall IBM Security Key Lifecycle Manager and its components when you nolonger need them on your Linux or AIX systems.
88 Installing, migrating, and configuring

Uninstalling in graphical modeUninstall IBM Security Key Lifecycle Manager and its components when you nolonger need them on your Linux or AIX systems in graphical mode.
Procedure1. Open a terminal window.2. Go to the disk1 directory of your installation package. For example,
download_path/disk1.3. Run the following command.
uninstallSKLM_linux.sh IM_INSTALL_LOCATION WAS_INSTALL_LOCATIONSKLM_INSTALL_HOME WAS_ADMIN WAS_PASSWORD
IM_INSTALL_LOCATION - Installation Manager directory for IBM Security KeyLifecycle Manager.WAS_INSTALL_LOCATION - WebSphere Application Server directory for IBMSecurity Key Lifecycle Manager.SKLM_INSTALL_HOME - IBM Security Key Lifecycle Manager installationdirectory.WAS_ADMIN - User name of WebSphere Application Server for IBM Security KeyLifecycle Manager.WAS_PASSWORD - Password of WebSphere Application Server user name.For example:uninstallSKLM_linux.sh /opt/IBM/Installation Manager /opt/IBM/WebSphere/AppServer/opt/IBM/SKLMV301 wasadmin WAS@admin123
4. In the IBM Installation Manager uninstallation wizard, click Uninstall.5. Select the packages to uninstall, IBM Security Key Lifecycle Manager, Db2,
and WebSphere Application Server.
Note: If WebSphere Application Server is not stopped before you uninstallIBM Security Key Lifecycle Manager, the following false message is displayed.Running processes have been detected that may interfere with the currentoperation. Stop all WebSphere and related processes before continue.
Click Recheck Status to proceed with the uninstallation task.6. Click Next.7. Type the WebSphere Application Server Administrator user ID and the
password.8. Click Next.9. Review the software packages to be uninstalled and their installation
directories.10. Click Uninstall.
What to do next
Verify the uninstallation summary and the log files that are at/var/ibm/InstallationManager/logs/sklmLogs/.
After you uninstall IBM Security Key Lifecycle Manager, delete the/opt/IBM/WebSphere and /opt/DB2SKLMV301 directories if not already removed.
Uninstallation of IBM Security Key Lifecycle Manager 89

Uninstalling in silent modeUninstall IBM Security Key Lifecycle Manager and its components when you nolonger need them on your Linux and AIX systems in silent mode.
Procedure1. Edit the response file to add encrypted passwords to the relevant elements of
the file. The sample response files are in the directory in which yourinstallation package is located.You can use the IBM Installation Manager utility to create encryptedpasswords. For information about how to encrypt the password, see Encryptedpassword for response file elements.
2. From the terminal window, go to the disk1 directory of your installationpackage. For example, download_path/disk1.
3. Run the following command.
Linuxsilent_uninstallSKLM_linux.sh IM_INSTALL_LOCATION WAS_INSTALL_LOCATIONSKLM_INSTALL_HOME WAS_ADMIN WAS_PASSWORD
silent_uninstallSKLM_linux.sh /opt/IBM/InstallationManager /opt/IBM/WebSphere/AppServer/opt/IBM/SKLMV301 wasadmin WAS@admin123
AIXsilent_uninstallSKLM_AIX.sh IM_INSTALL_LOCATION WAS_INSTALL_LOCATIONSKLM_INSTALL_HOME WAS_ADMIN WAS_PASSWORD
silent_uninstallSKLM_AIX.sh /opt/IBM/InstallationManager /opt/IBM/WebSphere/AppServer/opt/IBM/SKLMV301 wasadmin WAS@admin123
IM_INSTALL_LOCATION - Installation Manager directory for IBM Security KeyLifecycle Manager.WAS_INSTALL_LOCATION - WebSphere Application Server directory for IBMSecurity Key Lifecycle Manager.SKLM_INSTALL_HOME - IBM Security Key Lifecycle Manager installation directory.WAS_ADMIN - User name of WebSphere Application Server for IBM Security KeyLifecycle Manager.WAS_PASSWORD - Password of WebSphere Application Server user name.
What to do next
Verify the uninstallation summary and the log files that are at/var/ibm/InstallationManager/logs/sklmLogs/.
After you uninstall IBM Security Key Lifecycle Manager, delete the/opt/IBM/WebSphere and /opt/DB2SKLMV301 directories if not already removed.
Recovering from a failed uninstallation on Linux or AIX systemsYou might want to recover a failed attempt to uninstall IBM Security Key LifecycleManager on Linux or AIX systems.
About this task
This task assumes that the uninstallation program failed to complete successfully.Take these recovery steps:
90 Installing, migrating, and configuring

Procedure1. Log in as root.2. Stop the WebSphere Application Server processes if they are running.
cd WAS_HOME/profiles/KLMProfile/bin./stopServer.sh server1
3. Uninstall WebSphere Application Server, if exists and other products are notusing it.For uninstallation instructions, see the following links:
Graphical user interfacehttp://www.ibm.com/support/knowledgecenter/SSAW57_9.0.0/com.ibm.websphere.installation.nd.doc/ae/tins_uninstallation_dist_gui.html
Command-line interfacehttp://www.ibm.com/support/knowledgecenter/SSAW57_9.0.0/com.ibm.websphere.installation.nd.doc/ae/tins_uninstallation_cl.html
If the WAS_HOME or WAS_HOME/bin directories are already removed, skip Steps 2and 3.
4. Uninstall DB2, if exists and other products are not using it.For uninstallation instructions, see “Optional removal of Db2” on page 93.
5. Open the /var/ibm/InstallationManager/installRegistry.xml file.
Note: Back up the installRegistry.xml file.6. Remove the entries that are relating only to IBM Security Key Lifecycle
Manager. For example:<profile id=’IBM Security Key Lifecycle Manager v3.0’ kind=’product’>
....</profile>
7. Remove the installation log files from the /var/ibm/InstallationManager/logsdirectory by using the following command:rm -rf /var/ibm/InstallationManager/logs
8. Uninstall IBM Installation Manger.9. Remove the following folders, if exist:v opt/IBM/DB2SKLMV301
v opt/IBM/WebSphere
v opt/IBM/SKLMV301
v opt/IBM/Installation Manager
v opt/IBM/IBMIMShared
10. Restart the computer.
Encrypted password for response file elementsYou must add the encrypted passwords to the relevant elements of the responsefile. Use the IBM Installation Manager utility to create an encrypted password.
WindowsFor example, if you extract the IBM Security Key Lifecycle Managerproduct image to the C:\SKLM\disk1 directory, run the following commandto create an encrypted password.cd C:\SKLM\disk1\im\toolsimcl.exe encryptString password
Uninstallation of IBM Security Key Lifecycle Manager 91

Add the encrypted password that you created in the response file asshown in the following example.<data key=’user.WAS_ADMIN_ID,com.ibm.sklm301.win’ value=’wasadmin’/><data key=’user.WAS_ADMIN_PASSWORD,com.ibm.sklm301.win’ value=’e9PjN93MeQxwnSs9VXJFMw==’/>
Linux For example, if you extract the IBM Security Key Lifecycle Managerproduct image to the /SKLM/disk1 directory, run the following command tocreate an encrypted password.cd /SKLM/disk1/im/tools./imcl encryptString password
Add the encrypted password that you created in the response file asshown in the following example.<data key=’user.WAS_ADMIN_ID,com.ibm.sklm301.linux’ value=’wasadmin’/><data key=’user.WAS_ADMIN_PASSWORD,com.ibm.sklm301.linux’ value=’e9PjN93MeQxwnSs9VXJFMw==’/>
Reinstalling previous version if migration repeatedly failsMigration process does not affect the earlier version of IBM Security Key LifecycleManager. If the migration continues to fail, uninstall IBM Security Key LifecycleManager, Version 3.0.1 and continue to run the previous version.
Note: On Windows platform, after you migrate from the earlier version of IBMSecurity Key Lifecycle Manager to version 3.0.1, DB2 associated with the earlierversion might not start if you uninstall IBM Security Key Lifecycle Manager,Version 3.0.1 before uninstalling the earlier version.
You can uninstall IBM Security Key Lifecycle Manager, Version 3.0.1 by followingthe steps in “Uninstallation of IBM Security Key Lifecycle Manager” on page 85.
92 Installing, migrating, and configuring

Optional removal of Db2
After you uninstall IBM Security Key Lifecycle Manager, you have the option ofleaving Db2 installed or uninstalling the program.
Uninstalling IBM Security Key Lifecycle Manager does not uninstall DB2 if it isinstalled before you install IBM Security Key Lifecycle Manager. DB2 is uninstalledwhen you uninstall IBM Security Key Lifecycle Manager if it is installed by theIBM Security Key Lifecycle Manager installer. You might also ensure that relatedautomatic startup services are disabled.
Db2 uninstallationAfter uninstalling IBM Security Key Lifecycle Manager, you have the option ofleaving Db2 installed or uninstalling the program.
If you choose to leave Db2 installed, you have the option of keeping or removingthe IBM Security Key Lifecycle Manager Db2 instance owner. Unless you have aspecific reason for keeping the instance owner, such as keeping a connection to adatabase, disassociate the user ID from the Db2 database instance. For moreinformation, see “Disassociation of a user ID from the Db2 instance” on page 94.
If you choose to uninstall Db2, follow these steps:
WindowsOpen the Control Panel.
Windows Server 2012: Click Programs and Features. Locate the entry forDb2, and click Remove to uninstall it.
Note: After uninstalling Db2, extra steps might be required to finishremoving Db2 artifacts.1. To delete the user ID that was used for the IBM Security Key Lifecycle
Manager Db2 instance owner, open Server Manager and click Tools >Computer Management > Local Users and Groups > Users.Review the list of user IDs. If the user ID for the IBM Security KeyLifecycle Manager Db2 instance owner still exists, delete it.Close the Computer Management console.
2. Review the entries and verify that the entries for the Db2 ports areremoved from the C:\WINDOWS\system32\drivers\etc\services file. Editthe file and search for the port numbers that are used by Db2. If anyare found, remove the entries from the file.
3. Open Server Manager and click Tools > Services. Review the list ofservices and verify that the Db2 related service entries are removed.Close the Services console when you are finished.
4. Remove the Db2 installation directory if the directory is not alreadyremoved.
For more information on Db2 uninstallation on Windows systems, see DB2documentation (http://www-01.ibm.com/support/knowledgecenter/SSEPGG_11.1.0/com.ibm.db2.luw.qb.server.doc/doc/t0007436.html).
AIX and Linux
93

1. Log in as the root user.2. Remove the user ID of the IBM Security Key Lifecycle Manager Db2
instance owner:a. Change to the user ID of the IBM Security Key Lifecycle Manager
Db2 instance owner, run the db2stop command for the instanceowner user ID and exit back to the root user ID:su - sklm_instance_owner_userid
cd DB_HOME/instance./db2stop sklm_instance_owner_userid /home/sklm_instance_owner_userid
exit
b. Run the db2idrop command on the instance owner user ID:cd DB_HOME/instance./db2idrop sklm_instance_owner_userid
c. Remove the user ID from the system:userdel -r sklm_instance_owner_userid
3. Remove Db2 from the system:cd DB_HOME/install/./db2_deinstall -a
4. Edit the services file:vi /etc/services
Locate the port numbers that are used by Db2, and remove the entriesfrom the file.
5. Remove the Db2 installation directory if it is not removed.
For more information on uninstalling Db2 on Linux and AIX systems, seeDb2 documentation (http://www-01.ibm.com/support/knowledgecenter/SSEPGG_11.1.0/com.ibm.db2.luw.qb.server.doc/doc/t0007439.html).
The following example shows the steps that are involved, by using thedefault Db2 instance owner user ID, sklmdb31, and the default Db2directory, /opt/IBM/DB2SKLMV301.
Starting as root, type:su - sklmdb31cd /opt/IBM/DB2SKLMV301/instance./db2stop sklmdb301/home/sklmdb301exit# Exit back to root.cd /opt/IBM/DB2SKLMV301/instance./db2idrop sklmdb31userdel -r sklmdb31cd /opt/IBM/DB2SKLMV301/install./db2_deinstall -avi /etc/services# Locate and remove the Db2 port entries in the services file.rm -rf /opt/IBM/DB2SKLMV301
Disassociation of a user ID from the Db2 instanceYou can disassociate a user ID from the IBM Security Key Lifecycle Manager Db2instance.
If the user ID is already disassociated from the Db2 instance, a step might return amessage that the user was not found. If you get this message, continue with thenext step.v Windows systems:
94 Installing, migrating, and configuring

1. Open the Windows Services console, and stop the Db2 service for the IBMSecurity Key Lifecycle Manager instance owner.To locate the Db2 instance service, search the list of services for serviceswhose names begin with "Db2." The entry for the instance service containsthe user ID of the IBM Security Key Lifecycle Manager Db2 instance owneras part of the service name. For example, DB2 - DBSKLMV301 -SKLMDB31.Open the properties dialog for the service and set the Service status toStopped, and the Startup type to Manual.
2. Click Start > Programs > IBM Db2 > instance_owner > Command LineTools > Command Window to open the Db2 Command Window, and enter:db2idrop db databasenamedb2idrop sklm_instance_owner_userid
3. If the C:\sklm_instance_owner_user_id directory still exists, remove it:del /s /q C:\sklm_instance_owner_user_id
v AIX and Linux systems:
Log in as the root user, and follow these steps.1. Change to the user ID of the IBM Security Key Lifecycle Manager Db2
instance owner, run the db2stop command for the instance owner user IDand exit back to the root user ID:su - sklm_instance_owner_userid
cd DB_HOME/instance./db2stop sklm_instance_owner_userid /home/sklm_instance_owner_userid
exit
2. Run the db2idrop command on the instance owner user ID:cd DB_HOME/instance./db2idrop sklm_instance_owner_userid
3. If the sklm_instance_owner_user_id/sqllib directory still exists, remove it:rm -rf sklm_instance_owner_user_id/sqllib
Removal of user ID from the Db2 instance ownerTo remove the user ID that was used as the IBM Security Key Lifecycle ManagerDb2 instance owner, use the user management utilities of the operating system todelete the user ID.
Before you delete a user ID that is used as the instance owner for the IBM SecurityKey Lifecycle Manager databases, ensure that the user ID is no longer associatedwith the Db2 instance.
Follow the steps in “Disassociation of a user ID from the Db2 instance” on page94. If the user ID is already disassociated from the Db2 instance, a step mightreturn a message that the user was not found. If this message, continue with thenext step.
After verifying that the user ID is not associated with the Db2 database instance,follow these steps to remove the user ID from the system:v Windows systems:
Use the user management tool for the version of Windows you are running todelete the Db2 administrative user from the system. For example, on someversions of Windows, carry out these steps:1. Open the Control Panel.
Optional removal of Db2 95

2. Click Administrative tools > Computer Management > Local Users andGroups > Users.
3. Delete the user from the system.v AIX and Linux systems:
Log in as the root user, and enter this command to remove the user ID:userdel -r sklm_instance_owner_userid
Disablement of automatic servicesThe IBM Security Key Lifecycle Manager uninstall process disables the Db2 andWebSphere Application Server services that are associated with IBM Security KeyLifecycle Manager. To correct error conditions, you might also want to ensure thatthese services are disabled.
Windows systems
On Windows systems, use the Windows Services console to prevent the Db2 andWebSphere Application Server services that are associated with IBM Security KeyLifecycle Manager from starting automatically.
Open the Windows Services console and locate the services in the following list.For each service in the list, open the Properties dialog box for the service, andensure that the Startup Type is set to Disabled, and the Service status field is setto Stopped.
Db2 - db2 copy name - SKLM_INSTANCE_OWNERFor example, DB2 - DBSKLMV301 - SKLMDB31
Db2 Governor (db2 copy name)For example, Db2 Governor (DB2SKLMV301)
Db2 License Server (db2 copy name)For example, Db2 License Server (DB2SKLMV301)
Db2 Management Service (db2 copy name)For example, Db2 Management Service (DB2SKLMV301)
Db2 Remote Command Server (db2 copy name)For example, Db2 Remote Command Server (DB2SKLMV301)
DB2DAS - DB2DAS_entryFor example, DB2DAS - DB2DAS00
Note: Disable Db2 Administration Server (DAS) only if DAS service ishosted in Windows service.
AIX and Linux systems
On AIX or Linux systems, enter the following commands to configure the IBMSecurity Key Lifecycle Manager Db2 instance owner so that it does not startautomatically:. ~sklmdb2/sqllib/db2profileDB_HOME/instance/db2iauto -off sklmdb31
Where sklmdb2 is the default instance owner user ID. If you changed it duringinstallation, use that user ID instead.
96 Installing, migrating, and configuring

Next, edit the /etc/inittab file and remove the entry that autostarts theWebSphere Application Server server:/opt/IBM/WebSphere/AppServer/bin/startServer.sh server1
Optional removal of Db2 97

98 Installing, migrating, and configuring

Installation and migration log files
If the installation or migration encounters an unexpected error condition, use thelog files to determine the cause of the problem.
Background informationThe installation program uses several subprograms, components, and subsystemsduring installation. Many error conditions occur because a subprogram fails.
Installation subprograms, components, and systems
You might see these names or abbreviations in the log files:v Db2v IBM Installation Manager
Installation phases
Error conditions that occur and the log files available to you depend on the phasein which the error occurred:1. Introductory that includes panels for language selection, details of the packages
to be installed, and the license agreement. The installation program also runs asystem prerequisites check to verify the minimum requirements to install theproduct.
2. Db2 installation that includes panels to gather information for installing Db2.After you enter the information, the installation program installs Db2.
3. Middleware installation that includes panels that gather information to installWebSphere Application Server middleware. After you enter the information, theinstallation program installs the middleware.IBM Security Key Lifecycle Manager is installed during this phase.
Important log files and locationsThe installation of IBM Security Key Lifecycle Manager and its componentsgenerates log files that you can read to ensure that the installation is completedsuccessfully. The installation error logs provide critical information.
The following table list the log files and the file locations that are generated whenyou use the default installation settings.
99

Table 12. Location of installation log files
Log File Description Location
db2_install.log Db2 installation log file.Windows systems
drive:\<IM_DATA_DIR>\logs\sklmLogs\
C:\ProgramData\IBM\InstallationManager\logs\sklmLogs\
Linux systems/<IM_DATA_DIR>/logs/sklmLogs/
/var/ibm/InstallationManager/logs/sklmLogs/
db_config.log Contains informationabout IBM Security KeyLifecycle Managerdatabase creation andtable creation.
Windows systemsdrive:\<IM_DATA_DIR>\logs\sklmLogs\
C:\ProgramData\IBM\InstallationManager\logs\sklmLogs\
Linux systems/<IM_DATA_DIR>/logs/sklmLogs/
/var/ibm/InstallationManager/logs/sklmLogs/
Various *.xml and*.log files
IBM Security KeyLifecycle Managerinstallation log files.
You can verify theinstallation, modification,or uninstallation of IBMSecurity Key LifecycleManager by checking thelog file that the IBMInstallation Managercreates.
Windows systemsdrive:\<IM_DATA_DIR>\logs\
C:\ProgramData\IBM\Installation Manager\logs\
Linux systems/<IM_DATA_DIR>/logs/
/var/ibm/InstallationManager/logs/
Various *.out and*.err files
STDOUT and STDERRfiles that are generatedduring installation.
The .err file sizes arezero bytes if theoperation they representwas successful. Examineerror files with sizesgreater than zero.
WindowsWAS_HOME\logs\
C:\Program Files\IBM\WebSphere\AppServer\logs\
Linux WAS_HOME/logs/
/opt/IBM/WebSphere/AppServer/log/
100 Installing, migrating, and configuring

Table 12. Location of installation log files (continued)
Log File Description Location
migration.log After you migrateexisting data (earlierversion) into the newinstallation, you canreview the migration logfile to verify whether theprocess was successful,or for troubleshootingpurposes.
Windows systemsdrive:\<IM_DATA_DIR>\logs\sklmLogs\
C:\ProgramData\IBM\InstallationManager\logs\sklmLogs\
Linux systems/<IM_DATA_DIR>/logs/sklmLogs/
/var/ibm/InstallationManager/logs/sklmLogs/
sklmInstall*.log IBM Security KeyLifecycle Managerinstaller log files.
The log files are createdwhen each step of theinstallation is run. Youcan read these log finesto verify whether theproduct is installedsuccessfully.
Windows%temp%/sklmInstaller*.log*
Linux ${TMPDIR}/sklmInstaller*.log
Log files in sklmPRS The sklmPRS foldercontains log files fordetailed output of theprerequisite scan activity(precheck.log) and forthe results of the scan(results.txt).
Windows%temp%/sklmPRS/
Linux ${TMPDIR}/PRS/
Log files to troubleshoot problemsThe timing of an error can provide an idea of which log file to use first. The twoplaces an error might occur are immediately after the Db2 phase, and immediatelyafter the middleware phase. Use this list to determine where to start.
During or immediately after the Db2 installation phase1. If the error occurs early enough, you might want to check the db2_install.log,
prsResults.xml, and sklmInstaller*.log files.2. If the error occurs later during this phase, the sklm301properties directory
might contain results of some of the Db2 configuration, or results from theother subprograms that run during this phase.
3. The location of the error log file can vary depending on whether the erroroccurs during the Db2 phase, or at the end of the Db2 phase.At the end of the Db2 phase, the log files are copied from thesklm301properties directory to the <IM_DATA_DIR>\logs\sklmLogs directory. SeeTable 12 on page 100 for the location of the files.
During or immediately after WebSphere Application Serverinstallation phase
The log files to examine for errors are db_config.log and sklmInstaller*.log files.
Installation and migration log files 101

Migration log file names and locationDuring the migration process, the migration program creates log files when it callsother programs or tools.
After you upgrade IBM Security Key Lifecycle Manager, and migrate your existingdata into the new installation, you can review the migration.log file to verifywhether the process was successful, or for troubleshooting purposes.
Windows systemsdrive:\<IM_DATA_DIR>\logs\sklmLogs
For example: C:\ProgramData\IBM\Installation Manager\logs\sklmLogs\migration.log
Linux systems/<IM_DATA_DIR>/logs/sklmLogs
For example: /var/ibm/InstallationManager/logs/sklmLogs/migration.log
Examining an error log fileIBM Security Key Lifecycle Manager generates several log files that you can use totroubleshoot problems that occur when you install and configure IBM Security KeyLifecycle Manager.
Procedure1. Review the list of log files. The log file to start with depends on the operating
system and the phase of the installation. The list in “Log files to troubleshootproblems” on page 101 can provide a starting point. You might examine severallog files before you find the one with the error messages.
2. Go to the directory with the log file, and open it with a text editor. On aWindows system, use a text editor that can process UNIX-style newlinecharacters, such as Microsoft WordPad.
3. The most recent log entries are at the end of the file. Starting at the last entry inthe log file, examine each entry. Take note of the program that is involved andthe time stamp of the entry if it has one.After the final entry is reviewed, look at the entry before it. Review this entryas you did the previous entry. Scan for anything that is mentioned in bothplaces such as file names or error conditions.Repeat the previous step, moving upward in the log file. There might beseveral entries with information that is related to the error condition. If theinformation in this log file is insufficient, look for more information in anotherlog file.If there are no messages about an error, go to another log file.
Other information to gatherYou must run several actions that might provide more information to verifyinstallation.v Check your free disk space. See “Hardware requirements” on page 7 for
minimum space requirements.v To validate the Db2 installation, check whether the Db2 instance is created.
102 Installing, migrating, and configuring

To verify that the Db2 instance was created, log in as the IBM Security KeyLifecycle Manager Db2 instance owner, go to the DB_INSTANCE_HOMEdirectory, and run:db2ilist
A list of the configured instances is displayed. The instance name for IBMSecurity Key Lifecycle Manager such as sklmdb31 is typically in the list.
v To validate the database creation, start and stop the IBM Security Key LifecycleManager database server by using the instance owner user ID.To start and stop the database, log in as the IBM Security Key Lifecycle ManagerDb2 instance owner, go to the DB_INSTANCE_HOME directory, and run thedb2start and db2stop commands on the database.
v To validate the Dynamic Data Language process, display a list of the tables inthe Db2 database.To display the list of tables, log in as the IBM Security Key Lifecycle ManagerDb2 instance owner, go to the DB_INSTANCE_HOME directory, and run thesecommands:db2 connect to sklm_database user sklm_instance_owner_userid \using sklm_instance_owner_passwd
db2 list tables
db2 describe table table_name
v Determine whether the Java process for WebSphere Application Server isrunning. A running process validates the WebSphere Application Serverinstallation.To determine whether the Java process is running, go to the WAS_HOME/bindirectory, stop and restart the server by running these commands:stopServer.sh server1startServer.sh server1
If global security is enabled, add these parameters to the commands to stop andrestart your server:
-username was_admin_id -password was_admin_passwd
On Windows systems, you can also open the Windows Services console andverify that the service for the KLMProfile is started.
v Start the IBM Security Key Lifecycle Manager application to validate the IBMSecurity Key Lifecycle Manager installation and the overall installation.To start the IBM Security Key Lifecycle Manager application, start theWebSphere Application Server, and look for the IBM Security Key LifecycleManager task.
Installation and migration log files 103

104 Installing, migrating, and configuring

Installation error messages
Messages indicate events that occur during the operation of the system. Dependingon the outcome of an operation, IBM Security Key Lifecycle Manager provides aninformational, warning, or error message.
Message formatMessages that are logged by IBM Security Key Lifecycle Manager adhere to theTivoli Message Standard. Each message consists of a message identifier (ID) andaccompanying message text.
Messages have the following syntax:CTGUUXXXXZ
where:
CTG Identifies the IBM Security Key Lifecycle Manager product.
UU Identifies the component or subsystem of IBM Security Key LifecycleManager. For example:
KM IBM Security Key Lifecycle Manager server messages.
KO Password policy messages.
KS IBM Security Key Lifecycle Manager key server messages.
XXXX Indicates serial or message number, such as 0001.
Z One-character type code indicates the severity of the message:v I for informational messagev W for warning messagev E for error message
For example:CTGKM0545E: An error occurred exporting a certificate.
Error and warning messagesIBM Security Key Lifecycle Manager generates error and warning messages thatare based on the action you take.
CTGKM9002E The administrator ID must be eightcharacters or less.
Explanation: The user ID is restricted to a maximumlength of eight characters.
System action: Installation cannot continue until youcorrect the error.
User response: Select a different user ID that is eightcharacters or less.
CTGKM9003E The administrator ID must begin withan alphabetic character.
Explanation: The user ID must start with a letter.
Additionally, the user ID can only use alphabeticalcharacters, numeric characters, and the underscore(A-Z, a-z, 0–9, and _).
System action: Installation cannot continue until youcorrect the error.
User response: Select a different user ID that startswith a letter.
105

CTGKM9004E The administrator ID cannot beginwith: ibm, sql, or sys.
Explanation: The administrator user ID cannot startwith ibm, sql, or sys.
System action: Installation cannot continue until youcorrect the error.
User response: Select a different user ID that does notstart with one of the restricted strings.
CTGKM9005E The administrator ID cannot be: db2,users, admins, guests, public, private,properties, local, or root.
Explanation: Db2 reserved keywords cannot be usedas an administrator user ID.
System action: Installation cannot continue until youcorrect the error.
User response: Select a different user ID that is not aDb2 keyword.
CTGKM9006E The administrator ID is a requiredfield.
Explanation: You must specify an administrator userID.
System action: Installation cannot continue until youenter a value in the field.
User response: Enter a user ID in the AdministratorID field.
CTGKM9007E The password is a required field.
Explanation: You must specify a password.
System action: Installation cannot continue until youenter a value in the field.
User response: Enter a password for the user ID.
CTGKM9010E The password confirmation field isrequired.
Explanation: You must specify a password.
System action: Installation cannot continue until youenter a value in the field.
User response: Enter a password for the user ID.
CTGKM9011E The database home is a requiredfield.
Explanation: You must specify the database homedirectory.
System action: Installation cannot continue until youenter a value in the field.
User response: Enter the directory in which to storethe database files.
CTGKM9012E The database name is a requiredfield.
Explanation: You must specify a name for thedatabase.
System action: Installation cannot continue until youenter a value in the field.
User response: Enter a name for the database.
CTGKM9037E The port number must be a positiveinteger among 443, 80, or between 1024and 65536.
System action: Installation cannot continue until youcorrect the error.
User response: Enter a port number that is among443, 80, or between 1024 and 65536.
CTGKM9038E The port is a required field.
Explanation: You must specify a port.
System action: Installation cannot continue until youenter a value in the field.
User response: Enter a port number.
CTGKM9041E The password and passwordconfirmation fields do not match.Reenter matching passwords for thesetwo fields.
Explanation: The passwords in both fields mustmatch.
System action: Installation cannot continue until youcorrect the error.
User response: Re-enter the values in the fields.
CTGKM9042I Passwords cannot contain spaces.
Explanation: Passwords can only containalphanumeric characters and the underscore (a-z, A-Z,0–9, and _).
System action: Installation cannot continue until youcorrect the error.
User response: Enter a different password thatconforms to the rules.
CTGKM9044I The Administrator ID cannot be anSQL reserved word.
Explanation: The Administrator ID cannot be an SQLreserved word.
CTGKM9004E • CTGKM9044I
106 Installing, migrating, and configuring

System action: Installation cannot continue until youcorrect the error.
User response: Enter a different value for theAdministrator ID.
CTGKM9049I The Windows Db2 DB Home fieldmust be a drive letter [A-Z] followed bya colon.
Explanation: On Windows systems, you must selectthe drive on which to install the IBM Security KeyLifecycle Manager database. A Windows drive indicatoris a letter, following by a colon (:). For example, C:.
System action: Installation cannot continue until youcorrect the error.
User response: Enter a correctly formatted drive letter.
CTGKM9050E The DB Name must be 8 characters orless.
Explanation: The DB Name must be 8 characters orless.
System action: Installation cannot continue until youcorrect the error.
User response: Select a different name.
CTGKM9050I The Windows Db2 DB Home fieldmust be a drive letter that can bewritten to.
Explanation: The drive must be writable forinstallation to proceed.
System action: Installation cannot continue until youcorrect the error.
User response: Use the operating system utilities tomake the drive writable, or select a different drive.
CTGKM9051E The DB Name cannot contain specialcharacters.
Explanation: The name contains one or more incorrectcharacters.
User response: Reenter the name and try again.
CTGKM9052E The DB Name must begin with analphabetic character.
Explanation: The DB Name can only use alphabeticalcharacters, numeric characters, and the underscore(A-Z, a-z, 0–9, and _).
System action: Installation cannot continue until youcorrect the error.
User response: Select a different name.
CTGKM9053E The DB2 version currently selectedfor use is not supported. The supportedversion is 11.1 and above.
Explanation: IBM Security Key Lifecycle Managerrequires a supported version of Db2.
System action: The installation task fails.
User response: Obtain a supported version of Db2.Try again.
CTGKM9054E The location specified is not a validDB2 installation directory
Explanation: The specified directory does not containthe existing DB2 installation.
User response: Select a valid DB2 installationdirectory.
CTGKM9055E The user name/password fieldscannot have more than {0} characters.
Explanation: The value you specified exceeds themaximum length.
System action: Installation cannot continue until youcorrect the error.
User response: Specify a value that does not exceedthe limit. Then, try the operation again.
CTGKM9056E Password and the confirmation doesnot match for {0}.
Explanation: The Password and Confirm Passwordfields must have the same value.
System action: Installation cannot continue until youcorrect the error.
User response: Specify the same value for thePassword and Confirm Password fields, and try theoperation again.
CTGKM9057E The Application Server AdministratorConfirm Password field is empty.
Explanation: User has not specified the passwordconfirmation value.
System action: Installation cannot continue until youcorrect the error.
User response: Enter a value in the Confirm Passwordfield. Try again.
CTGKM9058E The Application Server AdministratorUser field is empty or invalid.
Explanation: This message is displayed when theApplication Server Administrator User field is empty orinvalid.
CTGKM9049I • CTGKM9058E
Installation error messages 107

System action: Installation cannot continue until youcorrect the error.
User response: Specify a correct value and try again.
CTGKM9059E The IBM Security Key LifecycleManager Administrator User field isempty or invalid.
Explanation: This message is displayed when the IBMSecurity Key Lifecycle Manager Administrator Userfield is empty or invalid.
System action: Installation cannot continue until youcorrect the error.
User response: Specify a correct value and try again.
CTGKM9060E The user name field cannot containany special characters.
Explanation: The user name contains one or moreincorrect characters.
System action: Installation cannot continue until youcorrect the error.
User response: Reenter the user name with validcharacters and try again.
CTGKM9061E The port specified is already in use.
Explanation: The port number that is entered must beavailable for use. The port number is already in use.
System action: Installation cannot continue until youcorrect the error.
User response: Select another port number. Ensurethat the specified port number is available.
CTGKM9062E The IBM Security Key LifecycleManager Administrator Password fieldis empty or invalid.
Explanation: This message is displayed when the IBMSecurity Key Lifecycle Manager AdministratorPassword field is empty or invalid.
System action: Installation cannot continue until youcorrect the error.
User response: Specify a correct value and try again.
CTGKM9063E The Application Server AdministratorPassword field is empty or invalid.
Explanation: This message is displayed when theApplication Server Administrator Password field isempty or invalid.
System action: Installation cannot continue until youcorrect the error.
User response: Specify a correct value and try again.
CTGKM9064E The Encryption Key ManagerProperty File field is empty.
Explanation: This message is displayed when theEncryption Key Manager Property File field is empty.
System action: Installation cannot continue until youcorrect the error.
User response: Specify a value.
CTGKM9065E The IBM Security Key LifecycleManager Administrator ConfirmPassword field is empty.
Explanation: User has not specified the passwordconfirmation value.
System action: Installation cannot continue until youcorrect the error.
User response: Specify a value and try again.
CTGKM9066E IBM Security Key Lifecycle ManagerApplication Port Number is empty.
Explanation: This message is displayed when the IBMSecurity Key Lifecycle Manager Application PortNumber field is empty.
System action: Installation cannot continue until youcorrect the error.
User response: Specify a value and try again.
CTGKM9067E The password for DatabaseAdministrator field is empty.
Explanation: This message is displayed when thepassword field for Database Administrator field isempty.
System action: Installation cannot continue until youcorrect the error.
User response: Specify a value and try again.
CTGKM9068E The password for keystore is empty.
Explanation: You must specify a password for thekeystore.
User response: Specify a password for the keystoreand try again.
CTGKM9069E The user name {0} or password is notvalid.
Explanation: The operation requires a valid user nameand password.
System action: The operation fails.
User response: Specify a valid user name andpassword. Then, try again.
CTGKM9059E • CTGKM9069E
108 Installing, migrating, and configuring

CTGKM9070E The credentials could not be validatedat the moment.
Explanation: The specified credentials might beincorrect.
System action: Installation cannot continue until youcorrect the error.
User response: Refer to the WebSphere ApplicationServer logs for more information and correct theproblem.
CTGKM9071E The WebSphere Application Serverinstance could not be started.
Explanation: The WebSphere Application Serverinstance could not be started.
System action: Installation cannot continue until youcorrect the error.
User response: Refer to the WebSphere ApplicationServer logs for more information and correct theproblem.
CTGKM9072E The DB2 installation details file {0}cannot be found.
Explanation: The DB2 instance data file was notfound.
System action: Installation cannot continue until youcorrect the error.
User response: Ensure that the following files exist.
Windows systemsThe db2srcit.txt file under the followingdirectories:
v C:\sklmtemp
v C:\sklm301properties
Linux and AIX systemsCheck for the missing properties in thedb2unix.srcit file under the followingdirectories:
v /sklmtemp
v /root/sklm301properties
CTGKM9073E DB2InstallResponseUpdater requiresminimum {0} parameters. Only had {1}parameters.
Explanation: The installer is not passing in the correctparameters for a binary which it is trying to execute.This is an internal error which cannot be resolved bythe Installation Manager.
System action: The installation fails.
User response: Identify the package that has the issueby looking at the installation history. In InstallationManager, click File > Installation History. In console
mode, enter S on the main menu to select “ViewInstallation History”. Contact IBM customer support.
CTGKM9074E File {0} does not exist.
Explanation: A binary which the installer is executingis attempting to access a file which does not exist. Thisis an internal error which cannot be resolved by theInstallation Manager.
System action: The installation fails.
User response: Identify the package that has the issueby looking at the installation history. In InstallationManager, click File > Installation History. In consolemode, enter S on the main menu to select “ViewInstallation History”. Contact IBM customer support.
CTGKM9075E File {0} is not writable.
Explanation: A binary which the installer is executingis attempting to modify a read-only file. This is aninternal error which cannot be resolved by theInstallation Manager.
System action: The installation fails.
User response: Identify the package that has the issueby looking at the installation history. In InstallationManager, click File > Installation History. In consolemode, enter S on the main menu to select “ViewInstallation History”. Contact IBM customer support.
CTGKM9076E The specified path for existing DB2installation is not valid.
Explanation: The specified path for existing DB2installation is incorrect.
System action: Installation cannot continue until youcorrect the error.
User response: Specify the correct path. Then, tryagain.
CTGKM9077E The response file object is null.
Explanation: You must specify the response file.
User response: Specify a value. Then, try again.
CTGKM9078E {0} requires {1} parameters. Only had{2} parameters.
Explanation: The installer is not passing in the correctparameters for a binary which it is trying to execute.This is an internal error which cannot be resolved bythe Installation Manager.
System action: The installation fails.
User response: Identify the package that has the issueby looking at the installation history. In InstallationManager, click File > Installation History. In consolemode, enter S on the main menu to select “View
CTGKM9070E • CTGKM9078E
Installation error messages 109

Installation History”. Contact IBM customer support.
CTGKM9079E The file/folder specified by the path{0} does not exist on the file system.
Explanation: A binary which the installer is executingis attempting to access a file which does not exist. Thisis an internal error which cannot be resolved by theInstallation Manager.
System action: The installation fails.
User response: Identify the package that has the issueby looking at the installation history. In InstallationManager, click File > Installation History. In consolemode, enter S on the main menu to select “ViewInstallation History”. Contact IBM customer support.
CTGKM9080E IBM Tivoli Key Lifecycle Managerserver version {0} has been detected onthe system. This version cannot beupgraded to v2.6. To continue with theinstallation, upgrade IBM Tivoli KeyLifecycle Manager to version {1}.
Explanation: The installation fails.
System action: Installation cannot continue until youcorrect the error.
User response: Upgrade IBM Tivoli Key LifecycleManager to the supported version.
CTGKM9081E Error while executing the command{0}
Explanation: There was a problem when running thespecified command.
System action: The installation fails.
User response: Check the Installation Manager logfiles and take necessary corrective actions. Then, tryagain.
CTGKM9082E Cannot find a running process for theserver.
Explanation: There was a problem when trying tostop WebSphere Application Server.
System action: The installation fails.
User response: Manually start the server and tryagain.
CTGKM9083E Unable to determine the installlocation for WebSphere ApplicationServer v9.
Explanation: The Installer could not identify thelocation of WebSphere Application Server, version 9.0.
System action: The installation fails.
User response: Uninstall Installation Manager andrerun the installation process.
CTGKM9084E Invalid DB2 installation details file.Cannot find an entry for {0}.
Explanation: The details present in the DB2 instancedata file is incorrect.
System action: The installation fails.
User response:
Windows systemsCheck for the missing properties in thedb2srcit.txt file under the followingdirectories:
v C:\sklmtemp
v C:\sklm301properties
Linux and AIX systemsCheck for the missing properties in thedb2unix.srcit file under the followingdirectories:
v /sklmtemp
v /root/sklm301properties
CTGKM9085E The DB2 installation details file {0}cannot be found.
Explanation: The DB2 instance data file was notfound.
System action: Installation cannot continue until youcorrect the error.
User response: Ensure that the following files exist.
Windows systemsThe db2srcit.txt file under the followingdirectories:
v C:\sklmtemp
v C:\sklm301properties
Linux and AIX systemsCheck for the missing properties in thedb2unix.srcit file under the followingdirectories:
v /sklmtemp
v /root/sklm301properties
CTGKM9086E No WebSphere Application Serverinstallation found in the registry.
Explanation: Instance of the WebSphere ApplicationServer, version 8.5 was not found in the install registry.
System action: Installation cannot continue until youcorrect the error.
User response: Uninstall Installation Manager andrerun the installation program.
CTGKM9079E • CTGKM9086E
110 Installing, migrating, and configuring

CTGKM9087E Could not load data from the portsdefinition file {0}.
Explanation: The ports definition file for theWebSphere Application Server could not be read.
System action: Installation cannot continue until youcorrect the error.
User response: Clean up any existing installation andrerun the installation program.
CTGKM9088E The ports definition file {0} does notcontain the required keys - {1}.
Explanation: Details in the ports definition file isincorrect.
System action: Installation cannot continue until youcorrect the error.
User response: Clean up any existing installation andrerun the installation program.
CTGKM9089E Could not get the key store filelocation.
Explanation: Keystore location was not found.
System action: Installation fails.
User response: Make sure that the Tivoli Key LifecycleManager database is up and running and rerun theinstallation program.
CTGKM9090E IBM DB2 and IBM WebSphereApplication Server offerings must beselected for IBM Security Key LifecycleManager installation to proceed. Goback to the previous screen and selectIBM DB2 V11.1 and IBM WebSphereApplication Server V9.0 offerings.
Explanation: The details that you specified areincorrect.
User response: Specify the correct values.
CTGKM9091E IBM DB2 and IBM WebSphereApplication Server offerings associatedwith IBM Security Key LifecycleManager must be selected for IBMSecurity Key Lifecycle Manageruninstallation to proceed. Go back tothe previous screen and select IBM DB2V11.1 and IBM WebSphere ApplicationServer V9.0 offerings.
Explanation: The details that you specified areincorrect.
System action: Uninstallation cannot continue untilyou correct the error.
User response: Specify the correct values.
CTGKM9092E One or more prerequisites failed tomeet the requirements. The report isgiven below.
Explanation: The prerequisite requirements for theinstallation are not met. All prerequisites must besatisfied for the installation.
System action: Installation cannot continue until youcorrect the error.
User response: Take corrective actions to meet therequirements. Then, try again.
CTGKM9093E None of the drives on the system hasthe required space ({0}) to install theproduct.
Explanation: The minimum space to install theproduct is not available in the system.
System action: Installation cannot continue until youcorrect the error.
User response: Increase the amount of space availableon the specified drive to the minimum required. Then,try again.
CTGKM9094E Unable to read the prerequisitescanner results.
Explanation: The prerequisite output file was notfound after Prerequisite Scanner is run.
System action: Installation cannot continue until youcorrect the error.
User response: Rerun the installation without deletingany files from the system.
CTGKM9095E The password does not meet theoperating system password policyrequirements. Check the minimumpassword length and passwordcomplexity requirements.
Explanation: The password the you specified violatesthe password rules.
System action: The password is not updated on theserver.
User response: Check the minimum password length,password complexity and password historyrequirements.
CTGKM9096E The credentials provided forWebSphere Application ServerAdministrator is not valid.
Explanation: Incorrect credentials are specified for theWebSphere Application Server administrator.
System action: Installation cannot continue until youcorrect the error.
CTGKM9087E • CTGKM9096E
Installation error messages 111

User response: Specify the correct user name andpassword for WebSphere Application Serveradministrator. Then, try again.
CTGKM9099E WebSphere Administrator credentialsare required to proceed withuninstallation.
Explanation: The user name or password forWebSphere Application Server is not specified orincorrect.
User response: Specify the correct user name andpassword for the WebSphere Application Serveradministrator and then try again.
CTGKM9100E DB2 installation details file {0} cannotbe found
Explanation: The DB2 instance data file was notfound.
System action: Installation cannot continue until youcorrect the error.
User response: Ensure that the following files exist.
Windows systemsThe db2srcit.txt file under the followingdirectories:
v C:\sklmtemp
v C:\sklm301properties
Linux and AIX systemsCheck for the missing properties in thedb2unix.srcit file under the followingdirectories:
v /sklmtemp
v /root/sklm301properties
CTGKM9101E The path "<VariableformatSpec="{0}">VALUE_0</Variable>"is either on a network file system or notwritable. Select a local file system pathfor installation.
Explanation: The installation is attempted on alocation that is not on the local hard disk of the system.
System action: Installation cannot continue until youcorrect the error.
User response: Change the installation path andspecify a local path on the system.
CTGKM9102E The path "<VariableformatSpec="{0}">VALUE_0</Variable>"is either on a network drive or notwritable. Select a local drive forinstallation.
Explanation: The installation is attempted on alocation that is not on the local hard disk of the system.
System action: Installation cannot continue until youcorrect the error.
User response: Change the installation path andspecify a local path on the system.
CTGKM9103E Unable to find the location ofprerequisite scanner tool.
Explanation: Location of Prerequisite Scanner was notfound.
System action: Installation cannot continue until youcorrect the error.
User response: Rerun the installation without deletingany files from the system.
CTGKM9104E Required permission is not availableon {0} to perform the installation.
Explanation: You might not have the read, write, andexecute permissions to the installation directories.
System action: Installation cannot continue until youcorrect the error.
User response: Verify permissions to the installationdirectories for performing installation of eachcomponent of IBM Security Key Lifecycle Manager andtry the installation again.
CTGKM9105E Java TEMP location and environmentvariable TEMP location are different.The location paths must be same.
Explanation: Java temporary directory location andthe TEMP environment variable location might not besame.
System action: Installation cannot continue until youcorrect the error.
User response: Ensure that the location paths for Javatemporary directory and the TEMP environmentvariable are same.
CTGKM9106E Error in uninstalling IBM SecurityKey Lifecycle Manager. Check theinstaller log files for details.
System action: You cannot uninstall until you correctthe error.
User response: Take corrective actions and try again.
CTGKM9107E {0} environment variable not set OR isnull, please set the environmentvariable to proceed further.
Explanation: The TEMP (Windows) or TMPDIR (Linux)environment variable is not set or empty.
System action: Installation cannot continue until youcorrect the error.
CTGKM9099E • CTGKM9107E
112 Installing, migrating, and configuring

User response: Ensure that the environment variablevalue is set to a valid temporary directory, for exampleTMPDIR=/tmp.
CTGKM9108E The port FCM_PORT_NUMBER {0}that is required for DB2 installation isin use. Release the port to continue withthe installation.
System action: Installation cannot continue until youcorrect the error.
User response: Release the port by stopping theapplication, which is using this port. Then, try theinstallation again.
CTGKM9109E Port number {0} is in conflict withFCM_PORT_NUMBER value. Choose adifferent port and try again.
System action: Installation cannot continue until youcorrect the error.
User response: Specify a valid port, which does notcause a port conflict. Then, try the installation again.
CTGKM9110W IBM Security Key Lifecycle Manageris being installed on an unsupportedoperating system.
User response: Ensure you are running on asupported operating system. For a list of supportedoperating systems, see the IBM Security Key LifecycleManager product documentation in IBM KnowledgeCenter.
CTGKM9111W The product installer cannot detectthe operating system on the host.
User response: Ensure you are running on asupported operating system. For a list of supportedoperating systems, see the IBM Security Key LifecycleManager product documentation in IBM KnowledgeCenter.
CTGKM9112E You must specify different portnumbers.
Explanation: Port numbers that are mentioned on theform must not be the same.
System action: Installation cannot continue until youcorrect the error.
User response: Ensure that the port numbers aredifferent and try the installation again.
CTGKM9113E The port {0} is in conflict with DB2port. Choose a different port to proceedwith the installation.
Explanation: Selected value for the port is in conflictwith the DB2 port.
System action: Installation cannot continue until youcorrect the error.
User response: Specify a free port and try theinstallation again.
CTGKM9114E Ports 441, 5696, 3801 are reserved forother services. Specify a different port tocontinue with the installation.
Explanation: Selected value for the port is reserved foranother service.
System action: Installation cannot continue until youcorrect the error.
User response: Check to ensure that the port value isnot reserved for any other services.
CTGKM9115E Unable to create the port definitionproperty file.
Explanation: Unable to modify the portsDef.props filewith the port number settings for WebSphereApplication Server profile creation.
System action: Installation cannot continue until youcorrect the error.
User response: Check for the following informationand try the installation:
v Check that you have the read, write, and executepermission to the TEMP (Windows) and $HOME (Linux)location.
v Ensure that the property file with the same namedoes not exist.
v Ensure that the file is not in use by another program.
CTGKM9116E The password must be different fromthe user name. Specify a differentpassword.
Explanation: A password cannot be the same as youruser name or user ID.
System action: Installation cannot continue until youcorrect the error.
User response: Enter a different password thatconforms to the rules and try again.
CTGKM9117E The version detected is not supportedfor IBM Security Key Lifecycle Managerinline migration.
User response: Ensure that you are migrating asupported version. For a list of supported versions for
CTGKM9108E • CTGKM9117E
Installation error messages 113

inline migration, see the IBM Security Key LifecycleManager product documentation in IBM KnowledgeCenter.
114 Installing, migrating, and configuring

Sample response files
You might want to use sample response files for Windows and other systems.Before installation, you must also read and agree to the license terms for thisproduct. To locate the response files and license term files, look in the rootdirectory of the installation image files. The /license subdirectory has the licensefiles in text format.
Installation fails unless you take these steps.
In the response file, make following changes to the line that specifies the license:v Set the default value to true to indicate that you agree with the terms of the
license.v Uncomment the line by removing the pound sign (#) character at the beginning
of the line.
New installation of version 3.0.1 on Windows systemsThe example response file contains responses for an installation of IBM SecurityKey Lifecycle Manager version 3.0.1 onto a Windows system or an installation inwhich Encryption Key Manager migration occurs.<?xml version=’1.0’ encoding=’UTF-8’?><agent-input clean=’true’ ><server><repository location=’C:\disk1\im’/>
<repository location=’C:\disk1\’/></server><profile id=’IBM Installation Manager’ installLocation=’C:\Program Files\IBM\Installation Manager\eclipse’ kind=’self’><data key=’eclipseLocation’ value=’C:\Program Files\IBM\Installation Manager\eclipse’/><data key=’user.import.profile’ value=’false’/><data key=’cic.selector.os’ value=’win32’/><data key=’cic.selector.arch’ value=’x86_64’/><data key=’cic.selector.ws’ value=’win32’/>
</profile><install modify=’false’><offering profile=’IBM Installation Manager’ id=’com.ibm.cic.agent’ features=’agent_core,agent_jre,agent_web’ installFixes=’none’/><offering profile=’IBM DB2 SKLM301’ id=’com.ibm.sklm301.db2.win.ofng’ features=’main.feature’ installFixes=’none’/><offering profile=’IBM WebSphere Application Server V9.0’ id=’com.ibm.websphere.BASE.v90’ features=’core.feature,ejbdeploy,thinclient,embeddablecontainer’ installFixes=’none’/><offering profile=’IBM WebSphere Application Server V9.0’ id=’com.ibm.java.jdk.v8’ features=’com.ibm.sdk.8’ installFixes=’none’/><offering profile=’IBM Security Key Lifecycle Manager v3.0.1’ id=’com.ibm.sklm301.win’ features=’main.feature’ installFixes=’none’/>
</install><profile id=’IBM DB2 SKLM301’ installLocation=’C:\Program Files\IBM\DB2SKLMV301’><data key=’eclipseLocation’ value=’C:\Program Files\IBM\DB2SKLMV301’/><data key=’user.import.profile’ value=’false’/><data key=’cic.selector.os’ value=’win32’/><data key=’cic.selector.arch’ value=’x86_64’/><data key=’cic.selector.ws’ value=’win32’/><data key=’user.DB2_ADMIN_ID,com.ibm.sklm301.db2.win.ofng’ value=’sklmdb31’/><data key=’user.DB2_ADMIN_PWD,com.ibm.sklm301.db2.win.ofng’ value=’QTh/0AiFvrljhs9gnOYkGA==’/><data key=’user.CONFIRM_PASSWORD,com.ibm.sklm301.db2.win.ofng’ value=’QTh/0AiFvrljhs9gnOYkGA==’/><data key=’user.DB2_DB_HOME,com.ibm.sklm301.db2.win.ofng’ value=’C:’/><data key=’user.DB2_DB_NAME,com.ibm.sklm301.db2.win.ofng’ value=’SKLMDB31’/><data key=’user.DB2_DB_PORT,com.ibm.sklm301.db2.win.ofng’ value=’50050’/><data key=’user.DB2_EXISTS,com.ibm.sklm301.db2.win.ofng’ value=’false’/><data key=’user.DB2_LOCATION,com.ibm.sklm301.db2.win.ofng’ value=’C:\\Program Files\\IBM\\DB2SKLMV301’/><data key=’cic.selector.nl’ value=’en’/>
</profile>
<profile id=’IBM WebSphere Application Server V9.0’ installLocation=’C:\Program Files\IBM\WebSphere\AppServer’><data key=’eclipseLocation’ value=’C:\Program Files\IBM\WebSphere\AppServer’/><data key=’user.import.profile’ value=’false’/><data key=’cic.selector.os’ value=’win32’/><data key=’cic.selector.arch’ value=’x86_64’/><data key=’cic.selector.ws’ value=’win32’/><data key=’cic.selector.nl’ value=’en’/>
115

</profile><profile id=’IBM Security Key Lifecycle Manager v3.0.1’ installLocation=’C:\Program Files\IBM\SKLMV301’><data key=’eclipseLocation’ value=’C:\Program Files\IBM\SKLMV301’/><data key=’user.import.profile’ value=’false’/><data key=’cic.selector.os’ value=’win32’/><data key=’cic.selector.arch’ value=’x86_64’/><data key=’cic.selector.ws’ value=’win32’/><data key=’user.IS_SILENT_MODE,com.ibm.sklm301.win’ value=’false’/><data key=’user.EKM_PROPFILE,com.ibm.sklm301.win’ value=’C:\KeyManagerConfig.properties’/><data key=’user.EKM_MIGRATION,com.ibm.sklm301.win’ value=’false’/><data key=’user.PROFILE_NAME,com.ibm.sklm301.win’ value=’KLMProfile’/><data key=’user.WAS_ADMIN_ID,com.ibm.sklm301.win’ value=’wasadmin’/><data key=’user.WAS_ADMIN_PASSWORD,com.ibm.sklm301.win’ value=’e9PjN93MeQxwnSs9VXJFMw==’/><data key=’user.WAS_ADMIN_CONF_PWD,com.ibm.sklm301.win’ value=’e9PjN93MeQxwnSs9VXJFMw==’/><data key=’user.SKLM_ADMIN_USER,com.ibm.sklm301.win’ value=’SKLMAdmin’/><data key=’user.SKLM_ADMIN_PASSWORD,com.ibm.sklm301.win’ value=’9YTRJMRIydDSdfhaHPs1ag==’/><data key=’user.SKLM_ADMIN_CONF_PWD,com.ibm.sklm301.win’ value=’9YTRJMRIydDSdfhaHPs1ag==’/><data key=’user.SKLM_APP_PORT,com.ibm.sklm301.win’ value=’443’/>
<data key=’user.WAS_ADMIN_PORT,com.ibm.sklm301.win’ value=’9083’/><data key=’user.SKLM_APP_NS_PORT,com.ibm.sklm301.win’ value=’80’/>
<data key=’cic.selector.nl’ value=’en’/></profile>
<preference name=’com.ibm.cic.common.core.preferences.eclipseCache’ value=’C:\Program Files (x86)\IBM\IBMIMShared’/><preference name=’com.ibm.cic.common.core.preferences.connectTimeout’ value=’30’/><preference name=’com.ibm.cic.common.core.preferences.readTimeout’ value=’45’/><preference name=’com.ibm.cic.common.core.preferences.downloadAutoRetryCount’ value=’0’/><preference name=’offering.service.repositories.areUsed’ value=’true’/><preference name=’com.ibm.cic.common.core.preferences.ssl.nonsecureMode’ value=’false’/><preference name=’com.ibm.cic.common.core.preferences.http.disablePreemptiveAuthentication’ value=’false’/><preference name=’http.ntlm.auth.kind’ value=’NTLM’/><preference name=’http.ntlm.auth.enableIntegrated.win32’ value=’true’/><preference name=’com.ibm.cic.common.core.preferences.preserveDownloadedArtifacts’ value=’true’/><preference name=’com.ibm.cic.common.core.preferences.keepFetchedFiles’ value=’false’/><preference name=’PassportAdvantageIsEnabled’ value=’false’/><preference name=’com.ibm.cic.common.core.preferences.searchForUpdates’ value=’false’/><preference name=’com.ibm.cic.agent.ui.displayInternalVersion’ value=’false’/><preference name=’com.ibm.cic.common.sharedUI.showErrorLog’ value=’true’/><preference name=’com.ibm.cic.common.sharedUI.showWarningLog’ value=’true’/><preference name=’com.ibm.cic.common.sharedUI.showNoteLog’ value=’true’/>
</agent-input>
New installation of version 3.0.1 on Linux systemsThe example response file contains responses for an installation of IBM SecurityKey Lifecycle Manager version 3.0.1 onto a system, such as Linux, or aninstallation in which Encryption Key Manager migration occurs.<?xml version=’1.0’ encoding=’UTF-8’?><agent-input clean=’true’ ><server><repository location=’/disk1/im’/><repository location=’/disk1/’/>
</server><profile id=’IBM Installation Manager’ installLocation=’/opt/IBM/InstallationManager/eclipse’ kind=’self’><data key=’eclipseLocation’ value=’/opt/IBM/InstallationManager/eclipse’/><data key=’user.import.profile’ value=’false’/><data key=’cic.selector.os’ value=’linux’/><data key=’cic.selector.arch’ value=’x86_64’/><data key=’cic.selector.ws’ value=’gtk’/>
</profile><install modify=’false’><offering profile=’IBM Installation Manager’ id=’com.ibm.cic.agent’ features=’agent_core,agent_jre,agent_web’ installFixes=’none’/>
<offering profile=’IBM DB2 SKLM301’ id=’com.ibm.sklm301.db2.lin.ofng’ features=’main.feature’ installFixes=’none’/><offering profile=’IBM WebSphere Application Server V9.0’ id=’com.ibm.websphere.BASE.v90’ features=’core.feature,ejbdeploy,thinclient,embeddablecontainer’ installFixes=’none’/><offering profile=’IBM WebSphere Application Server V9.0’ id=’com.ibm.java.jdk.v8’ features=’com.ibm.sdk.8’ installFixes=’none’/><offering profile=’IBM Security Key Lifecycle Manager v3.0.1’ id=’com.ibm.sklm301.linux’ features=’main.feature’ installFixes=’none’/></install><profile id=’IBM DB2 SKLM301’ installLocation=’/opt/IBM/DB2SKLMV301’><data key=’eclipseLocation’ value=’/opt/IBM/DB2SKLMV301’/><data key=’user.import.profile’ value=’false’/><data key=’cic.selector.os’ value=’linux’/><data key=’cic.selector.arch’ value=’x86_64’/><data key=’cic.selector.ws’ value=’gtk’/><data key=’user.DB2_ADMIN_ID,com.ibm.sklm301.db2.lin.ofng’ value=’sklmdb31’/><data key=’user.DB2_ADMIN_PWD,com.ibm.sklm301.db2.lin.ofng’ value=’QTh/0AiFvrljhs9gnOYkGA==’/><data key=’user.CONFIRM_PASSWORD,com.ibm.sklm301.db2.lin.ofng’ value=’QTh/0AiFvrljhs9gnOYkGA==’/><data key=’user.DB2_DB_HOME,com.ibm.sklm301.db2.lin.ofng’ value=’/home/sklmdb31’/>
116 Installing, migrating, and configuring

<data key=’user.DB2_DB_NAME,com.ibm.sklm301.db2.lin.ofng’ value=’SKLMDB31’/><data key=’user.DB2_DB_PORT,com.ibm.sklm301.db2.lin.ofng’ value=’50050’/><data key=’user.DB2_EXISTS,com.ibm.sklm301.db2.lin.ofng’ value=’false’/><data key=’user.DB2_LOCATION,com.ibm.sklm301.db2.lin.ofng’ value=’/opt/IBM/DB2SKLMV301’/><data key=’user.DB2_DB_LHOME,com.ibm.sklm301.db2.lin.ofng’ value=’/home/sklmdb31’/><!--The DB2 Group name should not be more than 8 characters --><data key=’user.DB2_ADMIN_GRP,com.ibm.sklm301.db2.lin.ofng’ value=’sklmdb31’/><data key=’cic.selector.nl’ value=’en’/>
</profile><profile id=’IBM WebSphere Application Server V9.0’ installLocation=’/opt/IBM/WebSphere/AppServer’><data key=’eclipseLocation’ value=’/opt/IBM/WebSphere/AppServer’/><data key=’user.import.profile’ value=’false’/><data key=’cic.selector.os’ value=’linux’/><data key=’cic.selector.arch’ value=’x86_64’/><data key=’cic.selector.ws’ value=’gtk’/><data key=’cic.selector.nl’ value=’en’/>
</profile><profile id=’IBM Security Key Lifecycle Manager v3.0.1’ installLocation=’/opt/IBM/SKLMV301’><data key=’eclipseLocation’ value=’/opt/IBM/SKLMV301’/><data key=’user.import.profile’ value=’false’/><data key=’cic.selector.os’ value=’linux’/><data key=’cic.selector.arch’ value=’x86_64’/><data key=’cic.selector.ws’ value=’gtk’/><data key=’user.IS_SILENT_MODE,com.ibm.sklm301.linux’ value=’false’/><data key=’user.EKM_PROPFILE,com.ibm.sklm301.linux’ value=’/opt/IBM/KeyManagerConfig.properties’/><data key=’user.EKM_MIGRATION,com.ibm.sklm301.linux’ value=’false’/><data key=’user.PROFILE_NAME,com.ibm.sklm301.linux’ value=’KLMProfile’/><data key=’user.WAS_ADMIN_ID,com.ibm.sklm301.linux’ value=’wasadmin’/><data key=’user.WAS_ADMIN_PASSWORD,com.ibm.sklm301.linux’ value=’e9PjN93MeQxwnSs9VXJFMw==’/><data key=’user.WAS_ADMIN_CONF_PWD,com.ibm.sklm301.linux’ value=’e9PjN93MeQxwnSs9VXJFMw==’/><data key=’user.SKLM_ADMIN_USER,com.ibm.sklm301.linux’ value=’SKLMAdmin’/><data key=’user.SKLM_ADMIN_PASSWORD,com.ibm.sklm301.linux’ value=’9YTRJMRIydDSdfhaHPs1ag==’/><data key=’user.SKLM_ADMIN_CONF_PWD,com.ibm.sklm301.linux’ value=’9YTRJMRIydDSdfhaHPs1ag==’/><data key=’user.SKLM_APP_PORT,com.ibm.sklm301.linux’ value=’443’/>
<data key=’user.WAS_ADMIN_PORT,com.ibm.sklm301.linux’ value=’9083’/><data key=’user.SKLM_APP_NS_PORT,com.ibm.sklm301.linux’ value=’80’/>
<data key=’cic.selector.nl’ value=’en’/></profile><preference name=’com.ibm.cic.common.core.preferences.eclipseCache’ value=’/opt/IBM/IBMIMShared’/><preference name=’com.ibm.cic.common.core.preferences.connectTimeout’ value=’30’/><preference name=’com.ibm.cic.common.core.preferences.readTimeout’ value=’45’/><preference name=’com.ibm.cic.common.core.preferences.downloadAutoRetryCount’ value=’0’/><preference name=’offering.service.repositories.areUsed’ value=’true’/><preference name=’com.ibm.cic.common.core.preferences.ssl.nonsecureMode’ value=’false’/><preference name=’com.ibm.cic.common.core.preferences.http.disablePreemptiveAuthentication’ value=’false’/><preference name=’http.ntlm.auth.kind’ value=’NTLM’/><preference name=’http.ntlm.auth.enableIntegrated.win32’ value=’true’/><preference name=’com.ibm.cic.common.core.preferences.preserveDownloadedArtifacts’ value=’true’/><preference name=’com.ibm.cic.common.core.preferences.keepFetchedFiles’ value=’false’/><preference name=’PassportAdvantageIsEnabled’ value=’false’/><preference name=’com.ibm.cic.common.core.preferences.searchForUpdates’ value=’false’/><preference name=’com.ibm.cic.agent.ui.displayInternalVersion’ value=’false’/><preference name=’com.ibm.cic.common.sharedUI.showErrorLog’ value=’true’/><preference name=’com.ibm.cic.common.sharedUI.showWarningLog’ value=’true’/><preference name=’com.ibm.cic.common.sharedUI.showNoteLog’ value=’true’/>
</agent-input>
New installation of version 3.0.1 on Linux for System zThe example response file contains responses for an installation of IBM SecurityKey Lifecycle Manager version 3.0.1 on Linux for System z or an installation inwhich Encryption Key Manager migration occurs.<?xml version="1.0" encoding="UTF-8"?><!--The "acceptLicense" attribute has been deprecated. Use "-acceptLicense" command line option to accept license agreements.--><agent-input clean=’true’ ><server><repository location=’/disk1/im’/><repository location=’/disk1/’/></server><profile id=’IBM Installation Manager’ installLocation=’/opt/IBM/InstallationManager/eclipse’ kind=’self’><data key=’eclipseLocation’ value=’/opt/IBM/InstallationManager/eclipse’/><data key=’user.import.profile’ value=’false’/><data key=’cic.selector.os’ value=’linux’/><data key=’cic.selector.arch’ value=’s390x’/><data key=’cic.selector.ws’ value=’gtk’/></profile><install modify=’false’>
Sample response files 117

<offering id=’com.ibm.cic.agent’ profile=’IBM Installation Manager’ features=’agent_core,agent_jre’ installFixes=’none’/><offering id=’com.ibm.sklm301.db2.lin.ofng’ profile=’IBM DB2 SKLM301’ features=’main.feature’ installFixes=’none’/><offering id=’com.ibm.websphere.BASE.v90’ profile=’IBM WebSphere Application Server V9.0’ features=’core.feature,ejbdeploy,thinclient,embeddablecontainer’ installFixes=’none’/><offering id=’com.ibm.java.jdk.v8’ profile=’IBM WebSphere Application Server V9.0’ features=’com.ibm.sdk.8’ installFixes=’none’/><offering id=’com.ibm.sklm301.linux’ profile=’IBM Security Key Lifecycle Manager v3.0.1’ features=’main.feature’ installFixes=’none’/></install><profile id=’IBM DB2 SKLM301’ installLocation=’/opt/IBM/DB2SKLMV301’><data key=’eclipseLocation’ value=’/opt/IBM/DB2SKLMV301’/><data key=’user.import.profile’ value=’false’/><data key=’cic.selector.os’ value=’linux’/><data key=’cic.selector.arch’ value=’s390x’/><data key=’cic.selector.ws’ value=’gtk’/><data key=’user.DB2_ADMIN_ID,com.ibm.sklm301.db2.lin.ofng’ value=’sklmdb31’/><!--The DB2 Group name should not be more than 8 characters --><data key=’user.DB2_ADMIN_GRP,com.ibm.sklm301.db2.lin.ofng’ value=’sklmdb31’/><data key=’user.DB2_ADMIN_PWD,com.ibm.sklm301.db2.lin.ofng’ value=’QTh/0AiFvrljhs9gnOYkGA==’/><data key=’user.CONFIRM_PASSWORD,com.ibm.sklm301.db2.lin.ofng’ value=’QTh/0AiFvrljhs9gnOYkGA==’/><data key=’user.DB2_DB_HOME,com.ibm.sklm301.db2.lin.ofng’ value=’/home/sklmdb31’/><data key=’user.DB2_DB_LHOME,com.ibm.sklm301.db2.lin.ofng’ value=’/home/sklmdb31’/><data key=’user.DB2_DB_NAME,com.ibm.sklm301.db2.lin.ofng’ value=’SKLMDB31’/><data key=’user.DB2_DB_PORT,com.ibm.sklm301.db2.lin.ofng’ value=’50050’/><data key=’user.DB2_EXISTS,com.ibm.sklm301.db2.lin.ofng’ value=’false’/><data key=’user.DB2_LOCATION,com.ibm.sklm301.db2.lin.ofng’ value=’/opt/IBM/DB2SKLMV301’/><data key=’cic.selector.nl’ value=’en’/></profile><profile id=’IBM WebSphere Application Server V9.0’ installLocation=’/opt/IBM/WebSphere/AppServer’><data key=’eclipseLocation’ value=’/opt/IBM/WebSphere/AppServer’/><data key=’user.import.profile’ value=’false’/><data key=’cic.selector.os’ value=’linux’/><data key=’cic.selector.arch’ value=’s390x’/><data key=’cic.selector.ws’ value=’gtk’/><data key=’cic.selector.nl’ value=’en’/></profile><profile id=’IBM Security Key Lifecycle Manager v3.0.1’ installLocation=’/opt/IBM/SKLMV301’><data key=’eclipseLocation’ value=’/opt/IBM/SKLMV301’/><data key=’user.import.profile’ value=’false’/><data key=’cic.selector.os’ value=’linux’/><data key=’cic.selector.arch’ value=’s390x’/><data key=’cic.selector.ws’ value=’gtk’/><data key=’user.IS_SILENT_MODE,com.ibm.sklm301.linux’ value=’false’/><data key=’user.EKM_PROPFILE,com.ibm.sklm301.linux’ value=’/opt/IBM/KeyManagerConfig.properties’/><data key=’user.EKM_MIGRATION,com.ibm.sklm301.linux’ value=’false’/><data key=’user.PROFILE_NAME,com.ibm.sklm301.linux’ value=’KLMProfile’/><data key=’user.WAS_ADMIN_ID,com.ibm.sklm301.linux’ value=’wasadmin’/><data key=’user.WAS_ADMIN_PASSWORD,com.ibm.sklm301.linux’ value=’e9PjN93MeQxwnSs9VXJFMw==’/><data key=’user.WAS_ADMIN_CONF_PWD,com.ibm.sklm301.linux’ value=’e9PjN93MeQxwnSs9VXJFMw==’/><data key=’user.SKLM_ADMIN_USER,com.ibm.sklm301.linux’ value=’SKLMAdmin’/><data key=’user.SKLM_ADMIN_PASSWORD,com.ibm.sklm301.linux’ value=’9YTRJMRIydDSdfhaHPs1ag==’/><data key=’user.SKLM_ADMIN_CONF_PWD,com.ibm.sklm301.linux’ value=’9YTRJMRIydDSdfhaHPs1ag==’/><data key=’user.SKLM_APP_PORT,com.ibm.sklm301.linux’ value=’443’/><data key=’user.WAS_ADMIN_PORT,com.ibm.sklm301.linux’ value=’9083’/><data key=’user.SKLM_APP_NS_PORT,com.ibm.sklm301.linux’ value=’80’/><data key=’cic.selector.nl’ value=’en’/></profile><preference name=’com.ibm.cic.common.core.preferences.eclipseCache’ value=’/opt/IBM/IBMIMShared’/><preference name=’com.ibm.cic.common.core.preferences.connectTimeout’ value=’30’/><preference name=’com.ibm.cic.common.core.preferences.readTimeout’ value=’45’/><preference name=’com.ibm.cic.common.core.preferences.downloadAutoRetryCount’ value=’0’/><preference name=’offering.service.repositories.areUsed’ value=’true’/><preference name=’com.ibm.cic.common.core.preferences.ssl.nonsecureMode’ value=’false’/><preference name=’com.ibm.cic.common.core.preferences.http.disablePreemptiveAuthentication’ value=’false’/><preference name=’http.ntlm.auth.kind’ value=’NTLM’/><preference name=’http.ntlm.auth.enableIntegrated.win32’ value=’true’/><preference name=’com.ibm.cic.common.core.preferences.preserveDownloadedArtifacts’ value=’true’/><preference name=’com.ibm.cic.common.core.preferences.keepFetchedFiles’ value=’false’/><preference name=’PassportAdvantageIsEnabled’ value=’false’/><preference name=’com.ibm.cic.common.core.preferences.searchForUpdates’ value=’false’/><preference name=’com.ibm.cic.agent.ui.displayInternalVersion’ value=’false’/><preference name=’com.ibm.cic.common.sharedUI.showErrorLog’ value=’true’/><preference name=’com.ibm.cic.common.sharedUI.showWarningLog’ value=’true’/><preference name=’com.ibm.cic.common.sharedUI.showNoteLog’ value=’true’/></agent-input>
118 Installing, migrating, and configuring

New installation of version 3.0.1 on Linux PPC systemsThe example response file contains responses for an installation of IBM SecurityKey Lifecycle Manager version 3.0.1 onto a system, such as Linux PPC, or aninstallation in which Encryption Key Manager migration occurs.<?xml version="1.0" encoding="UTF-8"?><!--The "acceptLicense" attribute has been deprecated. Use "-acceptLicense" command line option to accept license agreements.--><agent-input clean=’true’ ><server><repository location=’/disk1/im’/><repository location=’/disk1/’/></server><profile id=’IBM Installation Manager’ installLocation=’/opt/IBM/InstallationManager/eclipse’ kind=’self’><data key=’eclipseLocation’ value=’/opt/IBM/InstallationManager/eclipse’/><data key=’user.import.profile’ value=’false’/><data key=’cic.selector.os’ value=’linux’/><data key=’cic.selector.arch’ value=’ppc64le’/><data key=’cic.selector.ws’ value=’gtk’/></profile><install modify=’false’><offering id=’com.ibm.cic.agent’ profile=’IBM Installation Manager’ features=’agent_core,agent_jre’ installFixes=’none’/><offering id=’com.ibm.sklm301.db2.lin.ofng’ profile=’IBM DB2 SKLM301’ features=’main.feature’ installFixes=’none’/><offering id=’com.ibm.websphere.BASE.v90’ profile=’IBM WebSphere Application Server V9.0’ features=’core.feature,ejbdeploy,thinclient,embeddablecontainer’ installFixes=’none’/><offering id=’com.ibm.java.jdk.v8’ profile=’IBM WebSphere Application Server V9.0’ features=’com.ibm.sdk.8’ installFixes=’none’/><offering id=’com.ibm.sklm301.linux’ profile=’IBM Security Key Lifecycle Manager v3.0.1’ features=’main.feature’ installFixes=’none’/></install><profile id=’IBM DB2 SKLM301’ installLocation=’/opt/IBM/DB2SKLMV301’><data key=’eclipseLocation’ value=’/opt/IBM/DB2SKLMV301’/><data key=’user.import.profile’ value=’false’/><data key=’cic.selector.os’ value=’linux’/><data key=’cic.selector.arch’ value=’ppc64le’/><data key=’cic.selector.ws’ value=’gtk’/><data key=’user.DB2_ADMIN_ID,com.ibm.sklm301.db2.lin.ofng’ value=’sklmdb31’/><!--The DB2 Group name should not be more than 8 characters --><data key=’user.DB2_ADMIN_GRP,com.ibm.sklm301.db2.lin.ofng’ value=’sklmdb31’/><data key=’user.DB2_ADMIN_PWD,com.ibm.sklm301.db2.lin.ofng’ value=’QTh/0AiFvrljhs9gnOYkGA==’/><data key=’user.CONFIRM_PASSWORD,com.ibm.sklm301.db2.lin.ofng’ value=’QTh/0AiFvrljhs9gnOYkGA==’/><data key=’user.DB2_DB_HOME,com.ibm.sklm301.db2.lin.ofng’ value=’/home/sklmdb31’/><data key=’user.DB2_DB_LHOME,com.ibm.sklm301.db2.lin.ofng’ value=’/home/sklmdb31’/><data key=’user.DB2_DB_NAME,com.ibm.sklm301.db2.lin.ofng’ value=’SKLMDB31’/><data key=’user.DB2_DB_PORT,com.ibm.sklm301.db2.lin.ofng’ value=’50050’/><data key=’user.DB2_EXISTS,com.ibm.sklm301.db2.lin.ofng’ value=’false’/><data key=’user.DB2_LOCATION,com.ibm.sklm301.db2.lin.ofng’ value=’/opt/IBM/DB2SKLMV301’/><data key=’cic.selector.nl’ value=’en’/></profile><profile id=’IBM WebSphere Application Server V9.0’ installLocation=’/opt/IBM/WebSphere/AppServer’><data key=’eclipseLocation’ value=’/opt/IBM/WebSphere/AppServer’/><data key=’user.import.profile’ value=’false’/><data key=’cic.selector.os’ value=’linux’/><data key=’cic.selector.arch’ value=’ppc64le’/><data key=’cic.selector.ws’ value=’gtk’/><data key=’cic.selector.nl’ value=’en’/></profile><profile id=’IBM Security Key Lifecycle Manager v3.0.1’ installLocation=’/opt/IBM/SKLMV301’><data key=’eclipseLocation’ value=’/opt/IBM/SKLMV301’/><data key=’user.import.profile’ value=’false’/><data key=’cic.selector.os’ value=’linux’/><data key=’cic.selector.arch’ value=’ppc64le’/><data key=’cic.selector.ws’ value=’gtk’/><data key=’user.IS_SILENT_MODE,com.ibm.sklm301.linux’ value=’false’/><data key=’user.EKM_PROPFILE,com.ibm.sklm301.linux’ value=’/opt/IBM/KeyManagerConfig.properties’/><data key=’user.EKM_MIGRATION,com.ibm.sklm301.linux’ value=’false’/><data key=’user.PROFILE_NAME,com.ibm.sklm301.linux’ value=’KLMProfile’/><data key=’user.WAS_ADMIN_ID,com.ibm.sklm301.linux’ value=’wasadmin’/><data key=’user.WAS_ADMIN_PASSWORD,com.ibm.sklm301.linux’ value=’e9PjN93MeQxwnSs9VXJFMw==’/><data key=’user.WAS_ADMIN_CONF_PWD,com.ibm.sklm301.linux’ value=’e9PjN93MeQxwnSs9VXJFMw==’/><data key=’user.SKLM_ADMIN_USER,com.ibm.sklm301.linux’ value=’SKLMAdmin’/><data key=’user.SKLM_ADMIN_PASSWORD,com.ibm.sklm301.linux’ value=’9YTRJMRIydDSdfhaHPs1ag==’/><data key=’user.SKLM_ADMIN_CONF_PWD,com.ibm.sklm301.linux’ value=’9YTRJMRIydDSdfhaHPs1ag==’/><data key=’user.SKLM_APP_PORT,com.ibm.sklm301.linux’ value=’443’/><data key=’user.WAS_ADMIN_PORT,com.ibm.sklm301.linux’ value=’9083’/><data key=’user.SKLM_APP_NS_PORT,com.ibm.sklm301.linux’ value=’80’/><data key=’cic.selector.nl’ value=’en’/></profile><preference name=’com.ibm.cic.common.core.preferences.eclipseCache’ value=’/opt/IBM/IBMIMShared’/><preference name=’com.ibm.cic.common.core.preferences.connectTimeout’ value=’30’/><preference name=’com.ibm.cic.common.core.preferences.readTimeout’ value=’45’/>
Sample response files 119

<preference name=’com.ibm.cic.common.core.preferences.downloadAutoRetryCount’ value=’0’/><preference name=’offering.service.repositories.areUsed’ value=’true’/><preference name=’com.ibm.cic.common.core.preferences.ssl.nonsecureMode’ value=’false’/><preference name=’com.ibm.cic.common.core.preferences.http.disablePreemptiveAuthentication’ value=’false’/><preference name=’http.ntlm.auth.kind’ value=’NTLM’/><preference name=’http.ntlm.auth.enableIntegrated.win32’ value=’true’/><preference name=’com.ibm.cic.common.core.preferences.preserveDownloadedArtifacts’ value=’true’/><preference name=’com.ibm.cic.common.core.preferences.keepFetchedFiles’ value=’false’/><preference name=’PassportAdvantageIsEnabled’ value=’false’/><preference name=’com.ibm.cic.common.core.preferences.searchForUpdates’ value=’false’/><preference name=’com.ibm.cic.agent.ui.displayInternalVersion’ value=’false’/><preference name=’com.ibm.cic.common.sharedUI.showErrorLog’ value=’true’/><preference name=’com.ibm.cic.common.sharedUI.showWarningLog’ value=’true’/><preference name=’com.ibm.cic.common.sharedUI.showNoteLog’ value=’true’/></agent-input>
New installation of version 3.0.1 on AIX systemsThe example response file contains responses for an installation of IBM SecurityKey Lifecycle Manager version 3.0.1 on AIX systems or an installation in whichEncryption Key Manager migration occurs.<?xml version="1.0" encoding="UTF-8"?><!--The "acceptLicense" attribute has been deprecated. Use "-acceptLicense" command line option to accept license agreements.--><agent-input clean=’true’ ><server><repository location=’/disk1/im’/><repository location=’/disk1/’/></server><profile id=’IBM Installation Manager’ installLocation=’/opt/IBM/InstallationManager/eclipse’ kind=’self’><data key=’eclipseLocation’ value=’/opt/IBM/InstallationManager/eclipse’/><data key=’user.import.profile’ value=’false’/><data key=’cic.selector.os’ value=’aix’/><data key=’cic.selector.arch’ value=’ppc’/><data key=’cic.selector.ws’ value=’gtk’/></profile><install modify=’false’><offering id=’com.ibm.cic.agent’ profile=’IBM Installation Manager’ features=’agent_core,agent_jre’ installFixes=’none’/><offering id=’com.ibm.sklm301.db2.aix.ofng’ profile=’IBM DB2 SKLM301’ features=’main.feature’ installFixes=’none’/><offering id=’com.ibm.websphere.BASE.v90’ profile=’IBM WebSphere Application Server V9.0’ features=’core.feature,ejbdeploy,thinclient,embeddablecontainer’ installFixes=’none’/><offering id=’com.ibm.java.jdk.v8’ profile=’IBM WebSphere Application Server V9.0’ features=’com.ibm.sdk.8’ installFixes=’none’/><offering id=’com.ibm.sklm301.aix’ profile=’IBM Security Key Lifecycle Manager v3.0.1’ features=’main.feature’ installFixes=’none’/></install><profile id=’IBM DB2 SKLM301’ installLocation=’/opt/IBM/DB2SKLMV301’><data key=’eclipseLocation’ value=’/opt/IBM/DB2SKLMV301’/><data key=’user.import.profile’ value=’false’/><data key=’cic.selector.os’ value=’aix’/><data key=’cic.selector.arch’ value=’ppc64’/><data key=’cic.selector.ws’ value=’gtk’/><data key=’user.DB2_ADMIN_ID,com.ibm.sklm301.db2.aix.ofng’ value=’sklmdb31’/><!--The DB2 Group name should not be more than 8 characters --><data key=’user.DB2_ADMIN_GRP,com.ibm.sklm301.db2.aix.ofng’ value=’bin’/><data key=’user.DB2_ADMIN_PWD,com.ibm.sklm301.db2.aix.ofng’ value=’QTh/0AiFvrljhs9gnOYkGA==’/><data key=’user.CONFIRM_PASSWORD,com.ibm.sklm301.db2.aix.ofng’ value=’QTh/0AiFvrljhs9gnOYkGA==’/><data key=’user.DB2_DB_HOME,com.ibm.sklm301.db2.aix.ofng’ value=’/home/sklmdb31’/><data key=’user.DB2_DB_NAME,com.ibm.sklm301.db2.aix.ofng’ value=’SKLMDB31’/><data key=’user.DB2_DB_PORT,com.ibm.sklm301.db2.aix.ofng’ value=’50050’/><data key=’user.DB2_EXISTS,com.ibm.sklm301.db2.aix.ofng’ value=’false’/><data key=’user.DB2_LOCATION,com.ibm.sklm301.db2.aix.ofng’ value=’/opt/IBM/DB2SKLMV301’/><data key=’cic.selector.nl’ value=’en’/></profile><profile id=’IBM WebSphere Application Server V9.0’ installLocation=’/usr/IBM/WebSphere/AppServer’><data key=’eclipseLocation’ value=’/usr/IBM/WebSphere/AppServer’/><data key=’user.import.profile’ value=’false’/><data key=’cic.selector.os’ value=’aix’/><data key=’cic.selector.arch’ value=’ppc64’/><data key=’cic.selector.ws’ value=’gtk’/><data key=’cic.selector.nl’ value=’en’/></profile><profile id=’IBM Security Key Lifecycle Manager v3.0.1’ installLocation=’/opt/IBM/SKLMV301’><data key=’eclipseLocation’ value=’/opt/IBM/SKLMV301’/><data key=’user.import.profile’ value=’false’/><data key=’cic.selector.os’ value=’aix’/><data key=’cic.selector.arch’ value=’ppc64’/><data key=’cic.selector.ws’ value=’gtk’/><data key=’user.IS_SILENT_MODE,com.ibm.sklm301.linux’ value=’false’/><data key=’user.EKM_PROPFILE,com.ibm.sklm301.aix’ value=’/opt/IBM/KeyManagerConfig.properties’/><data key=’user.EKM_MIGRATION,com.ibm.sklm301.aix’ value=’false’/>
120 Installing, migrating, and configuring

<data key=’user.PROFILE_NAME,com.ibm.sklm301.aix’ value=’KLMProfile’/><data key=’user.WAS_ADMIN_ID,com.ibm.sklm301.aix’ value=’wasadmin’/><data key=’user.WAS_ADMIN_PASSWORD,com.ibm.sklm301.aix’ value=’e9PjN93MeQxwnSs9VXJFMw==’/><data key=’user.WAS_ADMIN_CONF_PWD,com.ibm.sklm301.aix’ value=’e9PjN93MeQxwnSs9VXJFMw==’/><data key=’user.SKLM_ADMIN_USER,com.ibm.sklm301.aix’ value=’SKLMAdmin’/><data key=’user.SKLM_ADMIN_PASSWORD,com.ibm.sklm301.aix’ value=’9YTRJMRIydDSdfhaHPs1ag==’/><data key=’user.SKLM_ADMIN_CONF_PWD,com.ibm.sklm301.aix’ value=’9YTRJMRIydDSdfhaHPs1ag==’/><data key=’user.SKLM_APP_PORT,com.ibm.sklm301.aix’ value=’443’/><data key=’user.WAS_ADMIN_PORT,com.ibm.sklm301.aix’ value=’9083’/><data key=’user.SKLM_APP_NS_PORT,com.ibm.sklm301.aix’ value=’80’/><data key=’cic.selector.nl’ value=’en’/></profile><preference name=’com.ibm.cic.common.core.preferences.eclipseCache’ value=’/opt/IBM/IBMIMShared’/><preference name=’com.ibm.cic.common.core.preferences.connectTimeout’ value=’30’/><preference name=’com.ibm.cic.common.core.preferences.readTimeout’ value=’45’/><preference name=’com.ibm.cic.common.core.preferences.downloadAutoRetryCount’ value=’0’/><preference name=’offering.service.repositories.areUsed’ value=’true’/><preference name=’com.ibm.cic.common.core.preferences.ssl.nonsecureMode’ value=’false’/><preference name=’com.ibm.cic.common.core.preferences.http.disablePreemptiveAuthentication’ value=’false’/><preference name=’http.ntlm.auth.kind’ value=’NTLM’/><preference name=’http.ntlm.auth.enableIntegrated.win32’ value=’true’/><preference name=’com.ibm.cic.common.core.preferences.preserveDownloadedArtifacts’ value=’true’/><preference name=’com.ibm.cic.common.core.preferences.keepFetchedFiles’ value=’false’/><preference name=’PassportAdvantageIsEnabled’ value=’false’/><preference name=’com.ibm.cic.common.core.preferences.searchForUpdates’ value=’false’/><preference name=’com.ibm.cic.agent.ui.displayInternalVersion’ value=’false’/><preference name=’com.ibm.cic.common.sharedUI.showErrorLog’ value=’true’/><preference name=’com.ibm.cic.common.sharedUI.showWarningLog’ value=’true’/><preference name=’com.ibm.cic.common.sharedUI.showNoteLog’ value=’true’/></agent-input>
Earlier versions 2.5, 2.6, 2.7, and 3.0 to version 3.0.1 migration onWindows systems
The example response files contain responses for an installation onto a Windowssystem in which IBM Security Key Lifecycle Manager earlier versions 2.5, 2.6, 2.7,and 3.0 to version 3.0.1 migration occurs.
Note: To determine whether IBM Security Key Lifecycle Manager earlier versionexists and requires migration, use the tklmVersionInfo command. For example,type this command in a Jython session:print AdminTask.tklmVersionInfo<>
Migration from version 2.5 to 3.0.1<agent-input clean=’true’ >
<server><repository location=’C:\disk1’/><repository location=’C:\disk1\im’/>
</server><install modify=’false’>
<offering profile=’IBM Installation Manager’ id=’com.ibm.cic.agent’ features=’agent_core,agent_jre,agent_web’installFixes=’none’/><offering profile=’IBM DB2 SKLM30’ id=’com.ibm.sklm30.db2.win.ofng’ version=’11.1.2.2’ features=’main.feature’installFixes=’none’/><offering profile=’IBM WebSphere Application Server V9.0’ id=’com.ibm.websphere.BASE.v90’features=’core.feature,ejbdeploy,thinclient,embeddablecontainer’ installFixes=’none’/><offering profile=’IBM WebSphere Application Server V9.0’ id=’com.ibm.java.jdk.v8’features=’com.ibm.sdk.8’ installFixes=’none’/><offering profile=’IBM Security Key Lifecycle Manager v3.0’ id=’com.ibm.sklm30.win’ version=’3.0.0.0’features=’main.feature’ installFixes=’none’/>
</install><profile id=’IBM DB2 SKLM30’ installLocation=’C:\Program Files\IBM\DB2SKLMV30’><data key=’eclipseLocation’ value=’C:\Program Files\IBM\DB2SKLMV30’/><data key=’user.import.profile’ value=’false’/><data key=’cic.selector.os’ value=’win32’/><data key=’cic.selector.arch’ value=’x86_64’/><data key=’cic.selector.ws’ value=’win32’/><data key=’cic.selector.nl’ value=’en’/>
Sample response files 121

<data key=’user.DB2_ADMIN_ID,com.ibm.sklm30.db2.win.ofng’ value=’sklmdb30’/><data key=’user.DB2_ADMIN_PWD,com.ibm.sklm30.db2.win.ofng’ value=’QTh/0AiFvrljhs9gnOYkGA==’/><data key=’user.CONFIRM_PASSWORD,com.ibm.sklm30.db2.win.ofng’ value=’QTh/0AiFvrljhs9gnOYkGA==’/><data key=’user.DB2_DB_HOME,com.ibm.sklm30.db2.win.ofng’ value=’C:’/><data key=’user.DB2_DB_NAME,com.ibm.sklm30.db2.win.ofng’ value=’SKLMDB30’/><data key=’user.DB2_DB_PORT,com.ibm.sklm30.db2.win.ofng’ value=’50040’/><data key=’user.DB2_EXISTS,com.ibm.sklm30.db2.win.ofng’ value=’false’/><data key=’user.DB2_LOCATION,com.ibm.sklm30.db2.win.ofng’ value=’C:\\Program Files\\IBM\\DB2SKLMV30’/>
</profile><profile id=’IBM WebSphere Application Server V9.0’ installLocation=’C:\Program Files\IBM\WebSphere30\AppServer’><data key=’eclipseLocation’ value=’C:\Program Files\IBM\WebSphere30\AppServer’/><data key=’user.import.profile’ value=’false’/><data key=’cic.selector.os’ value=’win32’/><data key=’cic.selector.arch’ value=’x86_64’/><data key=’cic.selector.ws’ value=’win32’/><data key=’cic.selector.nl’ value=’en’/>
</profile>
<profile id=’IBM Security Key Lifecycle Manager v3.0’ installLocation=’C:\Program Files\IBM\SKLMV30’><data key=’eclipseLocation’ value=’C:\Program Files\IBM\SKLMV30’/><data key=’user.import.profile’ value=’false’/><data key=’cic.selector.os’ value=’win32’/><data key=’cic.selector.arch’ value=’x86_64’/><data key=’cic.selector.ws’ value=’win32’/>
<data key=’user.EKM_PROPFILE,com.ibm.sklm30.win’ value=’C:\KeyManagerConfig.properties’/><data key=’user.EKM_MIGRATION,com.ibm.sklm30.win’ value=’false’/>
<data key=’user.IS_SILENT_MODE,com.ibm.sklm30.win’ value=’false’/><data key=’cic.selector.nl’ value=’en’/><data key=’user.PROFILE_NAME,com.ibm.sklm30.win’ value=’KLMProfile’/><data key=’user.WAS_HOME,com.ibm.sklm30.win’ value=’C:\Program Files\IBM\WebSphere30\AppServer’/><data key=’user.WAS_ADMIN_ID,com.ibm.sklm30.win’ value=’wasadmin’/><data key=’user.WAS_ADMIN_PASSWORD,com.ibm.sklm30.win’ value=’e9PjN93MeQxwnSs9VXJFMw==’/><data key=’user.WAS_ADMIN_CONF_PWD,com.ibm.sklm30.win’ value=’e9PjN93MeQxwnSs9VXJFMw==’/><data key=’user.SKLM_ADMIN_USER,com.ibm.sklm30.win’ value=’SKLMAdmin’/><data key=’user.SKLM_ADMIN_PASSWORD,com.ibm.sklm30.win’ value=’9YTRJMRIydDSdfhaHPs1ag==’/><data key=’user.SKLM_ADMIN_CONF_PWD,com.ibm.sklm30.win’ value=’9YTRJMRIydDSdfhaHPs1ag==’/><data key=’user.TKLM_VERSION,com.ibm.sklm30.win’ value=’2.5.0.4’/><data key=’user.TKLM_TIP_HOME,com.ibm.sklm30.win’ value=’C:\Program Files (x86)\IBM\WebSphere\AppServer’/><data key=’user.TKLM_INSTALLED,com.ibm.sklm30.win’ value=’true’/><data key=’user.TKLM_DB_PWD,com.ibm.sklm30.win’ value=’SwIhGBTDHcJok80Ux4Sb3g==’/>
<data key=’user.TKLM_KEYSTORE_PWD,com.ibm.sklm30.win’ value=’fufgZbY47EfxLYarBAIxeQ==’/><data key=’user.SKLM_APP_PORT,com.ibm.sklm30.win’ value=’443’/><data key=’user.WAS_ADMIN_PORT,com.ibm.sklm30.win’ value=’9083’/><data key=’user.SKLM_APP_NS_PORT,com.ibm.sklm30.win’ value=’80’/></profile>
<preference name=’com.ibm.cic.common.core.preferences.eclipseCache’ value=’C:\Program Files (x86)\IBM\IBMIMShared’/><preference name=’com.ibm.cic.common.core.preferences.connectTimeout’ value=’30’/><preference name=’com.ibm.cic.common.core.preferences.readTimeout’ value=’45’/><preference name=’com.ibm.cic.common.core.preferences.downloadAutoRetryCount’ value=’0’/><preference name=’offering.service.repositories.areUsed’ value=’true’/><preference name=’com.ibm.cic.common.core.preferences.ssl.nonsecureMode’ value=’false’/><preference name=’com.ibm.cic.common.core.preferences.http.disablePreemptiveAuthentication’ value=’false’/><preference name=’http.ntlm.auth.kind’ value=’NTLM’/><preference name=’http.ntlm.auth.enableIntegrated.win32’ value=’true’/><preference name=’com.ibm.cic.common.core.preferences.preserveDownloadedArtifacts’ value=’true’/><preference name=’com.ibm.cic.common.core.preferences.keepFetchedFiles’ value=’false’/><preference name=’PassportAdvantageIsEnabled’ value=’false’/><preference name=’com.ibm.cic.common.core.preferences.searchForUpdates’ value=’false’/><preference name=’com.ibm.cic.agent.ui.displayInternalVersion’ value=’false’/><preference name=’com.ibm.cic.common.sharedUI.showErrorLog’ value=’true’/><preference name=’com.ibm.cic.common.sharedUI.showWarningLog’ value=’true’/><preference name=’com.ibm.cic.common.sharedUI.showNoteLog’ value=’true’/>
</agent-input>
122 Installing, migrating, and configuring

Migration from version 2.6 to 3.0.1<!-- insta --><agent-input clean=’true’ >
<server><repository location=’C:\disk1’/><repository location=’C:\disk1\im’/>
</server><install modify=’false’>
<offering profile=’IBM Installation Manager’ id=’com.ibm.cic.agent’ features=’agent_core,agent_jre,agent_web’ installFixes=’none’/><offering profile=’IBM DB2 SKLM301’ id=’com.ibm.sklm301.db2.win.ofng’ version=’11.1.2.2’ features=’main.feature’ installFixes=’none’/><offering profile=’IBM WebSphere Application Server V9.0’ id=’com.ibm.websphere.BASE.v90’ features=’core.feature,ejbdeploy,thinclient,embeddablecontainer’ installFixes=’none’/><offering profile=’IBM WebSphere Application Server V9.0’ id=’com.ibm.java.jdk.v8’ features=’com.ibm.sdk.8’ installFixes=’none’/><offering profile=’IBM Security Key Lifecycle Manager v3.0.1’ id=’com.ibm.sklm301.win’ version=’3.0.1000.00’ features=’main.feature’ installFixes=’none’/>
</install><profile id=’IBM DB2 SKLM301’ installLocation=’C:\Program Files\IBM\DB2SKLMV301’><data key=’eclipseLocation’ value=’C:\Program Files\IBM\DB2SKLMV301’/><data key=’user.import.profile’ value=’false’/><data key=’cic.selector.os’ value=’win32’/><data key=’cic.selector.arch’ value=’x86_64’/><data key=’cic.selector.ws’ value=’win32’/><data key=’cic.selector.nl’ value=’en’/><data key=’user.DB2_ADMIN_ID,com.ibm.sklm301.db2.win.ofng’ value=’sklmdb31’/><data key=’user.DB2_ADMIN_PWD,com.ibm.sklm301.db2.win.ofng’ value=’QTh/0AiFvrljhs9gnOYkGA==’/><data key=’user.CONFIRM_PASSWORD,com.ibm.sklm301.db2.win.ofng’ value=’QTh/0AiFvrljhs9gnOYkGA==’/><data key=’user.DB2_DB_HOME,com.ibm.sklm301.db2.win.ofng’ value=’C:’/><data key=’user.DB2_DB_NAME,com.ibm.sklm301.db2.win.ofng’ value=’SKLMDB31’/><data key=’user.DB2_DB_PORT,com.ibm.sklm301.db2.win.ofng’ value=’50050’/><data key=’user.DB2_EXISTS,com.ibm.sklm301.db2.win.ofng’ value=’false’/><data key=’user.DB2_LOCATION,com.ibm.sklm301.db2.win.ofng’ value=’C:\\Program Files\\IBM\\DB2SKLMV301’/>
</profile><profile id=’IBM WebSphere Application Server V9.0’ installLocation=’C:\Program Files\IBM\WebSphere30\AppServer’><data key=’eclipseLocation’ value=’C:\Program Files\IBM\WebSphere30\AppServer’/><data key=’user.import.profile’ value=’false’/><data key=’cic.selector.os’ value=’win32’/><data key=’cic.selector.arch’ value=’x86_64’/><data key=’cic.selector.ws’ value=’win32’/><data key=’cic.selector.nl’ value=’en’/>
</profile>
<profile id=’IBM Security Key Lifecycle Manager v3.0.1’ installLocation=’C:\Program Files\IBM\SKLMV301’><data key=’eclipseLocation’ value=’C:\Program Files\IBM\SKLMV301’/><data key=’user.import.profile’ value=’false’/><data key=’cic.selector.os’ value=’win32’/><data key=’cic.selector.arch’ value=’x86_64’/><data key=’cic.selector.ws’ value=’win32’/>
<data key=’user.EKM_PROPFILE,com.ibm.sklm301.win’ value=’C:\KeyManagerConfig.properties’/><data key=’user.EKM_MIGRATION,com.ibm.sklm301.win’ value=’false’/>
<data key=’user.IS_SILENT_MODE,com.ibm.sklm301.win’ value=’false’/><data key=’cic.selector.nl’ value=’en’/><data key=’user.PROFILE_NAME,com.ibm.sklm301.win’ value=’KLMProfile’/><data key=’user.WAS_HOME,com.ibm.sklm301.win’ value=’C:\Program Files\IBM\WebSphere30\AppServer’/><data key=’user.WAS_ADMIN_ID,com.ibm.sklm301.win’ value=’wasadmin’/><data key=’user.WAS_ADMIN_PASSWORD,com.ibm.sklm301.win’ value=’e9PjN93MeQxwnSs9VXJFMw==’/><data key=’user.WAS_ADMIN_CONF_PWD,com.ibm.sklm301.win’ value=’e9PjN93MeQxwnSs9VXJFMw==’/><data key=’user.SKLM_ADMIN_USER,com.ibm.sklm301.win’ value=’SKLMAdmin’/><data key=’user.SKLM_ADMIN_PASSWORD,com.ibm.sklm301.win’ value=’9YTRJMRIydDSdfhaHPs1ag==’/><data key=’user.SKLM_ADMIN_CONF_PWD,com.ibm.sklm301.win’ value=’9YTRJMRIydDSdfhaHPs1ag==’/><data key=’user.TKLM_VERSION,com.ibm.sklm301.win’ value=’2.6.0.2’/><data key=’user.TKLM_TIP_HOME,com.ibm.sklm301.win’ value=’C:\Program Files (x86)\IBM\WebSphere\AppServer’/><data key=’user.TKLM_INSTALLED,com.ibm.sklm301.win’ value=’true’/><data key=’user.TKLM_DB_PWD,com.ibm.sklm301.win’ value=’Fr4dMn3eZtW5WgCojtMXrg==’/>
<data key=’user.TKLM_KEYSTORE_PWD,com.ibm.sklm301.win’ value=’fufgZbY47EfxLYarBAIxeQ==’/><data key=’user.SKLM_APP_PORT,com.ibm.sklm301.win’ value=’443’/><data key=’user.WAS_ADMIN_PORT,com.ibm.sklm301.win’ value=’9083’/><data key=’user.SKLM_APP_NS_PORT,com.ibm.sklm301.win’ value=’80’/></profile>
Sample response files 123

<preference name=’com.ibm.cic.common.core.preferences.eclipseCache’ value=’C:\Program Files (x86)\IBM\IBMIMShared’/><preference name=’com.ibm.cic.common.core.preferences.connectTimeout’ value=’30’/><preference name=’com.ibm.cic.common.core.preferences.readTimeout’ value=’45’/><preference name=’com.ibm.cic.common.core.preferences.downloadAutoRetryCount’ value=’0’/><preference name=’offering.service.repositories.areUsed’ value=’true’/><preference name=’com.ibm.cic.common.core.preferences.ssl.nonsecureMode’ value=’false’/><preference name=’com.ibm.cic.common.core.preferences.http.disablePreemptiveAuthentication’ value=’false’/><preference name=’http.ntlm.auth.kind’ value=’NTLM’/><preference name=’http.ntlm.auth.enableIntegrated.win32’ value=’true’/><preference name=’com.ibm.cic.common.core.preferences.preserveDownloadedArtifacts’ value=’true’/><preference name=’com.ibm.cic.common.core.preferences.keepFetchedFiles’ value=’false’/><preference name=’PassportAdvantageIsEnabled’ value=’false’/><preference name=’com.ibm.cic.common.core.preferences.searchForUpdates’ value=’false’/><preference name=’com.ibm.cic.agent.ui.displayInternalVersion’ value=’false’/><preference name=’com.ibm.cic.common.sharedUI.showErrorLog’ value=’true’/><preference name=’com.ibm.cic.common.sharedUI.showWarningLog’ value=’true’/><preference name=’com.ibm.cic.common.sharedUI.showNoteLog’ value=’true’/>
</agent-input>
Migration from version 2.7 to 3.0.1<!-- insta --><agent-input clean=’true’ >
<server><repository location=’C:\disk1’/><repository location=’C:\disk1\im’/>
</server><install modify=’false’>
<offering profile=’IBM Installation Manager’ id=’com.ibm.cic.agent’ features=’agent_core,agent_jre,agent_web’ installFixes=’none’/><offering profile=’IBM DB2 SKLM301’ id=’com.ibm.sklm301.db2.win.ofng’ version=’11.1.2.2’ features=’main.feature’ installFixes=’none’/><offering profile=’IBM WebSphere Application Server V9.0_1’ id=’com.ibm.websphere.BASE.v90’ features=’core.feature,ejbdeploy,thinclient,embeddablecontainer’ installFixes=’none’/><offering profile=’IBM WebSphere Application Server V9.0_1’ id=’com.ibm.java.jdk.v8’ features=’com.ibm.sdk.8’ installFixes=’none’/><offering profile=’IBM Security Key Lifecycle Manager v3.0.1’ id=’com.ibm.sklm301.win’ version=’3.0.1000.00’ features=’main.feature’ installFixes=’none’/>
</install><profile id=’IBM DB2 SKLM301’ installLocation=’C:\Program Files\IBM\DB2SKLMV301’><data key=’eclipseLocation’ value=’C:\Program Files\IBM\DB2SKLMV301’/><data key=’user.import.profile’ value=’false’/><data key=’cic.selector.os’ value=’win32’/><data key=’cic.selector.arch’ value=’x86_64’/><data key=’cic.selector.ws’ value=’win32’/><data key=’cic.selector.nl’ value=’en’/><data key=’user.DB2_ADMIN_ID,com.ibm.sklm301.db2.win.ofng’ value=’sklmdb31’/><data key=’user.DB2_ADMIN_PWD,com.ibm.sklm301.db2.win.ofng’ value=’QTh/0AiFvrljhs9gnOYkGA==’/><data key=’user.CONFIRM_PASSWORD,com.ibm.sklm301.db2.win.ofng’ value=’QTh/0AiFvrljhs9gnOYkGA==’/><data key=’user.DB2_DB_HOME,com.ibm.sklm301.db2.win.ofng’ value=’C:’/><data key=’user.DB2_DB_NAME,com.ibm.sklm301.db2.win.ofng’ value=’SKLMDB31’/><data key=’user.DB2_DB_PORT,com.ibm.sklm301.db2.win.ofng’ value=’50050’/><data key=’user.DB2_EXISTS,com.ibm.sklm301.db2.win.ofng’ value=’false’/><data key=’user.DB2_LOCATION,com.ibm.sklm301.db2.win.ofng’ value=’C:\\Program Files\\IBM\\DB2SKLMV301’/>
</profile><profile id=’IBM WebSphere Application Server V9.0_1’ installLocation=’C:\Program Files\IBM\WebSphere30\AppServer’><data key=’eclipseLocation’ value=’C:\Program Files\IBM\WebSphere30\AppServer’/><data key=’user.import.profile’ value=’false’/><data key=’cic.selector.os’ value=’win32’/><data key=’cic.selector.arch’ value=’x86_64’/><data key=’cic.selector.ws’ value=’win32’/><data key=’cic.selector.nl’ value=’en’/>
</profile>
<profile id=’IBM Security Key Lifecycle Manager v3.0.1’ installLocation=’C:\Program Files\IBM\SKLMV301’><data key=’eclipseLocation’ value=’C:\Program Files\IBM\SKLMV301’/><data key=’user.import.profile’ value=’false’/><data key=’cic.selector.os’ value=’win32’/><data key=’cic.selector.arch’ value=’x86_64’/><data key=’cic.selector.ws’ value=’win32’/>
<data key=’user.EKM_PROPFILE,com.ibm.sklm301.win’ value=’C:\KeyManagerConfig.properties’/><data key=’user.EKM_MIGRATION,com.ibm.sklm301.win’ value=’false’/>
124 Installing, migrating, and configuring

<data key=’user.IS_SILENT_MODE,com.ibm.sklm301.win’ value=’false’/><data key=’cic.selector.nl’ value=’en’/><data key=’user.PROFILE_NAME,com.ibm.sklm301.win’ value=’KLMProfile’/><data key=’user.WAS_HOME,com.ibm.sklm301.win’ value=’C:\Program Files\IBM\WebSphere30\AppServer’/><data key=’user.WAS_ADMIN_ID,com.ibm.sklm301.win’ value=’wasadmin’/><data key=’user.WAS_ADMIN_PASSWORD,com.ibm.sklm301.win’ value=’e9PjN93MeQxwnSs9VXJFMw==’/><data key=’user.WAS_ADMIN_CONF_PWD,com.ibm.sklm301.win’ value=’e9PjN93MeQxwnSs9VXJFMw==’/><data key=’user.SKLM_ADMIN_USER,com.ibm.sklm301.win’ value=’SKLMAdmin’/><data key=’user.SKLM_ADMIN_PASSWORD,com.ibm.sklm301.win’ value=’9YTRJMRIydDSdfhaHPs1ag==’/><data key=’user.SKLM_ADMIN_CONF_PWD,com.ibm.sklm301.win’ value=’9YTRJMRIydDSdfhaHPs1ag==’/><data key=’user.TKLM_VERSION,com.ibm.sklm301.win’ value=’2.7.0.0’/><data key=’user.TKLM_TIP_HOME,com.ibm.sklm301.win’ value=’C:\Program Files\IBM\WebSphere\AppServer’/><data key=’user.TKLM_INSTALLED,com.ibm.sklm301.win’ value=’true’/><data key=’user.TKLM_DB_PWD,com.ibm.sklm301.win’ value=’SwIhGBTDHcJok80Ux4Sb3g==’/>
<data key=’user.TKLM_KEYSTORE_PWD,com.ibm.sklm301.win’ value=’m4oQ5vWqvwGUwOgZaAiFqg==’/><data key=’user.SKLM_APP_PORT,com.ibm.sklm301.win’ value=’443’/><data key=’user.WAS_ADMIN_PORT,com.ibm.sklm301.win’ value=’9083’/><data key=’user.SKLM_APP_NS_PORT,com.ibm.sklm301.win’ value=’80’/></profile>
<preference name=’com.ibm.cic.common.core.preferences.eclipseCache’ value=’C:\Program Files\IBM\IBMIMShared’/><preference name=’com.ibm.cic.common.core.preferences.connectTimeout’ value=’30’/><preference name=’com.ibm.cic.common.core.preferences.readTimeout’ value=’45’/><preference name=’com.ibm.cic.common.core.preferences.downloadAutoRetryCount’ value=’0’/><preference name=’offering.service.repositories.areUsed’ value=’true’/><preference name=’com.ibm.cic.common.core.preferences.ssl.nonsecureMode’ value=’false’/><preference name=’com.ibm.cic.common.core.preferences.http.disablePreemptiveAuthentication’ value=’false’/><preference name=’http.ntlm.auth.kind’ value=’NTLM’/><preference name=’http.ntlm.auth.enableIntegrated.win32’ value=’true’/><preference name=’com.ibm.cic.common.core.preferences.preserveDownloadedArtifacts’ value=’true’/><preference name=’com.ibm.cic.common.core.preferences.keepFetchedFiles’ value=’false’/><preference name=’PassportAdvantageIsEnabled’ value=’false’/><preference name=’com.ibm.cic.common.core.preferences.searchForUpdates’ value=’false’/><preference name=’com.ibm.cic.agent.ui.displayInternalVersion’ value=’false’/><preference name=’com.ibm.cic.common.sharedUI.showErrorLog’ value=’true’/><preference name=’com.ibm.cic.common.sharedUI.showWarningLog’ value=’true’/><preference name=’com.ibm.cic.common.sharedUI.showNoteLog’ value=’true’/>
</agent-input>
Migration from version 3.0 to 3.0.1<!-- insta --><agent-input clean=’true’ >
<server><repository location=’C:\disk1’/><repository location=’C:\disk1\im’/>
</server><install modify=’false’>
<offering profile=’IBM Installation Manager’ id=’com.ibm.cic.agent’ features=’agent_core,agent_jre,agent_web’ installFixes=’none’/><offering profile=’IBM DB2 SKLM301’ id=’com.ibm.sklm301.db2.win.ofng’ version=’11.1.2.2’ features=’main.feature’ installFixes=’none’/><offering profile=’IBM WebSphere Application Server V9.0_1’ id=’com.ibm.websphere.BASE.v90’ features=’core.feature,ejbdeploy,thinclient,embeddablecontainer’ installFixes=’none’/><offering profile=’IBM WebSphere Application Server V9.0_1’ id=’com.ibm.java.jdk.v8’ features=’com.ibm.sdk.8’ installFixes=’none’/><offering profile=’IBM Security Key Lifecycle Manager v3.0.1’ id=’com.ibm.sklm301.win’ version=’3.0.1000.00’ features=’main.feature’ installFixes=’none’/>
</install><profile id=’IBM DB2 SKLM301’ installLocation=’C:\Program Files\IBM\DB2SKLMV301’><data key=’eclipseLocation’ value=’C:\Program Files\IBM\DB2SKLMV301’/><data key=’user.import.profile’ value=’false’/><data key=’cic.selector.os’ value=’win32’/><data key=’cic.selector.arch’ value=’x86_64’/><data key=’cic.selector.ws’ value=’win32’/><data key=’cic.selector.nl’ value=’en’/><data key=’user.DB2_ADMIN_ID,com.ibm.sklm301.db2.win.ofng’ value=’sklmdb31’/><data key=’user.DB2_ADMIN_PWD,com.ibm.sklm301.db2.win.ofng’ value=’QTh/0AiFvrljhs9gnOYkGA==’/><data key=’user.CONFIRM_PASSWORD,com.ibm.sklm301.db2.win.ofng’ value=’QTh/0AiFvrljhs9gnOYkGA==’/><data key=’user.DB2_DB_HOME,com.ibm.sklm301.db2.win.ofng’ value=’C:’/><data key=’user.DB2_DB_NAME,com.ibm.sklm301.db2.win.ofng’ value=’SKLMDB31’/><data key=’user.DB2_DB_PORT,com.ibm.sklm301.db2.win.ofng’ value=’50050’/>
Sample response files 125

<data key=’user.DB2_EXISTS,com.ibm.sklm301.db2.win.ofng’ value=’false’/><data key=’user.DB2_LOCATION,com.ibm.sklm301.db2.win.ofng’ value=’C:\\Program Files\\IBM\\DB2SKLMV301’/>
</profile><profile id=’IBM WebSphere Application Server V9.0_1’ installLocation=’C:\Program Files\IBM\WebSphere30\AppServer’><data key=’eclipseLocation’ value=’C:\Program Files\IBM\WebSphere30\AppServer’/><data key=’user.import.profile’ value=’false’/><data key=’cic.selector.os’ value=’win32’/><data key=’cic.selector.arch’ value=’x86_64’/><data key=’cic.selector.ws’ value=’win32’/><data key=’cic.selector.nl’ value=’en’/>
</profile>
<profile id=’IBM Security Key Lifecycle Manager v3.0.1’ installLocation=’C:\Program Files\IBM\SKLMV301’><data key=’eclipseLocation’ value=’C:\Program Files\IBM\SKLMV301’/><data key=’user.import.profile’ value=’false’/><data key=’cic.selector.os’ value=’win32’/><data key=’cic.selector.arch’ value=’x86_64’/><data key=’cic.selector.ws’ value=’win32’/>
<data key=’user.EKM_PROPFILE,com.ibm.sklm301.win’ value=’C:\KeyManagerConfig.properties’/><data key=’user.EKM_MIGRATION,com.ibm.sklm301.win’ value=’false’/>
<data key=’user.IS_SILENT_MODE,com.ibm.sklm301.win’ value=’false’/><data key=’cic.selector.nl’ value=’en’/><data key=’user.PROFILE_NAME,com.ibm.sklm301.win’ value=’KLMProfile’/><data key=’user.WAS_HOME,com.ibm.sklm301.win’ value=’C:\Program Files\IBM\WebSphere30\AppServer’/><data key=’user.WAS_ADMIN_ID,com.ibm.sklm301.win’ value=’wasadmin’/><data key=’user.WAS_ADMIN_PASSWORD,com.ibm.sklm301.win’ value=’e9PjN93MeQxwnSs9VXJFMw==’/><data key=’user.WAS_ADMIN_CONF_PWD,com.ibm.sklm301.win’ value=’e9PjN93MeQxwnSs9VXJFMw==’/><data key=’user.SKLM_ADMIN_USER,com.ibm.sklm301.win’ value=’SKLMAdmin’/><data key=’user.SKLM_ADMIN_PASSWORD,com.ibm.sklm301.win’ value=’9YTRJMRIydDSdfhaHPs1ag==’/><data key=’user.SKLM_ADMIN_CONF_PWD,com.ibm.sklm301.win’ value=’9YTRJMRIydDSdfhaHPs1ag==’/><data key=’user.TKLM_VERSION,com.ibm.sklm301.win’ value=’3.0.0.0’/><data key=’user.TKLM_TIP_HOME,com.ibm.sklm301.win’ value=’C:\Program Files\IBM\WebSphere\AppServer’/><data key=’user.TKLM_INSTALLED,com.ibm.sklm301.win’ value=’true’/><data key=’user.INSTALL_AS_FP,com.ibm.sklm301.win’ value=’false’/><data key=’user.TKLM_DB_PWD,com.ibm.sklm301.win’ value=’SwIhGBTDHcJok80Ux4Sb3g==’/>
<data key=’user.TKLM_KEYSTORE_PWD,com.ibm.sklm301.win’ value=’m4oQ5vWqvwGUwOgZaAiFqg==’/><data key=’user.SKLM_APP_PORT,com.ibm.sklm301.win’ value=’443’/><data key=’user.WAS_ADMIN_PORT,com.ibm.sklm301.win’ value=’9083’/><data key=’user.SKLM_APP_NS_PORT,com.ibm.sklm301.win’ value=’80’/></profile>
<preference name=’com.ibm.cic.common.core.preferences.eclipseCache’ value=’C:\Program Files\IBM\IBMIMShared’/><preference name=’com.ibm.cic.common.core.preferences.connectTimeout’ value=’30’/><preference name=’com.ibm.cic.common.core.preferences.readTimeout’ value=’45’/><preference name=’com.ibm.cic.common.core.preferences.downloadAutoRetryCount’ value=’0’/><preference name=’offering.service.repositories.areUsed’ value=’true’/><preference name=’com.ibm.cic.common.core.preferences.ssl.nonsecureMode’ value=’false’/><preference name=’com.ibm.cic.common.core.preferences.http.disablePreemptiveAuthentication’ value=’false’/><preference name=’http.ntlm.auth.kind’ value=’NTLM’/><preference name=’http.ntlm.auth.enableIntegrated.win32’ value=’true’/><preference name=’com.ibm.cic.common.core.preferences.preserveDownloadedArtifacts’ value=’true’/><preference name=’com.ibm.cic.common.core.preferences.keepFetchedFiles’ value=’false’/><preference name=’PassportAdvantageIsEnabled’ value=’false’/><preference name=’com.ibm.cic.common.core.preferences.searchForUpdates’ value=’false’/><preference name=’com.ibm.cic.agent.ui.displayInternalVersion’ value=’false’/><preference name=’com.ibm.cic.common.sharedUI.showErrorLog’ value=’true’/><preference name=’com.ibm.cic.common.sharedUI.showWarningLog’ value=’true’/><preference name=’com.ibm.cic.common.sharedUI.showNoteLog’ value=’true’/>
</agent-input>
126 Installing, migrating, and configuring

Earlier versions 2.5, 2.6, 2.7, and 3.0 to version 3.0.1 migration onLinux systems
The example response files contain responses for an installation Linux system inwhich IBM Security Key Lifecycle Manager earlier versions 2.5, 2.6, 2.7, and 3.0 toversion 3.0.1 migration occurs.
Note: To determine whether IBM Security Key Lifecycle Manager earlier versionexists and requires migration, use the tklmVersionInfo command. For example,type this command in a Jython session:print AdminTask.tklmVersionInfo<>
Migration from version 2.5 to 3.0.1<?xml version=’1.0’ encoding=’UTF-8’?><agent-input clean=’true’ >
<server><repository location=’/disk1’/><repository location=’/disk1/im’/>
</server><install modify=’false’>
<offering profile=’IBM Installation Manager’ id=’com.ibm.cic.agent’ features=’agent_core,agent_jre,agent_web’ installFixes=’none’/><offering profile=’IBM WebSphere Application Server V9.0’ id=’com.ibm.websphere.BASE.v90’ features=’core.feature,ejbdeploy,thinclient,embeddablecontainer’ installFixes=’none’/><offering profile=’IBM WebSphere Application Server V9.0’ id=’com.ibm.java.jdk.v8’ features=’com.ibm.sdk.8’ installFixes=’none’/><offering profile=’IBM DB2 SKLM301’ id=’com.ibm.sklm301.db2.lin.ofng’ version=’11.1.2.2’ features=’main.feature’ installFixes=’none’/><offering profile=’IBM Security Key Lifecycle Manager v3.0.1’ id=’com.ibm.sklm301.linux’ version=’3.0.1000.00’ features=’main.feature’ installFixes=’none’/>
</install><profile id=’IBM DB2 SKLM301’ installLocation=’/opt/IBM/DB2SKLMV301’><data key=’eclipseLocation’ value=’/opt/IBM/DB2SKLMV301’/><data key=’user.import.profile’ value=’false’/><data key=’cic.selector.os’ value=’linux’/><data key=’cic.selector.arch’ value=’x86_64’/><data key=’cic.selector.ws’ value=’gtk’/><data key=’cic.selector.nl’ value=’en’/><data key=’user.DB2_ADMIN_ID,com.ibm.sklm301.db2.lin.ofng’ value=’sklmdb31’/><data key=’user.DB2_ADMIN_PWD,com.ibm.sklm301.db2.lin.ofng’ value=’QTh/0AiFvrljhs9gnOYkGA==’/><data key=’user.CONFIRM_PASSWORD,com.ibm.sklm301.db2.lin.ofng’ value=’QTh/0AiFvrljhs9gnOYkGA==’/><data key=’user.DB2_DB_HOME,com.ibm.sklm301.db2.lin.ofng’ value=’/home/sklmdb31’/><data key=’user.DB2_DB_NAME,com.ibm.sklm301.db2.lin.ofng’ value=’SKLMDB31’/><data key=’user.DB2_DB_PORT,com.ibm.sklm301.db2.lin.ofng’ value=’50050’/><data key=’user.DB2_EXISTS,com.ibm.sklm301.db2.lin.ofng’ value=’false’/><data key=’user.DB2_LOCATION,com.ibm.sklm301.db2.lin.ofng’ value=’/opt/IBM/DB2SKLMV301’/><data key=’user.DB2_DB_LHOME,com.ibm.sklm301.db2.lin.ofng’ value=’/home/sklmdb31’/><!--The DB2 Group name should not be more than 8 characters --><data key=’user.DB2_ADMIN_GRP,com.ibm.sklm301.db2.lin.ofng’ value=’sklmdb31’/>
</profile><profile id=’IBM Installation Manager’ installLocation=’/opt/IBM/InstallationManager/eclipse’ kind=’self’><data key=’eclipseLocation’ value=’/opt/IBM/InstallationManager/eclipse’/><data key=’user.import.profile’ value=’false’/><data key=’cic.selector.os’ value=’linux’/><data key=’cic.selector.arch’ value=’x86_64’/><data key=’cic.selector.ws’ value=’gtk’/></profile>
<profile id=’IBM WebSphere Application Server V9.0’ installLocation=’/opt/IBM/WebSphere30/AppServer’><data key=’eclipseLocation’ value=’/opt/IBM/WebSphere30/AppServer’/><data key=’user.import.profile’ value=’false’/><data key=’cic.selector.os’ value=’linux’/><data key=’cic.selector.arch’ value=’x86_64’/><data key=’cic.selector.ws’ value=’gtk’/><data key=’cic.selector.nl’ value=’en’/>
</profile>
<profile id=’IBM Security Key Lifecycle Manager v3.0.1’ installLocation=’/opt/IBM/SKLMV301’><data key=’eclipseLocation’ value=’/opt/IBM/SKLMV301’/>
Sample response files 127

<data key=’user.import.profile’ value=’false’/><data key=’cic.selector.os’ value=’linux’/><data key=’cic.selector.arch’ value=’x86_64’/><data key=’cic.selector.ws’ value=’gtk’/><data key=’user.IS_SILENT_MODE,com.ibm.sklm301.linux’ value=’false’/><data key=’cic.selector.nl’ value=’en’/><data key=’user.PROFILE_NAME,com.ibm.sklm301.linux’ value=’KLMProfile’/><data key=’user.WAS_ADMIN_ID,com.ibm.sklm301.linux’ value=’wasadmin’/><data key=’user.WAS_ADMIN_PASSWORD,com.ibm.sklm301.linux’ value=’e9PjN93MeQxwnSs9VXJFMw==’/><data key=’user.WAS_ADMIN_CONF_PWD,com.ibm.sklm301.linux’ value=’e9PjN93MeQxwnSs9VXJFMw==’/><data key=’user.SKLM_ADMIN_USER,com.ibm.sklm301.linux’ value=’SKLMAdmin’/><data key=’user.SKLM_ADMIN_PASSWORD,com.ibm.sklm301.linux’ value=’9YTRJMRIydDSdfhaHPs1ag==’/><data key=’user.SKLM_ADMIN_CONF_PWD,com.ibm.sklm301.linux’ value=’9YTRJMRIydDSdfhaHPs1ag==’/><data key=’user.TKLM_VERSION,com.ibm.sklm301.linux’ value=’2.5.0.4’/><data key=’user.TKLM_TIP_HOME,com.ibm.sklm301.linux’ value=’/opt/IBM/WebSphere/AppServer’/><data key=’user.TKLM_INSTALLED,com.ibm.sklm301.linux’ value=’true’/><data key=’user.TKLM_DB_PWD,com.ibm.sklm301.linux’ value=’SwIhGBTDHcJok80Ux4Sb3g==’/><data key=’user.SKLM_APP_PORT,com.ibm.sklm301.linux’ value=’443’/>
<data key=’user.WAS_ADMIN_PORT,com.ibm.sklm301.linux’ value=’9083’/><data key=’user.SKLM_APP_NS_PORT,com.ibm.sklm301.linux’ value=’80’/></profile>
<preference name=’com.ibm.cic.common.core.preferences.eclipseCache’ value=’/opt/IBM/IBMIMShared’/><preference name=’com.ibm.cic.common.core.preferences.connectTimeout’ value=’30’/><preference name=’com.ibm.cic.common.core.preferences.readTimeout’ value=’45’/><preference name=’com.ibm.cic.common.core.preferences.downloadAutoRetryCount’ value=’0’/><preference name=’offering.service.repositories.areUsed’ value=’true’/><preference name=’com.ibm.cic.common.core.preferences.ssl.nonsecureMode’ value=’false’/><preference name=’com.ibm.cic.common.core.preferences.http.disablePreemptiveAuthentication’ value=’false’/><preference name=’http.ntlm.auth.kind’ value=’NTLM’/><preference name=’http.ntlm.auth.enableIntegrated.win32’ value=’true’/><preference name=’com.ibm.cic.common.core.preferences.preserveDownloadedArtifacts’ value=’true’/><preference name=’com.ibm.cic.common.core.preferences.keepFetchedFiles’ value=’false’/><preference name=’PassportAdvantageIsEnabled’ value=’false’/><preference name=’com.ibm.cic.common.core.preferences.searchForUpdates’ value=’false’/><preference name=’com.ibm.cic.agent.ui.displayInternalVersion’ value=’false’/><preference name=’com.ibm.cic.common.sharedUI.showErrorLog’ value=’true’/><preference name=’com.ibm.cic.common.sharedUI.showWarningLog’ value=’true’/><preference name=’com.ibm.cic.common.sharedUI.showNoteLog’ value=’true’/>
</agent-input>
Migration from version 2.6 to 3.0.1<?xml version=’1.0’ encoding=’UTF-8’?><agent-input clean=’true’ >
<server><repository location=’/disk1’/><repository location=’/disk1/im’/>
</server><install modify=’false’>
<offering profile=’IBM Installation Manager’ id=’com.ibm.cic.agent’ features=’agent_core,agent_jre,agent_web’ installFixes=’none’/><offering profile=’IBM WebSphere Application Server V9.0’ id=’com.ibm.websphere.BASE.v90’ features=’core.feature,ejbdeploy,thinclient,embeddablecontainer’ installFixes=’none’/><offering profile=’IBM WebSphere Application Server V9.0’ id=’com.ibm.java.jdk.v8’ features=’com.ibm.sdk.8’ installFixes=’none’/><offering profile=’IBM DB2 SKLM301’ id=’com.ibm.sklm301.db2.lin.ofng’ version=’11.1.2.2’ features=’main.feature’ installFixes=’none’/><offering profile=’IBM Security Key Lifecycle Manager v3.0.1’ id=’com.ibm.sklm301.linux’ version=’3.0.1000.00’ features=’main.feature’ installFixes=’none’/>
</install><profile id=’IBM DB2 SKLM301’ installLocation=’/opt/IBM/DB2SKLMV301’><data key=’eclipseLocation’ value=’/opt/IBM/DB2SKLMV301’/><data key=’user.import.profile’ value=’false’/><data key=’cic.selector.os’ value=’linux’/><data key=’cic.selector.arch’ value=’x86_64’/><data key=’cic.selector.ws’ value=’gtk’/><data key=’cic.selector.nl’ value=’en’/><data key=’user.DB2_ADMIN_ID,com.ibm.sklm301.db2.lin.ofng’ value=’sklmdb31’/><data key=’user.DB2_ADMIN_PWD,com.ibm.sklm301.db2.lin.ofng’ value=’QTh/0AiFvrljhs9gnOYkGA==’/><data key=’user.CONFIRM_PASSWORD,com.ibm.sklm301.db2.lin.ofng’ value=’QTh/0AiFvrljhs9gnOYkGA==’/><data key=’user.DB2_DB_HOME,com.ibm.sklm301.db2.lin.ofng’ value=’/home/sklmdb31’/>
128 Installing, migrating, and configuring

<data key=’user.DB2_DB_NAME,com.ibm.sklm301.db2.lin.ofng’ value=’SKLMDB31’/><data key=’user.DB2_DB_PORT,com.ibm.sklm301.db2.lin.ofng’ value=’50050’/><data key=’user.DB2_EXISTS,com.ibm.sklm301.db2.lin.ofng’ value=’false’/><data key=’user.DB2_LOCATION,com.ibm.sklm301.db2.lin.ofng’ value=’/opt/IBM/DB2SKLMV301’/><data key=’user.DB2_DB_LHOME,com.ibm.sklm301.db2.lin.ofng’ value=’/home/sklmdb31’/><!--The DB2 Group name should not be more than 8 characters --><data key=’user.DB2_ADMIN_GRP,com.ibm.sklm301.db2.lin.ofng’ value=’sklmdb31’/>
</profile><profile id=’IBM Installation Manager’ installLocation=’/opt/IBM/InstallationManager/eclipse’ kind=’self’><data key=’eclipseLocation’ value=’/opt/IBM/InstallationManager/eclipse’/><data key=’user.import.profile’ value=’false’/><data key=’cic.selector.os’ value=’linux’/><data key=’cic.selector.arch’ value=’x86_64’/><data key=’cic.selector.ws’ value=’gtk’/></profile>
<profile id=’IBM WebSphere Application Server V9.0’ installLocation=’/opt/IBM/WebSphere30/AppServer’><data key=’eclipseLocation’ value=’/opt/IBM/WebSphere30/AppServer’/><data key=’user.import.profile’ value=’false’/><data key=’cic.selector.os’ value=’linux’/><data key=’cic.selector.arch’ value=’x86_64’/><data key=’cic.selector.ws’ value=’gtk’/><data key=’cic.selector.nl’ value=’en’/>
</profile>
<profile id=’IBM Security Key Lifecycle Manager v3.0.1’ installLocation=’/opt/IBM/SKLMV301’><data key=’eclipseLocation’ value=’/opt/IBM/SKLMV301’/><data key=’user.import.profile’ value=’false’/><data key=’cic.selector.os’ value=’linux’/><data key=’cic.selector.arch’ value=’x86_64’/><data key=’cic.selector.ws’ value=’gtk’/><data key=’user.IS_SILENT_MODE,com.ibm.sklm301.linux’ value=’false’/><data key=’cic.selector.nl’ value=’en’/><data key=’user.PROFILE_NAME,com.ibm.sklm301.linux’ value=’KLMProfile’/><data key=’user.WAS_ADMIN_ID,com.ibm.sklm301.linux’ value=’wasadmin’/><data key=’user.WAS_ADMIN_PASSWORD,com.ibm.sklm301.linux’ value=’e9PjN93MeQxwnSs9VXJFMw==’/><data key=’user.WAS_ADMIN_CONF_PWD,com.ibm.sklm301.linux’ value=’e9PjN93MeQxwnSs9VXJFMw==’/><data key=’user.SKLM_ADMIN_USER,com.ibm.sklm301.linux’ value=’SKLMAdmin’/><data key=’user.SKLM_ADMIN_PASSWORD,com.ibm.sklm301.linux’ value=’9YTRJMRIydDSdfhaHPs1ag==’/><data key=’user.SKLM_ADMIN_CONF_PWD,com.ibm.sklm301.linux’ value=’9YTRJMRIydDSdfhaHPs1ag==’/><data key=’user.TKLM_VERSION,com.ibm.sklm301.linux’ value=’2.5.0.4’/><data key=’user.TKLM_TIP_HOME,com.ibm.sklm301.linux’ value=’/opt/IBM/WebSphere/AppServer’/><data key=’user.TKLM_INSTALLED,com.ibm.sklm301.linux’ value=’true’/><data key=’user.TKLM_DB_PWD,com.ibm.sklm301.linux’ value=’SwIhGBTDHcJok80Ux4Sb3g==’/><data key=’user.SKLM_APP_PORT,com.ibm.sklm301.linux’ value=’443’/>
<data key=’user.WAS_ADMIN_PORT,com.ibm.sklm301.linux’ value=’9083’/><data key=’user.SKLM_APP_NS_PORT,com.ibm.sklm301.linux’ value=’80’/></profile>
<preference name=’com.ibm.cic.common.core.preferences.eclipseCache’ value=’/opt/IBM/IBMIMShared’/><preference name=’com.ibm.cic.common.core.preferences.connectTimeout’ value=’30’/><preference name=’com.ibm.cic.common.core.preferences.readTimeout’ value=’45’/><preference name=’com.ibm.cic.common.core.preferences.downloadAutoRetryCount’ value=’0’/><preference name=’offering.service.repositories.areUsed’ value=’true’/><preference name=’com.ibm.cic.common.core.preferences.ssl.nonsecureMode’ value=’false’/><preference name=’com.ibm.cic.common.core.preferences.http.disablePreemptiveAuthentication’ value=’false’/><preference name=’http.ntlm.auth.kind’ value=’NTLM’/><preference name=’http.ntlm.auth.enableIntegrated.win32’ value=’true’/><preference name=’com.ibm.cic.common.core.preferences.preserveDownloadedArtifacts’ value=’true’/><preference name=’com.ibm.cic.common.core.preferences.keepFetchedFiles’ value=’false’/><preference name=’PassportAdvantageIsEnabled’ value=’false’/><preference name=’com.ibm.cic.common.core.preferences.searchForUpdates’ value=’false’/><preference name=’com.ibm.cic.agent.ui.displayInternalVersion’ value=’false’/><preference name=’com.ibm.cic.common.sharedUI.showErrorLog’ value=’true’/><preference name=’com.ibm.cic.common.sharedUI.showWarningLog’ value=’true’/><preference name=’com.ibm.cic.common.sharedUI.showNoteLog’ value=’true’/>
</agent-input>
Sample response files 129

Migration from version 2.7 to 3.0.1<?xml version=’1.0’ encoding=’UTF-8’?><agent-input clean=’true’ >
<server><repository location=’/disk1’/><repository location=’/disk1/im’/>
</server><install modify=’false’>
<offering profile=’IBM Installation Manager’ id=’com.ibm.cic.agent’ features=’agent_core,agent_jre,agent_web’ installFixes=’none’/><offering profile=’IBM WebSphere Application Server V9.0_1’ id=’com.ibm.websphere.BASE.v90’ features=’core.feature,ejbdeploy,thinclient,embeddablecontainer’ installFixes=’none’/><offering profile=’IBM WebSphere Application Server V9.0_1’ id=’com.ibm.java.jdk.v8’ features=’com.ibm.sdk.8’ installFixes=’none’/><offering profile=’IBM DB2 SKLM301’ id=’com.ibm.sklm301.db2.lin.ofng’ version=’11.1.2.2’ features=’main.feature’ installFixes=’none’/><offering profile=’IBM Security Key Lifecycle Manager v3.0.1’ id=’com.ibm.sklm301.linux’ version=’3.0.1000.00’ features=’main.feature’ installFixes=’none’/>
</install><profile id=’IBM DB2 SKLM301’ installLocation=’/opt/IBM/DB2SKLMV301’><data key=’eclipseLocation’ value=’/opt/IBM/DB2SKLMV301’/><data key=’user.import.profile’ value=’false’/><data key=’cic.selector.os’ value=’linux’/><data key=’cic.selector.arch’ value=’x86_64’/><data key=’cic.selector.ws’ value=’gtk’/><data key=’cic.selector.nl’ value=’en’/><data key=’user.DB2_ADMIN_ID,com.ibm.sklm301.db2.lin.ofng’ value=’sklmdb31’/><data key=’user.DB2_ADMIN_PWD,com.ibm.sklm301.db2.lin.ofng’ value=’QTh/0AiFvrljhs9gnOYkGA==’/><data key=’user.CONFIRM_PASSWORD,com.ibm.sklm301.db2.lin.ofng’ value=’QTh/0AiFvrljhs9gnOYkGA==’/><data key=’user.DB2_DB_HOME,com.ibm.sklm301.db2.lin.ofng’ value=’/home/sklmdb31’/><data key=’user.DB2_DB_NAME,com.ibm.sklm301.db2.lin.ofng’ value=’SKLMDB31’/><data key=’user.DB2_DB_PORT,com.ibm.sklm301.db2.lin.ofng’ value=’50050’/><data key=’user.DB2_EXISTS,com.ibm.sklm301.db2.lin.ofng’ value=’false’/><data key=’user.DB2_LOCATION,com.ibm.sklm301.db2.lin.ofng’ value=’/opt/IBM/DB2SKLMV301’/><data key=’user.DB2_DB_LHOME,com.ibm.sklm301.db2.lin.ofng’ value=’/home/sklmdb31’/><!--The DB2 Group name should not be more than 8 characters --><data key=’user.DB2_ADMIN_GRP,com.ibm.sklm301.db2.lin.ofng’ value=’sklmdb31’/>
</profile><profile id=’IBM Installation Manager’ installLocation=’/opt/IBM/InstallationManager/eclipse’ kind=’self’><data key=’eclipseLocation’ value=’/opt/IBM/InstallationManager/eclipse’/><data key=’user.import.profile’ value=’false’/><data key=’cic.selector.os’ value=’linux’/><data key=’cic.selector.arch’ value=’x86_64’/><data key=’cic.selector.ws’ value=’gtk’/></profile>
<profile id=’IBM WebSphere Application Server V9.0’ installLocation=’/opt/IBM/WebSphere30/AppServer’><data key=’eclipseLocation’ value=’/opt/IBM/WebSphere30/AppServer’/><data key=’user.import.profile’ value=’false’/><data key=’cic.selector.os’ value=’linux’/><data key=’cic.selector.arch’ value=’x86_64’/><data key=’cic.selector.ws’ value=’gtk’/><data key=’cic.selector.nl’ value=’en’/>
</profile>
<profile id=’IBM Security Key Lifecycle Manager v3.0.1’ installLocation=’/opt/IBM/SKLMV301’><data key=’eclipseLocation’ value=’/opt/IBM/SKLMV301’/><data key=’user.import.profile’ value=’false’/><data key=’cic.selector.os’ value=’linux’/><data key=’cic.selector.arch’ value=’x86_64’/><data key=’cic.selector.ws’ value=’gtk’/><data key=’user.IS_SILENT_MODE,com.ibm.sklm301.linux’ value=’false’/><data key=’cic.selector.nl’ value=’en’/><data key=’user.PROFILE_NAME,com.ibm.sklm301.linux’ value=’KLMProfile’/><data key=’user.WAS_ADMIN_ID,com.ibm.sklm301.linux’ value=’wasadmin’/><data key=’user.WAS_ADMIN_PASSWORD,com.ibm.sklm301.linux’ value=’e9PjN93MeQxwnSs9VXJFMw==’/><data key=’user.WAS_ADMIN_CONF_PWD,com.ibm.sklm301.linux’ value=’e9PjN93MeQxwnSs9VXJFMw==’/><data key=’user.SKLM_ADMIN_USER,com.ibm.sklm301.linux’ value=’SKLMAdmin’/><data key=’user.SKLM_ADMIN_PASSWORD,com.ibm.sklm301.linux’ value=’9YTRJMRIydDSdfhaHPs1ag==’/><data key=’user.SKLM_ADMIN_CONF_PWD,com.ibm.sklm301.linux’ value=’9YTRJMRIydDSdfhaHPs1ag==’/><data key=’user.TKLM_VERSION,com.ibm.sklm301.linux’ value=’2.5.0.4’/><data key=’user.TKLM_TIP_HOME,com.ibm.sklm301.linux’ value=’/opt/IBM/WebSphere/AppServer’/><data key=’user.TKLM_INSTALLED,com.ibm.sklm301.linux’ value=’true’/>
130 Installing, migrating, and configuring

<data key=’user.TKLM_DB_PWD,com.ibm.sklm301.linux’ value=’SwIhGBTDHcJok80Ux4Sb3g==’/><data key=’user.SKLM_APP_PORT,com.ibm.sklm301.linux’ value=’443’/>
<data key=’user.WAS_ADMIN_PORT,com.ibm.sklm301.linux’ value=’9083’/><data key=’user.SKLM_APP_NS_PORT,com.ibm.sklm301.linux’ value=’80’/></profile>
<preference name=’com.ibm.cic.common.core.preferences.eclipseCache’ value=’/opt/IBM/IBMIMShared’/><preference name=’com.ibm.cic.common.core.preferences.connectTimeout’ value=’30’/><preference name=’com.ibm.cic.common.core.preferences.readTimeout’ value=’45’/><preference name=’com.ibm.cic.common.core.preferences.downloadAutoRetryCount’ value=’0’/><preference name=’offering.service.repositories.areUsed’ value=’true’/><preference name=’com.ibm.cic.common.core.preferences.ssl.nonsecureMode’ value=’false’/><preference name=’com.ibm.cic.common.core.preferences.http.disablePreemptiveAuthentication’ value=’false’/><preference name=’http.ntlm.auth.kind’ value=’NTLM’/><preference name=’http.ntlm.auth.enableIntegrated.win32’ value=’true’/><preference name=’com.ibm.cic.common.core.preferences.preserveDownloadedArtifacts’ value=’true’/><preference name=’com.ibm.cic.common.core.preferences.keepFetchedFiles’ value=’false’/><preference name=’PassportAdvantageIsEnabled’ value=’false’/><preference name=’com.ibm.cic.common.core.preferences.searchForUpdates’ value=’false’/><preference name=’com.ibm.cic.agent.ui.displayInternalVersion’ value=’false’/><preference name=’com.ibm.cic.common.sharedUI.showErrorLog’ value=’true’/><preference name=’com.ibm.cic.common.sharedUI.showWarningLog’ value=’true’/><preference name=’com.ibm.cic.common.sharedUI.showNoteLog’ value=’true’/>
</agent-input>
Migration from version 3.0 to 3.0.1<?xml version=’1.0’ encoding=’UTF-8’?><agent-input clean=’true’ >
<server><repository location=’/disk1’/><repository location=’/disk1/im’/>
</server><install modify=’false’>
<offering profile=’IBM Installation Manager’ id=’com.ibm.cic.agent’ features=’agent_core,agent_jre,agent_web’ installFixes=’none’/><offering profile=’IBM WebSphere Application Server V9.0_2’ id=’com.ibm.websphere.BASE.v90’ features=’core.feature,ejbdeploy,thinclient,embeddablecontainer’ installFixes=’none’/><offering profile=’IBM WebSphere Application Server V9.0_2’ id=’com.ibm.java.jdk.v8’ features=’com.ibm.sdk.8’ installFixes=’none’/><offering profile=’IBM DB2 SKLM301’ id=’com.ibm.sklm301.db2.lin.ofng’ version=’11.1.2.2’ features=’main.feature’ installFixes=’none’/><offering profile=’IBM Security Key Lifecycle Manager v3.0.1’ id=’com.ibm.sklm301.linux’ version=’3.0.1000.00’ features=’main.feature’ installFixes=’none’/>
</install><profile id=’IBM DB2 SKLM301’ installLocation=’/opt/IBM/DB2SKLMV301’><data key=’eclipseLocation’ value=’/opt/IBM/DB2SKLMV301’/><data key=’user.import.profile’ value=’false’/><data key=’cic.selector.os’ value=’linux’/><data key=’cic.selector.arch’ value=’x86_64’/><data key=’cic.selector.ws’ value=’gtk’/><data key=’cic.selector.nl’ value=’en’/><data key=’user.DB2_ADMIN_ID,com.ibm.sklm301.db2.lin.ofng’ value=’sklmdb31’/><data key=’user.DB2_ADMIN_PWD,com.ibm.sklm301.db2.lin.ofng’ value=’QTh/0AiFvrljhs9gnOYkGA==’/><data key=’user.CONFIRM_PASSWORD,com.ibm.sklm301.db2.lin.ofng’ value=’QTh/0AiFvrljhs9gnOYkGA==’/><data key=’user.DB2_DB_HOME,com.ibm.sklm301.db2.lin.ofng’ value=’/home/sklmdb31’/><data key=’user.DB2_DB_NAME,com.ibm.sklm301.db2.lin.ofng’ value=’SKLMDB31’/><data key=’user.DB2_DB_PORT,com.ibm.sklm301.db2.lin.ofng’ value=’50050’/><data key=’user.DB2_EXISTS,com.ibm.sklm301.db2.lin.ofng’ value=’false’/><data key=’user.DB2_LOCATION,com.ibm.sklm301.db2.lin.ofng’ value=’/opt/IBM/DB2SKLMV301’/><data key=’user.DB2_DB_LHOME,com.ibm.sklm301.db2.lin.ofng’ value=’/home/sklmdb31’/><!--The DB2 Group name should not be more than 8 characters --><data key=’user.DB2_ADMIN_GRP,com.ibm.sklm301.db2.lin.ofng’ value=’sklmdb31’/>
</profile><profile id=’IBM Installation Manager’ installLocation=’/opt/IBM/InstallationManager/eclipse’ kind=’self’><data key=’eclipseLocation’ value=’/opt/IBM/InstallationManager/eclipse’/><data key=’user.import.profile’ value=’false’/><data key=’cic.selector.os’ value=’linux’/><data key=’cic.selector.arch’ value=’x86_64’/><data key=’cic.selector.ws’ value=’gtk’/></profile>
<profile id=’IBM WebSphere Application Server V9.0_2’ installLocation=’/opt/IBM/WebSphere30/AppServer’>
Sample response files 131

<data key=’eclipseLocation’ value=’/opt/IBM/WebSphere30/AppServer’/><data key=’user.import.profile’ value=’false’/><data key=’cic.selector.os’ value=’linux’/><data key=’cic.selector.arch’ value=’x86_64’/><data key=’cic.selector.ws’ value=’gtk’/><data key=’cic.selector.nl’ value=’en’/>
</profile><profile id=’IBM Security Key Lifecycle Manager v3.0.1’ installLocation=’/opt/IBM/SKLMV301’><data key=’eclipseLocation’ value=’/opt/IBM/SKLMV301’/><data key=’user.import.profile’ value=’false’/><data key=’cic.selector.os’ value=’linux’/><data key=’cic.selector.arch’ value=’x86_64’/><data key=’cic.selector.ws’ value=’gtk’/><data key=’user.IS_SILENT_MODE,com.ibm.sklm301.linux’ value=’false’/><data key=’cic.selector.nl’ value=’en’/><data key=’user.PROFILE_NAME,com.ibm.sklm301.linux’ value=’KLMProfile’/><data key=’user.WAS_ADMIN_ID,com.ibm.sklm301.linux’ value=’wasadmin’/><data key=’user.WAS_ADMIN_PASSWORD,com.ibm.sklm301.linux’ value=’e9PjN93MeQxwnSs9VXJFMw==’/><data key=’user.WAS_ADMIN_CONF_PWD,com.ibm.sklm301.linux’ value=’e9PjN93MeQxwnSs9VXJFMw==’/><data key=’user.SKLM_ADMIN_USER,com.ibm.sklm301.linux’ value=’SKLMAdmin’/><data key=’user.SKLM_ADMIN_PASSWORD,com.ibm.sklm301.linux’ value=’9YTRJMRIydDSdfhaHPs1ag==’/><data key=’user.SKLM_ADMIN_CONF_PWD,com.ibm.sklm301.linux’ value=’9YTRJMRIydDSdfhaHPs1ag==’/><data key=’user.TKLM_VERSION,com.ibm.sklm301.linux’ value=’3.0.0.0’/><data key=’user.TKLM_TIP_HOME,com.ibm.sklm301.linux’ value=’/opt/IBM/WebSphere/AppServer’/><data key=’user.TKLM_INSTALLED,com.ibm.sklm301.linux’ value=’true’/><data key=’user.INSTALL_AS_FP,com.ibm.sklm301.linux’ value=’false’/><data key=’user.TKLM_DB_PWD,com.ibm.sklm301.linux’ value=’SwIhGBTDHcJok80Ux4Sb3g==’/><data key=’user.SKLM_APP_PORT,com.ibm.sklm301.linux’ value=’443’/><data key=’user.WAS_ADMIN_PORT,com.ibm.sklm301.linux’ value=’9083’/><data key=’user.SKLM_APP_NS_PORT,com.ibm.sklm301.linux’ value=’80’/>
</profile><preference name=’com.ibm.cic.common.core.preferences.eclipseCache’ value=’/opt/IBM/IBMIMShared’/><preference name=’com.ibm.cic.common.core.preferences.connectTimeout’ value=’30’/><preference name=’com.ibm.cic.common.core.preferences.readTimeout’ value=’45’/><preference name=’com.ibm.cic.common.core.preferences.downloadAutoRetryCount’ value=’0’/><preference name=’offering.service.repositories.areUsed’ value=’true’/><preference name=’com.ibm.cic.common.core.preferences.ssl.nonsecureMode’ value=’false’/><preference name=’com.ibm.cic.common.core.preferences.http.disablePreemptiveAuthentication’ value=’false’/><preference name=’http.ntlm.auth.kind’ value=’NTLM’/><preference name=’http.ntlm.auth.enableIntegrated.win32’ value=’true’/><preference name=’com.ibm.cic.common.core.preferences.preserveDownloadedArtifacts’ value=’true’/><preference name=’com.ibm.cic.common.core.preferences.keepFetchedFiles’ value=’false’/><preference name=’PassportAdvantageIsEnabled’ value=’false’/><preference name=’com.ibm.cic.common.core.preferences.searchForUpdates’ value=’false’/><preference name=’com.ibm.cic.agent.ui.displayInternalVersion’ value=’false’/><preference name=’com.ibm.cic.common.sharedUI.showErrorLog’ value=’true’/><preference name=’com.ibm.cic.common.sharedUI.showWarningLog’ value=’true’/><preference name=’com.ibm.cic.common.sharedUI.showNoteLog’ value=’true’/>
</agent-input>
Earlier versions 2.5, 2.6, 2.7, and 3.0 to version 3.0.1 migration onLinux for System z
The example response files contain responses for a Linux for System z installationin which IBM Security Key Lifecycle Manager earlier versions 2.5, 2.6, 2.7, and 3.0to version 3.0.1 migration occurs.
Note: To determine whether IBM Security Key Lifecycle Manager earlier versionexists and requires migration, use the tklmVersionInfo command. For example,type this command in a Jython session:print AdminTask.tklmVersionInfo<>
132 Installing, migrating, and configuring

Migration from version 2.5 to 3.0.1<?xml version="1.0" encoding="UTF-8"?><!--The "acceptLicense" attribute has been deprecated. Use "-acceptLicense" command line option to accept license agreements.--><agent-input clean=’true’ >
<server><repository location=’/disk1/im’/><repository location=’/disk1/’/></server>
<install modify=’false’><offering profile=’IBM Installation Manager’ id=’com.ibm.cic.agent’ features=’agent_core,agent_jre’ installFixes=’none’/><offering profile=’IBM DB2 SKLM301’ id=’com.ibm.sklm301.db2.lin.ofng’ features=’main.feature’ installFixes=’none’/><offering profile=’IBM WebSphere Application Server V9.0’ id=’com.ibm.websphere.BASE.v90’ features=’core.feature,ejbdeploy,thinclient,embeddablecontainer’ installFixes=’none’/><offering profile=’IBM WebSphere Application Server V9.0’ id=’com.ibm.java.jdk.v8’ features=’com.ibm.sdk.8’ installFixes=’none’/><offering profile=’IBM Security Key Lifecycle Manager v3.0.1’ id=’com.ibm.sklm301.linux’ features=’main.feature’ installFixes=’none’/></install>
<profile id=’IBM DB2 SKLM301’ installLocation=’/opt/IBM/DB2SKLMV301’><data key=’eclipseLocation’ value=’/opt/IBM/DB2SKLMV301’/><data key=’user.import.profile’ value=’false’/><data key=’cic.selector.os’ value=’linux’/><data key=’cic.selector.arch’ value=’s390x’/><data key=’cic.selector.ws’ value=’gtk’/><data key=’user.DB2_ADMIN_ID,com.ibm.sklm301.db2.lin.ofng’ value=’sklmdb31’/><!--The DB2 Group name should not be more than 8 characters --><data key=’user.DB2_ADMIN_GRP,com.ibm.sklm301.db2.lin.ofng’ value=’sklmdb31’/><data key=’user.DB2_ADMIN_PWD,com.ibm.sklm301.db2.lin.ofng’ value=’QTh/0AiFvrljhs9gnOYkGA==’/><data key=’user.CONFIRM_PASSWORD,com.ibm.sklm301.db2.lin.ofng’ value=’QTh/0AiFvrljhs9gnOYkGA==’/><data key=’user.DB2_DB_LHOME,com.ibm.sklm301.db2.lin.ofng’ value=’/home/sklmdb31’/><data key=’user.DB2_DB_NAME,com.ibm.sklm301.db2.lin.ofng’ value=’SKLMDB31’/><data key=’user.DB2_DB_PORT,com.ibm.sklm301.db2.lin.ofng’ value=’50050’/><data key=’user.DB2_EXISTS,com.ibm.sklm301.db2.lin.ofng’ value=’false’/><data key=’user.DB2_LOCATION,com.ibm.sklm301.db2.lin.ofng’ value=’/opt/IBM/DB2SKLMV301’/><data key=’cic.selector.nl’ value=’en’/></profile><profile id=’IBM Installation Manager’ installLocation=’/opt/IBM/InstallationManager/eclipse’ kind=’self’><data key=’eclipseLocation’ value=’/opt/IBM/InstallationManager/eclipse’/><data key=’user.import.profile’ value=’false’/><data key=’cic.selector.os’ value=’linux’/><data key=’cic.selector.arch’ value=’s390x’/><data key=’cic.selector.ws’ value=’gtk’/></profile><profile id=’IBM WebSphere Application Server V9.0’ installLocation=’/opt/IBM/WebSphere30/AppServer’><data key=’eclipseLocation’ value=’/opt/IBM/WebSphere30/AppServer’/><data key=’user.import.profile’ value=’false’/><data key=’cic.selector.os’ value=’linux’/><data key=’cic.selector.arch’ value=’s390x’/><data key=’cic.selector.ws’ value=’gtk’/><data key=’cic.selector.nl’ value=’en’/></profile><profile id=’IBM Security Key Lifecycle Manager v3.0.1’ installLocation=’/opt/IBM/SKLMV301’><data key=’eclipseLocation’ value=’/opt/IBM/SKLMV301’/><data key=’user.import.profile’ value=’false’/><data key=’cic.selector.os’ value=’linux’/><data key=’cic.selector.arch’ value=’s390x’/><data key=’cic.selector.ws’ value=’gtk’/><data key=’user.EKM_PROPFILE,com.ibm.sklm301.linux’ value=’/opt/IBM/KeyManagerConfig.properties’/><data key=’user.EKM_MIGRATION,com.ibm.sklm301.linux’ value=’false’/><data key=’user.PROFILE_NAME,com.ibm.sklm301.linux’ value=’KLMProfile’/><data key=’user.WAS_ADMIN_ID,com.ibm.sklm301.linux’ value=’tipadmin’/><data key=’user.WAS_ADMIN_PASSWORD,com.ibm.sklm301.linux’ value=’e9PjN93MeQxwnSs9VXJFMw==’/><data key=’user.WAS_ADMIN_CONF_PWD,com.ibm.sklm301.linux’ value=’e9PjN93MeQxwnSs9VXJFMw==’/><data key=’user.SKLM_ADMIN_USER,com.ibm.sklm301.linux’ value=’TKLMAdmin’/><data key=’user.SKLM_ADMIN_PASSWORD,com.ibm.sklm301.linux’ value=’9YTRJMRIydDSdfhaHPs1ag==’/><data key=’user.SKLM_ADMIN_CONF_PWD,com.ibm.sklm301.linux’ value=’9YTRJMRIydDSdfhaHPs1ag==’/><data key=’user.TKLM_VERSION,com.ibm.sklm301.linux’ value=’2.0.1’/>
Sample response files 133

<data key=’user.TKLM_TIP_HOME,com.ibm.sklm301.linux’ value=’/opt/IBM/tivoli/tiptklmV2/’/><data key=’user.TKLM_INSTALLED,com.ibm.sklm301.linux’ value=’true’/><data key=’user.TKLM_DB_PWD,com.ibm.sklm301.linux’ value=’/6vJK3fcU3QxHY+RVfCFVw==’/><data key=’user.TKLM_KEYSTORE_PWD,com.ibm.sklm301.linux’ value=’fufgZbY47EfxLYarBAIxeQ==’/><data key=’user.SKLM_APP_PORT,com.ibm.sklm301.linux’ value=’443’/><data key=’user.WAS_ADMIN_PORT,com.ibm.sklm301.linux’ value=’9083’/><data key=’user.SKLM_APP_NS_PORT,com.ibm.sklm301.linux’ value=’80’/><data key=’cic.selector.nl’ value=’en’/></profile><preference name=’com.ibm.cic.common.core.preferences.eclipseCache’ value=’/opt/IBM/IBMIMShared’/><preference name=’com.ibm.cic.common.core.preferences.connectTimeout’ value=’30’/><preference name=’com.ibm.cic.common.core.preferences.readTimeout’ value=’45’/><preference name=’com.ibm.cic.common.core.preferences.downloadAutoRetryCount’ value=’0’/><preference name=’offering.service.repositories.areUsed’ value=’true’/><preference name=’com.ibm.cic.common.core.preferences.ssl.nonsecureMode’ value=’false’/><preference name=’com.ibm.cic.common.core.preferences.http.disablePreemptiveAuthentication’ value=’false’/><preference name=’http.ntlm.auth.kind’ value=’NTLM’/><preference name=’http.ntlm.auth.enableIntegrated.win32’ value=’true’/><preference name=’com.ibm.cic.common.core.preferences.preserveDownloadedArtifacts’ value=’true’/><preference name=’com.ibm.cic.common.core.preferences.keepFetchedFiles’ value=’false’/><preference name=’PassportAdvantageIsEnabled’ value=’false’/><preference name=’com.ibm.cic.common.core.preferences.searchForUpdates’ value=’false’/><preference name=’com.ibm.cic.agent.ui.displayInternalVersion’ value=’false’/><preference name=’com.ibm.cic.common.sharedUI.showErrorLog’ value=’true’/><preference name=’com.ibm.cic.common.sharedUI.showWarningLog’ value=’true’/><preference name=’com.ibm.cic.common.sharedUI.showNoteLog’ value=’true’/></agent-input>
Migration from version 2.6 to 3.0.1<?xml version="1.0" encoding="UTF-8"?><!--The "acceptLicense" attribute has been deprecated. Use "-acceptLicense" command line option to accept license agreements.--><agent-input clean=’true’ >
<server><repository location=’/disk1/im’/><repository location=’/disk1/’/></server>
<install modify=’false’><offering profile=’IBM Installation Manager’ id=’com.ibm.cic.agent’ features=’agent_core,agent_jre’ installFixes=’none’/><offering profile=’IBM DB2 SKLM301’ id=’com.ibm.sklm301.db2.lin.ofng’ features=’main.feature’ installFixes=’none’/><offering profile=’IBM WebSphere Application Server V9.0’ id=’com.ibm.websphere.BASE.v90’ features=’core.feature,ejbdeploy,thinclient,embeddablecontainer’ installFixes=’none’/><offering profile=’IBM WebSphere Application Server V9.0’ id=’com.ibm.java.jdk.v8’ features=’com.ibm.sdk.8’ installFixes=’none’/><offering profile=’IBM Security Key Lifecycle Manager v3.0.1’ id=’com.ibm.sklm301.linux’ features=’main.feature’ installFixes=’none’/></install>
<profile id=’IBM DB2 SKLM301’ installLocation=’/opt/IBM/DB2SKLMV301’><data key=’eclipseLocation’ value=’/opt/IBM/DB2SKLMV301’/><data key=’user.import.profile’ value=’false’/><data key=’cic.selector.os’ value=’linux’/><data key=’cic.selector.arch’ value=’s390x’/><data key=’cic.selector.ws’ value=’gtk’/><data key=’user.DB2_ADMIN_ID,com.ibm.sklm301.db2.lin.ofng’ value=’sklmdb31’/><!--The DB2 Group name should not be more than 8 characters --><data key=’user.DB2_ADMIN_GRP,com.ibm.sklm301.db2.lin.ofng’ value=’sklmdb31’/><data key=’user.DB2_ADMIN_PWD,com.ibm.sklm301.db2.lin.ofng’ value=’QTh/0AiFvrljhs9gnOYkGA==’/><data key=’user.CONFIRM_PASSWORD,com.ibm.sklm301.db2.lin.ofng’ value=’QTh/0AiFvrljhs9gnOYkGA==’/><data key=’user.DB2_DB_LHOME,com.ibm.sklm301.db2.lin.ofng’ value=’/home/sklmdb31’/><data key=’user.DB2_DB_NAME,com.ibm.sklm301.db2.lin.ofng’ value=’SKLMDB31’/><data key=’user.DB2_DB_PORT,com.ibm.sklm301.db2.lin.ofng’ value=’50050’/><data key=’user.DB2_EXISTS,com.ibm.sklm301.db2.lin.ofng’ value=’false’/><data key=’user.DB2_LOCATION,com.ibm.sklm301.db2.lin.ofng’ value=’/opt/IBM/DB2SKLMV301’/><data key=’cic.selector.nl’ value=’en’/></profile><profile id=’IBM Installation Manager’ installLocation=’/opt/IBM/InstallationManager/eclipse’ kind=’self’><data key=’eclipseLocation’ value=’/opt/IBM/InstallationManager/eclipse’/>
134 Installing, migrating, and configuring

<data key=’user.import.profile’ value=’false’/><data key=’cic.selector.os’ value=’linux’/><data key=’cic.selector.arch’ value=’s390x’/><data key=’cic.selector.ws’ value=’gtk’/></profile><profile id=’IBM WebSphere Application Server V9.0’ installLocation=’/opt/IBM/WebSphere30/AppServer’><data key=’eclipseLocation’ value=’/opt/IBM/WebSphere30/AppServer’/><data key=’user.import.profile’ value=’false’/><data key=’cic.selector.os’ value=’linux’/><data key=’cic.selector.arch’ value=’s390x’/><data key=’cic.selector.ws’ value=’gtk’/><data key=’cic.selector.nl’ value=’en’/></profile><profile id=’IBM Security Key Lifecycle Manager v3.0.1’ installLocation=’/opt/IBM/SKLMV301’><data key=’eclipseLocation’ value=’/opt/IBM/SKLMV301’/><data key=’user.import.profile’ value=’false’/><data key=’cic.selector.os’ value=’linux’/><data key=’cic.selector.arch’ value=’s390x’/><data key=’cic.selector.ws’ value=’gtk’/><data key=’user.EKM_PROPFILE,com.ibm.sklm301.linux’ value=’/opt/IBM/KeyManagerConfig.properties’/><data key=’user.EKM_MIGRATION,com.ibm.sklm301.linux’ value=’false’/><data key=’user.PROFILE_NAME,com.ibm.sklm301.linux’ value=’KLMProfile’/><data key=’user.WAS_ADMIN_ID,com.ibm.sklm301.linux’ value=’tipadmin’/><data key=’user.WAS_ADMIN_PASSWORD,com.ibm.sklm301.linux’ value=’e9PjN93MeQxwnSs9VXJFMw==’/><data key=’user.WAS_ADMIN_CONF_PWD,com.ibm.sklm301.linux’ value=’e9PjN93MeQxwnSs9VXJFMw==’/><data key=’user.SKLM_ADMIN_USER,com.ibm.sklm301.linux’ value=’TKLMAdmin’/><data key=’user.SKLM_ADMIN_PASSWORD,com.ibm.sklm301.linux’ value=’9YTRJMRIydDSdfhaHPs1ag==’/><data key=’user.SKLM_ADMIN_CONF_PWD,com.ibm.sklm301.linux’ value=’9YTRJMRIydDSdfhaHPs1ag==’/><data key=’user.TKLM_VERSION,com.ibm.sklm301.linux’ value=’2.0.1’/><data key=’user.TKLM_TIP_HOME,com.ibm.sklm301.linux’ value=’/opt/IBM/tivoli/tiptklmV2/’/><data key=’user.TKLM_INSTALLED,com.ibm.sklm301.linux’ value=’true’/><data key=’user.TKLM_DB_PWD,com.ibm.sklm301.linux’ value=’/6vJK3fcU3QxHY+RVfCFVw==’/><data key=’user.TKLM_KEYSTORE_PWD,com.ibm.sklm301.linux’ value=’fufgZbY47EfxLYarBAIxeQ==’/><data key=’user.SKLM_APP_PORT,com.ibm.sklm301.linux’ value=’443’/><data key=’user.WAS_ADMIN_PORT,com.ibm.sklm301.linux’ value=’9083’/><data key=’user.SKLM_APP_NS_PORT,com.ibm.sklm301.linux’ value=’80’/><data key=’cic.selector.nl’ value=’en’/></profile><preference name=’com.ibm.cic.common.core.preferences.eclipseCache’ value=’/opt/IBM/IBMIMShared’/><preference name=’com.ibm.cic.common.core.preferences.connectTimeout’ value=’30’/><preference name=’com.ibm.cic.common.core.preferences.readTimeout’ value=’45’/><preference name=’com.ibm.cic.common.core.preferences.downloadAutoRetryCount’ value=’0’/><preference name=’offering.service.repositories.areUsed’ value=’true’/><preference name=’com.ibm.cic.common.core.preferences.ssl.nonsecureMode’ value=’false’/><preference name=’com.ibm.cic.common.core.preferences.http.disablePreemptiveAuthentication’ value=’false’/><preference name=’http.ntlm.auth.kind’ value=’NTLM’/><preference name=’http.ntlm.auth.enableIntegrated.win32’ value=’true’/><preference name=’com.ibm.cic.common.core.preferences.preserveDownloadedArtifacts’ value=’true’/><preference name=’com.ibm.cic.common.core.preferences.keepFetchedFiles’ value=’false’/><preference name=’PassportAdvantageIsEnabled’ value=’false’/><preference name=’com.ibm.cic.common.core.preferences.searchForUpdates’ value=’false’/><preference name=’com.ibm.cic.agent.ui.displayInternalVersion’ value=’false’/><preference name=’com.ibm.cic.common.sharedUI.showErrorLog’ value=’true’/><preference name=’com.ibm.cic.common.sharedUI.showWarningLog’ value=’true’/><preference name=’com.ibm.cic.common.sharedUI.showNoteLog’ value=’true’/></agent-input>
Migration from version 2.7 to 3.0.1<?xml version="1.0" encoding="UTF-8"?><!--The "acceptLicense" attribute has been deprecated. Use "-acceptLicense" command line option to accept license agreements.--><agent-input clean=’true’ >
<server><repository location=’/disk1/im’/><repository location=’/disk1/’/></server>
Sample response files 135

<install modify=’false’><offering profile=’IBM Installation Manager’ id=’com.ibm.cic.agent’ features=’agent_core,agent_jre’ installFixes=’none’/><offering profile=’IBM DB2 SKLM301’ id=’com.ibm.sklm301.db2.lin.ofng’ features=’main.feature’ installFixes=’none’/><offering profile=’IBM WebSphere Application Server V9.0_1’ id=’com.ibm.websphere.BASE.v90’ features=’core.feature,ejbdeploy,thinclient,embeddablecontainer’ installFixes=’none’/><offering profile=’IBM WebSphere Application Server V9.0_1’ id=’com.ibm.java.jdk.v8’ features=’com.ibm.sdk.8’ installFixes=’none’/><offering profile=’IBM Security Key Lifecycle Manager v3.0.1’ id=’com.ibm.sklm301.linux’ features=’main.feature’ installFixes=’none’/></install>
<profile id=’IBM DB2 SKLM301’ installLocation=’/opt/IBM/DB2SKLMV301’><data key=’eclipseLocation’ value=’/opt/IBM/DB2SKLMV301’/><data key=’user.import.profile’ value=’false’/><data key=’cic.selector.os’ value=’linux’/><data key=’cic.selector.arch’ value=’s390x’/><data key=’cic.selector.ws’ value=’gtk’/><data key=’user.DB2_ADMIN_ID,com.ibm.sklm301.db2.lin.ofng’ value=’sklmdb31’/><!--The DB2 Group name should not be more than 8 characters --><data key=’user.DB2_ADMIN_GRP,com.ibm.sklm301.db2.lin.ofng’ value=’sklmdb31’/><data key=’user.DB2_ADMIN_PWD,com.ibm.sklm301.db2.lin.ofng’ value=’QTh/0AiFvrljhs9gnOYkGA==’/><data key=’user.CONFIRM_PASSWORD,com.ibm.sklm301.db2.lin.ofng’ value=’QTh/0AiFvrljhs9gnOYkGA==’/><data key=’user.DB2_DB_LHOME,com.ibm.sklm301.db2.lin.ofng’ value=’/home/sklmdb31’/><data key=’user.DB2_DB_NAME,com.ibm.sklm301.db2.lin.ofng’ value=’SKLMDB31’/><data key=’user.DB2_DB_PORT,com.ibm.sklm301.db2.lin.ofng’ value=’50050’/><data key=’user.DB2_EXISTS,com.ibm.sklm301.db2.lin.ofng’ value=’false’/><data key=’user.DB2_LOCATION,com.ibm.sklm301.db2.lin.ofng’ value=’/opt/IBM/DB2SKLMV301’/><data key=’cic.selector.nl’ value=’en’/></profile><profile id=’IBM Installation Manager’ installLocation=’/opt/IBM/InstallationManager/eclipse’ kind=’self’><data key=’eclipseLocation’ value=’/opt/IBM/InstallationManager/eclipse’/><data key=’user.import.profile’ value=’false’/><data key=’cic.selector.os’ value=’linux’/><data key=’cic.selector.arch’ value=’s390x’/><data key=’cic.selector.ws’ value=’gtk’/></profile><profile id=’IBM WebSphere Application Server V9.0’ installLocation=’/opt/IBM/WebSphere30/AppServer’><data key=’eclipseLocation’ value=’/opt/IBM/WebSphere30/AppServer’/><data key=’user.import.profile’ value=’false’/><data key=’cic.selector.os’ value=’linux’/><data key=’cic.selector.arch’ value=’s390x’/><data key=’cic.selector.ws’ value=’gtk’/><data key=’cic.selector.nl’ value=’en’/></profile><profile id=’IBM Security Key Lifecycle Manager v3.0.1’ installLocation=’/opt/IBM/SKLMV301’><data key=’eclipseLocation’ value=’/opt/IBM/SKLMV301’/><data key=’user.import.profile’ value=’false’/><data key=’cic.selector.os’ value=’linux’/><data key=’cic.selector.arch’ value=’s390x’/><data key=’cic.selector.ws’ value=’gtk’/><data key=’user.EKM_PROPFILE,com.ibm.sklm301.linux’ value=’/opt/IBM/KeyManagerConfig.properties’/><data key=’user.EKM_MIGRATION,com.ibm.sklm301.linux’ value=’false’/><data key=’user.PROFILE_NAME,com.ibm.sklm301.linux’ value=’KLMProfile’/><data key=’user.WAS_ADMIN_ID,com.ibm.sklm301.linux’ value=’tipadmin’/><data key=’user.WAS_ADMIN_PASSWORD,com.ibm.sklm301.linux’ value=’e9PjN93MeQxwnSs9VXJFMw==’/><data key=’user.WAS_ADMIN_CONF_PWD,com.ibm.sklm301.linux’ value=’e9PjN93MeQxwnSs9VXJFMw==’/><data key=’user.SKLM_ADMIN_USER,com.ibm.sklm301.linux’ value=’TKLMAdmin’/><data key=’user.SKLM_ADMIN_PASSWORD,com.ibm.sklm301.linux’ value=’9YTRJMRIydDSdfhaHPs1ag==’/><data key=’user.SKLM_ADMIN_CONF_PWD,com.ibm.sklm301.linux’ value=’9YTRJMRIydDSdfhaHPs1ag==’/><data key=’user.TKLM_VERSION,com.ibm.sklm301.linux’ value=’2.0.1’/><data key=’user.TKLM_TIP_HOME,com.ibm.sklm301.linux’ value=’/opt/IBM/tivoli/tiptklmV2/’/><data key=’user.TKLM_INSTALLED,com.ibm.sklm301.linux’ value=’true’/><data key=’user.TKLM_DB_PWD,com.ibm.sklm301.linux’ value=’/6vJK3fcU3QxHY+RVfCFVw==’/><data key=’user.TKLM_KEYSTORE_PWD,com.ibm.sklm301.linux’ value=’fufgZbY47EfxLYarBAIxeQ==’/><data key=’user.SKLM_APP_PORT,com.ibm.sklm301.linux’ value=’443’/><data key=’user.WAS_ADMIN_PORT,com.ibm.sklm301.linux’ value=’9083’/><data key=’user.SKLM_APP_NS_PORT,com.ibm.sklm301.linux’ value=’80’/><data key=’cic.selector.nl’ value=’en’/></profile>
136 Installing, migrating, and configuring

<preference name=’com.ibm.cic.common.core.preferences.eclipseCache’ value=’/opt/IBM/IBMIMShared’/><preference name=’com.ibm.cic.common.core.preferences.connectTimeout’ value=’30’/><preference name=’com.ibm.cic.common.core.preferences.readTimeout’ value=’45’/><preference name=’com.ibm.cic.common.core.preferences.downloadAutoRetryCount’ value=’0’/><preference name=’offering.service.repositories.areUsed’ value=’true’/><preference name=’com.ibm.cic.common.core.preferences.ssl.nonsecureMode’ value=’false’/><preference name=’com.ibm.cic.common.core.preferences.http.disablePreemptiveAuthentication’ value=’false’/><preference name=’http.ntlm.auth.kind’ value=’NTLM’/><preference name=’http.ntlm.auth.enableIntegrated.win32’ value=’true’/><preference name=’com.ibm.cic.common.core.preferences.preserveDownloadedArtifacts’ value=’true’/><preference name=’com.ibm.cic.common.core.preferences.keepFetchedFiles’ value=’false’/><preference name=’PassportAdvantageIsEnabled’ value=’false’/><preference name=’com.ibm.cic.common.core.preferences.searchForUpdates’ value=’false’/><preference name=’com.ibm.cic.agent.ui.displayInternalVersion’ value=’false’/><preference name=’com.ibm.cic.common.sharedUI.showErrorLog’ value=’true’/><preference name=’com.ibm.cic.common.sharedUI.showWarningLog’ value=’true’/><preference name=’com.ibm.cic.common.sharedUI.showNoteLog’ value=’true’/></agent-input>
Migration from version 3.0 to 3.0.1<?xml version="1.0" encoding="UTF-8"?><!--The "acceptLicense" attribute has been deprecated. Use "-acceptLicense" command line option to accept license agreements.--><agent-input clean=’true’ >
<server><repository location=’/disk1/im’/><repository location=’/disk1/’/></server>
<install modify=’false’><offering profile=’IBM Installation Manager’ id=’com.ibm.cic.agent’ features=’agent_core,agent_jre’ installFixes=’none’/><offering profile=’IBM DB2 SKLM301’ id=’com.ibm.sklm301.db2.lin.ofng’ features=’main.feature’ installFixes=’none’/><offering profile=’IBM WebSphere Application Server V9.0_1’ id=’com.ibm.websphere.BASE.v90’ features=’core.feature,ejbdeploy,thinclient,embeddablecontainer’ installFixes=’none’/><offering profile=’IBM WebSphere Application Server V9.0_1’ id=’com.ibm.java.jdk.v8’ features=’com.ibm.sdk.8’ installFixes=’none’/><offering profile=’IBM Security Key Lifecycle Manager v3.0.1’ id=’com.ibm.sklm301.linux’ features=’main.feature’ installFixes=’none’/></install>
<profile id=’IBM DB2 SKLM301’ installLocation=’/opt/IBM/DB2SKLMV301’><data key=’eclipseLocation’ value=’/opt/IBM/DB2SKLMV301’/><data key=’user.import.profile’ value=’false’/><data key=’cic.selector.os’ value=’linux’/><data key=’cic.selector.arch’ value=’s390x’/><data key=’cic.selector.ws’ value=’gtk’/><data key=’user.DB2_ADMIN_ID,com.ibm.sklm301.db2.lin.ofng’ value=’sklmdb31’/><!--The DB2 Group name should not be more than 8 characters --><data key=’user.DB2_ADMIN_GRP,com.ibm.sklm301.db2.lin.ofng’ value=’sklmdb31’/><data key=’user.DB2_ADMIN_PWD,com.ibm.sklm301.db2.lin.ofng’ value=’QTh/0AiFvrljhs9gnOYkGA==’/><data key=’user.CONFIRM_PASSWORD,com.ibm.sklm301.db2.lin.ofng’ value=’QTh/0AiFvrljhs9gnOYkGA==’/><data key=’user.DB2_DB_LHOME,com.ibm.sklm301.db2.lin.ofng’ value=’/home/sklmdb31’/><data key=’user.DB2_DB_HOME,com.ibm.sklm301.db2.lin.ofng’ value=’/home/sklmdb31’/><data key=’user.DB2_DB_NAME,com.ibm.sklm301.db2.lin.ofng’ value=’SKLMDB31’/><data key=’user.DB2_DB_PORT,com.ibm.sklm301.db2.lin.ofng’ value=’50050’/><data key=’user.DB2_EXISTS,com.ibm.sklm301.db2.lin.ofng’ value=’false’/><data key=’user.DB2_LOCATION,com.ibm.sklm301.db2.lin.ofng’ value=’/opt/IBM/DB2SKLMV301’/><data key=’cic.selector.nl’ value=’en’/></profile><profile id=’IBM Installation Manager’ installLocation=’/opt/IBM/InstallationManager/eclipse’ kind=’self’><data key=’eclipseLocation’ value=’/opt/IBM/InstallationManager/eclipse’/><data key=’user.import.profile’ value=’false’/><data key=’cic.selector.os’ value=’linux’/><data key=’cic.selector.arch’ value=’s390x’/><data key=’cic.selector.ws’ value=’gtk’/></profile><profile id=’IBM WebSphere Application Server V9.0_1’ installLocation=’/opt/IBM/WebSphere30/AppServer’><data key=’eclipseLocation’ value=’/opt/IBM/WebSphere30/AppServer’/><data key=’user.import.profile’ value=’false’/>
Sample response files 137

<data key=’cic.selector.os’ value=’linux’/><data key=’cic.selector.arch’ value=’s390x’/><data key=’cic.selector.ws’ value=’gtk’/><data key=’cic.selector.nl’ value=’en’/></profile><profile id=’IBM Security Key Lifecycle Manager v3.0.1’ installLocation=’/opt/IBM/SKLMV301’><data key=’eclipseLocation’ value=’/opt/IBM/SKLMV301’/><data key=’user.import.profile’ value=’false’/><data key=’cic.selector.os’ value=’linux’/><data key=’cic.selector.arch’ value=’s390x’/><data key=’cic.selector.ws’ value=’gtk’/><data key=’user.EKM_PROPFILE,com.ibm.sklm301.linux’ value=’/opt/IBM/KeyManagerConfig.properties’/><data key=’user.EKM_MIGRATION,com.ibm.sklm301.linux’ value=’false’/><data key=’user.PROFILE_NAME,com.ibm.sklm301.linux’ value=’KLMProfile’/><data key=’user.WAS_ADMIN_ID,com.ibm.sklm301.linux’ value=’tipadmin’/><data key=’user.WAS_ADMIN_PASSWORD,com.ibm.sklm301.linux’ value=’e9PjN93MeQxwnSs9VXJFMw==’/><data key=’user.WAS_ADMIN_CONF_PWD,com.ibm.sklm301.linux’ value=’e9PjN93MeQxwnSs9VXJFMw==’/><data key=’user.SKLM_ADMIN_USER,com.ibm.sklm301.linux’ value=’TKLMAdmin’/><data key=’user.SKLM_ADMIN_PASSWORD,com.ibm.sklm301.linux’ value=’9YTRJMRIydDSdfhaHPs1ag==’/><data key=’user.SKLM_ADMIN_CONF_PWD,com.ibm.sklm301.linux’ value=’9YTRJMRIydDSdfhaHPs1ag==’/><data key=’user.TKLM_VERSION,com.ibm.sklm301.linux’ value=’3.0.0.0’/><data key=’user.TKLM_TIP_HOME,com.ibm.sklm301.linux’ value=’/opt/IBM/WebSphere/AppServer/’/><data key=’user.TKLM_INSTALLED,com.ibm.sklm301.linux’ value=’true’/><data key=’user.INSTALL_AS_FP,com.ibm.sklm301.linux’ value=’false’/><data key=’user.TKLM_DB_PWD,com.ibm.sklm301.linux’ value=’/6vJK3fcU3QxHY+RVfCFVw==’/><data key=’user.TKLM_KEYSTORE_PWD,com.ibm.sklm301.linux’ value=’fufgZbY47EfxLYarBAIxeQ==’/><data key=’user.SKLM_APP_PORT,com.ibm.sklm301.linux’ value=’443’/><data key=’user.WAS_ADMIN_PORT,com.ibm.sklm301.linux’ value=’9083’/><data key=’user.SKLM_APP_NS_PORT,com.ibm.sklm301.linux’ value=’80’/><data key=’cic.selector.nl’ value=’en’/></profile><preference name=’com.ibm.cic.common.core.preferences.eclipseCache’ value=’/opt/IBM/IBMIMShared’/><preference name=’com.ibm.cic.common.core.preferences.connectTimeout’ value=’30’/><preference name=’com.ibm.cic.common.core.preferences.readTimeout’ value=’45’/><preference name=’com.ibm.cic.common.core.preferences.downloadAutoRetryCount’ value=’0’/><preference name=’offering.service.repositories.areUsed’ value=’true’/><preference name=’com.ibm.cic.common.core.preferences.ssl.nonsecureMode’ value=’false’/><preference name=’com.ibm.cic.common.core.preferences.http.disablePreemptiveAuthentication’ value=’false’/><preference name=’http.ntlm.auth.kind’ value=’NTLM’/><preference name=’http.ntlm.auth.enableIntegrated.win32’ value=’true’/><preference name=’com.ibm.cic.common.core.preferences.preserveDownloadedArtifacts’ value=’true’/><preference name=’com.ibm.cic.common.core.preferences.keepFetchedFiles’ value=’false’/><preference name=’PassportAdvantageIsEnabled’ value=’false’/><preference name=’com.ibm.cic.common.core.preferences.searchForUpdates’ value=’false’/><preference name=’com.ibm.cic.agent.ui.displayInternalVersion’ value=’false’/><preference name=’com.ibm.cic.common.sharedUI.showErrorLog’ value=’true’/><preference name=’com.ibm.cic.common.sharedUI.showWarningLog’ value=’true’/><preference name=’com.ibm.cic.common.sharedUI.showNoteLog’ value=’true’/></agent-input>
Earlier versions 2.5, 2.6, 2.7, and 3.0 to version 3.0.1 migration on AIXsystems
The example response files contain responses for an installation on AIX system inwhich IBM Security Key Lifecycle Manager earlier versions 2.5, 2.6, 2.7, and 3.0 toversion 3.0.1 migration occurs.
Note: To determine whether IBM Security Key Lifecycle Manager earlier versionexists and requires migration, use the tklmVersionInfo command. For example,type this command in a Jython session:print AdminTask.tklmVersionInfo<>
138 Installing, migrating, and configuring

Migration from version 2.5 to 3.0.1<?xml version="1.0" encoding="UTF-8"?><!--The "acceptLicense" attribute has been deprecated. Use "-acceptLicense" command line option to accept license agreements.--><agent-input clean=’true’><server><repository location=’/disk1/im’/><repository location=’/disk1/’/></server><install modify=’false’><offering profile=’IBM Installation Manager’ id=’com.ibm.cic.agent’ features=’agent_core,agent_jre’ installFixes=’none’/><offering profile=’IBM DB2 SKLM301’ id=’com.ibm.sklm301.db2.aix.ofng’ features=’main.feature’ installFixes=’none’/><offering profile=’IBM WebSphere Application Server V9.0’ id=’com.ibm.websphere.BASE.v90’ features=’core.feature,ejbdeploy,thinclient,embeddablecontainer’ installFixes=’none’/><offering profile=’IBM WebSphere Application Server V9.0’ id=’com.ibm.java.jdk.v8’ features=’com.ibm.sdk.8’ installFixes=’none’/><offering profile=’IBM Security Key Lifecycle Manager v3.0.1’ id=’com.ibm.sklm301.aix’ features=’main.feature’ installFixes=’none’/></install><profile id=’IBM DB2 SKLM301’ installLocation=’/opt/IBM/DB2SKLMV301’><data key=’eclipseLocation’ value=’/opt/IBM/DB2SKLMV301’/><data key=’user.import.profile’ value=’false’/><data key=’cic.selector.os’ value=’aix’/><data key=’cic.selector.arch’ value=’ppc64’/><data key=’cic.selector.ws’ value=’gtk’/><data key=’user.DB2_ADMIN_ID,com.ibm.sklm301.db2.aix.ofng’ value=’sklmdb31’/><!--The DB2 Group name should not be more than 8 characters --><data key=’user.DB2_ADMIN_GRP,com.ibm.sklm301.db2.aix.ofng’ value=’bin’/><data key=’user.DB2_ADMIN_PWD,com.ibm.sklm301.db2.aix.ofng’ value=’QTh/0AiFvrljhs9gnOYkGA==’/><data key=’user.CONFIRM_PASSWORD,com.ibm.sklm301.db2.aix.ofng’ value=’QTh/0AiFvrljhs9gnOYkGA==’/><data key=’user.DB2_DB_HOME,com.ibm.sklm301.db2.aix.ofng’ value=’/home/sklmdb31’/><data key=’user.DB2_DB_NAME,com.ibm.sklm301.db2.aix.ofng’ value=’SKLMDB31’/><data key=’user.DB2_DB_PORT,com.ibm.sklm301.db2.aix.ofng’ value=’50050’/><data key=’user.DB2_EXISTS,com.ibm.sklm301.db2.aix.ofng’ value=’false’/><data key=’user.DB2_LOCATION,com.ibm.sklm301.db2.aix.ofng’ value=’/opt/IBM/DB2SKLMV301’/><data key=’cic.selector.nl’ value=’en’/></profile><profile id=’IBM Installation Manager’ installLocation=’/opt/IBM/InstallationManager/eclipse’ kind=’self’><data key=’eclipseLocation’ value=’/opt/IBM/InstallationManager/eclipse’/><data key=’user.import.profile’ value=’false’/><data key=’cic.selector.os’ value=’aix’/><data key=’cic.selector.arch’ value=’ppc’/><data key=’cic.selector.ws’ value=’gtk’/></profile><profile id=’IBM WebSphere Application Server V9.0’ installLocation=’/usr/IBM/WebSphere30/AppServer’><data key=’eclipseLocation’ value=’/usr/IBM/WebSphere30/AppServer’/><data key=’user.import.profile’ value=’false’/><data key=’cic.selector.os’ value=’aix’/><data key=’cic.selector.arch’ value=’ppc64’/><data key=’cic.selector.ws’ value=’gtk’/><data key=’cic.selector.nl’ value=’en’/></profile><profile id=’IBM Security Key Lifecycle Manager v3.0.1’ installLocation=’/opt/IBM/SKLMV301’><data key=’eclipseLocation’ value=’/opt/IBM/SKLMV301’/><data key=’user.import.profile’ value=’false’/><data key=’cic.selector.os’ value=’aix’/><data key=’cic.selector.arch’ value=’ppc64’/><data key=’cic.selector.ws’ value=’gtk’/><data key=’user.EKM_PROPFILE,com.ibm.sklm301.aix’ value=’/opt/IBM/KeyManagerConfig.properties’/><data key=’user.EKM_MIGRATION,com.ibm.sklm301.aix’ value=’false’/><data key=’user.PROFILE_NAME,com.ibm.sklm301.aix’ value=’KLMProfile’/><data key=’user.WAS_ADMIN_ID,com.ibm.sklm301.aix’ value=’tipadmin’/><data key=’user.WAS_ADMIN_PASSWORD,com.ibm.sklm301.aix’ value=’e9PjN93MeQxwnSs9VXJFMw==’/><data key=’user.WAS_ADMIN_CONF_PWD,com.ibm.sklm301.aix’ value=’e9PjN93MeQxwnSs9VXJFMw==’/><data key=’user.SKLM_ADMIN_USER,com.ibm.sklm301.aix’ value=’TKLMAdmin’/><data key=’user.SKLM_ADMIN_PASSWORD,com.ibm.sklm301.aix’ value=’9YTRJMRIydDSdfhaHPs1ag==’/><data key=’user.SKLM_ADMIN_CONF_PWD,com.ibm.sklm301.aix’ value=’9YTRJMRIydDSdfhaHPs1ag==’/><data key=’user.TKLM_VERSION,com.ibm.sklm301.aix’ value=’2.0.1’/><data key=’user.TKLM_TIP_HOME,com.ibm.sklm301.aix’ value=’/opt/IBM/tivoli/tiptklmV2/’/><data key=’user.TKLM_INSTALLED,com.ibm.sklm301.aix’ value=’true’/><data key=’user.TKLM_DB_PWD,com.ibm.sklm301.aix’ value=’/6vJK3fcU3QxHY+RVfCFVw==’/>
Sample response files 139

<data key=’user.TKLM_KEYSTORE_PWD,com.ibm.sklm301.aix’ value=’fufgZbY47EfxLYarBAIxeQ==’/><data key=’user.SKLM_APP_PORT,com.ibm.sklm301.aix’ value=’443’/><data key=’user.WAS_ADMIN_PORT,com.ibm.sklm301.aix’ value=’9083’/><data key=’user.SKLM_APP_NS_PORT,com.ibm.sklm301.aix’ value=’80’/><data key=’cic.selector.nl’ value=’en’/></profile><preference name=’com.ibm.cic.common.core.preferences.eclipseCache’ value=’/opt/IBM/IBMIMShared’/><preference name=’com.ibm.cic.common.core.preferences.connectTimeout’ value=’30’/><preference name=’com.ibm.cic.common.core.preferences.readTimeout’ value=’45’/><preference name=’com.ibm.cic.common.core.preferences.downloadAutoRetryCount’ value=’0’/><preference name=’offering.service.repositories.areUsed’ value=’true’/><preference name=’com.ibm.cic.common.core.preferences.ssl.nonsecureMode’ value=’false’/><preference name=’com.ibm.cic.common.core.preferences.http.disablePreemptiveAuthentication’ value=’false’/><preference name=’http.ntlm.auth.kind’ value=’NTLM’/><preference name=’http.ntlm.auth.enableIntegrated.win32’ value=’true’/><preference name=’com.ibm.cic.common.core.preferences.preserveDownloadedArtifacts’ value=’true’/><preference name=’com.ibm.cic.common.core.preferences.keepFetchedFiles’ value=’false’/><preference name=’PassportAdvantageIsEnabled’ value=’false’/><preference name=’com.ibm.cic.common.core.preferences.searchForUpdates’ value=’false’/><preference name=’com.ibm.cic.agent.ui.displayInternalVersion’ value=’false’/><preference name=’com.ibm.cic.common.sharedUI.showErrorLog’ value=’true’/><preference name=’com.ibm.cic.common.sharedUI.showWarningLog’ value=’true’/><preference name=’com.ibm.cic.common.sharedUI.showNoteLog’ value=’true’/></agent-input>
Migration from version 2.6 to 3.0.1<?xml version="1.0" encoding="UTF-8"?><!--The "acceptLicense" attribute has been deprecated. Use "-acceptLicense" command line option to accept license agreements.--><agent-input clean=’true’><server><repository location=’/disk1/im’/><repository location=’/disk1/’/></server><install modify=’false’><offering profile=’IBM Installation Manager’ id=’com.ibm.cic.agent’ features=’agent_core,agent_jre’ installFixes=’none’/><offering profile=’IBM DB2 SKLM301’ id=’com.ibm.sklm301.db2.aix.ofng’ features=’main.feature’ installFixes=’none’/><offering profile=’IBM WebSphere Application Server V9.0’ id=’com.ibm.websphere.BASE.v90’ features=’core.feature,ejbdeploy,thinclient,embeddablecontainer’ installFixes=’none’/><offering profile=’IBM WebSphere Application Server V9.0’ id=’com.ibm.java.jdk.v8’ features=’com.ibm.sdk.8’ installFixes=’none’/><offering profile=’IBM Security Key Lifecycle Manager v3.0.1’ id=’com.ibm.sklm301.aix’ features=’main.feature’ installFixes=’none’/></install><profile id=’IBM DB2 SKLM301’ installLocation=’/opt/IBM/DB2SKLMV301’><data key=’eclipseLocation’ value=’/opt/IBM/DB2SKLMV301’/><data key=’user.import.profile’ value=’false’/><data key=’cic.selector.os’ value=’aix’/><data key=’cic.selector.arch’ value=’ppc64’/><data key=’cic.selector.ws’ value=’gtk’/><data key=’user.DB2_ADMIN_ID,com.ibm.sklm301.db2.aix.ofng’ value=’sklmdb31’/><!--The DB2 Group name should not be more than 8 characters --><data key=’user.DB2_ADMIN_GRP,com.ibm.sklm301.db2.aix.ofng’ value=’bin’/><data key=’user.DB2_ADMIN_PWD,com.ibm.sklm301.db2.aix.ofng’ value=’QTh/0AiFvrljhs9gnOYkGA==’/><data key=’user.CONFIRM_PASSWORD,com.ibm.sklm301.db2.aix.ofng’ value=’QTh/0AiFvrljhs9gnOYkGA==’/><data key=’user.DB2_DB_HOME,com.ibm.sklm301.db2.aix.ofng’ value=’/home/sklmdb31’/><data key=’user.DB2_DB_NAME,com.ibm.sklm301.db2.aix.ofng’ value=’SKLMDB31’/><data key=’user.DB2_DB_PORT,com.ibm.sklm301.db2.aix.ofng’ value=’50050’/><data key=’user.DB2_EXISTS,com.ibm.sklm301.db2.aix.ofng’ value=’false’/><data key=’user.DB2_LOCATION,com.ibm.sklm301.db2.aix.ofng’ value=’/opt/IBM/DB2SKLMV301’/><data key=’cic.selector.nl’ value=’en’/></profile><profile id=’IBM Installation Manager’ installLocation=’/opt/IBM/InstallationManager/eclipse’ kind=’self’><data key=’eclipseLocation’ value=’/opt/IBM/InstallationManager/eclipse’/><data key=’user.import.profile’ value=’false’/><data key=’cic.selector.os’ value=’aix’/><data key=’cic.selector.arch’ value=’ppc’/><data key=’cic.selector.ws’ value=’gtk’/></profile><profile id=’IBM WebSphere Application Server V9.0’ installLocation=’/usr/IBM/WebSphere30/AppServer’>
140 Installing, migrating, and configuring

<data key=’eclipseLocation’ value=’/usr/IBM/WebSphere30/AppServer’/><data key=’user.import.profile’ value=’false’/><data key=’cic.selector.os’ value=’aix’/><data key=’cic.selector.arch’ value=’ppc64’/><data key=’cic.selector.ws’ value=’gtk’/><data key=’cic.selector.nl’ value=’en’/></profile><profile id=’IBM Security Key Lifecycle Manager v3.0.1’ installLocation=’/opt/IBM/SKLMV301’><data key=’eclipseLocation’ value=’/opt/IBM/SKLMV301’/><data key=’user.import.profile’ value=’false’/><data key=’cic.selector.os’ value=’aix’/><data key=’cic.selector.arch’ value=’ppc64’/><data key=’cic.selector.ws’ value=’gtk’/><data key=’user.EKM_PROPFILE,com.ibm.sklm301.aix’ value=’/opt/IBM/KeyManagerConfig.properties’/><data key=’user.EKM_MIGRATION,com.ibm.sklm301.aix’ value=’false’/><data key=’user.PROFILE_NAME,com.ibm.sklm301.aix’ value=’KLMProfile’/><data key=’user.WAS_ADMIN_ID,com.ibm.sklm301.aix’ value=’tipadmin’/><data key=’user.WAS_ADMIN_PASSWORD,com.ibm.sklm301.aix’ value=’e9PjN93MeQxwnSs9VXJFMw==’/><data key=’user.WAS_ADMIN_CONF_PWD,com.ibm.sklm301.aix’ value=’e9PjN93MeQxwnSs9VXJFMw==’/><data key=’user.SKLM_ADMIN_USER,com.ibm.sklm301.aix’ value=’TKLMAdmin’/><data key=’user.SKLM_ADMIN_PASSWORD,com.ibm.sklm301.aix’ value=’9YTRJMRIydDSdfhaHPs1ag==’/><data key=’user.SKLM_ADMIN_CONF_PWD,com.ibm.sklm301.aix’ value=’9YTRJMRIydDSdfhaHPs1ag==’/><data key=’user.TKLM_VERSION,com.ibm.sklm301.aix’ value=’2.0.1’/><data key=’user.TKLM_TIP_HOME,com.ibm.sklm301.aix’ value=’/opt/IBM/tivoli/tiptklmV2/’/><data key=’user.TKLM_INSTALLED,com.ibm.sklm301.aix’ value=’true’/><data key=’user.TKLM_DB_PWD,com.ibm.sklm301.aix’ value=’/6vJK3fcU3QxHY+RVfCFVw==’/><data key=’user.TKLM_KEYSTORE_PWD,com.ibm.sklm301.aix’ value=’fufgZbY47EfxLYarBAIxeQ==’/><data key=’user.SKLM_APP_PORT,com.ibm.sklm301.aix’ value=’443’/><data key=’user.WAS_ADMIN_PORT,com.ibm.sklm301.aix’ value=’9083’/><data key=’user.SKLM_APP_NS_PORT,com.ibm.sklm301.aix’ value=’80’/><data key=’cic.selector.nl’ value=’en’/></profile><preference name=’com.ibm.cic.common.core.preferences.eclipseCache’ value=’/opt/IBM/IBMIMShared’/><preference name=’com.ibm.cic.common.core.preferences.connectTimeout’ value=’30’/><preference name=’com.ibm.cic.common.core.preferences.readTimeout’ value=’45’/><preference name=’com.ibm.cic.common.core.preferences.downloadAutoRetryCount’ value=’0’/><preference name=’offering.service.repositories.areUsed’ value=’true’/><preference name=’com.ibm.cic.common.core.preferences.ssl.nonsecureMode’ value=’false’/><preference name=’com.ibm.cic.common.core.preferences.http.disablePreemptiveAuthentication’ value=’false’/><preference name=’http.ntlm.auth.kind’ value=’NTLM’/><preference name=’http.ntlm.auth.enableIntegrated.win32’ value=’true’/><preference name=’com.ibm.cic.common.core.preferences.preserveDownloadedArtifacts’ value=’true’/><preference name=’com.ibm.cic.common.core.preferences.keepFetchedFiles’ value=’false’/><preference name=’PassportAdvantageIsEnabled’ value=’false’/><preference name=’com.ibm.cic.common.core.preferences.searchForUpdates’ value=’false’/><preference name=’com.ibm.cic.agent.ui.displayInternalVersion’ value=’false’/><preference name=’com.ibm.cic.common.sharedUI.showErrorLog’ value=’true’/><preference name=’com.ibm.cic.common.sharedUI.showWarningLog’ value=’true’/><preference name=’com.ibm.cic.common.sharedUI.showNoteLog’ value=’true’/></agent-input>
Migration from version 2.7 to 3.0.1<?xml version="1.0" encoding="UTF-8"?><!--The "acceptLicense" attribute has been deprecated. Use "-acceptLicense" command line option to accept license agreements.--><agent-input clean=’true’><server><repository location=’/disk1/im’/><repository location=’/disk1/’/></server><install modify=’false’><offering profile=’IBM Installation Manager’ id=’com.ibm.cic.agent’ features=’agent_core,agent_jre’ installFixes=’none’/><offering profile=’IBM DB2 SKLM301’ id=’com.ibm.sklm301.db2.aix.ofng’ features=’main.feature’ installFixes=’none’/><offering profile=’IBM WebSphere Application Server V9.0_1’ id=’com.ibm.websphere.BASE.v90’ features=’core.feature,ejbdeploy,thinclient,embeddablecontainer’ installFixes=’none’/><offering profile=’IBM WebSphere Application Server V9.0_1’ id=’com.ibm.java.jdk.v8’ features=’com.ibm.sdk.8’ installFixes=’none’/><offering profile=’IBM Security Key Lifecycle Manager v3.0.1’ id=’com.ibm.sklm301.aix’ features=’main.feature’ installFixes=’none’/></install>
Sample response files 141

<profile id=’IBM DB2 SKLM301’ installLocation=’/opt/IBM/DB2SKLMV301’><data key=’eclipseLocation’ value=’/opt/IBM/DB2SKLMV301’/><data key=’user.import.profile’ value=’false’/><data key=’cic.selector.os’ value=’aix’/><data key=’cic.selector.arch’ value=’ppc64’/><data key=’cic.selector.ws’ value=’gtk’/><data key=’user.DB2_ADMIN_ID,com.ibm.sklm301.db2.aix.ofng’ value=’sklmdb31’/><!--The DB2 Group name should not be more than 8 characters --><data key=’user.DB2_ADMIN_GRP,com.ibm.sklm301.db2.aix.ofng’ value=’bin’/><data key=’user.DB2_ADMIN_PWD,com.ibm.sklm301.db2.aix.ofng’ value=’QTh/0AiFvrljhs9gnOYkGA==’/><data key=’user.CONFIRM_PASSWORD,com.ibm.sklm301.db2.aix.ofng’ value=’QTh/0AiFvrljhs9gnOYkGA==’/><data key=’user.DB2_DB_HOME,com.ibm.sklm301.db2.aix.ofng’ value=’/home/sklmdb31’/><data key=’user.DB2_DB_NAME,com.ibm.sklm301.db2.aix.ofng’ value=’SKLMDB31’/><data key=’user.DB2_DB_PORT,com.ibm.sklm301.db2.aix.ofng’ value=’50050’/><data key=’user.DB2_EXISTS,com.ibm.sklm301.db2.aix.ofng’ value=’false’/><data key=’user.DB2_LOCATION,com.ibm.sklm301.db2.aix.ofng’ value=’/opt/IBM/DB2SKLMV301’/><data key=’cic.selector.nl’ value=’en’/></profile><profile id=’IBM Installation Manager’ installLocation=’/opt/IBM/InstallationManager/eclipse’ kind=’self’><data key=’eclipseLocation’ value=’/opt/IBM/InstallationManager/eclipse’/><data key=’user.import.profile’ value=’false’/><data key=’cic.selector.os’ value=’aix’/><data key=’cic.selector.arch’ value=’ppc’/><data key=’cic.selector.ws’ value=’gtk’/></profile><profile id=’IBM WebSphere Application Server V9.0’ installLocation=’/usr/IBM/WebSphere30/AppServer’><data key=’eclipseLocation’ value=’/usr/IBM/WebSphere30/AppServer’/><data key=’user.import.profile’ value=’false’/><data key=’cic.selector.os’ value=’aix’/><data key=’cic.selector.arch’ value=’ppc64’/><data key=’cic.selector.ws’ value=’gtk’/><data key=’cic.selector.nl’ value=’en’/></profile><profile id=’IBM Security Key Lifecycle Manager v3.0.1’ installLocation=’/opt/IBM/SKLMV301’><data key=’eclipseLocation’ value=’/opt/IBM/SKLMV301’/><data key=’user.import.profile’ value=’false’/><data key=’cic.selector.os’ value=’aix’/><data key=’cic.selector.arch’ value=’ppc64’/><data key=’cic.selector.ws’ value=’gtk’/><data key=’user.EKM_PROPFILE,com.ibm.sklm301.aix’ value=’/opt/IBM/KeyManagerConfig.properties’/><data key=’user.EKM_MIGRATION,com.ibm.sklm301.aix’ value=’false’/><data key=’user.PROFILE_NAME,com.ibm.sklm301.aix’ value=’KLMProfile’/><data key=’user.WAS_ADMIN_ID,com.ibm.sklm301.aix’ value=’tipadmin’/><data key=’user.WAS_ADMIN_PASSWORD,com.ibm.sklm301.aix’ value=’e9PjN93MeQxwnSs9VXJFMw==’/><data key=’user.WAS_ADMIN_CONF_PWD,com.ibm.sklm301.aix’ value=’e9PjN93MeQxwnSs9VXJFMw==’/><data key=’user.SKLM_ADMIN_USER,com.ibm.sklm301.aix’ value=’TKLMAdmin’/><data key=’user.SKLM_ADMIN_PASSWORD,com.ibm.sklm301.aix’ value=’9YTRJMRIydDSdfhaHPs1ag==’/><data key=’user.SKLM_ADMIN_CONF_PWD,com.ibm.sklm301.aix’ value=’9YTRJMRIydDSdfhaHPs1ag==’/><data key=’user.TKLM_VERSION,com.ibm.sklm301.aix’ value=’2.0.1’/><data key=’user.TKLM_TIP_HOME,com.ibm.sklm301.aix’ value=’/opt/IBM/tivoli/tiptklmV2/’/><data key=’user.TKLM_INSTALLED,com.ibm.sklm301.aix’ value=’true’/><data key=’user.TKLM_DB_PWD,com.ibm.sklm301.aix’ value=’/6vJK3fcU3QxHY+RVfCFVw==’/><data key=’user.TKLM_KEYSTORE_PWD,com.ibm.sklm301.aix’ value=’fufgZbY47EfxLYarBAIxeQ==’/><data key=’user.SKLM_APP_PORT,com.ibm.sklm301.aix’ value=’443’/><data key=’user.WAS_ADMIN_PORT,com.ibm.sklm301.aix’ value=’9083’/><data key=’user.SKLM_APP_NS_PORT,com.ibm.sklm301.aix’ value=’80’/><data key=’cic.selector.nl’ value=’en’/></profile><preference name=’com.ibm.cic.common.core.preferences.eclipseCache’ value=’/opt/IBM/IBMIMShared’/><preference name=’com.ibm.cic.common.core.preferences.connectTimeout’ value=’30’/><preference name=’com.ibm.cic.common.core.preferences.readTimeout’ value=’45’/><preference name=’com.ibm.cic.common.core.preferences.downloadAutoRetryCount’ value=’0’/><preference name=’offering.service.repositories.areUsed’ value=’true’/><preference name=’com.ibm.cic.common.core.preferences.ssl.nonsecureMode’ value=’false’/><preference name=’com.ibm.cic.common.core.preferences.http.disablePreemptiveAuthentication’ value=’false’/><preference name=’http.ntlm.auth.kind’ value=’NTLM’/><preference name=’http.ntlm.auth.enableIntegrated.win32’ value=’true’/>
142 Installing, migrating, and configuring

<preference name=’com.ibm.cic.common.core.preferences.preserveDownloadedArtifacts’ value=’true’/><preference name=’com.ibm.cic.common.core.preferences.keepFetchedFiles’ value=’false’/><preference name=’PassportAdvantageIsEnabled’ value=’false’/><preference name=’com.ibm.cic.common.core.preferences.searchForUpdates’ value=’false’/><preference name=’com.ibm.cic.agent.ui.displayInternalVersion’ value=’false’/><preference name=’com.ibm.cic.common.sharedUI.showErrorLog’ value=’true’/><preference name=’com.ibm.cic.common.sharedUI.showWarningLog’ value=’true’/><preference name=’com.ibm.cic.common.sharedUI.showNoteLog’ value=’true’/></agent-input>
Migration from version 3.0 to 3.0.1<?xml version="1.0" encoding="UTF-8"?><!--The "acceptLicense" attribute has been deprecated. Use "-acceptLicense" command line option to accept license agreements.--><agent-input clean=’true’><server><repository location=’/disk1/im’/><repository location=’/disk1/’/></server><install modify=’false’><offering profile=’IBM Installation Manager’ id=’com.ibm.cic.agent’ features=’agent_core,agent_jre’ installFixes=’none’/><offering profile=’IBM DB2 SKLM301’ id=’com.ibm.sklm301.db2.aix.ofng’ features=’main.feature’ installFixes=’none’/><offering profile=’IBM WebSphere Application Server V9.0_1’ id=’com.ibm.websphere.BASE.v90’ features=’core.feature,ejbdeploy,thinclient,embeddablecontainer’ installFixes=’none’/><offering profile=’IBM WebSphere Application Server V9.0_1’ id=’com.ibm.java.jdk.v8’ features=’com.ibm.sdk.8’ installFixes=’none’/><offering profile=’IBM Security Key Lifecycle Manager v3.0.1’ id=’com.ibm.sklm301.aix’ features=’main.feature’ installFixes=’none’/></install><profile id=’IBM DB2 SKLM301’ installLocation=’/opt/IBM/DB2SKLMV301’><data key=’eclipseLocation’ value=’/opt/IBM/DB2SKLMV301’/><data key=’user.import.profile’ value=’false’/><data key=’cic.selector.os’ value=’aix’/><data key=’cic.selector.arch’ value=’ppc64’/><data key=’cic.selector.ws’ value=’gtk’/><data key=’user.DB2_ADMIN_ID,com.ibm.sklm301.db2.aix.ofng’ value=’sklmdb31’/><!--The DB2 Group name should not be more than 8 characters --><data key=’user.DB2_ADMIN_GRP,com.ibm.sklm301.db2.aix.ofng’ value=’bin’/><data key=’user.DB2_ADMIN_PWD,com.ibm.sklm301.db2.aix.ofng’ value=’QTh/0AiFvrljhs9gnOYkGA==’/><data key=’user.CONFIRM_PASSWORD,com.ibm.sklm301.db2.aix.ofng’ value=’QTh/0AiFvrljhs9gnOYkGA==’/><data key=’user.DB2_DB_HOME,com.ibm.sklm301.db2.aix.ofng’ value=’/home/sklmdb31’/><data key=’user.DB2_DB_NAME,com.ibm.sklm301.db2.aix.ofng’ value=’SKLMDB31’/><data key=’user.DB2_DB_PORT,com.ibm.sklm301.db2.aix.ofng’ value=’50050’/><data key=’user.DB2_EXISTS,com.ibm.sklm301.db2.aix.ofng’ value=’false’/><data key=’user.DB2_LOCATION,com.ibm.sklm301.db2.aix.ofng’ value=’/opt/IBM/DB2SKLMV301’/><data key=’cic.selector.nl’ value=’en’/></profile><profile id=’IBM Installation Manager’ installLocation=’/opt/IBM/InstallationManager/eclipse’ kind=’self’><data key=’eclipseLocation’ value=’/opt/IBM/InstallationManager/eclipse’/><data key=’user.import.profile’ value=’false’/><data key=’cic.selector.os’ value=’aix’/><data key=’cic.selector.arch’ value=’ppc’/><data key=’cic.selector.ws’ value=’gtk’/></profile><profile id=’IBM WebSphere Application Server V9.0_1’ installLocation=’/usr/IBM/WebSphere30/AppServer’><data key=’eclipseLocation’ value=’/usr/IBM/WebSphere30/AppServer’/><data key=’user.import.profile’ value=’false’/><data key=’cic.selector.os’ value=’aix’/><data key=’cic.selector.arch’ value=’ppc64’/><data key=’cic.selector.ws’ value=’gtk’/><data key=’cic.selector.nl’ value=’en’/></profile><profile id=’IBM Security Key Lifecycle Manager v3.0.1’ installLocation=’/opt/IBM/SKLMV301’><data key=’eclipseLocation’ value=’/opt/IBM/SKLMV301’/><data key=’user.import.profile’ value=’false’/><data key=’cic.selector.os’ value=’aix’/><data key=’cic.selector.arch’ value=’ppc64’/><data key=’cic.selector.ws’ value=’gtk’/><data key=’user.EKM_PROPFILE,com.ibm.sklm301.aix’ value=’/opt/IBM/KeyManagerConfig.properties’/><data key=’user.EKM_MIGRATION,com.ibm.sklm301.aix’ value=’false’/>
Sample response files 143

<data key=’user.PROFILE_NAME,com.ibm.sklm301.aix’ value=’KLMProfile’/><data key=’user.WAS_ADMIN_ID,com.ibm.sklm301.aix’ value=’tipadmin’/><data key=’user.WAS_ADMIN_PASSWORD,com.ibm.sklm301.aix’ value=’e9PjN93MeQxwnSs9VXJFMw==’/><data key=’user.WAS_ADMIN_CONF_PWD,com.ibm.sklm301.aix’ value=’e9PjN93MeQxwnSs9VXJFMw==’/><data key=’user.SKLM_ADMIN_USER,com.ibm.sklm301.aix’ value=’TKLMAdmin’/><data key=’user.SKLM_ADMIN_PASSWORD,com.ibm.sklm301.aix’ value=’9YTRJMRIydDSdfhaHPs1ag==’/><data key=’user.SKLM_ADMIN_CONF_PWD,com.ibm.sklm301.aix’ value=’9YTRJMRIydDSdfhaHPs1ag==’/><data key=’user.TKLM_VERSION,com.ibm.sklm301.aix’ value=’3.0.0.0’/><data key=’user.TKLM_TIP_HOME,com.ibm.sklm301.aix’ value=’/opt/IBM/WebSphere/AppServer’/><data key=’user.TKLM_INSTALLED,com.ibm.sklm301.aix’ value=’true’/><data key=’user.INSTALL_AS_FP,com.ibm.sklm301.aix’ value=’false’/><data key=’user.TKLM_DB_PWD,com.ibm.sklm301.aix’ value=’/6vJK3fcU3QxHY+RVfCFVw==’/><data key=’user.TKLM_KEYSTORE_PWD,com.ibm.sklm301.aix’ value=’fufgZbY47EfxLYarBAIxeQ==’/><data key=’user.SKLM_APP_PORT,com.ibm.sklm301.aix’ value=’443’/><data key=’user.WAS_ADMIN_PORT,com.ibm.sklm301.aix’ value=’9083’/><data key=’user.SKLM_APP_NS_PORT,com.ibm.sklm301.aix’ value=’80’/><data key=’cic.selector.nl’ value=’en’/></profile><preference name=’com.ibm.cic.common.core.preferences.eclipseCache’ value=’/opt/IBM/IBMIMShared’/><preference name=’com.ibm.cic.common.core.preferences.connectTimeout’ value=’30’/><preference name=’com.ibm.cic.common.core.preferences.readTimeout’ value=’45’/><preference name=’com.ibm.cic.common.core.preferences.downloadAutoRetryCount’ value=’0’/><preference name=’offering.service.repositories.areUsed’ value=’true’/><preference name=’com.ibm.cic.common.core.preferences.ssl.nonsecureMode’ value=’false’/><preference name=’com.ibm.cic.common.core.preferences.http.disablePreemptiveAuthentication’ value=’false’/><preference name=’http.ntlm.auth.kind’ value=’NTLM’/><preference name=’http.ntlm.auth.enableIntegrated.win32’ value=’true’/><preference name=’com.ibm.cic.common.core.preferences.preserveDownloadedArtifacts’ value=’true’/><preference name=’com.ibm.cic.common.core.preferences.keepFetchedFiles’ value=’false’/><preference name=’PassportAdvantageIsEnabled’ value=’false’/><preference name=’com.ibm.cic.common.core.preferences.searchForUpdates’ value=’false’/><preference name=’com.ibm.cic.agent.ui.displayInternalVersion’ value=’false’/><preference name=’com.ibm.cic.common.sharedUI.showErrorLog’ value=’true’/><preference name=’com.ibm.cic.common.sharedUI.showWarningLog’ value=’true’/><preference name=’com.ibm.cic.common.sharedUI.showNoteLog’ value=’true’/></agent-input>
Uninstallation on Windows systemsThe example response file contains responses for uninstall on Windows systems.<?xml version="1.0" encoding="UTF-8"?><agent-input clean=’true’ ><profile id=’IBM Security Key Lifecycle Manager v3.0.1’><data key=’user.WAS_ADMIN_ID,com.ibm.sklm301.win’ value=’wasadmin’/><data key=’user.WAS_ADMIN_PASSWORD,com.ibm.sklm301.win’ value=’e9PjN93MeQxwnSs9VXJFMw==’/></profile><uninstall modify=’false’><offering id=’com.ibm.sklm301.win’ profile=’IBM Security Key Lifecycle Manager v3.0.1’ features=’main.feature’/><offering id=’com.ibm.websphere.BASE.v90’ profile=’IBM WebSphere Application Server V9.0’ features=’core.feature,ejbdeploy,thinclient,embeddablecontainer’/><offering id=’com.ibm.java.jdk.v8’ profile=’IBM WebSphere Application Server V9.0’ features=’com.ibm.sdk.8’/><offering id=’com.ibm.sklm301.db2.win.ofng’ profile=’IBM DB2 SKLM301’ features=’main.feature’/></uninstall></agent-input>
Uninstallation on Linux systemsThe example response file contains responses for uninstall on a Linux system.<?xml version="1.0" encoding="UTF-8"?><agent-input clean=’true’ ><profile id=’IBM Security Key Lifecycle Manager v3.0.1’><data key=’user.WAS_ADMIN_ID,com.ibm.sklm301.linux’ value=’wasadmin’/><data key=’user.WAS_ADMIN_PASSWORD,com.ibm.sklm301.linux’ value=’e9PjN93MeQxwnSs9VXJFMw==’/></profile><uninstall modify=’false’><offering id=’com.ibm.sklm301.linux’ profile=’IBM Security Key Lifecycle Manager v3.0.1’ features=’main.feature’/><offering id=’com.ibm.websphere.BASE.v90’ profile=’IBM WebSphere Application Server V9.0’ features=’core.feature,ejbdeploy,thinclient,embeddablecontainer’/>
144 Installing, migrating, and configuring

<offering id=’com.ibm.java.jdk.v8’ profile=’IBM WebSphere Application Server V9.0’ features=’com.ibm.sdk.8’/><offering id=’com.ibm.sklm301.db2.lin.ofng’ profile=’IBM DB2 SKLM301’ features=’main.feature’/></uninstall></agent-input>
Uninstallation on Linux for System zThe example response file contains responses for uninstall on Linux for System z.<?xml version="1.0" encoding="UTF-8"?><agent-input clean=’true’ ><profile id=’IBM Security Key Lifecycle Manager v3.0.1’><data key=’user.WAS_ADMIN_ID,com.ibm.sklm301.linux’ value=’wasadmin’/><data key=’user.WAS_ADMIN_PASSWORD,com.ibm.sklm301.linux’ value=’e9PjN93MeQxwnSs9VXJFMw==’/></profile><uninstall modify=’false’><offering id=’com.ibm.sklm301.linux’ profile=’IBM Security Key Lifecycle Manager v3.0.1’ features=’main.feature’/><offering id=’com.ibm.websphere.BASE.v90’ profile=’IBM WebSphere Application Server V9.0’ features=’core.feature,ejbdeploy,thinclient,embeddablecontainer’/><offering id=’com.ibm.java.jdk.v8’ profile=’IBM WebSphere Application Server V9.0’ features=’com.ibm.sdk.8’ /><offering id=’com.ibm.sklm301.db2.lin.ofng’ profile=’IBM DB2 SKLM301’ features=’main.feature’/></uninstall></agent-input>
Uninstallation on Linux PPC systemsThe example response file contains responses for uninstall on a Linux PPC system.<?xml version="1.0" encoding="UTF-8"?><agent-input clean=’true’ ><profile id=’IBM Security Key Lifecycle Manager v3.0.1’><data key=’user.WAS_ADMIN_ID,com.ibm.sklm301.linux’ value=’wasadmin’/><data key=’user.WAS_ADMIN_PASSWORD,com.ibm.sklm301.linux’ value=’e9PjN93MeQxwnSs9VXJFMw==’/></profile><uninstall modify=’false’><offering id=’com.ibm.sklm301.linux’ profile=’IBM Security Key Lifecycle Manager v3.0.1’ features=’main.feature’/><offering id=’com.ibm.websphere.BASE.v90’ profile=’IBM WebSphere Application Server V9.0’ features=’core.feature,ejbdeploy,thinclient,embeddablecontainer’/><offering id=’com.ibm.java.jdk.v8’ profile=’IBM WebSphere Application Server V9.0’ features=’com.ibm.sdk.8’ /><offering id=’com.ibm.sklm301.db2.lin.ofng’ profile=’IBM DB2 SKLM301’ features=’main.feature’/></uninstall></agent-input>
Uninstallation on AIX systemsThe example response file contains responses for uninstall on a AIX system.<?xml version="1.0" encoding="UTF-8"?><agent-input clean=’true’ ><profile id=’IBM Security Key Lifecycle Manager v3.0.1’><data key=’user.WAS_ADMIN_ID,com.ibm.sklm301.aix’ value=’wasadmin’/><data key=’user.WAS_ADMIN_PASSWORD,com.ibm.sklm301.aix’ value=’e9PjN93MeQxwnSs9VXJFMw==’/></profile><uninstall modify=’false’><offering id=’com.ibm.sklm301.aix’ profile=’IBM Security Key Lifecycle Manager v3.0.1’ features=’main.feature’/><offering id=’com.ibm.websphere.BASE.v90’ profile=’IBM WebSphere Application Server V9.0’ features=’core.feature,ejbdeploy,thinclient,embeddablecontainer’/><offering id=’com.ibm.java.jdk.v8’ profile=’IBM WebSphere Application Server V9.0’ features=’com.ibm.sdk.8’/><offering id=’com.ibm.sklm301.db2.aix.ofng’ profile=’IBM DB2 SKLM301’ features=’main.feature’/></uninstall></agent-input>
Sample response files 145

146 Installing, migrating, and configuring

Notices
This information was developed for products and services offered in the U.S.A.IBM may not offer the products, services, or features discussed in this document inother countries. Consult your local IBM representative for information on theproducts and services currently available in your area. Any reference to an IBMproduct, program, or service is not intended to state or imply that only that IBMproduct, program, or service may be used. Any functionally equivalent product,program, or service that does not infringe any IBM intellectual property right maybe used instead. However, it is the user's responsibility to evaluate and verify theoperation of any non-IBM product, program, or service.
IBM may have patents or pending patent applications covering subject matterdescribed in this document. The furnishing of this document does not give youany license to these patents. You can send license inquiries, in writing, to:
IBM Director of LicensingIBM CorporationNorth Castle Drive, MD-NC119Armonk, NY 10504-1785US
For license inquiries regarding double-byte character set (DBCS) information,contact the IBM Intellectual Property Department in your country or sendinquiries, in writing, to:
Intellectual Property LicensingLegal and Intellectual Property LawIBM Japan, Ltd.19-21, Nihonbashi-Hakozakicho, Chuo-kuTokyo 103-8510, Japan
The following paragraph does not apply to the United Kingdom or any othercountry where such provisions are inconsistent with local law :
INTERNATIONAL BUSINESS MACHINES CORPORATION PROVIDES THISPUBLICATION "AS IS" WITHOUT WARRANTY OF ANY KIND, EITHEREXPRESS OR IMPLIED, INCLUDING, BUT NOT LIMITED TO, THE IMPLIEDWARRANTIES OF NON-INFRINGEMENT, MERCHANTABILITY OR FITNESSFOR A PARTICULAR PURPOSE.
Some jurisdictions do not allow disclaimer of express or implied warranties incertain transactions, therefore, this statement may not apply to you.
This information could include technical inaccuracies or typographical errors.Changes are periodically made to the information herein; these changes will beincorporated in new editions of the publication. IBM may make improvementsand/or changes in the product(s) and/or the program(s) described in thispublication at any time without notice.
Any references in this information to non-IBM Web sites are provided forconvenience only and do not in any manner serve as an endorsement of those Web
147

sites. The materials at those Web sites are not part of the materials for this IBMproduct and use of those Web sites is at your own risk.
IBM may use or distribute any of the information you supply in any way itbelieves appropriate without incurring any obligation to you.
Licensees of this program who wish to have information about it for the purposeof enabling: (i) the exchange of information between independently createdprograms and other programs (including this one) and (ii) the mutual use of theinformation which has been exchanged, should contact:
IBM Director of LicensingIBM CorporationNorth Castle Drive, MD-NC119Armonk, NY 10504-1785US
Such information may be available, subject to appropriate terms and conditions,including in some cases payment of a fee.
The licensed program described in this document and all licensed materialavailable for it are provided by IBM under terms of the IBM Customer Agreement,IBM International Program License Agreement or any equivalent agreementbetween us.
Any performance data contained herein was determined in a controlledenvironment. Therefore, the results obtained in other operating environments mayvary significantly. Some measurements may have been made on development-levelsystems and there is no guarantee that these measurements will be the same ongenerally available systems. Furthermore, some measurement may have beenestimated through extrapolation. Actual results may vary. Users of this documentshould verify the applicable data for their specific environment.
Information concerning non-IBM products was obtained from the suppliers ofthose products, their published announcements or other publicly available sources.IBM has not tested those products and cannot confirm the accuracy ofperformance, compatibility or any other claims related to non-IBM products.Questions on the capabilities of non-IBM products should be addressed to thesuppliers of those products.
All statements regarding IBM's future direction or intent are subject to change orwithdrawal without notice, and represent goals and objectives only.
All IBM prices shown are IBM's suggested retail prices, are current and are subjectto change without notice. Dealer prices may vary.
This information is for planning purposes only. The information herein is subject tochange before the products described become available.
This information contains examples of data and reports used in daily businessoperations. To illustrate them as completely as possible, the examples include thenames of individuals, companies, brands, and products. All of these names arefictitious and any similarity to the names and addresses used by an actual businessenterprise is entirely coincidental.
COPYRIGHT LICENSE:
148 Installing, migrating, and configuring

This information contains sample application programs in source language, whichillustrate programming techniques on various operating platforms. You may copy,modify, and distribute these sample programs in any form without payment toIBM, for the purposes of developing, using, marketing or distributing applicationprograms conforming to the application programming interface for the operatingplatform for which the sample programs are written. These examples have notbeen thoroughly tested under all conditions. IBM, therefore, cannot guarantee orimply reliability, serviceability, or function of these programs. The sampleprograms are provided "AS IS", without warranty of any kind. IBM shall not beliable for any damages arising out of your use of the sample programs.
Each copy or any portion of these sample programs or any derivative work, mustinclude a copyright notice as follows:
© (your company name) (year). Portions of this code are derived from IBM Corp.Sample Programs. © Copyright IBM Corp. _enter the year or years_.
If you are viewing this information in softcopy form, the photographs and colorillustrations might not be displayed.
Terms and conditions for product documentationPermissions for the use of these publications are granted subject to the followingterms and conditions.
ApplicabilityThese terms and conditions are in addition to any terms of use for the IBMwebsite.
Personal useYou may reproduce these publications for your personal, noncommercialuse provided that all proprietary notices are preserved. You may notdistribute, display or make derivative work of these publications, or anyportion thereof, without the express consent of IBM.
Commercial useYou may reproduce, distribute and display these publications solely withinyour enterprise provided that all proprietary notices are preserved. Youmay not make derivative works of these publications, or reproduce,distribute or display these publications or any portion thereof outside yourenterprise, without the express consent of IBM.
Rights Except as expressly granted in this permission, no other permissions,licenses or rights are granted, either express or implied, to the publicationsor any information, data, software or other intellectual property containedtherein.
IBM reserves the right to withdraw the permissions granted hereinwhenever, in its discretion, the use of the publications is detrimental to itsinterest or, as determined by IBM, the above instructions are not beingproperly followed.
You may not download, export or re-export this information except in fullcompliance with all applicable laws and regulations, including all UnitedStates export laws and regulations
IBM MAKES NO GUARANTEE ABOUT THE CONTENT OF THESEPUBLICATIONS. THE PUBLICATIONS ARE PROVIDED "AS-IS" ANDWITHOUT WARRANTY OF ANY KIND, EITHER EXPRESSED OR
Notices 149

IMPLIED, INCLUDING BUT NOT LIMITED TO IMPLIED WARRANTIESOF MERCHANTABILITY, NON-INFRINGEMENT, AND FITNESS FOR APARTICULAR PURPOSE.
TrademarksIBM, the IBM logo, and ibm.com are trademarks or registered trademarks ofInternational Business Machines Corp., registered in many jurisdictions worldwide.Other product and service names might be trademarks of IBM or other companies.A current list of IBM trademarks is available on the web at http://www.ibm.com/legal/copytrade.shtml.
Adobe, Acrobat, PostScript and all Adobe-based trademarks are either registeredtrademarks or trademarks of Adobe Systems Incorporated in the United States,other countries, or both.
IT Infrastructure Library is a registered trademark of the Central Computer andTelecommunications Agency which is now part of the Office of GovernmentCommerce.
Intel, Intel logo, Intel Inside, Intel Inside logo, Intel Centrino, Intel Centrino logo,Celeron, Intel Xeon, Intel SpeedStep, Itanium, and Pentium are trademarks orregistered trademarks of Intel Corporation or its subsidiaries in the United Statesand other countries.
Linux is a trademark of Linus Torvalds in the United States, other countries, orboth.
Microsoft, Windows, Windows NT, and the Windows logo are trademarks ofMicrosoft Corporation in the United States, other countries, or both.
ITIL is a registered trademark, and a registered community trademark of the Officeof Government Commerce, and is registered in the U.S. Patent and TrademarkOffice.
UNIX is a registered trademark of The Open Group in the United States and othercountries.
Java and all Java-based trademarks and logos are trademarks or registeredtrademarks of Oracle and/or its affiliates.
Cell Broadband Engine is a trademark of Sony Computer Entertainment, Inc. in theUnited States, other countries, or both and is used under license therefrom.
Linear Tape-Open, LTO, the LTO Logo, Ultrium, and the Ultrium logo aretrademarks of HP, IBM Corp. and Quantum in the U.S. and other countries.
150 Installing, migrating, and configuring

Index
Numerics3592
device group 18
Aadministrator
Db2 15, 63Db2 user ID, removing extra 44domain user ID, avoiding 44IBM Security Key Lifecycle
Manager 15, 63klmBackupRestoreGroup 17klmGUICLIAccessGroup 17klmSecurityOfficer 17limiting available tasks 17LTOAdmin 18LTOAuditor 18LTOOperator 18predefined groups 17reserved words 44, 50, 61SKLMAdmin 17SKLMAdmin user ID 17WASAdmin 17WebSphere Application Server 15, 63
AIX, requirements 8audit
Audit.handler.file.name 17log 17
Audit.handler.file.name, property 17authority
SYSADM for database 13SYSCTRL for database 13SYSMAINT for database 13
automatic servicesdisabling
Db2 96WebSphere Application Server 96
enablingDb2 69, 83migration recovery mode 83WebSphere Application Server 69
Bbackup
migration 31backup and restore
klmBackupRestoreGroup 17best practices, non-root 59BRCD_ENCRYPTOR device group 18browser
certificate 66Firefox 14Internet Explorer 14problems, workarounds 66settings, Internet Explorer 76
Ccertificate
access to WebSphere ApplicationServer 66
browser 66conflicted after migration 28device group 28error as not trusted 66extracting 66pending 28rollover 28unknown after migration 28usage update 28
componentDB2 1IBM Security Key Lifecycle Manager
server 1WebSphere Application Server 1
configurationDb2 44IBM Security Key Lifecycle
Manager 51installation 39installation, earlier version 92IPv6 with IPv4 URL 63migration 39silent mode response file, deleting 63WebSphere Application Server 51
configuration, non-rootDb2 61
cross-migrationmulti-master setup 57
Ddatabase
SYSADM, SYSCTRL, or SYSMAINTauthority 13
database, requirement 13db_config.log 99DB_HOME, default directory 5DB_INSTANCE_HOME, default
directory 5Db2
administrator user IDcharacters allowed 44, 61domain user ID, avoiding 44extra, removing 44, 61login password 44password security policy 44, 61when created 44, 61
autostart, disable 96configuration 44configuration, non-root 61DB2_COPY_NAME 44db2admin user ID 44directory name, specifying 44documentation website 14host name 72installation 44
Db2 (continued)instance owner user ID
disassociating from instance 94removing 95
instance, disassociating user ID 94kernel settings 14name of new copy 44Optional removal 93passwords 46, 48security 46, 48server, stopping 72services
autostart, disabling 96autostart, enabling 83enabling 69
sklmdb2instance name 15instance owner 15
uninstallationinstallation directory 93instance owner 93ports 93service entries 93
verifying installation 102DB2
administrator user IDcharacters allowed 50requirements 50restrictions 50
levels on operating systems 8db2_install.log 99db2admin user ID 44deployment
DB2 1IBM Security Key Lifecycle Manager
server 1WebSphere Application Server 1
device groups3592 18after migration 28BRCD_ENCRYPTOR 18DS5000 18DS8000 18ETERNUS_DX 18LTO 18ONESECURE 18XIV 18
directoryDB_HOME default 5DB_INSTANCE_HOME default 5default definitions 5SKLM_DATA, default 5SKLM_HOME default 5SKLM_INSTALL_HOME, default 5WAS_HOME default 5
domain controller, unsupported forinstallation 1
download installation 2DS5000
device group 18
151

DS8000device group 18
DVD installation 2
EEncrypted password
installation 43silent mode 43, 91uninstallation 43, 91
Encryption Key Managermigration 25
Encryption Key Manager migrationdata objects migrated 29failure recovery 79migration
conflicted keys and certificates 28stand-alone migration-recovery
script 28unknown keys and certificates 28validating 28
properties migrated 29recovery from failure 79requirements
IBM i systems 27JCEKS keystore 27properties 27version 2.1 only 27
restrictions 28steps during installation 52Website, to obtain 27
errorinstallation
disk space available 58license agreement 58no error logged 58no error message 58subdirectory removal 58
installation messages 105log files
db_config.log 99, 101db2_install.log 99, 101migration.log 99most important 99prsResults.xml 101reading 102sklmInstall.log 101
message format 105error messages
installation 105ETERNUS_DX 18
Ffailure
Encryption Key Manager migrationlog files 79migration-recovery script 79, 80recovery 79
IBM Security Key Lifecycle Managermigration
log files 80migration-recovery script 80, 81recovery 80
installation errorsdisk space available 58
failure (continued)installation errors (continued)
license agreement 58no error logged 58no error message 58subdirectory removal 58
migrationdebugging 83properties file 83recovery mode 83
featuresoverview
component deployment 1roles 18
Firefox browser 14fix packs
operating system support 8Passport Advantage 40
formatmessages 105
Gglobal security
disable 78enable 77
graphical modeinstalling 40
graphical mode installation 21graphical mode, uninstallation
stepsAIX 89
graphical mode, uninstallingsteps
Linux 89Windows 85
GUI mode installation 21guidelines, non-root 59
Hhardware
minimum values 7requirements
disk space 7typical values 7
hardware and softwarerequirements 7
host nameDb2 server 72WebSphere Application Server 72
IIBM ADE Service, started on Windows
systems 39IBM Security Key Lifecycle Manager
configuration 51verifying installation 102
IBM Security Key Lifecycle Managermigration
after migrationbackup 32best practice 32migration.log 32rollover deletion with 32
IBM Security Key Lifecycle Managermigration (continued)
after migration (continued)stand-alone migration-recovery
script 32data objects migrated 34failure recovery 80preparations 31properties migrated 34recovery from failure 80
imagesinstallation instructions 40Passport Advantage 40
initial user ID and password 15, 63install
libraries required 10Red Hat Enterprise Linux systems 10
installation 51AIX 39configuration 39Db2
configuration 44on local system 44password 46, 48security 46, 48
downloaded packageseImages 2steps to extract 2
DVD 2earlier version 92encrypted password 43Encryption Key Manager migration
after migration 28data objects migrated 29failure recovery 79IBM i systems 27planning 5properties migrated 29recovery from failure 79requirements 27restrictions 28steps during installation 52
errordisk space available 58license agreement 58no error logged 58no error message 58subdirectory removal 58
error log files 99field entry restrictions 39graphical mode 21, 40GUI mode 21host name
Db2 server 72WebSphere Application Server 72
IBM Security Key Lifecycle Managermigration
after migration 32data objects migrated 34failure recovery 80preparations 31properties migrated 34recovery from failure 80
imagesfix packs 40Passport Advantage 40
Linux 39
152 Installing, migrating, and configuring

installation (continued)locale selection 39migration log files, location 102mode 5network drive, avoiding 39non-root user, Linux 60overview 1panels 21path changes 39phases 1planning worksheets
Db2 36general 35IBM Security Key Lifecycle
Manager 37WebSphere Application Server 37
port, validating 64previously installed Db2 5process, validating 64requirements
runtime environment 12WebSphere Application Server 12
service, validating 64silent mode 21, 22, 42, 43steps 1subprograms
Composite Offering Installer 99Data Definition Language 99Deployment Engine 99IBM Installation Manager 99
time required 1, 39topology, determining 5types of 21uninstallation 85verification 102
command lists 75login 75server stop, start 75
WebSphere Application Serverconfiguration 51requirement 12
Windows 39wizard 21worksheets 5
Db2 36general 35IBM Security Key Lifecycle
Manager 37WebSphere Application Server 37
installation packageDVD or downloaded package 2setting up 2
installation wizard 21installation, non-root
best practices 59instance
name, sklmdb2 15owner, sklmdb2 15
instance owner user IDDB2 instance, disassociating 94removing 95
Internet Explorer browser 14Internet Explorer, settings 76IPv6 with IPv4 URL 63
JJava Runtime Environment,
requirement 13, 14
Kkernel settings for Db2 14key
conflicted after migration 28device group 28pending 28rollover 28unknown after migration 28usage update 28
keystorepassword 68
klmAdminDeviceGroup permission 18klmAudit permission 18klmBackup permission 18klmBackupRestoreGroup 17, 18klmConfigure permission 18klmCreate permission 18klmDelete permission 18klmGet permission 18klmGUICLIAccessGroup 18klmModify permission 18klmRestore permission 18klmSecurityOfficer 17klmSecurityOfficerGroup 18klmView permission 18
Llimitations
browser 66Linux
packages 9requirements 8Security Enhanced Linux (SELINUX),
disabling 12locale, correcting during installation 39log
audit 17db_config.log 99db2_install.log 99migration.log 99precheck.log 99results.txt 99sklmInstall*.log 99
loginport number 63URL 63user ID and password 15, 63WebSphere Application Server
port 63LTO
device group 18LTOAdmin 18LTOAuditor 18LTOOperator 18
Mmessages
format 105
messages (continued)installation errors, warnings 105
middlewareconfiguration
WebSphere Application Server 51deployment
DB2 1WebSphere Application Server 1
verifying installation 102migrate.bat command 25migrate.sh command 25migratestatus.properties file 83migrateToSKLM.bat command 25migrateToSKLM.sh command 25migration
<SKLM_INSTALL_HOME>\migration\bin directory 25
commands 25configuration 39data 25Db2 levels 31during installation only 25Encryption Key Manager 25, 52failure 79fix pack, current 31IBM ADE Service, started on
Windows 39IBM Security Key Lifecycle
Manager 25log files, location 102manual steps 25migrate command 25migration.log 31operating systems, unsupported 32preparations
key serving, temporary halt 26testing 26time needed 26
recovery script 25recovery, failure 79requirements 25restrictions
backup 31password 31
silent inline mode 53steps after failure 25utility 25
migration-recovery scriptEncryption Key Manager migration
locations 80password 80
IBM Security Key Lifecycle Managermigration
locations 81migration.log file 81password 81
migration.log 31, 99, 102multi-master setup
cross-migrated server 57
Nnon-root user, Linux
installing 60
Index 153

OONESECURE device group 18operating system
AIX 8DB2 levels 8Linux 12Linux packages 9PowerPC 8, 12RedHat Linux 8SuSE Linux 8System z 11Ubuntu 8Windows 8
operating systems, unsupportedmigration 32
Optional removalDb2 93
overviewdeploy 1features
component deployment 1roles 18
install 1installation 1
PPassport Advantage, installation
images 40password
Db2 46, 48initial login 15, 63migration restrictions 31
path, correcting during installation 39permissions
klmAdminDeviceGroup 18klmAudit 18klmBackup 18klmConfigure 18klmCreate 18klmDelete 18klmGet 18klmModify 18klmRestore 18klmView 18
planningEncryption Key Manager migration
after migration 28data objects migrated 29failure recovery 79IBM i systems 27properties migrated 29recovery from failure 79requirements 27restrictions 28steps during installation 52
IBM Security Key Lifecycle Managermigration
after migration 32data objects migrated 34failure recovery 80preparations 31properties migrated 34recovery from failure 80
installationhardware requirements 5
planning (continued)installation (continued)
migrate Encryption KeyManager 5
mode 5previously installed Db2 5topology, determining 5worksheets 5
installation worksheetsDb2 36general 35IBM Security Key Lifecycle
Manager 37WebSphere Application Server 37
worksheets 35port
installation default 63number
determining current 74https address 63IBM Security Key Lifecycle
Manager 64WebSphere Application Server 64
validating 64post-installation
security 66post-installation steps
automatic servicesDb2 69WebSphere Application Server 69
browser certificate 66configuration 63, 69, 70Db2, stop 72keystore password 68master key
protection 69master key, protection 69session timeout interval 70silent mode response file, deleting 63SSL 73timeout parameters 71transaction timeout 71verifying the installation
command lists 75login 75server stop, start 75
WebSphere Application Server 72problems
browser 66keystore password 68
processb2fmp.exe db2syscs.exe 64validating 64WASService.exe java.exe 64
protectionmaster key 69
Rrecovery mode
automatic services, enabling 83migration 83
recovery script, migration 25RedHat Linux, requirements 8required libraries
Red Hat Enterprise Linux 10
requirementsAIX 8browser
Firefox 14Internet Explorer 14
database 13DB2 levels 8fix pack 8hardware
disk space 7hardware and software 7Java Runtime Environment 13, 14Linux 12Linux packages 9migration 25PowerPC 12Red Hat Linux 8runtime environment 12, 13software 8, 9, 11, 12SuSE Linux 8System z 11WebSphere Application Server 12, 13Windows 8
response filesadapting 22sample 115samples 22
Encryption Key Managermigration, Windows 121
IBM Security Key LifecycleManager migration, AIX 120
IBM Security Key LifecycleManager migration, Linux 116
IBM Security Key LifecycleManager migration, Linux forSystem z 117
IBM Security Key LifecycleManager migration, LinuxPPC 119
IBM Security Key LifecycleManager migration,Windows 115
migration, AIX 138migration, Linux 127migration, Linux for System
z 132uninstall, AIX 145uninstall, Linux 144uninstall, Linux for System z 145uninstall, Linux PPC 145uninstall, Windows 144
silent installation 22REST services
Restart Server REST Service 76restrictions, migration 25roles
suppressmonitor 18
Ssample
response files 115sample response files
adapting 22Encryption Key Manager migration
Windows 121
154 Installing, migrating, and configuring

sample response files (continued)IBM Security Key Lifecycle Manager
migrationAIX 120Linux 116Linux for System z 117Linux PPC 119Windows 115
migrationAIX 138Linux 127Linux for System z 132
silent installation 22uninstall
Linux 144Linux for System z 145Linux or AIX 145Linux PPC 145Windows 144
script, migration recovery 25security
browser certificate 66Db2 46, 48IPv6 with IPv4 URL 63keystore password 68post-installation 66Security Enhanced Linux (SELINUX),
disabling 12silent mode response file, deleting 63stopServer command password 68WASService.Trace file 68
Security Enhanced Linux (SELINUX),disabling 12
server, restartinggraphical user interface 76GUI 76
serviceDb2 64validating 64
sessionbrowser
cookies 14JavaScript 14supported 14
timeout interval 70silent installation
description 21, 22silent mode
installing 42migrating 53
silent mode uninstallingsteps
Linux 90silent uninstallation
stepsWindows 86
silent, uninstallationAIX 90
SKLM_DATA, default directory 5SKLM_HOME, default directory 5SKLM_INSTALL_HOME, default
directory 5SKLMAdmin 15, 17sklmdb2
instance name 15instance owner 15
softwareAIX 8DB2 levels 8Linux 12Linux packages 9PowerPC 12RedHat Linux 8requirements 8, 9, 11, 12SuSE Linux 8System z 11Windows 8
SSLconfig.keystore.ssl.certalias
property 73configuration 73IBM Security Key Lifecycle Manager
keystore 73stand-alone migration-recovery
script 28, 32startServer
command 76script 76
steps in the installation 1stopServer
command password, cautiondisplaying 68, 76
global security user ID, password 76script 76
subprograms, installationComposite Offering Installer 99Data Definition Language 99Deployment Engine 99IBM Installation Manager 99
suppressmonitor role 18SuSE Linux, requirements 8SYSADM authority, database 13SYSCTRL authority, database 13SYSMAINT authority, database 13
Ttime, required for installation 1timeout
long running operations 71parameters 71
transaction timeout parameters 71TS3592, device family 18
Uuninstallation
AIX 89, 90Db2
installation directory 93instance owner 93ports 93service entries 93
encrypted password 43, 91introduction 85Linux 89, 90silent mode 43, 91steps
AIX 89, 90Linux 89, 90Sun Server Solaris 90Windows 85, 87
uninstallation (continued)Sun Server Solaris 90WebSphere Application Server 89, 90
AIX 89, 90Linux 89, 90Windows 85, 86
WebSphere Application Server onAIX 90
WebSphere Application Server onLinux 90
WebSphere Application Server on SunServer Solaris 90
WebSphere Application Server onWindows 87
Windows 85, 87uninstallation, graphical mode
Windows 85uninstallation, silent
Linux 90uninstallation, silent mode
stepsAIX 90
Windows 86user groups
klmBackupRestoreGroup 18klmGUICLIAccessGroup 18klmSecurityOfficerGroup 18LTOAdmin 18LTOAuditor 18LTOOperator 18
user IDIBM Security Key Lifecycle Manager
administrator 15, 63initial login 15, 63WebSphere Application Server
administrator 15, 63utility, migration 25
Vverifying installation
Db2 installation 102IBM Security Key Lifecycle
Manager 102installation 102middleware installation 102WebSphere Application Server 102
WWAS_HOME, default directory 5WASAdmin 15, 17WebSphere Application Server
configuration 51host name, changing 72services autostart
disabling 96enabling 69
verifying installation 102WebSphere Application Server,
requirement 12Windows, requirements 8wizard
installation 21panels 21
Index 155

workaroundsbrowser 66keystore password 68
worksheetsDb2 planning 36general installation planning 35
worksheets (continued)IBM Security Key Lifecycle Manager
planning 37installation planning 35WebSphere Application Server
planning 37
XXIV 18
156 Installing, migrating, and configuring