group posing guide - pointe dance photography
TRANSCRIPT
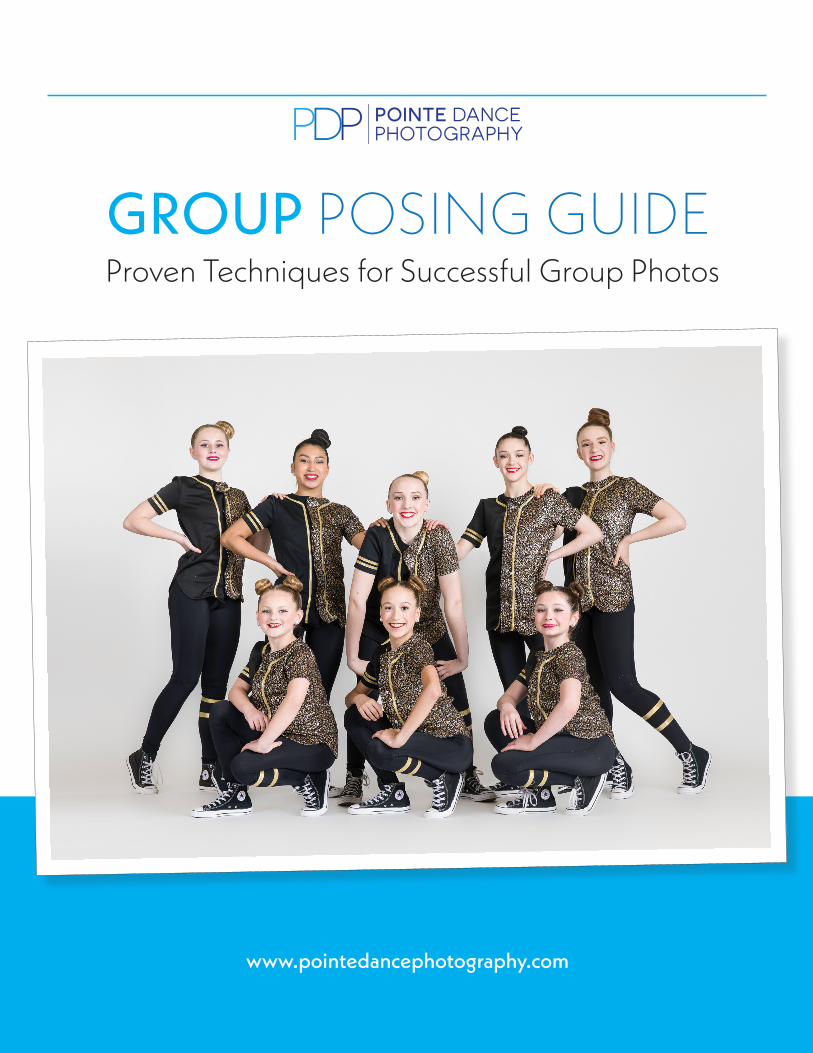
GROUP POSING GUIDEProven Techniques for Successful Group Photos
PDP POINTE dance photography
www.pointedancephotography.com

© 2019 Pointe Dance Photography. All Rights Reserved.
Group Posing Guide
Proven Techniques for Successful Group Photos
Table of Contents
PDP POINTE dance photography
Understanding Perspective
Posing Technique 1
Posing Technique 2
Posing Technique 3
Posing Technique 4
Posing Technique 5
Posing Technique 6
Posing Technique 7
3
4
5
6
7
8
9
10
11
Usable Space
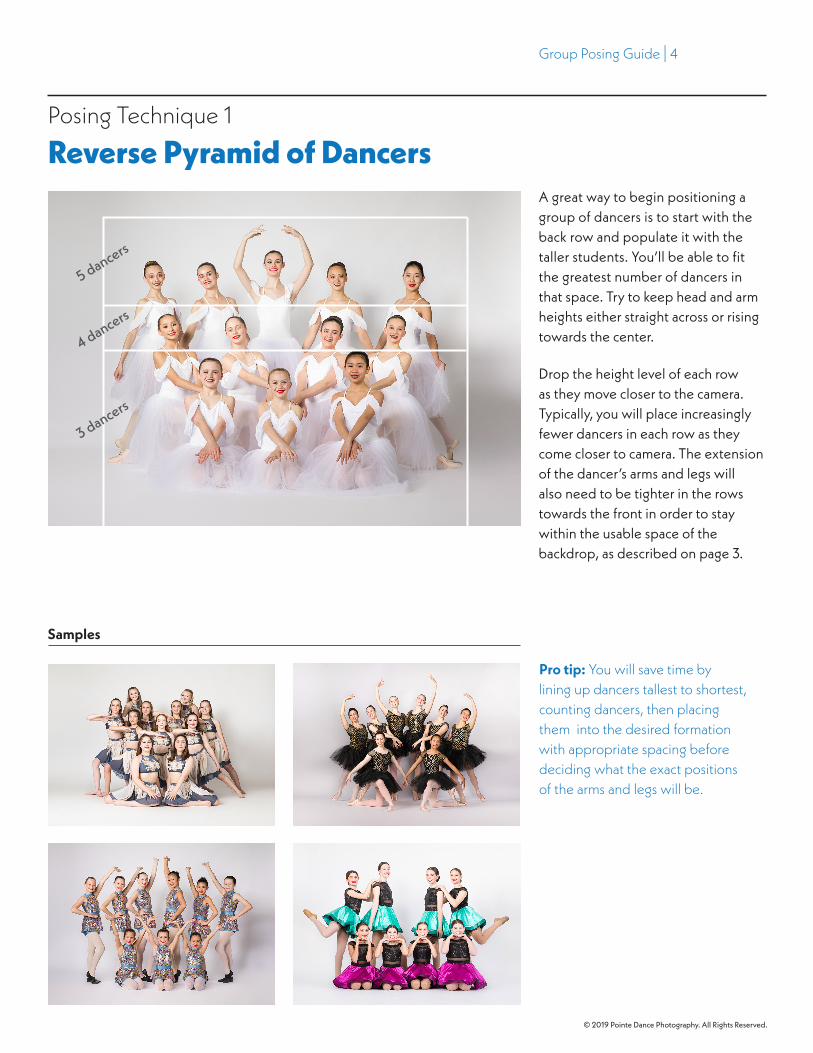
Reverse Pyramid of Dancers
Stacking Dancers in Levels
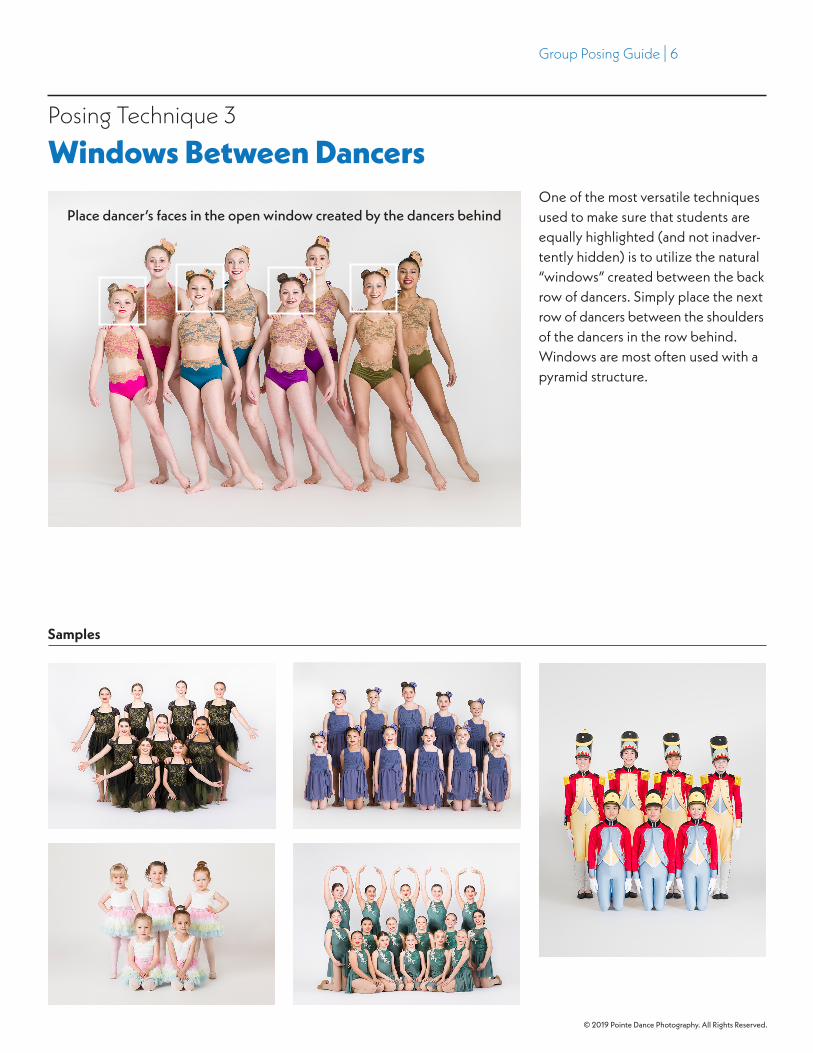
Windows Between Dancers
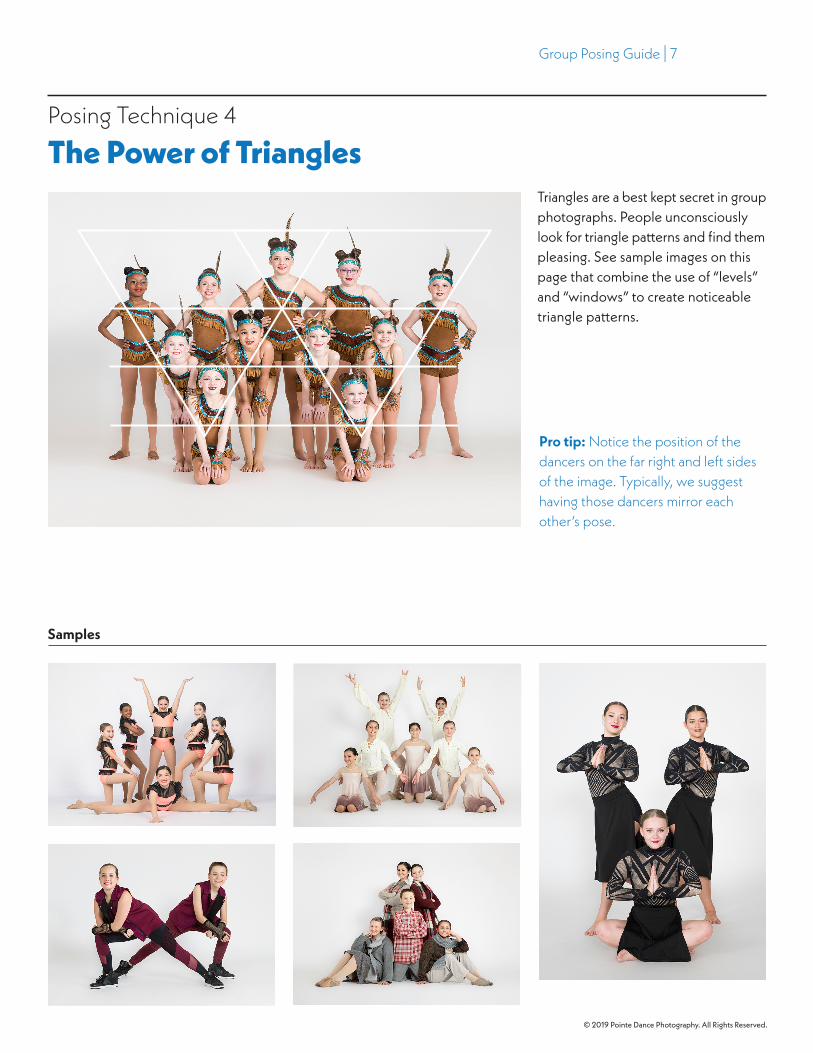
The Power of Triangles
Line of Dancers
Duets and Siblings
Very Large Groups
Inspiring Samples
Pro tip: Be mindful of maintainingbalance between right and left sides of the frame. This means equal spacing between dancers, being aware of head heights and being certain that all dancers are contributing to the balance and success of the pose.

Group Posing Guide | 3
© 2019 Pointe Dance Photography. All Rights Reserved.
Understanding perspective and depth. The illustration to the left depicts a birds-eye view of the group of dancers in the pose below. Yellow lines indicate the usable space the group must stay within so that they don’t extend past the width of the backdrop in the final cropped photograph.
From the photographer’s perspective, the usable space on the backdrop gets tighter as the dancers get closer to the camera. All arms, legs, and bodies must fit within this space. The closer the dancers are to the photographer, the less width s/he has to work with, and the tighter the pose must become.
The area towards the back has the most room, so place more dancers – and tallest dancers – in the back.
Creating Poses That Work With Perspective
Usable Space
Be mindful of the backdrop edges. Position dancers so that your photographer can crop a rectangle around the dancers.
photographer
front edge of backdrop paper
safety line
Backdrop paper curves upwards here towards the ceiling
Group Posing Guide | 4
© 2019 Pointe Dance Photography. All Rights Reserved.
Posing Technique 1
Reverse Pyramid of DancersA great way to begin positioning a group of dancers is to start with the back row and populate it with the taller students. You’ll be able to fit the greatest number of dancers in that space. Try to keep head and arm heights either straight across or rising towards the center.
Drop the height level of each row as they move closer to the camera. Typically, you will place increasingly fewer dancers in each row as they come closer to camera. The extension of the dancer’s arms and legs will also need to be tighter in the rows towards the front in order to stay within the usable space of the backdrop, as described on page 3.
5 dancers
4 dancers
3 dancers
Pro tip: You will save time by lining up dancers tallest to shortest, counting dancers, then placing them into the desired formation with appropriate spacing before deciding what the exact positions of the arms and legs will be.
Samples

Group Posing Guide | 5
© 2019 Pointe Dance Photography. All Rights Reserved.
Posing Technique 2
Stacking Dancers in LevelsStacking your dancers in levels is a simple and elegant solution when you have an even number of dancers (6, 9, 12) for each row. Create a few levels with each student directly in front of the student behind. Head levels should be at least a full head height above the dancers in front.
Samples
Group Posing Guide | 6
© 2019 Pointe Dance Photography. All Rights Reserved.
Posing Technique 3
Windows Between DancersOne of the most versatile techniques used to make sure that students are equally highlighted (and not inadver-tently hidden) is to utilize the natural “windows” created between the back row of dancers. Simply place the next row of dancers between the shoulders of the dancers in the row behind. Windows are most often used with a pyramid structure.
Place dancer’s faces in the open window created by the dancers behind
Samples
Group Posing Guide | 7
© 2019 Pointe Dance Photography. All Rights Reserved.
Posing Technique 4
The Power of TrianglesTriangles are a best kept secret in group photographs. People unconsciously look for triangle patterns and find them pleasing. See sample images on this page that combine the use of “levels” and “windows” to create noticeable triangle patterns.
Samples
Pro tip: Notice the position of the dancers on the far right and left sides of the image. Typically, we suggest having those dancers mirror each other’s pose.
Group Posing Guide | 8
© 2019 Pointe Dance Photography. All Rights Reserved.
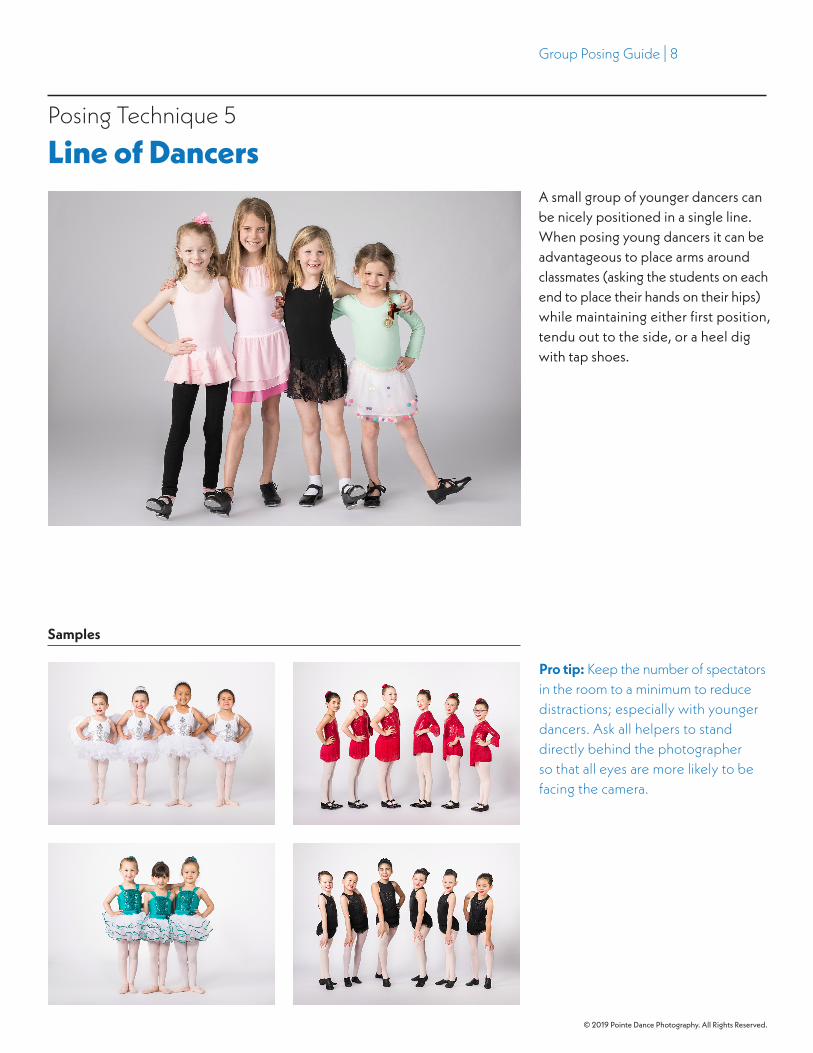
Posing Technique 5
Line of DancersA small group of younger dancers can be nicely positioned in a single line. When posing young dancers it can be advantageous to place arms around classmates (asking the students on each end to place their hands on their hips) while maintaining either first position, tendu out to the side, or a heel dig with tap shoes.
Pro tip: Keep the number of spectators in the room to a minimum to reduce distractions; especially with younger dancers. Ask all helpers to stand directly behind the photographer so that all eyes are more likely to be facing the camera.
Samples
Group Posing Guide | 9
© 2019 Pointe Dance Photography. All Rights Reserved.
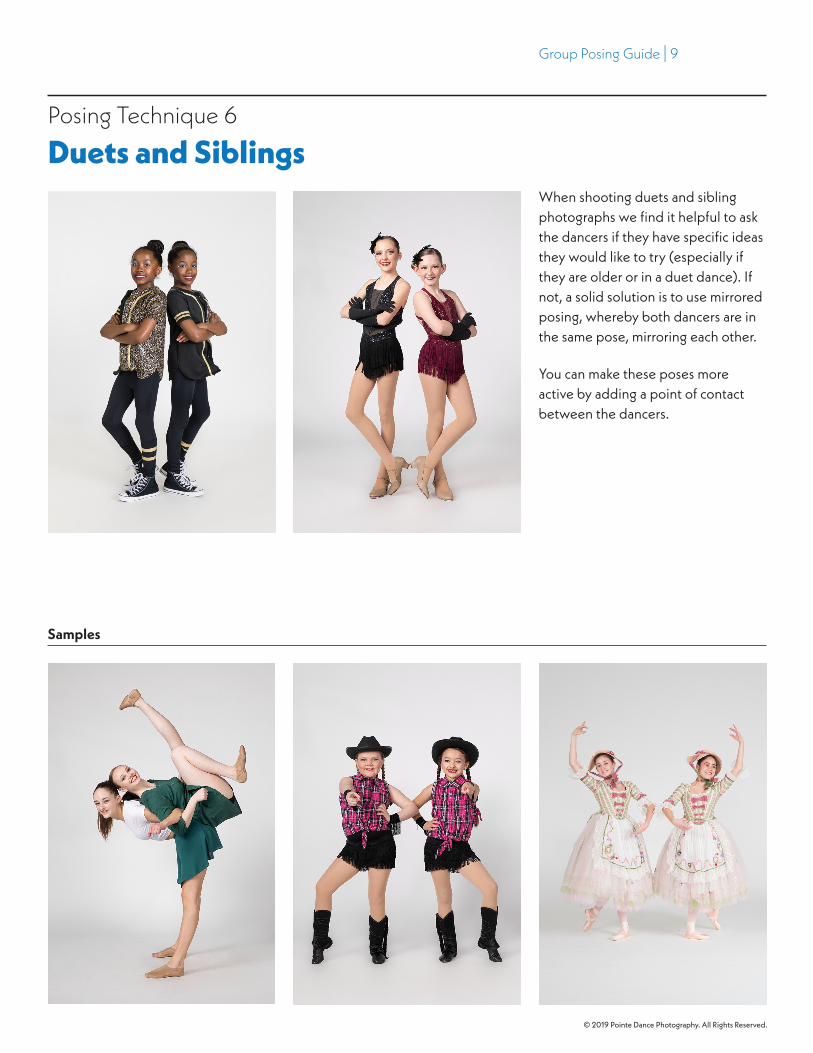
Posing Technique 6
Duets and SiblingsWhen shooting duets and sibling photographs we find it helpful to ask the dancers if they have specific ideas they would like to try (especially if they are older or in a duet dance). If not, a solid solution is to use mirrored posing, whereby both dancers are in the same pose, mirroring each other.
You can make these poses more active by adding a point of contact between the dancers.
Samples
Group Posing Guide | 10
© 2019 Pointe Dance Photography. All Rights Reserved.
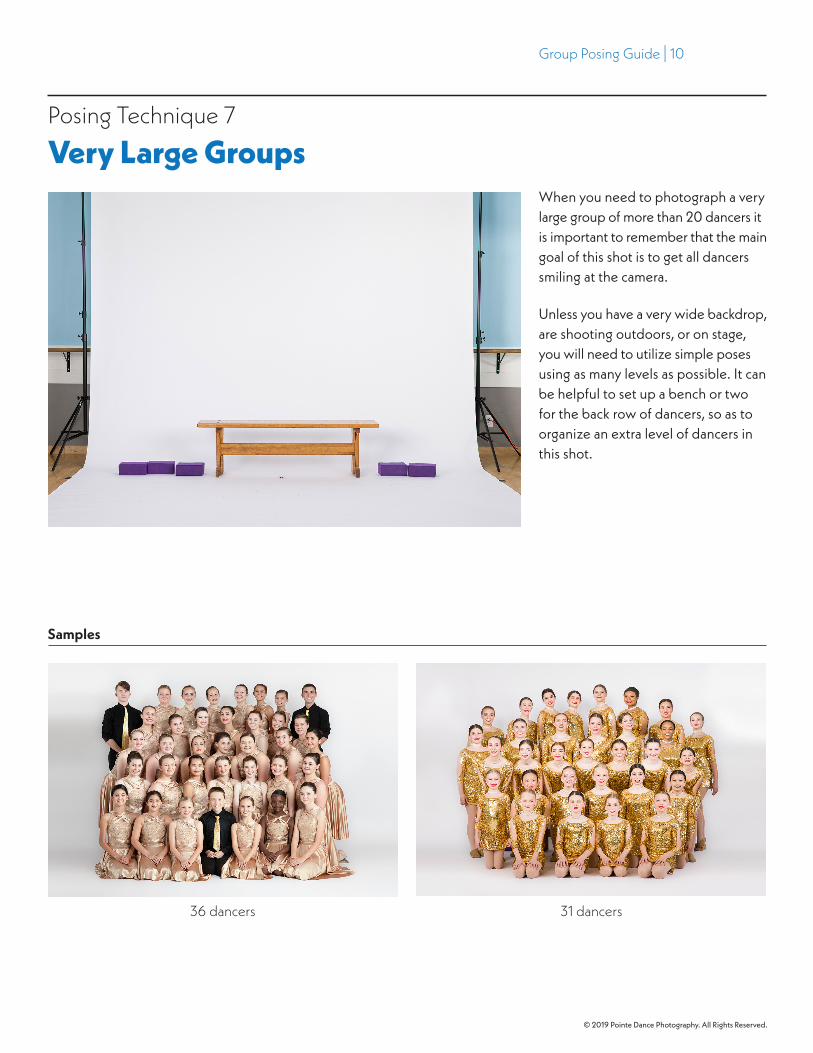
Posing Technique 7
Very Large GroupsWhen you need to photograph a very large group of more than 20 dancers it is important to remember that the main goal of this shot is to get all dancers smiling at the camera.
Unless you have a very wide backdrop, are shooting outdoors, or on stage, you will need to utilize simple poses using as many levels as possible. It can be helpful to set up a bench or two for the back row of dancers, so as to organize an extra level of dancers in this shot.
Samples
36 dancers 31 dancers
Group Posing Guide | 11
© 2019 Pointe Dance Photography. All Rights Reserved.
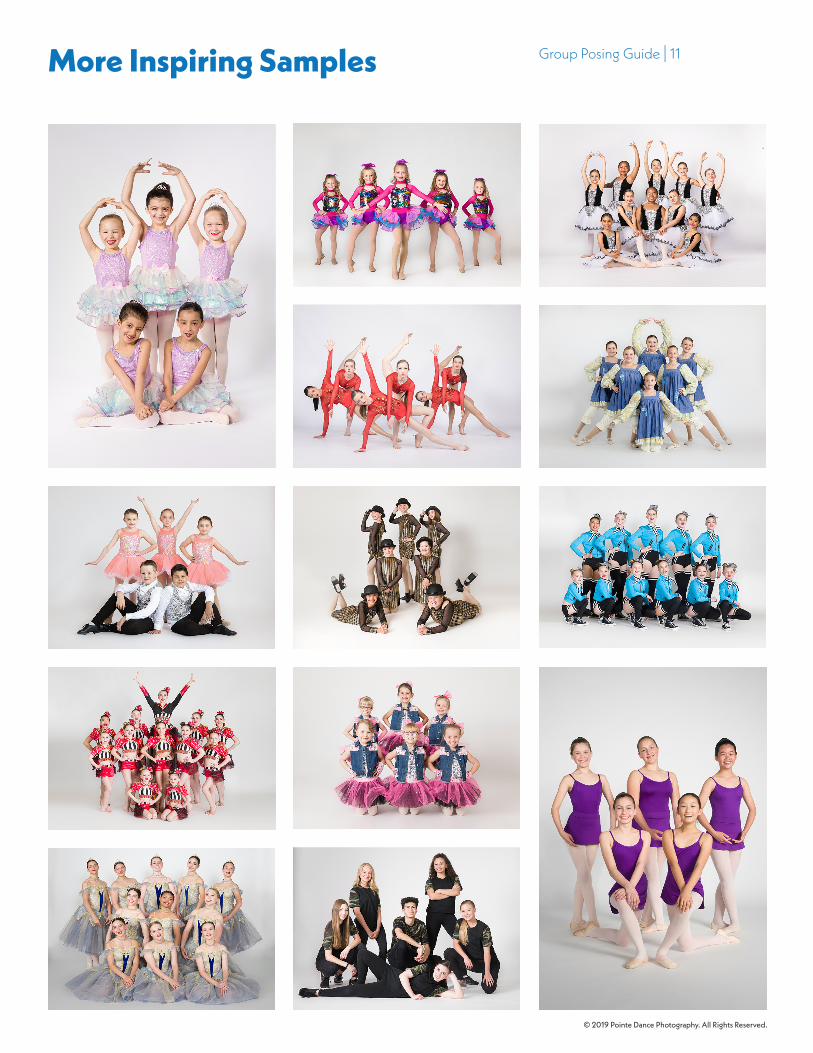
More Inspiring Samples
PDP POINTE dance photography
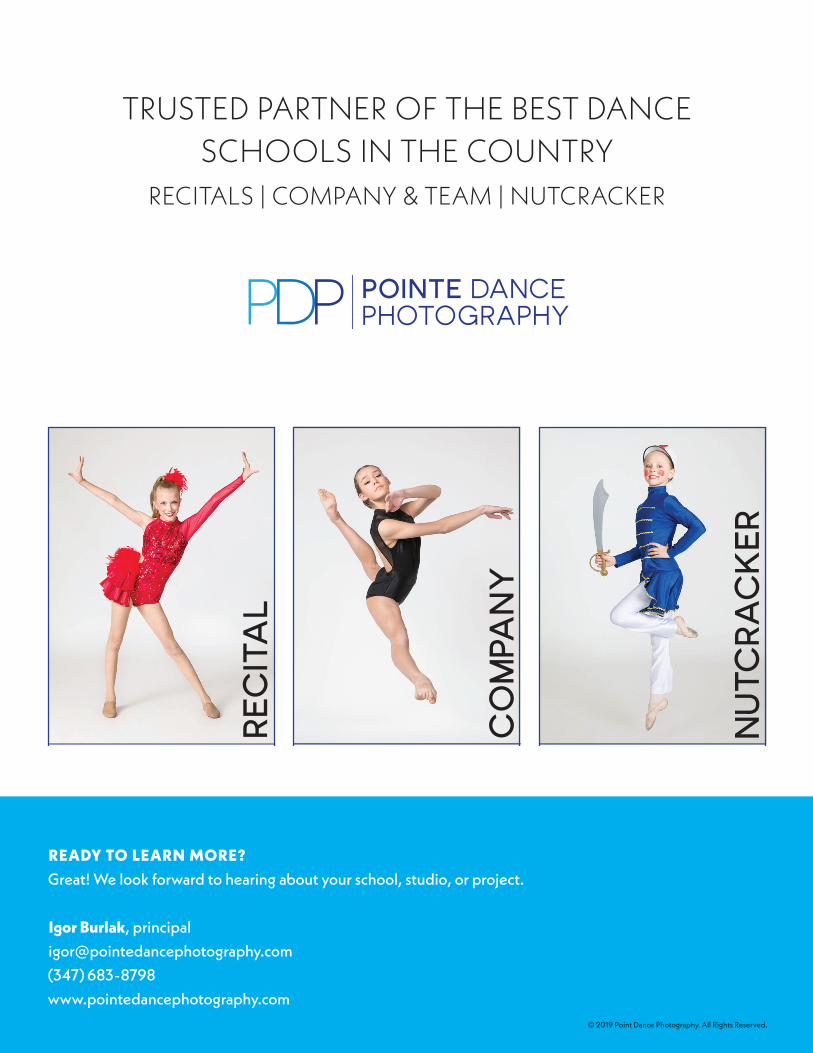
RECITAL
compAny
nutcracker
TRUSTED PARTNER OF THE BEST DANCE SCHOOLS IN THE COUNTRY
RECITALS | COMPANY & TEAM | NUTCRACKER
READY TO LEARN MORE?Great! We look forward to hearing about your school, studio, or project.
Igor Burlak, principal [email protected](347) 683-8798www.pointedancephotography.com
© 2019 Point Dance Photography. All Rights Reserved.