adcet guidelines - australian disability clearinghouse on
TRANSCRIPT

ADCET Guidelines Online Tertiary Access for Students and Staff who are Blind or Vision Impaired
1
Acknowledgements This resource has been produced by the Australian Disability Clearinghouse on Education and Training (ADCET) in partnership with Blind Citizens Australia (BCA). It has been informed by the professional guidance and expertise of an advisory group and has been influenced by the significant Vision Australia report (2018) Online, but offtrack: barriers to online learning experienced by university students who are blind or have low vision, which has been quoted throughout this document.
Project Manager Darlene McLennan, Manager, ADCET.
Guideline Developers Dr Joanne Webber, Project Officer, BCA; Jane Britt, Policy and Advocacy Team Leader, BCA; Darren Britten, National Assistive Technology Officer, ADCET.
Advisory Group Angela Jaeschke, General Manager Operations, BCA; Jane Britt, Policy and Advocacy Team Leader, BCA; Stephen Belbin, TAFE NSW; Jodie Hoger, Teacher Consultant Vision Specialist, TAFE NSW; James Newton, Disability Liaison Officer, TasTAFE; Doug McGinn, Disability Advisor, University of Tasmania; Dr Sheelagh Daniels-Mayes, Lecturer and Researcher, Faculty of Arts and Social Science, University of Sydney; Dr Ben Whitburn, Academic, Faculty of Arts and Education, Deakin University; Jason Markou, Digital Accessibility Lead, Information and Communications Technology, University of Sydney; Associate Professor Paul Harpur, University of Queensland Law School; Andrew Downie, Accessibility Consultant, University of Technology Sydney; Bruce Maguire, Vision Australia; Layla Clarkson-Eather, Deakin student; Darren Britten, National Assistive Technology Officer, ADCET.
Just as accessibility must be front-of-mind at all stages of the design and deployment of online learning platforms, so also it must be integrated into
every online system used throughout the university. This also includes "back end" systems that may be used by university staff. People who are blind or
have low vision should be able to seek employment in universities on an equal basis with the rest of the community. The inaccessibility of administrative and related systems can present an insurmountable barrier to equal employment.
(Vision Australia 2018)
2
Brief Contents Supporting an Inclusive and Accessible Learning Environment........................................... 5
Important Tools for Blind and Vision Impaired Students ..................................................... 10
Online Learning Impacts and Challenges .............................................................................. 11
Accessibility of Learning Resources ..................................................................................... 16
Presenting Visual Information for Online/Blended Delivery ................................................ 23
Course Content and Learning Management Systems .......................................................... 28
Teaching Etiquette, Tips and Tricks ....................................................................................... 30
Videoconferencing ................................................................................................................... 33
Glossary of Terms ................................................................................................................... 35
Abbreviations ........................................................................................................................... 36
3
Detailed Contents Supporting an Inclusive and Accessible Learning Environment........................................... 5
Overview ________________________________________________________________________ 5
Creating an accessible and inclusive learning space _______________________________________ 6
Preparing students for online learning __________________________________________________ 7
Reasonable adjustments ____________________________________________________________ 7
Access Plans _____________________________________________________________________ 8
Important Tools for Blind and Vision Impaired Students ..................................................... 10
Screen reading software ___________________________________________________________ 10
Other assistive software and hardware ________________________________________________ 10
Online Learning Impacts and Challenges .............................................................................. 11
Overview _______________________________________________________________________ 11
Listening/concentration fatigue and energy level _________________________________________ 11
Reading time ____________________________________________________________________ 11
Micro distractions _________________________________________________________________ 12
Note taking ______________________________________________________________________ 12
Interactions with peers _____________________________________________________________ 12
Presentation of information _________________________________________________________ 12
Online accessibility guidelines _______________________________________________________ 13
Accessibility of Learning Resources ..................................................................................... 16
Overview _______________________________________________________________________ 16
e-text and electronic formats ________________________________________________________ 16
Creating accessible formats _________________________________________________________ 17
Timely access to learning resources __________________________________________________ 17
Guidelines for producing accessible e-text _____________________________________________ 18
Microsoft Word documents _________________________________________________________ 18
Microsoft PowerPoint ______________________________________________________________ 21
PDF documents __________________________________________________________________ 22
Presenting Visual Information for Online/Blended Delivery ................................................ 23
Overview _______________________________________________________________________ 23
Informing students of the software you will be using ______________________________________ 23
Setting clear expectations __________________________________________________________ 23
Reducing cognitive load ____________________________________________________________ 23

4
Audio quality and connection ________________________________________________________ 24
Showing videos __________________________________________________________________ 24
Describing images and diagrams _____________________________________________________ 24
Transcripts ______________________________________________________________________ 24
Instructional videos and screen captures _______________________________________________ 25
Audio description for videos/alternative presentations _____________________________________ 25
Colour contrast and colour blindness __________________________________________________ 26
Discussion boards/forums __________________________________________________________ 26
Third-party interactive tools _________________________________________________________ 26
Course Content and Learning Management Systems .......................................................... 28
Overview _______________________________________________________________________ 28
Teaching Etiquette, Tips and Tricks ....................................................................................... 30
Overview _______________________________________________________________________ 30
Fostering respectful communication __________________________________________________ 30
Pace, talk time and talk speed _______________________________________________________ 30
Screen sharing ___________________________________________________________________ 30
View mode ______________________________________________________________________ 31
Virtual whiteboards and brainstorming tools ____________________________________________ 31
Tutorials/breakout groups __________________________________________________________ 31
Chat feature and non-verbal feedback _________________________________________________ 31
Vocalise and summarise ___________________________________________________________ 32
Videoconferencing ................................................................................................................... 33
Overview _______________________________________________________________________ 33
Recording your session ____________________________________________________________ 33
During the videoconference _________________________________________________________ 33
After the session _________________________________________________________________ 34
Platform-specific accessibility and guides ______________________________________________ 34
Glossary of Terms ................................................................................................................... 35
Abbreviations ........................................................................................................................... 36
5
Supporting an Inclusive and Accessible Learning Environment Overview These guidelines have been developed to address access barriers experienced by learners who are blind or vision impaired studying in tertiary education in Australia. They provide a range of practical solutions and strategies to support TAFE colleges, registered training organisations (RTOs) and universities in reducing these barriers. These guidelines have also been designed to overcome barriers experienced by blind or vision impaired professional and academic staff in higher education.
… the profound transformations that technology is making possible, often have a negative impact on the human rights of people with a disability and are not always grounded in the principles of equal access and universal inclusion.
(Vision Australia 2018)
While not an exhaustive list of solutions, these guidelines have been designed as a good starting point to improving inclusion.
The United Nations Convention on the Rights of Persons with Disabilities (UNCRPD) is an international human rights instrument that documents the fundamental rights and freedoms of people with disability. Australia ratified the UNCRPD on 17 July 2008 and signed the Optional Protocol on 30 July 2009. This ensures that the Australian government is accountable regarding compliance with CRPD obligations, and it positions Australia as an international leader in disability inclusive practices. The CRPD sets out general and specific obligations in relation to human rights and fundamental freedoms, and outlaws discrimination in all areas of life, including education. Of most relevance is Article 24, which focuses on inclusion in all levels of education for people with a disability through reasonable adjustments that address access barriers.
Australia’s Disability Discrimination Act 1992 (DDA) and the Disability Standards for Education (2005) (DSE) cover all levels of education, including tertiary education. The Standards relate to enrolment, course participation, curriculum development and delivery, and the provision of training to specialised support staff as well as to students who require specialised equipment such as adaptive/assistive technology. The Standards require that education providers make reasonable adjustments to address access barriers experienced by students with disability.
While the DDA does not specifically reference technology or access to online content, the Australian Human Rights Commission (AHRC) published the World Wide Web Access: Disability Discrimination Act Advisory Notes (2014) that outlined equal access required by law:
The provision of information and online services through the web is a service covered by the DDA. Equal access for people with a disability in this area is required by the DDA where it can reasonably be provided. This requirement applies to any individual or organisation developing a website or other web resource in Australia, or placing or maintaining a web resource on an Australian server. This includes web pages and other resources developed or maintained for purposes related to employment; education; provision of services including

6
professional services, banking, insurance or financial services, entertainment or recreation, telecommunications services, public transport services, or government services; sale or rental of real estate; sport; activities of voluntary associations; or administration of Commonwealth laws and programs.
And advised that:
… the Web Content Accessibility Guidelines (WCAG) … provide the most comprehensive set of testable benchmarks for assessing key aspects of the accessibility of websites and other web content, and represent current international best practice in most areas of accessible web design.
Creating an accessible and inclusive learning space It is essential to provide an accessible and inclusive learning space for all students, and education providers have a legislative requirement to do so.
Consult with the student and support staff: To ensure students who are blind or have a vision impairment experience education that is accessible, it is important that you understand their needs. We encourage you to consult directly with the student prior to commencement of their learning as they are the expert of their adjustment needs. Blindness and vision impairment occurs on a spectrum, and therefore support needs also vary according to the level of vision loss the student experiences and the underlying causes that have led to blindness.
After consulting with the student, speak with anyone involved in educational delivery and support. This may include formal disability support staff or learning advisors for the education institution; educators; and information, communication and technology (ICT) staff.
Procurement: The COVID-19 pandemic has demonstrated that at times there is a need to pivot quickly and provide adjustments for a range of students. It is often easy to forget – in the rush to be innovative or engaging – to assess how accessible the solution is for students. A significant consideration is the procurement of ICT products and services to meet the needs students who are blind or vision impaired. This might include online learning platforms and their compatibility with added-on software or features for accessibility.
Accessibility statement: It is important that providers develop an accessibility statement for all learning spaces, whether these be virtual or face-to-face learning environments. These statements assist in fostering inclusion by making it clear that a method of learning has been chosen to be inclusive for all students rather than opting for one that excludes students.
Leadership: Fostering an inclusive environment starts from top-level leadership and spreads down throughout an education institution; it can be created through awareness and training about disability equity. Check with your institution on policies and procedures that support and foster inclusion, such as a Disability or Inclusion Action Plan.
Training: It is critical that all staff are given the opportunity to regularly engage with training that promotes an awareness of the needs of students with disability and informs them about their legal obligations under the DDA and DSE. It is also crucial to provide ongoing professional development to ensure staff have knowledge of accessible teaching practices and are able to produce accessible materials.

7
Some of my lecturers were really good and helped me with those online activities that were inaccessible, but others made no effort at all and told me it
was my problem. (Vision Australia 2018)
Preparing students for online learning Students who are blind or vision impaired use a range of software and technologies to navigate computers, the internet and learning resources involved in their education. One of the most widely used assistive technologies for blind students is the screen reader. A brief introduction to screen reading software is available later in this resource.
Once online systems have been made accessible and compatible with software used for screen reading, there are multiple methods that can be used to assist students who are blind or vision impaired to prepare for online learning. One method is to provide guides in a preferred format to help students navigate the online platform (e.g. Moodle) and different areas of the training provider’s site.
Another method is to provide the ability for students to experience using the online platform through areas specifically designed for practice (e.g. mock online quizzes or discussion boards).
Provide a list of keyboard shortcuts for the software you will be using. This can be aided by in-built features of online teleconferencing or learning platforms. For example, Zoom has an accessibility page, which includes a list of keyboard shortcuts. This can provide students who are blind or vision impaired with access to specific functions and quick navigation.
Offer students access and information on support services that are available to them, both online and offline, such as peer support/mentoring programs, learning skills advisors, library and referencing support and other self-help guides.
Finally, supply clear instructions so all students know what areas of an online learning platform they need to visit to find learning materials, submit assignments, participate in discussion boards and complete assessment activities.
Reasonable adjustments Tertiary institutions must make reasonable adjustments in all cases where the mainstream or Universal Design (UD) approaches do not cater for the specific access requirements of students who are blind or vision impaired. Reasonable adjustments are identified in the UNCRPD as “necessary and appropriate modification and adjustments not imposing a disproportionate or undue burden, where needed in a particular case, to ensure to persons with disabilities the enjoyment or exercise on an equal basis with others of all human rights and fundamental freedoms”.
The Disability Standards for Education (2005) set out a process whereby education providers can meet the obligation to make reasonable adjustments where necessary.
When are reasonable adjustments necessary? Reasonable adjustments are required at the point when UD features cannot cater for access barriers experienced by students and staff with disabilities.
For example, reasonable adjustments are frequently required to provide:
8
• braille reading material (especially critical for music, maths and languages) • accessible large-print-format reading material • accessible electronic Word-format reading material • exam adjustments (for accessible reading material or additional time) • training in the use of assistive technology with online learning platforms • alternate assessment methods and tasks.
The UNCRPD (Article 24 section 2c) states that “reasonable accommodation of the individual’s requirements is provided”. In defining Universal Design, Article 2 states that it “shall not exclude assistive devices for particular groups of persons with disabilities where this is needed”. Therefore, it is critical that tertiary institutions provide for reasonable adjustments where a student or staff member who is blind or vision impaired encounters an access barrier. Access barriers, such as information being provided in a format that cannot be read by a screen reader, will vary from student to student and it is important to work with the student in identifying and remediating any barriers in a timely manner.
How to implement reasonable adjustments • Consult with staff and students who are blind or vision impaired to identify access
barriers and suitable reasonable adjustments. • Ensure access barriers are identified and addressed immediately. • Use an access committee to identify access barriers and ensure streamlined systems are
in place to respond quickly to these barriers. • Ensure every student who is blind or vision impaired is aware of and has access to
support services that can address access barriers.
Access Plans Access Plans, also known as Learning Access Plans, Academic Inclusion Plans, Reasonable Adjustment Plans, Education Access Plans or other similar variations to this term, are documents developed by the institution in partnership with the student to record reasonable adjustments or other relevant support to enable their full and equitable inclusion in their learning environment. Students who seek to formalise adjustments to address disability related barriers are first required to register with their institution’s disability service. At this point, a meeting will be made with a disability practitioner where the student and practitioner can discuss anticipated access barriers and suitable adjustments to address these barriers and then document these to share with relevant teaching and professional staff.
Access Plans are documents for identifying individual reasonable accommodations for students with disability. They also demonstrate an institution’s legal compliance with the DDA. For students who are blind or vision impaired, typical accommodations may include:
• alternative-format reading material • exam adjustments • extensions to assessments • support in accessing library material • orientation around campus • orientation to online learning platforms and library databases • ensuring access to assistive software and hardware on campus
9
• ensuring course content is compliant with the Web Content Accessibility Guidelines (WCAG 2.1).
Important aspects of an Access Plan • Ensure the student’s voice and access solutions are central in the development of an
Access Plan. • Develop Access Plans as soon as possible after a student has registered with the
institution’s disability service. • Review and revise Access Plans each semester (in most situations). • Make clear who will distribute Access Plans, who they should be distributed to, and
what/how much information is disclosed about the student.
10
Important Tools for Blind and Vision Impaired Students Screen reading software Screen reading software, often referred to simply as a screen reader, is sophisticated software that provides access to, and navigation of, information on computers, phones and tablets for people who have little or no vision. A screen reader presents information to the user via synthetic speech or can send it to additional devices such as an electronic braille display.
Windows, Macintosh, iOS and Android operating systems have built-in screen readers. There are free and commercially available screen readers across all of the major platforms.
How does it work? The screen reader provides the user with access to:
• the operating system (e.g. file management, settings) • applications such as word processing, spreadsheets, databases, email and multimedia • the internet in conjunction with a browser.
Screen readers are mainly controlled by keyboard commands and application keyboard shortcuts. Touchscreen devices are controlled by different gestures and tactile interactions. The user chooses what and when information is presented. An entire document, for example, could be read from beginning to end. It could also be read one character at a time, by word or by sentence. A well-structured document or website that includes headings will give the user the ability to navigate quickly through the document by skipping between headings. There are also powerful facilities for reading data tables, including presentation of header cells along with associated data cells.
Screen readers have evolved to provide very effective reading of websites. Elements such as headings, paragraphs, tables, links, buttons and form fields are recognised, allowing very effective navigation of well-structured websites.
Further information can be found on Blind and Vision Impairment: Screen Readers on the ADCET website.
Other assistive software and hardware There is a wide variety of software and hardware that can assist students who are blind or vision impaired and can operate independently or in conjunction with a screen reader. Options range from screen magnification software that allows users to enlarge what is being shown on the screen, to text-to-speech software that can allow for books and websites to be read aloud, to software that can change the font on a webpage or provide high contrast viewing (such as white text on a black background) to reduce glare. Some of the many other assistive technologies are listed on the Vision Australia – Using Technology website.
11
Online Learning Impacts and Challenges Overview Online learning can have accessibility implications and create potential challenges for students who are blind or vision impaired. The presentation of information and the platforms used for delivering it can create additional barriers for some students. For example, this may include:
• incompatibility with screen reading software • poor contrast of text against backgrounds • small font size and/or inability to change font size or style for ease of reading • graphics presented without alt text, which is embedded descriptive content about the
image which can be read by a screen reader • embedded video or other audiovisual material that does not have audio description.
Website content and design is overarched by the Website Content Accessibility Guidelines (currently WCAG 2.1), which provide the principles by which website content can be ensured compatible with screen reading software. More information on this can be found in the Online Accessibility Guidelines section of this guide.
Other online learning accessibility challenges facing students who are blind or vision impaired include:
• fatigue due to multisensory processing of information (e.g. listening to a screen reader read out information, while also attending to a lecturer providing additional information)
• micro distractions (e.g. a screen reader may read out extraneous information like an email arriving on another platform)
• note taking issues • interaction with peers.
Listening/concentration fatigue and energy level For some students who are blind or vision impaired, listening to both a screen reader and an educator or listening to a large body of information on an online page may create additional barriers. This can impact the student’s capacity to concentrate and can lead to fatigue. If a student has residual vision, it may also lead to visual fatigue and ocular pain or discomfort. A note taker can be useful in helping to manage this.
Break tasks into smaller sections to enable a student to have rest breaks and to manage their own fatigue and energy thresholds. This will make it easier for the student to take in the information and appropriately absorb it.
If a learning session is scheduled to be over an hour in length, it is particularly important to provide a quick break for all students.
Reading time Be mindful of the amount of information that students are required to read, especially if it is within a limited timeframe. It is not possible for students using a screen reader to quickly browse or skim an article or website, and it can take even longer to go through a lengthy document.

12
Provide notification, appropriate time and links to resources in advance of online sessions, especially if there is a need for students to take notes or highlight questions in various tools.
Micro distractions Micro distractions might occur for students who are blind or vision impaired; these interruptions can shift a student’s focus and cause their attention to waiver during online learning. For example, a message sent by a student using the chat function during a virtual learning session may be read out by a screen reader or it may be activated on a braille device attached to the computer. Another issue may be the stress of having their video turned on, creating uncertainty about what their camera is showing and whether the camera is aligned with their screen. This point will be discussed in more detail later.
A student who is blind or vision impaired may be distracted if there is extraneous information being shown on the screen from other apps or sidebars. When screen-sharing, ensure you are only presenting what is necessary. Hide or move all other applications and windows. Students don’t need to see your desktop icons, bookmarks and emails.
All students benefit when you keep the information presented simple and concise. Too many complex images, diagrams, tables, walls of text or charts can create unnecessary cognitive load.
One final helpful measure when presenting learning material online (either in real time or in an uploaded recording) is to minimise any background noise that may interfere with students’ ability to concentrate. This will ensure that the verbal material can be clearly heard by all students.
Note taking Students with disability may have access to support services, including a note taking service whereby another person attends the lecture in a support role, either in person or virtually, to take notes. It is important that educators are aware that a note taker may be present in this capacity to assist a student with disability to have equal access to all learning material. Note takers are generally employed as professional staff by the support service.
Due to the nature of their support role, a note taker should not be called upon by teaching staff to participate in learning discussions or be considered to be participating in the role of a learning aid for the student.
Interactions with peers During learning activities, it is important to provide opportunities for common interactions between all students. This might be during discussion about learning material including summaries of group discussions or feedback from groups in virtual breakout rooms, or through daily digests relating to course activities.
It may be useful to schedule some extra times outside of online sessions for students to engage with peers in informal conversations.
Presentation of information If online learning material requires the use of graphical content, it is important that a description is provided that clearly explains the information depicted in the graphic. If it can be described in

13
a few words then adding alternate (alt) text to the image is appropriate; however, if a lengthier description is required, this must be presented alongside the graphic.
The best approach for describing graphic content is to use structural pointers. For example, when describing a line graph, indicate what is on the x-axis (horizontal) and y-axis (vertical). Describing images and diagrams is covered later in this resource.
Technology access Technology access can present challenges for all students engaging in online learning. There are several considerations to be made when providing content through online platforms, including bandwidth availability, internet speeds and access, size of files, use of video sharing and the importance of conventions when naming files.
If you are preparing material for remote or online learning, two major considerations include bandwidth and internet speed. Students will have differing levels of access in terms of both bandwidth and internet speed to support online learning, including streaming of online lectures. This may create delays or disruptions in smoothly accessing content, which will impede learning. The use of screen reading software can make it difficult for students who are blind or vision impaired to keep up efficiently with real-time learning. A further consideration is the amount of downloading capacity a student may have if streaming large video files. This may be compounded further by uploading if students are required to have their video stream on during a lecture or tutorial.
As mentioned earlier, a student who is blind or vision impaired may feel disadvantaged by having a video stream turned on if they cannot be certain whether their camera is aligned with their face and/or they are worried about what other sensitive information may be revealed in the background. Students be given the option to have their camera switched off if that enables them to feel more comfortable and safe participating in online learning.
Finally, it is essential to clearly name any files uploaded for students and to let students know where files can be accessed. Each file should have a name that enables it to be easily identified. Using numbers and acronyms in file names can create confusion, so avoid them if possible.
Online accessibility guidelines The Web Content Accessibility Guidelines (WCAG) assist content creators and web developers to ensure their websites are accessible to all users, regardless of impairment or disability. The guidelines, developed by the World Wide Web Consortium (W3C) Web Accessibility Initiative, are a single shared standard for web content accessibility that meets the needs of individuals, organisations and governments.
The current version of the guidelines is version 2.1 and is widely adopted by government and education as the standard that online information should meet. If you are unfamiliar with web accessibility, W3C Introduction to Web Accessibility is a good place to start.
The WCAG Standards are based on four key principles that have the acronym POUR:
• Perceivable – Information and user interface components must be presentable to users in ways they can perceive.
14
o This means that users must be able to perceive the information being presented (it can't be invisible to all of their senses).
• Operable – User interface components and navigation must be operable. o This means that users must be able to operate the interface (the interface cannot
require interaction that a user cannot perform). • Understandable – Information and the operation of user interface must be
understandable. o This means that users must be able to understand the information as well as the
operation of the user interface (the content or operation cannot be beyond their understanding).
• Robust – Content must be robust enough that it can be interpreted reliably by a wide variety of user agents, including assistive technologies.
o This means that users must be able to access the content as technologies advance (as technologies and user agents evolve, the content should remain accessible).
Source: W3C Introduction to Understanding WCAG 2.1
The Accessibility Principles section of W3C website provides a more detailed breakdown of some of the key principles.
Conformance with Web Content Accessibility Guidelines 2.1 The W3C has outlined three different levels of conformance with the guidelines.
Level A is the minimum level of accessibility you can apply. Level A does not on its own achieve a broad level of accessibility that would assist most users.
Level A: Minimal compliance Level A ensures basic accessibility is included.
Level A includes:
• Content can be navigated by keyboard only • Non-text content has text alternatives • Videos have captions • Content has meaning without colour, shape alone • Alternate text is available for all non-text content • Form fields have labels • Headings and heading hierarchy are logical
Level AA: Acceptable compliance Level AA is the most widely adopted level as it is more detailed and provides better accessibility for more users. The Australia Human Rights Commission DDA Advisory Notes (2014) states:
The Commission’s advice is that all web resources (including web pages and websites) should achieve a minimum of Level AA conformance in order to be consistent with the Aims and Objects of the DDA. In addition, some web resources may need to achieve conformance with at least some Level AAA success criteria,
15
for example, health and safety information, national warnings, and online resources published by education institutions and which are intended for use by all students studying a particular course.
Level AA includes:
• Navigation elements are consistent • Colour contrast is acceptable
Level AAA: Maximum compliance Level AAA includes:
• Sign language is available for all video content • Real-time transcription is available • Timing of activities is not essential
The W3C Understanding Conformance guide highlights the different conformance requirements.
Further information Center for Accessibility – What is WCAG?
Web Content Accessibility Guidelines – What is WCAG?
Vision Australia Web Accessibility Training

16
Accessibility of Learning Resources Overview Accessible formats, sometimes called alternative formats, are ways of presenting printed, written or visual material so that people who experience barriers with these formats can access the material in a way that is accessible to them or their assistive technology.
Accessible formats are an essential component of educational access for tertiary students who are blind or vision impaired. This is typically the only way that students can access reading materials. Given most tertiary textbooks and journal articles are not originally designed in an accessible format, tertiary support services are required to individually format readings to ensure their accessibility for each student who is blind or vision impaired. This can take significant time, so advance notice and a responsive and efficient process is necessary for the timely provision of accessible reading materials. These educational services are often based within the institution’s library or through external providers.
The selection of accessible formats is carefully considered by the individual who is blind or vision impaired. Factors considered include the topic, most accessible solution, ease of navigation, learning preference and available options for the subject being studied. Different formats may be needed to effectively study different subjects, depending on what is being studied and the resources available to the student. Some subjects or topics may have only one accessible format such as braille for music, maths or languages for people who are totally blind.
I have had quite a bit of difficulty accessing online books as I cannot copy and paste them to view them in a larger font. I have found the disability support
department are not very understanding of low vision and I am often required to provide medical certificates for assignment extensions. (Vision Australia 2018)
e-text and electronic formats Electronic reading material (variously referred to as e-text, E-text, e-Text or etext) has become the most popular format for many students who are blind or vision impaired. Electronic format is especially popular for tertiary students, with many requesting Microsoft Word documents for all textbooks and readings. This format is desirable as it is:
• compact (hundreds of books can fit on a laptop) • easy to navigate (e.g. Ctrl F to find a word) • suitable for cutting and pasting content into an assignment • easy to move forward and back by paragraph, page or chapter • able to work with track changes and comments.
It is worth noting that many textbooks are still not available in e-text formats that are accessible to users or compatible with commonly used accessibility technologies.
I found some online articles hard to access, as many were like an image format that had been badly photocopied – making it hard to read, and screen
reader didn't work. (Vision Australia 2018)
17
Creating accessible formats • Consult with the student to identify their preferred format and document layout
requirements. • Ensure an accessible electronic format of a print document provides the same
information as the original. • Indicate any changes/omissions from the original print version with producers' notes in
the electronic format. • Include publishing information. • Describe images and visual elements. • Use a sans serif font such as Arial or Arial Narrow, 1.5 line spacing, with a black font. • Arrange text in a linear reading order. • Use structural markup throughout the document through consistent heading levels (e.g.
Heading 1, Heading 2, Heading 3). • Ensure consistency of style and formatting within the document. • Ensure students have reasonable computer skills, including skills to navigate documents
and good file management skills, so that they can store and retrieve documents or books within well-named and well-located folders. Refer students for training if these skills require further development.
• Source existing electronic material, where possible, directly from the publisher. • Use a support service to scan hard-copy text, use optical character recognition (OCR)
software and convert into a Word document. Hard copies should be good quality (i.e. not faded text, not poorly photocopied) and centre text needs to be straight, which can be difficult to achieve if trying to flatten a large book.
Timely access to learning resources The following table is a general guide to the length of time required to produce accessible formats and therefore the timeline for teaching staff to provide support services with text in advance. This will help support services to ensure students receive their accessible formatted material in time for when it is required.
Format Timeline
electronic Word format (text only) 1–2 weeks
electronic Word format (with tables requiring reformatting and/or diagrams requiring alternative text descriptions)
2–4 weeks
audio 4–6 weeks
large print 2–4 weeks
braille – plain text 6–10 weeks
braille – music Varies as this often requires a specialised service
18
I asked the disability services people for assistance with the online stuff, but it took them six weeks to get back to me and by then I was too far behind in my
course to continue with it. (Vision Australia 2018)
Guidelines for producing accessible e-text The Round Table on Information Access for People with Print Disabilities publication Guidelines for Producing Accessible E-text provides document creators with best-practice accessibility methods across a variety of electronic formats in common use.
Microsoft Word documents Creating well-structured Word documents assists everybody, including the author. By using some of the available tools in Word you will not only help your audience access and interpret your content, but you will also effectively future proof your document. You’ll make it easier to update and transform your content into different formats that can be read and interpreted on a wide range of devices by a wide range of students and staff.
Word documents have the advantage of being portable, readily viewable across devices and common as an input into other software and programs. Many people have access to Microsoft Word as it is one of the most popular word processing tools used across the tertiary sector.
This is a brief list of inclusive considerations you should apply when creating your document.
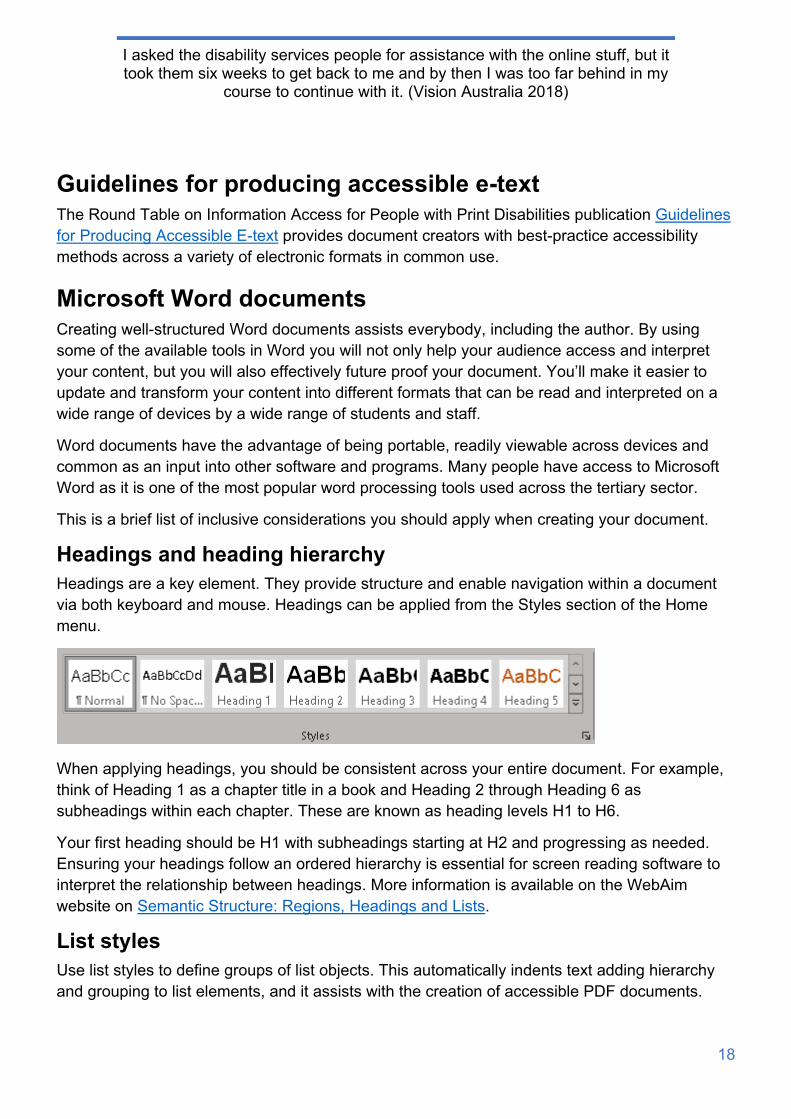
Headings and heading hierarchy Headings are a key element. They provide structure and enable navigation within a document via both keyboard and mouse. Headings can be applied from the Styles section of the Home menu.
When applying headings, you should be consistent across your entire document. For example, think of Heading 1 as a chapter title in a book and Heading 2 through Heading 6 as subheadings within each chapter. These are known as heading levels H1 to H6.
Your first heading should be H1 with subheadings starting at H2 and progressing as needed. Ensuring your headings follow an ordered hierarchy is essential for screen reading software to interpret the relationship between headings. More information is available on the WebAim website on Semantic Structure: Regions, Headings and Lists.
List styles Use list styles to define groups of list objects. This automatically indents text adding hierarchy and grouping to list elements, and it assists with the creation of accessible PDF documents.

19
Alternative (alt) text Use alt text to describe images and graphics. This allows the content of images, graphs and charts to be accessible to users who cannot see them. This is covered in more detail in the Describing Images and Diagrams section of this guide.
Font clarity Use Arial or an appropriate sans serif font. Sans serif fonts are more easily readable on screen and in print, are common to most computer systems and generally do not need to be embedded or installed by the user. Where possible, avoid the use of cursive fonts.
Further information on fonts and typeface readability is available from https://webaim.org/techniques/fonts/.
White space Ensure there is enough white space within a document (i.e. do not cram content to fit on one page). This assists visually when navigating a document, improves readability and creates visual groupings of content that appear more organised and less cluttered. Avoid adding white space by entering blank lines; instead, adjust the paragraph setting to enable appropriate spacing between headings, paragraphs and content.
High contrast and colour selection Use high contrast between the text colour and the background colour such as black on white. This provides visual assistance and improves readability for users with limited vision who are navigating the document. Further information is available in the Colour Contrast and Colour Blindness section of this guide.
Consistent font size Ensure consistent font sizes are used throughout your document. This improves the readability of the content and appears professional and organised.
Use the in-built accessibility checker Newer versions of Microsoft Office have a built-in accessibility checker that allows you to identify and fix potential issues with your document. It is important to understand that automated accessibility checkers have limitations and cannot automatically fix or detect all accessibility issues that may be present. Microsoft has released Improve Accessibility with the Accessibility Checker and Rules for the Accessibility Checker – guides that outline what can be tested for and limitations in the testing.
Things to avoid • Avoid using text boxes (or floating text). These can only be read visually, sit separately to
the rest of the document, do not adjust to formatting changes and are not easily identified when using assistive technologies.
• Do not use colour by itself to convey meaning and information. This loses meaning when printed in black and white, relies on the ability of the user to see colour and is difficult to communicate non-visually.

20
• Avoid the use of decorative, serif or non-standard fonts. This can result in text being difficult to read. It may be confusing and look unorganised, and fonts may need to be installed by a user.
• Do not use justified text. This creates uneven spacing between words and decreases readability.
• Avoid using tables to control design and layout. This can only be easily read visually, only has the appearance of structure, hinders readability when using assistive technologies and can make revisions and updating the information more difficult and time consuming.
• Avoid using tabs to control design and layout. This can only be read visually, only has the appearance of structure and loses formatting if the document is adjusted for large print.
Creating more accessible data tables Tables are a very useful (sometimes essential) method of displaying tabular data. This short summary will help you to create tables that are accessible and useful to all, including people who use assistive technology such as screen readers.
Importantly, tables should not be used to lay out contents on a page.
Keep it simple Avoid complex tables as they can be difficult to interpret by screen reader users due to the screen reader not being able to associate header cells with corresponding data cells.
It is very important in Word to have uniform tables. That is, each row should have the same number of cells. Do not merge cells together across columns or rows.
To create a table in Microsoft Word with column headings:
• right-click the table or use the Table Layout menu to select Table Properties • Select the Row tab and check the “Repeat as header row at the top of each page” check
box, even if the table is only on one page. • In the Table Design menu select Header Row and First Column options.
That will allow the screen reader to present each column and row headings of the corresponding data cells as the user navigates around the table.
Please note that there is no guarantee that the column and row headings transfer correctly when converting your Word document to other formats, such as PDF (that process not covered here).
Not all software creates accessible tables Depending on the software you are using to create tables, you may not have the option to specify column or row headings. For example, older versions of Microsoft Word do not include methods for telling screen readers that the first column contains row headings. However, some screen readers and versions of Microsoft (e.g., Office 365) include commands for doing so.
Further guides and information Make your Word documents accessible to people with disabilities

21
Microsoft PowerPoint PowerPoint presentations are good for breaking down information into small chunks to convey a linear sequence of information. When developing a PowerPoint presentation, you need to also consider that it may be used outside of where it was originally presented and without the context of the original presenter.
It is important to note that many online tools render PowerPoint presentations as an image and make the text of your slides unreadable to screen readers.
Here is a list of things you can do to create more accessible PowerPoint presentations:
• Use the default slide layouts within PowerPoint. This default slide layout is more accessible to assistive technologies.
• Limit the amount of text on each slide. • Limit the number of slides. • Ensure that all slides have unique titles. • Provide outline/speaker notes. Not only will this help you when presenting, it will add
context for students. • Number the slides and announce the slide you are on when presenting. This will help all
students follow along when reviewing the material at a later date. • Use alternative text to describe images and graphics – content can be conveyed without
the image and the description is retained if converting the document to HTML. • Use a consistent font size. • Provide alt text descriptions for relevant images (see Describing Images and Diagrams) • Ensure high contrast between the text colour and the background colour to improve
readability. • Use the in-built accessibility checker. • Do not add additional text boxes as any text you add to these may not be read by screen
readers.
And most importantly:
Consider whether PowerPoint is the best way to present your information. PowerPoint may not be the most appropriate format to convey complex and detailed information.
Swap to outline view to check what is visible. If the text of your slide cannot be seen in outline view, then it will not be visible to many assistive technologies. This is often the case if you have added images of text or used text boxes to add text to slides.
Further guides and information Creating Accessible PowerPoint Presentations
Make your PowerPoint presentations accessible to people with disabilities
PowerPoint Accessibility

22
PDF documents PDF documents need to be structured and tagged to be more accessible for students using assistive technologies across a range of devices. PDFs that are not accessible are often the result of converting non-structured content from other programs such as Microsoft Word.
If you are scanning a section of a book, an image of the text will be captured and this will result in an inaccessible image PDF. An image PDF cannot be searched by users to find relevant content and cannot be accessed by screen reader or text-to-speech (TTS) software.
To fulfil minimum accessibility requirements, at least one other format must be provided with all PDF documents.
Providing a structured Word document as an alternative can assist all students whether they are using different devices or have different accessibility requirements.
The easiest and most effective way to create a more accessible PDF is by converting a well-structured Microsoft Word document, using the Word menu options, as this will make a good source document. Be aware that you will need to export/convert to PDF and not directly print to PDF as many accessibility options are not available when printing directly to PDF.
When a well-structured source document is converted into PDF it is tagged. The PDF tag tree reflects the structure of the document, and it is this structure that assistive technologies, like screen readers, use to navigate the document.
Provide the link to where you downloaded the PDF from as there may be an option to read the information in HTML. Students can also read the abstract or summary and use the citation tools.
When PDFs are not well structured, they often become highly problematic for the blind or vision impaired user who is not able to read the text, navigate through the document or add notes. Poorly structured PDFs require more time for the user to be successful with the document as solutions need to be determined to overcome barries to accessibility.
Useful resources The Round Table on Information Access for People with Print Disabilities facilitates and influences the production and use of quality alternative formats for people with print disability. http://printdisability.org/
• Guidelines for Accessible Assessment (2019) • Guidelines for Producing Accessible E-text (2018) • ABA Rules and Guidelines for Formatting Braille (2016) • Unified English Braille Australian Training Manual (2016) • Sound Advice Guidelines (2013) • Guidelines on Conveying Visual Information (2005) • WebAIM Guide to Alternative Text • Creating and Accessible PDF from a Word Document (video)
23
Presenting Visual Information for Online/Blended Delivery Overview Students who are blind or vision impaired can experience exclusion if teaching practices are primarily visual. Barriers are created when teaching staff present significant content on the screen that is not audibly described or when printed information is based on visual diagrams without any accompanying text. In these cases, educators need to ensure text-based or audible descriptions are provided for inaccessible content.
A great way to assist all students with their learning and ensure they can access your content is to provide clear instructions and information on what will be delivered and how delivery will happen (what tools and formats will be used). Clearly communicate any expectations you have of the students.
Informing students of the software you will be using • Check with students or staff who are blind or vision impaired to find out whether they
have a sound working knowledge of the platform you will be using. Ensure they know the basic shortcut keys for the functions that are going to be needed in the upcoming session.
• Provide guides on how to use platforms like Zoom and Microsoft Teams with assistive technology, and share essential shortcut keys for the functions that will be called upon in the upcoming session (more information can be found in the Videoconferencing section).
• Offer an opportunity to test/train in the use of the platform well before the session commences. A practice session for anyone who would like to attend can be beneficial and a great icebreaker for staff and students, giving them an opportunity to make sure everything works for them in an informal session.
Setting clear expectations • Are students expected to have their cameras turned on? • Are students expected to talk? • Will students be moved into breakout rooms? • How will the session run? Will there be a break if it is a long session? • Can and when should participants ask questions? Via chat, voice?
Reducing cognitive load A method to assist students who are blind or vision impaired in processing information presented online is to consider how to reduce the cognitive load for the student; that is, the number of things that are required to be focused on at the same time. One method would be to have any presentation in a full-screen format when presenting it.
Another method to reduce cognitive load is to ensure all information presented is clear, relevant and concise. Where content is not relevant to the presentation, it should be removed or hidden. For example, when presenting information such as a website in your browser, hide your bookmarks, or if showing a Word document, use the Focus View to remove all the interface and
24
show only the content of the document. The focus option is available in the Microsoft 365 Word View menu and is also located at the bottom right of the application screen.
Audio quality and connection If you are using audio content during online learning, there are several steps that are critical to ensuring students can follow the content efficiently. These include:
• checking the quality of your internet or Wi-Fi connection • trying a headset mic and not your camera microphone because a camera microphone
can sometimes pick up a lot of background noise • using a noise-cancelling microphone • recording and listening to your own voice and timing.
Showing videos If you are using audiovisual content, it is important to provide links to this content, ideally in advance, because there may be buffering issues during playback due to connection speeds or technology that does not support smooth playback.
Another method to ensure that students can efficiently access the learning material provided in audiovisual content is to provide a transcript of the audio content.
If using audiovisual material such as documentaries or films, remember that these are not often available with audio description, and if the documentary or film uses subtitles to translate language into English, blind or vision impaired students will not be able to read this alternative. In these circumstances, it is essential that you contact your local disability support service to investigate what options may be available such as an English transcript of the video.
Finally, providing students with information about the audiovisual content file size or running time will support students in ensuring they can save the content to their device of choice for viewing.
Describing images and diagrams Clearly tell students and staff what you are referring to. Instead of saying “As you can see here, there was an increase in …”, try “This graph shows the population growth over time in Melbourne. It shows that there was an increase in …”. Avoid using screen shots that do not have a corresponding text description.
WebAim has a great article on techniques for creating alternative text, and the Diagram Centre POET tool for describing images and the Highcharts resource How to Write Accessible Descriptions for Interactive Charts can help you in determining what and how to write image descriptions.
Transcripts Transcripts provide the information in written rather than visual or audio form. This can be more accessible for people who are deafblind or who find it easier to access the information in this way.
25
Turn on closed captioning or let viewers know whether they can turn it on or off themselves. Provide details of any available versions that are audio described.
Instructional videos and screen captures Be mindful when describing visual processes. This is particularly relevant when demonstrating software, how-to guides and steps to complete online processes. Try to avoid visual references to the layout of information on your screen and be explicit about the action itself.
Here is a brief list of things to avoid and some suggestions.
• “So if you just click here” would be better as “So now select the submit button”. • “Grab the brush tool from the left menu” would be better as “Select the brush tool from
the tools menu”. • “If you go to the top of the screen you can see the filter function on the right. Make sure it
is selected and then press the arrow to process your request” would be better as “In the main menu there is an option for applying the filter. Activate the filter and submit your request”.
When demonstrating software, it is a good idea to also announce the keyboard shortcuts for the various functions and menu items you may be selecting, if you know them. These will often be listed with the menu item or can be found in the help/support information.
A good way to check whether the instructions of your video work is to follow along without the video, just listening to the audio instructions. For example, can you still follow the same steps on a mobile? What about when your browser window is smaller or when you only have a transcript of your video to read?
Would the following transcript make sense without the visual?
So, as you can see here, if I enter a value into this box and then select this option, I can scroll to the bottom of the form and update the results by clicking here.
Audio description for videos/alternative presentations Visual information in an online video may be inaccessible to some students and staff who may be blind or have vision impairments. Audio descriptions make videos accessible by providing narrated details of what is happening on screen.
Check out The Interviewer – Captions and Audio Description to experience audio descriptions for yourself.
• Try closing your eyes and listening to the video. • Does the audio description relay all the relevant information?
Further information and examples can be found at Audio Description in Australia.
The ability to add audio description may not be possible for everyone, so please contact your local disability support area to look at what options are available. Not all videos may need audio description; it depends on the nature of the video. For example, a “talking head” delivering a lecture may not need to be audio described if there is enough information available already. 3PlayMedia has a good overview of When and When Not to Add Audio Description to Content.

26
Colour contrast and colour blindness Not everyone sees things the same way. In many cases, colour blindness and eye conditions can cause information to become invisible or confusing if the contrast between the background and the text colour is too low.
There are many colour contrast and vision simulators you can use to test your content. The Contrast Checker from ACART Communications is a useful tool that measures the contrast in compliance with the Web Content Accessibility Guidelines.
Silktide is a browser plugin that provides a dyslexia simulator and other options to show how a range of different eye conditions may have an impact on the perception of your online content.
Discussion boards/forums Discussion boards are a useful way for students and staff to post ideas and feedback on assessments and topics relevant to the subject and are good at grouping discussions around specific topics and themes; however, many discussion boards are not fully accessible to screen readers. While blind and vision impaired students may be able to access the board, many tend to avoid them because they can easily be overwhelmed by the sheer volume of information that is presented. Providing an alternative way for students to interact with the discussions is vital.
Discussion boards were inaccessible. Blackboard Collaborate navigability was limited as the chat functionality was inaccessible. (Vision Australia 2018)
If students are required to post to specific topics or discussion, then providing them with direct links to the topics can help minimise some of the unnecessary navigation. Alternatively, some boards allow students to receive emails on new posts, or daily digests of new posts. This may be an opt in/out option. Some boards may also have different ways to display the information, which may be more accessible. Check with your local teaching support team to investigate whether there are options available for students to personalise how and what information is presented.
I was told that the online discussion board was accessible, but I found that there were 200 links on the page, and I couldn't actually find anything I
needed because of all the clutter. (Vision Australia 2018)
Third-party interactive tools It is important that you inform students of the various interactive tools and elements they will need to use during their studies.
27
H5P HTML5 Packages (H5P) enable the development of rich and interactive web experiences quickly and easily using pre-made content types. Many of the H5P content types have been developed to meet the web accessibility standards (WCAG 2.1 AA); however, it is important to note that in their H5P Content Types Recommendations, content can be made inaccessible as “due to mistakes done by authors, the example content (not the software) on H5P.org isn't always accessible”.
When adding H5P interactive elements to your online content, please ensure you develop them to be accessible. For example, provide captions with your videos and check that your content has sufficient colour contrast. Check with your teaching support team to making sure your H5P can be used by all students.
Polling, whiteboards and quiz tools Polling tools (such as Mentimeter, Slido and Kahoot) and interactive whiteboards and project workspaces (such as Padlet, Miro and Lucidchart) are common features in many online environments. Note that most of these tools do not work well with screen reading software. Some vendors are working on upgrading their software to be more accessible, and it is important to check that any third-party tools you plan on using currently meet accessibility standards or can be used in an accessible way.
Check the vendor’s website for an accessibility statement or for a Voluntary Product Accessibility Statement (VPAT), which will help you determine whether the tool meets current accessibility standards.
Mentimeter Accessibility Statement
Slido accessibility for people with disabilities
Kahoot Inclusion and Accessibility policy
Padlet Accessibility
Miro Accessibility Statement
Lucid Accessibility Statement
While making their tools accessible is an ongoing commitment from many vendors, it does not mean these tools should not be used until they are fully compliant. You should limit their use or provide alternative means for students to engage with the learning.

28
Course Content and Learning Management Systems Overview Most educational providers deliver their online learning content through a learning management system (LMS) such as Blackboard, Canvas, Desire 2 Learn or Moodle.
Each institution has their own system and policies around accessing and delivering learning content through their online platform of choice. You should refer to local guides and procedures related to developing online content and, where possible, use local templates to create your content. Please check with the relevant teaching and learning team to find out whether the templates are accessible and meet the Web Accessibility Content Guidelines.
It takes a long time to become really proficient and productive with screen-reading software. But the university then said it was therefore not their
problem if I couldn't use the online learning platform. (Vision Australia 2018)
While it would be impossible to go into every scenario to improve access for every LMS, it is worth highlighting some of the main things that can assist all students in using and navigating online learning.
Timely access • Provide access to presentation/lecture material before you will be teaching it. This will
allow users to prepare before your session. Good practice is to provide material at least one week before it is required.
Accessible templates • Use provided templates where possible. Ask your institution whether there are templates
that are more accessible for you to use.
Structure and consistency • Ensure the title of each week/session provides a consistent and meaningful means of
navigating the content. Instead of Week 1, try Week 1 Introduction to Programming. • Use meaningful headings and apply them consistently. • Ensure files you put online for students to download have meaningful file names and are
consistent week to week. Naming all your lecture slides “lecture” will not be useful when students need to find the material later. Adding your subject code or an abbreviated version to the file name will assist students in identifying files across multiple subjects.
Provide key dates and information • Provide assessment dates and tasks well ahead of time so students can plan
accordingly.

29
• Inform students of the software, systems and tools they will be required to use and, if possible, provide guides/links on how to use them effectively.
Accessible and downloadable documents • Provide accessible documents for download. • Where possible provide more than one format. If you are unsure of the accessibility of
your content, providing more than one file type (such as Microsoft Word and PDF) will give students choice and flexibility in what file works best for them.
• Provide both online content and downloadable versions of the content whenever possible. This will assist people who need to use the content offline or with other software.
• Where possible put your original files online for students. Don’t spend time converting your Word and PowerPoint files to PDF, just make the original files available. Students can easily turn these into PDFs if required.
Use built-in accessibility checkers • Many platforms and software come with tools to check the accessibility of your content.
Use them (and consult with your institution’s e-Learning team if you are unsure where to locate them).
Provide context • Provide context to your content and links.
o Why have you added this? o What is the purpose of the link? o How does it relate to what they are learning? o Do students need to read the entire article or just a particular section? o Do students need to watch the whole video?
Provide practice and examples • Provide examples and practice files for students to use. Examples of previous essays,
quizzes and exams can be extremely useful for all students. • If using specific software/online tool for quizzes or assessments, it is critical that students
who are blind or vision impaired have access well in advance to test it with their assistive technology.
Provide links to support services • Do not assume all students know what you know, or know where to go to get support.
30
Teaching Etiquette, Tips and Tricks Overview There are many things that can be considered when teaching that can help to improve the experience of students who are blind or vision impaired when they participate in online learning. These include:
• fostering respectful communication between educators, students and their peers • considering pace, talk time and speed when delivering spoken and/or written learning
material by teleconferencing or for streaming on online learning platforms • considering the view mode being used in online teleconference or learning platforms (e.g.
gallery view, speaker view) • carefully consider the use of third-party interactive tools and/or provide alternatives. • providing clear instructions for using breakout rooms for group sessions as these may
vary from platform to platform • considering the issues surrounding chat features interfering with screen reading software
and/or braille displays • vocalising and summarising learning material to help students follow the content.
Fostering respectful communication Fostering respectful communication is an important aspect of online learning. This enables students to feel comfortable to speak up when they may be experiencing difficulties in accessing course content. It begins with understanding the needs of students through their learning plans and through conversations with the student and disability support staff, with an open-door policy for students to raise any difficulties with accessibility that they may be encountering online. How a blind or vision impaired student experiences their disability will vary from student to student depending on a number of factors, and the student is often well placed to share their particular needs with you.
Developing (co-designing) a shared agreement between educators, students and peers to determine positive behaviours, interactions and communications can help foster the creation of a respectful educational environment for all.
Pace, talk time and talk speed There are factors to consider in delivering learning online which can aid students’ engagement. These include the pace of your speech and the duration and speed of your presentation. Allow enough time for students to take effective notes and follow any additional links you may provide, and allow time for students to just listen when required.
Screen sharing Screen sharing is an effective way to relay information and graphics to other users in an online environment; it can be used to deliver a presentation or to show an additional resource or website. Screen sharing is, however, as the term conveys, only sharing a visual representation of your screen. As such, the shared image can only be used by screen reading software if they are able to use OCR to analyse and interpret the image. Even if users have the necessary software to perform this function, it can give widely inconsistent results. It also has the added
31
complication of requiring additional time and effort from the student, taking them away from the presentation itself. Providing your presentation and related resources/links to students in advance of an online session will alleviate this issue and be helpful to all students.
The Presenting Visual Information section covers more advice on describing visual elements and engaging all students in your presentation.
View mode Online platforms for videoconferencing (including Microsoft Teams and Zoom) have alternative options for the view mode that students can use to toggle between to focus on the active speaker, shared screens where lecture notes may be shown, and video streams for other participants in the videoconference. If you are delivering a presentation, you can let students know about the different view modes and ask them to use a particular mode to follow the presentation, the active speaker or to see all screens, with consideration for the best method for the type of learning activity taking place. For example, a lecture may be best with a view mode focusing on the presentation or shared screen, but a class discussion may be best viewed with the entire gallery of participants’ videos being shown.
Virtual whiteboards and brainstorming tools Be aware that most virtual whiteboards and collaborative/brainstorming tools are not accessible to screen readers as they are primarily used for illustrations and quickly visualising and organising information. In many instances they can still be used if students are made aware of any additions to the whiteboard and can contribute to the activity via another means such as via the chat function or through their team/group. Ensure you describe, summarise and vocalise what is added in these tools. More information is available in the third-party interactive tools section.
Tutorials/breakout groups Online teleconferencing platforms often provide the opportunity for breakout rooms to be used, whereby students are placed in separate virtual rooms to have smaller group discussions. If an educator is going to make use of breakout rooms, it is important that clear instructions are provided for how the student can access the spaces. Also explain how to exit the room, if this does not automatically occur at the conclusion of the activity.
It is important that you establish the expectations of each breakout group and ensure that there is a clear understanding of what needs to be done in that group. Ideally, each group should have a designated person to keep the group on task. If the breakout groups are active for a short amount of time, it can be useful to delegate a time keeper as well. If you are planning on regular breakout groups then consider establishing, with the students, a code of conduct/rules for how the groups will run.
Chat feature and non-verbal feedback Two potentially problematic features of online learning platforms are the chat feature and non-verbal feedback. As mentioned, the chat feature can be distracting if a screen reader reads out the messages sent in the chat box or if a braille display reads out the messages. Non-verbal feedback needs to be audio described for a student who is blind or vision impaired; this feedback includes nods, shaking of heads or use of thumbs up to indicate a positive response
32
to a question. It may be best to ask students to provide all feedback verbally instead of using non-verbal responses to questions.
Ensure any questions or relevant chat messages are verbalised (e.g. “Molly has asked the group …”). Or you may choose to paraphrase the chat as there may be overlapping of questions and answers.
Vocalise and summarise Finally, finishing up online learning sessions is best done by giving a round-up of that section or lesson and summarising the content to reinforce comprehension and help students follow the learning material.
• Cut and paste relevant material such as book references, websites or quotes from the chat section into a Word document or an email to be shared with all participants after the session.
• During the session ensure you vocalise any dialogue boxes that may appear for polls or breakout rooms.
33
Videoconferencing Overview There are multiple methods of ensuring that videoconferencing is a seamless and accessible experience for students who are blind or vision impaired. This section will cover tips for presenting and/or recording a videoconference session; how to deal with logistical aspects of videoconferencing, including chat functions, which can interfere with learning for students who are blind or vision impaired; and accessibility features of commonly used platforms, including Microsoft Teams, Blackboard Collaborate Ultra and Zoom. Finally, this section will conclude by outlining what educators should consider doing after a session.
Recording your session Inform students when the videoconference is being recorded. If the recording is a manual process, let students know when you are about to start and when you are stopping.
During the videoconference • Verbalise text and image content on the screen. • Talk through any calculations or procedures as they are carried out. • Read any printed information and describe any pictures, photographs, charts or graphs
being used. • For meetings and smaller classes, say who is in attendance. • Ask each speaker to announce their name before talking if it is not clear who is speaking.
It is not necessary for everyone to say their name each time if it is obvious who the next speaker is (e.g. “It’s Bill here. I just wanted to ask about …” may not be necessary if the preceding speaker said “Bill, you had a question?”).
• Make sure only one person talks at a time. • Do not use jargon. • Give people time to process new information. • Provide enough time for students to navigate polls/surveys that may take more than the
usual 10–15 seconds to complete. • Describe results of any polls/surveys (e.g. “One-third of people voted ‘yes’”). • Don’t single out people with disability (e.g. Don’t say, “I’ll read this out for Doug” or “Jill, is
the text big enough for you to see?”). • Use the mute function for people who are not speaking or ask them to mute themselves
so additional noise does not cause a distraction or prevent people from hearing what is spoken.
• Take care to avoid inappropriate terms when talking about disability (e.g. Don’t use words like “suffering”, “confined” or “victim”). It is considered acceptable to use terms like “as you can see”.
• Respectfully remind participants if their camera is incorrectly placed or if any other software, like text-to-speech software, is being heard by other participants.
• It is helpful to provide directions on how to position the screen for the best camera angle. This prevents a participant who is blind or vision impaired discovering afterwards that only half of their face was present on the screen. Likewise, it is acceptable for
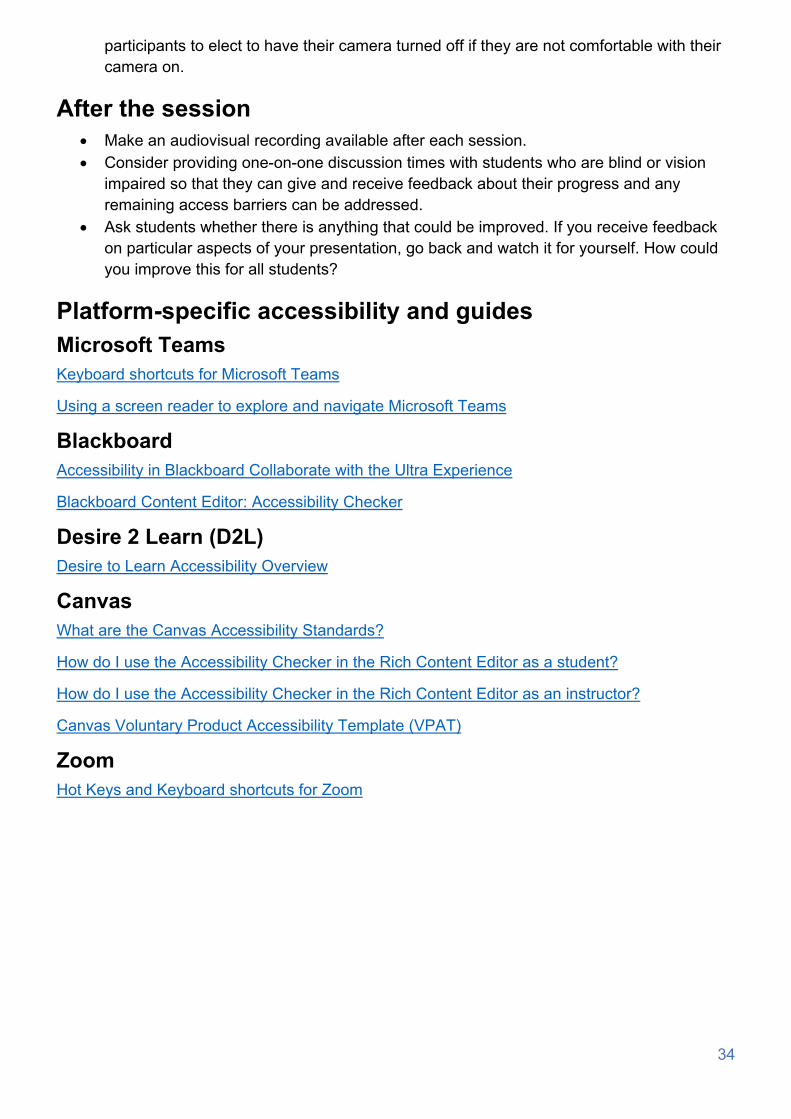
34
participants to elect to have their camera turned off if they are not comfortable with their camera on.
After the session • Make an audiovisual recording available after each session. • Consider providing one-on-one discussion times with students who are blind or vision
impaired so that they can give and receive feedback about their progress and any remaining access barriers can be addressed.
• Ask students whether there is anything that could be improved. If you receive feedback on particular aspects of your presentation, go back and watch it for yourself. How could you improve this for all students?
Platform-specific accessibility and guides Microsoft Teams Keyboard shortcuts for Microsoft Teams
Using a screen reader to explore and navigate Microsoft Teams
Blackboard Accessibility in Blackboard Collaborate with the Ultra Experience
Blackboard Content Editor: Accessibility Checker
Desire 2 Learn (D2L) Desire to Learn Accessibility Overview
Canvas What are the Canvas Accessibility Standards?
How do I use the Accessibility Checker in the Rich Content Editor as a student?
How do I use the Accessibility Checker in the Rich Content Editor as an instructor?
Canvas Voluntary Product Accessibility Template (VPAT)
Zoom Hot Keys and Keyboard shortcuts for Zoom

35
Glossary of Terms access barriers: Environmental barriers that prevent people with disability from using or accessing knowledge and resources in the same way as people without disability.
Access Plan: A document used to record reasonable adjustments to enable equitable participation in learning for students with disability.
accessible format reading material: Reading material that has been reformatted to be accessible to people who are blind or vision impaired. Formats can include audio, braille, large print, Word format or tactile images.
adaptive/assistive technology: specialist hardware and/or software developed to enable access for people with disability. This technology can include braille displays, text magnification software, OCR conversion software or text-to-speech software.
alternative formatting services: Services provided by TAFE colleges, universities and blindness services that convert documents into accessible formats that can be read by people who are blind or vision impaired.
disability advisor: Staff employed by TAFE colleges and universities to coordinate reasonable adjustments for students with disability.
disability advocacy groups: Groups that defend the human rights of people with disability. They focus on issues that affect the rights of a group, individual or society. Their work can be paid or voluntary.
inaccessible content: Information not accessible to people with a disability. For example, visual content such as images or diagrams presented through an online presentation that does not have an alternate text description.
OCR software: Optical character recognition software converts inaccessible text (such as a scanned image of text in a PDF document) to a text document (such as Microsoft Word) that can be read with screen reading software.
online learning platforms: Used by tertiary institutions for student services, delivery of learning content and resources for both students and staff.
Universal Design: The intentional design to maximise access for all people including people with disability.
Universal Design for Learning: An approach to minimise or remove access barriers at the design phase to maximise participation for all learners.
Web Content Accessibilities Guidelines (WCAG 2.1): Guidelines developed by the W3C that outline how to make web content more accessible for people with disability. https://www.w3.org/WAI/standards-guidelines/wcag/

36
Abbreviations ADCET: Australian Disability Clearinghouse on Education and Training
ATAG: Authoring Tool Accessibility Guidelines
CSS: Cascading Style Sheets
DDA: [Australian] Disability Discrimination Act
FAQ: frequently asked questions
HTML: HyperText Markup Language
ISO: International Organization for Standardisation
JAWS: Job Access With Speech
NVDA: NonVisual Desktop Access
OCR: optical character recognition
PDF: Portable Document Format
RSS: Really Simple Syndication
RTO: registered training organisation
TAFE: Technical and Further Education
UDL: Universal Design for Learning
UNCRPD: United Nations Convention on the Rights of Persons with Disabilities
UNESCO: United Nations Educational, Scientific and Cultural Organization
WCAG: Web Content Accessibility Guidelines
WIPO: World Intellectual Property Organization
W3C: World Wide Web Consortium