6 2 5 workflow manager
TRANSCRIPT

WORKFLOW MANAGER CONSULTANT’S GUIDE
Version 6.2.5

CREATE DEMAND. MANAGE DEMAND. FULFILL DEMAND.
Workflow Manager Consultant’s GuideVersion 6.2.5Release Date: 2005
Copyright 1999–2005, Demantra®, Inc. All rights reserved.
Demantra and Demantra Spectrum are registered trademarks of Demantra, Inc. All other trademarks used herein are the properties of their respective owners and are used for identification purposes only.
The software described in this guide is furnished under a license agreement and may be used only according to the terms of that agreement.
No information contained in this manual may be copied without written permission.
Publication Notice: The information in this guide does not constitute a warranty of performance. Demantra reserves the right to revise this guide and make changes in its contents without obligation to notify any person of such revisions. Demantra assumes no liability for losses incurred as a result of outdated or incorrect information in this publication.
http://www.demantra.com
Demantra, Inc.230 Third AvenueWaltham, MA 02451USA
Tel: 781-810-1700Fax: 781-810-1701Toll-free: 1-866-Demantra
support: 1-866-Demantra (x501)[email protected]
Workflow Manager Consultant’s Guide
Contents
Preface . . . . . . . . . . . . . . . . . . . . . . . . . . . . . . . . . . . . . . . . . . . . . . . . . . . . . . . . . . . . . . vAbout This Manual . . . . . . . . . . . . . . . . . . . . . . . . . . . . . . . . . . . . . . . . . . . . . . . . . . . vOverview of the Demantra Spectrum Documentation. . . . . . . . . . . . . . . . . . . . . . . . . v
For Use During Installation. . . . . . . . . . . . . . . . . . . . . . . . . . . . . . . . . . . . . . . . . . vFor Use During Implementation . . . . . . . . . . . . . . . . . . . . . . . . . . . . . . . . . . . . . . viFor the System Administrator . . . . . . . . . . . . . . . . . . . . . . . . . . . . . . . . . . . . . . . viiFor End Users . . . . . . . . . . . . . . . . . . . . . . . . . . . . . . . . . . . . . . . . . . . . . . . . . . . vii
Location of HTML and PDF Manuals. . . . . . . . . . . . . . . . . . . . . . . . . . . . . . . . . . . .viiiFor Customer Support . . . . . . . . . . . . . . . . . . . . . . . . . . . . . . . . . . . . . . . . . . . . . . . .viii
Chapter 1: Introduction to the Workflow Manager . . . . . . . . . . . . . . . . . . . . . . . 1About the Workflow Manager . . . . . . . . . . . . . . . . . . . . . . . . . . . . . . . . . . . . . . . . . . . 1Introduction to Workflows and Workflow Steps. . . . . . . . . . . . . . . . . . . . . . . . . . . . . 1
Tasks and Email . . . . . . . . . . . . . . . . . . . . . . . . . . . . . . . . . . . . . . . . . . . . . . . . . . 2Demantra Spectrum Actions . . . . . . . . . . . . . . . . . . . . . . . . . . . . . . . . . . . . . . . . . 2Logic . . . . . . . . . . . . . . . . . . . . . . . . . . . . . . . . . . . . . . . . . . . . . . . . . . . . . . . . . . . 3External Functions. . . . . . . . . . . . . . . . . . . . . . . . . . . . . . . . . . . . . . . . . . . . . . . . . 3
Typical Step Properties . . . . . . . . . . . . . . . . . . . . . . . . . . . . . . . . . . . . . . . . . . . . . . . . 3Using a Workflow as a Method . . . . . . . . . . . . . . . . . . . . . . . . . . . . . . . . . . . . . . . . . . 4Introduction to the Workflow Manager . . . . . . . . . . . . . . . . . . . . . . . . . . . . . . . . . . . . 5Recovery and the Workflow Engine . . . . . . . . . . . . . . . . . . . . . . . . . . . . . . . . . . . . . . 6Workflow Schema Examples. . . . . . . . . . . . . . . . . . . . . . . . . . . . . . . . . . . . . . . . . . . . 6
Example 1 . . . . . . . . . . . . . . . . . . . . . . . . . . . . . . . . . . . . . . . . . . . . . . . . . . . . . . . 6Example 2 . . . . . . . . . . . . . . . . . . . . . . . . . . . . . . . . . . . . . . . . . . . . . . . . . . . . . . . 6Example 3 . . . . . . . . . . . . . . . . . . . . . . . . . . . . . . . . . . . . . . . . . . . . . . . . . . . . . . . 7
Chapter 2: Creating and Editing Workflows . . . . . . . . . . . . . . . . . . . . . . . . . . . . 9Considerations When Creating Workflows . . . . . . . . . . . . . . . . . . . . . . . . . . . . . . . . . 9Creating or Editing Workflow Schemas . . . . . . . . . . . . . . . . . . . . . . . . . . . . . . . . . . 10Deleting Workflow Schemas . . . . . . . . . . . . . . . . . . . . . . . . . . . . . . . . . . . . . . . . . . . 12Creating or Editing a Schema Group . . . . . . . . . . . . . . . . . . . . . . . . . . . . . . . . . . . . . 12Deleting a Schema Group . . . . . . . . . . . . . . . . . . . . . . . . . . . . . . . . . . . . . . . . . . . . . 14
Chapter 3: Managing Workflow Instances . . . . . . . . . . . . . . . . . . . . . . . . . . . . 15Viewing Workflow Status . . . . . . . . . . . . . . . . . . . . . . . . . . . . . . . . . . . . . . . . . . . . . 15Starting Workflow Instances . . . . . . . . . . . . . . . . . . . . . . . . . . . . . . . . . . . . . . . . . . . 16Scheduling Workflow Instances . . . . . . . . . . . . . . . . . . . . . . . . . . . . . . . . . . . . . . . . 17Stopping Workflow Instances . . . . . . . . . . . . . . . . . . . . . . . . . . . . . . . . . . . . . . . . . . 19Viewing the Workflow Process Log . . . . . . . . . . . . . . . . . . . . . . . . . . . . . . . . . . . . . 19

Contents
Chapter 4: Available Workflow Steps . . . . . . . . . . . . . . . . . . . . . . . . . . . . . . . . 21Specifying a Task. . . . . . . . . . . . . . . . . . . . . . . . . . . . . . . . . . . . . . . . . . . . . . . . . . . . 22BLE Step . . . . . . . . . . . . . . . . . . . . . . . . . . . . . . . . . . . . . . . . . . . . . . . . . . . . . . . . . . 23Condition Step . . . . . . . . . . . . . . . . . . . . . . . . . . . . . . . . . . . . . . . . . . . . . . . . . . . . . . 25Container Step . . . . . . . . . . . . . . . . . . . . . . . . . . . . . . . . . . . . . . . . . . . . . . . . . . . . . . 26Custom Step . . . . . . . . . . . . . . . . . . . . . . . . . . . . . . . . . . . . . . . . . . . . . . . . . . . . . . . . 28Email Step . . . . . . . . . . . . . . . . . . . . . . . . . . . . . . . . . . . . . . . . . . . . . . . . . . . . . . . . . 30Exception Step . . . . . . . . . . . . . . . . . . . . . . . . . . . . . . . . . . . . . . . . . . . . . . . . . . . . . . 31Executable Step . . . . . . . . . . . . . . . . . . . . . . . . . . . . . . . . . . . . . . . . . . . . . . . . . . . . . 33Fail-To-Execute Step . . . . . . . . . . . . . . . . . . . . . . . . . . . . . . . . . . . . . . . . . . . . . . . . . 35Group Step . . . . . . . . . . . . . . . . . . . . . . . . . . . . . . . . . . . . . . . . . . . . . . . . . . . . . . . . . 36Selection Step. . . . . . . . . . . . . . . . . . . . . . . . . . . . . . . . . . . . . . . . . . . . . . . . . . . . . . . 38Simulation Step . . . . . . . . . . . . . . . . . . . . . . . . . . . . . . . . . . . . . . . . . . . . . . . . . . . . . 40Stored Procedure Step . . . . . . . . . . . . . . . . . . . . . . . . . . . . . . . . . . . . . . . . . . . . . . . . 43Transfer Step . . . . . . . . . . . . . . . . . . . . . . . . . . . . . . . . . . . . . . . . . . . . . . . . . . . . . . . 44User Step . . . . . . . . . . . . . . . . . . . . . . . . . . . . . . . . . . . . . . . . . . . . . . . . . . . . . . . . . . 45Wait Until Step . . . . . . . . . . . . . . . . . . . . . . . . . . . . . . . . . . . . . . . . . . . . . . . . . . . . . 47
Index . . . . . . . . . . . . . . . . . . . . . . . . . . . . . . . . . . . . . . . . . . . . . . . . . . . . . . . . . . . . . . . 49
iv Workflow Manager Consultant’s Guide

PrefaceThis preface includes the following sections:
About This Manual .......................................................................... vOverview of the Demantra Spectrum Documentation..................... vLocation of HTML and PDF Manuals .........................................viiiFor Customer Support ..................................................................viii
About This ManualThis manual is intended for use by system implementors, while you implement a Demantra Spectrum solution. For details on this manual, see the following section.
Overview of the Demantra Spectrum DocumentationThe Demantra Spectrum documentation is divided into the following categories.
For Use During Installation
Manual Contents
Demantra Spectrum Release Notes
• New and changed features• Defects fixed in this release• Known defects in this release
Demantra Spectrum Installation Guide
• Hardware and software prerequisites• Running the Demantra Spectrum installer• Upgrading from a previous release• Starting the server and logging on• Initiating the Citrix Metaframe Server, if you use this product• Uninstalling Demantra Spectrum
Workflow Manager Consultant’s Guide v

Preface
For Use During Implementation
Manual Contents
Getting Started with Demantra Spectrum
Provides a detailed discussion of basic Demantra Spectrum concepts such as the following:• Aggregation levels• Series, worksheets, and how Demantra Spectrum stores data• Overview of the proport (splitting) mechanism• Causal factors• The forecast tree• Overview of the Demantra Spectrum products• Overview of the implementation process• Tips on information needed to hand off the solution to users
and administrators
Demantra Spectrum Reference Guide
Provides reference material on the following:• Demantra Spectrum URLs• Parameters• Database procedures• Base data fields• Default data series associated with Demand Planner Web,
Demand Planner, and Promotions Effectiveness• Functions and operators used in server and client expressions• Theoretical forecast models• Glossary
Business Modeler Consultant’s Guide
Basic how-to information:• Setting up the Demantra Spectrum data model• Configuring levels• Configure units of measure, financial indexes, and conversion
rates for use in series and worksheets• Configure the series and groups of series• Setting up import and export
Less common tasks:• Defining methods that the user can execute from within
worksheets• Managing the worksheets (queries)• Editing the database• Using the Constraint Profit Optimization Wizard• Customizing messages
Business Application Modeler Consultant’s Guide
• Creating and configuring the components• Configuring starter worksheets, which you can also create
within the components
vi Workflow Manager Consultant’s Guide

Preface
For the System Administrator
For End UsersThe following manuals apply to Demantra Web-based products:
• Promotions Effectiveness User’s Guide
• Demand Planner Web User’s Guide
• Collaborator Workbench User’s Guide
• Deduction Management User’s Guide
The following manuals apply to Demantra desktop products:
• Demand Planner User’s Guide
• Demand Replenisher User’s Guide
Analytical Engine Consultant’s Guide for Demand Planning
Applies to Demand Planner Web, Demand Planner, and Demand Replenisher.• Configuring causal factors• Configuring the forecast tree• Tuning the Analytical Engine• Tuning the proport mechanism• Running the Analytical Engine and the Engine Administrator
Reference information:• Engine flow• Shape modeling
Analytical Engine Consultant’s Guide for Promotions Effectiveness
Applies to Promotions Effectiveness. Same general contents as Analytical Engine Consultant’s Guide for Demand Planning.
Workflow Manager Consultant’s Guide
• Defining, starting, and managing automated workflows. • Reference information for the predefined workflow steps
Manual Contents
Manual Contents
Demantra Spectrum Administrator’s Guide
• Overview of administrative tasks• Using the Security Manager• Using the Scheduler to schedule database procedures• Wrapping database procedures• Using the Business Logic Engine and defining safety stock levels• Using the desktop System menu• Configuring the Collaborator Workbench logon page• Configuring the menus, links, and default layout of Collaborator
Workbench and other Demantra Spectrum Web-based applications
• Upgrading the Demantra Spectrum license
Workflow Manager Consultant’s Guide vii

Preface
Location of HTML and PDF ManualsAll Demantra Spectrum manuals are available in PDF format, within the directory Demantra_root\Documents. To read a PDF file, use Adobe Acrobat version 4.0 or higher. These files are formatted for double-sided printing and contain color graphics (which can be printed in color or in black and white).
Most of the manuals are also available in HTML format, as follows:
Each help file is contained in a subdirectory of Demantra_root\Documents. Each of these directories contains the file helpset.htm. To open the help, open that file from an internet browser.
For Customer SupportFor customer support, call 1-866-Demantra (x501) or send email to [email protected].
Help Title Contents
User Help HTML versions of the following:• Demand Planner Web User’s Guide• Promotions Effectiveness User’s Guide• Collaborator Workbench User’s Guide• Member Management and Chaining Management chapters
from Demand Planner User’s Guide• Demantra Spectrum Administrator’s Guide• Combined glossary and index
Consultant Help HTML versions of the following:• Getting Started with Demantra Spectrum• Business Modeler Consultant’s Guide• Business Application Modeler Consultant’s Guide• Analytical Engine Consultant’s Guide for Demand Planning• Analytical Engine Consultant’s Guide for
Promotions Effectiveness• Workflow Manager Consultant’s Guide• Demantra Spectrum Administrator’s Guide• Demantra Spectrum Reference Guide• Combined glossary and index
Demand Planner Help HTML version of the Demand Planner User’s Guide.
Demand Replenisher Help
HTML version of the Demand Replenisher User’s Guide.
viii Workflow Manager Consultant’s Guide

Workflow ManagerThis chapter introduces the Workflow Manager. It includes the following sections:
About the Workflow Manager ..........................................................1Introduction to Workflows and Workflow Steps ...............................1Typical Step Properties ....................................................................3Using a Workflow as a Method........................................................4Introduction to the Workflow Manager ...........................................5Recovery and the Workflow Engine .................................................6Workflow Schema Examples ............................................................6
For an overview of the implementation process, see the manual Getting Started with Demantra Spectrum.
About the Workflow ManagerThe Web-based Workflow Manager enables you to create and manage workflows. This software provides the following tools:
• The Workflow Editor, which you use to define workflow schemas. You choose from the predefined steps, and you specify properties of the steps. You also connect the steps as needed for the workflow.
• The Workflow Engine is a background process that keeps the workflows running.
You log into the Workflow Manager as the owner or a qualified user of a specific component, which is a subdivision of the Demantra Spectrum data (created within the Business Application Modeler). You can define workflows that include any users of the component, as well as any groups (groups can be defined across multiple components).
Introduction to Workflows and Workflow StepsA workflow is a logically connected set of steps. Each step can be automated or can require interaction from one or more users or groups. The steps that are available allow you to perform familiar business tasks such as loading data, forecasts and reviews. This section provides a brief overview of the kinds of available steps.
Workflow Manager Consultant’s Guide 1

Chapter 1: Introduction to the Workflow Manager
Tasks and EmailSome steps send tasks to users or groups; these tasks appear in the My Tasks module for those users, within Collaborator Workbench. A typical task is a request to examine a worksheet, make a decision, and possibly edit data. A task can also include a link to a Web page for more information.
A task can be accompanied by email. Also, a workflow step can simply send email.
The following kinds of workflow steps support tasks and email:
• User Step sends tasks to a specific user, to ask the user to review and update a worksheet, or to prompt for a workflow decision.
• Group Step sends tasks to a group of users using just one step instead of sending the task individually to each one. This also allows you to coordinate your workflow processes with responses from whole groups of users.
• Email Step sends an email to a user that will arrive in the user’s standard email application. This step allows integration with the organizational messaging system.
• Exception Step runs a worksheet on which an exception has been defined. If the worksheet returns data, the step then send tasks to users to resolve the exception.
• Selection Step provides a user with a selection of choices to direct the continuation of the workflow instance. For instance, selection step can be used to obtain approval, rejection, or postponement of workflow activities, or selection of a priority from a list of activities.
Demantra Spectrum ActionsThe following specialized workflow steps perform actions that are specific to Demantra Spectrum needs:
• Transfer Step initiates transfer procedures for the import and export of data. This kind of step is associated with an integration interface, as defined within the Business Modeler.
• Stored Procedure Step runs a stored database procedure on the database that holds the Demantra Spectrum data. Demantra Spectrum provides a set of predefined database procedures, some of which must run regularly in any Demantra Spectrum solution. See the Demantra Spectrum Administrator’s Guide for details.
• BLE Step runs the Business Logic Engine directly on a worksheet to obtain the most recent results.
Note The BLE Step does not start the Business Logic Engine.
If a workflow includes this kind of step, you must make sure that the Business Logic Engine is running before a step of this kind is launched; otherwise the step will fail.
2 Workflow Manager Consultant’s Guide

Typical Step Properties
• Simulation Step runs simulations on the Simulation Engine and then either automatically accepts the results or displays the results in a worksheet for review by a user.
LogicThe following kinds of steps support programming logic within the workflow:
• Selection Step, which was introduced above, provides a user with a selection of choices to direct the continuation of the workflow instance.
• Condition Step directs the course of the workflow instance depending on condition results obtained from worksheets run on the Demantra Spectrum database.
• Exception Step runs a worksheet on which an exception has been defined. If the worksheet returns data, the step then send tasks to users to resolve the exception.
• Container Step runs multiple steps in parallel.
• Wait Until Step waits until a specific condition is met before allowing the workflow to continue. The condition can be the existence or modification of a given file, or a change in the database.
External FunctionsFinally, other kinds of steps call external functions:
• Executable Step runs applications from within the workflow instance. The applications can be Demantra Spectrum tasks such as Load or Forecast, or external such as exe and batch files. This step allows interaction between Demantra Spectrum and external applications.
• Custom Step runs a Java class.
Typical Step PropertiesEach step has connection handles that you use to connect it to other steps, as in the following example.
When you add a step to a workflow, the Workflow Editor displays a popup page where you can specify properties for that step. Common properties include the following; not all steps have all these properties.
• The User and Group properties specify users and groups, respectively, associated with the step. Generally, the Workflow Engine sends tasks to these users or groups. Some kinds of steps have both these properties, some have only the User
Workflow Manager Consultant’s Guide 3

Chapter 1: Introduction to the Workflow Manager
property, and some have neither. In some cases, you can specify only a single user, while in other cases, multiple users are permitted.
• The Query Name property specifies an associated worksheet, from the set defined within Demantra Spectrum. Different kinds of steps use worksheets in different ways. For example, BLE Step evaluates the client expressions in the worksheet.
• Several properties specify built-in processing delays with short default values. For example, the Pause property specifies how long the Workflow Engine should wait after the step is completed, before starting the next step. In this way, you can coordinate workflow activities by making the engine wait for defined periods of time.
• The Timeout>Timer property specifies when the step times out. For example, if the user does not mark a task as done before its due date, then the task will expire or time out. You use this property to prevent a step from stalling the workflow. If you specify a timeout period, you also specify an alternative following step that the Workflow Engine should execute.
• The Timeout>Alert Time property specifies when the step enters its alert phase.
• The Recovery property specifies the recovery action for the Workflow Engine to use if the system crashes while performing this step.
Using a Workflow as a MethodYou can use a workflow as a method, which the user sees as an ordinary menu option. To execute a method, the user right-clicks a level member in a worksheet and then selects the method name from the menu. Demantra Spectrum displays a dialog box where the user can edit values of attributes of the currently selected member. Then Demantra Spectrum passes the member and its attributes to the method, executes the underlying workflow, and then optionally displays data to the user.
To define a method, you do the following:
1. Define a workflow that performs the activity of interest. Often the workflow consists of a single Custom Step that executes a Java class.
2. Within the Business Modeler, configure the method itself. In this step, you specify how the method will appear within the user interface. Most importantly, you associate the method with a specific aggregation level; users can execute a method for any member of that level.
For more information on methods and information on configuring methods, see the Business Modeler Consultant’s Guide.
Note When a step times out, the Workflow Engine executes the timeout step immediately without waiting for the pause counter to finish.
4 Workflow Manager Consultant’s Guide

Introduction to the Workflow Manager
Introduction to the Workflow ManagerBefore logging onto the Workflow Manager, make sure that the database and the Web server are both running.
To open the Workflow Manager
1. Browse to the following case-sensitive URL:
http://server name/b2b/workflow/login.jsp
A login page appears.
2. Type your username and password and then click Log on.
The Workflow Manager comes up.
To exit the Workflow Manager
• Click Logout.
See also
“Viewing Workflow Status” on page 15
Note Use one of the following user names:
• User name of the owner of a specific component.
• User with the System Manager permission level.
In either case, the user must belong to a group that is authorized to log onto the Workflow Editor, via the workflow.group parameter. See the Demantra Spectrum Administrator’s Guide for details.
Workflow Manager Consultant’s Guide 5

Chapter 1: Introduction to the Workflow Manager
Recovery and the Workflow EngineEach time it starts up, the Workflow Engine checks to see if there are any workflow instances that are running, that is, an instance whose status is not completed or terminated. For each instance that is currently running, the engine performs a recovery procedure.
An instance is considered to be in mid-step and therefore running, even when it is between steps. The current step is the last step that was running when the crash happened.
Workflow Schema ExamplesWorkflows are very often used to import data. In the process of importing data, it is often necessary to perform various kinds of integrity checking and data cleanup, which you do within database procedures. As a consequence, many workflow schemas include the Stored Procedure Step in addition to the Transfer Step.
Example 1
Example 2
6 Workflow Manager Consultant’s Guide

Workflow Schema Examples
Example 3
Workflow Manager Consultant’s Guide 7

Chapter 1: Introduction to the Workflow Manager
8 Workflow Manager Consultant’s Guide

WorkflowsThis chapter describes how to create workflow schemas using the steps that are available in the Workflow Editor. It includes the following sections:
Considerations When Creating Workflows......................................9Creating or Editing Workflow Schemas.........................................10Deleting Workflow Schemas ..........................................................12Creating or Editing a Schema Group ............................................12Deleting a Schema Group..............................................................14
Considerations When Creating WorkflowsBefore you begin creating a workflow schema, you should have a clear idea of the intended purpose, flow, and users of the schema. Also, you should consider the following issues:
• Remember that client expressions that are affected by data changes should not be used until the Business Logic Engine evaluates them. (The Workflow Manager does provide a kind of step that submits worksheets to the Business Logic Engine.)
• A worksheet must be public in order to be visible from a task. Also, users must have the correct security privileges to view worksheet results.
• Initiators of a workflow instance must have permissions to view worksheet results for all worksheets that the workflow schema includes. If the workflow instance is to be initiated by more than one user, the worksheet must be a public worksheet, and the users of the group must have permissions to view the worksheet results.
• Properties of workflow steps cannot be changed within or by the workflow instance. If you make changes to a workflow schema, those changes do not affect any instances that are currently running.
• Only the owner of a workflow schema can edit that schema.
Workflow Manager Consultant’s Guide 9

Chapter 2: Creating and Editing Workflows
Creating or Editing Workflow SchemasYou can edit any workflow schema that you created, but you cannot edit schemas created by other users. When you edit a schema, the changes will be used in any new instances of the workflow schema. Any instances of the schema that are currently running are unaffected.
To create or edit a workflow schema
1. On the Workflow Management page, do one of the following:
• To create a new schema, click New Schema at the bottom of the page.
• To edit a schema, click Edit in the row corresponding to that schema. Or click the schema name.
The Workflow Editor appears.
This screen has three panes:
• The left pane lists all the available steps that you can include in the workflow.
• The right pane shows the definition of the workflow itself.
• The message pane at the bottom of the window contains information, such as a warning of a failed validation or confirmation of a successful save.
2. Do one of the following:
• To make the schema to be available for use, select the Live check box.
Notes • You do not have to write the whole schema in one editing session. You can save your changes and then return to edit the schema.
• You can mark a schema as archived, which prevents it from being used. It is good practice to archive any schema that is not yet finalized, to prevent it from being used before it is ready.
10 Workflow Manager Consultant’s Guide

Creating or Editing Workflow Schemas
• To make the schema unavailable, clear the Live check box.
3. Add the required steps to the workflow. To add a step to the workflow:
a. In the left pane, double-click the icon corresponding to the step.
The Workflow Editor displays a popup window that prompts you for information about the step.
b. Specify the step properties. The properties depend on the kind of step you are adding. For details, see “Available Workflow Steps” on page 21.
c. Click OK.
The step is added to the right pane.
d. Within the right pane, optionally reposition the step icon to improve readability.
4. Connect the steps in the required order. To link two steps, click the outgoing connection handle of the first step and drag to the incoming connection handle of the next steps.
Note the following rules:
• An outgoing connection handle can be linked to only one following step. The Container Step is the exception.
• A step that is contained within a Container Step cannot have any of its outgoing connection handles connected to other steps.
• The Selection Step has multiple outgoing steps. To define the outgoing connection handles and to add the links, you use the properties dialog box. See “Defining and Linking to Selections” on page 38.
5. To specify which step starts the workflow, right-click the step and then select Set as Start step.
This step is labelled with a yellow star.
Each schema must specify a step from which the execution starts.
outgoingconnectionhandle
incomingconnectionhandle
Workflow Manager Consultant’s Guide 11

Chapter 2: Creating and Editing Workflows
6. To save your workflow to the database, click Save. Or click Back to cancel your changes.
7. Click Back to return to the Workflow Process Management screen.
To edit an existing step
• Right-click the step and then click Properties.
To delete a step
• Click the step and press Delete.
To delete a link
• Click the link and press Delete.
See also
“Introduction to the Workflow Manager” on page 5“Starting Workflow Instances” on page 16
Deleting Workflow SchemasYou can delete any workflow schema that you created, as long as no instances of that schema are currently running. You cannot delete schemas created by other users.
To delete a workflow schema
1. On the Workflow Management page, click Delete next to the workflow schema.
2. Click OK to confirm the deletion.
Creating or Editing a Schema GroupYou can group the schemas to manage them more easily. The groupings affect only the display within the Workflow Manager. A schema can belong to multiple groups. Also, a schema group can be public (viewable by all users who log into Workflow Manager) or private (viewable only by you).
Note When you save a schema, it is automatically checked for validity. You cannot save an invalid schema. You can verify before saving by clicking Verify.
12 Workflow Manager Consultant’s Guide

Creating or Editing a Schema Group
You can edit any schema group that you created; this has no effect on the workflow schemas themselves. You cannot edit schema groups created by other users.
To create or edit a schema group
1. On the Workflow Management page, do one of the following:
• To create a new schema group, click New at the top of this page.
• To edit a schema group, select the group from the dropdown list at the top of this page. Then click Modify.
The Workflow Manager displays the following page:
2. For Name, type a unique name for this schema group.
3. For Description, type an optional description.
4. Specify the workflow schemas to include in this group. To do so, move schemas from the left list to the right list.
5. For Permission, click Public or Private, depending on whether you want other users to be able to see this schema group.
6. Click OK.
See also
Chapter 3, “Managing Workflow Instances” on page 15
Workflow Manager Consultant’s Guide 13

Chapter 2: Creating and Editing Workflows
Deleting a Schema GroupYou can delete any schema group that you created; this has no effect on the workflow schemas themselves. You cannot delete schema groups created by other users.
To create or edit a schema group
1. On the Workflow Management page, select the group from the dropdown list at the top of this page.
2. Click Delete.
3. Click OK to confirm the deletion.
14 Workflow Manager Consultant’s Guide

InstancesThis chapter describes how to use the Workflow Manager to start, stop, and view workflow instances. It includes the following sections:
Viewing Workflow Status................................................................15Starting Workflow Instances ..........................................................16Scheduling Workflow Instances .....................................................17Stopping Workflow Instances.........................................................19Viewing the Workflow Process Log................................................19
Viewing Workflow StatusYou can view all the status of all public workflow schemas and all private workflow schemas that you created. This means that you can see how many instances of those schemas are running, as well as the status of each instance.
To view overall status of the workflows
The Workflow Manager displays the overall status information for the workflows.
Each row corresponds to a workflow schema. The Instances column indicates how many instances of this workflow schema are currently running, if any. The Status column uses the following color codes:
Green The workflow schema is live and you may execute it, creating an workflow instance.
Red The workflow schema is archived and cannot be executed.
Yellow There is a data error or other fault within this schema.
Workflow Manager Consultant’s Guide 15

Chapter 3: Managing Workflow Instances
To specify which workflow schemas to display
• To see all workflow schemas, select All in the Schema Groups dropdown list. Then click View.
• To see a subset of the schemas, select a group in the Schema Groups dropdown list. Then click View.
To refresh the display
• Click Refresh.
To view the currently running instances of a schema
1. On the Workflow Management page, click the Instances link in the row corresponding to that workflow.
The Workflow Manager lists all the instances of that schema that are currently running.
2. When you are done, click Back.
See also
“Introduction to the Workflow Manager” on page 5“Viewing the Workflow Process Log” on page 19
Starting Workflow InstancesYou can start an instance of any public workflow schema or any private workflow schema that you created.
To start a workflow instance
• On the Workflow Management page, click Start next to the schema that you want to start.
The Workflow Engine starts an instance of the workflow and increments the number of instances in the Instances column by one.
Caution Although you can run as many instances of a workflow as you want at the same time, be careful not to activate conflicting processes and tasks.
16 Workflow Manager Consultant’s Guide

Scheduling Workflow Instances
See also
“Introduction to the Workflow Manager” on page 5“Creating or Editing Workflow Schemas” on page 10“Stopping Workflow Instances” on page 19
Scheduling Workflow InstancesIf you are the owner of a workflow, you can schedule an instance to start at a specific time or times. If you are not the owner, you cannot schedule it, although you can start it manually, as described in “Starting Workflow Instances” on page 16.
To schedule a workflow instance
1. On the Workflow Management page, click Schedule in the row corresponding to that workflow.
The system displays the Schema Scheduler page.
2. Click Add.
Workflow Manager Consultant’s Guide 17

Chapter 3: Managing Workflow Instances
The system displays the following page.
3. In the first dropdown list, select the option that specifies how often to start an instance of this workflow:
• Daily
• Weekly
• Monthly
• Once
Depending on the choice you make here, the system displays additional scheduling options in the bottom part of the page.
4. Specify the starting time and starting date.
5. In the bottom part of the page, finish specifying the schedule.
6. Click OK.
To unschedule a workflow instance
1. On the Workflow Management page, click Schedule in the row corresponding to that workflow.
The system displays the Schema Scheduler page. This page displays one row for each scheduling entry for this workflow.
2. Click the row corresponding to the scheduling entry you want to remove.
3. Click Remove.
See also
“Starting Workflow Instances” on page 16“Stopping Workflow Instances” on page 19
18 Workflow Manager Consultant’s Guide

Stopping Workflow Instances
Stopping Workflow InstancesYou can stop any workflow instance that you started. You cannot stop a workflow instance started by another user.
To stop a workflow instance
1. On the Workflow Management page, click the number in the Instances column that corresponds to that workflow.
The system lists all the instances of that schema.
2. Click Terminate next to the instance that you want to stop.
3. Click OK.
The instance is stopped and is removed from the list of instances.
See also
“Starting Workflow Instances” on page 16“Scheduling Workflow Instances” on page 17
Viewing the Workflow Process LogThe workflow process log displays information on all the workflow instances that have run or that are running.
To view the process log
• On the bottom of the Workflow Management page, click Process Log.
Note Instances that show in red are instances of Fail-To-Execute Step steps. For more information, see “Fail-To-Execute Step” on page 35.
Note Terminate stops only the workflow instance itself. It does not cancel any work that the instance may have initiated (such as tasks that were sent or requests placed in the Simulation Engine or Business Logic Engine queues). These items must be cancelled manually.
Workflow Manager Consultant’s Guide 19

Chapter 3: Managing Workflow Instances
The Process Log page appears.
To filter process log entries
1. Select the required filter from the View Processes dropdown menu.
2. Click View.
The filtered processes are shown.
See also
“Viewing Workflow Status” on page 15
20 Workflow Manager Consultant’s Guide
Workflow StepsThis chapter provides reference information for the available workflow steps. It includes the following sections:
Specifying a Task ...........................................................................22BLE Step ........................................................................................23Condition Step ...............................................................................25Container Step ...............................................................................26Custom Step ...................................................................................28Email Step......................................................................................30Exception Step ...............................................................................31Executable Step..............................................................................33Fail-To-Execute Step......................................................................35Group Step .....................................................................................36Selection Step.................................................................................38Simulation Step ..............................................................................40Stored Procedure Step....................................................................43Transfer Step..................................................................................44User Step........................................................................................45Wait Until Step ...............................................................................47
Workflow Manager Consultant’s Guide 21

Chapter 4: Available Workflow Steps
Specifying a TaskSeveral of the step types include a task or list of tasks, for use in Collaborator Workbench. A task consists of a set of properties, described here.
Each user who logs onto Collaborator Workbench sees an individualized list of tasks in a module called My Tasks on the Collaborator Workbench page.
Each task in the My Tasks module has a subject line which can be a link to a URL, and a description that explains more about the purpose of the task. The subject line link can refer to a worksheet, a file, a URL that initiates an external application, or any other URL.
Task Properties (in a Workflow Step)
See AlsoCollaborator Workbench User’s Guide
Property Description
Message Message to include in My Tasks. It is also used in the email message, if you use that option.
URL Optionally specify a URL, including the prefix http://. For example,http://www.acme.com/page.html
If you do not include the prefix http:// then the URL is read relative to the local host’s Workflow Engine root directory. For example, buyer/start.html is read as:http://localhost/B2B/Portal/buyer/start.html
You must specify either a URL or a worksheet to open.
Worksheet to open Optionally select a worksheet, from the list of public worksheets defined in Demantra Spectrum. This worksheet is listed in My Tasks. If you use the email option, the subject line of the message includes a link to this worksheet.
You must specify either a URL or a worksheet to open.
Source name Optionally specify the originator of this task.
Description Optionally specify a longer description of this task, up to 255 characters. This text will show in the Description field in My Tasks. It is also used in the email message, if you use that option.
File Optionally specify a local file to send to the task recipient.
Send as email as well Select this checkbox if the system should also send an email message containing this task. You use the Security Manager to configure email addresses. See the Demantra Spectrum Administrator’s Guide.
22 Workflow Manager Consultant’s Guide
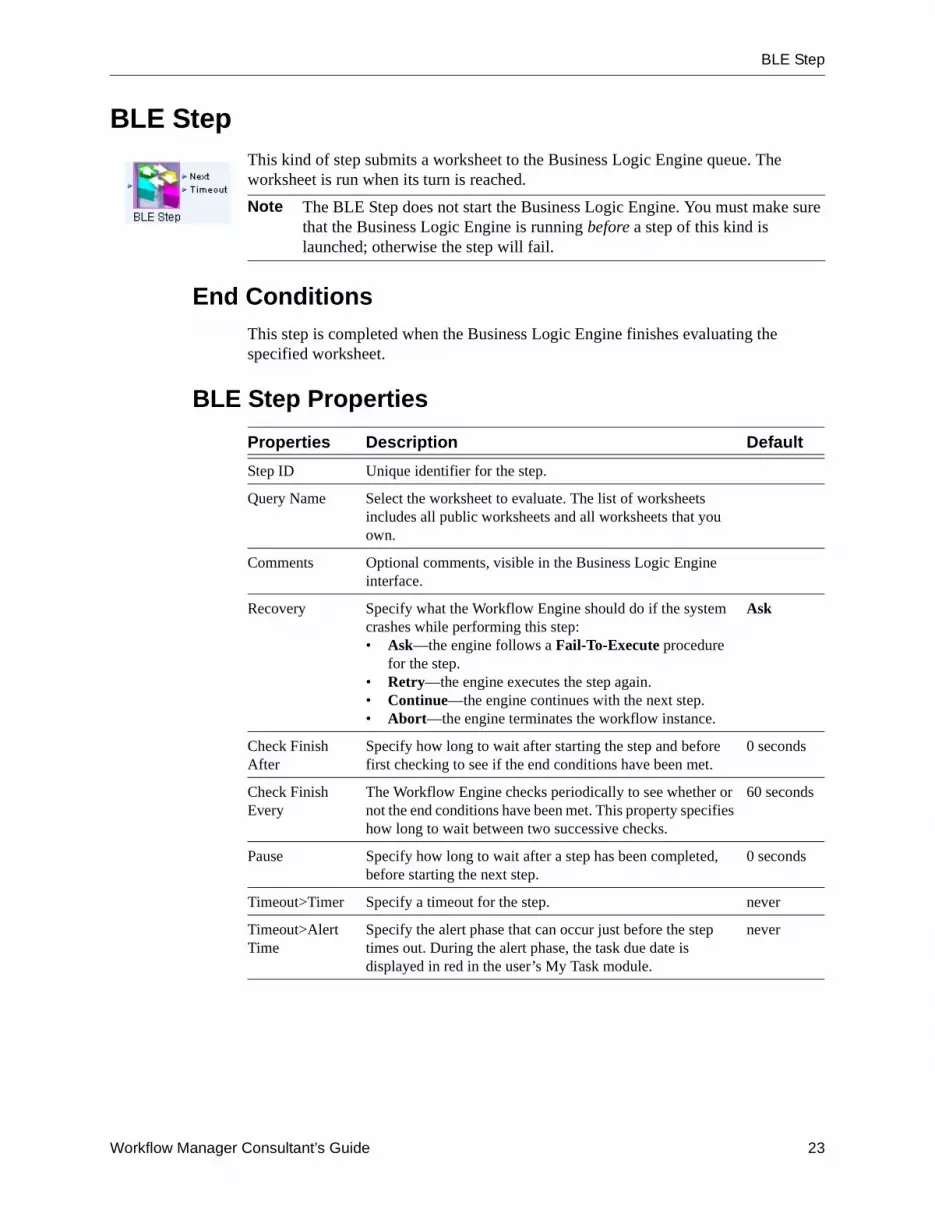
BLE Step
BLE StepThis kind of step submits a worksheet to the Business Logic Engine queue. The worksheet is run when its turn is reached.
End ConditionsThis step is completed when the Business Logic Engine finishes evaluating the specified worksheet.
BLE Step Properties
Note The BLE Step does not start the Business Logic Engine. You must make sure that the Business Logic Engine is running before a step of this kind is launched; otherwise the step will fail.
Properties Description Default
Step ID Unique identifier for the step.
Query Name Select the worksheet to evaluate. The list of worksheets includes all public worksheets and all worksheets that you own.
Comments Optional comments, visible in the Business Logic Engine interface.
Recovery Specify what the Workflow Engine should do if the system crashes while performing this step:• Ask—the engine follows a Fail-To-Execute procedure
for the step.• Retry—the engine executes the step again.• Continue—the engine continues with the next step.• Abort—the engine terminates the workflow instance.
Ask
Check Finish After
Specify how long to wait after starting the step and before first checking to see if the end conditions have been met.
0 seconds
Check Finish Every
The Workflow Engine checks periodically to see whether or not the end conditions have been met. This property specifies how long to wait between two successive checks.
60 seconds
Pause Specify how long to wait after a step has been completed, before starting the next step.
0 seconds
Timeout>Timer Specify a timeout for the step. never
Timeout>Alert Time
Specify the alert phase that can occur just before the step times out. During the alert phase, the task due date is displayed in red in the user’s My Task module.
never
Workflow Manager Consultant’s Guide 23
Chapter 4: Available Workflow Steps
NotesIf a step ends before the Check Finish After period, or during a Check Finish Every period, then the Workflow Engine still waits for that counter to finish before checking if the step has finished.
In timers, a month is measured as a calendar month.
If this step times out, the worksheet request is not deleted from the Business Logic Engine queue. You must manually delete the worksheet request from the Business Logic Engine queue.
See AlsoGetting Started with Demantra SpectrumDemantra Spectrum Administrator’s Guide
24 Workflow Manager Consultant’s Guide

Condition Step
Condition StepThis kind of step tests a worksheet and proceeds to one of two possible following steps, based on the worksheet result:
• If the worksheet result contains data, the Workflow Engine continues with the True step.
• If the worksheet result is empty, the Workflow Engine continues with False step.
End ConditionsThis step is completed when the worksheet is successfully tested.
Condition Step Properties
Properties Description Default
Step ID Unique identifier for the step.
Pause Specify how long to wait after a step has been completed, before starting the next step.
0 seconds
Query Name Select the worksheet to test. The list of worksheets includes all public worksheets and all worksheets that you own.
Recovery Specify what the Workflow Engine should do if the system crashes while performing this step:• Ask—the engine follows a Fail-To-Execute procedure for
the step.• Retry—the engine executes the step again.• Abort—the engine terminates the workflow instance.
Ask
Population Specifies the population attribute that further filters the worksheet used by this step. Specify the following:• Name—specify the name of the population attribute, as
given in GROUP_ATTRIBUTES_POPULATION.ATTRIBUTE_LABEL. In the demo, this attribute is named Population.
• The Value field is not used.
This property is useful when you use a workflow as a method; otherwise it has no effect.
Workflow Manager Consultant’s Guide 25

Chapter 4: Available Workflow Steps
Container StepThis kind of step is used to execute multiple single steps simultaneously and independently. The Container step is completed when all steps in it are completed.
Included StepsA Container step can contain any number of steps. All the steps proceed independently of each other. The steps do not have to be for the same user.
You cannot include the following kinds of steps:
• Condition Step
• Container Step
• Exception Step
Also, the order in which the steps are included is not relevant to their processing.
End ConditionsThis step is completed when all the steps that it contains are completed.
Container Step Properties
Note In order to run a sequence of steps from within a Container step, you can use an Executable step that initiates a workflow instance that itself contains the required series of steps. However, you should remember that new workflow instance is run separately and does not affect the timeout, fail-to-execute, or end conditions of the original Container step.
Properties Description Default
Step ID Unique identifier for the step.
Check Finish After
Specify how long to wait after starting the step and before first checking to see if the end conditions have been met.
0 seconds
Check Finish Every
The Workflow Engine checks periodically to see whether or not the end conditions have been met. This property specifies how long to wait between two successive checks.
60 seconds
Pause Specify how long to wait after a step has been completed, before starting the next step.
0 seconds
Recovery Specify what the Workflow Engine should do if the system crashes while performing this step:• Ask—the engine follows a Fail-To-Execute procedure for
the step.• Retry—the engine executes the step again.• Abort—the engine terminates the workflow instance.
Ask
26 Workflow Manager Consultant’s Guide

Container Step
Container Step Fail-To-ExecuteIf any of the steps in a container step fail to execute, the engine waits until all other steps have either finished before performing a Fail-To-Execute procedure on the entire container step.
An email notification is sent to the process initiator and shows which specific steps failed to execute. For example:
Subject: Failure in Process execution.Message Text:Process ID: 19Schema ID: 7Step ID: ContainerStepError description: Invalid user name: Brian, internal step in container step: 'Action Required Activities'.Schema name: 'Check for Action Required', step name: 'Notify user of Action Required'
Container Step TimeoutIf an individual step included within a Container step times out, it does not continue to its own timeout step. The timeout procedure is executed but the timeout step is not activated.
NotesIf a step ends before the Check Finish After period, or during a Check Finish Every period, then the Workflow Engine still waits for that counter to finish before checking if the step has finished.
In timers, a month is measured as a calendar month.
Workflow Manager Consultant’s Guide 27

Chapter 4: Available Workflow Steps
Custom StepThis kind of step executes a Java class from within a workflow instance. You can use this kind of step to add functionality to your workflow or interact with external applications without having to change the workflow structure itself.
End ConditionsThis step is completed when the executed Java class is completed.
Custom Step Properties
Java Class FunctionsThe Java class should contain these two functions:
public int executeStep() { write your code here }setParameters(Hashtable params) { write your code here }
The workflow step executes the executeStep() function.
setParameters(Hashtable params) defines parameters for the class. This function is called before execution.
Properties Description Default
Step ID Unique identifier for the step.
Class Name The Java class to execute.
Parameters Any input parameters that are needed by the Java class. For each parameter, specify the parameter name and value, as well as an optional description.
Recovery Specify what the Workflow Engine should do if the system crashes while performing this step:• Ask—the engine follows a Fail-To-Execute procedure for
the step.• Retry—the engine executes the step again.• Continue—the engine continues with the next step.• Abort—the engine terminates the workflow instance.
Ask
Check Finish After
Specify how long to wait after starting the step and before first checking to see if the end conditions have been met.
0 seconds
Check Finish Every
The Workflow Engine checks periodically to see whether or not the end conditions have been met. This property specifies how long to wait between two successive checks.
60 seconds
Pause Specify how long to wait after a step has been completed, before starting the next step.
0 seconds
28 Workflow Manager Consultant’s Guide

Custom Step
Example
package com.demantra.workflow.step;import com.demantra.workflow.parameters.*;
public class SampleCustomStep implements CustomStep{ public SampleCustomStep() {}
public int executeStep(Parameter[] parms) { int i, length = parms != null ? parms.length : 0; for(i=0; i<length; i++) System.out.println("Parameter name : " + parms[i].getName() + " value: " + parms[i].getValue()); // write your own logic here // ...................... return LinkedStep.ST_COMPLETED; }}
NotesIf a step ends before the Check Finish After period, or during a Check Finish Every period, then the Workflow Engine still waits for that counter to finish before checking if the step has finished.
In timers, a month is measured as a calendar month.
Workflow Manager Consultant’s Guide 29

Chapter 4: Available Workflow Steps
Email StepThis kind of step is used to send an email message to a user. This step allows a connection to the installed messaging application using SMTP protocol.
End ConditionsThis step is completed when the email message is successfully delivered to the installed messaging system.
Email Step Properties
NoteYou use the Security Manager to configure email addresses for the users. See the Demantra Spectrum Administrator’s Guide.
Note This step does not check if or when the message is read.
Properties Description Default
Step ID Unique identifier for the step.
Pause Specify how long to wait after a step has been completed, before starting the next step.
0 seconds
To User Select the user who should receive the email. The list of possible users includes all users defined within this component; see “About the Workflow Manager” on page 1.
Subject The subject line of the email message
Message The email message text
Recovery Specify what the Workflow Engine should do if the system crashes while performing this step:• Ask—the engine follows a Fail-To-Execute procedure for
the step.• Retry—the engine executes the step again.• Continue—the engine continues with the next step.• Abort—the engine terminates the workflow instance.
Ask
30 Workflow Manager Consultant’s Guide
Exception Step
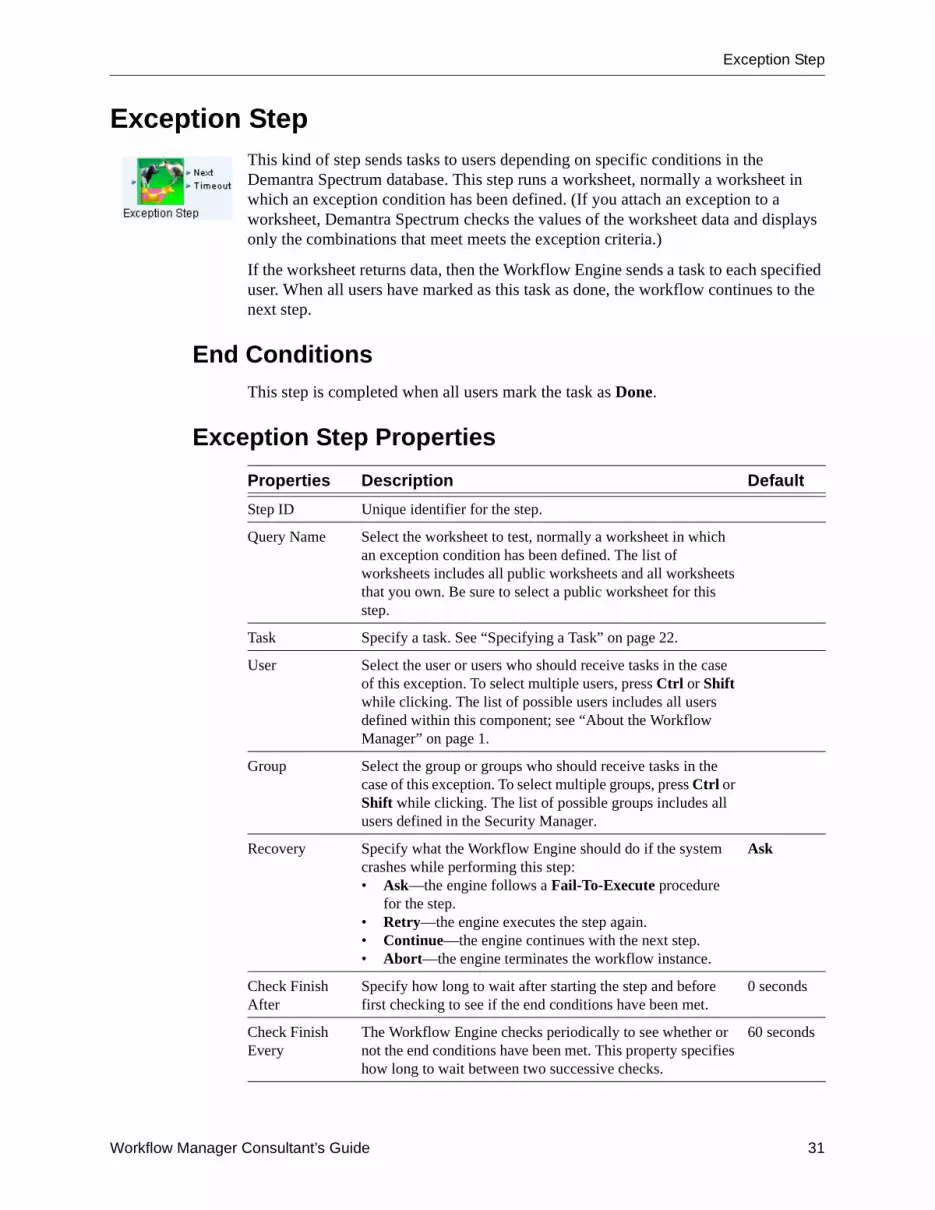
Exception StepThis kind of step sends tasks to users depending on specific conditions in the Demantra Spectrum database. This step runs a worksheet, normally a worksheet in which an exception condition has been defined. (If you attach an exception to a worksheet, Demantra Spectrum checks the values of the worksheet data and displays only the combinations that meet meets the exception criteria.)
If the worksheet returns data, then the Workflow Engine sends a task to each specified user. When all users have marked as this task as done, the workflow continues to the next step.
End ConditionsThis step is completed when all users mark the task as Done.
Exception Step Properties
Properties Description Default
Step ID Unique identifier for the step.
Query Name Select the worksheet to test, normally a worksheet in which an exception condition has been defined. The list of worksheets includes all public worksheets and all worksheets that you own. Be sure to select a public worksheet for this step.
Task Specify a task. See “Specifying a Task” on page 22.
User Select the user or users who should receive tasks in the case of this exception. To select multiple users, press Ctrl or Shift while clicking. The list of possible users includes all users defined within this component; see “About the Workflow Manager” on page 1.
Group Select the group or groups who should receive tasks in the case of this exception. To select multiple groups, press Ctrl or Shift while clicking. The list of possible groups includes all users defined in the Security Manager.
Recovery Specify what the Workflow Engine should do if the system crashes while performing this step:• Ask—the engine follows a Fail-To-Execute procedure
for the step.• Retry—the engine executes the step again.• Continue—the engine continues with the next step.• Abort—the engine terminates the workflow instance.
Ask
Check Finish After
Specify how long to wait after starting the step and before first checking to see if the end conditions have been met.
0 seconds
Check Finish Every
The Workflow Engine checks periodically to see whether or not the end conditions have been met. This property specifies how long to wait between two successive checks.
60 seconds
Workflow Manager Consultant’s Guide 31

Chapter 4: Available Workflow Steps
Exception Step Fail-To-ExecuteAside from the expected cases of Fail-To-Execute such as an invalid worksheet ID, you should take care to avoid the following circumstances which will also cause a Fail-To-Execute:
• Workflow Initiator does not have privileges to execute the condition worksheet.
• An invalid Group id or User id in the ExceptionStep.
This applies if a Group contains an invalid User id or any individual User id listed to receive the Exception step task is invalid. Exception step will Fail-To-Execute even if all other Group ids or User ids are in the Exception step are valid.
In the event of a Fail-To-Execute, none of the user groups or users listed in the Exception step receive the Exception step task.
NotesIf a step ends before the Check Finish After period, or during a Check Finish Every period, then the Workflow Engine still waits for that counter to finish before checking if the step has finished.
In timers, a month is measured as a calendar month.
Pause Specify how long to wait after a step has been completed, before starting the next step.
0 seconds
Timeout>Timer Specify a timeout for the step. never
Timeout>Alert Time
Specify the alert phase that can occur just before the step times out. During the alert phase, the task due date is displayed in red in the user’s My Task module.
never
Population Specifies the population attribute that further filters the worksheet used by this step. Specify the following:• Name—specify the name of the population attribute, as
given in GROUP_ATTRIBUTES_POPULATION.ATTRIBUTE_LABEL. In the demo, this attribute is named Population.
• The Value field is not used.
This property is useful when you use a workflow as a method; otherwise it has no effect.
Properties Description Default
32 Workflow Manager Consultant’s Guide

Executable Step
Executable StepThis kind of step runs applications from within the workflow instance. The applications can be external executable files such as exe. and batch files, or Demantra Spectrum executables.
End ConditionsThis step is completed when the executed program ends and sends an interrupt to the Workflow Engine.The Workflow Engine then continues with the workflow instance.
Executable Step Properties
NotesThe Workflow Engine executes the command that you specified for the Command Line element. For this reason, you can only run files that can be opened by using a single DOS prompt instruction. This is important if you are accessing files over a network.
Also, if you are invoking a batch file, be sure to do the following within that batch file:
• Enclose all paths within double quotes
• Use complete paths and file names
When executing batch files, Fail-to-Execute is triggered only if there is an error when executing the batch file. If the batch file fail after execution, then Fail-to-Execute will not be triggered.
Properties Description Default
Step ID Unique identifier for the step.
Pause Specify how long to wait after a step has been completed, before starting the next step.
0 seconds
Command Line
The location of the network of the file to be executed, and its full name. (Must be in quotation marks). Specify the full path to the file.
Note: The file location is always from the server’s view.
Recovery Specify what the Workflow Engine should do if the system crashes while performing this step:• Ask—the engine follows a Fail-To-Execute procedure for
the step.• Retry—the engine executes the step again.• Continue—the engine continues with the next step.• Abort—the engine terminates the workflow instance.
Ask
Workflow Manager Consultant’s Guide 33

Chapter 4: Available Workflow Steps
ExampleTo run a .bat file from the Workflow Engine, do the following:
1. Create a new workflow.
2. Insert an EXE step.
3. In the command line of the EXE step, put the full path to the location of the file you wish to run.
4. Within the file that you are calling, ensure that all paths are enclosed in double quotes. For example:
cd "E:\Demantra\Spectrum610\scripts_vtk\Biio_load_proms"
IF EXIST "E:\Demantra\Spectrum610\scripts_vtk\Biio_load_proms\cust_prom_flag.dat" (exit) ELSE (myplus vk_check_file)
34 Workflow Manager Consultant’s Guide

Fail-To-Execute Step
Fail-To-Execute StepThis kind of step is the automatic response when the Workflow Engine fails to execute a step. This may happen for a variety of reasons, for example, an invalid worksheet or user, a database communication error, the Web server being down, or failure of an invoked external application.
What a Fail-to-Execute Step DoesWhen the Workflow Engine fails to execute any step, it stops running the current process and does the following instead:
• It executes a standard selection step. The selection step creates a selection task in the My Tasks module of the user who initiated the workflow instance. The task contains the failed process details, the details of the failed step, the error details and response options to choose from. See “Response Options” on page 35.
• A Fail-To-Execute process is displayed in the Workflow Manager and in the Process Instance screen. See “Viewing Workflow Status” on page 15.
• In addition to the selection task, and the usual task email, an email is sent to the process initiator with details of the failed process. For example:
Subject: Failure in process execution
Message text:Process ID: 15Schema ID: 2Step ID: Request response on Out of limitsError description: Invalid user name: RJACKSON.Schema name: 'Out of Limits tasking', step name: 'Notify relevant user'
Response Options
Note Container step has a specific Fail-To-Execute procedure. For more information, see “Container Step” on page 26.
Retry The failed step is rerun and the process continues. This option can be used when the cause of the failure is identified and solved, and it is necessary to rerun the step.
Continue The process continues running by going to the Next Step ID of the failed step. This option is used when the cause of the failure is identified and solved. The process instance initiator can continue the workflow instance after manually performing the failed step function.
Not all kinds of steps have a Continue option.
Abort The error is fatal and the failed process must be terminated.
Workflow Manager Consultant’s Guide 35

Chapter 4: Available Workflow Steps
Group StepThis kind of step sends tasks to a user group or groups. Tasks are shown in My Tasks in Collaborator Workbench, and a task is usually associated with a worksheet. The purpose of a task is typically to draw attention to exceptions, or to request that the user review and possibly edit the worksheet. You can also configure the step to automatically send email notification of the new task.
In contrast to the User Step, this step includes the Manager property, which specifies the user who is in charge of or manages the process.
You can use this step to send a worksheet to users with different security permissions. Each user is then presented with a worksheet, with contents filtered by the user’s permissions.
End ConditionsThis step is completed when all the users mark all the tasks as Done.
Group Step Properties
Properties Description Default
Step ID Unique identifier for the step.
User Select the user or users who should receive this task or tasks. To select multiple users, press Ctrl or Shift while clicking. The list of possible users includes all users defined within this component; see “About the Workflow Manager” on page 1.
Group Select the group or groups who should receive this task or tasks. To select multiple groups, press Ctrl or Shift while clicking. The list of possible groups includes all users defined in the Security Manager.
Tasks Specify one or more tasks. See “Specifying a Task” on page 22.
Recovery Specify what the Workflow Engine should do if the system crashes while performing this step:• Ask—the engine follows a Fail-To-Execute procedure
for the step.• Retry—the engine executes the step again.• Continue—the engine continues with the next step.• Abort—the engine terminates the workflow instance.
Ask
Check Finish After
Specify how long to wait after starting the step and before first checking to see if the end conditions have been met.
0 seconds
Check Finish Every
The Workflow Engine checks periodically to see whether or not the end conditions have been met. This property specifies how long to wait between two successive checks.
60 seconds
Pause Specify how long to wait after a step has been completed, before starting the next step.
0 seconds
36 Workflow Manager Consultant’s Guide

Group Step
Group Tasks and TimeoutA group task times out if one or more of the users in the group do not mark the task as done before the response period has ended. The timeout procedure is as follows:
1. A user who is responsible for the relevant task receives an email message notification of all the users within the group that have not marked the task as done. For example, this may be the group manager, or a supporting job function.
2. The task stays in the My Tasks module of the users who have not marked it as done.
3. The Workflow Engine continues with an alternative procedure that has been defined within the workflow for this circumstance.
NotesIf a step ends before the Check Finish After period, or during a Check Finish Every period, then the Workflow Engine still waits for that counter to finish before checking if the step has finished.
In timers, a month is measured as a calendar month.
For easy maintenance and flexibility, it is recommended to use the Group property instead of User whenever possible. Using Group allows you to change the defined user name for a job function within a workflow instance without editing the workflow schema itself.
If any of the specified Group is empty or contains an invalid user name, then this step will Fail-To-Execute.
See AlsoFor information on tasks, see the Collaborator Workbench User’s Guide.
Manager Specify the user who is in charge of or manages the process. In the event of a timeout, this user is notified by email. This notification is in addition to the timeout notification email that is sent to each user whose task has timed out and the timeout step that is executed.
Timeout>Timer Specify a timeout for the step. never
Timeout>Alert Time
Specify the alert phase that can occur just before the step times out. During the alert phase, the task due date is displayed in red in the user’s My Task module.
never
Properties Description Default
Workflow Manager Consultant’s Guide 37

Chapter 4: Available Workflow Steps
Selection StepThis kind of step sends a selection task to a user. A selection task includes a list of options, each of which specifies a different branch for the workflow to follow. Like other tasks, this task is shown in My Tasks in Collaborator Workbench. This task can also be associated with a worksheet.
Defining and Linking to SelectionsWhen you first add a Selection step to a workflow, it does not contain any options and therefore does not have any connectors that lead from those options. For example, suppose that you have created a Selection step and two other steps that you want to use as options:
Within the properties of the Selection step, you can add the options. When you add an option, you specify a user-friendly name and you choose the corresponding step from the list of existing steps as follows
As you add each option, the Workflow Editor automatically creates a connection handle for that option and automatically links that to the appropriate step, as follows:
You may enter as many options as you like into a selection step.
38 Workflow Manager Consultant’s Guide
Selection Step
End ConditionsThis step is completed when the user makes a selection and marks the selection task as Done.
Selection Step Properties
NotesIf a step ends before the Check Finish After period, or during a Check Finish Every period, then the Workflow Engine still waits for that counter to finish before checking if the step has finished.
In timers, a month is measured as a calendar month.
Properties Description Default
Step ID Unique identifier for the step.
Option Name The Name of the Option. This is the text that shows for each option in the selection list presented by the selection task.
User Select the user who should receive this list of options. The list of possible users includes all users defined within this component; see “About the Workflow Manager” on page 1.
Task This is the task that the SelectionStep sends.
Recovery Specify what the Workflow Engine should do if the system crashes while performing this step:• Ask—the engine follows a Fail-To-Execute procedure
for the step.• Retry—the engine executes the step again.• Abort—the engine terminates the workflow instance.
Ask
Check Finish After
Specify how long to wait after starting the step and before first checking to see if the end conditions have been met.
0 seconds
Check Finish Every
The Workflow Engine checks periodically to see whether or not the end conditions have been met. This property specifies how long to wait between two successive checks.
60 seconds
Pause Specify how long to wait after a step has been completed, before starting the next step.
0 seconds
Timeout>Timer Specify a timeout for the step. never
Timeout>Alert Time
Specify the alert phase that can occur just before the step times out. During the alert phase, the task due date is displayed in red in the user’s My Task module.
never
Workflow Manager Consultant’s Guide 39

Chapter 4: Available Workflow Steps
Simulation StepThis kind of step submits a worksheet to the Simulation Engine and then displays the worksheet and the simulation results to a specific user. The user can either accept or reject the simulation. This kind of step works the same as running a simulation in the user applications.
To save or reject the simulation data, use the stored database procedures; execute those procedures with a Stored Procedure Step. For more information, see “Stored Procedure Step” on page 43.
End ConditionsThis step is completed when the Simulation Engine finishes processing the simulation request.
Simulation Step Properties
Notes • The Simulation Step does not start the Simulation Engine. You must make sure that the is running before a step of this kind is launched; otherwise the step will fail. You can start the Simulation Engine by using an Executable Step.
• You must take care not to initiate the Simulation Engine twice.
• The Simulation Engine and Analytical Engine cannot run simultaneously. You must take care not to initiate the Simulation Engine if the Analytical Engine is running.
• Before running the simulation, the Workflow Engine checks to see if a simulation is running or has already run for this worksheet. If a simulation has been scheduled but has not yet run, the Workflow Engine waits until the simulation completes and then continues to the next step in the workflow schema. If a simulation has already run but has not been accepted or rejected, the Workflow Engine rejects it and executes the workflow simulation step.
Properties Description Default
Step ID Unique identifier for the step.
User Select the user who should receive this simulation worksheet. The list of possible users includes all users defined within this component; see “About the Workflow Manager” on page 1.
40 Workflow Manager Consultant’s Guide

Simulation Step
NotesIf a step ends before the Check Finish After period, or during a Check Finish Every period, then the Workflow Engine still waits for that counter to finish before checking if the step has finished.
In timers, a month is measured as a calendar month.
In the event of a timeout or a major system failure, the simulation request remains in the Simulation Engine queue. You must remove it manually from the queue.
Auto Accept Specify whether to accept the results of the simulation automatically:• If Yes, the results of the simulation are saved directly as
valid forecast data.• If No, the results of the simulation are first made
available for review by a user. To review the results of a simulation, the assigned user can open the worksheet from a task. The user can then decide whether or not to save them.
Yes
Query Name Select the worksheet on which to run the simulation. The list of worksheets includes all public worksheets and all worksheets that you own.
Recovery Specify what the Workflow Engine should do if the system crashes while performing this step:• Ask—the engine follows a Fail-To-Execute procedure
for the step.• Retry—the engine executes the step again.• Continue—the engine continues with the next step.• Abort—the engine terminates the workflow instance.
Ask
Check Finish After
Specify how long to wait after starting the step and before first checking to see if the end conditions have been met.
0 seconds
Check Finish Every
The Workflow Engine checks periodically to see whether or not the end conditions have been met. This property specifies how long to wait between two successive checks.
60 seconds
Pause Specify how long to wait after a step has been completed, before starting the next step.
0 seconds
Timeout>Timer Specify a timeout for the step. never
Timeout>Alert Time
Specify the alert phase that can occur just before the step times out. During the alert phase, the task due date is displayed in red in the user’s My Task module.
never
Properties Description Default
Workflow Manager Consultant’s Guide 41

Chapter 4: Available Workflow Steps
See AlsoFor information on simulation, see the Demand Planner Web User’s Guide or other user manuals. Also see the Analytical Engine Consultant’s Guide for Demand Planning or the Analytical Engine Consultant’s Guide for Promotions Effectiveness.
42 Workflow Manager Consultant’s Guide

Stored Procedure Step
Stored Procedure StepThis kind of step runs a stored database procedure, such as manuals_ins or insert_units.
For information on creating database procedures, see the Oracle or SQL Server documentation.
End ConditionsThis step is completed when the database procedure finishes.
Stored Procedure Step Properties
See AlsoFor information on the predefined Demantra Spectrum database procedures, see the Demantra Spectrum Reference Guide.
Properties Description Default
Step ID Unique identifier for the step.
Pause Specify how long to wait after a step has been completed, before starting the next step.
0 seconds
Procedure Name
Name of the stored procedure.
Parameters Any input parameters that are needed by the database procedure. List the parameters in the order that they are needed by the procedure.
Recovery Specify what the Workflow Engine should do if the system crashes while performing this step:• Ask—the engine follows a Fail-To-Execute procedure for
the step.• Retry—the engine executes the step again.• Continue—the engine continues with the next step.• Abort—the engine terminates the workflow instance.
Ask
Workflow Manager Consultant’s Guide 43
Chapter 4: Available Workflow Steps
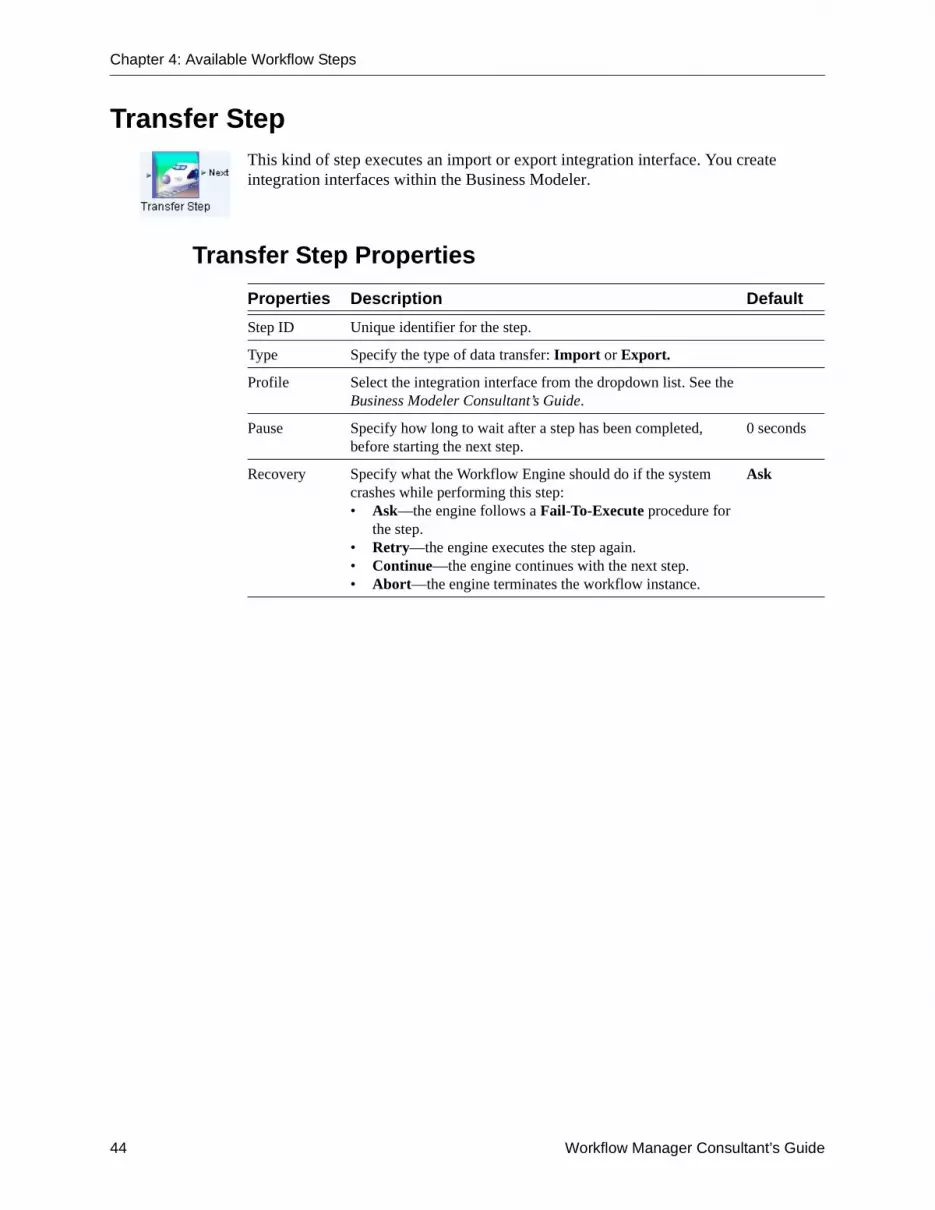
Transfer StepThis kind of step executes an import or export integration interface. You create integration interfaces within the Business Modeler.
Transfer Step Properties
Properties Description Default
Step ID Unique identifier for the step.
Type Specify the type of data transfer: Import or Export.
Profile Select the integration interface from the dropdown list. See the Business Modeler Consultant’s Guide.
Pause Specify how long to wait after a step has been completed, before starting the next step.
0 seconds
Recovery Specify what the Workflow Engine should do if the system crashes while performing this step:• Ask—the engine follows a Fail-To-Execute procedure for
the step.• Retry—the engine executes the step again.• Continue—the engine continues with the next step.• Abort—the engine terminates the workflow instance.
Ask
44 Workflow Manager Consultant’s Guide

User Step
User StepThis kind of step sends tasks to a user. Tasks are shown in My Tasks in Collaborator Workbench, and a task is usually associated with a worksheet. The purpose of a task is typically to draw attention to exceptions, or to request that the user review and possibly edit the worksheet. You can also configure the step to automatically send email notification of the new task.
End ConditionsThis step is completed when the user marks all tasks as Done.
User Step Properties
Properties Description Default
Step ID Unique identifier for the step.
User Select the user who should receive this list of options. The list of possible users includes all users defined within this component; see “About the Workflow Manager” on page 1.
Task Specify one or more tasks. See “Specifying a Task” on page 22.
Recovery Specify what the Workflow Engine should do if the system crashes while performing this step:• Ask—the engine follows a Fail-To-Execute procedure
for the step.• Retry—the engine executes the step again.• Continue—the engine continues with the next step.• Abort—the engine terminates the workflow instance.
Ask
Check Finish After
Specify how long to wait after starting the step and before first checking to see if the end conditions have been met.
0 seconds
Check Finish Every
The Workflow Engine checks periodically to see whether or not the end conditions have been met. This property specifies how long to wait between two successive checks.
60 seconds
Pause Specify how long to wait after a step has been completed, before starting the next step.
0 seconds
Timeout>Timer Specify a timeout for the step. never
Timeout>Alert Time
Specify the alert phase that can occur just before the step times out. During the alert phase, the task due date is displayed in red in the user’s My Task module.
never
Workflow Manager Consultant’s Guide 45

Chapter 4: Available Workflow Steps
User Tasks and TimeoutA user task times out if the user does not mark the task as done before the response period has ended. The timeout procedure for a user task is as follows:
1. The user is sent an email notification that the task has timed out.
2. The task is removed from the user’s task list.
3. The Workflow Engine continues with an alternative procedure that has been defined within the workflow for this circumstance.
NotesIf a step ends before the Check Finish After period, or during a Check Finish Every period, then the Workflow Engine still waits for that counter to finish before checking if the step has finished.
In timers, a month is measured as a calendar month.
See AlsoFor information on tasks, see the Collaborator Workbench User’s Guide.
46 Workflow Manager Consultant’s Guide

Wait Until Step
Wait Until StepThis kind of step pauses the workflow until a specific condition is met. When the condition is true, the Workflow Engine continues with the next step in the workflow.
You can specify a condition in either of the following general ways:
• You can instruct the Workflow Engine to look for a specific file and wait until the file is created, or is modified, or reaches a certain size.
• You can specify an SQL query to execute. The Workflow Engine runs repeatedly until it returns a value that is different from the original returned value.
You can specify multiple wait conditions. If you do, they are combined with a logical OR. For example, if you select both Created and Modified, the Workflow Engine waits until either a new file has been created or an existing file has been modified.
Step End ConditionsThis step is completed when the condition is met.
Wait Until Step Properties
Properties Description Default
Step ID Unique identifier for the step.
File Full path and filename for the file to be checked. The path and filename can include wildcards, for example:
c:\dat\*.dat
The Workflow Engine ignores the case of the path and filename.
Wait Until Specify the file state to wait for:• Created—wait until this file is created. If you use a
wildcard in the filename, then wait until at least one new file that matches the given name is created.
• Exists—wait until this file exists. If you use a wildcard in the filename, then wait until at least one new file that matches the given name is created. In contrast to the Created option, this option creates a condition that can be true even for the first time the file is checked.
• Modified—wait until the timestamp on this file has been changed. If you use a wildcard in the filename, then wait until the timestamp on at least one matching file is changed.
• Size is bigger than—wait until the file is larger than the given size, in kB. If you use a wildcard in the filename, then wait until at least one of the matching files exceeds the given size.
Workflow Manager Consultant’s Guide 47

Chapter 4: Available Workflow Steps
NoteIf a step ends before the Check Finish After period, or during a Check Finish Every period, then the Workflow Engine still waits for that counter to finish before checking if the step has finished.
In timers, a month is measured as a calendar month.
SQL Specify an SQL statement. Every time period, the Workflow Engine will execute this statement. When the result of this statement is different than it was before, the step condition has been met, and the workflow continues.
Check Finish Every
The Workflow Engine checks periodically to see whether or not the specified conditions have been met. This property specifies how long to wait between two successive checks.
60 seconds
Recovery Specify what the Workflow Engine should do if the system crashes while performing this step:• Ask—the engine follows a Fail-To-Execute procedure
for the step.• Retry—the engine executes the step again.• Continue—the engine continues with the next step.• Abort—the engine terminates the workflow instance.
Ask
Check Finish After
Specify how long to wait after starting the step and before first checking to see if the end conditions have been met.
0 seconds
Pause Specify how long to wait after a step has been completed, before starting the next step.
0 seconds
Timeout>Timer Specify a timeout for the step. never
Timeout>Alert Time
Specify the alert phase that can occur just before the step times out. During the alert phase, the task due date is displayed in red in the user’s My Task module.
never
Properties Description Default
48 Workflow Manager Consultant’s Guide

Index
Aalert phase 4
Bbatch file
running from within workflow 33running within a workflow schema 33
BLE Step 2reference 23
Business Logic Enginestep in workflow 23
Ccomponent
and workflow 1Condition Step 3
reference 25connection handles
deleting link 12introduction 3linking 11
Container Step 3reference 26
Custom Step 3reference 28
Ddefault
delays in workflow processing 4
Eemail
in automated workflow 2specifying user addresses 30
Email Step 2reference 30
Exception Step 2, 3reference 31
Executable Step 3reference 33
executeStep function 28export
within automated workflow 44
FFail-To-Execute
in Container Step 27in Exception Step 32
Fail-to-Execute Stepreference 35
GGroup Step 2
reference 36
Iimport
within automated workflow 44integration interface
used in Transfer Step 44
JJava, including in workflow 28
Llink
creating 11deleting 12
Mmethod 4
Pparameters
passing to database procedures 43passing to Java 28
process log 19
Rrecovery 6
Sscheduling workflow instances 17schema group
creating 13deleting 14
Selection Step 2, 3reference 38
Workflow Manager Consultant’s Guide 49

Index
setParameters function 28simulation
running from workflow 40Simulation Step 3
reference 40step
adding 11common properties 3connecting to another step 11connection handles 3deleting 12editing 12overview of kinds 1
Stored Procedure step 2reference 43
Ttask
introduction 2selection tasks 38specifying 22timeout 3
timeoutin BLE Step 24in Container Step 27in workflow 3
Transfer step 2reference 44
UUser Step 2
reference 45
WWait Until Step 3
reference 47workflow
available steps in 1creating schema 10creating schema groups 12deleting schema groups 14starting instances 19stopping instance 19
Workflow Editorusing 10
Workflow Engine 1Workflow Manager
introduction 5scheduling workflow instances 17
starting workflow instances 16stopping workflow instances 19viewing process log 19viewing workflow status 15
50 Workflow Manager Consultant’s Guide