document resume author price, charles l. title. … · a photography primer for middle school...
TRANSCRIPT

DOCUMENT RESUME
ED 210 161 SE 035 837
AUTHOR Price, Charles L.TITLE. A Photography Primer for Middle School Students and
Temphers.INSTITUTION Indiana State Univ., Evansville.-PUP DATE Apr 81NOT! 41p.; Paper presented at the National Meeting of the
National Science Teachers Association (New York, NT,April 3, 1981). Contains light and broken type.
EDRS PRICE MF01/PCO2 Plus Postage.DESCRIPTORS *Elementary School Science; Elementary Secondary
Education; *Instructional Materials; Middle Schools;*Photography; *Science Activities; Science Educatiois;Science Instruction: Secondary School Science;*Teaching Guides
ABSTRACTProject PHOTO provides a format for middle school
students to learn about photography with three different types of
techniques: 'sun prints, can cameras; and pinhole cameras. Additional-topics and.activities include film developing, contact prints andenlarging, history of photography, photographic composition,. types of
cameras, a photography word find, constructing and equiping adarkroom, prices of supplies, evaluation', and a short bibliography.*Lesson plans are provided which include cognitive, affective, andpsychomotor objectives, motivational techniques, specific procedures,formative an& summative evaluation, list of materials, and typicalguestions to ask students. (DS)
************************************************************************ Reproductions supplied by EDRS are the best that can be made *
* from the original document. *
illoclomillikt*************************************************************

U S DEPARTMENT OF EDUCATIONNATIONAL INSTITUTE OF EDUCATION r.
FOUL A TIONAL RESOURCES INFORMATION
CENTER IERK)<Th. _fix ,irhe,I ha, been reprodiii.rd Li,
...1V,1 Mt' IIPI,1111 Of rijamihititiiiphata,i
Mn,,,a haqes ha., two, ntOL a ,hpot.a
If vrr v. or opa,or 1.1(1411ik,t ',CPS4d,SV ,PprtNt It "flit rdl NIE
cowl nn r po,c
p
'PERMISSION TO REPRODUCE THISMATERIAL HAS BEEN GRANTED BY
Charlet, L. r.A.-ice.
TO THE EDUCATIONAL RESOURCESINFORMATION CENTER (ERIC)"
.r
A PHOTOGRAPHY PRIMER
FOR
MIDDLE SCHOOL STUDENTS AND TEACHERS
Prepared for:
National Science Teachers Association
National Meeting.
New York, New York
Apri2k3, 1981
Presented by:
Charles L. Price, Ph.D.Professor of Science Education
Indiana State University EvansvilleEvansville, Indiana 47712
NDIANASTATEUNIVERSITY
gi I EVANSVI Lt

ACKNOWLEDGEMENTS
I would like to express my appreciation to those who enabled
PROJECT PHOTO to become reality. Specifically, the teachers and admin-
isttators of Daniel Wertz Elementary School, Perry Heights Elementary
School, and West Terrace Elementary School, all of Evansville, Indiana
exhibited outstanding patienceand flexibility in the initial field
testing phase.
The unit components of PROJECT PHOTO were developed by the following
science education students at ISUE: Karen Abbot, Don DeWeese, Becky
Duncan, John Eifler, Marsha Fitch, Linda Foyer, Patty Prayer, Kristie
Freich, Betsy Hall, Joy Hyneman, Marla Jenny,'Jan Kellen, Sonya Kirwer,
Tammy Koch, Maryann Kotyuk, Christy Nodarse, Donna Sickbert, Cindy
,'Sprosty, Patty Wagner and Chria Westerman.a
Finally, it would be inappropriate not to thank our "board of
experts"--the elementary school children who participated in the project.
Their enthusiasm and comments were greatly appreciated.
3
WHAT PROJECT PHOTO WAS ALL ABOUT
I have yet to meet a person (child or adult) who was not excited,
when the image on his first photo appeared in the darkroom tray. The
desire to see this excitement in students' faces is what inspired
PROJECT PHOTO.
The rationale behind this project is that, basically, photography
is simple. First off, students take photos (sun prints) without a
camera. This technique shows outlines but no features. Good quality
photographs can be obtained from the can camera constructed from
an oatmeal box. For those who wish to take photographs which may be
enlarged, pinhole (film) camera construction is explained. Additional
topics on photographic composition, history of photography, and types
of cameras are provided and may be included in a photography unit 1f
so desired.
Sample evaluation questions and a unit checklist are also provided.
The bibliography which is appended to this paper lists some excellent
free publications from Kodak as well as good article, on photography
units for middle school grades.-

TABLE OF CONTENTS
Timetable 1
Sun Prints 2
Can Cameras 4
Pinhole Cameras 8
Film Developing 11
Contact Prints, Enlarging 15
History of Photography 17
Photographic Composition 18
Types of Cameras ./20
Photography Word Find 27
Constructing a Darkroom 28
Elie ping a Darkroom 29
Prices of Supplies 30
Evaluation 31
Bibliography 35
5

PROJECT PHOTO
Sdience Education Field Experience
West Terrace Elementary School
Date Topics)
April 14
April 16
April 21
April 23
April 28
April 30
Sun PrintsHistory--Part INeeded: Bring cans for can cameras
Can Cameras Build and Take photoDevelop PhotoHistory Part II
Developing Paper--Theory, Positive from negativePinhole Camera--ConstructionComposition--Story TellingHistory --Part III
Finish Construction of Pinhole CameraTypes of.Cameras --Part 1Developing FilmHistory Part IV
Contact Prints, EnlargementsComposition Examples of photosTypes of Cameras --Part IIHistoryPart V
EnlargementsHistoryif neededFinal Evaluation
4r -rkti A%11A4-64102,%,J 1k4 1.0tStA %%0% a c;dck
A-es c tt.s. wait er tatS.
6

Sues( imiiCTS
I. OBJECTIVES
A. Cognitive
After instruction the student will be able to:
1. explain that opaque objects &rbind., because the paper beneath the object
will not be exposed.
2. compare the prints on ozalid paper to those on blue print, to determine
which has a. light image on a dark background and which has the reverse.
3.- explain -what chemical or chemical solution is needed to develop each print.
B. Affective
The student will show an appreciation for photographs made without a camera
or darkroom.
C. Psychomotor
After instruction the student will be able to:
1. demonstrate the steps for exposing an object on ozalid and blueprint paper.
2. demonstrate the steps for developing prints on ozalid and blueprint paper.
II. MOTIVATION
Most people think a camera and a darkroom are necessary for making photographs.
Today we are going to make photographs without either of these things. These phto-
graphs are called sun prints. (Don) (Karen show examples)
II/. PROCEWRE
1. Osalid Paper - Choose an opaque object. (Explain this term)
2. Place the object on the yellow side of the paper and lay the paper in the light,
quickly letting go.
3. The sun or light will action this sensitive paper everywhere except under the
opaque object.4. Expose the paper to direct sunlight for 30-60 seconds, or to inside light for
minutes.
5. Pick up the paper and shield it from light, putting it in the developing jar as
quickly as possible.
1. The same procedure is.usedqor expoeipg the blueprint paper.
7. For developing the °solid paper, pour enough:ammonia into a gallon jar to cover J
the bOtton.
A 8. Pour 2 cups of sand or gravel into the jar and mix with the ammonia. There should
be enough gravel to prevent the ozalid paper from touching the ammonia.
9. After exposing the paper to light, quickly put it into the jar; lidding the jar.
10. Allow the paper to develop until the image appears.
11. For developing the blueprint paper, put a few drOlos of hydrogen peroxide in a
pan of water.
12. After exposing the paper to light, quickly plunge the paper into the pan, for
at least one minute, moving it around a little.
13: Remove and let dry in the shade.
2.

IV. Formative Evaluation
What happened when the paper was exposed to light?
What happened when the paper was. put in the jar of ammonia?
What happened when the paper was put in the pan of water and peroxide?
Now long did it take for each picture to develop?
What happened if an object slipped while in the light?
V. Summary
By carefully following directions, photographs can be made by simply exposing an
object on ozalid or blueprint paper to sunlight or inside light, and developing
the exposed paper in the correct chemical.
VI. Summary Evaluation
Short Answer
1. What chemical is used to develop the exposed ozalid.paper ?.
2. What chemical is used to develop the exposed blueprint paper?
Multiple choice
1. What type of image 3s produced on the ozalid paper?
a. a light image on a light background
b. a light image on a dark background
c. a dark image on a light background
a dark image on a dark background
2. What type of image is produced on the blueprint paper?
15a light image on a light background
a light image on a dark background
c. a dark image on a light background
dd a dark image on a dark background
(Test Questions)
True-False
1. A camera is needed to make sunprints.
2. It is best to make sunprints of opaque objects.
3. The part of the paper under the object should be exposed to the light.1114m*
VII. Materials
Blueprint PaperOzalid PaperHydrogen peroxideAmmoniaTwo 1-gallon jars with lids
3-4 cups gravel or sand2 pans of waterObjects to print
8
SUN PRINTSHow to use. paper:
1. Gather items for your sun print.2. In your shadow (with your back to the sun).arrange items on the paper. Cover with clearplastic.3. Step aside and let sun shine on the paper for40-60 seconds.4. Develop paper for 60 seconds in . . .
(For Ozalidpaper)
Z, 5. Let paper dry in the shade.
(For Blueprintpaper)

Lesson Plan -- Can cameras
Long Range Objective -- After instructions, each student witl be
able to construct a can camera and successfully take one photograph.
Materials Needed -- oatmeal boxes (any size), black construction paper,
needle (#7), Reynolds aluminum wrap, tape, scissors, razor blade
or sharp knife, and Kodak Polycontrast Photographic paper
What we will do --
1. Demonstrate construction of can camera.
2. Define terms necessary to know in constructing and taking
pictures with the can camera. Camera must be loaded (with
photographic paper) in a darkroom.
Try this exposure time first:
sunny days -- 15 seconds
If picture is too light, double time.
If picture is too dark, halve time.
3. Explain how can camera works.
4. Explain procedure for taking pictures.
Evaluation --
1. Did each student make a camera?
2. Did each studentsuccessfully take a picture?
3. Can students define the following terms? -- aperature, shutter,
depth of field, focus, darkroom, light sensitive paper,
emulsion side of paper, exposure time, negative and positive
prints, simple camera, lighting (front, back, and side)
4. Do the students understand the importance of lightproofing,
size of aperature, and exposure time?
5. Do studentsundersta,4 how the can camera operates?

AtikromY or lyE CAA/ CAKEKA
7,
1,1!)109(! L7e S rt. 41utistiem sidec e.5 aro,
Aye/Jure (6-
2.e. ,(:ro i4oid stg.ve.Dosed)
s h 44.112,
(re ose 0AA, reiur0
--
11)(5117
® CvA. 4 (X% " ote apt Co V2A, vifaCt POiL
C7A blues (004r c.41 'pol) ( r O'cOvilerte:^ dP,a '11)
reduce lAterfrut( re-ttc4int. .
10

DEVeLor?saG C144 (PASTA Picrt.trz.SS
OBJErTIVES
Cognitive:After instruction the students will be able to:
1. Demonstrate the correct order in which the paper is put into, the
different solutions.
2. Discover what happens in the developer, and the purpose of each of the
other solutions.
3. Compare the lengths of time the paper is left in each solution and be
able to explain why there are differamzee.
Affective:1. The students will show an appreciation for how photography works and
for seeing their own photograph develop into an image.
Psychomotor:After instruction the students will be able to:
1^ Demonstrate bow to develop their own photograph from start to finish.
2. Judge bow long to develop their photograph for best results and know
when to take their photograph out of the developer is it gets too
dark.
3. Demonstrate proper use of the tongs by keeping them in the proper
solution.
MATERIALSrgiTeTfourth tray is optional)4 pairs of tongschemicals for'solutions: developer working solution, stop bath, fixer
(or hypo)waterDarkroom with safelight or lighditight room
stopwatch or clock with second hand (timer)
paper towels
PROCEDUREBegin by explaining to the students that when you develop par, there are
certain conditions and procedures that must be followed to ensure a good
.photograph. First of all, the paper must be developed in a darkroom or a
light tight room. A safe light can be used to see what is taking place.
Secondly, explain to the students that there are certain materials needed r.
trays. tongs, chemical for solutions, water, paper towels, timer.
1. Place theepays on the table and fill each one with the appropriatechemical.' (Se sure to let the students know how much chemical and how
mach water is reouired for each solution).
2. Explain what is inilach tray, its pupose, and how long the paper must
stay in each of the trays.
3. Place a pair of tongs in each tray. (Stress the fact that each tray
must have a separate pair of tongs to keep the solutions free from
other chemicals).Ask the students what they think might happen if the solutions were
to get mixed.4. Place the paper in the developer, stop bath, and fixer for the proper.
amounts of time. Use timer or stop watch.
3. Rinse each photograph in water.
oycltrOpera-hot
40
Istrr ring

6. Lay photographs on paper to dry.
7. Compare the pictures that each student took.
The first demonstration of developing paper will be done by the instructors
and will take place in the classroom. When the class does the actual
developing, they will be expected to develop their own photographs with
little help from instructors. :They will be expected to time their own
work and each child will be responsible for a photograph.
IMPORTANT POINTS TO STRESS
1. It Lust bd very dark to develop paper. The room must be light tight.
2. The paper must be timed in each solution. Don't keep paper in_the ,tokdeveloper too long, or your photograph will be too dark. N44 7,770J1)01,
3. Use separate tongs for each tray. Sv--
4. When you trafer the paper from one solution to the next, let your
paper drip off, so the chemicals wdn't mix.
5. When you put your paper in the developer, be sure the emulsion side
is up. Wick side) .. r4', vt4.6m0AL w^hvm Lew Lmt0.4(v4wEli oyte...
QUESTIONS TO ASK
1. Why do you use a developer?
2. Why -do you use a stop bath?
3. Why do you use a fixer?Why doesn't the photograph darken after it has gone through the
developing process?S. Now long did it take for the image to appear on the paper after it
was placed in the developer?6. What &et the emulsion side of the paper feel like?
7. What precious metal is used to make photographic paper? (If this
wasn't discussed in a previous lesson, it should be discussed in
this lesson).
S. What would happen if the room wasn't light tight and the paper was
exposed to light while In the developer?
1

ni 1401 t. Cfir KlikA Con-rgittcrioiv
. Objectives:
Cognitive.
The student will be able tot KVA' "1° i",1 es*See,
1) -c`)1. condtruct a` pin h_ ole camra eslc-2. know how to wind the film d(
3. take inside and outside pictures4. undo-reken-4why a camera Should be light proof
%:te clod. tt4e.
Affective:
1. The student will show an appreciateion for the construction-.
of a pin hole camera.
Psychomotor:
The student will
1. take pictures of objects inside and outside2. make a story of the pictures they have taken
Procedure,'
Measure black board into four sections. Fold board andtape edges together. Make a pinhole in the center of aluminumfoil. Fut foil in the center of black board and tape down theedges. Make a flap to cover the pin hole. Tape board to box.Put thelmx on cartridge with rubber bands.
When taking pictures open the flap for so many seconds.Close the flap so no light can get in. Then turn the film tp the
next frame.
Materialst
1 cartridge Kodak Verichrome pan film 126, 1 piece black cardboardlt by 53/4 inches, l'piece black board i. Iv 2.3/4 inches,opening
cut in center, 1 piece aluminum foil 1 inch square, 1 piec black
paper 1 inch square, 1 wooden tongue depressor, 2 rubber bands,black .:asking tape
Questions to ask?
1. How .long did it take to take pictures outside?2. Why did you put i covering over the pinhole?3. How.many.times do you turn the film to get to the next frame?4. Why-does the camera have 'o be light proof?
a 13

H. How to Make a Pinhole CameraThis intwesting prolwt helps you to 1 ' krstand how a arnerawads.
MATERIAlS1 cartridge Kodak Vericlrome pan fikn 1261 pion black cardbowd, 1% by 5% inches1 is black ardbowd, 11/2 by 2% Win, with 1/2inch square
wining an In owner1 piece illuminati foll, 1-inch apartI Owe black ppm 1-Inch sawn1 maim Mew chlwasor2 rubber bode1 Na 10 sawing nudeblack masIdng tape
ALUMINUM FOILWITH PINHOLE
6
MAKING-THE CAMERA
L Measure and mark the large piece of black cardboard into four
sections, each 1.7/16 inches wide.
1 2. Using a knife, out through the 'top layer of cardboard alongeach of the lines. This will make it easier to fold the cardboard.Don't at yourself
3. Fold the cardboard Into a box and tape the edges togetherwith the black tape. This is your camera box.
4. Using only the point of the sewing noddle, _make a very thypinhole in the cellar of the aluminum foil.
5. Cattier the pinhole in the foil over the square opening in thesmall place of cardboard. Taps the foil to the cardboard on allfour edges.
9.t 1 4

6. Put the small piece of black paper over the *hole and tapit along the top edge.
7. Tape the small cardboard to the box. Use plenty of tape andmake sure all the edgai in taped together so no light can getinto the camera box.
8. Put the camera box into the square opening in the film cartridge.
This should be a tight fit so that no light can get into the camera.
9. Use the rubber bands to hold the camera and cartridge
In place.
10. Trim the wooden stick so that it will ht the meld operdng
In the cartridge and turn the film.1
i
WINDING THE FILM FOR PICTURE-TAKINGWhen you turn the stick, the yellow paper in the window shouldmove. The film has borders and numbers printed on It. By haTimthe stick slowly with the third and fourth limbers in each satesshow in the window, you'll put the film in the ,proper positionfor picheetaldng.
TAKING THE PICTUREYOUR CAMERA MUST BE VERY STILL WHOZ YOU'RETAKING A PICTURE You can't snap pictures as you do witha regular camera. You must keep your camera still by tapingit to a rock, car fender, chair, table or windowsill.
To take a picture on sunny days: Uncover the pinhole andcount "one.thousandane, one-thousand-two." Then cover the pin-hole.
To take a picture on cloudy days: Uncover the pinhole andcount 'one-thousand -a* one-thousand-two, one-thousand-three,"etc, up to one-thousand-eight. Then cover the pinhole
Wind the film after taking each picture. After the last picture,wind the film until all the yellow paper has passed the window.Then you can take the camera apart.
HAVING THE FILM DEVELOPEDTake your film to a drugstore or a photo shop for developing.Po not break open the film cartridge. Opening the cartridgewill ruin your pictures. Send in the whole cartridge for developing.You'll get 12 black - and -white prints ken one cartridge d film.
Curiously enough, a tiny pinhole as than half ci a rnilimeterin diametacan be used instead of a lats. A pinhole forms anoptical image in much the same way as a lens. but the Imagea less bright then that made by a lens end, thoraces, raLutresa much longer wows time to record the image.
/0.15
1
F.

FILM DEVELOPING+
PURPOSE: To teach students how-to develop film.
OBJECTIVES:V4444Cognitive:
She students will understand the concepts offilm developing.
The students will be able to list' the suppliesand their uses. attaosa
The students will bib/ the step-by-step processof film developing.
Psychomotor:The students will demonstrate loading the film
into developing tank. etrart)The students will mix the chemicals.The studentii`will watch the time and demonstrate f
agitation every thirty seconds.Affective:
The students will enjoy film developing.The students will want to observe and demonstrate
more film developing.The students will desire an accessible darkroom
and necessary supplies.
41:4scve,i"4 164
MATERIALS:exposed film graduatetwo film cartridges thoormameter
Clearing agent Quart jarsDarkroom spongeDeveloper timer/watchDeveloping Tank scissorsUndeveloped Film film clipsFixing Bath (HYPO)SafelightStop Bath
DEMONSTRATION:Demonstrate loading of film in developing tank. 64164
(Each student will have a turn.)Demonstrate mixing of chemicals.Tell importance of timing.
-4441y 4ow. room 0;
61 CA(0941 65)Tell importance of only touching film by the edges.Go through Step-by-step Prpcess of film developing.Go over term list. -- WkGk 04m. broom: 44WWW.Develop film in class---students will do much of the work.
ti
_co &aloe V:Im sulosed by ca 1.410(e ca"QraS.
H. 16

nstructions below describethe equipment you'll need andoutline the 'procedures requi
I
FOLLOW THESE 8 BASIC STEPS:
,To stoned yotfil need some basic equipment end supOise Yogi heed a ft* developing tank and developingMg that w4 itccept the abet ol yrAir film. n **Mon. you'll
need a pkotq therroomotar. cderktooni timer or 0.44,pmeeming ttientioals. beetle for MAN) CMS**. *MON tpeduete. e raining CORifki*If. stirring peddle. Meet
dad ad* apron and film clips: tikseVoidOds-drysio.
==sositiskimposl.skilomosseisressosssist
0 Load %Ili into thedeveloping tank
Transfer your film from its reason* to the developing tonespired. Then piece the loaded spiral Inside the tank endscum on the' lid. tootling must he done in total darkness
. or inside a changing bag. die film it loaded. you
upt complete the developing process in ordinary light
0 - the developerYou need three cheritiads to Mon* the rdert: dil***Pqrstop bath and finer. You an buy these as anicentrine' liq-
uids which only need diluting with view. F0040 the menu,lachntke instructors for miting. storing mid the proper um
of shemkele. Tice temperature of the nevelt**, mod bekir* WA. but the temperatureof the stop both and firm
are not critical. Pour the developer into the sink as quickly
ro possible to ad ports of the film *re covered re the sametime. Development time will wry depending on No type ofdeveloper and film Film instruction sheet will list die time
needed for the kind of film you're using.
o A611,0110 the developer
:rxhe desioper psriodicsay so Out it acts evenly on
A tent file the one shown lets you do this by Wm-
: 0/ turning the to upside down and boot twin ones ev,
toy 30 MOM.
0 Stop the development and add the floor
de the end of dratiopew Oros. paur out the sisssiorarand pow* the *top bed:. Ti i wilt asap the nobs of thedevelop* IA about 20 nom& Than wool t e bath
sod pew ea the lbw Fee4 wee, Awes ace la i or
.oreset screwy Gift Oka about 10 minims
Wash this Mt
Owe ere Bran la food. oripty the tank and Ill with sew.Wm* the 10 memo* Wash tins can be named
49 W 64* Neapbpi* ciearate sleet . Ode sots slot*
AP Ws MO tab* rdestf:41 stare *sr fleece OS that
bait Iitos edik-leittekt A few Os intoner Me *tossdirmismosar*setab du. tank sank*KiSIS You
OM Sat tea otti fki* ehsegleg eteviller kt the
Wok 1Mifiti Niks.944 iihribrOpli at weeds, spot 4i
fleet *eat se steles peo-yow filet bees deb*
Ones lbws* dry, yowl hiss a setet neestIvest
Ow *pad* a dip Mon it ea* dry wieners ei edgily
anew* :4 Ilas wiper is be tied to 1110.91140 OW 0,4111011**0 Olt lbw ft Moo to dry mom Odds Mostht thb Vte 1**0 $4 *sew slips and ghat ism
aavidedeeierrode erevato and strittatoli. Yvat Apr fe,.eee
41***10 OlealtA, and are reedy to weitelOwls.

DEVELOPING PILELessowPla:
yam--OBJECTIVE3
After instruction the student will be able to:
Cognitive:1. identify the six steps in developing film2. state how to 'load the film onto the reel
3. list the equipment needed for use in the darkroom orthe process without a darkroom
Affective: .
1. shOw appreciation for the work we are doing throughhiwparticipation
2. show respect for our property by taking care of it3. show enthusiasm for what we are doing by being anxious-
to follow the procedure in order that the negatives
process properly
Psychomotor:1. demonstrate how to load the film onto the reel2. sake a chart showing the six steps takenin developing
the film
MEM1. Load the film into the developing tank. Do this in the dark-
room or in the changing bag. 2. Add the developer. .Followthe instructions owthe bottom of the developing tank for,theamount of chemicals needed for the type of film you are using.Pour the developer into the tank as quickly as possible so allparts of the film are oovered at the same time. 3. Agitatethe developer once every 30 seconds by turning the tank upsidedown and book again. Use a dataguide to see how long you must
continue doing'this. After the time is up. pour 'out thedeveloper and olds. the film with water (room temperature).Do this for a few minutes. 46 Add the fixer. Again yow must
4WHOOL. the tank every 30 seconds-for certain amount-pf time.Pour out the fixer. S. Wash the film. Add a typo clearing-Nit:4aged) (about 2 drops)°to remove excess fixer from the film. 00i6. move the film from the tank. Use a squeegee to remove laexcess water from the film and to speed up drying. -Rang the '1,k "ItLi
film up with a clip where it can dry-without getting dust onit."* You now have :Let of negatives. Cut the film into 3-4 atio6
frame strips and put into envelopes to help prevent dirt and Siw-16;
scratches. 0Atis1701
/3. 18
Bala/AU
film, diveloping tank, changing bag, developer, fixer, hypoclearing agent, watch, water, clip, dataguide
QUESTIONS 20 ASK
What would happen if the film-was_left -in the developer too long?
What would happen if the film was not left in the developer longenough?
What would happen if the film was exposed to light?
Whemwould you find the time needed to develop the film?
Science EducationDr. Chuck PriceApril 89_1980
19

,-15vItgryzym4 wits
LESSON PLAN
Pjectivess
Cognitive
The student will be able to'
1. explain what a contact print is aid the process of making
one.2. explain what an enlargement is and thi process of making
one.3. define 14 vocabulary words that are listed later in thi3-
lesson.,z
Affective
The student will.be able toy
1. show an appreciation for the techniques used in contact
printing and enlarging.2. demonstrate that they are enjoying themselves by the
smiles on their faces.
Psychomotor
The student will be able to:
1. demonstrate the process of making a contact print.
2. demonstrate the process of making an enlargement.
Procedure: Contact Printing
Turn out all of the lights except the darkroom safelight that
is equipped with a 15 -watt bulb and an amber filter. Place the
negative on the base of the enlarger with the dull side facing down.
This is the emulsion side of the negative. Next place the photo-
graphic paper shiny side (emulsion side) up under the negative.
Put he large place of glass on top of these. Turn on the timer
to the desired time which you have already pre-determined. This
will turn the light on for the exact time needed.
st.Procedure: Enlarg.mt
.Place the negative into the motive carrier so that the
emulsion side (dull) is facing dowt. Turn on the enlarger light
and set the lens at its widest opening (smallest f-number on the
lens Maunt). TherrraiSe and lower the enlarger head and adjust
1110111111.111..2
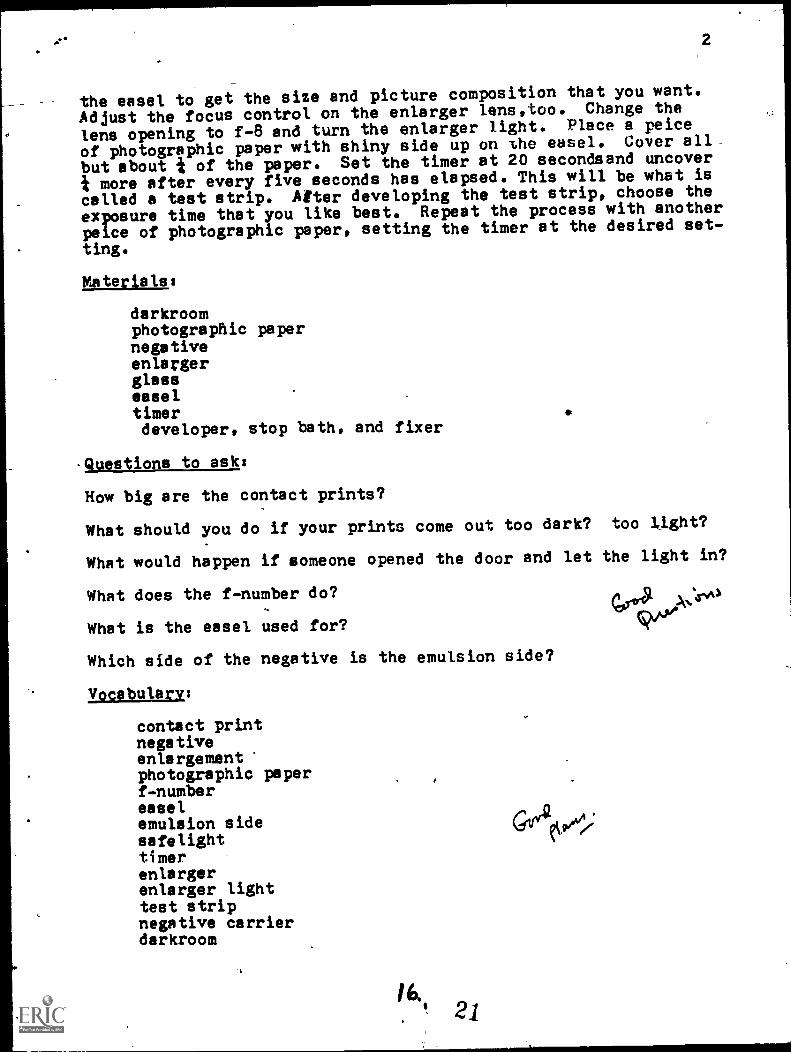
the easel to get the size and picture composition that you want.
Adjust the focus control on the enlarger lens,too. Change the
lens opening to f-8 and turn the enlarger light. Place a peice
of photographic paper with shiny side up on the easel. Cover all
but about t of the paper. Set the timer at 20 secondsand uncover
more after every five seconds has elapsed. This will be what is
celled a test strip. Atter developing the test strip, choose the
exposure time that you like best. Repeat the process with another
peice of photographic paper, setting the timer at the desired set-
ting.
Materials:
darkroomphotographic papernegativeenlargerglasseaseltimerdeveloper, stop bath, and fixer
-Questions to ask:
How big are the contact prints?
What should you do if your prints come out too dark? too ].fight?
What would happen if someone opened the door and let the light in?
What does the f-number do?er°19'9/4,0.A%447-4A1
What is the easel used for?
Which side of the negative is the emulsion side?
Dcabulary:
contact printnegativeenlargementphotographic paperf-numbereaselemulsion sidesafelighttimerenlargerenlarger lighttest stripnegative carrierdarkroom
GIPAick,i;

t.
HISTORY OF PHOTOGRAPHY
OBJECTIVES' 1. Students will be able to identify some et the
pioneers of photography.
2. Students will be able to recognide some of the early
cameras used in the development of photography.
3. Students will have an appreciation for the ad-
vances made in the development of photograOhy(photo-
graihs and cameras).
PROCEDURE: 1. Give brief reports on Matthew Brady,and George Eastman.
2. Bring in pictures of early cameras with brief ex-
planations of each one.
3. Bring in and show class some actual examples of mod-
ern day cameras. Explain some of the improvements
and/or idiantages'of the modern day cameras.
QUESTIONS: 1. Matthew Brady was famous for his photographic work
during what war? ans: Civil War.
2. 'Who developed the first-Kodak camera? ans: George Eastman.
3. What camera made photography eakily available to the
-public? anss Kodak Camera.
4. What was the advantage of the Instantograph camera?
ans: It could take pictures of moving objects.
5. Which camera produced profile-like figures and
eventually evolved into what we know as the photo-
graphic camera? ens: Camera obscure.
/122

Ittiro.bizprvm Lc Com Post-m*4
Cognitive
The student will be able to:
1. ,soknoWledge a aosningfUl arrangement of the parts of apicture so taking pictures becomes sore visually satise.tying and whole to thee.
2. ceaTare different pictures, showing how they are good or
bad, Ind ity.
3. desiniatrata how pictures tall a story:or express a moodthrough examples.
k. .dis4over how simplicity, framing, and foreground, lead-ing lines and design all act as impbrtant elements inany picture.
Affective:
The students will show arVappreciation for different typesof pictures, and how pictures tell a story or express a mood.
Psychomotor:
The student will be able tot
1.Aanonst;eteAdmmghldatures-theithave takeir:or:bronehter"in, her pictures tell a story.
2. make a bulletin board of snapshots and pictures frommmaneliesshowinsformsimplicity, framing, foreground,leading line," and design.
-3.-'given a piece of paper with squares an it, (like apicture), deibletrato by drawing horisontal, vertical,triangular, radiaidne,and.ddagenal lines, and balancedobjects. different types of pictures.
0
Introduce the word4compamItion and its seaming as related
to victors:4' Show students good and bad pictures. Tell studentsShout the'different7lines and balanced abjects that composepletures and show examples of each.'. !lad into form. Explaindifferent forms and how one's ?made of form effects: theirentire picture. lay-take pictures? For enjoyment' to expressa feelt4 or mood, for besnzy. Vora picture tells a story and
the -story often depends as the individual.
B. 23

Platarials
Pictures showing fora--sinplicity, franing, foreground lead-
ing lines; design, said horisontal, vertical, diagonal, triangu-
lar; radiating lines and talanoed objects. Also pictures showing
the ace of color and star filterso.T.Antrolbse-ups,..soft,foous,
*till life; nature, and shadows.r.,
lweluations17-
1. They will sake a bulletin board showing fora.
2, Given a piece of paper with swamis au:.it they will draw
the different lines and the balanced object, showing thii
different types of pictures.
3. Then. ye show then piotures, they will be able to tell us if
they are good or bad.
9mbstions to ask'
1. Is this picture good or bad, and why?
2. Do you "joy taking pictures, or is it 4: bother for sou, and
3. Whit does empisiticu neon? ( as related to a p1cture )
4. Tell se the different types of fora.:
.1
ft
4.6 I IA1
PE 24
.4

TYpes of cAtiveghsLesson Plan
ib
Obi ectivea:
Cognitive: After instruction the pupil Will be able to identify5 different types of cameras (box yoitadi simpleadjustable, single lens reflex, twin lens reflex)
ikand telkaoll,each.
Affective: After instruction the pupil will be able to show anappreciation for different types of cameras by payinglineation during the presentation.
Psychomotor: After instruction the pupil will beable to makea notebbok of ditto's with pictures, information, andquestions pertaining to each-type of camera.
Procedure:
A presentation of different types of cameras will be given ty
Cindy using as many different types of cameras possible. Hand-
outs will be make by Bona for each child about cameras.
Materials:
CamerasHandouts
evaluation:
The handouts will contain questions to be answered by the students.
A word find puszle will he given to be completed on the students
own time or time remaining in the classroom.
Worn D -0..,aAe_ A.. 4;44 vv\Aekt.
20.25

BOX OR SIMPLE CAMERA- -
Advantages: inexpensive, takes good pictures, simple, will take considerableabuse, best cameras for use by children. instamatics simple to load film.
Dipadvantages: fixed lens setting, aperture, and shutter speed prohibitpictures under extreme conditions of lighting and motion, impossible to
get shart detail with simple lens.
35NM (MINIATURE OR REGULAR SIZE CAMERA BODY) --
Advantages: light and compact, easy to carry, best camera for candid work,short focal-length lens (usually 50mm) gives good depth of field and makesprecise focusing unnecessary for once-in-a-lifetime shot, fastest lensesof any type still cameras, lowest film cost and largest number of exposuresper loading (20 or 36 shots per cartridge), highly versatile, wide rangeof attachments and accessories usually available.
Disadvantages: large film load makes single shoot-and-develop techniqueimpossible (unless you bulk load your own film), enlargements necessaryfor prints meaning loss of some detail and sharpness, smallest film scratchbecomes noticeable on print, parallax problem on close-ups.
TWIN-LENS REFLEX CAMERA
Advantages: good-size contact prints and fine enlargements possible sincenegative is of larger size, ground-glass composing and focusing withoutany mirror movements as in SLR. (Single Lens Reflex).
Disadvantages: parallax at close distance, depth of field cannot be observed,lenses can't be changed in most models, more expensive' film.
SINGLE -LENS REFLEX (SLR) 35 -
Advantages: same as other 35mm type plus reflex viewing which eliminatesparallax completely, high versatility, excellent camera for extreme close-upsand copying.
Disadvantages: same as other 35mm except for parallax.
POLAROID- -
Advantages: instant pictures, easy to operate, small number of exposuresper roll such that changing from color to black and white is possible atabout any time, extremely fast black and white film.'
Disadvantages: waste materials (caustic-gooey chemicals) to dispose of(except SX-70), quite expensive per picture, you have no negative whichmakes it difficult to make extra prints.
2 '

WLITwmgmm
THE 'ANATOMY OF A CLKERA EXPLAINED
All cameras are basically alike. Each is simply a box with a
piece of film in one end and a hole in the other. The hole is there
so that light can enter the box, strike the chemicilly sensitized
:,urface of the film and make a picture: Every model, no matter the
cost, works the was. The differences are in how well and how easily
they do the lob, but the job is always the same: setting lisht onto
film to farm an imams.
To do the job properly certain things are needed; these are
shown in the cut away drawing on the next page. The picture shows;
viewing system, ;Um, tilt advance, camera body, disphramm, shutter,
lens, and focusing control.
All cameras except the very cheapest have all these features in
some form. If that is, so then why are there so many different kinds
of cameras? The reason is that cameras are salmi to do so many different
things, under such a wide variety of comAitions, that they have had
to become specialized. A bulky studio camera has features that
make it ideal for makia3 indoor pictures, but for unpo.ed pictures,
possibly people at a picnic, the studio camera is not as zood as a
pocket - sized instsmatic.
UESTICNS:
. Why is a hole, aperture, needed in a camera?
.1-. a
is:the...-!ob all cameras must do?*.
...
3. List 5 features all cameras must have.
4. :shy are there so Many different types of cameras?
2.2., 2 7

(D). THIC OAKUM HWY -a bait that-bow-Wevarious parts of the camera, protector--
the film from all light except that
which enters through the lens when a
picturvis taken.1
(g) THZ;DIAPORAGR a light control 1device usually made of overlappingmetal leaves, forms an adjustable,
hole, or aperture. It can aka opeom4
to let more light pass through the. 4
lens or partially closed to restriei
-this passage of light.
IP-VIEWING SYSTEU: shore the'sosne
the picture Will:-ObVir, usually
28 through set. of--erses or the
ff picture-taking.lini=itself..
(p) THE YIL4*aceiveiothe illage of ,
the objeatAfeing.t3itatqarapbed
and rgoordi this lmqisson its
I
THE 8HUTTIR the s000ndlightcontrol, is i movable, protectiveshield that opens and closes topermit a measured amount of light
to strike the elm.
(G) d focuses the light raysfrom a subject and creates areversed, upsidedown image on the
.film at the back of the camera.
(H) THS FOCUSING CONTROL moves the
lens bank or forth to crotts asharp image on the film.
(0) THE ?ILK. ADVANCEr winds
' film from one spool toanother in cameras usingfilm rolls or cartridges
.in other cameras, which
use sheets of film, there
. is a slot admitting onesheet at a time.
29

.SIN3LE ISN3 REFLEX
If you are looking for a camera that is compact size, light
weight, uses inexpensive film and are willing to do the required
fiddling that is unecessary with simple viewfindina cameras, then a
single lens reflex camera will probably be the camera type for ycu.
This is the most popular among aMatures and professionals alike
because of the film it uses. Most single lens reflexes accept 35
millimeter (li inches) wide film. This film is very economical, you
can make a large number of pictures at minimum expense.
Obviously, the best way ;o see what the camera sees is to look
right through the camera lens itself. This way you can decide how
much every part of the scene will be in your picture. The -Jingle lens
reflex camera has a mirror and a prism, which enables ycu to use the
camera lens for composing and focusing pictures.
The key to the single lens reflex camera is the mirror.(a) Light
coming in through the camera lens is reflected upwardrl'y this mirror to
a viewing screen then through a fly. sided 'prism that turns the inverted
image right side up and delivers it to the eye.
When a picture is taken, the mirror
snaps up momentarily to position (b),
permitting light to strike the film at
the back of the camera: Through - the -
lens viewing produces an image virtually"
identical with that produced on the film.
^USSTIONi
1. Why is the single leas reflex popular with amateurs and professionals?
2. What is the key tc single lens reflex?
30

TWIN LENS REFLEX
The twin lens reflex, like the viewfl ''r camera, has separate
viewing and picture - taking systems: Nero they are stack64 one over
the other. The lower lens draws light to the film. The upper lens,
along with the lower one draws light to a mirror (a) set at a 45 degree.
angle, which is reflected upward to'a. viewing screen (b). Like all
mirror reflections the image appears reversed left to right. Unlike
1 the single lens reflex camera, the
I mirror is fixed (does not move).
The principal problem with
the twin lens reflex is parallax
error"(the difference between the
view seen through the viewfinder and
that recorded on*the film). Another
-drawback is that the image projected
on the viewing screen is revered
left to right, which takes some Fs
getting used to.
One advantage to the twin lens reflex is that since the photographer
looks tato the camera from the top, he can lower it to waist level or
even place it on the ground - an awkward angle for an eye-level viewfinder,
This camera is light enough and quick enough and quick-handling enough
to be useful companions on a trip, pr around the house.
QUESTIONS
1. What is the principal problem with the twin lens reflex cameras?
2. Name two advantages of the twin lens reflex cameras.
31

ILODAI INSTAMATICS and POLAROID LAND CAMERAS
The real camera explosion has cone since World War II with the
astonishing success of two !sillies of.cameras for the amateur: the
Kodak Instamatics and similar "do - everything - for - you" cameras of
other aanufacturers, and the Polaroid Land Cameras, named for Edwin
E. Land, inventor of the first successful in - the - camera developing
process. (Land was inspired to create the picture - in - a:-minute
camera by his daughter: When he was taking snapshots of her one day,
she impatiently asked how .soon she could see them and was heartbroken
when he explained about the delay involved Pn developing and printing.) .
QUESTIONS
1. When did the real camera explosion start?
2. What insptted Edwin Land to create the in - the - camera developingprocess?
at,. 32
via

Plik
o-ro
Wvf
? 0 KO
' ' - .
''
N NT
VA
IER
RIN
SEN
DC
-PSi
OP
OACEROZROGLINNEI
Y N I 0
....x
xxri
s
0-A1110
RA.TAILIIIIIIVAONZ
011ZIRA.NIRNUNIZDAZP
SNOT
O
1,B
L,A
VN
IVIA
AIL
L.I
IMIT
IOL
C
..
.:*-1
011A
CII
IIG
tRIF
RIC
IRO
OX
IZA
,
'
711E
ICII
XO
N7I
TA
11.-
N11
74:0
X-L
LP3
L8
-.:,1
1.11
0-01
0.11
1101
0TA
laR
CL
'LL
IT.
4':A
RA
PDT
tOG
VN
IV-D
OSA
ZA
AA
RT
INI
'...V
ON
LA
CttA
ND
AIR
ITtR
IRO
TX
III
111111,111(LCADIDT7Z20MONIIRR
LIFIXOLTIEUSOR112Z.Llillt
.T.HADZATILICLO/IIIII2IIISIIV7T
:"..%
:A.L
ILV
DT
AT
L
P TD I V I R
R25
78L
C,
L1 X 3. 04. 0 X 8 70
1310
RA
"
11z$
!:41
.I15
011T
INL
DZ
SPR
ICN
PX?
:-.J
;:-Z
iPA
RN
TPS
NA
IIV
IAO
INE
RR
.710
-.i.7
'-1F-
GR
WL
,GG
IRL
EIL
LA
R1P
R0Z
IA.
oCU
LC
LN
OV
IL
IIIL
RO
LO
CR
I.L
cCA
BPR
ZL
:i;.:.
,:;;3
1.11
117
121
S4 Op
/Ca P
IL
4N8R
N7
. - # . -
.7 -
.
r
NN
IPL
Et
...M
ill
LIN
N
IIN
LIN
*-PO
LA
ND
ID -_.
.
. 1111
112
11:1
6MD
ER
. CC
IIII
ICT
Plan
....
*
.111
201I
LT
IC
CA
1C37
1
BA
CID
IRO
UN
D
&A
VE
'
CA
RE
E=
CL
OS&
DP
corm
s!C
IVIO
PIN
G
=M
AW
FLU
E
.
MU
. PRIM
AM
U
ZIP
OSO
IP
MC
KIM
CO
LO
R-H
AC
K
AN
D
WE
=
PIC
T=
BE
ITR
'LE
ON
rra
10:9
23R
All -
--D
IST
AN
CE
Dan
z
SOW
=
INIC
ILT
GR
TIN
G
CO
NT
DO
L
33
.1_L
c

0.4
sr

EUIPP1NG A DAMOOPI
35
For Can Camcres
4 trays3 tongseafelightchemicalspekcol developeratop bahfixer
light sou7.ce --
enlarger ordais lamp
glass --8 x 10 window glass
For Pinhole Cameras
above its, plus:developing sank
(35 ma)graduated measurechemicalsD-76 developer
film clips (3)thermometer

r
PRICES OF PHOTOGRAPHIC SUPPLIESAT SCHMITT PHOTO SERVICE SHOPSIN EVANSVILLE
(April, 1980)
Darkroom apparatus --Negative Clips (12) WOOx10 Tray $1.55
Omit (canned air) $3.25Patterson tank and reel (self-feeding) $12.33
J stainless steel tank (35 mm),$7.98Patterson stainless steel reel (35 ma) $4.25
Premier safelight $14.41Brownie sidelight $5.91Funnel (with filter) $2.25Print tongs (set of 3) $1.99Stirring paddle $1.16Thermometer $9.00
Film Materials --Daylight film loader: Premier $14.41Negative envelopes (glassine strip holds 6-35 mm or 126) Package $3.20
Enlarger --Bogen X-35A $100.00
Photographic papers --Rodabrome s x 7 100 sheets $12.45
8 x 10 25 sheets 7.18
8 x 10 100 sheets 24.91
Agfa Brovira 8 x 10 25 sheets 9.56
Polycontrast II Rapid RC,F 5 x 7 100 sheets 1C.36
Polycontrast II Rapid RC,F 8 x 10 100 sheets 40.12
25 sheets 7.69 (old price)
Chemicals --Tri-Chem pack (Dektol, Stop Bath, Fixer: 8 oz of each) $.98
Microdol-X to make 1 gal $2.89
Stop Bath (pt. container dilute before using) $2.00
Fixer to make If gal $1.19Rapid fixer to make 2 gal $3.02Hypo clearing agent to make 1 gal $.98
Dektol to make 1 gal $2.10Sepia toner to make 1 qt $1.02Photo-Flo to make 1 pt $2.55
Blueprint Paper and Oxalid paper are available.from Delta Education,
Box M, Nashna NH 03061. The materials are not too-expensive,
25 sheets 'assuring 9 x 12 inches cost about $1.50.

EYAL.M ATI of/
PROJECT PHOTO
At the completion of this project,fiou should be able to answer the following questions
and define the terms listed. We will have a test on the items on Wednesday, April 30.
Sun Print, -
Which paper produces a light image on a dark background?
Answer: blueprint
Which paper produces a dark image in a light background?
Answer: oxalid
What chemical is needed to develop the oxalid paper?
Answer: ammonia
What chemical is needed to develop the blueprint paper?
Answer: peroxide
Xnow these terms:
opaquetransparentdeveloplight sensitive
Can Cameras -. . :a..ca,
What are the four necessary conditions for a camera?
Answer: light, film, aperature, shutter
Row can a can camera negative be made into a positive?
Answer: In a darkroom, place a piece of photo paper face up on the enlarger's easel.
Pat the negative face down on'the paper. Cover with glass to hold flat.
Turn on the enlarger light for approximately 30 seconds. Develop the picture.
If a can camera photo is overexposed, how does the picture appear?
Answer: All black
If a can camera photo is underexposed, how does the picture appear?
Answer: All white or nearly white
3
3/,

UMW these terms:
aperatareShutterdepth of fieldfocusdarkroomlight sensitive paperesuleion side of paper
Developins Tills --
What are the steps in developing film?
Kam these terms:
developerfixerrinsehypo clearing agentchanging bagdeveloping tank
What would happen if the film was lef in the developer too long?
Answer: It would be too dark.
What would happen if the film was exposed to light?
Answers It would be dark
How do you find the information concerning developing time for a certain kind of film?
Answer: The information is provided with the film or available in a data book.
What effect does temperature have on the time necessary to develop film?
Answer: Warmer chemicals require less time._
History of Photography -
Matthew Drady was famous for his photographic work during what war?
Answer: Civil War
Who developed the first Kodak camera?
Answer: George lastman
What camera sada photography easily available to the public?
Answer: Kodak camera 38
34.

What was the advantage of the /nstantograph camera?
answer: It could take pictures of moving objects.
Which camera produced profile-like figures and eventually evolved into wht.t we knowas the photographic camera?
answer: Camera obscure
3933.

p
student's name
Sunprintsoxalid
blueprint
Can Camera
PROJECT PHOTO CHECKLISTApril 14-30, 1980
Operational Camera
At least one successful photo
Positive from negative
Pinhole Camera (per teen of two)
Operational Camera01111
Exposed Roll of film
Developed Roll of Film
Developing/Enlarging
Contact prints from pinhole camera
Enlargement of negative

BIBLIOGRAPHY
Free lodak publications:
AJ -3, IP8ov to Process end Print Black and White Films" useful if
making pinhole cameras.
AC-13, "Picture-Taking in Five Minutes" TT explains basic camera types
and composition techniques.
AT-1, "Your Programs From Kodak" -- lists rental free movies which
teach basic concepts of taking, developing photos.
AT-2, "Photography: Bow It Works" -T a good introduction to the
principles behind how a camera operates.
AT-18, "Teaching Tips from 16dak" -- 275 ways to use photography in
the classroom, covers all disciplines._
Excellent articles written for middle-school teacher in mind:
Galindez, Peter, "Focus on Color Photography," Science Activities,.
Spring, 1978, pp. 24r31.
Galindex, Peter, "Focus on Photography," Science Activities, March/April,
1977, pp. 8-13.
41
35.