dms 300 4l holter ecg recorder - holterdms.comholterdms.com/manuals/300-4l user guide.pdf · 4...
TRANSCRIPT

1
DMS 300‐4L
Holter ECG Recorder
Operator’s Manual

2
Table of Contents
Page
Overview of the Recorder ………………………………………….…….………………….3
Initial Set‐Up…………………………………………..…………………………………………...4
The Start/Setting Menu ……………………………………………………………………….8
Removing and Loading the Recorder…………….……………………………….......13

3
Overview of the DMS 300‐4L Holter Recorder
Front Rear
Side Bottom
HDMI Port
(for ECG Cable) SD Card Slot
Battery Compartment
Battery CompartmentSD Card (included)
ECG Cable (included)
LCD Screen
Navigation Buttons

4
Initial Set‐Up
1. Please insert a compatible SD card into the recorder as indicated in the picture
below.
2. Insert a NEW AAA battery into the recorder. Do not connect any ECG cable at
this point.
3. As soon as the battery is inserted, you will see the DMS logo on the LCD screen.
5
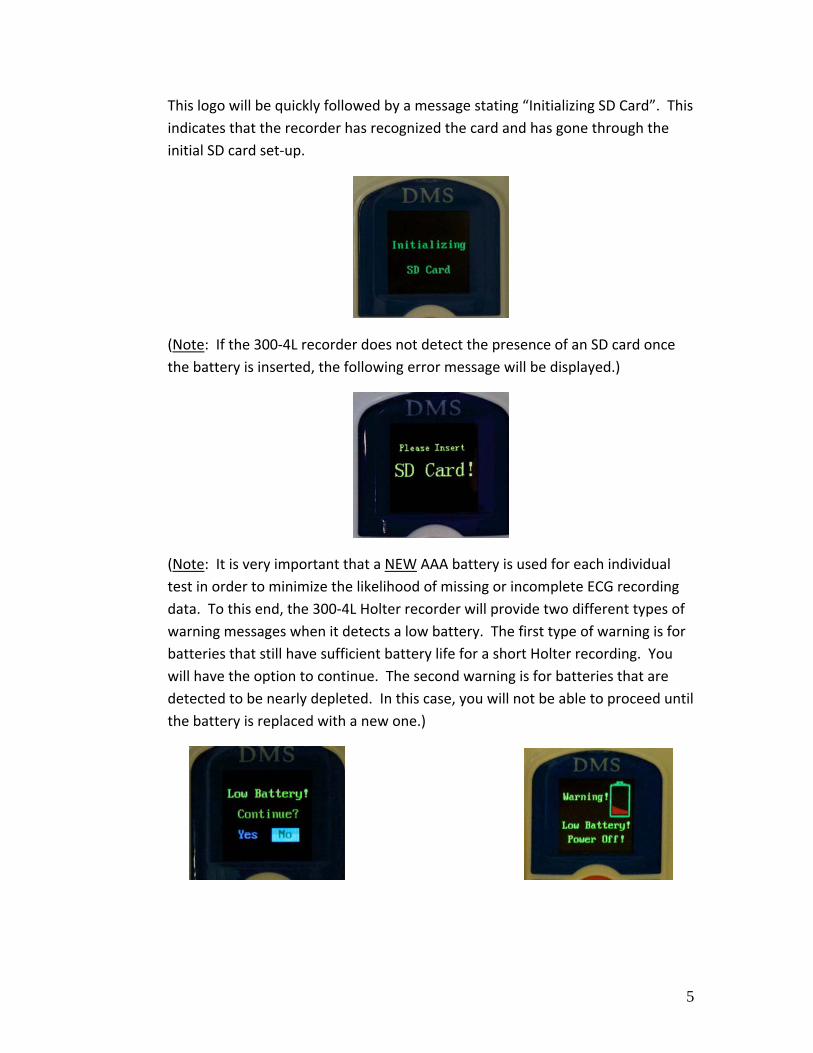
This logo will be quickly followed by a message stating “Initializing SD Card”. This
indicates that the recorder has recognized the card and has gone through the
initial SD card set‐up.
(Note: If the 300‐4L recorder does not detect the presence of an SD card once
the battery is inserted, the following error message will be displayed.)
(Note: It is very important that a NEW AAA battery is used for each individual
test in order to minimize the likelihood of missing or incomplete ECG recording
data. To this end, the 300‐4L Holter recorder will provide two different types of
warning messages when it detects a low battery. The first type of warning is for
batteries that still have sufficient battery life for a short Holter recording. You
will have the option to continue. The second warning is for batteries that are
detected to be nearly depleted. In this case, you will not be able to proceed until
the battery is replaced with a new one.)
6
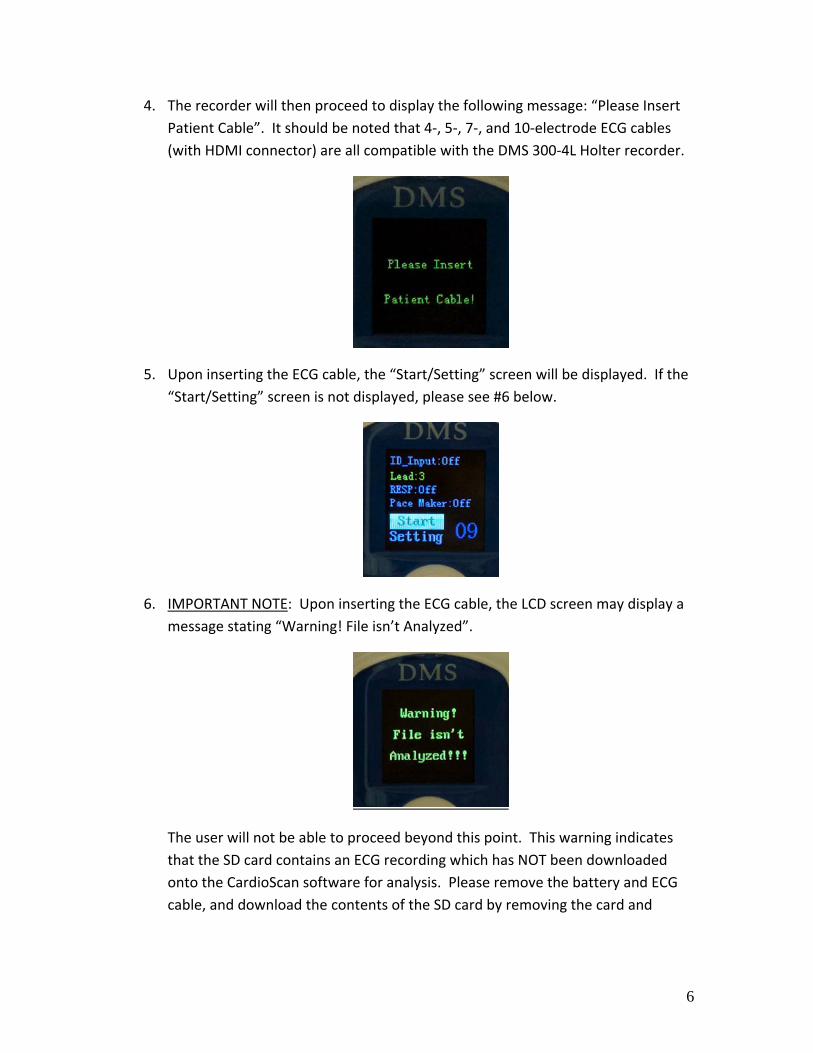
4. The recorder will then proceed to display the following message: “Please Insert
Patient Cable”. It should be noted that 4‐, 5‐, 7‐, and 10‐electrode ECG cables
(with HDMI connector) are all compatible with the DMS 300‐4L Holter recorder.
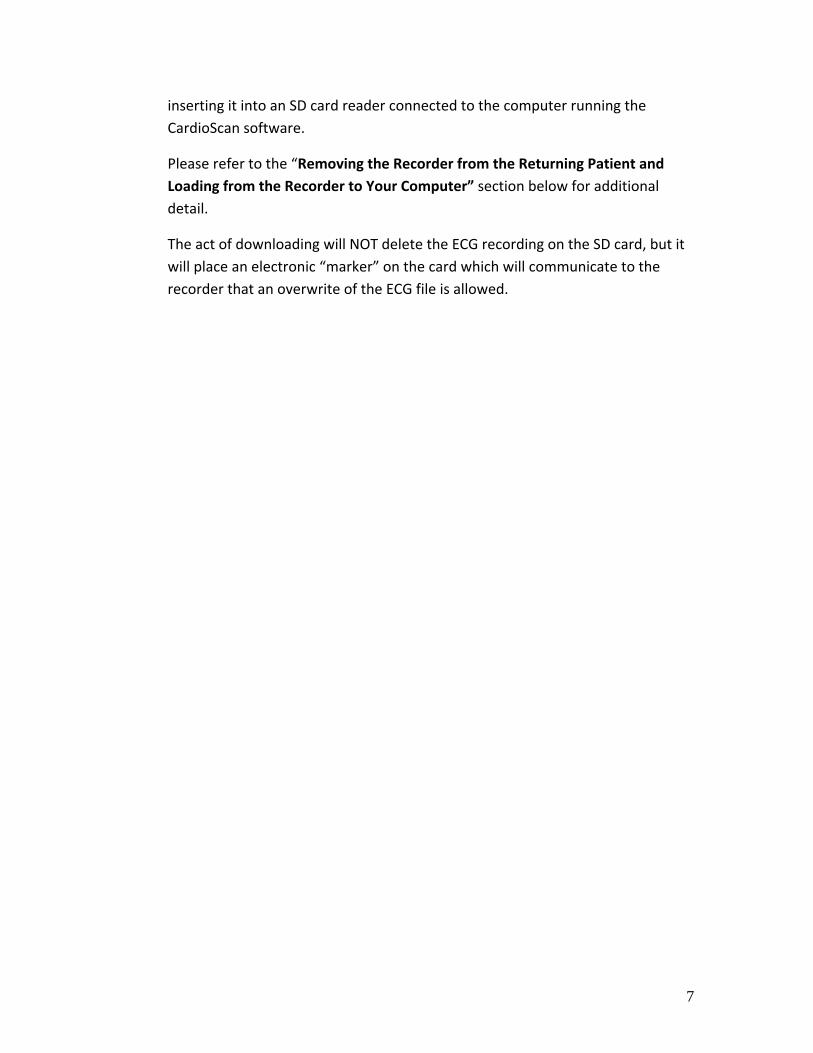
5. Upon inserting the ECG cable, the “Start/Setting” screen will be displayed. If the
“Start/Setting” screen is not displayed, please see #6 below.
6. IMPORTANT NOTE: Upon inserting the ECG cable, the LCD screen may display a
message stating “Warning! File isn’t Analyzed”.
The user will not be able to proceed beyond this point. This warning indicates
that the SD card contains an ECG recording which has NOT been downloaded
onto the CardioScan software for analysis. Please remove the battery and ECG
cable, and download the contents of the SD card by removing the card and
7
inserting it into an SD card reader connected to the computer running the
CardioScan software.
Please refer to the “Removing the Recorder from the Returning Patient and
Loading from the Recorder to Your Computer” section below for additional
detail.
The act of downloading will NOT delete the ECG recording on the SD card, but it
will place an electronic “marker” on the card which will communicate to the
recorder that an overwrite of the ECG file is allowed.

8
The Start/Setting Menu
1. As you can see in the picture below, the current recorder settings (On/Off) for “ID_Input”,
Respiration (“RESP”), and “Pace Maker” are shown in the Start/Setting screen. These can be
changed in the “Setting” menu. The “Lead” input is displayed in yellow. This cannot be
manually changed as it is automatically detected based on the ECG cable connected (4‐, 5‐, and
7‐electrode result in “3‐Lead”; 10‐electrode results in “12‐Lead”).
2. A 30‐second countdown clock will also be displayed in the lower right‐hand portion of the
screen. This gives the user an opportunity to adjust settings, if so desired.
3. The blue Up and Down arrow buttons on the recorder allow the user to navigate between
“Start” (which confirms the settings and prompts the recorder to proceed to the next display),
and “Setting” (which allows the user to adjust the settings before the ECG recording begins).
Press the orange “Enter” button to confirm the selection of “Start” or “Setting”. For
instructions on adjusting settings, please refer to #9 below.

9
4. Selecting “Start” in the Start/Setting screen will prompt a 10‐second countdown “Start
Recording” confirmation message. Select “OK” if you are ready to proceed. (Please note that
not making any selection in the Start/Setting screen, and allowing the 30‐second countdown
clock to expire, will have the same effect as selecting “Start”.)
5. A message will now appear for 5‐10 seconds stating “Erasing ECG File”. This function
automatically deletes any existing ECG data present in the SD card.
6. The recorder has now begun to record patient ECG data. As the illustration below shows, the
LCD screen displays: the date in the upper left, the current time immediately below it, the
number of leads in the upper right, the time elapsed in blue, a green battery life icon in the
lower right, and a picture at the bottom indicating that pressing the orange key on the recorder
will display the various ECG leads in real‐time. No action on the part of the operator is needed
beyond this point until the recorder is ready to be removed from the patient for ECG data
download.

10
7. Please note that the LCD screen dims after approximately 30 seconds in order to conserve
battery life.
8. Pressing the orange “Enter” key at any point will display the patient’s real‐time ECG by channel,
as well as the patient’s heart rate. The Up and Down arrows can be used to navigate between
channels.
9. As highlighted above in Step #3, selecting “Setting” will allow the user to adjust the settings
before the ECG recording begins.
10. Upon selecting “Setting” in the Start/Setting screen, a 4‐digit password prompt will appear.
Please input the appropriate password to enter the settings menu.
11
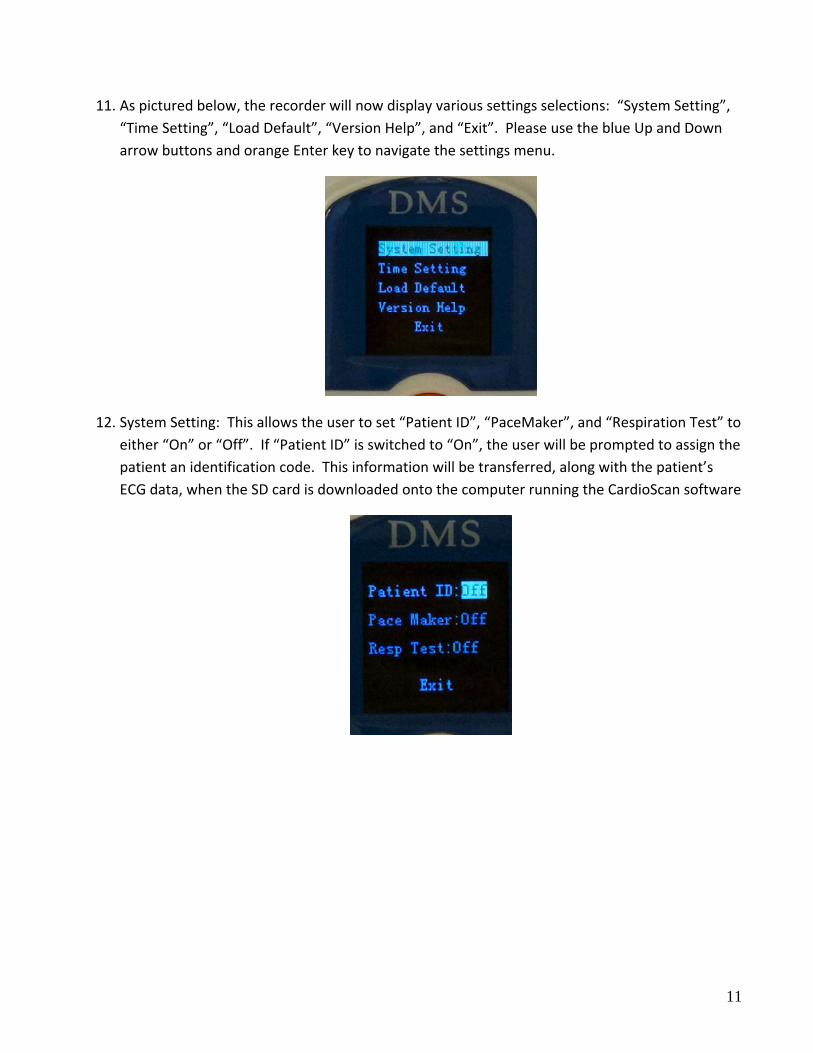
11. As pictured below, the recorder will now display various settings selections: “System Setting”,
“Time Setting”, “Load Default”, “Version Help”, and “Exit”. Please use the blue Up and Down
arrow buttons and orange Enter key to navigate the settings menu.
12. System Setting: This allows the user to set “Patient ID”, “PaceMaker”, and “Respiration Test” to
either “On” or “Off”. If “Patient ID” is switched to “On”, the user will be prompted to assign the
patient an identification code. This information will be transferred, along with the patient’s
ECG data, when the SD card is downloaded onto the computer running the CardioScan software

12
13. Time Setting: This allows the user to set the appropriate date and time. The 300‐4L Holter
recorder has an internal time‐keeping function regardless of whether a battery is inserted or
not. Thus, the user will not have to set the date and time for every patient. It is also important
to note that the date and time can be updated automatically using the CardioScan software if
the operator chooses to pre‐enroll the patient.
14. Load Default: This quickly allows the user to restore the 300‐4L recorder to its default factory
settings.
15. Version Help: This displays the recorder model number, the serial number, and the firmware
version.
16. Exit: Once the user is finished with the settings menu, press exit to return to the main
“Start/Setting” screen.

13
Removing the Recorder from the Returning Patient and Loading from the Recorder to Your Computer
1. Upon returning to your office, remove the battery cover from the back of the Holter recorder,
and remove the battery.
2. Make sure to discard the battery, since the recorder is designed for one new battery per each
recording.
3. Warning: If you do re‐use the battery, you will likely cause the recorder to stop operating in
the middle of recording your next patient.
4. Un‐snap the Lead Wires from the electrodes, and disconnect the ECG cable from the recorder.
5. On your computer desktop screen, double‐click the CardioScan Icon
6. ECG data can be downloaded from the Holter recorder in two different ways: 1) remove the SD
card from the recorder and insert it into the SD card reader connected to your PC or 2) plug the
recorder into the HDMI‐to‐USB download cable connected to your computer. The SD card can
be accessed through the battery compartment. Push it in to release it.
7. In the upper left of the Holter program main menu display, click on the “New Patient” button
which will bring up the “Patient Data” display. [WARNING: MAKE SURE YOU CLICK ON “NEW
PATIENT”. DO NOT CLICK ON “ENROLL”, AS YOU RISK ERASING ALL ECG DATA FROM THE SD
CARD YOU ARE TRYING TO DOWNLOAD].
8. If you pre‐enrolled your patient, you should see the information that you have already entered
for the patient. If not, please enter the required information such as the supervising physician,
the referring physician, the patient name, the patient’s age, etc. Please note that data fields
such as date, time, and whether the patient has a pacemaker will be automatically downloaded
from the SD card based on the initial settings selection.
9. After entering all of the patient information, click on the “Next” button. If you have filled out
something incorrectly, the computer will prompt you to fill in the applicable information.
10. If you have not connected the SD card reader or your download cable correctly, you will be
prompted to insert the patient’s SD card. Please simply make sure that the SD card reader or
cable is connected to the PC. Now click on the “OK” button to load the Holter ECG data.
11. The patient’s data will now be loaded onto the CardioScan program and the software will
analyze your data.

14
12. When the analyzing has finished, you will be prompted, “You may take out the SD card now or
disconnect the Holter recorder now”. Click on the “OK” button.
13. You are now finished and ready to use the Holter for another patient.
***********************************