determine factors affecting aav capsid uncoating … factors affecting aav capsid uncoating using...
TRANSCRIPT

UNC-CH PROGRAM IN CELLULAR AND MOLECULAR BIOPHYSICS
Determine Factors Affecting AAV Capsid Uncoating Using AFM Nano-indentation
Gene Therapy Center & CISMM
Li, Zimeng
1/20/2012
This report contains two parts. First part is a summary of my work in the project in the title; the second part outlines details of my work and understanding of the project, as well as proposals to future directions.

Determine Factors Affecting AAV Capsid Uncoating Using AFM Nano-indentation
1
CONTENTS
SUMMARY 2
DETERMINE FACTORS AFFECTING AAV CAPSID UNCOATING USING AFM NANO-INDENTATION 3
Introduction 3 Virus Physics 3 Factors that Affect Uncoating 6
Methods 6 Atomic Force Microscopy (AFM) 6
Principle 7 Physics of AFM probing 7
Probe Structure 7 Probing Modes 7 Cantilever Equations – AC mode 8
Scanning 12 Height Determination 12 Deflection & Feedback System 12 Movement 16 Tune & Engage 17
Imaging 18 Cantilevers Choices 18 Scan Speed 19
Determine Stiffness/Deformation Using Nano-indentation 20 Spring Model 20 Spring Constant Determination 22 Force Curve 22
Sample Preparation 25 Polylysine Treatment 25 Virus deposition 26
Results 27 In Air 27
Imaging 27 Force Indentation 28
In Liquid 29
Discussion 30
Known Issues 31 Imaging Drifting 31 Deflection Drifting 32 ‘White’ Tip 32
Acknowledgement 33
Bibliography 33

Determine Factors Affecting AAV Capsid Uncoating Using AFM Nano-indentation
2
Summary I start working on this rotation because I think gene therapy is cool, and gene technology is and will be the cutting edge research in the next decade. I have always been interested in how transgenic techniques can shape the future of new biological beings. With this aim, I visited Dr. Aravind Asokan and talked about rotation project. At first I am a little disappointed that my project is not working on anything related to genes, which is still a mystery to me; but I was introduced to work on easily understood measurement of mechanic properties of virus, which looks not challenging (as a physics student, I only consider theoretical quantum/relativity physics as challenging). I didn’t think this simple class mechanics problem difficult when I accept this work. After all, it is only a rotation project. I may still be enjoying learning genetic technology if I were lucky to join the lab afterwards. I started working on September 21st, 2011, and concluded on December 13th, roughly two months and a half. I spend the first two weeks reading related literature, only roughly understood. At the same time, I was practicing my in-air AFM imaging skill on some standard or old samples like cilia, adenovirus and many others with the company of experienced people. It was not until October 18th did I finish trouble shooting all air imaging technic problems and start working on my virus sample. I did the sample preparation after ‘stole’ the secrets from Eric, and magically I could view the desired AAV particles in my fantasy microscope after only a few unsuccessful sample preparation practices. I obtain my first group of air imaging preliminary result in October 24th, which presented later in the context. The happy fact is that I saw the virus; the unhappy fact is it looks terrible compared to the beautiful online clear images. After Mike’s instructions, I could finally obtain great image on Nov. 4th. Until then, I thought I was doing quite well. I learned force measurement and did the in-air force indentation four days later. Everything seemed fine except I couldn’t find the expected rupture. Why? This really troubled my head as I naturally thought that the rupture should occur. This obstacle angered me more and more as I did two weeks of indentation but with no success. It seemed that I have mastered all those measurement, but the rupture is missing. I had to end my in-air imaging and proposed my understanding to causes on Nov. 21st. I thought the force indentation in liquid might be different, and who knows that the virus won’t behave differently when surrounded by water? Unfortunately, I did in-fluid imaging in a crazy manner for two weeks and still didn’t observe any rupture, and my rotation ended there. I have been questioning my abilities seriously during the entire period. The project seemed simple, but why I couldn’t get the desired result? What is lacking? Maybe Aravind is essentially right that I need someone to guide me through. It really took a significant amount of time to do a simple thing like imaging if you are just a beginner. Everything has to be done from the beginning, and I have to face and troubleshoot all difficulties alone. It is interesting and a spiritual pleasure to figure everything out indeed, but the time consumed far exceeds my imagination. I was

Determine Factors Affecting AAV Capsid Uncoating Using AFM Nano-indentation
3
then thinking that a student may not be able to work out his lab in two hours if his TA was not there to help – the same applies here. The project is predictable, understandable and certainly will eventually be solved within time, but the price there is also the time. As a crazy science lover, I knew that efforts will work if given time, thinking freely and deeply, but then I am not going anywhere in a timely manner if I am not standing on somebody else’s shoulder. As a famous cheat goes, don’t derive it if it’s in the book, and don’t do it alone if you can get help from others. After all, I think this might be a good time to change my thought about research – never work alone.
Determine Factors Affecting AAV Capsid Uncoating Using AFM Nano-indentation
Introduction Adeno-associated Virus (AAV) is a small, non-enveloped parvovirus that is used on Gene therapy treatment. The effectiveness of viral capsid uncoating accompanied by DNA releasing is a major factor of successful gene transfer between normal cells and the virus. The current research focuses on how internal and external factors might affect viral capsid uncoating. Viral capsid stiffness is a measurable observable that relates closely to the easiness of its uncoating. Nano-indentation assays utilizing Atomic Force Microscopy (AFM) proved to be a powerful tool to determine capsid stiffness in other viruses. We use Atomic Force Microscopy (AFM) to perform Nano-indentation assays, both in air and in fluid, hoping to unravel the factors that contribute to AAV capsid uncoating.
Virus Physics Many viruses with a DNA genome enter the nucleus. Its genome is condensed by nucleoprotein complexes called capsids. Some viruses have a lipid bilayer that contains viral spike glycoprotein called envelope, which surrounds the capsid. They usually takes a sphere form or tube-like form[1]. In order to infect, the viruses have to bind to receptors in the cell membrane, which serve as cues that induces membrane fusion and penetration through conformation change. The pH has great influence on when the virus begins fusion and penetration. A diagram of adenovirus is shown below (Figure 1). For more information, see Smith et al. review article[2].

Determine Factors Affecting AAV Capsid Uncoating Using AFM Nano-indentation
4
Figure 1
The commonly seen two distinct types of viruses are bacteriophages (e.g. , ) which injects DNA into the cell and viruses that penetrate cells and release their DNA by subsequently disassembly. The former withstands extreme internal pressure by their packaged DNA, which results in the powerful injection of their genome into cells, while the latter does not store their DNA under high pressure. Both of the two types of virus can resist remarkably external forces. Some example of the latter virus includes minute virus of mice (MVM), cowpea chlorotic mottle virus (CCMV) and AAV. Most of them take an icosahedral form. For example, in a mechanical study of MVM[3], the capsid consists of 60 structurally equivalent subunits and takes a T=1 simple icosahedral symmetry, where the T number [1, 4, 5] determines the virus size and symmetry around a chosen vertex. The constituents proteins can be identical or different to different viruses[1]. They crowd to morphological units (‘capsomers’), which corresponds to the vertices of a regular triangulation of a sphere. The geometry of viral capsid is thus governed by Euler theorem (F(aces)-E(dges)+V(ertices)=2), this results in 12 pentavalent units (pentamers) and all remaining hexavalent units (hexamers) for icosahedral viruses [6].

Determine Factors Affecting AAV Capsid Uncoating Using AFM Nano-indentation
5
It is suspected that the mechanical response of the capsid should be isotropic due to the great symmetry, and it is true for empty virus, where a wall model [3](Figure 2) beautifully corresponds to the experimental result. However the wall model fails to capture the property of full virion. In the model with DNA packaged, DNA (green) is thought to be filling the 60 concavities in the inner wall of the capsid homogenously. The wall will have an identical thickness, and the mechanical response is much like a homogenous sphere. Unfortunately, this is only observed at a wall thickness of ~2nm.
Figure 2
The stiffness of the capsid is not isotropic, with difference in the five-, three- and twofold symmetry axes observed in full virion (with DNA packaged). Because of the special triangulated surface and symmetry, finite element analysis [3] is used to take advantage of this geometry and predicts the anisotropic mechanical reinforcement with success. Besides stiffness of viral capsid, people are also interested in the sphere-buckling transition when elasticity changes [5-7], which is governed by the crossing over the critical FvK number , an indication of virus elasticity. The smaller (~100) corresponds to spherical structure with linear compression response and rupture
force
while larger (~1000) represents sharply faceted shape with non-linear compression and rupture force √ . Conversely, Knobler et al.[7] didn’t observe close relations of rupture force and . The two deformed structure can be seen in Figure 3 (A ~ small , B ~ large ). The figure has surprisingly commensurate impact on different viruses. It happens that breaking force is usually different to different viruses, but the fracture deformation is roughly the same (~10%)[5].
Figure 3

Determine Factors Affecting AAV Capsid Uncoating Using AFM Nano-indentation
6
The deformation (inverse transition, invert shape as shown in Figure 3B) will be seen as a first-order transition in AFM force-indentation curve (represented by turning point). Usually, after in-depth indentation, the viral capsid will rupture and cannot restore its elasticity, a different scheme from simply deformation.
Factors that Affect Uncoating Several studies have shown that viral capsid deformation can be affected by internal and external factors. External factors including acidity of the buffer as the environment of the virus, surface properties that the viruses are interaction with. One study showed that Tobacco Mosaic Virus (TMV) remains its identity on non-adsorption surface (hydrophobic) and deforms on hydrophilic surface [8]. Another study shows lower pH helps destabilize the virus [5, 7]. Higher loading rate or number of low repeated indentation forces also affects the extent the virus can deform [5, 9]. Study shows the higher the loading rate of forces, the larger the virus deforms. Even low forces, if pushing the virus 100 times, will result in its deformation. Internal factors include the genome length that packaged in the capsid. It is shown in phage that WT with full genome has twice the stiffness as the partially filled shells, which act like empty capsid [10]. This is thought to be caused by water molecules being hydrated from vicinity of DNA and squeezed out of the capsid from pores, where the hydration contributes to the osmotic pressure exponentially such that a little denser of DNA than WT will cause capsid rupture. There are two ways to denser DNA in the capsid – one is to compress the capsid by external forces like AFM Nano-indentation, another is to package longer-than-WT length of DNA. Both will result in viral capsid uncoating. One of our goals in this article is to determine the effect of such correlation between length of genome packaging and uncoating easiness. In our experiment, we tested with two types of AAV, one is empty and the other is packaged with full genome. We want to measure the elasticity and rupture forces to determine their relationship. This helps us understanding the extent how much genome a virus can capsulate. Another internal factor includes the property of the capsid protein[5]. It is possible by modifying the proteins (via mutation) we can change viruses stiffness [9]. It is also suspected that capsid mechanics are altered inside the host cell before genome release[11].
Methods
Atomic Force Microscopy (AFM) We use MFP3D from Asylum Research (AR). In the following description of AFM, I will exclusively imply MFP3D if not specified.

Determine Factors Affecting AAV Capsid Uncoating Using AFM Nano-indentation
7
Principle As one member of the family of Scan Force Microscopy (SPM), AFM utilize force interactions between atoms, specifically Van der Waals force and electrostatic force, as sensors to detect the changing of interaction distance between the probe and the atoms or molecules on the sample. AFM can’t distinguish them, it only measures what it ‘feels’ overall – a coupling of all forces. It is therefore not wise to determine
the height/tip-sample separation from force equations (e.g.
) due to this
mixture, but a scrutiny on the movement of cantilever simplifies the problem, as described later. Once the tip-sample separation distance is determined, AFM is able to give 3D topography.
Physics of AFM probing
Probe Structure To measure the interaction force at molecular level, the probe should be small and sensitive. The AFM probe (Ref. Figure 4) consists of a chip which can be inserted and hold tightly in the cantilever holder. On the front of the chip stretches out the cantilever arm, which is barely visible under naked eyes. The actual sensor, or the tip that is used to interact with the sample molecules, is hidden under the tip. The size, material and geometry of the cantilever and tip have great influence over the imaging capability in terms of its sensitivity, resolution and accuracy.
Figure 4
Probing Modes The interaction forces, once exerted on the AFM cantilever, satisfies Hooker’s Law assuming linear elasticity when in small bending (harmonic oscillator). How the interaction forces affect the movement of the cantilever divides AFM scanning into
Cantilever
Chip
Holder
Tip

Determine Factors Affecting AAV Capsid Uncoating Using AFM Nano-indentation
8
two modes – contact and non-contact mode. The former is used when the sample is tough so that large interaction force won’t damage it while giving higher resolution (and large signal to noise rate). The interaction forces ( ) cancel out the spring force at all times. The deflection signal will correlate linearly to the bending extent of the cantilever. Therefore, deflection signal is used in its feedback loop (discussed later). To avoid damage sample topography, we use non-contact mode, or dynamic mode, as the tip is electronic driven to oscillate above the sample at a given amplitude (enough to trigger height discrimination). The interaction force is therefore able to maintain minimum impact on soft biological sample like the viruses’ surface and yet affect the tip’s oscillation to an extent to obtain desired information. Because the tip is oscillating instead of direct bending, vibration amplitude is used in its feedback loop.
Cantilever Equations – AC mode Therefore, to preserve sample’s physical structure, we only use contact mode in force indentation because the tip is dabbed into the viral capsid. All imaging is done in non-contact mode. The dynamic mode is also called jumping mode or tapping mode. AR called it AC mode (AC stands for alternative current) as implication how the tip is electronically driven. In AC mode, the tip is driven by electronic oscillator at an adjustable frequency, adding the external force ( ) to its internal motion of inertial ( ), spring force ( ) and friction force ( ), as is shown in the following equation[12]
Equation 1
Where C is the friction coefficient (assuming friction is proportional to velocity), w is the drive frequency. The solution of the equation is
{
( ) ( )
√( )
(
)
Equation 2
Where B is the amplitude and is the phase,
being the
damping coefficient or decay coefficient, we will see its significance later. The second term is a transient solution, which will decay quickly and not affect the motion shortly afterwards. Also refer to Equation 8 for more discussion of the damping term.

Determine Factors Affecting AAV Capsid Uncoating Using AFM Nano-indentation
9
As we can see B, the amplitude of the vibration, reaches maximum (best signal to noise rate) at (ignore assuming small friction C), which is called the resonant frequency. Precise result shows the resonant frequency occurs at
√
Equation 3
Which is dependent of the damping coefficient and so the friction coefficient C. Therefore the resonant frequency will increase or decrease depending whether the interaction forces become stronger (repulsive) or weaker (attractive) as the tip approaches the surface. Typical amplitude vs. drive frequency graph (called frequency spectrum) is shown as below (Ref. Figure 5)
Figure 5
In reality, the frequency spectrum is obtained by doing Fourier Transform of the time vs. amplitude data. We will describe later how they are obtained. A key parameter to describe the shape of the frequency spectrum is the quality factor Q,
which is defined as
, where is the energy loss after one period of
vibration through dissipation. Substitute in the energy expression of a harmonic
oscillator, we obtain another form
. In Figure 5, at some special divisions
adjacent to the resonant frequency, we can define a sharpening factor
. From
Eq.2, we have ( )( ) , therefore Q=S indicating Q as a description of sharpness (signal to noise) of frequency spectrum. The change of resonant frequency also has an impact on phase . is calibrated (via
auto-tune or center phase in MFP3D software) in free oscillation to (
), so the
variation of will render the phase negative when repulsive and positive when attractive (see Eq.1). We also notice that Q becomes smaller (flatten resonant peak) when repulsive but larger (sharpen resonant peak) when attractive. In reality, both could occur during a scan. The intermittent occurrence of phase hopping will result in artifacts in the phase graph the AFM produces. Therefore we

Determine Factors Affecting AAV Capsid Uncoating Using AFM Nano-indentation
10
would like to manually force the phase in repulsive mode or attractive mode[13]. Before we describe the advantage and disadvantage of both modes, we first illustrate how to enforce scanning into the two distinct modes. Take repulsive mode as an example (which is also all we used in our study). To keep AFM in repulsive mode, we need to shift the drive frequency to the left of the resonant peak (Ref. Figure 6), i.e. the vertical gray bar (drive freq) relative to the blue resonant peak. The percentage of shifting should consider ensuring enough amplitude signals while enough to prevent phase hopping (assuming surface structure is not very cliffy to across the 90 degree phase border). We use 10% in our study. No phase hopping is observed (Ref. Figure 7, all phases are in repulsive mode, i.e. <90 degree). The difference when tuning in attractive mode, despite of shifting the drive frequency rightwards, is that attractive mode uses much smaller vibration forces (will be discussed shortly). This helps keep the phase in attractive mode because larger vibration will render the tip into the repulsive force region.
Figure 6
Figure 7
Another consideration is that the drive frequency is better at the linear region of the slope, which will give the sharpest contrast signal. This has been observed in imaging that the drive frequency can be very sensitive and several tens of Hz away from the optimal response area will render the image out of track for trace and retrace.

Determine Factors Affecting AAV Capsid Uncoating Using AFM Nano-indentation
11
Next we will illustrate the cons and pros of these two modes. We would use the van del Waals force (excluding electrostatic forces) as a simplification. Refer to Figure 8 for the potential curve (Lenard Jones Potential) for this force.
Figure 8
As can be seen, the watershed of attractive forces and repulsive forces is . After an
interaction distance smaller than the critical point, the force will transit from attractive to repulsive. Essentially, adding negative electrostatic forces could destroy the attractive Lenard Jones Potential, making attractive mode not feasible. This is one of the reasons why repulsive mode is used more often. The force, being the slope of the potential, shows us that the repulsive force increases/decreases much more steeply, which will render a more steep contrast for the phases changes as well. That’s why repulsive mode imaging will help us accentuate phase contrast (better quality phase images). But the disadvantage is that the repulsive force needs closer interaction distance than attractive force, also ‘tapping’ the sample more violently, which will likely damage soft biological samples. This is the situation when we prefer attractive modes. Another important discrimination between these two modes comes from height topography. The thing to remember is that in attractive mode, the tip turns around before it ever touches the surface. Imagine the feedback loop is maintaining amplitude of 10 nm (20 nm peak to peak). If you are in attractive mode, the center of the tip motion may be 12 nm above the surface. In repulsive mode, it would be 10 nm. This means that the surface imaged in attractive mode looks higher (to be confirmed). This means the topography in attractive mode has higher contrast than repulsive mode. The higher Q factor in attractive mode also contributes to this.
U
Distance
𝑅𝑔

Determine Factors Affecting AAV Capsid Uncoating Using AFM Nano-indentation
12
Scanning
Height Determination Now the physics background is ready, we continue to discuss how AFM extract distance information. As we discussed earlier, it’s hard to obtain tip-sample separation from solving equation mixtures. Another possible way to do so is to use the Hooker’s Law to determine the relative surface’s up and downs (instead of absolute tip-sample separation). However the cantilever cannot guarantee simple harmonic oscillator to large vertical variations. The solution [14] is to use a piezoelectric material to measure the distance with the help of a feedback system (Ref. Figure 9). This material is unique in that it elongates according to the voltage applying on it. It could be linear correlation, which is the region we are more comfortable to use. It could also be non-linear – a calibration process will diminish this by applying non-linear voltage.
Figure 9
In the new protocol, instead of determining the distance, we adjust the distance to maintain constant feedback signal (amplitude in AC and deflection in contact). This requires us to set up a constant feedback signal, the so-called set point voltage in MFP3D. With this set up, the piezo scanner move the tip vertically in order to keep pace of the surface feature once the feedback signal is out of pace with the set point. The magnitude of this out-of-pace, called error signal, is input in the feedback system and returns a feedback to adjust the piezo voltage to make it return in pace with the surface. Therefore, even though the tip is tuned to synchronize with the surface structure, the height information is already obtained by transforming from the piezo-voltage of the scanner.
Deflection & Feedback System Now we exam how AFM obtains the feedback signal - amplitude and deflection. MFP3D uses a laser deflection system to amplify the tiny variation of the tip’s bending or oscillating strength. (Ref. Figure 10)

Determine Factors Affecting AAV Capsid Uncoating Using AFM Nano-indentation
13
Figure 10
A laser is projected to the cantilever (presumably the upper front region, also the most sensitive region), and reflected to a position sensitive detector (PSD) made of photodiodes forming a quadrant detector, the differential signal of which will give the position information (vertical & lateral). The laser deflection signal obtained from the detector, changes corresponding to tiny bending of the AFM cantilever when enforced by interactions. Through conversion of the light signal to electric signal and amplification, we subject the differential signal (‘error’ signal) to computerized feedback system to achieve precise control to keep the AFM tip in constant deflection amplitude – a key step to measure height information. The feedback system controls the movement of the piezoelectric platform, which can translate in two dimensions horizontally; the movement in the vertical dimension is controlled by the cantilever holder which connects to the vertical piezo-scanner described earlier. Here is how feedback manages the control. The feedback output signal to the Z piezo is [14]
∫
∫ ∫
Where are proportional gain, integral gain and second integral gain,
respectively. Similarly, the summed up output is called gain. The most important term is the integral gain, which we’ll explain shortly. A scratch of error-response diagram is shown in Figure 11.

Determine Factors Affecting AAV Capsid Uncoating Using AFM Nano-indentation
14
Figure 11
As is seen in the figure, the feedback response is discrete (due to the Analog-Digital conversion (A-D) during scan). Because we can never apply abruptly varied voltage directly on the piezo, which will likely cause damage, we use a gentle and continuous feedback response – integral gain. Therefore the feedback/gain figure is simply an integration of the surface/error figure. As can be seen, after each time step (yellow bar), the output signal after the gain reaches the same as the error signal, thus cancelling the error signal and maintain the set point voltage (amplitude). The next step will continue from the previous step. The error signal wills always the difference between the previous step and the current step, instead of the difference between the current step and the ground level. The actual case of this feedback may not be that ideal to cancel out the error completely after each time step. It is usually only after several iterative feedbacks do the output and the error signal coincides. This causes defects in tracking, which makes the amplitude image often a “shaded” appearance (Ref. Figure 12) similar to a view of the sample lit from one side. It is suspected biased feedback response upon downstream curve and upstream curve on the cantilever causes such polarity. I suspect the amplitude trace image and retrace image will have difference polarities (difference shading directions). (To be confirmed)
Surface /Error
Feedback
/Gain

Determine Factors Affecting AAV Capsid Uncoating Using AFM Nano-indentation
15
Figure 12
One study gives another explanation for the shaded feature in amplitude graph [8], also see Figure 13. The Z signal of the amplitude graph, instead of amplitude, is
actually the derivative of the horizontal line scans, i.e.
, where x is the
scanning direction. Therefore when the tip is scanning from left to right over the virus, it first goes up with a positive amplitude change and then goes down with a negative amplitude change. This will generate Z in different sign, resulting in the shaded feature. They called it in situ error mode AFM.
Figure 13
Another issue with the integral gain is the ringing effect. (Ref. Figure 14) As can be seen in the following sample of cilia, there are repetitive noise similar to interference. This ringing effect is caused by larger-than-needed integral gain which triggers the feedback system so violently that the system is over responded to the error signal, exceeding what is actually needed for the cantilever to return to its constant amplitude. This then will cause another remedy for the extra error caused by the over responded feedback signal. Such a repetitive rectify signal contributes to the ringing effect.

Determine Factors Affecting AAV Capsid Uncoating Using AFM Nano-indentation
16
Figure 14
Movement MFP3D scanner consists of two piezoelectric components, with the horizontal movement component in the platform that holds the sample, and the vertical movement component in the cantilever holder (AFM head). The scanner traces and retraces for every single scan line as a check for meaningful signals, for if they keep in pace with one another (in the same phase), it means the tip is experiencing similar forces in the cycle. Otherwise, heterogeneous effect (e.g. the tip is stained by dirt or isotropic air/fluid flow) is likely to causing great difference in the tracing and retracing curves. A significant observation is that the trace and retrace curve, albeit in pace, presents differentiated phase difference in different scanning sizes, a phenomenon called hysteresis. This is due to the nonlinearity of the scanner movement towards linear voltage control. Although this is solved by applying a nonlinear voltage to achieve simultaneity, the piezo material changes its property within time; re-calibration is needed after long time usages. The calibration is achieved by another detector that monitors and concerts the voltage vs. movement profile. The normal scan without real-time calibration is called open loop, while the opposite is called closed loop. Typically a closed loop scan will improve signal tracing and remove artifacts. Even though, the piezo elongation will only be calibrated to a linear response in a certain region of elongation distance. It will become significantly non-linear outside of this region, leaving the data of that region unreliable. Therefore, it is advised to use the piezo height response (called piezozsens) in a restricted voltage area (50~90V) where the response is linear, which means the elongation is neither too short nor too long, otherwise it will not reflecting the actual height. It is advised to use the Z sensor data, which comes from a real time detector (the same one which dictates the calibration), to account for the height outside of the piezozsens region. While the Z sensor is not as precise as the piezozsens, it provides more accurate data for longer or shorter working distance.

Determine Factors Affecting AAV Capsid Uncoating Using AFM Nano-indentation
17
Tune & Engage Before scanning, the tip has to be tuned to find its resonant frequency, which is apparently the highest peak in the frequency spectrum. After that, the tip has to be positioned in the right distance to the sample – process called engage. The distance is set by user indirectly through set point voltage. There is a false engagement when applying gentle engage procedure (smaller set point force), when the set point is reached after the lever is damped by the pressed medium (air or water) between the sample and the cantilever. This is still not within the sample-tip interaction distance. Refer to Figure 15. The dampening effect adds another repulsion barrier in our potential graph, and this additional barrier caused the soft-engage. We have to still increase the interaction force (lower set point voltage or increase the drive amplitude) that surpass the aforementioned dampening. The criteria to judge ‘hard engage’ (Figure 15) is that the Z sensor doesn’t move/stops at a point, which means the height of the cantilever is engaged at a position. This is not exactly true, because even when the tip is hard engaged, increasing the set point force (level up the yellow dashed line in Figure 15) will still decrease the distance (Z sensor height) a little in the left repulsive peak. But as far as the magnitude of the increasing of the force is not that large, the height is roughly constant. But this is completely different to the right repulsive peak (dampening peak). A small increase in set point force will render a large distance variation (soft-drifting distance). This is where the term soft-engage and hard-engage come from. A contradictory point here is what the Z sensor meter shows is the opposite direction. Increasing set point force doesn’t lower the tip, but lift it (increase in Z voltage until hard engagement). It is because in AC mode the cantilever is vibrating more violently as the set point force increases, however the amplitude monitored by QD is compromised by a larger interaction forces due to the larger amplitude, saying, the amplitude output is less than expected (set point). In order to achieve the set point, the cantilever has to be moved further apart from the sample so that dampening lessens and amplitude increases to set point. This is why the contradictory happens – the forces increases, the amplitude increases, the interaction distance deceases (tapping distance), but the height (center of cantilever) is going up.

Determine Factors Affecting AAV Capsid Uncoating Using AFM Nano-indentation
18
Figure 15
In liquid imaging, if you observe much shade in the CCD camera, which means not hard contact, but the Z voltage hard engaged (by adjusting set point and drive amp), the retract curve seems sinuous. This shows false engagement and the tip is wandering in water above the surface. Solution: Try to lower/decrease the shade by adjusting the Z wheel, or try different locations.
Imaging
Cantilevers Choices When using AFM in imaging, cantilever choice is a determinant factor. A higher Q factor often comes better contrast image (higher real resolution), but it is also too
stiff (
) to be sensitive enough to measure high resolution forces. A
less stiff cantilever is easily bent and capable of amplifying tiny forces, but using it to image will be very blurry. Since force and imaging must be done using the same cantilever in MFP3D, we’ll have to make a compromise in balance between high quality image and sensitive force measurement (Force measurement is described in Nano-indentation). In practice, we employ multiple cantilevers, starting from the toughest one and observe the force data. If the force curve is not sensitive, gradually decrease its stiffness until it is producing structures you are looking for. It takes multiple trials to ascertain the right cantilevers to use for imaging and indentation. It becomes more difficult to tune the parameters in liquid. While imaging in air, it is not recommended to apply soft levers since there will be significant retract well. See Figure 16 - blue curve that dabbed deeply beneath the background. This is caused by adhesion forces due to capillary condensation between the tip and the surface (water always exists in ambient condition). The soft levers will be more easily dragged by the adhesion forces than the tougher levers,
Soft-drifting distance
Hard-engage Soft-engage
Set point

Determine Factors Affecting AAV Capsid Uncoating Using AFM Nano-indentation
19
even snapped in the sample. However, this won’t happen once the cantilever is immersed in liquid environment, making using of soft levers feasible.
Figure 16
Scan Speed Slow scan speed can help the feedback loop response to error signal better, improving tracking significantly. Scan speed is adjustable, but to get faithful images, it is recommended that the cantilever is oscillating at least in a full cycle in one pixel size of the image (a full oscillation at the resolution of the image). However, the slower scanning speed may also cause larger drifting effect as the AFM image is continuous drifting in thermal condition (drifting locations). Therefore, faster scanning speed will lose statistical stability and even results in artifacts when imaging less than one cycle oscillation per pixel, slower scanning size will cause drifts or increased adhesion effect. A general equation to determine the least scanning speed is [14]
Resonance Frequency * Q > Scan Points * Scan Rate The right hand side determines the amounts of data in the designated scanning
speed and resolution, the left hand side can be written as
,
where we have used quantum uncertainty principles - , is the frequency representation of the energy E. Therefore the scanning minimum requirement for accuracy is guaranteed as far as the scanning speed is such small that the required scanning data (Scan Points * Scan Rate) is smaller than the physically feasible scanning data (Resonance Frequency * Q or ). Higher the resonant frequency, higher quality factor and lower scan size and rate will usually accompanies better tracking and imaging quality. As is seen from the inequality, the imaging quality improves as scan size decreases (i.e. scan points decrease) because the difference of the inequality widens. As imaging in liquid, the slow scan speed is preferred, partly due to the reason to prevent damaging to the soft sample and partly due to the reduction of thermal fluctuations by surrounding waters.

Determine Factors Affecting AAV Capsid Uncoating Using AFM Nano-indentation
20
Determine Stiffness/Deformation Using Nano-indentation
Spring Model Since Nano-indentation is done in contact mode, it can be simplified as a simple model as one spring (the AFM cantilever) pressures the other spring (the viral capsid) [5, 9]. Ref Figure 17 In a straightforward manner, the two springs are in tandem. The force equation is (Newton’s third law)
{
Equation 4
Where is the effective force measured by the AFM from deflection data. As we
know that the deflection data is a coupling of the cantilever elasticity modulus ( ) and the sample elasticity modulus ( ), therefore we can measure the sample’s stiffness if we measured and . The definition of is seen in Figure 18.
Figure 18
𝑥
𝑥
𝑥 𝑥 𝑥
𝑘
𝑘
Figure 17

Determine Factors Affecting AAV Capsid Uncoating Using AFM Nano-indentation
21
As can be seen in the figure, initially (all blue dash line) the cantilever touches the sample, but no bending. After force indentation, the cantilever bends down at a length of (measured as deflection signal), while the sample also deforms a little and shrinks at a length of . The total distance of the final point from the intial consition is measured by Z sensor or piezo Z sensor, resulting in lower. Solving the equation, we have
Equation 5
To measure , from Equation 5, if is infinitely large, then . That
means what we measure from AFM will directly equals to the stiffness of the cantilever. This is done when we enforcing the cantilever on an infinite hard surface like glass or mica. Cautions have to be with these two materials because they are both notorious for carrying charges, which will likely causing non-linearity. The best practice is to neutralize them before taking force indentation. The next step is to take force curves on samples. In order to obtain most sensitive force signals, the effective spring constant has to be large enough (to be debated) that tiny bending of the cantilever will be reflected as large increase of forces (i.e. more sensitive). Therefore a simple mathematics shows
√
√
Equation 6
Where equality comes from . This shows in order to get maximum sensitivity on force curves (e.g. pico-Newton resolution for our experiment to show viral capsid deformation), the elasticity of the tip should be approximate to that of the sample. This restricts the choices of cantilevers to neither too stiff nor too sloppy. However, we don’t have preliminary data of the region of our viral capsid pressures are. It takes multiple trials to find the optimum cantilever that will give us sensitive force data. This again has to be balanced between a decent image and a meaningful force indentation. Despite the simple spring model which works well on thin shell virus with linear mechanic response, Hertz model is widely used in thick shell virus with non-linear mechanic response [3, 9]. For our study, simple spring model is the more suitable one to use. Also refer to Figure 3 for different mechanic response.

Determine Factors Affecting AAV Capsid Uncoating Using AFM Nano-indentation
22
Spring Constant Determination Spring constant of the cantilever ( ) is determined by doing a thermal tune. In the thermal tune, the power spectrum of the cantilever doing Brownian motion is collected. This is described by the damping equation – (See also Equation 1) [12]
Equation 7
The friction coefficient comes from collision with air molecules or fluid molecules. Thus this equation applies both in air and in liquid. The solution of the equation is
( ) ( ) Equation 8
Where √ . The power spectrum is calculated by performing a Fourier
transform on the displacement signal, i.e. converting the amplitude signal from time domain to frequency domain.
( ( )) Equation 9
Utilizing the solution of the damping equation of a simple harmonic oscillator (SHO), from the power spectrum of the thermal tune, we can fit Equation 9 and obtain all the parameters, such as resonant frequency and damping coefficient , and
ultimately Q factor (
) and spring constant (
) as well.
Alternatively, if mean square displacement (MSD) is also collected, we could use equi-partition theorem to obtain the spring constant from the time domain solution. For example, in a simplified model, using equi-partition theorem, we have
( )
( )
Equation 10
This is how we obtain the spring constant from temperature T and mean square displacement. By incorporating damping effects, we have
( )
(
)
Equation 11
Fitting Equation 11 to the MSD signal, we’ll obtain spring constant k accordingly.
Force Curve Force indentation is done in contact mode, i.e. deflection signal is used. Refer to Figure 18. A deflection (nm) vs. Z sensor (nm) is plotted. This will correlate the deflection and the Z vertical distance (indenting depth). A linear fit (y=bx+a) is done,
a is called deflection signal, and the slope
can be converted to INVOLS
(Invert OLS, OLS definition see Figure 19 [13]) after the y axis is converted to deflection voltage.

Determine Factors Affecting AAV Capsid Uncoating Using AFM Nano-indentation
23
Figure 19
Therefore the INVOLS gives us the correlation between Z displacement and the deflection voltage. Since the spring constant of the cantilever has been calibrated, we can convert the deflection distance to force. At this point, the y axis of Figure 19 is replaced by force (see Figure 20), which is measured by deflection signal, the same force that appears in Equation 4. Because this force is also the same force experienced by the sample
and cantilever as a whole, the slope of the Force curve will be
. In Figure 20,
if yellow line corresponds to , it means the sample has the same stiffness
as the hard surface that we used to measure the spring constant (see Equation 5). Similarly, the red line and the green line means sample harder than the surface or more compliable than the surface. Typically, we will observe the green line for soft samples because they are all supposedly softer than the mica surface.
Figure 20
Eventually, by measuring the force curves after spring constant is dertermined, we can measure the effective spring constant according to the two spring
model at an ease. By solving Equation 5, we’ll be able to determine the stiffness of
Z sensor/ [Length]
Force

Determine Factors Affecting AAV Capsid Uncoating Using AFM Nano-indentation
24
the virus capsid (
). The force curve shows how the cantilever feels at the
compressing interface. It is therefore possible to observe viral capsid deformation by a sudden drop of the force curve (Figure 21). We can see clearly in the picture that the effective stiffness (red curve) changes suddenly (a turning point) when indenting deeper into the sample.
Figure 21
Another feature in the force curve is hysteresis phenomenon of the tracing and retracing curves. In Figure 21, we have the red tract curve (extension, approaching surface) preceding the blue retrace curve (retention, moving away from surface). This is caused by the adhesion forces experienced by the cantilever from the surface water. This additional force will pull the retreating tip, adding more bending to the cantilever, thus producing more force per unit length. It is suspected that the stiffness of the cantilever will determine how it will react to this retreating force (Figure 22, Figure 23, to be confirmed). The deep blue grove is a proof of the large adhesion force. The negative sign of the force (part of the blue curve below the ground level) shows the cantilever, instead of bending upwards (via. repulsion), is bending downwards due to adhesion (compare Figure 22 and Figure 18). The different bending directions will change sign of , leading to a negative contribution of total x and eventually negative force.
Figure 22
In some situations, we observe a different scenario that the retrace curve precedes the trace curve (Figure 23). This usually happens to sloppy cantilevers force-indenting in air. In liquid, all adhesion grooves disappears because the capillary interaction is not existent.

Determine Factors Affecting AAV Capsid Uncoating Using AFM Nano-indentation
25
Figure 23
A successful force curve which represents the expected physics of viral particle is seen in Figure 24 [5]. The black line corresponds to infinite hard surface, the red line being the trace and blue line the retrace force curve. We see that the force indentation on the capsid has lower slope than on hard surface, indicating elasticity. However after indenting deeper inside and after several rupture events, the slope of the red curve increases and eventually to the strength of the hard surface, indicating that the tip has penetrated the viral particle and is touching the surface. Another interesting fact is that with smaller indentation, the tip should be totally reversible (minimum hysteresis in trace and retrace, and can be repeated with same result), indicating reversible deformation. But larger indentation will permanently destroy such reversibility[7].
Figure 24
Sample Preparation
Polylysine Treatment Cut a piece of parafilm (a kind of hydrophobic film) and put it into a petri dish. Place drops of water around the parafilm to make the closed petri dish moisture. In air: Peel a piece of mica and tape it onto a glass slide or a cover slip. If cover slip is used, it will eventually be glued to the glass slide or use the water sucking method to build a vacuum beneath the slid (air pressure gluing) before imaging. The cover slip is easier to rinse in water when clamped by tweezers, but the defect is that it is less stable (drifting) when imaging. After the mica is adhered, drop 10 polylysine (used to adhere the virus) onto the mica.
Determine Factors Affecting AAV Capsid Uncoating Using AFM Nano-indentation
26
In liquid: The mica is directly deposited with polylysine without being glued. The mica is cut in asymmetric shape for easily recognition of its treated face and untreated face. Place treated mica (face up) onto the parafilm in the petri dish and subject them to incubation at 37 for four to five hours. After that, wash them with deionized water three times. Dump the mica into water directly if the mica is attached to the cover slip or nothing, or rinsed it with water nozzle if it is attached to the glass slide. Dry gentle with Kimwipes and blow air over it. At this point, the initial treatment of mica is finished. In another article [2], silanized glass is used instead of mica. Hydrophobic glass is used instead in [5, 9, 10]. M.Knex, et al. [8] takes a deep scrutiny on the surface effects on virus structure stability. They have used hydrophobic (van del Waals), weak hydrophilic (hydrogen bond), and covalent bonding. And the result suggests strong hydrophilic interaction may render the virus into deformation, which certainly is not a good sign to imaging. In our study, polylysine is an effective adhesive which covalently binds to the virus. The concentration of polylysine deposited may have a big impact on our viruses’ structure stability, which we haven’t investigated and may compromise our result. Conversely, Liashkovich et al. has success with polylysine coated mica but not glass[11].
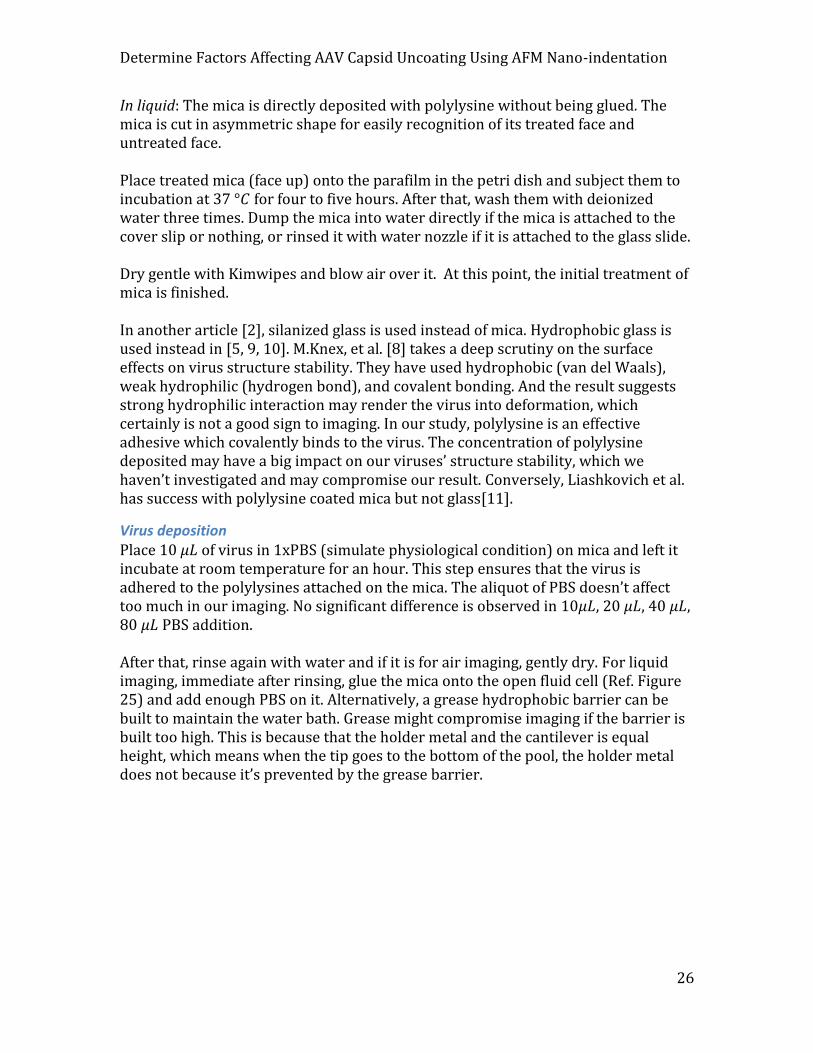
Virus deposition Place 10 of virus in 1xPBS (simulate physiological condition) on mica and left it incubate at room temperature for an hour. This step ensures that the virus is adhered to the polylysines attached on the mica. The aliquot of PBS doesn’t affect too much in our imaging. No significant difference is observed in 10 , 20 , 40 , 80 PBS addition. After that, rinse again with water and if it is for air imaging, gently dry. For liquid imaging, immediate after rinsing, glue the mica onto the open fluid cell (Ref. Figure 25) and add enough PBS on it. Alternatively, a grease hydrophobic barrier can be built to maintain the water bath. Grease might compromise imaging if the barrier is built too high. This is because that the holder metal and the cantilever is equal height, which means when the tip goes to the bottom of the pool, the holder metal does not because it’s prevented by the grease barrier.

Determine Factors Affecting AAV Capsid Uncoating Using AFM Nano-indentation
27
Figure 25
Upper left: Open fluid cell – the blue side is the hydrophobic film Down right: Hydrophobic barrier made by grease (orange); Mica (grey) is placed inside the hydrophobic ring
Results
In Air
Imaging I try to use a model picture online to refine my imaging quality. We could get good images overall, but not quite the same quality as the model ones. Click here to see the result. As can be seen from the result, that our virus sample is not the same size as the online model, even our own result will differ in size somewhat. The cause of the incommensurate size problem is caused by the different geometry of the tips used. A sharp tip will help refine a better precision contour of the virus, giving more accurate size data. A blunt tip will have a more rough sensory of the contour, thus compromising horizontal resolution (the virus seemly oversized). Refer to Figure 26. The red and blue dashed curve is what the two different tips measure, apparently not the same size in x,y direction. However, the vertical direction doesn’t have any involvement with the geometry of the tip, so the heigth determination is quite consistent. We have measured consistent height (~10-12nm) for AAV virus using different tips. Refer to Figure 27.

Determine Factors Affecting AAV Capsid Uncoating Using AFM Nano-indentation
28
Figure 26
Figure 27
Empirical imaging tuning shows that for spring constant 0.5-4n/m, integral gain ~10 gives image without ringing. For spring constant 40N/m, intergral ~6-7 seems best for smaller region (5 ), ~8 best for larger region (20 ).
Force Indentation Force measurement is done on the sample in air. Preliminary result sees here. Despite the known issue of imaging drifting (described later), I have taken many force curves on the same spot (i.e. the same virus center). It seems after multiple Nano-indentations, the particle is already crapped and the FZ just likes solid glass, even though the first trial on the particle will gives a lower FZ curve, indicating smaller stiffness for the capsid. Experiments with large spring constant cantilever (40N/M) cannot show the turning point (Figure 28). Less sensitive, suppose.

Determine Factors Affecting AAV Capsid Uncoating Using AFM Nano-indentation
29
Figure 28
Overall, our result tends to suggest that the viruses in air are already deformed prior to force indentation. We have seen in some images the virus are not round as it supposed to be, the irregular shape of the viruses of those images might be due to the large loading forces during scanning [1, 9], which will seriously compromise height accuracy.
In Liquid I hadn’t got enough time to do a systematic study in liquid. A short preliminary result is here. Overall, liquid imaging is harder to tune than in-air imaging, the compromise for force measurement and image quality is discussed in Cantilever Choices. However, we have much more events than in-air force indentation that show turning point in force graph, but overall occurrence of such events are still very low in fraction of all our indentation data. Even with only those seemly meaningful deformation data considered, it’s hard to justify that they are the real deformation of the viral capsid, because measurement of the turning-point force are at the range of nNs instead of pNs in most literature. However, since we don’t have much time working on improving results, we have proposed detail plans that might lead to more meaningful result. (See discussion) Outrage in image is observed. See Figure 29, the distinct center area is an outrage. This is due to the fact that the sample is not deposited onto flat mica. The roughness of the mica caused the rupture in image. Because the AFM is set to be scanning optimally at a certain height (it has far less depth of focus compared to SEM), it will lose focus immediately if it experience a rupture and is scanning a surface at a different height. Actually, the depth of focus for AFM is closely related to whether it’s engaged or not. It happens that it loses engage when it comes out of focus.

Determine Factors Affecting AAV Capsid Uncoating Using AFM Nano-indentation
30
Figure 29
Discussion Although our result didn’t show any promising sign at the moment, I believe we are moving in the right direction. The biggest problems right now, as is stated in analysis of the results, are to obtain more stable and qualified image in liquid, and to do a systematic research on in-fluid force indentation. It is foreseeable that these problems can be solved if more experienced operations are outlined. First, for the image quality in liquid, we haven’t obtained image qualities we have expected yet. In the given example that demonstrates MFP3D’s in-fluid capabilities in the manual, the author shows gorgeous images of Rhodopsin protein that is structurally visible in true Nano resolutions. Our protocol of sample preparation and imaging skills can certainly be refined to obtain better results. We have large range selections of cantilevers in our lab, which is a plus to test their capabilities in liquid on a one by one case. We still need more experiment to sort out which one gives us the balanced performance in imaging and force measurement. Second, the drifting of the tip during force measurement – see known issues. This issue is can be solved by a more solid gluing method of the mica on the glass. Eventually we can get non-drifting sample and good imaging with sensitive force measurement. However the next biggest issue is - will we be able to obtain a similar rupture force curve as obtained in other viruses? We have obtain several ‘turning point’ events in our preliminary result, but that very unimpressive force dropping does not match with those reported in the literature. The number of such turning events is much less, even rare, than our expectations, which we supposedly all viruses should undergoing the same deformation at an average distance on a statistically basis. From our result, we can conclude that we weren’t able to observe substantial rupture events yet. However, we do observe different mechanic response from viruses compare to that from hard surface, and these response are not repeatable in an intense indentation. This seems to suggest that our force measurement resolution is not enough to unravel the real dropping of forces. This conundrum is partly due to the cantilever we choose, and the other half due to an inappropriate sample preparation or deposition which may already deforms the virus prior to force indentation. Indentation speed may also have a role. A detail study should be carried out in order to know which causes hide the expected rupture event.

Determine Factors Affecting AAV Capsid Uncoating Using AFM Nano-indentation
31
It is only after we are skilled in obtain faithful images and force-indentation data shall we begin unraveling various factors that matters the physical property of viral capsid uncoating. Even though a lot of factors have been checked in the literature in past studies on various viruses, AAV is a completely new virus in Nano-indentation experiment, which makes it challenging and intriguing to use this technique to understand more deeply into its physical properties. The different factors we would like to unravel in described in the introduction. The first experiment we can do is to compare the stiffness of empty virus and full DNA virus. This does not need force rupture, which we haven’t resolved yet. There is no problem to compare the stiffness of empty capsid and full virion once we have collected enough force data. We can even do a correlation experiment by packaging into the capsid with different length of genome. The second experiment we can do is to subject the liquid environment into different pH scenarios, or though interactions with membrane proteins, or other chemicals that may affect the stability of the virus. The third experiment we can do is to alter/mutate the viral capsid proteins by specific computational design. This is our ultimate goal to improve gene transfer effectiveness.
Known Issues
Imaging Drifting After using adhesion methods such as nail polish, glass glue, double tape and vacuum pressure, the forces (measured by manually pushing) are
Glass optical glue<nail polish<double tape<vacuum pressure Experiments have mixed result on the stability (imaging drifting) of the sample. Using the vacuum pressure method, we can obtain a drifting of 20nm per scan, which is neither small nor large. Stability proved to be related to sample preparation. Graphite sample seems not moving at all. Tape the sample will solve the issue partly. But not always, still slightly going upward when imaging. This drifting has significant impact on our force measurement. Because supposedly when we aim at the center of the virus and force the tip into it, the constant drifting will render our target out of focus and our measurement will actually be doing on the glass surface instead of on the virus. It is possible to programing the AFM to indent non-specifically, i.e. indent the whole area – force mapping and measure statistically meaningful indentation (specific event) and leave out those non-specific event. This will resolve the ‘miss the target’ issue. But since the trend of the drifting is directional and linear, we can still hit the target by incorporating into such effects.

Determine Factors Affecting AAV Capsid Uncoating Using AFM Nano-indentation
32
I’m still working on a solution to adhere the mica more effectively onto the glass surface so that we could do the force indentation more faithfully. But currently, the imaging still has significant drift that compromises our force study. For example, Liashkovich et al. only used indentation point at the very top of the microspheres for accurate material response [11].
Deflection Drifting Constantly drifting of deflection is observed for small spring constant cantilever. The speed of drifting can be controlled by adjusting the two levels on the head. But the much stiffer tips didn't see any drifting at all, with exactly the same configuration of the AFM head. I changed another small spring constant tip, which seems not changing at all initially for a long time, and a long time after, it changes to -0.14! So whether it decrease or increase seems randomly, sometimes both, sometimes on either side. Many noise-like issues may cause deflection drifting. It is recommended to close the hood of AFM, leave it there drifting for twenty minutes, and it will be usually stable around a small range of variation. Deflection drifting is dangerous for contact mode (use deflection signal) because you will never get engaged if it is drifting!
‘White’ Tip The abnormal color of the cantilever is a direct visualization of its bending status. Typically free in air, the cantilever should be in its original color – black under CCD. However, if abnormal colors occur, like golden or white, it means either the cantilever is not positioned perfectly in the cantilever holder, causing bending, or the cantilever itself is damaged and changed its geometry already. It doesn’t take several trials to figure out the exact problem, but sometimes the abnormal color simply comes from the illumination light. It is still usable though, with minor deviation from its normal status, but the signal adjustment can be very tricky. For example, the cantilever tip may become brown, which will leave the deflection unchangeable (to its maximum but still not zero value). If it's not complete golden, try to use the center part instead of the forefront part. Interestingly, the color of the tip can be a flag to show the flatness of the sample. Once engaged, saying the tip is very close to the sample, if we move the tip around our scanning region, the color will tells us whether there is an especially bumping region which tends to bend the cantilever significantly. It's good strategy to check whether surface is bumpy or not by moving the cantilever around the imaging area to see whether the tip become golden or not, if it does then this area is NO GOOD for imaging - try another place instead.

Determine Factors Affecting AAV Capsid Uncoating Using AFM Nano-indentation
33
Acknowledgement I thank Dr. Michael Falvo for instructions on AFM and discussions, CISMM (Computer Integrated Systems for Microscopy and Manipulation) group for their technique support. I thank CHANL (Chapel Hill Analytical and Nanofabrication Laboratory) for providing AR-MFP3D, Dr. Amar Kumbhar, Dr. Carrie Donley and Robert Judith for imaging instructions. I thank Dr. Eric Horowitz for instructions on sample preparation, Shen for introduction to AAV research topics. Mostly, I’d like to thank Dr. Aravind Asokan to offer me the opportunity for this lab rotation.
Bibliography 1. Baclayon, M., G.J.L. Wuite, and W.H. Roos, Imaging and manipulation of single
viruses by atomic force microscopy. Soft Matter, 2010. 6(21): p. 5273-5285. 2. Smith, A.E. and A. Helenius, How viruses enter animal cells. Science, 2004.
304(5668): p. 237-242. 3. Carrasco, C., et al., DNA-mediated anisotropic mechanical reinforcement of a
virus. Proc Natl Acad Sci U S A, 2006. 103(37): p. 13706-11. 4. Arisaka, F. Virus Capsid Model. 5. Roos, W.H. and G.L. Wuite, Nanoindentation Studies Reveal Material
Properties of Viruses. Advanced Materials, 2009. 21(10-11): p. 1187-1192. 6. Buenemann, M. and P. Lenz, Mechanical limits of viral capsids. Proc Natl Acad
Sci U S A, 2007. 104(24): p. 9925-30. 7. Klug, W.S., et al., Failure of viral shells. Physical Review Letters, 2006. 97(22). 8. Knez, M., et al., Binding the tobacco mosaic virus to inorganic surfaces.
Langmuir, 2004. 20(2): p. 441-7. 9. Michel, J.P., et al., Nanoindentation studies of full and empty viral capsids and
the effects of capsid protein mutations on elasticity and strength. Proc Natl Acad Sci U S A, 2006. 103(16): p. 6184-9.
10. Ivanovska, I., et al., Internal DNA pressure modifies stability of WT phage. Proc Natl Acad Sci U S A, 2007. 104(23): p. 9603-8.
11. Liashkovich, I., et al., Exceptional mechanical and structural stability of HSV-1 unveiled with fluid atomic force microscopy. J Cell Sci, 2008. 121(Pt 14): p. 2287-92.
12. Zheng, Y., Mechanics, 2002, High Education Press. p. 588. 13. Fuierer, R., MFP3D Procedural Operation 'Manualette', 2009. 14. Research, A., MFP3D Installation and Operation Manual, 2008.