db br110 buegelfalte orient red expert-line
TRANSCRIPT
DB BR110 Buegelfalte Orient Red
Expert-Line
Compatible with Train Simulator 2017
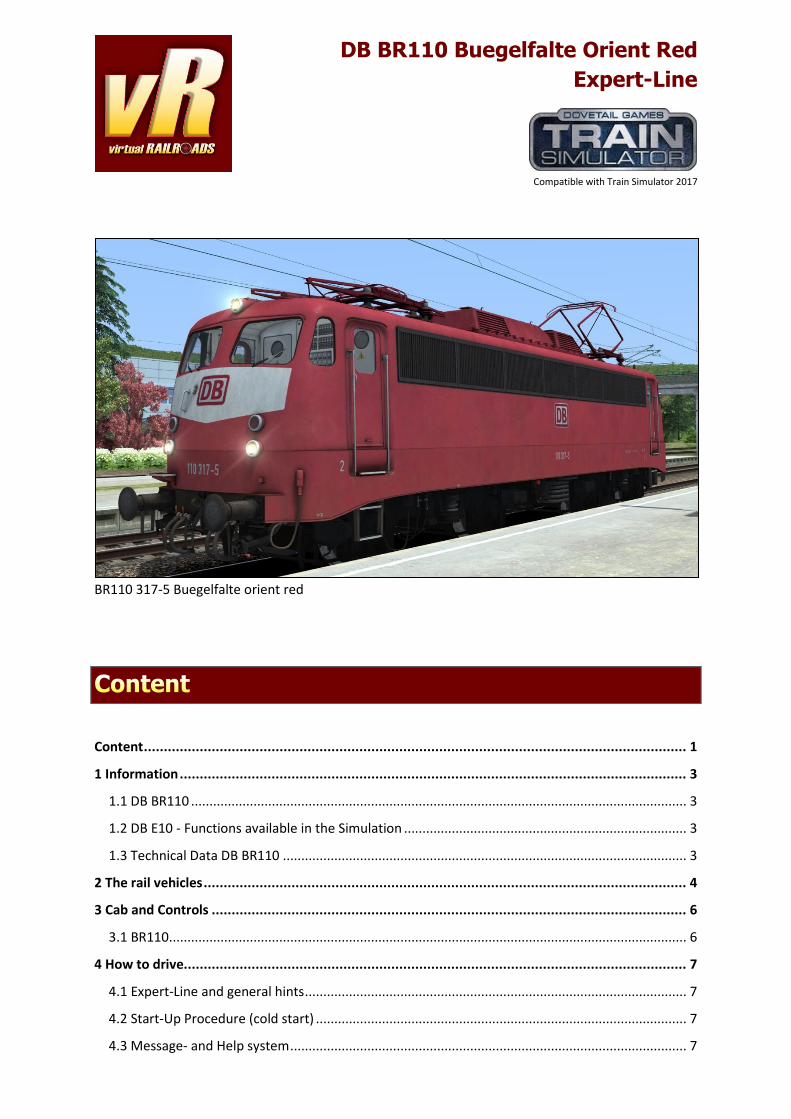
BR110 317-5 Buegelfalte orient red
Content ........................................................................................................................................ 1
1 Information ............................................................................................................................... 3
1.1 DB BR110 ....................................................................................................................................... 3
1.2 DB E10 - Functions available in the Simulation ............................................................................. 3
1.3 Technical Data DB BR110 .............................................................................................................. 3
2 The rail vehicles ......................................................................................................................... 4
3 Cab and Controls ....................................................................................................................... 6
3.1 BR110 ............................................................................................................................................. 6
4 How to drive.............................................................................................................................. 7
4.1 Expert-Line and general hints ........................................................................................................ 7
4.2 Start-Up Procedure (cold start) ..................................................................................................... 7
4.3 Message- and Help system ............................................................................................................ 7

4.4 Battery ........................................................................................................................................... 7
4.5 Pantograph and Main Switch ........................................................................................................ 7
4.6 Regulator ....................................................................................................................................... 8
4.7 Brakes ............................................................................................................................................ 8
The locomotive has three brake systems. ........................................................................................... 8
4.8 FML (Traction motor blowers) ....................................................................................................... 9
5 SiFa and PZB ............................................................................................................................ 10
5.1 SiFa (vigilance alarm) ................................................................................................................... 10
5.2 PZB 90 (train protection) ............................................................................................................. 10
Overview of PZB 90 .................................................................................................................... 10
6 Additional Systems .................................................................................................................. 13
6.1 Protective section ........................................................................................................................ 13
6.2 Door control ................................................................................................................................ 13
6.3 Destination board control ........................................................................................................... 13
6.4 Faults / Observation .................................................................................................................... 13
6.5 AI Pantograph selection .............................................................................................................. 14
7 Key Layout .............................................................................................................................. 15
8 Hints for scenario creators ....................................................................................................... 16
9 Credits .................................................................................................................................... 16

1.1 DB BR110
The Class E10 is a four-axle alternating current locomotive and a part of the
“Einheitslokomotiven” series that was designed to use standardized parts and techniques to
produce a range of identical Locomotives adapted for specific duties. The E10 itself was
originally created for express passenger services. After some decades, with the introduction
of more modern designs it was re-deployed to commuter work. There were over 400
E10/110 built from 1956 to 1968 following on from the 1952 prototypes.
Equipped with KWS, a push pull system, the BR110 Buegelfalte was mainly used for
commuter and regional services.
1.2 DB E10 - Functions available in the Simulation
The most important functions are summarised below (Not all functions are listed)
✓ Prototypical driving behaviour ✓ Tap-changer automatic notch control ✓ Monitoring function for important values
like voltage, traction motor temperature ✓ Manually selection of the pantograph ✓ Delayed and smooth regulated e-brake ✓ Brake system with overcharging of the main
air pipe pressure ✓ High braking for the locomotive brakes ✓ Real sounds optimized for EFX ✓ Realistic PZB90 ✓ Time-Time-Sifa
✓ vR EBuLa system ✓ Switchable instrument lights ✓ Desk light and cab light ✓ Separately switch-able wipers
with speed control ✓ Standard TS2017 Effects ✓ TS2017 Camera positions ✓ vR ZZA compatible
1.3 Technical Data DB BR110
Manufacturer: Henschel, Krauss-Maffei, Krupp, AEG, BBC, Siemens-Schuckertwerke
Build Dates: 1956 - 1969
Type: Electric Wheel arrangement: Bo-Bo
Length / buffer: 16.49 m Mass: 85 t
perm. Output: 3700 kW Maximum speed: 140 km/h

DB BR110 317-5
DB BR110 343-1
DB BR110 414-0

DB BR110 510-5
DB BR110 cabine

3.1 BR110

4.1 Expert-Line and general hints
We are proud to present to you a new package from our Expert-Line product line-up. As
usual the delivered vehicles are oriented to more experienced train simulator users but not
that complicated so all users can handle them after a short time. Please read this manual for
all needed information how to drive them.
4.2 Start-Up Procedure (cold start)
It is not necessary to start the locomotive for driving. They already started up upon scenario
start. But if you need to start them cold, we implemented a cold start feature into the
scripts. To force the cold start just type ‘cold’ appended to the vehicles numbering in the
editors flyout field.
Notice: We can’t give a guarantee that this will work every time because TS is not suitable
for such things.
4.3 Message- and Help system
Messages:
The locomotive has a special message and help system to give you information about
events and errors which occur. You can adjust the systems level with <Shift+->
The system is switched on by default and has three levels: 1/only errors, 2/errors and
further messages, 3/all messages and debug information for log-mate.
Messages which are necessary can´t be switched off.
PZB help system:
The locomotive has a special help system for the PZB system. If you get an emergency brake
due to incorrect operation you will get additional information in a message box. Switch on or
off the help system with <Shift+-)
4.4 Battery
Battery voltage:
Before you can start driving with the locomotive the battery need to be switched on.
You do this by pressing <Shift+B>. The battery can only be switched on or off when the
locomotive is not moving and the reverser is set to 0 (zero). The battery is always fully
charged and active upon scenario start (except on a cold start).
4.5 Pantograph and Main Switch
Pantograph pre-selection:
Before raising a pantograph you need to choose one or two. Press <Shift+P> to cycle
through the four available options both down, Pantograph 1, Pantograph 2 and raise both.
Please look at the messages especially when you choose both pantographs.
Choosing a pantograph is only possible when the locomotive is standing still.
Raising and lowering the pantograph:
To raise the selected pantograph the reverser needs to be set to M. To raise the pantograph,
use the switch in the cab or press <P>. Raising and lowering a pantograph is possible when
driving the locomotive. This might be necessary when you pass a neutral section.
Switching the main circuit switch on or off:
After you have raised a pantograph you can turn on the main switch with the appropriate
switch in the cab or with <Z>. The main switch can also be operated when the locomotive is
moving. Please keep in mind: the main switch will be set to off (tripped) when the

pantographs are lowered or other faults happen. Normally you can switch on the main
switch again without any problems. If not you will be informed by a message why not.
4.6 Regulator
Automatic notching control:
The regulator is used to select the required notch from 0 to 27. The tap changer will then
automatically notch up or down to the selected notch at a pre-set speed. If you switch the
regulator directly from notch 27 to 0 it will take approx. 14 seconds to reach notch 0. Please
keep in mind that selecting too high a notch will result in an overload and the main switch
will be tripped. The chosen regulator notch and tractive effort can be checked with the
ammeter effort gauge to the left instruments (second gauge from right) It should not exceed
420A to avoid an overload.
Notch 28 is not allowed to use as stated in the original locos manual.
Fast power off:
The fast power of button in the middle of the regulator wheel allows you to shut down the
applied traction power immediately. After a fast power-off you need to set the regulator to
zero to raise power up again.
Regulator locking:
The regulator is locked when:
• An overload occurred because you selected too high a notch with the regulator
• You used a brake while the regulator is not set to 0 (zero)
• An emergency brake application occurred
• A fault occurred
• The doors of the coaches are open
If the regulator is locked you can´t notch up or down. The tap changer runs automatically to
notch zero.
To unlock the regulator again do the following things:
✓ Set the regulator to notch 0 (zero)
✓ All brakes need to be released
✓ Check no emergency braking is active
✓ All faults are cleared
✓ The main switch is on
✓ The doors are closed
4.7 Brakes
The locomotive has three brake systems.
• loco brake (direct brake)
• train brake (automatic brake)
• E-brake (electric rheostatic brake)
Loco brake:
when you enter the cab the loco brake is released. The brake is only used to brake the
locomotive and not the train. You can use the brake when starting your train on a hill to
prevent the locomotive from rolling back. When you take power, the loco brake should be
released.

Train brake:
The train brake is used to brake the whole train. It is a notched brake and can be precisely
controlled. Use the brake with care, according to the train weight and track conditions.
When you take power the train brake needs to be released.
E-brake:
The E-brake works on all traction motors. If both train brake and E-brake levers are in the
release position they are automatically coupled when the train brake is used.
To use the E-brake independently from the train brake simply press the top of the lever
down to decouple it and then move the lever within 5 seconds, or it will recouple again to
the train brake lever.
How to brake:
Braking with this locomotive needs a lot experience. You should drive with caution.
It is necessary to think at least 1000m ahead. Notch down in good time with the regulator.
It is necessary to switch off power before you can use the train brake.
Keep in mind: from notch 27 to 0 it takes nearly 14 seconds until you can use the brakes
without getting a fault. Check the traction effort gauge and the transformer voltage gauge to
see if power is down to 0 (zero).
High braking:
On block braked high speed locomotives there is a system that uses more pressure to brake
the loco itself at higher speeds. Block brakes are not as efficient as disc brakes at higher
speeds, so they need more pressure to be effective. Above 60km/h the system activates
automatically and de-activates if you come back below 50km/h. There is a lamp on the desk
that will show you the actual state of the system. It is called “Hohe Abbremsung”. The
system works automatically, but be aware that due to the additional pressure applied, the
locomotive brakes will release more slowly than usual. Release the brakes earlier to prevent
too much reduction in speed.
Air pipe overcharging, Time reservoir and pressure equalisation:
We have implemented a new function for the brake system. A feature of locomotives
equipped with a Knorr D2 self-regulating brake lever system is that you can overcharge the
air pipe with more than 5BAR pressure. It is used to release brakes that are dragging. But if
you do it too often you may cause a brake system fault where you can’t release the brakes
anymore. That happens when the pressure in the equalizing reservoir grows too high
(greater than 0.4 BAR). Normally the over pressure releases very slowly over time. But not if
the pressure is too high in the whole system. If you reach that state you have two options to
get the system working again. First one is to simply wait until the pressure is back to normal,
which means the pressure in the equalizing reservoir needs to be zero. Second option is to
even up the pressures manually. For that you can use the key command <Shift+A> to speed
up the equalizing reservoir air release a bit. This function is equipped with some
randomness. In real life, the process also involves releasing the excess pressure on the
whole train, it is not possible to replicate this in TS.
To initiate overcharging you should hold the train brake against the spring in the max fast
release position and watch the pressure gauge. Don't apply overcharging for too long. In real
life, it is recommended that if possible you do not apply the air brakes again for several
minutes after doing this.
4.8 FML (Traction motor blowers)
The locomotive has a manual traction motor blower system. Switch on the blowers with
<Shift+F> and <Ctrl+F>. See the fault section for more information.

5.1 SiFa (vigilance alarm)
The locomotive has a working Zeit-Zeit-Sifa (vigilance alarm) which can be activated or
deactivated with <Shift+7> The purpose of the SIFA is to keep the driver vigilant at all times
and to allow the locomotive to come quickly and safely to a stop should the driver become
incapacitated or otherwise not be in proper control of the train.
If you switched on the SIFA you must press the space bar every 30 seconds to reset it.
If you forget to reset the SIFA, the SIFA light will start glowing on the console to remind you
to press the SIFA button. If you miss this, after 2 seconds you will hear a warning beep that
will last for a further 2 seconds after which the train will begin emergency braking.
The SIFA will pause if you switch to an outside view. So, you can have it switched on even if
you want to have some route explorations. Back in cab the SIFA timer runs again from
30secs down.
5.2 PZB 90 (train protection)
The locomotive has a near realistic build in PZB 90 v2.0 system used in Germany for speed
control of trains.
Use <SHIFT+8> to switch PZB on or off.
Indusi train mode you can switch with <Ctrl+8>.
After switching on the PZB will start a self-test. The PZB could only be switched on or off
when the train is not moving and the reverser is set to 0 (zero).
Use the following keys to control the Indusi:
• <DEL> = PZB Befehl / command 40
• <End> = PZB Frei / release
• <Page down> = PZB Wachsam / acknowledge
Important: The usage of the PZB acknowledge switch will be registered by the PZB system
when the switch is released! That is a prototypical behaviour installed in vR locomotives. You
can switch and hold the acknowledge switch when you pass a 1000Hz magnet, but need to
release the switch in between 4sec. to avoid an emergency brake.
PZB help system:
The help system will assist you when you have no experience with the PZB.
It tells you in a message box why you have an emergency braking when it occurs.
Switch on or off the help system with <Shift+->
The PZB 90 system is used to ensure that trains are running at correct speeds in certain
controlled sections (for example, leading up to signals) and to ensure that no train can pass
a signal at danger.
There are three types of train controlled via the PZB system, these are described as:
Zugart O Obere (Upper) Light trains / Passenger trains

Zugart M Mittlere (Medium) Heavy trains / Freight trains
Zugart U Untere (Lower) Very heavy trains / Freight trains
When you enable PZB with Shift+8 it will start up ready for a Zugart O train.
Zugart could be read in the vR Message window to the right in the cab.
You can use Ctrl+8 to cycle between the train types until you have the one most appropriate
for your train. The key differentiators are the maximum speed and the ability to stop,
so a long slow heavy freight train should be a Zugart U, for example.
In the descriptions below, the process that is followed is the same regardless of the train
type selected, what differs is the speed limits that are enforced.
PZB is implemented by means of three kinds of magnets that are placed
on the track; these are described as 500Hz, 1000Hz and 2000Hz. These
magnets are only powered if their associated signal is set at a non-clear
aspect, if the aspect is clear (‘green / green’) then the magnets have no
effect on the train.
For some controlled element, such as a signal, each of the magnets
will be placed in the following order:
• 1000Hz - at some remote point on the track such as the distant signal • 500Hz - usually 250m before the main signal being checked • 2000Hz - placed at the signal itself
For this description, a Zugart O train is assumed.
Note: In the speed limit descriptions below the line limit always overrides that given in the
description. For example, if the description says that you must be below 85km/h and the
line limit is 60km/h then this takes precedence.
1000Hz Magnet
A passing train will first meet the 1000Hz magnet and the 1000Hz lamp will light on the PZB
display after pressing PZB Wachsam / key Page Down while passing the signal.
On the Train Simulator 2012 HUD, the exclamation point indicator will light up with a wasp
black/yellow pattern, but there is no audible indicator. The driver now has four seconds
within which to press the PZB Wachsam button (Page Down). Failure to do this will result in
emergency brakes being applied.
Having acknowledged the 1000Hz magnet, the driver now has 23 seconds to drop their
speed to 85km/h (Note: A different Zugart (M or U ) has a different speed ) or emergency
brakes will apply.
After the train has passed 700m from the 1000Hz magnet the 1000Hz lamp will go out and
at this point the driver may choose to press PZB Frei (End) to get out of the speed restriction
if, and only if, they can clearly see that the controlled signal is now showing a clear aspect.

If the driver presses PZB Frei and then runs over an active 500Hz magnet the train assumes
the driver has made a mistake and will apply emergency brakes.
500Hz Magnet
On passing the 500Hz magnet, the train must not be exceeding 65km/h or the emergency
brakes will be applied. The 500Hz lamp on the PZB display will light up. The train now has
153 meters to reduce speed to 45km/h.
The 45km/h speed limit is now in force for the next 250m. It is not possible to release from
this with the PZB Frei button.
2000Hz Magnet
If the train passes an active 2000Hz magnet then it will always apply its emergency brakes
as the only time this can happen is if the train is passing a signal at danger.
Other notes
If, while under the control of a 1000Hz or 500Hz magnet, the train stops or spends more
than 15 seconds at less than 10km/h the enforced speed limit will be reduced by a further
20km/h and this is then called a restrictive speed limit. This is indicated on the PZB display
by the speed indicators (the top row) alternating between two lamps (70 and 85 ).
Once the magnet lamp goes out you can press PZB Frei (END) to get out of the restrictive
speed limit.
Befehl40 (‘Order 40km/h’)
The Befehl40 button (DEL) allows a special case that instructs the train to ignore a 2000Hz
(red signal) magnets that it comes across. You are put in to an enforced speed limit of
40km/h while this is active, exceeding this limit will cause the emergency brakes to apply.
To pass the red signal press and hold DEL for PZB Befehl40 until the Befehl40 light lights up.
Type of Train Normal Monitoring Restrictive Monitoring
1000Hz 500Hz 1000Hz 500Hz
O (Obere) 165km/h -> 85km/h
in 23 seconds
65km/h ->
45km/h
in 153m
45km/h
constant
45km/h -> 25km/h
In 153m
M (Mittlere) 125km/h -> 75km/h
in 26 seconds
50km/h ->
35km/h
in 153m
45km/h
constant
25km/h
constant
U (Untere) 105km/h -> 55km/h
in 34 seconds
40km/h ->
25km/h
in 153m
45km/h
constant
25km/h
constant

Further Reading
You can find more recommended reading about the German PZB90 system at these links:
• http://www.marco-wegener.de/technik/pzb90.htm • http://www.sh1.org/eisenbahn/rindusi.htm
(content is owned and maintained by 3rd parties and not under our control)
6.1 Protective section
The locomotive can recognize and react to EL (overhead wire) signals. Two types of signals
are possible: Main switch off and pantograph down.
If you miss one of these signals you will get a message about this. If you pass the
pantograph down signal with a raised pantograph the pantograph will be destroyed. Then
you need to use the other one or better restart the scenario.
6.2 Door control
The locomotive has a programmed door control that could be used with different passenger
wagons from the vR Shop. If you open the doors the T light positioned at the left console
will go off and you will hear a beep sound. To close the doors use <Shift+T>.
When the doors are open the regulator is disabled. It may be necessary to engage the loco
brake to prevent the train from rolling.
6.3 Destination board control
The locomotive can handle coaches with the vR destination board system.
The 110 itself has no destination boards but those on the coupled coaches can be switched
with <0> and <Shift+0> (zero).
6.4 Faults / Observation
Electrical fault:
The maximum voltage the locomotive can handle is 420A. If you move over this value power
will trip and power will be switched off automatically. If this happens set the regulator to
notch zero. After that you can use the regulator normally. To check the amperage, use the
second vertical gauge from right on the left desk. It should not show more than 420A.
Traction motor heating:
To prevent the tractions motors from overheating it is necessary to keep an eye on the
ammeter gauge. Please use these maximum values when notching up the power:
- over 330A maximum 2min.
- over 200A maximum 15min.
- under 200A permanent traction effort
These values are valid when the traction motor blowers are working. You can hear them on
the loco. If the blowers are not working the motors will get overheating fast.
To prevent this rapid overheating, you need to switch on the blowers manually with
<Shift+F>. If you want to switch the blowers back to off use <Ctrl+F>.
Do not use the off position for the blowers to avoid damage to the motors while moving.

6.5 AI Pantograph selection
If you write scenarios by yourself you can decide which pantograph should be raised when
the locomotive is used as an AI vehicle. Use the listed codes appended to the locomotive
number in the editor’s ID field:
• SA-00- = no pantograph is raised
• SA-10- = pantograph No. 1 is raised
• SA-01- = pantograph No. 2 is raised
• SA-11- = both pantographs are raised
You can see the result of the preselection in the editor right after entering it into the
numbering field.

Function Key Key
Battery Isolating Switch on/off Shift B
Pantograph Selection Shift P
Pantograph up / down P
Main switch on/off Z
Regulator A / D
Regulator fast up / down >1sec. press A / D
Reverser W / S
Traction motor blower Shift / Ctrl F
Air pipe pressure aligning Shift A
Hand brake /
Train brake ; / ´
E-brake < / >
E-brake decoupling Shift D
Loco brake [ / ]
Emergency brake Backsp ()
Sander X
SIFA on/off Shift 7
SIFA Reset Space
PZB on/off Shift 8
PZB Wachsam / Acknowledge Page down
PZB Frei / Free End
PZB Befehl40 Del
Horn long B
Horn short N
Doors closing Shift T
Wiper right on/off V
Wiper left on/off C
Wiper right speed faster Shift V
Wiper left speed faster Shift C
Wiper right speed slower Ctrl V
Wiper left speed slower Ctrl C
Cab light and desk light (Shift) L
Instrument light I
ZZA up 0
ZZA down Shift 0
PZB help system on or off Shift [
Message level Ctrl ]
Locomotive information Ctrl+Shift 8

Please place the locomotives so that cab 1 points into the driving direction.
This will prevent a false detection of the driving direction for placing the driver and raising
the correct pantograph.
If you want to use more than one locomotive in your train, the additional locomotives should
have their pantographs lowered. Set them to dead engine within the flyout. Note, that since
TS2015 more than one locomotive can be set to dead engine state.
This Expert-Line can follow the save and resume function of TS. All important system states
are saved so you can save your scenario and resume it later. Please note that some system
values are not stored like an active PZB monitoring.
We say Thank you to all people who helped realizing this package.
Your virtualRailroads Team