datagrid - information & communication technologies · edg tutorial handouts for participants...
TRANSCRIPT
DataGRID
EDG TUTORIAL
HANDOUTS FOR PARTICIPANTS FOR EDG RELEASE 2.X
Document identifier: DataGrid-08-TUT-V3.2.1
EDMS id:
Date: December 10, 2003
Work package: EDG Collaboration
Partner(s): EDG Collaboration
Lead Partner: EDG
Document status: Version 3.2.1
Author(s): Flavia Donno, Leanne Guy, MarioReale, Ricardo Rocha, ElisabettaRonchieri, Massimo Sgaravatto,Heinz & Kurt Stockinger, AntonyWilson
File: edg-tutorial-handout
Abstract: These handouts are provided for people to learn how to use the EDG middleware componentsto submit jobs on the Grid, manage data files and get information about their jobs and the testbed. It isintended for people who have a basic knowledge of the Linux/UNIX operating system and know basic texteditor and shell commands.
IST-2000-25182 PUBLIC 1/68

EDG TUTORIALHandouts for participants for EDG Release 2.x
Doc. Identifier:DataGrid-08-TUT-V3.2.1
Date: December 10, 2003
CONTENTS
1. INTRODUCTION 5
1.1. OVERVIEW . . . . . . . . . . . . . . . . . . . . . . . . . . . . . . . . . . . . . . . . 5
1.2. EXERCISES AND DOCUMENTATION . . . . . . . . . . . . . . . . . . . . . . . . . 5
1.3. GETTING A PROXY - BASICS OF GRID SECURITY . . . . . . . . . . . . . . . . . 5
1.4. EXAMPLES . . . . . . . . . . . . . . . . . . . . . . . . . . . . . . . . . . . . . . . . 6
1.4.1. GRID-PROXY-INIT . . . . . . . . . . . . . . . . . . . . . . . . . . . . . . . . 6
1.4.2. GRID-PROXY-INFO . . . . . . . . . . . . . . . . . . . . . . . . . . . . . . . . 6
1.4.3. GRID-PROXY-DESTROY . . . . . . . . . . . . . . . . . . . . . . . . . . . . . 6
1.5. GETTING THE EXERCISES . . . . . . . . . . . . . . . . . . . . . . . . . . . . . . . 6
2. JOB SUBMISSION EXERCISES 8
2.1. EXERCISE JS-1: ”HELLO WORLD” . . . . . . . . . . . . . . . . . . . . . . . . . . . 8
2.2. EXERCISE JS-2: LISTING CONTENT OF CURRENT DIRECTORY ON THE WORKERNODE - GRID-MAP FILE . . . . . . . . . . . . . . . . . . . . . . . . . . . . . . . . . 10
2.3. EXERCISE JS-3: A SIMPLE PAW PLOT . . . . . . . . . . . . . . . . . . . . . . . . . 12
2.4. EXERCISE JS-4: PING OF A GIVEN HOST FROM THE WORKER NODE . . . . . . 14
2.5. EXERCISE JS-5: RENDERING OF SATELLITE IMAGES: USING DEMTOOLS . . . 16
2.6. EXERCISE JS-6: USING POVRAY TO GENERATE VISION RAY-TRACER IMAGES 18
2.7. EXERCISE JS-7: GENERATE AN ALICE GEANT3 ALIROOT SIMULATED EVENT 20
2.8. EXERCISE JS-8: CHECKSUM ON A LARGE FILE TRANSFERRED WITH THEINPUTSANDBOX . . . . . . . . . . . . . . . . . . . . . . . . . . . . . . . . . . . . . 22
2.9. EXERCISE JS-9: A SMALL CASCADE OF ”HELLO WORLD” JOBS . . . . . . . . . 24
2.10. EXERCISE JS-10: A SMALL CASCADE OF ALICE ALIROOT MC EVENTS JOBS . 25
2.11. EXERCISE JS-11: TAKING A LOOK AT THE .BROKERINFO FILE . . . . . . . . . 27
2.12. EXERCISE JS-12: A SIMPLE EXAMPLE OF AN INTERACTIVE JOB . . . . . . . . 29
2.13. EXERCISE JS-13: EXECUTION OF PARALLEL JOBS . . . . . . . . . . . . . . . . . 30
2.14. EXERCISE JS-14: JOB CHECKPOINTING EXAMPLE . . . . . . . . . . . . . . . . . 31
3. DATA MANAGEMENT EXERCISES 37
3.1. EXERCISE DM-1: DISCOVER GRID STORAGE . . . . . . . . . . . . . . . . . . . . 38
3.2. EXERCISE DM-2: START USING THE EDG REPLICA MANGER . . . . . . . . . . 40
3.3. EXERCISE DM-3: FILE REPLICATION WITH THE EDG REPLICA MANGER . . . 42
3.3.1. ADVANCED EXERCISE - USING A STATIC CONFIGURATION FILE FORINFORMATION SERVICE . . . . . . . . . . . . . . . . . . . . . . . . . . . . 43
3.4. EXERCISE DM-4: USING THE REPLICA CATALOG . . . . . . . . . . . . . . . . . 45
3.5. EXERCISE DM-5: REPLICA OPTIMISATION WITH THE EDG REPLICA MANAGER 47
3.6. EXERCISE DM-6: USING THE REPLICA LOCATION SERVICE . . . . . . . . . . . 50
3.7. EXERCISE DM-7: USING THE REPLICA METADATA CATALOG . . . . . . . . . . 53
3.8. EXERCISE DM-8: USING THE EDG REPLICA MANAGER WITHIN A JOB . . . . . 55
IST-2000-25182 PUBLIC 2/68

EDG TUTORIALHandouts for participants for EDG Release 2.x
Doc. Identifier:DataGrid-08-TUT-V3.2.1
Date: December 10, 2003
3.9. EXERCISE DM-9: USE CASE - READ DATA ON THE GRID . . . . . . . . . . . . . 57
3.9.1. PRE-USE CASE STEPS . . . . . . . . . . . . . . . . . . . . . . . . . . . . . . 57
3.9.2. USE CASE STEPS . . . . . . . . . . . . . . . . . . . . . . . . . . . . . . . . . 57
3.10. EXERCISE DM-10: USE CASE - COPY AND REGISTER JOB OUTPUT DATA . . . 58
3.11. EXERCISE DM-11: USE CASE - BULK DATA REGISTRATION . . . . . . . . . . . 59
4. INFORMATION SERVICE EXERCISES 60
4.1. EXERCISE IS-1: WITH THE AID OF THE COMMAND LINE TOOL DISCOVERWHAT COMPUTING ELEMENTS ARE AVAILABLE ON THE TESTBED . . . . . . 60
4.2. EXERCISE IS-2: DISCOVER THE AVAILABLE STORAGE ELEMENTS . . . . . . . 60
4.3. EXERCISE IS-3: EMULATE THE RESOURCE BROKER . . . . . . . . . . . . . . . . 60
4.4. EXERCISE IS-4: FIND OUT WHICH ARE THE RELATED STORAGE ELEMENTS . 60
4.5. EXERCISE IS-5: AVAILABLE SPACE ON THE STORAGE ELEMENT . . . . . . . . 61
4.6. EXERCISE IS-6: JOINS . . . . . . . . . . . . . . . . . . . . . . . . . . . . . . . . . . 61
4.7. EXERCISE IS-7: R-GMA BROWSER . . . . . . . . . . . . . . . . . . . . . . . . . . . 61
4.8. EXTRACT FROM THE USERS GUIDE - STREAMPRODUCER . . . . . . . . . . . . 62
5. APPENDIX: ALTERNATIVE INFORMATION SERVICE: MDS 64
6. GLOSSARY 66
6.1. FILE NAMING CONVENTIONS . . . . . . . . . . . . . . . . . . . . . . . . . . . . . 66
6.2. ABBREVIATIONS AND EXPLANATIONS . . . . . . . . . . . . . . . . . . . . . . . 67
IST-2000-25182 PUBLIC 3/68

EDG TUTORIALHandouts for participants for EDG Release 2.x
Doc. Identifier:DataGrid-08-TUT-V3.2.1
Date: December 10, 2003
Document Change Record
Issue Date Comment Author1 0 24 June 2003 start writing new DM exercises Kurt Stockinger1 1 25 June 2003 more exercises added for DM; job
submission partly adaped to EDGrelease 2
Heinz & Kurt Stockinger
1 1 1 26 June 2003 more exercises added for DM Heinz & Kurt Stockinger, LeanneGuy
1 2 7 July 2003 JS examples adapted to release2.0; exercises 12 and 13 added
Ricardo Rocha
1 3 9 July 2003 IS exercises added Antony Wilson1 4 15 July 2003 JS exercise 14 added, some mod-
ifications DM exercise 8Ricardo Rocha
3 2 24 November 2003 small corrections to JS and DMexercises; source code for JS 14added
Heinz Stockinger
3 2 1 10 December 2003 small corrections to JS-9 Heinz Stockinger
IST-2000-25182 PUBLIC 4/68

EDG TUTORIALHandouts for participants for EDG Release 2.x
Doc. Identifier:DataGrid-08-TUT-V3.2.1
Date: December 10, 2003
1. INTRODUCTION
1.1. OVERVIEW
This document leads you through a number of increasingly sophisticated exercises covering aspects ofjob submission, data management and information systems.
It is assumed that you are familiar with the basic Linux/UNIX user environment (bash, shell etc.) andthat you have obtained a security certificate providing access to the EDG testbed.
This document is designed to be accompanied by a series of presentations providing a general overviewof Grids and the EDG tools.
Solutions to all the exercises are available online.
We do not give exact hostnames of machines in the testbed since they change over time. However, pleaserefer to the EDG tutorial web-page to get the exact machine names that you require for your tutorialsession.
1.2. EXERCISES AND DOCUMENTATION
In this document, you will find exercises on the following three topics: Job Sumbission, Data Manage-ment and Information Services. You will use several different Grid tools and you will sometimes needto consult the documentation of the tools you use. Here you find several hints how to find more detaileddocumentation.
• Workload Management Software Administrator and User Guide,Job Description Language (JDL),Broker Info API/CLI):
http://server11.infn.it/workload-grid/documents.html
• EDG Replica Manager, Replica Location Service, Replica Metadata Catalog:
http://cern.ch/edg-wp2/replication/documentation.html
• Replica Optimization Service
http://cern.ch/edg-wp2/optimization/documentation.html
1.3. GETTING A PROXY - BASICS OF GRID SECURITY
Once you have a certificate, you can request a ticket to be allowed to do the exercises that are given inthis manual. The ticket you receive will be valid for several hours, long enough for a hands-on afternoonat least.
First, you have to get onto a machine that understands Grid commands. Such computers are called theUser Interface (UI) machines and you may have one in your own home institute for which you have anaccount. If so, you can use this machine. Your instructor will tell you which machine and account youcan use and what your password is.
Now one can get a ticket that allows you to use the testbed. The following commands are available:
• grid-proxy-init to get a ticket, a pass phrase will be required
IST-2000-25182 PUBLIC 5/68

EDG TUTORIALHandouts for participants for EDG Release 2.x
Doc. Identifier:DataGrid-08-TUT-V3.2.1
Date: December 10, 2003
• grid-proxy-info -all gives information of the ticket in use
• grid-proxy-destroy destroys the ticket for this session
• grid-proxy-xxx -help shows the usage of the command grid-proxy-xxx
1.4. EXAMPLES
1.4.1. GRID-PROXY-INIT
[bosk@testbed010 bosk] grid-proxy-initYour identity: /O=dutchgrid/O=users/O=nikhef/CN=Kors BosEnter GRID pass phrase for this identity:Creating proxy .................................................... DoneYour proxy is valid until Thu Sep 5 21:37:39 2002
1.4.2. GRID-PROXY-INFO
[bosk@testbed010 bosk] grid-proxy-info -allsubject : /O=dutchgrid/O=users/O=nikhef/CN=Kors Bos/CN=proxyissuer : /O=dutchgrid/O=users/O=nikhef/CN=Kors Bostype : fullstrength : 512 bits<timeleft : 11:59:43
1.4.3. GRID-PROXY-DESTROY
[bosk@testbed010 bosk] grid-proxy-destroy -dryrun
Would remove the file /tmp/x509up uUID where your proxy is stored. Note that the proxy file /tmp/x509up uUIDdepends on your UNIX User ID (UID) and thus if your UID is 2899, the proxy file is called: /tmp/x509up u2899.
1.5. GETTING THE EXERCISES
Now you are logged onto the testbed and have a ticket, you can start to run some. Some material for theexercises has been prepared in advance and you can copy it (e.g. with wget) to your home directory onthe UI machine from:
http://cern.ch/hep-proj-grid-tutorials/jobsubmission-2.tar.gz
Example of what you may see on the screen:
[bosk@testbed010 temp] wget http://cern.ch/hep-proj-grid-tutorials/jobsubmission-2.tar.gzhttp://cern.ch:80/hep-proj-grid-tutorials/jobsubmission-2.tar-gz
=> ‘jobsubmission.tgz’
Connecting to hep-proj-grid-tutorials.web.cern.ch:80... connected!HTTP request sent, awaiting response... 200 OKLength: 2,031,924 [application/x-compressed]0K -> .......... .......... .......... .......... .......... [ 2%]
IST-2000-25182 PUBLIC 6/68

EDG TUTORIALHandouts for participants for EDG Release 2.x
Doc. Identifier:DataGrid-08-TUT-V3.2.1
Date: December 10, 2003
50K -> .......... .......... .......... .......... .......... [ 5%]1900K -> .......... .......... .......... .......... ..........[ 98%]1950K -> .......... .......... .......... .. ..[100%]11:31:45 (9.55 MB/s) - ‘jobsubmission.tgz’ saved [2031924/2031924]
IST-2000-25182 PUBLIC 7/68

EDG TUTORIALHandouts for participants for EDG Release 2.x
Doc. Identifier:DataGrid-08-TUT-V3.2.1
Date: December 10, 2003
2. JOB SUBMISSION EXERCISES
2.1. EXERCISE JS-1: ”HELLO WORLD”
Goal: In this example we do the simplest job submission to the Grid. We will involve the basic compo-nents of the Workload Management System (WMS). Namely, we will submit a job which simplyprints ”Hello World”, using the /bin/echo command and takes the ”Hello World” string as an argu-ment to this command.
A simplified version of the Workload Management System (WMS) and involved components is shownin Figure 1. The following main components are involved:
• User Interface (UI)
• Workload Management System (WMS) components (including. a Network Server, Resource Bro-ker, Job Controller etc. 1).
• Computing Element (CE) with the Globus Gatekeeper (GK) and the Local Resource ManagementSystem (LRMS),
• Worker Node (WN)
• Logging and Bookkeeping (LB) system
1
6
7
2 5
3
4
UI
WNCE
LRMS
Gatekeeper (GK)
WMS
Figure 1: The main WMS components and their operation
Users access the Grid through the User Interface machine, which by means of a set of binary executableswritten in Python, allows us to submit a job, monitor its status and retrieve its output. The job willexecute on the Worker Node but the output can be displayed and stored on the UI machine.
To do so, we write a simple JDL (Job Description Language) file and issue a the command
edg-job-list-match <JDL-file-name>
to check which are the available computing elements to execute the job. We submit it to the Grid bymeans of the following command:
1For architectural details please refer to the User Guide or to the slides in the Job Submission talk of the EDG Tutorial
IST-2000-25182 PUBLIC 8/68

EDG TUTORIALHandouts for participants for EDG Release 2.x
Doc. Identifier:DataGrid-08-TUT-V3.2.1
Date: December 10, 2003
edg-job-submit <JDL-file-name>
The system should accept our job and return a unique job identifier (JobId).
We verify the status of the execution of the job using
edg-job-status <JobId>
After the jobs gets into the Done (Success) status, we retrieve the output by issuing
edg-job-get-output <JobId>
Next, we verify that the output file is in the corresponding local temporary directory on the user interfaceand that no errors occurred.
Figure 1 shows the complete sequence of operations performed, after having compiled the JDL file andhaving verified the availability of matching computing elements. The numbers below correspond to thenumbers in Figure 1:
• User submits the job from the UI to the WMS. (1)
• The WMS (in particular the Resource Broker) performs the matchmaking to find the best availableCE to execute the job.
• The WMS first prepares the job which includes the creation of a RSL (Resource SpecificationLanguage) file to submit to the Local Resource Management System (LRMS or batch system suchas LSF, PBS, etc). The WMS then transfers the job (and files specified in the InputSandbox) to theGlobus Gatekeeper (GK). (2)
• The Gatekeeper sends the Job to the LRMS, which handles the job execution on the available localfarm worker nodes. (3)
• After the execution on the WN, the produced output is transferred back to the WMS and to the UI,using the OutputSandbox. (4), (5), (6)
• Queries of the job status are addressed to the logging and bookkeeping database (part of the WMS)from the UI machine. (7)
The JDL file, we will be using, is the following one:
Executable = "/bin/echo";Arguments = "Hello World";StdOutput = "message.txt";StdError = "stderror";OutputSandbox = {"message.txt", "stderror"};
The issued command sequence will be:
grid-proxy-initedg-job-submit HellowWorld.jdledg-job-status JobIdedg-job-get-output JobId
IST-2000-25182 PUBLIC 9/68

EDG TUTORIALHandouts for participants for EDG Release 2.x
Doc. Identifier:DataGrid-08-TUT-V3.2.1
Date: December 10, 2003
2.2. EXERCISE JS-2: LISTING CONTENT OF CURRENT DIRECTORY ON THE WORKER NODE -GRID-MAP FILE
Goal: In this example we will list the files on the local directory of the Worker Node.
Every user is mapped onto a local user account on the various Computing Elements all over the Grid.This mapping is controlled by the /etc/grid-security/grid-mapfile file on the Gatekeeper machine and isknown as the grid-mapfile mechanism: every user (identified by their personal certificate’s subject) mustbe listed in the grid-mapfile file and associated to one of the pooled accounts available on the CE for thelocally supported Virtual Organization he belongs to (see Figure 2).
User: Pablo Martinex VO: atlas
pablo:x:5001:1235:Martinez:/home/pablo:/bin/sh
grid−mapfile on the CE (GateKeeper) gridmapdir
...............
User: atlas039 VO: atlas
atlas039:x:1089:2002:mapped user for atlas:/home/atlas039:/bin/bash
"/C=ES/O=IFPES/OU=DBA/CN=IanGonzalez/[email protected]" .cms
"/C=ES/O=IEF/OU=ASP/CN=Paolo Martinez/[email protected]" .atlas
"/C=FR/O=IFF/OU=CAL/CN=François Dupont/[email protected]" .alice
Figure 2: The grid-mapfile mechanism
The grid-mapfile mechanism, which is part of GSI, requires that each individual user on the Grid isassigned to a unique local User ID. The accounts leasing mechanism allows access to take place withoutthe need for the system manager to create an individual user account for each potential user on eachcomputing element.
On their first access to a Testbed site, users are given a temporary ”leased” identity (similar to temporarynetwork addresses given to PCs by the DHCP mechanism). This identity is valid for the task durationand need not to be freed afterwards. If the lease still exists when the user reenters the site, the sameaccount will be reassigned to him.
(See http://www.gridpp.ac.uk/gridmapdir/)
We therefore submit here (after grid-proxy-init) a job using the executable /bin/ls, and we redirectthe standard output to a file (JDL attribute: Stdoutput = ”ListOfFiles.txt”;), which is retrieved via theOutputSandbox to a local directory on the User Interface machine. The result of the file listing commandwill be the list of files on the $HOME directory of the local user account on the Worker Node to whichwe are mapped. We can issue edg-job-submit JobId and edg-job-get-output JobId (after the jobis in the Done (Success) status) to get the output.
The exercise is finished at this point.
IST-2000-25182 PUBLIC 10/68

EDG TUTORIALHandouts for participants for EDG Release 2.x
Doc. Identifier:DataGrid-08-TUT-V3.2.1
Date: December 10, 2003
BACKGROUND INFORMATION ON SECURITY
You are not asked to print the grid-mapfile. It is mentioned here for your information and knowledge.
This very basic example shows how accessing Grid resources is guaranteed only to certified users, witha valid PKI X.509 personal certificate (issued by an officially recognized Certification Authority), whosecertificate’s subject is listed in the grid-mapfile of the various CE resources, distributed all over the Grid.
To store all subjects of the certificates belonging to the large community of users, each virtual Organi-zation manages an LDAP Directory server, describing its members. Each user entry of this directorycontains at least the URL of the certificate on the Certification Authority LDAP Server and the Subjectof the user’s certificate, in order to make the whole process faster.
Moreover, EDG must sign the Acceptable Use Policy (AUP) document in order to receive a certificateand there is another LDAP Directory (”Authorization Directory”) which collects the names of peoplewho have signed the AUP. The grid-mapile file on the various Grid CEs is generated by a daemoncalled mkgridmap, which contacts these LDAP servers (the VO-Authentication server, which will at itsturn contact the Certification Authority LDAP server) and the Authorization Directory server, to locallygenerate (normally once per day) a locally updated version of the /etc/grid-security/grid-mapfile file.This mechanism is represented in Figure 3.
Figure 3: The mkgridmap daemon, updating the grid-mapfile file
IST-2000-25182 PUBLIC 11/68

EDG TUTORIALHandouts for participants for EDG Release 2.x
Doc. Identifier:DataGrid-08-TUT-V3.2.1
Date: December 10, 2003
2.3. EXERCISE JS-3: A SIMPLE PAW PLOT
Goal: In this exercise we execute a simple plot on the Grid using PAW, the Physics Analysis Workstationpackage belonging to the CERNLIB libraries.
The PAW executable is installed under the /cern/pro/bin directory. We will run PAW in its batch mode,passing as an argument to the executable the ”-b testgrid” string, which tells PAW to execute in batch amacro of instructions called testgrid.kumac.
testgrid.kumac opens a file for output in the postscript format and stores the drawing of the componentsof a previously created simple vector:
ve/create a(10) r 1 2 3 8 3 4 5 2 10 2ve/print afor/file 1 testgrid.psmetafile -1 -111ve/draw aclose 1
Another macro file called pawlogon.kumac sets the PAW environment and options for a given user: inthis case the date on the plots.
The produced output file is therefore testgrid.ps, which, after the Job Output retrieval, can be viewedusing ghostview.
Figure 4: The main Grid components involved in the execution of a simple PAW plot
The two required .kumac files are stored locally on our UI machine and need to be transferred to theWorker Node via InputSandbox. When the Job has finished, we can retrieve the produced output file,together with the standard error and standard output file via the OutputSandbox.
Therefore the JDL file (pawplot.jdl) we are going to use looks like this:
IST-2000-25182 PUBLIC 12/68

EDG TUTORIALHandouts for participants for EDG Release 2.x
Doc. Identifier:DataGrid-08-TUT-V3.2.1
Date: December 10, 2003
Executable = "/cern/pro/bin/paw";Arguments = "-b testgrid";StdOutput = "stdoutput";StdError = "stderror";InputSandbox = {"testgrid.kumac", "pawlogon.kumac"};OutputSandbox = {"stderror", "stdoutput", "testgrid.ps"};
We will submit this job twice: once to the Broker, leaving it the task of performing the matchmakingprocess to find the best matching CE, and once directly to an available CE (we get the list of availableCEs using the edg-job-list-match command).
The sequence of commands we are going to issue is:
grid-proxy-initedg-job-submit pawplot.jdledg-job-status JobId1edg-job-get-output JobId1edg-job-list-match pawplot.jdledg-job-submit -resource CEid pawplot.jdledg-job-status JobId2edg-job-get-output JobId2
Figure 4 shows the main Grid elements involved in this job’s execution example.
IST-2000-25182 PUBLIC 13/68

EDG TUTORIALHandouts for participants for EDG Release 2.x
Doc. Identifier:DataGrid-08-TUT-V3.2.1
Date: December 10, 2003
2.4. EXERCISE JS-4: PING OF A GIVEN HOST FROM THE WORKER NODE
Goal: In this example we run the simple ping of a remote host from the Worker Node, to start understandthe execution of simple commands on the worker nodes. We will execute a ping to a given hostfrom the Worker Node in two ways: directly calling the /bin/ping executable on the machine andwriting a very simple shell script (pinger.sh) which does it for us, just to understand how to useshell scripts on the Grid.
We need therefore to write two different JDL files and submit them.
In the first case we directly call the ping executable (JDL file is pinger1.jdl):
Executable = "/bin/ping";Arguments = "-c 5 lxshare0220.cern.ch";RetryCount = 7;StdOutput = "pingmessage1.txt";StdError = "stderror";OutputSandbox = {"pingmessage1.txt","stderror"};Requirements = other.GlueHostOperatingSystemName == "Redhat";
Whereas in the second case we call the bash executable to run a shell script, giving as input argumentboth the name of the shell script and the name of the host to be pinged (as required by the shell scriptitself) (JDL file is pinger2.jdl):
Executable = "/bin/bash";Arguments = "pinger.sh lxshare0220.cern.ch";RetryCount = 7;StdOutput = "pingmessage2.txt";StdError = "stderror";InputSandbox = "pinger.sh";OutputSandbox = {"pingmessage2.txt", "stderror"};Requirements = other.GlueHostOperatingSystemName == "Redhat";
where the pinger.sh shell script, to be executed in bash, is the following one:
#!/bin/bash/bin/ping -c 5 $1
As a related problem, try to build similar examples for /bin/pwd or /usr/bin/who, in both ways: directlyand via a shell script. As usual, the set of commands we are going to issue in both cases is the followingone (of course changing the name of the JDL from pinger1.jdl to pinger2.jdl in the second case):
grid-proxy-initedg-job-submit pinger1.jdledg-job-status JobIdedg-job-get-output JobId
The main difference between the two ways of operating are summarized below, and it suggests a thirdone:
JDL file - 1
IST-2000-25182 PUBLIC 14/68

EDG TUTORIALHandouts for participants for EDG Release 2.x
Doc. Identifier:DataGrid-08-TUT-V3.2.1
Date: December 10, 2003
Executable = "/bin/ping";Arguments = "-c 5 lxshare0393.cern.ch";
JDL file - 2
Executable = "/bin/bash";Arguments = "pinger.sh lxshare0393.cern.ch";InputSandbox = "pinger.sh";
JDL file - 3 There is a third way of executing the ping command: directly calling the pinger shell scriptas executable.
Executable = "pinger.sh";Arguments = "lxshare0393.cern.ch";InputSandbox = "pinger.sh";
IST-2000-25182 PUBLIC 15/68

EDG TUTORIALHandouts for participants for EDG Release 2.x
Doc. Identifier:DataGrid-08-TUT-V3.2.1
Date: December 10, 2003
2.5. EXERCISE JS-5: RENDERING OF SATELLITE IMAGES: USING DEMTOOLS
Please note that this exercise can only be executed if the DEMTOOLssoftware is installed on at least one available Computing Element.Since this software is not strictly related to the on going productionactivities, it may unfortunately happen that it occasionally will notbe available.
Therefore, please check, before trying to start the exercise, thatat least one CE fits the requirements of the exercise, and issue aedg-job-list-match demtools.jdl to make sure it can be executed,otherwise please skip this exercise.
In addition, after execution, a visualization tool called ‘‘lookat’’is required to visualize the produced graphical file in output. Ifthis tool is not installed on the UI machine you are using ( usually under/usr/local/bin/lookat) you will not be able to look at the producedoutput file. Cross-check this with the available tutors during the tutorials.
We will launch the DEMTOOLs program on the Grid, which is a satellite images rendering program:starting from ASCII files in the .DEM format (Digital Elevation Model, usually acquired by high reso-lution remote sensing satellites), produces graphical virtual reality images, in the .wrl file format, whichcan then be browsed and rotated using the lookat command, after output retrieval.
We need to specify in input the satellite remote sensing data stored in the 2 files, referring to satelliteviews of Mont Saint Helens and the Grand Canyon, called mount sainte helens WA.dem and grand canyon AZ.dem,and after the job’s execution we need to specify the name of the 2 produced images we want returned toour UI machine. The data flow is shown in Figure 5.
UI
WN
InputSandbox
OutputSandbox
mount_sainte_helens_WA.dem,grand_canyon_AZ.dem
mount_sainte_helens_WA.wrl,
grand_canyon_AZ.wrl
OUTPUT
INPUT
DEMTOOLs
UI
Figure 5: Data Flow for example exercise JS-5 on DEMTOOLs
The JDL file (demtools.jdl) is the following one:
Executable = "/bin/sh";
IST-2000-25182 PUBLIC 16/68

EDG TUTORIALHandouts for participants for EDG Release 2.x
Doc. Identifier:DataGrid-08-TUT-V3.2.1
Date: December 10, 2003
StdOutput = "demtools.out";StdError = "demtools.err";InputSandbox = {"start_demtools.sh",
"mount_sainte_helens_WA.dem","grand_canyon_AZ.dem"};
OutputSandbox = {"demtools.out","demtools.err","mount_sainte_helens_WA.ppm","mount_sainte_helens_WA.wrl","grand_canyon_AZ.ppm","grand_canyon_AZ.wrl"};
RetryCount = 7;Arguments = "start_demtools.sh";Requirements = Member("DEMTOOLS",other.GlueHostApplicationSoftwareRunTimeEnvironment);
Note that we need to expressly require that the destination CE should have the DEMTOOLs softwareinstalled: we do so in the last line of the JDL file.
The launching shell script (start demtools.sh) used is the following one:
/usr/local/bin/dem2ppm mount_sainte_helens_WA.dem \mount_sainte_helens_WA.ppm
/usr/local/bin/dem2vrml -r 2 mount_sainte_helens_WA.dem \mount_sainte_helens_WA.wrl}
/usr/local/bin/dem2ppm grand_canyon_AZ.dem \grand_canyon_AZ.ppm}
/usr/local/bin/dem2vrml -r 2 grand_canyon_AZ.dem \grand_canyon_AZ.wrl
To check the effective presence of available CEs for the job to be correctly executed, as usual, we canissue a edg-job-list-match demtools.jdl. After we checked (issuing a edg-job-status JobId)that the Job reached the OutputReady status, we can issue a edg-job-get-output JobId to retrievethe output locally on the User Interface machine and take a look at the produced images going in thelocal directory where the output has been returned using lookat grand canyon AZ.wrl and lookatmount sainte helens WA.wrl.
Finally, to visualize the produced graphical output file, we can issue:
lookat grand_canyon_AZ.wrl
IST-2000-25182 PUBLIC 17/68

EDG TUTORIALHandouts for participants for EDG Release 2.x
Doc. Identifier:DataGrid-08-TUT-V3.2.1
Date: December 10, 2003
2.6. EXERCISE JS-6: USING POVRAY TO GENERATE VISION RAY-TRACER IMAGES
Please note that this exercise can only be done if the POVRAY softwareis installed on at least one available Computing Element. Before youstart the exercise, therefore please make sure that the software isactually available (using the command dg-job-list-match povray_pipe.jdl)
We want to launch POVRAY (http://povray.org), a graphical program, which starting from ASCIIfiles (in this specific example - the pipeset.pov file) in input, creates in output Vision Ray-Tracer imagesin the .png file format.
We will do it using the Grid, submitting a proper JDL file which executes an ad-hoc shell script file. Inthis example the outcoming image is the one of a pipe duct.
We need therefore to compile our JDL file, specifying in the InputSandbox all the required ASCII filesto be used by the program and the corresponding shell script. Then we submit it to the WMS system.
The executable to be used in this case is the sh shell executable, giving as an input argument to it thename of the shell script we want to be executed(start povray pipe.sh):
#!/bin/bashmv pipeset.pov OBJECT.POV/usr/local/bin/x-povray /usr/local/lib/povray31/res640.inimv OBJECT.png pipeset.png
We can finally, after having retrieved the Job, examine the produced image using Netscape or Exploreror using xv (after having exported the $DISPLAY variable to our current terminal).
The JDL file we are going to use is the following one (povray pipe.jdl):
Executable = "/bin/sh";StdOutput = "povray_pipe.out";StdError = "povray_pipe.err";InputSandbox = {"start_povray_pipe.sh", "pipeset.pov"};OutputSandbox = {"povray_pipe.out",
"povray_pipe.err","pipeset.png"};
RetryCount = 7;Arguments = "start_povray_pipe.sh";Requirements = Member("POVRAY-3.1",other.GlueHostApplicationSoftwareRunTimeEnvironment);
Since we require a special software executable (/usr/local/bin/x-povray/usr/local/lib/povray3/res640.ini),which is identified by the Grid Run Time Environment lag called “POVRAY-3.1”, we notice here that weneed to specify it in the Requirements classAd, in order to consider (during the matchmaking done bythe Broker to select the optional CE to send the job to) only those CEs which have this software installed.This is done in the last line of the JDL file.
The set of sequence commands we are going to issue is the following one:
grid-proxy-initedg-job-list-match povray_pipe.jdledg-job-submit povray_pipe.jdledg-job-status JobIdedg-job-get-output JobId
IST-2000-25182 PUBLIC 18/68

EDG TUTORIALHandouts for participants for EDG Release 2.x
Doc. Identifier:DataGrid-08-TUT-V3.2.1
Date: December 10, 2003
UI
WN
UI
InputSandbox
OutputSandbox
POVRAY
OUTPUT
INPUTstart_povray_pipe.sh,pipeset.pov
povray_pipe.out,
povray_pipe.err, pipeset.png
Figure 6: Data Flow for example exercise JS-6 on POVRAY
The data flow via Input and Output Sandboxes for this exercise is shown in Figure 6. To take a look atthe produced file look at pipeset.png using xview : issue xv pipeset.png or xview pipeset.png .
IST-2000-25182 PUBLIC 19/68
EDG TUTORIALHandouts for participants for EDG Release 2.x
Doc. Identifier:DataGrid-08-TUT-V3.2.1
Date: December 10, 2003
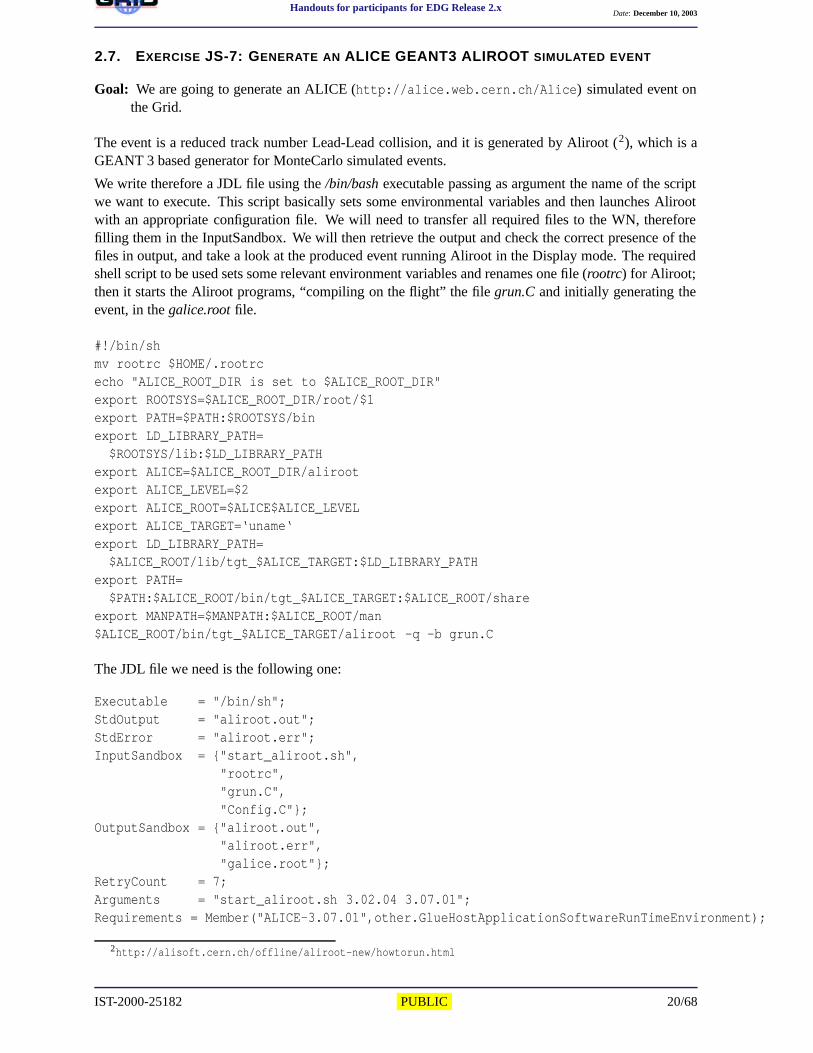
2.7. EXERCISE JS-7: GENERATE AN ALICE GEANT3 ALIROOT SIMULATED EVENT
Goal: We are going to generate an ALICE (http://alice.web.cern.ch/Alice) simulated event onthe Grid.
The event is a reduced track number Lead-Lead collision, and it is generated by Aliroot (2), which is aGEANT 3 based generator for MonteCarlo simulated events.
We write therefore a JDL file using the /bin/bash executable passing as argument the name of the scriptwe want to execute. This script basically sets some environmental variables and then launches Alirootwith an appropriate configuration file. We will need to transfer all required files to the WN, thereforefilling them in the InputSandbox. We will then retrieve the output and check the correct presence of thefiles in output, and take a look at the produced event running Aliroot in the Display mode. The requiredshell script to be used sets some relevant environment variables and renames one file (rootrc) for Aliroot;then it starts the Aliroot programs, “compiling on the flight” the file grun.C and initially generating theevent, in the galice.root file.
#!/bin/shmv rootrc $HOME/.rootrcecho "ALICE_ROOT_DIR is set to $ALICE_ROOT_DIR"export ROOTSYS=$ALICE_ROOT_DIR/root/$1export PATH=$PATH:$ROOTSYS/binexport LD_LIBRARY_PATH=$ROOTSYS/lib:$LD_LIBRARY_PATH
export ALICE=$ALICE_ROOT_DIR/alirootexport ALICE_LEVEL=$2export ALICE_ROOT=$ALICE$ALICE_LEVELexport ALICE_TARGET=‘uname‘export LD_LIBRARY_PATH=$ALICE_ROOT/lib/tgt_$ALICE_TARGET:$LD_LIBRARY_PATH
export PATH=$PATH:$ALICE_ROOT/bin/tgt_$ALICE_TARGET:$ALICE_ROOT/share
export MANPATH=$MANPATH:$ALICE_ROOT/man$ALICE_ROOT/bin/tgt_$ALICE_TARGET/aliroot -q -b grun.C
The JDL file we need is the following one:
Executable = "/bin/sh";StdOutput = "aliroot.out";StdError = "aliroot.err";InputSandbox = {"start_aliroot.sh",
"rootrc","grun.C","Config.C"};
OutputSandbox = {"aliroot.out","aliroot.err","galice.root"};
RetryCount = 7;Arguments = "start_aliroot.sh 3.02.04 3.07.01";Requirements = Member("ALICE-3.07.01",other.GlueHostApplicationSoftwareRunTimeEnvironment);
2http://alisoft.cern.ch/offline/aliroot-new/howtorun.html
IST-2000-25182 PUBLIC 20/68

EDG TUTORIALHandouts for participants for EDG Release 2.x
Doc. Identifier:DataGrid-08-TUT-V3.2.1
Date: December 10, 2003
Figure 7: The ALICE Aliroot GEANT 3 simulated event
Note that the following part of the exercise (displaying the event) can only beexecuted if aliroot is installed locally on your User Interfacemachine (UI). Please check that or ask your tutor for help.
After output retrieval, we can take a look at the event launching Aliroot in the Display mode by issuingaliroot display.C, after having copied the rootrc file to our home directory, having renamed it to .rootrcand having sourced the aliroot.sh file. The generated event looks like the one reported in Figure 7.
Figure 8 reports the data flow (Input/Output) for this aliroot example run.
IST-2000-25182 PUBLIC 21/68

EDG TUTORIALHandouts for participants for EDG Release 2.x
Doc. Identifier:DataGrid-08-TUT-V3.2.1
Date: December 10, 2003
UI
WN
UI
InputSandbox
OutputSandbox
aliroot.err, aliroot.out,
start_aliroot.sh, rootrc,grun.C, Config.C
galice.root
INPUT
OUTPUT
Aliroot
Figure 8: Input/Output data flow to the Worker Node for the generation of an ALICE simulatedevent
2.8. EXERCISE JS-8: CHECKSUM ON A LARGE FILE TRANSFERRED WITH THE INPUTSAND-BOX
Goal: In this example exercise we transfer via InputSandbox a large file (file size about 200 MB), whosebit wise checksum is known, and check that the file transfer did not corrupt by any mean the fileby performing again the checksum on the Worker Node and comparing the two results.
We will use a shell script (ChecksumShort.sh), which exports in an environmental variable ($CSTRUE) thevalue of the CheckSum for the file before file transfer, and then performs again the check locally on theWorker Node issuing the cksum command on the file short.dat and exporting the result in the $CSTRUEenvironmental variable. The test result is correct if the two values are equal:
#!/bin/sh# The true value of the checksumexport CSTRUE="2933094182 1048576 short.dat"# Create a 20MB file with the given seedecho "True checksum:’${CSTRUE}’"export CSTEST="‘cksum short.dat‘"echo "Test checksum:’${CSTEST}’"echo "Done checking"if ["${CSTRUE}" = "${CSTEST}"]; thenexport STATUS=OK;
elseexport STATUS=FAIL;
fi# Finishedecho "Goodbye. [${STATUS}]"
The JDL file we are going to use is the following one (ChecksumShort.jdl):
IST-2000-25182 PUBLIC 22/68

EDG TUTORIALHandouts for participants for EDG Release 2.x
Doc. Identifier:DataGrid-08-TUT-V3.2.1
Date: December 10, 2003
Executable = "ChecksumShort.sh";StdOutput = "std.out";StdError = "std.err";InputSandbox = {"ChecksumShort.sh", "short.dat"};OutputSandbox = {"std.out", "std.err"};Arguments = "none";
If everything works fine (and the GridFTP InputSandbox transfer was OK) in the std.out file we shouldfind this content:
True checksum:’2933094182 1048576 short.dat’Test checksum:’2933094182 1048576 short.dat’Done checking.Goodbye. [OK]
The data flow for this exercise is shown in Figure 9.
UI
WN
UI
InputSandbox
OutputSandbox
short.dat (~20 MB)ChecksumShort.sh
INPUT
cksum
OUTPUTstd.out
std.err
Figure 9: Checksum example data flow
As usual, the sequence of commands we are going to issue is the following one:
grid-proxy-initedg-job-submit ChecksumShort.jdledg-job-status JobIdedg-job-get-output JobId
We finally need to change directory to the local directory where files have been retrieved and examinethe std.out to check the result of the checksum test.
IST-2000-25182 PUBLIC 23/68

EDG TUTORIALHandouts for participants for EDG Release 2.x
Doc. Identifier:DataGrid-08-TUT-V3.2.1
Date: December 10, 2003
2.9. EXERCISE JS-9: A SMALL CASCADE OF ”HELLO WORLD” JOBS
Goal: Goal of this exercise is to submit a small cascade of elementary ”Hello World” jobs, to explorethe tools provided to handle numerous JobIds during the parallel execution of a large set of Jobs.
For our purpose we can log in twice on the User Interface, in order to have at our disposal two simulta-neous sessions from which to submit jobs.
We then use a shell script that loops a given amount of times submitting a single job each occasion(submitter.sh):
#!/bin/bashi=0while [ $i -lt $1 ]do edg-job-submit -o $2 HelloWorld.jdli=‘expr $i +1‘
done
From each UI session, after grid-proxy-init, we can issue the command:
./submitter.sh 4 HelloWorld.jobids}.
The ”.jobids” file is a file containing all JobIds for the 4 submitted Jobs. This can be done using the ”-ofilename option in the edg-job-submit command to submit jobs.
We can then use the provided shell script called analysis.sh (which requires in input the name of the.jobids file) to issue the edg-job-status for all jobs and extract in a formatted way some relevantinformation, storing it in the file analizza.txt. Otherwise we can also issue directly a edg-job-status-i HelloWorld.jobids to get info on the Job’s status. To collectively retrieve the output we can issuea edg-job-get-output -i HelloWorld.jobids and then examine the content of the files on the localtemporary directories on the UI, where files are retrieved. The JDL file we use is the simplest one of all:
Executable = "/bin/echo";StdOutput = "message.txt";StdError = "stderror";OutputSandbox = {"message.txt", "stderror"};Arguments = "Hello World";
IST-2000-25182 PUBLIC 24/68

EDG TUTORIALHandouts for participants for EDG Release 2.x
Doc. Identifier:DataGrid-08-TUT-V3.2.1
Date: December 10, 2003
2.10. EXERCISE JS-10: A SMALL CASCADE OF ALICE ALIROOT MC EVENTS JOBS
Goal: The aim of this exercise is to submit a small cascade of Aliroot jobs to represent a mini productionof ALICE simulated events on the Grid.
We will therefore use a submitter shell script, which will produce a loop in which the submission of thealiroot.jdl (see exercise JS-7) is performed.
Like in the previous exercise (JS-9), we will store all JobIds in a file (aliroot.jobids), and use this file tohandle the jobs (getting their status and retrieving the output).
We run the alirootSubmitter.sh shell script, that will issue the edg-job-submit -o aliroot.jobidscommands. We then monitor the status of the jobs using the analysis.sh script. After all jobs have beenexecuted, we will issue a edg-job-get-output -i aliroot.jobids to retrieve the output of all theexecuted jobs. We require the presence of the ALICE Experiment Software installed on the ComputingElement’s Worker Nodes: this is done in the last line of the following JDL file (aliroot.jdl):
Executable = "/bin/sh";StdOutput = "aliroot.out";StdError = "aliroot.err";InputSandbox = {"start_aliroot.sh",
"rootrc","grun.C","Config.C"};
OutputSandbox = {"aliroot.out","aliroot.err","galice.root"};
RetryCount = 7;Arguments = "start_aliroot.sh 3.02.04 3.07.01";Requirements = Member("ALICE-3.07.01",other.GlueHostApplicationSoftwareRunTimeEnvironment);
The corresponding shell script (start aliroot.sh) is (like in exercise JS-7):
#!/bin/shmv rootrc $HOME/.rootrcecho "ALICE_ROOT_DIR is set to $ALICE_ROOT_DIR"export ROOTSYS=$ALICE_ROOT_DIR/root/$1export PATH=$PATH:$ROOTSYS/binexport LD_LIBRARY_PATH=$ROOTSYS/lib:$LD_LIBRARY_PATH
export ALICE=$ALICE_ROOT_DIR/alirootexport ALICE_LEVEL=$2export ALICE_ROOT=$ALICE/$ALICE_LEVELexport ALICE_TARGET=‘uname‘export LD_LIBRARY_PATH=$ALICE_ROOT/lib/tgt_$ALICE_TARGET:$LD_LIBRARY_PATH
export PATH=$PATH:$ALICE_ROOT/bin/tgt_$ALICE_TARGET:$ALICE_ROOT/share
export MANPATH=$MANPATH:$ALICE_ROOT/man$ALICE_ROOT/bin/tgt_$ALICE_TARGET/aliroot -q -b grun.C
and the alirootSubmitter.sh shell script is the following one:
IST-2000-25182 PUBLIC 25/68

EDG TUTORIALHandouts for participants for EDG Release 2.x
Doc. Identifier:DataGrid-08-TUT-V3.2.1
Date: December 10, 2003
#!/bin/bashi=0while [ $i -lt $1 ]do edg-job-submit -o $2 aliroot.jdli=‘expr $i +1‘
done
Finally, we need to issue from the User Interface machine the following commands to start the produc-tion:
grid-proxy-init./alirootSubmitter.sh 5 aliroot.jobids./analysis.sh aliroot.jobidsedg-job-get-output -i aliroot.jobids
IST-2000-25182 PUBLIC 26/68

EDG TUTORIALHandouts for participants for EDG Release 2.x
Doc. Identifier:DataGrid-08-TUT-V3.2.1
Date: December 10, 2003
2.11. EXERCISE JS-11: TAKING A LOOK AT THE .BROKERINFO FILE
Goal: In this exercise we learn how to use the .BrokerInfo file and corresponding tools to retrieve infor-mation about a job on a Worker Node.
When a Job is submitted to the Grid, we do not know a-priori its destination Computing Element.
There are reciprocal ”closeness” relationships among Computing Elements and Storage Elements whichare taken into account during the match making phase by the Resource Broker and affect the choice ofthe destination CE according to where required input data are stored.
For jobs which require accessing input data normally resident on a given Grid SE, the first part of thematchmaking is a query to the Replica Catalog to resolve each required LFN into a set of correspondingSURLs or physical locations. Once a set of job-accessible SEs is available, the matchmaking processselects the optimal destination CE - i.e. the ”closest” to the most accessed Storage Element.
In general, we need a way to inform the Job of the choice made by the Resource Broker during thematchmaking so that the Job itself knows which are the physical files actually to be opened. Therefore,according to the actual location of the chosen CE, there must be a way to inform the job how to accessthe data.
This is achieved using a file called the .BrokerInfo file, which is written at the end of the matchmakingprocess by the Resource Broker and it is sent to the worker node as part of the InputSandbox.
The .BrokerInfo file contains all information relevant for the Job, like the destination CEId, the requireddata access protocol for each of the SEs needed to access the input data (”file” - if the file can be openedlocally, ”rfio” or ”gridftp” - if it has to be accessed remotely, etc), the corresponding port numbers to beused and the physical file names (SURLs) corresponding to the accessible input files from the CE wherethe job is running.
The .BrokerInfo file provides to the application a set of methods to resolve the LFN into a set of possiblecorresponding SURLs (getLFN2SFN). Note that by definition the SFN corresponds to an SURL butit does not contain the prefix “srm:”. Neither the BrokerInfo API nor CLI distinguishes betweenSFN and SURL and thus they are identical here..
In addition, there exists a Command Line Interface (CLI) called edg-brokerinfo that is equivalent tothe C++ API. It can be used to get information on how to access data, compliant with the chosen CE.The CLI methods can be invoked directly on the Worker Node (where the .BrokerInfo file actually isheld), and - similarly to the C++ API - do not actually re-perform the matchmaking, but just read the.BrokerInfo file to get the result of the matchmaking process. Note that the CLI and the API can onlybe successfully used on the WN where the .BrokerInfo file exists. You will not be able to use thetool on the UI.
In this example exercise we take a look at the .BrokerInfo file on the Worker Node of the destination CE,and examine its various fields.
The vary basic JDL we are going to use is the following one (brokerinfo.jdl):
Executable = "/bin/more";StdOutput = "message.txt";StdError = "stderror.log";OutputSandbox = {"message.txt", "stderror.log"};Arguments = " .BrokerInfo";
The corresponding set of commands we have to issue are as follows:
IST-2000-25182 PUBLIC 27/68

EDG TUTORIALHandouts for participants for EDG Release 2.x
Doc. Identifier:DataGrid-08-TUT-V3.2.1
Date: December 10, 2003
grid-proxy-initedg-job-submit brokerinfo.jdledg-job-get-output JobId
IST-2000-25182 PUBLIC 28/68

EDG TUTORIALHandouts for participants for EDG Release 2.x
Doc. Identifier:DataGrid-08-TUT-V3.2.1
Date: December 10, 2003
2.12. EXERCISE JS-12: A SIMPLE EXAMPLE OF AN INTERACTIVE JOB
Goal: This exercise will show you how to submit jobs to the grid which require input from the user.
We can specify an interactive job by setting JobType on the JDL to “Interactive”. By doing this, our jobsubmission will involve some additional steps: A shadow process will be launched in the backgroundof the console. This process will listen for job standard streams on some port chosen by the OS. A newwindow is opened where the job streams are forwarded. As this is a X window, we have to make surethat we either connect to the UI via ssh -X or manually set the DISPLAY environment variable to thecorrect value.
The JDL we will use for this example is the following (interactive.jdl):
[JobType = "Interactive" ;Executable = "scriptint.sh" ;InputSandbox = {"scriptint.sh"} ;OutputSandbox = {"err" , "out" } ;StdOutput = "out";StdError = "err";]
As the job starts running, a new window will show on the screen with three main areas: Standard Output,Error and Input. In this example we will see the result of scriptint.sh on Standard Output. We shouldprovide the necessary input by writing on the window and after the job ends simply close it.
The script executed on the WN is the following one:
#!/bin/shecho "Welcome !"sleep 1;echo "What’s your name ?"read Aecho ‘‘Bye Bye \$A’’exit 0
The command sequence for this example is this one: grid-proxy-initedg-job-submit interactive.jdledg-job-status JobId
As StdOut and StdError are being redirected to the X window, there are no files coming from these. If wehad some additional data being generated on the WN, we could get it as usually using edg-job-get-output.
IST-2000-25182 PUBLIC 29/68

EDG TUTORIALHandouts for participants for EDG Release 2.x
Doc. Identifier:DataGrid-08-TUT-V3.2.1
Date: December 10, 2003
2.13. EXERCISE JS-13: EXECUTION OF PARALLEL JOBS
Goal: The goal of this exercise is to give an example of parallel job submission on the grid.
In DataGrid, parallel job support is currently achieved using the MPI library, in this case a portableimplementation of MPI called MPICH.
Currently, execution of parallel jobs is supported only on single CE’s but in the future it may be possibleto have parallel execution of jobs in different CE’s.
From a user point of view, the submission of a parallel job is very similar to the ones we have been tryingbefore (“single jobs”). All we need is to give JobType the value MpiCh and specify the number of nodeswe want to use in our job execution.
The JDL for this example is the following one (parallel.jdl):
[JobType = "MpiCh";NodeNumber = 4;Executable = "cpi";InputSandbox = {"cpi"};OutputSandbox = {"err", "out"};StdOutput = "out";StdError = "err";]
Note that an additional Requirement will be added to the JDL specifying that the MPICH software shouldbe installed on all WNs of the selected CE. If none has it currently installed, we will not be able to runthis example.
The job consists on the execution of a PI calculation application - cpi - which is provided on the exercise’sfiles.
We’ll have to issue the following sequence of commands for this example: grid-proxy-initedg-job-submit parallel.jdledg-job-status JobIdedg-job-get-output JobId
In the out file retrieved we will have the value for PI as well as other information concerning the jobexecution.
IST-2000-25182 PUBLIC 30/68

EDG TUTORIALHandouts for participants for EDG Release 2.x
Doc. Identifier:DataGrid-08-TUT-V3.2.1
Date: December 10, 2003
2.14. EXERCISE JS-14: JOB CHECKPOINTING EXAMPLE
Goal: In this exercise we’ll learn how to define and create checkpoints for a job, saving it’s state andallowing it to be resumed later.
There are two main new features that Job Checkpointing brings to EDG.
At first, it gives the user the ability to save intermediate states for the jobs, allowing them to be resumedin case of a system failure. A job simply restarts from the last saved state, which is an important featurein particular for long-running jobs.
At another level, it gives the ResourceBroker the possibility to stop the execution of a job without neces-sarily loosing what had been done till that point. This is important in several situations: a new job withhigher priority just arrived and should be run immediately; during execution it is decided that the job isnot suitable for that resource and should be moved elsewhere - in this case, the job will restart in the newresource from the last saved state; etc...
In EDG’s checkpointing implementation, a user’s application can save it’s state at any time. This stateis defined by the user as a list of ¡var, value¿ pairs. Typical cases where this is important and can beeasily implemented is inside applications composed by a sequence of steps/iterations. The state of thejob could be saved after each one of this steps.
In this example, we’re going to submit a job where checkpointing will be performed. The several statesof the job will be saved and after it’s execution, we’ll resubmit the job specifying a state from where itshould start.
We’ll use this JDL (checkpoint.jdl):
[JobType = "checkpointable";Executable = "hsum";Arguments = " 2000000 200000 gsiftp://lxshare0236.cern.ch/tmp/";Inputsandbox = {"hsum"};Outputsandbox = {"err","out"};StdOutput = "out";StdError = "err";Requirements = member("ROOT", other.GlueHostApplicationSoftwareRunTimeEnvironment);]
Notice the special JobType.
hsum needs ROOT to be installed in the WN, so we’ll have to make sure it is available. Also, thearguments passed to the application represent the following: . first argument: 2000000 - the total numberof events . second argument: 200000 - the number of events between 2 state saving . third argument:gsiftp://lxshare0236.cern.ch/tmp/ - the gridftp server directory where the histogram files should be saved
Here is the sequence of actions we should perform:
Submit the job issuing the command: edg-job-submit checkpoint.jdl.
Wait for the job to get into Done (Success) status. Check it using edg-job-status jobId.
After it finishes, we can check that the states were successfully saved. At first, list the directory wherewe saved the intermediate states: edg-gridftp-ls –verbose gsiftp://lxshare0236.cern.ch/tmp/. Some filescorresponding to the saved states should be in it. After that, retrieve the output of the job with edg-job-get-output jobId and check the contents of the output file. There should be something close to this:
CHECKPOINTING at Event = 200000 Waiting 10 seconds... ... ( some more lines here ) ... CHECK-POINTING at Event = 1800000 Waiting 10 seconds...
IST-2000-25182 PUBLIC 31/68

EDG TUTORIALHandouts for participants for EDG Release 2.x
Doc. Identifier:DataGrid-08-TUT-V3.2.1
Date: December 10, 2003
As we can see, we have the states successfully stored, so although the job was completed, we’ll restartit just to show how checkpoint works. The first thing to do is to retrieve an intermediate state of the job.We can do this by issuing edg-job-get-chkpt –cs 1 -o ¡state-file¿ ¡edg-jobid¿. We’re simply retrievingthe last but one saved state, storing it in the file specified in ¡state-file¿. The ¡edg-jobid¿ is the regularjob identifier. Check other options available for this command with the –help option.
All that’s left is to submit the job again, but this time passing it the file with the retrieved state. After thejob is finished we can do the normal procedure of returning the output and notice that only the last partof the job was executed. We can also check the gridftp server directory where the files were stored andsee how only the file corresponding to the last step in the job was modified.
The complete sequence of commands for this exercise is the following: grid-proxy-initedg-job-submit checkpoint.jdledg-job-status JobIdedg-job-get-output JobIdedg-job-get-chkpt --cs 1 -o state-file JobIdedg-job-submit -chkpt state-file checkpoint.jdledg-job-status JobIdedg-job-get-output JobId
The source code for the C++ application is as follows:
#include <TCanvas.h>#include <TH1.h>#include <TF1.h>#include <TH2.h>#include <TProfile.h>#include <TNtuple.h>#include <TFile.h>#include <TROOT.h>#include <TFrame.h>#include <TRandom.h>#include <TSystem.h>#include <TBenchmark.h>#include <TApplication.h>#include <TSlider.h>#include <unistd.h>#include <netdb.h>#include <sys/types.h>#include <sys/wait.h>// checkpointing library#include "edg/workload/checkpointing/client/checkpointing.h"
/** MACRO meaning:* WITH_IT => use the iterator* WITH_X => use graphical interface* WITH_IMG => take a snapshot of the last chekpointing event* (needs WITH_X set to true)*/
using namespace edg::workload::checkpointing;
#define BUF_SIZE 1000
TROOT mRoot( "Tracking", "Tracking Root Interface" );
IST-2000-25182 PUBLIC 32/68

EDG TUTORIALHandouts for participants for EDG Release 2.x
Doc. Identifier:DataGrid-08-TUT-V3.2.1
Date: December 10, 2003
int main( int argc, char *argv[] ) {
std::string file;bool first;
// temporary filechar *OutFile = "hsum.root";std::string OutFileCkpt;int CkptEv, EndEv;int err;char *echostr, *hostname, *wd, *tmp;
#ifndef WITH_ITint BegEv;
#endif
if (argc != 4) {printf ("Usage: %s <Last_ev> <Ckpt_ev> <SE_path> \n", argv[0]);exit(-1);
} else {EndEv = atoi(argv[1]);CkptEv = atoi(argv[2]);OutFileCkpt = argv[3];
}
OutFileCkpt.append("hsum_CHKPT");
echostr = (char *) malloc(BUF_SIZE);tmp = (char *) malloc(BUF_SIZE);hostname = (char *) malloc(BUF_SIZE);wd = (char *) malloc(BUF_SIZE);if ((echostr == NULL) || (tmp == NULL) || (hostname == NULL) || (wd == NULL)) {
printf("Not enough memory\n");exit(-1);
}
if ( !getcwd(wd, 255)) wd = "/tmp/";gethostname(hostname, 255);
#ifdef WITH_XTApplication tApp( "Buuu", &argc, argv );
#endif
// Create a new canvas.TCanvas *c1 = new TCanvas("c1","The HSUM example",200,10,600,400);c1->SetFillColor(42);c1->GetFrame()->SetFillColor(21);c1->GetFrame()->SetBorderSize(6);c1->GetFrame()->SetBorderMode(-1);
TFile *hsumfile;TH1F *total, *main, *s1, *s2;TSlider *slider = 0;
try { // initialize a state quering the LBJobState state(JobState::job);
IST-2000-25182 PUBLIC 33/68

EDG TUTORIALHandouts for participants for EDG Release 2.x
Doc. Identifier:DataGrid-08-TUT-V3.2.1
Date: December 10, 2003
try {// take the name of the chkpt_file from the State if it existsfile = state.getStringValue("hsum_filename")[0];printf ("Restarting the Job from the last saved state...\n");fflush(NULL);// copy the last chkpted file from the SEsprintf(echostr, "globus-url-copy %s file://%s/%s", file.c_str(), wd, OutFile);err = system(echostr);if ( WIFSIGNALED(err) || ( WIFEXITED(err) && ( WEXITSTATUS(err) != 0 ) ) ) exit(2);hsumfile = new TFile(OutFile, "UPDATE");total = (TH1F*)gROOT->FindObject("total");main = (TH1F*)gROOT->FindObject("main");s1 = (TH1F*)gROOT->FindObject("s1");s2 = (TH1F*)gROOT->FindObject("s2");
} catch ( ULException ) { // the attribute has not been set => first runhsumfile = new TFile(OutFile,"RECREATE","Demo ROOT file with sum histogram");total = new TH1F("total","This is the total distribution",100,-4,4);main = new TH1F("main","Main contributor",100,-4,4);s1 = new TH1F("s1","This is the first signal",100,-4,4);s2 = new TH1F("s2","This is the second signal",100,-4,4);total->Sumw2(); // this makes sure that the sum of squares of weights will be storedtotal->SetMarkerStyle(21);total->SetMarkerSize(0.7);main->SetFillColor(16);s1->SetFillColor(36);s2->SetFillColor(46);
}#ifndef WITH_IT
try {// take the number of the first event from the State if it existsBegEv = state.getIntValue("first_event")[0];printf ("Start from event %d\n", BegEv);fflush(NULL);
} catch ( ULException ) { // the attribute has not been setBegEv = 0;
}#endif
try {// take the boolean variabile to decide which distribution must be plottedfirst = state.getBoolValue("distribution")[0];
} catch ( ULException ) { // the attribute has not been setfirst = true;
}
// Fill histograms randomlygRandom->SetSeed();Int_t i;const Int_t kUPDATE = 500;Float_t xs1, xs2, xmain;
#ifdef WITH_ITtry {
// Step st = state.getCurrentStep();while ( Step st = state.getCurrentStep() ) {i = st.getInteger();
IST-2000-25182 PUBLIC 34/68

EDG TUTORIALHandouts for participants for EDG Release 2.x
Doc. Identifier:DataGrid-08-TUT-V3.2.1
Date: December 10, 2003
st = state.getNextStep();#else
for ( i=BegEv; i < EndEv; i++ ) {#endif
if ( first ) {xmain = gRandom->Gaus(-1,1.5);xs1 = gRandom->Gaus(-0.5,0.5);xs2 = gRandom->Landau(1,0.15);
} else {xmain = gRandom->Gaus(3,0.75);xs1 = gRandom->Gaus(-1.75,0.25);xs2 = gRandom->Landau(-3,0.20);
}
main->Fill(xmain);s1->Fill(xs1,0.3);s2->Fill(xs2,0.2);total->Fill(xmain);total->Fill(xs1,0.3);total->Fill(xs2,0.2);if (i && (i%kUPDATE) == 0) {if (i == kUPDATE) {
total->Draw("e1p");main->Draw("same");s1->Draw("same");s2->Draw("same");c1->Update();slider = new TSlider("slider","test",4.2,0,4.6,total->GetMaximum(),38);slider->SetFillColor(46);
}if (slider) slider->SetRange(0,Float_t(i)/10000.);c1->Modified();c1->Update();if (gSystem->ProcessEvents())
break;}
// checkpointing...if (i && (i%CkptEv) == 0) {if ( ((i/CkptEv)%2) == 0 ) first = !first; // change the distribution definitions
#ifdef WITH_IMGc1->SaveAs("sumshot.gif");
#endifprintf ("CHECKPOINTING at Event = %d\n", i);fflush(NULL);hsumfile->Write();
#ifndef WITH_IT// store the BegEvstate.saveValue("first_event", i+1); // the next first event should be i+1, right?
#endif// copy the OutFile to the SEsprintf(tmp, "%s_%s_%d.root", OutFileCkpt.c_str(), gethostbyname(hostname)->h_name, i);sprintf(echostr, "globus-url-copy file://%s/%s %s", wd, OutFile, tmp);err = system(echostr);if ( WIFSIGNALED(err) || ( WIFEXITED(err) && ( WEXITSTATUS(err) != 0 ) ) ) exit(2);// store the name of the file in the State object
IST-2000-25182 PUBLIC 35/68

EDG TUTORIALHandouts for participants for EDG Release 2.x
Doc. Identifier:DataGrid-08-TUT-V3.2.1
Date: December 10, 2003
state.saveValue("hsum_filename", (std::string)tmp);state.saveValue("distribution", first);
try {err = state.saveState();if ( err ) {
printf ("Save State failed!!! Error: %d \n", err);// exit(1); // don’t exit if a save failed}
} catch ( ChkptException &exc ) {printf ("CHECKPOINTING failed!!! Exception message: %s\n", exc.dbgMessage().c_str());//exit(1); // don’t exit if a save failed
}printf( "%s\n", "Waiting 10 seconds..." );sleep(10);
}} // close while or for
#ifdef WITH_IT} catch (EoSException) {}
#endif
//Save all objects in this filetotal->Draw("sameaxis"); // to redraw axis hidden by the fill areac1->Modified();
} catch (ChkptException &exc) { // failed to retrieve the first state --> abortprintf ("CHECKPOINTING failed!!! Exception message: %s\n", exc.dbgMessage().c_str());exit(1);
}
// Note that the file is automatically close when application terminates// or when the file destructor is called.
free(hostname);free(tmp);free(echostr);free(wd);
exit(0);
#ifdef WITH_XtApp.Run( kTRUE );
#endif}
IST-2000-25182 PUBLIC 36/68

EDG TUTORIALHandouts for participants for EDG Release 2.x
Doc. Identifier:DataGrid-08-TUT-V3.2.1
Date: December 10, 2003
3. DATA MANAGEMENT EXERCISES
In the exercises JS-1 to JS-11 we have seen how to submit jobs, query the job’s status, retrieve the outputand packaging everything needed by our job into the Input and Output sandboxes. However, one doesnot use Input and Output Sandboxes for Data Management on the Grid.
On the contrary, the idea of using sandboxes is more thought as for providing small auxiliary files to thejobs, like data cards for the various Monte Carlo events generating programs, or small required librariesfor the executables.
We still have to discover and understand how to handle large files, distributed all over the Grid, how tomake other users aware of the availability of files owned by us on our Storage Elements and how to beable to find out where to find useful replicas for us to be used in our jobs.
For this purpose there is a set of tools that allows users to replicate files from one Storage Element toanother, to register files with a Replica Catalog, etc. The main tool for this purpose is the EDG ReplicaManager that uses a set of services (Replica Location Service, Replica Metadata Catalog, ReplicaOptimization Service etc. In this set of exercises you will learn how to use the replica manager as wellas the associated services. In more details, the EDG Replica Manager has a complete set of tools tocreate replicas of files between Storage Elements, Computing Elements (Worker Nodes) etc. and registerfiles in the Replica Catalogs.
For the exercises we assume that you use the following User Guides for the relevant tools and services:
• EDG Replica Manager, Replica Location Service, Replica Metadata Catalog:
http://cern.ch/edg-wp2/replication/documentation.html
• Replica Optimization Service
http://cern.ch/edg-wp2/optimization/documentation.html
For more background on the overall set of data management services provided by EDG, refer to the webfollowing web sites:
http://cern.ch/edg-wp2/publications.htmlhttp://web01.esc.rl.ac.uk/projects/DataGrid/wp5/documentation.html
In following examples you will use several files names (Logical File Name, SURL, etc.) which require aspecific syntax. For more information, please refer to the Glossary in Section 6.1..
NOTE
Filenames used in these examples are to be taken as example names.
When registering files into Replica Catalogs, LFNs must be unique, moreover, you are all sharing thesame directories. Therefore, try to use fancy and imagination to use your own filenames in order to avoidconflicts. A good way could be using filenames containing your complete name.
IST-2000-25182 PUBLIC 37/68

EDG TUTORIALHandouts for participants for EDG Release 2.x
Doc. Identifier:DataGrid-08-TUT-V3.2.1
Date: December 10, 2003
3.1. EXERCISE DM-1: DISCOVER GRID STORAGE
Goal: The goal of this exercise is to find out where Grid Storage is available and how it can be accessed.With the use of simple tools you will learn how to discover storage space in the Grid, mainly usingthe following command:
• edg-rm printInfo
In general, all Storage Elements registered with the Grid publish, through the Grid Information System,the location of the directory where to store files. This directory on the SE is usually VO dependent (eachdefined VO has its own one) but the location can also be hidden by the underlying Storage Element orStorage Resource Manager. In EDG, a Storage Element is mainly implemented by a Storage ResourceManager and thus both terms are used in the remainder of this document.
The are several ways to retrieve information about Storage Elements and their attributes. One way is todirectly query the Information System and you will learn how to do so in the exercises about InformationSystems (see Section 4.). In addition, the EDG Replica Manager provides a method called printInfoto query the most basic information of a Storage Element. Here we give details on how to do that.
Issue the following EDG Replica Manager command:
> edg-rm --vo=tutor printInfo
Note that we assume that you use the VO tutor. A possible (reduced) output looks as follows:
VO used : tutordefault SE : pcrd24.cern.chdefault CE : lxshare0313.cern.chInfo Service class : org.edg.data.reptor.info.InfoServiceStub
RMC endpoint : http://adc0013.cern.ch:8080/edg-replica-metadata-catalog/services/edg-replica-metadata-catalogLRC endpoint : http://adc0013.cern.ch:8080/edg-replica-location/services/edg-local-replica-catalogROS endpoint :http://lxshare0343.cern.ch:8080/edg-replica-optimization/services/edg-replica-optimization
List of CE ID’s : gppce06.gridpp.rl.ac.uk:2119/jobmanager-pbs-Sgppce06.gridpp.rl.ac.uk:2119/jobmanager-pbs-Mgppce06.gridpp.rl.ac.uk:2119/jobmanager-pbs-L
[...]
List of SE ID’s : gppse02.gridpp.rl.ac.uklxshare0408.cern.chtbn07.nikhef.nl
SE at RAL :name : RALhost : gppse06.gridpp.rl.ac.uktype : disk
accesspoint : /flatfiles/SE01VOs : lhcb,cms,tutor
VO directories : lhcb:/lhcb,cms:/cms,tutor:/tutorprotocols : file,rfio,gsiftp
IST-2000-25182 PUBLIC 38/68

EDG TUTORIALHandouts for participants for EDG Release 2.x
Doc. Identifier:DataGrid-08-TUT-V3.2.1
Date: December 10, 2003
[...]SE at CERN-DEV :
name : CERN-DEVhost : lxshare0408.cern.chtype : edg-se
accesspoint : /flatfiles/SE00endpoint : http://lxshare0408.cern.ch:8080/edg-se-webservice/services/edg-se-webservice
VOs : lhcb,cms,tutorVO directories : lhcb:/lhcb,cms:/cms,tutor:/tutor
protocols : gsiftp,file,rfio
The output presents information about all possible Computing Elements (CEs) as well as Storage Ele-ments that are registered with the information service. We are mainly interested in the Storage Elementsand their storage locations. The number of SEs given shows you how many SEs you can possibly use.Note that you also need to find an SE that allows for your VO (tutor). As a first exercise, go through theoutput and discover how many SEs you can use.
The SE can be implemented in several ways which has an impact on the directory where files are stored:
1. The SE is a conventional disk server with a GridFTP interface. That is a simple solution that doesnot require additional SE software but has several disadvantages are regards space management onthe disk.
2. On the Storage Element, a particular SRM (or EDG-SE) is running that takes care of space man-agement, interfacing to Mass Storage Systems etc.
In case of a conventional disk server that runs GridFTP (type : disk, this path might be exposed. Incase the SE is running an SRM or EDG-SE (type : edg-se), the path might not be there since theSRM decides internally where files can be written to.
In all cases, the VO specific directories can be obtained by combining the following two attributesaccesspoint and VO Directories. For example:
host : lxshare0408.cern.chaccesspoint : /flatfiles/SE00
VO directories : lhcb:/lhcb,cms:/cms,tutor:/tutor
Thus, files for the VO tutor are written into the directory /flatfiles/SE00/tutor.
ADVANCED AND RELATED EXERCISE
One way to query all possible Storage Elements is to use the Information System (i.e. R-GMA) directly.You will find details in Section 4. but you can already look ahead and try R-GMA queries like thefollowing:
rgma> latest select GlueSEUniqueID from GlueSL;
where you select all the unique IDs (i.e. names of Storage Elements). GlueSL stands for “Glue StorageLibrary” and corresponds to the SE as indicated in the output of printInfo.
IST-2000-25182 PUBLIC 39/68
EDG TUTORIALHandouts for participants for EDG Release 2.x
Doc. Identifier:DataGrid-08-TUT-V3.2.1
Date: December 10, 2003
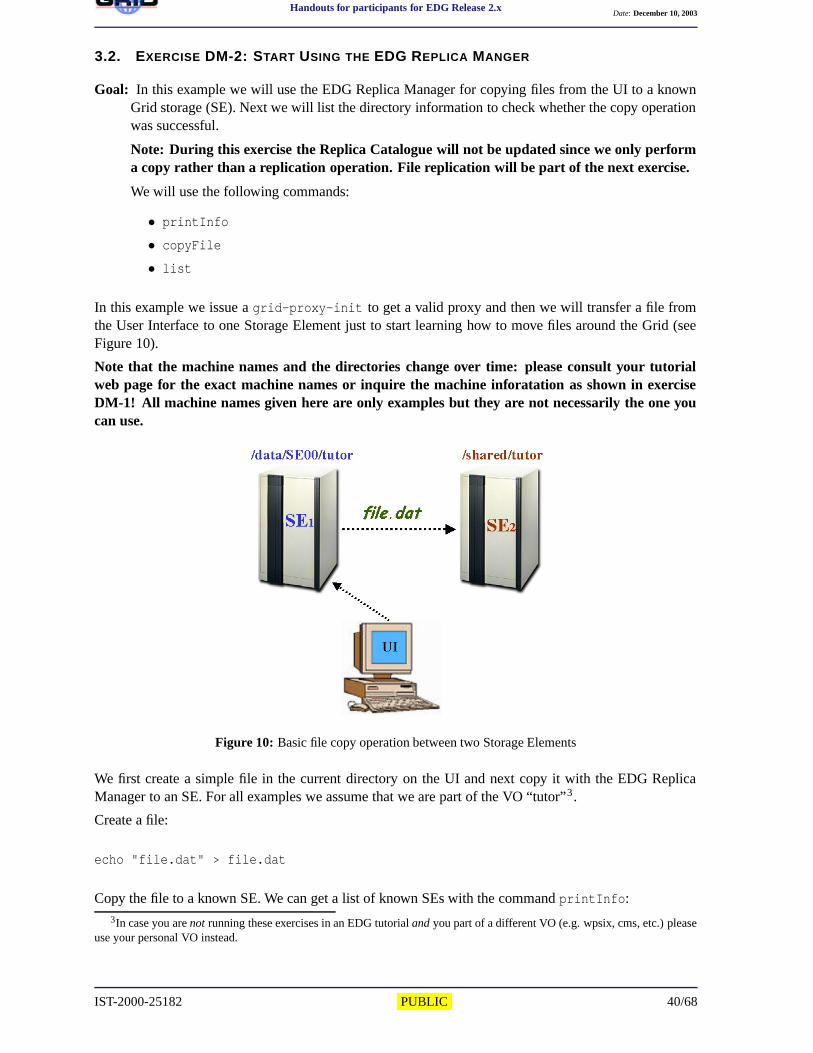
3.2. EXERCISE DM-2: START USING THE EDG REPLICA MANGER
Goal: In this example we will use the EDG Replica Manager for copying files from the UI to a knownGrid storage (SE). Next we will list the directory information to check whether the copy operationwas successful.
Note: During this exercise the Replica Catalogue will not be updated since we only performa copy rather than a replication operation. File replication will be part of the next exercise.
We will use the following commands:
• printInfo
• copyFile
• list
In this example we issue a grid-proxy-init to get a valid proxy and then we will transfer a file fromthe User Interface to one Storage Element just to start learning how to move files around the Grid (seeFigure 10).
Note that the machine names and the directories change over time: please consult your tutorialweb page for the exact machine names or inquire the machine inforatation as shown in exerciseDM-1! All machine names given here are only examples but they are not necessarily the one youcan use.
Figure 10: Basic file copy operation between two Storage Elements
We first create a simple file in the current directory on the UI and next copy it with the EDG ReplicaManager to an SE. For all examples we assume that we are part of the VO “tutor”3 .
Create a file:
echo "file.dat" > file.dat
Copy the file to a known SE. We can get a list of known SEs with the command printInfo:3In case you are not running these exercises in an EDG tutorial and you part of a different VO (e.g. wpsix, cms, etc.) please
use your personal VO instead.
IST-2000-25182 PUBLIC 40/68

EDG TUTORIALHandouts for participants for EDG Release 2.x
Doc. Identifier:DataGrid-08-TUT-V3.2.1
Date: December 10, 2003
edg-rm --vo=tutor printInfo
Typical SEs are:
List of SE ID’s : pcrd24.cern.chccgridli02.in2p3.frgppse06.gridpp.rl.ac.ukse01.nikhef.nltestbed007.cnaf.infn.it
Each SE might have a default directory for the files of a particular VO. For instance, on the SE pcrd24.cern.chthe default directory for VO “tutor” is:
SE at CERN :name : CERNhost : pcrd24.cern.chtype : disk
VO Directory : tutor : /data/tempprotocols : gsiftp
We now want to copy the file file.dat from the current directory to the directory /data/temp on theSE pcrd24.cern.ch
edg-rm --vo=tutor copyFile file://‘pwd‘/file.dat \gsiftp://pcrd24.cern.ch/data/temp/file.dat
Note that since the source file is available on the local file system, the prefix file: has be used to referto a local file.
We can check whether the copy operation was successful with the command list
edg-rm --vo=tutor list gsiftp://pcrd24.cern.ch/data/temp/file.dat
As an additional exercise, try to copy a file from the current SE that you have chosen to an additional SE,as depicted in Figure 10.
IST-2000-25182 PUBLIC 41/68

EDG TUTORIALHandouts for participants for EDG Release 2.x
Doc. Identifier:DataGrid-08-TUT-V3.2.1
Date: December 10, 2003
3.3. EXERCISE DM-3: FILE REPLICATION WITH THE EDG REPLICA MANGER
Goal: In this example we will use the EDG Replica Manager for replicating files between various SEsand get familiar with the basic catalogue commands to list and delete replicas.
We will use the following commands:
• copyAndRegisterFile
• replicateFile
• listReplicas
• deleteFile
• listGUID
We first create a file in the current directory that we want to replicate afterwards.
echo ‘‘file.kurt’’ > file.kurt
We now want to copy the file to an SE and register it in the replica catalogue with the logical file name(LFN) lfn:file.kurt. Note that an LFN needs to start with the prefix lfn:. We also provide a specificname and directory for the file on the destination SE.
edg-rm --vo=tutor copyAndRegisterFile file://‘pwd‘/file.kurt \-l lfn:file.kurt \-d srm://pcrd24.cern.ch/data/temp/file.kurt1
On successfully copying, a GUID is returned which uniquely identifies the replicas of file.kurt (withthe LFN lfn:file.kurt):
guid:ec3ee4d2-a653-11d7-849e-ea0706438314
We can check the replicas of a specific LFN that are registered in the replica catalogue with listReplicas.
edg-rm --vo=tutor listReplicas lfn:file.kurt
As the result we get:
srm://pcrd24.cern.ch/data/temp/file.kurt1
Now we replicate the file from CERN to an SE at France. We only specify the destination host and letthe Replica Manager create the file name and place the file into the correct directory.
edg-rm --vo=tutor replicateFile srm://pcrd24.cern.ch/data/temp/file.kurt1 \-d ccgridli07.in2p3.fr
The generated file name and thus the second replica looks, for instance, like follows:
srm://ccgridli07.in2p3.fr//tmp/generated/2003/06/24/file7572af6a-a655-11d7-8b9d-db2322879f7d
When we now list the replicas of our specific LFN lfn:file.kurt
IST-2000-25182 PUBLIC 42/68

EDG TUTORIALHandouts for participants for EDG Release 2.x
Doc. Identifier:DataGrid-08-TUT-V3.2.1
Date: December 10, 2003
edg-rm --vo=tutor listReplicas lfn:file.kurt
we should get two replicas at different locations:
srm://ccgridli07.in2p3.fr//tmp/generated/2003/06/24/file7572af6a-a655-11d7-8b9d-db2322879f7dsrm://pcrd24.cern.ch/data/temp/file.kurt1
We finally want to create a third replica in Scotland. As a source we specify the LFN and let the ReplicaManager find the best copy which is then replicated.
edg-rm --vo=tutor replicateFile lfn:file.kurt -d grid01.ph.gla.ac.uk
Assume that we need all the storage space at CERN for some other application and so we want to deletethe replica at the CERN SE.
edg-rm --vo=tutor deleteFile srm://pcrd24.cern.ch/data/temp/file.kurt1
Now assume that none of the replicas is needed any more and we want to delete all of them. In case wehave forgotten the GUID of the replicas associated with a specific LFN, we can retrieve it with:
edg-rm --vo=tutor listGUID lfn:file.kurt
We can now delete all the files by specifying the GUID we have just retrieved. Note that with the option-a we delete all replicas of a specific GUID.
edg-rm --vo=tutor deleteFile guid:ec3ee4d2-a653-11d7-849e-ea0706438314 -a
When we now list the replicas of LFN file.kurt
edg-rm --vo=tutor listReplicas lfn:file.kurt
we should get the following result:
java.io.FileNotFoundException: File not in catalog : lfn:file.kurt
since there is no replica anymore of that LFN.
3.3.1. ADVANCED EXERCISE - USING A STATIC CONFIGURATION FILE FOR INFORMATION SERVICE
Note that the following exercises is for advanced users only.
Goal: In the following exercise you are asked to use the EDG Replica Manager with a static configu-ration file for the Information Service and then remove/add an SE that only has a disk and doesnot provide an SRM interface. This is a very useful exercise in case the Information Service isnot on-line and you still need to run the EDG Replica Manager commands. In addition, it is alsouseful if you need to quickly add new machines (SEs) and test them: this it is very helpful fordebugging.
IST-2000-25182 PUBLIC 43/68

EDG TUTORIALHandouts for participants for EDG Release 2.x
Doc. Identifier:DataGrid-08-TUT-V3.2.1
Date: December 10, 2003
For this exercise you need to consult the EDG Replica Manager Installation Guide which can be ob-tained from the same link where you also find the User Guide.
Here, we only give you a few hints and you would need to find out the details yourself:
1. You need to change the configuration file edg-replica-manager.conf and point to it when youuse an EDG Replica Manager command.
2. In the configuration file edg-replica-manager.conf you can set the information service thatyou want to use. You want to configure the replica manager in a way that it does not contactan information service but it uses a local configuration file from which it obtains all SE and CEinformation etc.
3. You need to create a file called info-service-stub.properties and copy it to your home di-rectory unless your machine is not already configured in a way that it uses a configuration file. Formore hints on what this file has to look like, please refer to the Appendix of the Installation Guideor to the following web page:
http://datagrid.in2p3.fr/cvsweb/edg-reptor/config/info-service-stub.properties
4. Make sure you point your configuration to the file above (hint: check in the file edg-replica-manager.conf.
Once you have achieved all this, you can try to experiment with the file info-service-stub.propertiesand remove/add a new Storage Element or Computing Element.
Note that the information you see in the info-service-stub.properties is very similar to the oneprovided by the command printInfo. Please check Exercises DM1 for synergies.
IST-2000-25182 PUBLIC 44/68

EDG TUTORIALHandouts for participants for EDG Release 2.x
Doc. Identifier:DataGrid-08-TUT-V3.2.1
Date: December 10, 2003
3.4. EXERCISE DM-4: USING THE REPLICA CATALOG
Goal: After some preliminary replica catalogue interaction in the previous exercise, we now go a bitmore into detail with using the replica catalogue with the EDG Replica Manager and use thefollowing commands:
• addAlias, removeAlias
• registerFile, unregisterFile
As described in detail in the EDG Replica Manager User Guide4, the replica catalogue componentsconsists of two parts:
1. Replica Location Service (RLS): you will get more information in Exercise DM-6
2. Replica Metadata Catalog (RMC): you will get more information in Exercise DM-7
Although as a user you would not need to know all the details for simple replication commands, butfor more complex queries and inserts you would need to distinguish that the two services store differentinformation as depicted in Figure 11.
GUID
LogicalName
LogicalName
LogicalName
NamePhysical
Name
Name
NamePhysical
Physical
Physical
LogicalName
RMC
RLS
Logical File Name − GUID − SURL ( = Physical Name)
Figure 11: The Logical File Name to GUID mapping is maintained in the Replica Metadata Catalog,the GUID to Physical File Name (SURL) mapping in the RLS.
In the previous example, the commands listReplicas and listGUID were used in order to retrievecertain SURLs5 for details on file naming conventions or GUIDs based on a given filename. Thesecommands use both catalogues transparently. We first show how additional commands can be used andthen point out the limitations of the replica manager interface and refer to the specific interfaces for theRLS and RMC respectively.
For files that are already stored on a Storage Element but not yet registered with a Replica Catalogue, wecan use the command registerFile as follows:
edg-rm --vo=tutor registerFile \srm://pcrd24.cern.ch/data/temp/my-name-second-name
4http://cern.ch/edg-wp2/replication/documentation.html5refer to Section 6.1.
IST-2000-25182 PUBLIC 45/68

EDG TUTORIALHandouts for participants for EDG Release 2.x
Doc. Identifier:DataGrid-08-TUT-V3.2.1
Date: December 10, 2003
Note that the file might not be there yet. Please transfer the file there and then issue the command abovedepending on your name. The command then returns a GUID, e.g. guid:85c71452-a714-11d7-89d1-fd96669a052b.
A GUID that is registered with the Replica Location Service can have several LFNs (also referred to asAlias). We now show how you can add and remove several aliases for a given GUID. For example add,two alias names to the given GUID:
edg-rm --vo=tutor addAlias guid:85c71452-a714-11d7-89d1-fd96669a052b \lfn:my-first-lfn
edg-rm --vo=tutor addAlias guid:85c71452-a714-11d7-89d1-fd96669a052b \lfn:my-second-lfn
Then, we can remove one of the alias names:
edg-rm --vo=tutor removeAlias guid:85c71452-a714-11d7-89d1-fd96669a052b \lfn:my-second-lfn
In case you do not want to have the file registered anymore in the Replica Catalogue but you do not wantto delete the file, you can use the command unregisterFile:
edg-rm --vo=tutor unregisterFile guid:85c71452-a714-11d7-89d1-fd96669a052b \srm://pcrd24.cern.ch/data/temp/my-name-second-name
As an additional exercise, please try different combinations of the commands to get an idea about theLFN/alias usage.
Note: As you might have already realised, the interface to the replica catalogue (provided by the EDGReplica Manager) does not give you a full set of query functions like wild card queries SURLs, GUIDs,LFNs etc. In order to do so, you would need to use the direct interfaces to the RLS and RMC as we willsee in the the exercises DM-6 and DM-7.
IST-2000-25182 PUBLIC 46/68

EDG TUTORIALHandouts for participants for EDG Release 2.x
Doc. Identifier:DataGrid-08-TUT-V3.2.1
Date: December 10, 2003
3.5. EXERCISE DM-5: REPLICA OPTIMISATION WITH THE EDG REPLICA MANAGER
Goal: In this example we will use the EDG Replica Manager basic file replication and optimisation.
We will use the following commands:
• copyAndRegisterFile
• replicateFile
• listReplicas
• listGUID
• listBestFile
• getBestFile
• getAccessCost
• deleteFile
In the scenario the user knows that there is a file available at CERN, that has been put on a host accessiblethrough GridFTP. It is not a grid-aware store, so first the user has to copy the file to a Storage Elementand register it in the Grid. Say that for some reason the user cannot copy it to the local CERN StorageElement but has to copy it to the one at IN2P3 in France.
In the example the file is called higgs0 and resides at testbed008.cern.ch/tmp/.
Copy and registration is an atomic operation. In the example we assign also a Logical File Name alias toit in the process, lfn:higgs, which is easier to remember than the GUID that is returned by the call:
edg-rm --vo=tutor copyAndRegisterFile gsiftp://testbed008.cern.ch/tmp/higgs0 \-l lfn:higgs -d srm://ccgridli02.in2p3.fr/edg/StorageElement/dev2/tutor/higgs
A GUID is created and returned to the screen:
guid:7c29f32b-4964-11d7-a86c-9ee9a33b1f19
To verify whether the operation got successfully executed, we can issue listReplicas:
edg-rm --vo=tutor listReplicas lfn:higgs
which yields:
srm://ccgridli02.in2p3.fr/edg/StorageElement/dev2/tutor/higgs
In order to retrieve the GUID based on the LFN, we can issue
> edg-rm --vo=tutor listGUID lfn:higgs
As a second step, the user might want to have a replica of this data file available at NIKHEF in theNetherlands, because he intends to share it or to submit jobs that require resources at NIKHEF. A replicacan be created using the replicateFile command:
edg-rm --vo=tutor replicateFile lfn:higgs \-d srm://se01.nikhef.nl/flatfiles/tutor/higgs
IST-2000-25182 PUBLIC 47/68

EDG TUTORIALHandouts for participants for EDG Release 2.x
Doc. Identifier:DataGrid-08-TUT-V3.2.1
Date: December 10, 2003
The command confirms its execution by returning the actual SURL used. If the -d option is omitted, anautomatic SURL would have been created. Here the output is:
srm://se01.nikhef.nl/flatfiles/tutor/higgs
To list all replicas now in the system, we can issue listReplicas again:
edg-rm --vo=tutor listReplicas lfn:higgs
which yields:
srm://ccgridli02.in2p3.fr/edg/StorageElement/dev2/tutor/higgssrm://se01.nikhef.nl/flatfiles/tutor/higgs
To see which replica has the best network connection to CERN, we can use listBestFile:
edg-rm --vo=tutor listBestFile lfn:higgs -d pcrd24.cern.ch
The output is, for example:
srm://se01.nikhef.nl/flatfiles/tutor/higgs
which means that the file at NIKHEF can be made available at CERN faster than the one from LYON.
We now want to see the file access costs of the best replica with respect to CERN, NIKHEF and Lyon.
edg-rm --vo=tutor getAccessCost -l lfn:higgs \-d lxshare0313.cern.ch ce01.nikhef.nl ccgridli01.in2p3.fr
The output is:
Access Cost 0 :CE = lxshare0313.cern.ch0:srm://se01.nikhef.nl/flatfiles/tutor/higgsTotalTime = 0.13
Access Cost 1 :CE = ce01.nikhef.nl0:srm://se01.nikhef.nl/flatfiles/tutor/higgsTotalTime = 0.0
Access Cost 2 :CE = ccgridli01.in2p3.fr0:srm://ccgridli02.in2p3.fr/edg/StorageElement/dev2/tutor/higgsTotalTime = 0.0
The list is grouped by the CEs given on the command line. For each CE the ’best’ replica is listed andthe time it would take to make it available locally. We can see that the expected access cost to CERNis 0.13 sec for the replica from NIKHEF, which is better than the one at Lyon (so that one is not listedat all). For the other sites the access cost is 0 since the file is already locally available and no networktransfer is required.
To actually make the best file available at CERN, we can issue getBestFile
IST-2000-25182 PUBLIC 48/68

EDG TUTORIALHandouts for participants for EDG Release 2.x
Doc. Identifier:DataGrid-08-TUT-V3.2.1
Date: December 10, 2003
edg-rm --vo=tutor getBestFile lfn:higgs -d pcrd24.cern.ch
The output is something like:
srm://pcrd24.cern.ch/data/temp/a6289c7c-4966-11d7-bc63-d91230733e2d
We should now have three replicas:
edg-rm --vo=tutor listReplicas lfn:higgs
The output is:
srm://pcrd24.cern.ch/data/temp/aaa64014-4967-11d7-a6cc-f7a1ff1899b0srm://se01.nikhef.nl/flatfiles/tutor/higgssrm://ccgridli02.in2p3.fr/edg/StorageElement/dev2/tutor/higgs
To delete a replica we can use the deleteFile command:
edg-rm deleteFile lfn:higgs -s ccgridli02.in2p3.fr
As an exercise, please try to create a few more replicas, see how the commands listBestFile andgetBestFile work on your replicas.
IST-2000-25182 PUBLIC 49/68

EDG TUTORIALHandouts for participants for EDG Release 2.x
Doc. Identifier:DataGrid-08-TUT-V3.2.1
Date: December 10, 2003
3.6. EXERCISE DM-6: USING THE REPLICA LOCATION SERVICE
Goal: In this example we will use the Replica Location Service for performing basic replica catalogueoperations.
Note: This exercise is considered for administrators only since the operations do not do anyconsistency checks. For instance, one can create a GUID-PFN mapping even though thePFN does not exist. End users are asked to use the Replica Manager commands for theseoperations.
We will use the following commands:
• ping (administration command)
• mappingsByGuid
• mappingsByPfn
• guidExists
• addMapping
• listAttrDefns
• addAttrDefn
• removeAttrDefn
• setPfnAttr
• getPfnAttr
• removePfnAttr
• removePfn
The first step is to check whether the RLS server is up and running. This can be done with a simple pingcommand (see below). The hostname of the RLS server can be obtained via the EDG Replica Managercommand printInfo where the entire LRC endpoint (URL) of the service is given as shown in exerciseDM1. You only need to take the host name of the URL.
edg-lrc-admin -i ping -h adc0013.cern.ch
If the server is up, the number of registered GUIDs and PFNs6 is returned:
OK : 553 GUIDs, 573 Pfns.
All the GUID-PFN mappings can be retrieved with:
edg-lrc -i mappingsByGuid "*" -h adc0013.cern.ch
A typical result is:
guid:00c8b0cd-a730-11d7-801a-e343a9ee0c1f, srm://tbn03.nikhef.nl/flatfiles/tutor/cmkin.out.030425120250guid:00ccc27e-a720-11d7-9296-a4690dc71cde, srm://se010.fzk.de//flatfiles/tutor/h4mu_130_1.kinlis.030423101731guid:0277dacf-a7b4-11d7-8839-b121e819388b, srm://grid001.to.infn.it//flatfiles/SE00/tutor/filelist.lfn.030423104108
6Note that the term PFN is used here but it is equivalent to the SURL of previous exercises
IST-2000-25182 PUBLIC 50/68

EDG TUTORIALHandouts for participants for EDG Release 2.x
Doc. Identifier:DataGrid-08-TUT-V3.2.1
Date: December 10, 2003
In case you get a security error, you can also try to use the option -i in order to connect to the server inan insecure mode:
edg-lrc -i mappingsByGuid "*" -h adc0013.cern.ch
The PFN-mappings can be queried in a similar way:
edg-lrc -i mappingsByPfn "*" -h adc0013.cern.ch
For instance, all the PFNs stored at NIKHEF, can be retrieved as follows:
edg-lrc -i mappingsByPfn "*nikhef*" -h adc0013.cern.ch
Result:
guid:00c8b0cd-a730-11d7-801a-e343a9ee0c1f, srm://tbn03.nikhef.nl/flatfiles/tutor/cmkin.out.030425120250guid:036be6ce-a7ae-11d7-92ad-95e140d2ab86, srm://tbn03.nikhef.nl/flatfiles/tutor/h4mu_130_1.ntpl.030506101324guid:0401d348-a7b0-11d7-b37b-e2d53058f5eb, srm://tbn03.nikhef.nl/flatfiles/tutor/ff_cards.cmkin.030425120123guid:0c47f094-a7b1-11d7-95cc-ba61336cf560, srm://tbn03.nikhef.nl/flatfiles/tutor/start_cmkin.sh.030425120016...
Next we create a new GUID-PFN mapping. In order to make sure that our GUID guid:myGuid1 isunique, we will first check whether it exists in the catalogue.
edg-lrc -i guidExists guid:myGuid1 -h adc0013.cern.ch
Result:
GUID does not exist : ’guid:myGuid1’
edg-lrc -i addMapping guid:myGuid1 pfn:myPfn1 -h adc0013.cern.ch
We can now check whether the mapping was successfully entered:
edg-lrc -i mappingsByGuid "guid:myGuid1" -h adc0013.cern.ch
Result:
guid:myGuid1, pfn:myPfn1
Next we want to add the attribute size to the PFN pfn:myPfn1. Let us first check which attributedefinitions are entered in the catalogue:
edg-lrc -i listAttrDefns -h adc0013.cern.ch
IST-2000-25182 PUBLIC 51/68

EDG TUTORIALHandouts for participants for EDG Release 2.x
Doc. Identifier:DataGrid-08-TUT-V3.2.1
Date: December 10, 2003
Result:
size , stringowner , string
Since the attribute size is already registered, we can set the size of PFN pfn:myPfn1 to say 1000:
> edg-lrc -i setPfnAttr pfn:myPfn1 size 1000 -h adc0013.cern.ch
We can now check whether the operation was successful.
edg-lrc -i getPfnAttr pfn:myPfn1 size -h adc0013.cern.ch
Now we want to add a new attribute called description to the catalogue.
edg-lrc -i addAttrDefn description string -h adc0013.cern.ch
This new attribute will be set for our PFN pfn:myPfn1.
edg-lrc -i setPfnAttr pfn:myPfn1 description "This PFN contains CMS higgs \candidates" -h adc0013.cern.ch
Let us assume, we do not need the file size attribute of pfn:myPfn1 any more and we wish to delete it:
edg-lrc -i removePfnAttr pfn:myPfn1 size -h adc0013.cern.ch
Now assume that we also do not need to attribute description any more in the whole catalogue:
edg-lrc -i removeAttrDefn description -h adc0013.cern.ch
Finally, we want to remove the GUID-PFN mapping for pfn:myPfn1
edg-lrc -i removePfn guid:myGuid1 pfn:myPfn1 -h adc0013.cern.ch
ADVANCED EXERCISE
Create your own GUID-PFN mappings with different attributes and clean up the catalogue afterwards.
IST-2000-25182 PUBLIC 52/68
EDG TUTORIALHandouts for participants for EDG Release 2.x
Doc. Identifier:DataGrid-08-TUT-V3.2.1
Date: December 10, 2003
3.7. EXERCISE DM-7: USING THE REPLICA METADATA CATALOG
Goal: In this example we will use the Replica Metadata Catalog for performing basic replica metadatacatalogue operations.
Note: This exercise is considered for administrators only since the operations do not do anyconsistency checks. For instance, one can create a GUID-alias mapping even though thealias does not exist. End users are asked to use the Replica Manager commands for theseoperations.
We will use the following commands:
• ping (administration command)
• mappingsByGuid
• mappingsByAlias
• guidExists
• addAlias
• listGuidAttrDefns
• listAliasAttrDefns
• addGuidAttrDefn
• setGuidAttr
• getGuidAttr
• removeGuidAttr
• removeGuidAttrDefn
Before we start using the Replica Metadata Catalog, we check whether it is up and running (see below).The hostname of the RMC server can be obtained via the EDG Replica Manager command printInfowhere the entire RMC endpoint (URL) of the service is given as shown in exercise DM1.
edg-rmc-admin -i ping -h adc0013.cern.ch
As a result we get back the number of GUIDs and aliases that are stored in the catalogue.
OK : 825 GUIDs, 794 Aliases.
All the GUIDs and aliases can be retrieved with:
edg-rmc -i mappingsByGuid "*" -h adc0013.cern.ch
Result:
guid:00c8b0cd-a730-11d7-801a-e343a9ee0c1f, lfn:cmkin.out.030425120250guid:00ccc27e-a720-11d7-9296-a4690dc71cde, lfn:h4mu_130_1.kinlis.030423101731guid:017a3910-a7c2-11d7-b237-fbaf79cbba14, lfn:h4mu_130.ntpl.030423102714
Similarity, the mappings by alias can be queried with:
edg-rmc -i mappingsByAlias "*" -h adc0013.cern.ch
IST-2000-25182 PUBLIC 53/68

EDG TUTORIALHandouts for participants for EDG Release 2.x
Doc. Identifier:DataGrid-08-TUT-V3.2.1
Date: December 10, 2003
Next we want to add a new GUID-alias mapping. Before doing so, we make sure that the GUIDguid:myGuid1 is unique and thus does not exist in the catalogue:
edg-rmc -i guidExists guid:myGuid7 -h adc0013.cern.ch
Result:
GUID does not exist : ’guid:myGuid7’
We can now add the mapping:
edg-rmc -i addAlias guid:myGuid7 alias:alias7 -h adc0013.cern.ch
We now check whether the mapping was successfully entered:
edg-rmc -i mappingsByGuid "guid:myGuid7" -h adc0013.cern.ch
Result:
guid:myGuid7, alias:alias7
Next, we want to add a new attribute definition. The respective attributes can be checked with:
edg-rmc -i listGuidAttrDefns -h adc0013.cern.ch
edg-rmc -i listAliasAttrDefns -h adc0013.cern.ch
Assume we want to add the attribute owner for the GUID guid:myGuid7 and enter a specific value.
edg-rmc -i addGuidAttrDefn owner string -h adc0013.cern.ch
edg-rmc -i setGuidAttr guid:myGuid7 owner "kurt" -h adc0013.cern.ch
We can check the whether the entry was entered successfully:
edg-rmc -i getGuidAttr guid:myGuid7 owner -h adc0013.cern.ch
Result:
kurt
Next we want to remove the GUID attribute again:
edg-rmc -i removeGuidAttr guid:myGuid7 owner -h adc0013.cern.ch
Finally, we want to remove the GUID attribute definition from the whole catalogue:
edg-rmc -i removeGuidAttrDefn owner -h adc0013.cern.ch
ADVANCED EXERCISE
Create your own GUID-alias mappings with different attributes and clean up the catalogue afterwards.
IST-2000-25182 PUBLIC 54/68

EDG TUTORIALHandouts for participants for EDG Release 2.x
Doc. Identifier:DataGrid-08-TUT-V3.2.1
Date: December 10, 2003
3.8. EXERCISE DM-8: USING THE EDG REPLICA MANAGER WITHIN A JOB
Goal: In this exercise we are going to use the EDG Replica Manager inside a Job. We will copy afile from the Worker Node, where it is created, to a Storage Element, and register the file with aReplica Catalog. The file is a postscript file created by PAW on the worker node (see also exerciseJS-3).
Contrary to the previous examples on Data Management, this time we need to write a JDL file with thedescription of the job we want to submit to the system: we create a JDL file which runs PAW on a WorkerNode of a given Computing Element, copies and registers this file using the command:
edg-rm --vo=tutor copyAndRegisterFile
and we finally check that the produced file is correctly registered inside the Replica Catalog. The JDLwe are going to use is the following one:
Executable = "/bin/sh";Arguments = "edgRM.sh testgrid.ps";InputSandbox = {"edgRM.sh", "pawlogon.kumac", "testgridnew.kumac", "paw.metafile"};OutputSandbox = {"stderror.log", "StdOutput.log", "testgrid.ps"};Stderror = "stderror.log";StdOutput = "StdOutput.log";Requirement = Member("CMS-1.1.0", other.GlueHostApplicationSoftwareRunTimeEnvironment);
The issued commands sequence we have to use is the following one :
> grid-proxy-init>> edg-job-submit --resource testbed001.cnaf.infn.it:2119/ \> jobmanager-pbs-medium edgRM.jdl>> edg-job-status JobId>> edg-job-get-output JobId
Have a look at the file edgRM.sh where the commands executed on the WorkerNode are specified. Wefirst run the PAW application and after that we register and copy the result file. The reference to anenvironment variable - CMS ROOT DIR - is just to make sure that we’ll find the PAW executable on theremote machine.
To check the presence of the file, issue:
> edg-rm --vo=tutor list gsiftp://grid007g.cnaf.infn.it/shared/tutor
To check the registration with the catalogue, we can do the following where LFN is the logical file nameyou want to search for:
> edg-rm --vo=tutor listReplicas -l LFN
IST-2000-25182 PUBLIC 55/68

EDG TUTORIALHandouts for participants for EDG Release 2.x
Doc. Identifier:DataGrid-08-TUT-V3.2.1
Date: December 10, 2003
FOLLOW-UP EXERCISE
Now that the file is registered on the SE with a given LFN, create another job where you specify the LFNas InputData in the JDL. Next, create a small job that reads the file specified by the LFN.
Hint: try to create a JDL that contains the following parts:
Executable = "my-job.pl";Stdoutput = "stdoutput";StdError = "stderror";InputSandbox = {"my-job.pl"};OutputSandbox = {"stdoutput","stderror"};InputData = {"lfn:my-test-lfn"};DataAccessProtocol = {"file"};VirtualOrganisation = "tutor";
Note that the file specified with “lfn:my-test-lfn” needs to exists. In the job “my-job.pl” use the fileprotocol to open the file and read it.
ADVANCED EXERCISE
As a related problem, to gain experience with the EDG Replica Manager inside jobs, try to do the sameexercise involving the Storage Elements at other locations (see Exercise DM1 for information on how toobtain additional Storage Elements). In detail, modify the files edgRM.sh and edgRM.jdl accordingly.
IST-2000-25182 PUBLIC 56/68

EDG TUTORIALHandouts for participants for EDG Release 2.x
Doc. Identifier:DataGrid-08-TUT-V3.2.1
Date: December 10, 2003
3.9. EXERCISE DM-9: USE CASE - READ DATA ON THE GRID
Goal: In this exercise you are going to copy a file from a non Grid site to a remote SE. On replicatingthe file to various sites, you will retrieve the best file, read the contents and print it on the screen.
Note: In this exercise we only list a set of steps that will guide you through the use case. We donot provide a detailed list of commands but leave it as a challenge for you to solve the exercise inthe best possible way.
This exercise requires the following steps:
3.9.1. PRE-USE CASE STEPS
These steps are necessary to set up the test data for the use case. You can either use the EDG ReplicaManager based on R-GMA or based on the manual configuration file.
• Create a local test file.
• Place the test file on several SEs remote to the UI (or CE for a job) where you are working. [Hint:Use a specific LFN to keep track of the replicas. You will need the LFN later on.]
3.9.2. USE CASE STEPS
We assume that replicas are created at several remote SEs.
• Replicate the best file to the close SE. [Hint: use getBestFile]
• Extract the SFN from the SURL that is returned from getBestFile. [Hint: the SFN is the SURLwithout the prefix “srm://”]
• Obtain the TURL for the SURL. [Hint: use getTurl]
• Open the file for reading using the TURL.
• Print the file contents on the screen.
Notes: The use case will fail if there is no closeSE, so make sure that this is defined in R-GMA or inmanual configuration files.
IST-2000-25182 PUBLIC 57/68

EDG TUTORIALHandouts for participants for EDG Release 2.x
Doc. Identifier:DataGrid-08-TUT-V3.2.1
Date: December 10, 2003
3.10. EXERCISE DM-10: USE CASE - COPY AND REGISTER JOB OUTPUT DATA
Goal: In this exercise you are going to write a job job1 that produces several output files that areafterwards copied and registered to various SEs. Next you are going to write a second job that readsthe best files of job1 and prints the output on the screen. This is a typical use case of centraliseddata production where the result is distributed to various sites that are part of a particular VirtualOrganisation. These production results are later analysed by users distributed all over the globe.
Note: In this exercise we only list a set of steps that will guide you through the use case. We donot provide a detailed list of commands but leave it as a challenge for you to solve the exercise inthe best possible way.
The following steps are necessary for implementing this use case:
• Write a simple job job1 that produces 5 output files with random numbers between 0 and 100.
• Copy and register these files to various SEs at the end of the job.
• Register metadata about file size, owner and description of the files.
• Write a second job job2 that reads in the best files of job1 and prints the output on the screen.[Hint: This step is similar to Exercise 9.]
IST-2000-25182 PUBLIC 58/68
EDG TUTORIALHandouts for participants for EDG Release 2.x
Doc. Identifier:DataGrid-08-TUT-V3.2.1
Date: December 10, 2003
3.11. EXERCISE DM-11: USE CASE - BULK DATA REGISTRATION
Goal: In this exercise you will perform a bulk data registration operation on files that are in a specificdirectory on an SE.
Note: In this exercise we only list a set of steps that will guide you through the use case. We donot provide a detailed list of commands but leave it as a challenge for you to solve the exercise inthe best possible way.
There are several ways to reach this aim. One possibility is to use the replica manager commandbulkCopyAndRegisterFile.
IST-2000-25182 PUBLIC 59/68

EDG TUTORIALHandouts for participants for EDG Release 2.x
Doc. Identifier:DataGrid-08-TUT-V3.2.1
Date: December 10, 2003
4. INFORMATION SERVICE EXERCISES
Information Systems provide to the Grid an up to date view of its resources, to allow their managementand effective usage by users and internal Grid subcomponents.
The Information System deployed with EDG 2.x is R-GMA, Relational Grid Monitoring Architecture.This is a relational implementation of the GGF’s GMA. This is not a general distributed RDBMS sys-tem, but a way to use the relational model in a distributed environment where global consistency is notimportant. Producers announce themselves with an SQL CREATE TABLE and publish data with an SQLINSERT. Consumers collect data using an SQL SELECT. Some Producers, the Registry and Schema makeuse of an RDBMS as appropriate; but what is central is the relational model.
A number of information providers have been produced by EDG. These are scripts which when invokedmake available the desired information. The EDG information providers scripts cover Site Information,Computing Element, Storage Element and Network Monitoring. These scripts output data in LDIFformat, a legacy from when the information system was based on LDAP. GIN (Gadget IN), periodicallyinvokes these scripts and makes the data available via R-GMA.
Start the edg-rgma tool
edg-rgma
A couple of useful commands are
show tablesdescribe <table>
4.1. EXERCISE IS-1: WITH THE AID OF THE COMMAND LINE TOOL DISCOVER WHAT COMPUT-ING ELEMENTS ARE AVAILABLE ON THE TESTBED
latest select UniqueID from GlueCE
4.2. EXERCISE IS-2: DISCOVER THE AVAILABLE STORAGE ELEMENTS
latest select UniqueID from GlueSE
4.3. EXERCISE IS-3: EMULATE THE RESOURCE BROKER
In this example we perform some basic selection for the job, i.e. we emulate the Work Load Managerwhile performing the matchmaking process.
latest select UniqueID,TotalCPUs,WaitingJobs from GlueCE where WaitingJobs<9
4.4. EXERCISE IS-4: FIND OUT WHICH ARE THE RELATED STORAGE ELEMENTS
Now find the Storage Elements that are related to a Computing Element of your choice (substitute XXXXwith a UniqueID obtained from the previous search).
latest select GlueSEUniqueID from GlueCESEBind where GlueCEUniqueID=’XXXX’
IST-2000-25182 PUBLIC 60/68

EDG TUTORIALHandouts for participants for EDG Release 2.x
Doc. Identifier:DataGrid-08-TUT-V3.2.1
Date: December 10, 2003
4.5. EXERCISE IS-5: AVAILABLE SPACE ON THE STORAGE ELEMENT
Next find out how much available space the Storage Element has. You will need to substitute XXXXwith a GlueSEUniqueID, use the value you obtained from the previous search.
latest select Root,AvailableSpace from GlueSA where GlueSEUniqueID=’XXXX’
4.6. EXERCISE IS-6: JOINS
See if you can now combine the last 2 queries into 1 SQL statement.
4.7. EXERCISE IS-7: R-GMA BROWSER
The R-GMA Browser provides a web interface to the information and monitoring system. It is possibleto examine the structure of the schema as well as the published data.
http://gppic02.gridpp.rl.ac.uk:8080/R-GMA/index.html}
Take some time to look at the browser, in particular the EDG-Information-Providers. See what types ofproducers are available for the GlueCE
Now have a look at the table for Service.
ADVANCED EXERCISE
Using either the Java or C++ API write a program that will publish records to this table at a configurabletime interval using a StreamProducer. An extract form the “Users Guide” is includes below. The full“Users Guide” can be found at:
http://hepunx.rl.ac.uk/edg/wp3/documentation/doc/guide/index.html
And the API guides can be found at:
http://hepunx.rl.ac.uk/edg/wp3/documentation/doc/api/java/index.html
and
http://hepunx.rl.ac.uk/edg/wp3/documentation/doc/api/cpp/index.html
Use the browser to check that you are publishing your data correctly.
An Archiver re-publishing to a LatestProducer for the Service table has already been instantiated and willbe collecting information from all Producers. You should be able to see your data with a “Latest” query.Try modifying the data you are publishing and check the change propagates through to the “Latest”producer.
IST-2000-25182 PUBLIC 61/68

EDG TUTORIALHandouts for participants for EDG Release 2.x
Doc. Identifier:DataGrid-08-TUT-V3.2.1
Date: December 10, 2003
4.8. EXTRACT FROM THE USERS GUIDE - STREAMPRODUCER
In contrast to the DataBaseProducer and LatestProducer, the StreamProducer does not store tuples withina Database. Instead, published tuples are added to a buffer maintained by the StreamProducer mediator.As a result, the StreamProducer is not persistent between servlet container restarts.
When a tuple is published using a StreamProducer, the tuple is streamed to all connected Consumers.This approach therefore ”pushes” tuples on to the Consumer creating a broadcast effect.
A Single StreamProducer can produce any number of tables. (Note - clarify, check only applies toStreamProducer when update document.)
To create a new StreamProducer use the following:
myProducer = new StreamProducer();
The next step is to declare a table for publishing tuples:
myProducer.declareTable(‘‘ServiceStatus’’, # table name‘‘WHERE hostName = ’infocat.gridpp.rl.ac.uk’’’, # predicate‘‘CREATE TABLE ServiceStatus (service VARCHAR(30))’’) # create table
Although no data is stored within a database, declaring the table is still necessary to define the tuplecontent that will be published.
The setMaxBufferSize method is used to set the buffer size of the StreamProducer.
myProducer.setMaxBufferSize(1024);
To set the time-to-live value for the stored tuples, use the setMinRetentionPeriod method.
myProducer.setMinRetentionPeriod(new TimeInterval(1200));
To publish data, an SQL INSERT statement is used, which is passed as a parameter to the insert method:
myProducer.insert(‘‘INSERT INTO ServiceStatus # table name(hostName, name, VO, status, message) # columnsVALUES (’infocat.gridpp.rl.ac.uk’, ’GIN’, ’Atlas’, # values
’OK’,’GIN is running’)’’)
When defining a termination interval for the StreamProducer, use the same setTerminationIntervalmethod.
Note, when the StreamProducer is no longer required, be sure to call the undeclareTable and closemethod.
The following is example code from all available languages for the StreamProducer.
JavamyProducer = new StreamProducer();myProducer.declareTable
(‘‘ServiceStatus’’, ‘‘WHERE (hostName = ’infocat.gridpp.rl.ac.uk’)’’);
IST-2000-25182 PUBLIC 62/68

EDG TUTORIALHandouts for participants for EDG Release 2.x
Doc. Identifier:DataGrid-08-TUT-V3.2.1
Date: December 10, 2003
myProducer.setTerminationInterval(new TimeInterval(1200));myProducer.setMaxBufferSize(1024);myProducer.insert
(‘‘INSERT INTO ServiceStatus ‘‘+‘‘(hostName, name, VO, status, message) ‘‘+‘‘VALUES (’infocat.gridpp.rl.ac.uk’, ’GIN’, ’Atlas’, ’OK’, ’GIN is running’)’’);
myProducer.undeclareTable(‘‘ServiceStatus’’);myProducer.close();
C++myProducer= new edg::info::StreamProducer();myProducer->declareTable
(‘‘ServiceStatus’’, ‘‘WHERE (hostName = ’infocat.gridpp.rl.ac.uk’)’’);myProducer->setTerminationInterval(new edg::info::TimeInterval(1200));myProducer->setMaxBufferSize(1024);myProducer->insert
(‘‘INSERT INTO ServiceStatus(hostName, name, VO, status, message)VALUES (’infocat.gridpp.rl.ac.uk’, ’GIN’, ’Atlas’, ’OK’, ’GIN is running’)’’);
myProducer->undeclareTable(‘‘ServiceStatus’’);delete myProducer;
IST-2000-25182 PUBLIC 63/68

EDG TUTORIALHandouts for participants for EDG Release 2.x
Doc. Identifier:DataGrid-08-TUT-V3.2.1
Date: December 10, 2003
5. APPENDIX: ALTERNATIVE INFORMATION SERVICE: MDS
R-GMA is the official information service in the current EDG release. However, EDG software is alsocompatible with the Globus MDS information system. Below, you find some details on MDS.
Globus MDS 2.1 (Metacomputing Directory Service – now called Monitoring and Discovery Service)is a directory service based on the LDAP (Lightweight Directory Access Protocol). Directory Servicesare read-access optimized data bases; they are intended for systems with frequent read access rather thanfrequent write access. In Directory Services the complexity due to supporting transactions operationmode is avoided. LDAP is based on four models dealing with Information, Naming, Functional andSecurity. Data are organized in Object Classes, in a hierarchical object model, and all classes are derivedfrom the top class. The LDAP server can be queried specifying the particular class of objects to bereturned (using filters) and specifying the starting node – in the directory structure – from which we wantto retrieve information. This is done by specifying the DN (Distinguished Name) of the starting node forthe needed information. This is the base DN parameter of a LDAP search.
Entries have attributes, whose name can be specified in the query string. To describe in detail LDAP isout of the scope of this Tutorial. We want to show here just a few examples on how to get informationfrom the Grid Information Systems.
All relevant resources run a LDAP daemon called slapd. As a convention Globus MDS uses port 2135.
Globus MDS is built on OpenLDAP. The Lightweight Directory Assess Protocol (LDAP) offers a hier-archical view of information in which the schema describes the attributes and the types of the attributesassociated with data objects. The objects are then arranged in a Directory Information Tree (DIT).
A number of information providers have been produced. These are scripts which when invoked by theLDAP server make available the desired information. The information providers include Site Informa-tion, Computing Element, Storage Element and Network Monitoring scripts.
Within MDS the information providers are invoked by a local LDAP server, the Grid Resource Infor-mation Server (GRIS). “Aggregate directories”, Grid Information Index Servers (GIIS), are then used togroup resources. The GRISs use soft state registration to register with one or more GIISs. The GIIS canthen act as a single point of contact for a number of resources, i.e. a GIIS may represent all the resourcesat a site. In turn a GIIS may register with another GIIS, in which case the higher level GIIS may representa country or a virtual organisation.
As MDS is based on LDAP, queries can be posed to the current Information and Monitoring Serviceusing LDAP search commands. An LDAP search consists of the following components:
ldapsearch \-x \-LLL \-H ldap://ced-ii0.datagrid.cnr.it:2135 \-b ’Mds-Vo-name=datagrid,o=grid’ \’objectclass=ComputingElment’ \CEId FreeCPUs \-s base|one|sub
Explanation of fields:
IST-2000-25182 PUBLIC 64/68

EDG TUTORIALHandouts for participants for EDG Release 2.x
Doc. Identifier:DataGrid-08-TUT-V3.2.1
Date: December 10, 2003
-x ”simple” authentication
-LLL print output without comments-H ldap://ced-ii0.datagrid.cnr.it:2135 uniform resource identifier
-b ’Mds-Vo-name=datagrid,o=grid’ base distinguished name for search
’objectclass=ComputingElment’ filter
CEId FreeCPUs attributes to be returned
-s base scope of the search specifying just the base object,one-level or the complete subtree
As another example, the main entry point in MDS is the Information Index that can then be queried.Please check with your tutor to get information about a valid information index. Below, there are someexamples but the hostnames are not correct names:
ldapsearch -x -l 30 -L -h ced-ii0.datagrid.cnr.it -p 2170 \-b "mds-vo-name=local, o=grid" "objectclass=*"
The Information Index contains main relevant information concerning the various Computing Elementsand Storage Elements (belonging respectively to the testbed) is provided in a formatted way.
To take a direct look at the registered Storage Elements on the Grid information published by theGrid information systems, one can query the MDS LDAP servers hosting the whole hierarchy of MDSGRIS/GIIS information belonging to the various national branches of MDS. In order to find out the nameof the Grid top level MDS (ced-ii0.datagrid.cnr.it) please check the tutorial web page.
ldapsearch -x -l 30 -L -h ced-ii0.datagrid.cnr.it -p 2135 \-b "mds-vo-name=local, o=grid" "objectclass=*"
IST-2000-25182 PUBLIC 65/68

EDG TUTORIALHandouts for participants for EDG Release 2.x
Doc. Identifier:DataGrid-08-TUT-V3.2.1
Date: December 10, 2003
6. GLOSSARY
6.1. FILE NAMING CONVENTIONS
Throughout the tutorial you are confronted with several ways of naming files (Logical File Names,naming of replicas at Storage Elements etc.) and thus we give here the exact definitions and someexamples. For the exercises you mainly use LFN and SURL.
LFN Logical File Name A Logical File Name is a user defined alias to a GUID.Unlike GUIDs, aliases are mutable but they still shouldbe globally unique. Since the Replica Management Sys-tem has no control over the creation of LFNs, this globaluniqueness is only weakly enforced. Sometimes also theterm Alias is used to refer to an LFN.
SURL Storage URL An SURL is a locator for a physical file, where thescheme specific part is understood by a Storage ResourceManager (SRM). It is a URL where the scheme is ‘srm’and the host is a valid SRM host.
UUID Universally Unique IDentifier A UUID is a 128 bits long number, and is either guaran-teed to be different from all other UUIDs generated until3400 A.D. or extremely likely to be different (dependingon the mechanism chosen to generate it).
GUID Grid Unique IDentifier A UUID generated by the Replica Management Systemfor an SURL. It is created at the SURL registration time.A GUID is immutable.
TURL Transport URL A Transport URL is returned by a SRM in response to arequest for a way to access a SURL. It includes the ac-tual protocol you can access the SURL by. For instance,‘gsiftp’ for GridFTP, or ‘http’ for HTTP access.
EXAMPLES
In the following we give examples for the definitions of naming conventions.
LFN examples:
lfn:mydatalfn://any_name_you_want
SURL examples:
srm://host1.cern.ch/directory1/directory2/filenamesrm://lxhare0384.cern.ch/flatfiles/cms/data/05/x.dat
GUID examples:
guid:73e16e74-26b0-11d7-b1e0-c5c68d88236aguid:7c29f32b-4964-11d7-a86c-9ee9a33b1f19
TURL examples:
gsiftp://host1.cern.ch/directory1/directory2/filenamehttp://lxhare0384.cern.ch/flatfiles/cms/data/05/x.dat
IST-2000-25182 PUBLIC 66/68

EDG TUTORIALHandouts for participants for EDG Release 2.x
Doc. Identifier:DataGrid-08-TUT-V3.2.1
Date: December 10, 2003
6.2. ABBREVIATIONS AND EXPLANATIONS
Throughout the tutorial you will see several abbreviations that are summarised here and explained insome details. The list is not complete includes the most important items.
CE Computing Element A Computing Element is a Grid resource where jobs canbe executed. In particular, the Computing Element canbe regarded as the gateway that then further submits toone or more Worker Nodes in the same local area net-work.
ERM EDG Replica Manager The client interface to all RMS operations. This consistsof a set of command-line tools.
LRC Local Replica Catalog The catalog storing GUID to SURL mappings, alongwith SURL attributes for a given site, or a single Stor-age Resource Manager at a site. It only stores GUID toSURL mappings for SURLs that are actually located inthe given site or SRM.
RLI Replica Location Index The catalog storing information about which LocalReplica Catalogs have GUID to SURL mappings fora particular GUID. It thus provides the link betweendifferent LRCs, allowing for distributed indexing andquerying of the Catalogs.
RLS Replica Location Service The distributed service providing the mappings betweenGUIDs and SURLs. An RLS has two components: Lo-cal Replica Catalogs and Replica Location Indexes.
SE Storage Element A Grid Service where files can be stored and registeredwith a catalog.
SRM Storage Resource Manager A Storage Resource Manager takes care of managingstorage that can either be a single disk, a disk pool(farm), a hierarchical storage system, a tape system etc.and provides a unique interface to it.
VO Virtual Organization Every user needs to be part of a certain community (ororganisation). Since it does not necessity need to exist,it is called a “virtual organisation”. All people takingpart in an EDG tutorial are part of the VO “tutor”.
WMS Workload Management System Set of services that takes care of accepting user jobs,finding a match based on the job requirements, and thensubmit a job for execution to a Computing Element.
IST-2000-25182 PUBLIC 67/68

EDG TUTORIALHandouts for participants for EDG Release 2.x
Doc. Identifier:DataGrid-08-TUT-V3.2.1
Date: December 10, 2003
ACKNOWLEDGEMENTS
We want to thank many different people belonging to various EDG work packages, who contributed withexample material, suggestions or assistance in the set up of the exercises.
This work was partially funded by the European Commission program IST-2000-25182 through the EUDataGrid Project.
IST-2000-25182 PUBLIC 68/68