data from the national geophysical data center noaa ... relief globe.pdf · bene con il modellismo....
TRANSCRIPT

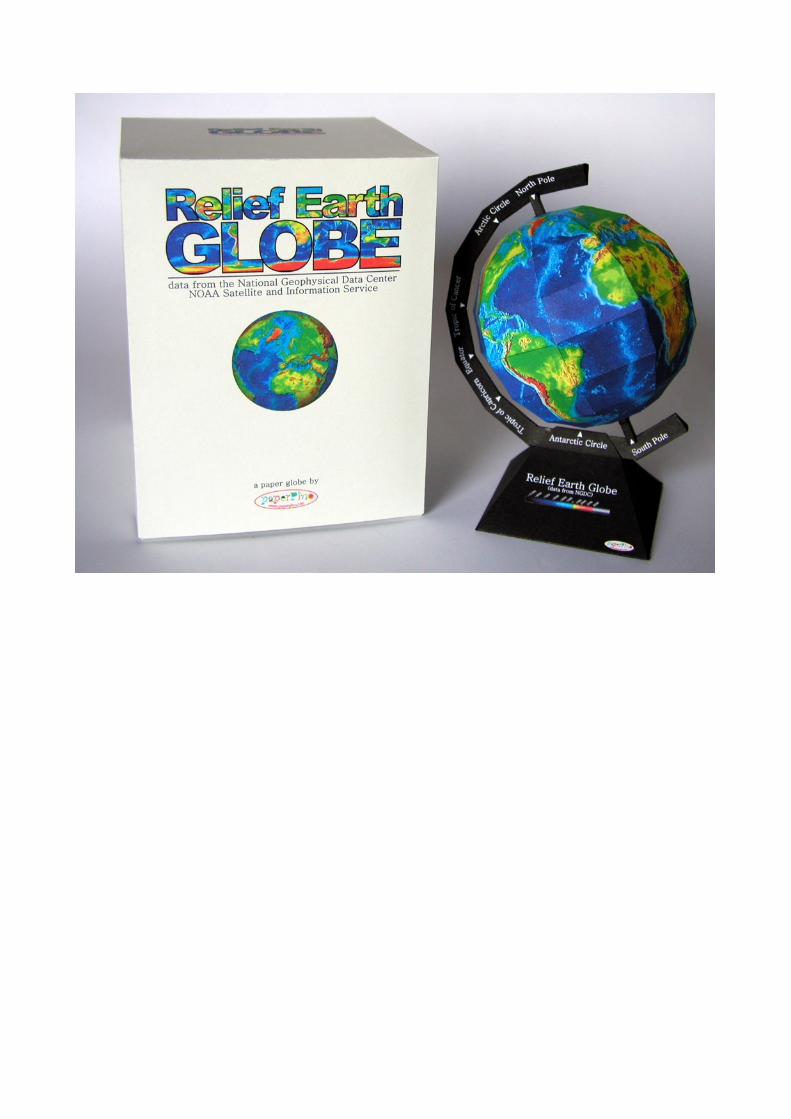
The images used to design this paper globe were taken from the National Geophysical Data Center-NOAA Satellite and Information Service website.These images were generated from the ETOPO2v2 (2006) database, created at NGDC from digital seafloor and land elevation on a 2-minute latitude/longitude grid. A Cylindrical Equidistant projection was used for the world image.More information at: http://www.ngdc.noaa.gov/mgg/fliers/06mgg01.html
data from the National Geophysical Data CenterNOAA Satellite and Information Service
Le immagini usate nella progettazione di questo mappamondo di carta sono tratte dal sito del National Geophysical Data Center-NOAA Satellite and Information Service.Queste immagini sono state generate dal database ETOPO2v2 (2006), creato al NGDC da una topografia ed una batimetria digitale su una griglia di 2x2 minuti. Una proiezione cilindrica equidistante è stata usata per l’immagine globale.Ulteriori informazioni sul sito: http://www.ngdc.noaa.gov/mgg/fliers/06mgg01.html
a paper globe by
INDICE
Dati tecnici 2Istruzioni generali 2Prima di cominciare... 2Strumenti base necessari 3Come incollare facilmente... 3
MappamondoEmisfero Nord (1) e Sud (2) 5Arco (3) 6Coperture arco (4 e 5) 6Asse (6) 7Rondella (7) 7Base (8) 7Istruzioni assemblaggio 8
Coperchio (9A-9D) 9-11Istruzioni 11
Scatola-espositore (10A-10D) 12-17Istruzioni 14Rinforzi (a-b, a’-b’) 18
Copyright © 2007 Giuseppe (Pino) Civitarese for PaperPino sas 1
CONTENTS
Technical Data 2General Instructions 2Before starting... 2Basic tools needed 3How to build the box-like... 3
Earth GlobeNorth (1) and South (2) Emisphere 5Arc (3) 6Arc covers (4 and 5) 6Axle (6) 7Washer (7) 7Base (8) 7Assembling instructions 8
Box lid (9A-9D) 9-11Instructions 11
Display-box (10A-10D) 12-17Instructions 14Reinforcements (a-a’, b-b’) 18

GLOBO TERRESTREGLOBO TERRESTREGLOBO TERRESTREGLOBO TERRESTRE
EARTH RELIEF GLOBEEARTH RELIEF GLOBEEARTH RELIEF GLOBEEARTH RELIEF GLOBE
Prima di cominciare… Leggi le istruzioni e prendi "confidenza" col modello che ti accingi a costruire. Le istruzioni sono scritte vicino ai pezzi da costruire. Durante la costruzione, prima di incollare le varie parti, controlla l'assemblaggio "a secco". Comunque, non preoccuparti: se sbagli qualcosa puoi ristampare e ricostruire. Prenditi tutto il tempo che vuoi: la fretta non va bene con il modellismo. In rete ci sono molti siti (tutti in inglese) con le istruzioni base per il modellismo su carta. Qui di seguito riporto gli indirizzi web di alcuni di questi: http://homepage.ntlworld.com/david.hathaway/ps_web/hintsandtips.htm http://www.lighthousemodelart.com/Introduction.htm http://www.papermodelsonline.com/tipsandtricks.html http://www.cardfaq.org/faq/ http://www.papermod.de/tips.htm Before starting… Read the instructions in order to be familiar with the model to be built. You will find instructions near the parts. During the construction, and before gluing, check the fitting parts. However, do not worry: if you make some mistakes, you can reprint and re-build. Take your time: rushing is not good for paper modelling. There are a number of website with basic instructions for beginners in paper modelling. Check the following list: http://homepage.ntlworld.com/david.hathaway/ps_web/hintsandtips.htm http://www.lighthousemodelart.com/Introduction.htm http://www.papermodelsonline.com/tipsandtricks.html http://www.cardfaq.org/faq/ http://www.papermod.de/tips.htm
DATI TECNICI TECHNICAL DATA
Numero pezzi: 7 (+8 della scatola) spessore: 0.22 (scatola: 0.30 mm) N. of parts: 7 (+8 for the box)
Dimensioni: 10.5x9x14(h) cm Dimensions: 10.5x9x14(h) cm
Carta: grammatura: 160 g/m2 (scatola: 250 g/m2)
Paper:
weight: 160 gsm (box: 250 gsm) thickness: 0.22 (box. 0.30 mm) (Note: paper 160 gsm = US 90lb card stock)
Difficoltà (1-5): 3 Difficulty (1-5): 3
ISTRUZIONI GENERALI GENERAL INSTRUCTIONS linea continua: RITAGLIARE continuous out-line: CUT linea tratteggiata: PIEGATURA CONVESSA broken line: HILL FOLD
linea puntinata (o punto-linea): PIEGATURA CONCAVA dotted line: VALLEY FOLD
area grigia: RITAGLIARE grey area: CUT
pallino rosso: incollare sul pezzo stesso red dot: glue on the same part
incollare il pezzo #12 su quell’area 12 glue piece #12 on that area

Stumenti base necessari • Colla (quella tipo "vinavil" va benissimo). In alcuni casi può essere utile usare la colla a base
cianoacrilica, ma attenzione! Devi saperla usare! Per la parti "laminate", a doppio o triplo spessore, o per le grandi superfifi, si consiglia di usare una colla tipo UHU Stick.
• Forbici • Righello (di metallo è meglio) • Un taglierino • Una penna scarica (o altro strumento simile) per incidere le piegature • Un paio di pinzette. Quelle lunghe e diritte vanno benissimo e sono quasi indispensabili. Sono facilmente
reperibili nei negozi di hobbistica e fai-da-te. • Pennarelli o matite colorate (per colorare gli spigoli bianchi che compaiono dopo il taglio e le piegature).
Questo è optionale, ma utile per migliorare l'aspetto finale del modello. • Una superficie di protezione per il taglio. Oltre a proteggere il tavolo da lavoro, rende i tagli col taglierino
molto più semplici. Basic tools needed • Glue (white PVA glue or the gelled “school glue”). In some cases the cyan acrylic glue can be very useful,
but be careful! You must know how to handle it! I suggest using a UHU Stick type glue for laminated parts (double or triple thickness), and for the large surfaces.
• Scissors (Ones with small sharp tips are best) • Ruler or any straight edge. • A Pen without any ink left for scoring the folding line. Also, a soft butter knife works nicely. • A Hobby Knife or X-Acto Knife. • A pair of Tweezers. They are almost essential. You can buy them at the hobby store. • Colored Pens or Pencils (to color white edges that appear after folding).This is optional and a purely
aesthetic choice. ••• Cutting Matte - not absolutely necessary - but keeps the table from getting gouged. Also makes cutting
with an X-Acto blade a lot easier. If you don't have a cutting matte, try using a piece of corrugated cardboard.
Come incollare facilmente e con accuratezza i pezzi "assimilabili a scatole" Con questa definizione vengono qui intesi tutti quei pezzi che presentano quattro lati tipo il cubo o qualsiasi altra "scatola", anche di forma apparentemente irregolare, aperta o chiusa che sia (fig. a). In questo modello, il pezzo 6, che in pratica è un prisma aperto, potebbe presentare qualche problema perché c'è da incollare un flap piuttosto lungo e sottile. Vediamo come risolvere il problema… (vedi sequenza fotografica nella pagina successiva) How to build the box-like parts easily and accurately Here, we intend to show all those parts representing four sides, like a cube or other box-like solids, including those with irregular shapes (fig. a). In this model, the part 6, a sort of open prism, could present some problems due to the presence of a long and narrow flap. See how you can build it… (see the picture succession on next page).
a

Come incollare facilmente e con accuratezza i pezzi "assimilabili a scatole" How to build the box-like parts easily and accurately
Pressa con forza, proteggendo il pezzo con un foglio bianco. Press with force, protecting the part with a white piece of paper.
Allarga il pezzo nella sua forma finale. Shape the part in its final form.
Ritaglia, incidi e piega lungo le linee tratteggiate. Cut out, score, and fold along the broken lines.
Prepara il pezzo piegando bene il flap da incollare. Prepare the parts folding the flap very well.
Stendi un po' di colla (poca!) sul flap. Put some glue (a bit!) on the flap.
Adagia il pezzo sul piano di lavoro, come mostrato. Lay down the part on the working table.


23°27’
66°33’
23°27’
66°33’
90°
90°
eloP htuoS
0
3- arco/arc
4 5
45
ISTRUZIONI:1- incidi le linee tratteggiate;2- ritaglia i pezzi;3- piega i flap;4- incolla seguendo l’ordine alfabetico,
controllando sempre l’allineamento planare di tutto l’arco.
5- incolla le coperture 4 e 5.
INSTRUCTIONS:1- score the broken lines;2- cut out;3- fold the flaps;4- glue following the alphabetical, always
checking the planar allignment of the arc.
5- glue the covers 4 & 5.
ATTENZIONE:tutti i flap sono esterni!
ATTENTION:all flaps are external!
a
b
c
d
e
f
g
h
i
j
k
l
m
n
o
p
q
s
r
u
t
w
v
y
x
6

-110
00-9
000
-700
0
-500
0
-300
0 -100
0
1000
2000
3500
5000
0
Relief
Eart
h G
lobe
(data
fro
m N
GD
C)
-11000-9000
-7000
-5000
-3000-1000
1000200035005000
0
Relie
f Earth
Glo
be
(data
from
NG
DC
)
Anta
rctic
Circ
le
Anta
rctic C
ircle
8- base
6- asse/axle
77
7- rondella/washer
Istruzioni per l’assemblaggio del mappamondo /Earth globe assembling instructions
7

8
Inserisci l’arco nella base, forzando leggermente per far passare il secondo settore dell’arco stesso.
Insert the arc through the base, gently forcing to let the secon sector enter through the hole.
Inserisci l’asse (con rondella) attraverso il globo.
Insert the axle (with the washer) through the globe.
Posiziona l’asse sull’arco, incastrandolo ai poli con le apposite scanalature.
Fit the axle grooves into the arc.
scanalaturegrooves
ISTRUZIONI ASSEMBLAGGIOASSEMBLING INSTRUCTIONS

data from the National Geophysical Data CenterNOAA Satellite and Information Service
a paper globe by
data from the National Geophysical Data CenterNOAA Satellite and Information Service
9A
Coperc
hio
/
9A
-9DB
ox L
id
9

9B
9C
10

9D9D
9D 9B 9C
9A
a bc
d e
f
ISTRUZIONI1- incidi lungo le line segnate dai tratteggi;2- ritaglia le parti della scatola;3- piega i flap ed incolla secondo lo schema
riportato qui sotto
INSTRUCTIONS1- score along the broken lines;2- cutout the box parts;3- fold the flaps and glue according to the
scheme reported below
coperchio / box lid
11
data from the National Geophysical Data CenterNOAA Satellite and Information Service
Scatola-espositore / 10A-10D
Display-box
10A
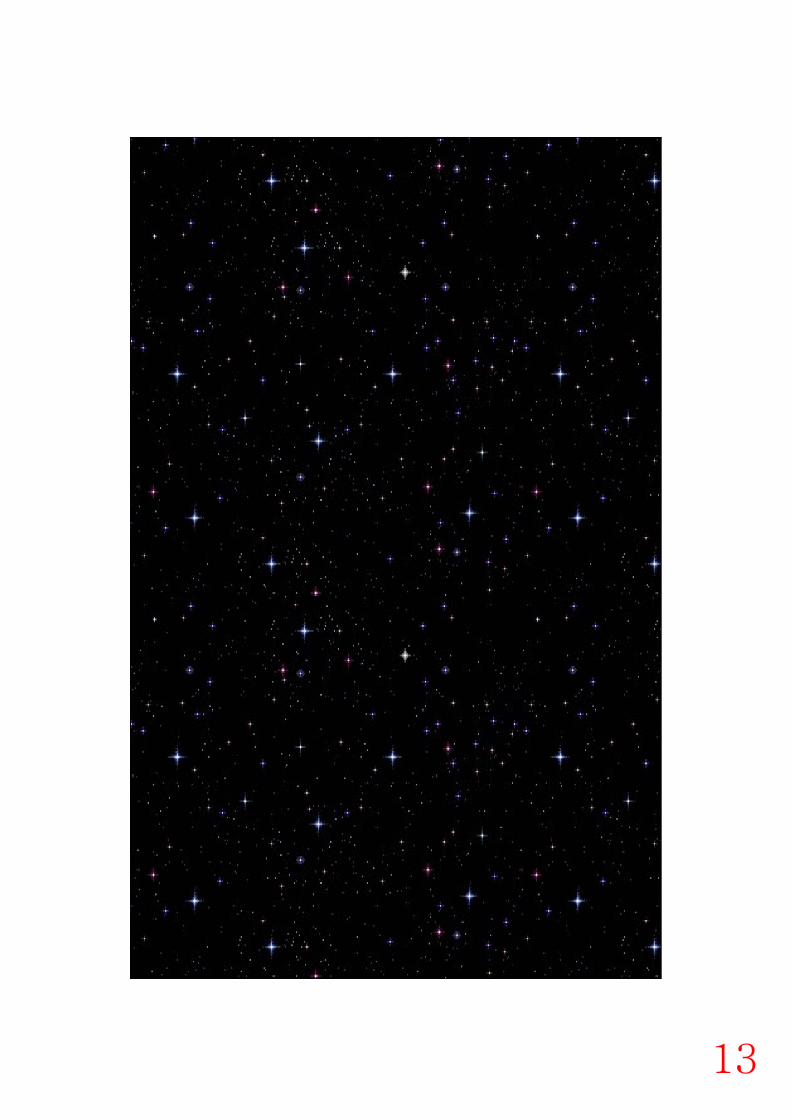
IF YOU PREFER A BOX WITH AN INTERNAL STARRY BACKGROUND, PRINT PAGE 13 ON BACK OF THIS PAGE
SE PREFERISCI AVERE LA SCATOLA CON UNO SFONDO STELLATO ALL’INTERNO, STAMPA LA PAGINA 13 SUL RETRO DI QUESTA.
12
13

data
fro
m t
he N
ational G
eophysic
al D
ata
Cente
rN
OA
A S
ate
llite a
nd Info
rmation S
erv
ice
10B
1OB
10A
10C10Da b
c
d
gf
ih
e
scatola / box
14
IF Y
OU
PR
EFE
R A
BO
X W
ITH
AN
IN
TE
RN
AL S
TA
RR
Y
BA
CK
GR
OU
ND
, PR
INT
PA
GE
15 O
N B
AC
K O
F T
HIS
PA
GE
SE
PR
EFE
RIS
CI A
VE
RE
LA
SC
AT
OLA
CO
N U
NO
SFO
ND
O
ST
ELLA
TO
ALL’IN
TE
RN
O, ST
AM
PA
LA
PA
GIN
A 1
5 S
UL
RE
TR
O D
I Q
UE
ST
A.
ISTRUZIONI1- incidi lungo le line segnate dai tratteggi;2- ritaglia le parti della scatola;3- piega i flap ed incolla secondo lo schema
riportato qui sotto
INSTRUCTIONS1- score along the broken lines;2- cutout the box parts;3- fold the flaps and glue according to the
scheme reported below

15

10C
10D
16
IF YOU PREFER A BOX WITH AN INTERNAL STARRY BACKGROUND, PRINT PAGE 17 ON BACK OF THIS PAGE
SE PREFERISCI AVERE LA SCATOLA CON UNO SFONDO STELLATO ALL’INTERNO, STAMPA LA PAGINA 17 SUL RETRO DI QUESTA.

17

a b
a’ b’
Se preferisci, rinforza la scatola con queste due parti additionali, come mostrato nelo schema accanto
If you like it, reinforce the box with these two additional parts, as shown in the scheme on right.
incolla qui il pezzo a o a’glue here the part a or a’
incolla qui il pezzo b o b’glue here the part b or b’
18