darksun cluebook for ms-dos
DESCRIPTION
Cluebook for the game DarkSun for MS-DOSTRANSCRIPT

✹ TABLE OF CONTENTS ✹
INTRODUCTION ..............................................................................1DENIZENS OF THE DESERT...........................................................2OVERLAND MAP ............................................................................13ADVENTURERS’ GUIDE................................................................14
Arena..........................................................................................15Slave Pens ..................................................................................17Sewers ........................................................................................23Dagolar’s Tunnels.......................................................................29Fields..........................................................................................33White Sands...............................................................................35Teaquetzl Village ........................................................................39Nazca Lines ...............................................................................45Cedrilte Village ...........................................................................47Undermountain..........................................................................51Lower Castle...............................................................................57Upper Castle ..............................................................................61Salt Oasis ...................................................................................65Hot Springs ................................................................................67Gedron Village ...........................................................................69Silt Sea Ssurrans ........................................................................73Silt Sea Summoning ...................................................................75Captured Gladiators...................................................................77Palace Ruins ..............................................................................79Lava Rift.....................................................................................83Gemfields ...................................................................................85Wagon Train ..............................................................................87Red Sands Plateau .....................................................................89Sand Oasis .................................................................................93Elven Slavers..............................................................................95Messenger Route ........................................................................97Elven Caravan............................................................................99Ssurran Ruins...........................................................................105Wyrm Belly ..............................................................................107Wyrm School............................................................................111Wyrm Temple ...........................................................................115Subterranean Temple ...............................................................117
TREASURE GUIDE .......................................................................121

✹ DENIZENS OF THE DESERT ✹
Travelling throughout the sun-baked lands of Athas, you are sure to encountermany vicious creatures. Below are suggestions on defeating these creatures.
BABAU
Although these creatures are commonly referred to as“babau,” their true name is “greater tanar’ri.” Please refer tothe “Tanar’ri, Greater (Babau)” description that appears laterin this section.
BULETTE
Bulettes travel underground and often surprise unsuspectingprey. They attack with their powerful jaws and front legs,and are capable of doing a tremendous amount of damage.Try to kill them quickly, or better yet, avoid them altogether.
DAGGORAN
Daggorans hunt in packs of 2-8, and use their greaternumbers to quickly overwhelm smaller prey. Attack themquickly before they can bring their psionic powers to bear. Ifthe daggorans are able to use their psionic powers, keep acareful eye on party members to make sure they do notbecome charmed. As with many monsters on Athas, the besttechnique is to attack first and ask questions later.
DAGOLAR SLIME
Dagolar is responsible for twisting tyrian slimes into theseabominations. These creatures are immune to attacks withblunt weapons (such as maces). Be sure to attack them withswords and other sharp-edged weapons. Also be careful ofthe imprisoning webs these creatures cast. The webs holdparty members rooted in one spot — thus characters canonly attack the slimes if they are adjacent. Like the tyrianslimes from which these abominations came, Dagolar slimesare immune to fire.
SHATTERED LANDS is the first in aseries of computer role-playinggames based in the highly acclaimedAD&D 2nd Edition DARK SUN
game world.You begin the game as a gladiatorabout to fight in King Tectuktitlay’sArena in Draj. You must survive thatfight, along with many others, andcontinue onward to escape from theSlave Pens.This clue book helps you escape theslavery of Draj and assists you inopposing those who would enslavethe innocent and helpless. The“Denizens of the Desert” sectioncontains specific hints on fighting the
various enemies and monsters in theArena and in the wilderness. The“Adventurers’ Guide” sectioncontains maps and descriptions ofthe various regions and encountersthat make up the adventure. The“Treasure Guide” lists all the itemsfound throughout the game.The information in this clue book isyour guide to SHATTERED LANDS. Use the book to answer questionsabout how the story unfolds. If youhave any questions about how toplay the game, check your rule book;or, if you have installation questions,check your data card. Armed withthis knowledge, your chances ofsuccess are assured!
1 2
✹ INTRODUCTION ✹

ELEMENTALS — AIR, EARTH, FIRE, AND WATER
There are two classes of elementals: lesser and regular. The lesser elementalscan only be affected by +1 or greater weapons. The regular elementals canonly affected by +2 or greater weapons. Ganging up on these creatures shouldquickly remove them from your path as you trudge onward to glory and richesin the DARK SUN world!
FIRE EEL
Fire eels are well known for lurking under the sand andattacking unsuspecting parties. Keep an eye out forsuspicious moving piles of sand, and attack with rangedspells if possible. These creatures shouldn’t pose too muchof a problem if the party stays alert.
MAGERA
Although not the brightest of creatures, the magera arestrong warriors. Soften them up with area effect spells likefireball; you should quickly reduce them to dust!
MASTYRIAL
Mastyrials are dangerous creatures and are best attacked atrange. Have your mages cast magic missile on them, andhave your clerics cast spells like aid, prayer, barkskin, andstoneskin on your party. If you have a thief in your party, besure to use his or her special backstab attack. Haste isalways an excellent spell to use against fiends such as these,and the ego whip psionic power seems to be effective too.Note that mastyrials are immune to blunt weapons.
DARK SPIDER
Dark spiders are fearsome creatures. Besides a poisonousbite which can kill (if you fail your save vs. poison), somespecial dark spiders also cast spells! Such spiders can cast3rd-level defiler spells such as lightning bolt and fireball.One tactic is to search out the mage spiders in the group,and make sure to hit them at least once a round. This atleast keeps them from spellcasting.
DEFILER
Defilers in SHATTERED LANDS are quite skilled, and can cast 5th-level mage spells. Their favorites are fireball,lightning bolt, ice storm, and cone of cold. The best defense in this case is a strong offense. Remember that hitting aspellcaster in combat prevents him or her from casting inthat combat round.
DRAJIAN GUARD
The Drajian guards can best be described as cannon fodder.Their strength lies in their sheer numbers. Try to use areaeffect spells such as fireball and ice storm to defeat a numberof them at once. All Drajian guards are armed with bows,and they use their arrows to great effect. Remember that theinertial barrier psionic power protects you from flying missileweapons such as arrows.
DUNE REAPER
Dune reapers are one of the most feared creatures inSHATTERED LANDS. They do an incredible amount of damage,and are very tough. One good tactic is to try to change theallegiance of these creatures with the control body psionicpower. Also be sure to gang up on one creature at a time,since a severely wounded dune reaper can attack for thesame amount of damage as a fresh one.
3 4

RAMPAGER
Although this creature is commonly referred to as a“rampager” its true name is “so-ut.” Please refer to the “So-ut (Rampager)” monster description that appears later in this section.
RENEGADE HALFLING
Renegade halflings attack with slings from a distance. They have low hit points and should easily be dispatched in melee.
SAND HOWLER
Sand howlers have a special paralyzing gaze attack. Theonly defense is to attack them first! Be quick, and youshouldn’t have too many problems with them.
SCREAMER BEETLE
Screamer beetles aren’t too dangerous. Simply be careful oftheir psionic attack, and hit them as soon as you can. Theydon’t have many hit points, and tend to die quickly.
MASTYRIAL, BLACK
The same tactics you used against the regular mastyrialswork well against the black mastyrials. Be aware, however,that the black mastyrial has a better save vs. spells, so yourspells may not be as effective. Try using the disintegrate andenhanced strength psionic powers.
MOUNTAIN STALKER
Mountain stalkers are feared because of the great number ofvicious attacks they bring to bear on hapless adventurers.Use ranged weapons and spells to defeat these creatures.Some good spells to use are fireball and flame arrow.
OTYUGH
Otyugh like to stop short of the party and guard, thus forcingparty members to come to them. Remember that thisguarding creature gets all its attacks when someone comeswithin range. Because of this, ranged weapons and spells arehighly recommended against otyugh.
PSURLON
Psurlons are particularly nasty creatures to fight. They’re30% magic resistant, you need +1 or greater weapons to hitthem, and they are immune to sleep and charm spells. Tomake things worse, they can also cast psionics against theparty. You can fight back with psionic powers such assynaptic static, mind blank, ego whip, and disintegrate. Youmay also wish to summon a monster or elemental to assistin defeating the psurlons.
5 6

SLAAD, RED
The red slaad regenerates three hit points a round and has30% magic resistance. Your best strategy is to rush forwardand engage them in melee. Be sure to have your weakercharacters fire ranged weapons at the creatures.
SLIG
Sligs (the slaad look-alikes) aren’t too difficult to take care ofin battle. Attack them with ranged weapons and spells asthey close to melee. Once in melee range, dispatch themwith your fighters.
SO-UT (RAMPAGER)
The so-ut (more commonly known as rampagers) are one ofthe most feared creatures on Athas. These beasts have a25% magic resistance, a low armor class, and sufficient hitpoints to allow them to survive most battles (which usuallymeans someone or something else didn’t). Try to attack thesebeasts at range, since it has a corrosive attack whichdestroys weapons and armor. If you must go hand-to-handwith it, be sure to cast haste upon your party.
SSURRAN
Ssurran have low hit points and can be easily defeated inmelee. Use a grease spell or a web spell to hold them inplace, then finish them off with ranged weapons.
SHADOW
Shadows attack with a nasty chilling touch that can paralyzeyour character. To make things worse, they can only be hitby +1 or greater weapons! Since they are immune to sleep,charm, and hold spells, have your cleric use turn undead.
SHADOW, GREATER
Greater shadows are similar to regular shadows, with theexception of having more hit points and being able to drainStrength with a touch. This Strength loss remains with thecharacter until the party rests.
SILT RUNNER
Silt runners are fast, but not too dangerous beyond that. Youshould have no problems dispatching them.
SLAAD, BLUE
You need a +1 or greater weapon to hit blue slaad. Theyhave 40% magic resistance and are allowed four attacks per round. Engage them at range using the psionic powersdisintegrate and ego whip, and as with the red slaad, be sure to have your weaker characters fire ranged weapons at the creatures.
7 8

TARI (RATMAN)
You shouldn’t have too much difficulty defeating the tari. Just don’t let them surround one of your weakercharacters — they can do surprising amounts of damage in numbers.
TEMPLAR
Templars are not particularly strong physically, but can castsome rather heavy-duty spells. It is best to keep hitting themwith ranged weapons if you can’t get close right away. Thisprevents them from casting spells.
THRI-KREEN (MANTIS WARRIOR)
Thri-kreen are highly dexterous, allowing them to dodgemissile attacks. It is usually best to attack them with magicalspells at range to soften them up, and then have yourwarriors fight them. Be careful of their paralyzing bite. Anyof your characters affected by this bite take double damagefor every hit they receive afterward.
TOHR-KREEN (MANTIS NOBLE)
Running from this relative of the thri-kreen will do you nogood. Their movement is very, very fast, so it is best to takethe initiative and attack! Protect weaker characters and becareful of their paralyzing bite. Any of your charactersaffected by this bite take double damage for every hit theyreceive afterward.
STRINE
Try to keep your spellcasters away from the strines’ rangedspine attack — being hit by the attack prevents yourcharacter from casting spells or using psionics that round.The strine’s bite does 2-12 points of damage, so be careful ofa monster that might be guarding. Beyond this, a healthyfighter should dispatch these beasts easily.
STYR
These monsters are extremely tough. To even be able to hita styr, you must have a +1 or greater weapon. Also keep inmind that they are 30% magic resistant. It is advisable tohaste your characters if possible. Try using the ego whippsionic power. It should keep these creatures from attackingfor 1-4 rounds. Also, try and keep your spellcasters out ofharm’s way.
TANAR’RI, GREATER (BABAU)
These powerful monsters are 50% magic resistant, andrequire +1 or greater weapons to hit. They have a gazeattack which may affect your character as though touchedby a ray of enfeeblement. They can also corrode weaponsand armor when they attack — be very careful when fightingthem hand-to-hand. Needless to say, use extreme cautionwhen fighting these beasts.
TANAR’RI, TRUE (VROCK)
Vrocks are pretty nasty creatures. They’re 70% magicresistant, so many of your spells may have no effect. Youalso need +2 or greater weapons to hit them. Since vrockshave five attacks a round, it is probably prudent to keepweaker characters behind the more powerful ones. Try usingthe id insinuation psionic power — it may paralyze a vrockfor up to four rounds.
9 10

WYVERN
It’s best to throw just about everything you’ve got atwyverns, for it is very risky to get in range of their poisonoussting. If your character gets hit and fails to make a save vs.poison, he or she will die. This is most inconvenient in theheat of combat.
XORN
These creatures are immune to fire and cold-based attacks,both magical and normal. Have your fighters move up andengage in melee. Your weaker characters should stay backand cast ranged spells or use ranged weapons. The xorndon’t move quickly so the characters in the back shouldhave nothing to fear.
ZOMBIE
Zombies are easily dealt with. Have your cleric use his orher turn undead ability to ward them away.
TYRIAN SLIME
These nasty critters are always on the lookout for anothermeal, and your party probably fits the bill quite nicely. Keepthem at bay with magic missiles, ego whip, and any kind ofedged weapon. Be wary of their entangling attack, psionics,and immunities to crushing weapons and fire.
UNDERMOUNTAIN FOLK (MINDHOME)
These kindly creatures don’t really deserve being attacked.But, if you must, you should have no problems slaughteringthese innocent, helpless, meek little people.
VROCK
Although these creatures are commonly referred to as“vrock,” their true name is “true tanar’ri.” Please refer to the “Tanar’ri, True — Vrock” description that appears earlier in this section.
WILD MUL
True to their race, wild muls are the hack and slash type.They can be dealt with in the same fashion or from adistance. Either way, it is best to get in the first blow.
11 12

The following pages contain detailed descriptions of the people and places tobe found outside of Draj. This guide helps you decide just where to look forthat one last item you need, or who to speak to for that last clue. It also warnsyou of potential dangers you may come across during your travels.
13 14
✹ ADVENTURERS’ GUIDE ✹
* You can reach the Palace Ruins through Teaquetzl after helping Cedrilte, Gedron, and Teaquetzl ally with each other. You can also get therethrough Teaquetzl if you kill everyone in Cedrilte and Gedron (although this is NOT recommended). Reach the Subterranean Temple byusing a rope on the bridge in the Wagon Train region, or by climbing down the wells in Cedrilte, Gedron, or Teaquetzl.
CAPTUREDGLADIATORS
SILT SEASUMMONING
GEDRONVILLAGE
UPPERCASTLE
SILT SEASSURRANS
ELVENCARAVAN
HOTSPRINGS
LOWERCASTLE
MESSENGERROUTE
ELVENSLAVERS
SALTOASIS
UNDER-MOUNTAIN
TEAQUETZLVILLAGE
SANDOASIS
WYRMBELLY
WYRMSCHOOL
NAZCALINES
CEDRILTEVILLAGE
WHITESANDS
RED SANDSPLATEAU
LAVARIFTGEMFIELDS FIELDS WAGON
TRAIN
SEWERS
SLAVEPENS
ARENA
DAGOLAR’STUNNELS
SSURRANRUINS
WYRMTEMPLE
PALACERUINS
SUBTERRANEANTEMPLE
PALACERUINS
SUBTERRANEANTEMPLE
U N D E R G R O U N DR E G I O N S *
S H A T T E R E D L A N D SS H A T T E R E D L A N D S
O V E R L A N D M A P
NON-PLAYER CHARACTERS IN THIS REGION
✹ AnnouncerLOCATION 4 — This is the announcer for all the fights in the Arena. Heannounces the upcoming fights for the crowd, heckles the gladiators to amusethe crowd, and controls the monsters for the fights. If you insult the Announcer,he summons more monsters for you to fight. If you insult Tectuktitlay when youtalk to him, after the third fight, he will call for very large monsters to bebrought in. Unless you’ve gone up at least one level, or are very confident, donot do this. The monsters will all be quite large and tough.
✹ SemyonLOCATION 3 — Semyon is a former gladiator who was tied up as a lesson toother gladiators who lose fights. He was left to die from lack of food and wateror from a blow from either a gladiator or monster. He can give you the locationof a gem if you untie him and give him water.
✹ VenyzVenyz is a second slave who was staked out in the Arena. However, he is beyond help.
LOCATIONS AND EVENTS1 In fights with big monsters, this corner is a great place to put mages or
fighters who are low on hit points. The opening is too small for the largermonsters to fit through.
2 Approach this west exit when fighting with Scar once you agree to escapewith him. You will have the option to escape, but the alarm is sounded. Ifyou change your mind before leaving, just say “no” to the “Do youcontinue down the tunnel?” question; the alarm will then be cancelled.
3 Semyon is hung here between two poles. Get the water pot in the SlavePens (location 6) or buy one from Kurzak and fill it with water at Dinos’sink (Slave Pens, location 2). Give the pot to Semyon and he revives.Once you cut him loose, he will go into the holding area. If you talk tohim after talking to Mirlon, he tells you where he hid his gem. If you talkto him before a fight and after letting him join the Veiled Alliance, he willfight one fight with you in the Arena, then leave.
4 You can talk to the Announcer before and after fights. If you like a realchallenge, choose the “I spit in Tectuktitlay’s face” option; after your thirdfight, the Announcer will be quite sure to send the big monsters out! But,to avoid trouble, just be polite and tactful.
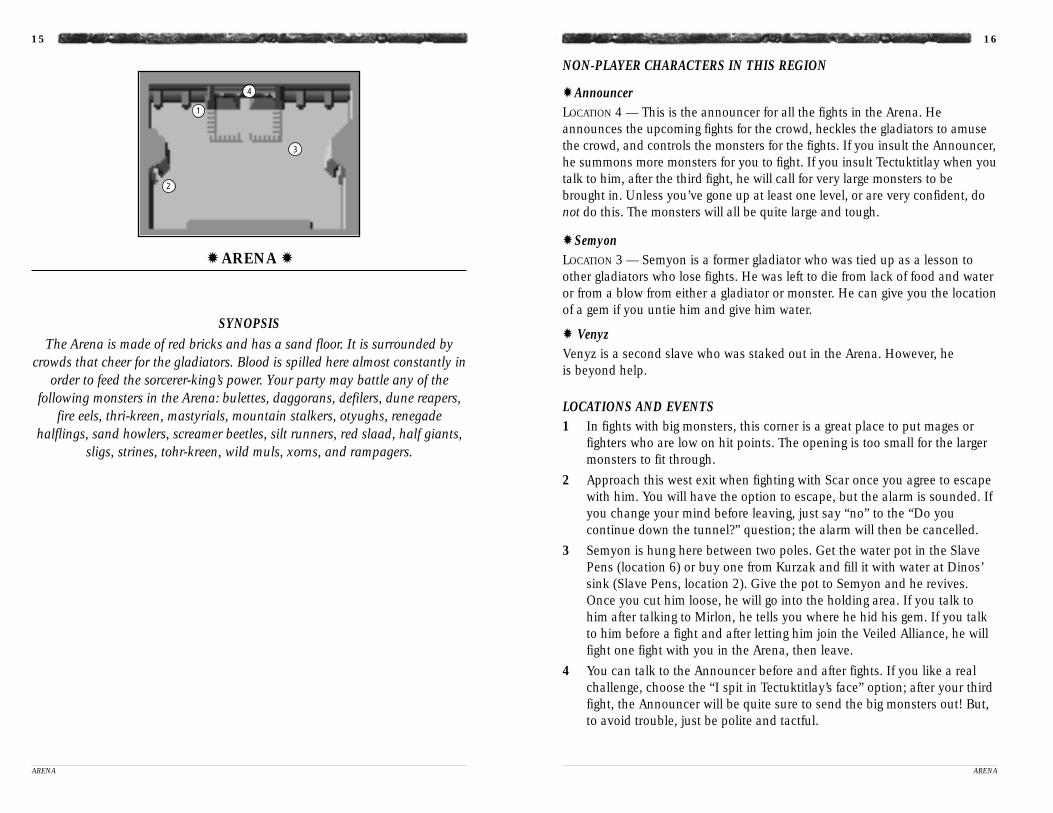
SYNOPSISThe Arena is made of red bricks and has a sand floor. It is surrounded by
crowds that cheer for the gladiators. Blood is spilled here almost constantly inorder to feed the sorcerer-king’s power. Your party may battle any of the
following monsters in the Arena: bulettes, daggorans, defilers, dune reapers,fire eels, thri-kreen, mastyrials, mountain stalkers, otyughs, renegade
halflings, sand howlers, screamer beetles, silt runners, red slaad, half giants,sligs, strines, tohr-kreen, wild muls, xorns, and rampagers.
15 16
ARENAARENA
✹ ARENA ✹
1
2
3
4

NON-PLAYER CHARACTERS IN THIS REGION
✹ ScarLOCATION 1 — Scar is a gladiator in the Arena. He won the title “King of thePens” by fighting a large group of mountain stalkers with his gang andwinning. Scar was captured and forced to fight in the Arena to please KingTectuktitlay. Once you’ve proven yourself in the Arena, Scar offers to escapewith you. You must fight five times in the Arena before he will consider it,though. (The party’s first experience in the Arena counts as one visit, then theparty must return for four more visits.)Note that for the purpose of experience as a gladiator, Scar and Merzolrecognize how many times the party visits the Arena (and fights at least onebattle), not how many battles they fight in one visit.
✹ TrusteeLOCATION 3 — The trustee is an old gladiator who can no longer fight. Hewalks the cells doing odd jobs and cleaning up. He used to be a guide in thewilderness, but was captured and forced to fight in the Arena. One day amountain stalker broke loose and he killed it, saving the main guard’s life.Now, he’s allowed to stay even though he can no longer fight in the Arena. Hewill let you see Dinos if you ask.
✹ DinosLOCATION 5 — Dinos is a slave in the pens who does the cooking for everyone.Dinos was arrested by a templar when he accidentally fed bad food to him.Although he was put in the pens to fight in the Arena, once another templardiscovered what a good cook he was, he was assigned cooking duty. Dinoscan heal Gilal for you once her head begins to hurt her.
✹ MerzolLOCATION 7 — Merzol is a gladiator who would be “King of the Pens” if he wassmarter. He and his gang are not as organized as Scar’s. He was captured andforced to fight in the Arena to please King Tectuktitlay. He will escape withyou if you fight in the Arena three times, but his plan is much morestraightforward and risky. (The party’s first experience in the Arena counts asone visit, then the party must return for two more visits.)Note that for the purpose of experience as a gladiator, Scar and Merzolrecognize how many times the party visits the Arena (and fights at least onebattle), not how many battles they fight in one visit.
SYNOPSISThe Slave Pens are a maze of little rooms made of brown brick walls. There isa big fountain to the south constructed by the templar to show his power toall who visit the pens. To the east are the gladiator pens and to the west are
the monster pens. The kitchen is found in the northwest corner, and thetemplar Pehtucl has his room in the southwest corner. In this region are
templars, half-giants, Drajian guards, and mountain stalkers.
17 18
SLAVE PENSSLAVE PENS
✹ SLAVE PENS ✹
1
2
3
4
5
6 7
8
9
10
11
12
13
14
15
16
17
18
19
20
19 19
19
19
19

LOCATIONS AND EVENTS1 Scar, the “King of the Pens” is here. If you talk to him after five visits to
the Arena he agrees to escape with you. Once you make it to the Arenawith him, escape through the west door.
2 Dinos’ sink can be used to get water. Once you have the water pot (SlavePens, location 6), use it with the sink and you get a full pot of water.
3 The trustee paces the pens. If you talk to him while no more than threepaces away and you have a thief as the party leader, you get the option ofpicking his pocket. Once you do this, you get the key to Dinos’ room. Talkto the trustee to get information about the people in the pens.
4 This is a room haunted by a zombie. If you knock on the door then enterthe room, the zombie will enter and close a secret door behind himself.Once you kill him, you can use the button on the north wall to open thesecret door. Inside the next room you will find some arrows+3, a gem, andscale armor.
5 Dinos is the cook for the Slave Pens. He gives you information aboutpeople in the pens if you talk to him. He also heals Gilal after she screamsin pain if you take him to her.
6 The empty water pot found here can be filled with water (Slave Pens,location 2), then taken to the Arena and used to revive Semyon.
7 Merzol is the leader of a gang of gladiators. He helps you escape north from the Slave Pens after you’ve had three visits to the Arena. If you decide to kill him, look at the haystack in his cell to find someceramic pieces.
8 Mirlon has been bribed by the templar to lead escaping prisoners to him.If you give him either the gem found in the haunted room or Semyon’sgem (which can be found in the first pot you break), he leads you to thetemplar. If you decide to go with him, and accept the templar’s offer, youcan then kill the templar without setting off the alarm.
9 Gilal is a gladiator who escaped recently but was recaptured. Now, shecannot even think about escaping without experiencing great pain. If youtalk to her about escaping, she screams in pain. Once she does this, youcan bring Dinos to heal her. After she is healed, she tells you how sheescaped and gives you information about the world outside the pens.
✹ MirlonLOCATION 8 — Mirlon is a gladiator who is very vain. He claims to come from arich family, but no one knows if it’s true. He was arrested and forced to fight inthe Arena. The templar promised to release Mirlon if he brings any potentialescapees directly to the templar’s room.
✹ GilalLOCATION 9 — Gilal is a gladiator who tried to escape once and paid for it withher memory. She can’t think about escape now without having severe headpains. She was captured and forced to fight in the Arena, but hasn’t foughtsince the escape attempt. If you get Dinos to heal her, she will tell you howshe escaped.
✹ Templar PehtuclLOCATION 10 — Templar Pehtucl is in charge of the Slave Pens. He makes sureeverything runs smoothly and that there’s always a fight going on in the Arena.He’ll offer to let you escape if you’ll follow him, but instead will lead you intoan ambush.
✹ KurzakLOCATION 13 — Kurzak is the main guard in charge of the pens. He was given his post by the templar and is determined to serve it well. Although hewill take a bribe, he won’t give you anything for it. He will let you go through if you’re with Mirlon, but otherwise, he will do his best to kill you if you try to escape.
✹ BonecrusherLOCATION 13 — Bonecrusher is a half-giant and a monster trainer. If you take too much time getting to the door of the pens, he is sent to retrieve you to fight in the Arena. If you kill or ignore Bonecrusher, the templar sets off the alarm.
19 20
SLAVE PENSSLAVE PENS

19 Look in the boxes here to find treasure. Take all the boxes with you tocarry excess items. The wardrobes here sometimes have gems in them,and the junk sometimes has arrows+1 in it.
20 Knock on this door to get into more Arena fights. If you say “Take me tothe arena! I want to fight,” you will be transported directly to the Arena.When escaping with Mirlon or Scar, go to this door and knock on it to getKurzak’s attention.
10 Templar Pehtucl agrees to let you escape when you get to him. If youfollow him, he gives you some poison guavas and takes you to an ambushset up by the fountain. Once here, you can kill him and the remainder ofthe guards without setting off the alarm. Check on his body forBloodwrath, a sword+1.
11 There is a secret door here that is activated by pushing a button on thenorth wall. First, you must break down the door to the mountain stalkerpen and kill the monster. You can then go for the button and thenorthwest corner of the Slave Pens.
12 This is a sewer grate that can be opened and used to escape down to theSewers. Either walk over the grate or “use” the grate. You will then havethe option of ripping or hacking it open, or of picking the lock if you havea thief. If you don’t at first succeed, try and try again.
13 Follow Kurzak to and from the pens when fighting in the Arena. You canbuy an empty water pot from him, but it would be better to get the one inthe pens. He takes bribes from you, but no amount will make him doanything for you. If you are with Mirlon, he lets you through, but this isbecause he knows Mirlon is working for the templar.
14 This clay pot can be broken with an arrow to distract the guard. You canthen run around the corner without him seeing you. Don’t start runninguntil he’s gone to check on the pot or he’ll catch you in the act.
15 Use this campfire ring to rest, heal, and regain your spells. If you resttwice, it will be time for you to fight in the Arena. Remember that everytime you rest, eight hours pass. If Kurzak calls you, and you keep himwaiting for too long, he will assume the party is trying to escape andsound the alarm. If you search the haystack here, you’ll find some random items. Althoughyou may sometimes sustain damage, you can also find gems in the stack.
16 This guard can be killed without setting off the alarm. The water drownsout his voice.
17 This is the armory. Be sure to look in the weapons rack for some newweapons. You can find some polearms and a steel axe here.
18 Pots lie on the ground at these locations. The first time you break one ofthese pots, you find Semyon’s gem.
21 22
SLAVE PENSSLAVE PENS

NON-PLAYER CHARACTERS IN THIS REGION
✹ Low Warren ThugsLOCATION 1 — The thugs are Churrr’s henchmen. Every community has low-life, and Churrr’s thugs fit the bill for the Sewers. These scum are quick tobully and quicker to be intimidated. The thugs have information about thehigh warren chief’s daughter and the entrance to Dagolar’s tunnels.
✹ ChurrrLOCATION 5 — Churrr is the beady-eyed controller of the low warrens. Churrr isjealous of the power others have and will do anything to gain control of theSewers. However, he and his thugs are too weak to accomplish anything ontheir own, and have become pawns of Mikquetzl. Churrr kidnapped the highwarren chief’s daughter for Mikquetzl. When Churrr meets the party, he seesan opportunity to use it to take control of the high warrens and is not abovebegging or playing on the party’s pity to get what he wants. Churrr buys bagsof grain from the party or trades pieces of leather armor. He also hasinformation about Mikquetzl and his worshippers, and the high warrens.
✹ High Warren GuardLOCATION 9 — The guards are tari warriors charged with protecting the highwarrens. With Mikquetzl and Churrr trying to take over the high warrens, theneed for protection, as well as caution, is great. The guards will lead the party tothe high warren chief if they manage to overcome their distrust. If the partycannot earn that trust, there is no way to enter the high warrens except by force.
✹ High Warren TariLOCATION 10 — The high warren tari make up the common populace. The highwarren tari are content with their lives in the Sewers and do not understandthe party’s adventuresome spirit. They are friendly and open, however, andhave information about: their chief and his daughter, the Elders, and theSewers in general. The tari’s lives revolve around the Skull Temple, whichhouses the Elders and their sole treasure, the Staff of Parting. The high warrentari can tell the party where to find their chief.
✹ High Warren ChiefLOCATION 12 — The high warren chief is a tari warrior who leads the other highwarren Tari. The high warren chief is a bold and intelligent sort . . . for aratman. He is highly distraught over the kidnapping of his daughter, but ispowerless to do anything about it. Up until Mikquetzl came to the Sewers anddisrupted life there, the chief was a very capable leader. Some say he isdestined to become an Elder. The chief possesses the Helm of Contemplation,which he offers to give to the party in exchange for rescuing his daughter.
SYNOPSISThe Sewers are a maze of tunnels which run beneath the city of Draj. In the
north end of the Sewers, flushing tunnels empty into the fields, while thesouthern tunnels are narrow with many flood-control gates. Despite its
unsavory atmosphere, the Sewers are inhabited by tari, a race of rat-likepeople. Tyrian slimes and sligs are also quite common in the Sewers.
23 24
SEWERSSEWERS
✹ SEWERS ✹
12
222
2
2 2 2 2 2
2
2 2 2
3
33
3
3
333
3
33
3
4
4
4
5
6
6
7
89
9
1011
12
13
1415
16
17
17
17
18
19
20
21
22 22
22
23
24
25
26
27
2828
29
30
31
32
33
✹ Skull GuardiansLOCATION 13 — The skull guardians are tari who were changed by Dagolar.The skull guardians are proud of their duty to protect the Elders, and of thechanges Dagolar has wrought with their bodies. They take their duty seriouslyand will not back down to any threat, no matter how overwhelming. The skullguardians may give the party a bone crank which they can use to turn thebroken wheels in the Sewers, as well as grant the party permission to seek thewisdom of the Elders.
✹ ElderLOCATION 15 — The Elders are the animated skulls of the tari’s past leaders.When great leaders of the tari die, their remains are taken to Dagolar, whouses them for experimentation. He returns the skulls with memories intact,and these are revered by the tari and provide guidance in times of crisis. TheElders are haughty and well-pleased with their limited wisdom. The Elders cangive the party permission to take the Staff of Parting without suffering anyconsequences. The Elders also instruct the party on how to escape the Sewersthrough the secret exit, and how to reach Dagolar’s Tunnels.
✹ MikquetzlLOCATION 18 — Mikquetzl is a disgraced templar who now rules over a rag-taggroup of tari worshippers. Mikquetzl was a templar of Tectuktitlay before he wasdisgraced by a slave uprising. Sentenced to die in the Arena, Mikquetzl’s fewremaining allies freed him from the slave pens, hoping to kill him before heimplicated them. Mikquetzl escaped, however, and descended into the Sewerswhere he teaches the tari to worship Tectuktitlay in order to build a fanaticalarmy. Once he is strong enough, he plans to send his tari into the streets tosweep away his enemies. He expects that this will impress Tectuktitlay and thusvault him into a senior position. Mikquetzl had the low warren thugs kidnap thehigh warren chief’s daughter and plans to sacrifice her to Tectuktitlay once herusefulness is at an end. He also possesses the Chameleon Gloves.
✹ High Warren Chief’s DaughterLOCATION 21 — Kidnapped by Churrr’s thugs and handed over to Mikquetzl as asacrifice for Tectuktitlay, the chief’s daughter is plucky and anxious to return tothe high warrens to warn her father of an upcoming attack on the Skull Temple.
✹ WorshippersLOCATION 17 — The worshippers are tari who have become fanatic followers ofMikquetzl. The worshippers had been in awe of humans ever since Mikquetzlcame and gave them his perverted religion. Mikquetzl’s schemes have giventhese tari purpose, and their recent raids have provided them with food. Theworshippers can tell the party where to find Mikquetzl.
25
SEWERS
26
SEWERS
LOCATIONS AND EVENTS1 Several low warren thugs wait here for any weakened slaves coming from the
pens. They attempt to bully the party into paying them or giving them equip-ment. The party can easily intimidate them by refusing to pay and/or threat-ening them. The party should not give in to the thugs — if they do, Churrr willhave no respect for them and will call the city guards. The thugs are also asdull as they are weak, and the party can pump them for information about theSewers and the high warren chief’s daughter.
2 The party can search the sewer holes at these locations for random treasure.3 The wheels at these locations control the nearby doors.4 The wheels at these locations are broken and require a bone crank to turn.5 Nest Master Churrr is at this location. Unless the party was passive with
his thugs, Churrr calls the city guards. However, if the party has earnedhis respect, Churrr tries to convince them to join him in an attack on thehigh warren. Agreeing to this earns the high warren’s enmity and makes itmore difficult for the party to defeat Mikquetzl. If the party gains proof of Churrr’s part in the kidnapping, he fears for hislife and tells the party about Mikquetzl and the kidnapping. Churrr will buy bags of grain from the party or trade pieces of leatherarmor. He also has information about Mikquetzl, his worshippers, and thehigh warrens.
6 Churrr’s thugs are at these locations. 7 Churrr has hidden a ring in this sewer hole. He objects if the party tries to
take it, but does nothing if the party is aggressive.8 Hidden in the pile of junk at this location is a chest containing gems and
a scroll which tells of Dagolar and the Staff of Parting.9 Tari guard the gates to the high warren at these locations. The guards are
suspicious and do not allow the party into the high warrens unless theparty is friendly and explains who they are truthfully. The high warrenchief needs help to recover his daughter, so the party can offer to help andgain instant entry to the high warrens. If the party joined Churrr and histhugs, the guards will not entertain any thoughts of letting the party inuntil it eliminates Churrr and his gang.
10 The high warren tari live here. They are friendly and open and haveinformation about: their chief and his daughter, the Elders, and the Sewers.
11 A fire ring lies on the floor. The party can rest here.12 The high warren chief is at this location. He pleads with the party to
rescue his kidnapped daughter, offering the party treasure in return.Believing that Churrr is responsible, he sends the party to the low

destroying the high warrens and returning to power as one of Tectuktitlay’stemplars. His unstable mind makes talking with him a dangerous proposition.If the party is subservient, Mikquetzl will destroy the high warrens, then getrid of the party at his earliest convenience. If the party defeats Mikquetzl, theyfind the Chameleon Gloves, an orange pear, and a guava on his body.
19 A bone crank which turns the wheels at locations 4 is on the floor.20 At the foot of the bed is a box containing a steel sword, a gem, a scroll of
color spray, and Mikquetzl’s note explaining his plans to destroy Dagolar.21 The high warren chief’s daughter has been tied up and left here. She tells the
party about Mikquetzl and his plans. She also warns the party of the wor-shippers’ forthcoming attack on the Skull Temple. The party gains experiencewhen she is released. The party should be careful not to let her fall too farbehind when she is following, or else she is likely to fall prey to Tyrian slimes.
22 Tyrian slimes frequent these areas of the flushing tunnels.23 If the party leader is a thief, the party can scale the wall at this location.24 The party finds a large gem in this sewer hole.25 A red slaad awaits the unwary, attacking the party with a terrifying roar.26 A steel axe+1 is hidden in a sewer hole.27 If the party did not dispatch templar Pehtucl in the Slave Pens, he and his
personal guard are searching for the party at this location.28 City guards frequently search the main outflow to the fields. If the party
attempts to escape the Sewers through the main outflow, they face stiffopposition as many guards file into the Sewers. The guards in the fieldsbeyond have also been warned, and have called for reinforcements.
29 There is a secret lever in the sewer hole at this location. The lever hasbeen booby-trapped, releasing a poisonous gas cloud if the party has notbeen told how to disarm it by the Elders at location 15. Pulling the leveropens the secret door at location 30.
30 The wall at this location is actually a secret door opened at location 29.31 This is a small opening to the fields outside of Draj. The party can escape
the Sewers here without alerting the city guards.32 A small collection pond is located here. The party can use the Staff of
Parting to drain the pond, revealing the entrance to Dagolar’s Tunnels.33 A small grate can be seen in the wall at this location before the collection
pond is drained. Examining it, the party hears the screams of tortured soulssuffering in Dagolar’s Tunnels. Once the pond is drained, the entrance toDagolar’s Tunnels is opened, allowing the party to enter if they so wish.
warrens. The chief is worried about Mikquetzl and his worshippers andtells the party about them. His fears are well-grounded, for when the partyreturns from its encounter with Mikquetzl, the worshippers launch anattack on the Skull Temple. If the party has successfully returned thechief’s daughter to the high warrens, they should keep an eye on her andprotect her. She is plucky and rushes into battle even though she is weakand weaponless, making her an easy target for the worshippers.Once the party has repelled the attack on the Skull Temple, the chief givesthe party the Helm of Contemplation. The chief also informs the party thatthe Elders will help the party escape the Sewers.
13 This is the antechamber to the Skull Temple — it is as ornate as the tari canmanage. The skull guardians here allow the party to enter if they promise tobe peaceful. Any violence here causes the entire high warrens to attack theparty. The guardians tell the party about the temple and the Elders. After theparty repels the worshippers’ attack, the guardians instruct the party to seekthe wisdom of the Elders, who can help them find an exit from the Sewers.
14 The Staff of Parting is hidden in the sewer hole at this location. Anyattempt to take it before the Elders grant the party permission brings downthe wrath of the entire high warrens.
15 This is the inner sanctum of the Skull Temple where the Elders dispense theirwisdom. The Elders refuse to speak to the party unless they have proven theirworthiness by defeating the worshippers. The Elders are haughty and theparty gets much more information if they flatter the Elders. The Elders are alsojealous of their limited wisdom and it often requires repeated questions to getthem to answer fully. Under no circumstances will they admit to not knowingsomething. Once the party successfully defends the temple from theworshippers’ attack, the Elders instruct the party on how to escape the Sewersthrough the secret exit, and how to reach Dagolar’s Tunnels. They allow theparty to take one of the offering bowls, which, if used, provides directions tothe exits as the party travels through the Sewers. They also grant the partypermission to take the Staff of Parting from its hiding place at location 14.
16 The party finds a scroll of enlarge in a sewer hole.17 Mikquetzl’s worshippers are at this location. They have an awe of humans
since Mikquetzl came and gave them his perverted religion. The party caneasily convince them that the party has business with Mikquetzl. Theparty is then directed to Mikquetzl’s temple. The party may also fool theworshippers by pretending to worship Tectuktitlay. If the party is hostile orderisive of Tectuktitlay, the worshippers attack fanatically.
18 Mikquetzl is in his temple exhorting the worshippers. He hails the party asthey enter, even if they have been slaughtering the worshippers. (He sees the tari as inferior tools.) Mikquetzl is quite insane and reveals his plans of
27 28
SEWERSSEWERS

NON-PLAYER CHARACTERS IN THIS REGION
✹ DagolarLOCATION 19 — but also varies (see below)Dagolar is a 20th-level human psionicist. He works in the tunnels, experi-menting with new ways of torture and cruelty. There are many different waysthat you can meet Dagolar in this region. Sometimes you will encounter hisfakes before you actually confront Dagolar himself. Note that once you enterthe Door of Eyes, you cannot leave until Dagolar is destroyed. On Dagolar’sbody you find: the Living Cloak, Dagolar’s Dagger, Dagolar’s Wand, a lemon,and orange grapes.
✹ Mow (Master of Watergate)LOCATION 2 — Mow, one of Dagolar’s “fakes,” is a Ratman with 9th-levelpsionic ability. He is also the watcher of the gate and the feeder of the slimes.Dagolar put him in charge of this after Mow accidentally wandered in herefrom the Sewers — or so he tells you. When Mow is following you, “looking”at many of the objects in the area prompts Mow to tell you something aboutthem. Of course, Mow knows so much because he is Dagolar.
✹ KeldarLOCATIONS 6, 9, 19 — Keldar is an 8th-level human templar. Keldar is a zealotof Dagolar, and has vowed to protect him and maintain the tunnels whileDagolar is busy. Unfortunately, being around Dagolar’s twisted creations haswarped Keldar’s mind. What little of it he has left is concentrated on filling hisbook with the names of all the people who have died at Dagolar’s hands. Ifyou can kill Keldar in one shot (by disintegrating him, for example), he doesnot teleport to his next location, and he won’t summon his creatures for afight. If you don’t succeed at killing him in one blow, you go right into a fight.
✹ JakeLOCATION 12 — Jake is a 9th-level human psionicist, and was an assassinunder a Drajian templar who, like many of the people in Draj, both feared and respected Dagolar. Jake was ordered to go into Dagolar’s domain and putan end to all of Dagolar’s madness. Unfortunately, Jake never got to killDagolar — he was discovered and thrown into a cell. In reality, Jake is justanother one of Dagolar’s fakes. Jake, like Mow, will also give you informationthroughout the region when you look at or use things. He only appears if Mowhas somehow died before you meet or expose Dagolar.
SYNOPSISDagolar’s experiments are performed in his tunnels, where no one can hearthe screams of his victims. His cruelty is evident in his twisted creations and
the upkeep of his domain. Feared by all, Dagolar’s name is whispered inhorror stories, scaring both the young and old. Your party will find
themselves battling Dagolar slimes, shadows, and zombies.
29 30
DAGOLAR’S TUNNELSDAGOLAR’S TUNNELS
✹ DAGOLAR’S TUNNELS ✹
1 2 3
45
6
7
8
9
10
11
12
13 13
13
14
15
15
16
17
18
19
20
21

10 Dagolar has imprisoned Goburnix in this room after turning him into azombie. Goburnix follows the party if you let him, and will expose Jake orMow as Dagolar if one of them is waiting outside the room.
11 More of Dagolar’s guards are stationed here.12 If Mow has died in some way or another, Jake will be here (before Dagolar
is defeated).13 These are Dagolar’s prisoners.14 If you take the powder over to the tank and mix it, random things can
happen. You may get friendly or hostile Dagolar slimes or zombies. Threezombies guard this room.
15 If you get too close to these animals, they’ll lash out at you.16 If you place a slime jar on the circle, then have a spellcaster read the
book, you can create Dagolar slimes. Although hostile, they’re a goodsource of experience points.
17 Two shadows inhabit this room.18 There are four ways through this gate. You can jump through it (26%
chance), have Goburnix trigger the plate, summon a water elemental, orget four of the heavy bones found throughout the tunnels and toss themon the pressure plate.
19 If you didn’t kill Keldar in any of the previous fights, he will be here toconfront you for the last time. If Dagolar is not here, Keldar summons fiveDagolar slimes to fight with him.If Goburnix is following you, and you exposed Dagolar, Dagolar will bewaiting here for you. He summons ten Dagolar slimes. If Dagolar is nothere, a fake waits for you in his private room (location 21), whichsummons five Dagolar slimes.
20 This device produces random effects, most of which are harmful to yourparty. If Dagolar or the fake Dagolar is in the room, there is a 50% chancethat the organ will destroy the fake, or release the spirits from Dagolar’screations (which will destroy Dagolar).
21 If you didn’t meet Dagolar in the sanctum, a fake will be here to attackyou. There is a chest in this room that contains a wand of missiles, a scrollof mirror image, a psionic bracelet of project force, and a lemon. AfterDagolar dies, a fire ring appears here.
✹ GoburnixLOCATION 10 — Goburnix is Dagolar’s brother, turned into a zombie. Goburnixand Dagolar led very different lives. While Dagolar was sadistic and cruel,Goburnix was kind and generous. Throughout their lives, the two brothers hadgrown farther and farther apart. Dagolar finally vanished, and Goburnixpursued his own goals. Over time, Goburnix began hearing his brother’s namewhispered of in relation to stories of torture and murder. He realized that hemust go to his brother and talk him out of his madness. Goburnix had the giftof always being able to see through his brother’s illusions, and he hoped thiswould help him in reaching Dagolar. Goburnix will, if you let him, follow youaround, so that may bring him to his brother. If you look at the flame archwith Goburnix following, he opens it for you. Bringing Goburnix to Dagolarallows the brothers to meet for one last time.
LOCATIONS AND EVENTS1 Four Dagolar slimes patrol this area, and attack when they see you.2 This is where you first meet Mow, the master of Watergate.3 Four zombies are guarding this location.4 Four guards are in this room. You need the hound’s head necklaces from
them in order to pass the Door of Eyes (location 5).5 The Door of Eyes protects Dagolar’s domain from outsiders. If you’re not
wearing the hound’s head necklaces when you approach, you take 51% ofyour hit points in damage. Wearing the necklaces allows you to open thedoor without taking damage. Note that everyone must be wearing them.Once you pass through this door, it closes behind you and you are lockedin until you kill Dagolar.
6 This is where you will first meet Keldar, Dagolar’s templar. If you don’t killhim before you talk to him, he’ll teleport to location 9 and await youthere. Attacking Keldar immediately triggers the fight (unless you kill himwith one hit). The fight consists of three Dagolar slimes, two shadows,and four zombies.
7 A nightmare tapestry hangs on this wall, eternally torturing some poor soul.8 Dagolar’s enemies have been fused into these statues, where they suffer
eternally in each other’s anguish. Some of the statues are more observantthan the others and try to warn you that Dagolar is nearby.
9 If Keldar vanished from the Sculpture hall, he awaits you here in the tortureroom. Once again, if you talk to him or attack him, he’ll call his minionsand teleport away. If he does teleport away, you’ll meet him next at location19. The monsters in this fight are identical to those in the fight at 6.
31 32
DAGOLAR’S TUNNELSDAGOLAR’S TUNNELS
NON-PLAYER CHARACTER IN THIS REGION
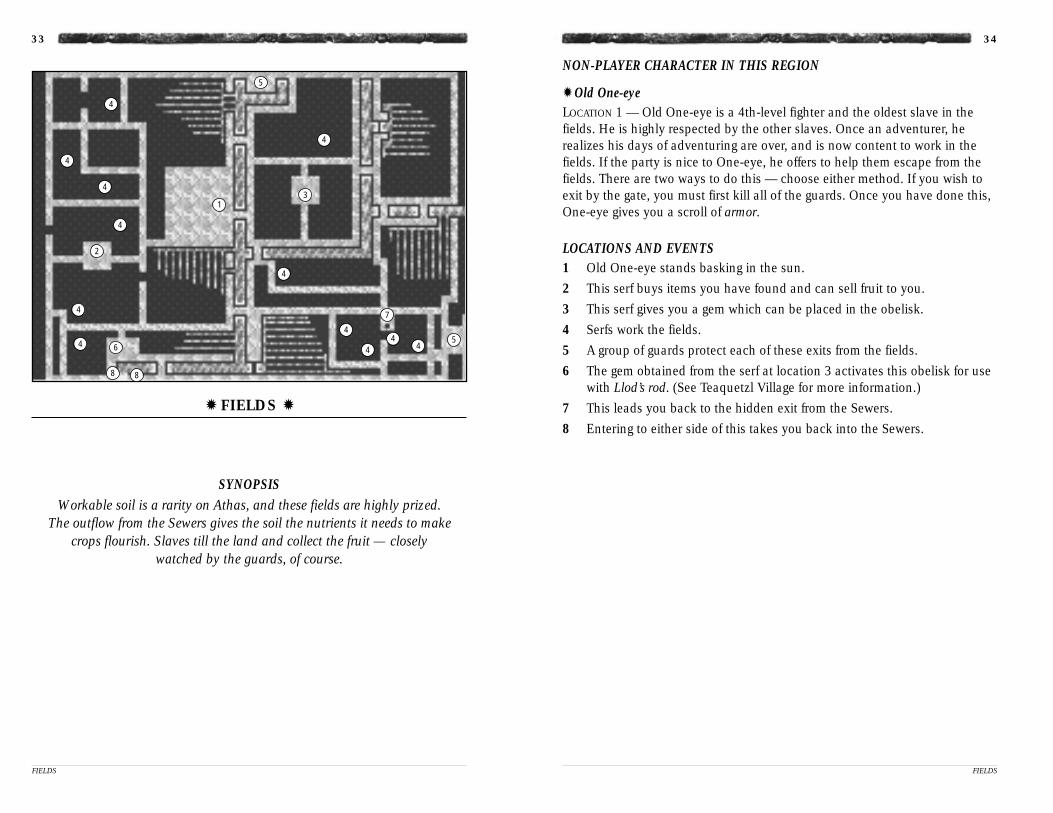
✹ Old One-eyeLOCATION 1 — Old One-eye is a 4th-level fighter and the oldest slave in thefields. He is highly respected by the other slaves. Once an adventurer, herealizes his days of adventuring are over, and is now content to work in thefields. If the party is nice to One-eye, he offers to help them escape from thefields. There are two ways to do this — choose either method. If you wish toexit by the gate, you must first kill all of the guards. Once you have done this,One-eye gives you a scroll of armor.
LOCATIONS AND EVENTS1 Old One-eye stands basking in the sun.2 This serf buys items you have found and can sell fruit to you.3 This serf gives you a gem which can be placed in the obelisk.4 Serfs work the fields.5 A group of guards protect each of these exits from the fields.6 The gem obtained from the serf at location 3 activates this obelisk for use
with Llod’s rod. (See Teaquetzl Village for more information.)7 This leads you back to the hidden exit from the Sewers.8 Entering to either side of this takes you back into the Sewers.
SYNOPSISWorkable soil is a rarity on Athas, and these fields are highly prized.
The outflow from the Sewers gives the soil the nutrients it needs to makecrops flourish. Slaves till the land and collect the fruit — closely
watched by the guards, of course.
33 34
FIELDSFIELDS
✹ FIELDS ✹
1
2
3
4
4
4
4
4
4
4
4
44
4
45
5
6
7
8 8

NON-PLAYER CHARACTERS IN THIS REGION
✹ LaussaLOCATION 1 — Laussa left her previous tribe due to dissent and is nowwandering the wastes, looking for a new tribe. In order to get the Ring ofSteadfastness from Laussa, you must find her a new tribe. This is done bygoing and talking to Ssovan in the Nazca Lines region. Then, you can go toLaussa and tell her about the new chief. It doesn’t matter if you’ve talked toLaussa beforehand. If you’re not greedy, she will thank you and leave for thenew tribe. Once she leaves the area, go to the Nazca Lines area, and she willbe there. Talk to her, and you can get the ring, which gives the wearer a +3 toConstitution. Killing her will not get you the ring.
✹ EgrusLOCATION 2 — Egrus is somewhat paranoid, and always felt unsafe in the slavevillages, worried about the Drajian soldiers one day finding him. Thus, he hasmoved out of the village of Teaquetzl, and into the wastes. He happenedacross the dead messenger, and read the news about the invading army. Sincethen, he convinced himself that the Drajian army is going to destroy all of theslave villages, and is resigned to not tell anyone, because it will “just be easierthat way.” He will tell you the direction of Teaquetzl and re-affirm that thearmy is soon going to roll into the wastes.
LOCATIONS AND EVENTS1 Laussa wanders the northern part of the map, so use your overhead map
to find her.2 Egrus stays around his camp unless you read the scroll on the body. If
you do that, he will come over to you.3 A fire ring lies on the ground. This will be here until the final battles, then
it will disappear.4 There is a scroll on this body that tells you about the armies massing
against the slave villages.5 Final Battle #1 — Summoned Monsters
This fight takes place if you’ve: killed everyone in Teaquetzl, left the ruinswithout getting the Genie, or didn’t wish for the shadow army from theGenie after getting him. The entire fight is against summoned and wildcreatures, and is quite tough. The fight consists of: vrock, blackmastyrials, rampagers, water elementals, and earth elementals. There arethree of each.
SYNOPSISThis region is a sandy waste between the Drajian fields and the village ofTeaquetzl. Here is where you will fight the Drajian army when they marchinto the wastes. Before the finale, there is an 80% chance of encountering
wandering monsters in this region. Afterward, there is a 100% chance.
35 36
WHITE SANDSWHITE SANDS
✹ WHITE SANDS ✹
1
2 3
4
56
7

6 Final Battle #2 — Templar troopsThis is the first fight if you’ve asked the Genie for help in the battle, or thesecond if you didn’t. The most dangerous things in this fight are theDaggorans and spellcasters. Daggorans will detonate your items andpossibly paralyze party members, so be sure to take them out quickly.After that, concentrate on the mages and psionicists. Flame wall and hastespells are good, and as an added bonus they will carry over into the nextfight. If you’ve allied with the emigrants from the Wagon Train, stoppedthe raids on the Caravan, or killed the bandits in the castle, some of thetroops will be diverted from you. The fight consists of: defilers [level 9] (4),psionicists [level 9] (4), daggorans (8), and city guards (12).
7 Final Battle #3 — Kraxis, the Drajian commander, and elite forcesThe final battle. If you let Wyrmias leave Gedron village alive, he willparticipate in this fight (see Gedron Village). Regardless, this fight shouldbe tough. Kraxis and his men are well-equipped and all of them have highstatistics. The best strategy for this fight is to put up a flame wall so manyof the enemies will take some damage before they reach you. The spellsblink and fire shield also make a deadly combination. Of course, youshould haste your party as well. The fight consists of: Kraxis [level 14],elite guard [level 12] (12), black mastyrials (3), defilers [level 9] (3), andWyrmias or 2 more defilers and 2 psionicists [level 9]. Winning this fightwill show the final cinematic and credits, then return you to the game,where you can continue to build up your characters.
37 38
WHITE SANDSWHITE SANDS

NON-PLAYER CHARACTERS IN THIS REGION
✹ ChahlLOCATION 2 AND THEN LOCATION 1 — Chahl, who escaped slavery in Nibenayyears ago, is the leader and founder of Teaquetzl village. He wanted to build aplace where average people could live in safety from the templars who wouldotherwise enslave them. Chahl was a loyal slave in Nibenay until his masterordered him to sacrifice a child for the Shadow King. Instead, Chahl stole thechild, Katura, and fled to the wastes around Draj where he raised Katura ashis daughter. Chahl dotes on Katura and would do anything to ensure herprotection. Some people in the village, most notably Lieutenant Kwerin, doubthis ability to lead, but none doubt his innate toughness.
✹ Lieutenant KwerinLOCATION 2 AND THEN LOCATION 3 — Kwerin is second-in-command inTeaquetzl village and has gained control over much of its day to day activities.Kwerin’s strength is his shrewdness. (He once managed to buy his freedomwith his master’s own money, who was never the wiser.) Kwerin is a relativenewcomer to Teaquetzl, and wants to turn the village into a major trade stopfor caravans on their way to Draj. Kwerin would like nothing more than totake leadership of Teaquetzl, but he knows he is not strong enough to defeatChahl. He is merely biding his time until old age takes care of Chahl for him.Kwerin does not believe the visionary’s prophecy and is not inclined to helpthe party with information, or anything else.
✹ The VisionaryLOCATION 7 — The visionary is a halfling who was found half-dead in the desert.His prophecy of the slave villages’ destruction is a rallying point for all. Thoughhis body was healed from the ravages of the desert, his mind is still overwhelmedby the power of his vision. Chahl believed the prophecy and began preparing thevillage for a coming war. The visionary is difficult, if not impossible, tounderstand since he speaks in obscure metaphors and garbled references.
✹ DominyLOCATION 10 — Dominy was among the first settlers in Teaquetzl and is thewell master for the village. He is the one who makes sure the well does not rundry. One could, therefore, say he is the most important person in the village,since there would be no village without the well. Dominy has, in fact, donesuch a remarkable job at keeping his well flowing that he and the bounty ofTeaquetzl’s water supply has become a local legend. Since all who live in orvisit Teaquetzl come to the well, Dominy is one of the best sources for rumorsand information about what is going on with Draj’s army.
SYNOPSISTeaquetzl village is located in the middle of the sandy wastes outside Draj.
The only significant feature of this area is below the sand where anunderground water source bubbles up and allows Teaquetzl to survive.
Before a visionary arrived to prophesy doom for all the slave villages in thedesert, Teaquetzl kept to itself and did its best to avoid drawing the attention
of Draj. However, the prophecy makes destruction inevitable. The villagebegins preparations for the war and the arrival of the band of heroes who
will drive back the evil as foretold in the prophecy.
39 40
TEAQUETZL VILLAGETEAQUETZL VILLAGE
✹ TEAQUETZL VILLAGE ✹
1 23
4
4
4
5
67 89
101112
13
1415
16
17
18
19 20
21

completes an alliance, it should return here and talk to the council, whocan give the party the latest news on the Drajian army. The council alsohas the party’s rewards sent to its room at location 5.After the party has defeated the Drajian army, the council asks the partyto become the leaders of Teaquetzl because Chahl was killed in the battle.
3 This is Lt. Kwerin’s house. He comes here after the party agrees to gatherallies. Lt. Kwerin does not believe the visionary’s prophecy, and willsometimes feed the party false information. He sees the party as threat tohis plans of making Teaquetzl a trade center.
4 These are the villagers’ houses. The party can talk to them to see how thewar effort is progressing and to get information about Teaquetzl. They arenot inclined to talk to strangers, but will open up once the party hasagreed to gather allies. The villagers include the carpenter, the charwoman, and warriors.
5 This is the party’s house. A fire ring lies on the ground where the party canrest. The party’s rewards can be found in the large chests along the northwall. When the party agrees to gather allies, it finds the sword Swiftbite,arrows+2, a lemon, and white grapes. When the party returns and informsthe council of its alliance with Cedrilte, it finds the Helm of Might,arrows+3, a psionic bracelet of share strength, and a red pear. When theparty returns and informs the council of its alliance with Gedron, it finds ascroll of pebble to boulder, Phrain’s Bow, arrows+2, and an orange. Theparty can also find a gem in each of the small chests.The party can also meet Chahl’s adoptive daughter, Katura, here if italready met her in the Elven Caravan and either Chahl or Father Garyntold her that the party is who the prophecy spoke of. If the party tells herwhat it knows about her parents in Nibenay, they can gain experience bywarning her against using magic rashly. She responds more favorably ifthe active character is a male human, elf, or half-elf.
6 A villager’s pet weasel is at this location. Trying to open its cage will upset the villager.
7 This is the visionary’s house. The party can talk to him and hear hisprophecy first-hand. The prophecy’s basic meaning is that an evil armywill come to prey on the weaker villages, and only a band of heroes canstop the destruction. These heroes will forge alliances among the isolatedvillages and bring forth an army of shadows to drive back the evil.Once the party has accepted its role as the heroes of the prophecy, thevisionary will give the party Llod’s Rod. This device enables the party toteleport between specific regions. In order for Llod’s Rod to work, the obelisk
✹ Father GarynLOCATION 15 — Father Garyn is a cleric of water and tends to the villagers’health and spiritual well-being. Father Garyn was the one who healed Chahlfrom the injuries he suffered while escaping slavery, and has become Chahl’sclosest friend and confidant. If the party is seeking information about Chahl,Father Garyn is the one to talk to. Indeed, Father Garyn seems to befriendmost people he comes in contact with, being one of the few people to take thevisionary under his wing in friendship. Father Garyn is also friends withLinara, the healer in Gedron. He has promised to get her some extract of thepith of a ranike tree, and he asks the party to retrieve the pith from Notaku inthe Red Sands Plateau region. Once that is done and the extract made, FatherGaryn asks the party to deliver the extract to Linara in Gedron.
✹ BowyerLOCATION 12 (TARGET AT 13) — The bowyer is a small shop owner specializingin archery and ranged weapons. The bowyer will sell to the party before it hasagreed to try to gather allies. He also has a small stash of magical arrowswhich he will give to the party if it displays remarkable archery skills. Theparty can do this by standing at least 14 paces from the target and hitting thecenter of the bull’s eye.
✹ ArmorerLOCATION 19 — The armorer is a small shop owner specializing in armor andclothing. He also runs a forge in the back of his shop. The armorer will not sellto the party unless it has agreed to gather allies for Teaquetzl.
✹ Weapon MerchantLOCATION 14 — The weapon merchant is a small shop owner who specializesin melee weaponry. The weapon merchant will sell to the party before it agreesto seek allies for Teaquetzl only if it claims Chahl sent them.
LOCATIONS AND EVENTS1 This is Chahl’s house. He comes here after the party agrees to gather
allies, and the party can talk to him about more personal matters. If theparty leader has a high Charisma, Chahl will be willing to talk abouthimself and his daughter Katura. The party can use this information atlocation 5 to gain experience when it talks to Katura.
2 The meeting hall is at this location. When the party first comes here,Chahl, Lt. Kwerin, and the council tell the party about the visionary’sprophecy and ask it to help gather allies to fight Draj. Once the partyagrees, Chahl and Lt. Kwerin return to their houses. Whenever the party
41 42
TEAQUETZL VILLAGETEAQUETZL VILLAGE

16 Alchemical devices are located along this wall. The party can make the pith extract that Father Garyn wants by pouring the pith into the device here. There is also an alchemical jar here which can be used at location 17.
17 The water tank here is Father Garyn’s focus of worship for the sphere ofwater. If the party puts the jar found at locations 16 or 18 in the watertank, it can produce green grapes.
18 There is an alchemical jar here which can be used at location 17.19 The village armorer has his shop at this location. He sells many types of
armor, but only if the party has agreed to help Teaquetzl in the fightagainst Draj.
20 A forge is located in this room which the party can use to make a steelaxe+1. In order to do this, the party must use the magical metal from themeteorite in the Gemfields at location 1. To make the axe, the partyshould heat the forge using the bellows on the coals. Once it is heated,the party can heat the meteorite, then use it with the anvil to make ametal rod. Next, the party should put the metal rod in the forge to heat it,then use the rod with the anvil to make the steel axe+1.
21 The gate at this location leads to the White Sands region. When the partyfirst enters, they must identify itself or the gate guard will not allow it toenter. The gate guard will try to charge the party for water if they express aneed for water. It is not necessary to pay him. Once the party has identified itself, the gate guard can provideinformation about the village as well as relaying any news he has heard about Draj’s movements. When the party has allied the other slave villages, a devastating sand-storm arises as the party leaves to face the Drajian army. The sandstormreveals the Palace Ruins and temporarily drives back the Drajian army.The visionary then explains that the party must enter the ruins to retrievethe Genie before it faces the overwhelming might of Draj. Without theGenie’s help in summoning an army of shadows, Draj will be able to bringits full force against Teaquetzl and undoubtedly crush any resistance.Notes: Because the fulfillment of the prophecy is dependent upon trustand making allies, any show of aggression by the party against thevillagers destroys the prophecy. If someone in Teaquetzl is killed, theDrajian army soon attacks with waves of troops and any hope of gaining the Genie’s help in the Palace Ruins is lost. If the party survivesthe attack on Teaquetzl, they will then face the full force of Draj’s army inthe White Sands region.
in the target region must be activated by placing the obelisk’s correspondinggem in its center. This activates the obelisk and allows Llod’s Rod to home inon its magical aura. However, Llod’s Rod cannot work underground, or ifthere is a massive amount of magical energy being used in the area, such aswhen the Drajian army is summoning its monsters for attack.The visionary also explains that the gem belonging to the obelisk inTeaquetzl was thrown down the village well.
8 There is a pile of fortune-telling bones at this location which the partymay use. The carving on the nearby wall reveals whether the fortune isfavorable or not.
9 An obelisk is located here; it allows the party to teleport to this locationusing Llod’s Rod once the gem found at the bottom of the village well (inthe Subterranean Temple) has been placed in the obelisk’s center.
10 The well master, Dominy, is here, working on various improvements forthe well. He is a good source of information regarding rumors about theDrajian army, as well as information about what is going on in the village.
11 The village well is located here. The party can quench its thirst at the well;if there is a half-giant in the party he or she can drink enough to drain thewell. The party can also lower and raise the water level of the well by turn-ing the crank on the side of the well. If the well water is lowered, the partycan climb into it, which takes them to the Subterranean Temple. The gemfound in the Subterranean Temple belongs in the obelisk at location 9.
12 The village bowyer has set up his shop at this location. The party canpurchase its archery and ranged weapons here. The bowyer will sell to theparty at all times.
13 The bowyer has set up a target at this location which the party can use tohone its archery skills. If one of the party displays exceptional archeryskills by hitting the bull’s eye from at least 14 paces away, the bowyer willgive the party a small quiver of arrows+2.
14 A weapon merchant specializing in melee weaponry is located here. Theweapon merchant sells to the party if it agrees to seek allies for Teaquetzlor if it claims Chahl sent them.
15 Father Garyn lives in this house. He can provide information about thevillage, Chahl, and Katura. The party can use this information at location5 to gain experience when it talks to Katura.Father Garyn is waiting for the delivery of a bag of pith from Notaku inthe Red Sands Plateau. If the party does not already have the pith, FatherGaryn asks the party to retrieve it. Once the party obtains the pith, FatherGaryn instructs them on how to make the pith extract, and he asks theparty to take the extract to Linara in Gedron.
43 44
TEAQUETZL VILLAGETEAQUETZL VILLAGE

NON-PLAYER CHARACTERS IN THE REGION
✹ MarisLOCATION 1 — Maris is a psionicist in search of deeper enlightenment. The pathshere form patterns that lead to greater enlightenment when followed for a certainperiod of time. If you follow the path with Maris, you gain enlightenment. As anadded bonus, Maris will then sell his psionic bracelets to you.
✹ ToonuuLOCATION 2 — Toonuu is a rich merchant who trades in salt. He is from themountains where salt is rare and valuable. He gathers and refines salt to takehome and sell for enormous profit. You can use this salt to buy Demothi’smastyrial in the Red Sands Plateau region.
✹ SsovanLOCATION 3 — Ssovan is a ssurran who’s lost his tribe. He’s now looking for anew tribe. Ssovan is following a dust devil because he believes it is his totemand will lead him to a new tribe that he will lead. Once you talk to Ssovan,you can get Laussa in the White Sands region to go and join him.
LOCATIONS AND EVENTS1 After speaking with Maris, you may walk around the path three times and
gain enlightenment. After you’ve been enlightened, Maris sells you hispsionic bracelets. If you kill him, you find the bracelets on his body. Thepsionic powers you gain from these bracelets are ego whip, intellectfortress, psionic blast, and synaptic static.
2 Toonuu is here gathering salt to take home with him. He sells you somefor 2,000 ceramic pieces. (1,800 if you bargain him down.) He does nothave the salt on him if you kill him. It is only necessary to buy the salt ifyou’ve decided to buy the mastyrial from Demothi in the Red SandsPlateau region.
3 Ssovan is searching for a new tribe. Once you’ve talked to him, you canentice Laussa (White Sands, location 1) into joining his tribe. When youreturn here, she will be with him.
4 Dig in the eye of the dragon with a shovel (found in the Hot Springs or on some Drajian guards) to find buried treasure. In the box you find a scroll of flame arrow and Aposs’ heart-crystal (for use in theSubterranean Temple).
SYNOPSISThe salt in this area has formed into mysterious shapes and lines.
Some of them have strange powers to enlighten and empower people. Geysers blow steaming water into the air and layer more salt on top
of the already coated ground.
45 46
NAZCA LINESNAZCA LINES
✹ NAZCA LINES ✹
1
2
3
4

NON-PLAYER CHARACTERS IN THIS REGION
✹ ChayaLOCATION 2 — Chaya is the leader of Cedrilte. With the castle atop themountain next to Cedrilte, the village has suffered greatly from constant raids by the wyvern riders. Chaya has done the best she could to hold thevillage together, but the effort has cost her. She is very suspicious of anystrangers and will not join the alliance against Draj unless all other threats toCedrilte are eliminated; namely, the wyvern riders and Tara. Even then, shewill only agree to an alliance if she is given assurances. Chaya gives the partythe gem to the magical obelisk, as well as green grapes and a sling+2 if theyagree to stop the wyvern riders from attacking her village. If the partysucceeds, she gives the party a psionic bracelet of animal affinity and a lime.Chaya sends the party to Krikor, a dwarf who helps the party find the secretentrance to the Undermountain.
✹ UskuyeLOCATION 6 — Uskuye is the village sub-leader. Despite the near destruction ofhis village, Uskuye is undaunted. He likes nothing better than a good fightand volunteers to accompany the party on hunting forays. Uskuye hasinformation about the wyvern riders and Lukyan, the lore master.
✹ KrikorLOCATION 7 — Krikor is a dwarf whose focus is charting all the caves in themountain ranges. Krikor uses the village as a base from which he does hischarting. He knows the secret cave entrance to the Undermountain and canlead the party to it . . . but only if you speak to Chaya first and promise todispatch the bandits.
✹ LukyanLOCATION 8 — Lukyan is a lore master, but now spends his time preparingmeager meals for the village. The mountains around Cedrilte offer a variety ofunique plants which Lukyan studies. Lukyan is able to instruct the party onhow to acquire the terror bloom required for Notaku’s mission (Red SandsPlateau, location 1).
✹ AzamiLOCATION 4 — Azami is the village carpenter. Azami despairs since anythingshe builds is quickly destroyed by the wyvern riders.
SYNOPSISCedrilte lies nestled against the base of a mountain and is nearly
surrounded by cliffs. This makes it easily defensible. Unfortunately, this is no impediment to the wyvern riders who simply land in the middle of the
village. The village has been almost entirely destroyed, without a singlebuilding still intact. The villagers are without hope and have nothing to
look forward to except death.
47 48
CEDRILTE VILLAGECEDRILTE VILLAGE
✹ CEDRILTE VILLAGE ✹
1
2
34
5
6
7
8
11
12
910

6 Uskuye, the village sub-leader, is at this location. He is friendly andundaunted by the destruction about him. He is impressed by the party’sprowess and will go on a hunt for strines if the party shows an interest inhis fighting ability. If the party is on the quest to find a terror bloom,Uskuye also helps the party fight the rampager at location 10.
7 Krikor, who is charting the caves and mountains of the area, is at thislocation. He does not want to be bothered by the party and is easilyirritated; however he will lead the party to the secret cave entrance to theUndermountain if they were sent to him by Chaya, or if the party does nottake up too much of his time.
8 A lore master, Lukyan, is preparing meals at this location. Lukyan is ableto instruct the party on how to acquire the terror bloom if the party hasspoken to Notaku (Red Sand Plateau, location 1) about that mission.
9 The secret cave entrance is located here on the north wall. The entrance isvery difficult to find unless Krikor helps the party. Having a thief as theparty leader improves the party’s chances of finding the entrance.
10 The serpent tree is located here. If the party is looking for a terror bloom, itmust use the tree to make noise (or use the conch found in Lukyan’shouse) in order to call a rampager. If the rampager is destroyed within 15paces of the serpent tree, a terror bloom appears.
11 Strines can often be found wandering in this area. If the party is huntingwith Uskuye, this location is a good one to find them.
12 An obelisk is located here; it allows the party to teleport to this locationusing Llod’s Rod once the appropriate gem has been placed in theobelisk’s center. The gem is found in location 2 of this region.
✹ MehtarLOCATION 3 — Mehtar is a thri-kreen cleric of air. Mehtar despairs in the faceof the wyvern riders’ destruction and has become morbidly pragmatic. Havingburned all her strength vainly trying to keep the village alive, she is simplywaiting for her death. Whether she dies at the hands of the bandits or one ofthe many other horrors to be found on Athas means little to her. If the party isinjured, Mehtar gives it a red pear.
LOCATIONS AND EVENTS1 The entrance to Cedrilte is at this location. When the party first arrives,
the village is under attack from the wyvern riders. If the party does notdefeat the bandits, it is likely to be the end of any hope for Cedrilte andany chance of another alliance to help in the war against Draj.
2 Chaya, the village leader, can be found at this location. Having seen hervillage all but destroyed, she does not give the party a warm welcome. Ifthe party shows itself to be unselfish and promises to stop the banditraids, Chaya gives the party the gem to the magical obelisk, as well asgreen grapes and a sling+2. She will not entertain any thoughts of analliance until the wyvern riders have been stopped. The party should askChaya for help getting to the castle. She tells them where to find Krikor, adwarf who has mapped the surrounding mountains.After stopping the wyvern riders and eliminating the threat posed by Tara,Chaya gives the party a psionic bracelet of animal affinity and a lime. Shealso listens to the party’s proposed alliance. Convincing her is difficult,and the party gains less experience, unless the Druid of the HowlingWind offers his protection. He will do so if he is still alive and the partydestroyed Tara for him.The party can also gain experience by giving Chaya any bags of grain it is carrying.
3 Mehtar, the village cleric, ekes out a meager existence here. If the party isinjured, she may offer it a red pear.
4 The village carpenter, Azami, is at this location. She has more informationabout the village.
5 The village well is located here. The party can climb down the well toenter the Subterranean Ruins. After the fight with the wyvern and theirriders at location 1, one of the villagers approaches the party and leads itthe leader’s house. The villagers tell the party about the bandits’ attacksand the castle.
49 50
CEDRILTE VILLAGECEDRILTE VILLAGE

NON-PLAYER CHARACTERS IN THIS REGION
✹ First MindhomeLOCATION 5 — The first mindhome is a psionically-linked group ofUndermountain folk. Before the rebel mindhome dissented and broke away,the first mindhome was the only group mind in Undermountain. The firstmindhome refuses to act against the dark spiders, believing peace is the onlyworthwhile existence. There are no leaders among the folk and any memberknows what has transpired with any other member. The first mindhome tellsthe party about the Outcast, the castle, the dark spiders, and the fungus groves.
✹ Rebel MindhomeLOCATION 3 — The rebel mindhome is a psionically-linked group ofUndermountain folk who believe the only way to deal with the threat ofQueen Cheee-smak-tunk! and her spider mages is to destroy them. The rebelmindhome broke away from the first mindhome when it disagreed about howto deal with the threat posed by the spiders. No great plurality of minds canexist within a mindhome, so a split was inevitable. The rebel mindhome is nothostile towards the first mindhome — the two groups simply disagree toomuch to maintain their link. The rebel mindhome gives the party orangegrapes if it agrees to destroy the dark spiders. If the party succeeds in killing allthe dark spiders, the rebel mindhome helps the party sneak into the castle.However, the party can earn more experience by establishing trade betweenPrince Clikk-tunk! and the rebel mindhome. The rebel mindhome then helpsthe party enter the castle.
✹ OutcastLOCATION 9 — The Outcast is a slightly defective member of the folk whomanaged to set up a small trade with Clikk-tunk!, a prince of the dark spiders.The Outcast collects vermin for Prince Clikk-tunk! who, in turn, gives theOutcast spider silk which he weaves into many useful things: bedding, rope,nets, etc. The Outcast could never truly link with the group mind, and whenthe hostilities began between the spiders and the folk, he went off to patch upthe differences.
✹ Churr-te-tunk!LOCATION 10 — Churr-te-tunk! is a dark spider who guards the west cliffagainst unwanted visitors. He is a follower of Prince Clikk-tunk! and acts as acontact between Prince Clikk-tunk! and the Outcast. Churr-te-tunk! gives theparty a silk talisman which allows them to pass freely through Darkhold. Heknows about the Cavern of the Ancients and the fungus groves.
SYNOPSISThe Undermountain is a maze of underground tunnels which are divided
into two levels by a cliff running east to west. The lower level ofUndermountain is inhabited by the mindhome, a peaceful community
of telepathically linked individuals. The upper level is inhabited by darkspiders. Darkhold, the spider community, has become hostile to the
mindhomes since Queen Cheee-smak-tunk! began her reign. A resourceful party can forge peace between the mindhomes and spiders by establishing trade. A large cavern on the east side of the upper level
is dominated by fungus groves, while in the northeast corner a massive portcullis overlooks a chasm.
51 52
UNDERMOUNTAINUNDERMOUNTAIN
✹ UNDERMOUNTAIN ✹
1 2
34
5
6
78
9
10
1112
13
14
1414
14
14
15
16 17
18
19
19
19
19
19
19
19
2020
20
20
20
21
22
23 24

The party may gain more experience as well as the folk’s help by estab-lishing trade between the spiders and the folk. To rejoin the mindhomes,the party must return here with Prince Clikk-tunk! and convince the rebelmindhome that the prince is trustworthy. Telling the mindhome that theprince will not harm them even if they do not agree to trade is a sure wayof convincing them. Once there is peace between the spiders and the folk,the rebel mindhome sends one of its members with the party to the castleentrance to help it enter without alerting the castle guards.
4 The party can climb the cliff at this location using the silk rope it gets fromthe Outcast. They can also climb it if the party leader is a thief.
5 The first mindhome lives in these caverns. The first mindhome is a peace-loving community and talks to the party as long as it is not hostile. Theycan tell the party where the Outcast and the castle are, and haveinformation about the dark spiders and the fungus groves.
6 A fire ring is located here which allows the party to rest.7 The guard at the top of the cliff challenges the party. He allows the party
to pass if it claims it is just going to the castle and gives the party a silktalisman which allows it to pass freely through Darkhold. He hasinformation about Darkhold and tells the party about the entity in thefungus grove.
8 The party can climb the cliff at this location if the party leader is a thief. Ifthe Outcast led the party here, he gives the party a silk rope whichenables it to climb the cliff.
9 The Outcast is at this location. He believes that the ancients are behindthe recent violence and is certain a curse dooms all who live inUndermountain. He talks to the party if it promises not to harm him. TheOutcast tells the party about the Cavern of the Ancients and its possibleconnection to the fungus groves and the spiders’ hostility. He also hasinformation about Darkhold and wants the party to help him establishtrade between the dark spiders and the folk.If the party pledges to end the curse, the Outcast offers to make a piece of Silk Armor for it, and helps the party up the cliff into Darkhold. Oncethe party has accomplished this, he gives the party the Silk Armor. TheOutcast will not give the Silk Armor to the party if they destroy all the dark spiders.
✹ Queen Cheee-smak-tunk!LOCATION 16 — Queen Cheee-smak-tunk! is a powerful defiler who rulesDarkhold. Queen Cheee-smak-tunk! is a vicious and devious ruler. She likesto eat humanoids and uses the threat posed by the entity to wage war on thefolk. She promises to give the party treasure if it destroys the entity andreleases the dark spiders enthralled by it. However, she does not like the ideaof people as powerful as the party walking free in Darkhold. She prepares anassassin force to kill the party, should it survive the ordeals in the fungusgrove. If the party lends its support to Prince Clikk-tunk!, it can thwart thequeen’s plans and gain the help of the other dark spiders. Queen Cheee-smak-tunk! possesses the Wyldwind Wand. She will not relinquish her rule ofDarkhold easily.
✹ Prince Clikk-tunk!LOCATION 18 — Prince Clikk-tunk! is the child of Queen Cheee-smak-tunk!.Prince Clikk-tunk! sees the advantage of trade with the folk, but he is weakerthan his mother, the queen, so he must enlist the party’s aid in ousting QueenCheee-smak-tunk! from power. To gain the other spiders’ trust, the princeinstructs the party to destroy the entity in the fungus grove. The prince warnsthe party that Queen Cheee-smak-tunk! is untrustworthy and he will help inthe fight against the queen. If the party does not agree to help the prince, theywill not be able to establish trade with the folk.
LOCATIONS AND EVENTS1 The entrance to Undermountain is at this location. Screamer beetles often
prowl this area looking for prey.2 These caves are filled with vermin. Some of the Undermountain folk come
here to collect the vermin for the spiders if the party establishes tradebetween the two groups. Screamer beetles often prowl this area lookingfor prey.
3 The rebel mindhome lives in this cavern. The rebel mindhome broke awayfrom the first mindhome when some of the folk decided the only way todeal with the spiders was to destroy them. They tell the party about QueenCheee-smak-tunk! and the dark spiders and ask the party to destroy thespiders. In return, the folk give the party orange grapes and promise to helpthe party sneak into the castle. The rebel mindhome also has informationabout the Outcast, the fungus groves, and the first mindhome.
53 54
UNDERMOUNTAINUNDERMOUNTAIN

in its fight with the queen. Any spiders rescued from the fungus grove alsofight on the party’s side. The party needs the prince’s support to establishtrade with the folk and end the hostilities between the two races.Queen Cheee-smak-tunk! drops the Wyldwind Wand when she isdefeated. Prince Clikk-tunk! then follows the party to the rebel mindhomewhere he hopes to establish trade and bring peace to Undermountain.
17 The queen has stashed an apple and an orange pear in the chest behindthe screens at this location, along with the remains of her latest victims.The party can attack and knock down the screens, but the queen and hersubjects attack the party for stealing. Grateful for the party’s help, theprince allows the party to take what it wants once the queen is defeated.
18 After the party has spoken to the queen, Prince Clikk-tunk! meets theparty at this location. He warns the party of Queen Cheee-smak-tunk!’streachery and asks the party to join his attempts to oust the queen and establish trade with the folk. The party must first destroy the entity in the fungus grove in order to overcome the dark spiders’ distrust. Oncethe entity is destroyed, Prince Clikk-tunk! follows the party to confront the queen.
19 The fungi at these locations shoot poisonous spores at the party if theyare not wearing the talismans of Nagi.
20 Dark spiders whose minds are controlled by the entity are at theselocations to protect it against attack. They attack if the party approachestoo closely. The talismans of Nagi may not provide protection from thefungus spores when the entity is threatened by combat.
21 The party should move to the brick circle at this location as quickly as possible and throw the golden pendant into the hole. This destroys the entity and releases the enthralled grove spiders. If the party does not attack them, the spiders in the grove offer to help the party against the queen.
22 Queen Cheee-smak-tunk!’s assassins ambush the party at this locationafter it has destroyed the entity.
23 Guards from the castle are stationed at this location. They are lazy andwill not attack unless the party intrudes on them or the alarm is raised byopening the portcullis without the folk’s help.
24 The castle portcullis is at this location. The party can enter the castlewithout setting off the alarm if one of the folk has agreed to help them. Ifthe party uses the portcullis on its own, guards attack and the party willface more guards once it enters the castle.
10 Churr-te-tunk! guards the top of the cliff at this location. He allows theparty to pass into Darkhold if it claims that the Outcast sent it. He alsogives the party a silk talisman which allows it to pass freely throughDarkhold. He has additional information about the Cavern of theAncients and the fungus groves.
11 This is the entrance to the Cavern of the Ancients and is protected by awarning symbol set in the ground. The symbol erupts in flame if anyonewalks over it.
12 The north wall at this location was bricked up centuries ago to imprisonNagi and his followers. The party can attack and knock down the wall to reveal the room beyond. Red slaad appear to defend the Cavern of the Ancients.
13 Tara imprisoned her brother Nagi in this room after a battle for controlover the Inner Eye, an ancient magical society. The remains of Nagi’sfollowers are still chained to the wall, though Nagi managed to escape hisbonds and curse Tara. The party can read the curse which is still etchedinto the cave floor.Also in the cavern are the talismans of Nagi, which protect the wearerfrom the poisonous spores of the fungi in the groves. The party finds thegolden pendant, a scroll of minute meteors, and Nagi’s journal. The partycan read the journal to learn of Nagi’s struggle with his sister and gainvital information about the entity in the fungus grove.
14 Dark spiders are at each of these locations. They talk to the party if theyhave a silk talisman.
15 A spider mage questions the party. He allows an audience with the queenas long as they are not aggressive. When the party returns after destroyingthe entity, he thanks the party and instructs them to talk to the queen toreceive their reward.
16 Queen Cheee-smak-tunk! sits on her throne at this location. She isdisdainful of the party, but wishes to use it to eliminate the threat of theentity in the fungus. The party should be careful not to insult the queen.All of Darkhold will rally to her defense if the party does not show herrespect. Agreeing to destroy the entity will mollify her distrust of the party.After the entity in the fungus grove is destroyed, Queen Cheee-smak-tunk!lures the party into her back room with the promise of treasure, at whichtime she calls for her subjects to kill the party. If the party has agreed tohelp the prince, he exposes the queen’s plan and calls on the otherspiders to support his more honest rule. The party then has valuable allies
55 56
UNDERMOUNTAINUNDERMOUNTAIN

NON-PLAYER CHARACTERS IN THIS REGION
✹ Tara’s FollowersLOCATIONS 4, 5, 6, 7 — Tara’s followers are the remains of the Inner Eye. Tara’sfollowers were cursed to spend eternity with Tara. Their bodies, however, showthe effects of time, and they have become little more than animated corpses.Tara grew weary of her followers’ grim visages and imprisoned them in the blackmaze. Nagi’s curse and their unending imprisonment in the black maze hasdriven Tara’s followers insane. Though the followers’ bodies can be attacked,they cannot be truly destroyed until Nagi’s curse is broken by defeating Tara.
✹ ChaeroLOCATION 12 — Chaero is the bandit in charge of taking care of the wyverns.Chaero is enamored by the idea of riding wyverns and joined the bandits forthat sole purpose. He is cowardly and does not want to face the party alone.He tries to trick the party by claiming he will help it.
✹ TaraLOCATION 11 — Tara is an ancient defiler who ruled the Inner Eye, but is nowkept in an animated state by her brother’s curse. Centuries ago, Tara vied withher brother, Nagi, for control over the Inner Eye. Though she won the battleand entombed Nagi in the Undermountain, her brother cursed her and herfollowers to eternal life, trapped in the castle. Centuries later, the WyvernMaster arrived with his bandits and the two struck a bargain. Tara gave theWyvern Master the Wyvern Hook while he provided her with the victims sheneeds to maintain her youth. Tara can be summoned to this location bystriking the gong. The party can only destroy Tara by using the Wind Potion(Upper Castle, location 5) after she has been struck down in combat. Onceshe has been destroyed, the Silver Necklace and Tynan’s heart appear.
LOCATIONS AND EVENTS1 The entrance to the castle is located here. It leads to the Undermountain.2 If the party set off the alarm while raising the portcullis in the
Undermountain, they find several guards waiting in this room. The guards attack the party.
3 There are sigils set in the floor at these locations which prevent Tara’sfollowers from leaving the black maze. If the follower from location 4 iswith the party, he will be destroyed by the sigil’s warding magic when hewalks over the it. Once Tara has been destroyed with the Wind Potion, theparty can gain experience by using the Wind Potion to destroy the sigilsand free the followers.
SYNOPSISThe Lower Castle is perched atop a mountain. There is a steep cliff on the
east face of the mountain from which the wyvern riders launch their attacks.Vrock have also been know to perch along this cliff.
The castle is ancient beyond memory. Indeed, the carvings on some of thewalls suggest it was built before Athas turned into a wasteland. It also seemsto attract evil. The Inner Eye, a magical society formed several centuries ago,
made its home in this castle, and the cursed remains of that group still haunt it. More recently, the castle has become the home of bandits. These
bandits somehow manage to control wyverns and now mercilessly raid the surrounding areas.
57 58
LOWER CASTLELOWER CASTLE
✹ LOWER CASTLE ✹
1
2
3
3
4
5
678
9
9
9
10
11
12
13
14
1515
16
16
16
17
18
18
18
18
18
18
192021

13 Wyvern riders are at this location guarding the wyvern pens. When theyspot the party, they attempt to release the wyverns from their pens beforeattacking. The party should charge these guards and attack to preventthem from opening the pens. If the party manages to dispatch theseguards before encountering other guards, they can reach the Upper Castlewithout sounding the alarm.
14 The stairs at this location lead to the Upper Castle.15 If the party agrees to let Chaero help them at location 12, he instructs
them to hide in this pen. Once in the pen, Chaero sounds the alarm.When all of the bandits and wyverns have arrived, the door to the pen isopened and they attack. A party leader with a Strength greater than 18can break down the door.
16 A wyvern is in each of these pens.17 Wyverns and the riders occasionally land in this area. They attack if they
spot the party.18 The levers at these locations open or close the door immediately to the
north of it.19 Vrock have taken to perching on the cliff at this location. They attack if
they spot the party.20 The north wall at this location is actually a magical barrier. The party can
discover it by having the party leader wear the Serpent Boots whilewalking along the edge of the wall. Once discovered, the wall can bedispelled by touching it.
21 The sword Darkflame is hidden in a chest at this location. There are alsoseveral gems and other treasures.
4 The zombie at this location begs the party to save him from Nagi’s curse.The party can agree, but the zombie will be killed when he walks over thesigil at location 3. If the party refuses to help him, he attacks. The onlyway to release Tara’s followers from the curse is to destroy the sigils.
5 The zombie at this location has been driven totally insane by Nagi’s curseand attacks the party whenever he sees it. The party can, however, get thezombie to talk and tell it about the sigils.
6 The zombie begs the party to destroy Tara and end the curse. He hasinformation about Tara, Nagi’s curse, and the Druid of the Howling Wind.If the party leader is wearing one of the talismans of Nagi found in theUndermountain, the zombie attacks.
7 This zombie wants nothing more than to be left alone. However, the partycan cajole him into telling them how to destroy Tara. He sends the partyto the Druid of the Howling Wind. Once Tara has been destroyed, he tellsthe party about the Serpent Boots at location 8.
8 The Serpent Boots are hidden in a broken jar at this location.9 Guards are stationed at these locations and attack the party.10 A guard is sleeping at this location if the party has not made too much
noise fighting nearby. The party should threaten him in order to get him totalk. Otherwise, he sounds the alarm. The guard tells the party where tofind the Wyvern Master and informs them that Chaero can help the partyget past the wyverns at location 13. He also has information about theblack maze and the Wyvern Hook.
11 The Wyvern Master sacrifices victims to Tara in this room. Tara feeds offthe victims’ life force to maintain her youth and appears if the party ringsthe gong by hitting it with the striker. The party can then talk to Tara,though she invariably succumbs to her hunger and attacks the party. Taracannot be destroyed by normal attacks and appears three times beforeshe grows weary of the party’s games. She goes into a rage if the partyleader is wearing one of the talismans of Nagi.
12 Chaero is in this room taking care of the wyvern saddles and other tack.Chaero attempts to trick the party by claiming he can sneak it past theguards in the wyvern pens. However, he merely wants to trap the party inone of the wyvern pens until he can sound the alarm. If the party does notthreaten him and goes along with Chaero’s schemes, he tells the partyhow to get to the Upper Castle. He also has excellent information aboutthe Wyvern Master, the Wyvern Hook, and Tara.
59 60
LOWER CASTLELOWER CASTLE

NON-PLAYER CHARACTERS IN THIS REGION
✹ Wyvern MasterLOCATION 7 — The Wyvern Master is a minor bandit who spotted the ancientcastle. He entered the castle hoping to discover treasure. Instead, he foundTara. A combination of his quick wit and tossing two of his subordinates to herallowed him to negotiate. His offer to provide victims in return for powerfound favor. She provided him with the Wyvern Hook and an earth elemental,and told him how to gather the wyverns. When the Druid of the HowlingWind attacked, the Wyvern Master was quick to imprison him as a possibledefense against Tara, whom the Wyvern Master fears. The party must defeatthe Wyvern Master and recover the Wyvern Hook in order to gain the Druid ofthe Howling Wind’s help in destroying Tara. In addition to the Wyvern Hook,the Wyvern Master carries the Wind Ring, Drake Leather chest armor, abanana, and an orange pear.
✹ TaraLOCATION 10 — Tara is an ancient defiler who ruled the Inner Eye, but is nowkept in an animated state by her brother’s curse. Centuries ago, Tara vied withher brother, Nagi, for control over the Inner Eye. Though she won the battleand entombed Nagi in the Undermountain, her brother cursed her and herfollowers to eternal life, trapped in the castle. Centuries later, the WyvernMaster arrived with his bandits and the two struck a bargain. Tara gave theWyvern Master the Wyvern Hook and he provided her with the victims sheneeds to maintain her youth. The party can only destroy Tara by using theWind Potion after she has been struck down in combat. Once she has beendestroyed, the Silver Necklace and Tynan’s heart appear.
✹ Druid of the Howling WindLOCATION 5 — The Druid of the Howling Wind is the protector of the wind-swept slopes of the mountain the castle is built on. When the Wyvern Mastergained control of the wyverns, the Druid of the Howling Wind came to thecastle to recover them. He was captured and placed in the west tower, andprevented from using his powers by the earth elemental guarding his cell. Theparty must gain the Druid of the Howling Wind’s help before it can banishTara. Doing so will grant Cedrilte the druid’s protection and enable them toform an alliance against Draj with the party. The Druid of the Howling Windgives the party the Wind Potion which can be used to destroy Tara once she isstruck down in combat. Giving the Wyvern Hook to the Druid gives himcontrol of any remaining wyverns in the lower castle area. They disappearwhen you return to that region.
SYNOPSISThe Upper Castle consists primarily of two towers built above the Lower
Castle. Its long, open corridors make it difficult to navigate without being spotted by guards.
61 62
UPPER CASTLEUPPER CASTLE
✹ UPPER CASTLE ✹
12
3
4
56
7
89
9
10

8 The key to the door at location 3 is hidden under the Wyvern Master’s bed.The Wyvern Master will not allow the party to take this key without a fight.
9 Guards are stationed at these locations and attack when they spot the party.10 This is the east tower where Tara and a few of her followers stay. She talks
briefly with the party if it has not already talked to her at location 11 inthe Lower Castle. Inevitably, she attacks the party. The party must strikeher down in combat and then use the Wind Potion to destroy her,otherwise, her body simply regenerates. Once she has been destroyed, theSilver Necklace and Tynan’s heart appear.
LOCATIONS AND EVENTS1 The stairs at this location lead down to the Lower Castle. If the Wyvern
Master has led the party here on the pretense of giving the party treasure,he instructs them to go to location 11 and strike the gong, after which heseeks the protection of his guards.
2 The door at this location is locked. The key is in the west tower at location 6.3 This is the Wyvern Master’s treasure room. The door is locked. The key to
this door is at location 8.4 An earth elemental guards the door to the west tower. It attacks if the
party tries to enter. A bow+2 can be found on the skeleton in the corner.5 The Druid of the Howling Wind is imprisoned here in the west tower. The
party should agree to help the druid rid the castle of Tara. The druidexplains how to destroy Tara with the Wind Potion, which he gives to theparty after it has returned the Wyvern Hook to him. The druid also tells theparty about the Serpent Boots and Darkflame once it has destroyed Tara.It is important for the party to destroy Tara and gain the druid’s trust.Otherwise, the druid will not offer his protection to Cedrilte when theparty tries to make an ally of Cedrilte, and the village will then refuse tosend its warriors to Teaquetzl.
6 The key to the door at location 2 is on the floor. A fire ring also found hereallows the party to rest.
7 These are the Wyvern Master’s quarters. Realizing only resourcefulwarriors could get this far, the Wyvern Master tries to cut a deal with theparty to get it to leave. He promises nearly anything, though he has noplans to deliver any of the things he promises. If attacked, the WyvernMaster calls his guards.Once the Wyvern Master is defeated the party finds the Wyvern Hook, theWind Ring, Drake Leather chest armor, a banana, and an orange pear onhis body. The party needs the Wyvern Hook to get the Wind Potion fromthe Druid of the Howling Wind.
63 64
UPPER CASTLEUPPER CASTLE

NON-PLAYER CHARACTERS IN THIS REGION
✹ Druid of the Steaming WatersLOCATION 1 — The Druid of the Steaming Waters is a Mul and a 3rd-leveldruid of water. The last protector of the oasis has moved on to pursue hisenlightenment, and his neophyte apprentice, the new Druid of the SteamingWaters, has taken over. Unfortunately, a defiler and his troops showed up anddrove him off. If you kill the defiler and his troops, the druid tells you aboutthe location of treasure in the Ssurran Ruins region. He warns you about thecrazy ssurrans that live nearby, but not of the shadows.
✹ Troop LeaderLOCATION 2 — The templar has set up camp here not only because the oasis isa source of water, but also because it is a source of power for his dark magic.The defiler is draining the oasis in order to track down a band of wyvernbandits that have been raiding supplies travelling to and from Draj. You canconvince the leader to leave the oasis in a number of ways (aside from killinghim and his men). Telling him you bring a message from Draj starts you alongseveral possible paths you can take to make him leave. The more believablethe lie, the better the chance you have of getting rid of him. He will believe amessage from Dagolar more than he will one from Drakath. If you have apsionicist, you can try to dominate his mind. If you succeed, you can force thetemplar to leave the oasis, or make him fight with you against his own troops.If you kill the templar, you find the Obsidian Necklace on his body.
LOCATIONS AND EVENTS1 The Druid of the Steaming Waters can be found here.2 The troop leader guards this location.3 Guards stationed at their posts.4 If you surrendered to the guards in the Elven Slavers region after drinking
Tobrian’s wine, this is the location you appear at. If the druid is alive, heappears with two water elementals and helps you defeat the guards thatescorted you here. After that, he either explains his plight, or thanks youagain for helping him.
SYNOPSISA druid wanders the area, bemoaning the loss of his oasis to a defiler. Thedefiler plans on draining the oasis to fuel his dark powers. The druid wants to prevent this, and pleads with the party to help. He is not strong enough
to do it himself, so he must get help before it becomes too late.
65 66
SALT OASISSALT OASIS
✹ SALT OASIS ✹
1
23
3
3
3
33
3
3
3
3
3
3
3
3
3
3
3
3
3
3
3
4

NON-PLAYER CHARACTERS IN THIS REGION✹ TemplarLocation 1 — The templar is making futile attempts to mine copper.
✹ Drajian GuardsLOCATION 1 — These Drajian guards are here to guard the templar and hisslaves. They keep the slaves in line and protect the templar from harm. Whenfirst approached you may either agree to be enslaved, or fight the guards.
✹ SlavesLOCATION 1 — Slaves mine the springs for copper.
✹ KashaLOCATION 1 — Kasha, a recently escaped slave, has not yet left the area. He warnsyou that you are about to become a slave if you don’t turn around immediately.
✹ UzomaLOCATION 2 — Uzoma is the leader of a patrol of Drajian guards. You will notfind him until the templar from the Hot Springs is gone or dead. Uzomamistakes you for a Drajian guard and will let you join his patrol. If you do notfollow him closely, he waits awhile and then leaves.
✹ Teaquetzl PatrolLOCATION 3 — Patrolmen from Teaquetzl. They are patrolling the area to keepit clear of Drajian guards or large monsters that might threaten Teaquetzl.They will not appear unless you join Uzoma and his patrol.
LOCATIONS AND EVENTS1 When you approach this hot spring, an escaped slave named Kasha
warns you of the mining going on. If you continue on, the guards try tomake you slaves. If the party resists, they will attack. If you agree to beslaves, you can wander freely about the area. Picks and shovels are lyingaround and can be gathered for use in the future. If you have the Wand ofMetal Detection given to you by the sage in the Red Sands Plateau, give itto the templar. He realizes there is no copper and leaves, taking hisguards with him. If you kill the templar, you receive a Drake Shield. Youreceive experience points for either solution.
2 Once you’ve completed the Hot Springs, walk to the west and a Drajianpatrol approaches you. They mistake you for a Drajian guard and let youjoin their group. If you follow them, they take you on patrol with them.
3 If you’ve joined the Drajian patrol, you can follow them here and find apatrol from Teaquetzl. If you join the Teaquetzl patrol to fight the Drajianguards, the Teaquetzl patrolmen thank you afterward.
SYNOPSISThe salt flats in this area have springs and pools of minerals covering largesections. In the middle of the flats is a large hot spring that is being mined
for copper by a templar from Draj. A templar, Drajian guards, and patrols from Teaquetzl roam this region.
67 68
HOT SPRINGSHOT SPRINGS
✹ HOT SPRINGS ✹
1
2
3

NON-PLAYER CHARACTERS IN THIS REGION
✹ WyrmiasLOCATIONS 1, 9 — Wyrmias has seized control of the town, and is toying withthem while he sends villagers to look for his statue pieces. In order to freeGedron Village of Wyrmias, you must get him those statue pieces. The twopieces are the head and rattle for the serpentine statue in the center of thetown. They are located in the Silt Sea Summoning region and the Silt SeaSsurrans region (for specifics look under each region). Killing Wyrmias beforehe has the statue pieces destroys Gedron, ruining your chances of forging analliance. If you attack the villagers or insult Wyrmias after he warns you notto, Wyrmias teleports all the villagers into the silt. They’re not dead — yet.Killing Wyrmias when the villagers are in the silt also ruins your chances ofobtaining an alliance. Once you’ve given Wyrmias both of his statue pieces,he releases control of the village and brings back the villagers if he teleportedthem out into the silt. He then challenges you to a duel. He won’t let youleave the region after he challenges you, so you must fight him. Once he’sdead, the statue comes to life. If you’re not sufficiently high-level, you don’twant to fight Wyrmias in his statue form. However, Wyrmias, being aman/creature of his word honors his agreement and leaves the townpeacefully. If you don’t fight him now, you’ll simply fight him in the ending battles.
✹ LinaraLOCATION 2 — Linara is a 6th-level human preserver, and is the only one in thevillage that is unaffected by Wyrmias’ spells. She is waiting to hear from hersister who has gone off to the Silt Sea Summoning region.
✹ Gedron MayorLOCATION 3 — The Mayor is currently Wyrmias’ puppet. You can meetWyrmias through the mayor instead of meeting Wyrmias directly. After you’verid the town of Wyrmias and recovered the gladiators, the mayor will agree toan alliance against Draj.
✹ MelkorLOCATION 4 — A travelling merchant, Melkor was stuck here when Wyrmiastook control of the town.
SYNOPSISGedron Village has been taken over by an evil defiler who is controlling the
minds of the villagers. He has sent the gladiators away and is trying to obtainseveral statue pieces to complete the serpentine statue in the middle of the
town. Anyone that comes into the town is asking for trouble.
69 70
GEDRON VILLAGEGEDRON VILLAGE
✹ GEDRON VILLAGE ✹
1
2
3
4
5
5
5
5
5
5 5
5
6 6
6
6
66
7
8
9
10
11
12

LOCATIONS AND EVENTS1 This is where Wyrmias is before you meet him. Once you talk to him, he
teleports to the statue (location 9).2 Linara’s house is filled with everything that she needs to help the villagers.
She will be here until you win the game, then she wanders around. Givingthe pith extract from Father Garyn to Linara rewards you with a dispelmagic scroll. Giving her Jasmine’s spellbook gets you information onWyrmias’ room, and the hidden safe within.
3 This is where the mayor lives and where Gedron holds town meetings.4 Before Wyrmias leaves the village, Melkor sells nothing but junk. He even
buys broken pots from you for 50 ceramic pieces each! Afterward, he sellsstandard supplies.
5 Before Wyrmias leaves, the villagers are loony and talk nonsense.Afterward, they thank you or tell you about anything that is unresolved in Gedron.
6 The Gedron gladiators only return once you’ve freed Gedron of Wyrmiasand have released the gladiators from Arant and his men (from theCaptured Gladiators region).
7 A fire ring lies on the ground.8 You can climb down this well and enter the Subterranean Temple region.9 Here is where Wyrmias teleports after he talks to you. This is where you
must confront him and rid Gedron of his presence.10 If you “look” at the rug with a high Intelligence character, he or she
notices that it is loose. Lifting it exposes a safe. If you have a characterwith high Strength or a thief, you can open the safe by bashing or pickingthe lock. Bashing the lock triggers a trap, but picking the lock disarms it.Once open, the safe contains 2,000 ceramic pieces, the sword El’s Drinker,a psionic bracelet of life draining, and the obelisk gem for Gedron(location 11).
11 Putting the gem from the safe into this obelisk activates it for use withLlod’s Rod (See Teaquetzl Village, location 9).
12 This tapestry hides the entrance into Wyrmias’ room. A thief or acharacter with high Intelligence finds it easily.
71 72
GEDRON VILLAGEGEDRON VILLAGE

NON-PLAYER CHARACTERS IN THIS REGION
✹ Ssurran merchantsLOCATION 2 — The ssurrans are slave traders hired by a human merchanthouse to acquire gladiators. The ssurrans are waiting to buy the gladiatorsfrom Arant, who is in the Silt Sea Summoning region. They plan to pay for thegladiators with a statue piece. This statue piece is one sought by Wyrmias inGedron village. The party can buy the statue piece from the ssurrans at anexorbitant price or simply take it by brute force.
✹ Wild halflingLOCATION 1 (CAN APPEAR ANYWHERE IN THE REGION) — The halfling is a traveller.He wandered into this region by mistake and wants only to leave the area. Ifcaught in combat, the halfling fights on the party’s side.
LOCATIONS AND EVENTS1 A wild halfling who mistakenly wandered into this region warns the party
of the dangers in the area. He is being hunted by two mastyrials, so theparty should act quickly once the halfling is spotted.
2 The ssurrans waiting to buy the captured gladiators from Arant set upcamp at this location. They possess one of the two statue pieces sought byWyrmias. If the party has spoken to Arant in the Captured Gladiatorregion, the ssurrans here are willing to sell the statue piece to the party.Although, it is easier (and cheaper) to simply take it by force.
3 A mastyrial sometimes lies in wait under the sand here. Its stinger issought after by Notaku, the spell component dealer in the Red SandsPlateau region. The mastyrial will only be here after you talk to Notakuabout getting a stinger from a mastyrial.
4 Quirri birds scavenge many objects, such as gems and psionic bracelets,and store them in their nests at these locations.
5 The exit at this location leads to the Silt Sea Summoning region.6 The exit at this location leads to Gedron.7 The exit at this location leads to the Messenger Route region.
SYNOPSISThis area is an isthmus which reaches out into the Silt Sea and is dotted
with higher plateaus. The silt is impassable except where firmer sand has pushed back the silt. This area of the Silt Sea is infested with wandering
monsters which continually prowl the region for prey. Monsters that theparty may encounter include mastyrials, lesser air elementals, silt
runners, rampagers, and red slaad.
73 74
SILT SEA SSURRANSSILT SEA SSURRANS
✹ SILT SEA SSURRANS ✹
1
1
12
3
4
4
4
5
6
7

NON-PLAYER CHARACTERS IN THIS REGION
✹ JasmineLOCATION 1 — Jasmine is a 9th-level human preserver. Jasmine came here toretrieve a statue piece for Wyrmias, but Dakaren and the magera had other thingsin mind, so she was chained to the rock to be sacrificed. Freeing her starts theconfrontation with Dakaren. Afterward, if you ask her to take you to her spellbook,she tells you to follow her and heads to some ruins. Following her, you receive herspellbook and two scrolls, rainbow pattern and minor globe of invulnerability.
✹ DakarenLOCATION 1 — Dakaren is an evil human druid. Dakaren has terrorized somemagera into worshipping him so he can have sacrifices. Dakaren only appearsonce you’ve released Jasmine and killed the silt tentacles. Killing Dakaren getsyou the Shimmer Leather and one of the statue pieces for the Wyrmias statue(see Gedron Village).
✹ Magera/Magera DrummersLOCATION 5 — Dakaren has taken advantage of the gullible nature of themagera and terrorized them into getting sacrifices for him. If you talk to one ofthe magera and hang around too long, they attack. The drummers are intenton their drumming and won’t do anything to you unless you attack one, atwhich point they will all attack you. Once Dakaren is dead, the magera flee.
LOCATIONS AND EVENTS1 Some great creature died on this coast of the Silt Sea, and the magera
have been using the natural formation as the perfect place to sacrifice toDakaren. Jasmine is chained to the rock here. Free her, and the silt horrorcomes. Killing the tentacles causes Dakaren to appear.
2 Since the completion of the great statue, the magera needed a way to getto the sacrificial rock. This rope bridge was constructed to serve thatpurpose. You will need the grappling hook (found at location 4) to getacross this bridge.
3 This great statue was built by the magera under Dakaren’s command. It isto show all the fate of those who cross Dakaren’s path.
4 The grappling hook lies on the ground here. You can use it to pull up therope bridge, or in any of the other places that require rope.
5 Magera are located at these locations.6 Ten magera are drumming here, calling Dakaren for the sacrifice.7 In addition to drumming, the magera use this horn to summon Dakaren.
Playing with it angers the magera nearby.
SYNOPSISDakaren, an evil druid, has found some magera and terrorized them into
sacrificing victims to him. Currently, Jasmine from Gedron Village is chainedto the rock and awaiting Dakaren, who takes the form of a silt horror when
he feasts. The party can encounter magera and the silt horror.
75 76
SILT SEA SUMMONINGSILT SEA SUMMONING
✹ SILT SEA SUMMONING ✹
1
2
3
45
5
5
5
5
5
6
7

NON-PLAYER CHARACTERS IN THIS REGION
✹ ArantLOCATION 1 — Arant is an 8th-level dwarven gladiator and slave trader,currently holding Gedron Village’s gladiators for sale. He is waiting for somessurrans to come and buy them. You can buy the gladiators from Arant, ortrade him one of the four special magic swords, El’s Drinker, Swiftbite,Draketooth, or Dark Flame. If you kill Arant or get him to leave after theconfrontation with Karas, you get his Grey Scale Armor.
✹ KarasLOCATION 2 — Karas is the leader of the Gedron gladiators. Wyrmiasthreatened the gladiators into slavery by holding their families in Gedron. Ifthey return, Wyrmias kills the villagers. If you get rid of Wyrmias and then talkto Karas, they will return to Gedron. If you haven’t bought them or killedArant, you can lead them into a confrontation with Arant, in which you get hisarmor and equipment. Unless you want the experience from killing Arant andhis men, it’s easier to just talk to Karas and confront Arant (with Karas).
LOCATIONS AND EVENTS1 Arant has set up camp here, and awaits the ssurrans. As the guards
will tell you, he’s the short one.2 Karas is located here. 3 Arant’s guards stand at these locations.
They may look like they are strategically deployed in order to preventescape, but many of them are asleep. Arant’s guards are with Arant for the money. Because they know the gladiators won’t escape, the guardshave become lazy and obnoxious. Threatening them causes them to back down.
4 Gedron gladiators stand at these locations. All of Gedron’s gladiators arehere in the pen. The gladiators won’t return to Gedron because ofWyrmias. All of the gladiators will defer to Karas when you talk to them.
SYNOPSISWyrmias has sent the gladiators from Gedron Village off to be sold into
slavery by Arant. The gladiators are not resisting because they don’t want their families to be killed by Wyrmias. Arant is waiting for the
ssurrans from the Silt Sea Ssurrans region to come and buy the gladiators.Arant’s men, discovering that they really don’t have to work because the gladiators won’t escape, have become lazy and obnoxious. Arant is almost at his wit’s end with them, and is desperate to get out of this
area, so he’s willing to sell the gladiators to anyone who can meet his price.
77 78
CAPTURED GLADIATORSCAPTURED GLADIATORS
✹ CAPTURED GLADIATORS ✹
1
2
3
3
3
3
3
3 3
3
3
3
3
3
4
4
44
4
4
4

NON-PLAYER CHARACTERS IN THIS REGION
✹ Shadow King, DwyerLOCATION 5 — Dwyer is a greater shadow. King Dwyer was buried with the citywhen the Genie caused the sandstorm. Stepping onto the dais angers the king.Insulting him or stepping on the dias more than once starts a fight with theking and the palace guards (if they’re not already dead). You find the BlackMace on the king’s body.
✹ CraggLOCATIONS 9, 10 — Cragg is a greater shadow and was Dwyer’s advisor. Whenhe heard of the plan to summon the psurlons, he objected to it. After theywere summoned, he learned that the psurlons wanted the Genie in exchangefor their knowledge, and took action. In council, he struck the king to stop hisactions. The king was blind with worry, and had Cragg condemned to death.Escaping his execution, Cragg fought and killed the king over the Genie bottle.Cragg, by then mortally wounded, wished (to the Genie) that the evil in thecity be contained. The Genie decided the best method would be to bury thecity in a sandstorm. Cragg has been buried with the city ever since. Craggpossesses the Genie bottle. Killing his spirit gets you the bottle, but the Geniewill not grant a wish for aid. However, retrieving Cragg’s body from thepsurlons makes the Genie friendly. If you bring Cragg his body, he’ll go to hiscoffin and his final rest. If you put his body into the coffin, you receive a greataxe+3 and the Genie Bottle.
✹ City dwellersLOCATIONS 2, 3, 4 — All the spirits are greater shadows. These shadows are ofpeople who still don’t realize that the city has been destroyed. All of theseshadows can give you additional information about what is going on in Korbnor.
✹ GenieLOCATIONS 9, 10 — The Genie once belonged to the king, but Cragg took itfrom him in order to prevent the psurlons from obtaining it. The Genie grantsyou three wishes. You can wish for an assortment of things — choose wisely!If you wish for help in defeating Draj, and you didn’t kill Cragg, your wish isgranted, and you also receive the Quicksilver Glove. As a bonus, the Genieteleports you out of the ruins when you are ready to face the army. This makesthe ending fight easier, for the Genie will prevent the Drajian forces fromsummoning aid, and calls the shadows from the ruined city to assist yourallies. You can use the Genie for healing, either in the ruins or between thewaves in the finale. As well as healing all of your characters, any dead oneswill be resurrected. If you are in the final battles, your allies (if any) will behealed (but not resurrected) as well.
SYNOPSISKorbnor was once a beautiful, thriving city. However, due to its location
on the trade routes, the city was slipping behind in trade with other cities.King Dwyer, not wanting to lose the city, turned to Llod, his court wizard, tofind a solution to the problem. Llod found the answer in the psurlons, a raceof evil creatures long ago pulled into the astral plane. He summoned them at
the king’s wish. Unfortunately, when the psurlons arrived, they discoveredthat the king possessed a genie, and demanded it as the price for their
knowledge. The king agreed, but before he could act, an advisor namedCragg protested and wrested the Genie from the king. In the resulting chaos,
Cragg wished the evil to be contained, and the Genie did so. The city wasburied, trapping the psurlons and killing all of its inhabitants. The city
remained buried for thousands of years until recently, when a sandstormrevealed the palace of the once great city of Korbnor. It is here that the
visionary has sent you to retrieve the Genie and summon the shadow army.Beware! The ruins are full of psurlons and greater shadows.
79 80
PALACE RUINSPALACE RUINS
✹ PALACE RUINS ✹
1
2
3
45
6
8
9
10
11
12
1314
15
1617
18
19
20
7

16 The final group of psurlons guarding Cragg’s body. One mastyrialaccompanies the two psurlons.
17 This is the body that you must lay to rest in the coffin. You can carry hisbody in your inventory.
18 This teleports you to location 19.19 Once you have the Genie, you find a psurlon adept and two
psurlons here.20 There are many traps located throughout this area, so a thief is a
definite plus.
Additional Notes:♦ Wishing for wealth grants you 1,000,000 ceramic pieces.♦ Wishing for duplication allows you to legally duplicate your items. Some
suggestions: El’s Drinker or the Terror Blade.Use all of your wishes before the end of the game!After the final battle with Kraxis and his guards, the Genie talks to you, then vanishes for good!
LOCATIONS AND EVENTS1 This psurlon tells you the story of the ruins. If you question him too much
or try to leave the conversation before he wants you to, he attacks you.2 A city dweller is waiting for an execution.3 The city’s head of the stables stands here.4 You meet a city dweller named Prince Jahard.5 Dwyer, the King of the Ruins lurks here.6 Some personal notes from Llod the Mage are on this scroll.7 The Orb of Knowledge is here. Using this reveals Llod’s fate. It crumbles to
dust after being used.8 This psurlon checks to make sure your allegiance lies with them. You can
lie to him if you so desire, but it may anger him.9 Cragg guards the mausoleum at this location. Anyone who approaches
him will be challenged.10 Cragg’s coffin is the one in the middle of the chamber.11 The minute you enter this wing, you will be set upon by all kinds of
monsters. They keep appearing as long as you stay in this wing! There arealso numerous traps in this area, so a thief (or a cleric with the find trapsspell) is a must.
12 Cragg’s body appears here, then vanishes, revealing a teleporter. Walktoward it and you teleport to location 13.
13 You can use this teleporter to return to location 12.14 Two psurlons head the guard unit of Cragg’s body.15 Yet another group of psurlon guards. The group consists of four psurlons
and three mastyrials.
81 82
PALACE RUINSPALACE RUINS

NON-PLAYER CHARACTERS IN THIS REGION
✹ Lava HermitLOCATION 1 — The lava hermit is a defiler. He discovered the lava rift whileexploring, and saw it as a great source of power. He began summoning fireelementals to protect it, and was massing a force with which he could terrorizethe wastes. Fortunately, a ranger and his band came along and stopped him.The defiler fled the rift, but sees the party as his means of return.
✹ Rift RangerLOCATION 2 — The rift ranger is a human ranger. He was part of a larger bandthat came into this area to get to the Gemfields. On encountering all the fireelementals, they discovered that a hermit defiler found a rift to the elementalplane of fire, and was summoning creatures from it. They drove him off, butsuffered heavy losses — only the ranger survived.
LOCATIONS AND EVENTS1 Here is where the hermit has fled to. The party has several choices. If they
pester the hermit, it will make him angry and he will summon elementalsand attack. If they attack the hermit, but do not kill him in one round hesummons elementals to fight on his side. If the party kills him outright,they will find the Iron Necklace. If they kill the ranger first (which is notnecessarily recommended), the hermit will return to the rift, give them theIron Necklace and ask them to leave.
2 The ranger is guarding the rift here. Since he’s the only one that remains,he has decided to guard the rift against the hermit’s return. He is overlycautious and does not want to talk to anyone — he’s too busy watchingfor the hermit. If you kill the hermit instead of the ranger, not only will youget the Iron Necklace from the hermit’s body, but the ranger will give you apsionic bracelet of energy containment when you talk to him again.
3 Once you’ve either killed the hermit or the ranger, random monstersappear in this area, including lesser fire elementals.
SYNOPSISIn the midst of the fire fields, a rift to the elemental plane of fire was
discovered. The hermit who discovered it was driven off by a ranger and hisband after a fierce battle. The ranger survived (but not his band) and now
guards the rift against the hermit’s return. The hermit has fled to the far sideof the area, but schemes to return so he can once again summon hiselementals. He has already summoned and lost control of quite a few
elementals. They will attack anyone foolish enough to come near them. Theyare all lesser fire elementals, and require +1 weapons to hit them.
83 84
LAVA RIFTLAVA RIFT
✹ LAVA RIFT ✹
1
2
3 3
3
3
3
3
3

LOCATIONS AND EVENTS1 This group of geysers shoots up steaming hot water. If you gather up the
rocks lying around, then put them in the geysers, the water will not beable to shoot out anymore. Note that each rock only fits one particulargeyser. If you do this to all the small geysers, the middle geyser will blowand shoot out a piece of meteor metal to the southwest (location 5). Themeteor metal can be sold for 200 ceramic pieces or can be used atTeaquetzl (location 20) to make a metal axe+1.
2 This lava dome is a trap set by a group of thri-kreen. If you “look” at itbefore breaking it open with the pick, you will have the opportunity todisarm or spring the trap. If you have a thief as the party leader, yourchances of disarming the trap are much greater. If you spring the trap,thri-kreen will pop up around you.
3 The lava domes in this area have gems inside them. Use a pick to breakthem open, then “look” at them to get a gem out. A pick can be found inthe Hot Springs, and sometimes Drajian guards carry them.
4 The thri-kreen here hunt in packs and attack when they see you.5 This is where the chunk of meteor metal lands when you plug up all of the
small geysers (location 1).6 Rocks which can be used to plug up the small geysers.
SYNOPSISThis area is cut into sections by lava flows. Geysers shoot up lava and
scalding water. Domes made of lava are scattered around the area. Thri-kreencan always be found waiting for the unwary treasure hunter to wander too
close. Rocks are scattered around the region.
85 86
GEMFIELDSGEMFIELDS
✹ GEMFIELDS ✹
1
2
3
3
3
3
3
3
3
3
3
3
3
3
4
4
4
44
5
6 6
6
6
6
6

NON-PLAYER CHARACTERS IN THIS REGION
✹ PrisonersLOCATION 1 — These people were emigrating from their village because theirwell dried up and they needed a new water source. They were attacked andcaptured by a group of magera hunting for slaves. This particular group ofprisoners were rejected as useless and left to be killed. If these prisoners arenot saved, they will be killed by their captors.
✹ SlavesLOCATION 3 — These prisoners are the emigrants that were chosen to be slaves.They are on their way to the mageras’ home. They will be enslaved if youdon’t save them.
✹ Wagon GuardsLOCATION 2 — These magera attacked the wagon train to get slaves for their leader.They were left behind to kill the remaining prisoners. Once you approach them,you must kill them quickly so they don’t kill the prisoners. Keep your eyes out forthe one running for the wagon train; he’ll kill the prisoners if you don’t stop him.
✹ MageraLOCATION 3 — These magera are guarding the emigrants from the wagon train.They are taking the prisoners to their home in order to enslave them. Youmust kill them to free the prisoners.
LOCATIONS AND EVENTS1 Near the wagon train is a group of prisoners. After you kill both groups of
magera, return here with the other prisoners and talk to Kalinin, the leader ofthe warriors. He thanks you and gives you the sword Hornblade for savinghis people. If you ask, he also allies with Teaquetzl for the final battle.
2 This is a small group of magera arguing over who gets to split the lootthey’ve found at the wagon. One of them will walk off to kill the prisoners;kill him before he can get there. This entire group of magera needs to bekilled to save the prisoners.
3 There is a large group of magera and prisoners here. Once you kill themagera, talk to the people; they will follow you down to the wagon train.
4 A bridge crosses a deep chasm. If you use a rope while standing on thebridge, you can climb down to the Subterranean Ruins.
5 You can make rope from the plants you find here. They are naturallyfibrous and the rope made from them is quite strong.
6 A fire ring appears on the floor when Kalinin returns. The party can rest here.
SYNOPSISSmall plateaus and sinkholes divide this region into small areas. A
floundering wagon train can be seen in the southwest corner and a bridgeover a deep chasm is to the northwest. Magera also inhabit this area.
87 88
WAGON TRAINWAGON TRAIN
✹ WAGON TRAIN ✹
12
34
5
6

NON-PLAYER CHARACTERS IN THIS REGION
✹ Wise HermitLOCATION 6 — The hermit wanders the region looking for the Veiled Alliance.His knowledge of magical items is vast. He gladly identifies almost any itemthe party is carrying. Once you’ve finished talking to him, he gives you amagic wand and a gem for the obelisk in this region.
✹ DemothiLOCATION 7 — Demothi trains mastyrials to sell in the mountains as packanimals. Demothi is training Alita, his current mastyrial.
✹ NotakuLOCATION 1 — Notaku is an elven merchant dealing in magical herbs andcomponents. Notaku has set up a semi-permanent camp in this region; heconducts his business with neighboring clerics and mages. He is not abovedealing with evil magic users. Notaku is willing to hire the party to run errandsand to collect components that he needs.
LOCATIONS AND EVENTS1 Notaku, a spell component merchant, has set up camp. He is not adverse
to idle conversation, but much prefers talking straight business. If theparty shows interest, Notaku asks the party to deliver a bag of pith to thecleric in Teaquetzl (Teaquetzl, location 15) to prove it can survive in thedesert. Once this is accomplished, he sends the party on more profitableventures. He pays cash for any sand howler eyes, fire eel tongues, andscreamer beetle wings that the party comes across. One major quest he sends the party on is to collect a terror bloom, forwhich the party receives Derth’s Wand. Once the party retrieves the terrorbloom, Notaku is able to make and deliver the terror extract to Balkazar inthe Wyrm School. Notaku also sends the party after a mastyrial’s stinger.The payment for this quest is El’s Shield.
2 An obelisk is located here. Placing the correct gem in the obelisk’s centerallows the party to teleport to this location using Llod’s Rod. The party canget the obelisk’s gem from the sage wandering this region.
3 This exit leads to the sand oasis. If Alita (from location 7) is with theparty, she chooses this moment to turn and run.
SYNOPSISThe Red Sands Plateau is dominated by a large central mesa. The more
common wandering monsters in this area include tohr-kreen, strines, sandhowlers, dune reapers, and otyughs. The party should also keep a wary eye
out for rampagers or lesser earth elementals.
89 90
RED SANDS PLATEAURED SANDS PLATEAU
✹ RED SANDS PLATEAU ✹
1
2
3
4
5
6
7

4 This exit leads to the Whitesands Regions. If Alita (from location 7) iswith the party, she chooses this moment to turn and run.
5 This exit leads to the wagon train. If Alita (from location 7) is with theparty, she chooses this moment to turn and run.
6 The sage you meet identifies most of your magic items and gives you aWand of Metal Detection and an obelisk gem. Putting the obelisk gem intothe obelisk enables you to return here using Llod’s Rod.
7 Demothi is training Alita, his mastyrial, here before taking her to themountains. If you buy her, she will return to Demothi. Although anexpensive rip-off, she will help you kill some dune reapers that appear afteryou buy her, so the experience points you gain might make her worth theceramic pieces. If you decide to buy her, you need to go to the Nazca Linesto buy salt from Toonuu, then return to Demothi with the bag of salt. Ifyour party leader is a thri-kreen when Alita runs away, you hear a whistlethat Demothi blows. This information makes it easier to confront him.
91 92
RED SANDS PLATEAURED SANDS PLATEAU

NON-PLAYER CHARACTERS IN THIS REGION
✹ Sand DruidLOCATION 1 — This druid watches over the oasis region. He takes care of hisoasis and ensures that it is not defiled in any way. He gives you butterflywings if you are looking for them.
✹ AnnouncerLOCATION 3 — This announcer is the same one who harassed the party in theArena in Draj. He is travelling through the desert in search of buried treasure.If you threaten him, the Announcer tells you the location of the buriedtreasure. He is also carrying gems that he has already found on his hunt.
LOCATIONS AND EVENTS1 A recently ripened plant can be found here. If you plant one of the
seedpods, the druid appears and thanks you. If you are looking forbutterfly wings for Notaku in the Red Sands Plateau, he gives you sixpairs of wings in gratitude for your rare kindness.
2 Butterflies flit throughout the oasis, but the brilliant orange and yellowones make good spell components. If you attack any of these, the druidappears and demands to know why you are killing his butterflies. If youabjectly apologize, he gives you six wings, but only if he has not alreadydone so. Do not attack another butterfly unless you wish to kill the druidand see the oasis overrun by guards after he has gone.
3 The announcer from the Arena is travelling through this area on his wayto a buried treasure he knows of. If you ask him about it, he tells you it isfound in a dragon’s eye (Nazca Lines, location 4). He is referring to thedragon on the sand in the Nazca Lines. If you kill him and his guards,you find many gems on his body and a scroll of stoneskin.
SYNOPSISThe blowing sand has formed many dunes in the flatlands. To the southeast
is a beautiful oasis where plants and animals flourish. The Draj ArenaAnnouncer and his guards are resting here. A worried druid watches the
troops move about his oasis.
93 94
SAND OASISSAND OASIS
✹ SAND OASIS ✹
1
2
3

NON-PLAYER CHARACTERS IN THIS REGION✹ Elven LeaderLOCATION 1 — The elven leader is an 8th-level fighter who deals with the templar.
✹ TemplarLOCATION 2 — The templar is an 8th-level defiler. She is out to gather slaves forthe Arena to replace the ones that escaped. She is angry at being away from thecomfort of Draj, and wants to return quickly before anything happens to her.
✹ Slaver guardsLOCATION 3 — The slave guards are 3rd-level elven fighters. They havereturned with some slaves to sell to Draj.
LOCATIONS AND EVENTS1 The elven slavers have made permanent camp here. This is where they
conduct business and hold slaves before selling them. Once you’re inconversation with the leader and templar, you can get the elves to ally withyou in the fight if your leader has a high Charisma. Otherwise, they willeither stand aside and watch, or fight against you. If the slavers are neutralor friendly, when the fight is over the leader will come and talk to you (if heis alive). You receive a gythka+1 as a gift for your defiance of the Drajianforces. After that conversation, the slavers pack up and head out. You canthen talk to the slaves in the pen, who are now free.
2 When you meet the templar, she is arguing with the Elven Leader over theprice of the slaves the elves have captured. After your conversation, youwill either be taken to the slave pen (again, perhaps) or will begin a com-bat with her. When you start the fight with the templar, she blows awhistle to summon the city troops waiting nearby.
3 The slave guards have returned with some slaves to sell to Draj. If you are toldto wait for an escort, going into the camp raises an alarm and everyone attacks.You can bluff your way into the camp, or walk in freely, as well. If you areescorted, it won’t be to the leader, but to the slave pen. If you agree to dropyour weapons, you’ll be thrown into the slave pen. If not, you start a fight.Once you’re in the pen, you can approach the guards at the gate and talk tothe guard to find out what’s going on. You can also convince the guard to letyou talk to the leader, at which point you must follow him to the leader. Onceyou’re in the pen, you have to fight your way out, or get to the leader.
4 These slaves are each from different places, and can tell you their history.5 If you drank Tobrian’s wine in the Elven Caravan, and failed your save, you’ll
wake up here, surrounded by guards who are arguing over your fate. You canattack them, wager with them, or surrender and be taken to the Salt Oasis.
6 This is where the templar’s troops appear when she blows the whistle.
SYNOPSISSome Elven slavers have taken advantage of the natural terrain and erected abone fence to house their permanent camp. They are currently working for a
templar from Draj, who is looking for more candidates for the Arena.
95 96
ELVEN SLAVERSELVEN SLAVERS
✹ ELVEN SLAVERS ✹
123
33
33
33
3
3
33
3
444
5
6

NON-PLAYER CHARACTERS IN THIS REGION
✹ MessengerLOCATION 1 — The messenger carries notes between a templar and a noble. Heis currently taking a message across the desert to either the templar or thenoble. He has a magic scroll on his person and can summon up to four blueslaad to protect himself.
✹ Hototo & BandLOCATION 2 — Hototo is the leader of a band of slavers who capture and sellslaves. They are here to transfer an important slave, Nirveli, to another bandof slavers in order to get him to the new owner. Hototo has never done thisbefore, so will easily mistake you for Dagger, the leader of the other band. Youcan take the slave away from him by pretending to either be Dagger orDagger’s lieutenant.
✹ Dagger & BandLOCATION 2 — Dagger is the leader of another band of slavers. They too,capture people and sell them as slaves. Dagger is here to collect Nirveli, the slave, from Hototo and take him to the new owner. Dagger has never had any transactions with Hototo, so will mistake you for either Hototo orHototo’s lieutenant.
✹ NirveliLOCATION 2 — Nirveli is a noble who was captured and sold to these slavers.Nirveli is being taken to his new owner by a gang of slavers. Nirveli iscurrently under a spell and cannot speak until both gangs of slavers are gone.
LOCATIONS AND EVENTS1 When you walk up to the messenger, he will summon a blue slaad to
keep you away from him. If you don’t kill him in one blow, he willsummon three more blue slaad. Once you kill the messenger, you can find a message scroll on his body and a magic scroll of fire shield.
2 The slave transfer begins here. Before you see these slavers, they mustmake sure the area is clear. You must, therefore, kill the messenger andleave the region. When you return, Hototo and his gang of slavers willfind you when you get into their area. Claim to be Dagger and take theslave from Hototo. Once the first group of slavers has left the region,Dagger will show up wanting Nirveli, the slave. Once you kill Dagger andhis gang, Nirveli will talk to you and give you his thanks for freeing him.
3 If you look closely, you’ll see some green grapes hidden in the grass here.
SYNOPSISThe white sand deserts are barren as few plants can survive here. The fewplateaus are not enough to stop the relentless wind from blowing the sand
into piles of dunes. Where dunes have been created, grass sometimes finds ameager foothold. Your party may find themselves fighting slavers, the
messenger, and blue slaad.
97 98
MESSENGER ROUTEMESSENGER ROUTE
✹ MESSENGER ROUTE ✹
12
3

NON-PLAYER CHARACTERS IN THIS REGION
✹ LarissaLOCATION 7 — Larissa is a seer who, for a fee, uses her minor abilities to tellfortunes. Larissa lived in Teaquetzl until the visionary came. Jealous of thevisionary’s greater powers, Larissa left Teaquetzl for the greener pastures of the caravan. Her brother, the gate guard, feeds her information which she uses to impress her customers. Though her auguries are not powerfulprophecies, they often contain bits of useful information. Until the party has stopped the raids on the caravan, Larissa’s fortunes will point the partytoward completing those quests.
✹ KelLOCATION 6 — Kel is the caravan’s merchant for magical items, though much ofwhat he sells is not magical at all. He spins long and fantastic tales about hisgoods to try to confuse the buyer. He also poses as a mage to better sell hisgoods, and is not above flattering his customers if it means a few moreceramic pieces in his pocket.
✹ JarkLOCATION 8 — Jark is an all-purpose merchant, and one of the few honestones. He offers a variety of goods including armor and weapons. The partycan hear rumors about Draj and the surrounding area if they are inclined totalk with Jark.
✹ DrisanaLOCATION 5 — Drisana is the caravan master. Drisana is mainly concernedabout her caravan making a profit and cares little about politics. She wants tohire the party to stop the raids which have cut into those profits. She has alsoheard rumors about Draj’s army and will tell the party about the differentmerchants in her caravan. If the party brings Tobrian to Drisana after accusinghim of trying to poison them, she will judge the right or wrong of the situation.She is a fair judge and likely to favor the party if they do not lie.
✹ TobrianLOCATION 9 — Tobrian is an ex-slave merchant who is now a wine merchant.Tobrian joined the caravan only recently, mainly to escape trouble. He still hasties to the slavers he used to work for and occasionally deals in slave trade.The party looks like it would fetch a good price so he and Seref quickly devisea plan to kidnap them by poisoning them. The party can expose Tobrian’streachery and have him expelled from the caravan.
SYNOPSISThe Elven Caravan sits amid the sandy wastes of the desert where its
merchants are able to trade with many of the villages, as well as Draj itself.Although the caravan has built a bone fence for protection, burrowingmonsters such as fire eels and bulettes are known to attack the unwary.Though profits are good because of the approaching war, the caravan has suffered raids by the magera from the Wyrm to the southeast and
the wyvern riders from the castle to the southwest.
Like most caravans, there are many ways for a traveler to lose his money.
99 100
ELVEN CARAVANELVEN CARAVAN
✹ ELVEN CARAVAN ✹
1
2
3
4
4
5
6
7
8
9
10
LOCATIONS AND EVENTS1 The entry gate for the caravan is at this location. When the party first
comes to the caravan, the gate guard challenges them. Identifyingthemselves is the only way for the party to enter peacefully. Violence willbring down the wrath of the entire caravan.The gate guard is a good source for hearing the latest rumors, as well asbeing able to tell the party about the visitor’s circle and the raids againstthe caravan by the magera and the wyvern riders. In fact, the gate guardhas more reliable information about the raids than the caravan master.
2 A fire ring is located here at the visitor’s circle. The party can also meetseveral other visitors here at different times during the game.The first time the party comes here, it can meet Katura, who hasinformation about Larissa and Kel. She will also tell the party about thevisionary in Teaquetzl and his prophecy. The party may also meet Tidzio,a halfling wanderer who will tell the party about the Gemfields and otherareas if the party shares a bowl of stew with him.On the party’s next visit to the caravan, it may meet Metiklt who iscelebrating his good fortune after convincing a templar to mine for copperin the Hot Springs. He will tell the party about the Hot Springs if the partyagrees to keep him company. The party may later meet Ylakez and Ketziawho have been trying unsuccessfully to get villages to rebel against Draj.The party can gain experience points by giving them money for food andshelter. The more money they are given, the more experience the partygains. Ylakez and Ketzia also have information on what has happenedwith Draj’s sorcerer-king and his templars if the party displays sympathyfor their cause.After meeting Ylakez and Ketzia, the party may meet Makhlad, a halflingwhose tribe was destroyed by Wyrmias. Makhlad will tell the party aboutWyrmias and Gedron if they are friendly and if the active character has ahigh Charisma. If the active character is a halfling, Makhlad will feel safeenough to talk freely.After talking to Makhlad, the party may meet Hesutu, a dwarf whose tribewas destroyed by Drajian troops. If the party impresses Hesutu as beingtougher than he is, he will talk to the party. The party can gain experiencepoints by convincing Hesutu to supply weapons to Teaquetzl, whichHesutu will do if he is challenged to fight back against Draj. After the Drajian army has been defeated, the party may meet Alhenawho is returning to Cedrilte.
✹ KaturaLOCATION 2 — Katura is the adopted daughter of Chahl, the leader ofTeaquetzl. Katura has a fascination for anything magical and comes to thecaravan to have Larissa tell her fortune, and to buy supplies for Teaquetzl.Katura will also appear in Teaquetzl after the party has met her here.
✹ TidzioLOCATION 2 — Tidzio is a halfling traveler who has stopped at the caravan torest. He has information about the areas around Draj and clues about how toget the gems in the Gemfields.
✹ MetikltLOCATION 2 — Metiklt is the dwarf thief who convinced the templar at the HotSprings to mine for copper there, and will tell the party about that region.
✹ Ylakez and KetziaLOCATION 2 — Ylakez and Ketzia are refugees whose village was burned byDrajian troops. Ylakez and Ketzia are trying to get other villages to resist Draj’soppression, but so far, they have been unable to muster any support. Theparty gain experience points and information about Draj’s sorcerer-king andhis templars if they give the refugees money for food.
✹ MakhladLOCATION 2 — Makhlad is a halfling on the run after escaping from a group ofslave hunters out of Draj. He may give the party information about Wyrmiasand Gedron.
✹ HesutuLOCATION 2 — Hesutu is a dwarf who lost his focus when Drajian troopsdestroyed his tribe. He will only react favorably to someone who he thinks istougher than he is. The party can gain experience points if they can prove toHesutu that they are is as tough as his slain leader, and thereby give him anew focus in life.
✹ AlhenaLOCATION 2 — Alhena is a refugee who fled Cedrilte after it was attacked by thewyvern riders. She is on her way back to Cedrilte. Alhena will only appearafter the Drajian army is defeated and the desert is safe from its oppression.
101 102
ELVEN CARAVANELVEN CARAVAN

9 Tobrian, the wine merchant, is in this wagon. When the party first arrives,he is arranging the sale of the party to Seref, a slave merchant from Draj. Tobrian offers poison wine to the party in an attempt to overpower them. If the party is wearing the talisman of venom, the wine has no effect. Otherwise, the party must attempt to save vs. poison, or simplyrefuse to drink his wine. If the party is poisoned, Tobrian takes all theparty’s equipment and sends them to Seref (in the Elven Slaver region,location 5).Once discovered at his treachery, Tobrian can be confronted by the party.However, if Tobrian becomes too frightened, he will call the guards andthe caravan turns against the party. Intimidate him, but make sure it is thecaravan master who decides his fate.
10 A buried chest contains: cahulaks+1, a bracelet of graft weapon, aquarterstaff, a gem, and 100 ceramic pieces.
3 An obelisk is located here which will allow the party to teleport to thislocation using Llod’s Rod once the correct gem has been placed in theobelisk’s center. The party can buy the gem from Kel at location 6.
4 Fire eels and bulettes sometimes burrow under the fence and attack theparty at these locations.
5 The caravan master, Drisana, is in this wagon. She tells the party aboutthe merchants in her caravan and offers to pay the party if they stop theraids by the magera from the Wyrm or the wyvern riders from the castle. Ifthe party returns to the caravan after Tobrian sells them into slavery or ifthe party discovers Tobrian is trying to poison them at location 9, Drisanawill help the party by acting as judge. The party is advised to replyhonestly to her questions if they hope to gain a favorable outcome.
6 Kel, a self-professed mage with a story for all his items, sells his goods in this wagon. The party should be very selective in the items it buys from Kel since many have no magical properties whatsoever. The truemagical items that Kel sells include arrows+1, Soulcrusher, a mage scroll of web, a mage scroll of spirit armor, the talisman of venom, and the gembelonging to the obelisk at location 3. Kel also sells fruit, including,apples, a lime, and corn.The talisman of venom will prevent weak poisons, such as those used byTobrian at location 9, from affecting anyone who wears it. Strongerpoisons still have their normal effect.
7 This is Larissa’s wagon. Larissa is a seer of minor abilities and will tell the party their fortune for a few ceramic pieces. If the party has notstopped the raids on the caravan, Larissa’s fortunes will urge the partytoward completing those missions. Later, her fortunes are more generaland echo the Visionary’s prophecy. The party can often glean a hint ortwo from her auguries.
8 Jark operates an honest business out of this wagon, selling a variety ofgoods such as armor and melee weapons. If the party is inclined to talk, itcan hear the latest rumor sweeping the deserts.
103 104
ELVEN CARAVANELVEN CARAVAN

NON-PLAYER CHARACTERS IN THIS REGION
✹ Ssurran ShamanLOCATION 1 — The ssurran is a 3rd-level shaman. He is the leader of a ssurrantribe that has gone a little crazy. The tribe is worshipping some old ruins andspirits that inhabit them. Insulting the spirits gets you into a fight. If you agreeto help, and then back out, they’ll attack you. If you do go and fight theshadows, you’ll be attacked when you return anyway. Moral: just kill them!
✹ Loweman and NnamdiLOCATIONS 4, 5 (THESE TWO WANDER THE NORTHEAST CORNER OF THE MAP) — Thisregion seems to attract crazy creatures, and Loweman and Nnamdi are noexception. They wander the desert here, praying to the “great spire” and eatingrocks. Loweman and Nnamdi are merely crazed desert-dwellers. There are noclues given or rewards granted for talking to them.
LOCATIONS AND EVENTS1 The shaman starts here. If you walk near him, he comes to you.2 The shaman’s followers are here.3 If you haven’t talked to the shaman, the moment you pick up El’s ring, it
summons ten greater shadows (the guardians of the ruins). If you havealready spoken to the shaman, the shadows will be waiting for you.
4 This is where Loweman and Nnamdi start their wanderings when you firstenter the region.
5 It’s just a rock. It happens to be the rock that Loweman and Nnamdiworship, but other than that it’s just a rock.
6 Four magera guard the entrance to the Wyrm.
SYNOPSISThis region has attracted some crazy refugees from the wastelands, including
a band of ssurrans, and two crazy hermits. The ssurrans are worshippingsome ruins, while the hermits are worshipping a big rock. Also found here isthe entrance to the Wyrm, where Balkazar has taken control of the magera.
105 106
SSURRAN RUINSSSURRAN RUINS
✹ SSURRAN RUINS ✹
12
3
4
56

NON-PLAYER CHARACTERS IN THIS REGION
✹ Blind OneLOCATION 1 — Blind One is one of the magera that spoke against Balkazarwhen he took over the Wyrm and started the myth of “transformation.” As aresult, his eyes were torn out by babau when the others were asleep. Balkazarclaimed that doubting in transformation resulted in such atrocities.
✹ Magera SlavesLOCATIONS 3, 4, 5, 6 — The slaves live and work in the Wyrm. There are manydifferent factions of slaves in the Wyrm. Some are loyal to the leaders, someare loyal to Blind One, and some are neutral. As with most creatures, talkingto them nicely usually yields better results than yelling at them. If the partyattacks any of the magera in the great cavern or beyond (excluding theleaders) the party will hear Tanelyv’s voice, telling you to leave the area. Whenthe party goes to leave, Tanelyv and other spirits appear and attack.Remember that the minute the party attacks any of the magera and getsTanelyv’s warning, the party has ruined their chances at getting the chamberof healing in the Wyrm Temple to work.
LOCATIONS AND EVENTS1 Blind One lives here. He stays here unless you can take him to the
temple. Blind One knows the true nature of Balkazar’s “transformation”and has been trying to convince the other magera that it is indeed a myth. In order to free the magera of Balkazar, you must heal Blind One.To do this, you need to convince the magera leaders that healing slaves is not a bad idea, and you must talk to Tanelyv in the Wyrm Templeregion. After both of these things are done, it is possible to heal BlindOne. The healing process involves getting Blind One to follow you to theWyrm Temple and taking him to the chamber of healing. Once he’shealed, return to the great warren, so the other magera that are still loyalto Blind One can be healed as well. When all that is done, Blind One willspeak against transformation, with the other magera backing him up. After all the fighting, the party can use the chamber of healing in theWyrm Temple area.
SYNOPSISOnce a dwelling for a peaceful group of magera, the Wyrm is now under
the control of Balkazar, an evil defiler bent on ruling Athas. He has enslaved the magera, and is using them as sacrifices to summon his
babau and vrock. Terrified, the magera are eager to please, lest they be torn apart by babau.
107 108
WYRM BELLYWYRM BELLY
✹ WYRM BELLY ✹
122
333
3
3
4
4
4 4 4
44
4
4
4
4
4
4
4
5
5
5 5 6 66
6
6
7
8

2 The six magera in this room are the leaders of the slaves. They areBalkazar’s zealots, living luxuriously compared to the slaves. Pass them to get to the Wyrm School and the Wyrm Temple areas. In order to getpast the leaders, kill them or bluff your way past them. If you’ve askedBlind One for advice, it will be easier to bluff. If you agree to wait for anescort to see Balkazar, a babau comes and attacks you. The leaders attack you as well if they are close by. If you’ve come to stop the caravanraids, the leaders offer to drink to it with you. The drink is poisoned, andafter the conversation, the leaders attack. Killing them is a sure way toend the raids (and convincing them to let the slaves be healed is no longer an issue).
3 With their tongues cut out, these magera do little else than toil forBalkazar. If you ask one to lead you, they will take you to the great warren(location 7). Threatening them only makes them distrust you.
4 These magera ally with Blind One. If asked nicely, sometimes they willlead you to Blind One (location 1).
5 These slaves are untalkative and point in Blind One’s general direction.6 Scared into believing in “transformation,” these slaves talk very little,
afraid it may ruin their chances at reaching a new state of being.7 After all of Blind One’s followers are healed, he asks the party to
accompany him to the great warren (location 7), where he will lead therevolt against Balkazar. Supporting the Blind One gives the party the mostbenefits. Balkazar appears after the speech and summons four babau totake care of the magera. Now unafraid of Balkazar, the magera aid theparty in the fight.
8 Once you bring Blind One here after he’s healed, he begins to heal hisfollowers. If you want to go and do something else while he does this,choose the “I’ll be back, I have other things to do” option. If you are goingto wait, choosing the “I’ll wait” option will accelerate time and heal all ofthe slaves instantly. If you’ve said you have something else to do, whenyou re-enter the region or all his followers are healed, Blind One comes toyou and the revolt in the warren can begin.
109 110
WYRM BELLYWYRM BELLY

NON-PLAYER CHARACTER IN THIS REGION
✹ BalkazarLOCATION 5 (IMAGES OF HIM APPEAR AT LOCATIONS 1 AND 4) — Balkazar is a 9th-level human defiler. He has built this addition to the Wyrm caverns to househis sacrificial chambers and personal quarters. This is where he directsoperations of the babau and vrock, and through them, the magera. Balkazar isarrogant and self-assured. He will not attack the party because he does notbelieve that they can hurt him in any way. Actually, he’s right — until youdestroy his focus. If you agree to join Balkazar when you meet him, he will goto the dark mirror (location 6) and begin chanting. He then offers to teleportthe party to the temple with him. If you go, you are teleported to the WyrmTemple. Please see the Wyrm Temple section for more information on thetemple. If you don’t go to the temple, you must fight him. Balkazar is equippedwith Balkazar’s Staff as his weapon.
LOCATIONS AND EVENTS1 The first time you enter this region, an image of Balkazar appears and
warns you away from the area.2 This thri-kreen has fallen under Balkazar’s influence, and will fight to the
death to defend his post. On his body you find a chatkcha+1.3 A babau guards the entrance to the school. Anyone that tries to pass will
be challenged. Unless you plead and surrender, you eventually have tofight this babau. If the party is passive and drops all their items, thebabau leads it into the kitchen, and then returns to his post. If you get toofar ahead or behind while following the babau, he attacks you.
4 This is where Balkazar makes his sacrifices to summon more babau. Themagera are led blindly into the circle, while Balkazar’s image completesthe rites and the sacrifices takes place. This magera is about to besacrificed in order to summon another babau. If the party attacks beforethe two babau begin to move towards the magera, the magera, blind withdevotion, attacks the party as well. If you wait until the babau move, themagera realizes it’s been tricked and attacks the babau with you. If themagera survives the fight, you can get it to lead you to Balkazar.
5 This is where Balkazar currently resides.6 This mirror is Balkazar’s focus. Breaking it destroys Balkazar’s immortality
and allows you to kill him. You must attack the mirror three separatetimes in order to break it. The mirror defends itself with fire jets. Adexterous thief can avoid being damaged by these jets.
SYNOPSISBalkazar built this addition to the Wyrm as his private retreat. This is wherehe retreats to do his research and studies. Also located here is his teleporter
maze, where he throws anyone foolish enough to get caught near the Wyrm.Balkazar’s sacrificial chamber may also be found here, where the magera,
blinded by their faith, are sacrificed to summon more babau and vrock. Youcan also encounter styr and more magera.
111 112
WYRM SCHOOLWYRM SCHOOL
✹ WYRM SCHOOL ✹
1 2
3
4
56
7
8
9
10111213
1415
16
17
17
18
19
20
20
20
20
20

16 The diary entries concern the research Balkazar has done on the Terror Blade+2.
17 These two teleporters take you to and from the school into the teleportermaze staging area.
18 This teleporter takes you into the teleporter maze. The best path throughthe maze is east, south, north, west, east (where you find a sword atlocation 19), north, north.
19 Located on this platform is the sword Draketooth.20 Styr are located at these locations. They attack on sight.
7 One of the zealous magera is here in the kitchen, awaiting transformation.It is blinded by faith, and will not listen to anything that may spoil itschances at reaching a higher form of existence. After the party speaks tothis magera, a babau enters into the room to take the magera to be“transformed.” If you attack the babau, the magera will attack you as well.
8 Three vrock guard Balkazar’s treasure rooms.9 In addition to all of the ceramic pieces in this room, a Belt of Might can
be found.10 The Light of Dawn is located in this room, along with many bags of
ceramic pieces.11 This book describes the Light of Dawn.12 This book discusses the uses and forms that many focuses have
taken over the years. It defines some of the requirements that a focus must have.
13 This book concerns itself with the summoning of all kinds of darkcreatures, including the Unnamed One. This book is so evil that wardshave been placed on it to contain it to one area. If you ever try to leavethe region while carrying this book, the wards pull it from you and returnit to its protective circle.
14 This book gives you directions that you can take to go through theteleporter maze and back out. If you take the first letter of each word (E, S, N, W, E, N, N), you get the directions east, south, north, west, east,north, north. Note: You must use the teleporter at location 18 first beforestarting this sequence.
15 If you’ve completed the component quest for the Terror Extract (see theRed Sands Plateau section for more information), you can use the extractto make the Terror Blade+2. The extract can be found on Balkazar (if he’snot dead yet) or on the floor. To make the blade, you must be next to themixing bowl. Pour the extract into the bowl, then dip an obsidian dagger(the one lying on the floor does nicely) into the bowl. The dagger istransformed into the Terror Blade+2 — one of the best weapons found in the game.
113 114
WYRM SCHOOLWYRM SCHOOL

NON-PLAYER CHARACTER IN THIS REGION
✹ TanelyvLOCATION 1 — Tanelyv is a greater shadow. Since Tanelyv knew this band ofmagera was unlike the rest of their race (cruel and hostile), he became theirguardian and protector. He served this post with his companions for manyyears, but was killed in the battle for the temple when Balkazar first came tothe Wyrm. His spirit still resides here, bound by duty to protect the magera,but unable to act against Balkazar.
LOCATIONS AND EVENTS1 Tanelyv resides here in his mausoleum. Killing Balkazar is the only way he
will be able to rest. Unless you’ve attacked the magera and already foughtTanelyv, he will always be here. Tanelyv is a noble spirit, and wants nothingbut to end Balkazar’s reign over the Wyrm so he can finally be at peace. Hehopes the party will dispatch Balkazar for him. After he tells you his story, heoffers to heal the slaves. You must take this offer back to the Blind One in theWyrm Belly area. After the Blind One and the other slaves have been healedand have revolted, Tanelyv gives you the Ring of Insight, and activates theChamber of Healing (location 2) for use by the party. If you ever attack anyof the magera after the chamber has been activated, it ceases to function.After killing Balkazar, Tanelyv will finally be able to rest. He gives you the fullsuit of Tanelyv’s Armor, and then departs for his long-overdue rest.
2 This chamber can heal your entire party of any injuries — even rathermajor ones such as death. This is the only place (until the Genie isdiscovered at the finale) that a character can be resurrected without losingConstitution points.
3 A scroll with Monster Summoning III on it lies on the floor.4 The vrock guarding the temple attack you when you enter the room. If
you come into this room with Balkazar (from the Wyrm School), they willbe dismissed.
5 You are teleported here to watch Balkazar summon the Unnamed One. Hefails, calling forth four fire elementals instead. After killing them, he speakswith you and then tries again to summon the Unnamed One. This repeatsover and over — he will never be able to summon the being, no matterhow long he tries. Eventually, you must fight him. Please refer to Balkazar’sdescription in the Wyrm School section for hints on fighting him.
6 This is one of Balkazar’s two focuses. Destroying one destroys the other aswell. Before you meet or fight Balkazar, you will not be able to break thismirror. Once you are fighting Balkazar, you can break it by attacking itthree times. Once broken, you can destroy Balkazar.
SYNOPSISBalkazar has turned a temple the magera worshipped into a dark place
where he intends to summon the Unnamed One, a being capable ofdestroying all of Athas. The once-great Chamber of Healing has stoppedworking, and the temple has fallen into the grasp of evil. The only source
of good to be found here is Tanelyv, the lone shadow warrior that remains behind, bound by duty. Vrock have been summoned to guard
rooms in the temple at Balkazar’s behest.
115 116
WYRM TEMPLEWYRM TEMPLE
✹ WYRM TEMPLE ✹
1
2
3
4
4
4
45
6

NON-PLAYER CHARACTERS IN THIS REGION
✹ TynanLOCATION 1 — Tynan used to be a teacher of magic. He was trapped in theform of a shadow by an evil spell cast by A’poss. He can only be freed fromthe evil spell if you bring his heart-crystal to him with Tristram’s heart crystaland use them on the altar in the main temple.
✹ A’possLOCATION 2 — A’poss is a shadow who used to be a pupil of Tynan’s. He wastrapped in the form of a shadow by an evil spell he cast. He meant to catchonly Tynan and Tristram in the spell, but miscalculated. He can only be freedfrom the evil spell if you bring his heart-crystal to him.
✹ TristramLOCATION 4 — Tristram is now a shadow in a ruined temple. She was once abeautiful princess in love with Tynan, but promised to another by her father.Tristram was trapped here by A’poss’ evil spell. The centuries of lonelyconfinement have driven Tristram insane. She no longer knows where she is orwhy she is here. She only knows that she wants to go home.
✹ ZeeframLOCATION 3 — Zeefram used to be the gate guard for the temple. Now he is astill-loyal zombie, keeping as many robbers away as he can. Althoughinnocent of any wrong-doing, Zeefram was condemned to live forever alongwith all other converts in this temple by A’poss’ evil spell. He will give yousome background to the temple if you promise not to pillage the premises.
LOCATIONS AND EVENTS1 Tynan can only be reached by either climbing down the well in Teaquetzl
or using his heart-crystal in the circle of the main temple. The first timeyou arrive here, you will find the gem for Teaquetzl’s obelisk; be sure totake it with you. Once you’ve gotten Tristram into her gem and haveTynan’s gem, (found when you kill Tara in the Upper Castle), return hereand talk to Tynan. Tynan will allow himself to be drawn into his heart-crystal if you use it in his presence once you have Tristram’s heart-crystal.
2 If you give A’poss his heart-crystal, found in the treasure in the dragon’seye in Nazca Lines, he will be freed. Once A’poss is free, he will try to killyou and any other people he can find. You can reach this area byclimbing down the well in Gedron.
SYNOPSISCreated centuries ago, this temple was once beautiful. Remnants of
the beauty remain in the blue-green walls and floors, ornate sculptures inset into the walls, and large columns in the main temple. The centuries
of neglect have caused rubble to pile up in the hallways, splitting the temple into separate areas. You encounter A’poss and zombies in
the subterranean temple.
117 118
SUBTERRANEAN TEMPLESUBTERRANEAN TEMPLE
✹ SUBTERRANEAN TEMPLE ✹
12
3
4
56
7
8
9
10

3 Zeefram is the gate guard, still loyally holding his post. He gives youbackground information about the temple if you promise not to loot thearea. You can reach this section of the temple by climbing down the wellin Cedrilte.
4 You can reach Tristram by climbing down a rope in the Wagon Trainwhen you’re over the deep chasm in the northwest (location 4). Onceyou’ve talked to Tynan, she will give you her heart-crystal if you’repersistent and continue to ask questions of her. You will have to repeatyourself, but just keep going. If Tynan hasn’t told you to go to Tristramand get her heart-crystal, you won’t have the proper responses available toyou. Once you get the gem from her, use it in her presence and she will bedrawn into it. Now the gem is ready to be taken to Tynan.
5 If you stand in the circle here, then use Tynan’s crystal, you can teleportto Tynan’s room. It also works in reverse by standing on Tynan’s circle andusing the crystal; you then teleport to the main temple.
6 Tynan’s journal can be found lying on the floor of this room. When youread the journal, be sure to have your character with the highest dexterityread it. It is very old and fragile and will disintegrate if handled roughly.Not only will this journal give you good insights into exactly whathappened here, you can also gain a magic scroll of hold undead byreading the spells section.
7 Once you have Tynan in his heart-crystal and Tristram in her heart-crystal,use them both with this altar. Tristram’s crystal must be used first on thealtar, then Tynan’s. The evil spell cast by A’poss will be lifted, Tynan andTristram will be freed, and the rubble in the temple will be removed. Youcan now walk freely about the temple.
8 Look here after lifting the spell to find ceramic pieces and treasure. Withinthis area is a storm ring and a mace+2, but beware of the zombies roamingthe halls.
9 This is another area that the treasure hunters could never get into. Foundhere are piles of ceramic pieces. Other items are here as well. However,there are zombies and other monsters wandering these halls.
10 The gem found here can be placed in the obelisk in Teaquetzl.
119 120
SUBTERRANEAN TEMPLESUBTERRANEAN TEMPLE
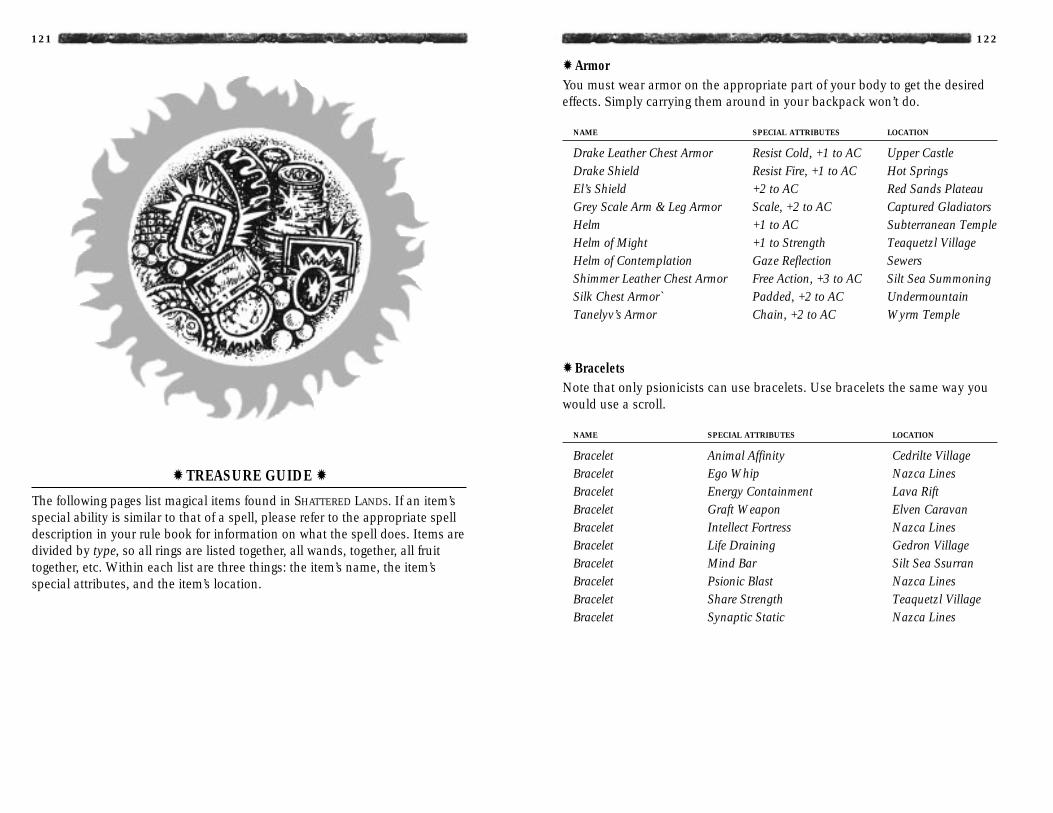
✹ ArmorYou must wear armor on the appropriate part of your body to get the desiredeffects. Simply carrying them around in your backpack won’t do.
NAME SPECIAL ATTRIBUTES LOCATION
Drake Leather Chest Armor Resist Cold, +1 to AC Upper CastleDrake Shield Resist Fire, +1 to AC Hot SpringsEl’s Shield +2 to AC Red Sands PlateauGrey Scale Arm & Leg Armor Scale, +2 to AC Captured GladiatorsHelm +1 to AC Subterranean TempleHelm of Might +1 to Strength Teaquetzl VillageHelm of Contemplation Gaze Reflection SewersShimmer Leather Chest Armor Free Action, +3 to AC Silt Sea SummoningSilk Chest Armor` Padded, +2 to AC UndermountainTanelyv’s Armor Chain, +2 to AC Wyrm Temple
✹ BraceletsNote that only psionicists can use bracelets. Use bracelets the same way youwould use a scroll.
NAME SPECIAL ATTRIBUTES LOCATION
Bracelet Animal Affinity Cedrilte VillageBracelet Ego Whip Nazca LinesBracelet Energy Containment Lava RiftBracelet Graft Weapon Elven CaravanBracelet Intellect Fortress Nazca LinesBracelet Life Draining Gedron VillageBracelet Mind Bar Silt Sea Ssurran Bracelet Psionic Blast Nazca LinesBracelet Share Strength Teaquetzl VillageBracelet Synaptic Static Nazca Lines
✹ TREASURE GUIDE ✹The following pages list magical items found in SHATTERED LANDS. If an item’sspecial ability is similar to that of a spell, please refer to the appropriate spelldescription in your rule book for information on what the spell does. Items aredivided by type, so all rings are listed together, all wands, together, all fruittogether, etc. Within each list are three things: the item’s name, the item’sspecial attributes, and the item’s location.
121 122

✹ ScrollsOnly preservers can use scrolls. Scrolls give your preserver spells that he orshe doesn’t have in his or her spellbook. If you right-click on a scroll in yourinventory, a description window appears with the appropriate spell icon.Clicking on the spell icon allows you to memorize the spell and add it to yourspellbook. If you already know the spell, clicking on the icon simply casts it.
NAME SPECIAL ATTRIBUTES LOCATION
Scroll Armor FieldsScroll Color Spray SewersScroll Dispel Magic Gedron VillageScroll Enlarge SewersScroll Fire Shield Messenger RouteScroll Flame Arrow Nazca LinesScroll Hold Monster UndermountainScroll Hold Undead Subterranean TempleScroll Minor Globe of Invulnerability Silt Sea SummoningScroll Minute Meteors UndermountainScroll Mirror Image Dagolar’s TunnelsScroll Monster Summoning III Wyrm SchoolScroll Monster Summoning III Wyrm TempleScroll Rainbow Pattern Silt Sea SummoningScroll Spirit Armor Cedrilte VillageScroll Stone Skin Sand OasisScroll Summon Shadow Subterranean TempleScroll Turn Pebble into Boulder Teaquetzl VillageScroll Wall of Fog Slave PensScroll Web Elven Caravan
✹ Swords and Daggers
NAME SPECIAL ATTRIBUTES LOCATION
Dagolar’s Dagger +1 to Charisma, +3 (to hit & damage) Dagolar’s TunnelsDark Flame Burning Hands, +2 Upper CastleDraketooth +3 to Strength, +1 (to hit & damage) Wyrm SchoolEl’s Drinker Vampiric Touch, +2 Gedron VillageHornblade +1 Wagon TrainSwiftbite +2 Teaquetzl VillageTerror Dagger Poison, +2 Wyrm School
✹ FruitFruit is scattered all throughout SHATTERED LANDS, so we have not listed theirlocations. You may also buy (and sell) fruit.
NAME SPECIAL ATTRIBUTES
Apple IronskinBanana +3 to StrengthBlue Pear Cure DiseaseCorn BarkskinGreen Grapes BlessGuava PoisonLemon Psionic RestoreLime Dispel MageOrange AidOrange Grapes Neutralize PoisonOrange Pear Cure Light WoundsPurple Grapes Cure Blindness or DeafnessRed Pear Cure Serious WoundsStar Fruit Invisibility to UndeadWhite Grapes Prayer
✹ RingsNo more than two rings may be worn by a player character. Below is a list ofrings and what they do. Charges on items represent how many times you mayuse an item’s special power before it becomes useless.
NAME SPECIAL ATTRIBUTES LOCATION
El’s ring +3 to Dexterity Ssurran RuinsRing of insight +2 to Wisdom Wyrm TempleRing of steadfastness +3 to Constitution White SandsStorm ring Ice Storm (50 charges) Subterranean TempleWind ring Protection from Normal Missiles Upper Castle
123 124

✹ Miscellaneous ItemsAs this section’s name implies, the items below do not fit in one of the othertreasure categories. While some items are very powerful, some are also veryweak. Items without charges listed either have unlimited charges or cast aconstant spell on the wearer.
NAME SPECIAL ATTRIBUTES LOCATION
Belt of Might Strength increases to 24 Wyrm SchoolChameleon Gloves Cause Blindness SewersDagolar’s Wand Control Body (75 charges) Dagolar’s TunnelDerth’s Wand Lightning Bolt (65 charges) Red Sands PlateauIron Necklace Fireball (12 charges) Lava RiftLight of Dawn Dismissal Wyrm SchoolLiving Cloak Inertial Barrier Dagolar’s TunnelObsidian Necklace Disintegrate (7 charges) Salt OasisQuicksilver Gloves Detonate Palace RuinsSerpent Boots Displacement Upper CastleSilver Necklace Biofeedback Lower CastleWand of Metal Detection Detects the presence of metal Hot SpringsWand of Missiles Magic Missiles (50 charges) Dagolar’s TunnelWildwynd Wand Confusion (70 charges) Undermountain
✹ WeaponsUnless otherwise noted, staffs and wands use one charge when a spell is castfrom it. For example, if there were a staff of lightning, it would use one chargewhen the user cast a lightning bolt from it. (A “charge” represents how manytimes you can use an item before it becomes drained and useless.)
NAME SPECIAL ATTRIBUTES LOCATION
Arrows +1 Slave PensArrows +2 Teaquetzl VillageArrows +3 Slave PensArrows +3 Teaquetzl VillageArrows +3 Upper CastleAxe Steel, +1 Cedrilte VillageAxe Steel Teaquetzl VillageBalkazar’s Staff Slow, +1 Wyrm SchoolBlack Mace Chill Touch, +1 Palace RuinsBow +2 Upper CastleCahulaks Cause Light Wounds, +1 Elven CaravanChatchka Produce Fire, +1 Wyrm SchoolGreat Axe +3 Palace RuinsGythka +1 Elven SlaversGythka +3 Nazca LinesMace +2 Subterranean TemplePhrain’s Bow Melf’s Acid Arrow Teaquetzl VillagePole Arm +1 Elven CaravanSling +2 Cedrilte VillageStaff +2 Sand Oasis
125 126

✹ CREDITS ✹Authors
Chris Carr, Caron Collver, Adam Isgreen
Contributing Authors and EditorsEileen Matsumi, André Vrignaud
Associate ProducerRick White
Editing SupportSteven Okano, Don McClure
ProducerBret Berry
Clue Book TestersLee Crawford, Chris Lanka, Brian Lowe, Sean House, Matt Vella, Jeff Shotwell
Special Thanks toJim Ward
Graphic Design and DTPLOUIS SAEKOW DESIGN: David Boudreau, Leedara Sears,
Kirk Nichols
PrintingBanta ISG
STRATEGIC SIMULATIONS, INC. reserves the right to make improvements in the product described in this cluebook at any time and without notice.Strategic Simulations, Inc. makes no warranties, express or implied, with respect to this clue book, its quality,merchantability or fitness for any particular purpose. This clue book is provided “as is.”ADVANCED DUNGEONS & DRAGONS, AD&D, DARK SUN, and the TSR logo are trademarks owned by andused under license from TSR, Inc. Lake Geneva, WI USA. All TSR characters, character names, and thedistinctive likenesses thereof are trademarks owned by and used under license from TSR, Inc.©1993 TSR, Inc. ©1993 Strategic Simulations, Inc. All Rights Reserved.This clue book is copyrighted and includes proprietary information belonging to TSR, Inc. and StrategicSimulations, Inc. No one is permitted to sell copies of this clue book to any person or institution except asprovided for by written agreement with TSR, Inc. and Strategic Simulations, Inc. No one may copy, photocopy,reproduce, translate, or reduce to machine-readable form this clue book without the prior written consent ofTSR, Inc. and Strategic Simulations, Inc.Any persons reproducing any portion of this clue book for any reason, in any media, shall be guilty of copyrightviolation and subject to the appropriate civil or criminal action at the discretion of the copyright holder(s).