daily children’s 2 sewing patterns: sewing made modern. 3 ... · sewing patterns: 4 f ree sewing...
TRANSCRIPT
© F+W Media, inc. All rights reserved.
F+W Media grants permission for any or all pages in this issue to be copied for personal use.
page 1 of 31 visit sewdaily.com
1
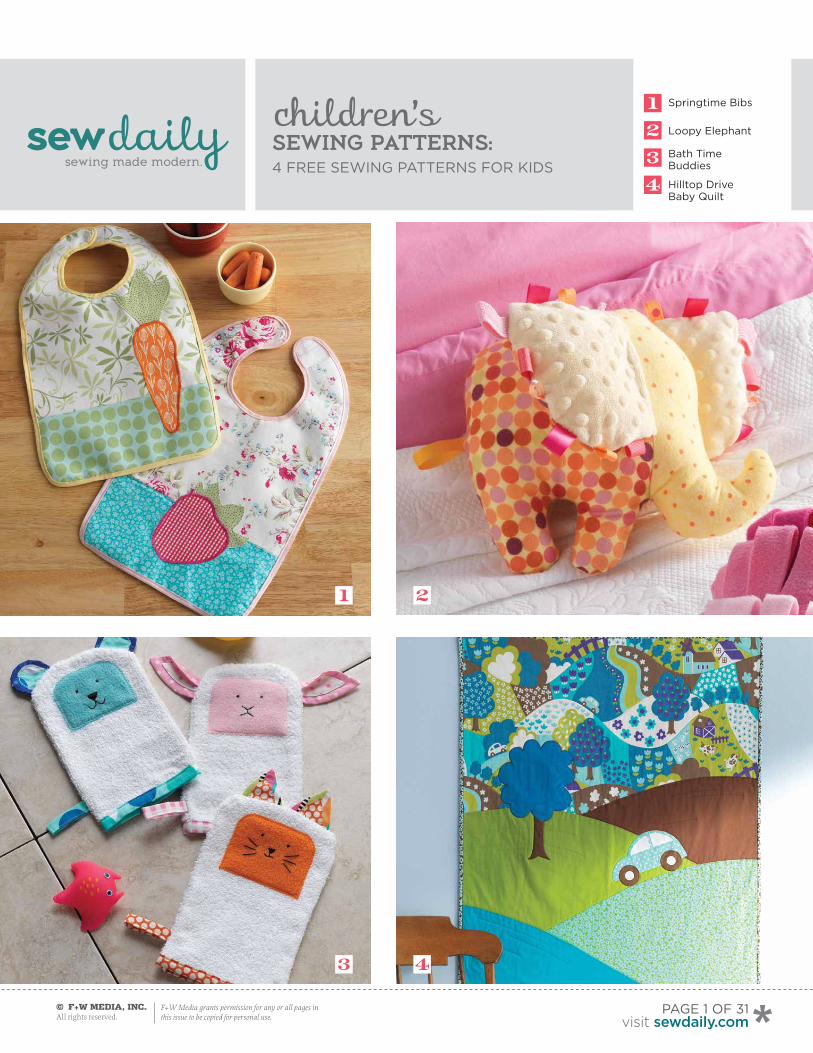
Springtime Bibs Loopy elephant
Bath Time Buddies
Hilltop Drive Baby Quilt
1
2
3sewdailysewdaily
sewing made modern.
children’s sewing patterns: 4 fRee Sewing paTTeRnS foR kiDS
3
2
4
4
sewdailysewdaily
children’s sewing patterns: 4 FREE Sewing Patterns for Kids
© F+W Media, inc. All rights reserved.
F+W Media grants permission for any or all pages in this issue to be copied for personal use.
1 Springtime Bibs.........................................32 Loopy Elephant.........................................53 Bath Time Buddies...................................94 Hilltop Drive Baby Quilt........................14
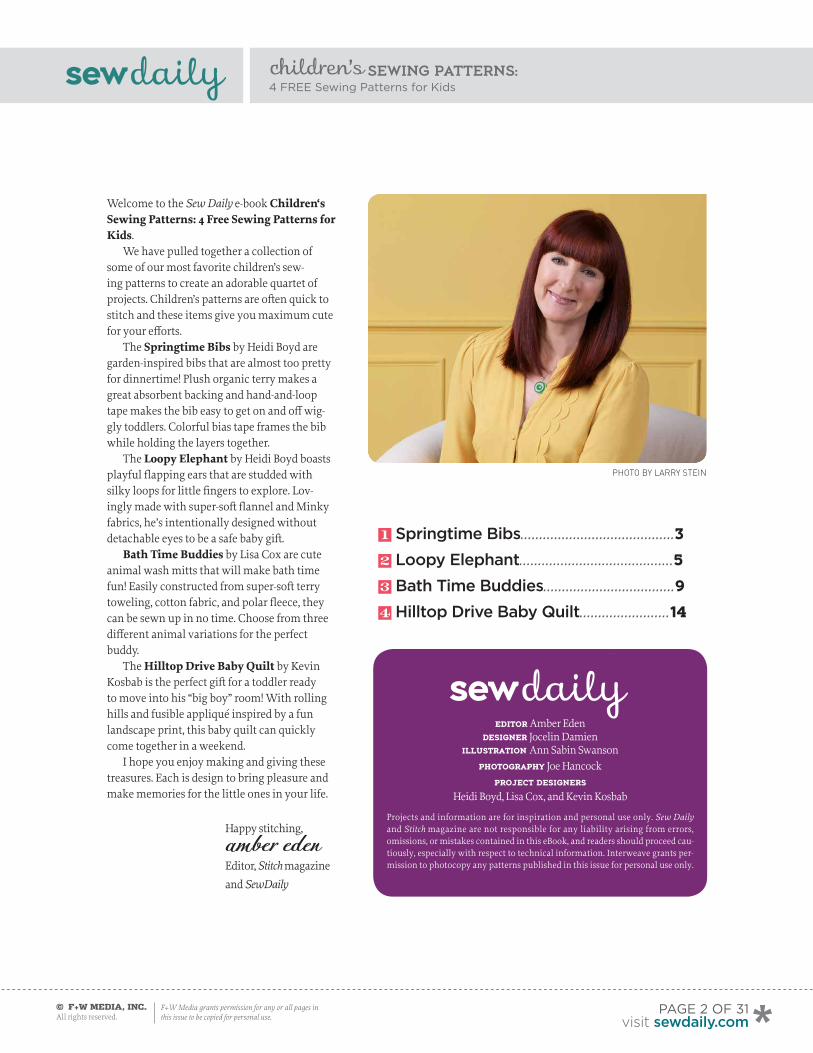
Photo by Larry Stein
Editor Amber EdendEsignEr Jocelin Damien
illustration Ann Sabin SwansonPhotograPhy Joe Hancock
ProjEct dEsignErs
Heidi Boyd, Lisa Cox, and Kevin Kosbab
Projects and information are for inspiration and personal use only. Sew Daily and Stitch magazine are not responsible for any liability arising from errors, omissions, or mistakes contained in this eBook, and readers should proceed cau-tiously, especially with respect to technical information. Interweave grants per-mission to photocopy any patterns published in this issue for personal use only.
sewdailysewdaily
page 2 of 31visit sewdaily.com
Welcome to the Sew Daily e-book Children‘s Sewing Patterns: 4 Free Sewing Patterns for Kids.
We have pulled together a collection of some of our most favorite children’s sew-ing patterns to create an adorable quartet of projects. Children’s patterns are often quick to stitch and these items give you maximum cute for your efforts.
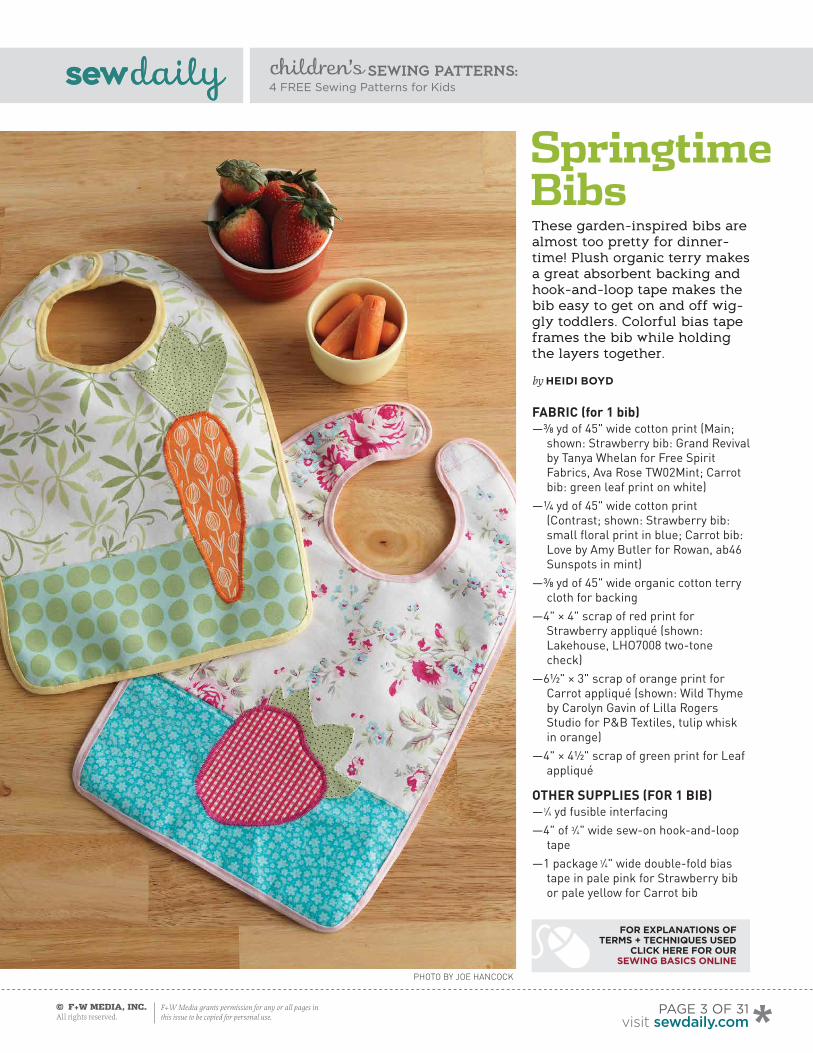
The Springtime Bibs by Heidi Boyd are garden-inspired bibs that are almost too pretty for dinnertime! Plush organic terry makes a great absorbent backing and hand-and-loop tape makes the bib easy to get on and off wig-gly toddlers. Colorful bias tape frames the bib while holding the layers together.
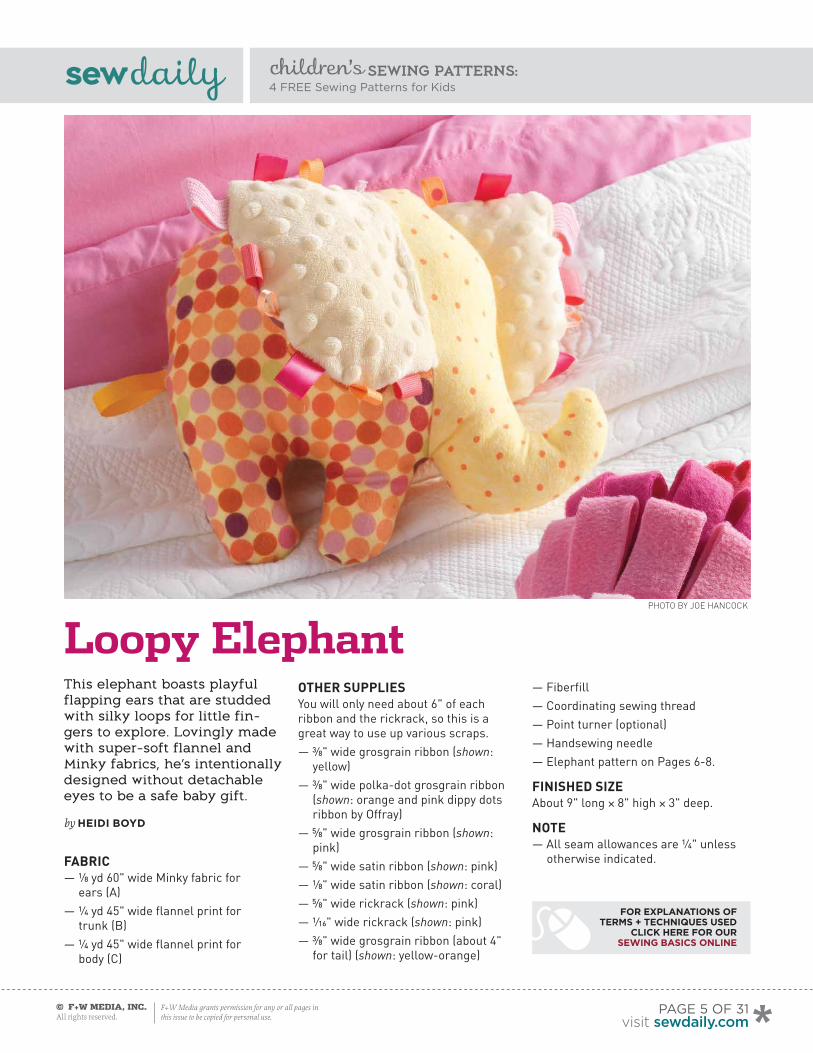
The Loopy Elephant by Heidi Boyd boasts playful flapping ears that are studded with silky loops for little fingers to explore. Lov-ingly made with super-soft flannel and Minky fabrics, he’s intentionally designed without detachable eyes to be a safe baby gift.
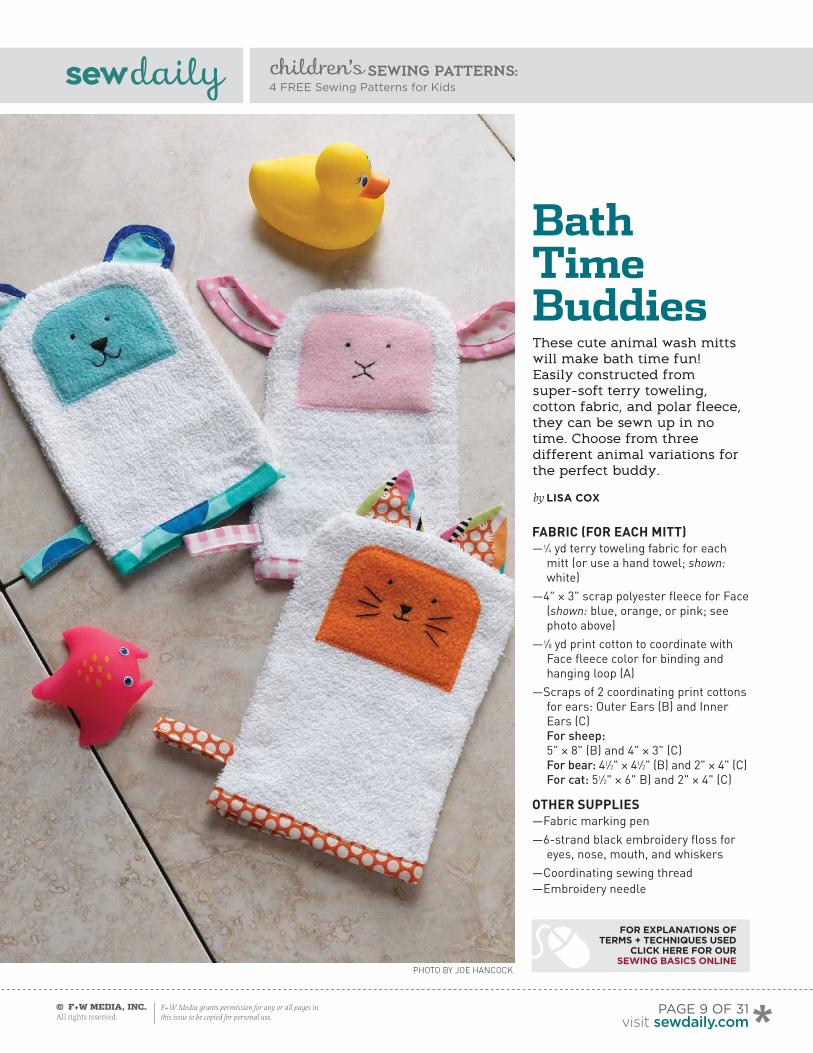
Bath Time Buddies by Lisa Cox are cute animal wash mitts that will make bath time fun! Easily constructed from super-soft terry toweling, cotton fabric, and polar fleece, they can be sewn up in no time. Choose from three different animal variations for the perfect buddy.
The Hilltop Drive Baby Quilt by Kevin Kosbab is the perfect gift for a toddler ready to move into his “big boy” room! With rolling hills and fusible appliqué inspired by a fun landscape print, this baby quilt can quickly come together in a weekend.
I hope you enjoy making and giving these treasures. Each is design to bring pleasure and make memories for the little ones in your life.
Happy stitching,
amber edenEditor, Stitch magazine
and SewDaily
sewdailysewdaily
children’s sewing patterns: 4 FREE Sewing Patterns for Kids
© F+W Media, inc. All rights reserved.
F+W Media grants permission for any or all pages in this issue to be copied for personal use.
sewdailysewdaily
page 3 of 31visit sewdaily.com
For explanations oF terms + techniques used
click here For our sewing Basics online
SpringtimeBibsThese garden-inspired bibs are almost too pretty for dinner-time! Plush organic terry makes a great absorbent backing and hook-and-loop tape makes the bib easy to get on and off wig-gly toddlers. Colorful bias tape frames the bib while holding the layers together.
by heidi Boyd
Fabric (for 1 bib)— 3⁄8 yd of 45" wide cotton print (Main;
shown: Strawberry bib: Grand Revival by Tanya Whelan for Free Spirit Fabrics, Ava Rose TW02Mint; Carrot bib: green leaf print on white)
— ¼ yd of 45" wide cotton print (Contrast; shown: Strawberry bib: small floral print in blue; Carrot bib: Love by Amy Butler for Rowan, ab46 Sunspots in mint)
— 3⁄8 yd of 45" wide organic cotton terry cloth for backing
— 4" × 4" scrap of red print for Strawberry appliqué (shown: Lakehouse, LHO7008 two-tone check)
— 6½" × 3" scrap of orange print for Carrot appliqué (shown: Wild Thyme by Carolyn Gavin of Lilla Rogers Studio for P&B Textiles, tulip whisk in orange)
— 4" × 4½" scrap of green print for Leaf appliqué
Other SupplieS (FOr 1 bib)—1⁄4 yd fusible interfacing —4" of 3⁄4" wide sew-on hook-and-loop
tape— 1 package 1⁄4" wide double-fold bias
tape in pale pink for Strawberry bib or pale yellow for Carrot bib
Photo by Joe hancock

sewdailysewdaily
children’s sewing patterns: 4 FREE Sewing Patterns for Kids
© F+W Media, inc. All rights reserved.
F+W Media grants permission for any or all pages in this issue to be copied for personal use.
page 4 of 31visit sewdaily.com
— Sewing thread in colors to coordinate with appliqués
—Off-white cotton sewing thread for sewing bib
— Bib pattern and templates for Strawberry and Carrot appliqué on pages 18-21
FiniShed Size 15" long × 10" wide
nOteS—All seam allowances are ½" unless
otherwise indicated.
cOnStruct bib1 Cut a 13" × 11" rectangle from the Main fabric. Cut a 5" × 11" rectangle from the Contrast fabric. Lay the two rectangles right sides together, aligning one 11" edge, and sew together. Press the seam open.2 From the interfacing, cut one 121⁄2" × 11" rectangle and one 41⁄2" × 11" rectangle. Slide the appropriately sized interfacing rectangle under the seam allowances from each side, butting the interfacing raw edge against the seam and aligning the raw edges around the rectangle perimeter. Follow the manufacturer’s instructions to fuse the interfacing to the wrong side of the pieced cotton rectangle.
3 Iron a separate piece of interfacing to the wrong side of each of the appliqué fabrics. Use the templates to cut the Carrot or Strawberry and the corresponding Leaf from the appropriate fabrics.4 Referring to the photos above for placement, pin the Leaf appliqué onto the bib. Remember that the pieced cotton will be trimmed to size later (it might help to use the Bib pattern to visualize finished dimensions as you place the appliqué); use the center of the fabric block and the seam between fabrics as guides for placing the appliqué. With matching thread, use a short straight stitch to sew the Leaf to the bib, sewing 1⁄8" inside the appliqué edges. Add more lines of stitching to indicate the leaf veins, if desired. 5 Pin the Carrot or Strawberry appliqué over the base of the Leaf. Change the color of your thread to complement the appliqué and set the machine for a zigzag satin stitch. Note: Use 2 scraps of interfaced fabric to test your stitch settings before working on the bib; the stitch should cover the fabric edges completely and smoothly without gaps or bunching. As you sew around the Carrot or Strawberry, align the edge of the fabric under the center
of the presser foot, ensuring that the zigzag stitch spans from one fabric to the other, trapping the cut fabric edge in the center of the stitch.6 Cut a 17" × 11" rectangle from the terry cloth. Lay the assembled bib front (right side up) over the terry fabric (right side down), and then pin the bib pattern over both pieces. Lift the pattern to double check the appliqué placement within the bib perimeter. Cut both fabrics along the pattern outline. Set the terry aside.7 Cut 2 pieces of hook-and-loop tape 2" long. Separate the hook and loop portions of the fastener. Lay the 2 hook pieces (the stiffer part) on the fabric right side at the end of the bib’s left neck strap (as worn; figure 1). Sew the hook-and-loop tape in place along the edges of each strip (don’t worry if the tape hangs over the edges slightly; you’ll trim it later). Position and sew the softer loop strips of the fastener to the right side of the terry at the end of the bib’s right neck strap (as worn; figure 1). Note: With both the terry and the pieced bib panel face up, the hook-and-loop tape positions appear to be the same, figure 1 shows tape placement as it would appear with terry and pieced cotton bibs wrong sides together. Trim the hook-and-loop tape so that its edges are flush with the terry and cotton fabrics.8 Lay the terry and pieced cotton bibs wrong sides together, matching all raw edges, and pin. Stitch 1⁄8" from the raw edges all the way around.9 Unfold the bias tape. Press 1⁄4" to the wrong side at one end of the tape. Beginning with the pressed end at a relatively straight portion of the bib perimeter, near the neck straps, match the bias tape’s raw edge to the bib’s raw edge and stitch along the first crease in the bias tape. Continue around the entire bib perimeter. When you return to the starting point, overlap the pressed end of the bias tape 1⁄2" and cut off the excess length. Refold the bias tape along the original creases, folding it around the bib raw edges. Slip stitch the bias tape to the seamline on the bib wrong side, enclosing the raw edges.
Heidi Boyd is the author of ten books with North Light Books, most notably the Simply Beautiful series. Her goal is to make sophisticated design approachable and easy for all. Visit her blog on heidiboyd.blogspot.com.
figure 1
sewdailysewdaily
children’s sewing patterns: 4 FREE Sewing Patterns for Kids
© F+W Media, inc. All rights reserved.
F+W Media grants permission for any or all pages in this issue to be copied for personal use.
page 5 of 31visit sewdaily.com
For explanations oF terms + techniques used
click here For our sewing Basics online
Photo by Joe hancock
Loopy ElephantThis elephant boasts playful flapping ears that are studded with silky loops for little fin-gers to explore. Lovingly made with super-soft flannel and Minky fabrics, he’s intentionally designed without detachable eyes to be a safe baby gift.
by heidi Boyd
Fabric— 1⁄8 yd 60" wide Minky fabric for
ears (A)— 1⁄4 yd 45" wide flannel print for
trunk (B)— 1⁄4 yd 45" wide flannel print for
body (C)
Other SupplieSYou will only need about 6" of each ribbon and the rickrack, so this is a great way to use up various scraps.— 3⁄8" wide grosgrain ribbon (shown:
yellow)— 3⁄8" wide polka-dot grosgrain ribbon
(shown: orange and pink dippy dots ribbon by Offray)
— 5⁄8" wide grosgrain ribbon (shown: pink)
— 5⁄8" wide satin ribbon (shown: pink)— 1⁄8" wide satin ribbon (shown: coral)— 5⁄8" wide rickrack (shown: pink)— 1⁄16" wide rickrack (shown: pink)— 3⁄8" wide grosgrain ribbon (about 4"
for tail) (shown: yellow-orange)
— Fiberfill— Coordinating sewing thread— Point turner (optional)— Handsewing needle— Elephant pattern on Pages 6-8.
FiniShed Size About 9" long × 8" high × 3" deep.
nOte— All seam allowances are ¼" unless
otherwise indicated.

sewdailysewdaily
children’s sewing patterns: 4 FREE Sewing Patterns for Kids
© F+W Media, inc. All rights reserved.
F+W Media grants permission for any or all pages in this issue to be copied for personal use.
page 6 of 31visit sewdaily.com
cut Fabric1 Using the provided pattern, cut the following pieces.From fabric A:— Cut 2 Ears (cut 1, cut 1 reverse)From fabric B:— Cut 2 Trunk/Head (cut 1, cut 1
reverse)From fabric C:— Cut 2 Body (cut 1, cut 1 reverse)— Cut 2 Ears (cut 1, cut 1 reverse)2 Cut the assorted ribbons and rickrack into 3" lengths for a total of 8 to 10 pieces for each ear.
aSSemble elephant3 Fold each ribbon from Step 2 in half widthwise, matching the cut ends. Lay a Fabric C Ear, right side up, on a flat work surface and arrange 8 to 10 ribbon loops around the curved edge, with the ribbon folds toward the center of the ear and the ribbon raw edges extending ¼"–1⁄2" past the fabric raw edge. Do not place ribbons along the ear’s straight edge, which will be sewn into the body. Lay a Fabric A Ear on the Fabric C Ear and ribbons, right sides together, raw edges matched, and pin. Repeat the entire step for the second Ear.4 Machine stitch around the curved edges of each ear, trapping the ribbons in the seam and leaving the straight edge of the ear open. Make a second reinforcing seam just outside of the first seam, about 1⁄8" from the raw edges. Turn the ears right side out and lightly stuff them with fiberfill.5 Place an ear on a Body piece, matching the notches, with Fabric C surfaces together. Allow the ear raw edges to extend 1⁄4" beyond the body raw edges. Lay a Trunk/Head piece on the other two right sides together, matching the notches, and pin the neck edge through all layers. Stitch the head to the Body piece, trapping the ear in the seam. Make a reinforcing seam 1⁄8" from the raw edge to prevent the ears from pulling loose. Repeat the entire step with the remaining Ear, Body, and Trunk/Head pieces.
6 Fold the 4" ribbon tail in half widthwise, matching the raw edges to form a loop. Pin the tail to one body at the notch, allowing the raw edges of the tail to extend 1⁄4" past the body raw edges. Place the 2 finished elephant halves right sides together and pin, making sure the ears and tail are sandwiched between the layers and that the ears will not be caught in the next seam. Stitch around the outside of the elephant, trapping the tail in the seam and leaving a 3" opening in the back of the hind leg. Turn the elephant right side
out through the opening, using a point turner or other tool such as a knitting needle or chopstick, if necessary. 7 Stuff the elephant with fiberfill, beginning at the tip of the trunk and continuing to stuff the entire elephant tightly. Handstitch the opening closed with a slip stitch.
Heidi Boyd is the author of ten books with North Light Books, most notably the Simply Beautiful series. Her goal is to make sophisticated design approachable and easy for all. Visit her blog on heidiboyd.blogspot.com.
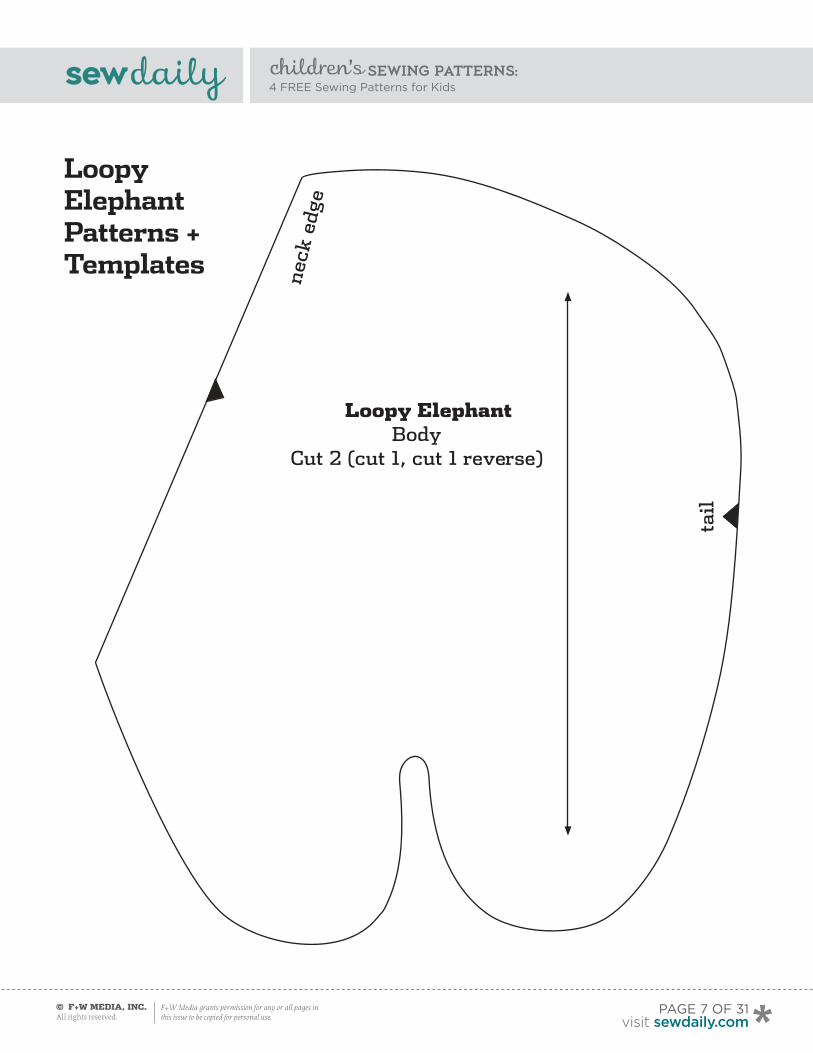
Ear
Cut 2 (cut 1, cut 1 reverse)
Loopy Elephant Patterns + Templates
sewdailysewdaily
children’s sewing patterns: 4 FREE Sewing Patterns for Kids
© F+W Media, inc. All rights reserved.
F+W Media grants permission for any or all pages in this issue to be copied for personal use.
Loopy elephant Body
Cut 2 (cut 1, cut 1 reverse)
tail
nec
k ed
ge
page 7 of 31visit sewdaily.com
Loopy Elephant Patterns + Templates

sewdailysewdaily
children’s sewing patterns: 4 FREE Sewing Patterns for Kids
© F+W Media, inc. All rights reserved.
F+W Media grants permission for any or all pages in this issue to be copied for personal use.
Loopy elephant Trunk/Head
Cut 2 (cut 1, cut 1 reverse)
nec
k e
dge
page 8 of 31visit sewdaily.com
Loopy Elephant Patterns + Templates
sewdailysewdaily
children’s sewing patterns: 4 FREE Sewing Patterns for Kids
© F+W Media, inc. All rights reserved.
F+W Media grants permission for any or all pages in this issue to be copied for personal use.
page 9 of 31visit sewdaily.com
For explanations oF terms + techniques used
click here For our sewing Basics online
These cute animal wash mitts will make bath time fun! Easily constructed from super-soft terry toweling, cotton fabric, and polar fleece, they can be sewn up in no time. Choose from three different animal variations for the perfect buddy.
by lisa cox
Bath Time Buddies
Fabric (FOr each mitt)— 1⁄4 yd terry toweling fabric for each
mitt (or use a hand towel; shown: white)
— 4" × 3" scrap polyester fleece for Face (shown: blue, orange, or pink; see photo above)
— 1⁄8 yd print cotton to coordinate with Face fleece color for binding and hanging loop (A)
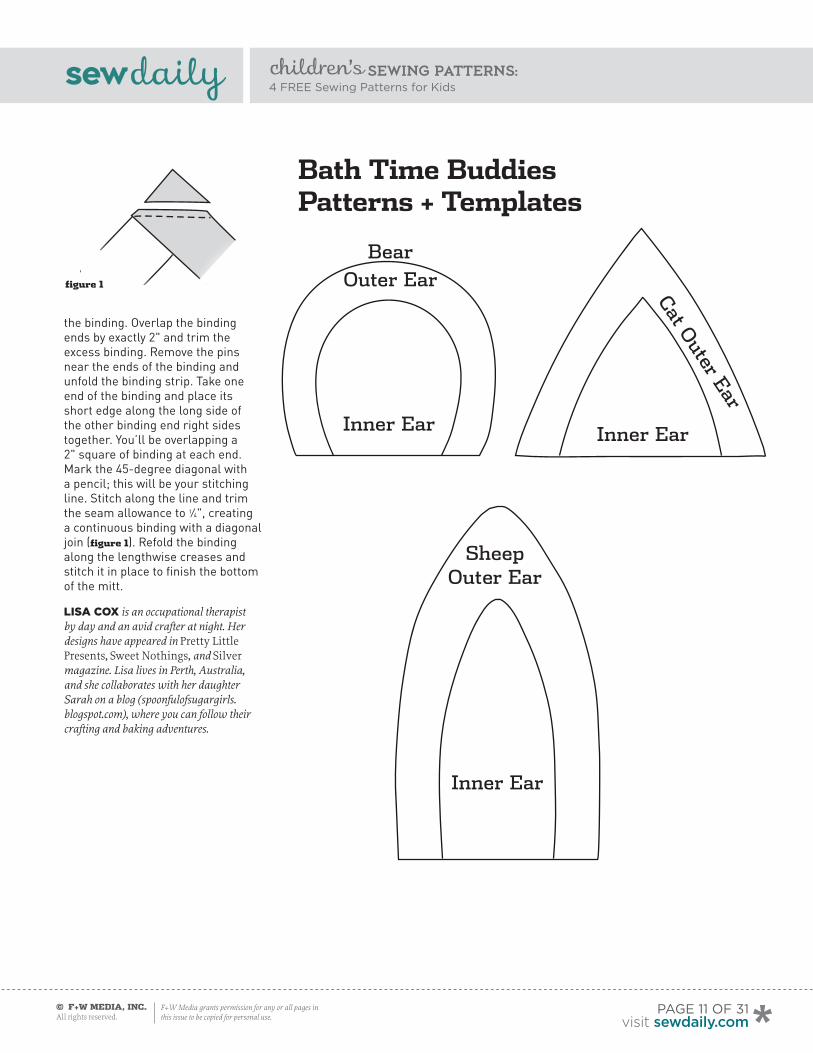
— Scraps of 2 coordinating print cottons for ears: Outer Ears (B) and Inner Ears (C) For sheep: 5" × 8" (B) and 4" × 3" (C) For bear: 41⁄2" × 41⁄2" (B) and 2" × 4" (C) For cat: 51⁄2" × 6" B) and 2" × 4" (C)
Other SupplieS— Fabric marking pen— 6-strand black embroidery floss for
eyes, nose, mouth, and whiskers — Coordinating sewing thread— Embroidery needle
Photo by Joe hancock
sewdailysewdaily
children’s sewing patterns: 4 FREE Sewing Patterns for Kids
© F+W Media, inc. All rights reserved.
F+W Media grants permission for any or all pages in this issue to be copied for personal use.
— Point turner (optional)— Serger (optional)— Bath Time Buddies pattern and
templates on Pages 11-13
FiniShed Size 8½" long × 5" wide, excluding ears.
nOteS— All seam allowances are 1⁄4" unless
otherwise indicated.
— Zigzag, serge, or overcast all raw edges.
— Look for brightly colored towels on clearance to make funky mitts.
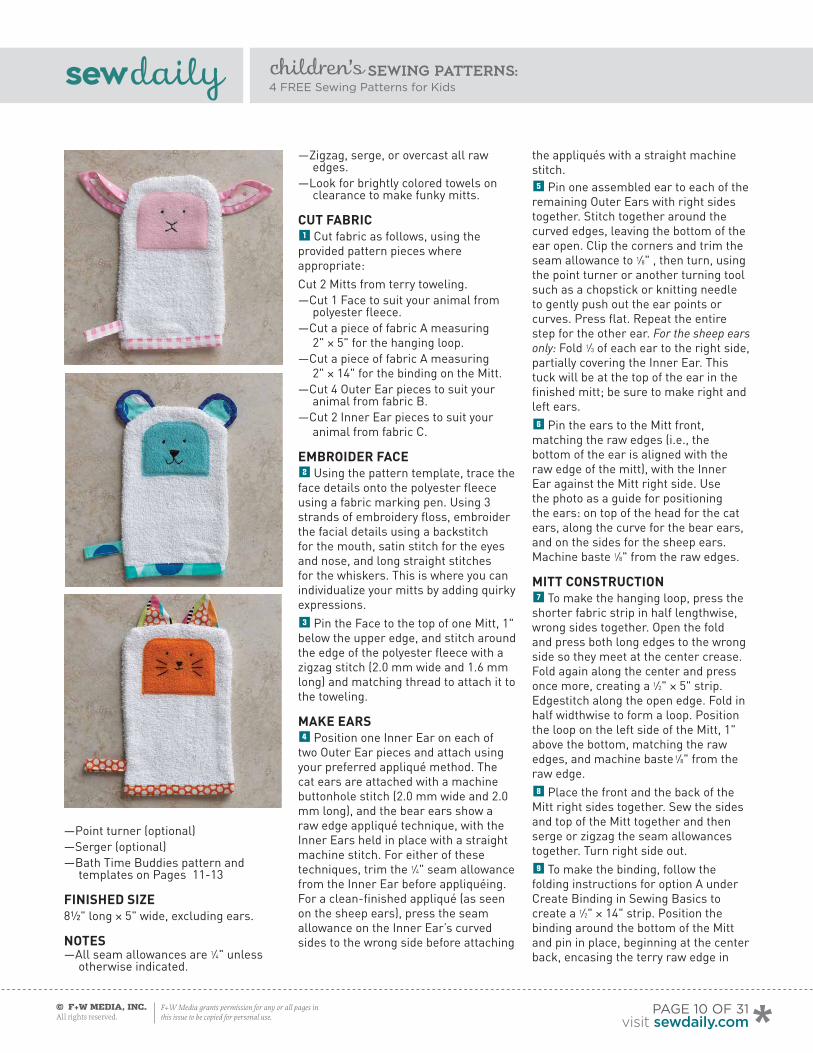
cut Fabric1 Cut fabric as follows, using the provided pattern pieces where appropriate:Cut 2 Mitts from terry toweling.— Cut 1 Face to suit your animal from
polyester fleece. — Cut a piece of fabric A measuring
2" × 5" for the hanging loop.— Cut a piece of fabric A measuring
2" × 14" for the binding on the Mitt.— Cut 4 Outer Ear pieces to suit your
animal from fabric B.— Cut 2 Inner Ear pieces to suit your
animal from fabric C.
embrOider Face2 Using the pattern template, trace the face details onto the polyester fleece using a fabric marking pen. Using 3 strands of embroidery floss, embroider the facial details using a backstitch for the mouth, satin stitch for the eyes and nose, and long straight stitches for the whiskers. This is where you can individualize your mitts by adding quirky expressions.3 Pin the Face to the top of one Mitt, 1" below the upper edge, and stitch around the edge of the polyester fleece with a zigzag stitch (2.0 mm wide and 1.6 mm long) and matching thread to attach it to the toweling.
make earS4 Position one Inner Ear on each of two Outer Ear pieces and attach using your preferred appliqué method. The cat ears are attached with a machine buttonhole stitch (2.0 mm wide and 2.0 mm long), and the bear ears show a raw edge appliqué technique, with the Inner Ears held in place with a straight machine stitch. For either of these techniques, trim the 1⁄4" seam allowance from the Inner Ear before appliquéing. For a clean-finished appliqué (as seen on the sheep ears), press the seam allowance on the Inner Ear’s curved sides to the wrong side before attaching
the appliqués with a straight machine stitch.5 Pin one assembled ear to each of the remaining Outer Ears with right sides together. Stitch together around the curved edges, leaving the bottom of the ear open. Clip the corners and trim the seam allowance to 1⁄8" , then turn, using the point turner or another turning tool such as a chopstick or knitting needle to gently push out the ear points or curves. Press flat. Repeat the entire step for the other ear. For the sheep ears only: Fold 1⁄3 of each ear to the right side, partially covering the Inner Ear. This tuck will be at the top of the ear in the finished mitt; be sure to make right and left ears.6 Pin the ears to the Mitt front, matching the raw edges (i.e., the bottom of the ear is aligned with the raw edge of the mitt), with the Inner Ear against the Mitt right side. Use the photo as a guide for positioning the ears: on top of the head for the cat ears, along the curve for the bear ears, and on the sides for the sheep ears. Machine baste 1⁄8" from the raw edges.
mitt cOnStructiOn7 To make the hanging loop, press the shorter fabric strip in half lengthwise, wrong sides together. Open the fold and press both long edges to the wrong side so they meet at the center crease. Fold again along the center and press once more, creating a 1⁄2" × 5" strip. Edgestitch along the open edge. Fold in half widthwise to form a loop. Position the loop on the left side of the Mitt, 1" above the bottom, matching the raw edges, and machine baste 1⁄8" from the raw edge. 8 Place the front and the back of the Mitt right sides together. Sew the sides and top of the Mitt together and then serge or zigzag the seam allowances together. Turn right side out. 9 To make the binding, follow the folding instructions for option A under Create Binding in Sewing Basics to create a 1⁄2" × 14" strip. Position the binding around the bottom of the Mitt and pin in place, beginning at the center back, encasing the terry raw edge in
page 10 of 31visit sewdaily.com
sewdailysewdaily
children’s sewing patterns: 4 FREE Sewing Patterns for Kids
© F+W Media, inc. All rights reserved.
F+W Media grants permission for any or all pages in this issue to be copied for personal use.
the binding. Overlap the binding ends by exactly 2" and trim the excess binding. Remove the pins near the ends of the binding and unfold the binding strip. Take one end of the binding and place its short edge along the long side of the other binding end right sides together. You’ll be overlapping a 2" square of binding at each end. Mark the 45-degree diagonal with a pencil; this will be your stitching line. Stitch along the line and trim the seam allowance to 1⁄4", creating a continuous binding with a diagonal join (figure 1). Refold the binding along the lengthwise creases and stitch it in place to finish the bottom of the mitt.
Lisa Cox is an occupational therapist by day and an avid crafter at night. Her designs have appeared in Pretty Little Presents, Sweet Nothings, and Silver magazine. Lisa lives in Perth, Australia, and she collaborates with her daughter Sarah on a blog (spoonfulofsugargirls.blogspot.com), where you can follow their crafting and baking adventures.
figure 1
Inner Ear
BearOuter Ear
Inner Ear
Cat Outer Ear
SheepOuter Ear
Inner Ear
page 11 of 31visit sewdaily.com
Bath Time Buddies Patterns + Templates
sewdailysewdaily
children’s sewing patterns: 4 FREE Sewing Patterns for Kids
© F+W Media, inc. All rights reserved.
F+W Media grants permission for any or all pages in this issue to be copied for personal use.
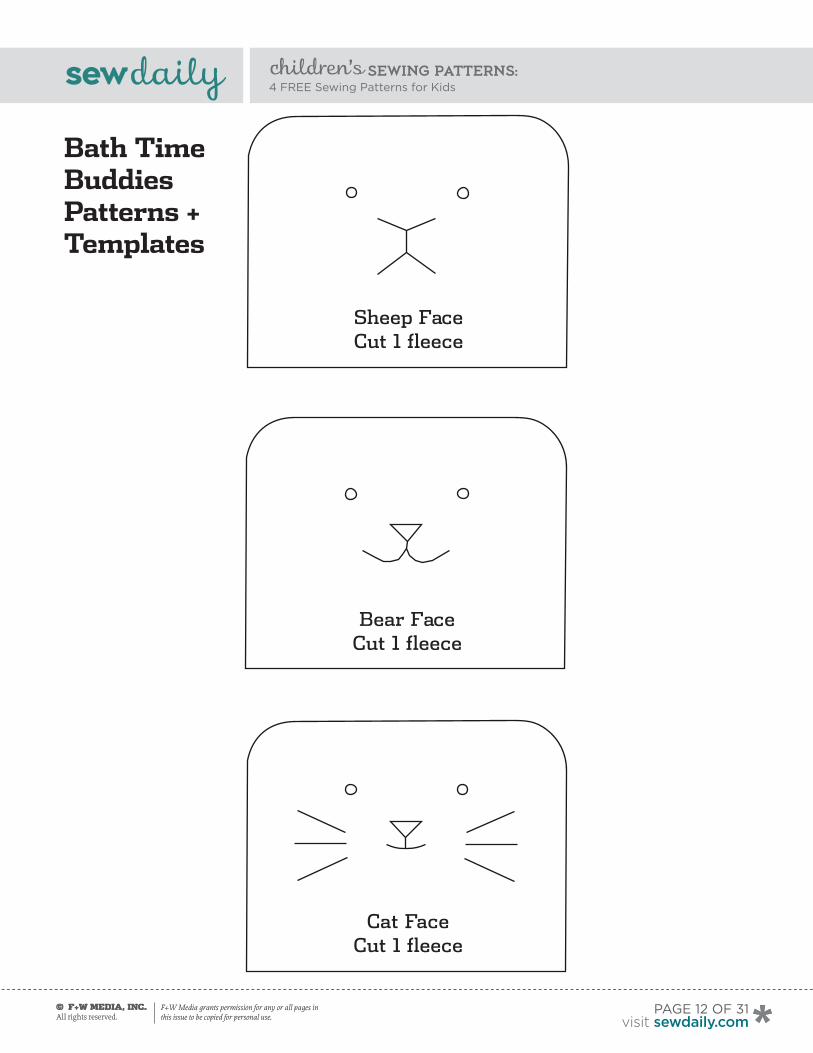
Sheep Face Cut 1 fleece
Bear Face Cut 1 fleece
Cat Face Cut 1 fleece
© F+W Media, inc. All rights reserved.
F+W Media grants permission for any or all pages in this issue to be copied for personal use.
page 12 of 31visit sewdaily.com
Bath Time Buddies Patterns + Templates

sewdailysewdaily
children’s sewing patterns: 4 FREE Sewing Patterns for Kids
© F+W Media, inc. All rights reserved.
F+W Media grants permission for any or all pages in this issue to be copied for personal use.
Mitt
Cut 2 from terry towelling
page 13of 31visit sewdaily.com
Bath Time Buddies Patterns + Templates
sewdailysewdaily
children’s sewing patterns: 4 FREE Sewing Patterns for Kids
© F+W Media, inc. All rights reserved.
F+W Media grants permission for any or all pages in this issue to be copied for personal use.
page 14 of 31visit sewdaily.com
Photo by Joe hancock
For explanations oF terms + techniques used
click here For our sewing Basics online
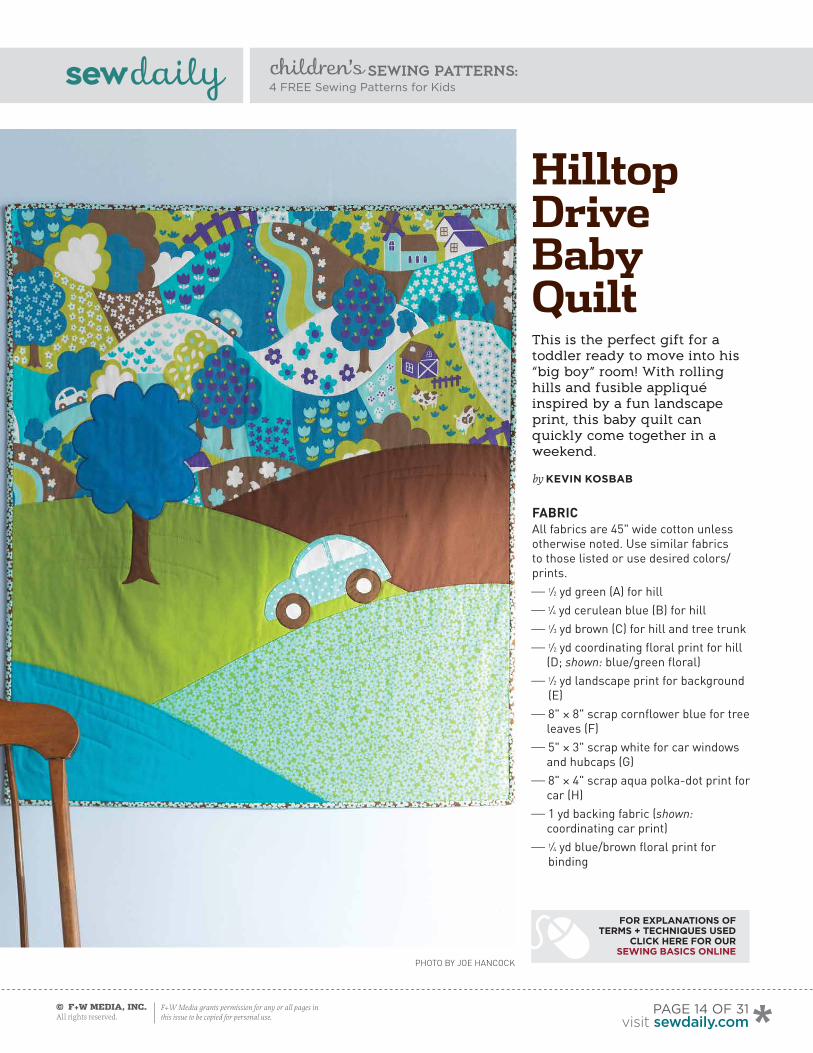
This is the perfect gift for a toddler ready to move into his “big boy” room! With rolling hills and fusible appliqué inspired by a fun landscape print, this baby quilt can quickly come together in a weekend.
by kevin kosBaB
Hilltop Drive Baby Quilt
FabricAll fabrics are 45" wide cotton unless otherwise noted. Use similar fabrics to those listed or use desired colors/prints. 1⁄2 yd green (A) for hill 1⁄4 yd cerulean blue (B) for hill 1⁄3 yd brown (C) for hill and tree trunk 1⁄2 yd coordinating floral print for hill
(D; shown: blue/green floral) 1⁄2 yd landscape print for background
(E) 8" × 8" scrap cornflower blue for tree
leaves (F) 5" × 3" scrap white for car windows
and hubcaps (G) 8" × 4" scrap aqua polka-dot print for
car (H) 1 yd backing fabric (shown:
coordinating car print) 1⁄4 yd blue/brown floral print for
binding

sewdailysewdaily
children’s sewing patterns: 4 FREE Sewing Patterns for Kids
© F+W Media, inc. All rights reserved.
F+W Media grants permission for any or all pages in this issue to be copied for personal use.
page 15 of 31visit sewdaily.com
Note: Don’t worry if you can’t find a similar landscape print—a cloud print would work, too. A a coordinating car print was used for the backing to have a more urban look to contrast with the countryside theme of the front.
Other SupplieS Freezer paper Spray starch (optional) 1⁄2 yd lightweight fusible web Sewing or embroidery thread to
coordinate with each fabric 1 yd low-loft cotton batting Invisible monofilament thread
(optional) Safety pins (recommended: bent-
arm quilting safety pins) or quilt-basting spray
Walking foot for sewing machine (optional)
Baby Car Quilt template on Page 22-31
FiniShed Size 28" × 33"
nOteS All seam allowances are 1⁄4" unless
otherwise noted. If your sewing machine is capable of
a blanket stitch, feel free to use that for the appliqué instead of a zigzag stitch.
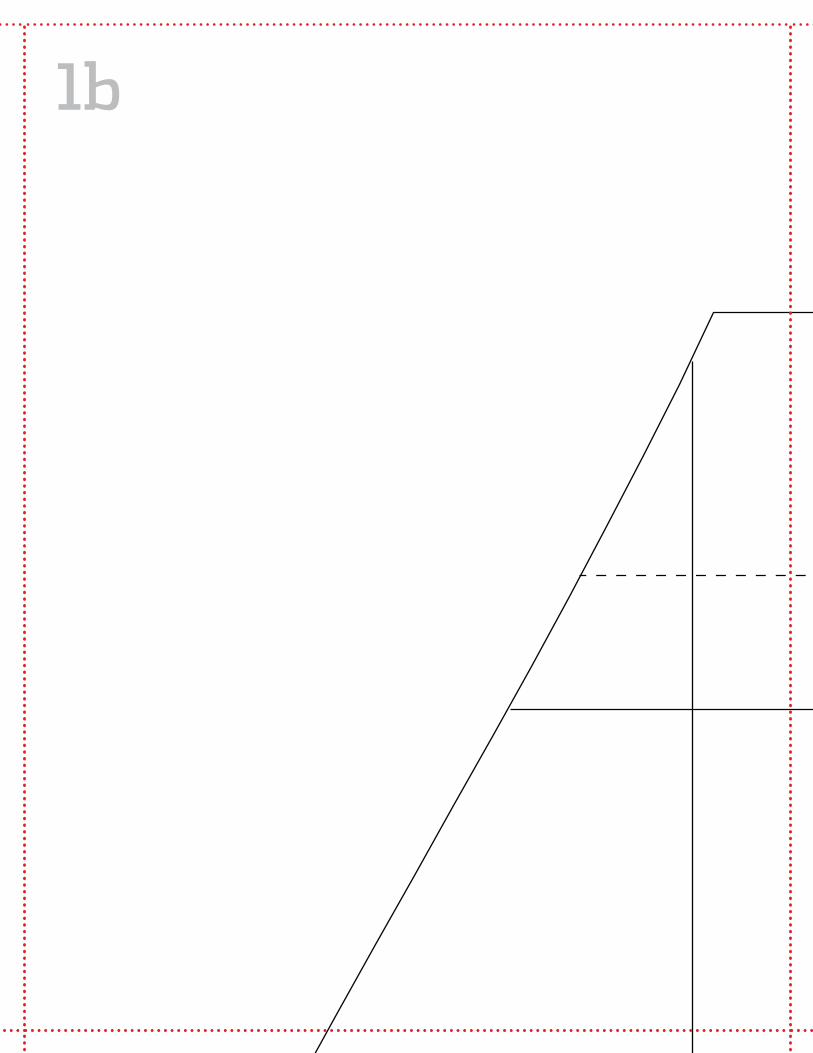
make hill templateS1 The shapes for each hill are indicated on the provided composite hill template. Trace the 3 straight sides and curve of the A hill template onto the paper (non-waxy) side of freezer paper. Cut the template out around the outer edge and label it. Repeat to make a template for the B hill.2 The C and D hills face the other direction, so flip the template sheet over and use a light box or a window to trace freezer-paper templates for the C and D hills.
make hillS3 Lay each template, shiny side up, on the wrong side of the corresponding fabric, being sure to leave at least a 1⁄2"
margin around the template. Pin each template to the corresponding fabric (A–D), around the perimeter of the template. If the freezer paper curls, anchor it flat with pattern weights or other heavy objects.4 Cut the curve for each hill 3⁄8" outside the template edge. Cut the straight sides along the template edge. Do not remove the freezer-paper templates from the fabric.5 Using the tip of a hot, dry iron, press the seam allowance over the freezer-paper template, making sure the fabric folds tightly around the edge of the template. Clip into the seam allowance along the curved edge every 1–2", if necessary, so the seam allowance lies
flat against the freezer paper and the fold creates a smooth curve. The shiny side of the freezer paper will hold the turned-under seam allowance in place. Remove the template when the hill fabric has cooled. Use spray starch, if necessary, to hold the pressed seam allowances in place when the template is removed.
attach hillS6 Cut a 28" × 171⁄2" rectangle from the landscape print.7 Referring to the photo above for placement guidance, arrange the hills and the landscape rectangle as follows. Place the C hill first, aligning the straight right-hand edges and
a
B
c
d

sewdailysewdaily
children’s sewing patterns: 4 FREE Sewing Patterns for Kids
© F+W Media, inc. All rights reserved.
F+W Media grants permission for any or all pages in this issue to be copied for personal use.
positioning the top of the hill 13" below the top of the landscape rectangle. Pin the hill’s curved edge in place, then position the remaining hills in the same way, placing the A hill 161⁄4" from the top of the landscape rectangle, the D hill 71⁄2" from the top of the C hill, and the B hill 81⁄2" from the top of the A hill. Make sure the pieces align correctly at the sides and lower edge and that the sides are perpendicular to the top edge. The pinned quilt top should measure 28" × 33". Make sure each hill has enough overlap to be sewn down along its pressed edge, then pin again so the entire quilt top is securely held together.8 Starting with the C hill and working your way to the B hill, topstitch each hill in place, 1⁄8" from the pressed edge, removing the pins as you go. Where a lower hill overlaps the edge being stitched, temporarily fold the upper-layer hill back so it isn’t caught in the current seam. Optional: After sewing each hill, flip the quilt top over and trim away the excess fabric of the previous hill, leaving a 1⁄4" seam allowance.
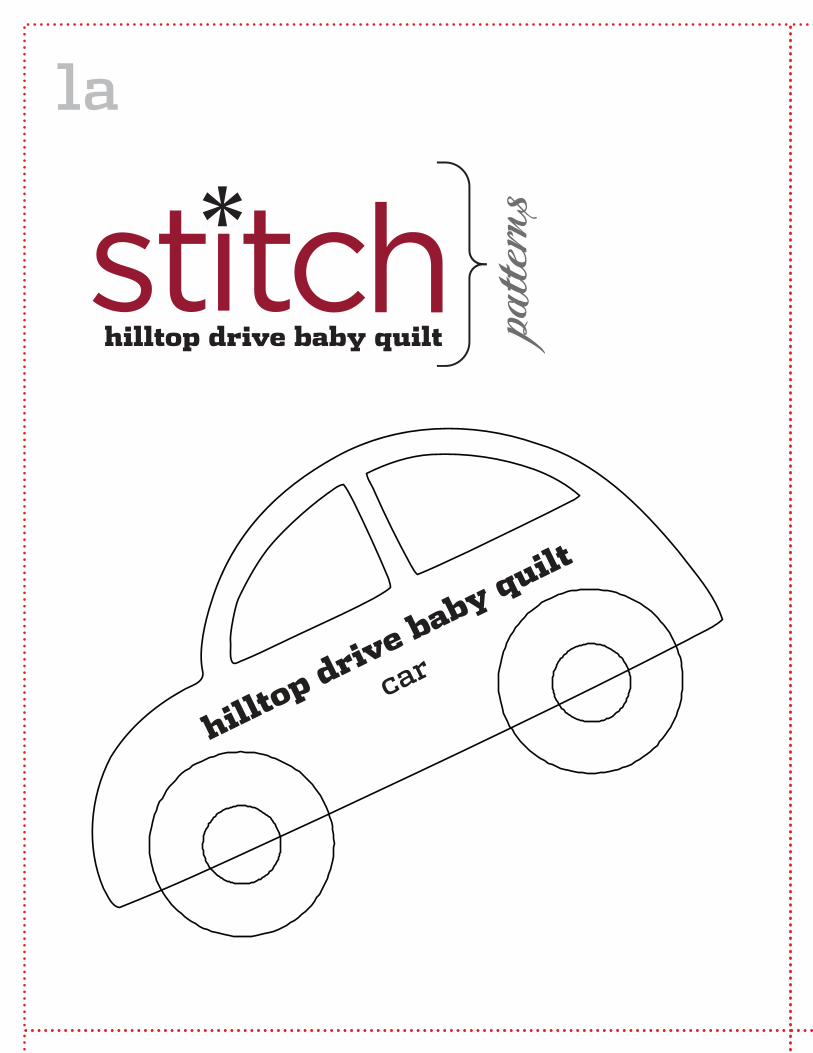
prepare appliquéS9 Trace each separate shape from the provided Car and Tree templates onto the paper side of fusible web, leaving at least 1⁄2" between the shapes.0 Roughly cut each shape about 1⁄4" outside the traced line. Optional: To reduce stiffness, cut the center out of the fusible shape, leaving a 1⁄4" margin of fusible web inside the line.- Following the manufacturer’s instructions, press the fusible-web shapes onto the wrong sides of the corresponding (or desired) fabrics as follows. Press the tree trunk and car tires onto fabric C, the tree leaves onto fabric F, the car windows and hubcaps onto fabric G, and the car body onto fabric H.
= When cool, cut out each fused shape directly on the traced line. Referring to the templates for placement, peel off the paper backing and fuse the windows to the car body and the hubcaps to the tires. Make sure the car body and tires are still backed with paper so they don’t stick to the pressing surface.
appliquéq Using a zigzag stitch 2.0 mm wide and 0.3–0.4 mm long, sew the car window and hubcaps to the car body and tires with white thread. The right swing of the needle should fall into the foundation fabric immediately beside the appliqué, while the main body of the stitches falls on the appliqué itself. Pivot frequently with the needle in the foundation fabric for smooth curves. When you have sewn all the way around the shapes, pull the thread ends to the back and knot them.w Peel the paper backing off the remaining appliqué shapes (including the car body and tires). Arrange them on the quilt top, referring to the photo above for placement or placing them as desired. When you’re satisfied, fuse the appliqués in place, being sure to fuse the car body before the wheels.e Matching thread color to the appliqué piece, zigzag stitch around the
edges of each appliqué as described in Step 13.
quilt & FiniShr Square up the edges of the completed quilt top, if necessary.t Cut the backing fabric 33" wide × 36" long. Cut the batting 32" wide × 35" long. With the backing wrong side up, center the batting on top, then center the quilt top right side up on the batting to create a quilt "sandwich." Baste the 3 layers together with safety pins or basting spray.y With matching or invisible thread and a straight stitch 2.5–3.0 mm long, stitch through all layers immediately beside the tree, the car, and each hill. Use a regular presser foot, a walking foot, or free-motion stitching for the quilting; work in the method with which you’re most comfortable. To further highlight the shape of the hills and hold the quilt together, quilt a few lines in each hill, parallel to the curved hilltop. Vary the lines’ length and spacing. Quilt along the hills within the landscape print or around the clouds or other shapes in an alternate background fabric.u Trim the batting and backing to match the quilt top. Cut 4 strips 2" wide across the width of the binding fabric and join into a continuous length. Press the binding in half, lengthwise, with wrong sides together. Follow the instructions under Binding with Mitered Corners, option B, in Sewing Basics to bind the quilt edges.
Kevin KosBaB is a writer, an editor, and a pattern designer. His modern quilts and sewing projects have appeared in Stitch and American Patchwork & Quilting, and his Feed Dog Designs patterns are available on his website at feeddog.net.
page 16 of 31visit sewdaily.com
GettinG Started Basic techniques + terms you’ll need to know for the pattern you have downloaded.guide
Button + Buttonhole placement markS Solid lines indi-cate buttonholes. A large open circle is the button symbol and shows placement.
cuttinG lineS Multisize patterns have different cutting lines for each size.
place on fold Bracket This is a grainline marking with arrows pointing to the edge of the pattern. Place on the fold of the fabric so that your finished piece will be twice the size of the pattern piece, without adding a seam.
Grainline The double-ended arrow should be parallel to the lengthwise grain or fold unless specifically marked as crosswise. Bias grainlines will be diagonal.
notcheS Notches are triangle-shaped symbols used for accurately matching seams. Pieces to be joined will have corresponding notches.
dartS Lines and dots mark darts. The lines show where the stitching will be, and the dot shows the position of the dart point (signaling the point, at the end of the dart, where your stitching should end).
pattern dotS Filled circles indicate that a mark needs to be made (often on the right side of the fabric) for placement of elements such as a pocket or a dart point. Mark by punching through the pat-tern paper only, then mark on the fabric through the hole.
SlaSh markS A dashed line (some-times appearing with pattern dots) indicates an area to be slashed. Further instructions for making the slash will be included in the pattern instructions.
pattern SymBolS & markinGSaSSemBlinG full-Size pattern printout1 | When prepar-ing to print the PdF, make sure that you are printing it at 100% and that there is no scaling. Check the settings for page scaling (should be “None”) and check the preview to make sure that you will be printing at full size. Make sure that the box labeled “Au-to-Rotate and Center” is unchecked (instruc-tions apply specifically to Adobe Reader; if using another PdF reader, check for similar settings).2 | To ensure that the pattern has printed at the correct scale, check the size of the TEST SQUARE. The Test Square should be 2" × 2”.3 | To begin assembling the pattern, cut off or fold the dotted margin around each page.4 | The pages are numbered in rows, so the first row of pages is numbered 1a, 1b, 1c, etc. Line up the rows and match the dotted lines together so they overlap. Tape the pages together. Use the illustrated guide to match each piece. Once the pattern is complete, find your size, pin the pattern to the fabric, and fol-low the coordinating line to cut out or trace the pattern.
layout, markinG & cuttinG GuidelineS1 | Find the lines that correspond to your size and trace the pattern pieces, either on tissue paper or directly onto the fabric, using tracing paper and a tracing wheel. 2 | If you are cutting pattern pieces on the fold or cutting two of the same pattern piece, fold the fabric in half, selvedge to selvedge, with right sides together. Note that this technique is not appropriate for some fabrics, so check the project instructions if you are unsure. 3 | Lay the pattern pieces on the fabric as close together as possible. double-check that all pattern pieces to be cut “on the fold” are placed on the fold.4 | Make sure all pattern pieces are placed on the fabric with the grainline running parallel to the lengthwise grain unless a crosswise or bias grainline is present. 5 | Copy all pattern markings onto the wrong side of the fabric unless otherwise noted.6 | Read through all cutting instructions listed in the project instructions for directions on how many pattern pieces to cut out of your fabric and interfacing.7 | Use weights to hold the pattern pieces down and use pins to secure the corners as needed.8 | Cut the pieces slowly and carefully.
Test Square2" 2"
ASYMMETRICAL FOLDS SKIRTRIGHT FRONT
cut 2 XXxx
XL
L
M
S
XS
XLLMSXS
cut on foldother text
selvedges foldback
LABELS FOR YIELDS
ASYMMETRICAL FOLDS SKIRTRIGHT FRONT
cut 2 XXxx
XL
L
M
S
XS
XLLMSXS
cut on foldother text
selvedges foldback
LABELS FOR YIELDS
ASYMMETRICAL FOLDS SKIRTRIGHT FRONT
cut 2 XXxx
XL
L
M
S
XS
XLLMSXS
cut on foldother text
selvedges foldback
LABELS FOR YIELDS
ASYMMETRICAL FOLDS SKIRTRIGHT FRONT
cut 2 XXxx
XL
L
M
S
XS
XLLMSXS
cut on foldother text
selvedges foldback
LABELS FOR YIELDS
ASYMMETRICAL FOLDS SKIRTRIGHT FRONT
cut 2 XXxxX
L
L
M
S
XS
XLLMSXS
cut on foldother text
selvedges foldback
LABELS FOR YIELDS
ASYMMETRICAL FOLDS SKIRTRIGHT FRONT
cut 2 XXxx
XL
L
M
S
XS
XLLMSXS
cut on foldother text
selvedges foldback
LABELS FOR YIELDS
ASYMMETRICAL FOLDS SKIRTRIGHT FRONT
cut 2 XXxx
XL
L
M
S
XS
XLLMSXS
cut on foldother text
selvedges foldback
LABELS FOR YIELDS
ASYMMETRICAL FOLDS SKIRTRIGHT FRONT
cut 2 XXxx
XL
L
M
S
XS
XLLMSXS
cut on foldother text
selvedges foldback
LABELS FOR YIELDS
sewdailysewdaily
© F+W Media, inc. All rights reserved.
F+W Media grants permission for any or all pages in this issue to be copied for personal use.
children’s sewing patterns: 4 FREE Sewing Patterns for Kids
page 17 of 31visit sewdaily.com

sewdailysewdaily
children’s sewing patterns: 4 FREE Sewing Patterns for Kids
© F+W Media, inc. All rights reserved.
F+W Media grants permission for any or all pages in this issue to be copied for personal use.
page 18 of 31visit sewdaily.com
sprin
gtime b
ibs
strawberry
leaf
sprin
gtime b
ibs
strawberry
sprin
gtime b
ibs
carrot leaf
springtime bibscarrot
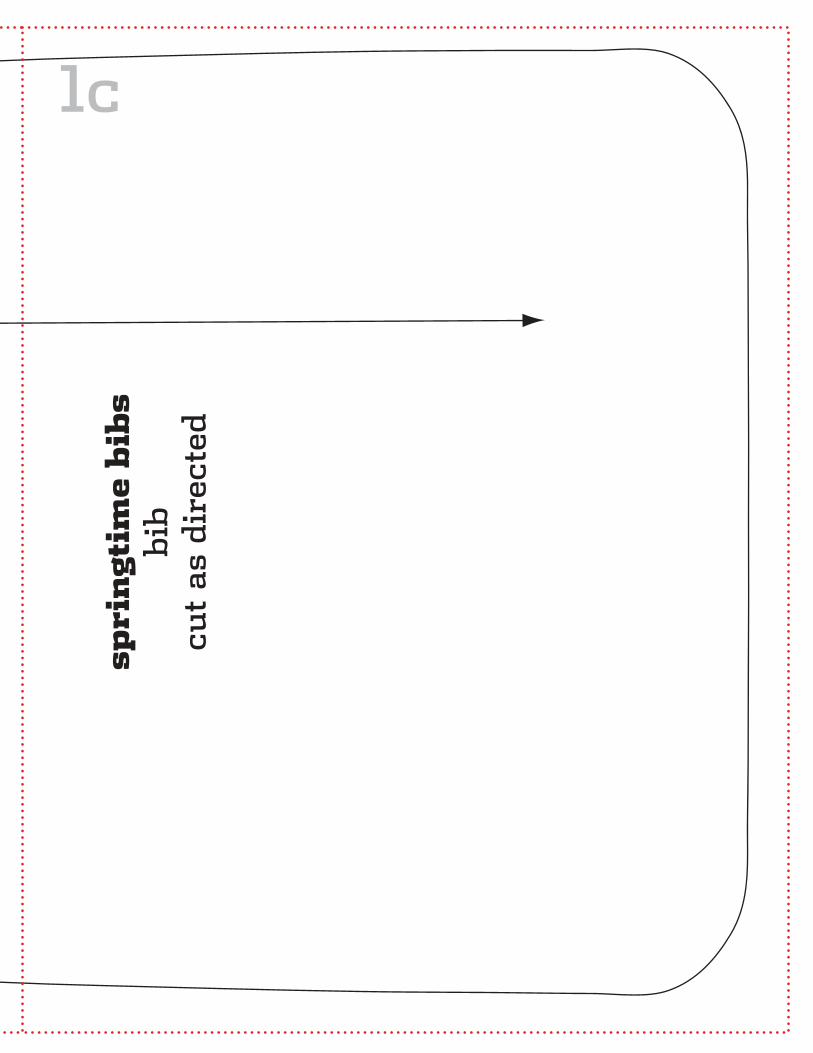
springtime bibsbib
cut as directed
SPRIN
GTIM
E BIB
S
1a1b
1c
Springtime Bibs Patterns + Templates

springtime bibsstrawberry leaf
springtime bibsstrawberry
springtime bibscarrot leaf
spri
ngt
ime
bib
sca
rrot
SPRINGTIME BIBS
1a 1b

1b 1c
spri
ngt
ime
bib
sbi
bcu
t as
dir
ecte
d
1c
sewdailysewdaily
children’s sewing patterns: 4 FREE Sewing Patterns for Kids
© F+W Media, inc. All rights reserved.
F+W Media grants permission for any or all pages in this issue to be copied for personal use.
page 22 of 31visit sewdaily.com
hilltop drive baby quilttree
(reversed for tracing
hil
ltop
dri
ve
bab
y q
uil
th
ills
reve
rse
tem
plat
e fo
r h
ills
m
arke
d in
das
hed
lin
es
ceru
lean
(B)
brow
n (C
) flor
al(D
)
gree
n (
A)
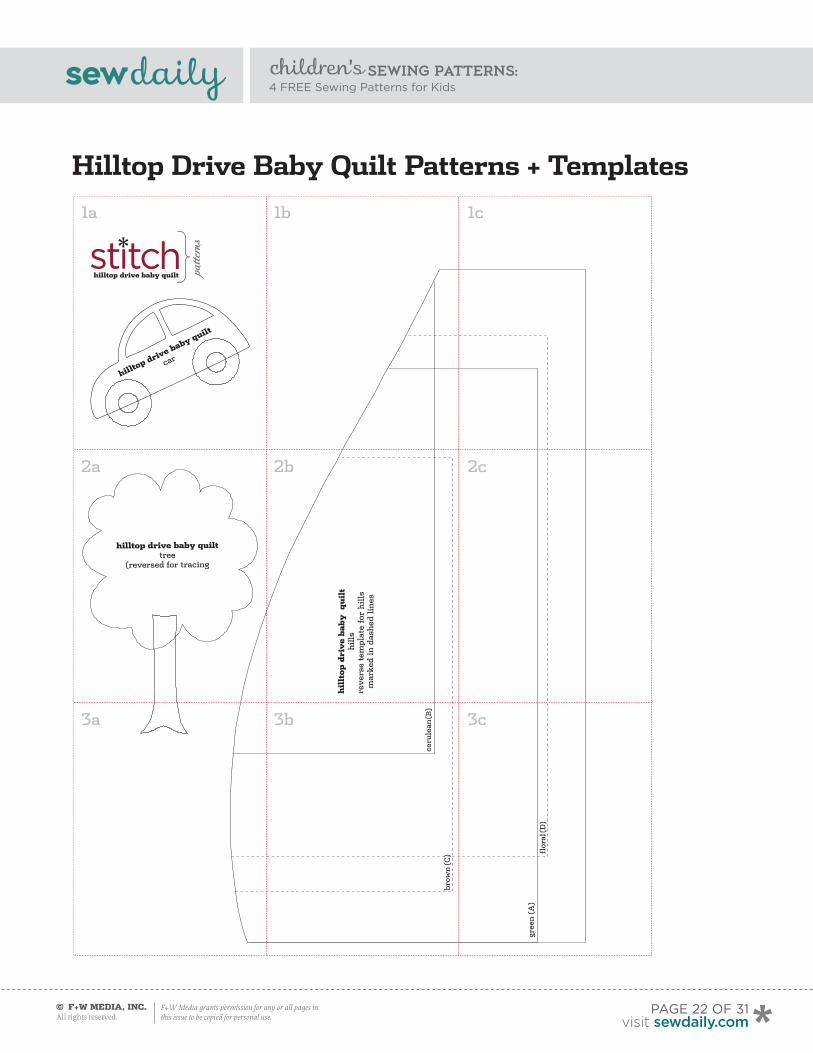
hilltop drive baby quilt
car
hilltop drive baby quilt
1a 1b 1c
2a 2b 2c
3a 3b 3c
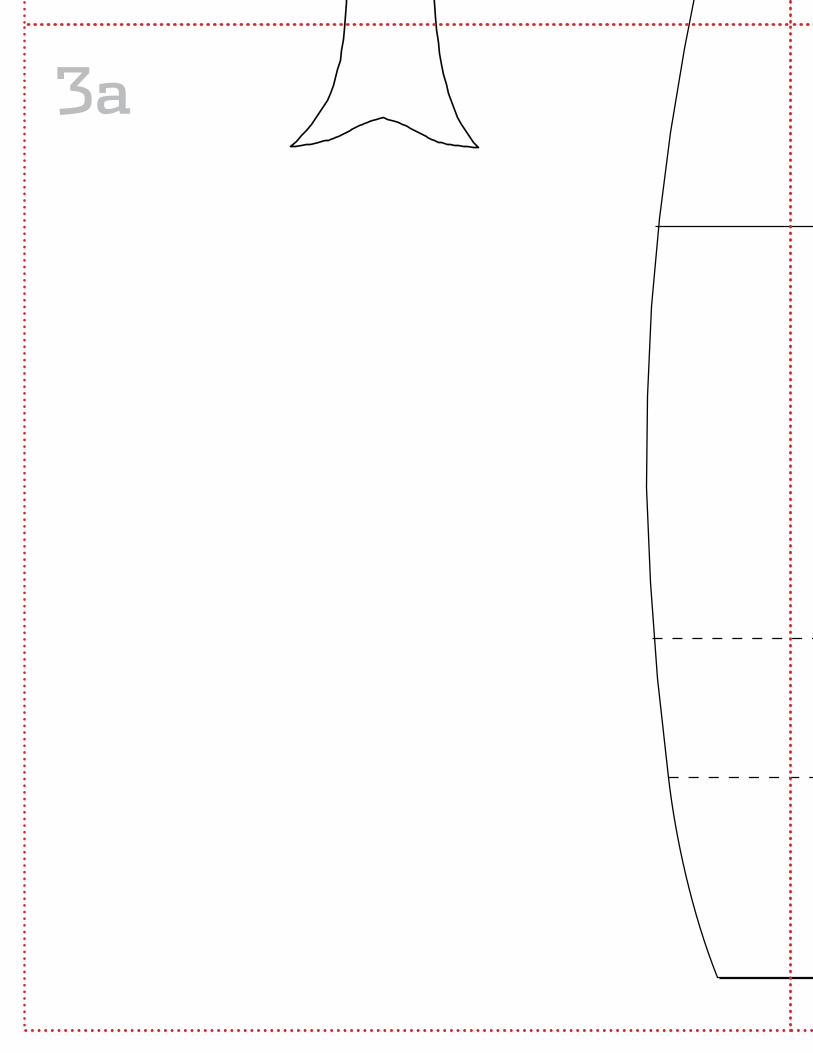
Hilltop Drive Baby Quilt Patterns + Templates
hilltop drive baby quilt
car
hilltop drive baby quilt
1a
1b

1c

hilltop drive baby quilttree
(reversed for tracing
2a

hil
ltop
dri
ve
bab
y q
uil
th
ills
reve
rse
tem
plat
e fo
r h
ills
m
arke
d in
das
hed
lin
es
ceru
lean
(B)
2b
2c
3a
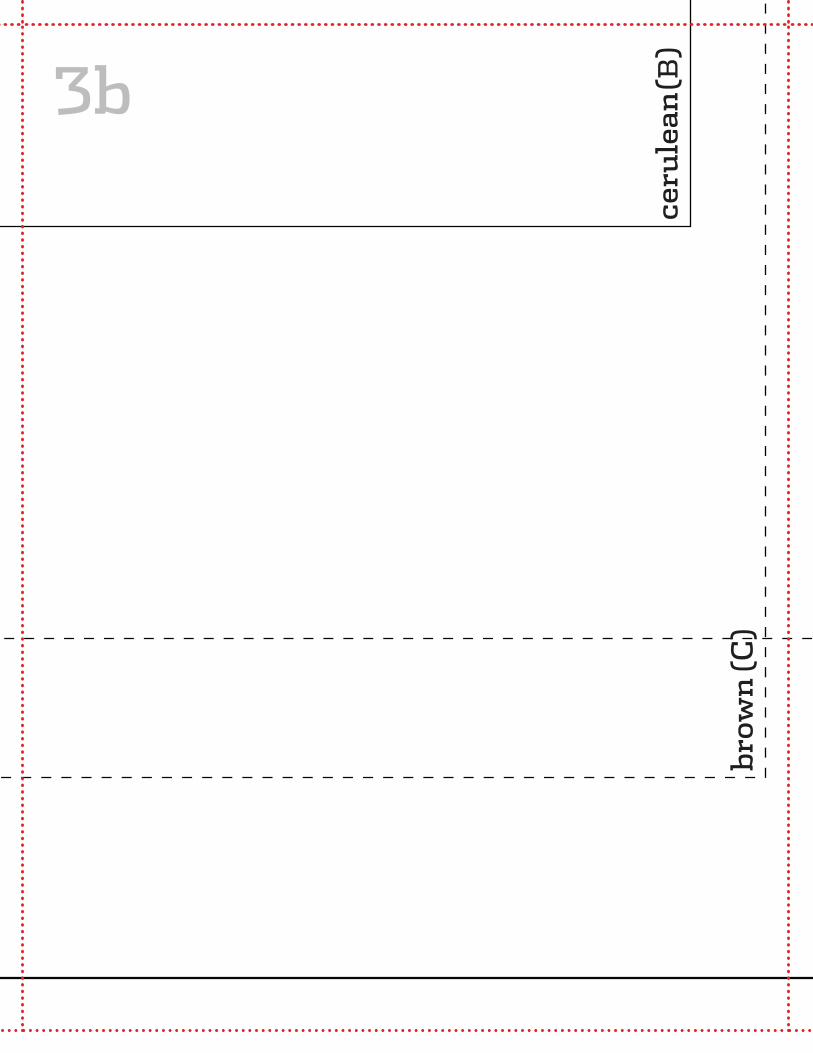
ceru
lean
(B)
brow
n (C
)
3b

brow
n (C
) flor
al(D
)
gree
n (
A)
3c