cupss self-paced training series - us epa · slide 1 . cupss self-paced training series ... asset...
TRANSCRIPT

Slide 1
CUPSS Self-Paced Training Series for Small Drinking Water and Wastewater Systems
Lesson 4: My O&M and Search
Navigation: Use the arrows in the bottom-middle of the screen to navigate backward to previous screens or forward through the lesson screens. When you enter an interactive tool, check the notes to receive instruction on using that tool’s navigation. If you do not want to hear the audio, set the sound scale on the bottom left to zero or mute the computer’s sound. Welcome to Lesson 4 of the Check Up Program for Small Systems (CUPSS) Self-Paced Training Series! This lesson will explain the fundamentals of using the My O&M module and how your community can get started. Before you begin using this self-paced training, you might have a few questions about using CUPSS for managing your assets, tasks, and finances. In this lesson, we'll provide information about how the CUPSS software can help you manage your tasks and work orders. At the beginning of the lesson, we’ll review the five core questions of asset management to give you a sense of where operations and maintenance fits into the overall picture. The My O&M module will then be introduced and the lesson will conclude with a review of how to use the Search feature within CUPSS to readily create reports. Let’s get started!

Slide 2
Objectives for Lesson 4
• Learn how to create your operation and maintenance tasks
• Learn how to search and print reports on assets and work order tasks
Navigation: Use the arrows in the bottom-middle of the screen to navigate backward to previous screens or forward through the lesson screens. When you enter an interactive tool, check the notes to receive instruction on using that tool’s navigation. If you do not want to hear the audio, set the sound scale on the bottom left to zero or mute the computer’s sound. Lesson 4 will introduce you to the My O&M module where you’ll learn how to enter your operation and maintenance (O&M) tasks. This lesson will also show you how the search features can be used to display and print reports of your assets that you entered in the My Inventory module (which you learned about in Lesson 3) and your tasks or work orders that you entered in the My O&M module which you’ll learn about in this lesson, Lesson 4.

Slide 3
Main Menu -What We’ll Cover
Part 2: Entering your tasks in the My O&M module
Part 1: Understanding the five core questions of asset management
Part 3: Using the Search feature
Quiz Glossary
Navigation: Click a button on the slide to begin a part of the lesson. You can start at the beginning or skip ahead the choice is yours. You may also choose “Quiz” to find test questions or “Glossary” to find term definitions. If you do not want to hear the audio, set the sound scale on the bottom left to zero or mute the computer’s sound. This lesson is designed to familiarize you with the My O&M Module and the Search feature. Each lesson within the Self-Paced Training Series begins with an overview of the five core questions of asset management. Here’s what will be covered in this lesson:
• Part 1: Understanding the five core questions of asset management • Part 2: Entering your tasks in the My O&M module • Part 3: Using the Search feature

Slide 4
What Are We Learning?
Part 1: Understanding the five core questions of asset management
Main Menu
Navigation: Use the arrows in the bottom-middle of the screen to navigate backward to previous screens or forward through the lesson screens. When you enter an interactive tool, check the notes to receive instruction on using that tool’s navigation. If you do not want to hear the audio, set the sound scale on the bottom left to zero or mute the computer’s sound. For each lesson within the Self-Paced Training Series, you’ll start with the basics. Let’s review the five core questions of asset management.

Slide 5
PROPERTIESAllow user to leave interaction: After viewing all the stepsShow ‘Next Slide’ Button: Show upon completionCompletion Button Label: Next Slide
Navigation: Use the arrows in the bottom-middle of the screen to navigate backward to previous screens or forward through the lesson screens. Click on the buttons on the left side or click on the arrows at the top of the slide to navigate through the information. If you do not want to hear the audio, set the sound scale on the bottom left to zero or mute the computer’s sound.

Introduction When you start thinking about asset management, there are five core questions that will help you get the ball rolling. The five core questions of an asset management framework are:
• What Is The Current State Of The Utility’s Assets? • What Is The Utility’s Required Sustained Level Of Service? • Which Assets Are Critical To Sustained Performance? • What Are The Utility’s Best “Minimum Life-Cycle-Cost” Capital Improvement
Project (CIP) and Operation and Maintenance (O&M) Strategies? • What Is The Utility’s Best Long-term Financing Strategy?
You’ll soon see how these questions all relate to effective asset management!

Question 1 What Is The Current State Of The Utility’s Assets? The first step in managing a utility’s assets is knowing their current state. Because some of this information may be difficult to find, estimates can be used when necessary. Over time, as assets are replaced or rehabilitated, the utility’s inventory will become more accurate. Questions to ask:
• What does the utility own? • Where is it? • What is its condition? • What is its useful life? • What is its value?

Question 2 What Is The Utility’s Required Sustained Level Of Service? Knowing the utility’s required “sustainable” level of service will help the utility implement an asset management plan and communicate to stakeholders what is being done. The required sustainable level of service is the set of features that describe the utility’s short- and long-term performance standards as well as the customer’s expectations. Questions to ask in determining the utility’s Level of Service (LOS):
• What do the regulators require? Find out what the utility has to provide and how. • What are the utility’s performance goals? Or what services is the utility currently
providing? Find out if the services can be improved. • What level of service do the stakeholders and customers demand or expect?
Another way to ask this is ‘what is the best way to meet the needs of the customers’? Find out from customers what services are most important to them.
• What are the physical capabilities of the assets? Or what else can the utility do in it’s current capacity? Figure out if the utility is doing all it can do.

Question 3 Which Assets Are Critical To Sustained Performance? Because assets fail, how you manage the consequences of failure is vital. Not every asset presents the same failure risk, or is equally critical to the drinking water or wastewater system’s operations. Therefore, it is important to know which assets are required to sustain the utility’s performance. Critical assets are those that you decide have a high risk of failing (like if the asset is old or in poor condition) and major consequences if they do fail (major expense, system failure, safety concerns, etc.). You can decide how critical each asset is and rank them accordingly. Questions to ask:
• How can assets fail? Different things contribute to an asset failing. This can include: Demand exceeds design capacity (which comes from population growth) or physical deterioration from age, usage, or nature.
• How do assets fail? The type of failure depends on the type of asset: Water pipes can leak or disinfection equipment can stop working.
• What are the likelihoods (meaning the probabilities) and the consequences of asset failure? Likelihoods of failure depend on age and condition. Consequences of failure depend on how critical the asset is: Is it the Chlorinator in a small system that has no other backup? Are the customers logging more complaints than comments?
• What does it cost to repair or replace the asset? Cost depends upon if the utility has to repair, rehabilitate, or replace the asset.

• What are the other costs (such as social costs or environmental costs) that are associated with asset failure?
These are important values to know, understand and consider in any decision-making process. Running a utility is fundamentally a business operation and should be treated that way.
Question 4 What Are The Utility’s Best “Minimum Life-Cycle-Cost” Capital Improvement Project (CIP) and Operation and Maintenance (O&M) Strategies? It is important to recognize that operations and maintenance (O&M), personnel, and the capital budget account for an estimated 85 percent of a typical system’s expenses. Asset management enables a system to determine the lowest cost options for providing the highest level of service over time. Utilities want to optimize the work O&M crews are doing, where they are doing it, and why. An asset management program helps a utility make risk-based decisions by choosing the right project, at the right time, for the right reason. Questions to ask:
• What alternative management strategies exist? Run to failure may be a very real option for some utilities. Is it necessarily the best option?
• What strategies are the most feasible for the organization?

Question 5 What Is The Utility’s Best Long-term Financing Strategy? Knowing the full economic costs of services provided is critical for making sound financial decisions and developing an effective long-term funding strategy. Having this information in an asset management plan will help tell the utility’s “story.” An asset management plan that refers to the utility’s sustainable level of service is good for communicating this information to decision makers and customers. The utility can decide how to fund it’s strategies by knowing the system’s financial forecast. Questions to ask:
• Do we have enough funding to maintain our assets for our required level of service?
• Is our rate structure sustainable for our system’s long-term needs?

Slide 6
What Are We Learning?
Part 2: Entering your tasks in the My O&M module
Benefits to My Utility
CUPSS allows you to track all of the tasks associated with each utility. Since CUPSS allows several users to use CUPSS, everyone can manage their tasks in CUPSS.
Main Menu
Navigation: Use the arrows in the bottom-middle of the screen to navigate backward to previous screens or forward through the lesson screens. When you enter an interactive tool, check the notes to receive instruction on using that tool’s navigation. If you do not want to hear the audio, set the sound scale on the bottom left to zero or mute the computer’s sound. In Part 2, you’re going to learn how to enter your tasks in the My O&M module. Benefits to My Utility CUPSS allows you to track all of the tasks associated with each utility. Since CUPSS allows several users to use CUPSS, everyone can manage their tasks in CUPSS.

Slide 7
MY O&M
Operations&
Maintenance
Navigation: Use the arrows in the bottom-middle of the screen to navigate backward to previous screens or forward through the lesson screens. When you enter an interactive tool, check the notes to receive instruction on using that tool’s navigation. If you do not want to hear the audio, set the sound scale on the bottom left to zero or mute the computer’s sound. Let’s go ahead and jump right into My O&M.

Slide 8
Asset Management Core QuestionsCUPSS Modules
Current State of Assets
1
Level of Service
2
CriticalAssets
3Minimum Life Cycle Cost
4
Long-term Funding Plan
5
Asset Management
• My Inventory• My O&M• My CUPSS Plan
•My CUPSS Plan
• My Inventory • My Asset Check Up• My CUPSS Plan
• My Finances• My O&M• My Financial Check Up• My CUPSS Plan
• My Finances• My Financial Check Up• My CUPSS Plan
Navigation: Use the arrows in the bottom-middle of the screen to navigate backward to previous screens or forward through the lesson screens. When you enter an interactive tool, check the notes to receive instruction on using that tool’s navigation. If you do not want to hear the audio, set the sound scale on the bottom left to zero or mute the computer’s sound. This module focuses on core questions #1 and #4.
1. What Is The Current State Of The Utility’s Assets? 4. What Are The Utility’s Best “Minimum Life-Cycle-Cost” CIP And O&M Strategies?

Slide 9
My O&M
• How to manage your tasks• What information is
important to consider in a task
• How to print customized reports about different tasks
For the My O&M module, you will be learning:
CUPSS User’s Guide – Section 6
Navigation: Use the arrows in the bottom-middle of the screen to navigate backward to previous screens or forward through the lesson screens. When you enter an interactive tool, check the notes to receive instruction on using that tool’s navigation. If you do not want to hear the audio, set the sound scale on the bottom left to zero or mute the computer’s sound. Managing your O&M tasks will help you learn more about your assets. Being able to track tasks that are associated with assets will help you know their location and help indicate their condition and consequence of failure. In this module, you’ll learn what information is important to consider in a task and you’ll learn how to group your tasks in a way that makes sense to you. In the My O&M module, you will be learning:
• How to manage your tasks • What information is important to consider in a task • How to print customized reports about different tasks

Slide 10
Why Track O&M?
• Develop good recordkeeping habits
• Gain institutional knowledge of your utility
• Optimize your assets
Navigation: Use the arrows in the bottom-middle of the screen to navigate backward to previous screens or forward through the lesson screens. When you enter an interactive tool, check the notes to receive instruction on using that tool’s navigation. If you do not want to hear the audio, set the sound scale on the bottom left to zero or mute the computer’s sound. Why track your O&M tasks? It’s always good practice to know what you’ve done in the past to help determine what you need to do in the future. Keeping track of your O&M tasks will help build your records. You’ll know exactly when to perform tasks and how the work orders are usually done. Knowing the maintenance history before an asset needs rehabilitation will help you plan O&M for future assets. Remember that planned maintenance costs are approximately 1/3 less than unplanned maintenance for the same task so it’s always important to plan ahead when possible. Tracking O&M will help:
• Develop good recordkeeping habits • Gain institutional knowledge of your utility • Optimize your assets

Slide 11
Think about the Asset Management Plan
Tracking your O&M tasks will help you develop an
O&M strategy for your asset management plan. CUPSS
gives you a template to describe your routine,
preventive, and emergency maintenance approaches.
Navigation: Use the arrows in the bottom-middle of the screen to navigate backward to previous screens or forward through the lesson screens. When you enter an interactive tool, check the notes to receive instruction on using that tool’s navigation. If you do not want to hear the audio, set the sound scale on the bottom left to zero or mute the computer’s sound. It’s always good to have a strategy or plan when an asset fails. Your asset management plan will contain descriptions of your routine, preventive, and emergency maintenance approaches. CUPSS will provide this template in your My CUPSS Plan.

Slide 12
Navigate to My O&M
Navigation: Use the arrows in the bottom-middle of the screen to navigate backward to previous screens or forward through the lesson screens. When you enter an interactive tool, check the notes to receive instruction on using that tool’s navigation. If you do not want to hear the audio, set the sound scale on the bottom left to zero or mute the computer’s sound. These are ways that you can get to the My O&M module from the CUPSS Homepage. You can either click on the:
1. “Enter a New Task or Work Order” link in the main activity window; 2. Calendar on the top right activity window 3. My O&M module button at the top of the screen
Slide 13
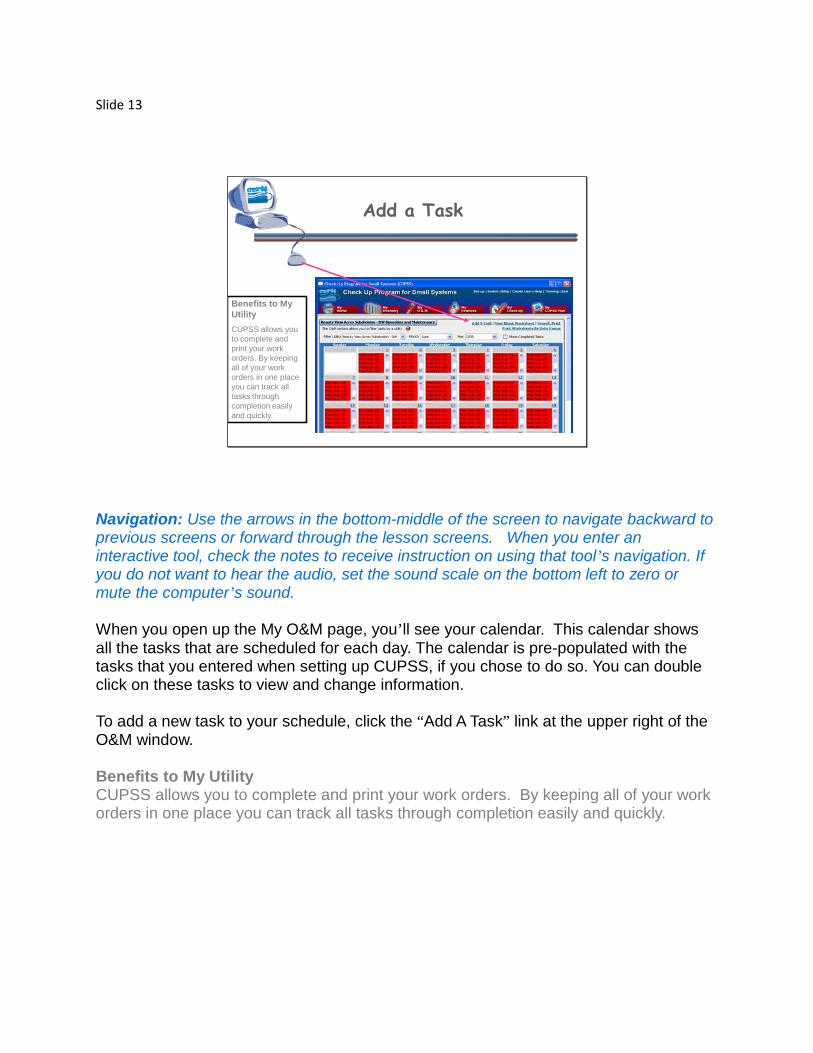
Add a Task
Benefits to My UtilityCUPSS allows you to complete and print your work orders. By keeping all of your work orders in one place you can track all tasks through completion easily and quickly.
Navigation: Use the arrows in the bottom-middle of the screen to navigate backward to previous screens or forward through the lesson screens. When you enter an interactive tool, check the notes to receive instruction on using that tool’s navigation. If you do not want to hear the audio, set the sound scale on the bottom left to zero or mute the computer’s sound. When you open up the My O&M page, you’ll see your calendar. This calendar shows all the tasks that are scheduled for each day. The calendar is pre-populated with the tasks that you entered when setting up CUPSS, if you chose to do so. You can double click on these tasks to view and change information. To add a new task to your schedule, click the “Add A Task” link at the upper right of the O&M window. Benefits to My Utility CUPSS allows you to complete and print your work orders. By keeping all of your work orders in one place you can track all tasks through completion easily and quickly.

Slide 14
PROPERTIESAllow user to leave interaction: After viewing all the stepsShow ‘Next Slide’ Button: Show upon completionCompletion Button Label: Next Slide
Navigation: Use the arrows in the bottom-middle of the screen to navigate backward to previous screens or forward through the lesson screens. Click on the information and arrow buttons on the screen or click on the arrows at the top of the slide to navigate through the information. If you do not want to hear the audio, set the sound scale on the bottom left to zero or mute the computer’s sound. When you click the “Add A Task” link, this will open the Task Details form. This form is divided into five main sections:

Task This section provides the ability to enter the Task Name, select from a drop down the Task Type, select whether the task is a Capital Improvement Project, enter the Task Details/Notes, enter the Cost of the Task, the Percent of Task Deferred Maintenance, and select from a drop down the Staff Assigned to complete the task. Asset Information This section allows you to select an asset if the task you are entering is associated with an asset that has already been entered into CUPSS or will be entered at this time. You are able to Select an Existing Asset from the drop down or can Enter a New Asset, select from a drop down the Asset Category and the Asset Type. Monitoring or Chemical Added This section enables you to track monitoring of operational values, such as pH, conductivity, as well as chemical additions. You are able to select the Chemical (or other operational value) from a drop down or can add a new value, enter the Amount (i.e., the numeric size of the amount), the Chemical Unit, and select the Date and Time it was added. After this information has been added or selected, click the “Add” link to add this information to the text box at the bottom of this section. Schedule

This section is where you set the schedule for a particular task. You can enter the Task Start date, select whether you would like the task to appear in your Pop-Up Reminders (this is the default), enter the Length of the Task (in days), the Completion Date, the Time it was completed, select from a drop down the Staff who Completed the task, the Frequency of the task, enter the Recurrence End Date, and select the Recurrence. Optional Parts Information This section allows you to enter specific information on the name and cost of the parts that may be associated with this task. You can select a Manufacturer/Supplier from a drop down or enter a new entry, can enter the Parts Name, the Parts Number, the Parts Cost, and the Labor Maintenance Cost. Once this information has been entered, click the “Add” link to add to the text box at the bottom of this section. Click on the arrows to go through each section within the Task Details screen in more detail.
Task Details Let’s take a look at the Task Details section. In this section, you will enter basic information about what tasks need to be done, such as the name, type, and staff assigned to the task. This information will provide you with the very basic information you need to manage the task. The task name that you enter will be what appears on your calendar.

Fields available in the Task Details section:
• Task Name* Enter a descriptive name for the task. • Task Type* Select the type of task from the drop down menu. If no type is
appropriate, select “Other” from the drop down menu. This activates the field below the drop down menu where you can enter a new task type. Once you save the record for this task, the new task type will be available as an option.
• Capital Improvement Project Select the Capital Improvement Project checkbox if appropriate.
• Task Details/Notes Enter details and notes for the task if necessary. • Cost of the Task Enter the cost of completing the task. • Percent of Task Deferred Maintenance Enter percentage of the overall task
costs that will be deferred to a future year. • Staff Name* Select the name of the employee who is responsible for completing
the task. Select from the drop down or add a new staff name by clicking on the “Add New Staff” link below the drop down menu.
(An “*” indicates a required field)
Asset Information

The Asset Information section allows you to associate an asset to a task, if you wish to do so. If you would like to associate an asset to a task, you can select an asset that you’ve already entered in the My Inventory module or you can add a new asset here. If you would like to add a new asset, click “Enter Asset Details” to open the Asset Inventory form in the My Inventory module to enter additional information about the asset. Fields available in the Asset Information section:
• Select Existing Asset OR Enter New Asset If the task is associated with an asset, select an asset from the drop down menu. If the appropriate asset is not an option in the drop down menu select “Other.” This activates the field below the drop down menu where you can enter the name of a new asset. Entering a new asset here adds a new record in the asset inventory.
• Select Asset Category If you select an existing asset from the field above, you will not need to select an asset category. If you enter the name of a new asset, use the drop down menu to select an asset category.
• Select Asset Type If you select an existing asset from the field above, you will not need to select an asset type. If you enter the name of a new asset, use the drop down menu to select an asset type.
Click the “Enter Asset Details” link to open the Asset Inventory form and enter additional information about the asset.

Monitoring or Chemical Added The Monitoring or Chemical Added section is where you can add information about your chemicals or monitoring parameters. This section indicates what monitoring has been done or what chemical has been added. It can be used to record monitoring parameters like pH, TOC, and turbidity as well as chemicals associated with this task. Fields available in the Monitoring or Chemical Added section:
• Select Chemical Added Select a chemical from the drop down menu. If no appropriate option is listed, select “Other.” This activates the field below the drop down menu where you can enter the name of a new chemical. Once you save this task, the new chemical will be available as an option in the drop down menu.
• Amount Added Enter the amount of the chemical added. • Chemical Unit Enter the chemical unit. • Chemical Date Enter the date the chemical was added. NOTE: Use the following
format to input this date: MM/DD/YYYY • Chemical Time Select the time the chemical was added.
Once you’ve entered information for a chemical or monitoring parameter, click the “Add” link to save the information and add the record to the table below the fields.

Schedule The Schedule section sets the start and end dates for a task (the duration of the particular task). If a task is to start and end on the same day, enter the same dates in both the Task Start and Recurrence End Date fields. For tasks that take 2 days or longer to complete, enter the appropriate dates. The default task length is one day. The Schedule section also provides reminders at recurring intervals that you can set up; this way you do not need to add tasks multiple times. For example, if you need to clean a valve once a month, the task only needs to be entered one time with information describing how often it should be repeated; the task will then appear on your calendar once a month. After the initial set-up and entry of tasks, the calendar provides a complete picture of your O&M tasks. Fields available in the Schedule section:
• Task Start* Select a start date for the task duration from the drop down menu. • Pop-up Reminder Select the checkbox if you want a popup reminder for this task • Length of Task Enter the duration or the length of the task in days. • Completion Date Indicate in the drop down menu the date that the task was
completed. This field should remain Empty until the task is completed. Once the task is completed, the completion date should be entered in the task form.

• Completion Time Indicate the time the task was completed. This field should be filled out at when the Completion Date is entered.
• Staff Completed Select the staff that completed the task. • Frequency Indicate the frequency with which this task occurs. • Recurrence End Date* Indicate the last date on which the task will occur for items
that occur repeatedly. If you do not wish the task to end, pick a date far in the future. Use one such date for all “never-ending” tasks. As this date approaches, you can update the task field.
• Select Recurrence* The choice selected for the task Frequency field determines which radio buttons are activated for the Select Recurrence field. • Daily Recurrence Indicate how often the task should occur and how many
times per day. • Weekly Recurrence Indicate how often the task should occur. • Monthly Recurrence Indicate how often the task should occur. • Annual recurrence Indicate how often the task should occur.
(An “*” indicates a required field)
Optional Parts Information The Parts Information section allows you to keep track of information such as which parts came from which manufacturers and suppliers and at what cost. This information

is useful to you when you want to get in touch with the manufacturers and suppliers with questions about their products or, if necessary, requests for replacement parts. Fields available in the Optional Parts Information section:
• Manufacturer or Supplier Select the manufacturer or supplier from the drop down menu. If the manufacturer is not an option in the drop down menu, click the “Add New Manufacturer / Supplier” link to open the Manufacturer and Supplier form
• Parts Name Indicate the name of the part. • Parts Number Indicate the part number. • Parts Costs Indicate the cost of the part (in US dollars). • Labor or Maintenance Cost Indicate the labor or maintenance cost for replacing
the part. When you have finished entering data into the task form, click “Save and Close” to save your data and close the form. If for some reason you don’t want to save any changes, click “Cancel” to close the Task Details form to close without saving your data.
Print Completed Work Order After you are finished adding all of your task information, you can print a generated work order of the information you just entered into CUPSS to keep as a paper record.

Slide 15
Completed Work Order Form
Navigation: Use the arrows in the bottom-middle of the screen to navigate backward to previous screens or forward through the lesson screens. When you enter an interactive tool, check the notes to receive instruction on using that tool’s navigation. If you do not want to hear the audio, set the sound scale on the bottom left to zero or mute the computer’s sound. This is what your completed work order form will look like. This screenshot shows a possible drinking water task that could have been added through the O&M set-up when you first set up CUPSS. As you can see, only basic information is added from the initial set up. Feel free to add additional information about these initial tasks through the O&M module.

Slide 16
Print Blank Work Order
Navigation: Use the arrows in the bottom-middle of the screen to navigate backward to previous screens or forward through the lesson screens. When you enter an interactive tool, check the notes to receive instruction on using that tool’s navigation. If you do not want to hear the audio, set the sound scale on the bottom left to zero or mute the computer’s sound. It may be useful to print a blank work order so you can write down the tasks that you already perform on a daily, weekly, monthly, or yearly basis. Sometimes it’s easier to first write information down, and then enter it into CUPSS. You can also use this blank work order form when you’re physically performing the maintenance - this way, you can write down all the information you’ll need to enter CUPSS.

Slide 17
Blank New Task Worksheet
Navigation: Use the arrows in the bottom-middle of the screen to navigate backward to previous screens or forward through the lesson screens. When you enter an interactive tool, check the notes to receive instruction on using that tool’s navigation. If you do not want to hear the audio, set the sound scale on the bottom left to zero or mute the computer’s sound. This is the blank New Task Worksheet. If you find it easier to list tasks using pen and paper, you can print out a hard copy of the New Task Worksheet. A copy of this form is also available in the Getting Started with CUPSS Workbook and Appendix B of this guide. Use the “Print Blank Worksheet” link at the top of the My O&M module to open the form.

Slide 18
Print Work Order By Date Range
Navigation: Use the arrows in the bottom-middle of the screen to navigate backward to previous screens or forward through the lesson screens. When you enter an interactive tool, check the notes to receive instruction on using that tool’s navigation. If you do not want to hear the audio, set the sound scale on the bottom left to zero or mute the computer’s sound. It may be useful to print a series of work orders so you can give them to the appropriate staff member to complete the tasks entered into CUPSS. Select the date range for the desired work orders. You can also choose to print all tasks, uncompleted tasks, or completed tasks. Fields available in the Print Worksheets by Date Range pop-up include:
• Start Date* Select the start date of the tasks that you wish to print. • End Date* Select the end date of the tasks that you wish to print. • Print* Select the option of which tasks to print:
• All Tasks Indicate if all tasks should be searched within the date range provided.
• Uncompleted Tasks Indicate if only uncompleted tasks should be searched within the date range provided.
• Completed Tasks Indicate if only completed tasks should be searched within the date range provided.
(An “*” indicates a required field)

Slide 19
What Are We Learning?
Part 3: Using the Search feature
Benefits to My Utility
Using the search module in CUPSS you can extract all of the asset and task information to help develop the O&M section of the My CUPSS Asset Management Plan.
Main Menu
Navigation: Use the arrows in the bottom-middle of the screen to navigate backward to previous screens or forward through the lesson screens. When you enter an interactive tool, check the notes to receive instruction on using that tool’s navigation. If you do not want to hear the audio, set the sound scale on the bottom left to zero or mute the computer’s sound. For Part 3 of this lesson, you’ll learn how to search for assets and tasks that you’ve entered into CUPSS. Benefits to My Utility Using the search module in CUPSS, you can extract all of the asset and task information to help develop the O&M section of the My CUPSS Asset Management Plan.

Slide 20
Search/Print
Navigation: Use the arrows in the bottom-middle of the screen to navigate backward to previous screens or forward through the lesson screens. When you enter an interactive tool, check the notes to receive instruction on using that tool’s navigation. If you do not want to hear the audio, set the sound scale on the bottom left to zero or mute the computer’s sound. The search feature allows you to find assets entered through the My Inventory module and tasks entered through the My O&M module. This feature generates a report of your assets and tasks based on the selections made under the “Search and Report” heading. Click the “Search/Print” link in the My O&M module to open the Search page.

Slide 21
Search and Report
Navigation: Use the arrows in the bottom-middle of the screen to navigate backward to previous screens or forward through the lesson screens. When you enter an interactive tool, check the notes to receive instruction on using that tool’s navigation. If you do not want to hear the audio, set the sound scale on the bottom left to zero or mute the computer’s sound. The Search and Report page can be accessed through the My Inventory module and the My O&M module. This page allows you to filter your assets by asset category, asset type, asset, asset status, and keyword and your tasks by recurrence frequency, person assigned to, task type, task date range, task status, and keyword. As you enter more assets and tasks, this tool may be valuable when identifying assets that need or may need attention in the foreseeable future. The variety of filters will allow you to customize your search results to best fit with your needs. When you have finished selecting your options click the “View Results” button to generate a search report. Options available on the Search page:
• Select Utility Select a utility to include assets for in the search. • Select Report Type

• Asset Service History Select Asset Service History if you are interested in learning about operation and maintenance tasks that have been completed for the asset.
• Work Order Select Work Order if you are interested in learning about historic information for scheduled tasks.
• Chemical Report Select Chemical Report if you are interested in learning about the chemicals associated with a particular asset or task.
• Filter by: • Asset Category Select one or more asset categories to include in the search. • Asset Type Select one or more asset types to include in the search results. • Asset Status Select one or more values for asset status to filter the results of
the search. • Asset Select one or more assets to include in the search results • Recurrence Frequency Select one or more frequencies to include in the
search results. • Person Assigned to Tasks Select one or more people (with assigned tasks) to
filter the results of the search. • Task Type Select one or more types of tasks to filter the results of the search. • Task Status Select one or more task status values to filter the results of the
search. • Task Date Range Indicate a date range to filter the results of the search. The
results will include all tasks scheduled or completed between the indicated dates (inclusive).
• Keyword Enter a keyword to include in the search results.

Slide 22
Search Results
Navigation: Use the arrows in the bottom-middle of the screen to navigate backward to previous screens or forward through the lesson screens. When you enter an interactive tool, check the notes to receive instruction on using that tool’s navigation. If you do not want to hear the audio, set the sound scale on the bottom left to zero or mute the computer’s sound. The results of your search are shown in a table. Here you can change the sort order of the data by clicking the column heading (such as “Asset” or “Condition”) so that an arrow appears next to the column name. Click the heading again to sort the list in ascending order either numerically or alphabetically (depending on the type of information in the column). Click the heading a third time to sort the records in descending order. Click the “Return” button to return to the search page or the “Print Report” button to open a printable version of the results. The Search Results Report opens as an excel file.

Slide 23
Congratulations!You are now ready for Lesson 5 of the
CUPSS Self-Paced training!
Lesson 5 Preview
• Five Core Questions Refresher
• My Finances• My Financial Check Up
Report
Main Menu
Navigation: Use the arrows in the bottom-middle of the screen to navigate backward to previous screens or forward through the lesson screens. When you enter an interactive tool, check the notes to receive instruction on using that tool’s navigation. If you do not want to hear the audio, set the sound scale on the bottom left to zero or mute the computer’s sound. Congratulations! You have completed Lesson 4 and are now ready for Lesson 5 of the CUPSS Self-Paced training! Lesson 5 Preview includes:
• Five Core Questions Refresher • My Finances • My Financial Check Up Report

Slide 24
For More CUPSS Information
• Email us at:– [email protected]
• Visit the CUPSS website at:–www.epa.gov/cupss
Navigation: Use the arrows in the bottom-middle of the screen to navigate backward to previous screens or forward through the lesson screens. When you enter an interactive tool, check the notes to receive instruction on using that tool’s navigation. If you do not want to hear the audio, set the sound scale on the bottom left to zero or mute the computer’s sound. Email us at:
Visit the CUPSS website at: www.epa.gov/cupss