ctms site management - dcrictms site management ║ 9 follow these steps to add a new site to the...
TRANSCRIPT

July 2014
CTMS Site Management
User Reference Guide

TrademarksDCRI is a registered trademark of Duke University.
Microsoft and Windows are registered trademarks of the Microsoft Corporation in the United States and other countries.
All other product names and services used throughout this document are trademarks or registered trademarks of their respective companies. The product names and services are used throughout this document in editorial fashion only and for the benefit of such companies. No such use, or the use of any trade name, is intended to convey endorsement or other affiliation with the document.
Copyright NoticeCopyright © 2014 by Information Technology Training & Documentation at Duke Clinical Research Institute. All rights reserved.
Printed in the United States of America. This publication, or any part thereof, may not be reproduced or transmitted in any form or by any means, electronic or mechanical, including photocopying, recording, storage in an information retrieval system, or otherwise, without the prior written permission of Duke Clinical Research Institute.
VersionRevision Level 9 • Published July 2014

ContentsReference Guide Conventions ............................................ viWhat You Need to Know Before Using This Reference Guide ................. vi
Visual Aids Used in This Reference Guide ................................................ vi
Site Management Overview .................................................. 7Defining Sites in the CTMS .........................................................................7
Global Data vs. Site Data .............................................................................8
Creating a Site ....................................................................... 9Querying the Site .......................................................................................10
1. Defining the Site Associations ...............................................................10
Entering a Site Number .......................................................................11
Selecting the Project Number (Protocol) .............................................11
Selecting the PI ....................................................................................12
Selecting the Region ............................................................................13
Selecting the Account ..........................................................................14
Verifying the Account Address ............................................................15
Additional Fields in the Site Record ....................................................16
2. Completing the PI’s Contact Record ......................................................17
Associating the PI’s Phone/Fax/Pager .................................................19
Changing a Site’s Principal Investigator .............................................20
3. Associating Additional Contacts to a Site ..............................................22
Associating the Contact’s Phone/Fax ..................................................26
4. Associating Additional Accounts to a Site ............................................27
Viewing Protocol Experience for an Account .....................................29
5. Verifying Activity Plans .........................................................................30
Adding an Additional Activity Plan .....................................................30
Deleting an Activity Plan .....................................................................31
Rev 09 - July 2014
CTMS Site Management ║ iii

iv ║ CTMS Site Management
Rev 09 - July 2014
Site Statuses and Milestones ............................................. 33Introducing Site Statuses ............................................................................33
Changing Site Statuses ...............................................................................36
Tracking Site Milestones ...........................................................................37
Communicating with Vendors ....................................................................39Prerequisites Required .........................................................................39Sending an Email Notification to a Vendor .........................................40
Adding Milestones to the Activity Plan .....................................................40
Tracking Site Documents.................................................... 41Tracking a Site Document ..........................................................................41
Viewing a Document’s Status History .......................................................44
Adding Documents to the Activity Plan ....................................................44
Tracking Training and Education ....................................... 45Tracking Training Activity .........................................................................45
Adding Training Activities to the Activity Plan .........................................47
Tracking Other Requirements ............................................ 49Tracking Other Activities or Qualifications ...............................................49
Adding Other Requirements to the Activity Plan ................................50
Tracking Safety Letters ....................................................... 51Tracking Letters .........................................................................................51
Adding Trial Safety Letters to the Activity Plan ........................................52
Adding Site Attachments .................................................... 53Tracking a Site Document or Letter ...........................................................53
Editing a Word Document from the Attachments Tab .........................54
Logging Conversations ...................................................... 57Logging a Conversation .............................................................................57
Viewing All Conversation Logs .................................................................60

CTMS Site Management ║ v
Rev 09 - July 2014
Tracking Issues.................................................................... 61Considerations When Using the Issues Log ..............................................61
Tracking Site-Level Issues .........................................................................61
Tracking Protocol Deviations ............................................. 63Recording a Site-Level Protocol Deviation ...............................................63
Requesting Changes to Global Contact & Account Information ........................................................................... 65Adding or Updating Contact Information ..................................................65
Adding or Updating Account Information .................................................69
Enrolling a Site Subject ...................................................... 73Subject ID Configuration Options .............................................................73
Manually Enrolling a New Subject ............................................................74
Editing a Subject Record ...........................................................................76
Appendix A: CTMS Request Form ..................................... 77

vi ║ CTMS Site Management
Rev 09 - July 2014
What You Need to Know Before Using This Reference GuideTo gain maximum benefit from the material presented in this reference guide and the associated training course, you should have a working knowledge of personal computers (PCs), Microsoft Windows, and the DCRI network. If you need training in any of these areas, send an email message to IT Training (at [email protected]) requesting assistance.
Visual Aids Used in This Reference GuideThis reference guide uses the following visual aids to indicate notes, tips, and warnings.
Note: The note icon indicates a clarification or supplemental information. Content that is too extensive for a note appears inside a shaded box instead. Read a note or a shaded box if you want to learn more about a particular step or procedure.
tip: The tip icon indicates a helpful hint or keyboard shortcut. Read a tip if you want to learn a quicker or easier way to perform a particular step or procedure.
WarNiNg: The warning icon indicates that performing a particular step or procedure under the stated conditions causes a significant problem or concern. Always read warnings.
RefeRenCe Guide Conventions

Rev 09 - July 2014
No t e s
CTMS Site Management ║ 7
Site management within DCRI’s Clinical Trial Management System (CTMS) includes many activities, such as creating sites, logging
conversations, and tracking site statuses, milestones, and documents.
Before you begin, you must understand the data structure within the CTMS as well as the relationship between global and site data.
Defining Sites in the CTMSIn the CTMS:
♦ Sites are defined by the association of the principal investigator (contact), an account, and a protocol.
♦ A contact is a person related to the clinical research process, including site personnel (for example, principal investigator or study coordinator).
♦ An account is an organization or entity, such as a hospital or clinic, but can also be a sponsor, lab, or IRB.
♦ A protocol is a trial.
site ManaGeMent oveRview

8 ║ CTMS Site Management
Rev 09 - July 2014
No t e s
Site Management Overview
Global Data vs. Site DataWhen you define a site by making contact and account associations, you are building connections to the global CTMS database. All related data elements, such as phone numbers and addresses, link to the global record.
Additions and change requests (see “Requesting Changes to Global Contact & Account Information” on page 65) must be verified by the DCRI Service Desk because they are made at the global level and could affect other protocols and sites.

Rev 9 - July 2014
No t e s
CTMS Site Management ║ 9
Follow these steps to add a new site to the CTMS. Some steps are optional, depending on the specific site you are creating. For example, not all
sites have additional accounts. Refer to your protocol’s Data Entry Guideline (DEG) document for protocol-specific questions regarding data entry in the CTMS system.
1 Define the site associations (page 10). Define the site number, project number (protocol), PI (principal investigator), region, account, and address.
2 Complete the PI’s contact record (page 17). Associate the PI’s address, email address, and phone/fax numbers to the site by selecting them from the global contact record. Also, specify the PI’s preferred communication method and start date.
3 Associate additional contacts to a site (page 22). Associate additional site personnel, such as the study coordinator, to the site.
4 Associate additional accounts to a site (page 27). If your site uses additional accounts, associate them to the site.
5 Verify Activity Plans applied to a site (page 30). Verify that the pre-defined lists of required activities—milestones, documents, training, safety letters, and other requirements—have been applied and appear on the appropriate view tab for the site.
tip: When you begin to add new data, you must eithercomplete all required fields or press the Esc key to getout of edit mode (no changes will be saved).
CReatinG a site

10 ║ CTMS Site Management
Rev 9 - July 2014
No t e s
Creating a Site
Querying the SiteBefore you create a site, always query the database in your protocol to ensure it does not already exist, to avoid duplicate entries.
1 Go to the Site Management screen.
2 Click the Query button.
3 Define your query, most commonly using the Site #, PI, and Account fields. See “Query Basics” in IT Training’s CTMS Fundamentals user reference guide, to further define your query.
4 Click Go.The results of your query appear beneath the Site Management screen toolbar. If no results are returned, the site does not currently exist in the global database and must be added.
1. Defining the Site AssociationsIf you query the database (see “Querying the Site” above) and do not find the correct site (site number/PI/account combination), then create the site by defining the main site associations: site number, project number (protocol), PI, region, account, and address.
1 Go to the Site Management screen.
2 Remember: to prevent duplicates, always query for the site first. (See previous procedure.)
3 On the site form, click New at the bottom of the window.Empty fields appear for the new site. The following pages detail how to complete these fields.
tip: To enter a new site record, you can also click the New button above the list area. In the new blank yellow line complete the Site Number, Protocol, Region, PI Last Name, and Account fields.

CTMS Site Management ║ 11
No t e s
Rev 9 - July 2014 Creating a Site
Entering a Site NumberIn the Site # field, enter the DCRI number unique within the protocol that identifies the site.
Note: Refer to your protocol’s Data Entry Guideline (DEG) document to determine the Site # naming convention you should use. Site numbers can be edited manually at any time to accommodate “renumbering” requests.
Selecting the Project Number (Protocol)1 Click the selection icon in the Project # field.
The Pick Protocol window appears.
2 Select the correct protocol by clicking to the left of the record.
3 Click OK.Selection of a protocol populates the Project Number field.

12 ║ CTMS Site Management
Rev 9 - July 2014
No t e s
Creating a Site
Selecting the PI1 In the PI Last Name field, click the selection icon.
The Pick Contacts window appears.
2 Query for the name, and then do one of the following:
♦ If the correct name is listed, select the contact by clicking to the left of the contact record, and then click OK. Proceed to “Selecting the Region” on page 13.
OR
♦ If the correct contact name is not listed, click the New button, complete the new row using the following guidelines, and then click OK.
a Enter the PI’s Last Name and First Name.
b In Address Line 1, click the selection icon to open the Pick Address window, query for the address using the City and Prov/State fields, and then do one of the following:
◊ If the correct address is listed:
1 Select the address by clicking to the left of the address record.
2 Click Add to add the address to the Selected pane.
3 Click the Address Type drop-down arrow to select the correct type of address.
4 If necessary, enter the correct date in the Start Date field.
5 Click OK.
The Pick Contact window reappears.
6 Click OK.
The new site window reappears.
◊ If the correct address is not listed:
1 Click New.
A new row appears.
2 Complete the fields, and then click OK.
The Pick Contact window reappears.
3 Click OK.
The new site window reappears.
CTMS Site Management ║ 13
No t e s
Rev 9 - July 2014 Creating a Site
c In Primary Phone, click the selection icon, select the correct phone number, and then click OK. If the phone number is not listed, click New to complete a new row.
d In Primary Fax, click the selection icon, select the correct fax number, and then click OK. If the fax number is not listed, click New to complete a new row.
e In Primary Email, click the selection icon, select the correct email address, and then click OK. If the email address is not listed, click New to complete a new row.
f In Type, select the appropriate contact record (not site affiliation) in the drop-down list.When you click OK, you submit the new contact information to the DCRI Service Desk for verification, and the new site setup window reappears.
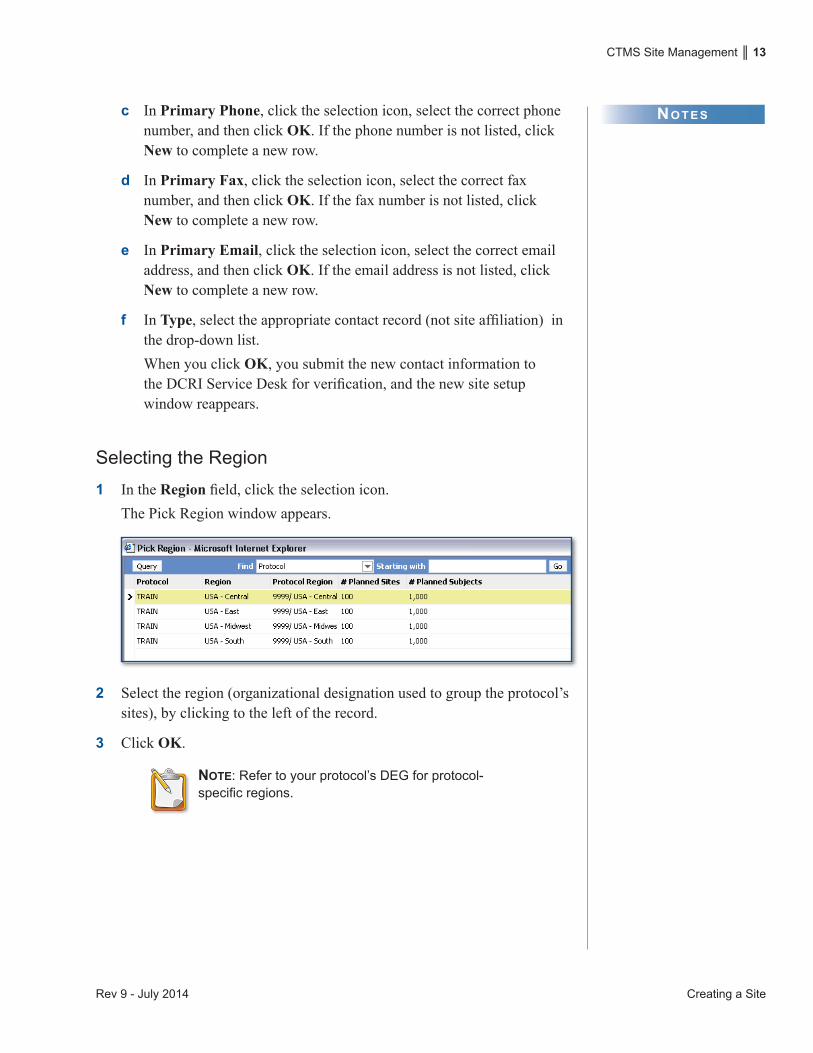
Selecting the Region1 In the Region field, click the selection icon.
The Pick Region window appears.
2 Select the region (organizational designation used to group the protocol’s sites), by clicking to the left of the record.
3 Click OK.
Note: Refer to your protocol’s DEG for protocol-specific regions.

14 ║ CTMS Site Management
Rev 9 - July 2014
No t e s
Creating a Site
Selecting the Account
1 Click the selection icon in the Account field.
The Pick Account window appears.
2 Query for the account, using the City and Prov/State fields.
3 Do one of the following:
♦ If the correct account is listed, select the account by clicking to the left of the account record, and then click OK. Proceed to Step 4.
OR
♦ If the correct account is not listed, click the New button, complete the new row using the following guidelines, and then click OK.
a Enter the Account Name.
b Select the Account Type from the drop-down list.
c If applicable, based on the Account Type, select the appropriate Account Class from the drop-down list.
d In Address Line 1, click the selection icon to open the Pick Address window, query for the address using the City and Prov/State fields, and then do one of the following:
♦ If the correct address for the account is listed, select it by clicking to the left of the address record, and then click OK.
OR
♦ If the correct address is not listed, click New, complete the new address record, and then click OK.
e In Primary Phone, click the selection icon to open the Account Phone Numbers window, select the correct phone number, and then click OK. If the correct phone number is not listed, click New, enter the new phone number record, and then click OK.
f In Primary Fax, click the selection icon to open the Account Phone Numbers window, select the correct fax number, and then click OK. If the correct fax number is not listed, click New, enter the new fax number record, and then click OK.

CTMS Site Management ║ 15
No t e s
Rev 9 - July 2014 Creating a Site
Note: Two fields are read-only.
♦ The Account Status field shows the status set by the DCRI Service Desk. This can be Active (can be associated to a site) or Inactive (cannot be associated to a site).
♦ The Account Sub-Status field shows the sub-status set by the DCRI Service Desk. This can be New (recently added to the global database), Unverified (change requested to the Service Desk, but not yet verified), or Verified (CTMS Administrator has verified account information).
When you click OK, you submit the new account information to the DCRI Service Desk for verification, and the new site setup window reappears.
4 Save the record by pressing Ctrl+S.
Verifying the Account Address1 If the account address fields are not
automatically populated after selecting the account or do not show the correct address for the site, click the selection icon in the Address Line 1 field.
The Pick Address window appears, listing addresses that are already associated to the account.
2 Select the correct address for the site by clicking to the left of the address record.
Note: If the correct address is not listed in the Pick Address window, click Cancel, and then submit a change request to add the new address (see “Adding or Updating Account Information” on page 69).
3 Click OK.
Selection of an address automatically populates the Office/Dept, Address Line 1, Address Line 2, Address Line 3, City, Prov/State, Postal Code, and Country fields.
4 Save the record by pressing Ctrl+S.
tip: To view additional information about a site, click the More Info view tab in the lower portion of the window.

16 ║ CTMS Site Management
Rev 9 - July 2014
No t e s
Creating a Site
Additional Fields in the Site RecordThe following table defines additional fields that appear in the site record. These fields, not required at site creation, are explained further throughout this guide.
Field Guidelines
SM First/Last Name
Click the selection icon in the SM Last Name field to select the Site Manager (person primarily responsible for site management of a site) from the list of Internal Personnel.
CRA First/Last Name
Click the selection icon in the CRA Last Name field to select the site’s primary Site Monitor from the list of Internal Personnel.
SSU First/Last Name
Click the selection icon in the SSU Last Name field to select the Site Startup (SSU) representative assigned to your protocol.
Site Source If applicable, select the source of the site referral from the drop-down list.
Last PI/Account Visit
Automatically calculated from the PI and account records to indicate when the last visit occurred.
Status Click the selection icon in this field and then click New to complete the new status row. See “Site Statuses and Milestones” on page 33.
Sub-Status(read-only) Automatically populated when you complete the Status field.Status Comment
Status Date
Time Zone Select the site’s time zone in the drop-down list.
Interest Pack Sent (read-only) Automatically populated when each milestone is recorded. See “Tracking Site Milestones” on page 37.Reg Pack Sent
Contract Sent (read-only) Automatically populated with information entered on the site’s Contracts tab by the protocol’s SSU representative.Contract Executed
CTMS Site Management ║ 17
No t e s
Rev 9 - July 2014 Creating a Site
Field Guidelines
Reg Complete(read-only) Automatically populated when each milestone is recorded. See “Tracking Site Milestones” on page 37.
IP Sent
Starter Box Sent
Activated for Enrollment
(read-only) Shows the date that is entered into the Completed field for the Activated for Enrollment milestone on the Milestones view tab.
Comments Enter comments about the site, up to a maximum of 1,500 characters.
# Enrolled (read-only) Automatically populated with the number of enrolled subjects for the site. This field only appears in the site’s list view.
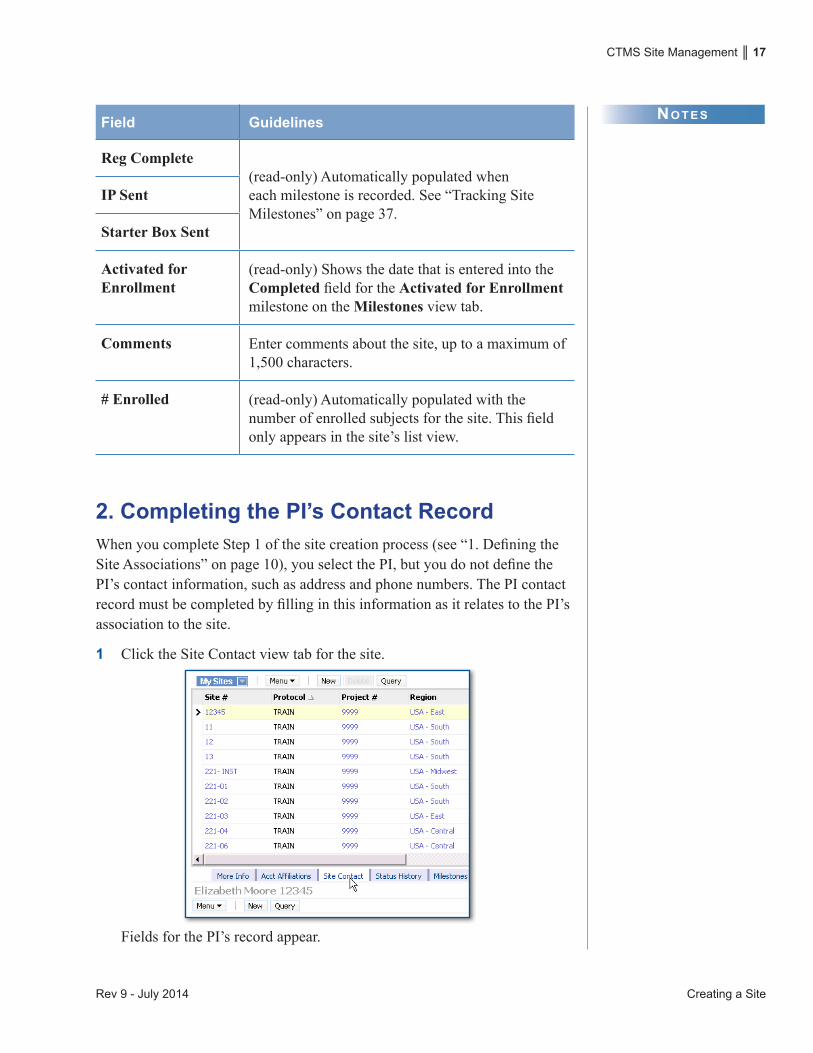
2. Completing the PI’s Contact RecordWhen you complete Step 1 of the site creation process (see “1. Defining the Site Associations” on page 10), you select the PI, but you do not define the PI’s contact information, such as address and phone numbers. The PI contact record must be completed by filling in this information as it relates to the PI’s association to the site.
1 Click the Site Contact view tab for the site.
Fields for the PI’s record appear.

18 ║ CTMS Site Management
Rev 9 - July 2014
No t e s
Creating a Site
2 Use the following table as a guideline for completing the PI’s record.
Field Guidelines
Address Line 1 1 Click the selection icon in this field to open the Pick Address window. A list of addresses associated to the global contact record appears.
2 Select the correct address by clicking to the left of the address record, and then click OK.Note: If the correct address is not listed in the Pick Address window, click Cancel and then submit a change request to add the new address (see “Adding or Updating Contact Information” on page 65).
Preferred Communication
Select the best way to communicate with the PI from the drop-down list.
E-Mail 1 Click the selection icon in this field to open the Pick Email window.
2 Do one of the following: ♦ If the correct email address is listed, select
it by clicking to the left of the email record, and then click Select. OR
♦ If the correct email address is not listed, click New, complete the email information form, click OK, and then click Select.
EDC Access Needed
Select the checkbox to indicate that the PI needs access to the clinical electronic data capture (EDC) system.
EDC Training 1 Click the selection icon in this field.The Pick EDC Training window appears.
2 Click New.3 Select the EDC system from the EDC Training
drop-down list.4 In the EDC Training Date field, enter the date
that the training occurred.5 Click Pick.

CTMS Site Management ║ 19
No t e s
Rev 9 - July 2014 Creating a Site
Field Guidelines
EDC Training Date
(read-only) Automatically populated when you complete the EDC Training field.
Start Date Enter the date that the PI’s association with the site became effective. The default value is today’s date.
End Date If necessary, enter the date that the PI’s association with the site is no longer valid.
Warning: Do not add a future end date to a record. Records with end dates will not appear in search lists throughout the CTMS.
Bio/CV/ML Contains a hyperlink to the contact’s BioSketch, CV, and/or Medical License located in a DCRI network folder. This hyperlink is added by the DCRI Service Desk.
Associating the PI’s Phone/Fax/Pager1 On the Site Contact view tab, select the PI by clicking to the left of the
contact record.
2 Scroll to the bottom of the Site Contact view tab to see the Phones applet, a sub-view attached to the Site Contact view.
3 Click Associate.

20 ║ CTMS Site Management
Rev 9 - July 2014
No t e s
Creating a Site
The Add Phones window appears, listing numbers currently associated to the PI’s global contact record.
4 Select the primary phone/fax/pager number(s) by clicking to the left of the record(s). To select more than one number, hold down the Ctrl key while clicking on the correct records.
Note: If the correct number is not listed in the Add Phones window, click Cancel and then submit a change request to add the new number. (See “Adding or Updating Account Information” on page 69.)
5 Click Add.
The numbers appear on the Phones applet. Checkmarks indicate the site primary (which may be different from the global primary) numbers for the PI. If more than one of the same number type appears, only one will be marked as primary.
Changing a Site’s Principal Investigator
Because the PI is recorded in the main site record, and not just in the Site Contact view tab, changes must be reflected in both areas.
1 Click the Site Management screen tab.
2 Query for the site.
3 In the site record, click the selection icon in the PI Last Name field.
4 Query for and select the new PI’s contact record.
5 Click OK.

CTMS Site Management ║ 21
No t e s
Rev 9 - July 2014 Creating a Site
6 Click the Site Contact view tab for the site.
7 If needed, refresh the Site Contact tab by clicking the Execute Query button in the top right corner of the application window.
On the Site Contact view tab, the new PI record appears, and the old PI record disappears. This is because the old PI is viewed as an “inactive” record now.
8 To view both PI records, select All from the Active / All drop-down list.
The new PI record shows today’s date in the Start Date field, and the old PI record shows today’s date in the End Date field.
9 If necessary, change the Start Date field for the new PI, and the End Date field for the old PI to properly reflect the date that the transition occurred.
10 Complete the empty fields (Address, Preferred Communication, EDC Access/EDC Training, E-Mail, Phones) for the new PI record.
Note: If you do not need to maintain the old PI’s record for this site, send a CTMS Request (CTMSR) form to the DCRI Service Desk ([email protected]) requesting that the record be deleted from the list of site contacts. See “Appendix A: CTMS Request Form” on page 77.

22 ║ CTMS Site Management
Rev 9 - July 2014
No t e s
Creating a Site
3. Associating Additional Contacts to a SiteUse this procedure to associate additional contacts, such as the study coordinator, to a site.
1 Go to the Site Management screen.
2 Locate the site by running a query on the Site # field. (See “Querying the Site” on page 10.)
3 Select the site by clicking to the left of the site record.
4 Click the Site Contact view tab at the bottom of the window.
By default, only active site contacts (records that do not have a date in the End Date field) display. To view all site contacts, select All from the drop-down list.
5 If necessary, query for the site contact to make sure that it does not already appear in the list of site contacts for the site.
6 On the Site Contact view tab, click New.
7 Use the following table as a guideline for completing the new record.
* indicates a required field
Field Guidelines
Role* Select the contact’s role at the site from the drop-down list.
Last Name* 1 Click the selection icon in this field.The Pick Contacts window appears.
2 Locate the name of the site contact, using the query options at the top of the window.
(continued on next page)

CTMS Site Management ║ 23
No t e s
Rev 9 - July 2014 Creating a Site
Field Guidelines
(continued) Tip: For best results, query for the contact’s name by clicking Query, and then enter the first few letters of the Last Name and the first letter of the First Name, along with the Prov/State field.
3 Do one of the following: ♦ If the correct name is listed, select the
contact by clicking to the left of the contact record, and then click OK.OR
♦ If the correct name is not listed:a Click New.
b Enter the contact’s name in the Last/First/Middle Name fields.
c In the Address Line 1 field, click the selection icon to view a list of all addresses in the CTMS database, and then query for and select an existing address or click New to add an address not already in the list, click Add, and then click OK.
d In the Primary Phone field, click the selection icon to open the Contact Phone Numbers window, click New to add the new phone number, and then click OK.
e In the Primary Fax field, click the selection icon to open the Contact Phone Numbers window, click New to add the new fax number, and then click OK.
f In the Primary Email field, click the selection icon to open the Contact Email Addresses window, click New to add the new email address, and then click OK.
(continued on next page)

24 ║ CTMS Site Management
Rev 9 - July 2014
No t e s
Creating a Site
Field Guidelines
(continued) g Click OK to close the Pick Contacts window.
The new contact information is submitted to the DCRI Service Desk for verification, and the Site Contacts view tab reappears.
Selection of a name automatically populates the First Name and Primary Specialty fields.
Office/Dept (read-only) Automatically populated after an address is selected in the Address Line 1 field.
Address Line 1 1 Click the selection icon in this field.The Pick Address window appears, listing all addresses associated to the global contact record.
2 Select the correct address by clicking to the left of the address record, and then click OK.Note: If the correct address is not listed in the Pick Address window, click Cancel and then submit a change request to add the new address (see “Adding or Updating Contact Information” on page 65).
Preferred Communication
Select the best way to communicate with the contact from the drop-down list.
EDC Access Needed Check the box to indicate that the contact needs access to the clinical electronic data capture (EDC) system.
EDC Training 1 Click the selection icon in this field to open the Pick EDC Training window.
2 Click New.3 Select the EDC system from the EDC
Training drop-down list.4 In the EDC Training Date field, enter the
date that the training occurred.5 Click Pick.
EDC Training Date (read-only) Automatically populated when you complete the EDC Training field.

CTMS Site Management ║ 25
No t e s
Rev 9 - July 2014 Creating a Site
Field Guidelines
Primary Specialty Automatically populated when you select a name in the Last Name field.
E-Mail 1 Click the selection icon in this field.
The Pick Email window appears.
2 Do one of the following:
♦ If the correct email address is listed, select it by clicking to the left of the email record, and then click Select. OR
♦ If the correct email address is not listed, click Cancel, and then submit a change request to add the email address to the contact’s global contact record. (See “Requesting Changes to Global Contact & Account Information” on page 65).
Start Date Enter the date that the contact’s association with the site became effective. The default value is today’s date.
End Date If necessary, enter the date that the contact’s association with the site is no longer valid.
Warning: Do not add a future end date to a record. Records with end dates will not appear in search lists throughout the CTMS.
Bio/CV/ML Contains a hyperlink to the contact’s BioSketch, CV, and/or Medical License located in a DCRI network folder. This hyperlink is added by the DCRI Service Desk.
8 Save the record by pressing Ctrl+S.
tip: If the same person has multiple roles, copy the record (Ctrl+B) and change the role. You may have to edit some other fields as well.

26 ║ CTMS Site Management
Rev 9 - July 2014
No t e s
Creating a Site
Associating the Contact’s Phone/Fax1 On the Site Contact view tab, select the contact by clicking to the left of
the contact record.
2 Scroll to the bottom of the Site Contact view tab to see the Phones applet, a sub-view attached to the Site Contact view.
3 Click Associate.
The Add Phones window appears, listing numbers currently associated to the contact’s global record.
4 Select the primary phone/fax/pager number(s) by clicking to the left of the record(s). To select more than one number, hold down the Ctrl key while clicking on the correct records.
Note: If the correct number is not listed in the Add Phones window, click Cancel and then submit a change request to add the new number. (See “Adding or Updating Contact Information” on page 65.)
5 Click Add.The numbers appear in the Phones applet. Checkmarks indicate the primary numbers for the site contact. If more than one of the same number type appears, only one will be marked as primary.
CTMS Site Management ║ 27
No t e s
Rev 9 - July 2014 Creating a Site
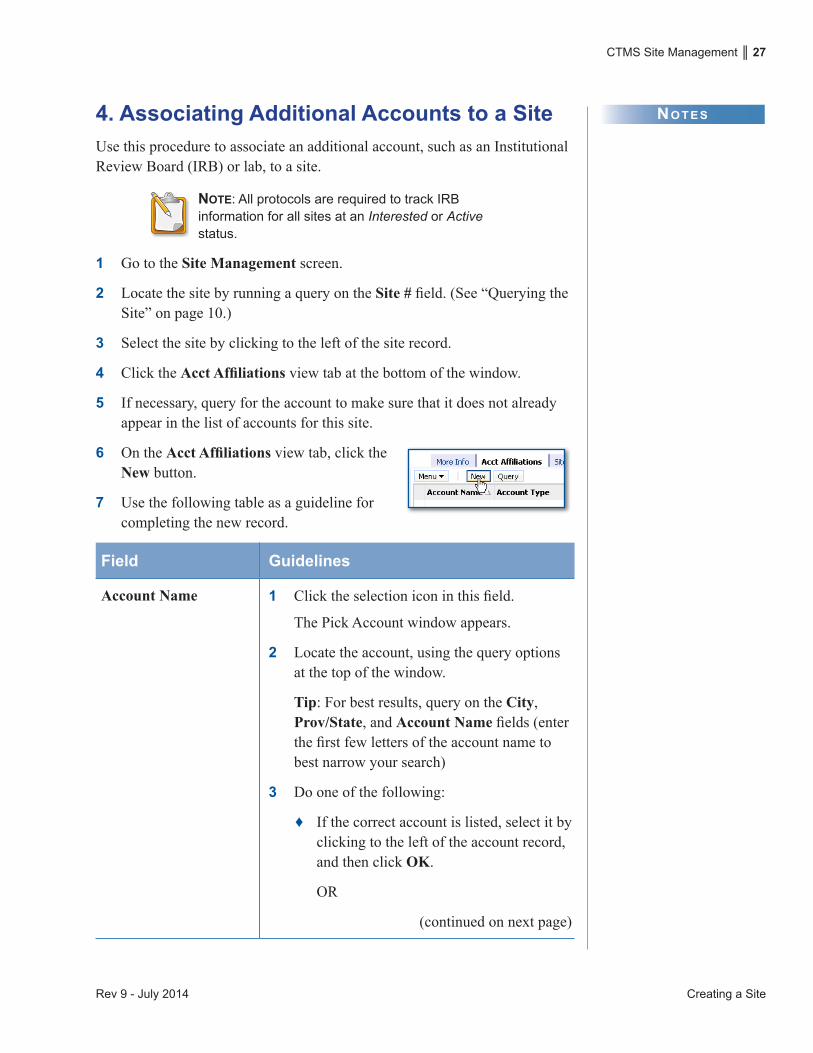
4. Associating Additional Accounts to a Site Use this procedure to associate an additional account, such as an Institutional Review Board (IRB) or lab, to a site.
Note: All protocols are required to track IRB information for all sites at an Interested or Active status.
1 Go to the Site Management screen.
2 Locate the site by running a query on the Site # field. (See “Querying the Site” on page 10.)
3 Select the site by clicking to the left of the site record.
4 Click the Acct Affiliations view tab at the bottom of the window.
5 If necessary, query for the account to make sure that it does not already appear in the list of accounts for this site.
6 On the Acct Affiliations view tab, click the New button.
7 Use the following table as a guideline for completing the new record.
Field Guidelines
Account Name 1 Click the selection icon in this field.
The Pick Account window appears.
2 Locate the account, using the query options at the top of the window.
Tip: For best results, query on the City, Prov/State, and Account Name fields (enter the first few letters of the account name to best narrow your search)
3 Do one of the following:
♦ If the correct account is listed, select it by clicking to the left of the account record, and then click OK.
OR
(continued on next page)

28 ║ CTMS Site Management
Rev 9 - July 2014
No t e s
Creating a Site
Field Guidelines
(continued) ♦ If the correct account is not listed:
a Click New.
b Complete the new row.
c Click OK.
The new account information is submitted to the DCRI Service Desk for verification, and the Acct Affiliations view tab reappears.
Selection of an account name automatically populates the Status, Sub-Status, Account Type, Account Class, and Parent Account Name fields.
Account Role From the drop-down list, select an option to designate the role for the account’s affiliation to the site.
Start Date Enter the date that the account association began for the site affiliation. The default value is today’s date.
End Date If necessary, enter the date that the account association ended for the site affiliation.
Warning: Do not add a future end date to a record. Records with end dates will not appear in search lists throughout the CTMS.
Office/Dept (read-only) Automatically populated when an address is selected in the Address Line 1 field.
Address Line 1 1 Click the selection icon in this field.
The Pick Address window appears.
2 Select the correct address for the contact’s affiliation to the site by clicking to the left of the record.
(Continued on next page)

CTMS Site Management ║ 29
No t e s
Rev 9 - July 2014 Creating a Site
Field Guidelines
(continued) Note: If the correct address is not listed in the Pick Address window, click Cancel and then submit a change request to add the new address (see “Adding or Updating Account Information” on page 69).
3 Click OK.Selection of an address automatically populates the Office/Dept, Address Line 1, Address Line 2, Address Line 3, City, Prov/State, Postal Code, and Country fields.
Parent Account Name (read-only) Automatically populated when an account is selected in the Account Name field.
8 Save the record by pressing Ctrl+S.
Viewing Protocol Experience for an AccountProtocol experience for accounts that are affiliated on a site’s Acct Affiliations view tab can be found on the main Accounts screen’s Protocol Experience view tab.
For example, the image below shows the Acct Affiliations tab for the site MM123, viewed from the Site Management screen, showing MacNeal Cardiology as the Central IRB.
The image below shows the Protocol Experience tab for the MacNeal Cardiology account, viewed from the Accounts screen, showing that it is the Central IRB for site MM123, as well as the Local IRB for site MM555.

30 ║ CTMS Site Management
Rev 9 - July 2014
No t e s
Creating a Site
5. Verifying Activity PlansAn activity plan is a pre-defined protocol-specific list of required activities—milestones, documents, and training—that, when applied to a site, will pre-populate the appropriate activity view tab.
Activity plans are defined by Project Leaders and entered into the CTMS by a CTMS Administrator when a project begins. Projects can have more than one activity plan to track different types of activities, but care must be taken in selecting Activity Plans: only the DCRI Service Desk can delete or replace them.
Adding an Additional Activity Plan
WarNiNg: If there is only one activity plan for a protocol, it will be automatically applied to all new sites for that protocol. However, if there are multiple activity plans for a protocol, they must be applied manually to each new site. Be careful: once you apply an Activity Plan, you cannot change it to a different one (the existing plan must first be deleted by the Service Desk).
1 Go to the Site Management screen.
2 Locate the site by running a query on the Site # field. (See “Querying the Site” on page 10.)
3 Select the site by clicking to the left of the site record.
4 Click the Activity Plans view tab at the bottom of the window. If you do not see the Activity Plans tab, click the drop-down arrow at the right side of the view tabs to select it.
5 If the activity plan is not already listed on the Activity Plans view tab, click the New button.
A new row appears.
6 Use the following table as a guideline when completing the new row.

CTMS Site Management ║ 31
No t e s
Rev 9 - July 2014 Creating a Site
Field Guidelines
Planned Start Defaults to today’s date. Do not change this date.
Template Select the activity plan that is being applied, from the drop-down list.
Description Automatically populated when you select an activity plan in the Template field. You can enter additional text in this field to further define the activity plan.
7 Save the record by pressing Ctrl+S.
WarNiNg: If you have just added a new site, there can be a slight delay before the activity plan is automatically applied.
8 Scroll down to the Activities view applet to view all of the site-required activities to be tracked.
Note: You may have to refresh your view to see new activities that were added to each view tab as a result of applying the activity plan. To refresh the view, click the Execute Query button in the top right corner of the window.
Deleting an Activity PlanTo remove an activity plan record, submit a CTMS Request (CTMSR) to the DCRI Service Desk ([email protected]).

32 ║ CTMS Site Management
Rev 9 - July 2014Creating a Site

Rev 09 - July 2014
No t e s
CTMS Site Management ║ 33
Site statuses and milestones reflect a site’s progress at any given point during a project. Maintained over the course of the project, a site’s status
and milestone history provides metrics that enable the DCRI to review a site’s overall performance during a project, especially when considering sites for participation in future projects.
You are responsible for carefully maintaining site status and milestone history over the course of a project, to provide an accurate picture of a site’s overall performance. This section is designed to give you the information that you will need to ensure that you are tracking statuses and milestones properly.
Introducing Site StatusesWhen you add a site to the CTMS, the site’s default status is Entered. Thereafter, you must manually apply statuses.
While in each site status, the site can also achieve one or more milestones. Milestones are specific events that a site achieves as it progresses from one status to the next.
The most current status appears in the site’s Status field, and the corresponding Status Date field reflects the effective date of that site status.
You can also view a status history by clicking on the Status History view tab for that site.
site statuses and Milestones

34 ║ CTMS Site Management
Rev 09 - July 2014
No t e s
Site Statuses and Milestones
The following table defines the site statuses.
Site Status Definition
Entered The site has been added to the CTMS (default site status).
Approached Communication has been established with the site via written or oral correspondence.
Approached Stop The site will not participate in the project for one of the following reasons:
♦ Unable to contact the site for reasons in the Comments field.
♦ The site decided not to participate.
♦ Competing trial.
♦ DCRI decided not to use the site.
♦ Other reasons indicated in the Comments field.
Note: Stop statuses require a sub-status. Select the appropriate reason from the Sub-Status field.
Interested The site has confirmed interest in the project.
Interested Stop The site will not participate in the project for one of the following reasons:
♦ The site decided not to participate.
♦ The site is unresponsive.
♦ DCRI decided not to use the site.
♦ The IRB did not approve.
♦ Regulatory compliance issues.
♦ Contract issues.
♦ Competing trial.
♦ Other reasons indicated in the Comments field.
Note: Stop statuses require a sub-status. Select the appropriate reason from the Sub-Status field.

CTMS Site Management ║ 35
No t e s
Rev 09 - July 2014 Site Statuses and Milestones
Site Status Definition
Active The site has received the investigational product and has achieved the appropriate milestone(s). For example, the contract executed and regulatory complete milestones were achieved. The site remains in this status throughout enrollment and follow-up.
Active Stop The site’s participation in the project stopped prematurely for one of the following reasons:
♦ Regulatory compliance issues.
♦ Safety issues.
♦ IRB-related issues.
♦ The site is unresponsive.
♦ The investigational product is not available.
♦ The site decided not to participate.
♦ Other reasons indicated in the Comments field.
Note: Stop statuses require a sub-status. Select the appropriate reason from the Sub-Status field.
Closed The close-out process is complete, all data forms have been received, and all queries have been completed.
Note: A warning appears if a new site status date is later than any existing status date and is not marked as current or if a new site status date (marked as current) is prior to any existing status date.

36 ║ CTMS Site Management
Rev 09 - July 2014
No t e s
Site Statuses and Milestones
Changing Site StatusesChange a site’s status after all prerequisites have been met. You can verify this by reviewing the activities on the Milestones, Training, Documents, and Other Requirements view tabs.
1 Go to the Site Management screen.
2 Locate the site by running a query on the Site # field. (See “Querying the Site” on page 10.)
3 Select the site by clicking to the left of the site record.
4 Click the Status History view tab.
5 Click New.
A new blank yellow line appears.
WarNiNg: Delete a status record only if it was entered in error. Since the Status field becomes read-only after creating the record, always create a new status record to properly reflect the status history for a site.
6 Use the following table as a guideline to complete the new row.
* indicates a required field
Field Guidelines
Current Select the checkbox to designate the most up-to-date status (the default when you enter the first status record). The record marked as “current” displays on the Site screen.
Status* Select a status from the drop-down list.
Sub-Status* If applicable, select a Sub-Status from the drop-down list. If a Stop status was selected in the Status field, this field is required.

CTMS Site Management ║ 37
No t e s
Rev 09 - July 2014 Site Statuses and Milestones
Field Guidelines
Status Date Enter the date that the new status became effective. The default value is today’s date.
Comment If needed, enter comments relating to the status record.
7 Save the new status record by pressing Ctrl+S.
Note: Selecting the Active Stop or Closed status in the Status field triggers a reminder to complete the Enrollment Complete milestone.
Tracking Site MilestonesRecord a milestone after all prerequisites have been met. Milestones typically used to gather metrics appear on the main site form and are automatically populated when a milestone is recorded. Applicable protocols have the ability to communicate with vendors by email when a site is ready to receive supplies (see “Communicating with Vendors” on page 39).
1 Go to the Site Management screen.
2 Locate the site by running a query on the Site # field. (See “Querying the Site” on page 10.)
3 Select the site by clicking to the left of the site record.
4 Click the Milestones view tab.
If an activity plan has been applied to the site (see “5. Verifying Activity Plans” on page 30), a milestones list appears on the Milestones view tab.
Note: Flags in the Template column indicate items from the activity plan. These rows cannot be deleted. Milestones that you add in addition to the template milestones can be deleted by clicking the Delete button.

38 ║ CTMS Site Management
Rev 09 - July 2014
No t e s
Site Statuses and Milestones
5 Do one of the following:
♦ If the milestone is listed, complete the row for the milestone by filling in the Completed and Comments fields.
OR
♦ If the milestone is not listed, click the New button in the Milestones view tab.
WarNiNg: Milestones to be tracked for your protocol should already be listed as a result of applying the activity plan (see “5. Verifying Activity Plans” on page 30). If a milestone is not listed, contact your project lead to determine whether the new milestone should be added to the template, and then applied to all sites within the protocol.
6 Use the following table as a guideline when completing the new row.
Field Guidelines
Template (read-only) Flags in the Template column indicate items from the activity plan.
Milestone If entering a new record, select the milestone from the drop-down list.
Description If entering a new record, enter a brief description of the milestone.
Planned Enter the date that the milestone is planned to occur.
Completed Enter the date when the milestone was achieved. Future dates are not allowed.
Comments Enter comments related to the milestone.
Completed By (read-only) Automatically populated with your user ID.
7 Save the record by pressing Ctrl+S.The milestone is recorded and the date is automatically populated in the site form.

CTMS Site Management ║ 39
No t e s
Rev 09 - July 2014 Site Statuses and Milestones
Milestones
Recorded Milestone
Date automatically populated in form
Communicating with VendorsThe CTMS enables you to communicate with vendors by email when a site is ready to receive various supplies. To set up this automated tool for applicable protocols, required information is collected by the DCRI Service Desk at protocol setup or provided by a CTMSR after the protocol is configured.
Vendor buttons
Prerequisites RequiredThere are prerequisites at the site level that must be in place for the vendor communication process to work correctly.
♦ Drug IP or Device IP◊ Site contact with the Role of IP Shipment Contact with an associated
address.◊ Milestone of Investigational Product Sent or Device Sent in the
activity plan.
♦ Starter Box◊ Site contact with the Role of Study Coordinator with an associated
address.◊ Milestone of Starter Box in the activity plan.

40 ║ CTMS Site Management
Rev 09 - July 2014
No t e s
Site Statuses and Milestones
♦ Reg Pack◊ Site contact with the Role of Study Coordinator with an associated
address.◊ Milestone of Reg Pack Sent in the activity plan.
Note: The CTMS prompts you with a message like the one below if the required information is incomplete.
Sending an Email Notification to a Vendor1 Click the site’s Milestones view tab.
2 Click the appropriate button above the list of milestones.
A confirmation message appears.
3 Click OK.
Email notification is sent to the vendor, and the affiliated milestone’s Completed field is updated with today’s date. You are copied on the email for documentation of the request.
Adding Milestones to the Activity PlanIf milestones will be tracked at more than one site within a protocol, they should be listed on the appropriate Activity Plan. To add milestones to an Activity Plan, submit a CTMS Request Form (see “Appendix A: CTMS Request Form” on page 77).

Rev 09 - July 2014
No t e s
CTMS Site Management ║ 41
The CTMS enables you to track documents sent to and collected from sites. When an activity plan is applied to a site (see “5. Verifying
Activity Plans” on page 30), all specified documents are pre-populated on the Documents view tab to provide easier tracking. However, you might have to add the same document multiple times. For example, you record CVs, Medical Licenses, and Financial Disclosures for multiple site personnel.
Note: A flag in the Template column indicates an item from the Activity Plan. These rows cannot be deleted. Documents that you enter in addition to the template documents can be deleted by clicking the Delete button.
Tracking a Site Document1 Go to the Site Management screen.
2 Locate the site by running a query on the Site # field. (See “Querying the Site” on page 10.)
3 Select the site by clicking to the left of the site record.
4 Click the Documents view tab in the lower portion of the window.
5 If the document is listed, complete the record by filling in the appropriate fields (see the field guidelines on the next page).
6 If the document is not listed, do one of the following: ♦ To add a document that is not listed on your site’s Activity Plan,
click New, select the new document, and then complete the record by filling in the appropriate fields.OR
♦ To add a duplicate copy of a document that is listed on your site’s Activity Plan, highlight the record and then press Ctrl + B to create a copy. Complete the record by filling in the appropriate fields.
7 Use the following table as a guideline when completing the row.
Note: To capture information about all types of documents, there are more columns/fields than apply to any specific document. Only complete the fields that are appropriate for the document you are recording.
tRaCkinG site doCuMents

42 ║ CTMS Site Management
Rev 09 - July 2014
No t e s
Tracking Site Documents
Field Guidelines
Template A flag in the Template column indicates an item from the activity plan.
Document Select the document from the drop-down list.
Document Description If necessary, enter a description of the document.
Note: Text in this field automatically becomes a hyperlink to the Attachments view tab, where you can attach documents or related files. For more information, see “Adding Site Attachments” on page 53.
Status
1 Click the selection icon in this field to open the Document Tracking History window.
2 Click New.
3 Select the checkbox in the Current field to indicate that this is the most current status for the document.
4 Select the document status from the Status drop-down list.
5 In the Status Date field, enter the date when the new status occurred. Future dates are not allowed.
6 If necessary, enter comments regarding this document in the Comments field.
7 Click OK.
Version Date If applicable, enter the document’s version date. Refer to your protocol’s DEG to determine the appropriate version date of a document. Future dates are not allowed.
Expiration Date If applicable, enter the date that the document expires or is no longer valid. For example, an IRB Approval Letter is usually only valid for one year. Refer to your protocol’s DEG to determine the appropriate expiration date of a document.

CTMS Site Management ║ 43
No t e s
Rev 09 - July 2014 Tracking Site Documents
Field Guidelines
Last Name If applicable, follow the steps below to select a person related to the document. For example, select the name of the person for whom a CV is recorded.
1 Click the selection icon in this field to open the Pick Site Contact window (lists the names of people from the Site Contact view tab).
2 Select the name by clicking to the left of the record.
3 Click Pick.
Selection of a name automatically populates the First Name and Role fields
Sent Date
(read-only) Automatically populated when you complete the status field for the document.
Received Date
Approval Date
Source Verified Date Enter the date that the document was source verified at the site.
Doc In House Check the box to indicate that the document is located at DCRI.
Doc On Site Check the box to indicate that the document is located at the site.
Comments Enter comments relating to the document.
Note: For documents related to the IRB or lab, record the IRB or lab name in this field.
Bio/CV/ML Contains a hyperlink to the contact’s BioSketch, CV, and/or Medical License located in a DCRI network folder. This hyperlink is added by the DCRI Service Desk.

44 ║ CTMS Site Management
Rev 09 - July 2014
No t e s
Tracking Site Documents
8 Save the record by pressing Ctrl+S.
tip: To quickly duplicate a record, highlight the record and then press Ctrl + B on your keyboard. The document’s Template flag, Name, and Description will be copied to the new record. (This method is the only way to add a document that is listed on the site’s Activity Plan.)
Viewing a Document’s Status HistoryTo review the history of a document, select the document from the list and then scroll down to the Status History view applet at the bottom of the window.
Adding Documents to the Activity PlanIf documents will be tracked at more than one site within a protocol, they should be listed on the appropriate Activity Plan. To add documents to an Activity Plan, submit a CTMS Request Form (see “Appendix A: CTMS Request Form” on page 77).

Rev 09 - July 2014
No t e s
CTMS Site Management ║ 45
Use the Training view tab to track training and meetings for site personnel. When an activity plan is applied to a site (see “5. Verifying
Activity Plans” on page 30), all specified training activities are pre-populated on the Training view tab to provide easier tracking. However, you might have to add the same activities multiple times. For example, you might need to record Human Research Training for multiple site personnel.
Note: A flag in the Template column indicates an item from the Activity Plan. These rows cannot be deleted. Training activities that you enter in addition to the template activities can be deleted by clicking the Delete button.
Tracking Training Activity1 Go to the Site Management screen.
2 Locate the site by running a query on the Site # field. (See “Querying the Site” on page 10.)
3 Select the site by clicking to the left of the site record.
4 Click the Training view tab in the lower portion of the window.
5 If the training activity is listed, complete the record by filling in the appropriate fields (see the field guidelines on the next page).
6 If the training activity is not listed, do one of the following:
♦ To add a training activity that is not listed on your site’s Activity Plan, click New, select the new training activity, and then complete the record by filling in the appropriate fields.
OR
♦ To add a duplicate copy of a training activity that is listed on your site’s Activity Plan, highlight the record and then press Ctrl + B to create a copy. Complete the record by filling in the appropriate fields.
7 Use the following table as a guideline when completing the row.
tRaCkinG tRaininG and eduCation
46 ║ CTMS Site Management
Rev 09 - July 2014
No t e s
Tracking Training and Education
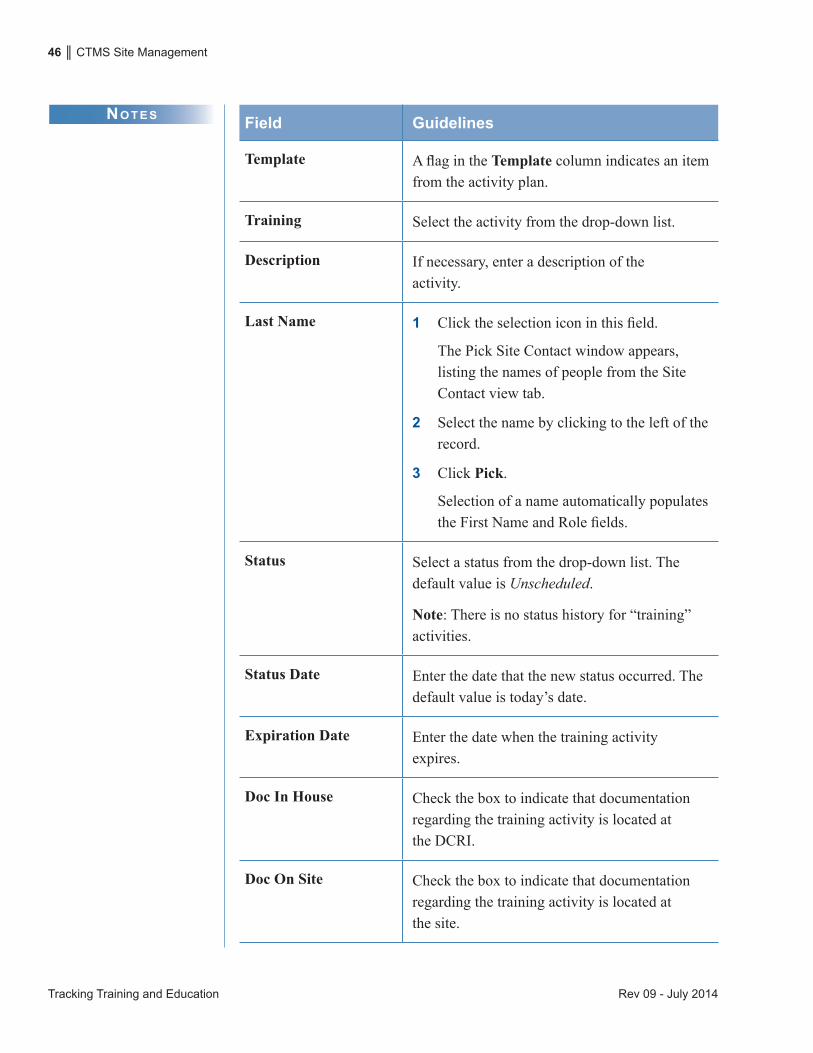
Field Guidelines
Template A flag in the Template column indicates an item from the activity plan.
Training Select the activity from the drop-down list.
Description If necessary, enter a description of the activity.
Last Name 1 Click the selection icon in this field.
The Pick Site Contact window appears, listing the names of people from the Site Contact view tab.
2 Select the name by clicking to the left of the record.
3 Click Pick.
Selection of a name automatically populates the First Name and Role fields.
Status Select a status from the drop-down list. The default value is Unscheduled.
Note: There is no status history for “training” activities.
Status Date Enter the date that the new status occurred. The default value is today’s date.
Expiration Date Enter the date when the training activity expires.
Doc In House Check the box to indicate that documentation regarding the training activity is located at the DCRI.
Doc On Site Check the box to indicate that documentation regarding the training activity is located at the site.

CTMS Site Management ║ 47
No t e s
Rev 09 - July 2014 Tracking Training and Education
Field Guidelines
Comments Enter comments relating to the activity.
Completed By (read-only) Automatically populated with your user ID.
8 Save the record by pressing Ctrl+S.
tip: To quickly duplicate a record, highlight the record and then press Ctrl + B on your keyboard. The training activity’s Template flag, Name, and Description will be copied to the new record. (This method is the only way to add a training activity that is listed on the site’s Activity Plan.)
Adding Training Activities to the Activity PlanIf training activities will be tracked at more than one site within a protocol, they should be listed on the appropriate Activity Plan. To add training activities to an Activity Plan, submit a CTMS Request Form (see “Appendix A: CTMS Request Form” on page 77).

48 ║ CTMS Site Management
Rev 09 - July 2014Tracking Training and Education
Rev 9 - July 2014
No t e s
CTMS Site Management ║ 49
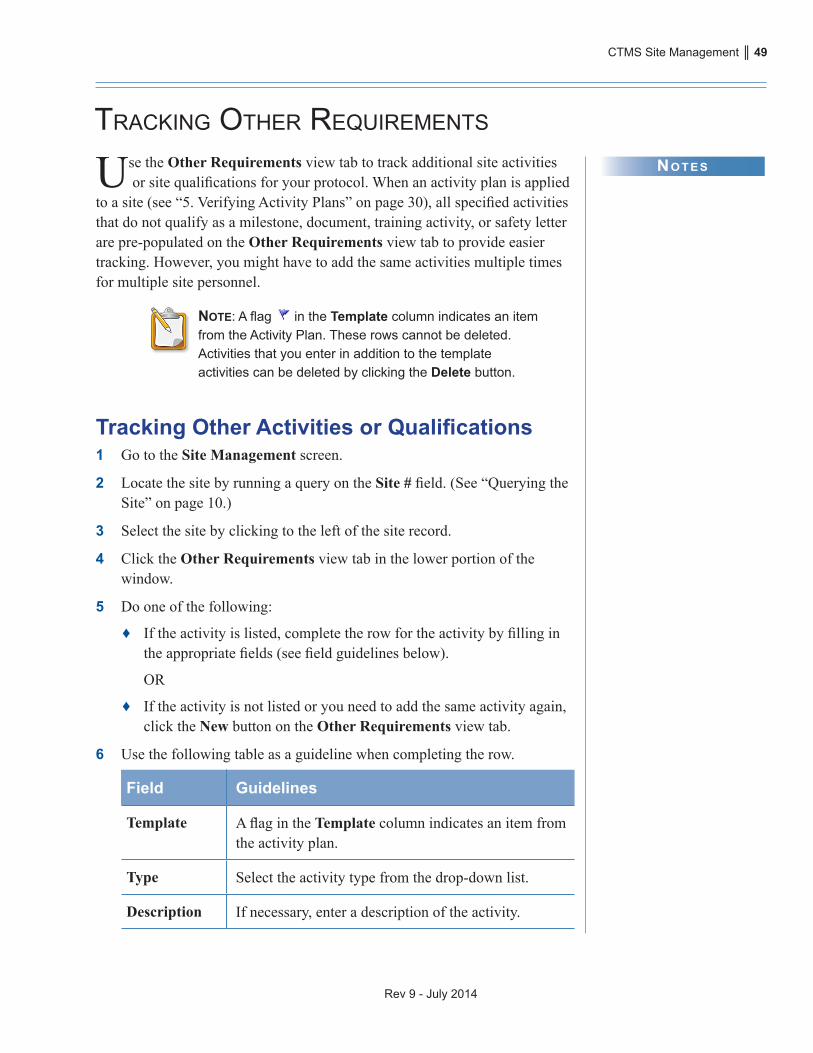
Use the Other Requirements view tab to track additional site activities or site qualifications for your protocol. When an activity plan is applied
to a site (see “5. Verifying Activity Plans” on page 30), all specified activities that do not qualify as a milestone, document, training activity, or safety letter are pre-populated on the Other Requirements view tab to provide easier tracking. However, you might have to add the same activities multiple times for multiple site personnel.
Note: A flag in the Template column indicates an item from the Activity Plan. These rows cannot be deleted. Activities that you enter in addition to the template activities can be deleted by clicking the Delete button.
Tracking Other Activities or Qualifications1 Go to the Site Management screen.
2 Locate the site by running a query on the Site # field. (See “Querying the Site” on page 10.)
3 Select the site by clicking to the left of the site record.
4 Click the Other Requirements view tab in the lower portion of the window.
5 Do one of the following:
♦ If the activity is listed, complete the row for the activity by filling in the appropriate fields (see field guidelines below).
OR
♦ If the activity is not listed or you need to add the same activity again, click the New button on the Other Requirements view tab.
6 Use the following table as a guideline when completing the row.
Field Guidelines
Template A flag in the Template column indicates an item from the activity plan.
Type Select the activity type from the drop-down list.
Description If necessary, enter a description of the activity.
tRaCkinG otheR RequiReMents

50 ║ CTMS Site Management
Rev 9 - July 2014
No t e s
Tracking Other Requirements
Field Guidelines
Instructions (read-only) Based on the activity plan template, tells which fields to complete (Response, Quantity, or Date) for the activity.
Annotations (read-only) Contains additional instructions for completing the record.
Last Name 1 Click the selection icon in this field.The Pick Site Contact window appears, listing the names of people from the Site Contact view tab.
2 Select the name by clicking to the left of the record.
3 Click Pick.Selection of a name automatically populates the First Name and Role fields.
Response For activity items that require a response, such as Yes or No, select the option from the drop-down list.
Quantity If applicable, enter the quantity for the activity.
Date Enter the date that the activity was addressed.
Comments Enter comments relating to the activity.
Completed By
(read-only) Automatically populated with your user ID.
7 Save the record by pressing Ctrl+S.
tip: To quickly duplicate a record, highlight the record and then press Ctrl + B on your keyboard.
Adding Other Requirements to the Activity PlanIf other requirements will be tracked at more than one site within a protocol, they should be listed on the appropriate Activity Plan. To add other requirements to an Activity Plan, submit a CTMS Request Form (see “Appendix A: CTMS Request Form” on page 77).

Rev 9 - July 2014
No t e s
CTMS Site Management ║ 51
Use the Safety Letters view tab to track trial and site safety letters. When an activity plan is applied to a site (see “5. Verifying Activity Plans”
on page 30), all specified trial safety letters are pre-populated on the Safety Letters view tab to provide easier tracking.
Note: A flag in the Template column indicates an item from the Activity Plan. These rows cannot be deleted. Site safety letters that you enter in addition to the template (trial) safety letters can be deleted by clicking the Delete button.
Tracking Letters1 Go to the Site Management screen.
2 Locate the site by running a query on the Site # field. (See “Querying the Site” on page 10.)
3 Select the site by clicking to the left of the site record.
4 Click the Safety Letters view tab in the lower portion of the window.
5 Do one of the following:
♦ For a trial safety letter, complete the record by filling in the appropriate fields (see the field guidelines on the next page).
OR
♦ For a site safety letter, click the New button on the Safety Letters view tab. Then complete the record by filling in the appropriate fields.
6 Use the following table as a guideline when completing the row.
* indicates field is pre-populated for trial safety letters
Field Guidelines
Template* (read-only) A flag in the Template column indicates an item from the activity plan.
Type* (read-only) Shows the type of safety letter. The default value for new records is Site Safety Letter.
Note: If you need to add another Trial Safety Letter, contact the DCRI Service Desk.
tRaCkinG safety letteRs

52 ║ CTMS Site Management
Rev 9 - July 2014
No t e s
Tracking Safety Letters
Field Guidelines
Description* Enter a description of the event.
Case #* Enter the case number for the letter.
Sequence* If applicable, enter the sequence of the letter as related to other letters.
Version* For new records, enter the letter’s version date. This field is read-only for template records.
Sent to Site Enter the date that the letter was sent to the site. This date may be pre-populated for trial safety letters.
Submitted to IRB Enter the date that the letter was submitted to the IRB.
Submission Letter Received
Enter the date that DCRI received the letter that was sent to the IRB.
IRB Acknowledgment Received
Enter the date that the IRB acknowledged receiving the letter.
Sent to Sponsor Enter the date that the letter was sent to the sponsor.
Doc In House Select the checkbox to indicate that the safety letter is located at the DCRI.
Doc On Site Check the box to indicate that the document is located at the site.
Comments Enter comments relating to the letter.
Completed By (read-only) Automatically populated with your user ID.
7 Save the record by pressing Ctrl+S.
Adding Trial Safety Letters to the Activity PlanIf trial safety letters will be tracked at more than one site within a protocol, they should be listed on the appropriate Activity Plan. To add trial safety letters to an Activity Plan, submit a CTMS Request Form (see “Appendix A: CTMS Request Form” on page 77).

Rev 9 - July 2014
No t e s
CTMS Site Management ║ 53
You can add attachments to a site that relate to a required site document, such as the principal investigator’s CV, the 1572, or the IRB approval
letter. You can also add attachments that are not required, such as driving directions to the facility or a link to the company’s website.
WarNiNg: An attachment with a large file size will cause the CTMS to perform slowly. Remove color graphics from documents and zip files to reduce the file size before attaching them in the CTMS.
Tracking a Site Document or Letter1 Go to the Site Management screen.
2 Locate the site by running a query on the Site # field. (See “Querying the Site” on page 10.)
3 Select the site by clicking to the left of the site record.
4 Click the Attachments view tab at the bottom of the window. If you do not see the Attachments tab, click the drop-down arrow to the right of the view tabs to select it.
Attachments information appears.
New File button
New URL button
5 If necessary, query for the attachment to make sure that it does not already appear in the list of attachments.
addinG site attaChMents

54 ║ CTMS Site Management
Rev 9 - July 2014
No t e s
Adding Site Attachments
6 To add an attachment, do the following:
a Click New File.
b Find and select the file.
c Click Open.To add a link to a website, do the following:
d Click New URL.
e Enter the complete website address in the URL field. For example, enter http://www.trialsite.com.
f Click Add.
7 Save the record by pressing Ctrl+S.
Note: Attachments in the CTMS are copies of the original files. Documents that were locked from editing before being attached in the CTMS are not locked in the CTMS. To help prevent editing, save documents as PDFs before attaching them in the CTMS.
Editing a Word Document from the Attachments TabYou can no longer save a Word document directly to the CTMS if you had opened that file from within the CTMS. The work-around is to first save the document to another location and then import it back into the CTMS, following the steps below.
1 Open the file by clicking the document name link.
2 Edit the document.
3 Click Save.
The Save As window appears.
IMPORTANT! If the original document was a Word template, Word will try to save the file with the extension Word 97-2003 Template (*.dot). To save the file as a Word document, select either the *.doc or *.docx option from the Save as type drop-down list.

CTMS Site Management ║ 55
No t e s
Rev 9 - July 2014 Adding Site Attachments
4 Save the file to an external location, such as a project folder.
5 To import the file back into the CTMS, click New File on the Attachments tab.
6 Navigate to and select the file you want to import, and then click Open.
7 If you saved the file with the same name and extension as the original file, you will be asked (after saving or stepping off the record) if you want to replace the old file. Click OK.
Note: This issue is related to a security feature in Microsoft Office 2013, and a solution is being investigated.

56 ║ CTMS Site Management
Rev 9 - July 2014
No t e s
Adding Site Attachments

Rev 9 - July 2014
No t e s
CTMS Site Management ║ 57
Use the Conversation Log to capture required communications and other correspondence with the site. You can record activity types such as:
♦ Call—Inbound/Outbound
♦ Email—Inbound/Outbound
♦ Fax—Inbound/Outbound
♦ Letter—Inbound/Outbound
Note: Only the person who created a Conversation Log entry (whose name appears in the Owner First / Last Name fields) can edit that record. For other users, all fields of the record are locked from editing.
Logging a Conversation1 Click the Site Management screen tab.
2 Locate the site by running a query on the Site # field. (See “Querying the Site” on page 10.)
3 Select the site by clicking to the left of the site record.
4 Click the Conversation Log view tab in the lower portion of the window.
5 On the Conversation Log tab, click the New button.
6 Use the following table as a guideline to complete the new row.
tip: Select a row and scroll down to enter data in the form displayed at the bottom of the window. Data entered in form fields is more visible and can be spell-checked. Use the navigation buttons to go to the next/previous conversation.
Bottom of Conversation Log view
loGGinG ConveRsations

58 ║ CTMS Site Management
Rev 9 - July 2014
No t e s
Logging Conversations
Field Guidelines
Activity # (read-only) This is a CTMS system-generated unique identifier.
Type In this required field, select the activity description from the drop-down list, for example, Call - Inbound. The default value is Other.
Activity Date Enter the date that the activity occurred. Defaults to the current date.
Activity Time Enter the time that the activity occurred. Defaults to the current time.
Description Enter a detailed description of the activity. For example, for a Call - Inbound activity type, enter the conversation details in this field, up to a maximum of 4,000 characters.
You can copy email text to this field by highlighting the email text, pressing Ctrl + C to copy it, clicking in the Conversation Log’s Description field, and then pressing Ctrl + V to paste the text into the field.
Warning! Be careful not to copy email headers and blank rows into the Description field, as they can take up a large amount of storage space.
Keywords Used primarily for Call activity types, this field assists in organizing and querying for data.
1 Click the selection icon to display the Activity Keywords applet.
2 Click New.
3 Click the DCRI Keywords drop-down arrow to select a keyword.
4 Repeat steps 2–3 to add additional keywords.
5 Click OK.
CTMS Site Management ║ 59
No t e s
Rev 9 - July 2014 Logging Conversations
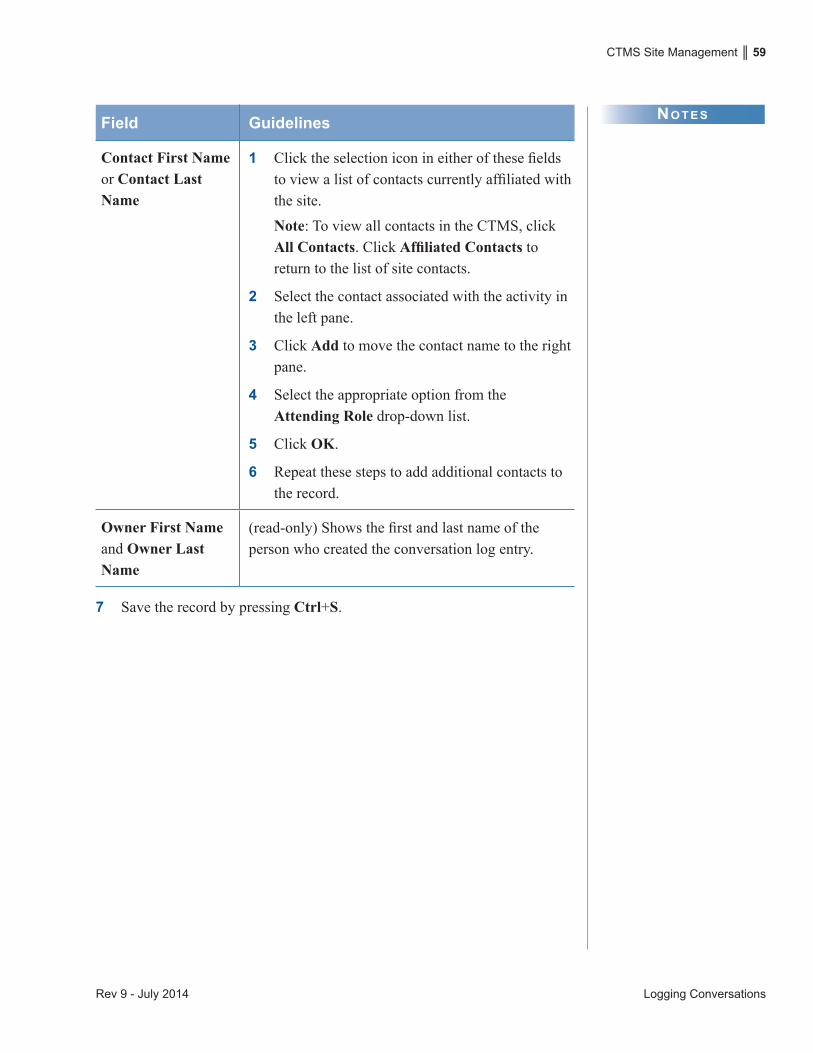
Field Guidelines
Contact First Name or Contact Last Name
1 Click the selection icon in either of these fields to view a list of contacts currently affiliated with the site.
Note: To view all contacts in the CTMS, click All Contacts. Click Affiliated Contacts to return to the list of site contacts.
2 Select the contact associated with the activity in the left pane.
3 Click Add to move the contact name to the right pane.
4 Select the appropriate option from the Attending Role drop-down list.
5 Click OK.
6 Repeat these steps to add additional contacts to the record.
Owner First Name and Owner Last Name
(read-only) Shows the first and last name of the person who created the conversation log entry.
7 Save the record by pressing Ctrl+S.

60 ║ CTMS Site Management
Rev 9 - July 2014
No t e s
Logging Conversations
Viewing All Conversation LogsTo view a list of all conversation logs for your protocol(s), go to the top of the Site Management view tab and click the Conversation Log link.
You view all conversation logs regardless of site/protocol. To find specific logs:
1 Click Query.
2 Enter one or more words into the Keywords field.
tip: Use an asterisk (*) as a wildcard.
3 Click Go.
All entries that contain your keywords appear.

Rev 9 - July 2014
No t e s
CTMS Site Management ║ 61
Use the Issue Log view tab to track site-level issues outside of the trip report. By default, this tab displays site-related issues in descending order
by the Date Identified.
Considerations When Using the Issues Log ♦ Unblinded follow-up items should never be entered on the Issue Log tab.
♦ Issue Log records cannot be copied.
♦ Issue Log records can be created without regard to the site’s status.
♦ You cannot track protocol deviations on the Issue Log tab. An error message appears to remind you to enter records on the Protocol Deviations tab (see “Tracking Protocol Deviations” on page 63).
♦ To delete an Issue Log record, submit a CTMSR to the DCRI Service Desk, requesting record deletion.
♦ The Site-Level Issue Log Report captures all site-level issues.
Tracking Site-Level Issues1 Go to the Site Management screen.
2 Locate the site by running a query on the Site # field. (See “Querying the Site” on page 10.)
3 Select the site by clicking to the left of the site record.
4 Click the Issue Log view tab in the lower portion of the window.
5 Do one of the following:
♦ If the activity is listed, complete the row for the activity by filling in the appropriate fields (see field guidelines below).
OR
♦ If the activity is not listed or you need to add the same activity again, click the New button on the Issue Log view tab.
tRaCkinG issues

62 ║ CTMS Site Management
Rev 9 - July 2014
No t e s
Tracking Issues
6 Use the following table as a guideline when recording a new site-related issue outside of the trip report.
Field Guidelines
Type Select the issue type from the drop-down list.
Description Enter the issue description, up to a maximum of 1,500 characters.
Date Identified Defaults to today’s date. Enter the date that the issue was identified. The system does not allow entry of a future date.
Due Defaults to blank. You can enter a date that the issue is expected to be resolved/completed, if needed.
Status Defaults to Open. When the issue is resolved, select Done from the drop-down list. If Done is selected, the Completed Date field will be automatically populated with today’s date.
Completed Date When the Status is changed to Done, this field is populated with today’s date, but enables you to enter a previous date representing the date the issue was resolved. The system will not allow entry of a future date. Entering a date in this field will automatically change the Status to Done.
Resolution/Action Comments
Enter resolution/action comments, up to a maximum of 1,500 characters.
Assigned To Defaults to the Site Manager as Primary (if the Site Manager field is populated on the site record), and the user ID of the person who entered the record. Click the selection icon in this field to assign the record to someone else.
Created By (Read-only) Automatically populated with the user ID of the person who created the record.
7 Save the record by pressing Ctrl+S.

Rev 9 - July 2014
No t e s
CTMS Site Management ║ 63
Use the Protocol Deviation view tab to track site-level protocol deviations. This tab, available whether the protocol uses the CTMS trip
report or not, contains both site-level and trip report-level protocol deviations.
Protocol deviations recorded on the trip report screen will also appear on the site-level Protocol Deviation tab.
Recording a Site-Level Protocol Deviation1 Go to the Site Management screen.
2 Locate the site by running a query on the Site # field. (See “Querying the Site” on page 10.)
3 Select the site by clicking to the left of the site record.
4 Click the Protocol Deviation view tab.
5 Do one of the following:
♦ If the activity is listed, complete the row for the activity by filling in the appropriate fields.
OR
♦ If the activity is not listed, click the New button on the Protocol Deviation view tab.
6 Do one of the following.
♦ For site-level entries, the Discovered Date defaults to today’s date and can be edited.
♦ For trip report-level entries, the Discovered Date is the Actual Visit Start date, and this field cannot be edited on the site-level Protocol Deviations tab. The Entry Location field indicates where the record was entered.
7 Save the record by pressing Ctrl+S.
tRaCkinG PRotoCol deviations

64 ║ CTMS Site Management
Rev 9 - July 2014Tracking Protocol Deviations

Rev 9 - July 2014
No t e s
CTMS Site Management ║ 65
CTMS Administrators in the DCRI Service Desk maintain the contact and account information you associate with your sites. When you add
new contacts or accounts, that new information is verified by the CTMS Administrators (see “3. Associating Additional Contacts to a Site” on page 22, and “4. Associating Additional Accounts to a Site” on page 27).
To request changes to existing contact/account information (i.e., address, phone, or email data) or to add new data, use the procedures in this section.
Because the data in the CTMS is shared across projects, the DCRI Service Desk must verify your new entries and change requests to determine whether they will affect other projects. This protects the integrity of the data by minimizing inappropriate deletions or duplicate contact or account records.
Adding or Updating Contact InformationYou can request additions and updates to contact information (e.g., address, phone, or email data) to the CTMS database by submitting a change request.
Note: When a new site contact record is added, there is a 15-minute grace period in which you can make corrections to data without going through the change request process listed here. If it has been over 15 minutes since the record was added, follow the procedure in this section to request data additions and changes.
1 Click the Site Management screen tab.
2 Locate the site by running a query on the Site # field. (See “Querying the Site” on page 10.)
3 Select the site by clicking to the left of the site record.
4 Click the Site Contact view tab in the lower portion of the window.
5 If necessary, query for the site contact on the Site Contact view tab.
6 Click the blue hyperlink name in the Last Name field for the site contact.
RequestinG ChanGes to Global ContaCt & aCCount infoRMation

66 ║ CTMS Site Management
Rev 9 - July 2014
No t e s
Requesting Changes to Global Contact & Account Information
The contact record appears on the Contacts screen tab.
7 Important! Click Change Request.The Global Database screen tab appears.
8 Enter your edits, using the table below as a guideline.
Note: You can cancel your change request at any time by clicking the Cancel Request button in the top right corner of the window.
tip: If you are requesting multiple changes, finish entering all changes before you click the Submit Request button.
To Do This
Update or add general contact information
Complete the appropriate fields in the upper form area of the window, such as Greeting, Degree, or Job Title.

CTMS Site Management ║ 67
No t e s
Rev 9 - July 2014 Requesting Changes to Global Contact & Account Information
To Do This
Update existing address information for the contact
1 Click the Address tab in the lower portion of the window.
2 Select the address by clicking to the left of the address record.
3 Click Update Address.
4 Complete the Address Change Request form.
5 Click OK.
Add new address information for the contact
1 Click the Address tab in the lower portion of the window.
2 Click Add Address.
3 Query for the address, using the street number and Prov/State, or part of the street name between asterisks and Prov/State fields. (For international addresses, search by entering the street number and Country.)
4 Do one of the following:
♦ If the address exists in the database:
a Select it by clicking to the left of the address record.
b Click OK.
OR
♦ If the address does not exist in the database:
a Click New.
b Complete the new row.
Update existing phone information for the contact
1 Click the Phone tab in the lower portion of the window.
2 Select the phone number by clicking to the left of the record.
3 Click Update Phone.
(continued on next page)

68 ║ CTMS Site Management
Rev 9 - July 2014
No t e s
Requesting Changes to Global Contact & Account Information
To Do This
(continued) 4 Complete the Phone Change Request form.
5 Click OK.
Add new phone information for the contact
1 Click the Phone tab in the lower portion of the window.
2 Click Add Phone.
3 Complete the new row.
Note: For international numbers, enter + Country Code - City Code - Remaining Number. Example: +011-44-878789. The plus sign (+) indicates a non-US number.
Update existing email information for the contact
1 Click the Email tab in the lower portion of the window.
2 Select the email address by clicking to the left of the record.
3 Click Update Email.
4 Complete the Email Change Request form.
5 Click OK.
Add new email information for the contact
1 Click the Email tab in the lower portion of the window.
2 Click Add Email.
3 Complete the new row.
9 Enter comments in the Comments field to further clarify your request.
10 Click Submit Request.
Your request is submitted to the DCRI Service Desk for verification as the Site Contact view tab on the Site Management screen reappears. You now associate the new information to the site contact’s record. See “3. Associating Additional Contacts to a Site” on page 22 for information on completing these fields. When your request has been processed, you will receive an email notification from the DCRI Service Desk.

CTMS Site Management ║ 69
No t e s
Rev 9 - July 2014 Requesting Changes to Global Contact & Account Information
Adding or Updating Account InformationAt any time, you can request additions and updates to account information e.g., address or phone data) to the CTMS database by submitting a change request.
1 Click the Site Management screen tab.
2 Locate the site by running a query on the Site # field. (See “Querying the Site” on page 10.)
3 Select the site by clicking to the left of the site record.
4 Do one of the following:
♦ To work with the main site account, click the blue hyperlink in the Account field for the account (the hyperlink shows only in the list view, not in the form view).
OR
♦ To work with another affiliated site account:
a Click the Acct Affiliations view tab at the bottom of the window
b Click the blue hyperlink in the Account Name field for the account.
The account record on the Accounts screen tab appears.
5 Important! Click Change Request.

70 ║ CTMS Site Management
Rev 9 - July 2014
No t e s
Requesting Changes to Global Contact & Account Information
The Global Database screen tab opens.
6 Enter your edits, using the table below as a guideline.
Note: You can cancel your change request at any time by clicking the Cancel Request button in the top right corner of the window.
tip: If multiple changes are being requested, finish entering all changes before you click the Submit Request button.
To Do This
Update or add general account information
Complete the appropriate fields in the upper form area of the window, such as Account Name or Account Type.
Update existing address information for the account
1 Click the Address tab in the lower portion of the window.
2 Select the address by clicking to the left of the address record.
3 Click Update Address.
4 Complete the Address Change Request form.
5 Click OK.
Add new address information for the account
1 Click the Address tab.
2 Click Add Address.(continued on next page)

CTMS Site Management ║ 71
No t e s
Rev 9 - July 2014 Requesting Changes to Global Contact & Account Information
To Do This
(continued) 3 Query for the address, using the street number and Prov/State fields, or part of the street name between asterisks and Prov/State fields. (For international addresses, search by Country.)
4 Do one of the following:
♦ If the address exists in the database:
a Select it by clicking to the left of the address record.
b Click OK.
c Enter a date in the Start Date field to indicate when the address became effective for the account.
OR
♦ If the address does not exist in the database:
a Click New.
b Complete the new row.
Update existing phone information for the account
1 Click the Phone tab in the lower portion of the window.
2 Select the phone number by clicking to the left of the record.
3 Click Update Phone.
4 Complete the Phone Change Request form.
5 Click OK.
Add new phone information for the account
1 Click the Phone tab in the lower portion of the window.
2 Click Add Phone.
3 Complete the new row.

72 ║ CTMS Site Management
Rev 9 - July 2014
No t e s
Requesting Changes to Global Contact & Account Information
7 Enter comments in the Comments field to further clarify your request.
8 Click Submit Request.
Your request is submitted to the DCRI Service Desk for verification, as the Site Management screen reappears. When your request has been processed, you will receive an email notification from the Service Desk.

Rev 9 - July 2014
No t e s
CTMS Site Management ║ 73
Site subjects are added to the CTMS for tracking throughout a clinical protocol. If your trial uses an interactive voice response system (IVRS)
to automatically pull enrollment information into the CTMS, you do not need to manually enroll subjects.
WarNiNg: There can be as much as a 48-hour delay from the time subject information is received from an IVRS to when it appears in the CTMS. If your trial uses an IVRS, do NOT use the New button in the Subjects view to add a new subject, as this will result in a duplicate entry.
Subject ID Configuration OptionsThe Subject ID field is system-generated and can be configured by the CTMS Administrators in the DCRI Service Desk to reflect any combination of the Screening ID, Randomization ID, and Enrollment ID (each ID can be unique). For new protocols, configuration is discussed during the Protocol Setup meeting. You can also submit a CTMSR to the DCRI Service Desk ([email protected]) to request configuration.
Example:
♦ Screening ID = 123-555 ♦ Randomization ID = 1717 ♦ Enrollment ID = 8888
The Subject ID can be configured in any of the following combinations:
All three IDs 123-555:1717:8888
Screening ID + Randomization ID 123-555:1717
Randomization ID + Enrollment ID 1717:8888
Enrollment ID + Screening ID: 8888:123-555
enRollinG a site subjeCt

74 ║ CTMS Site Management
Rev 9 - July 2014
No t e s
Enrolling a Site Subject
Manually Enrolling a New Subject1 Click the Site Management screen tab.
2 Locate the site by running a query on the Site # field. (See “Querying the Site” on page 10.)
3 Select the site by clicking to the left of the site record.
4 Click the Subjects view tab at the bottom of the window. If you do not see the Subjects view tab, click the drop-down arrow to the right of the view tabs to select it.
5 To ensure that the subject has not already been added, follow the steps below to query for the subject:
a On the Subjects view tab, click Query.
b Enter the subject’s initials in the Subject Initials field.
c Click Go.
If no rows are returned, you can proceed with adding the subject.
6 On the Subjects view tab, click New.
The Subject Enrollment window appears.
7 Complete the subject record, using the following table as a guideline.
* indicates a required field
Field Guidelines
Subject Initials* Enter the subject’s initials.
Date of Birth* Enter the subject’s date of birth (using the format MM/DD/YYYY).Note: If your protocol is not collecting date of birth information for subjects, enter 01/01/1880.

CTMS Site Management ║ 75
No t e s
Rev 9 - July 2014 Enrolling a Site Subject
Field Guidelines
Gender Select the subject’s gender from the drop-down list.
Screening ID* Enter the subject’s screening ID.
Note: If your protocol is not screening subjects, this field will automatically be populated with the value in the Enrollment ID field.
Screen Date If applicable, enter the date when the subject was screened.
Race Select the subject’s race from the drop-down list.
Enrollment ID* Enter the subject’s enrollment ID.
Note: This field is required if the Screening ID field is blank.
Enrollment Date Enter the date when the subject was enrolled.
Randomization ID If applicable, enter the subject’s randomization ID.
8 Click Screen/Enroll.
The new subject record appears, and the Subject ID field is automatically populated with the system-generated ID determined by your protocol team.

76 ║ CTMS Site Management
Rev 9 - July 2014
No t e s
Enrolling a Site Subject
Editing a Subject Record1 Click the blue hyperlink in the subject’s Screening Number field.
The subject’s global record appears.
Screen and Rescreen buttons Enroll button
New button
2 Do any of the following:
♦ Click Screen or Rescreen to record screening information about the subject.
♦ Click Enroll to record enrollment information about the subject.
♦ Click the selection icon in the Status field to add new status information about the subject, such as a Screen Failure.
♦ Click New in the Visits area of the window to record visit information about the subject.
3 Save the record by pressing Ctrl+S.
4 To return to the site record, click the breadcrumb above the Home tab.
Breadcrumb back to site

Rev 9 - July 2014
No t e s
CTMS Site Management ║ 77
Use the CTMS Request (CTMSR) form to request configuration or data changes to the CTMS.
1 Requester downloads the CTMSR form from the DCRI Intranet.
a Go to the CTMS Learning Center (https://dcri.org/education-training/ctms-learning-center).
b Under Forms and Instructions, click the CTMSR: CTMS Request Form link to open and download the document to any folder.
2 Requester completes required fields on form and compiles any supporting material in separate files.
3 Requester sends email, with the form and supplemental files attached, to the Project Leader, Senior Lead CRA, or Lead CRA for approval.
4 Approver returns email to Requester, stating approval (no signature is required).
5 Requester forwards the email containing the Approver’s approval, with form and supplemental files attached, to the DCRI Service Desk ([email protected]).
The request will be tracked in the Footprints system and handled by CTMS specialists at the Service Desk.
aPPendix a: CtMs Request foRM

78 ║ CTMS Site Management
Rev 9 - July 2014Appendix A: CTMS Request Form
No t e s