ctd-202-l-9
DESCRIPTION
9.0 O BJECTIVES 9.11 G LOSSARY 9.6 S UMMING U P 9.8 T ERMINAL Q UESTIONS 9.7 P OSSIBLE ANSWERS TO S ELF C HECK Q UESTIONS 9.4 P RECAUTIONS TO O BSERVE W HILE P RINTING S TRUCTURE 9.2 P RINTING WITH S TENCILS 9.3 N EW I DEAS FOR P RINTING 9.2.1 P RINTING BY DABBING 9.2.2 P RINTING WITH PAINTING BRUSH 9.2.3 S PRAY P RINTING WITH STENCIL 9.5.1 C LASS ASSIGNMENTS 9.5.2 H OME ASSIGNMENTS 93TRANSCRIPT
93
LESSON 9 PRINTING WITH STENCILS
STRUCTURE
9.0 OBJECTIVES
9.1 INTRODUCTION
9.2 PRINTING WITH STENCILS
9.2.1 PRINTING BY DABBING 9.2.2 PRINTING WITH PAINTING BRUSH 9.2.3 SPRAY PRINTING WITH STENCIL
9.3 NEW IDEAS FOR PRINTING
9.3.1 MULTI COLOURED DESIGN WITH STENCILS 9.3.2 PRINTING WITH TWO OR MORE SUPERIMPOSED STENCILS 9.3.3 MAKING REPEATS 9.3.4 SHADING EFFECT IN STENCILING 9.3.5 NEGATIVE STENCIL DESIGNS 9.3.6 OTHER EASILY MADE STENCILS
9.4 PRECAUTIONS TO OBSERVE WHILE PRINTING
9.5 ASSIGNMENTS
9.5.1 CLASS ASSIGNMENTS 9.5.2 HOME ASSIGNMENTS
9.6 SUMMING UP
9.7 POSSIBLE ANSWERS TO SELF CHECK QUESTIONS
9.8 TERMINAL QUESTIONS
9.9 REFERENCES AND SUGGESTED FURTHER READING
9.11 GLOSSARY
95
9. PRINTING WITH STENCILS
The historical background and the tools and materials used in stencil printing were described in Lesson 7. The technique of cutting stencils and the different types of materials used for making good stencils were discussed in the previous lesson. Now in the present lesson we will consider the methods and techniques of applying colours on the stencils to produce satisfactory prints on a fabric or any other object to be ornamented.
9.0 Objectives
After going through this lesson, you will be able to:
• Stencil-print a multi-coloured design onto a fabric.
• Use printing technique like tooth brush printing, spray printing or bring about shadow effect in printing.
• Work with new ideas of stenciling like symmetric stencils, superimposed stencils, a negative stencil, or using masking tapes as stencils, shading effects etc.
9.1 Introduction
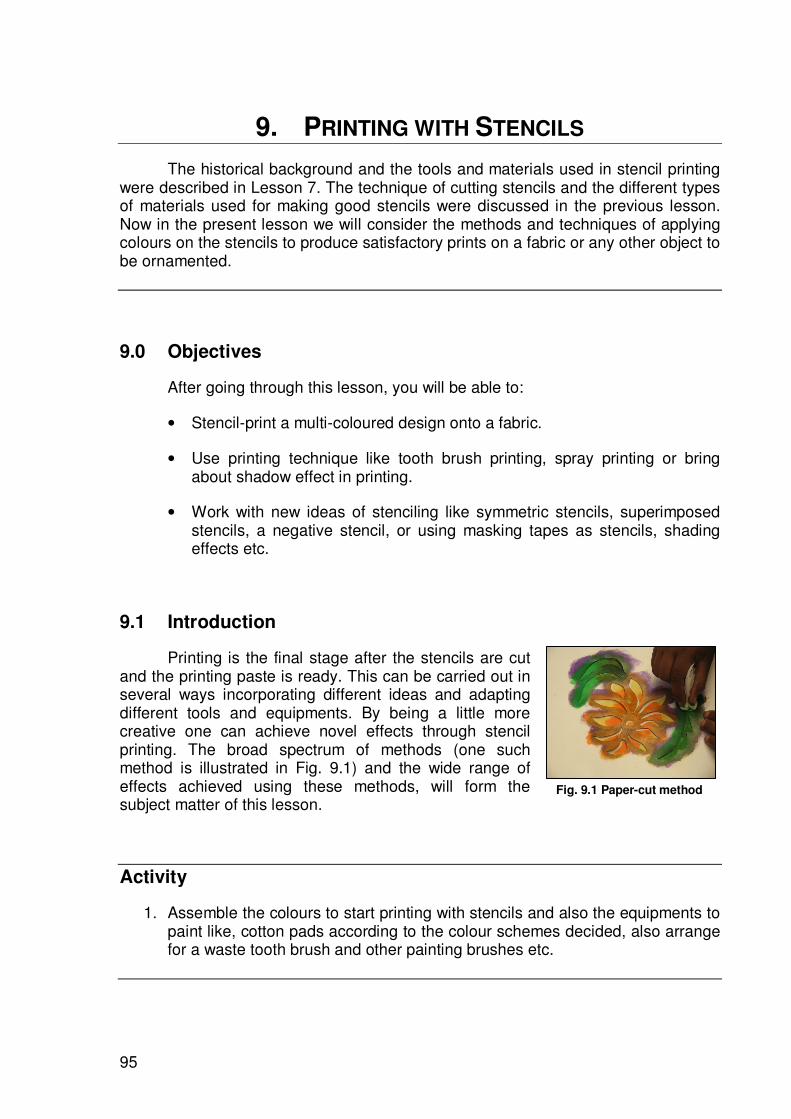
Printing is the final stage after the stencils are cut and the printing paste is ready. This can be carried out in several ways incorporating different ideas and adapting different tools and equipments. By being a little more creative one can achieve novel effects through stencil printing. The broad spectrum of methods (one such method is illustrated in Fig. 9.1) and the wide range of effects achieved using these methods, will form the subject matter of this lesson.
Activity
1. Assemble the colours to start printing with stencils and also the equipments to paint like, cotton pads according to the colour schemes decided, also arrange for a waste tooth brush and other painting brushes etc.
Fig. 9.1 Paper-cut method
96
9.2 Printing with Stencils
A variety of dyes and pigments can be used for stencil printing and a number of devices can be used to apply the colours. The various types of colours and pigments used for stencil printing were described in Lesson 7. In this lesson we will learn how the colours are applied to the stencil.
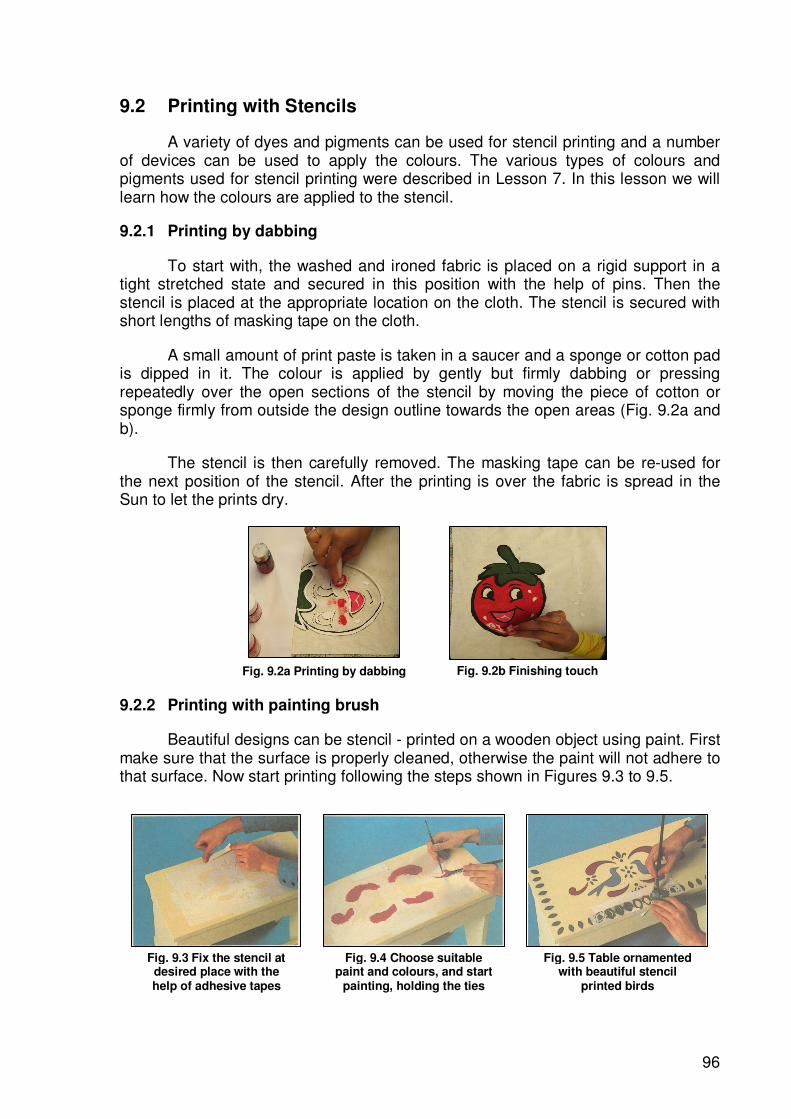
9.2.1 Printing by dabbing
To start with, the washed and ironed fabric is placed on a rigid support in a tight stretched state and secured in this position with the help of pins. Then the stencil is placed at the appropriate location on the cloth. The stencil is secured with short lengths of masking tape on the cloth.
A small amount of print paste is taken in a saucer and a sponge or cotton pad is dipped in it. The colour is applied by gently but firmly dabbing or pressing repeatedly over the open sections of the stencil by moving the piece of cotton or sponge firmly from outside the design outline towards the open areas (Fig. 9.2a and b).
The stencil is then carefully removed. The masking tape can be re-used for the next position of the stencil. After the printing is over the fabric is spread in the Sun to let the prints dry.
9.2.2 Printing with painting brush
Beautiful designs can be stencil - printed on a wooden object using paint. First make sure that the surface is properly cleaned, otherwise the paint will not adhere to that surface. Now start printing following the steps shown in Figures 9.3 to 9.5.
Fig. 9.2b Finishing touch Fig. 9.2a Printing by dabbing
Fig. 9.4 Choose suitable paint and colours, and start
painting, holding the ties
Fig. 9.3 Fix the stencil at desired place with the help of adhesive tapes
Fig. 9.5 Table ornamented with beautiful stencil
printed birds
97
Fig. 9.8 Multi colour printing Fig. 9.9 separate pad is used for different colours
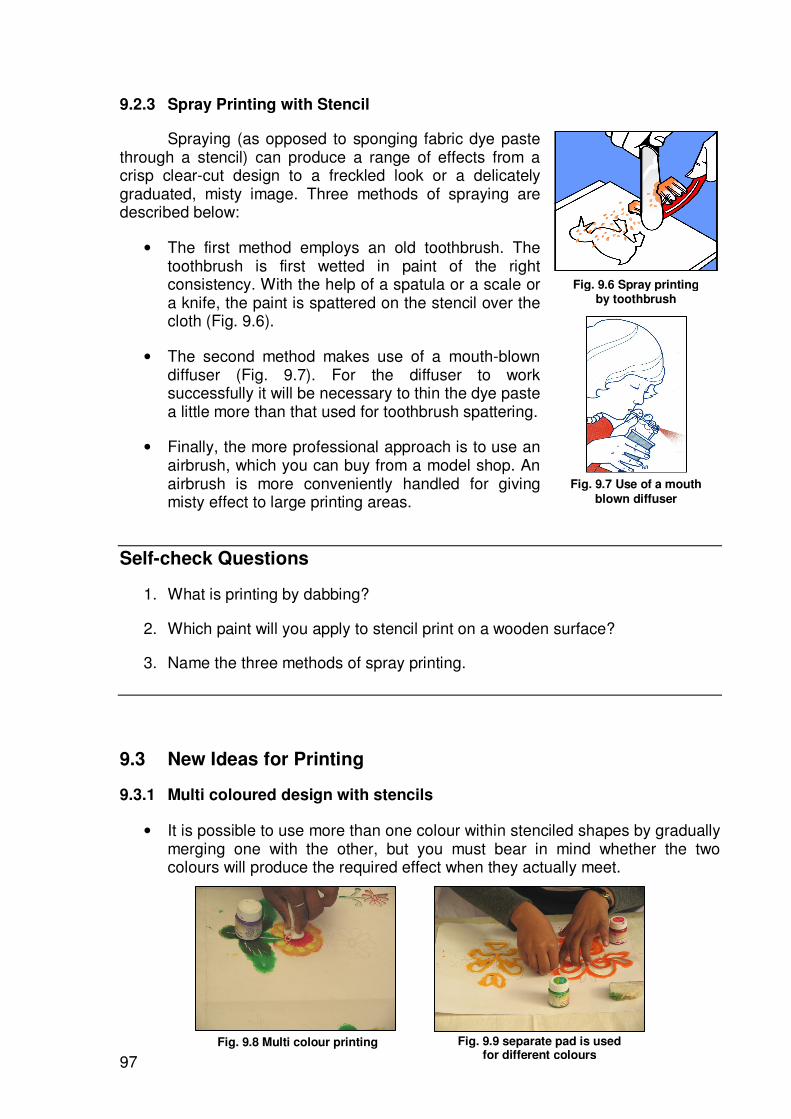
9.2.3 Spray Printing with Stencil
Spraying (as opposed to sponging fabric dye paste through a stencil) can produce a range of effects from a crisp clear-cut design to a freckled look or a delicately graduated, misty image. Three methods of spraying are described below:
• The first method employs an old toothbrush. The toothbrush is first wetted in paint of the right consistency. With the help of a spatula or a scale or a knife, the paint is spattered on the stencil over the cloth (Fig. 9.6).
• The second method makes use of a mouth-blown diffuser (Fig. 9.7). For the diffuser to work successfully it will be necessary to thin the dye paste a little more than that used for toothbrush spattering.
• Finally, the more professional approach is to use an airbrush, which you can buy from a model shop. An airbrush is more conveniently handled for giving misty effect to large printing areas.
Self-check Questions
1. What is printing by dabbing?
2. Which paint will you apply to stencil print on a wooden surface?
3. Name the three methods of spray printing.
9.3 New Ideas for Printing
9.3.1 Multi coloured design with stencils
• It is possible to use more than one colour within stenciled shapes by gradually merging one with the other, but you must bear in mind whether the two colours will produce the required effect when they actually meet.
Fig. 9.6 Spray printing by toothbrush
Fig. 9.7 Use of a mouth
blown diffuser
98
• Use a fresh piece of sponge for each colour, and use it only for that colour throughout the printing (Fig. 9.8).
• Try printing your design in separate colours (Fig. 9.9). If yours is a large scale design this is quite feasible with stencil printing. The gaps you are not printing should be covered with paper secured by masking tape.
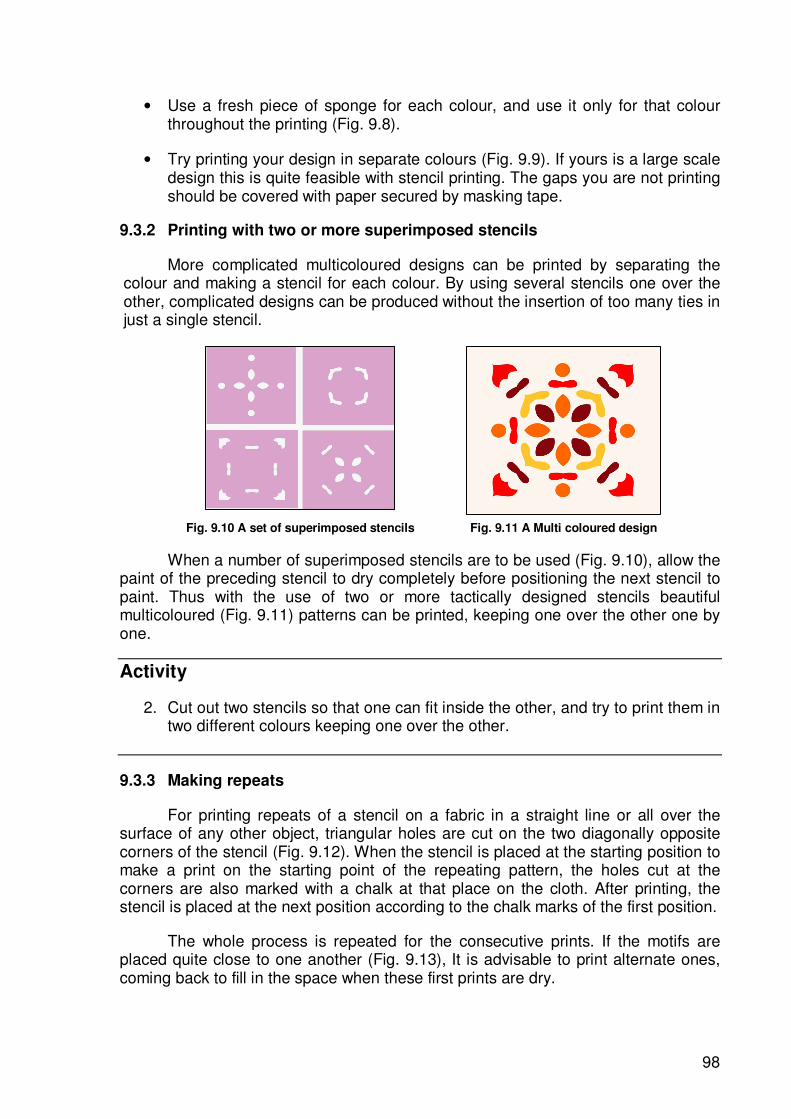
9.3.2 Printing with two or more superimposed stencils
More complicated multicoloured designs can be printed by separating the colour and making a stencil for each colour. By using several stencils one over the other, complicated designs can be produced without the insertion of too many ties in just a single stencil.
When a number of superimposed stencils are to be used (Fig. 9.10), allow the paint of the preceding stencil to dry completely before positioning the next stencil to paint. Thus with the use of two or more tactically designed stencils beautiful multicoloured (Fig. 9.11) patterns can be printed, keeping one over the other one by one.
Activity
2. Cut out two stencils so that one can fit inside the other, and try to print them in two different colours keeping one over the other.
9.3.3 Making repeats
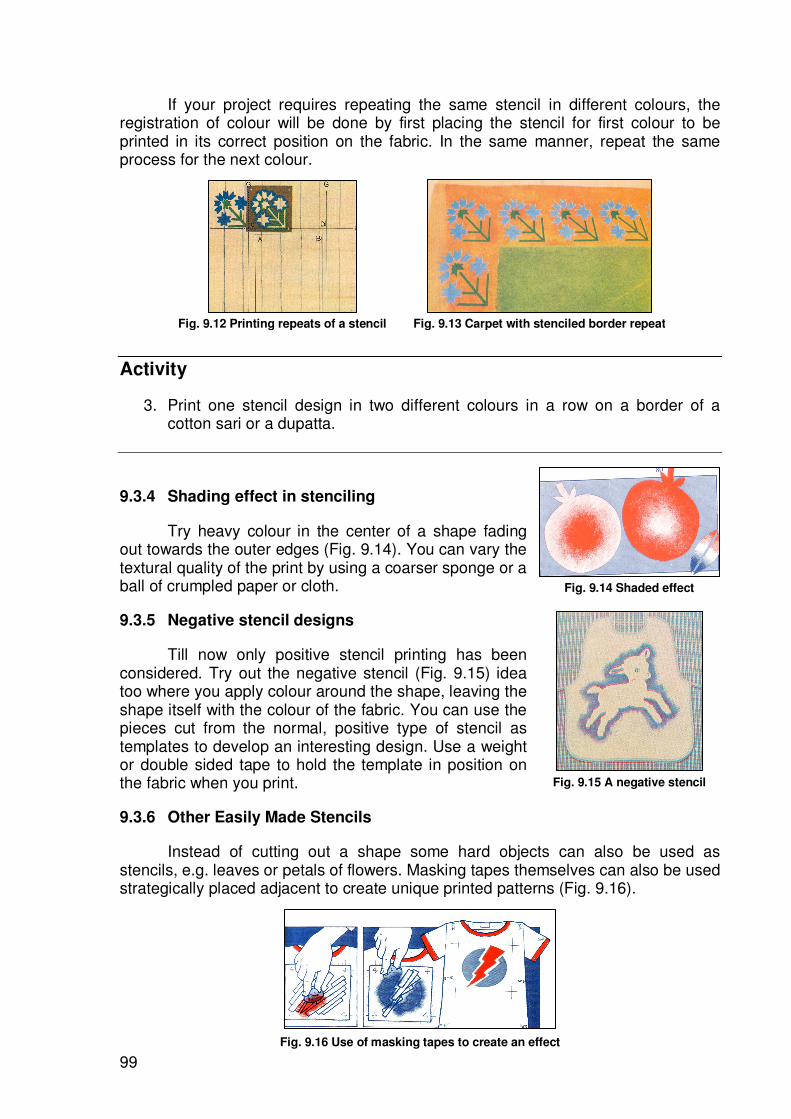
For printing repeats of a stencil on a fabric in a straight line or all over the surface of any other object, triangular holes are cut on the two diagonally opposite corners of the stencil (Fig. 9.12). When the stencil is placed at the starting position to make a print on the starting point of the repeating pattern, the holes cut at the corners are also marked with a chalk at that place on the cloth. After printing, the stencil is placed at the next position according to the chalk marks of the first position.
The whole process is repeated for the consecutive prints. If the motifs are placed quite close to one another (Fig. 9.13), It is advisable to print alternate ones, coming back to fill in the space when these first prints are dry.
Fig. 9.11 A Multi coloured design Fig. 9.10 A set of superimposed stencils
99
If your project requires repeating the same stencil in different colours, the registration of colour will be done by first placing the stencil for first colour to be printed in its correct position on the fabric. In the same manner, repeat the same process for the next colour.
Activity
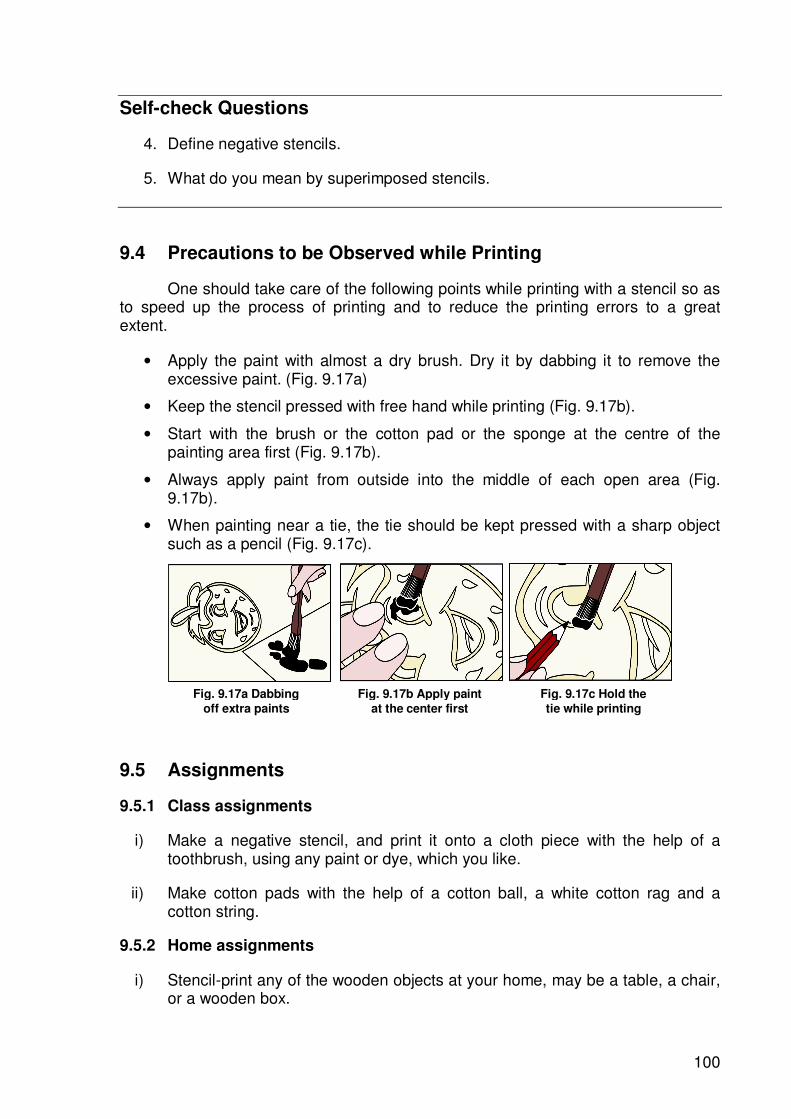
3. Print one stencil design in two different colours in a row on a border of a cotton sari or a dupatta.
9.3.4 Shading effect in stenciling
Try heavy colour in the center of a shape fading out towards the outer edges (Fig. 9.14). You can vary the textural quality of the print by using a coarser sponge or a ball of crumpled paper or cloth.
9.3.5 Negative stencil designs
Till now only positive stencil printing has been considered. Try out the negative stencil (Fig. 9.15) idea too where you apply colour around the shape, leaving the shape itself with the colour of the fabric. You can use the pieces cut from the normal, positive type of stencil as templates to develop an interesting design. Use a weight or double sided tape to hold the template in position on the fabric when you print.
9.3.6 Other Easily Made Stencils
Instead of cutting out a shape some hard objects can also be used as stencils, e.g. leaves or petals of flowers. Masking tapes themselves can also be used strategically placed adjacent to create unique printed patterns (Fig. 9.16).
Fig. 9.16 Use of masking tapes to create an effect
Fig. 9.15 A negative stencil
Fig. 9.14 Shaded effect
Fig. 9.12 Printing repeats of a stencil Fig. 9.13 Carpet with stenciled border repeat
100
Self-check Questions
4. Define negative stencils.
5. What do you mean by superimposed stencils.
9.4 Precautions to be Observed while Printing
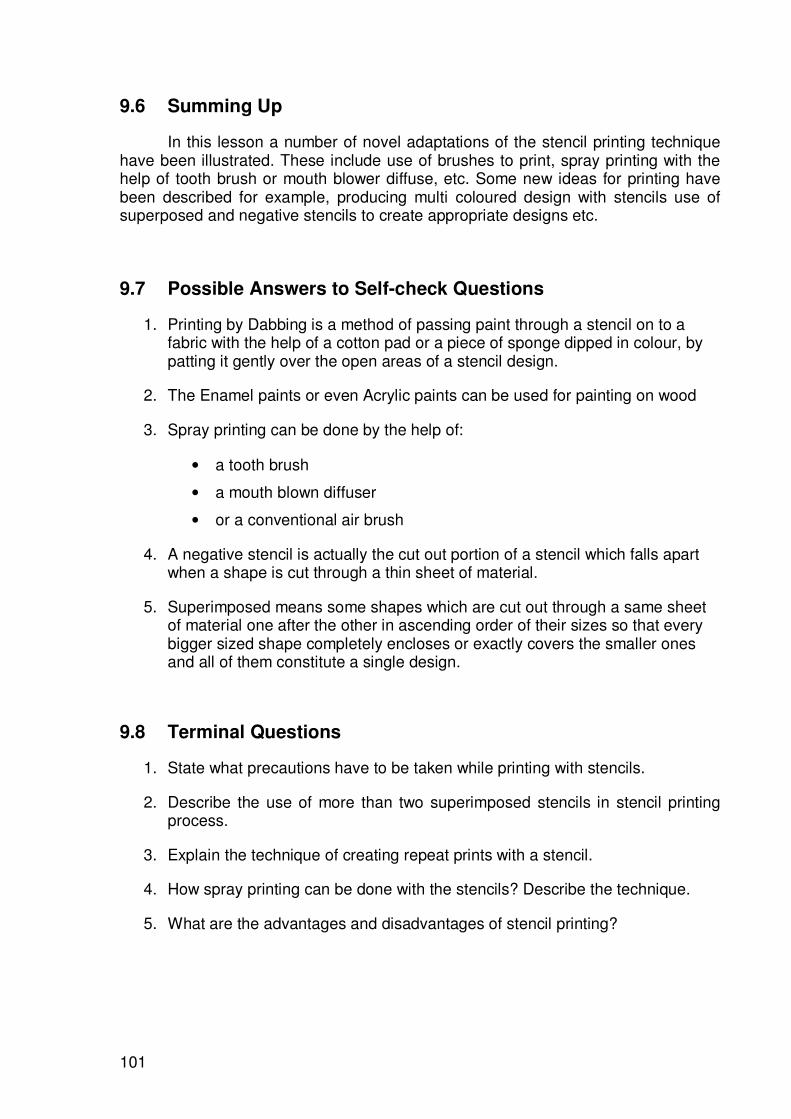
One should take care of the following points while printing with a stencil so as to speed up the process of printing and to reduce the printing errors to a great extent.
• Apply the paint with almost a dry brush. Dry it by dabbing it to remove the excessive paint. (Fig. 9.17a)
• Keep the stencil pressed with free hand while printing (Fig. 9.17b).
• Start with the brush or the cotton pad or the sponge at the centre of the painting area first (Fig. 9.17b).
• Always apply paint from outside into the middle of each open area (Fig. 9.17b).
• When painting near a tie, the tie should be kept pressed with a sharp object such as a pencil (Fig. 9.17c).
9.5 Assignments
9.5.1 Class assignments
i) Make a negative stencil, and print it onto a cloth piece with the help of a toothbrush, using any paint or dye, which you like.
ii) Make cotton pads with the help of a cotton ball, a white cotton rag and a cotton string.
9.5.2 Home assignments
i) Stencil-print any of the wooden objects at your home, may be a table, a chair, or a wooden box.
Fig. 9.17a Dabbing
off extra paints
Fig. 9.17b Apply paint
at the center first
Fig. 9.17c Hold the
tie while printing
101
9.6 Summing Up
In this lesson a number of novel adaptations of the stencil printing technique have been illustrated. These include use of brushes to print, spray printing with the help of tooth brush or mouth blower diffuse, etc. Some new ideas for printing have been described for example, producing multi coloured design with stencils use of superposed and negative stencils to create appropriate designs etc.
9.7 Possible Answers to Self-check Questions
1. Printing by Dabbing is a method of passing paint through a stencil on to a fabric with the help of a cotton pad or a piece of sponge dipped in colour, by patting it gently over the open areas of a stencil design.
2. The Enamel paints or even Acrylic paints can be used for painting on wood
3. Spray printing can be done by the help of:
• a tooth brush
• a mouth blown diffuser
• or a conventional air brush
4. A negative stencil is actually the cut out portion of a stencil which falls apart when a shape is cut through a thin sheet of material.
5. Superimposed means some shapes which are cut out through a same sheet of material one after the other in ascending order of their sizes so that every bigger sized shape completely encloses or exactly covers the smaller ones and all of them constitute a single design.
9.8 Terminal Questions
1. State what precautions have to be taken while printing with stencils.
2. Describe the use of more than two superimposed stencils in stencil printing process.
3. Explain the technique of creating repeat prints with a stencil.
4. How spray printing can be done with the stencils? Describe the technique.
5. What are the advantages and disadvantages of stencil printing?
102
9.9 References and Suggested Further Reading
1. Anonymous. 1977. Dyeing and Printing. Excalibur Books.
2. Anonymous. 1979. Craft and Hobbies (Reader’s Digest). Reader’s Digest Association, New York.
3. Bhatnagar, P. 2000. Screen Printing Techniques for Unemployed Educated Women. Ministry of SSI & ARI., Govt. of India, New Delhi.
4. Pellow, C. 1998. Dyes and Dyeing. Abhishek Publications, Chandigarh.
5. Russ, S. 1964. Fabric Printing by Hand. Studio Vista Limited.
9.10 Glossary
1. Dabbing Apply small amount, touch lightly
2. Pigment colour Colouring matter used to print the fabric
3. Spraying Scatter, sprinkle
4. Superimpose Place one over another, lay over
5. Negative Inverse image