creating custom groups a beginner’s guide to using the custom groups data-entry application
TRANSCRIPT

Creating Creating Custom GroupsCustom Groups
Creating Creating Custom GroupsCustom Groups
A beginner’s guide to using the A beginner’s guide to using the Custom Groups data-entry applicationCustom Groups data-entry application

What is the Custom Groups application?
• It is a data-entry application that allows school administrators to create customized groups of students for easy viewing in MyData.
• Examples of custom groups usage: track students who participate in an after school program, track performance of recently reclassified English learners
• You can add or remove students at any time, and the group is viewable in any of the classroom reports of MyData.
Who can access this application?
• Administrators and other users with schoolwide MyData access, can access this application to create custom groups and assign teachers to monitor these groups.
• Teachers cannot create custom groups, but can access the custom groups in MyData.

Can we see a demo?
• Let’s begin!
• Click to move through the following slides…
mydata
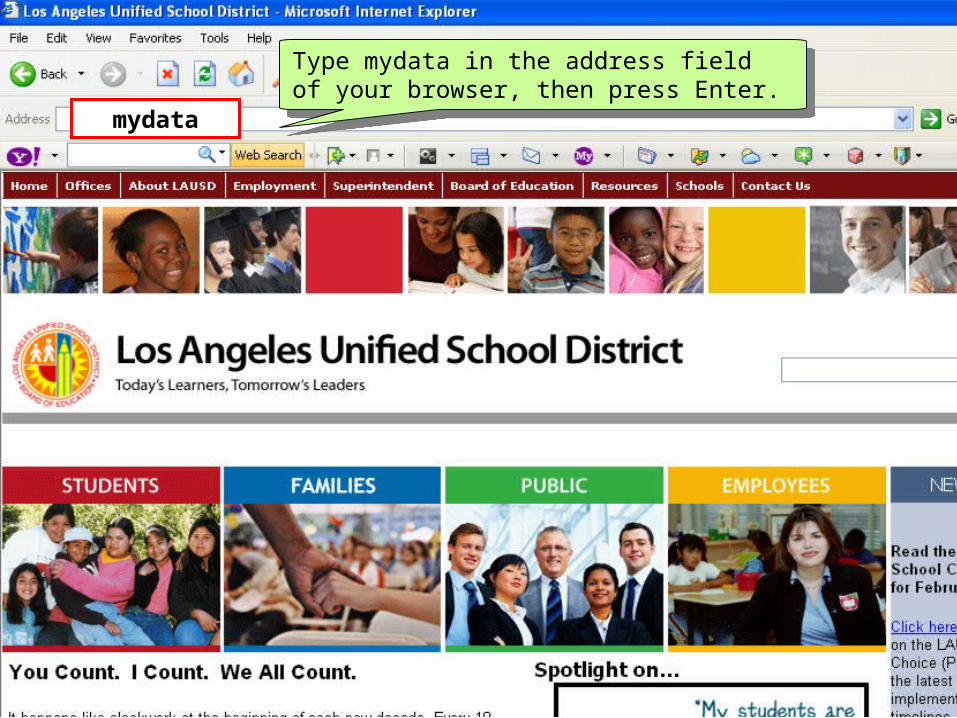
Type mydata in the address field of your browser, then press Enter.
Type mydata in the address field of your browser, then press Enter.
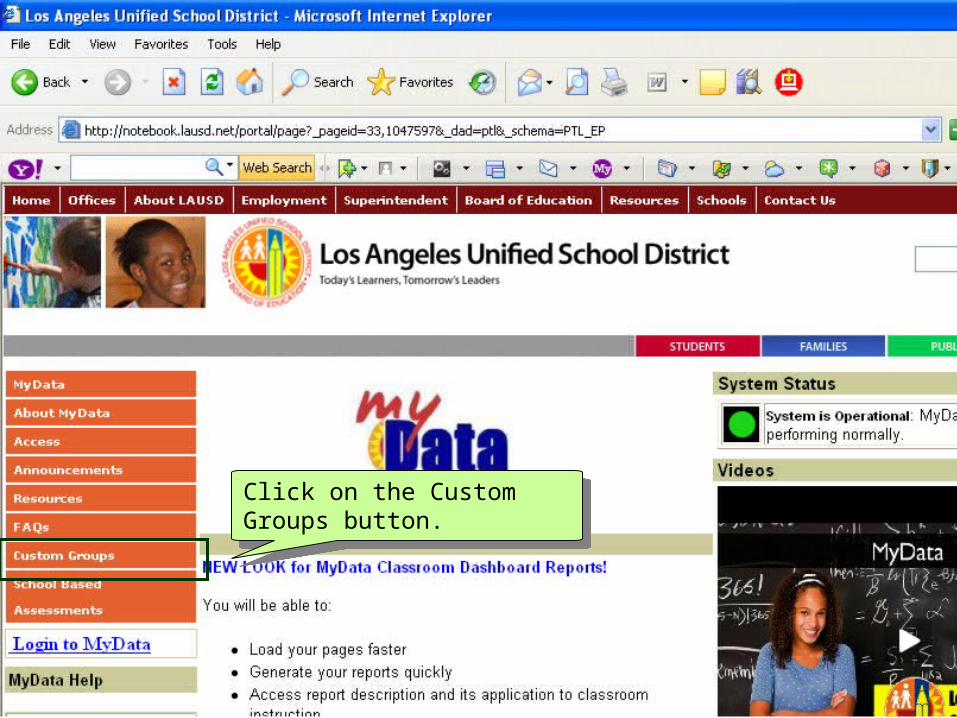
Click on the Custom Groups button.
Click on the Custom Groups button.

Click on the Custom Groups Application link.
Click on the Custom Groups Application link.
firstname.lastname
********
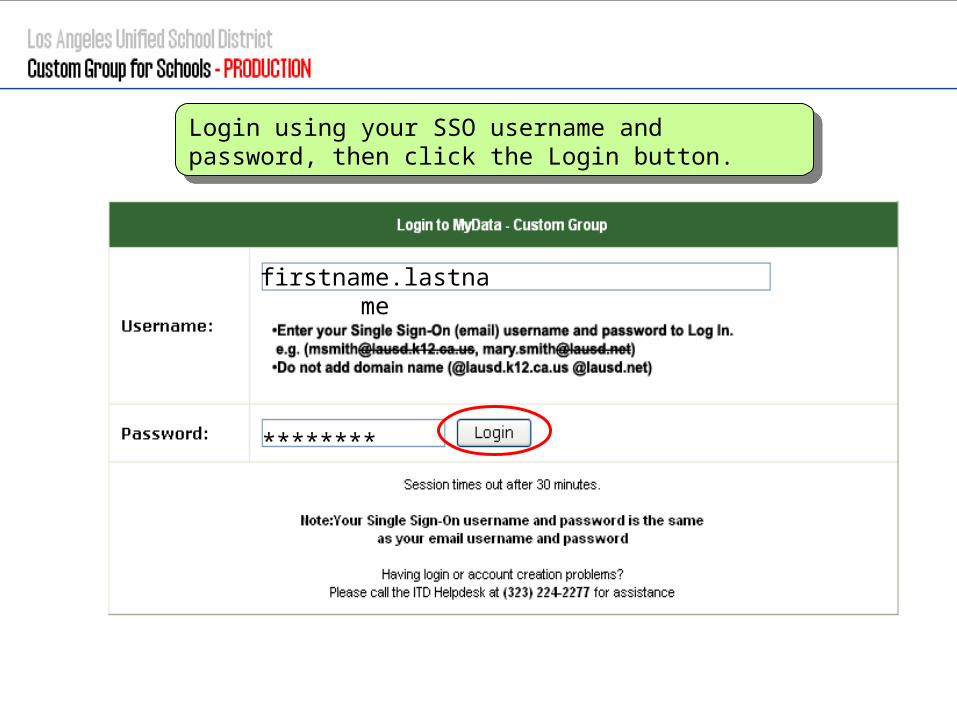
Login using your SSO username and password, then click the Login button.
Login using your SSO username and password, then click the Login button.
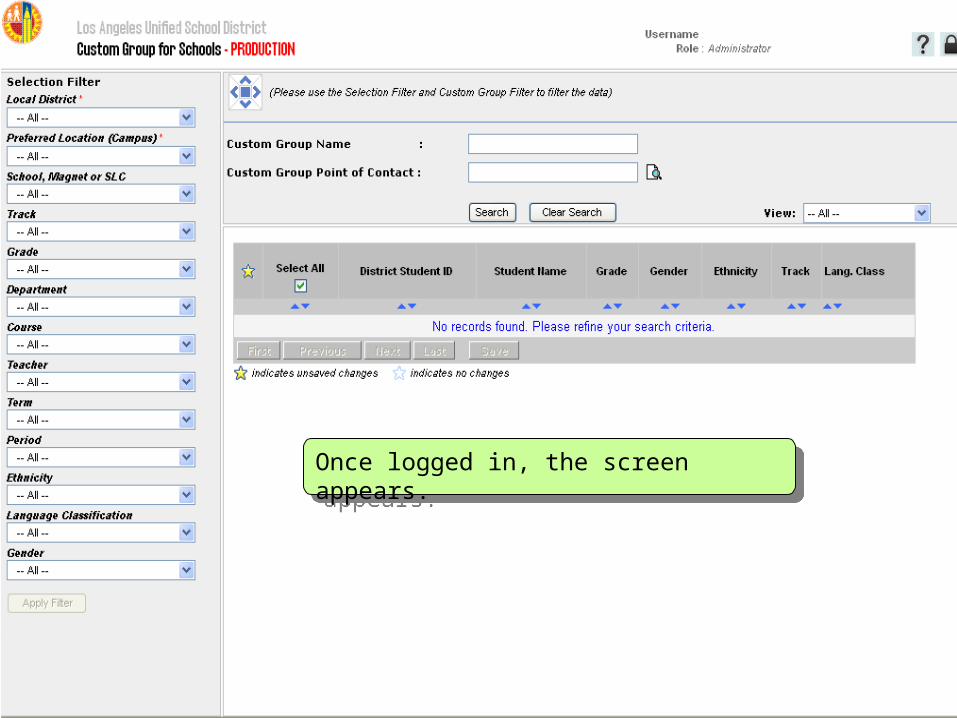
Once logged in, the screen appears.Once logged in, the screen appears.

Use the selection filters on the left-hand side of the screen to select those students for which you need to enter data.
Use the selection filters on the left-hand side of the screen to select those students for which you need to enter data.
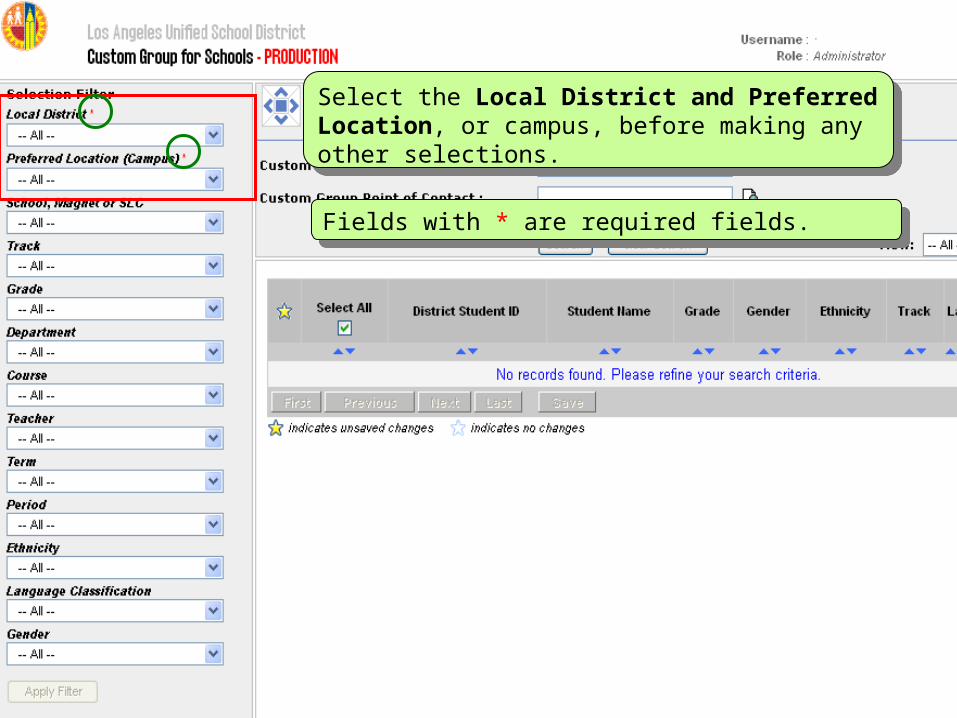
Select the Local District and Preferred Location, or campus, before making any other selections.
Select the Local District and Preferred Location, or campus, before making any other selections.
Fields with * are required fields.Fields with * are required fields.
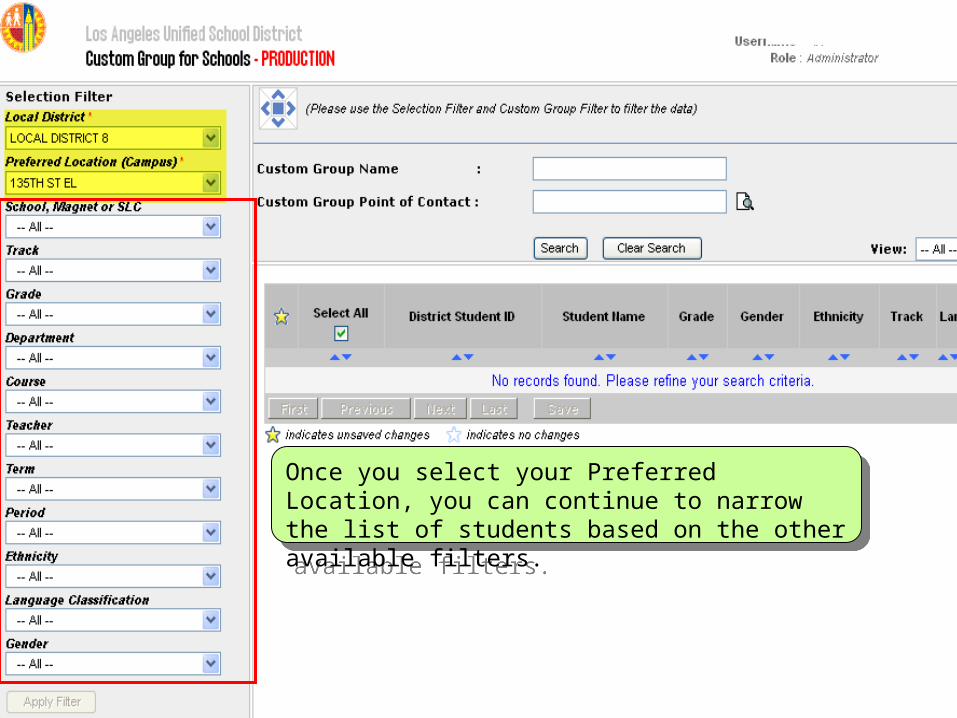
Once you select your Preferred Location, you can continue to narrow the list of students based on the other available filters.
Once you select your Preferred Location, you can continue to narrow the list of students based on the other available filters.

After selecting Preferred Location, the Track and Teacher filters will refresh with information specific to the school.
After selecting Preferred Location, the Track and Teacher filters will refresh with information specific to the school.

For secondary schools, if you want to select students in a particular course, you must select the associated Department first.
For secondary schools, if you want to select students in a particular course, you must select the associated Department first.

All the other filters display the same values regardless of the school. If no student records return after selecting your criteria, it may be because the choices do not apply to your school’s population (e.g., selecting “Filipino” and “Limited English Proficient”).
All the other filters display the same values regardless of the school. If no student records return after selecting your criteria, it may be because the choices do not apply to your school’s population (e.g., selecting “Filipino” and “Limited English Proficient”).
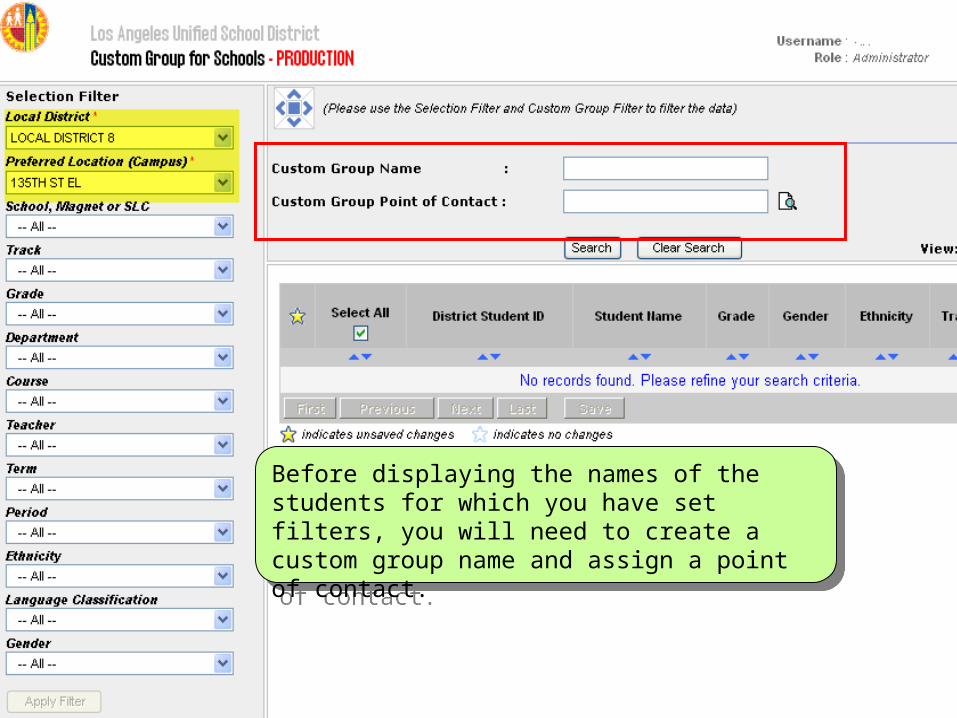
Before displaying the names of the students for which you have set filters, you will need to create a custom group name and assign a point of contact.
Before displaying the names of the students for which you have set filters, you will need to create a custom group name and assign a point of contact.
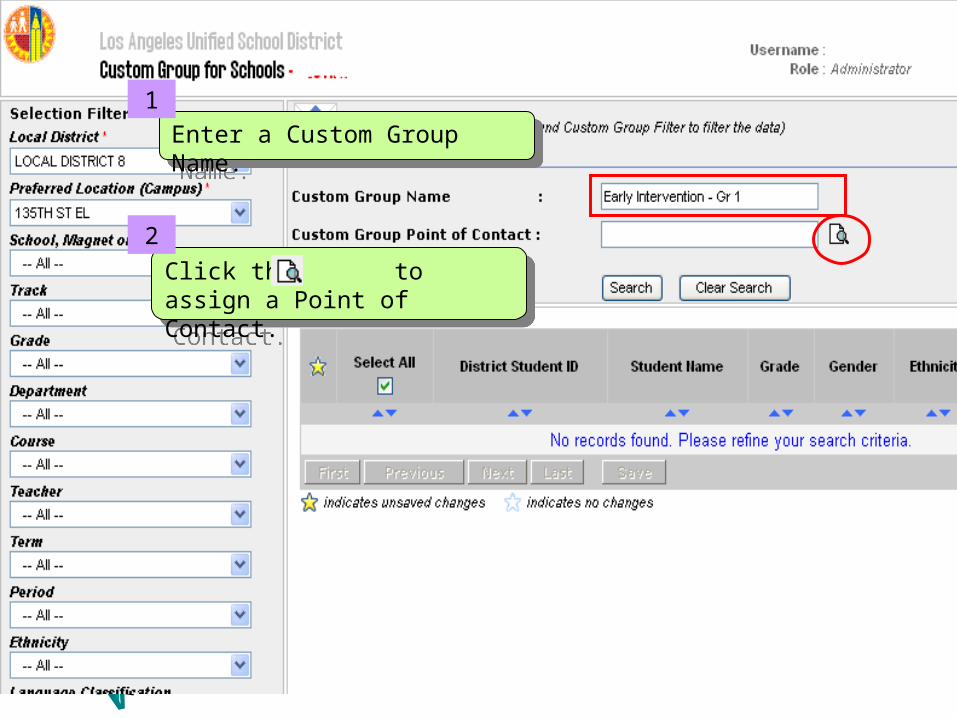
Enter a Custom Group Name.
Enter a Custom Group Name.
1
Click the to assign a Point of Contact.
Click the to assign a Point of Contact.
2
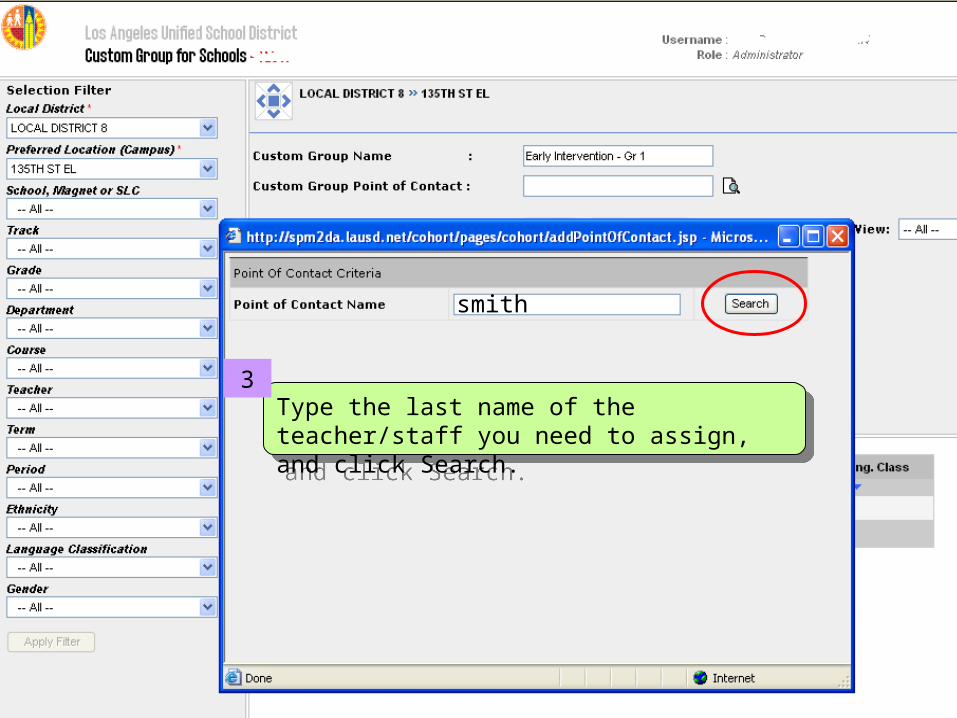
smith
Type the last name of the teacher/staff you need to assign, and click Search.
Type the last name of the teacher/staff you need to assign, and click Search.
3
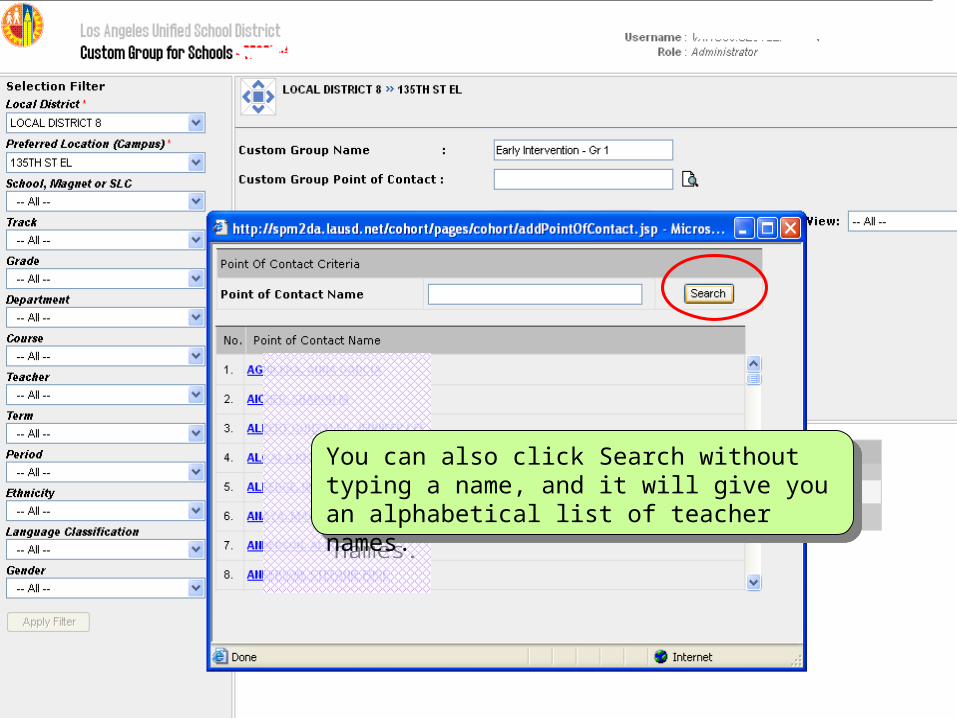
You can also click Search without typing a name, and it will give you an alphabetical list of teacher names.
You can also click Search without typing a name, and it will give you an alphabetical list of teacher names.
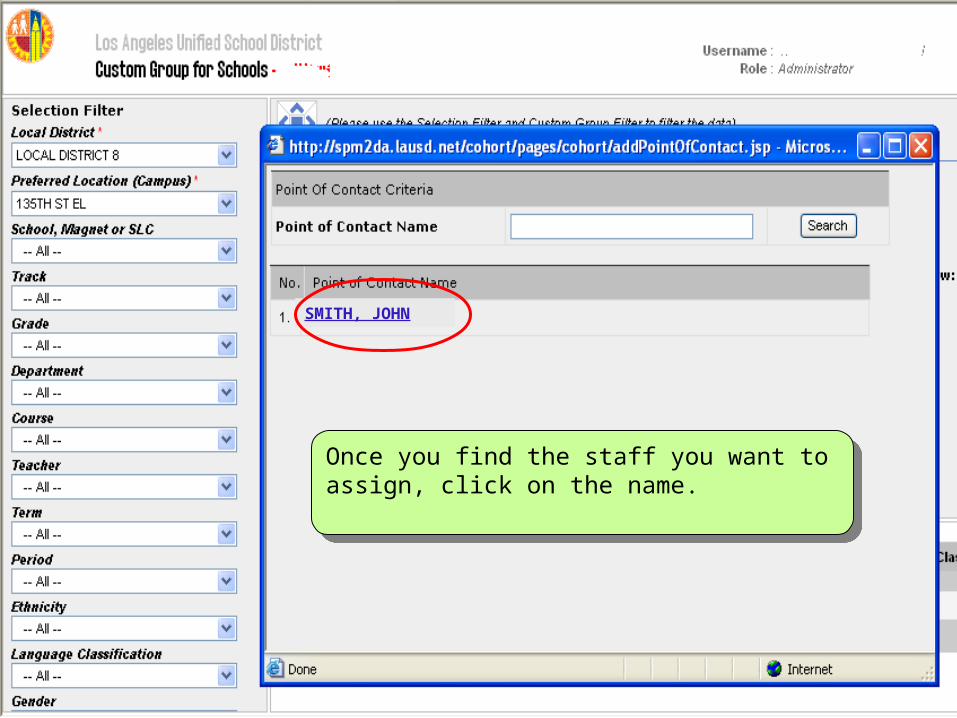
SMITH, JOHN
Once you find the staff you want to assign, click on the name.
Once you find the staff you want to assign, click on the name.

SMITH, JOHN
Now that you have assigned a Point of Contact, click Yes to add this new custom group.
Now that you have assigned a Point of Contact, click Yes to add this new custom group.

SMITH, JOHN
SMITH, JOHN
Click on the link to display the list of students from which you can select to create your custom group.
Click on the link to display the list of students from which you can select to create your custom group.

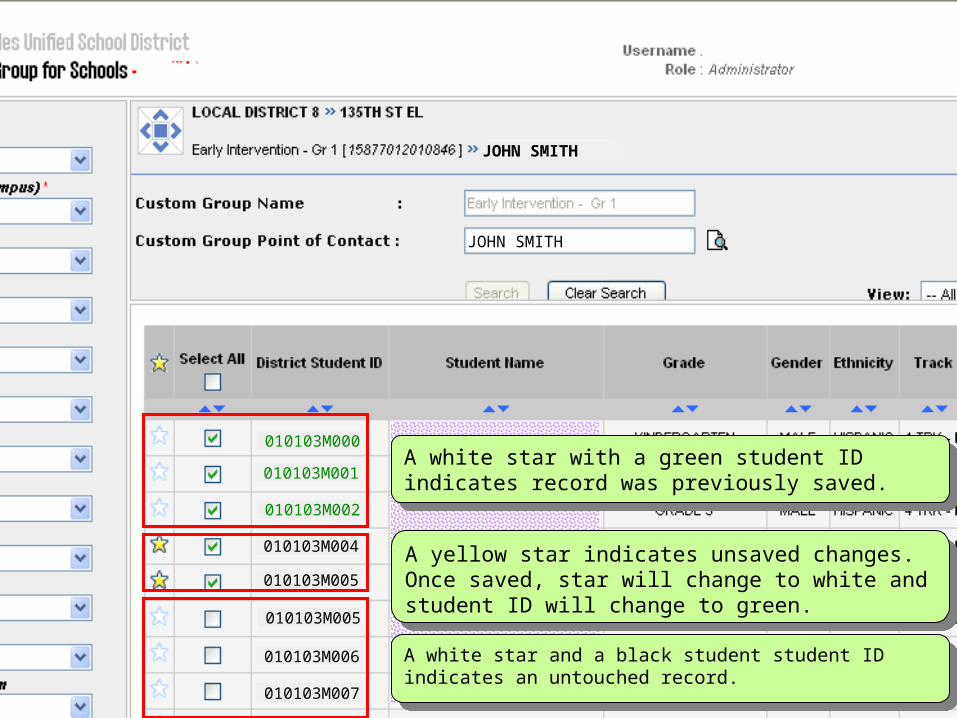
Select the students you want to include in your custom group by clicking the box for each student.
Select the students you want to include in your custom group by clicking the box for each student.

Once the box is checked for a student, a yellow star will appear next to it, indicating that it is flagged for inclusion in the custom group.
Once the box is checked for a student, a yellow star will appear next to it, indicating that it is flagged for inclusion in the custom group.

JOHN SMITH
To move to the next page, click the Next button.
To move to the next page, click the Next button.
To move several pages, type a specific page number.
To move several pages, type a specific page number.
JOHN SMITH
010103M000
010103M004
010103M005
010103M001
010103M002
010103M005
010103M006
010103M007
JOHN SMITH
JOHN SMITH
A white star with a green student ID indicates record was previously saved.
A white star with a green student ID indicates record was previously saved.
A yellow star indicates unsaved changes. Once saved, star will change to white and student ID will change to green.
A yellow star indicates unsaved changes. Once saved, star will change to white and student ID will change to green.
A white star and a black student student ID indicates an untouched record.
A white star and a black student student ID indicates an untouched record.

010103M000
010103M004
010103M005
010103M001
010103M002
010103M005
010103M006
010103M007
JOHN SMITH
JOHN SMITH
To clear the selections and create a new custom group, click on the Clear Search button.
To clear the selections and create a new custom group, click on the Clear Search button.

JOHN SMITH
JOHN SMITH
You can change your view to display All Students or Un-Selected Students. If you are editing an existing list, click on Edit Selected Students. This will display only those who belong to the custom group.
You can change your view to display All Students or Un-Selected Students. If you are editing an existing list, click on Edit Selected Students. This will display only those who belong to the custom group.

Viewing the Viewing the Created Custom Created Custom
Groups Groups in MyData in MyData
Viewing the Viewing the Created Custom Created Custom
Groups Groups in MyData in MyData
Accessing reports for custom groups on Accessing reports for custom groups on the reporting applicationthe reporting application
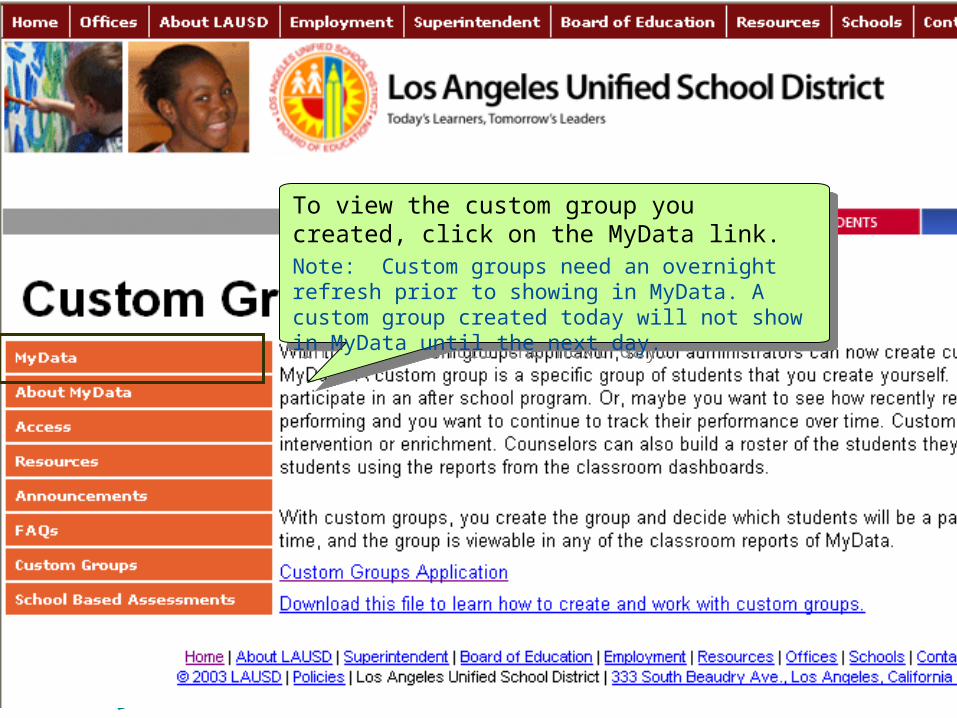
To view the custom group you created, click on the MyData link.Note: Custom groups need an overnight refresh prior to showing in MyData. A custom group created today will not show in MyData until the next day.
To view the custom group you created, click on the MyData link.Note: Custom groups need an overnight refresh prior to showing in MyData. A custom group created today will not show in MyData until the next day.

Log in to MyData using the login link on the left side of the screen, or, click on the MyData icon.
Log in to MyData using the login link on the left side of the screen, or, click on the MyData icon.

firstname.lastname
********
Login using your SSO username and password, then click the Login button.
Login using your SSO username and password, then click the Login button.

Click the Classroom menu and select “My Students, Current Year Data” dashboard.
Click the Classroom menu and select “My Students, Current Year Data” dashboard.

On the Select Roster Type field, drop the arrow and change the selection from Class Roster to Custom Roster. Then click Go.
On the Select Roster Type field, drop the arrow and change the selection from Class Roster to Custom Roster. Then click Go.

SMITH, JOHN
DOE, JANE
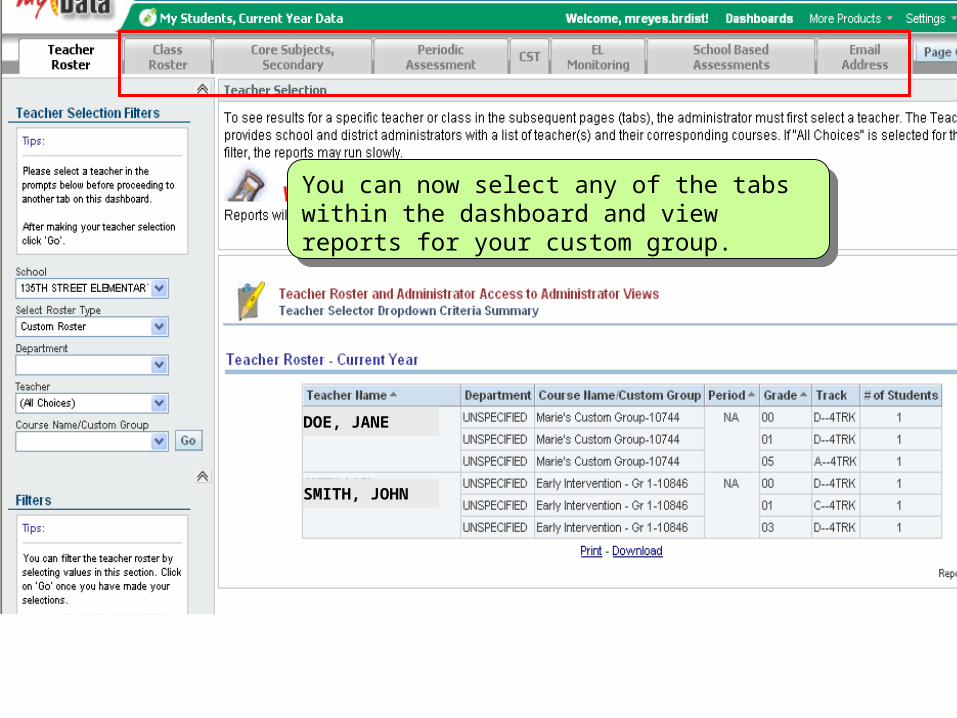
Your Teacher Roster will now display teachers who are assigned to monitor custom groups.
Your Teacher Roster will now display teachers who are assigned to monitor custom groups.
SMITH, JOHN
DOE, JANE
You can now select any of the tabs within the dashboard and view reports for your custom group.
You can now select any of the tabs within the dashboard and view reports for your custom group.

Here is the view for the custom roster, using the Class Roster report.
Here is the view for the custom roster, using the Class Roster report.

This concludes the tutorial on the
Custom Groups Application.
For further assistance, please send an email to
[email protected] or call 213.241.1113.