copyright 2014 kenneth m. chipps ph.d. software defined networking lab using mininet and the...
TRANSCRIPT

Copyright 2014 Kenneth M. Chipps Ph.D. www.chipps.com
Software Defined NetworkingLab
Using Mininetand the
Floodlight ControllerLast Update 2014.02.02
1.0.0
1

Objectives
• See what an OpenFlow GUI based controller looks like and how it works
Copyright 2014 Kenneth M. Chipps Ph.D. www.chipps.com 2

Sources
• This lab uses the completely setup and functional Mininet and Floodlight virtual machine from Project Floodlght at http://www.projectfloodlight.org
Copyright 2014 Kenneth M. Chipps Ph.D. www.chipps.com 3

Flow of the Lab
• In this lab you will– Simulate a single switch, multi-host network
with Mininet– Add flow rules to a flow table from a GUI
based controller
Copyright 2014 Kenneth M. Chipps Ph.D. www.chipps.com 4

Anti Linux Rant
• Before we get to this lab which does work - not without some wasted time and considerable research, but successfully nevertheless – let me vent a bit
• You see I spent hours trying to create this lab using the OpenDaylight controller
• What a waste of time
Copyright 2014 Kenneth M. Chipps Ph.D. www.chipps.com 5

Anti Linux Rant
• Despite going through numerous sample labs that alleged that the OpenDaylight controller would run, l never got the whole thing to work properly
• The problem in each case was the idiot Linux command line
Copyright 2014 Kenneth M. Chipps Ph.D. www.chipps.com 6

Anti Linux Rant
• I reiterate my view that I have held from 1995 when I started using the Slackware distribution of Linux to this week’s experience with the Ubuntu distribution, which is that Linux sucks
• And I mean it sucks big time• In short I hate Linux• Have none of the idiots who develop in the
Linux environment ever used WindowsCopyright 2014 Kenneth M. Chipps Ph.D. www.chipps.com 7

Anti Linux Rant
• A Windows install, even an Alpha or Beta version, is so simple
• Download an exe file, run it, you are done• Besides the excessive number of steps
required to install and setup OpenDaylight, it runs in Java, which creates a whole new set of problems
• Java has been a security risk and pain in the rear since it was invented
Copyright 2014 Kenneth M. Chipps Ph.D. www.chipps.com 8

Anti Linux Rant
• Even worse are all of the steps that must be done from the Linux command line in subterrain directories
• In the sample OpenDaylight labs among other things I am expected to change directory using a string that is 97 characters long
• 97 characters• Notice that they cannot spell either
Copyright 2014 Kenneth M. Chipps Ph.D. www.chipps.com 9

Anti Linux Rant
• Here are the directory instructions– The source code of the OpenDaylight
Controller is in a directory called opendaylight– In this directory (the coresponding directory in
the git repository is usually the• distribution/opendaylight/target/
distribution.opendaylight-0.1.0-SNAPSHOTosgipackage/opendaylight
Copyright 2014 Kenneth M. Chipps Ph.D. www.chipps.com 10

Anti Linux Rant
• Even if you successfully get there without a typo, the prompt is so long that you only have two characters of room to enter anything before it scrolls off to the next line
• Of course you then have to edit hidden files in hidden places to make Java work
• The suggestion was to edit these, assuming you can find them, using the vi editor
Copyright 2014 Kenneth M. Chipps Ph.D. www.chipps.com 11

Anti Linux Rant
• vi ??• Why don’t we just go back to living in
caves• Why would anyone think the command
line is a suitable environment in the 21st century
• Imbeciles
Copyright 2014 Kenneth M. Chipps Ph.D. www.chipps.com 12

Lab Setup
• Enough ranting• I feel so much better now• On to the lab setup
Copyright 2014 Kenneth M. Chipps Ph.D. www.chipps.com 13

Lab Setup
• About the time I was going to abandon this effort I decided to try the Floodlight controller
• I was amazed that it worked• But it did• So let’s see how to set it up so we can use
a controller instead of the command line to enter instructions into the flow table
Copyright 2014 Kenneth M. Chipps Ph.D. www.chipps.com 14

Flow of the Lab
• The steps required to do this are– Download the virtual machine– Setup the virtual machine– Check the setup in Linux– Create the network– Enter flow table entries from the controller
Copyright 2014 Kenneth M. Chipps Ph.D. www.chipps.com 15

Acquire Floodlight VM
• The first step is to acquire the Floodlight virtual machine
• Unlike the convoluted setup procedure required for OpenDaylight the Floodlight folks have created a virtual machine with the Floodlight controller already installed and ready to go
• Smart folks• The virtual machine is found here
Copyright 2014 Kenneth M. Chipps Ph.D. www.chipps.com 16

Acquire Floodlight VM
– http://www.projectfloodlight.org/floodlight/
Copyright 2014 Kenneth M. Chipps Ph.D. www.chipps.com 17

Acquire Floodlight VM
Copyright 2014 Kenneth M. Chipps Ph.D. www.chipps.com 18

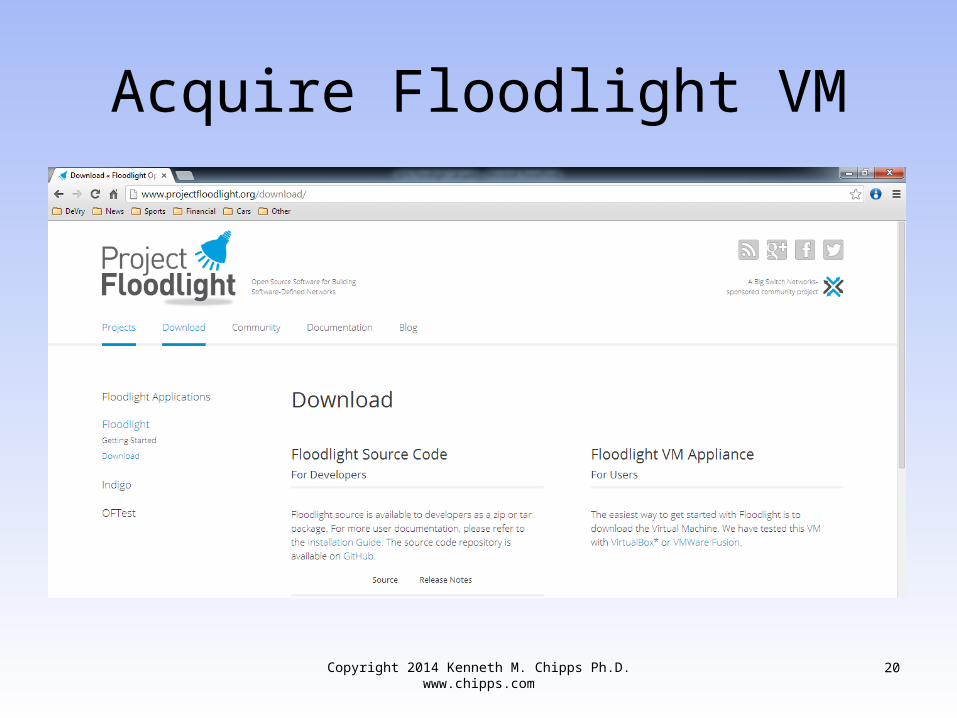
Acquire Floodlight VM
• Click on the Download link in the menu bar• Scroll down• On the right side click on
– Download
Copyright 2014 Kenneth M. Chipps Ph.D. www.chipps.com 19
Acquire Floodlight VM
Copyright 2014 Kenneth M. Chipps Ph.D. www.chipps.com 20

Acquire Floodlight VM
Copyright 2014 Kenneth M. Chipps Ph.D. www.chipps.com 21

Acquire Floodlight VM
Copyright 2014 Kenneth M. Chipps Ph.D. www.chipps.com 22
Acquire Floodlight VM
• Unzip the file• Remember where you put it
Copyright 2014 Kenneth M. Chipps Ph.D. www.chipps.com 23

Setup the Virtual Machine
• This is a VMware virtual machine• It will also run in VirtualBox
Copyright 2014 Kenneth M. Chipps Ph.D. www.chipps.com 24

Setup the Virtual Machine
• Once the files are unzipped they must be loaded into VMware
• Start VMware Player• Click on
– Open a Virtual Machine
Copyright 2014 Kenneth M. Chipps Ph.D. www.chipps.com 25

Setup the Virtual Machine
Copyright 2014 Kenneth M. Chipps Ph.D. www.chipps.com 26

Setup the Virtual Machine
• Navigate to where the vmx file is stored• Click
– Open• The virtual machine will appear in the
virtual machine list in the left panel• Click on
– Play the virtual machine• toward the bottom of the right panel
Copyright 2014 Kenneth M. Chipps Ph.D. www.chipps.com 27

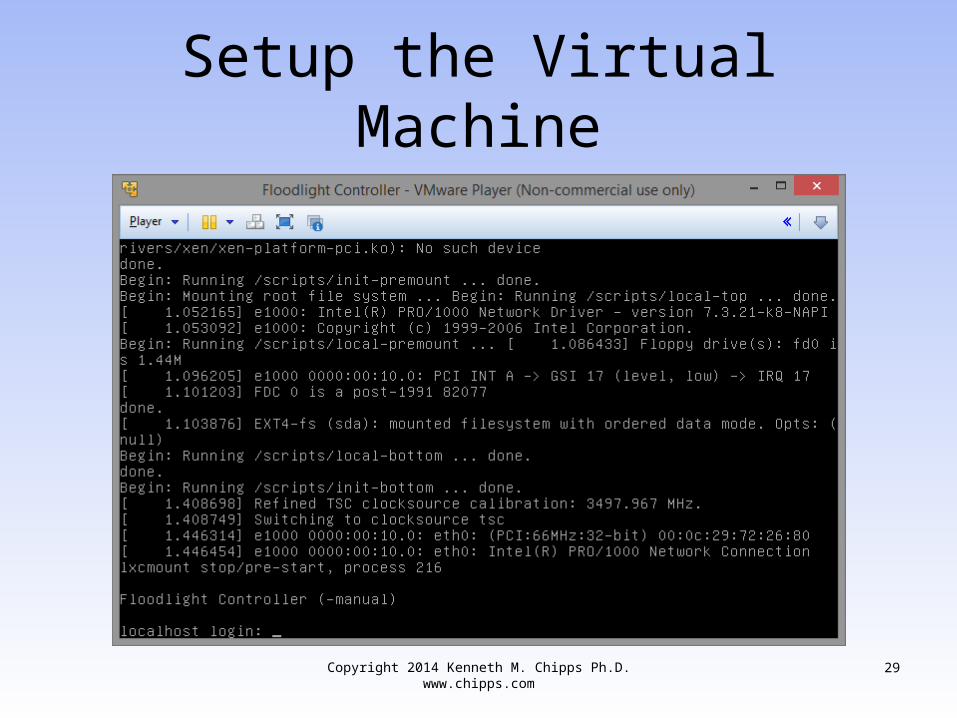
Setup the Virtual Machine
• Don’t’ bother with the VMware tools for Linux
• Once it is ready the screen should look like this
Copyright 2014 Kenneth M. Chipps Ph.D. www.chipps.com 28
Setup the Virtual Machine
Copyright 2014 Kenneth M. Chipps Ph.D. www.chipps.com 29

Setup the Virtual Machine
• Even though this is a VMware created virtual machine it can be opened in VirtualBox
• To do this download the appliance shown below this lab’s link
• Extract the files from the zip file just downloaded
• Start VirtualBox
Copyright 2014 Kenneth M. Chipps Ph.D. www.chipps.com 30

Setup the Virtual Machine
• Under the File menu select– Import Appliance
• Navigate to where the zip file was expanded
• Select the ovf file• Click
– Next
Copyright 2014 Kenneth M. Chipps Ph.D. www.chipps.com 31

Setup the Virtual Machine
• Once the appliance is imported select it in the left pane
• Click– Settings
• Select– Network
• Change the adapter to– Host-only Adapter
Copyright 2014 Kenneth M. Chipps Ph.D. www.chipps.com 32

Setup the Virtual Machine
• Click– OK
Copyright 2014 Kenneth M. Chipps Ph.D. www.chipps.com 33

Setup the Virtual Machine
Copyright 2014 Kenneth M. Chipps Ph.D. www.chipps.com 34

The Virtual Machine
• Start the virtual machine as you would any virtual machine
• Login using– floodlight
• As the username• There is no password
Copyright 2014 Kenneth M. Chipps Ph.D. www.chipps.com 35

The Virtual Machine
Copyright 2014 Kenneth M. Chipps Ph.D. www.chipps.com 36

Record the IP Address
• Run ifconfig• Write down the IP address of this virtual
machine
Copyright 2014 Kenneth M. Chipps Ph.D. www.chipps.com 37

Record the IP Address
Copyright 2014 Kenneth M. Chipps Ph.D. www.chipps.com 38

Create the Network
• To start Floodlight at the command line enter– sudo mn
• This will create a network with– Controller using Floodlight– Switch named s1– Host named h2– Host named h3
Copyright 2014 Kenneth M. Chipps Ph.D. www.chipps.com 39

Create the Network
Copyright 2014 Kenneth M. Chipps Ph.D. www.chipps.com 40

What is Mininet
• For this lab on SDN we will be using Mininet to create the SDN hardware and OpenFlow commands to define how the hardware acts
Copyright 2014 Kenneth M. Chipps Ph.D. www.chipps.com 41

What is Mininet
• Mininet is a network emulator, not a simulator
• It can be used to create virtual hosts, hubs, switches, controllers, and links
• The code used in Mininet can be used with no or minimal changes on real SDN OpenFlow networks
Copyright 2014 Kenneth M. Chipps Ph.D. www.chipps.com 42

Connect to the Controller
• To connect to the controller go to the host operating system
• Start a web browser• Google Chrome works best for this as
Internet Explorer is missing some add in as it only shows part of the page
• Likely something to do with Java again
Copyright 2014 Kenneth M. Chipps Ph.D. www.chipps.com 43

Connect to the Controller
• Enter this– http://192.168.13.131:8080//ui/index.html
• Where 192.168.13.131 is the IP address shown when ifconfig was run above
• This screen will appear
Copyright 2014 Kenneth M. Chipps Ph.D. www.chipps.com 44

Connect to the Controller
Copyright 2014 Kenneth M. Chipps Ph.D. www.chipps.com 45
Examine the Controller
• Let’s look around• Click on
– Topology• This shows the network layout created by
the sudo mn command• Here we have one OpenFlow switch and
two generic hosts
Copyright 2014 Kenneth M. Chipps Ph.D. www.chipps.com 46

Examine the Controller
Copyright 2014 Kenneth M. Chipps Ph.D. www.chipps.com 47

Examine the Controller
• Click on– Switches
Copyright 2014 Kenneth M. Chipps Ph.D. www.chipps.com 48

Examine the Controller
Copyright 2014 Kenneth M. Chipps Ph.D. www.chipps.com 49

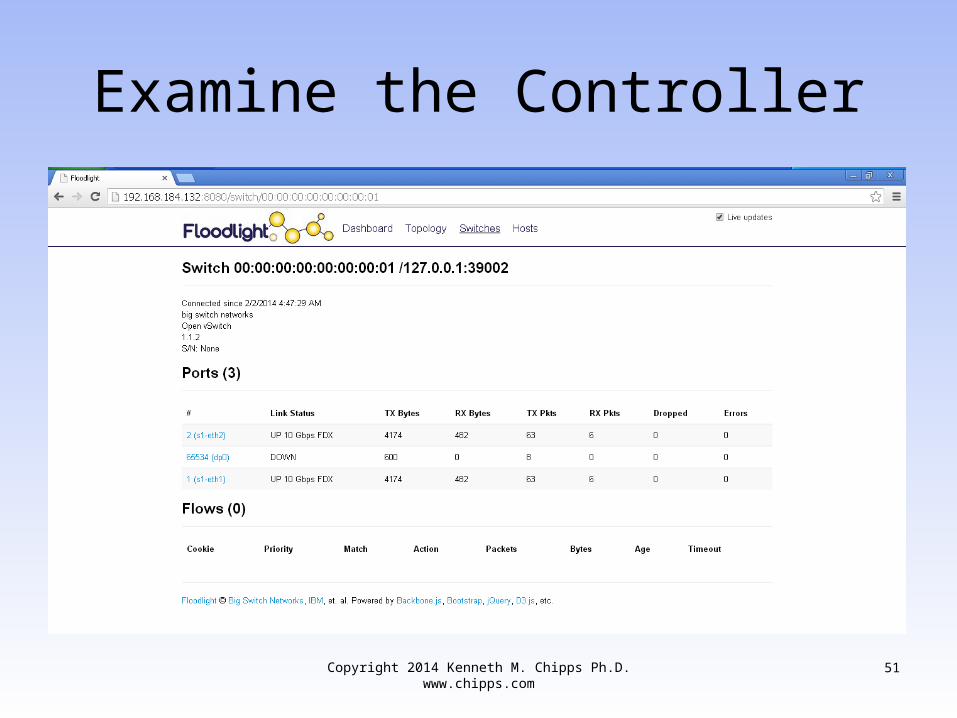
Examine the Controller
• Click on the number in blue just below DPID
• This will appear• It shows us the active ports and the flows
being managed by the controller and sent to the switch
• Notice that there are none as no traffic has crossed the network as the Flows shows 0
Copyright 2014 Kenneth M. Chipps Ph.D. www.chipps.com 50
Examine the Controller
Copyright 2014 Kenneth M. Chipps Ph.D. www.chipps.com 51

Examine the Controller
• Let’s cause the switch to ask the controller for instructions so that a set of flow rules will appear in the flow table
• This will be reactive mode since the switch will ask the controller what to do
• The controller will respond with a set of flow rules for the flow table
Copyright 2014 Kenneth M. Chipps Ph.D. www.chipps.com 52

Examine the Controller
• To cause this go to the mininet prompt and enter– h2 ping h3
• Return to the virtual machine running the browser
• Notice the two flow entries now shown
Copyright 2014 Kenneth M. Chipps Ph.D. www.chipps.com 53

Examine the Controller
Copyright 2014 Kenneth M. Chipps Ph.D. www.chipps.com 54
Summary
• We now have a fully functioning Software Defined Network being controlled by an OpenFlow controller
Copyright 2014 Kenneth M. Chipps Ph.D. www.chipps.com 55