contents user guide.pdf · in the destination email address that will receive the forwarded email...
TRANSCRIPT

Contents 1. Assign User ........................................................................................................................................ 2
2. Create Email Accounts .................................................................................................................. 5
3. Delete Email Accounts .................................................................................................................. 8
4. Change Email Account Password ............................................................................................. 8
5. Create Auto Responder.............................................................................................................. 10
6. Creating Email Forwarders ...................................................................................................... 12
7. Import Addresses/Forwarders .............................................................................................. 15
8. Email Archiving ............................................................................................................................ 19

1. Assign User This is to allow you to launch Business Email Hosting. 1.1 Go to mybusinessapps.globe.com.ph and login with your myBusiness user
name and password.
1.2 After you login, you will see your Business Email Hosting application icon.
Click Assign user(s) to assign user to launch application.
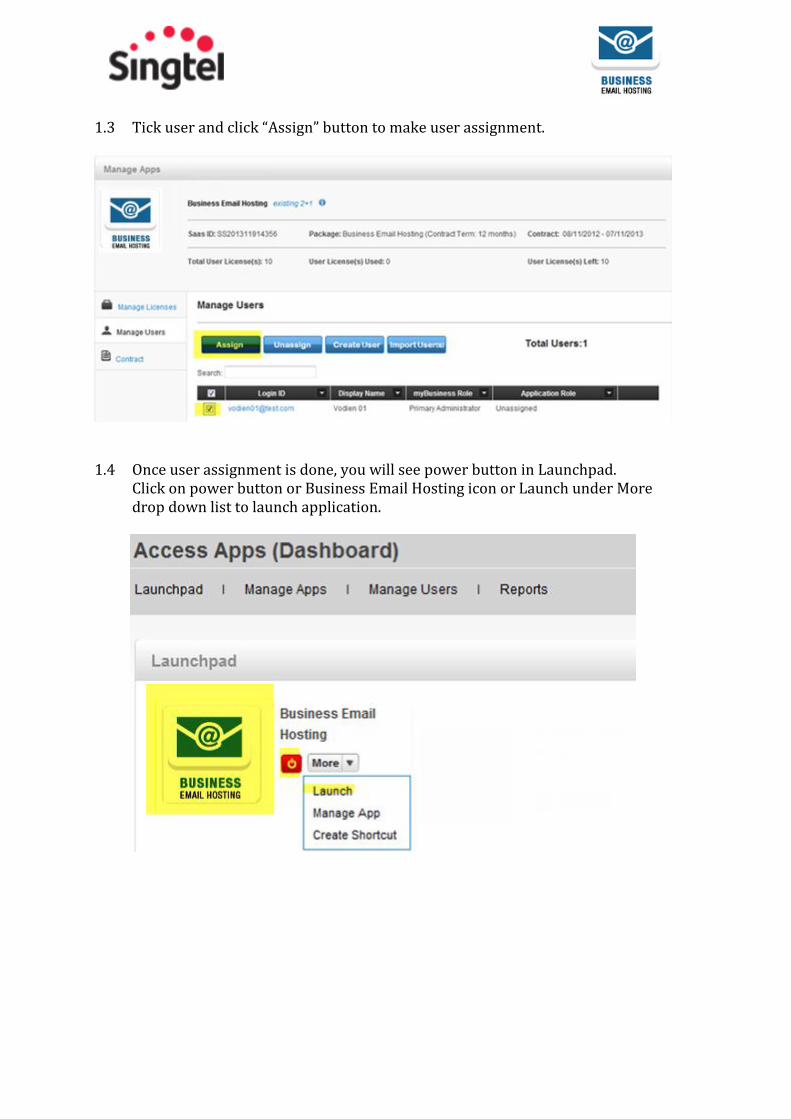
1.3 Tick user and click “Assign” button to make user assignment.
1.4 Once user assignment is done, you will see power button in Launchpad.
Click on power button or Business Email Hosting icon or Launch under More drop down list to launch application.

1.5 You will see below Administrative Dashboard in which you can access Business
Email Hosting cPanel, Domain Name cPanel and DNS cPanel.

1.6 Click on Business Email Hosting Cpanel to access all features.
2. Create Email Accounts Note: As an administrator, you will need to inform both email address and password to your user manually who will be accessing this particular email address via webmail or mail clients. 2.1 Click the Email Accounts function to proceed.
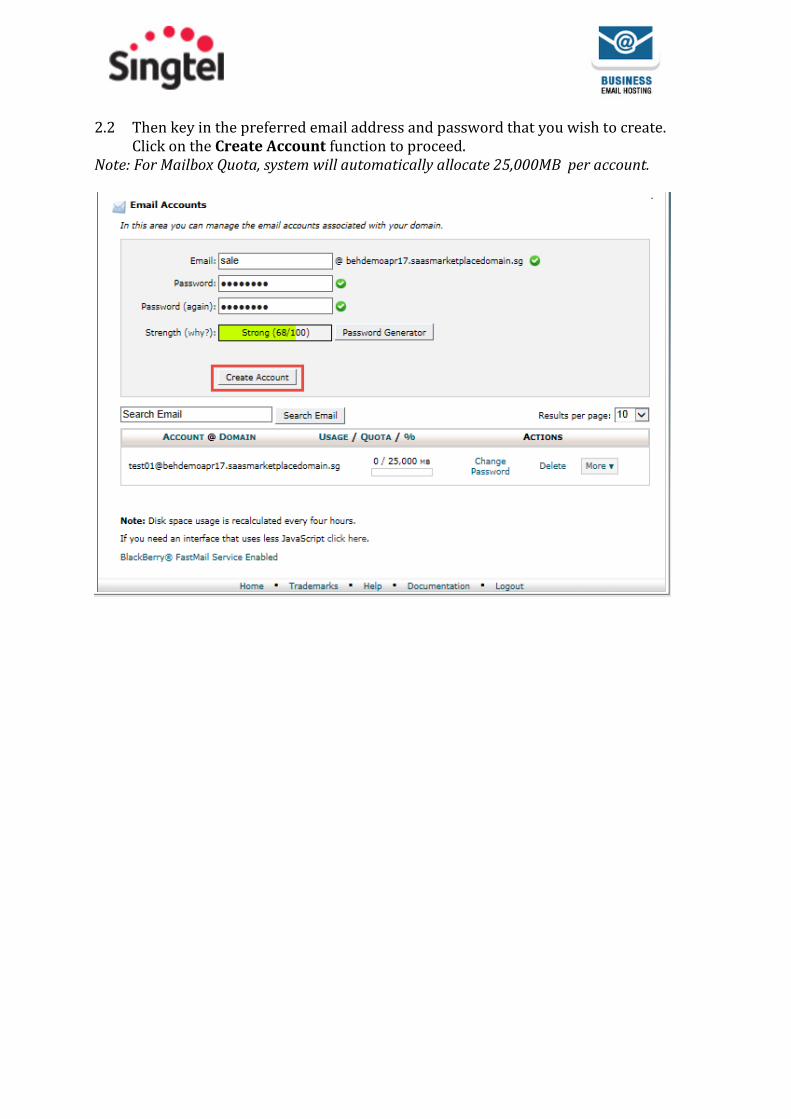
2.2 Then key in the preferred email address and password that you wish to create.
Click on the Create Account function to proceed. Note: For Mailbox Quota, system will automatically allocate 25,000MB per account.

2.3 The entire process has been completed. You have now created a new email
account.

3. Delete Email Accounts 3.1 Click the Email Accounts function to proceed.
3.2 Click on the "delete" option on the right of respective mail account.
3.3 Confirm the deletion of account by clicking on "Delete" button.
4. Change Email Account Password
4.1 Click the Email Accounts function to proceed.
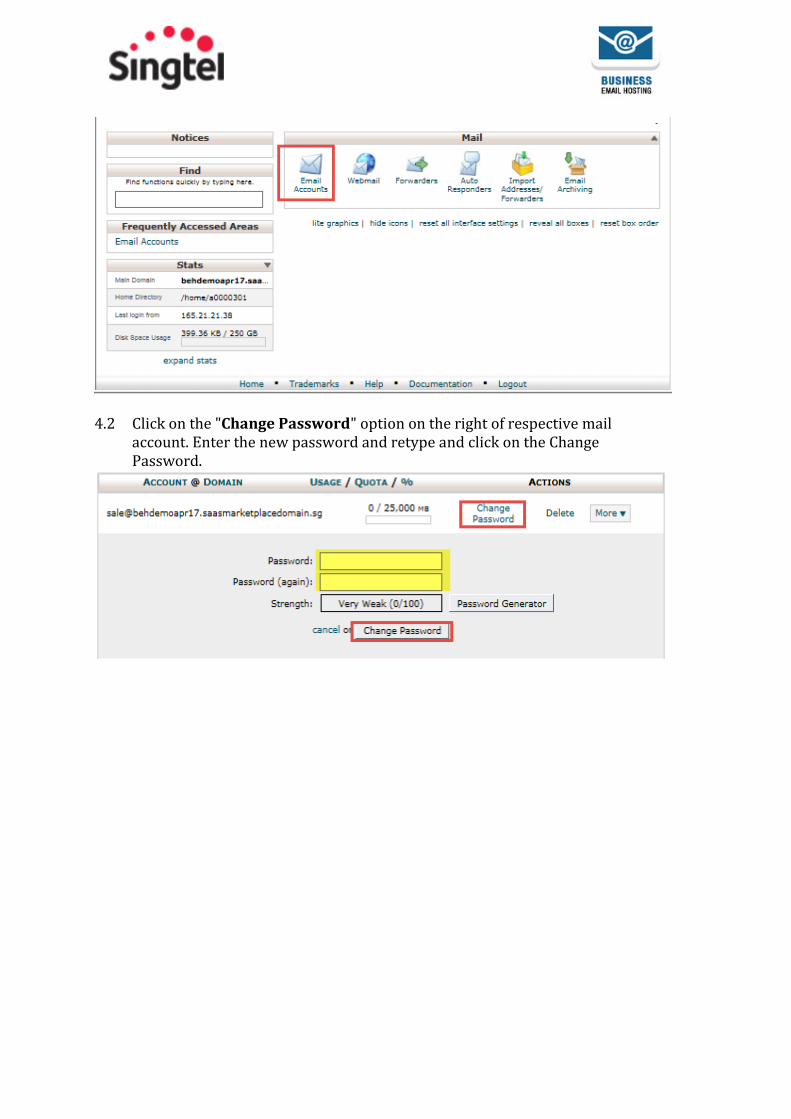
4.2 Click on the "Change Password" option on the right of respective mail
account. Enter the new password and retype and click on the Change Password.

5. Create Auto Responder
5.1 Click the Auto Responders function to proceed.
5.2 Click on the Add Auto Responder on the next window.
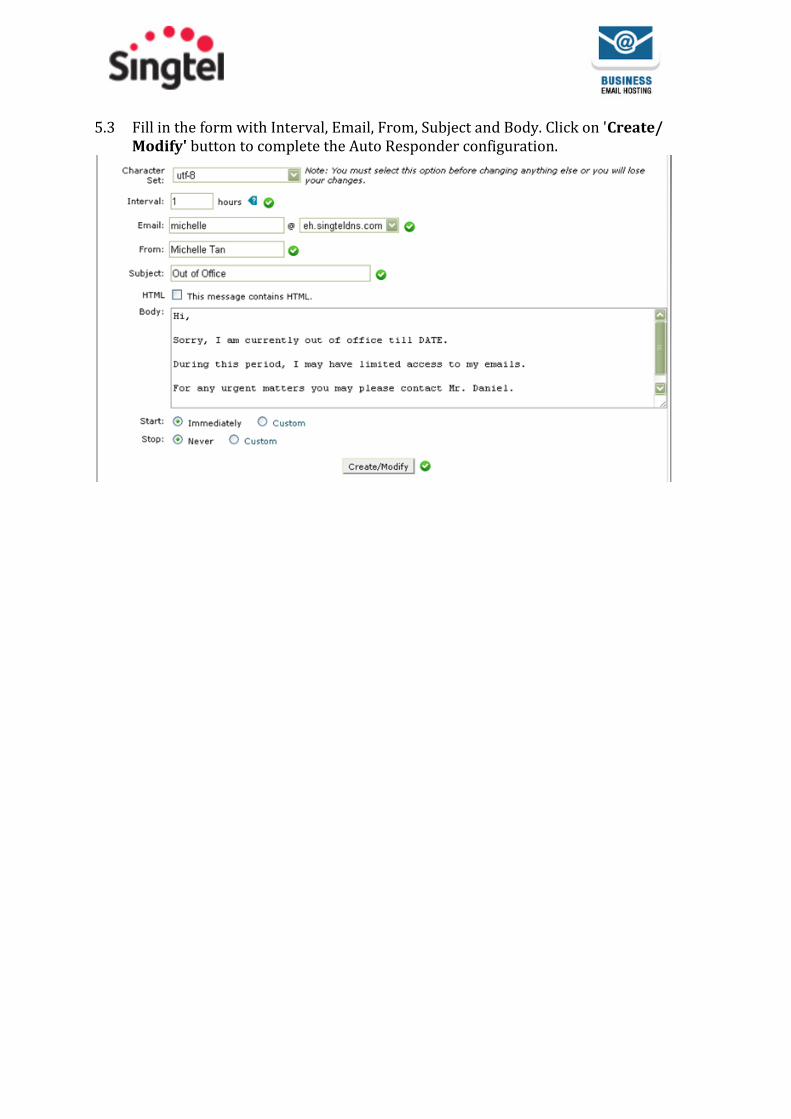
5.3 Fill in the form with Interval, Email, From, Subject and Body. Click on 'Create/
Modify' button to complete the Auto Responder configuration.

6. Creating Email Forwarders You can also use this email forwarder to create distribution list for group of people and receive email when sender send email to generic email like [email protected] . 6.1 Click the Forwarders function to proceed.

6.2 Click on the Add Forwarder function to proceed.
6.3 Key in the name of the email forwarding address that will provide the mail forwarding services into the Address to Forward field. The next step is to key in the destination email address that will receive the forwarded email messages into the Forward to email address field. Simply click on the Add Forwarder function to proceed.
Note: you can forward to any mail address excepts (gmail.com , yahoo.com , aol.com, hotmail.com , ymail.com , googlemail.com, msn.com, outlook.com, redmail.com, qq.com)

6.4 Now new email forwarding configuration is completed.
6.5 The view shown below will provide an overall view of all the email forwarders
that you have configured into the system.

7. Import Addresses/Forwarders You can use this function to create bulk email address and forwarders. 7.1 Click the Import Addresses/Forwarders function to proceed.
7.2 Select which type of addresses you want to create.
For this example, choose email address to create email address. Then choose csv or xls file with user info and click Next to proceed.

Sample csv file uploaded for this example.

7.3 Map Header from dropdown and uploaded csv file and then click Next to
create.
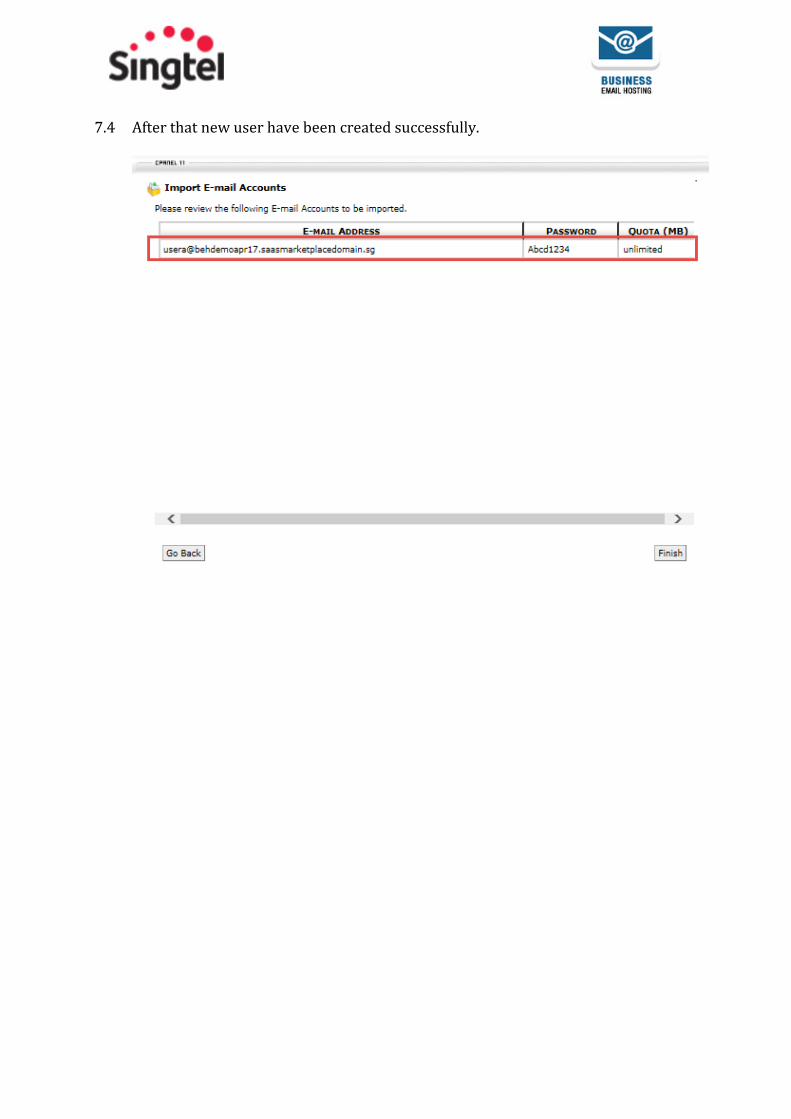
7.4 After that new user have been created successfully.

8. Email Archiving You can use this function to archive all your incoming and outgoing emails based on domain level. 8.1 Click the Email Archiving function to proceed.

8.2 Select which type of email you want to archive and how long you want to
archive and then click on “Apply to All My Domains” button. For this example, tick incoming email and choose Forever.
Note: The archived storage space will be using the total account storage. If the total account storage is fully utilized, all email accounts under your domain will not be able to receive new emails.