consolidated sddc deployment of - vmware · 2019-09-12 · vmware validated design for consolidated...
TRANSCRIPT

Deployment ofConsolidated SDDC
Modified on 12 SEP 2019VMware Validated Design 5.1VMware Validated Design for Management and WorkloadConsolidation 5.1

You can find the most up-to-date technical documentation on the VMware website at:
https://docs.vmware.com/
If you have comments about this documentation, submit your feedback to
VMware, Inc.3401 Hillview Ave.Palo Alto, CA 94304www.vmware.com
Copyright © 2019 VMware, Inc. All rights reserved. Copyright and trademark information.
Deployment of Consolidated SDDC
VMware, Inc. 2

Contents
1 About VMware Validated Design Deployment for Consolidated SDDC 6
Updated Information 7
2 Prepare the Environment for Deployment for Consolidated SDDC 8Prerequisites for Virtual Infrastructure Layer Implementation for Consolidated SDDC 8
Prerequisites for Installation of ESXi Hosts for Consolidated SDDC 9
Install ESXi Interactively on All Hosts for Consolidated SDDC 9
Configure the Network on All Hosts for Consolidated SDDC 10
Configure the Virtual Machine Network Port Group on All Hosts for Consolidated SDDC 12
Configure SSH and NTP on All Hosts for Consolidated SDDC 12
Mount NFS Storage on All ESXi Hosts for Consolidated SDDC 13
Prerequisites for Operations Management Layer Implementation for Consolidated SDDC 15
Deploy and Configure a Linux Virtual Machine for vSphere Update Manager Download Service forConsolidated SDDC 15
Prerequisites for Cloud Management Layer Implementation for Consolidated SDDC 17
Deploy and Configure the Master Windows System for vRealize Automation IaaS Nodes forConsolidated SDDC 17
Deploy and Configure the External SQL Server for vRealize Automation for Consolidated SDDC20
Generate Certificates for the SDDC Components for Consolidated SDDC 24
Prerequisites for Generating Signed Certificates for the SDDC Components for Consolidated SDDC24
Create and Add a Microsoft Certificate Authority Template for Consolidated SDDC 25
Generate Signed Certificates for the SDDC Components for Consolidated SDDC 26
3 VMware Cloud Builder Implementation for Consolidated SDDC 29Prerequisites for VMware Cloud Builder Implementation for Consolidated SDDC 29
Deploy the Virtual Appliance of VMware Cloud Builder for Consolidated SDDC 30
4 Deploy the Software-Defined Data Center Components for Consolidated SDDC 32Automated SDDC Deployment for Consolidated SDDC 32
Prerequisites for Automated SDDC Deployment for Consolidated SDDC 33
Upload the VMware Validated Design Software Bundle and Signed Certificates to VMware CloudBuilderfor Consolidated SDDC 34
Generate the JSON Deployment Filefor Consolidated SDDC 35
Validate the Deployment Parameters and Target Environment Prerequisites for Consolidated SDDC36
Start the Automated Deployment for Consolidated SDDC 37
Skyline Manual Deployment for Consolidated SDDC 38
VMware, Inc. 3

Prerequisites for Deploying VMware Skyline for Consolidated SDDC 39
Configure User Access in vSphere for Integration with VMware Skyline for Consolidated SDDC40
Configure User Privileges in NSX Manager for the Skyline Collector Instances for ConsolidatedSDDC 42
Configure User Privileges in vRealize Operations Manager for the Skyline Collector Instances forConsolidated SDDC 43
Prepare for Skyline Collector Registration with VMware Cloud Services 44
Deploy the Skyline Collector Appliance for Consolidated SDDC 46
Configure the Skyline Collector Instance for Consolidated SDDC 48
5 Post-Deployment Virtual Infrastructure Configuration for Consolidated SDDC 59Distributed Firewall Configuration for Consolidated SDDC 59
Add the vCenter Server Appliance to the NSX Distributed Firewall Exclusion List for ConsolidatedSDDC 60
Create IP Sets for the Components of the Consolidated Cluster for Consolidated SDDC 60
Create Security Groups for Consolidated SDDC 62
Create Distributed Firewall Rules for Consolidated SDDC 64
Update the Host Profile for Consolidated SDDC 66
6 Post-Deployment Operations Management Configuration for Consolidated SDDC 68Post-Deployment Configuration of Update Manager Download Service for Consolidated SDDC 68
Reconfigure Update Manager Download Service for Consolidated SDDC 69
Post-Deployment Configuration of vRealize Operations Manager for Consolidated SDDC 71
Integrate vRealize Log Insight with vRealize Operations Manager for Consolidated SDDC 71
Configure User Privileges in vRealize Operations Manager for vRealize Automation Tenant WorkloadReclamationfor Consolidated SDDC 72
Verify the Integration of vRealize Operations Manager as a Metrics Provider in vRealize Automationfor Consolidated SDDC 73
Define the Monitoring Goals for the Default Policy in vRealize Operations Manager for ConsolidatedSDDC 73
Update the SNMP Configuration of the vRealize Operations Manager Network Devices Adapter74
Post-Deployment Configuration of vRealize Log Insight for Consolidated SDDC 75
Configure vRealize Orchestrator to Forward Log Events to vRealize Log Insight for ConsolidatedSDDC 75
Add Skyline Collector and Site Recovery Manager to the Agent Group for Management VirtualAppliances for Consolidated SDDC 76
Post-Deployment Configuration of vRealize Suite Lifecycle Manager for Consolidated SDDC 77
Configure NTP and DNS Settings of the vRealize Suite Lifecycle Manager Appliance forConsolidated SDDC 77
Save the Configuration Baselines for the vRealize Suite Products in vRealize Suite LifecycleManager 78
Register vRealize Suite Lifecycle Manager with My VMware 79
Deployment of Consolidated SDDC
VMware, Inc. 4

7 Post-Deployment Cloud Management Configuration for Consolidated SDDC 80Reconfigure the Microsoft SQL Server for vRealize Automation for Consolidated SDDC 81
Create Machine Prefixes for Consolidated SDDC 84
Create Business Groups for Consolidated SDDC 85
Create Logical Switches for Business Groups for Consolidated SDDC 86
Create Reservation Policies for Consolidated SDDC 88
Create External Network Profiles for Consolidated SDDC 89
Create Reservations for the Consolidated Cluster for Consolidated SDDC 91
Create Reservations for the User Edge Resources for Consolidated SDDC 93
Configure Single Machine Blueprints for Consolidated SDDC 95
Create a Service Catalog for Consolidated SDDC 96
Create a Single Machine Blueprint for Consolidated SDDC 96
Create Entitlements for Business Groups for Consolidated SDDC 99
Configure Entitlements for Blueprints for Consolidated SDDC 100
Test the Deployment of a Single Machine Blueprint for Consolidated SDDC 101
Deployment of Consolidated SDDC
VMware, Inc. 5

About VMware Validated DesignDeployment for ConsolidatedSDDC 1VMware Validated Design Deployment for Management and Workload Consolidation (also referred to asVMware Validated Design for Consolidated SDDC) provides step-by-step instructions for installing,configuring, and operating a Software-Defined Data Center (SDDC) based on VMware Validated Design,and usingVMware Cloud Builder to automate the implementation of this Validated Design.
VMware Validated Design Deployment for Management and Workload Consolidation does not containstep-by-step instructions for performing all the required post-configuration tasks because their natureoften depends on the requirements of your organization.
Intended AudienceThe VMware Validated Design Deployment for Management and Workload Consolidation document isintended for cloud architects, infrastructure administrators, and cloud administrators who are familiar withand want to use VMware software to deploy in a short time and manage an SDDC that meets therequirements for capacity, scalability, backup and restore, and extensibility for disaster recovery support.
Required VMware SoftwareVMware Validated Design Deployment for Management and Workload Consolidation is compliant andvalidated with certain product versions. See VMware Validated Design Release Notes for moreinformation about supported product versions.
Before You Apply This GuidanceThe sequence of the documentation of VMware Validated Design follows the stages for implementing andmaintaining an SDDC. See Documentation Map for VMware Validated Design.
To use VMware Validated Design Deployment for Management and Workload Consolidation, you must beacquainted with the following guidance:
n Introducing VMware Validated Designs
n Optionally VMware Validated Design Architecture and Design for Consolidated SDDC
n VMware Validated Design Planning and Preparation for Consolidated SDDC
VMware, Inc. 6

Updated Information
This VMware Validated Design Deployment for Management and Workload Consolidation is updated witheach release of the product or when necessary.
This table provides the update history of the VMware Validated Design Deployment for Management andWorkload Consolidation.
Revision Description
12 SEP 2019 Updated topic Prerequisites for Automated SDDC Deploymentfor Consolidated SDDC to add computer objects to the ActiveDirectory prerequisite.
18 JUL 2019 Initial release.
VMware, Inc. 7
Prepare the Environment forDeployment for ConsolidatedSDDC 2Before you start the automated deployment of VMware Validated Design for Software-Defined DataCenter by using VMware Cloud Builder, your environment must meet target prerequisites and be in aspecific starting state. Prepare each layer of the SDDC by deploying and configuring the necessaryinfrastructure, operational, and management components.
n Prerequisites for Virtual Infrastructure Layer Implementation for Consolidated SDDC
To prepare the virtual infrastructure layer of the SDDC, you first install ESXi on all hosts for theconsolidated cluster, then you configure the management network, DNS, NTP, and SSH services.
n Prerequisites for Operations Management Layer Implementation for Consolidated SDDC
To prepare the operations management layer for automated deployment of the SDDC componentswith Cloud Builder, you deploy and configure a Linux virtual machine for vSphere® UpdateManager™.
n Prerequisites for Cloud Management Layer Implementation for Consolidated SDDC
To prepare the cloud management layer for automated deployment of the SDDC components usingCloud Builder, you deploy and configure the Master Windows system for vRealize AutomationInfrastructure as a Service (IaaS) nodes and deploy and configure the external SQL server forvRealize Automation.
n Generate Certificates for the SDDC Components for Consolidated SDDC
To ensure secure and operational connectivity between the SDDC components, you generate newsigned certificates for the SDDC components.
Prerequisites for Virtual Infrastructure LayerImplementation for Consolidated SDDCTo prepare the virtual infrastructure layer of the SDDC, you first install ESXi on all hosts for theconsolidated cluster, then you configure the management network, DNS, NTP, and SSH services.
Procedure
1 Prerequisites for Installation of ESXi Hosts for Consolidated SDDC
2 Install ESXi Interactively on All Hosts for Consolidated SDDC
VMware, Inc. 8

3 Configure the Network on All Hosts for Consolidated SDDC
After the initial boot, use the ESXi Direct Console User Interface (DCUI) for initial host networkconfiguration and administrative access.
4 Configure the Virtual Machine Network Port Group on All Hosts for Consolidated SDDC
You perform the network configuration for each ESXi host by using the VMware Host Client.
5 Configure SSH and NTP on All Hosts for Consolidated SDDC
Complete the initial configuration of all ESXi hosts by enabling the TSM-SSH service. You alsoconfigure the NTP service to avoid time synchronization issues in the SDDC.
6 Mount NFS Storage on All ESXi Hosts for Consolidated SDDC
This VMware Validated Design uses NFS storage as secondary storage for the SDDC components.You mount the NFS storage to provide storage capacity for archiving log data, backup, andapplication templates.
Prerequisites for Installation of ESXi Hosts for Consolidated SDDCInstall and configure the VMware ESXi™ hosts for your workload and management consolidationdeployment.
Before you start:
n Download the ESXi ISO.
n Make sure that you have a host machine for SDDC access. You use this host to connect to the datacenter and perform configuration steps.
IP Addresses, Host Names, and Network ConfigurationThe following values are required to configure your hosts.
Table 2-1. Hosts for the Consolidated SDDC
FQDN IP VLAN ID Default Gateway NTP Server
sfo01w01esx01.sfo01.rainpole.local 172.16.31.101 1631 172.16.31.253 ntp.sfo01.rainpole.local
sfo01w01esx02.sfo01.rainpole.local 172.16.31.102 1631 172.16.31.253 ntp.sfo01.rainpole.local
sfo01w01esx03.sfo01.rainpole.local 172.16.31.103 1631 172.16.31.253 ntp.sfo01.rainpole.local
sfo01w01esx04.sfo01.rainpole.local 172.16.31.104 1631 172.16.31.253 ntp.sfo01.rainpole.local
Install ESXi Interactively on All Hosts for Consolidated SDDCInstall ESXi on all hosts in the consolidated cluster interactively.
Repeat this procedure for all hosts in the consolidated cluster. Enter the respective values from theprerequisites section for each host that you configure. See Prerequisites for Installation of ESXi Hosts forConsolidated SDDC.
Deployment of Consolidated SDDC
VMware, Inc. 9

Procedure
1 Power on the sfo01w01esx01 host.
2 Mount and boot from ESXi ISO.
3 On the Welcome to the VMware ESXi 6.7 U2 Installation screen, press Enter to start theinstallation.
4 On the End User License Agreement (EULA) screen, press F11 to accept the EULA.
5 On the Select a Disk to Install or Upgrade screen, select the USB drive under local storage toinstall ESXi and press Enter to continue.
6 Select the keyboard layout and press Enter.
7 Enter the esxi_root_user_password, enter the password a second time to confirm the spelling, andpress Enter.
8 On the Confirm Install screen, press F11 to start the installation.
9 After the installation completes successfully, unmount the USB drive and press Enter to reboot thehost.
Configure the Network on All Hosts for Consolidated SDDCAfter the initial boot, use the ESXi Direct Console User Interface (DCUI) for initial host networkconfiguration and administrative access.
Perform the following tasks to configure the host network settings:
n Configure the network adapter (vmk0) and VLAN ID for the Management Network.
n Configure the IP address, subnet mask, gateway, DNS server, and FQDN for the ESXi host.
Repeat this procedure for all hosts in the consolidated cluster. Enter the respective values from theprerequisites section for each host that you configure. See Prerequisites for Installation of ESXi Hosts forConsolidated SDDC.
Deployment of Consolidated SDDC
VMware, Inc. 10

Procedure
1 Open the DCUI on the sfo01w01esx01.sfo01.rainpole.local ESXi host.
a Open a console window to the host.
b Press F2 to enter the DCUI.
c Log in by using the following credentials.
Setting Value
User name root
Password esxi_root_user_password
2 Configure the network.
a Select Configure Management Network and press Enter.
b Select VLAN (Optional) and press Enter.
c Enter 1631 as the VLAN ID for the Management Network and press Enter.
d Select IPv4 Configuration and press Enter.
e Configure the IPv4 network settings and press Enter.
Setting Value
Set static IPv4 address and network configuration Selected
IPv4 Address 172.16.31.101
Subnet Mask 255.255.255.0
Default Gateway 172.16.31.253
f Select DNS Configuration and press Enter.
g Configure the DNS settings and press Enter.
Setting Value
Use the following DNS Server address and hostname Selected
Primary DNS Server 172.16.11.5
Alternate DNS Server 172.16.11.4
Hostname sfo01w01esx01.sfo01.rainpole.local
h Select Custom DNS Suffixes and press Enter.
i Ensure that there are no suffixes listed and press Enter.
3 Press Escape to exit and press Y to confirm the changes.
Deployment of Consolidated SDDC
VMware, Inc. 11

Configure the Virtual Machine Network Port Group on All Hostsfor Consolidated SDDCYou perform the network configuration for each ESXi host by using the VMware Host Client.
You configure the VLAN ID of the VM Network port group on the vSphere Standard Switch. Thisconfiguration provides connectivity and common network configuration for the virtual machines that resideon each host.
You repeat this procedure for all hosts in the consolidated cluster with the following VLAN IDs.
Table 2-2. Default VM Network Port Group for the Consolidated Cluster
Host VLAND ID
sfo01w01esx01.sfo01.rainpole.local 1611
sfo01w01esx02.sfo01.rainpole.local 1611
sfo01w01esx03.sfo01.rainpole.local 1611
sfo01w01esx04.sfo01.rainpole.local 1611
Procedure
1 In a Web browser, log in to the ESXi host by using the VMware Host Client.
Settings Value
URL https://sfo01w01esx01.sfo01.rainpole.local
User name root
Password esxi_root_user_password
2 Click OK to join the Customer Experience Improvement Program.
3 Configure a VLAN for the VM Network port group.
a In the navigation pane, click Networking.
b Click the Port groups tab, select the VM network port group, and click Edit Settings.
c On the Edit port group - VM network page, enter 1611 for VLAN ID, and click Save.
Configure SSH and NTP on All Hosts for Consolidated SDDCComplete the initial configuration of all ESXi hosts by enabling the TSM-SSH service. You also configurethe NTP service to avoid time synchronization issues in the SDDC.
Repeat this procedure for all hosts in the consolidated cluster. See Prerequisites for Installation of ESXiHosts for Consolidated SDDC.
Deployment of Consolidated SDDC
VMware, Inc. 12

Procedure
1 In a Web browser, log in to the ESXi host by using the VMware Host Client.
Settings Value
URL https://sfo01w01esx01.sfo01.rainpole.local
User name root
Password esxi_root_user_password
2 Configure and start the TSM-SSH service.
a In the navigation pane, click Manage and click the Services tab.
b Select the TSM-SSH service, and click the Actions menu.
c Select Policy and click Start and stop with host.
d To start the service, click Start.
3 Configure and start the NTP service.
a In the navigation pane, click Manage, and click the System tab.
b Click Time & date and click Edit settings.
c On the Edit time configuration page, select the Use Network Time Protocol (enable NTPclient) radio button, and change the NTP service startup policy to Start and stop with host.
d In the NTP servers text box, enter ntp.sfo01.rainpole.local, ntp.rainpole.local, andclick Save.
e To start the service, click Actions, select NTP service, and click Start.
Mount NFS Storage on All ESXi Hosts for Consolidated SDDCThis VMware Validated Design uses NFS storage as secondary storage for the SDDC components. Youmount the NFS storage to provide storage capacity for archiving log data, backup, and applicationtemplates.
Repeat this procedure for all hosts in the consolidated cluster. See Prerequisites for Installation of ESXiHosts for Consolidated SDDC.
Prerequisites
Verify that you allocated static IP addresses for each ESXi VMkernel storage port.
Deployment of Consolidated SDDC
VMware, Inc. 13

Procedure
1 In a Web browser, log in to the ESXi host by using the VMware Host Client.
Settings Value
URL https://sfo01w01esx01.sfo01.rainpole.local
User name root
Password esxi_root_user_password
2 Configure the Maximum Transmission Units (MTU) on the standard virtual switch.
a In the navigation pane, click Networking and click Virtual switches.
b Click vSwitch0 and click Edit.
c On the Edit standard virtual switch page, enter the values, and click Save.
Setting Value
MTU 9000
Uplink1 vmnic0
3 Configure a VMkernel storage port on all ESXi hosts.
a In the navigation pane, select Networking.
b Select the VMkernel NICs tab and click Add VMkernel NIC.
c In the Add VMkernel NIC page, enter the values, and click Create.
Setting Value
Port Group New port group
New Port Group Storage
Virtual Switch vSwitch0
VLAN ID 1625
MTU 9000
IP version IPv4 only
IPv4 settings Static
Address 172.16.25.101
Subnet mask 255.255.255.0
TCP/IP stack Default TCP/IP stack
Services Deselected
4 Mount the NFS datastore on the ESXi host.
a In the navigation pane, click Storage.
b Click the Datastores tab and click New datastore.
Deployment of Consolidated SDDC
VMware, Inc. 14

c On the Select creation type page, select Mount NFS datastore and click Next.
d On the Provide NFS mount details page, configure the values, and click Next.
Setting Value
Name sfo01-w01-bkp01
NFS Server 172.16.25.251
NFS Share /VVD_backup01_nfs01_Consolidated_6TB
NFS Version NFS 3
e On the Ready to complete page, click Finish.
Prerequisites for Operations Management LayerImplementation for Consolidated SDDCTo prepare the operations management layer for automated deployment of the SDDC components withCloud Builder, you deploy and configure a Linux virtual machine for vSphere® Update Manager™.
Procedure
1 Deploy and Configure a Linux Virtual Machine for vSphere Update Manager Download Service forConsolidated SDDC
Before you deploy vSphere Update Manager with Cloud Builder, you deploy and configure a virtualmachine with an Ubuntu Server operating system.
Deploy and Configure a Linux Virtual Machine for vSphere UpdateManager Download Service for Consolidated SDDCBefore you deploy vSphere Update Manager with Cloud Builder, you deploy and configure a virtualmachine with an Ubuntu Server operating system.
You create a virtual machine on the sfo01w01esx01.sfo01.rainpole.local host for vSphere UpdateManager Download Service with the following virtual machine and network configuration requirements.Ensure that the virtual machine has access to the Internet.
Table 2-3. Virtual Machine Requirements for the vSphere Update Manager Download ServiceLinux VM
Setting Value
ESXi Host sfo01w01esx01
VM Name sfo01umds01
Guest OS Ubuntu Server 18.04 LTS
CPU 2
Memory 2 GB
Hard Disk 120 GB
SCSI Controller LSI Logic SAS
Deployment of Consolidated SDDC
VMware, Inc. 15

Table 2-3. Virtual Machine Requirements for the vSphere Update Manager Download ServiceLinux VM (continued)
Setting Value
Network Interface VM Network
Network Adapter Type VMXNET3
Datastore sfo01-w01-bkp01
Table 2-4. Network Requirements for the vSphere Update Manager Download Service LinuxVM
Setting Value
Host Name sfo01umds01
Static IPv4 Address 172.16.11.67
Default Gateway 172.16.11.253
Subnet Mask 255.255.255.0
DNS Server 172.16.11.5, 172.16.11.4
DNS Domain sfo01.rainpole.local
DNS Search sfo01.rainpole.local
Procedure
1 Deploy the vSphere Update Manager Download Service Linux VM with the specified configuration.
2 In a Web browser, log in to the ESXi host by using the VMware Host Client.
Settings Value
URL https://sfo01w01esx01.sfo01.rainpole.local
User name root
Password esxi_root_user_password
3 In the navigation pane, click Virtual machines.
4 Select the sfo01umds01 virtual machine, click Console, and select Open browser console.
5 Create the svc-umds service account for vSphere Update Manager Download Service.
a Run the command for adding the user.
adduser svc-umds
b When prompted, enter and confirm the password, and provide the svc-umds full user name.
6 Assign administrative privileges to the svc-umds service account by running the following command.
usermod -aG sudo svc-umds
Deployment of Consolidated SDDC
VMware, Inc. 16

7 Install Secure Shell (SSH) server by running the following command.
sudo apt-get update
sudo apt-get -y install ssh
8 Verify the status of the SSH service by running the following command.
service ssh status
9 Install Expect and Nginx packages for Ubuntu by running the following commands.
sudo apt-get install -y expect
sudo apt-get install -y nginx
Prerequisites for Cloud Management LayerImplementation for Consolidated SDDCTo prepare the cloud management layer for automated deployment of the SDDC components using CloudBuilder, you deploy and configure the Master Windows system for vRealize Automation Infrastructure asa Service (IaaS) nodes and deploy and configure the external SQL server for vRealize Automation.
Procedure
1 Deploy and Configure the Master Windows System for vRealize Automation IaaS Nodes forConsolidated SDDC
You deploy and configure a single Master Windows system virtual machine which will be cloned andreconfigured during the SDDC deployment to provision the vRealize Automation IaaS components -IaaS Web Server and IaaS Manager Service Server.
2 Deploy and Configure the External SQL Server for vRealize Automation for Consolidated SDDC
You deploy and configure a Windows virtual machine to host the SQL Server database required forthe vRealize Automation IaaS components. After you install the SQL Server instance, you performadditional configurations to allow Cloud Builder to perform the initial validation and deploy thenecessary vRealize Automation components.
Deploy and Configure the Master Windows System for vRealizeAutomation IaaS Nodes for Consolidated SDDCYou deploy and configure a single Master Windows system virtual machine which will be cloned andreconfigured during the SDDC deployment to provision the vRealize Automation IaaS components - IaaSWeb Server and IaaS Manager Service Server.
You create a virtual machine on the sfo01w01esx01.sfo01.rainpole.local host for the Master Windowssystem with the following virtual machine, software, and network configuration.
Deployment of Consolidated SDDC
VMware, Inc. 17

Table 2-5. Virtual Machine Requirements for the Master Windows System
Setting Value
ESXi Host sfo01w01esx01
VM Name master-iaas-vm
Guest OS Microsoft Windows Server 2016 (64-bit)
vCPU 2
Memory 8 GB
Virtual Disk 60 GB
SCSI Controller LSI Logic SAS
Datastore sfo01-w01-bkp01
Network Interface VM Network
Network Adapter Type 1 x VMXNET3
Network Requirements:
n Verify that you allocated a static or DHCP IP address for the Master Windows system.
n Verify that the Master Windows system has access to the Internet.
Table 2-6. Software Requirements for the Master Windows System
Component Requirement
Operating System Windows Server 2016 (64-bit)
VMware Tools Latest version
Active Directory Join the virtual machine to the sfo01.rainpole.local domain.
Internet Explorer Enhanced Security Configuration Turn off ESC.
Remote Desktop Protocol Enable RDP access.
Secondary Logon Service Start Secondary Logon service and set start-up type toAutomatic.
Procedure
1 Deploy the Master Windows System for vRealize Automation with the specified configuration.
2 Log in to the vRealize Automation Master Windows virtual machine by using a Remote DesktopProtocol (RDP) client.
Settings Value
FQDN vRealize Automation Master Windows virtual machine
User name Windows administrator user
Password windows_administrator_password
3 Click Start, right-click Windows PowerShell, and select More > Run as Administrator.
Deployment of Consolidated SDDC
VMware, Inc. 18

4 Set the execution policy.
a Run the command for setting the execution policy.
Set-ExecutionPolicy Unrestricted
b When prompted, confirm the execution policy change.
5 Disable User Account Control (UAC) by running the following command.
Set-ItemProperty -Path "HKLM:\Software\Microsoft\Windows\CurrentVersion\Policies\System" -Name
"EnableLUA" -Value "0"
6 Disable IPv6 protocol.
Set-ItemProperty -Path "HKLM:\System\CurrentControlSet\Services\Tcpip6\Parameters" -Name
"DisabledComponents" -Value 0xff
7 Verify that the source path for Microsoft Windows Server is available.
a Mount the Microsoft Windows Server ISO file on the Master Windows system virtual machine.
b Create the \sources\sxs directory by running the following command in Windows PowerShell.
mkdir C:\sources\sxs
c Copy the Microsoft Windows Server source files from sources\sxs on the ISO file to theC:\sources\sxs directory on the virtual machine.
d Update the registry with the full system path of the Microsoft Windows Server source files byrunning the following commands in Windows PowerShell.
New-Item -Path "HKLM:\SOFTWARE\Microsoft\Windows\CurrentVersion\Policies\Servicing"
set-ItemProperty -Path "HKLM:\SOFTWARE\Microsoft\Windows\CurrentVersion\Policies\Servicing\" -
Name "LocalSourcePath" -value "c:\sources\sxs"
e Unmount the Microsoft Windows Server ISO file.
8 Add the svc-vra service account to the Local Administrators group.
a Click Start, right-click Windows PowerShell, and select More > Run as Administrator.
b Run the following command.
net localgroup administrators rainpole\svc-vra /add
Deployment of Consolidated SDDC
VMware, Inc. 19

9 Create the svc-vra user profile by logging in to the vRealize Automation Master Windows virtualmachine.
a Open an RDP connection to the virtual machine.
b Log in using the following credentials.
Setting Value
User name rainpole\svc-vra
Password svc-vra_password
After the successful login, the svc-vra user profile is created.
10 Shut down the Master Windows system virtual machine.
Deploy and Configure the External SQL Server for vRealizeAutomation for Consolidated SDDCYou deploy and configure a Windows virtual machine to host the SQL Server database required for thevRealize Automation IaaS components. After you install the SQL Server instance, you perform additionalconfigurations to allow Cloud Builder to perform the initial validation and deploy the necessary vRealizeAutomation components.
You create a virtual machine on the sfo01w01esx01.sfo01.rainpole.local host for the SQL Server with thefollowing virtual machine, software, and network configuration requirements.
Table 2-7. Virtual Machine Requirements for the External vRealize Automation SQL Server
Setting Value
ESXi Host sfo01w01esx01
VM Name vra01mssql01
Guest OS Microsoft Windows Server 2016
vCPU 8
Memory (GB) 16
Hard Disk (GB) 200
SCSI Controller LSI Logic SAS
Datastore sfo01-w01-bkp01
Network Interface VM Network
Network Adapter Type 1 x VMXNET3
Table 2-8. Network Requirements for the External vRealize Automation SQL Server
Setting Value
Host Name vra01mssql01
Static IPv4 Аddress 172.16.11.72
Subnet Мask 255.255.255.0
Deployment of Consolidated SDDC
VMware, Inc. 20

Table 2-8. Network Requirements for the External vRealize Automation SQL Server(continued)
Setting Value
Default Gateway 172.16.11.253
DNS Server n 172.16.11.5
n 172.16.11.4
FQDN vra01mssql01.rainpole.local
Table 2-9. Software Requirements for the External vRealize Automation SQL Server
Component Requirement
Operating System Microsoft Windows Server 2016
VMware Tools Latest version
SQL Server Microsoft SQL Server 2017 Standard Edition or higher
Microsoft SQL Server Management Studio
Instance Configuration: Default Instance (MSSQLSERVER)
SQL Server Network Configuration: Default TCP Port (1433)
Important During the SQL Server installation, the DatabaseEngine configuration wizard prompts you to provide the username and password for the SQL Server administrator. If thisuser is not added during the SQL Server installation, select SQLAuthentication from the Authentication drop-down menu,enter sa in the User name text box, and sa_password in thePassword text box.
Active Directory Join the virtual machine to the rainpole.local domain.
Remote Desktop Protocol Enable RDP access.
Privileges Verify that the svc-vra service account is a member of the LocalAdmins group for the SQL server virtual machine.
Procedure
1 Deploy the External vRealize Automation SQL Server VM with the specified configuration.
2 Log in to the SQL Server virtual machine by using a Remote Desktop Protocol (RDP) client.
Settings Value
FQDN vra01mssql01.rainpole.local
User name Windows administrator user
Password windows_administrator_password
Deployment of Consolidated SDDC
VMware, Inc. 21

3 Enable Microsoft Distributed Transaction Coordinator (MSDTC).
a Click the Windows Start icon, enter comexp.msc, and press Enter.
The Component Services window opens.
b In the left pane, from the Console Root tree, navigate to Component Services > Computers >My Computer > Distributed Transaction Coordinator.
c Right-click Local DTC and select Properties.
d In the Local DTC Properties dialog box, click the Security tab, configure the following values,and click OK.
Setting Value
Network DTC Access Selected
Allow Remote Clients Selected
Allow Remote Administration Selected
Allow Inbound Selected
Allow Outbound Selected
e In the MSDTC Service dialog box, click Yes to restart the MSDTC service.
4 Create the vRealize Automation account in the SQL Server instance.
a Click the Windows Start icon and open Microsoft SQL Server Management Studio.
b In the Connect to Server dialog box, leave the default value for the Server Name text box, fromthe drop-down menu, select Windows Authentication, and click Connect.
c In the Object Explorer tree, expand the VRA01MSSQL01 server instance, right-click theSecurity folder, and select New > Login.
d In the Login dialog box, under General, in the Login name text box, enter rainpole\svc-vra.
e On the Server Roles page, select sysadmin and click OK.
Deployment of Consolidated SDDC
VMware, Inc. 22

5 Create the vRealize Automation database.
a In the Object Explorer section, right-click the Databases folder and select New Database.
The New Database wizard appears.
b In the General page, enter VRADB01 for Database name and rainpole\svc-vra for Owner.
c On the Options page, configure the following recovery model settings, and click OK.
Setting Value
Recovery model Simple
Compatibility level SQL Server 2014 (120)
Other options > Miscellaneous > Allow Snapshot Isolation True
Other options > Miscellaneous > Is Read Committed SnapshotOn
True
6 Allow access to Microsoft SQL Server on TCP port 1433.
a Click the Windows Start button, type WF.msc, and press Enter.
The Windows Firewall with Advanced Security window appears.
b In the navigation pane, right-click Inbound Rules and select New Rule.
The New Inbound Rule Wizard appears.
c On the Rule Type page, select the Port radio button, and click Next.
d On the Protocol and Ports page, select TCP, enter the port number 1433 in the Specific localports text box, and click Next.
e On the Action page, select Allow the connection, and click Next.
f On the Profile page, select the Domain, Private, and Public profiles, and click Next.
g On the Name page, enter Microsoft SQL Server Port (1433) and click Finish.
7 Allow access for Microsoft Distributed Transaction Coordinator.
a Click the Windows Start icon, enter WF.msc, and press Enter.
The Windows Firewall with Advanced Security window appears.
b In the navigation pane, right-click Inbound Rules and select New Rule.
The New Inbound Rule Wizard appears.
c On the Rule Type page, click the Predefined radio button, select Distributed TransactionCoordinator, and click Next.
d On the Predefined Rules page, select all rules for Distributed Transaction Coordinator (RPC-EPMAP), Distributed Transaction Coordinator (RPC), and Distributed TransactionCoordinator (TCP-In), and click Next.
e On the Action page, select Allow the connection, and click Finish.
Deployment of Consolidated SDDC
VMware, Inc. 23

8 Unmount any ISO files mounted to the virtual machine.
Generate Certificates for the SDDC Components forConsolidated SDDCTo ensure secure and operational connectivity between the SDDC components, you generate new signedcertificates for the SDDC components.
You use the Certificate Generation Utility for VMware Validated Design (CertGenVVD) to generate thecertificate configuration files based on the deployment specification configured in the DeploymentParameters XLS file. You then generate new certificates signed by the Microsoft certificate authority(MSCA) for all management products.
You later upload the newly generated and signed certificates to VMware Cloud Builder as part of thedeployment and configuration procedure of the virtual appliance.
For information about the VMware Validated Design Certificate Generation Utility, see VMwareKnowledge Base article 70678 and VMware Validated Design Planning and Preparation for ConsolidatedSDDC.
Procedure
1 Prerequisites for Generating Signed Certificates for the SDDC Components for Consolidated SDDC
Before you generate MSCA signed certificates for the SDDC components, verify that yourenvironment fulfills the requirements for this process.
2 Create and Add a Microsoft Certificate Authority Template for Consolidated SDDC
You first set up a Microsoft Certificate Authority template on the Active Directory (AD) servers. Thetemplate contains the certificate authority (CA) attributes for signing certificates for the SDDCcomponents. After you create the template, you add it to the certificate templates of the MicrosoftCA.
3 Generate Signed Certificates for the SDDC Components for Consolidated SDDC
Use the Certificate Generation Utility for VMware Validated Design (CertGenVVD) to generate newsigned certificates for the SDDC components.
Prerequisites for Generating Signed Certificates for the SDDCComponents for Consolidated SDDCBefore you generate MSCA signed certificates for the SDDC components, verify that your environmentfulfills the requirements for this process.
This VMware Validated Design sets the Certificate Authority service on the Active Directory (AD)dc01rpl.rainpole.local (root CA) server. Verify that your environment satisfies the following prerequisitesgenerating signed certificates for the components of the SDDC.
Deployment of Consolidated SDDC
VMware, Inc. 24

Certificate Generation Prerequisites
Prerequisite Value
Active Directory n Verify that the Certificate Authority Service role and theCertificate Authority Web Enrollment role are installed andconfigured on the Active Directory server.
n Verify that a new Microsoft Certificate Authority template iscreated and enabled.
n Use a hashing algorithm of SHA-256 or higher on thecertificate authority.
n Verify that relevant firewall ports relating to the MicrosoftCertificate Authority and related services are open.
Windows Server host n Verify that the Windows Server host on which you plan togenerate the certificates has access to the data center andis joined to the domain of the Microsoft Certificate Authority.
n Install Java Runtime Environment version 1.8 or later.
n Configure the JAVA_HOME environment variable to the Javainstallation directory.
n Update the PATH system variable to include the bin folder ofJava installation directory.
n Install OpenSSL toolkit version 1.0.2 for Windows.
n Update the PATH system variable to include the bin folder ofthe OpenSSL installation directory.
Software Features n Fill in the Deployment Parameters XLS file for ConsolidatedSDDC. See Deployment Specification in the VMwareValidated Design Planning and Preparation for ConsolidatedSDDC documentation.
Installation Packages Download the CertGenVVD-version.zip file of the CertificateGeneration Utility from VMware Knowledge Base article 70678and extract the ZIP file to the C: drive.
Create and Add a Microsoft Certificate Authority Template forConsolidated SDDCYou first set up a Microsoft Certificate Authority template on the Active Directory (AD) servers. Thetemplate contains the certificate authority (CA) attributes for signing certificates for the SDDCcomponents. After you create the template, you add it to the certificate templates of the Microsoft CA.
Procedure
1 Log in to the Active Directory server by using a Remote Desktop Protocol (RDP) client.
FQDN Active Directory Host
User Active Directory administrator
Password ad_admin_password
2 Click Start > Run, enter certtmpl.msc, and click OK.
Deployment of Consolidated SDDC
VMware, Inc. 25

3 In the Certificate Template Console window, under Template Display Name, right-click WebServer and select Duplicate Template.
4 In the Duplicate Template dialog box, leave Windows Server 2003 Enterprise selected forbackward compatibility and click OK.
5 In the Properties of New Template dialog box, click the General tab.
6 In the Template display name text box, enter VMware.
7 Click the Extensions tab and configure the following.
a Select Application Policies and click Edit.
b Select Server Authentication, click Remove, and click OK.
c If present, select the Client Authentication policy, click Remove, and click OK.
d Select Key Usage and click Edit.
e Select the Signature is proof of origin (nonrepudiation) check box.
f Leave the defaults for all other options.
g Click OK.
8 Click the Subject Name tab, ensure that the Supply in the request option is selected, and click OKto save the template.
9 Add the new template to the certificate templates of the Microsoft CA.
a Click Start > Run, enter certsrv.msc, and click OK
b In the Certification Authority window, expand the left pane, right-click Certificate Templates,and select New > Certificate Template to Issue.
c In the Enable Certificate Templates dialog box, select VMware, and click OK.
Generate Signed Certificates for the SDDC Components forConsolidated SDDCUse the Certificate Generation Utility for VMware Validated Design (CertGenVVD) to generate new signedcertificates for the SDDC components.
Procedure
1 Log in to the Windows Server host that you allocated for certificate generation.
2 Set the execution policy to Unrestricted.
a Click Start, right click Windows PowerShell, and select More > Run as Administrator.
b Set the execution policy by running the following command.
Set-ExecutionPolicy Unrestricted
c Enter Y to confirm the execution policy change.
Deployment of Consolidated SDDC
VMware, Inc. 26
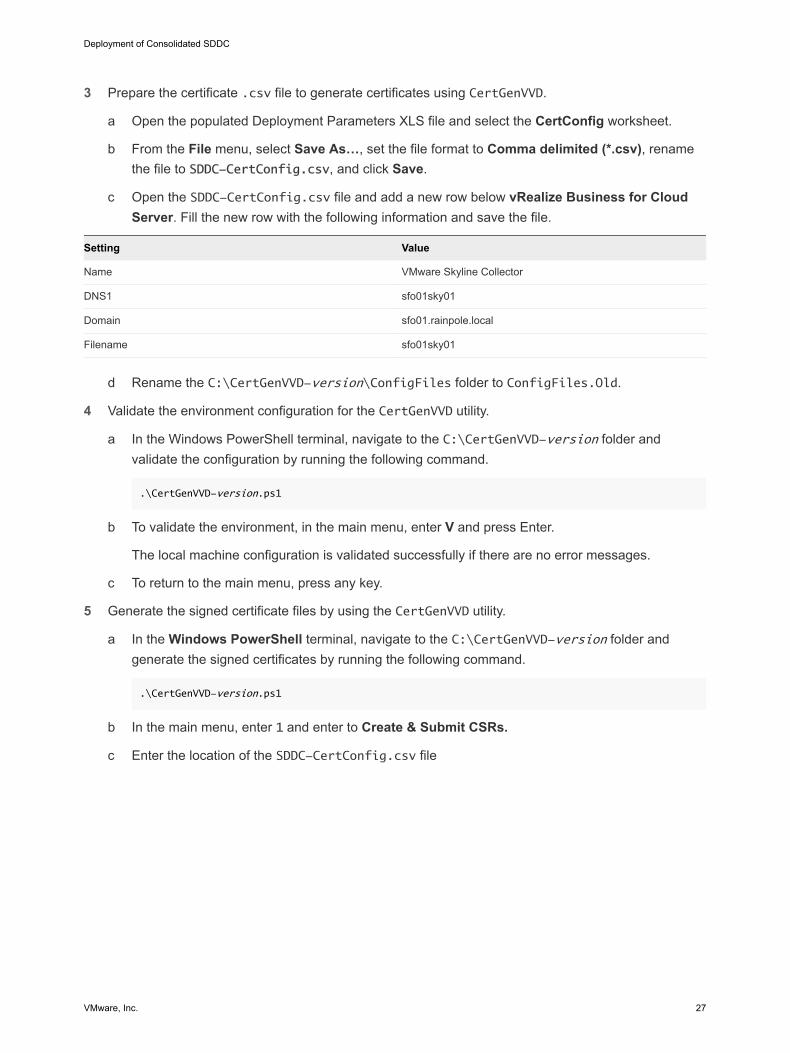
3 Prepare the certificate .csv file to generate certificates using CertGenVVD.
a Open the populated Deployment Parameters XLS file and select the CertConfig worksheet.
b From the File menu, select Save As…, set the file format to Comma delimited (*.csv), renamethe file to SDDC-CertConfig.csv, and click Save.
c Open the SDDC-CertConfig.csv file and add a new row below vRealize Business for CloudServer. Fill the new row with the following information and save the file.
Setting Value
Name VMware Skyline Collector
DNS1 sfo01sky01
Domain sfo01.rainpole.local
Filename sfo01sky01
d Rename the C:\CertGenVVD-version\ConfigFiles folder to ConfigFiles.Old.
4 Validate the environment configuration for the CertGenVVD utility.
a In the Windows PowerShell terminal, navigate to the C:\CertGenVVD-version folder andvalidate the configuration by running the following command.
.\CertGenVVD-version.ps1
b To validate the environment, in the main menu, enter V and press Enter.
The local machine configuration is validated successfully if there are no error messages.
c To return to the main menu, press any key.
5 Generate the signed certificate files by using the CertGenVVD utility.
a In the Windows PowerShell terminal, navigate to the C:\CertGenVVD-version folder andgenerate the signed certificates by running the following command.
.\CertGenVVD-version.ps1
b In the main menu, enter 1 and enter to Create & Submit CSRs.
c Enter the location of the SDDC-CertConfig.csv file
Deployment of Consolidated SDDC
VMware, Inc. 27
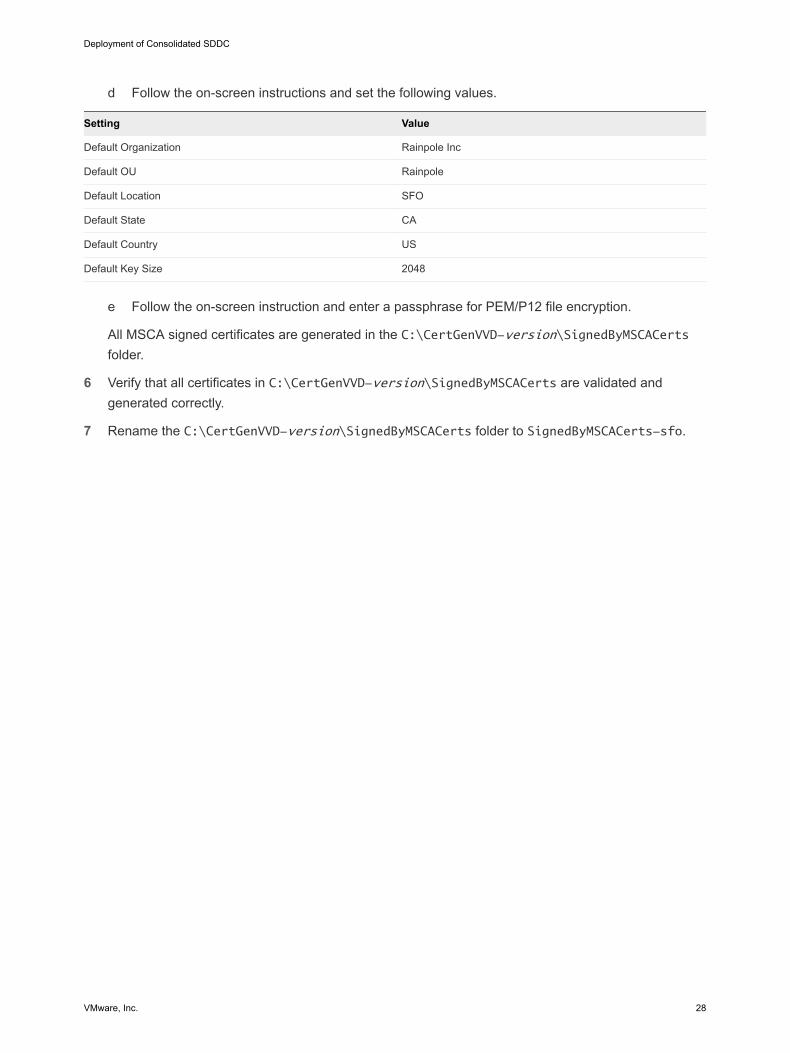
d Follow the on-screen instructions and set the following values.
Setting Value
Default Organization Rainpole Inc
Default OU Rainpole
Default Location SFO
Default State CA
Default Country US
Default Key Size 2048
e Follow the on-screen instruction and enter a passphrase for PEM/P12 file encryption.
All MSCA signed certificates are generated in the C:\CertGenVVD-version\SignedByMSCACertsfolder.
6 Verify that all certificates in C:\CertGenVVD-version\SignedByMSCACerts are validated andgenerated correctly.
7 Rename the C:\CertGenVVD-version\SignedByMSCACerts folder to SignedByMSCACerts-sfo.
Deployment of Consolidated SDDC
VMware, Inc. 28

VMware Cloud BuilderImplementation forConsolidated SDDC 3You deploy and configure the VMware Cloud Builder appliance to start the automated implementation ofthe SDDC components.
You deploy a single VMware Cloud Builder appliance to automate the implementation of the SDDCcomponents for Consolidated SDDC.
Procedure
1 Prerequisites for VMware Cloud Builder Implementation for Consolidated SDDC
Before you deploy the virtual appliance of VMware Cloud Builder, verify that your environment fulfillsthe requirements for this deployment.
2 Deploy the Virtual Appliance of VMware Cloud Builder for Consolidated SDDC
You deploy the virtual appliance of VMware Cloud Builderand configure the appliance to start theautomated implementation of the SDDC components for Consolidated SDDC.
Prerequisites for VMware Cloud Builder Implementationfor Consolidated SDDCBefore you deploy the virtual appliance of VMware Cloud Builder, verify that your environment fulfills therequirements for this deployment.
Network ConfigurationVerify that the static IP address and FQDN for the VMware Cloud Builder appliance are available.
Setting Value
IP address 172.16.11.60
Host name sfo01cb01.sfo01.rainpole.local
Default gateway 172.16.11.253
DNS servers n 172.16.11.5
n 172.16.11.4
DNS domain sfo01.rainpole.local
DNS search sfo01.rainpole.local,rainpole.local
VMware, Inc. 29

Setting Value
Subnet mask 255.255.255.0
NTP Servers n ntp.sfo01.rainpole.local
Deployment PrerequisitesVerify that your environment satisfies the following prerequisites for the deployment of the VMware CloudBuilder appliance.
Prerequisite Value
Environment Verify that your environment is configured for deployment ofVMware Cloud Builder and of the SDDC. See Chapter 2Prepare the Environment for Deployment for ConsolidatedSDDC.
CPU 4 vCPUs
Memory 8 GB
Storage n Virtual disk provisioning: Thin
n Required storage: 350 GB
Installation Packages Download the .ova file(s) for VMware Cloud Builder.
Deploy the Virtual Appliance of VMware Cloud Builder forConsolidated SDDCYou deploy the virtual appliance of VMware Cloud Builderand configure the appliance to start theautomated implementation of the SDDC components for Consolidated SDDC.
Procedure
1 In a Web browser, log in to the ESXi host by using the VMware Host Client.
Settings Value
URL https://sfo01w01esx01.sfo01.rainpole.local
User name root
Password esxi_root_user_password
2 In the navigation pane, select Host and click Create / Register VM.
The New virtual machine wizard opens.
3 On the Select creation type page, select Deploy a virtual machine from an OVF or OVA file andclick Next.
4 On the Select OVF and VMDK files page, enter sfo01cb01 for the virtual machine name, select theVMware Cloud Builder .ova file, and click Next.
5 In the Select storage page, select sfo01-w01-bkp01, and click Next.
Deployment of Consolidated SDDC
VMware, Inc. 30

6 On the License agreements page, click I agree to accept the license agreement, and click Next.
7 On the Deployment options page, enter the following values and click Next.
Setting Value
Network mappings VM network
Disk provisioning Thin
Power on automatically Selected
8 On the Additional settings page, expand Application, enter the following values, and click Next.
Setting Value
Deployment Architecture vvd
Admin User name admin
Admin Password sfo01cb01_admin_password
Note The passwords must be at least 8 characters, mustcontain uppercase, lowercase, digits, and special characters.
Admin Password confirm sfo01cb01_admin_password
Root Password sfo01cb01_root_password
Note The passwords must be at least 8 characters, mustcontain uppercase, lowercase, digits, and special characters.
Root Password confirm sfo01cb01_root_password
Host name sfo01cb01
Network 1 IP Address 172.16.11.60
Network 1 Subnet Mask 255.255.255.0
Default Gateway 172.16.11.253
DNS Servers 172.16.11.5,172.16.11.4
DNS Domain Name sfo01.rainpole.local
DNS Domain Search Paths sfo01.rainpole.local,rainpole.local
NTP Servers ntp.sfo01.rainpole.local
9 On the Ready to complete page, review the virtual machine configuration and click Finish.
Deployment of Consolidated SDDC
VMware, Inc. 31

Deploy the Software-DefinedData Center Components forConsolidated SDDC 4After you deploy and configure the VMware Cloud Builder appliance, you generate the JSON deploymentfile based on the values populated in the Deployment Parameters XLS file. You then validate thenecessary run parameters and start the automated deployment of the SDDC componentsforConsolidated SDDC.
Procedure
1 Automated SDDC Deployment for Consolidated SDDC
To deploy the SDDC management domain end-to-end and a virtual infrastructure workload domainfor tenant workloads by using automation, use VMware Cloud Builder.
2 Skyline Manual Deployment for Consolidated SDDC
Starting from VMware Validated Design 5.1, you connect the SDDC to VMware Skyline for proactiveproduct support. In each region, an instance of Skyline Collector sends product usage data from themanagement components to the analytics engine in the cloud. You deploy the Skyline Collectorinstance for the region manually after you complete the automated deployment of the other SDDCmanagement components by using Cloud Builder.
Automated SDDC Deployment for Consolidated SDDCTo deploy the SDDC management domain end-to-end and a virtual infrastructure workload domain fortenant workloads by using automation, use VMware Cloud Builder.
In this version of VMware Validated Design, VMware Cloud Builder deploys all components of the SDDCstack except the VMware Skyline Collector instances.
Procedure
1 Prerequisites for Automated SDDC Deployment for Consolidated SDDC
Before you start the automated SDDC deployment, verify that your environment fulfills therequirements for this deployment.
VMware, Inc. 32

2 Upload the VMware Validated Design Software Bundle and Signed Certificates to VMware CloudBuilderfor Consolidated SDDC
After you deploy the VMware Cloud Builder appliance, you prepare for an automated deployment ofthe SDDC components by uploading the software bundles and the generated signed certificates.You then mount the software bundle and configure application properties for the automateddeployment process.
3 Generate the JSON Deployment Filefor Consolidated SDDC
4 Validate the Deployment Parameters and Target Environment Prerequisites for Consolidated SDDC
5 Start the Automated Deployment for Consolidated SDDC
Prerequisites for Automated SDDC Deployment for ConsolidatedSDDCBefore you start the automated SDDC deployment, verify that your environment fulfills the requirementsfor this deployment.
Deployment PrerequisitesVerify that your environment satisfies the following prerequisites for the automated SDDC deployment.
Prerequisite Value
Environment Verify that your environment is configured for deployment of theSDDC. See Chapter 2 Prepare the Environment for Deploymentfor Consolidated SDDC.
Physical Network Verify that your environment meets all physical networkrequirements, all host names and IP addresses are allocated forexternal services and SDDC components.
Active Directory Verify that Active Directory is configured with all child domainsand all service accounts, groups, and computer objects arecreated and configured.
DNS Verify that DNS entries are configured for the root and childdomains.
NTP Services Verify that two external to the SDDC NTP servers are configuredand time synchronization is configured on all ESXi hosts and ADdomain controllers.
Storage Primary vSAN storage:
n Verify that the necessary primary storage capacity isallocated. See Deployment Parameters XLS file forConsolidated SDDC for automatic capacity calculation.
Secondary NFS storage:
n Verify that NFS storage is mounted.
n Verify that you allocated the necessary storage capacity.See Datastore Requirements in the VMware ValidatedDesign Planning and Preparation for Consolidated SDDCdocumentation.
Deployment of Consolidated SDDC
VMware, Inc. 33

Prerequisite Value
Software Features n Fill in the Deployment Parameters XLS file for ConsolidatedSDDC. See Deployment Specification in the VMwareValidated Design Planning and Preparation for ConsolidatedSDDC documentation.
n Verify that you generated CA-signed certificates for themanagement components of the SDDC. See GenerateSigned Certificates for the SDDC Components forConsolidated SDDC.
Installation Packages Download the .iso file (sddc-vrealize-bundle) of thesoftware bundle for VMware Validated Design to your local filesystem.
For additional information, see the VMware Validated Design Planning and Preparation for ConsolidatedSDDC documentation.
Upload the VMware Validated Design Software Bundle and SignedCertificates to VMware Cloud Builderfor Consolidated SDDCAfter you deploy the VMware Cloud Builder appliance, you prepare for an automated deployment of theSDDC components by uploading the software bundles and the generated signed certificates. You thenmount the software bundle and configure application properties for the automated deployment process.
Procedure
1 Log in to the VMware Cloud Builder appliance by using a Secure Copy Protocol (SCP) client.
Setting Value
FQDN sfo01cb01.sfo01.rainpole.local
User name admin
Password cloudbuilder_admin_password
2 Upload the VMware Validated Design software bundle file sddc-vrealize-bundle-x.x.x.x-xxxxxxxx.iso to the /mnt/hgfs directory on the VMware Cloud Builder appliance.
3 Upload all folders and their content from the C:\CertGenVVD-version\SignedByMSCACerts-sfo tothe /opt/vmware/vvd/certificates directory on the VMware Cloud Builder appliance.
4 Log in to the VMware Cloud Builder appliance by using a Secure Shell (SSH) client.
Setting Value
FQDN sfo01cb01.sfo01.rainpole.local
User name admin
Password cloudbuilder_admin_password
5 Switch to the root user by running the su command and entering the root password.
Deployment of Consolidated SDDC
VMware, Inc. 34
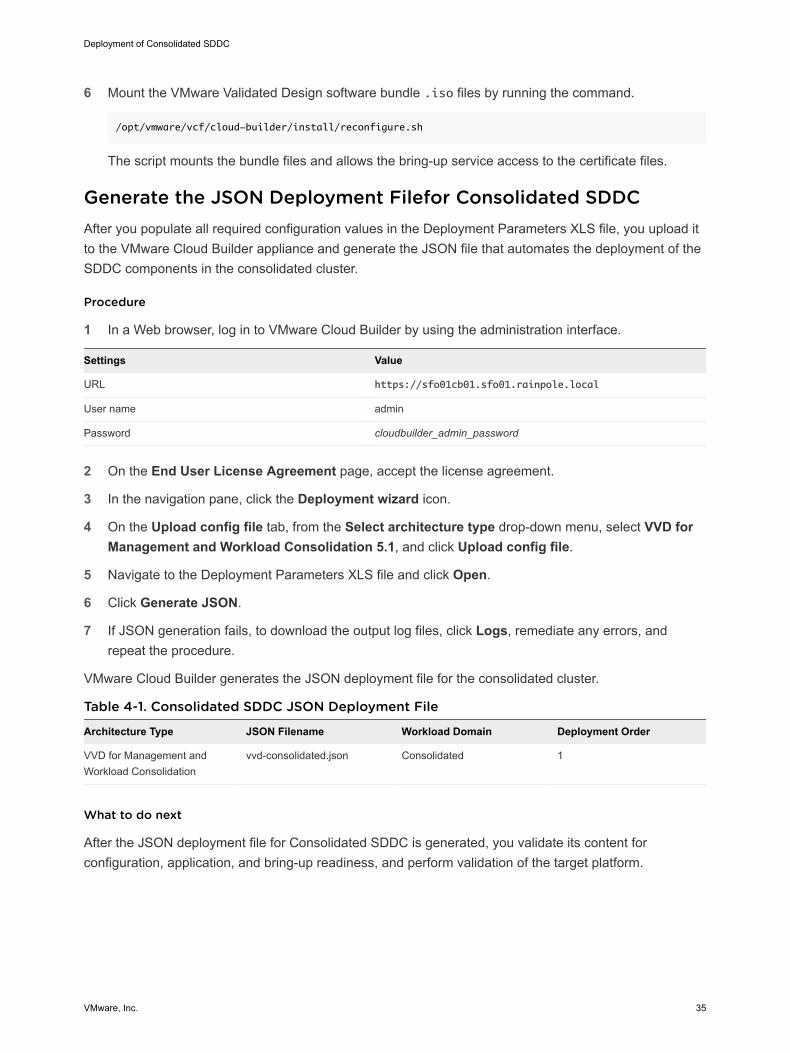
6 Мount the VMware Validated Design software bundle .iso files by running the command.
/opt/vmware/vcf/cloud-builder/install/reconfigure.sh
The script mounts the bundle files and allows the bring-up service access to the certificate files.
Generate the JSON Deployment Filefor Consolidated SDDCAfter you populate all required configuration values in the Deployment Parameters XLS file, you upload itto the VMware Cloud Builder appliance and generate the JSON file that automates the deployment of theSDDC components in the consolidated cluster.
Procedure
1 In a Web browser, log in to VMware Cloud Builder by using the administration interface.
Settings Value
URL https://sfo01cb01.sfo01.rainpole.local
User name admin
Password cloudbuilder_admin_password
2 On the End User License Agreement page, accept the license agreement.
3 In the navigation pane, click the Deployment wizard icon.
4 On the Upload config file tab, from the Select architecture type drop-down menu, select VVD forManagement and Workload Consolidation 5.1, and click Upload config file.
5 Navigate to the Deployment Parameters XLS file and click Open.
6 Click Generate JSON.
7 If JSON generation fails, to download the output log files, click Logs, remediate any errors, andrepeat the procedure.
VMware Cloud Builder generates the JSON deployment file for the consolidated cluster.
Table 4-1. Consolidated SDDC JSON Deployment File
Architecture Type JSON Filename Workload Domain Deployment Order
VVD for Management andWorkload Consolidation
vvd-consolidated.json Consolidated 1
What to do next
After the JSON deployment file for Consolidated SDDC is generated, you validate its content forconfiguration, application, and bring-up readiness, and perform validation of the target platform.
Deployment of Consolidated SDDC
VMware, Inc. 35

Validate the Deployment Parameters and Target EnvironmentPrerequisites for Consolidated SDDCYou perform validation of the JSON deployment file and specific target environment prerequisites toensure that you can successfully deploy the components of the consolidated cluster with VMware CloudBuilder.
You validate the JSON deployment file, vvd-consolidated.json for the consolidated cluster. In caseany of the tests fail, you must remediate any errors and perform the validation process again. Additionalinformation can be found in the audit log file.
Table 4-2. VMware Cloud Builder Platform Audit Log File Location
Cloud Builder Component Location
Platform Audit /opt/vmware/sddc-support/cloud_admin_tools/logs/
PlatformAudit.log
Procedure
1 In a Web browser, log in to VMware Cloud Builder by using the administration interface.
Settings Value
URL https://sfo01cb01.sfo01.rainpole.local
User name admin
Password cloudbuilder_admin_password
2 In the navigation pane, click the Deployment wizard icon.
3 Click the Validate environment tab.
4 From the Select File to Validate drop-down menu, select the vvd-consolidated.json file and clickValidate.
5 If the validation fails because of problems with the signed certificate files, resolve the issues and re-upload the modified certificate files.
a Upload the modified certificate files to the VMware Cloud Builder appliance by using an SCPsoftware, such as WinSCP.
b Open an SSH connection to sfo01cb01.sfo01.rainpole.local.
c Run the command.
su /opt/vmware/vcf/cloud-builder/install/reconfigure.sh
d When prompted, enter the cloudbuilder_root_password.
Deployment of Consolidated SDDC
VMware, Inc. 36

6 If the validation fails with a user input errors message, remediate the Deployment ParametersXLS file.
a On the Upload Config File tab, from the Select Architecture Type drop-down menu, selectVVD for Management and Workload Consolidation, and click Upload Config File.
b Navigate to the updated Deployment Parameters XLS file and click Open.
c Click Generate JSON.
d In the dialog box, click Yes.
e On the Validate environment tab, from the Select file to validate drop-down menu, select thevvd-consolidated.json file, and click Validate.
The vvd-consolidated.json file is successfully validated against the predefined runparameters.
What to do next
After the successful validation of the vvd-consolidated.json file, click Next to start the deployment ofthe management and workload consolidated cluster.
Start the Automated Deployment for Consolidated SDDCAfter you successfully validated the vvd-consolidated.json file, you start the automated deployment ofthe components of the consolidated cluster.
Procedure
1 In a Web browser, log in to VMware Cloud Builder by using the administration interface.
Settings Value
URL https://sfo01cb01.sfo01.rainpole.local
User name admin
Password cloudbuilder_admin_password
2 In the navigation pane, click the Deployment wizard icon.
3 Click the Deploy an SDDC tab.
4 From the Select deployment file drop-down menu, select the vvd-consolidated.json file and clickDeploy.
The automated deployment of the components of the consolidated cluster starts.
5 Monitor the deployment and check the following log files for errors.
Table 4-3. VMware Cloud Builder Bring Up Service Log File Location
Cloud Builder Component Location
Bring Up Service /opt/vmware/bringup/logs/vcf-bringup.log
/opt/vmware/bringup/logs/vcf-bringup-debug.log
Deployment of Consolidated SDDC
VMware, Inc. 37

Skyline Manual Deployment for Consolidated SDDCStarting from VMware Validated Design 5.1, you connect the SDDC to VMware Skyline for proactiveproduct support. In each region, an instance of Skyline Collector sends product usage data from themanagement components to the analytics engine in the cloud. You deploy the Skyline Collector instancefor the region manually after you complete the automated deployment of the other SDDC managementcomponents by using Cloud Builder.
Procedure
1 Prerequisites for Deploying VMware Skyline for Consolidated SDDC
Before you deploy and configure the Skyline Collector instance, verify that the environment fulfillsthe requirements for this deployment.
2 Configure User Access in vSphere for Integration with VMware Skyline for Consolidated SDDC
Assign the svc-skyline-vsphereservice account for the Skyline Collector instance the minimumpermissions that are required for connecting and collecting data from the vCenter Server instancesin the SDDC.
3 Configure User Privileges in NSX Manager for the Skyline Collector Instances for ConsolidatedSDDC
Assign the svc-skyline-nsx service account the required permissions for authentication and datacollection in VMware Skyline by associating the account with the default NSX Administrator role inVMware NSX® Data Center for vSphere®.
4 Configure User Privileges in vRealize Operations Manager for the Skyline Collector Instances forConsolidated SDDC
On VMware vRealize® Operations Manager™, give the [email protected] serviceaccount read-only privileges. These privileges provide the Skyline Collector instances in the SDDCwith access to vRealize Operations Manager.
5 Prepare for Skyline Collector Registration with VMware Cloud Services
Before you register the Skyline Collector instances with VMware Cloud Services and start usingVMware Skyline for proactive product support, you must create an organization on VMware CloudServices and generate a registration token for the Skyline Collector instances.
6 Deploy the Skyline Collector Appliance for Consolidated SDDC
You deploy the Skyline Collector appliance in the management cluster, configuring storage,networking, and other appliance attributes.
7 Configure the Skyline Collector Instance for Consolidated SDDC
After you deploy the Skyline Collector appliance, proceed with configuring log forwarding to vRealizeLog Insight for monitoring the operation of the collector and with the registration of the endpoints forthe SDDC management components in the region.
Deployment of Consolidated SDDC
VMware, Inc. 38

Prerequisites for Deploying VMware Skyline for ConsolidatedSDDCBefore you deploy and configure the Skyline Collector instance, verify that the environment fulfills therequirements for this deployment.
IP Addresses and Host NamesVerify that static IP address and FQDN for the Skyline Collector instance are available in the region-specific application virtual network.
Configure both forward and reverse DNS records with designated fully qualified domain name and IPaddress.
Table 4-4. IP Addresses and Host Names for the Skyline Collector Appliance
Setting Value
IP address 192.168.31.70
FQDN sfo01sky01.sfo01.rainpole.local
Default gateway 192.168.31.1
DNS search n sfo01.rainpole.local
n rainpole.local
DNS servers n 172.16.11.5
n 172.16.11.4
Subnet mask 255.255.255.0
NTP servers n ntp.sfo01.rainpole.local
n ntp.lax01.rainpole.local
Deployment PrerequisitesVerify that your environment satisfies the following prerequisites for the deployment of the SkylineCollector appliance.
Prerequisite Value
Storage n Virtual disk provisioning: Thin
n Required storage: 87 GB (1.1 GB initial if thin provisioned)
Software Features n Verify that the Management vCenter Server and ComputevCenter Server are operational.
n Verify that the vSphere cluster has DRS and HA enabled.
n Verify that the NSX Manager instances are operational.
n Verify that vRealize Operations Manager is operational.
n Verify that the Mgmt-RegionA01-VXLAN application virtualnetworks is available.
Installation Package Download the .ova file of the Skyline Collector virtual appliancefrom My VMware to a host that has access to the SDDC. SeeVMware Validated Design Release Notes for the version for thisVMware Validated Design.
Deployment of Consolidated SDDC
VMware, Inc. 39

Prerequisite Value
Active Directory Verify that you have a parent Active Directory with these SDDCuser accounts configured for the rainpole.local domain.
n svc-skyline-vsphere (User)
n svc-skyline-nsx (User)
n svc-skyline-vrops (User)
Certificate Authority n Verify that you have generated a CA-signed certificates forSkyline. See Generate Signed Certificates for the SDDCComponents for Consolidated SDDC.
Configure User Access in vSphere for Integration with VMwareSkyline for Consolidated SDDCAssign the svc-skyline-vsphereservice account for the Skyline Collector instance the minimumpermissions that are required for connecting and collecting data from the vCenter Server instances in theSDDC.
You associate the svc-skyline-vsphere service account in the Active Directory with a user role that hascertain privileges. You assign the user to all vCenter Server instances in the inventory by using globalpermissions.
Define a User Role in vSphere for the Skyline Collector Instances forConsolidated SDDCTo give the Skyline Collector instances rights to collect data from the vSphere endpoints, first create auser role with the required minimum privileges on the vCenter Server instances in the SDDC.
Procedure
1 In a Web browser, log in to vCenter Server by using the vSphere Client.
Setting Value
URL https://sfo01w01vc01.sfo01.rainpole.local/ui
User name [email protected]
Password vsphere_admin_password
2 On the Home page of the vSphere Client, in the navigation pane, select Administration.
3 On the Administration page, select Roles.
Deployment of Consolidated SDDC
VMware, Inc. 40

4 Create a role for the Skyline Collector instances.
a From the Roles provider drop-down menu, select sfo01w01vc01.sfo01.rainpole.local.
b Select Read-only and click the Clone role action icon.
You clone the Read-only role because it includes the System.Anonymous, System.View,and System.Read privileges. The Skyline Collector instances require these privileges to collectinformation from the vCenter Server endpoint in each workload domain and the vSphereinfrastructure components.
c In the Clone Role dialog box, enter Skyline Collector User as the name for the role and clickOK.
5 To grant the Skyline Collector nodes access to license data in vSphere, assign the Global.Licensesprivilege to the role.
a From the list of Roles, select the Skyline Collector User role.
b Click the Edit role action icon.
c On the Edit Role dialog box, select Global in the left pane and select Licenses in the right pane.
d Click Next and click Finish.
The Skyline Collector user role is propagated to the other linked vCenter Server instances.
Configure User Privileges in vSphere for the Skyline Collector InstancesforConsolidated SDDCTo give the svc-skyline-vsphere service account rights for collecting product analytics data from allconnected vCenter Server endpoints, assign global permissions to the account.
The [email protected] service account receives global read-only access to the objectinventory and global access to the license information on all linked vCenter Server instances. You definethese access rights in the Skyline Collector User custom role.
Procedure
1 In a Web browser, log in to vCenter Server by using the vSphere Client.
Setting Value
URL https://sfo01w01vc01.sfo01.rainpole.local/ui
User name [email protected]
Password vsphere_admin_password
2 On the Home page of the vSphere Client, in the navigation pane, select Administration.
3 On the Administration page, under Access Control, select Global Permissions.
4 On the Global Permissions page, click the Add Permission icon.
5 In the Add Permission-Global Permissions Root dialog box, from the User drop-down menu,select rainpole.local.
Deployment of Consolidated SDDC
VMware, Inc. 41

6 In the search box, enter svc and press Enter.
7 From the list of users and groups, select the svc-skyline-vsphere user.
8 From the Role drop-down menu, select Skyline Collector User, select Propagate to children, andclick OK.
Configure User Privileges in NSX Manager for the SkylineCollector Instances for Consolidated SDDCAssign the svc-skyline-nsx service account the required permissions for authentication and datacollection in VMware Skyline by associating the account with the default NSX Administrator role inVMware NSX® Data Center for vSphere®.
The NSX Administrator role has the permissions for collecting NSX Edge support log bundles by usingSkyline Log Assist.
You configure the NSX Administrator role for the svc-skyline-nsx service account on the NSX Managerinstance in the consolidated cluster.
Table 4-5. NSX Manager Instances
NSX Manager FQDN IP Address
sfo01w01nsx01.sfo01.rainpole.local 172.16.11.65
Procedure
1 In a Web browser, log in to vCenter Server by using the vSphere Web Client.
Setting Value
URL
User name [email protected]
Password vsphere_admin_password
2 In the Networking & Security inventory, under System, select Users and Domains.
3 On the Users tab, from the NSX Manager drop-down menu, select 172.16.11.66.
4 Click the Add icon.
The Assign Role wizard appears.
5 On the Identify User page, select the Specify a vCenter User radio button,enter [email protected] in the User text box, and click Next.
6 On the Select Roles page, select the NSX Administrator radio button, and click Finish.
Deployment of Consolidated SDDC
VMware, Inc. 42

Configure User Privileges in vRealize Operations Manager for theSkyline Collector Instances for Consolidated SDDCOn VMware vRealize® Operations Manager™, give the [email protected] serviceaccount read-only privileges. These privileges provide the Skyline Collector instances in the SDDC withaccess to vRealize Operations Manager.
Procedure
1 In a Web browser, log in to the vRealize Operations Manager by using the operations interface.
Settings Value
URL https://vrops01svr01.rainpole.local
User name admin
Password vrops_admin_password
2 On the main navigation bar, click Administration.
3 In the left pane of vRealize Operations Manager, expand Access and click Access Control.
4 On the Access Control page, click the User Accounts tab and click the Import Users icon.
5 On the Import Users page, import the [email protected] service account.
a From the Import From drop-down menu, select Rainpole.local.
b Select the Basic option for the search query.
c In the Search String text box, enter svc-skyline-vrops and click Search.
d In the search results, select [email protected] and click Next.
6 On the Assign Groups and Permissions page, click the Objects tab, assign the read-only role tothe service account, and click Finish.
Setting Value
Select Role ReadOnly
Assign this role to the user Selected
Allow access to all objects in the system Selected
Deployment of Consolidated SDDC
VMware, Inc. 43

Prepare for Skyline Collector Registration with VMware CloudServicesBefore you register the Skyline Collector instances with VMware Cloud Services and start using VMwareSkyline for proactive product support, you must create an organization on VMware Cloud Services andgenerate a registration token for the Skyline Collector instances.
Procedure
1 Create an Organization on VMware Cloud Services
The Skyline Collector instance in the region sends product analytics data to VMware Cloud Servicesfor analysis and proactive support. To enable registration of your Skyline Collector instances withVMware Cloud Services, first create an organization on VMware Cloud Services.
2 Associate Your Support Entitlement and Create a Registration Token for VMware Skyline
On VMware Cloud Services, associate your Production Support or Premier Services Supportentitlement with VMware Skyline so that you can initiate product usage analysis by using the datafrom the Skyline Collector instances in the SDDC.
3 Create a Token for Registration with VMware Cloud Services
To register a VMware Skyline Collector instance with your VMware Cloud Services organization, youmust provide a registration token for authentication to VMware Cloud Services.
Create an Organization on VMware Cloud ServicesThe Skyline Collector instance in the region sends product analytics data to VMware Cloud Services foranalysis and proactive support. To enable registration of your Skyline Collector instances with VMwareCloud Services, first create an organization on VMware Cloud Services.
Procedure
1 Log in to the getting started page of VMware Skyline.
a Open a Web browser and go to https://skyline.vmware.com/get-started.
b Click Get started now.
c Log in by using the following credentials.
Setting Value
User name Email address registered with My VMware
Password Password for My VMware
2 Click Create Your First Organization.
Deployment of Consolidated SDDC
VMware, Inc. 44

3 On the Set up your organization page, enter settings for your organization and click Continue.
Setting Value
Organization Name Name of your organization on VMware Cloud Services
OrganizationAddress
Country Country of your organization
Address Address of your organization
City City where organization is located
State/Province State where your organization is located
Zip/Postal Code Zip code of your organization's location
I agree to VMware Cloud Services Terms ofService
Selected
After you create the Organization on VMware Cloud Services, the Associate Support Entitlement toSkyline page appears.
Associate Your Support Entitlement and Create a Registration Token forVMware SkylineOn VMware Cloud Services, associate your Production Support or Premier Services Support entitlementwith VMware Skyline so that you can initiate product usage analysis by using the data from the SkylineCollector instances in the SDDC.
Procedure
1 Log in to the getting started page of VMware Skyline.
a Open a Web browser and go to https://skyline.vmware.com/get-started.
b Click Get started now.
c Log in by using the following credentials.
Setting Value
User name Email address registered with My VMware
Password Password for My VMware
2 Click Associate Support Entitlement.
3 Click Proceed to Next Step.
4 On the Download Skyline Collector page, click Proceed to Next Step.
5 On the Deploy Skyline Collector page, click Proceed to Next Step.
6 On the Register Skyline Collector page, click Create New Token
7 Copy, and save the token for later use.
A token for Skyline Collector registration is valid for 12 hours. If a token expires, you must generate anew one.
Deployment of Consolidated SDDC
VMware, Inc. 45

Create a Token for Registration with VMware Cloud ServicesTo register a VMware Skyline Collector instance with your VMware Cloud Services organization, you mustprovide a registration token for authentication to VMware Cloud Services.
A VMware Skyline Collector registration token is a unique, single use token for completing the registrationprocess. VMware Skyline Collector registration tokens are valid for 12 hours, after which time you mustrequest a new token.
Procedure
1 Log in to the getting started page of VMware Skyline.
a Open a Web browser and go to https://skyline.vmware.com/get-started.
b Click Get started now.
c Log in by using the following credentials.
Setting Value
User name Email address registered with My VMware
Password Password for My VMware
2 Click Step 4 - Register Skyline Collector.
3 Click Create New Token, copy, and save the token.
A token for Skyline Collector registration is valid for 12 hours. If a token expires, you must generate a newone.
Deploy the Skyline Collector Appliance for Consolidated SDDCYou deploy the Skyline Collector appliance in the management cluster, configuring storage, networking,and other appliance attributes.
Procedure
1 In a Web browser, log in to vCenter Server by using the vSphere Client.
Setting Value
URL https://sfo01w01vc01.sfo01.rainpole.local/ui
User name [email protected]
Password vsphere_admin_password
2 In the Hosts and clusters inventory, expand the sfo01w01vc01.sfo01.rainpole.local tree andexpand the sfo01-w01dc data center.
3 Right-click the sfo01-w01-consolidated01 cluster and select Deploy OVF Template.
4 On the Select template page, select Local file, browse to the location of the Skyline Collector OVAfile, and click Next.
Deployment of Consolidated SDDC
VMware, Inc. 46
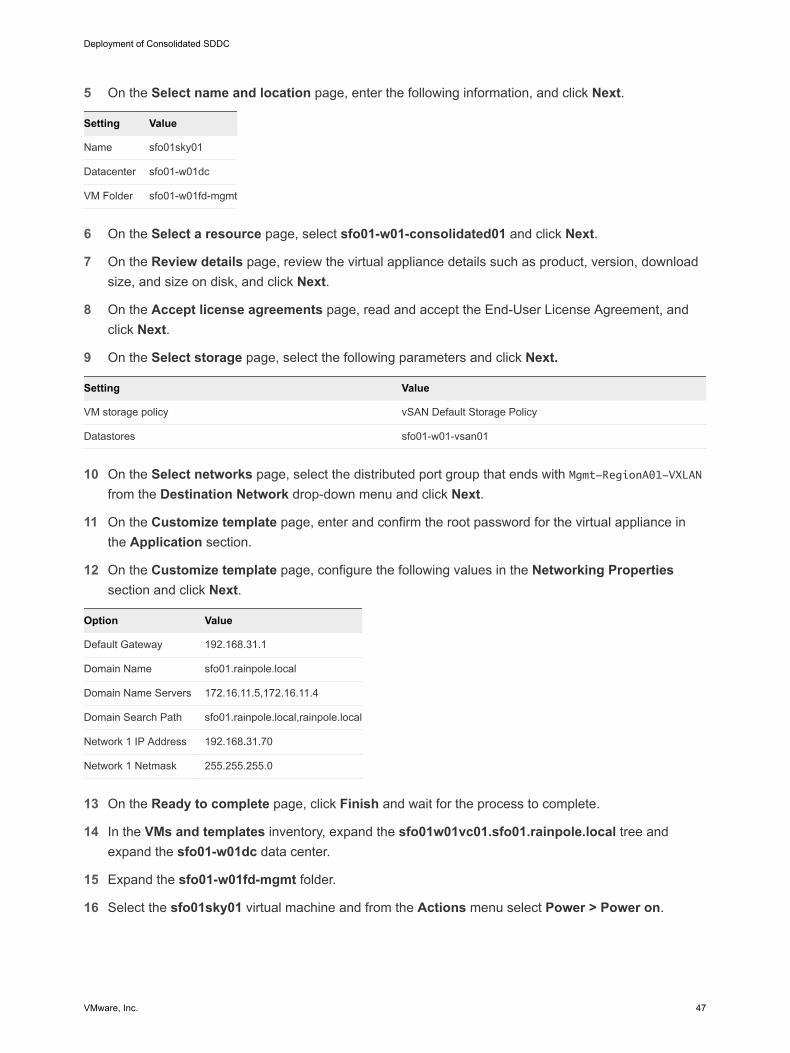
5 On the Select name and location page, enter the following information, and click Next.
Setting Value
Name sfo01sky01
Datacenter sfo01-w01dc
VM Folder sfo01-w01fd-mgmt
6 On the Select a resource page, select sfo01-w01-consolidated01 and click Next.
7 On the Review details page, review the virtual appliance details such as product, version, downloadsize, and size on disk, and click Next.
8 On the Accept license agreements page, read and accept the End-User License Agreement, andclick Next.
9 On the Select storage page, select the following parameters and click Next.
Setting Value
VM storage policy vSAN Default Storage Policy
Datastores sfo01-w01-vsan01
10 On the Select networks page, select the distributed port group that ends with Mgmt-RegionA01-VXLANfrom the Destination Network drop-down menu and click Next.
11 On the Customize template page, enter and confirm the root password for the virtual appliance inthe Application section.
12 On the Customize template page, configure the following values in the Networking Propertiessection and click Next.
Option Value
Default Gateway 192.168.31.1
Domain Name sfo01.rainpole.local
Domain Name Servers 172.16.11.5,172.16.11.4
Domain Search Path sfo01.rainpole.local,rainpole.local
Network 1 IP Address 192.168.31.70
Network 1 Netmask 255.255.255.0
13 On the Ready to complete page, click Finish and wait for the process to complete.
14 In the VMs and templates inventory, expand the sfo01w01vc01.sfo01.rainpole.local tree andexpand the sfo01-w01dc data center.
15 Expand the sfo01-w01fd-mgmt folder.
16 Select the sfo01sky01 virtual machine and from the Actions menu select Power > Power on.
Deployment of Consolidated SDDC
VMware, Inc. 47

Configure the Skyline Collector Instance for Consolidated SDDCAfter you deploy the Skyline Collector appliance, proceed with configuring log forwarding to vRealize LogInsight for monitoring the operation of the collector and with the registration of the endpoints for the SDDCmanagement components in the region.
Procedure
1 Enable SSH on the Skyline Collector Appliance for Consolidated SDDC
You access the Skyline Collector appliance over SSH for configuring NTP, uploading a CA-signedcertificate, and configuring log forwarding. Because it is disabled by default on the appliance, enableSSH after you deploy the appliance.
2 Replace the Certificate for the Skyline Collector User Interface for Consolidated SDDC
To establish a trusted connection to the Skyline Collector user interface, replace the SSL certificatefor the Skyline Collector appliance with a custom certificate. The custom certificate is signed by thecertificate authority available on the parent Active Directory.
3 Replace the Certificate for the Skyline Collector Appliance Management Interface for ConsolidatedSDDC
To establish a trusted connection to the Skyline Collector instance, you replace the SSL certificatefor the virtual appliance management interface (VAMI) with a custom certificate. The customcertificate is signed by the certificate authority available on the parent Active Directory or on theintermediate Active Directory.
4 Enable NTP on the Skyline Collector Instance for Consolidated SDDC
Enable NTP on the Skyline Collector appliance in the region so that it remains synchronized with theother SDDC components.
5 Connect the Skyline Collector Instance to vRealize Log Insight for Consolidated SDDC
To be able to monitor and troubleshoot the operation of the Skyline Collector appliance in the regionby using vRealize Log Insight, install and configure the vRealize Log Insight agent on the appliance.vRealize Log Insight receives log data from vRealize Log Insight agents that run on themanagement components of the SDDC.
6 Disable SSH on the Skyline Collector Appliance for Consolidated SDDC
After you complete the configuration of the services on the Skyline Collector appliance that you mustperform over SSH, disable SSH for security reasons.
7 Complete the Initial Configuration of the Skyline Collector Instance for Consolidated SDDC
After you complete the deployment and service configuration of the appliance, register the SkylineCollector instance with VMware Cloud Services and connect the collector to the ManagementvCenter Server, NSX Manager for the management cluster, and vRealize Operations Manager.
Deployment of Consolidated SDDC
VMware, Inc. 48

Enable SSH on the Skyline Collector Appliance for Consolidated SDDCYou access the Skyline Collector appliance over SSH for configuring NTP, uploading a CA-signedcertificate, and configuring log forwarding. Because it is disabled by default on the appliance, enable SSHafter you deploy the appliance.
Procedure
1 In a Web browser, log in to vCenter Server by using the vSphere Client.
Setting Value
URL https://sfo01w01vc01.sfo01.rainpole.local/ui
User name [email protected]
Password vsphere_admin_password
2 In the VMs and templates inventory, expand the sfo01w01vc01.sfo01.rainpole.local tree andexpand the sfo01-w01dc data center.
3 In the sfo01-w01fd-mgmt virtual machine folder, right-click the sfo01sky01 appliance and selectOpen Console.
4 In the console window to the appliance, to switch to the command prompt, press Enter.
5 At the command line, log in as the root user by using skyline_root_password password.
6 Open the configuration file for the SSH daemon sshd_config in the vi editor by running thiscommand.
vi /etc/ssh/sshd_config
7 To permit SSH login for the root user, set the PermitRootLogin property to yes in the sshd_configfile.
PermitRootLogin yes
8 Save the configuration and exit the vi editor.
9 Restart the SSH daemon on the appliance by running this command.
systemctl restart sshd
10 To return to the original screen, run the exit command.
11 Close the appliance console.
Replace the Certificate for the Skyline Collector User Interface forConsolidated SDDCTo establish a trusted connection to the Skyline Collector user interface, replace the SSL certificate for theSkyline Collector appliance with a custom certificate. The custom certificate is signed by the certificateauthority available on the parent Active Directory.
Deployment of Consolidated SDDC
VMware, Inc. 49

Procedure
1 Log in to the Windows Server host that you allocated for certificate generation.
2 In the C:\CertGenVVD-version\SignedByMSCACerts folder, duplicate the files for the SkylineCollector instance generated by using the Certificate Generation Utility for VMware Validated Designunder new file names.
File Type Original File Name New File Name
Certificate sfo01sky01.2.chain.pem nginx-selfsigned.crt
Key sfo01sky01-orig.key nginx-selfsigned.key
3 Log in to the Skyline Collector appliance by using a Secure Shell (SSH) client.
Setting Value
FQDN sfo01sky01.sfo01.rainpole.local
User name root
Password skyline_root_password
4 By using an scp software such as WinSCP, copy the nginx-selfsigned.crt and nginx-selfsigned.key files to the /usr/local/skyline/ui/ directory on the appliance.
Overwrite the original nginx-selfsigned.crt and nginx-selfsigned.key files in the /usr/local/skyline/ui/ directory.
5 To update the certificate on the Skyline user interface, restart the Nginx service.
a Restart the Ngnix service by running this command.
systemctl restart nginx
b Check the status of the Ngnix service by running this command .
systemctl status nginx
6 After restarting the services, verify that the certificate on the Skyline user interface is updated.
a Close all Web browser windows.
b Open a Web browser window and go to https://sfo01sky01.sfo01.rainpole.local.
c Verify that you see the new certificate in the Web browser.
Replace the Certificate for the Skyline Collector Appliance ManagementInterface for Consolidated SDDCTo establish a trusted connection to the Skyline Collector instance, you replace the SSL certificate for thevirtual appliance management interface (VAMI) with a custom certificate. The custom certificate is signedby the certificate authority available on the parent Active Directory or on the intermediate Active Directory.
Deployment of Consolidated SDDC
VMware, Inc. 50

Procedure
1 Log in to the Windows Server host that you allocated for certificate generation.
2 In the C:\CertGenVVD-version\SignedByMSCACerts folder, duplicate the chain.pem file generatedby using the Certificate Generation Utility for VMware Validated Design under a new file name.
File Type Original File Name New File Name
Certificate sfo01sky01.2.chain.pem server.pem
3 Log in to the Skyline Collector appliance by using a Secure Shell (SSH) client.
Setting Value
FQDN sfo01sky01.sfo01.rainpole.local
User name root
Password skyline_root_password
4 By using an scp software such as WinSCP, copy the server.pem file to the /opt/vmware/etc/lighttpd/ directory on the appliance
Overwrite the original server.pem file in the /opt/vmware/etc/lighttpd/ directory.
5 Restart the virtual appliance management interface (VAMI) service by running this command.
/etc/init.d/vami-lighttp restart
6 After restarting the service, verify that the certificate on the Skyline Collector VAMI interface isupdated.
a Close all Web browser windows.
b Open a Web browser window and go to https://sfo01sky01.sfo01.rainpole.local:5480.
c Verify that you see the new certificate in the Web browser.
Enable NTP on the Skyline Collector Instance for Consolidated SDDCEnable NTP on the Skyline Collector appliance in the region so that it remains synchronized with theother SDDC components.
Time synchronization issues can result in serious problems with your environment. You enable and startthe systemd-timesyncd service on the appliance to ensure accurate time synchronization.
Procedure
1 Log in to the Skyline Collector appliance by using a Secure Shell (SSH) client.
Setting Value
FQDN sfo01sky01.sfo01.rainpole.local
User name root
Password skyline_root_password
Deployment of Consolidated SDDC
VMware, Inc. 51

2 Configure the NTP source for the Skyline Collector appliance.
a Open the /etc/systemd/timesyncd.conf file for editing by using a text editor such as vi.
vi /etc/systemd/timesyncd.conf
b Remove the comment for the NTP configuration, add the NTP settings, and save the file.
NTP=ntp.sfo01.rainpole.local
3 Enable and start the systemd-timesyncd service, and verify its status by running these commands.
a Enable and start the systemd-timesyncd service.
timedatectl set-ntp true
b Restart the systemd-timesyncd service.
systemctl restart systemd-timesyncd
c Verify the status of the service.
timedatectl status
4 Log out of the session by entering logout.
Connect the Skyline Collector Instance to vRealize Log Insight forConsolidated SDDCTo be able to monitor and troubleshoot the operation of the Skyline Collector appliance in the region byusing vRealize Log Insight, install and configure the vRealize Log Insight agent on the appliance.vRealize Log Insight receives log data from vRealize Log Insight agents that run on the managementcomponents of the SDDC.
Procedure
1 Install the vRealize Log Insight Agent on the Skyline Collector Instance for Consolidated SDDC
To start sending log data from the Skyline Collector appliance to vRealize Log Insight, first install thevRealize Log Insight agent for Linux on the appliance in the region.
2 Configure the vRealize Log Insight Agent on the Skyline Collector Instance for Consolidated SDDC
After you install the vRealize Log Insight agent on the Skyline Collector appliance, to start forwardinglog events to vRealize Log Insight, configure the agent with the location of the vRealize Log Insightcluster, set the log ingestion API as the protocol for remote logging, and disable SSL-enabled logcollection.
Install the vRealize Log Insight Agent on the Skyline Collector Instance for ConsolidatedSDDC
To start sending log data from the Skyline Collector appliance to vRealize Log Insight, first install thevRealize Log Insight agent for Linux on the appliance in the region.
Deployment of Consolidated SDDC
VMware, Inc. 52

Procedure
1 In a Web browser, log in to vRealize Log Insight by using the user interface.
Setting Value
URL https://sfo01vrli01.sfo01.rainpole.local
User name admin
Password vrli_admin_password
2 Click the configuration drop-down menu icon and select Administration.
3 Under Management, click Agents.
4 On the Agents page, click the Download Log Insight Agent Version link.
5 In the Download Log Insight Agent Version dialog box, click Linux RPM (32-bit/64-bit) and savethe .rpm file.
6 By using an scp client such as WinSCP, copy the VMware-Log-Insight-Agent-4.8.0-xxxxxx.noarch_192.168.31.10.rpm file to the /tmp folder on the appliance.
7 Log in to the Skyline Collector appliance by using a Secure Shell (SSH) client.
Setting Value
FQDN sfo01sky01.sfo01.rainpole.local
User name root
Password skyline_root_password
8 Install the vRealize Log Insight Linux agent by running this command.
rpm -i /tmp/VMware-Log-Insight-Agent-4.8.0-xxxxxx.noarch_192.168.31.10.rpm
9 Configure the vRealize Log Insight agent to start automatically.
chkconfig liagentd on
Configure the vRealize Log Insight Agent on the Skyline Collector Instance for ConsolidatedSDDC
After you install the vRealize Log Insight agent on the Skyline Collector appliance, to start forwarding logevents to vRealize Log Insight, configure the agent with the location of the vRealize Log Insight cluster,set the log ingestion API as the protocol for remote logging, and disable SSL-enabled log collection.
Deployment of Consolidated SDDC
VMware, Inc. 53

Procedure
1 Log in to the Skyline Collector appliance by using a Secure Shell (SSH) client.
Setting Value
FQDN sfo01sky01.sfo01.rainpole.local
User name root
Password skyline_root_password
2 Open the liagent.ini file for editing by using a text editor such as vi.
vi /var/lib/loginsight-agent/liagent.ini
3 Locate the [server] section, remove the comment for these parameters, insert the following values,and save the file.
[server]
; Log Insight server hostname or ip address
; If omitted the default value is LOGINSIGHT
hostname=sfo01vrli01.sfo01.rainpole.local
; Set protocol to use:
; cfapi - Log Insight REST API
; syslog - Syslog protocol
; If omitted the default value is cfapi
proto=cfapi
; Log Insight server port to connect to. If omitted the default value is:
; for syslog: 512
; for cfapi without ssl: 9000
; for cfapi with ssl: 9543
port=9000
; ssl - enable/disable SSL. Applies to cfapi protocol only.
; Possible values are yes or no. If omitted the default value is no.
ssl=no
; Time in minutes to force reconnection to the server
; If omitted the default value is 30
; reconnect=30
4 Restart the vRealize Log Insight agent on the appliance.
/etc/init.d/liagentd restart
5 Verify that the vRealize Log Insight agent is running on the appliance.
/etc/init.d/liagentd status
Disable SSH on the Skyline Collector Appliance for Consolidated SDDCAfter you complete the configuration of the services on the Skyline Collector appliance that you mustperform over SSH, disable SSH for security reasons.
Deployment of Consolidated SDDC
VMware, Inc. 54

Procedure
1 In a Web browser, log in to vCenter Server by using the vSphere Client.
Setting Value
URL https://sfo01w01vc01.sfo01.rainpole.local/ui
User name [email protected]
Password vsphere_admin_password
2 In the VMs and templates inventory, expand the sfo01w01vc01.sfo01.rainpole.local tree andexpand the sfo01-w01dc data center.
3 In sfo01-w01fd-mgmt virtual machine folder, right-click the sfo01sky01 appliance and select OpenConsole.
4 In the console to the appliance, press Enter to switch to the command prompt.
5 At the command prompt, log in as the root user by using skyline_root_password password.
6 Open the SSH daemon configuration in the vi editor by running this command.
vi /etc/ssh/sshd_config
7 To disable access of the root user by using SSH, set the PermitRootLogin property to no in thesshd_config file.
PermitRootLogin no
8 Save the configuration file and exit the vi editor.
9 Restart the SSH daemon on the appliance by running this command.
systemctl restart sshd
10 To return to the original screen, run the exit command.
11 Close the appliance console.
Complete the Initial Configuration of the Skyline Collector Instance forConsolidated SDDCAfter you complete the deployment and service configuration of the appliance, register the SkylineCollector instance with VMware Cloud Services and connect the collector to the Management vCenterServer, NSX Manager for the management cluster, and vRealize Operations Manager.
Deployment of Consolidated SDDC
VMware, Inc. 55

Procedure
1 In a Web browser, log in to the Skyline Collector instance by using the user interface.
Setting Value
URL https://sfo01sky01.sfo01.rainpole.local
User name admin
Password default
2 On the You must change your password on first login page, use the following credentials andclick Change.
Setting Value
Enter Old Password default
Enter New Password skyline_admin_password
Reenter New Password skyline_admin_password
3 Click Login Again.
4 Log in to the Skyline Collector user interface by using the new credentials.
Setting Value
User name admin
Password skyline_admin_password
The Initial Configuration wizard appears displaying the Network Connectivity page.
5 If your organization requires the use of an HTTP proxy for external network connections, enter thesettings for connection to the proxy.
a Turn on the Use a Proxy Server toggle switch to Yes and fill in the proxy details.
Setting Value
Proxy Server FQDN of the allocated HTTP proxy
Proxy Server Port HTTP proxy port for incoming requests
Proxy Server Username User name for authentication to the HTTP proxy
Proxy Server Port Password of the user for authentication to the HTTP proxy
b Click Test Connectivity.
c After a confirmation message appears, click Continue.
6 On the Customer Experience Improvement Program (CIEP) page, review the configuration andclick Agree and Continue .
Deployment of Consolidated SDDC
VMware, Inc. 56

7 On the Collector Registration page, connect the Skyline Collector instance to your VMware CloudServices organization.
a In the Collector Registration Token box, enter the token you generated in the VMware CloudServices portal.
b Click Register Collector and click Continue.
8 On the Continue Configuration page, click Continue.
9 On the Collector Name page, the friendly name of the collector.
a Enter sfo01sky01.sfo01.rainpole.local in the Friendly Name text box and click SetFriendly Name
b After a confirmation message appears, click Continue.
10 On the Auto-Upgrade page, to continue having auto-upgrade turned off, click Continue.
11 On the Configure vCenter page, configure the endpoint for the Management vCenter Server.
a In the Configure vCenter section, enter the settings for connection to the Management vCenterServer.
Setting Value
vCenter Host Address sfo01w01vc01.sfo01.rainpole.local
vCenter Read-Only Account [email protected]
Password svc-skyline-vsphere_password
b In the SSO Config section, enter the settings for authentication to the VMware Platform ServicesController™ pair by using vCenter Single Sign-On.
Setting Value
Use Custom SSO Configuration Yes
PSC/SSO Host Address sfo01psc01.sfo01.rainpole.local
SSO Admin URL https://sfo01psc01.sfo01.rainpole.local /sso-adminserver/sdk/vsphere.local
SSO STS URL https://sfo01psc01.sfo01.rainpole.local /sts/STSService/vsphere.local
Lookup Service URL https://sfo01psc01.sfo01.rainpole.local /lookupservice/sdk/vsphere.local
c In the Data Collection section, leave Collect from All Datacenters as Yes and click Add.
d To set the CA-signed certificate of the Management vCenter Server as trusted, accept thecertificate from the vCenter Server instance by clicking Continue .
e After a confirmation message appears, click Continue.
Deployment of Consolidated SDDC
VMware, Inc. 57

12 On the Configure NSX (optional) page, configure the endpoint for the NSX Manager instance for themanagement cluster.
a Enter the settings for connecting the collector to the NSX Manager instance and click Add.
Setting Value
NSX Address/IP sfo01w01nsx01.sfo01.rainpole.local
Username [email protected]
Password svc-skyline-nsx_password
b To set the CA-signed certificate of the NSX Manager instance as trusted, accept the certificate byclicking Continue.
c After a confirmation message appears, click Continue.
13 On the Configure vRealize Operations (optional) page, configure the endpoint for vRealizeOperations Manager.
a Enter the settings for connecting the collector to vRealize Operations Manager and click Add.
Setting Value
vROps Manager Host vrops01svr01.rainpole.local
Username [email protected]
Password svc-skyline-vrops_password
14 On the Final Step page, review the configuration and click Finish.
15 On the System Status page, under Collector Overview, verify that the status of the collector is Yourcollector is running.
16 On the System Status page, under System Overview, verify that each of thesfo01w01vc01.sfo01.rainpole.local, sfo01w01nsx01.sfo01.rainpole.local, andvrops01svr01.rainpole.local endpoints has a Endpoints Working status.
Deployment of Consolidated SDDC
VMware, Inc. 58

Post-Deployment VirtualInfrastructure Configuration forConsolidated SDDC 5After you deploy the virtual infrastructure layer for Consolidated SDDC, to reach full functionality andoperability of the layer, perform the necessary post-deployment product configuration tasks.
Procedure
1 Distributed Firewall Configuration for Consolidated SDDC
Configure the distributed firewall to improve the security in your environment by allowing only therequired SDDC network traffic to pass through. You define explicit firewall rules to allow access tothe management applications.
2 Update the Host Profile for Consolidated SDDC
You add the domain account credentials to the host profile for the consolidated cluster andremediate the attached hosts to apply all host profile managed parameters. This brings all ESXihosts in the cluster to compliant status.
Distributed Firewall Configuration for Consolidated SDDCConfigure the distributed firewall to improve the security in your environment by allowing only the requiredSDDC network traffic to pass through. You define explicit firewall rules to allow access to themanagement applications.
Procedure
1 Add the vCenter Server Appliance to the NSX Distributed Firewall Exclusion List for ConsolidatedSDDC
If a distributed firewall rule prevents network access between NSX Manager and vCenter Server,you cannot manage the firewall. To keep the network access open between the vCenter ServerAppliance and NSX, you exclude the vCenter Server Appliance from all distributed firewall rules.
2 Create IP Sets for the Components of the Consolidated Cluster for Consolidated SDDC
Create IP sets for all management applications in the consolidated cluster. At a later stage, use theIP sets to create security groups to use with the distributed firewall rules.
VMware, Inc. 59

3 Create Security Groups for Consolidated SDDC
To ease the creation and management of distributed firewall rules and to avoid per single virtualmachine configuration, you create security groups containing vSphere inventory items that requiresimilar levels of accessibility. You create security groups based on previously configured IP sets andas collections of existing security groups.
4 Create Distributed Firewall Rules for Consolidated SDDC
Create firewall rules to define administrative, user, and tenant access to applications, and toconfigure the necessary connectivity to the SDDC.
Add the vCenter Server Appliance to the NSX Distributed FirewallExclusion List for Consolidated SDDCIf a distributed firewall rule prevents network access between NSX Manager and vCenter Server, youcannot manage the firewall. To keep the network access open between the vCenter Server Appliance andNSX, you exclude the vCenter Server Appliance from all distributed firewall rules.
Procedure
1 In a Web browser, log in to vCenter Server by using the vSphere Client.
Setting Value
URL https://sfo01w01vc01.sfo01.rainpole.local/ui
User name [email protected]
Password vsphere_admin_password
2 In the Networking and security inventory, click Firewall settings.
3 Click the Exclusion list tab, and, from the NSX Manager drop-down menu, select 172.16.11.66.
4 Click Add .
The Select VMs to exclude dialog box opens.
5 From the Available objects section, select sfo01w01vc01, add it to the Selected objects section,and click OK.
Create IP Sets for the Components of the Consolidated Cluster forConsolidated SDDCCreate IP sets for all management applications in the consolidated cluster. At a later stage, use the IPsets to create security groups to use with the distributed firewall rules.
Repeat this procedure to configure all necessary IP sets. For applications that are load balanced, includetheir VIP in the IP set.
Deployment of Consolidated SDDC
VMware, Inc. 60

Table 5-1. IP Sets for the Management Components in the Consolidated Cluster
Name IP Addresses
Platform Services Controller Instance 172.16.11.63
vCenter Server Instance 172.16.11.64
vRealize Automation Appliances 192.168.11.51
192.168.11.53
vRealize Automation Windows 192.168.11.54
192.168.11.56
192.168.11.57
192.168.11.59
vRealize Business Server 192.168.11.66
vRealize Business Data Collector 192.168.31.54
VMware VADP Solution vStorage-API for Data-Protection-Solution_IPs
vRealize Operations Manager 192.168.11.31
192.168.11.35
vRealize Operations Manager Remote Collector 192.168.31.31
vRealize Log Insight 192.168.31.10
192.168.31.11
vRealize Suite Lifecycle Manager 192.168.11.20
Skyline Collector Instance 192.168.31.70
Update Manager Download Service 172.16.11.67
192.168.31.67
SDDC 192.168.31.0/24,172.16.11.0/24,192.168.11.0/24
Administrators Administrators_Subnet
Procedure
1 In a Web browser, log in to vCenter Server by using the vSphere Client.
Setting Value
URL https://sfo01w01vc01.sfo01.rainpole.local/ui
User name [email protected]
Password vsphere_admin_password
2 In the Networking and security inventory, click Groups and tags.
3 Click the IP sets tab and, from the NSX Manager drop-down menu, select 172.16.11.66.
4 Click the Add button.
The New IP set wizard opens.
Deployment of Consolidated SDDC
VMware, Inc. 61

5 Configure the IP set and click Add.
Setting Value
Name vCenter Server Instances
IP Addresses 172.16.11.64
Universal Synchronization On
6 Repeat this procedure to create all necessary IP sets.
Create Security Groups for Consolidated SDDCTo ease the creation and management of distributed firewall rules and to avoid per single virtual machineconfiguration, you create security groups containing vSphere inventory items that require similar levels ofaccessibility. You create security groups based on previously configured IP sets and as collections ofexisting security groups.
You perform this procedure multiple times to configure all security groups. You configure the WindowsServers and the VMware Appliances security groups after you create the necessary member securitygroups.
Table 5-2. Security Groups for the Management Components in the SDDC
Name Object Type Selected Object
Platform Services Controller Instances IP Sets Platform Services Controller Instances
vCenter Server Instances IP Sets vCenter Server Instances
vRealize Automation Appliances IP Sets vRealize Automation Appliances
vRealize Automation Windows IP Sets vRealize Automation Windows
vRealize Business Server IP Sets vRealize Business Server
vRealize Automation Proxy Agents IP Sets vRealize Automation Proxy Agents
vRealize Business Data Collector IP Sets vRealize Business Data Collector
vSphere Storage APIs - Data Protectionbased backup solution
IP Sets VMware VADP
vRealize Operations Manager IP Sets vRealize Operations Manager
vRealize Operations Manager RemoteCollectors
IP Sets vRealize Operations Manager RemoteCollectors
vRealize Suite Lifecycle Manager IP Sets vRealize Suite Lifecycle Manager
Skyline Collector Instances IP Sets Skyline Collector Instances
Site Recovery Manager IP Sets Site Recovery Manager
vSphere Replication IP Sets vSphere Replication
vRealize Log Insight IP Sets vRealize Log Insight
Update Manager Download Service IP Sets Update Manager Download Service
SDDC IP Sets SDDC
Administrators IP Sets Administrators
Deployment of Consolidated SDDC
VMware, Inc. 62

Table 5-2. Security Groups for the Management Components in the SDDC (continued)
Name Object Type Selected Object
Windows Servers Security Groups n vRealize Automation Windows
n vRealize Automation Proxy Agents
VMware Appliances Security Groups n Platform Services Controller Instances
n vCenter Server Instances
n vSphere Replication
n vRealize Automation Appliances
n vRealize Business Server
n Site Recovery Manager
n vRealize Business Data Collector
n vSphere Storage APIs - DataProtection based backup solution
n vRealize Operations Manager
n vRealize Operations Manager RemoteCollectors
n vRealize Suite Lifecycle Manager
n vRealize Log Insight
n Skyline Collector Instances
n Update Manager Download Service
Procedure
1 In a Web browser, log in to vCenter Server by using the vSphere Client.
Setting Value
URL https://sfo01w01vc01.sfo01.rainpole.local/ui
User name [email protected]
Password vsphere_admin_password
2 In the Networking and security inventory, click Groups and tags.
3 Click the Security groups tab and, from the NSX Manager drop-down menu, select 172.16.11.66.
4 Click Add.
The Create security group wizard opens.
5 On the Name and description page, configure the settings and click Next.
Setting Value
Name Platform Services Controller Instances
Universal Synchronization On
Deployment of Consolidated SDDC
VMware, Inc. 63

6 On the Select objects to include page, configure the settings and click Next.
Setting Value
Object type IP Sets
Selected objects Platform Services Controller Instances
7 On the Ready to complete page, review the security group configuration and click Finish.
8 Repeat this procedure to create all necessary security groups.
Create Distributed Firewall Rules for Consolidated SDDCCreate firewall rules to define administrative, user, and tenant access to applications, and to configure thenecessary connectivity to the SDDC.
You create and configure the distributed firewall rules in the SDDC.
Table 5-3. Distributed Firewall Rules in the SDDC
Name Source Destination Service / Port
Allow vRealize AutomationPortal to end users
* any n vRealize AutomationAppliances
n vRealize AutomationWindows
n vRealize Business Server
HTTP, HTTPS
Allow vRealize AutomationConsole Proxy to end users
* any vRealize AutomationAppliances
TCP:8444
Allow SDDC to any SDDC * any * any
Allow Platform ServicesController to admins
Administrators Platform Services ControllerInstances
HTTPS
Allow SSH to admins Administrators n VMware Appliances
n Update ManagerDownload Service
SSH
Allow RDP to admins Administrators Windows Servers RDP
Allow Orchestrator to admins Administrators vRealize AutomationAppliances
TCP: 8281, 8283
Allow vRealize Business DataCollector to admins
Administrators vRealize Business DataCollector
HTTP, HTTPS
Allow vRealize Opearations toadmins
Administrators n vRealize OperationsManager
n vRealize OperationsManager RemoteCollectors
HTTP, HTTPS
Allow vRLI to admins Administrators vRealize Log Insight HTTP, HTTPS
Allow vRealize Suite LifecycleManager to admins
Administrators vRealize Suite LifecycleManager
HTTPS
Deployment of Consolidated SDDC
VMware, Inc. 64

Table 5-3. Distributed Firewall Rules in the SDDC (continued)
Name Source Destination Service / Port
Allow Skyline Collectorinstances to administrators
Administrators Skyline Collector Instances HTTPS
Allow VAMI to admins Administrators VMware Appliances TCP:5480
Allow VMware VADP Solutionto admins
Administrators VMware Appliances TCP:8543
Procedure
1 In a Web browser, log in to vCenter Server by using the vSphere Client.
Setting Value
URL https://sfo01w01vc01.sfo01.rainpole.local/ui
User name [email protected]
Password vsphere_admin_password
2 Add a section of rules to organize the firewall rules for the management applications.
a In the Networking and security inventory, click Firewall and click the General tab.
b From the NSX Manager drop-down menu, select 172.16.11.66.
c Click Add Section.
d Configure the settings and click Add.
Setting Value
Section name VMware Management Services
Universal synchronization On
3 Create a distributed firewall rule to allow SSH access to administrators for the different VMwareappliances.
a Click Add rule.
b In the Name column, enter Allow SSH to admins.
c In the Source column, click the Edit icon.
d From the Object type drop-down menu, select Security group, add Administrators to theSelected objects list, and click Save.
e In the Destination column, click the Edit icon.
f From the Object type drop-down menu, select Security group, add VMware appliances andUpdate Manager Download Service to the Selected Objects list, and click Save.
g In the Service column, click the Edit icon.
Deployment of Consolidated SDDC
VMware, Inc. 65

h From the Object type drop-down menu, select Services, add SSH to the Selected objects list,and click Save.
i Click Publish.
4 Repeat Step 3 to create all necessary distributed firewall rules.
Note For TCP Service, Under Service Click on Raw Port-Protocol select TCP in the drop-down,enter Destination Port.
5 Change the default rule action to block.
a On the General tab, expand Default Section Layer3.
b For the default rule, from the Action drop-down menu, change the action to Block.
c Click Publish.
Update the Host Profile for Consolidated SDDCYou add the domain account credentials to the host profile for the consolidated cluster and remediate theattached hosts to apply all host profile managed parameters. This brings all ESXi hosts in the cluster tocompliant status.
Procedure
1 In a Web browser, log in to vCenter Server by using the vSphere Client.
Setting Value
URL https://sfo01w01vc01.sfo01.rainpole.local/ui
User name [email protected]
Password vsphere_admin_password
2 To update the Active Directory configuration, reset the host customizations forsfo01w01esx01.sfo01.rainpole.local.
a In the Policies and profiles inventory, click Host profiles.
b On the Host profiles page, click sfo01-w01hp-consolidated01.
The sfo01-w01hp-consolidated01 host profile page opens.
c On the Hosts tab, right-click sfo01w01esx01.sfo01.rainpole.local and select Host profiles >Reset host customizations.
d In the Reset host customizations dialog box, click Yes.
e Repeat the step to reset the host customizations for the remaining hosts in the shared edge andcompute cluster.
Deployment of Consolidated SDDC
VMware, Inc. 66

3 Update the sfo01-w01hp-consolidated01 host profile.
a In the Policies and profiles inventory, click Host profiles.
b Right-click the sfo01-w01hp-consolidated01 host profile, and select Copy settings from host.
c On the Copy settings from host dialog box, select sfo01w01esx01.sfo01.rainpole.local, andclick OK.
4 Edit the hots customizations for the sfo01-w01hp-consolidated01 host profile.
a Right-click sfo01-w01hp-consolidated01 and select Edit host customizations.
The Edit host customizations wizard opens.
b On the Select hosts page, select all hosts and click Next.
c On the Customize hosts page, configure the Active Directory domain account for all ESXi hostsattached to the host profile, and click Finish.
Setting Value
User name [email protected]
Password svc-domain-join_password
5 Verify compliance and remediate the ESXi hosts.
a On the Host Profiles page, click sfo01-w01hp-consolidated01.
b On the sfo01-w01hp-consolidated01 page, from the Actions drop-down menu, select Checkhost profile compliance.
c Click the Monitor tab, and in the left pane, click Compliance.
On the Host profile page, the Host profile compliance column showssfo01w01esx01.sfo01.rainpole.local as Compliant. The remaining ESXi hosts are Not Compliant.
d Click Remediate.
e On the Remediate dialog box, select all non compliant hosts, select Automatically reboot hoststhat require remediation, and click Remediate.
After restart, all hosts attached to the sfo01-w01hp-consolidated01 host profile show as Compliant.
Deployment of Consolidated SDDC
VMware, Inc. 67

Post-Deployment OperationsManagement Configuration forConsolidated SDDC 6After you deploy the operations management layer for Consolidated SDDC, to reach the full functionalityand operability of the layer, perform the necessary post-deployment product configuration tasks.
Procedure
1 Post-Deployment Configuration of Update Manager Download Service for Consolidated SDDC
After you deploy Update Manager Download Service (UMDS), to provide persistent network accessto the application, allocate a static IP address and connect UMDS to the application virtual networkfor Consolidated SDDC.
2 Post-Deployment Configuration of vRealize Operations Manager for Consolidated SDDC
After you deploy vRealize Operations Manager, perform the necessary post-deployment productconfiguration tasks to integrate with vRealize Log Insight and vRealize Automation, definemonitoring goals for the default policy and update the SNMP configuration.
3 Post-Deployment Configuration of vRealize Log Insight for Consolidated SDDC
To complete the deployment of vRealize Log Insight, you configure the embedded vRealizeOrchestrator to forward log events to vRealize Log Insight and add Skyline Collector Appliance tothe Linux agent group.
4 Post-Deployment Configuration of vRealize Suite Lifecycle Manager for Consolidated SDDC
After you deploy VMware vRealize® Lifecycle Manager™ and the components of the operationsmanagement layer, save the configuration baselines of the vRealize Suite products deploymentsand perform the necessary post-deployment configuration tasks.
Post-Deployment Configuration of Update ManagerDownload Service for Consolidated SDDCAfter you deploy Update Manager Download Service (UMDS), to provide persistent network access to theapplication, allocate a static IP address and connect UMDS to the application virtual network forConsolidated SDDC.
VMware, Inc. 68

Procedure
1 Reconfigure Update Manager Download Service for Consolidated SDDC
After you deploy Update Manager Download Service (UMDS), the UMDS virtual machine is not partof the application virtual network. Add the UMDS virtual machine to the application virtual networkfor Consolidated SDDC and change the UMDS virtual machine's IP address.
Reconfigure Update Manager Download Service for ConsolidatedSDDCAfter you deploy Update Manager Download Service (UMDS), the UMDS virtual machine is not part of theapplication virtual network. Add the UMDS virtual machine to the application virtual network forConsolidated SDDC and change the UMDS virtual machine's IP address.
Procedure
1 In a Web browser, log in to vCenter Server by using the vSphere Client.
Setting Value
URL https://sfo01w01vc01.sfo01.rainpole.local/ui
User name [email protected]
Password vsphere_admin_password
2 In the Hosts and clusters inventory, expand the sfo01w01vc01.sfo01.rainpole.local tree andexpand the sfo01-w01dc data center.
3 Expand the sfo01-w01-consolidated01 cluster.
4 Connect the Update Manager Download Service virtual machine to the Mgmt-RegionA01-VXLAN portgroup.
a Right-click sfo01umds01 and select Edit settings.
b On the Edit Settings dialog box, click the Virtual hardware tab.
c Under Network adapter 1, from the drop-down menu, select Browse, select the distributed portgroup that ends with Mgmt-RegionA01-VXLAN, and click OK.
5 Change the IP address of the Update Manager Download Service virtual machine.
a Right-click sfo01umds01 and select Open remote console.
b Log in by using the following credentials.
Setting Value
User name svc-umds
Password svc_umds_password
Deployment of Consolidated SDDC
VMware, Inc. 69
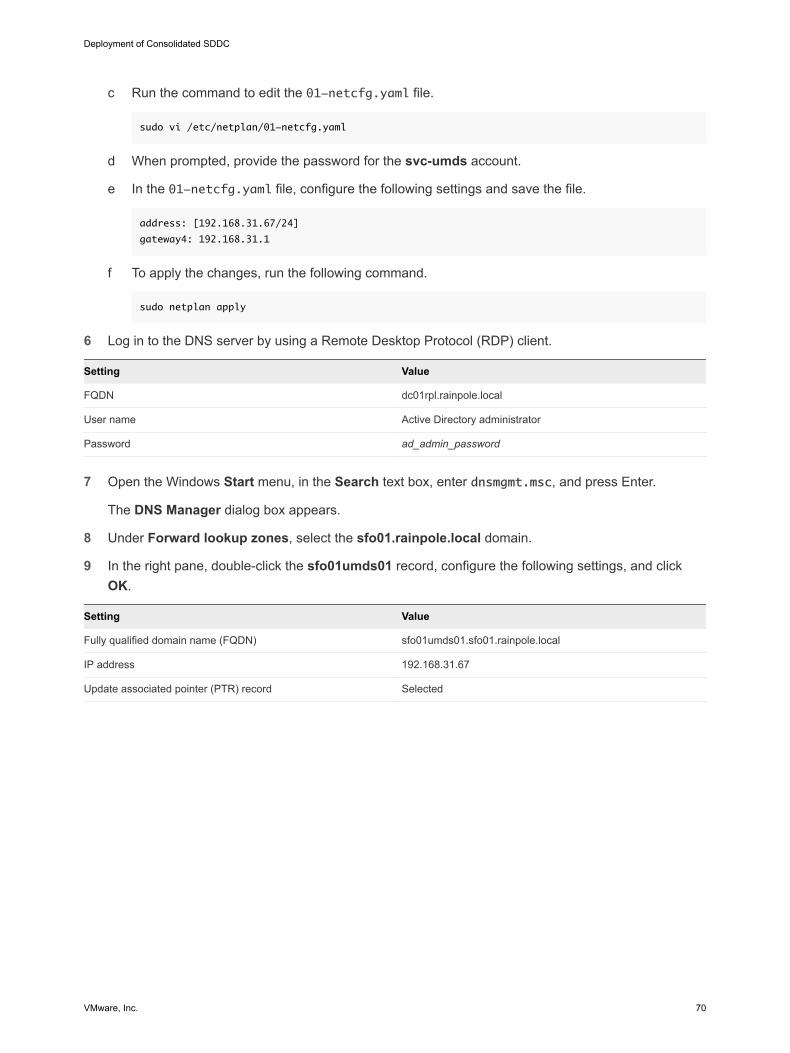
c Run the command to edit the 01-netcfg.yaml file.
sudo vi /etc/netplan/01-netcfg.yaml
d When prompted, provide the password for the svc-umds account.
e In the 01-netcfg.yaml file, configure the following settings and save the file.
address: [192.168.31.67/24]
gateway4: 192.168.31.1
f To apply the changes, run the following command.
sudo netplan apply
6 Log in to the DNS server by using a Remote Desktop Protocol (RDP) client.
Setting Value
FQDN dc01rpl.rainpole.local
User name Active Directory administrator
Password ad_admin_password
7 Open the Windows Start menu, in the Search text box, enter dnsmgmt.msc, and press Enter.
The DNS Manager dialog box appears.
8 Under Forward lookup zones, select the sfo01.rainpole.local domain.
9 In the right pane, double-click the sfo01umds01 record, configure the following settings, and clickOK.
Setting Value
Fully qualified domain name (FQDN) sfo01umds01.sfo01.rainpole.local
IP address 192.168.31.67
Update associated pointer (PTR) record Selected
Deployment of Consolidated SDDC
VMware, Inc. 70

Post-Deployment Configuration of vRealize OperationsManager for Consolidated SDDCAfter you deploy vRealize Operations Manager, perform the necessary post-deployment productconfiguration tasks to integrate with vRealize Log Insight and vRealize Automation, define monitoringgoals for the default policy and update the SNMP configuration.
Procedure
1 Integrate vRealize Log Insight with vRealize Operations Manager for Consolidated SDDC
In VMware vRealize® Log Insight™, you enable the launch in context feature for vRealizeOperations Manager. This allows vRealize Operations Manager to launch vRealize Log Insight withan object-specific query.
2 Configure User Privileges in vRealize Operations Manager for vRealize Automation TenantWorkload Reclamationfor Consolidated SDDC
Configure read only privilege for the [email protected] service account in vRealizeOperations Manager. With this privilege configuration, vRealize Operations Manager can accessvCenter Server and vRealize Automation can collect metrics from vRealize Operations Manager forreclamation of tenant workloads.
3 Verify the Integration of vRealize Operations Manager as a Metrics Provider in vRealize Automationfor Consolidated SDDC
In vRealize Automation, verify that vRealize Operations Manager is integrated as a metrics providerto enable vRealize Automation to pull metrics for the reclamation of tenant workloads.
4 Define the Monitoring Goals for the Default Policy in vRealize Operations Manager for ConsolidatedSDDC
Define the default policy settings for monitoring the vCenter Server instances in vRealize OperationsManager. vRealize Operations Manager uses these settings to analyze and monitor the objectsassociated with a vCenter Server instance.
5 Update the SNMP Configuration of the vRealize Operations Manager Network Devices Adapter
During automated deployment and configuration, VMware Cloud Builder configures the networkdevices adapter in vRealize Operations Manager with public SNMP read community strings to allowfor automatic discovery and device pooling. You reconfigure the SNMP read community string toprivate to enable device authentication and grant read-write access for the adapter to start the datacollection.
Integrate vRealize Log Insight with vRealize Operations Managerfor Consolidated SDDCIn VMware vRealize® Log Insight™, you enable the launch in context feature for vRealize OperationsManager. This allows vRealize Operations Manager to launch vRealize Log Insight with an object-specificquery.
Deployment of Consolidated SDDC
VMware, Inc. 71

Procedure
1 In a Web browser, log in to vRealize Log Insight by using the user interface.
Setting Value
URL https://sfo01vrli01.sfo01.rainpole.local
User name admin
Password vrli_admin_password
2 Click the configuration drop-down menu icon and select Administration.
3 In the left pane, under Integration, click vRealize Operations.
4 On the vRealize Operations Integration page, select Enable launch in context.
5 To validate the connection, click Test.
6 Click Save and in the progress dialog box, click OK.
Configure User Privileges in vRealize Operations Manager forvRealize Automation Tenant Workload ReclamationforConsolidated SDDCConfigure read only privilege for the [email protected] service account in vRealizeOperations Manager. With this privilege configuration, vRealize Operations Manager can access vCenterServer and vRealize Automation can collect metrics from vRealize Operations Manager for reclamation oftenant workloads.
Procedure
1 In a Web browser, log in to vRealize Operations Manager by using the operations interface.
Setting Value
URL https://vrops01svr01.rainpole.local
User name admin
Password vrops_admin_password
2 On the main navigation bar, click Administration.
3 In the left pane, navigate to Access > Access control.
4 On the Access control page, click the User accounts tab.
5 Select the [email protected] service account and click the Edit icon.
Deployment of Consolidated SDDC
VMware, Inc. 72

6 On the Edit permission dialog box, deselect the Allow access to all objects in the system checkbox, configure the settings, and click OK.
Setting Value
Select role ReadOnly
Assign this role to the user Selected
Select object hierarchies Adapter Instance
Select object vCenter Adapter - sfo01w01vc01
Verify the Integration of vRealize Operations Manager as a MetricsProvider in vRealize Automation for Consolidated SDDCIn vRealize Automation, verify that vRealize Operations Manager is integrated as a metrics provider toenable vRealize Automation to pull metrics for the reclamation of tenant workloads.
Procedure
1 In a Web browser, log in to vRealize Automation by using the Rainpole portal.
Setting Value
URL https://vra01svr01.rainpole.local/vcac/org/rainpole
User name vra-admin-rainpole
Password vra-admin-rainpole_password
Domain rainpole.local
2 On the main navigation bar, click the Administration tab.
3 In the left pane, navigate to Reclamation > Metrics provider.
4 Select vRealize Operations Manager endpoint, click Test connection, and verify that the testconnection is successful.
Define the Monitoring Goals for the Default Policy in vRealizeOperations Manager for Consolidated SDDCDefine the default policy settings for monitoring the vCenter Server instances in vRealize OperationsManager. vRealize Operations Manager uses these settings to analyze and monitor the objectsassociated with a vCenter Server instance.
Deployment of Consolidated SDDC
VMware, Inc. 73

Procedure
1 In a Web browser, log in to vRealize Operations Manager by using the operations interface.
Setting Value
URL https://vrops01svr01.rainpole.local
User name admin
Password vrops_admin_password
2 On the main navigation bar, click Administration.
3 In the left pane, click Solutions > Configuration.
4 On the Solutions pane, select the VMware vSphere solution.
5 On the Configured adapter instances pane, click the Configure icon.
The Manage solution - VMware vSphere dialog box appears.
6 Under Instance name, select the sfo01w01vc01 vCenter adapter and click Define monitoringgoals.
7 On the Define monitoring goals dialog box, leave the default definitions for monitored objects andtype of alerts, click Yes for Enable vSphere hardening guide alerts, and click Save.
8 In the Success message box, click OK.
9 In the Manage solution - VMware vSphere dialog box, click Save Settings.
10 In the Info message box, click OK.
11 In the Manage solution - VMware vSphere dialog box, click Close.
Update the SNMP Configuration of the vRealize OperationsManager Network Devices AdapterDuring automated deployment and configuration, VMware Cloud Builder configures the network devicesadapter in vRealize Operations Manager with public SNMP read community strings to allow for automaticdiscovery and device pooling. You reconfigure the SNMP read community string to private to enabledevice authentication and grant read-write access for the adapter to start the data collection.
Procedure
1 In a Web browser, log in to vRealize Operations Manager by using the operations interface.
Setting Value
URL https://vrops01svr01.rainpole.local
User name admin
Password vrops_admin_password
2 On the main navigation bar, click the Administration tab.
Deployment of Consolidated SDDC
VMware, Inc. 74

3 In the left pane, navigate to Solutions > Configuration.
4 In the Solutions section, select the Management pack for NSX-vSphere solution.
5 In the Configured adapter instances section, click the Configure icon.
The Manage solution - Management pack for NSX-vSphere dialog box opens.
6 In the Adapter type section, select Network devices adapter.
7 In the Instance name section, select Network devices adapter.
8 To modify the credentials for the network device adapter, in the Instance settings section, click theEdit icon.
9 In the Manage credential dialog box, for SNMP Read Community Strings, entersnmp_private_string and click OK.
10 On the Manage solution - Management pack for NSX-vSphere dialog box, click Save settings andclick Close.
11 Restart data collection for the network devices adapter.
a In the Configured adapter instances section, select theNetwork devices adapter.
b Click the Stop collecting icon.
c Click the Start collecting icon.
d Verify that the adapter Collection state is Collecting and the Collection Status is Datareceiving.
Post-Deployment Configuration of vRealize Log Insightfor Consolidated SDDCTo complete the deployment of vRealize Log Insight, you configure the embedded vRealize Orchestratorto forward log events to vRealize Log Insight and add Skyline Collector Appliance to the Linux agentgroup.
Configure vRealize Orchestrator to Forward Log Events tovRealize Log Insight for Consolidated SDDCYou configure the embedded vRealize Orchestrator appliance to forward system logs and events to thevRealize Log Insight. All syslog information can then be viewed and analyzed from the vRealize LogInsight Web interface.
Deployment of Consolidated SDDC
VMware, Inc. 75

Procedure
1 In a Web browser, log in to vRealize Orchestrator by using the Control Center interface.
Setting Value
URL https://vra01svr01.rainpole.local:8283/vco-controlcenter/
User name root
Password vra_root_password
2 Click Logging integration.
3 Turn on the Enable logging to a remote log server toggle switch.
4 Configure the logging method and host and click Save.
Setting Value
Type Use Log Insight agent
Host sfo01vrli01.sfo01.rainpole.local
Port 9000
Protocol cfapi
Add Skyline Collector and Site Recovery Manager to the AgentGroup for Management Virtual Appliances for Consolidated SDDCAfter the SDDC deployment, add the Skyline Collector and Site Recovery Manager appliances to theagent group for the management virtual appliances. You use this agent group to apply common settingsto the agents on the appliances in the region.
Procedure
1 In a Web browser, log in to vRealize Log Insight by using the user interface.
Setting Value
URL https://sfo01vrli01.sfo01.rainpole.local
User name admin
Password vrli_admin_password
2 Click the configuration drop-down menu icon and select Administration.
3 In the Management section, click Agents
4 In the All Agents drop-down menu, from the Active Groups section, select VA - Linux AgentGroup.
Deployment of Consolidated SDDC
VMware, Inc. 76

5 In the agent filter text boxes, add the host name of the Skyline Collector appliance and the SiteRecovery Manager appliance to the list of management virtual appliances in the region and pressEnter.
Filter Operator Values
Hostname Matches n vrops01svr01a.rainpole.local
n sfo01vropsc01a.sfo01.rainpole.local
n vrslcm01svr01a.rainpole.local
n vra01svr01a.rainpole.local
n vrb01svr01.rainpole.local
n sfo01vrbc01.sfo01.rainpole.local
n sfo01sky01.sfo01.rainpole.local
6 Click Save agentgroup.
7 Click the Refresh data icon and verify that all the agents listed in the filter appear in the Agents list.
Post-Deployment Configuration of vRealize SuiteLifecycle Manager for Consolidated SDDCAfter you deploy VMware vRealize® Lifecycle Manager™ and the components of the operationsmanagement layer, save the configuration baselines of the vRealize Suite products deployments andperform the necessary post-deployment configuration tasks.
Configure NTP and DNS Settings of the vRealize Suite LifecycleManager Appliance for Consolidated SDDCConfigure NTP and DNS settings on the vRealize Suite Lifecycle Manager appliance to keep vRealizeSuite Lifecycle Manager synchronized with the SDDC components.
Procedure
1 In a Web browser, log in to vRealize Suite Lifecycle Manager by using the administration interface.
Setting Value
URL https://vrslcm01svr01a.rainpole.local/vrlcm
User name admin@localhost
Password vrslcm_admin_password
2 In the navigation pane, click Settings > System administration and click the Time settings tab.
3 For Applicable time sync mode, select Use time server (NTP).
Deployment of Consolidated SDDC
VMware, Inc. 77

4 Add the ntp.sfo01.rainpole.local NTP server.
a In the Time server for system (NTP) section, click Add.
The Add NTP server dialog box opens.
b Configure the settings and click Add.
Setting Value
Name ntp.sfo01.rainpole.local
FQDN/IP Address ntp.sfo01.rainpole.local
5 Configure NTP server priority.
a On the Time server for system (NTP) section, click Select.
The NTP servers dialog box opens.
b On the Choose servers page, select ntp.sfo01.rainpole.local and click Next.
c On the Change server priority page, configure the NTP server priority and click Finish.
Setting Value
Server priority ntp.sfo01.rainpole.local
6 On the Time settings tab, click Submit.
7 In the navigation pane, click Settings > Servers and protocol and click the DNS servers tab.
8 Click Add DNS server, configure the following DNS servers, and click Add.
DNS Server Name IP Address
dc01rpl.rainpole.local 172.16.11.4
dc01sfo.sfo01.rainpole.local 172.16.11.5
Save the Configuration Baselines for the vRealize Suite Productsin vRealize Suite Lifecycle ManagervRealize Suite Lifecycle Manager uses the product baseline to generate configuration drift reports thatshow the difference between the current product configuration and the baseline configuration. You save abaseline to monitor each environment's configuration drift.
You save the baseline of the environment configuration for the following environments in vRealize SuiteLifecycle Manager.
n Cross-Region-Env
n SFO-Region-Env
Deployment of Consolidated SDDC
VMware, Inc. 78

Procedure
1 In a Web browser, log in to vRealize Suite Lifecycle Manager by using the administration interface.
Setting Value
URL https://vrslcm01svr01a.rainpole.local/vrlcm
User name admin@localhost
Password vrslcm_admin_password
2 On the Home page, click Manage Environments.
3 In the Cross-Region-Env environment card, click the ellipsis on the top right corner and, from thedrop-down menu, select Save Baseline.
The Baseline Save Initiated message appears in the Cross-Region-Env environment card,
4 Repeat this procedure for the remaining environments.
Register vRealize Suite Lifecycle Manager with My VMwareYou integrate vRealize Suite Lifecycle Manager with your My VMware account to download vRealizeSuite products patch and upgrade binaries. You also use the My VMware account to download contentfrom the VMware Marketplace.
Prerequisites
Before you register vRealize Suite Lifecycle Manager with My VMware, verify your environment meetscertain requirements.
n Verify that the vRealize Suite Lifecycle Manager appliance has access to the internet. If yourorganization restricts outbound access, configure a proxy server for the vRealize Suite LifecycleManager appliance.
n Verify that your My VMware account has the necessary product entitlements to download vRealizeSuite products update and upgrade binaries.
Procedure
1 In a Web browser, log in to vRealize Suite Lifecycle Manager by using the administration interface.
Setting Value
URL https://vrslcm01svr01a.rainpole.local/vrlcm
User name admin@localhost
Password vrslcm_admin_password
2 In the left pane, navigate to Settings > Product support.
3 Click the My VMware tab, enter your My VMware credentials, and click Submit.
4 In the Download product binaries dialog box, click No.
The Service registered with My VMware credentials provided message appears.
Deployment of Consolidated SDDC
VMware, Inc. 79

Post-Deployment CloudManagement Configuration forConsolidated SDDC 7After you deploy the cloud management layer for Consolidated SDDC, to reach full functionality andoperability of the layer, perform the necessary post-deployment product configuration tasks.
Procedure
1 Reconfigure the Microsoft SQL Server for vRealize Automation for Consolidated SDDC
When you deploy vRealize Automation, the Microsoft SQL Server is outside of the vRealizeAutomation application virtual network and you must reconfigure the Microsoft SQL Server.
2 Create Machine Prefixes for Consolidated SDDC
As a fabric administrator, you create machine prefixes that can be used for naming virtual machineswhen provisioned by vRealize Automation. Tenant administrators and business group managersselect the machine prefixes and assign them to provisioned machines through blueprints andbusiness group defaults.
3 Create Business Groups for Consolidated SDDC
Tenant administrators create business groups to associate a set of services and resources to a setof users that often correspond to a line of business, department, or other organizational units. Torequest virtual machine provisioning, users must belong to a business group.
4 Create Logical Switches for Business Groups for Consolidated SDDC
For each compute vCenter Server instance, you create one logical switch per business group tosimulate networks for the web, database, and application tiers.
5 Create Reservation Policies for Consolidated SDDC
You use reservation policies to group similar reservations together. To allow a tenant administrator ora business group manager to use the reservation policy in a blueprint, first create the reservationpolicy tag and then add the policy to the reservations.
6 Create External Network Profiles for Consolidated SDDC
Before members of a business group can request virtual machines, fabric administrators must createnetwork profiles to define the subnet and routing configuration for the virtual machines. Eachnetwork profile is configured for a specific network port group or virtual network to specify the IPaddress and the routing configuration for virtual machines provisioned to that network.
VMware, Inc. 80

7 Create Reservations for the Consolidated Cluster for Consolidated SDDC
Before members of a business group can request machines, as a fabric administrator, you mustallocate compute resources by creating reservations. Each reservation is configured for a specificbusiness group to grant access to request machines on a specified compute resource.
8 Create Reservations for the User Edge Resources for Consolidated SDDC
Before the members of a business group can request virtual machines, as a fabric administrator, youmust allocate NSX Edge resources by creating reservations. Each reservation is configured for aspecific business group to grant access for the group members to request virtual machines on aspecified compute resource.
9 Configure Single Machine Blueprints for Consolidated SDDC
Virtual machine blueprints regulate the attributes, policies, management settings, and provisioningmanner of a virtual machine. You create a service catalog and add virtual machine blueprints, thenconfigure entitlements to provide access to business groups to automatic virtual machineprovisioning on the specified compute resources.
Reconfigure the Microsoft SQL Server for vRealizeAutomation for Consolidated SDDCWhen you deploy vRealize Automation, the Microsoft SQL Server is outside of the vRealize Automationapplication virtual network and you must reconfigure the Microsoft SQL Server.
Procedure
1 In a Web browser, log in to vCenter Server by using the vSphere Client.
Setting Value
URL https://sfo01w01vc01.sfo01.rainpole.local/ui
User name [email protected]
Password vsphere_admin_password
Deployment of Consolidated SDDC
VMware, Inc. 81

2 Shut down the vRealize Automation components.
a In the Hosts and clusters inventory, expand the sfo01w01vc01.sfo01.rainpole.local tree andexpand the sfo01-w01dc data center.
b In the sfo01-w01-consolidated01 cluster, right-click each of the virtual machines, according totheir shutdown order, and select Power > Shut down guest OS.
Table 7-1. Shutdown Order
Product Virtual Machine Name Shutdown Order
vRealize Business for Cloud Total Number of VMs (2) 1
sfo01vrbc01 1
vrb01svr01 2
vRealize Automation Total Number of VMs (4) 2
vra01ims01a 1
vra01iws01a 2
vra01svr01a 3
vra01mssql01 4
3 Migrate the Microsoft SQL Server virtual machine to the sfo01-w01fd-vra folder and connect it to theMgmt-xRegion01-VXLAN port group.
a In the Hosts and clusters inventory, expand the sfo01w01vc01.sfo01.rainpole.local tree andexpand the sfo01-w01dc data center.
b Expand the sfo01-w01-consolidated01 cluster.
c Right-click vra01mssql01, select Move to folder, select sfo01-w01fd-vra, and click OK.
d Right-click vra01mssql01 and select Edit settings.
e On the Edit settings dialog box, configure the following network and click OK.
Setting Value
Network adapter 1 A distributed port group that ends with Mgmt-xRegion01-VXLAN.
f Right-click vra01mssql01 and select Power > Power on.
4 Change the IP address of the vra01mssql01 virtual machine.
a Right-click vra01mssql01 and select Open console.
b Log in by using the following credentials.
Setting Value
User name Windows administrator user
Password windows_administrator_password
Deployment of Consolidated SDDC
VMware, Inc. 82

c From the Windows Start menu, select Control panel > Network and internet > Network andsharing center > Change adapter settings.
d Right-click the Ethernet adapter and select Properties.
e Select Internet Protocol Version 4 (TCP/IPv4), click Properties, configure the followingsettings, and click OK.
Setting Value
IP address 192.168.11.62
Subnet mask 255.255.255.0
Default gateway 192.168.11.1
5 Change the IP address in the DNS that resides in the sfo01.rainpole.local domain for thevra01mssql01 virtual machine.
a Log in to the DNS server by using a Remote Desktop Protocol (RDP) client.
Setting Value
FQDN dc01rpl.rainpole.local
User name Active Directory administrator
Password ad_admin_password
b Open the Windows Start menu, in the Search text box, enter dnsmgmt.msc, and press Enter.
The DNS manager dialog box opens.
c Under Forward lookup zones, select the rainpole.local domain and in the right panelocate vra01mssql01.
d Double-click the vra01mssql01 record, configure the following settings, and click OK.
Setting Value
Fully qualified domain name (FQDN) vra01mssql01.rainpole.local
IP Address 192.168.11.62
Update associated pointer (PTR) record Selected
Deployment of Consolidated SDDC
VMware, Inc. 83

6 Power on the remaining vRealize Automation components.
a In the Hosts and clusters inventory of the vSphere Web Client, expand thesfo01w01vc01.sfo01.rainpole.local tree and expand the sfo01-w01dc data center.
b In the sfo01-w01-consolidated01 cluster, right-click each of the virtual machines, according totheir startup order, and select Power > Power on.
Table 7-2. Startup Order
Product Virtual Machine Name Startup Order
vRealize Automation Total Number of VMs (4) 1
vra01mssql01 1
vra01svr01a 2
vra01iws01a 3
vra01ims01a 4
vRealize Business for Cloud Total Number of VMs (2) 2
vrb01svr01 1
sfo01vrbc01 2
What to do next
Test your environment to confirm the successful provisioning of virtual machines. See Test theDeployment of a Single Machine Blueprint for Consolidated SDDC.
Create Machine Prefixes for Consolidated SDDCAs a fabric administrator, you create machine prefixes that can be used for naming virtual machines whenprovisioned by vRealize Automation. Tenant administrators and business group managers select themachine prefixes and assign them to provisioned machines through blueprints and business groupdefaults.
Machine prefixes are shared across all tenants. Every business group has a default machine prefix. Everyblueprint must have a machine prefix or use the group default prefix. Fabric administrators areresponsible for managing machine prefixes. A prefix consists of a base name to be followed by a counterof a specified number of digits. When all the digits are used, vRealize Automation rolls back to the firstnumber.
Procedure
1 In a Web browser, log in to vRealize Automation by using the Rainpole portal.
Setting Value
URL https://vra01svr01.rainpole.local/vcac/org/rainpole
User name vra-admin-rainpole
Deployment of Consolidated SDDC
VMware, Inc. 84

Setting Value
Password vra-admin-rainpole_password
Domain rainpole.local
2 On the main navigation bar, click the Infrastructure tab.
3 In the left pane, navigate to Administration > Machine prefixes.
4 Create a default machine prefix for the Production business group.
a On the Machine prefixes page, click New and enter the following settings.
Setting Value
Name Prod-
Tenant All tenants
Number of Digits 5
Next Number 1
b Click the Save icon.
5 Create a default machine prefix for the Development business group.
a On the Machine prefixes page, click New and enter the following settings.
Setting Value
Name Dev-
Tenant All tenants
Number of Digits 5
Next Number 1
b Click the Save icon.
Create Business Groups for Consolidated SDDCTenant administrators create business groups to associate a set of services and resources to a set ofusers that often correspond to a line of business, department, or other organizational units. To requestvirtual machine provisioning, users must belong to a business group.
For this implementation, you create two business groups, a Production business group and aDevelopment business group.
Table 7-3. Business Groups in Consolidated SDDC
Business Group Group Manager Default Machine Prefix
Production [email protected] Prod-
Development [email protected] Dev-
Deployment of Consolidated SDDC
VMware, Inc. 85

Procedure
1 In a Web browser, log in to vRealize Automation by using the Rainpole portal.
Setting Value
URL https://vra01svr01.rainpole.local/vcac/org/rainpole
User name vra-admin-rainpole
Password vra-admin-rainpole_password
Domain rainpole.local
2 On the main navigation bar, click the Administration tab.
3 In the left pane, navigate to Users & groups > Business groups.
4 Create the Production business group.
a On the Business groups page, click New.
b On the General tab, enter the following settings and click Next.
Setting Value
Name Production
Send capacity alert emails to [email protected]
c On the Members tab, in the Group manager role text box, [email protected], click the search icon, and select the [email protected] universal group.
d Click Next.
e On the Infrastructure tab, from the Default machine prefix drop-down menu, select Prod- andclick Finish.
5 Repeat this procedure to create the Development business group.
Create Logical Switches for Business Groups forConsolidated SDDCFor each compute vCenter Server instance, you create one logical switch per business group to simulatenetworks for the web, database, and application tiers.
You repeat this procedure to create all logical switches.
Table 7-4. Logical Switches for Business Groups
Logical Switch Name Description
Production-Web-VXLAN Logical switch for the Web tier of the Production Business Group
Production-DB-VXLAN Logical switch for the Database tier of the Production BusinessGroup
Deployment of Consolidated SDDC
VMware, Inc. 86

Table 7-4. Logical Switches for Business Groups (continued)
Logical Switch Name Description
Production-App-VXLAN Logical switch for the Application tier of the Production BusinessGroup
Development-Web-VXLAN Logical switch for the Web tier of the Development BusinessGroup
Development-DB-VXLAN Logical switch for the Database tier of the DevelopmentBusiness Group
Development-App-VXLAN Logical switch for the Application tier of the DevelopmentBusiness Group
Procedure
1 In a Web browser, log in to vCenter Server by using the vSphere Client.
Setting Value
URL https://sfo01w01vc01.sfo01.rainpole.local/ui
User name [email protected]
Password vsphere_admin_password
2 In the Networking and security inventory, click Logical switches.
3 From the NSX Manager drop-down menu, select 172.16.11.66.
4 Create the first logical switch.
a Click the Add button.
The New logical switch dialog box opens.
b Configure the settings and click OK.
Setting Value
Name Production-Web-VXLAN
Description Logical switch for Web tier of Production Business Group
Transport Zone SFO01W01 Transport Zone
Replication Mode Hybrid
Enable IP Discovery Selected
Enable MAC Learning Deselected
5 Repeat the previous step to create the remaining logical switches.
Deployment of Consolidated SDDC
VMware, Inc. 87

Create Reservation Policies for Consolidated SDDCYou use reservation policies to group similar reservations together. To allow a tenant administrator or abusiness group manager to use the reservation policy in a blueprint, first create the reservation policy tagand then add the policy to the reservations.
When you request a machine, it can be provisioned on any reservation of the appropriate type that hassufficient capacity for the machine. To restrict the machines provisioned from a blueprint to a subset ofavailable reservations, you apply a reservation policy to the blueprint. A reservation policy is often used tocollect resources into groups for different service levels, or to make a specific type of resource easilyavailable for a particular purpose. A reservation policy can include reservations of different types, but onlyreservations that match the blueprint type are considered when selecting a reservation for a particularrequest.
Table 7-5. Reservation Policies in Consolidated SDDC
Reservation Policy Name Type Description
SFO -Production-Policy Reservation Policy Reservation policy for the Productionbusiness group
SFO -Development-Policy Reservation Policy Reservation policy for the Developmentbusiness group
SFO -Edge-Policy Reservation Policy Reservation policy for the Tenant Edgeresources
Procedure
1 In a Web browser, log in to vRealize Automation by using the Rainpole portal.
Setting Value
URL https://vra01svr01.rainpole.local/vcac/org/rainpole
User name vra-admin-rainpole
Password vra-admin-rainpole_password
Domain rainpole.local
2 On the main navigation bar, click the Infrastructure tab.
3 In the left pane, navigate to Reservations > Reservation Policies.
4 Create a reservation policy for the Production business group.
a On the Reservation Policies page, click New and enter the following settings.
Setting Value
Name SFO -Production-Policy
Type Reservation Policy
Description Reservation policy for the Production business group
b Click OK.
Deployment of Consolidated SDDC
VMware, Inc. 88

5 Repeat this procedure to create the remaining reservation policies.
Create External Network Profiles for Consolidated SDDCBefore members of a business group can request virtual machines, fabric administrators must createnetwork profiles to define the subnet and routing configuration for the virtual machines. Each networkprofile is configured for a specific network port group or virtual network to specify the IP address and therouting configuration for virtual machines provisioned to that network.
Repeat this procedure to create the following external network profiles.
n Ext-Net-Profile-Production-App
n Ext-Net-Profile-Production-DB
n Ext-Net-Profile-Production-Web
n Ext-Net-Profile-Development-App
n Ext-Net-Profile-Development-DB
n Ext-Net-Profile-Development-Web
Procedure
1 In a Web browser, log in to vRealize Automation by using the Rainpole portal.
Setting Value
URL https://vra01svr01.rainpole.local/vcac/org/rainpole
User name vra-admin-rainpole
Password vra-admin-rainpole_password
Domain rainpole.local
2 On the main navigation bar, click the Infrastructure tab.
3 In the left pane, navigate to Reservations > Network profiles.
4 On the Network profiles page, click New > External.
The New network profile - external page opens.
Deployment of Consolidated SDDC
VMware, Inc. 89
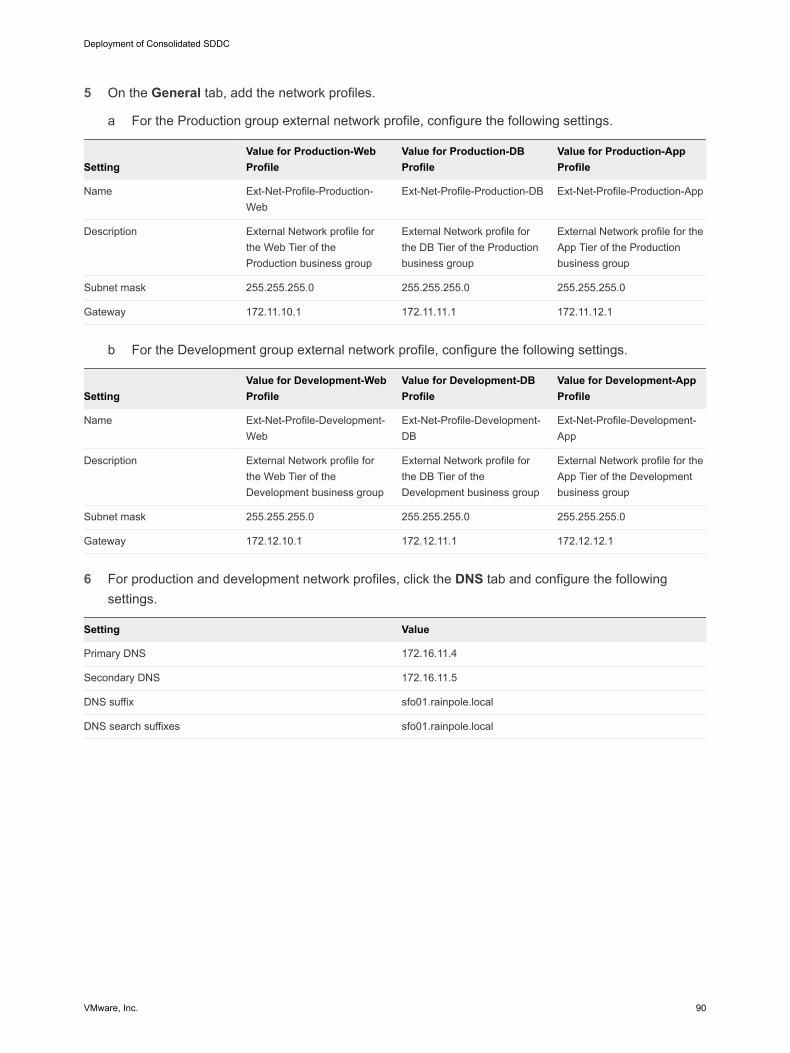
5 On the General tab, add the network profiles.
a For the Production group external network profile, configure the following settings.
SettingValue for Production-WebProfile
Value for Production-DBProfile
Value for Production-AppProfile
Name Ext-Net-Profile-Production-Web
Ext-Net-Profile-Production-DB Ext-Net-Profile-Production-App
Description External Network profile forthe Web Tier of theProduction business group
External Network profile forthe DB Tier of the Productionbusiness group
External Network profile for theApp Tier of the Productionbusiness group
Subnet mask 255.255.255.0 255.255.255.0 255.255.255.0
Gateway 172.11.10.1 172.11.11.1 172.11.12.1
b For the Development group external network profile, configure the following settings.
SettingValue for Development-WebProfile
Value for Development-DBProfile
Value for Development-AppProfile
Name Ext-Net-Profile-Development-Web
Ext-Net-Profile-Development-DB
Ext-Net-Profile-Development-App
Description External Network profile forthe Web Tier of theDevelopment business group
External Network profile forthe DB Tier of theDevelopment business group
External Network profile for theApp Tier of the Developmentbusiness group
Subnet mask 255.255.255.0 255.255.255.0 255.255.255.0
Gateway 172.12.10.1 172.12.11.1 172.12.12.1
6 For production and development network profiles, click the DNS tab and configure the followingsettings.
Setting Value
Primary DNS 172.16.11.4
Secondary DNS 172.16.11.5
DNS suffix sfo01.rainpole.local
DNS search suffixes sfo01.rainpole.local
Deployment of Consolidated SDDC
VMware, Inc. 90
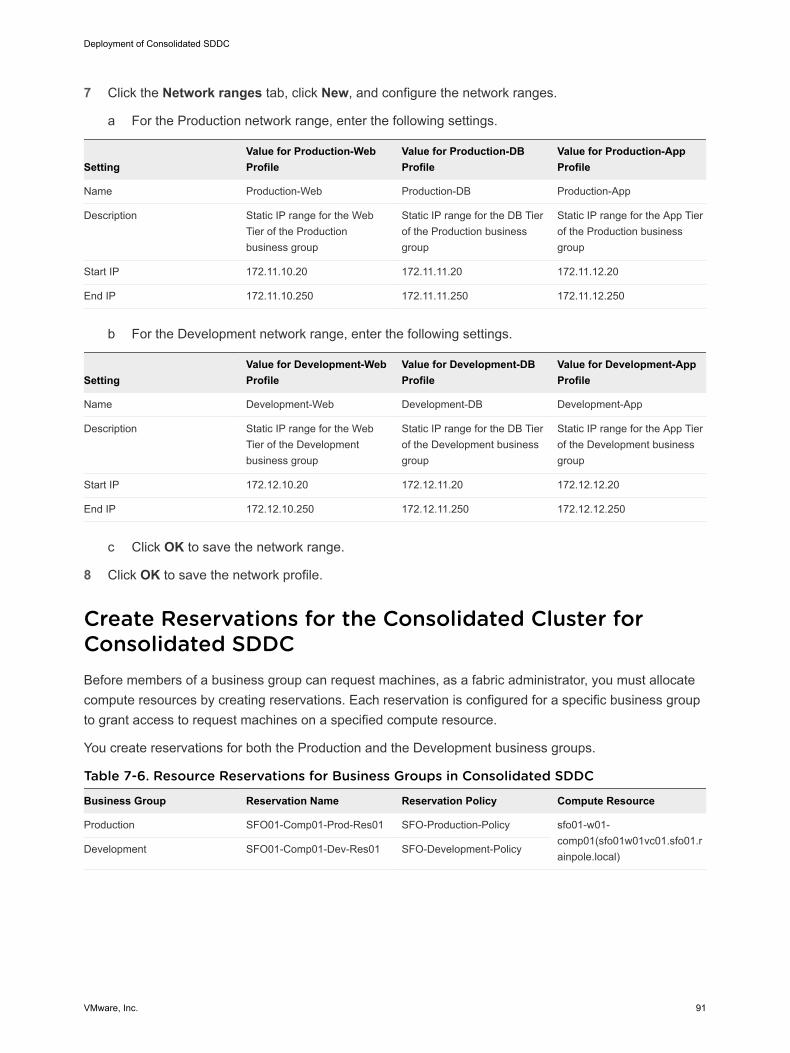
7 Click the Network ranges tab, click New, and configure the network ranges.
a For the Production network range, enter the following settings.
SettingValue for Production-WebProfile
Value for Production-DBProfile
Value for Production-AppProfile
Name Production-Web Production-DB Production-App
Description Static IP range for the WebTier of the Productionbusiness group
Static IP range for the DB Tierof the Production businessgroup
Static IP range for the App Tierof the Production businessgroup
Start IP 172.11.10.20 172.11.11.20 172.11.12.20
End IP 172.11.10.250 172.11.11.250 172.11.12.250
b For the Development network range, enter the following settings.
SettingValue for Development-WebProfile
Value for Development-DBProfile
Value for Development-AppProfile
Name Development-Web Development-DB Development-App
Description Static IP range for the WebTier of the Developmentbusiness group
Static IP range for the DB Tierof the Development businessgroup
Static IP range for the App Tierof the Development businessgroup
Start IP 172.12.10.20 172.12.11.20 172.12.12.20
End IP 172.12.10.250 172.12.11.250 172.12.12.250
c Click OK to save the network range.
8 Click OK to save the network profile.
Create Reservations for the Consolidated Cluster forConsolidated SDDCBefore members of a business group can request machines, as a fabric administrator, you must allocatecompute resources by creating reservations. Each reservation is configured for a specific business groupto grant access to request machines on a specified compute resource.
You create reservations for both the Production and the Development business groups.
Table 7-6. Resource Reservations for Business Groups in Consolidated SDDC
Business Group Reservation Name Reservation Policy Compute Resource
Production SFO01-Comp01-Prod-Res01 SFO-Production-Policy sfo01-w01-comp01(sfo01w01vc01.sfo01.rainpole.local)
Development SFO01-Comp01-Dev-Res01 SFO-Development-Policy
Deployment of Consolidated SDDC
VMware, Inc. 91

Procedure
1 In a Web browser, log in to vRealize Automation by using the Rainpole portal.
Setting Value
URL https://vra01svr01.rainpole.local/vcac/org/rainpole
User name vra-admin-rainpole
Password vra-admin-rainpole_password
Domain rainpole.local
2 On the main navigation bar, click the Infrastructure tab.
3 In the left pane, navigate to Compute resources > Compute resources.
4 In the Name column, from the sfo01-w01-comp01 drop-down menu, select Data collection.
5 Click the Request now button for all data collections.
Wait for the data collection processes to complete with state Succeeded.
6 In the left pane, navigate to Reservations > Reservations.
7 On the Reservations page, click New > vSphere (vCenter).
The New reservation - vSphere (vCenter) page opens.
8 Click the General tab and configure the following settings for the Production and Developmentbusiness groups.
Setting Value for Production Business Group Value for Development Business Group
Name SFO01-Comp01-Prod-Res01 SFO01-Comp01-Dev-Res01
Tenant Rainpole Rainpole
Business Group Production Development
Reservation Policy SFO-Production-Policy SFO-Development-Policy
Priority 100 100
Enable This Reservation Selected Selected
9 For production and development reservations, click the Resources tab and configure the followingsettings.
Setting Value
Compute resource sfo01-w01-comp01(sfo01w01vc01.sfo01.rainpole.local)
Memory (GB) 200
Storage (GB) Storage path Primary compute datastore sfo01-w01-vsan01 or sfo01-w01-lib01
Reserved 2000
Deployment of Consolidated SDDC
VMware, Inc. 92

Setting Value
Priority 1
Resource Pool sfo01-w01rp-user-vm
10 Click the Network tab.
a For the Production business group, configure the following settings.
Network Adapter Network Profile
vxw-dvs-xxxxx-Production-Web-VXLAN Ext-Net-Profile-Production-Web
vxw-dvs-xxxxx-Production-DB-VXLAN Ext-Net-Profile-Production-DB
vxw-dvs-xxxxx-Production-App-VXLAN Ext-Net-Profile-Production-App
b For the Development business group, configure the following settings.
Network Adapter Network Profile
vxw-dvs-xxxxx-Development-Web-VXLAN Ext-Net-Profile-Development-Web
vxw-dvs-xxxxx-Development-DB-VXLAN Ext-Net-Profile-Development-DB
vxw-dvs-xxxxx-Development-App-VXLAN Ext-Net-Profile-Development-App
11 To save this reservation, on the New reservation - vSphere (vCenter) click OK.
Create Reservations for the User Edge Resources forConsolidated SDDCBefore the members of a business group can request virtual machines, as a fabric administrator, youmust allocate NSX Edge resources by creating reservations. Each reservation is configured for a specificbusiness group to grant access for the group members to request virtual machines on a specifiedcompute resource.
Repeat this procedure to create reservations for the Production and the Development business groups.
Table 7-7. Resource Reservations for Business Groups in Consolidated SDDC
Business Group Reservation Name Reservation Policy Compute Resource
Production SFO01-Comp01-Prod-Res01 SFO-Edge-Policy sfo01-w01-comp01(sfo01w01vc01.sfo01.rainpole.local)
Development SFO01-Comp01-Dev-Res01 SFO-Edge-Policy
Procedure
1 In a Web browser, log in to vRealize Automation by using the Rainpole portal.
Setting Value
URL https://vra01svr01.rainpole.local/vcac/org/rainpole
User name vra-admin-rainpole
Deployment of Consolidated SDDC
VMware, Inc. 93
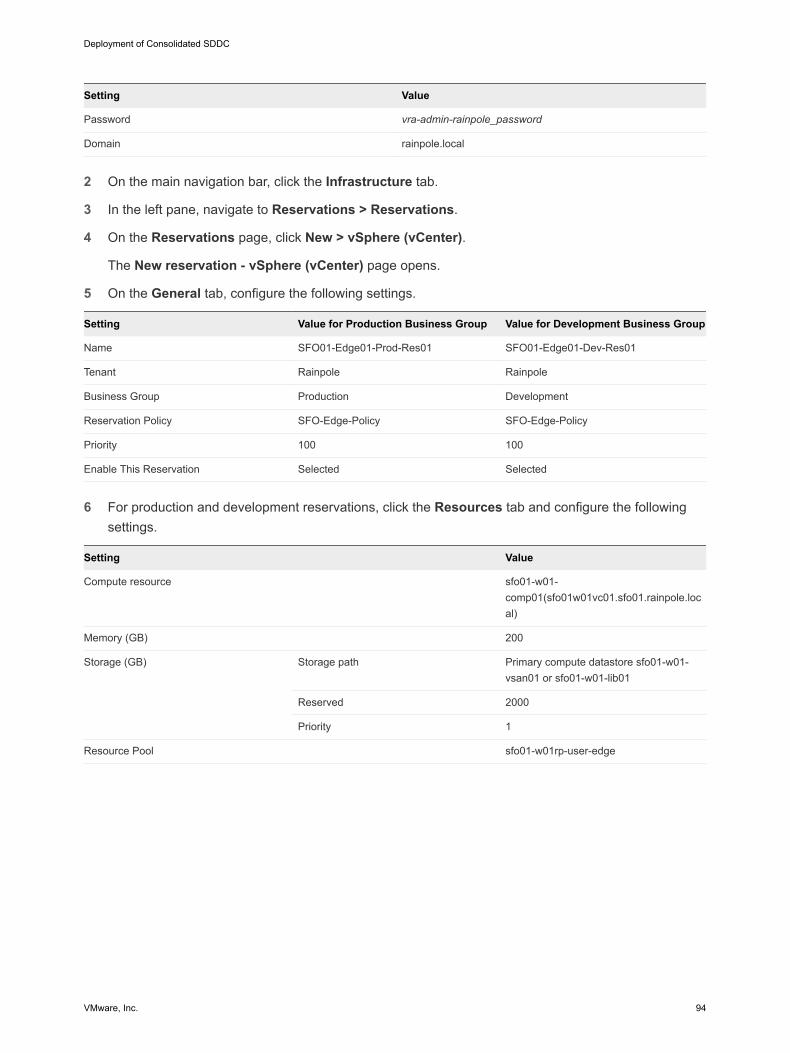
Setting Value
Password vra-admin-rainpole_password
Domain rainpole.local
2 On the main navigation bar, click the Infrastructure tab.
3 In the left pane, navigate to Reservations > Reservations.
4 On the Reservations page, click New > vSphere (vCenter).
The New reservation - vSphere (vCenter) page opens.
5 On the General tab, configure the following settings.
Setting Value for Production Business Group Value for Development Business Group
Name SFO01-Edge01-Prod-Res01 SFO01-Edge01-Dev-Res01
Tenant Rainpole Rainpole
Business Group Production Development
Reservation Policy SFO-Edge-Policy SFO-Edge-Policy
Priority 100 100
Enable This Reservation Selected Selected
6 For production and development reservations, click the Resources tab and configure the followingsettings.
Setting Value
Compute resource sfo01-w01-comp01(sfo01w01vc01.sfo01.rainpole.local)
Memory (GB) 200
Storage (GB) Storage path Primary compute datastore sfo01-w01-vsan01 or sfo01-w01-lib01
Reserved 2000
Priority 1
Resource Pool sfo01-w01rp-user-edge
Deployment of Consolidated SDDC
VMware, Inc. 94
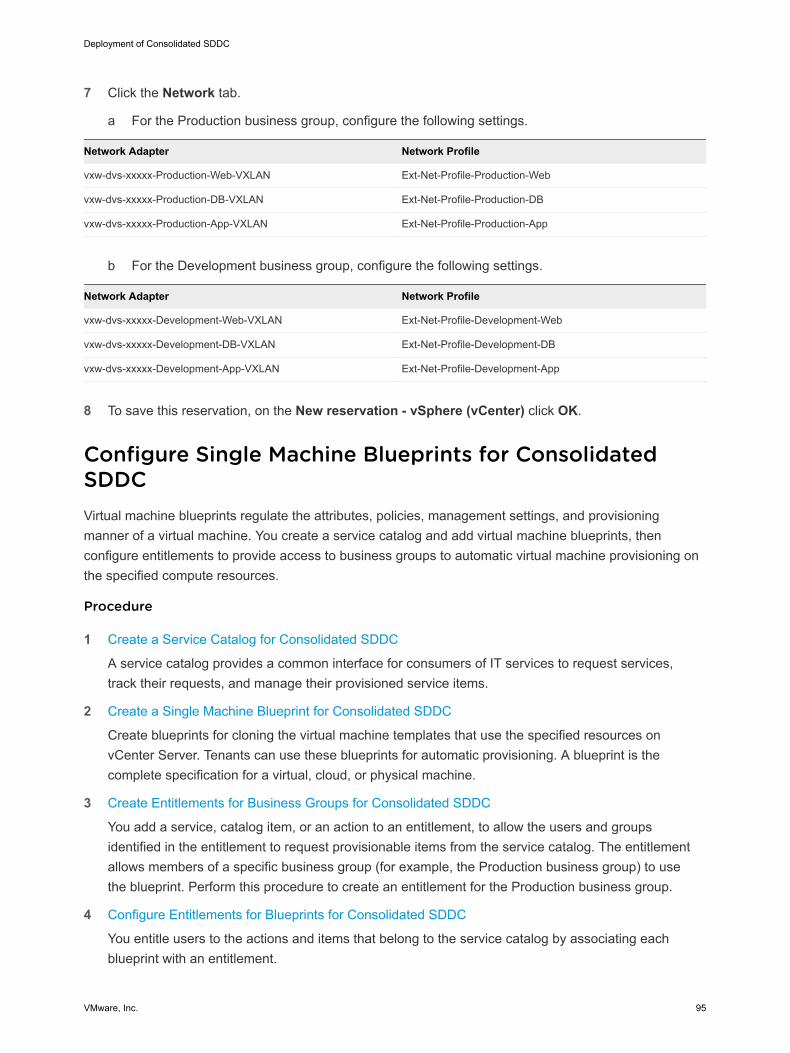
7 Click the Network tab.
a For the Production business group, configure the following settings.
Network Adapter Network Profile
vxw-dvs-xxxxx-Production-Web-VXLAN Ext-Net-Profile-Production-Web
vxw-dvs-xxxxx-Production-DB-VXLAN Ext-Net-Profile-Production-DB
vxw-dvs-xxxxx-Production-App-VXLAN Ext-Net-Profile-Production-App
b For the Development business group, configure the following settings.
Network Adapter Network Profile
vxw-dvs-xxxxx-Development-Web-VXLAN Ext-Net-Profile-Development-Web
vxw-dvs-xxxxx-Development-DB-VXLAN Ext-Net-Profile-Development-DB
vxw-dvs-xxxxx-Development-App-VXLAN Ext-Net-Profile-Development-App
8 To save this reservation, on the New reservation - vSphere (vCenter) click OK.
Configure Single Machine Blueprints for ConsolidatedSDDCVirtual machine blueprints regulate the attributes, policies, management settings, and provisioningmanner of a virtual machine. You create a service catalog and add virtual machine blueprints, thenconfigure entitlements to provide access to business groups to automatic virtual machine provisioning onthe specified compute resources.
Procedure
1 Create a Service Catalog for Consolidated SDDC
A service catalog provides a common interface for consumers of IT services to request services,track their requests, and manage their provisioned service items.
2 Create a Single Machine Blueprint for Consolidated SDDC
Create blueprints for cloning the virtual machine templates that use the specified resources onvCenter Server. Tenants can use these blueprints for automatic provisioning. A blueprint is thecomplete specification for a virtual, cloud, or physical machine.
3 Create Entitlements for Business Groups for Consolidated SDDC
You add a service, catalog item, or an action to an entitlement, to allow the users and groupsidentified in the entitlement to request provisionable items from the service catalog. The entitlementallows members of a specific business group (for example, the Production business group) to usethe blueprint. Perform this procedure to create an entitlement for the Production business group.
4 Configure Entitlements for Blueprints for Consolidated SDDC
You entitle users to the actions and items that belong to the service catalog by associating eachblueprint with an entitlement.
Deployment of Consolidated SDDC
VMware, Inc. 95
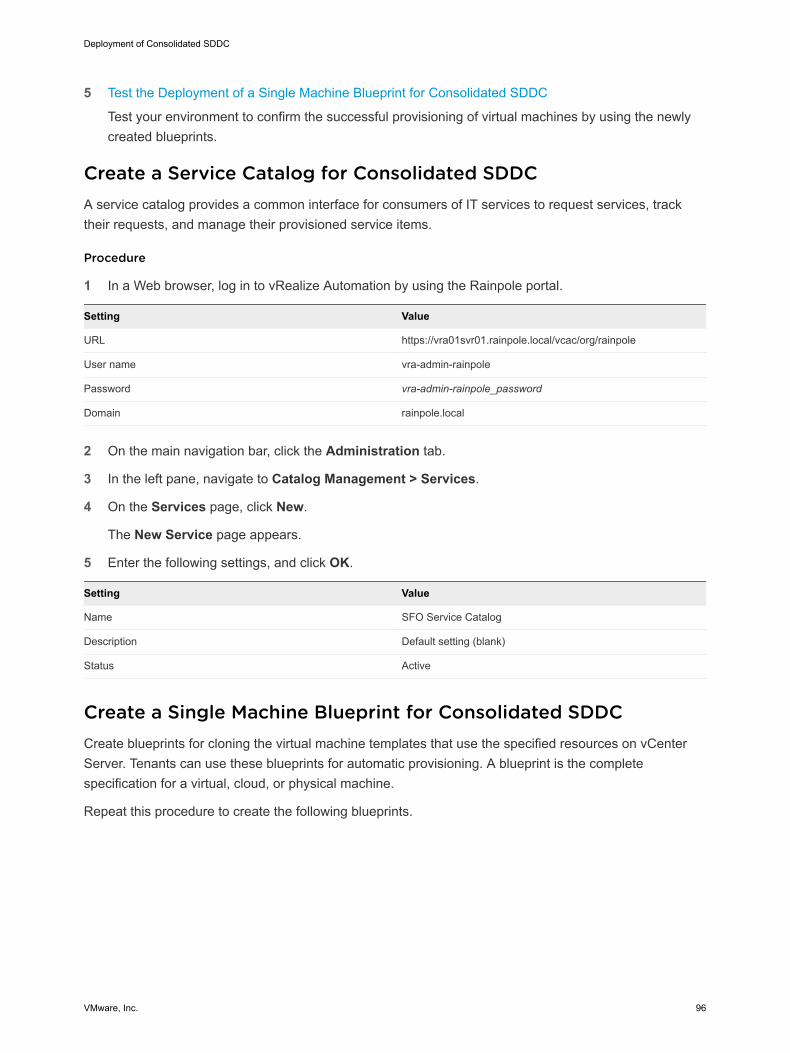
5 Test the Deployment of a Single Machine Blueprint for Consolidated SDDC
Test your environment to confirm the successful provisioning of virtual machines by using the newlycreated blueprints.
Create a Service Catalog for Consolidated SDDCA service catalog provides a common interface for consumers of IT services to request services, tracktheir requests, and manage their provisioned service items.
Procedure
1 In a Web browser, log in to vRealize Automation by using the Rainpole portal.
Setting Value
URL https://vra01svr01.rainpole.local/vcac/org/rainpole
User name vra-admin-rainpole
Password vra-admin-rainpole_password
Domain rainpole.local
2 On the main navigation bar, click the Administration tab.
3 In the left pane, navigate to Catalog Management > Services.
4 On the Services page, click New.
The New Service page appears.
5 Enter the following settings, and click OK.
Setting Value
Name SFO Service Catalog
Description Default setting (blank)
Status Active
Create a Single Machine Blueprint for Consolidated SDDCCreate blueprints for cloning the virtual machine templates that use the specified resources on vCenterServer. Tenants can use these blueprints for automatic provisioning. A blueprint is the completespecification for a virtual, cloud, or physical machine.
Repeat this procedure to create the following blueprints.
Deployment of Consolidated SDDC
VMware, Inc. 96

Blueprint Name VM TemplateCustomizationSpecification Network Profile Reservation Policy
Windows Server 2016 - SFO Prod
windows-server-2016(sfo01w01vc01.sfo01.rainpole.local)
os-windows-joindomain-custom-spec
Ext-Net-Profile-Production-Web
SFO-Production-Policy
Windows Server 2016with SQL Server 2017 -SFO Prod
windows-server-2016-sql-server-2017(sfo01w01vc01.sfo01.rainpole.local)
os-windows-joindomain-custom-spec
Ext-Net-Profile-Production-DB
SFO-Production-Policy
Ubuntu Server 18.04 - SFO Prod
ubuntu-server-1804(sfo01w01vc01.sfo01.rainpole.local)
os-linux-custom-spec Ext-Net-Profile-Production-App
SFO-Production-Policy
Procedure
1 In a Web browser, log in to vRealize Automation by using the Rainpole portal.
Setting Value
URL https://vra01svr01.rainpole.local/vcac/org/rainpole
User name vra-admin-rainpole
Password vra-admin-rainpole_password
Domain rainpole.local
2 On the main navigation bar, click the Design tab.
3 In the left pane, click Blueprints.
4 On the Blueprints page, click New.
The New blueprint dialog box appears.
5 On the General tab, configure the following settings, and click OK.
Setting Value
Name Windows Server 2016 - SFO Prod
Deployment limit Default setting (blank)
Lease (days): Minimum 30
Lease (days): Maximum 270
Archive (days) 15
6 From the Categories pane, click Machine types, select the vSphere (vCenter) machine componentand drag it in the Design Canvas.
Deployment of Consolidated SDDC
VMware, Inc. 97

7 On the virtual machine specification section, click the General tab, configure the following settings,and click Save.
Setting Value
ID Default setting (vSphere_vCenter_Machine_1)
Description Default setting (blank)
Display location on request Deselected
Reservation policy SFO -Production-Policy
Machine prefix Use group default
Instances: Minimum Default setting
Instances: Maximum 1
8 Click the Build information tab, enter the following settings, and click Save.
Setting Value
Blueprint type Server
Action Clone
Provisioning workflow CloneWorkflow
Clone from windows-server-2016
Customization spec os-windows-joindomain-custom-spec
Note If the value of the Clone from setting does not list the windows-server-2016 template, youmust perform a data collection on the sfo01-w01-consolidated01 compute resource.
Verify that the required customization specification is available in the vSphere Client under Menu >Policies and Profiles > VM Customization Specifications.
9 Click the Machine Resources tab, configure the following settings, and click Save.
Setting Minimum Maximum
CPUs 2 4
Memory (MB) 4096 16384
Storage (GB) Default setting Same value as Minimum
10 Configure the network for the virtual machine blueprint.
a From the Categories pane, click Network & security, select the Existing network componentand drag it in the Design Canvas.
b On the General tab of the existing network component, select the Ext-Net-Profile-Production-Web network profile , and click Save.
c In the Design Canvas, select the vSphere_vCenter_Machine object.
Deployment of Consolidated SDDC
VMware, Inc. 98

d Click the Network tab, click New, configure the following settings, and click OK.
Setting Value
Network Ext-Net-Profile-Production-Web
Assignment type Static IP
Address Default setting (blank)
e To save the blueprint, click Finish.
11 On the Blueprints page, select the Windows Server 2016 - SFO Prod blueprint and click Publish.
12 Repeat this procedure to create the remaining blueprints.
To test blueprints in a development environment, or according to your business needs, createdevelopment blueprints using the same process as for production blueprints.
Create Entitlements for Business Groups for Consolidated SDDCYou add a service, catalog item, or an action to an entitlement, to allow the users and groups identified inthe entitlement to request provisionable items from the service catalog. The entitlement allows membersof a specific business group (for example, the Production business group) to use the blueprint. Performthis procedure to create an entitlement for the Production business group.
Procedure
1 In a Web browser, log in to vRealize Automation by using the Rainpole portal.
Setting Value
URL https://vra01svr01.rainpole.local/vcac/org/rainpole
User name vra-admin-rainpole
Password vra-admin-rainpole_password
Domain rainpole.local
2 On the main navigation bar, click the Administration tab.
3 In the left pane, navigate to Catalog management > Entitlements.
4 On the Entitlements page, click New.
The New entitlement page appears.
5 Click the General tab, configure the following settings, and click Next.
Setting Value
Name Prod-SingleVM-Entitlement
Description Default setting (blank)
Expiration Date Default setting (blank)
Status Active
Business Group Production
Deployment of Consolidated SDDC
VMware, Inc. 99
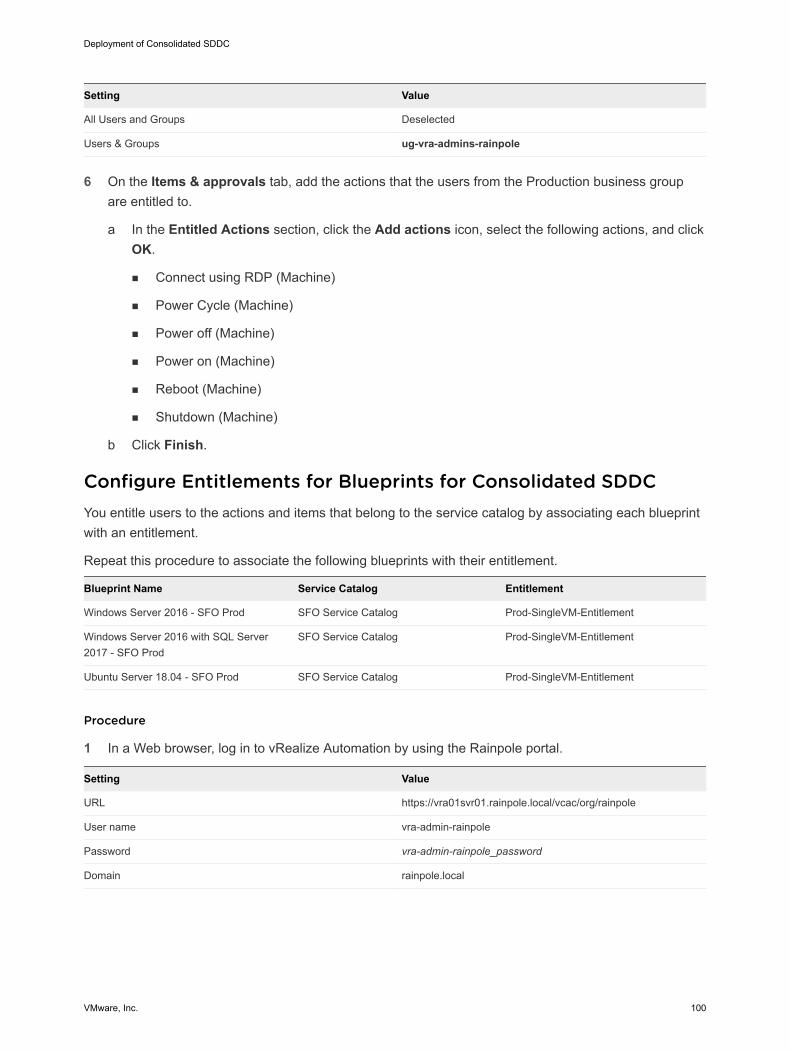
Setting Value
All Users and Groups Deselected
Users & Groups ug-vra-admins-rainpole
6 On the Items & approvals tab, add the actions that the users from the Production business groupare entitled to.
a In the Entitled Actions section, click the Add actions icon, select the following actions, and clickOK.
n Connect using RDP (Machine)
n Power Cycle (Machine)
n Power off (Machine)
n Power on (Machine)
n Reboot (Machine)
n Shutdown (Machine)
b Click Finish.
Configure Entitlements for Blueprints for Consolidated SDDCYou entitle users to the actions and items that belong to the service catalog by associating each blueprintwith an entitlement.
Repeat this procedure to associate the following blueprints with their entitlement.
Blueprint Name Service Catalog Entitlement
Windows Server 2016 - SFO Prod SFO Service Catalog Prod-SingleVM-Entitlement
Windows Server 2016 with SQL Server2017 - SFO Prod
SFO Service Catalog Prod-SingleVM-Entitlement
Ubuntu Server 18.04 - SFO Prod SFO Service Catalog Prod-SingleVM-Entitlement
Procedure
1 In a Web browser, log in to vRealize Automation by using the Rainpole portal.
Setting Value
URL https://vra01svr01.rainpole.local/vcac/org/rainpole
User name vra-admin-rainpole
Password vra-admin-rainpole_password
Domain rainpole.local
Deployment of Consolidated SDDC
VMware, Inc. 100

2 Configure the service catalog for the blueprint.
a On the main navigation bar, click the Administration tab.
b In the left pane, navigate to Catalog management > Catalog items.
c On the Catalog items page, click the Windows Server 2016 - SFO Prod blueprint.
The Configure catalog item page opens.
d On the General tab, from the Service drop-down menu, select SFO Service Catalog, andclick OK.
e Repeat this step to configure service catalog for the remaining blueprints.
3 Associate the blueprint with an entitlement.
a In the left pane, under Catalog management click Entitlements.
b On the Entitlements page, click the Prod-SingleVM-Entitlement entitlement.
The Edit entitlement page opens.
c Click the Items & approvals tab.
d Under Entitled items, click the Add items icon, select the Windows Server 2016 - SFO Prodblueprint, and click OK.
e On the Edit entitlement page, click Finish.
f Repeat this step to associate the remaining blueprints with their entitlements.
Test the Deployment of a Single Machine Blueprint forConsolidated SDDCTest your environment to confirm the successful provisioning of virtual machines by using the newlycreated blueprints.
Procedure
1 In a Web browser, log in to vRealize Automation by using the Rainpole portal.
Setting Value
URL https://vra01svr01.rainpole.local/vcac/org/rainpole
User name vra-admin-rainpole
Password vra-admin-rainpole_password
Domain rainpole.local
2 On the main navigation bar, click the Catalog tab.
3 On the Catalog page, click the Click here to apply filters icon.
4 In the left pane, select the SFO service catalog check box.
5 On one of the blueprint cards, click Request and click Submit.
Deployment of Consolidated SDDC
VMware, Inc. 101

6 Verify that the request finishes successfully.
a On the main navigation bar, click the Deployments tab.
b Click the deployment that you submitted, click the History tab and wait for the process to finish.
c Under Status, verify that the virtual machine is successfully provisioned.
7 In a Web browser, log in to vCenter Server by using the vSphere Client.
Setting Value
URL https://sfo01w01vc01.sfo01.rainpole.local/ui
User name [email protected]
Password vsphere_admin_password
8 Verify that the virtual machine is provisioned in the consolidated cluster.
a In the Hosts and Clusters inventory, expand the sfo01w01vc01.sfo01.rainpole.local tree andexpand the sfo01-w01dc data center.
b Expand the sfo01-w01-comp01 cluster and select the sfo01-w01rp-user-vm resource pool.
c Verify that the provisioned virtual machine is present and operational.
Deployment of Consolidated SDDC
VMware, Inc. 102