confined space level i/ii task book - squarespace space level i/ii . task book . course dates: ......
TRANSCRIPT

Task Book 7/2011 (DJ)
Confined Space Level I/II
Task Book
Course Dates:
Students Name:
Lead Instructor:

1

Confined Space Rescue Course
Level I/II
Course Completion
At the end of the course, the Lead Instructor will fill out the information below to document the student’s performance.
Student Name____________________________________________ Course Dates_______________________________________ Written Test Score__________ Completed Skills Check-off (if No explain below): Yes No Completed Exit Skills Test (if No explain below): Yes No Course completed (if No explain below): Yes No Lead Instructor___________________________________________Date__________ By signing below the student confirms he/she has met the objectives of this course and feels comfortable performing all the skills associated with the Confined Space Rescue course: Student Signature___________________________________________Date__________ Comments:
1

Confined Space Rescue Course
Level I/II
Task Book This Task Book is the evaluation tool used to validate the trainees proficiency in the skills required to complete the Confined Space Rescue Level I/II course. The National Fire Protection Association (NFPA) 1006 Technical Rescuer Professional Qualifications 2013 edition has specified Job Performance Requirements (JPR) required by individuals to comply with Chapter 7 (Confined Space). In this course all JPR’s in Chapter 7 of NFPA 1006 are assessed by one of three methods:
1. Written exam • The written exam will be given to assess the trainee’s cognitive
knowledge of the material taught during the course. • NFPA-1006 JPR’s- 7.1.5 • RESET JPR’s- 7.1, 7.4, 7.5, 7.6
2. Skills Check-off • The Skills Check-off is a list of practical skills that each rescuer must
perform under evaluation during the course. An instructor’s signature will constitute endorsement of acceptable performance.
• NFPA -1006 JPR’s- 7.1.1, 7.1.3, 7.2.1, 7.2.2, 7.2.3, • RESET JPR’s- 7.2,
3. Exit Skills Test • The Exit Skills Test is a set of skills that must be performed at the end of
the course. Each skill has criteria that must be met in order to pass the skill.
• NFPA-1006 JPR’s- 7.1.2, 7.1.4 • RESET JPR’s- 7.3
2

Confined Space Rescue Course
Level I/II Written Test Instructions Once all learning objective have been covered, a written test will be administered to the trainees. The test is a multiple choice exam and each question is directly linked to a learning objective within the curriculum. A minimum score of 70% must be achieved to complete the course. If the student fails the first attempt a second attempt may be given. If he/she fails the second attempt this would constitute a failure of the course. If the trainee fails the course a Course Attendance certificate may be given. This would identify the participation in the course but would not qualify the trainee to continue on to higher levels of training. Skills Check-off Instructions Students will be performing these skills through out the week during class. Instructors will evaluate two major areas: Safety and Efficiency. If any action is considered unsafe it should be stopped immediately. Instructors will work with students, teaching them to use efficient techniques. As the student performs these skills throughout the week, instructors will assess their proficiency. Once the student performs each of the required skills to the satisfaction of the instructor (evaluating: Safety and Efficacy) the instructor will initial the Skills Check-off sheet indicating the student can competently perform the skill. The instructors will work with trainees until he/she can perform the Check-off skills to the satisfaction of the Lead Instructor. There is no maximum number of attempts. Once all skills are endorsed by an instructor, the student must sign the Skills Check-off Sheet confirming he/she feels comfortable and competent at performing the specified skills. Exit Skills Test Instructions Once all learning objectives have been met exit skills test will be administered to the trainee. Each Exit Skill Sheet gives the objective for the skill, instructions for the trainee, examiner notes, and preparation instructions. Each skills test will also describe the criteria that will constitute a 0, 1, or 2.
Note: Not all possible situations that would dictate a 0, 1, or 2 are listed. It would be impossible to encompass all possible variations. In general;
A 2 will indicate you performed the skill correctly and efficiently. A 1 will indicate that you performed the skill safely but not efficiently. A 0 will indicate that you have incorrectly performed the skill or done something the evaluator considers to be unsafe.
3
Stations will be set up the same for each test and each student. These are testing stations; no teaching will occur during testing. Each trainee will be allowed three attempts to pass each Exit Skills Test. A separate Skill sheet should be used for each attempt. All Exit Skill Sheets should be attached to the task book for documentation.
1. If a trainee fails on his/her first attempt, time will be made to remediate the trainee in preparation for a second attempt.
2. In the event of a second failure, a second remediation will be provided in preparation for a third attempt.
3. If the trainee fails on his/her third attempt it will constitute a failure of the course. If the trainee fails the course a Course Attendance certificate may be given. This would identify the participation in the course but would not qualify the trainee to continue on to higher levels of training.
4
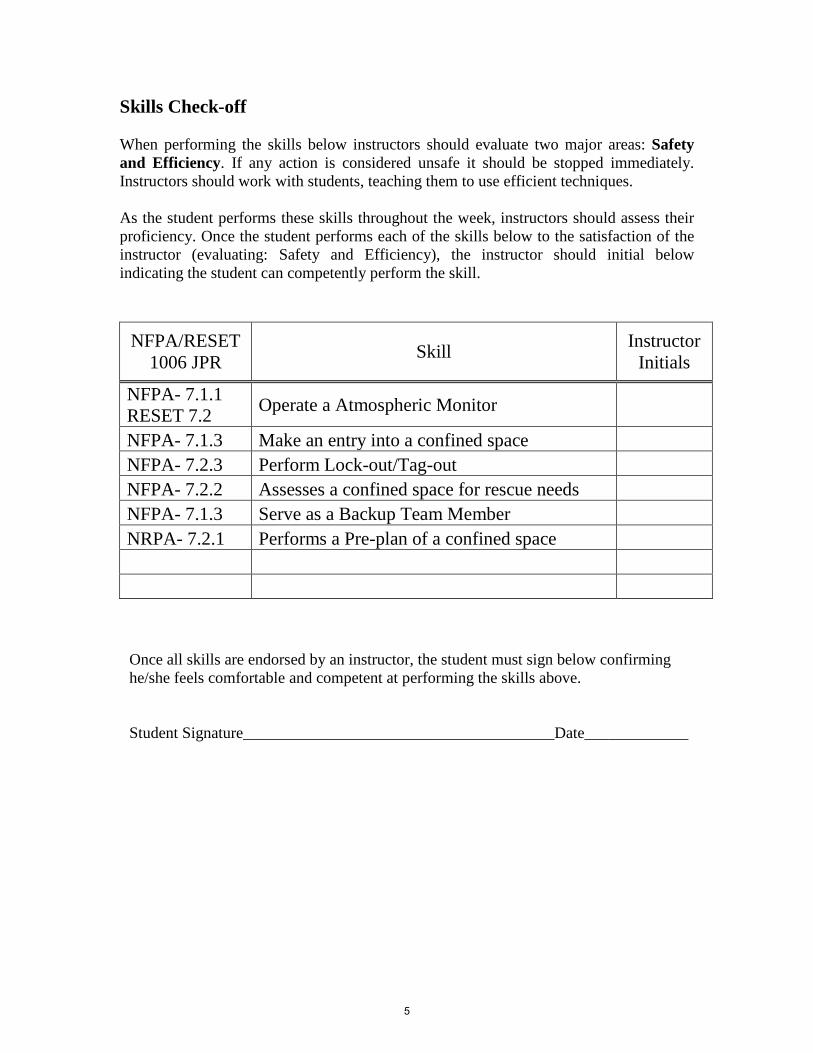
Skills Check-off When performing the skills below instructors should evaluate two major areas: Safety and Efficiency. If any action is considered unsafe it should be stopped immediately. Instructors should work with students, teaching them to use efficient techniques. As the student performs these skills throughout the week, instructors should assess their proficiency. Once the student performs each of the skills below to the satisfaction of the instructor (evaluating: Safety and Efficiency), the instructor should initial below indicating the student can competently perform the skill.
NFPA/RESET 1006 JPR Skill Instructor
Initials
NFPA- 7.1.1 RESET 7.2 Operate a Atmospheric Monitor NFPA- 7.1.3 Make an entry into a confined space NFPA- 7.2.3 Perform Lock-out/Tag-out NFPA- 7.2.2 Assesses a confined space for rescue needs NFPA- 7.1.3 Serve as a Backup Team Member NRPA- 7.2.1 Performs a Pre-plan of a confined space
Once all skills are endorsed by an instructor, the student must sign below confirming he/she feels comfortable and competent at performing the skills above. Student Signature_______________________________________Date_____________
5

6
Patient Packaging
Skill Sheet OBJECTIVE (NFPA JPR N/A) The trainee shall demonstrate packaging of a patient in a Sked for a vertical raise or lower (bridle will be weaved through the grommets in the traditional method) Rescuer will also utilize the OSS w/ shoulder board in the Sked. The trainee shall complete the patient packaging according to the criteria below. The trainee must score 9 out of 12 points with no zeros to pass. INSTRUCTIONS - procedures for achieving the objective You will package a patient in the Sked demonstrating the “traditional method” of weaving the bridle through the Sked's grommets for a vertical raise or lower. Furthermore, the rescuer will utilize the OSS w/ shoulder board while packaging the patient inside the Sked. An additional rescuer will assist you with packaging. Your assistant will only perform tasks at your direction. I will evaluate the finished product utilizing the criteria below. The skill will begin on my instruction to start. The time will stop when you inform me that you have completed the skill. Do you understand these instructions? EXAMINERS NOTE: The trainee will not be allowed to review the skills criteria during the skills test. PREPARATION & EQUIPMENT Provide the trainee with a Sked, OSS w/ shoulder board, a 20' 9mm (3/8”) rope for making a bridle, and a patient at least 5’ 6” tall.
7

8

Initial 1st Retest 2nd
Retest
0 1 2 0 1 2 0 1 2 1. Patient Orientation in OSS 0 1 2 0 1 2 0 1 2 2. Patient Orientation in Sked 0 1 2 0 1 2 0 1 2 3. Sked Lashing “traditional method” 0 1 2 0 1 2 0 1 2 4. Vertical Bridle Application 0 1 2 0 1 2 0 1 2 5. Knots and Hitches 0 1 2 0 1 2 0 1 2 6. Total Time Initial: 1st Retest: 2nd Retest: Note: If any score less than 2 is marked; explain below in “Examiner Notes”.
Student’s Total Points (min. passing: 9 points) Score: Initial Examiner’s Signature: Pass Student’s Signature: Fail Student’s Total Points (min. passing: 9 points) Score: 1st Retest Examiner’s Signature: Pass Student’s Signature: Fail Student’s Total Points (min. passing: 9 points) Score: 2nd Retest Examiner’s Signature: Pass Student’s Signature: Fail
Student’s Name: Date: Examiner’s Name: Initial Test Examiner’s Name: 1st Retest Examiner’s Name: 2nd Retest
Examiner Notes:
9

Skills Criteria Pt. Packaging utilizing an OSS with shoulder board
The trainee must score 9 out of 12 to pass with NO zeros allowed. Pt. Orientation (OSS):
2 (All must apply) The patient is positioned at the top (head end) of the Sked or in a suitable fashion for safe and ideal vertical movement. OSS must be secure across the chest and/or over the shoulders with all the colors of the webbing matching. Another option is to place chest buckle over the shoulders (green to orange) to prevent airway obstruction. The leg loops must be loose enough for lying down without causing injury or discomfort to the pt without allowing the pt. to slide down. Shoulder board must be in place perpendicular to the body behind the shoulders preventing the Sked from squeezing the Pt 1 The patient is positioned in the litter in a fashion that is safe but not ideal for transport. OSS is in place but chest and shoulders straps are too loose or too tight causing breathing difficulty. Shoulder board is not in the right location but perpendicular to the body 0 The patient is positioned in the litter upside down or otherwise incorrectly. Leg loops are too tight for lying flat comfortably or too loose allowing the pt. to potentially slide down in the OSS causing airway complications. OSS straps aren't connected or not matched by color correctly. Shoulder board is missing or parallel to the body
Pt. Orientation (Sked):
2 (All must apply) The patient is positioned at the top (head end) of the Sked or in a suitable fashion for safe and ideal vertical movement. Pt. is orientated to have their nipple line even with the top grommets in the back of the Sked. Sked isn't striking the Pt. in the face 1 The patient is positioned in the litter in a fashion that is safe but not ideal for transport. Pt is being struck in the face by the top. Pt is repositioned multiple times to correctly orient him/her (>2 attempts) 0 The patient is positioned in the litter upside down or in a manner that the Sked will not lash correctly.
10
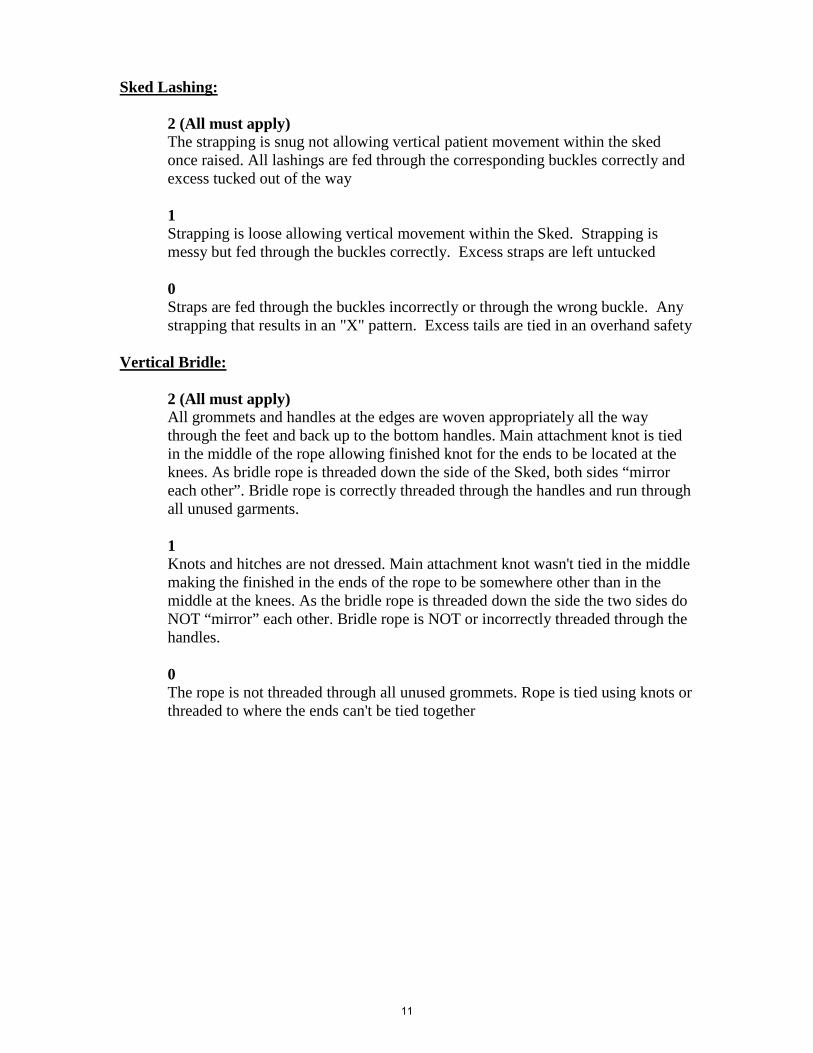
Sked Lashing:
2 (All must apply) The strapping is snug not allowing vertical patient movement within the sked once raised. All lashings are fed through the corresponding buckles correctly and excess tucked out of the way 1 Strapping is loose allowing vertical movement within the Sked. Strapping is messy but fed through the buckles correctly. Excess straps are left untucked 0 Straps are fed through the buckles incorrectly or through the wrong buckle. Any strapping that results in an "X" pattern. Excess tails are tied in an overhand safety
Vertical Bridle:
2 (All must apply) All grommets and handles at the edges are woven appropriately all the way through the feet and back up to the bottom handles. Main attachment knot is tied in the middle of the rope allowing finished knot for the ends to be located at the knees. As bridle rope is threaded down the side of the Sked, both sides “mirror each other”. Bridle rope is correctly threaded through the handles and run through all unused garments. 1 Knots and hitches are not dressed. Main attachment knot wasn't tied in the middle making the finished in the ends of the rope to be somewhere other than in the middle at the knees. As the bridle rope is threaded down the side the two sides do NOT “mirror” each other. Bridle rope is NOT or incorrectly threaded through the handles. 0 The rope is not threaded through all unused grommets. Rope is tied using knots or threaded to where the ends can't be tied together
11

Knots and Hitches:
2 (All must apply) Knots and hitches are tied correctly, dressed, and appropriate to the application, (i.e. butterfly or figure 8at the head of the bridal. square knot at the feet, and square knot w/ overhand safety knots at the bottom handle by the knees). Note the tails on the vertical bridle after tying the second square knot will be long. 1 Knots and hitches are not dressed; or not the optimal knot/hitch for the operation. 0 Knots and hitches are tied incorrectly, lack required safeties, or otherwise represent a safety hazard.
Time:
2 Patient is packaged in under 12 minutes. 1 Patient is packaged in 12-20 minutes. 0 Patient is packaged in over 20 minutes.
12
SAR Cart Skill Sheet
OBJECTIVE (NFPA JPR’s- 5.5.6, 5.5.8, 5.5.10, 5.5.11, 5.5.12) The trainee shall prepare a Supplied Air Respirator (SAR) Cart for use. The trainee will ensure that the system is prepared to provide continuous air for an Entry Team, Backup Team and a Patient. The trainee must score an 8 out of 12 with no zeros to pass. INSTRUCTIONS - procedures for achieving the objective You will be required to set up the SAR Cart(s) provided, to supply a two person Entry Team, a two person Backup Team, and a single patient. To ensure the air system is functional, you will be required to place an escape pack onto one rescuer and supply air to them. After the rescuer is breathing on the SAR Cart, you will be asked to change one bottle on the SAR Cart without interruption of air supply to the rescuer. You will begin on my instruction to start and the skill will end when you identify you have completed all identified skills. Do you understand these instructions? EXAMINERS NOTE: The trainee will not be allowed to review the skills criteria during the skills test. The SAR cart(s), bottles, air hoses, escape pack, and other devices should NOT be assembled, requiring the trainee to assemble them. PREPARATION & EQUIPMENT Provide the trainee with enough SAR Carts to supply 5 air lines (2- entry team, 2- backup team, 1- patient), one escape pack, 5 air lines, and spare air bottles.
13

14

Note: If any score less than 2 is marked; explain below in “Examiner Notes”.
Student’s Name: Date: Examiner’s Name: Initial Test Examiner’s Name: 1st Retest Examiner’s Name: 2nd Retest
Initial 1st Retest
2nd Retest
0 1 2 0 1 2 0 1 2 1. Connects and ensures air bottle connections are functional to the SAR cart(s)
0 1 2 0 1 2 0 1 2 2. Connects 5 hoses to the SAR cart(s) 0 1 2 0 1 2 0 1 2 3. Dons escape pack onto a rescuer 0 1 2 0 1 2 0 1 2 4. Equipment 0 1 2 0 1 2 0 1 2 5. System Operation 0 1 2 0 1 2 0 1 2 6. Total Time: 1st Retest: 2nd Retest:
Student’s Total Points (min. passing: 8 points) Score: Initial Examiner’s Signature: Pass Student’s Signature: Fail Student’s Total Points (min. passing: 8 points) Score: 1st Retest Examiner’s Signature: Pass Student’s Signature: Fail Student’s Total Points (min. passing: 8 points) Score: 2nd Retest Examiner’s Signature: Pass Student’s Signature: Fail
Examiner Notes:
15

Skill Criteria SAR Cart
The trainee must score a 8 out of 12 with no zeros allowed. Connects bottles to the SAR cart(s):
2 (All must apply) Bottles are oriented correctly; takes <2 attempts at connecting bottles to bottle connection; secures bottles in the cart; turns both bottles on to make sure “o-rings” on air cart are functional and then turns one air bottle off. 1 >2 attempts at connecting the bottles to the bottle connection; does not secure the bottle in the cart, does not turn other bottle off 0 Unable to connect bottle to the cart or otherwise does something that is non-functional or unsafe, does not turn both bottles on during initial check of air cart to inspect ‘o-rings’.
Connects 5 Hoses to the SAR Cart(s):
2 (All must apply) Identifies the need for 5 hoses (1 for each of the two rescuers, 1 for each of the two backup team members, and one for the patient); <2 attempts at connecting hose to SAR Cart; clearly identifies what hoses are for what purpose; Patients line has a regulator and mask; quarter-turns all coupling(s) at hose(s) connection(s) points; states that tape may be use to attach air line to rope at 5' increments 1 >2 attempts at connecting hose to SAR Cart; is unclear with the purpose of each hose; makes connections that are functional but is inefficient; does not quarter turn couplings hose connection points. 0 Is unable to make hose connections or connects hoses in such a way that they are non-functional; Patients line does not have a regulator or mask; does something that would otherwise be unsafe
16

Dons Escape Pac onto a rescuer:
2 (All must apply) Efficiently applies Escape Pack to the rescuer; <2 attempts at donning Escape Pack; buckles are securely connected and webbing is lying flat; 1 >2 attempts at donning Escape Pack; buckles are connected but binding; webbing is twisted or not fitted according to design; applying the escape pack is inefficient but functional; 0 Unable to don Escape Pack; buckle connections are insecure; the escape pack would not function correctly or is otherwise unsafe;
Equipment:
2 Ensures equipment is compatible with other components (EX. masks are compatible with regulator, hoses are compatible with cart); Equipment is appropriately and efficiently applied; <2 attempts at using or applying any equipment 1 Did not check compatibility, struggled with connecting equipment. Equipment use is safe, but used inefficiently; >2 attempts at using or applying any equipment 0 Equipment was incompatible; trainee was unable to connect/use equipment; Equipment use is inappropriately applied, or is otherwise unsafe
17

System Operation:
2 (All must apply) Trainee demonstrates safe, efficient operation of all systems and components:
• Keeps continuous air supply to rescuers and patient • Efficiently changes out air bottle • Identifies any problems and immediately corrects them (< 2 Attempts)
1 Trainee operates systems safely but inefficiently:
• Struggles with changing air bottles • Struggles with identifying how to provide air to the rescuer • Unable to immediately correct any identified problems. (> 2 Attempts)
0 Unable to operate the system; Air supply to rescuer is interrupted at any time; perform in such a way that would be considered unsafe;
Time:
2 Constructs and operates the system in less than 12 minutes. 1 Constructs and operates the system in 12-20 minutes. 0 Constructs and operates the system in over 20 minutes.
18

Confined Space Tripod Operations
OBJECTIVE (NFPA 1006 [2008 ed.] JPR’s 7.1.2, 7.1.5): The trainee will be required to demonstrate proficiency for confined space rescue operations. The trainee must score 10 out of 14 to pass. INSTRUCTIONS - You and two assistants will correctly set up a tripod over that access point. Then you, without the aid of your assistants, you will rig the tripod with a “change of direction system” technique to raise or lower the rescuer into or out of a confined space. You will state when you have completed all the steps to either raise or lower a rescuer from the confined space. Finally, the assistants will only follow your instructions and you are responsible for all of your assistant’s actions. Do you understand these instructions? EXAMINERS NOTE: The firefighter trainee will not be allowed to review the skills criteria during the skills test. PREPARATION & EQUIPMENT: Evaluators will select a space and anchor points to represent a vertical permitted confined space entry point. Equipment needed is as follows: 1-Tripod (with chain) 2-XL carabineers 3-20’1” nylon webbing 3-200’ 7/16” or ½” rope 10-large carabineers 4-pieces of edge protection 3-double pulleys 1-rescuescender 1-rigging plate 3-single pulleys 2-pair prusik loops
19

20

Note: If any score less than 2 is marked; explain below in “Examiner Notes”.
Initial 1st Retest 2nd Retest
0 1 2 0 1 2 0 1 2 1. Tripod set-up 0 1 2 0 1 2 0 1 2 2. Lowering System 0 1 2 0 1 2 0 1 2 3. Single Tensioned Main-Un-tensioned Belay
Raising 0 1 2 0 1 2 0 1 2 4. Knots and Hitches 0 1 2 0 1 2 0 1 2 5. Equipment 0 1 2 0 1 2 0 1 2 6. Safety 0 1 2 0 1 2 0 1 2 7. Total Time Initial:
Student’s Total Points (min. passing: 10 points) Score: Initial Examiner’s Signature: Pass Student’s Signature: Fail Student’s Total Points (min. passing: 10 points) Score: 1st Retest Examiner’s Signature: Pass Student’s Signature: Fail Student’s Total Points (min. passing: 10 points) Score: 2nd Retest Examiner’s Signature: Pass Student’s Signature: Fail
Student’s Name: Date: Examiner’s Name: Initial Test Examiner’s Name: 1st Retest Examiner’s Name: 2nd Retest
Examiner Notes:
21
Skills Criteria
The trainee must score 10 out of 14 to pass with NO zeros allowed. 1. Tripod Set-up
2 (All must apply) Trainee efficiently sets up tripod on any surface type provided. Fully locks out all legs on tripod. Uses and secures leg restraints to secure tripod legs. Knows working load limits of tripod at height; connection of the system to the tripod is in the correct and efficient location (EX. Does not bind, does not rub on leg, and is in line with rigging). 1 Trainee is inefficient when setting tripod; trainee fumbles with locking tripod’s legs. Connection of the system to the tripod is safe but not efficient (EX. Binds, rubs on leg, not in line with rigging). 0 Trainee is unable to assemble tripod; Trainee does not lock all of tripod’s legs, tripod tips over when weight is applied to the system; Connection to the tripod is unworkable or otherwise unsafe.
2. Two Tensioned Rope System: Lowering System:
Munter Hitch Lowering Device 2 (All must apply) Both Munter hitches are appropriately chosen and tied correctly. 1 Lowering system is rigged inefficiently (i.e. operator/rope position, etc.). 0 One or both of the Munter hitches are tied incorrectly.
22

3. Single Tensioned Main Un-tensioned Belay Raising System:
4:1/5:1 Block and Tackle 2 (All must apply) The mechanical advantage of the system is correctly identified; the mechanical advantage is efficiently incorporated into the haul system; the Munter hitches are identified as progress capture, change of direction pulley is within the foot print of the tripod. 1 The mechanical advantage of the system is incorrectly identified; the mechanical advantage system is inefficient (i.e. unnecessary friction, haul system requires frequent resets). 0 The mechanical advantage system is unsafe or otherwise unworkable; Progress capture is ineffective or omitted. A system other than a 4:1/5:1 Block and Tackle is used.
4. Knots and Hitches
2 (All must apply) Knots and hitches are tied correctly, dressed, and appropriate to the application, with at least 4” of tail and bights/loops smaller than 4.
1 Knots and hitches are not dressed; Bights are larger than 4”, or not the optimal knot for the operation.
0 Knots and hitches are tied incorrectly, Tail is shorter than 4”, lack required safeties, or otherwise represent a safety hazard.
5. Equipment
2 (All must apply) Equipment is appropriately and efficiently applied; equipment is correctly applied in <2 attempts 1 Equipment use is safe, but used inefficiently; equipment is correctly applied in >2 attempts 0 Equipment use is not safe or is inappropriately applied (i.e. unlocked carabineer).
23

6. Safety
2 (All must apply) Wears/uses appropriate PPE; safely accomplishes all tasks in a way that would not pose a hazard to the rescuer, bystanders, equipment, etc. 0
Does not use appropriate PPE (i.e. no gloves); Does something in the opinion
of the evaluator that would be considered dangerous or otherwise unsafe. 7. Time
2 Completes skill in less than 10 minutes.
1 Completes skill in 10-15 minutes. 0 Completes skill in over 20 minutes.
24