configuring your contentdm website - oclc.org
TRANSCRIPT
Configuring Your CONTENTdm Website January 8, 2013
© 2013 OCLC
Configuring & Customizing Your CONTENTdm Website
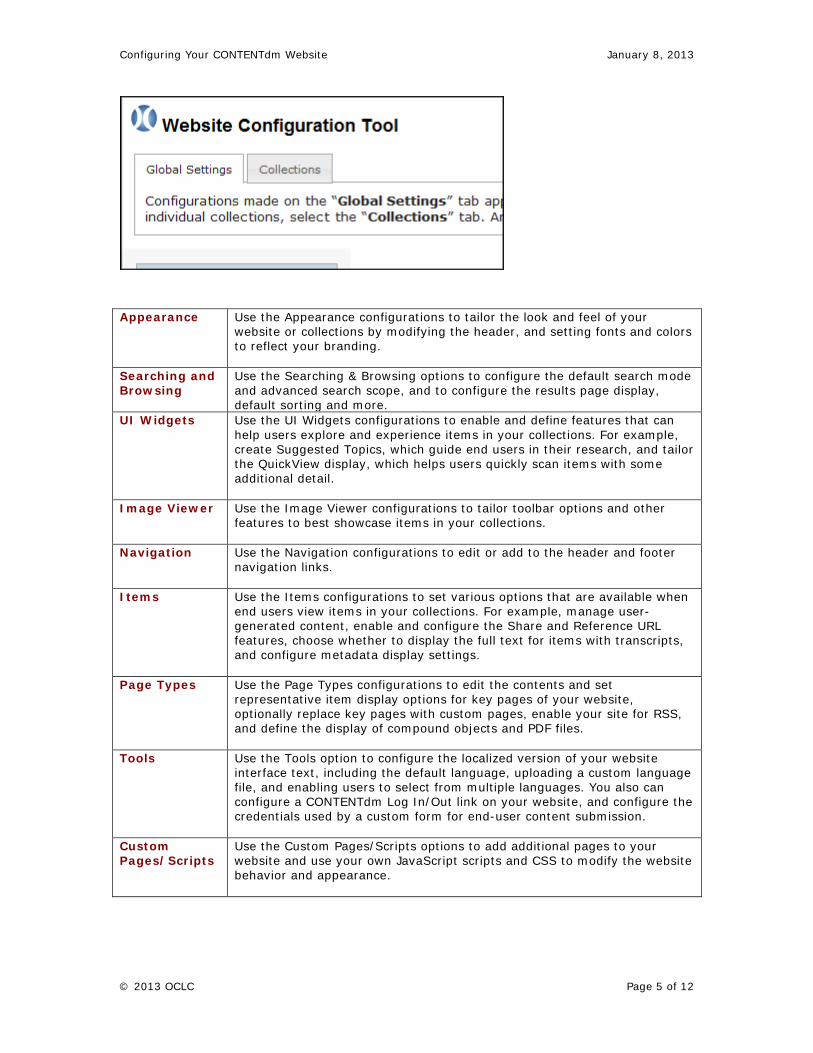
CONTENTdm provides you with the Website Configuration Tool for branding and tailoring the appearance and behavior of key elements of your CONTENTdm Website.
This tool enables you to configure your site by setting default values, enabling or disabling components, choosing colors, fonts and styles, and describing your website and collections. All of this is accomplished without programming skills.
The Website Configuration Tool also enables you to use "modular customizations," including custom pages, custom CSS or custom scripts (e.g., to add a shopping cart or Google Analytics). These optional, modular customizations require some programming skills.
This tutorial provides an overview for using the Website Configuration Tool and best practices. It walks you through establishing some of the more popular configurations.
If you are just getting started with CONTENTdm or don’t need to set up detailed configurations, see Jumpstart My Website as a quick guide on setting up some initial, basic configurations.
If you need information about more advanced customizations or localization, see Other Customizations.
This tutorial assumes that you are running CONTENTdm version 6 or later.
Learn About Section I: Overview
Section II: Before You Begin
Section III: Getting Started
Section IV: Common Configurations
Section V: Advanced Customizations
Section I Overview
About Configuring Your Website
You configure your website at either a global or collection level. Global settings are the default for your entire website. Collection settings affect only one collection. If no settings exist for a collection, then global settings are used. Any configurations set for a collection will override the global configurations.
If you need customizations beyond what the configurations supply, you can apply "modular" customizations using custom scripts. For those with some programming skills, optional modular customizations can be used to modify the appearance and behavior of the Home page, collection landing page, and About page. You can use custom scripts and custom CSS. You write the customization and then use the Website Configuration Tool to upload the file and record which file to execute.
All customizations will persist through future updates, provided you follow OCLC guidelines for where to store your customizations. If you use the Website Configuration Tool, your customizations will be stored correctly and preserved during updates.
Note: While most of these tools require no programming skills, some modular and advanced customizations may require working knowledge of HTML, PHP, and JavaScript.
Configuring Your CONTENTdm Website January 8, 2013
© 2013 OCLC Page 2 of 12
Best Practices
The end-user experience for your CONTENTdm Website was developed using extensive usability testing; thereby, providing an optimal collection-discovery experience. Before you invest in modifications or extensive customizations, we recommend you consider and evaluate their priority and requirement. Become familiar with the configurations in Website Configuration Tool before deciding to make customizations that require programming skills.
The directory structure of your website contains directories reserved for site-specific customizations. These \custom directories will not be overwritten during an upgrade and, therefore, your customizations will persist. For more information about separation of standard and custom directories, see Website Overview.
Caution: Do not directly modify website files provided by OCLC. Always use the Website Configuration Tool interface to edit configuration settings (CSS and XML configuration files). Configuring your website using the tools provided and integrating additional functionality using the recommended methods will provide your users with a successful experience and your organization with a maintainable, supported website that is easily upgraded over time.
Section II Before You Begin Before you configure your CONTENTdm Website, you will need to make sure the appropriate user permissions are established, understand the basic CONTENTdm architecture and website structure, optionally obtain any branding images, make decisions about user-generated content, and optionally preload some sample items into your collections.
Check Permissions
Configuring and customizing the website globally or at the collection level requires the appropriate permissions set in CONTENTdm Administration. For more information, see Managing Users.
Orient Yourself to the Website Review the Website Overview to see a site map and learn about the CONTENTdm architecture.
Determine Branding Requirements & Other Elements
It may be useful to plan ahead for the following elements before you get started:
• A title for your website (displays in the browser title bar and below the header on your Home page).
• A website description statement (300 words recommended).
• If you know you want to use a logo or other image as a header for your website (instead of just a text- or HTML-based header), it will be useful to create that ahead of time:
o Logo images can be no larger than 76 x 76 pixels.
o The custom header is an image that you upload. Custom headers (.jpg, .png, or .gif) can be no larger than about 828 x 76 pixels and are used as-is.
• Optional content for an About page (if you want it to differ from the website description [above]).
• Descriptions for each collection on your website (collection names are set in CONTENTdm Administration).
Configuring Your CONTENTdm Website January 8, 2013
© 2013 OCLC Page 3 of 12
• A Contact Us e-mail address (the Contact Us link displays in the global, website footer).
Determine Process/Guidelines for User-Generated Content If you want to enable social features like tagging, rating, and commenting, you may want to have discussions in your organization about any moderation expectations. For more information about how the content is managed, see User-Generated Content.
Add Sample Items to Your Collections If you are starting your website from scratch (i.e., not upgrading from an earlier version of CONTENTdm that already has established collections), it may be useful to add some representative items to your collection(s). CONTENTdm ships with example collections that can be used for reviewing or demonstrating your configurations, but if you have particular item types that you want to test configuration changes with, then it can be useful to have those added and approved so they are viewable on the website before you begin. For more information, see Adding Items.
Section III Getting Started
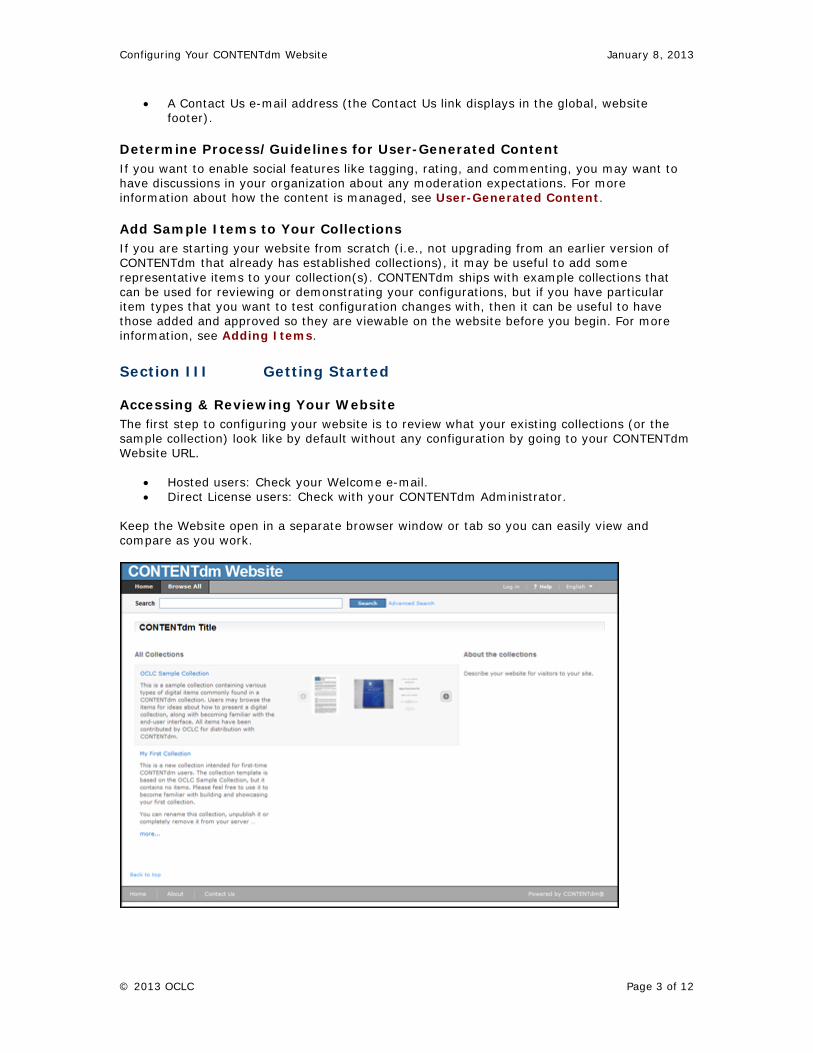
Accessing & Reviewing Your Website The first step to configuring your website is to review what your existing collections (or the sample collection) look like by default without any configuration by going to your CONTENTdm Website URL.
• Hosted users: Check your Welcome e-mail. • Direct License users: Check with your CONTENTdm Administrator.
Keep the Website open in a separate browser window or tab so you can easily view and compare as you work.
Configuring Your CONTENTdm Website January 8, 2013
© 2013 OCLC Page 4 of 12
Using the Website Configuration Tool The Website Configuration Tool enables you to:
• Globally brand and title the website, set a Contact Us link, and offer website and collection descriptions.
• Globally or per collection (configurations set for a collection will override global configurations):
o Refine page content, styles and behaviors o Refine item displays (including preventing words from being hyperlinked within
metadata displays, display of full text) o Refine navigation and behavior of UI widgets and other features
• Preview changes in your configurations before publishing. Website configurations are stored in .css and config (XML) files that should only be edited using the Website Configuration Tool. The complexity of these files makes manual editing error-prone and, therefore, unsupported. When you edit website configurations, you are working on a copy of your production style (.css) and configuration (.ini) files. The Website Configuration Tool makes a copy of the production settings files when it starts. When you click the Save button, you are saving your changes to the working copy, not to production. (You can revert to the last published version of your website.) When you click Preview, you are viewing your site using the working copy so you can verify your changes before pushing to production. When you click Publish, you are copying from your preview settings to your production settings. Caution: To manage changes and avoid simultaneous overwriting of configurations, we recommend that only one person at a time use the Website Configuration Tool.
Accessing the Website Configuration Tool 1. Navigate to your CONTENTdm Administration URL (this is different from your website
URL). (For Hosted users: Check your Welcome e-mail. For local installations: Check with your CONTENTdm Administrator.)
2. From CONTENTdm Administration, click the Server or Collections tab and then click Website. The Website Configuration Tool displays in a new window or tab.
3. Log in using the same user name and password that you use when accessing CONTENTdm Administration.
Configuration Options — Some Highlights
Remember: You configure your website at either a global or collection level. Global settings are the default for your entire website. Collection settings affect only one collection. If no settings exist for a collection, then global settings are used. Any configurations set for a collection will override the global configurations.
Note that the tool has two tabs. For any configuration you make, always confirm you are applying the option with the correct tab selection:
Configuring Your CONTENTdm Website January 8, 2013
© 2013 OCLC Page 5 of 12
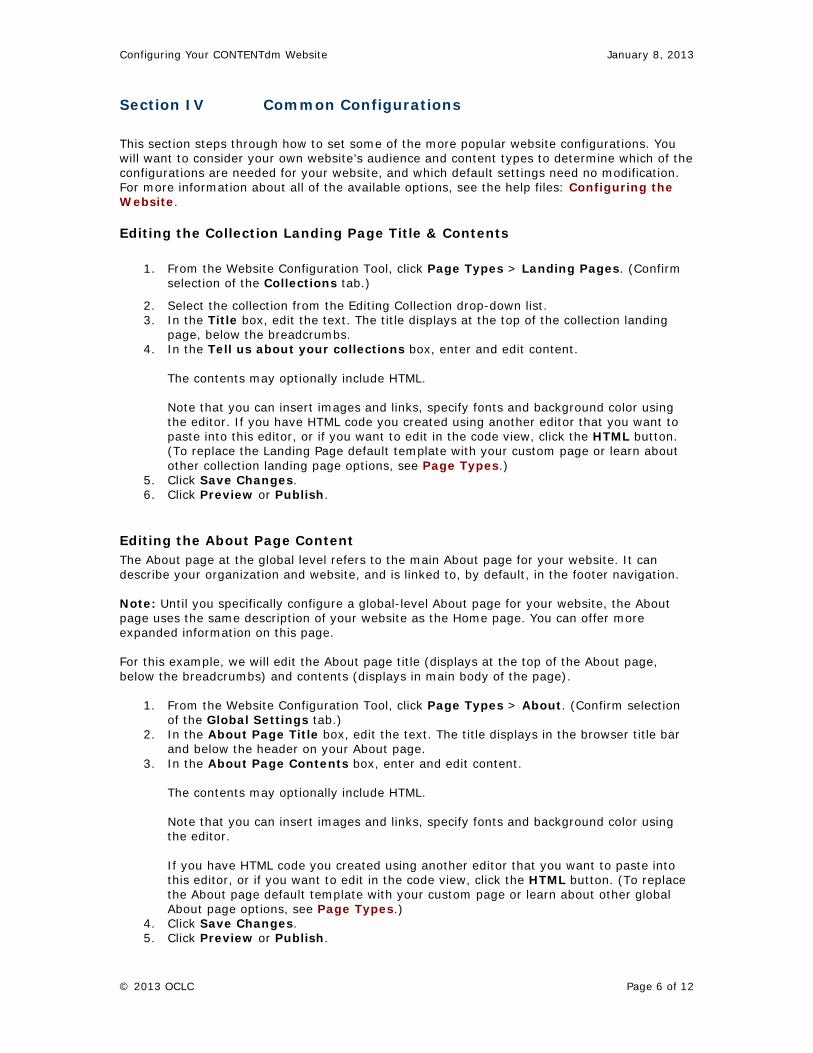
Appearance
Use the Appearance configurations to tailor the look and feel of your website or collections by modifying the header, and setting fonts and colors to reflect your branding.
Searching and Browsing
Use the Searching & Browsing options to configure the default search mode and advanced search scope, and to configure the results page display, default sorting and more.
UI Widgets Use the UI Widgets configurations to enable and define features that can help users explore and experience items in your collections. For example, create Suggested Topics, which guide end users in their research, and tailor the QuickView display, which helps users quickly scan items with some additional detail.
Image Viewer Use the Image Viewer configurations to tailor toolbar options and other features to best showcase items in your collections.
Navigation Use the Navigation configurations to edit or add to the header and footer navigation links.
Items Use the Items configurations to set various options that are available when end users view items in your collections. For example, manage user-generated content, enable and configure the Share and Reference URL features, choose whether to display the full text for items with transcripts, and configure metadata display settings.
Page Types Use the Page Types configurations to edit the contents and set representative item display options for key pages of your website, optionally replace key pages with custom pages, enable your site for RSS, and define the display of compound objects and PDF files.
Tools Use the Tools option to configure the localized version of your website interface text, including the default language, uploading a custom language file, and enabling users to select from multiple languages. You also can configure a CONTENTdm Log In/Out link on your website, and configure the credentials used by a custom form for end-user content submission.
Custom Pages/Scripts
Use the Custom Pages/Scripts options to add additional pages to your website and use your own JavaScript scripts and CSS to modify the website behavior and appearance.
Configuring Your CONTENTdm Website January 8, 2013
© 2013 OCLC Page 6 of 12
Section IV Common Configurations This section steps through how to set some of the more popular website configurations. You will want to consider your own website’s audience and content types to determine which of the configurations are needed for your website, and which default settings need no modification. For more information about all of the available options, see the help files: Configuring the Website.
Editing the Collection Landing Page Title & Contents
1. From the Website Configuration Tool, click Page Types > Landing Pages. (Confirm selection of the Collections tab.)
2. Select the collection from the Editing Collection drop-down list. 3. In the Title box, edit the text. The title displays at the top of the collection landing
page, below the breadcrumbs. 4. In the Tell us about your collections box, enter and edit content.
The contents may optionally include HTML. Note that you can insert images and links, specify fonts and background color using the editor. If you have HTML code you created using another editor that you want to paste into this editor, or if you want to edit in the code view, click the HTML button. (To replace the Landing Page default template with your custom page or learn about other collection landing page options, see Page Types.)
5. Click Save Changes. 6. Click Preview or Publish.
Editing the About Page Content The About page at the global level refers to the main About page for your website. It can describe your organization and website, and is linked to, by default, in the footer navigation. Note: Until you specifically configure a global-level About page for your website, the About page uses the same description of your website as the Home page. You can offer more expanded information on this page. For this example, we will edit the About page title (displays at the top of the About page, below the breadcrumbs) and contents (displays in main body of the page).
1. From the Website Configuration Tool, click Page Types > About. (Confirm selection of the Global Settings tab.)
2. In the About Page Title box, edit the text. The title displays in the browser title bar and below the header on your About page.
3. In the About Page Contents box, enter and edit content. The contents may optionally include HTML. Note that you can insert images and links, specify fonts and background color using the editor. If you have HTML code you created using another editor that you want to paste into this editor, or if you want to edit in the code view, click the HTML button. (To replace the About page default template with your custom page or learn about other global About page options, see Page Types.)
4. Click Save Changes. 5. Click Preview or Publish.
Configuring Your CONTENTdm Website January 8, 2013
© 2013 OCLC Page 7 of 12
Changing the Initial Viewport Setting to Fit to Window Some organizations prefer to change the default, initial zoom setting from Fit to Width to Fit to Window.
1. From the Website Configuration Tool, click Image Viewer > Zoom. (Confirm selection of the Global Settings or Collections tab.)
2. Set the Initial Viewport Zoom: o Select Fit to Window to view the image at the highest defined zoom level in
which the full image fits in defined viewport. o Select Fit to Width to display the image at the zoom level at which the image
width fits exactly in the viewport (this is the default). o Select Use Custom Initial Zoom Level and enter a percentage value in the
text box to initially display at that zoom level.
Note: The defined zoom level may not exceed 200.
3. Click Save Changes. 4. Click Preview or Publish.
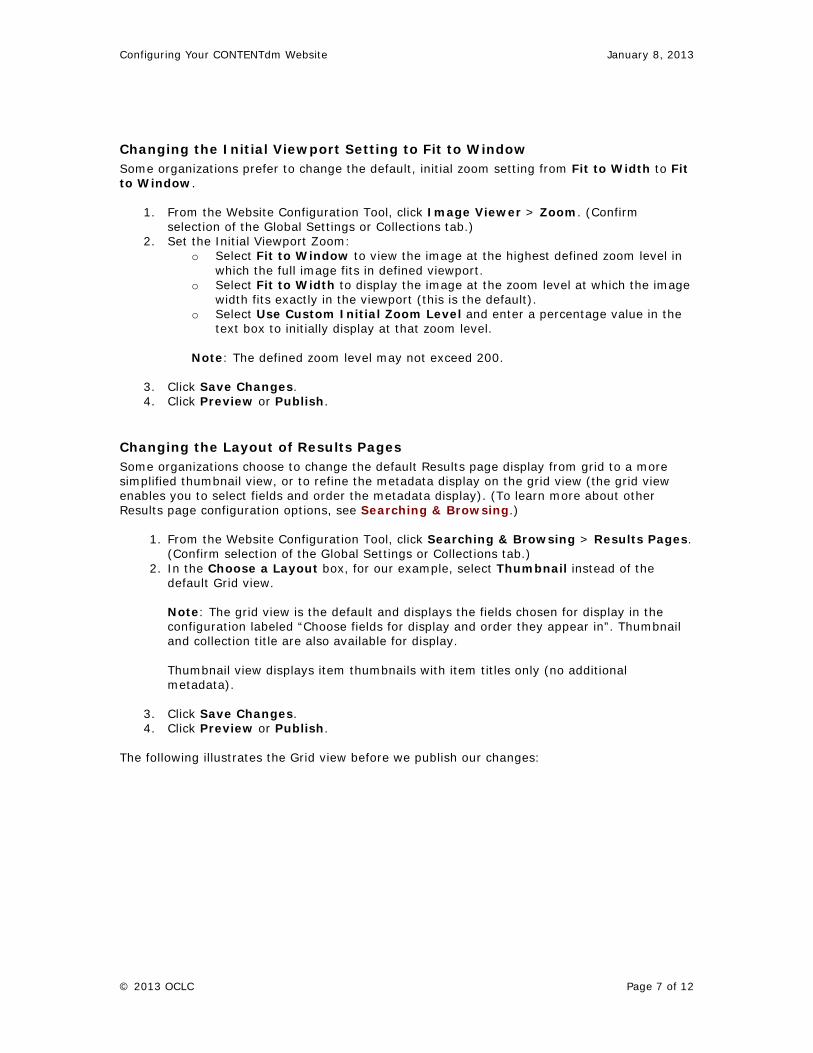
Changing the Layout of Results Pages Some organizations choose to change the default Results page display from grid to a more simplified thumbnail view, or to refine the metadata display on the grid view (the grid view enables you to select fields and order the metadata display). (To learn more about other Results page configuration options, see Searching & Browsing.)
1. From the Website Configuration Tool, click Searching & Browsing > Results Pages. (Confirm selection of the Global Settings or Collections tab.)
2. In the Choose a Layout box, for our example, select Thumbnail instead of the default Grid view. Note: The grid view is the default and displays the fields chosen for display in the configuration labeled “Choose fields for display and order they appear in”. Thumbnail and collection title are also available for display. Thumbnail view displays item thumbnails with item titles only (no additional metadata).
3. Click Save Changes. 4. Click Preview or Publish.
The following illustrates the Grid view before we publish our changes:
Configuring Your CONTENTdm Website January 8, 2013
© 2013 OCLC Page 8 of 12
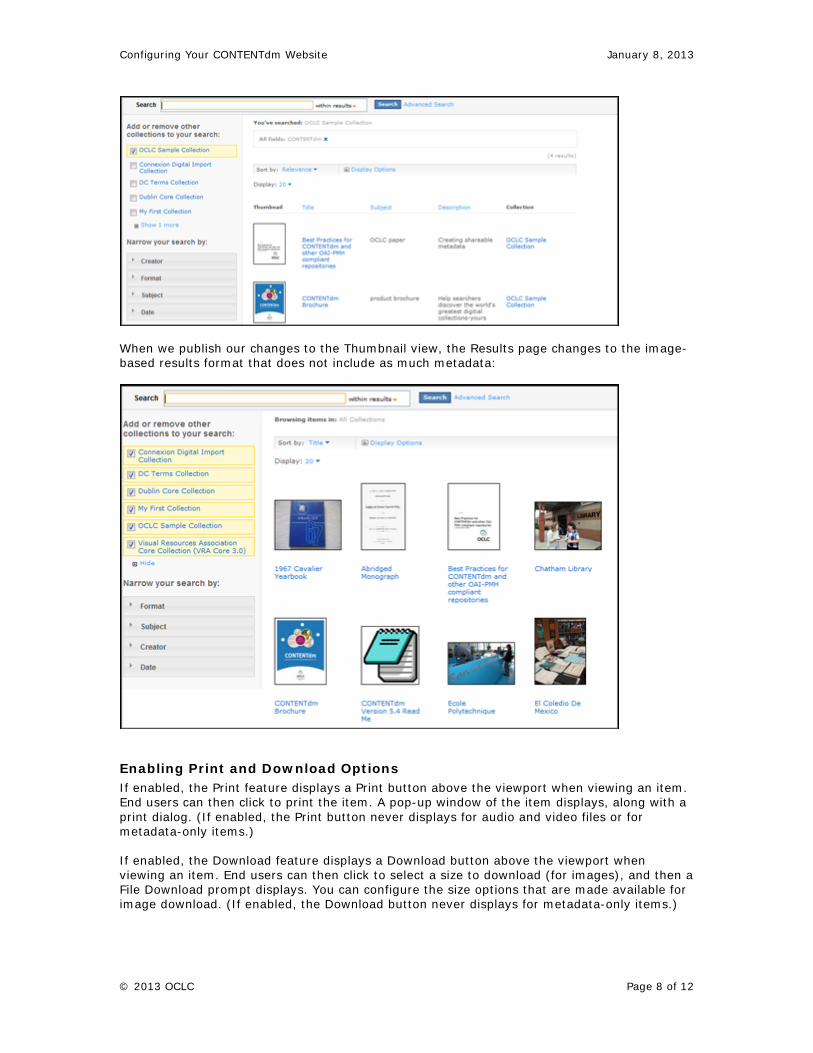
When we publish our changes to the Thumbnail view, the Results page changes to the image-based results format that does not include as much metadata:
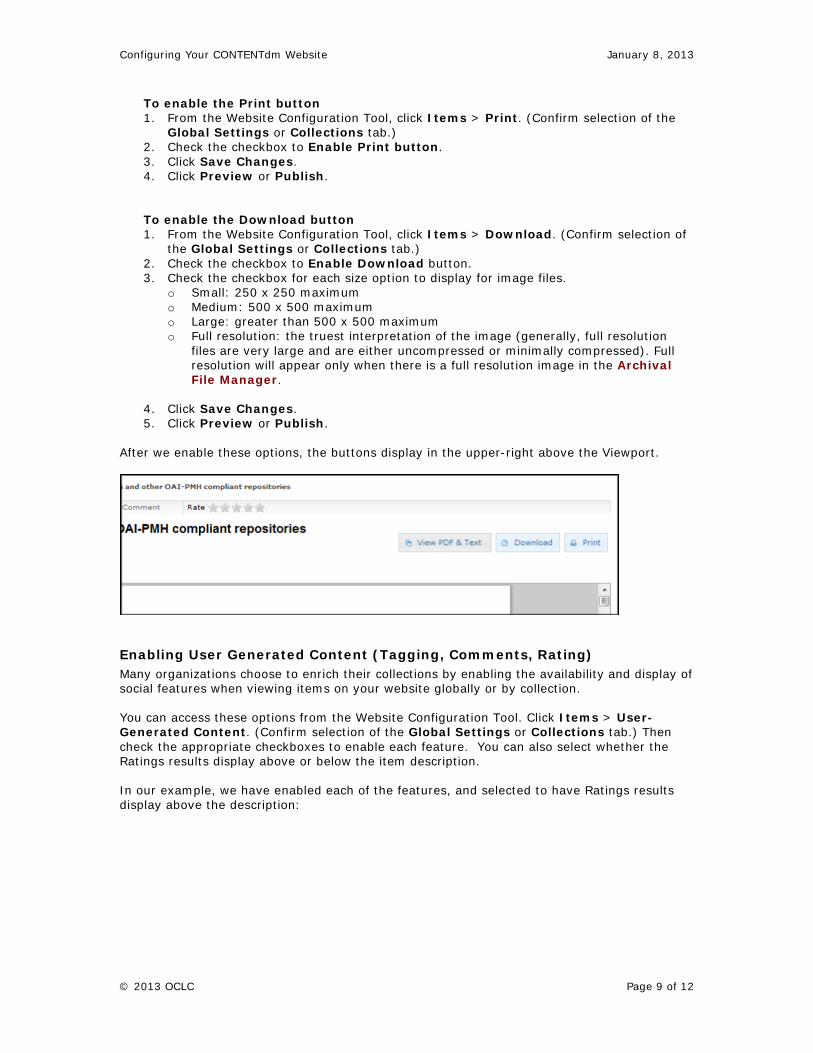
Enabling Print and Download Options If enabled, the Print feature displays a Print button above the viewport when viewing an item. End users can then click to print the item. A pop-up window of the item displays, along with a print dialog. (If enabled, the Print button never displays for audio and video files or for metadata-only items.) If enabled, the Download feature displays a Download button above the viewport when viewing an item. End users can then click to select a size to download (for images), and then a File Download prompt displays. You can configure the size options that are made available for image download. (If enabled, the Download button never displays for metadata-only items.)
Configuring Your CONTENTdm Website January 8, 2013
© 2013 OCLC Page 9 of 12
To enable the Print button 1. From the Website Configuration Tool, click Items > Print. (Confirm selection of the
Global Settings or Collections tab.) 2. Check the checkbox to Enable Print button. 3. Click Save Changes. 4. Click Preview or Publish.
To enable the Download button 1. From the Website Configuration Tool, click Items > Download. (Confirm selection of
the Global Settings or Collections tab.) 2. Check the checkbox to Enable Download button. 3. Check the checkbox for each size option to display for image files.
o Small: 250 x 250 maximum o Medium: 500 x 500 maximum o Large: greater than 500 x 500 maximum o Full resolution: the truest interpretation of the image (generally, full resolution
files are very large and are either uncompressed or minimally compressed). Full resolution will appear only when there is a full resolution image in the Archival File Manager.
4. Click Save Changes. 5. Click Preview or Publish.
After we enable these options, the buttons display in the upper-right above the Viewport.
Enabling User Generated Content (Tagging, Comments, Rating) Many organizations choose to enrich their collections by enabling the availability and display of social features when viewing items on your website globally or by collection. You can access these options from the Website Configuration Tool. Click Items > User-Generated Content. (Confirm selection of the Global Settings or Collections tab.) Then check the appropriate checkboxes to enable each feature. You can also select whether the Ratings results display above or below the item description. In our example, we have enabled each of the features, and selected to have Ratings results display above the description:

Configuring Your CONTENTdm Website January 8, 2013
© 2013 OCLC Page 10 of 12
The result on the website for Ratings:
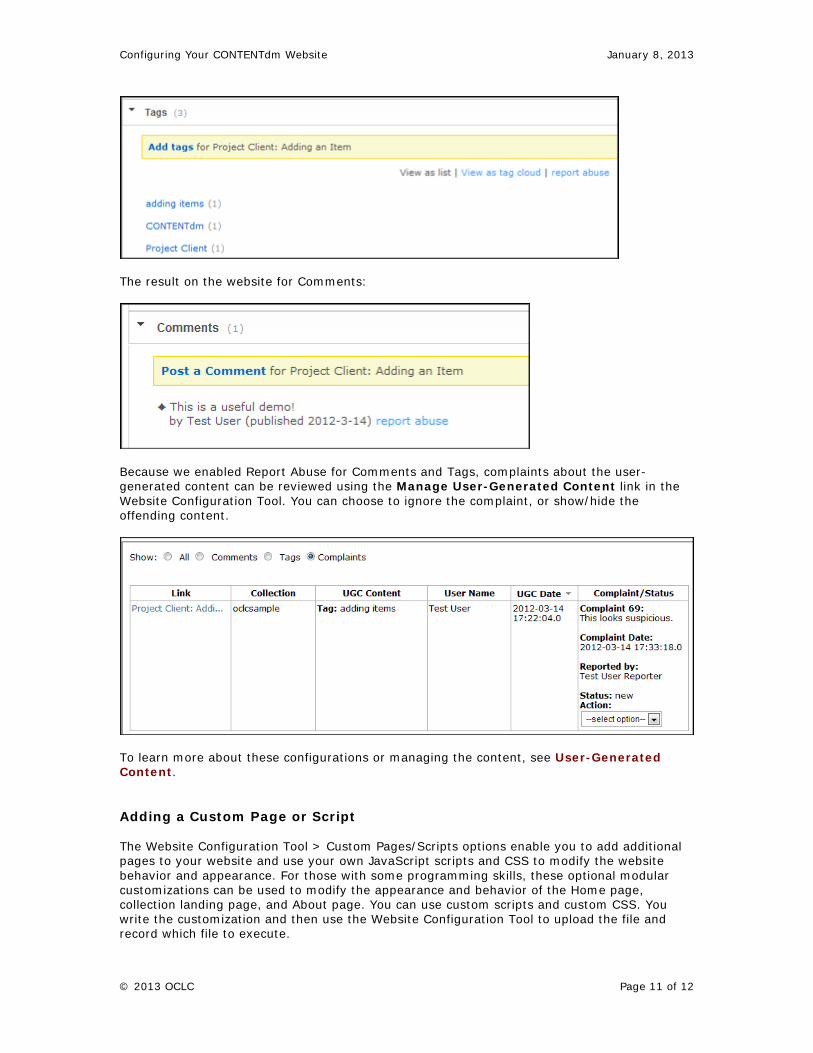
The result on the website for Tags:
Configuring Your CONTENTdm Website January 8, 2013
© 2013 OCLC Page 11 of 12
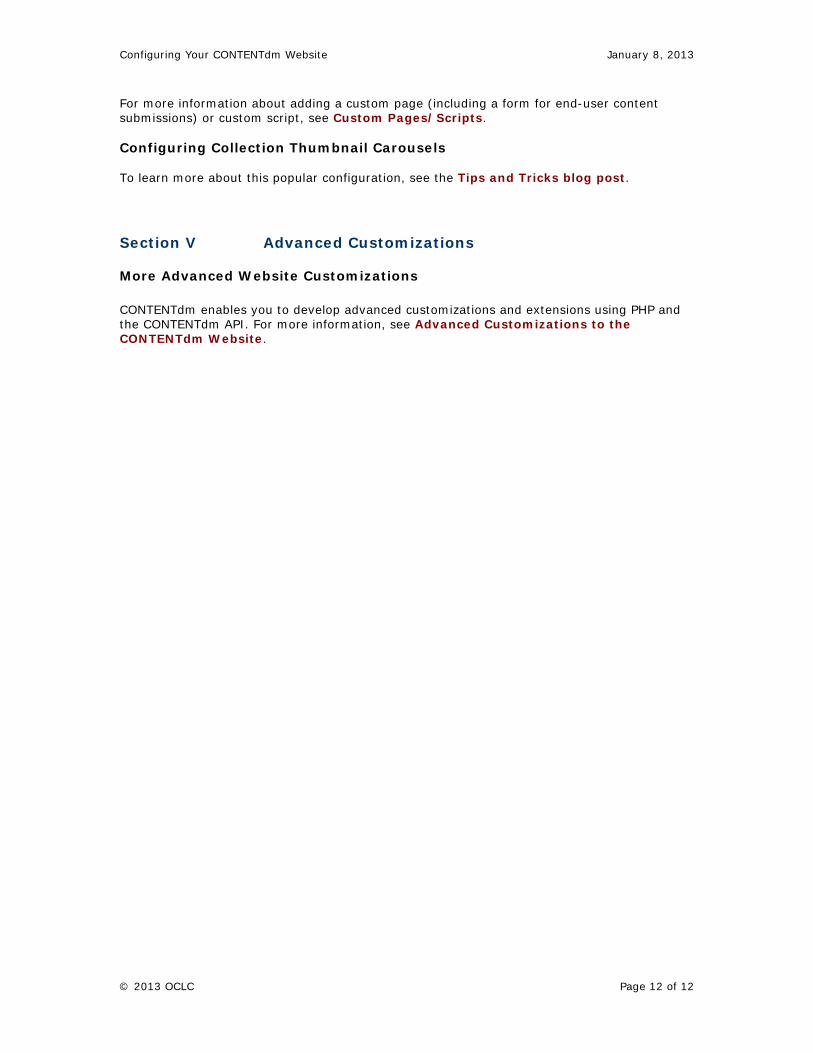
The result on the website for Comments:
Because we enabled Report Abuse for Comments and Tags, complaints about the user-generated content can be reviewed using the Manage User-Generated Content link in the Website Configuration Tool. You can choose to ignore the complaint, or show/hide the offending content.
To learn more about these configurations or managing the content, see User-Generated Content. Adding a Custom Page or Script The Website Configuration Tool > Custom Pages/Scripts options enable you to add additional pages to your website and use your own JavaScript scripts and CSS to modify the website behavior and appearance. For those with some programming skills, these optional modular customizations can be used to modify the appearance and behavior of the Home page, collection landing page, and About page. You can use custom scripts and custom CSS. You write the customization and then use the Website Configuration Tool to upload the file and record which file to execute.
Configuring Your CONTENTdm Website January 8, 2013
© 2013 OCLC Page 12 of 12
For more information about adding a custom page (including a form for end-user content submissions) or custom script, see Custom Pages/Scripts. Configuring Collection Thumbnail Carousels To learn more about this popular configuration, see the Tips and Tricks blog post.
Section V Advanced Customizations
More Advanced Website Customizations CONTENTdm enables you to develop advanced customizations and extensions using PHP and the CONTENTdm API. For more information, see Advanced Customizations to the CONTENTdm Website.