configuring the global navigation satellite system · configuring the global navigation satellite...
TRANSCRIPT

Configuring the Global Navigation SatelliteSystem
Effective Cisco IOS-XE Release 3.17, the Cisco ASR 903 (with RSP3 module) and Cisco ASR 907 routeruses a satellite receiver, also called the global navigation satellite system (GNSS), as a new timing interface.
In typical telecom networks, synchronization works in a hierarchal manner where the core network is connectedto a stratum-1 clock and this clock is then distributed along the network in a tree-like structure. However,with a GNSS receiver, clocking is changed to a flat architecture where access networks can directly take clockfrom satellites in sky using an on-board GPS chips.
This capability simplifies network synchronization planning, provides flexibility and resilience in resolvingnetwork synchronization issues in the hierarchical network.
• Information About the GNSS, on page 1• How to Configure the GNSS, on page 3• Configuration Example For Configuring GNSS, on page 6• Additional References, on page 6
Information About the GNSS
Overview of the GNSS ModuleThe GNSSmodule is present on the front panel of the RSP3 module and can be ordered separately with PID=.However, there is no license required to enable the GNSS module.
The GNSS LED on the RSP3 front panel indicates the status of the module. The following table explains thedifferent LED status.
DescriptionLEDStatus
GNSSNormal State. Self survey is complete.Green
All other statesAmber
When connected to an external antenna, the module can acquire satellite signals and track up to 32 GNSSsatellites, and compute location, speed, heading, and time. GNSS provides an accurate one pulse-per-second
Configuring the Global Navigation Satellite System1
(PPS), a stable 10MHz frequency output to synchronize broadband wireless, aggregation and pre-aggregationrouters, and an accurate time-of-day (ToD).
The RSP3 module can also receive 1PPS, 10 MHz, and ToD signals from an external clocking and timingsource. However, the timing signals from the GNSS module (when enabled) take precedence over those ofthe external source.
Note
By default, anti-jamming is enabled on the GNSS module.
Operation of the GNSS ModuleThe GNSS module has the following stages of acquiring and providing timing signals to the Cisco router:
• Self-Survey Mode—When the router is reset, the GNSS module comes up in self-survey mode. It triesto lock on to minimum four different satellites and computes approximately 2000 different positions ofthe satellites to obtain a 3-D location (Latitude, Longitude, and Height) of it current position. Thisoperation takes about 35-to-40 minutes. During this stage also, the module is able to generate accuratetiming signals and achieve a Normal or Phase-locked state.
When GNSS moves into Normal state, you can start using the 1PPS, 10 MHz, and ToD inputs from GNSS.The quality of the signal in Self-Survey mode with Normal state is considered good enough to lock to GNSS.
• Over determined clock mode—The router switches to over determined (OD) mode when the self-surveymode is complete and the position information is stored in non-volatile memory on the router. In thismode, themodule only processes the timing information based on satellite positions captured in self-surveymode.
The router saves the tracking data, which is retained even when the router is reloaded. If you want to changethe tracking data, use the no shutdown command to set the GNSS interface to its default value.
The GNSS module stays in the OD mode unless one of the following conditions occur:
• A position relocation of the antenna of more than 100 meters is detected. This detection causes anautomatic restart of the self-survey mode.
• A manual restart of the self-survey mode or when the stored reference position is deleted.
• A worst-case recovery option after a jamming-detection condition that cannot be resolved with othermethods.
You can configure the GNSS module to automatically track any satellite or configure it to explicitly use aspecific constellation. However, the module uses configured satellites only in the OD mode.
GLONASS and BeiDou satellites cannot be enabled simultaneously. GALILEO is not supported.Note
When the router is reloaded, it always comes up in the OD mode unless:
• the router is reloaded when the Self-Survey mode is in progress
• the physical location of the router is changed to more than 100 m from it’s pre-reloaded condition.
Configuring the Global Navigation Satellite System2
Configuring the Global Navigation Satellite SystemOperation of the GNSS Module

When the GNSS self-survey is restarted using the default gnss slot R0/R1 command in config mode, the10MHz, 1PPS, and ToD signals are not changed and remain up.
High Availability for GNSSThe Cisco ASR 903 and Cisco ASR 907 routers have two GNSSmodules, one each on the active and standbyRSP3 modules. Each GNSS module must have a separate connection to the antenna in case of an RSP3switchover.
Prerequisites for GNSSTo use GNSS:
• 1PPS, 10 MHz, and ToD must be configured for netsync and PTP. For more information see theConfiguring Clocking and Timing chapter in the Cisco ASR 903 Router Chassis Software ConfigurationGuide .
• The antenna should see as much as possible from the total sky. For proper timing, minimum of foursatellites should be locked. For information, see the Cisco ASR 903 Series Aggregation Services RouterHardware Installation Guide .
Restrictions for GNSS• The GNSSmodule is not supported through SNMP; all configurations are performed through commands.
• On HA system, the traps from the standby system are logged to the console as the SNMP infra does notget enabled on standby RSP module.
• GNSS objects or performance counters are updated every 5 seconds locally and acknowledge the MIBobject request accordingly.
• GNSS traps generation is delayed for 300 seconds for the first time after system startes to avoid any dropof GNSS traps.
How to Configure the GNSS
To know more about the commands referenced in this document, see the Cisco IOS Master Command List .Note
Enabling the GNSS on the Cisco Router
enableconfigure terminalgnss slot r0no shutdownexit
Configuring the Global Navigation Satellite System3
Configuring the Global Navigation Satellite SystemHigh Availability for GNSS
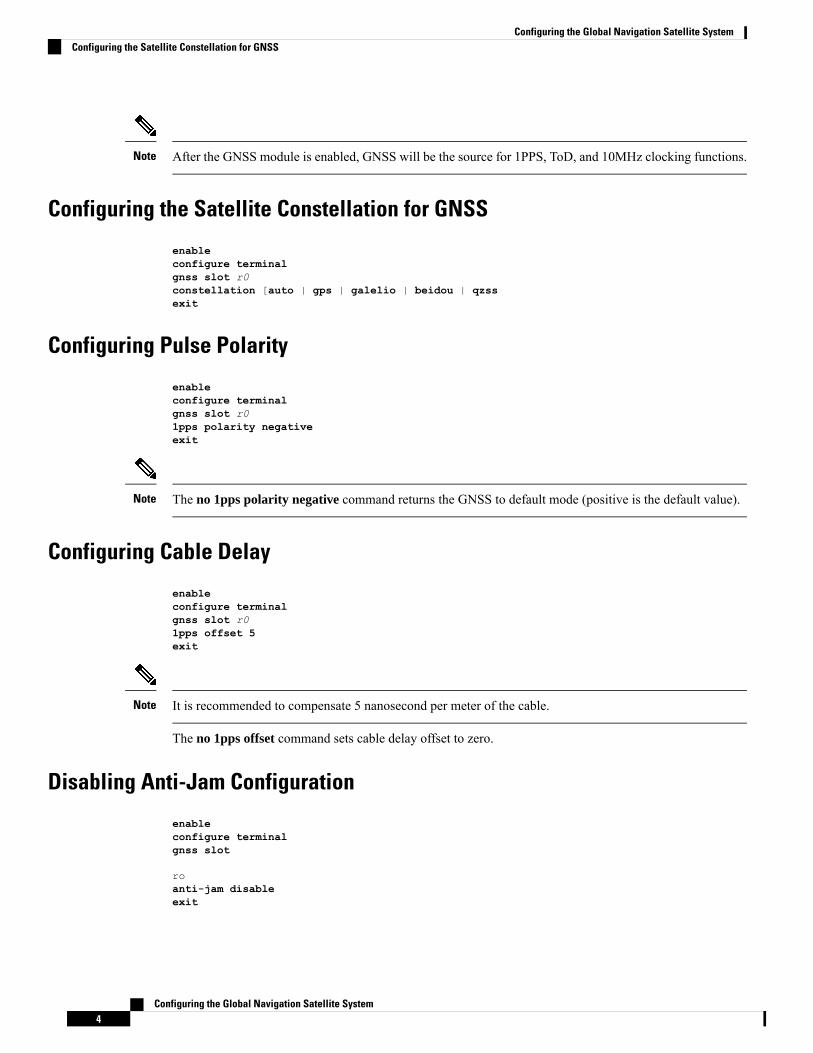
After the GNSS module is enabled, GNSS will be the source for 1PPS, ToD, and 10MHz clocking functions.Note
Configuring the Satellite Constellation for GNSS
enableconfigure terminalgnss slot r0constellation [auto | gps | galelio | beidou | qzssexit
Configuring Pulse Polarity
enableconfigure terminalgnss slot r01pps polarity negativeexit
The no 1pps polarity negative command returns the GNSS to default mode (positive is the default value).Note
Configuring Cable Delay
enableconfigure terminalgnss slot r01pps offset 5exit
It is recommended to compensate 5 nanosecond per meter of the cable.Note
The no 1pps offset command sets cable delay offset to zero.
Disabling Anti-Jam Configuration
enableconfigure terminalgnss slot
roanti-jam disableexit
Configuring the Global Navigation Satellite System4
Configuring the Global Navigation Satellite SystemConfiguring the Satellite Constellation for GNSS
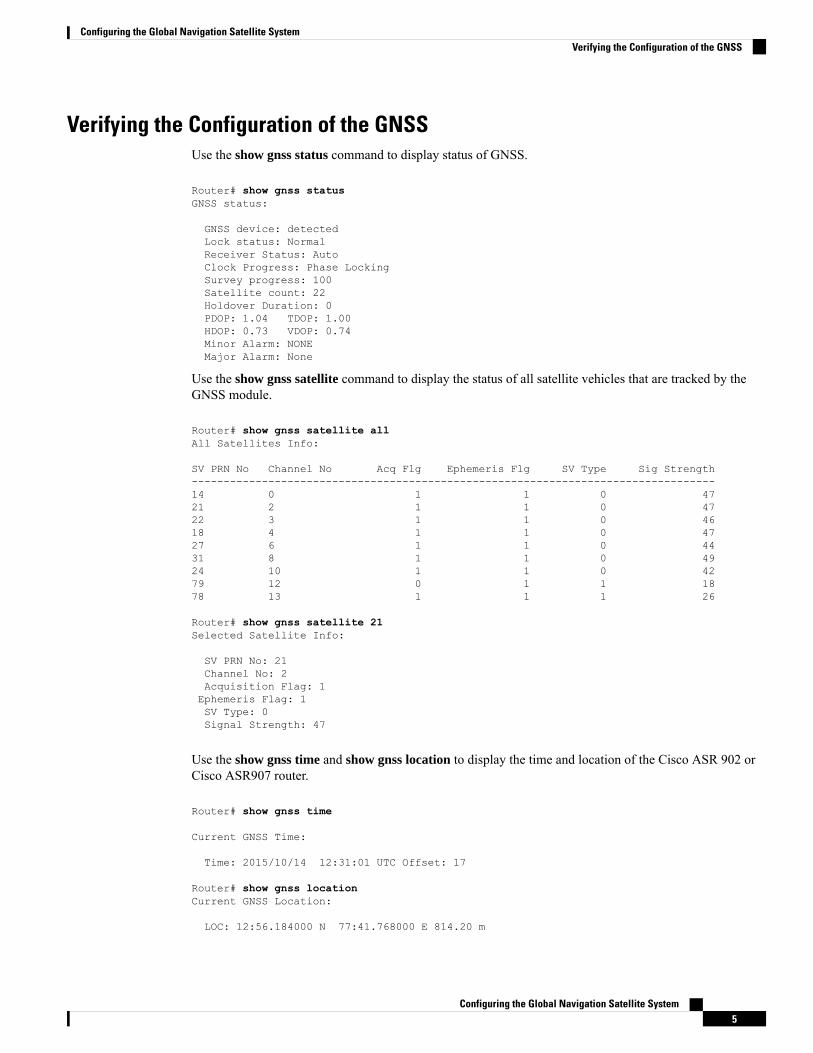
Verifying the Configuration of the GNSSUse the show gnss status command to display status of GNSS.
Router# show gnss statusGNSS status:
GNSS device: detectedLock status: NormalReceiver Status: AutoClock Progress: Phase LockingSurvey progress: 100Satellite count: 22Holdover Duration: 0PDOP: 1.04 TDOP: 1.00HDOP: 0.73 VDOP: 0.74Minor Alarm: NONEMajor Alarm: None
Use the show gnss satellite command to display the status of all satellite vehicles that are tracked by theGNSS module.
Router# show gnss satellite allAll Satellites Info:
SV PRN No Channel No Acq Flg Ephemeris Flg SV Type Sig Strength----------------------------------------------------------------------------------14 0 1 1 0 4721 2 1 1 0 4722 3 1 1 0 4618 4 1 1 0 4727 6 1 1 0 4431 8 1 1 0 4924 10 1 1 0 4279 12 0 1 1 1878 13 1 1 1 26
Router# show gnss satellite 21Selected Satellite Info:
SV PRN No: 21Channel No: 2Acquisition Flag: 1Ephemeris Flag: 1SV Type: 0Signal Strength: 47
Use the show gnss time and show gnss location to display the time and location of the Cisco ASR 902 orCisco ASR907 router.
Router# show gnss time
Current GNSS Time:
Time: 2015/10/14 12:31:01 UTC Offset: 17
Router# show gnss locationCurrent GNSS Location:
LOC: 12:56.184000 N 77:41.768000 E 814.20 m
Configuring the Global Navigation Satellite System5
Configuring the Global Navigation Satellite SystemVerifying the Configuration of the GNSS
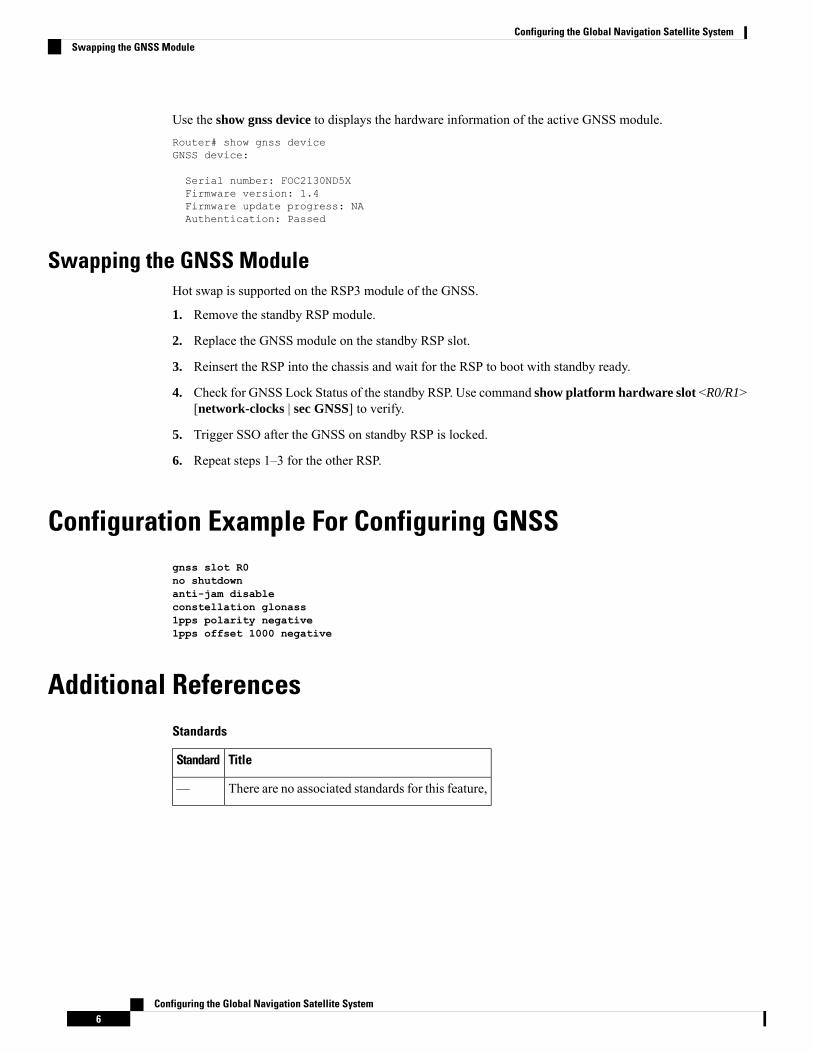
Use the show gnss device to displays the hardware information of the active GNSS module.Router# show gnss deviceGNSS device:
Serial number: FOC2130ND5XFirmware version: 1.4Firmware update progress: NAAuthentication: Passed
Swapping the GNSS ModuleHot swap is supported on the RSP3 module of the GNSS.
1. Remove the standby RSP module.
2. Replace the GNSS module on the standby RSP slot.
3. Reinsert the RSP into the chassis and wait for the RSP to boot with standby ready.
4. Check for GNSS Lock Status of the standby RSP. Use command show platform hardware slot <R0/R1>[network-clocks | sec GNSS] to verify.
5. Trigger SSO after the GNSS on standby RSP is locked.
6. Repeat steps 1–3 for the other RSP.
Configuration Example For Configuring GNSSgnss slot R0no shutdownanti-jam disableconstellation glonass1pps polarity negative1pps offset 1000 negative
Additional ReferencesStandards
TitleStandard
There are no associated standards for this feature,—
Configuring the Global Navigation Satellite System6
Configuring the Global Navigation Satellite SystemSwapping the GNSS Module
MIBs
MIBs LinkMIB
To locate and download MIBs for selected platforms, Cisco softwarereleases, and feature sets, use Cisco MIB Locator found at the followingURL:
http://www.cisco.com/go/mibs
• There are no MIBs for thisfeature.
RFCs
TitleRFC
There are no associated RFCs for this feature.—
Configuring the Global Navigation Satellite System7
Configuring the Global Navigation Satellite SystemAdditional References

Configuring the Global Navigation Satellite System8
Configuring the Global Navigation Satellite SystemAdditional References