configuring keychain management - cisco · default settings forkeychain management...
TRANSCRIPT

Configuring Keychain Management
This chapter describes how to configure keychain management on a Cisco NX-OS device.
This chapter includes the following sections:
• About Keychain Management, on page 1• Licensing Requirements for Keychain Management, on page 2• Prerequisites for Keychain Management, on page 2• Guidelines and Limitations for Keychain Management, on page 2• Default Settings for Keychain Management, on page 3• Configuring Keychain Management, on page 3• Determining Active Key Lifetimes, on page 9• Verifying the Keychain Management Configuration, on page 9• Configuration Example for Keychain Management, on page 9• Where to Go Next, on page 10• Additional References for Keychain Management, on page 10
About Keychain ManagementKeychain management allows you to create and maintain keychains, which are sequences of keys (sometimescalled shared secrets). You can use keychains with features that secure communications with other devicesby using key-based authentication. The device allows you to configure multiple keychains.
Some routing protocols that support key-based authentication can use a keychain to implement a hitless keyrollover for authentication. For more information, see the Cisco Nexus 9000 Series NX-OS Unicast RoutingConfiguration Guide.
Lifetime of a KeyTomaintain stable communications, each device that uses a protocol that is secured by key-based authenticationmust be able to store and use more than one key for a feature at the same time. Based on the send and acceptlifetimes of a key, keychain management provides a secure mechanism to handle key rollover. The deviceuses the lifetimes of keys to determine which keys in a keychain are active.
Each key in a keychain has two lifetimes, as follows:
Configuring Keychain Management1
Accept lifetime
The time interval within which the device accepts the key during a key exchange with another device.
Send lifetime
The time interval within which the device sends the key during a key exchange with another device.
You define the send and accept lifetimes of a key using the following parameters:
Start-time
The absolute time that the lifetime begins.
End-time
The end time can be defined in one of the following ways:
• The absolute time that the lifetime ends
• The number of seconds after the start time that the lifetime ends
• Infinite lifetime (no end-time)
During a key send lifetime, the device sends routing update packets with the key. The device does not acceptcommunication from other devices when the key sent is not within the accept lifetime of the key on the device.
We recommend that you configure key lifetimes that overlap within every keychain. This practice avoidsfailure of neighbor authentication due to the absence of active keys.
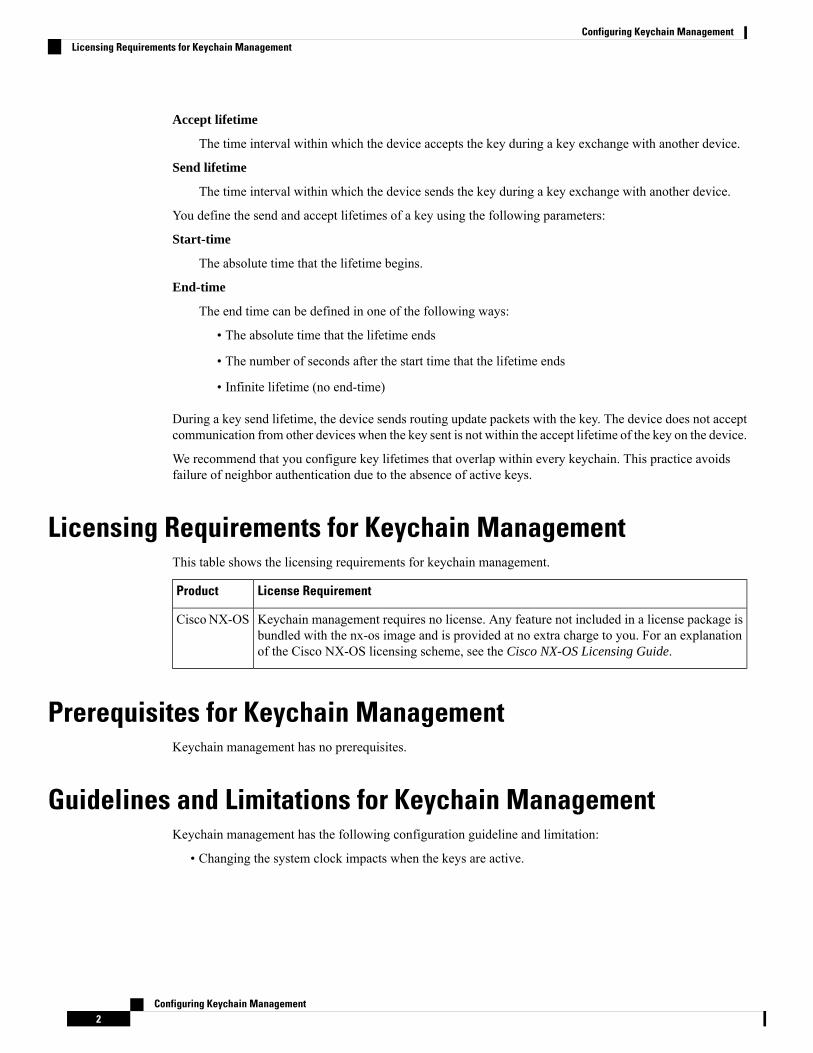
Licensing Requirements for Keychain ManagementThis table shows the licensing requirements for keychain management.
License RequirementProduct
Keychain management requires no license. Any feature not included in a license package isbundled with the nx-os image and is provided at no extra charge to you. For an explanationof the Cisco NX-OS licensing scheme, see the Cisco NX-OS Licensing Guide.
Cisco NX-OS
Prerequisites for Keychain ManagementKeychain management has no prerequisites.
Guidelines and Limitations for Keychain ManagementKeychain management has the following configuration guideline and limitation:
• Changing the system clock impacts when the keys are active.
Configuring Keychain Management2
Configuring Keychain ManagementLicensing Requirements for Keychain Management

Default Settings for Keychain ManagementThis table lists the default settings for Cisco NX-OS keychain management parameters.
Table 1: Default Keychain Management Parameters
DefaultParameters
No keychain exists by default.Key chains
No keys are created by default when you create a new keychain.Keys
Always valid.Accept lifetime
Always valid.Send lifetime
Unencrypted.Key-string entry encryption
Configuring Keychain Management
Creating a KeychainYou can create a keychain on the device. A new keychain contains no keys.
SUMMARY STEPS
1. configure terminal2. key chain name
3. (Optional) show key chain name
4. (Optional) copy running-config startup-config
DETAILED STEPS
PurposeCommand or Action
Enters global configuration mode.configure terminal
Example:
Step 1
switch# configure terminalswitch(config)#
Creates the keychain and enters keychain configurationmode.
key chain name
Example:
Step 2
switch(config)# key chain bgp-keysswitch(config-keychain)#
Displays the keychain configuration.(Optional) show key chain name
Example:
Step 3
Configuring Keychain Management3
Configuring Keychain ManagementDefault Settings for Keychain Management

PurposeCommand or Actionswitch(config-keychain)# show key chain bgp-keys
Copies the running configuration to the startupconfiguration.
(Optional) copy running-config startup-config
Example:
Step 4
switch(config-keychain)# copy running-configstartup-config
Removing a KeychainYou can remove a keychain on the device.
Removing a keychain removes any keys within the keychain.Note
Before you begin
If you are removing a keychain, ensure that no feature uses it. If a feature is configured to use a keychain thatyou remove, that feature is likely to fail to communicate with other devices.
SUMMARY STEPS
1. configure terminal2. no key chain name
3. (Optional) show key chain name
4. (Optional) copy running-config startup-config
DETAILED STEPS
PurposeCommand or Action
Enters global configuration mode.configure terminal
Example:
Step 1
switch# configure terminalswitch(config)#
Removes the keychain and any keys that the keychaincontains.
no key chain name
Example:
Step 2
switch(config)# no key chain bgp-keys
Confirms that the keychain no longer exists in runningconfiguration.
(Optional) show key chain name
Example:
Step 3
switch(config-keychain)# show key chain bgp-keys
Copies the running configuration to the startupconfiguration.
(Optional) copy running-config startup-config
Example:
Step 4
Configuring Keychain Management4
Configuring Keychain ManagementRemoving a Keychain

PurposeCommand or Actionswitch(config-keychain)# copy running-configstartup-config
Configuring a Master Key and Enabling the AES Password Encryption FeatureYou can configure a master key for type-6 encryption and enable the Advanced Encryption Standard (AES)password encryption feature.
SUMMARY STEPS
1. [no] key config-key ascii2. configure terminal3. [no] feature password encryption aes4. (Optional) show encryption service stat5. copy running-config startup-config
DETAILED STEPS
PurposeCommand or Action
Configures a master key to be used with the AES passwordencryption feature. The master key can contain between 16
[no] key config-key ascii
Example:
Step 1
and 32 alphanumeric characters. You can use the no formof this command to delete the master key at any time.switch# key config-key ascii
New Master Key:Retype Master Key: If you enable the AES password encryption feature before
configuring a master key, a message appears stating thatpassword encryption will not take place unless a master keyis configured. If a master key is already configured, you areprompted to enter the current master key before entering anew master key.
Enters global configuration mode.configure terminal
Example:
Step 2
switch# configure terminalswitch(config)#
Enables or disables the AES password encryption feature.[no] feature password encryption aes
Example:
Step 3
switch(config)# feature password encryption aes
Displays the configuration status of the AES passwordencryption feature and the master key.
(Optional) show encryption service stat
Example:
Step 4
switch(config)# show encryption service stat
Copies the running configuration to the startupconfiguration.
Required: copy running-config startup-config
Example:
Step 5
Configuring Keychain Management5
Configuring Keychain ManagementConfiguring a Master Key and Enabling the AES Password Encryption Feature

PurposeCommand or Actionswitch(config)# copy running-config startup-config This command is necessary to synchronize the
master key in the running configuration and thestartup configuration.
Note
Configuring Text for a KeyYou can configure the text for a key. The text is the shared secret. The device stores the text in a secure format.
By default, accept and send lifetimes for a key are infinite, which means that the key is always valid. Afteryou configure the text for a key, configure the accept and send lifetimes for the key.
Before you begin
Determine the text for the key. You can enter the text as unencrypted text or in the encrypted form that CiscoNX-OS uses to display key text when you use the show key chain command. Using the encrypted form isparticularly helpful if you are creating key text to match a key as shown in the show key chain commandoutput from another device.
SUMMARY STEPS
1. configure terminal2. key chain name
3. key key-ID
4. key-string [encryption-type] text-string
5. (Optional) show key chain name [mode decrypt]6. (Optional) copy running-config startup-config
DETAILED STEPS
PurposeCommand or Action
Enters global configuration mode.configure terminal
Example:
Step 1
switch# configure terminalswitch(config)#
Enters keychain configuration mode for the keychain thatyou specified.
key chain name
Example:
Step 2
switch(config)# key chain bgp-keysswitch(config-keychain)#
Enters key configuration mode for the key that youspecified. The key-ID argument must be a whole numberbetween 0 and 65535.
key key-ID
Example:switch(config-keychain)# key 13switch(config-keychain-key)#
Step 3
Configuring Keychain Management6
Configuring Keychain ManagementConfiguring Text for a Key

PurposeCommand or Action
Configures the text string for the key. The text-stringargument is alphanumeric, case-sensitive, and supportsspecial characters.
key-string [encryption-type] text-string
Example:switch(config-keychain-key)# key-string 0AS3cureStr1ng
Step 4
The encryption-type argument can be one of the followingvalues:
• 0—The text-string argument that you enter isunencrypted text. This is the default.
• 7—The text-string argument that you enter isencrypted. The encryption method is a Ciscoproprietary method. This option is useful when youare entering a text string based on the encrypted outputof a show key chain command that you ran on anotherCisco NX-OS device.
Shows the keychain configuration, including the key textconfiguration. The mode decrypt option, which can be used
(Optional) show key chain name [mode decrypt]
Example:
Step 5
by a device administrator only, displays the keys incleartext.switch(config-keychain-key)# show key chain
bgp-keys
Copies the running configuration to the startupconfiguration.
(Optional) copy running-config startup-config
Example:
Step 6
switch(config-keychain-key)# copy running-configstartup-config
Configuring Accept and Send Lifetimes for a KeyYou can configure the accept lifetime and send lifetime for a key. By default, accept and send lifetimes for akey are infinite, which means that the key is always valid.
We recommend that you configure the keys in a keychain to have overlapping lifetimes. This practice preventsloss of key-secured communication due to moments where no key is active.
Note
SUMMARY STEPS
1. configure terminal2. key chain name
3. key key-ID
4. accept-lifetime [local] start-time duration duration-value | infinite | end-time]5. send-lifetime [local] start-time duration duration-value | infinite | end-time]6. (Optional) show key chain name [mode decrypt]7. (Optional) copy running-config startup-config
Configuring Keychain Management7
Configuring Keychain ManagementConfiguring Accept and Send Lifetimes for a Key

DETAILED STEPS
PurposeCommand or Action
Enters global configuration mode.configure terminal
Example:
Step 1
switch# configure terminalswitch(config)#
Enters keychain configuration mode for the keychain thatyou specified.
key chain name
Example:
Step 2
switch(config)# key chain bgp-keysswitch(config-keychain)#
Enters key configuration mode for the key that youspecified.
key key-ID
Example:
Step 3
switch(config-keychain)# key 13switch(config-keychain-key)#
Configures an accept lifetime for the key. By default, thedevice treats the start-time and end-time arguments as
accept-lifetime [local] start-time duration duration-value| infinite | end-time]
Step 4
UTC. If you specify the local keyword, the device treatsthese times as local times.Example:
switch(config-keychain-key)# accept-lifetime00:00:00 Jun 13 2013 23:59:59 Sep 12 2013 The start-time argument is the time of day and date that
the key becomes active.
Specify the end of the lifetime with one of the followingoptions:
• duration duration-value—The length of the lifetimein seconds. The maximum length is 2147483646seconds (approximately 68 years).
• infinite—The accept lifetime of the key never expires.
• end-time —The end-time argument is the time of dayand date that the key becomes inactive.
Configures a send lifetime for the key. By default, the devicetreats the start-time and end-time arguments as UTC. If
send-lifetime [local] start-time duration duration-value |infinite | end-time]
Step 5
you specify the local keyword, the device treats these timesas local times.Example:
switch(config-keychain-key)# send-lifetime 00:00:00Jun 13 2013 23:59:59 Aug 12 2013 The start-time argument is the time of day and date that
the key becomes active.
You can specify the end of the send lifetime with one ofthe following options:
• duration duration-value—The length of the lifetimein seconds. The maximum length is 2147483646seconds (approximately 68 years).
• infinite—The send lifetime of the key never expires.
Configuring Keychain Management8
Configuring Keychain ManagementConfiguring Accept and Send Lifetimes for a Key

PurposeCommand or Action
• end-time —The end-time argument is the time of dayand date that the key becomes inactive.
Shows the keychain configuration, including the key textconfiguration. The mode decrypt option, which can be used
(Optional) show key chain name [mode decrypt]
Example:
Step 6
by a device administrator only, displays the keys incleartext.switch(config-keychain-key)# show key chain
bgp-keys
Copies the running configuration to the startupconfiguration.
(Optional) copy running-config startup-config
Example:
Step 7
switch(config-keychain-key)# copy running-configstartup-config
Determining Active Key LifetimesTo determine which keys within a key chain have active accept or send lifetimes, use the command in thistable.
PurposeCommand
Displays the key chains configured on the device.show key chain
Verifying the Keychain Management ConfigurationTo display keychain management configuration information, perform the following task:
PurposeCommand
Displays the keychains configured on the device.show key chain name
Configuration Example for Keychain ManagementThis example shows how to configure a keychain named bgp keys. Each key text string is encrypted.Each key has longer accept lifetimes than send lifetimes, to help prevent lost communications byaccidentally configuring a time in which there are no active keys.key chain bgp-keyskey 0key-string 7 zqdestaccept-lifetime 00:00:00 Jun 01 2013 23:59:59 Sep 12 2013send-lifetime 00:00:00 Jun 01 2013 23:59:59 Aug 12 2013
key 1key-string 7 uaeqdyitoaccept-lifetime 00:00:00 Aug 12 2013 23:59:59 May 12 2013send-lifetime 00:00:00 Sep 12 2013 23:59:59 Aug 12 2013
key 2
Configuring Keychain Management9
Configuring Keychain ManagementDetermining Active Key Lifetimes

key-string 7 eekgsdydaccept-lifetime 00:00:00 Nov 12 2013 23:59:59 Mar 12 2013send-lifetime 00:00:00 Dec 12 2013 23:59:59 Feb 12 2013
Where to Go NextFor information about routing features that use keychains, see the Cisco Nexus 9000 Series NX-OS UnicastRouting Configuration Guide.
Additional References for Keychain ManagementRelated Documents
Document TitleRelated Topic
Cisco Nexus 9000 Series NX-OS Unicast Routing Configuration GuideBorder Gateway Protocol
Cisco Nexus 9000 Series NX-OS Unicast Routing Configuration GuideOSPFv2
Standards
TitleStandards
—No new or modified standards are supported by this feature, and support for existing standards has notbeen modified by this feature.
Configuring Keychain Management10
Configuring Keychain ManagementWhere to Go Next