computer fundamentals and photoshop lab...
TRANSCRIPT

Computer Fundamentals and Photoshop Lab manual
Ch. Anil Kumar Page 1
1. Create your Visiting card
Step 1: Crate New document:
Go to file menu and select new option
It will displays new dialog box
In this dialog box enter the size of visiting card (width 3.75 inches, height
2.25 inches)
Select colour mode CMYK and background contents as transparent and
then press “OK” button.
Document created.
Step 2: Setting margins:
Go to view menu and select rules option
Rulers will enable to our document
Click on the ruler on each edge, and drag the blue lines to 0.125 inches
Repeat this process on top, bottom, left and right sides of this document
Step 3: Enter data:
Change background of this document by selecting a good background
image
Press horizontal type tool and place it in top of this document

Computer Fundamentals and Photoshop Lab manual
Ch. Anil Kumar Page 2
Type your name and highlight it by using options available in the options
bar.
Press horizontal type tool and place it in middle of this document
Type your address, phone number, email id, etc. change this format of this
text by using options available in the options bar.
Go to file menu and select open option
On the open dialog box select your photograph and click open button
Your photograph will be opened, copy this image and paste this image at
current document
Reduce the image size and position this image at convenient place.
If any relevant information you want to place in the visiting card, then
insert them
Your visiting card is ready, save this document.
Output:

Computer Fundamentals and Photoshop Lab manual
Ch. Anil Kumar Page 3
2. Create Cover page for any text book
Step 1: Crate New document:
Calculate the height and width of the book
Go to file menu and select new option, it will displays new dialog box.
In this dialog box, enter the measurements of your book
Press “OK” button, then your document will be created.
Step 2: Setting margins:
Go to view menu and select rules option
Rulers will enable to our document
Place horizontal and guides
Step 3: Enter data:
Set background of the cover page
Enter text book title by using horizontal typing tool
Insert any image that related to the subject in the middle
Type author of this text book by using horizontal typing tool
Enter and format any relevant information for this book.
After completion save this image in .psd format.
Your text book cover page is ready and take a print out.

Computer Fundamentals and Photoshop Lab manual
Ch. Anil Kumar Page 4
Output:

Computer Fundamentals and Photoshop Lab manual
Ch. Anil Kumar Page 5
3. Create a Paper ad for advertisement.
Step 1: Crate New document:
Calculate the height and width for your ad based on information
Go to file menu and select new option, it will displays new dialog box.
In this dialog box, enter the measurements of your ad already measured.
For example size = 4 inches height and 2.5 inches width.
Press “OK” button, then your document will be created.
Step 2: Enter data:
Put rectangular box on the top of the document by using Rectangle tool.
Type title of the ad inside rectangle and highlight it by using horizontal
typing tool.
Type the information about the advertisement by using horizontal typing
tool and format as your wish.
Insert any relevant image that is related to this subject.
Save this document in .psd format
Your ad is ready.
Output:

Computer Fundamentals and Photoshop Lab manual
Ch. Anil Kumar Page 6
4. Design a Passport photo
STEP 1
Go to “File” and select “Open”. Choose the picture from the above folder and
open the selected image.
STEP 2
Select the “Crop Tool”, change the width to 2in and height 2in, Resolution: 300
pixel/inch. US passport size is 2” by 2”.
STEP 3
Move the crop tool to the image and crop it by double click the mouse.
STEP 4
Go to “File” and choose for “New”. Look for the Preset sizes 4in X 6in, Mode
RGB color and click “OK” This will create a new layer.
STEP 5
Hold “ALT” key and using the “move tool” to drag the image to the new layer.
Repeat it twice and now you get 2 images in one layer. Repeat the same process
until 8 images in the 4X6 size card.

Computer Fundamentals and Photoshop Lab manual
Ch. Anil Kumar Page 7
STEP 6
Go to “File” and select “Save As”, name the file as “My Passport” and SAVE.
Output:

Computer Fundamentals and Photoshop Lab manual
Ch. Anil Kumar Page 8
5. Create a Pamphlet for any program to be conducted by an organisation
Step 1: Crate New document:
1. Before going to design first decide the size of the pamphlet
2. Go to Photoshop file menu and click new option
3. It will displays new dialog box
4. In that dialog box enter the size of the pamphlet (ex: width=6, Height=8)
5. New document will be created
Step 2: Enter data:
6. This document will be used for front side of the pamphlet
7. Now I am creating pamphlet for my college
8. Change the background of the document by inserting a good looking
designed image.
9. On the top of the document put horizontal typing tool and type college
name
10. Highlight the college name entered
11. Insert college logo below the college name
12. Type address of the college
13. Insert any image of your college.
14. Crate a new document of the same size for back side of the pamphlet
15. After that enter the following data like, courses offered, results, placements
of the previous year, facilities available in the college, etc.
16. Change the format of the text for each item.
17. After that go to file menu and select save option.
18. Save this document in .psd format
19. Your pamphlet is ready, take a print out.

Computer Fundamentals and Photoshop Lab manual
Ch. Anil Kumar Page 9
Output:

Computer Fundamentals and Photoshop Lab manual
Ch. Anil Kumar Page 10
6. Create Broacher for your college
Step 1: Crate New document:
1. Before going to design first decide the size of the broacher
2. Go to Photoshop file menu and click new option
3. It will displays new dialog box
4. In that dialog box enter the size of the broacher (ex: width=6, Height=8)
5. New document will be created
Step 2: Enter data:
6. This document will be used for front side of the broacher
7. Now I am creating broacher for my college
8. Change the background of the document by inserting a good looking
designed image.
9. On the top of the document put horizontal typing tool and type college
name
10. Highlight the college name entered
11. Insert college logo below the college name
12. Type address of the college
13. Insert any image of your college.
14. Crate a new document of the same size for back side of the broacher
15. After that enter the following data like, courses offered, results, placements
of the previous year, facilities available in the college, etc.
16. Change the format of the text for each item.
17. After that go to file menu and select save option.
18. Save this document in .psd format
19. Your broacher is ready, take a print out.

Computer Fundamentals and Photoshop Lab manual
Ch. Anil Kumar Page 11
Output:
Computer Fundamentals and Photoshop Lab manual
Ch. Anil Kumar Page 12
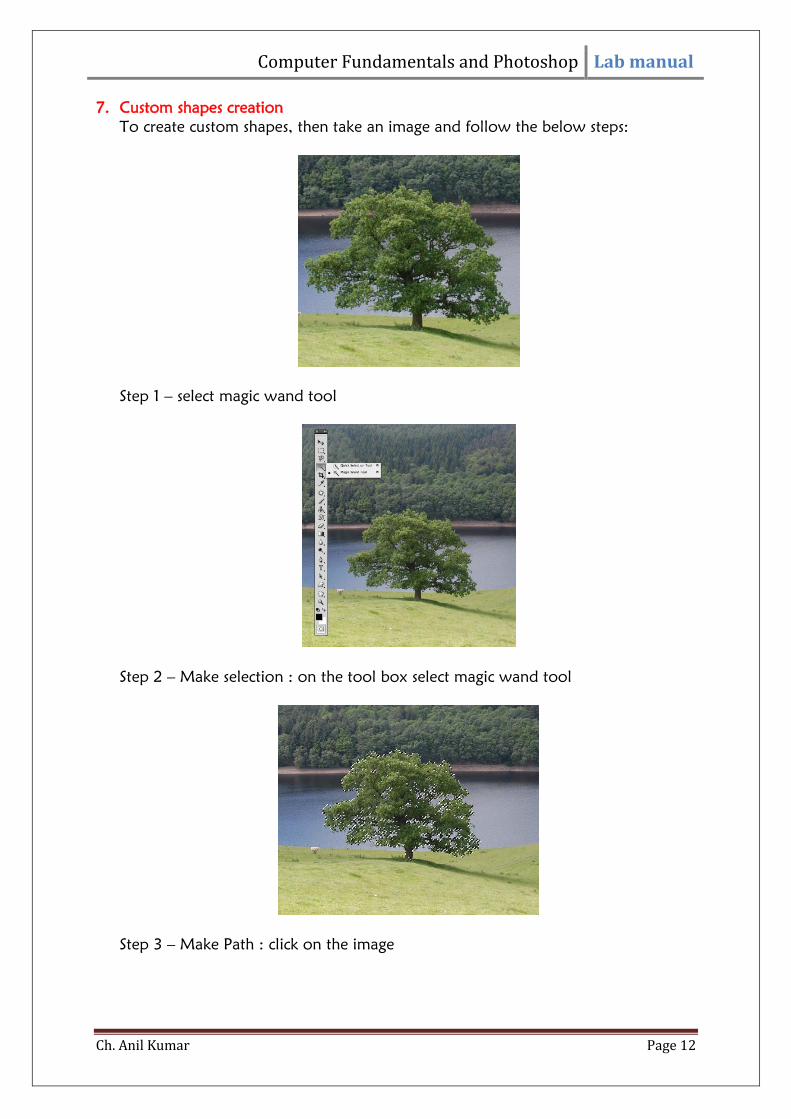
7. Custom shapes creation
To create custom shapes, then take an image and follow the below steps:
Step 1 – select magic wand tool
Step 2 – Make selection : on the tool box select magic wand tool
Step 3 – Make Path : click on the image

Computer Fundamentals and Photoshop Lab manual
Ch. Anil Kumar Page 13
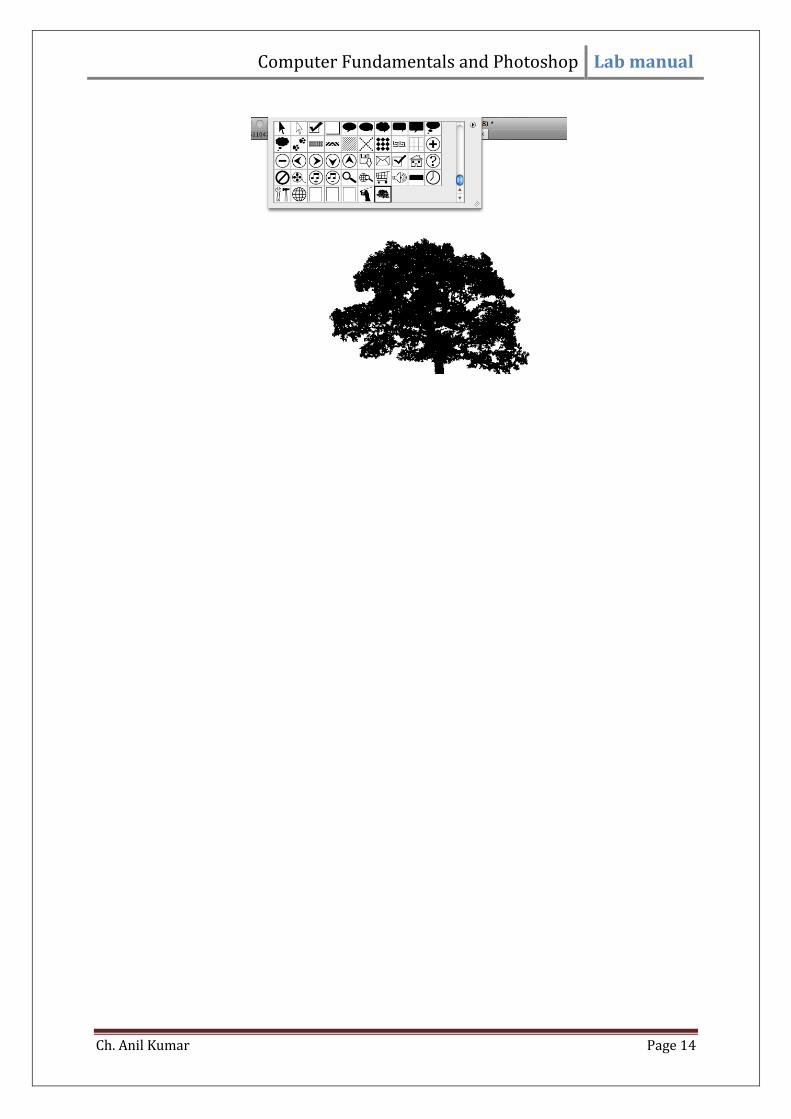
Step 4 – Define Shape:
go to edit menu and select “define custom shape”
it will displays “shape name” dialog box
enter any name on the dialog box and press “ok” button
Shape will be created.
Step 5 – Use the Shape”
Open up a blank document
select your Custom Shape tool (U)
In the Options bar lies all the presets and custom-made shapes
New shapes appear at base of this window
Apply the shape holding Shift to maintain proportions.
Computer Fundamentals and Photoshop Lab manual
Ch. Anil Kumar Page 14

Computer Fundamentals and Photoshop Lab manual
Ch. Anil Kumar Page 15
8. Convert color photo to black and white photo
Open any image in the Photoshop
Go to image menu and select mode option
It will displays a sub menu
In this sub menu select grayscale option
It will erases the all color information and your colour image will be
automatically converted into black and white image as below:

Computer Fundamentals and Photoshop Lab manual
Ch. Anil Kumar Page 16
9. Background change
1. Open the image in Adobe Photoshop using open dialog box
2. Now right click on lasso tool and click on magnetic lasso tool.
3. Then move the tool on the person’s body outline.
4. Right click and click on layer via copy
5. On the layer menu click on new then layer or press Shift+Ctrl+N.
7. Now open the new background image in Photoshop.

Computer Fundamentals and Photoshop Lab manual
Ch. Anil Kumar Page 17
8. Now “select all” the image by pressing Ctrl+A and copy using Ctrl+C.
9. Now paste it on the original image using Ctrl+P.
10. Now delete the layer named “Background”
11. Change the order of the two layers Layer 1 and layer 2.

Computer Fundamentals and Photoshop Lab manual
Ch. Anil Kumar Page 18
12. Now change the size of layer 2 using Ctrl+T.
13. You are done as shown in figure.