authorize.net cim: user manual - magento extensions | …€¦ · · 2016-11-18paradoxlabs | 8 n...
TRANSCRIPT
ParadoxLabs | 8 N Queen St | 9th Floor | Lancaster, PA 17603 | 717-431-3330 1
Authorize.Net CIM: User Manual Version 2.3 – For Magento® 1.x – Updated 2016-11-18
Table of Contents
Installing the Extension.................................................................................................................................................. 2
Updating the Extension ................................................................................................................................................. 2
Configuration ................................................................................................................................................................. 3
General.................................................................................................................................................................. 3
Advanced Settings ................................................................................................................................................. 5
ACH Processing (eCheck) ...................................................................................................................................... 6
Usage ............................................................................................................................................................................. 6
Checkout Payment Form....................................................................................................................................... 6
Order status page ................................................................................................................................................. 8
Customer ‘My Payment Data’ account area ......................................................................................................... 8
Admin order form ................................................................................................................................................. 9
Admin order status page..................................................................................................................................... 10
Admin customer ‘Payment Data’ account area .................................................................................................. 10
Admin transaction info ....................................................................................................................................... 11
Accept.js: Same Authorize.Net, even better security .................................................................................................. 12
What is Accept.js, and why should I care? .......................................................................................................... 12
How do I enable Accept.js? ................................................................................................................................. 12
Possible Accept.js Errors ..................................................................................................................................... 13
Frequently Asked Questions ........................................................................................................................................ 13
Why are my API Login ID and Transaction Key invalid? ...................................................................................... 13
How do I do an online refund from Magento? ................................................................................................... 14
I got an email from Authorize.Net about a new Akamai API endpoint. Does that affect me? ........................... 14
Technical / Integration Details ..................................................................................................................................... 14
Architecture ........................................................................................................................................................ 14
Custom customer attributes ............................................................................................................................... 14
Custom database schema ................................................................................................................................... 15
Events .................................................................................................................................................................. 15
Magento API ....................................................................................................................................................... 15
Support ........................................................................................................................................................................ 18

ParadoxLabs | 8 N Queen St | 9th Floor | Lancaster, PA 17603 | 717-431-3330 2
Installing the Extension
Step 1: Upload files
Upload all files within the upload folder into the root directory of Magento.
Folder in Download Folder on Server
/upload/app/ → /app/
/upload/js/ → /js/
/upload/skin/ → /skin/
Step 2: Flush Cache / Run Installation
To complete the installation process, open the Admin Panel and go to System > Cache Management. Click the
Flush Magento Cache button at the top-right, and wait for the page to finish loading.
If you have Magento's compilation enabled, you also need to recompile. Go to System > Tools > Compilation and
click Run Compilation Process at the top-right to do this.
Step 3: Configure
See the configuration section below.
Updating the Extension
Step 1: Upload files
Upload all files within the upload folder into the root directory of Magento.
Folder in Download Folder on Server
/upload/app/ → /app/
/upload/js/ → /js/
/upload/skin/ → /skin/
Step 2: Flush Cache
To complete the installation process, open the Admin Panel and go to System > Cache Management. Click the
Flush Magento Cache button at the top-right, and wait for the page to finish loading.
If you have Magento's compilation enabled, you also need to recompile. Go to System > Tools > Compilation and
click Run Compilation Process at the top-right to do this.
Step 3: Verify Changes
If you have any integrations or custom functionality based on this extension, we strongly recommend testing to
ensure they are not affected. If you would like details on changes beyond what is provided in the release notes,
you can run a diff between versions or contact us for specifics.
If you have copied our template files to any theme, ensure that any changes to the base templates are reflected
in your copies. Failure to do so may result in errors during checkout or card management.

ParadoxLabs | 8 N Queen St | 9th Floor | Lancaster, PA 17603 | 717-431-3330 3
Configuration Before proceeding: Sign up for an Authorize.Net merchant account if you don’t have one already, and ensure
your account has Customer Information Manager (CIM) enabled.
Open your Admin Panel and go to System > Configuration > Sales > Payment Methods. Toward the bottom of the
page, you’ll find an ‘Authorize.Net CIM’ settings section like the below.
General
Version Installed: This tells you the version of our extension currently installed on your website. Please
include this in any support requests.
API Test Results: If you’ve entered an API Login ID and Transaction Key, we will automatically connect to
Authorize.Net to verify that the API works successfully. If we cannot connect to Authorize.Net, or your API
Login ID or Transaction Key is incorrect, or your Authorize.Net account does not have the CIM service
enabled, this will tell you with a red message. Correct the error, then reload the page and it should show
‘Authorize.Net CIM connected successfully.’
Enable: Yes to enable the payment method. If disabled, you will still be able to invoice/refund existing
orders, but it will not show up as a payment option during checkout.
Title: This controls the payment option label on checkout and order status pages.
API Login ID: This is a secret value from your Authorize.Net account. If you don’t know it, log into your
Authorize.Net account, then go to Tools > Security Settings > General Security Settings > API Login ID and
Transaction Key. Your API Login ID will be in the middle of the page.
Transaction Key: This is a secret value from your Authorize.Net account. If you don’t know it, log you’re
your Authorize.Net account, then go to the same page as API Login ID above. You will have to enter your
secret answer to generate a new transaction key. Record the generated value for your records.
WARNING: Generating a new transaction key will cause your existing transaction key to expire 24 hours
later. If any other services or software are connected to your Authorize.Net account, you MUST update
them with the new transaction key immediately.

ParadoxLabs | 8 N Queen St | 9th Floor | Lancaster, PA 17603 | 717-431-3330 4
Authorize.Net Sandbox Account: Choose ‘Yes’ if the API Login ID and Transaction Key you entered are for
a sandbox account. If this value is correct, the API Test Results will report ‘Your API credentials are invalid.’
If you want to test, you must have a sandbox account (separate from your production Authorize.Net
account). You can create one here: https://developer.authorize.net/hello_world/sandbox/
Payment Action: Choose from the following options.
o Save info (do not authorize): This will require customers to enter a credit card on checkout, and
store that credit card in Authorize.Net CIM. If Validation Type is set to ‘live’, it will be tested to
verify it is a valid credit card in the process. No funds will be captured or held from the credit
card upon checkout. Invoicing the order will perform a standalone authorize+capture
transaction, but is not guaranteed to go through.
o Authorize: This will authorize the order amount upon checkout, allowing for manual invoicing
and capture of the funds later. The order amount will be reserved (held) for several days. If you
do not invoice within a couple weeks, the authorization will expire, and invoicing will perform a
standalone authorize+capture transaction instead (which is not guaranteed to go through).
o Authorize and Capture: This will capture all funds immediately when an order is placed.
Payment processors strongly recommend not capturing funds unless/until you are within three days of
fulfilling (shipping) the order
New Order Status: Set this to your desired initial status for orders paid via Authorize.Net CIM. Default
Magento behavior is ‘Pending’ for Authorize Only, and ‘Processing’ for Authorize and Capture.
Validation Type: Choose from the following options.
o Live: This will run a $0.00 or $0.01 test transaction against the credit card to verify that all details
(card number, expiration date, CCV, AVS) are correct. The transaction amount depends on the
card type. The transaction is immediately voided if successful, the customer will never see it on
any statements—however, this does incur an additional transaction fee on your account.
The benefit of live validation is that you are guaranteed all cards stored in Authorize.Net CIM
(and visible on customers’ accounts) are valid and usable.
The downsides are the extra validation fee, and a chance of ‘duplicate transaction’ errors if
customers enter part of their card info incorrectly.
o Test: In this mode, Authorize.Net will verify that the credit card number and expiration date are
possible, but will not actually talk to the card processor. There is no guarantee that the CCV or
billing address are correct, or that the card has any funds available.
o None: In this mode, Authorize.Net will blindly store the card without any validation.
Allow Credit Card Types: Choose the CC types you want to allow on checkout.
Credit Card Verification: If yes, customers will be prompted for their credit card’s CCV code when
entering a new card.
Allow card to not be stored: If yes, customers will have a ‘Save for next time’ checkbox on checkout. If no,
logged in customers will see a message instead: “For your convenience, this data will be stored securely by
our payment processor.” Guests will never be given the option to store a credit card.
Note that all cards are always stored in CIM, regardless of this setting or the customer’s choice. This is
necessary for payment processing. If the order is placed as a guest, or the customer chooses to not save
their card, it will be automatically purged from all systems 120 days (the maximum refund period) after its
last use. This ensures the info is available for edits, captures, and refunds, but respects the customer’
wishes.
If a card is ‘not saved’, it will not display under the customer’s saved credit cards (Account > My Payment
Data), nor will it be selectable during checkout. Note that as an admin, order ‘edit’ or ‘reorder’ will bypass
this, always allowing reuse of the original payment info (unless it was since purged).

ParadoxLabs | 8 N Queen St | 9th Floor | Lancaster, PA 17603 | 717-431-3330 5
Show Authorize.Net Logo: If yes, checkout will display an ‘Authorize.Net’ logo next to the payment form.
Accepted Currency: This setting must match the currency of your Authorize.Net account.
Allow Payment from Countries: This setting allows you to limit which countries are able to select it as a
payment option.
Minimum Order Total: This setting allows you to set a minimum order value for the payment option. For
instance, set to 5 to only allow credit card checkout for orders of $5 or more.
Maximum Order Total: This setting allows you to set a maximum order value for the payment option. For
instance, set to 1000 to only allow credit card checkout for orders of $1000 or less.
Sort Order: This setting allows you to change the order of payment options on checkout. Enter a number
for this and all other payment methods according to the order you want them to display in.
Advanced Settings
Accept.js: If yes, and you’ve entered your Client Key (below), Authorize.Net’s Accept.js functionality will
be enabled everywhere credit card info is entered. This sends CC data straight to Authorize.Net, bypassing
your server entirely. Unless it causes problems, we strongly recommend using this, for security and PCI-
compliance reasons. See the full details on what Accept.js is and how it works in the section later in this
document.
ParadoxLabs | 8 N Queen St | 9th Floor | Lancaster, PA 17603 | 717-431-3330 6
Client Key: In order to use Accept.js, you must enter your Client Key. To find this, log in to Authorize.Net
and go to Account > Settings > Security Settings > General Security Settings > Manage Public Client Key.
Require CCV for all transactions: If yes, customers and admins will be required to enter the credit card
CCV for all transactions, even with previously-stored cards.
Send Shipping Address: If yes, shipping address will be included with every new transaction sent to
Authorize.Net. This is required for some fraud filters. There is no performance penalty associated with this
option. Shipping addresses are not stored in CIM.
Send Line Items: If yes, the order items will be included with every transaction. This is required for Level-2
processing, but may not be desired for other reasons. There is no performance penalty associated with
this option.
Reauthorize on Partial Invoice: If yes, and you invoice part of an order, a new authorization will be
created for the outstanding order balance (if any). This helps guarantee funds, but can cause multiple
holds on the card until transactions settle. Any failure during reauthorization is ignored.
Auto-select 'save for next time': If yes, the ‘save this card for next time’ checkbox will be checked by
default. If no, customers will have to explicitly select it to store and reuse their card.
Verify SSL: If yes, the Authorize.Net API connection will be verified against known SSL information for the
API. Do not disable unless you encounter SSL errors from the API test results and your host is unable to fix
the underlying problem. Disabling this will make your store vulnerable to MITM (man-in-the-middle)
attacks.
3D Secure Card Validation: We support 3D Secure through Cardinal Commerce for most credit card
transactions. This requires a separate relationship with Cardinal Commerce, and additional configuration
of Magento and your Authorize.Net account. If you have done those things, set Yes to enable. Note that
Accept.js must be disabled to use 3D Secure.
ACH Processing (eCheck)
If you want to accept ACH (eCheck) payments, the first step is to apply and be approved by Authorize.Net and
eCheck.Net for ACH processing. Your account must be approved, or ACH payments will not go through.
If/when your account is approved for ACH processing, then complete the payment method settings for
‘Authorize.Net CIM – ACH (eCheck)’. This is a separate payment method option, with its own settings.
All settings are analogous to those covered above.
Note that there are significant differences in how ACH payments work compared to credit cards. Although all
processes appear the same to Magento, when and how money is moved is quite different. We strongly
recommend familiarizing yourself with the eCheck.Net FAQ:
https://support.authorize.net/authkb/index?page=content&id=A554
Also note that Authorize.Net Accept.js does not yet support ACH payment information.
Usage There isn’t much to using Authorize.Net CIM in practice: It’s a standard Magento payment method, and all
interfaces should be pretty self-explanatory. That being said, here’s what you get:
Checkout Payment Form
The frontend payment form lets you choose/enter credit card information. You can choose an existing card (if any)
from the dropdown, or to add a new one.

ParadoxLabs | 8 N Queen St | 9th Floor | Lancaster, PA 17603 | 717-431-3330 7
If a customer re-enters a card they’ve used before, the existing card will be detected, and the new information
(expiration date, billing address, etc.) will be saved on top of it. This happens seamlessly behind the scenes.
If the customer has stored cards, their most recent one will be selected by default:

ParadoxLabs | 8 N Queen St | 9th Floor | Lancaster, PA 17603 | 717-431-3330 8
Order status page
Customer ‘My Payment Data’ account area
The My Payment Data section allows customers to see their stored cards, add, edit, and delete.

ParadoxLabs | 8 N Queen St | 9th Floor | Lancaster, PA 17603 | 717-431-3330 9
Note that cards associated with an open (uncaptured) order cannot be edited or deleted. They will display a ‘Card
In Use’ message in place of the buttons. As soon as all orders paid by the card are completed, the ‘Edit’ and
‘Delete’ buttons will appear.
Admin order form
The admin form displays the same options as frontend checkout, in slightly different format.

ParadoxLabs | 8 N Queen St | 9th Floor | Lancaster, PA 17603 | 717-431-3330 10
Admin order status page
The admin panel shows extended payment info after placing an order, including transaction ID and validation
results. These details are not visible to the customer at any time.
Admin customer ‘Payment Data’ account area
Viewing a customer, you will see an added ‘Payment Data’ tab. This shows all of the same information with all of
the same functionality as the equivalent frontend section.

ParadoxLabs | 8 N Queen St | 9th Floor | Lancaster, PA 17603 | 717-431-3330 11
Admin transaction info
Viewing an order, you can also see full transaction info from the ‘Transactions’ tab.
Click into a transaction, and you’ll see all of the raw transaction data from Authorize.Net.
Click the ‘Fetch’ button on this page to grab the latest transaction info from Authorize.Net. This can be particularly
useful when dealing with fraud review via the Advanced Fraud Detection Suite (AFDS) or checking for settlement
on ACH transactions.

ParadoxLabs | 8 N Queen St | 9th Floor | Lancaster, PA 17603 | 717-431-3330 12
Accept.js: Same Authorize.Net, even better security
What is Accept.js, and why should I care?
Accept.js is Authorize.Net’s new alternative to Direct Post Method, released in summer of 2016. Accept.js allows
credit card information to be sent straight from your customers’ browsers to Authorize.Net, without touching your
web server at all. Instead, Authorize.Net gives us a one-time-use token (nonce) that refers to it. Since your web
server never sees the raw credit card number or CCV, this improves your website’s security, and reduces your PCI
compliance exposure.
Image © 2016 Authorize.Net (used by permission)
Since Accept.js sends the credit card number directly to Authorize.Net, using our extension and Accept.js for all
credit card transactions may make you eligible for PCI Self-Assessment Questionnaire (SAQ) A-EP, rather than the
longer and more intensive PCI SAQ D form. For details on the SAQ types and why this is the case, see
“Understanding the SAQs for PCI DSS version 3” (PDF, by PCI Security Standard Council).
Enabling Accept.js has minimal impact on user experience. The credit card form is still located on your website,
using your theme’s templates and styles. The data is tokenized as soon as all credit card fields are completed,
completely behind the scenes. Any validation or processing errors will be displayed to the customer inline on the
page.
How do I enable Accept.js?
In order to use Accept.js, change the ‘Accept.js’ setting to ‘Yes’ at Admin > System > Configuration > Payment
Methods > Authorize.Net CIM > Advanced Settings > Accept.js.
After changing that setting, you will see a new field for Client Key. You must enter your Client Key from
Authorize.Net. To find this, log in to Authorize.Net and go to Account > Settings > Security Settings > General
Security Settings > Manage Public Client Key.
Note that Accept.js requires any pages having a payment form to use SSL (including your admin panel and dev
sites). Also, while we’ve done the best we can to ensure compatibility, we cannot guarantee the additional
functionality will work with every possible payment form and checkout solution. We strongly recommend testing
checkout after enabling Accept.js, to ensure it works as expected. If you experience problems, please contact us.
In the interest of security, we also strongly recommend evaluating your Magento admin accounts, and only
providing access to Magento’s configuration area to people that absolutely require it.

ParadoxLabs | 8 N Queen St | 9th Floor | Lancaster, PA 17603 | 717-431-3330 13
Possible Accept.js Errors
Accept.js is another layer of complexity on top of the existing credit card processing, and that means more things
that can go wrong. Here are errors you might start seeing after you enable Accept.js, and what they mean:
“Invalid token. Please re-enter your payment info. (E00114)” (Log: ‘Invalid OTS Token.’)
This error means Authorize.Net rejected the one-time-use payment token we sent them for the transaction.
Usually this happens when the customer tries to place an order with a new credit card, their payment is rejected
(AVS failed/wrong billing address, or transaction declined, etc.). After they get that error message, they
immediately try hitting ‘Place Order’ again, without changing any of their billing or payment info. Since none of the
info changed, we did not request a new token, the existing one expired, and hence the error.
How to fix: Have the customer re-enter their billing and payment info, taking care to correct whatever error they
encountered originally.
“We did not receive the expected Accept.js data. Please verify payment details and try again. If you get this error twice, contact support.”
This error means that your server received a raw credit card number, instead of the Accept.js token that was
expected. We will never accept raw credit card details with Accept.js enabled, so we throw this error instead. This
means either the payment form that was submitted is incompatible with Accept.js, or the customer somehow
completed the form without triggering Accept.js.
How to fix: If most customers are able to checkout successfully, collect info about the customer’s browser and
operating system, then either have them re-attempt checkout (possibly using another browser or device), or assist
them by placing an admin order instead.
If no customers are able to complete checkout, or you can reproduce the problem yourself, please disable
Accept.js temporarily, then contact us for support.
Browser console displays “Cross-Origin Request Blocked: The Same Origin Policy disallows reading the remote resource at https://js.authorize.net/v1/AcceptCore.js.” (or similar message) on checkout
This message happens because your webpage is unable to access that file directly. Usually this would be a problem
(hence the warning message), but in this case this is actually normal and intended behavior. This is part of the
many security features of Accept.js: Your site cannot (and should not be able to) access that particular file directly.
This is not an error, nothing is going wrong, and you can safely ignore the message. If you noticed it because of
other problems you are experiencing with our extension, please contact us for support with an explanation of what
those problems are.
Frequently Asked Questions
Why are my API Login ID and Transaction Key invalid?
You may be trying to use a live Authorize.Net account with our extension set to sandbox mode, or vice versa.
In order to test CIM payment processing, you need to sign up for a free developer account at Authorize.Net. (The
account type must be 'card not present.') After registering, you will be given an API Login ID and Transaction Key.
Save these, then copy them into the Magento configuration at Admin Panel > System > Configuration > Payment
Methods > Authorize.Net CIM. Also set 'Sandbox Account' to 'Yes', then save.

ParadoxLabs | 8 N Queen St | 9th Floor | Lancaster, PA 17603 | 717-431-3330 14
To handle to live payment processing with CIM, enter your real Authorize.Net account details (API Login ID and
Transaction Key) and set ‘Sandbox Account' to 'No'.
Make sure that test mode is not enabled in your account settings at Authorize.Net, and that CIM is enabled. CIM
will not work in test mode.
How do I do an online refund from Magento?
In order to process an 'online' refund through Authorize.Net, you have to go to the invoice you want to refund,
and click the 'Credit Memo' button from there.
If you’ve done that correctly, at the bottom of the page you should see a button that says 'Refund'.
If you only have one button that says ‘Refund Offline’, it’s because you clicked ‘Credit Memo’ from the order
instead of from the invoice.
The reason for this is that the refund needs to be associated with a particular capture transaction. An order can
contain any number of capture transactions, but every capture has an invoice that’s directly related. You refund an
invoice, not an order.
I got an email from Authorize.Net about a new Akamai API endpoint. Does that affect me?
Authorize.Net offers an alternate API endpoint that using Akamai for better stability. Our extension already uses
that alternate endpoint, so you have nothing to worry about. The same announcement also mentions transaction
ID changes and an RC4 cipher change; neither of those should affect you.
Technical / Integration Details
Architecture
The payment method code for CIM is authnetcim.
The payment method code for CIM ACH is authnetcim_ach.
ParadoxLabs_AuthorizeNetCim is the payment method module, built heavily on the ParadoxLabs_TokenBase module.
TokenBase defines a variety of interfaces and architecture for handling tokenization and stored cards cleanly.
The payment method class is ParadoxLabs_AuthorizeNetCim_Model_Method. This talks to Authorize.Net through
ParadoxLabs_AuthorizeNetCim_Model_Gateway, and stores card information in instances of
ParadoxLabs_AuthorizeNetCim_Model_Card. Each of these extends an equivalent abstract class in TokenBase, and
implements only the details specific to the Authorize.Net API.
Card instances are stored in table paradoxlabs_stored_card, and referenced by quotes and orders via a tokenbase_id
column on payment tables.
In all cases, we strongly discourage any customization by editing our code directly. We cannot support
customizations. Use Magento’s preferences or plugins to modify behavior if necessary. If your use case isn’t
covered, let us know.
Custom customer attributes
authnetcim_profile_id

ParadoxLabs | 8 N Queen St | 9th Floor | Lancaster, PA 17603 | 717-431-3330 15
authnetcim_profile_version
Custom database schema
Added table: paradoxlabs_stored_card
Added column: sales_flat_quote_payment.tokenbase_id
Added column: sales_flat_order_payment.tokenbase_id
Events
tokenbase_before_load_payment_info (method, customer, transport, info): Fires before preparing method-
specific information for the order payment info blocks (frontend, admin, and emails). Use this to add
additional information to the payment info block.
tokenbase_after_load_payment_info (method, customer, transport, info): Fires before preparing method-
specific information for the order payment info blocks (frontend, admin, and emails). Use this to add
additional information to the payment info block, or modify what’s there by default.
tokenbase_before_load_active_cards (method, customer): Fires before loading a customer’s available stored
cards.
tokenbase_after_load_active_cards (method, customer, cards): Fires after loading a customer’s available
stored cards. Use this to modify cards available to the customer or admin.
Magento API
The module includes basic support for the Magento API via standard interfaces. You can use it to create, read,
update, and delete all stored cards.
If you have a specific use case in mind that is not currently possible, let us know.
You can generate new cards by creating an order with our payment method (code authnetcim), and information for
a new credit card. To place an order with a stored card, pass that card’s hash in as card_id with the cart payment
info.
You cannot use a new credit card directly when placing a SOAP API order, because payment storage and order
placement are two separate API calls, and confidential cardholder information is not stored persistently between
those requests. Instead, store the card in advance, then place an order using that stored card (per above).
Note that raw credit card numbers (cc_number) will not be accepted if Accept.js is enabled. If your solution is able to
implement Accept.js, you could pass the details as paymentData values acceptjs_key, acceptjs_value, and cc_last4
instead.
In each TokenBase API request, you can examine the corresponding method in
ParadoxLabs_TokenBase_Model_Api_Api to see the underlying logic.
SOAP API calls:
tokenbaseGetCard
Get stored payment data by numeric ID.
Inputs:
1. cardId (int)
ParadoxLabs | 8 N Queen St | 9th Floor | Lancaster, PA 17603 | 717-431-3330 16
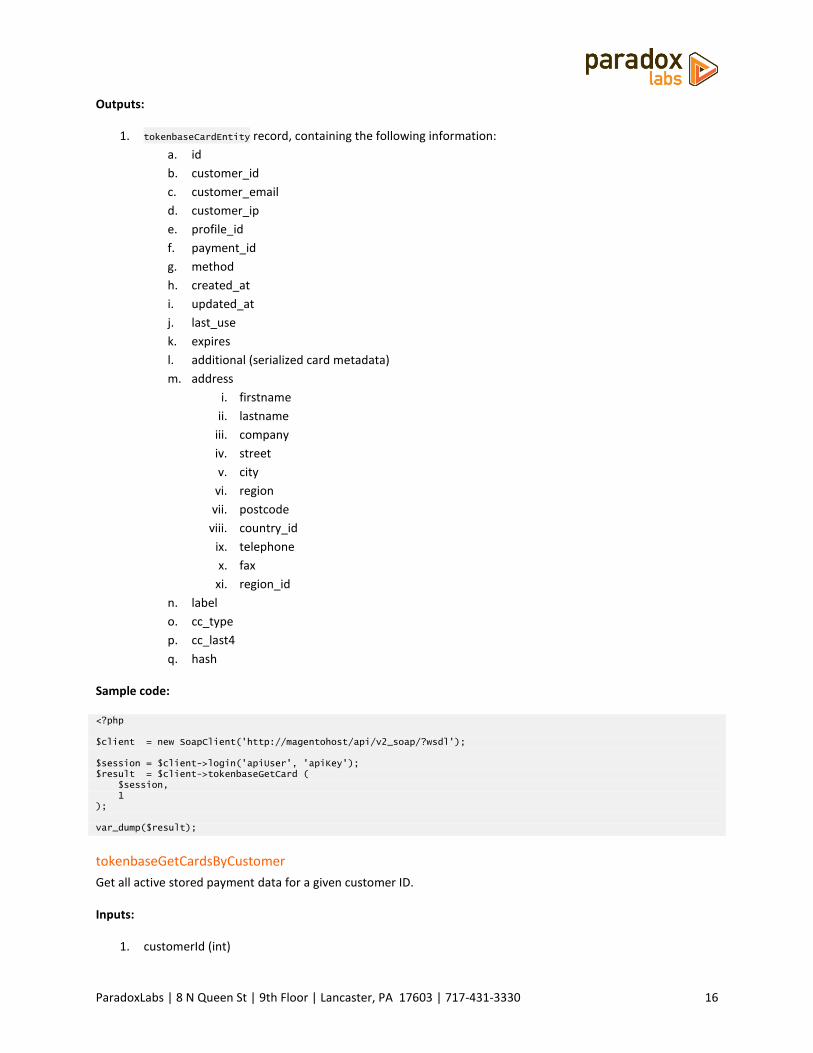
Outputs:
1. tokenbaseCardEntity record, containing the following information:
a. id
b. customer_id
c. customer_email
d. customer_ip
e. profile_id
f. payment_id
g. method
h. created_at
i. updated_at
j. last_use
k. expires
l. additional (serialized card metadata)
m. address
i. firstname
ii. lastname
iii. company
iv. street
v. city
vi. region
vii. postcode
viii. country_id
ix. telephone
x. fax
xi. region_id
n. label
o. cc_type
p. cc_last4
q. hash
Sample code:
<?php $client = new SoapClient('http://magentohost/api/v2_soap/?wsdl'); $session = $client->login('apiUser', 'apiKey'); $result = $client->tokenbaseGetCard ( $session, 1 ); var_dump($result);
tokenbaseGetCardsByCustomer
Get all active stored payment data for a given customer ID.
Inputs:
1. customerId (int)

ParadoxLabs | 8 N Queen St | 9th Floor | Lancaster, PA 17603 | 717-431-3330 17
Outputs:
1. cards (array of tokenbaseCardEntity records, as defined above)
Sample code:
<?php $client = new SoapClient('http://magentohost/api/v2_soap/?wsdl'); $session = $client->login('apiUser', 'apiKey'); $result = $client->tokenbaseGetCardsByCustomer( $session, 123 ); var_dump($result);
tokenbaseDeleteCard
Delete a stored card for a given customer.
Inputs:
1. customerId (int) – May be 0 for guest
2. cardId (int)
Outputs:
1. success (bool)
Sample code:
<?php $client = new SoapClient('http://magentohost/api/v2_soap/?wsdl'); $session = $client->login('apiUser', 'apiKey'); $result = $client->tokenbaseDeleteCard( $session, 123, 1 ); var_dump($result);
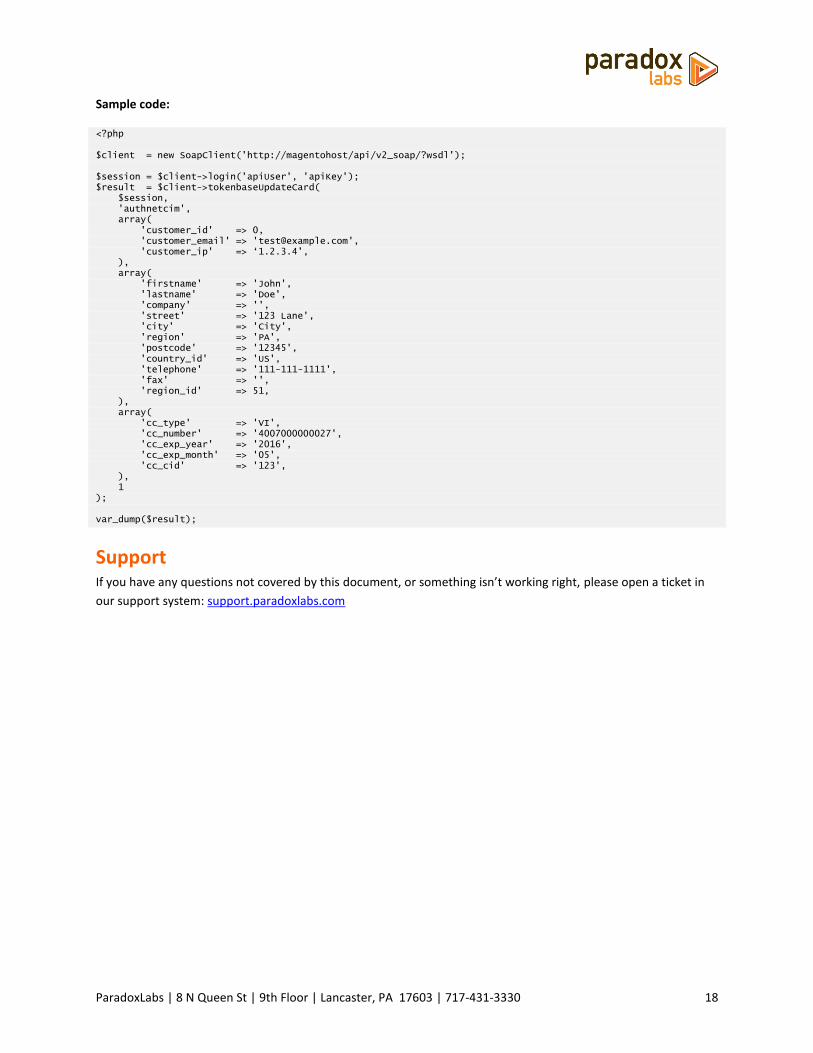
tokenbaseUpdateCard
Create or update a stored card for a given customer.
Inputs:
1. method (string)
2. customerData (array) – customer_email is required; customer_id may be 0 (for guest).
3. addressData (array) – Field names match those of any address.
4. paymentData (array) – Field names match those given for a standard credit card during checkout.
5. cardId (int, optional) – If given, the request will overwrite (update) an existing card. If none, will store the
data as a new card.
Outputs:
1. cardId (int)
ParadoxLabs | 8 N Queen St | 9th Floor | Lancaster, PA 17603 | 717-431-3330 18
Sample code:
<?php $client = new SoapClient('http://magentohost/api/v2_soap/?wsdl'); $session = $client->login('apiUser', 'apiKey'); $result = $client->tokenbaseUpdateCard( $session, 'authnetcim', array( 'customer_id' => 0, 'customer_email' => '[email protected]', 'customer_ip' => ‘1.2.3.4’, ), array( 'firstname' => 'John', 'lastname' => 'Doe', 'company' => '', 'street' => '123 Lane', 'city' => 'City', 'region' => 'PA', 'postcode' => '12345', 'country_id' => 'US', 'telephone' => '111-111-1111', 'fax' => '', 'region_id' => 51, ), array( 'cc_type' => 'VI', 'cc_number' => '4007000000027', 'cc_exp_year' => '2016', 'cc_exp_month' => '05', 'cc_cid' => '123', ), 1 ); var_dump($result);
Support If you have any questions not covered by this document, or something isn’t working right, please open a ticket in
our support system: support.paradoxlabs.com