chapter 9 gui programming using tkinter · pyqt: pyqt is one of the favoured cross-platform python...
TRANSCRIPT
© Copyright 2012 by Pearson Education, Inc. All Rights Reserved.1
Chapter 9
GUI Programming Using Tkinter

© Copyright 2012 by Pearson Education, Inc. All Rights Reserved.
Text-based User InterfacesText-based user interfaces (TUI) is a user interface that uses text, symbols, and colors. It runs in a character-based terminal.
alternately called terminal user interfaces, or a character-based user interfaces to reflect a dependence upon the properties of computer terminals.
Like GUIs, they may use the entire screen area and accept mouse and other inputs. They may also use color and often structure the display using special graphical characters such as ┌ and ╣, referred to in Unicode as the "box drawing" set.
The modern context of use is usually a terminal emulator.
2

© Copyright 2012 by Pearson Education, Inc. All Rights Reserved.
Text-based User Interfaces
3

© Copyright 2012 by Pearson Education, Inc. All Rights Reserved.
Types of text terminals
From text application's point of view, a text screen (and communications with it) can belong to one of three types (here ordered in order of decreasing accessibility):
A genuine text mode display, controlled by a video adapter or the central processor itself. This is a normal condition for a locally running application on various types of personal computers and mobile devices. If not deterred by the operating system, a smart program may exploit the full power of a hardware text mode.
A text mode emulator. Examples are xterm for X Window System and win32 console (in a window mode) for Microsoft Windows. This usually supports programs which expect a real text mode display, but may run considerably slower. Certain functions of an advanced text mode, such as an own font uploading, almost certainly become unavailable.
A remote text terminal. The communication capabilities usually become reduced to a serial line or its emulation, possibly with few ioctl()s as an out-of-band channel in such cases as Telnet and Secure Shell. This is the worst case, because software restrictions hinder the use of capabilities of a remote display device.
4
© Copyright 2012 by Pearson Education, Inc. All Rights Reserved.
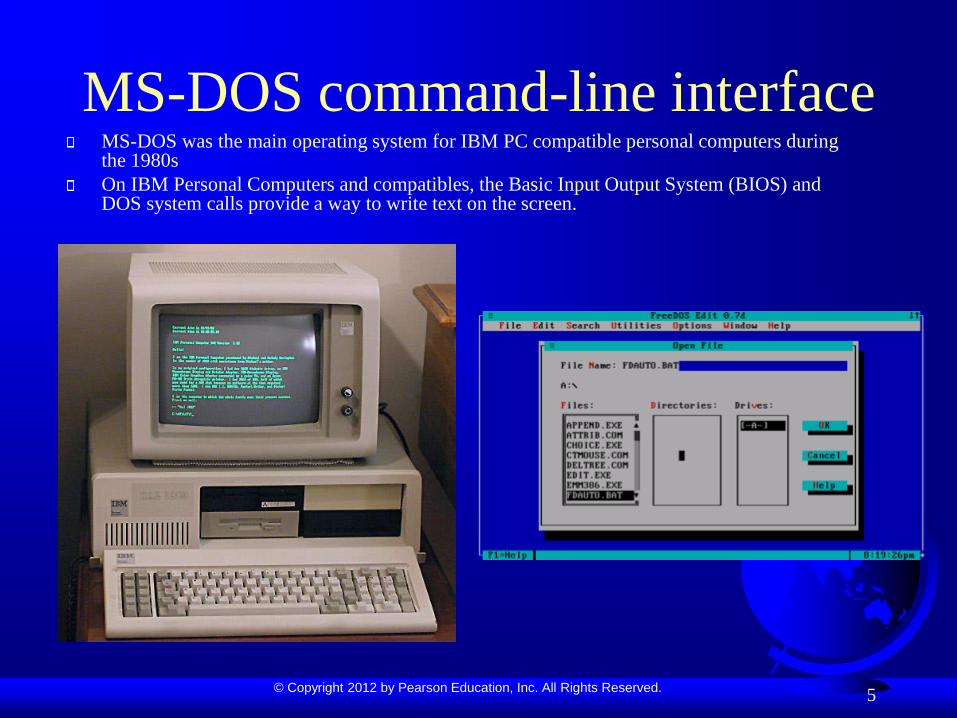
MS-DOS command-line interfaceMS-DOS was the main operating system for IBM PC compatible personal computers during the 1980s
On IBM Personal Computers and compatibles, the Basic Input Output System (BIOS) and DOS system calls provide a way to write text on the screen.
5

© Copyright 2012 by Pearson Education, Inc. All Rights Reserved.
Microsoft Windows
command-line interfaceAll versions of Microsoft Windows have had an MS-DOS-like command-line interface (CLI) called Command Prompt. This could run many DOS and variously Win32, OS/2 1.x and POSIX command line utilities in the same command-line session, allowing piping between commands
6

© Copyright 2012 by Pearson Education, Inc. All Rights Reserved.
Terminal EmulatorsTerminal emulators replicate the functionality of a traditional computer terminal to provide users with access to a local or distant host. The emulator presents a terminal window to appear as though it is directly connected to the client. Most terminal emulators are designed for specific uses and function only with specific operating systems. Companies use these tools to access data and programs on remote devices, servers, or mainframes.
7

© Copyright 2012 by Pearson Education, Inc. All Rights Reserved.
Graphical User Interface (GUI)The graphical user interface is a form of user interface that allows users to interact with electronic devices through graphical icons or elements instead of text-based user interfaces.
GUIs were introduced in reaction to the perceived steep (high) learning curve of command-line interfaces (CLIs) which require commands to be typed on a computer keyboard.
The actions in a GUI are usually performed through direct manipulation of the graphical elements.
8

© Copyright 2012 by Pearson Education, Inc. All Rights Reserved.
GUIs
The precursor to GUIs was invented by researchers at the Stanford Research Institute, led by Douglas Engelbart. They developed the use of text-based hyperlinks manipulated with a mouse (1963).
In 1983, the Apple Lisa was first GUI offering.
9

© Copyright 2012 by Pearson Education, Inc. All Rights Reserved.
GUIs
The X Windows System was introduced in the mid-1980s to provide graphical support for unixoperating systems.
Microsoft introduced A Windows 1.0 in 1985
10

© Copyright 2012 by Pearson Education, Inc. All Rights Reserved.
GUIs
The GUIs familiar to most people today are
– Microsoft Windows,
– Mac OS X, and
– the X Window System interfaces for desktop
and laptop computers in Unix based systems,
– Android, Windows Phone, and Apple's iOS for
handheld ("smartphone") devices.
11

© Copyright 2012 by Pearson Education, Inc. All Rights Reserved.
GUI programming in Python
Python has a huge number of GUI
frameworks (or toolkits) available for
it,from Tkinter (traditionally bundled with
Python, using Tk) to a number of other
cross-platform solutions, as well as bindings
to platform-specific technologies.
12

© Copyright 2012 by Pearson Education, Inc. All Rights Reserved.
Python GUI FrameworksPyQT: PyQT is one of the favouredcross-platform Python bindings implementing the Qt library for the Qt (owned by Nokia) application development framework. Currently, PyQT is available for Unix/Linux, Windows, Mac OS X and Sharp Zaurus. It combines the best of Python and Qt and it up to the programmer to decide whether to create a program by coding or using Qt Designer to create visual dialogs.
It is available in both, commercial as well as GPL license. Although some features may not be available in the free version, if your application is open source, then you can use it under the free license.
13
Resource: https://blog.resellerclub.com/the-6-best-python-gui-frameworks-for-developers/

© Copyright 2012 by Pearson Education, Inc. All Rights Reserved.
Python GUI Frameworks
Kivy : Kivy is an OpenGL ES 2 accelerated framework for the creation of new user interfaces. It supports multiple platforms namely Windows, MacOSX, Linux, Android iOS and Raspberry Pi. It is open source and comes with over 20 widgets in its toolkit.
14

© Copyright 2012 by Pearson Education, Inc. All Rights Reserved.
Python GUI FrameworksWxPython : WxPython is an open source wrapper for cross-platform GUI library WxWidgets (earlier known as WxWindows) and implemented as a Python extension module. With WxPython you as a developer can create native applications for Windows, Mac OS and Unix. If you’re just beginning to develop applications in WxPython, here is a good simple tutorial you can go through.
PyGUI : PyGUI is a graphical application cross-platform framework for Unix, Macintosh and Windows. Compared to some other GUI frameworks, PyGUI is by far the simplest and lightweight of them all, as the API is purely in sync with Python.PyGUI inserts very less code between the GUI platform and Python application, hence the display of the application usually displays the natural GUI of the platform.
PySide: PySide is a free and cross-platform GUI toolkit Qt initiated and sponsored by Nokia, Qt is a UI framework and a cross-platform application. PySide currently supports Linux/X11, Mac OS X, Maemo and Windows and, support for Android is in the plans for the near future.PySide provides tools to works with multimedia, XML documents, network, databases and GUI. A key feature of PySide is its API compatibility with PyQt4, so if you wish to migrate to PySide then the process will be hassle-free.
For a complete list: http://wiki.python.org/moin/GuiProgramming
15

© Copyright 2012 by Pearson Education, Inc. All Rights Reserved.
Python GUI FrameworksTkinter: Tkinter is the most popular programming package for graphical user interface or desktop apps. It is so named because of its simplicity. Tkinter is the combination of Tk and Python's standard GUI framework.
TKinter comes with an abundance of resources of codes and reference books which is the major merit of choosing it as a package. It provides diverse widgets, such as labels, buttons, and text boxes used in a graphical user interface application. The Button control also called widgets are used to display buttons in developed application while the Canvas widget is used to draw shapes (lines, ovals, polygon...) in your application.
16

© Copyright 2012 by Pearson Education, Inc. All Rights Reserved.17
Motivations
We will learn Tkinter.
Tkinter is not only a useful tool for
developing GUI projects, but also a valuable
pedagogical tool for learning object-oriented
programming.

© Copyright 2012 by Pearson Education, Inc. All Rights Reserved.
Tkinter Programming
Tkinter is the standard GUI library for Python. Python when combined with Tkinter provides a fast and easy way to create GUI applications. Tkinter provides a powerful object-oriented interface to the Tk GUI toolkit.
Tkinter (pronounced tea-kay-inter) is the Python interface to Tk, the GUI toolkit for Tcl/Tk.
Tcl (pronounced "tickle" and is an acronym for Tool Command Language) is a popular scripting language in the domains of embedded applications, testing, prototyping, and GUI development. Tk on the other hand is an open source, multiplatform widget toolkit that is used by many different languages for building GUI programs.
The Tkinter interface is implemented as a Python module, tkinter.py, which is just a wrapper around a C-extension that uses Tcl/Tk libraries.
18

© Copyright 2012 by Pearson Education, Inc. All Rights Reserved.
Tkinter Programming : Widgets
tkinter is one of the libraries which provides a number of graphical components to implement GUI based programs. They are called widgets.
Widgets are standard graphical user interface (GUI) elements like butons, labels, textboxes.
In a GUI program, there is a window with various graphical widgets/components with which the user can interact.
Widgets are basic building blocks of a GUI application. Over the years, several widgets became a standard in all toolkits on all OS platforms; for example a button, a check box or a scroll bar. Some of them might have different names. For instance, a check box is called a check button in Tkinter.
Tkinter has a small set of widgets which cover basic programming needs. More specialised widgets can be created as custom widgets.
Widgets are something like elements in the HTML. You will find different types of widgets to the different types of elements in the Tkinter.
19

© Copyright 2012 by Pearson Education, Inc. All Rights Reserved.
Tkinter Programming : Widgets
20
Button: The Button widget is used to display buttons in your
application.
Canvas: The Canvas widget is used to draw shapes, such as
lines, ovals, polygons and rectangles, in your application.
Checkbutton: The Checkbutton widget is used to display a
number of options as checkboxes. The user can select multiple
options at a time.
Entry: The Entry widget is used to display a single-line text
field for accepting values from a user.
https://www.tutorialspoint.com/python/python_gui_programming.htm

© Copyright 2012 by Pearson Education, Inc. All Rights Reserved.
Tkinter Programming : Widgets
Frame: The Frame widget is used as a container widget to
organize other widgets.
Label: The Label widget is used to provide a single-line
caption for other widgets. It can also contain images.
Listbox: The Listbox widget is used to provide a list of options
to a user.
21

© Copyright 2012 by Pearson Education, Inc. All Rights Reserved.
Tkinter Programming : Widgets
22
Menubutton: The Menubutton widget is used to display menus in
your application.
Menu: The Menu widget is used to provide various commands to a
user. These commands are contained inside Menubutton.
Message: The Message widget is used to display multiline text
fields for accepting values from a user.
Radiobutton: The Radiobutton widget is used to display a number
of options as radio buttons. The user can select only one option at a
time.https://www.tutorialspoint.com/python/python_gui_programming.htm

© Copyright 2012 by Pearson Education, Inc. All Rights Reserved.
Tkinter Programming : WidgetsScale: The Scale widget is used to provide a slider widget.
Scrollbar: The Scrollbar widget is used to add scrolling capability
to various widgets, such as list boxes.
23
Text: The Text widget is used to display text in multiple lines.
Toplevel: The Toplevel widget is used to provide a separate
window container.
Spinbox: The Spinbox widget is a variant of the standard Tkinter
Entry widget, which can be used to select from a fixed number of
values.
© Copyright 2012 by Pearson Education, Inc. All Rights Reserved.
Tkinter Programming : Widgets
24
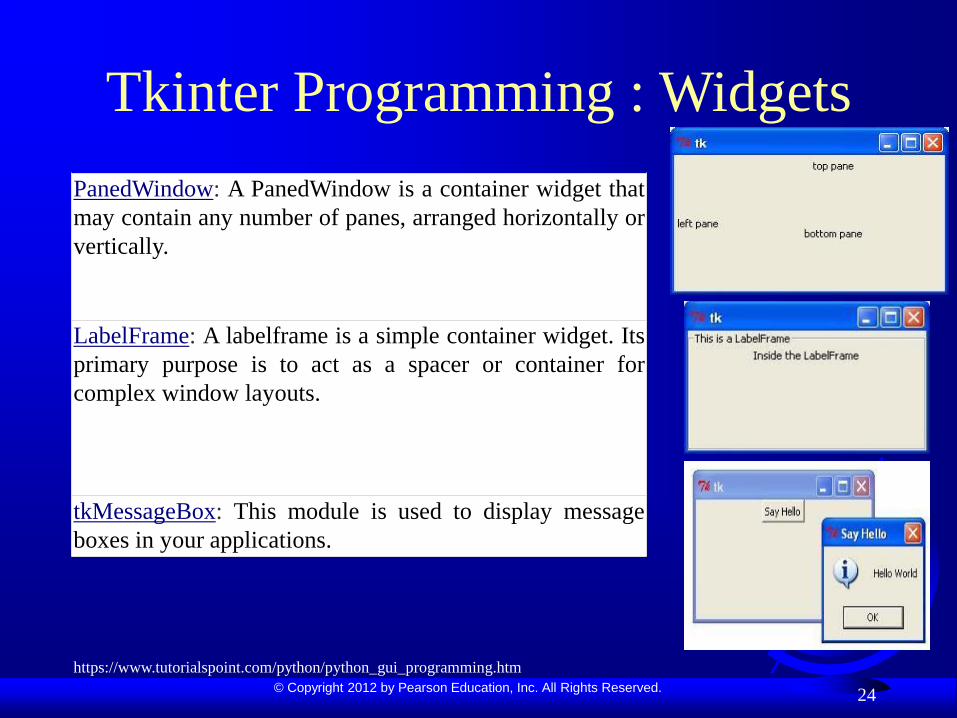
PanedWindow: A PanedWindow is a container widget that
may contain any number of panes, arranged horizontally or
vertically.
LabelFrame: A labelframe is a simple container widget. Its
primary purpose is to act as a spacer or container for
complex window layouts.
tkMessageBox: This module is used to display message
boxes in your applications.
https://www.tutorialspoint.com/python/python_gui_programming.htm

© Copyright 2012 by Pearson Education, Inc. All Rights Reserved.
Tkinter ProgrammingCreating a GUI application using Tkinter is an easy task. All you need to do is perform the following steps:– Import the Tkinter module.
– Generate the GUI application main (root) window.
– Add one or more widgets to the GUI application.
– Enter the main event loop to take action against each event triggered by the user
25

© Copyright 2012 by Pearson Education, Inc. All Rights Reserved.
Root Window
The root window is just like a piece of paper on which you can draw graphical objects. The actual UI construction is pretty standardized. You create a root window, add widgets and then add functionality to widgets.
Following are the steps you are required to follow:1. Create a root window
2. Add widgets to the root window
3. Customize widgets
4. The geometry of the widgets
5. Bind event handlers to widget events
6. Start the main event loop
26

© Copyright 2012 by Pearson Education, Inc. All Rights Reserved.
Generating An Empty Root
Window
27
import tkinter
def main():
#Create a root window
root = tkinter.Tk()
#Call the event loop
root.mainloop()
#Call the function main
main()
import tkinter imports all the methods, classes, and
attributes of tkinter module into the current
workspace. (import Tkinter in Pyhton 2.X, import
tkinter in pyhton 3.X)
root = tkinter.Tk() generates an instance of tkinter’s
Tk class which is a root window and assigned it to
the variable root. Simply speaking, it is Tk class’s
constructor method to create the main window.
root.mainloop() executes the mainloop function.
This function runs like an infinite loop until you
close the main window. (An event loop is basically
telling the code to keep displaying the window until
we manually close it. It runs in an infinite loop in
the back-end.)
© Copyright 2012 by Pearson Education, Inc. All Rights Reserved.
Adding widgets to root window
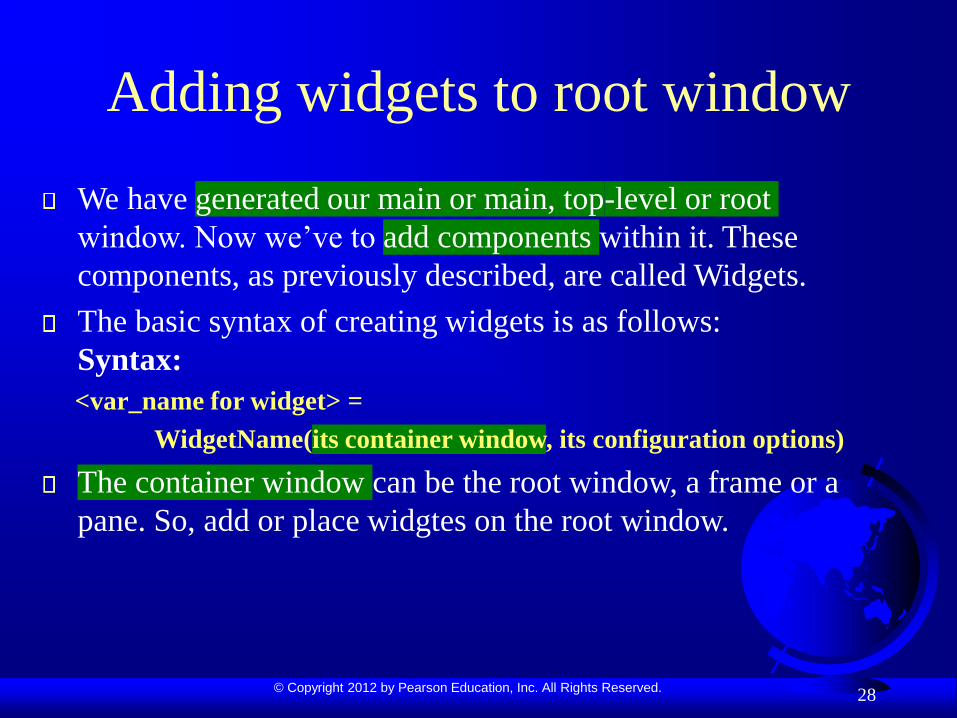
We have generated our main or main, top-level or root
window. Now we’ve to add components within it. These
components, as previously described, are called Widgets.
The basic syntax of creating widgets is as follows:
Syntax:
<var_name for widget> =
WidgetName(its container window, its configuration options)
The container window can be the root window, a frame or a
pane. So, add or place widgtes on the root window.
28
© Copyright 2012 by Pearson Education, Inc. All Rights Reserved.
Adding widgets to root window
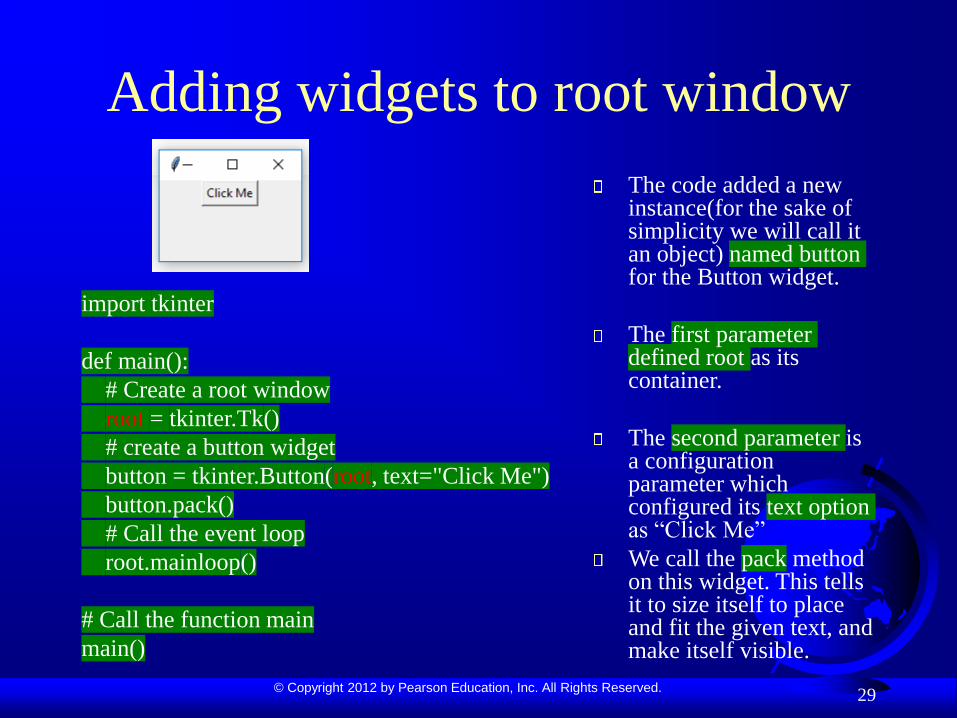
The code added a new instance(for the sake of simplicity we will call it an object) named button for the Button widget.
The first parameter defined root as its container.
The second parameter is a configuration parameter which configured its text option as “Click Me”
We call the pack method on this widget. This tells it to size itself to place and fit the given text, and make itself visible.
29
import tkinter
def main():
# Create a root window
root = tkinter.Tk()
# create a button widget
button = tkinter.Button(root, text="Click Me")
button.pack()
# Call the event loop
root.mainloop()
# Call the function main
main()
© Copyright 2012 by Pearson Education, Inc. All Rights Reserved.
Adding functionality to a button
We will write a callback function to add behavior to our button.
A callback function is also known as an event handler because it handles the event that occurs when the user clicks the button.
After writing the event handler or callback function, we register it with the button. We provide one more configuration option while creating a button.
30

© Copyright 2012 by Pearson Education, Inc. All Rights Reserved.
Adding functionality to a button
31
import tkinter
from tkinter import messagebox
#callback function
def do_something():
#the following line of code show messagebox
messagebox.showinfo('Response', 'You have clicked the button')
def main():
# Create a root window
root = tkinter.Tk()
# create a button widget
button = tkinter.Button(root, text="Click Me", command = do_something)
button.pack()
# Call the event loop
root.mainloop()
# Call the function main
main()

© Copyright 2012 by Pearson Education, Inc. All Rights Reserved.
Three Components Of GUI
ProgrammingThere are mainly three components or fundamentals of GUI programming in Python:1.What to place on the screen? (Widgets)
- Generate root window- Add widgets
2.Where to place widgets on the screen and how to organize them? (Geometry Management)
3.How do widgets work? (Events and callback functions)
- Write callback or event handler functions to the events such as button click.
32

© Copyright 2012 by Pearson Education, Inc. All Rights Reserved.
Geometry Management
All Tkinter widgets have access to specific geometry management methods, which have the purpose of organizing widgets throughout the parent widget area. Tkinter exposes the following geometry manager classes: pack, grid, and place.
– The pack() Method − This geometry manager organizes widgets in blocks before placing them in the parent widget.
– The grid() Method − This geometry manager organizes widgets in a table-like structure in the parent widget.
– The place() Method − This geometry manager organizes widgets by placing them in a specific position in the parent widget.
33

© Copyright 2012 by Pearson Education, Inc. All Rights Reserved.
pack() MethodThis geometry manager organizes widgets in blocks before placing them in the parent widget.
Syntax : widget.pack( pack_options )
Here is the list of possible options −
– expand − When set to true, widget expands to fill any space not otherwise used in widget's parent.
– fill − Determines whether widget fills any extra space allocated to it by the packer, or keeps its own minimal dimensions: NONE (default), X (fill only horizontally), Y (fill only vertically), or BOTH (fill both horizontally and vertically).
– side − Determines which side of the parent widget packs against: TOP (default), BOTTOM, LEFT, or RIGHT.
34

© Copyright 2012 by Pearson Education, Inc. All Rights Reserved.
pack() Method
35
import tkinter
window = tkinter.Tk()
window.title("GUI")
# creating 2 frames TOP and BOTTOM
top_frame = tkinter.Frame(window).pack()
bottom_frame = tkinter.Frame(window).pack(side = "bottom")
# now, create some widgets in the top_frame and bottom_frame
btn1 = tkinter.Button(top_frame, text = "Button1", fg = "red").pack()# 'fg - foreground' is used to color the contents
btn2 = tkinter.Button(top_frame, text = "Button2", fg = "green").pack()# 'text' is used to write the text on the Button
btn3 = tkinter.Button(bottom_frame, text = "Button2", fg = "purple").pack(side = "left")# 'side' is used to align the widgets
btn4 = tkinter.Button(bottom_frame, text = "Button2", fg = "orange").pack(side = "left")
window.mainloop()
LEFT places the three label side by side

© Copyright 2012 by Pearson Education, Inc. All Rights Reserved.
fill Option
If you want to make the widgets as wide as the parent widget, you have to use the fill=tk.X option
36
import tkinter as tk
root = tk.Tk()
w = tk.Label(root, text="Red Sun", bg="red", fg="white")
w.pack()
w = tk.Label(root, text="Green Grass", bg="green", fg="black")
w.pack(fill=tk.X)
w = tk.Label(root, text="Blue Sky", bg="blue", fg="white")
w.pack(fill=tk.X)
tk.mainloop()

© Copyright 2012 by Pearson Education, Inc. All Rights Reserved.
Grid Manager
The first geometry manager of Tk had been pack. The algorithmic behaviour of pack is not easy to understand and it can be difficult to change an existing design.
Grid was introduced in 1996 as an alternative to pack. Though grid is easier to learn and to use and produces nicer layouts, lots of developers keep using pack.
Grid is in many cases the best choice for general use. While pack is sometimes not sufficient for changing details in the layout, place gives you complete control of positioning each element, but this makes it a lot more complex than pack and grid.
The Grid geometry manager places the widgets in a 2-dimensional table, which consists of a number of rows and columns. The position of a widget is defined by a row and a column number.
37

© Copyright 2012 by Pearson Education, Inc. All Rights Reserved.
grid() Method
This geometry manager organizes widgets in a table-like structure in the parent widget.
Syntax : widget.grid( grid_options )
Here is the list of possible options −– column − The column to put widget in; default 0 (leftmost column).
– columnspan − How many columns widget occupies; default 1.
– ipadx, ipady − How many pixels to pad widget, horizontally and vertically, inside widget's borders.
– padx, pady − How many pixels to pad widget, horizontally and vertically, outside v's borders.
– row − The row to put widget in; default the first row that is still empty.
– rowspan − How many rowswidget occupies; default 1.
– sticky − What to do if the cell is larger than widget. By default, with sticky='', widget is centered in its cell. sticky may be the string concatenation of zero or more of N, E, S, W, NE, NW, SE, and SW, compass directions indicating the sides and corners of the cell to which widget sticks.
38

© Copyright 2012 by Pearson Education, Inc. All Rights Reserved.
Example 1 with grid
Places Labels in positions (0,0),(1,0),(2,0),(3,0),(4,0),(5,0) : First Column
Places Entries in positions (0,1),(1,1),(2,1),(3,1),(4,1),(5,1) : Second Column
39
import tkinter as tk
colours = ['red','green','orange','white','yellow','blue']
r = 0
for c in colours:
tk.Label(text=c, relief=tk.RIDGE, width=15).grid(row=r,column=0)
tk.Entry(bg=c, relief=tk.SUNKEN, width=10).grid(row=r,column=1)
r = r + 1
tk.mainloop()

© Copyright 2012 by Pearson Education, Inc. All Rights Reserved.
Example 2 with grid
40
import tkinter
root = tkinter.Tk( )
for r in range(3):
for c in range(4):
tkinter.Label(root, text='R%s/C%s'%(r,c), borderwidth=3, padx=3, pady=3, fg="yellow", \
bg="blue" ).grid(row=r,column=c)
root.mainloop()
© Copyright 2012 by Pearson Education, Inc. All Rights Reserved.
place() Method
This geometry manager organizes widgets by placing them in a specific position in the parent widget.
Syntax: widget.place( place_options )
Here is the list of possible options −– anchor − The exact spot of widget other options refer to: may be N, E, S,
W, NE, NW, SE, or SW, compass directions indicating the corners and sides of widget; default is NW (the upper left corner of widget)
– bordermode − INSIDE (the default) to indicate that other options refer to the parent's inside (ignoring the parent's border); OUTSIDE otherwise.
– height, width − Height and width in pixels.
– relheight, relwidth − Height and width as a float between 0.0 and 1.0, as a fraction of the height and width of the parent widget.
– relx, rely − Horizontal and vertical offset as a float between 0.0 and 1.0, as a fraction of the height and width of the parent widget.
– x, y − Horizontal and vertical offset in pixels
41

© Copyright 2012 by Pearson Education, Inc. All Rights Reserved.
Example 1 with place
42
import tkinter
from tkinter import messagebox
top = tkinter.Tk()
top.geometry("300x400") #Width x Height
def helloCallBack():
messagebox.showinfo( "Hello Python", "Hello World")
B = tkinter.Button(top, text ="Hello", command = helloCallBack)
B.pack()
B.place(bordermode="outside", height=100, width=200)
top.mainloop()
© Copyright 2012 by Pearson Education, Inc. All Rights Reserved.
Example 2 with place
43
import tkinter as tk
import random
root = tk.Tk()
# width x height + x_offset + y_offset:
# geometry("window width x window height + position right + position down")
# position the top left corner of the window right 300 pixels and down 300 pixels.
root.geometry("170x200+30+230")
languages = ['Python', 'Perl', 'C++', 'Java', 'Tcl/Tk']
labels = range(5)
for i in range(5):
ct = [random.randrange(256) for x in range(3)]
brightness = int(round(0.299 * ct[0] + 0.587 * ct[1] + 0.114 * ct[2]))
ct_hex = "%02x%02x%02x" % tuple(ct)
bg_colour = '#' + "".join(ct_hex)
l = tk.Label(root,
text=languages[i],
fg='White' if brightness < 120 else 'Black',
bg=bg_colour)
l.place(x=20, y=30 + i * 30, width=120, height=25)
root.mainloop()
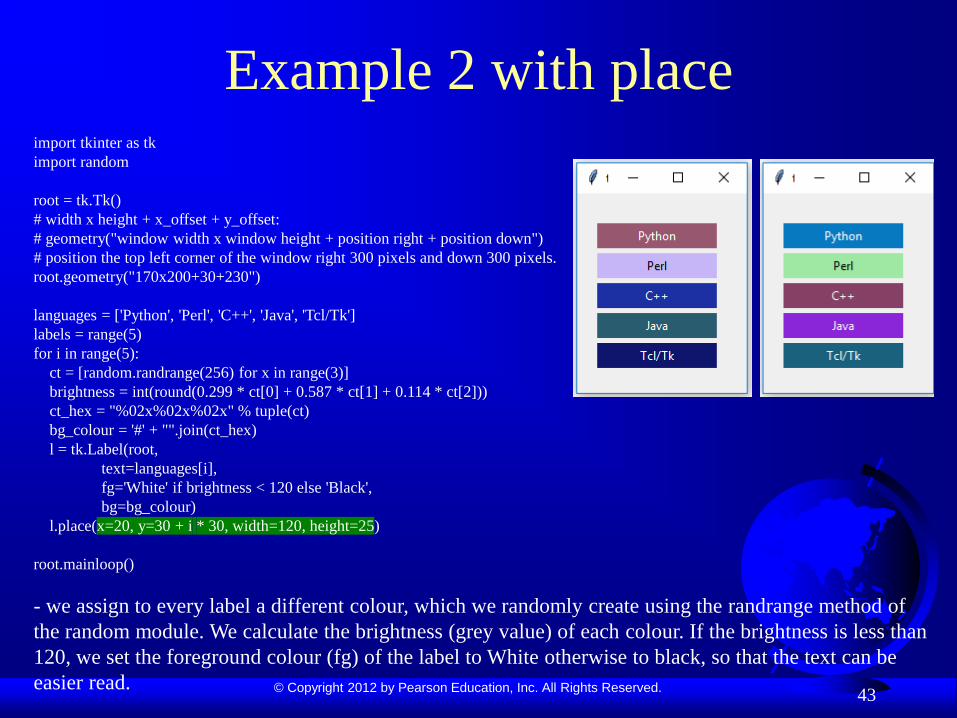
- we assign to every label a different colour, which we randomly create using the randrange method of
the random module. We calculate the brightness (grey value) of each colour. If the brightness is less than
120, we set the foreground colour (fg) of the label to White otherwise to black, so that the text can be
easier read.

© Copyright 2012 by Pearson Education, Inc. All Rights Reserved.
Binding FunctionsCalling functions whenever an event occurs refers to a binding function.– In the below example, when you click the button, it calls a function called say_hi.
– Function say_hi creates a new label with the text Hi.
44
import tkinter
window = tkinter.Tk()
window.title("GUI")
# creating a function called say_hi()
def say_hi():
tkinter.Label(window, text = "Hi").pack()
# 'command' is executed when you click the button
# in this above case we're calling the function 'say_hi'.
tkinter.Button(window, text = "Click Me!", command =
say_hi).pack()
window.mainloop()

© Copyright 2012 by Pearson Education, Inc. All Rights Reserved.
Binding Functions
Another way to bind functions is using events. Events are something like mousemove, mouseover, clicking, scrolling, etc..,.
Example on the next slide has clicking events are of 3 different types namely leftClick, middleClick, and rightClick.
<Button-1>' parameter of bind method is the left clicking event, i.e., when you click the left button the bind method call the function associated with it.
– <Button-1> for left click
– <Button-2> for middle click
– <Button-3> for right click
45

© Copyright 2012 by Pearson Education, Inc. All Rights Reserved.
Binding Functions
46
import tkinter
window = tkinter.Tk()
window.title("GUI")
#creating 3 different functions for 3 events
def left_click(event):
tkinter.Label(window, text = "Left Click!").pack()
def middle_click(event):
tkinter.Label(window, text = "Middle Click!").pack()
def right_click(event):
tkinter.Label(window, text = "Right Click!").pack()
window.bind("<Button-1>", left_click)
window.bind("<Button-2>", middle_click)
window.bind("<Button-3>", right_click)
window.mainloop()

© Copyright 2012 by Pearson Education, Inc. All Rights Reserved.
GUI with ClassesYou can use GUI Classes using root window when you're developing a large software or something that's big.
47
import tkinter
class GeeksBro:
def __init__(self, window):
# create a button to call a function called 'say_hi'
self.text_btn = tkinter.Button(window, text = "Click Me!", command = self.say_hi)
self.text_btn.pack()
# closing the 'window' when you click the button
self.close_btn = tkinter.Button(window, text = "Close", command = window.quit)
self.close_btn.pack()
def say_hi(self):
tkinter.Label(window, text = "Hi").pack()
window = tkinter.Tk()
window.title("GUI")
geeks_bro = GeeksBro(window)
window.mainloop()

© Copyright 2012 by Pearson Education, Inc. All Rights Reserved.48
Examples from textbook:
Getting Started with Tkinter
Getting started with Tkinter with a simple example.
SimpleGUI Run

© Copyright 2012 by Pearson Education, Inc. All Rights Reserved.49
Processing Eventswindow.mainloop() # Create an event loop
The statement creates an event loop. The event loop processes the events continuously.
ProcessButtonEvent
Run
Event to
Process?
Yes
false
Start Event Loop
Request to
Terminate?
Process
Yes
No
Terminate

© Copyright 2012 by Pearson Education, Inc. All Rights Reserved.50
The Widget Classes Widget Class Description
Button A simple button, used to execute a command.
Checkbutton Clicking a check button toggles between the values.
Radiobutton Clicking a radio button sets the variable to that value,
and clears all other radio buttons associated with the
same variable.
Entry A text entry field, a.k.a a text field or a text box.
Frame A container widget for containing other widgets.
Menu A menu pane, used to implement pull down and popup menus.
Menubutton A menu button, used to implement pull down menus.
Label Displays a text or an image.
Message Displays a text. Similar to the label widget, but can
automatically wrap text to a given width or aspect ratio.
Text Formatted text display. Allows you to display and edit
text with various styles and attributes. Also supports
embedded images and windows.
Scale Allows you to set a numerical value by dragging a
"slider".
Canvas Structured graphics, used to draw graphs and plots,
create graphics editors, and to implement custom widgets.
Toplevel A container widget displayed as a separate, top-level
window.

© Copyright 2012 by Pearson Education, Inc. All Rights Reserved.51
Color and FontTo specify a color, you can either use – a color name such as red, yellow, green, blue, white, black, purple,
etc, – or explicitly specify the red, green, and blue (RGB) color
components using a string #RRGGBB, where RR, GG, BB are hexadecimal representations of the red, green and blue values, respectively.
You can specify a font in a string that includes the font name, size, and style. Here are
Some examples:
"Times 10 bold"
"Helvetica 10 bold italic"
"Courier New 20 bold italic"
"Courier New 20 bold italic over strike underline"

© Copyright 2012 by Pearson Education, Inc. All Rights Reserved.52
Text Formatting
The text in a label and a button is centered by default.
You can change it by using the justify option with values
LEFT, CENTER, or RIGHT.
You can also display the text in multiple lines by
inserting the newline character \n to separate texts.

© Copyright 2012 by Pearson Education, Inc. All Rights Reserved.53
Mouse Cursor
You can set a mouse cursor by using the cursor option with
values such as
"arrow" (default),
"circle",
"cross"
"plus", etc.

© Copyright 2012 by Pearson Education, Inc. All Rights Reserved.54
Change PropertiesWhen you construct a widget, you can specify its properties such as fg, bg, font, cursor, text, and command in the constructor. Later in the program, you can change the widget’s properties by using the following syntax:
widgetName["propertyName] = newPropertyValue
Examples:
btShowOrHide = Button(window, text = "Show", bg = "white")
btShowOrHide["text"] = "Hide"
btShowOrHide["bg"] = "red"
btShowOrHide["fg"] = "#AB84F9" # Change fg color to #AB84F9
btShowOrHide["cursor"] = "plus" # Change mouse cursor to plus

© Copyright 2012 by Pearson Education, Inc. All Rights Reserved.55
Widget Demo
WidgetsDemo Run

© Copyright 2012 by Pearson Education, Inc. All Rights Reserved.56
Canvas
(0, 0) X Axis
Y Axis
(x, y)
x
y
Python Coordinate
System
X Axis Conventional
Coordinate
System
(0, 0)
Y Axis
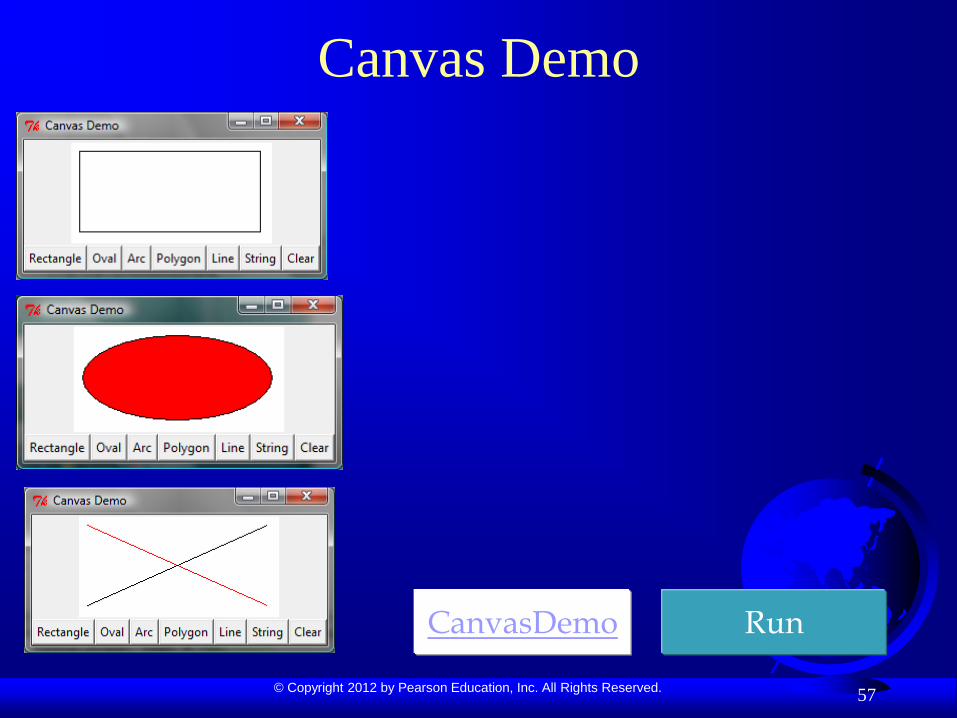
Canvas can be used to display shapes.
You can use the method such as create_rectangle,
create_oval, create_arc, create_polygon, and create_line to
draw a rectangle, oval, arc, polygon, and line on a canvas.
© Copyright 2012 by Pearson Education, Inc. All Rights Reserved.57
Canvas Demo
CanvasDemo Run

© Copyright 2012 by Pearson Education, Inc. All Rights Reserved.58
Drawing Methods (x1, y1)
(x2, y2)
canvas.create_rectangle(x1, y1,
x2, y2)
(x1, y1)
(x2, y2)
canvas.create_oval(x1, y1, x2, y2)
(x1, y1)
(x2, y2)
canvas.create_arc(x1, y1, x2, y2, start, extent)
canvas.create_line(x1, y1, x2, y2)
canvas.create_oval(x1, y1, x2, y2, x3, y3)
(x, y)
canvas.create_text(x, y, text = "ABCDE")
(x1, y1)
(x2, y2)
(x1, y1)
(x3, y3)
(x2, y2)
ABCDE

© Copyright 2012 by Pearson Education, Inc. All Rights Reserved.59
Geometry Managers
Grid Manager
Pack Manager
Place Manager
Since each manager has its own style of placing
the widget, it is not a good practice to mix the
managers for the widgets in the same container.
You can use a frame as a subcontainer to achieve
desired layout.

© Copyright 2012 by Pearson Education, Inc. All Rights Reserved.60
Grid Managers
GridManagerDemo Run

© Copyright 2012 by Pearson Education, Inc. All Rights Reserved.61
Pack Managers
PackManagerDemo2 Run
PackManagerDemo1 Run
© Copyright 2012 by Pearson Education, Inc. All Rights Reserved.62
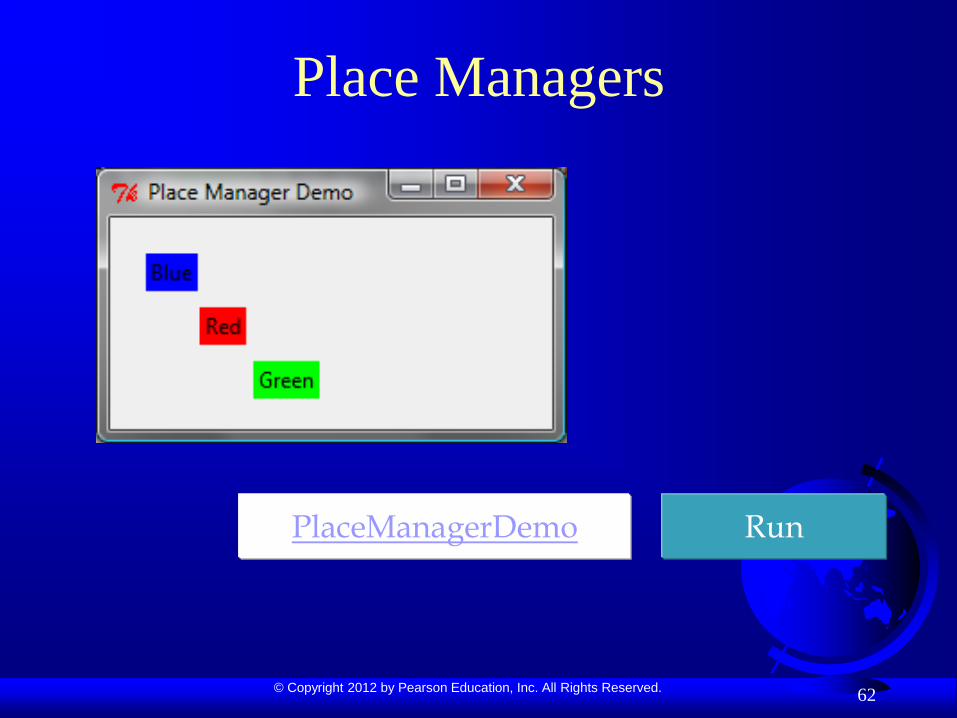
Place Managers
PlaceManagerDemo Run

© Copyright 2012 by Pearson Education, Inc. All Rights Reserved.63
Case Study: Loan Calculator
LoanCalculator Run
equivalent
label
label
label
label
entry
entry
entry
label
label
label
button

© Copyright 2012 by Pearson Education, Inc. All Rights Reserved.64
Display Images
You can add an image in a label, button, check
button, and radio button. To create an image, use
the PhotoImage class as follows:
photo = PhotoImage(file = imagefilename)
The image file must be GIF. You can use a
conversion utility to convert image files in other
format into GIF.

© Copyright 2012 by Pearson Education, Inc. All Rights Reserved.65
Image Example
ImageDemo Run

© Copyright 2012 by Pearson Education, Inc. All Rights Reserved.66
Menus
Tkinter provides a comprehensive solution for building graphical user interfaces.
MenuDemo Run
© Copyright 2012 by Pearson Education, Inc. All Rights Reserved.67
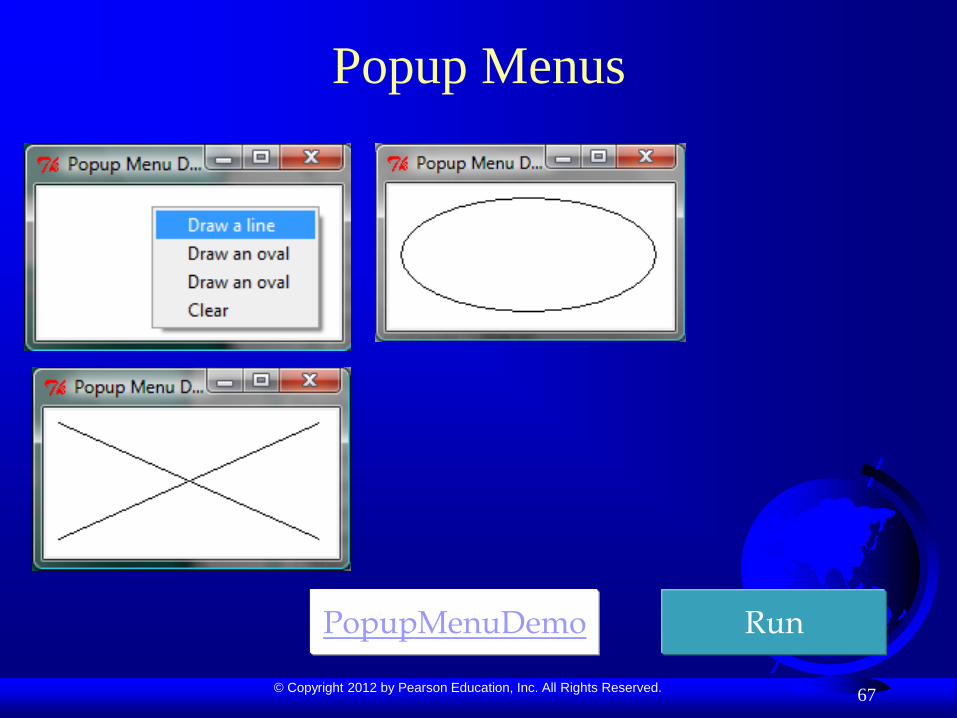
Popup Menus
PopupMenuDemo Run
© Copyright 2012 by Pearson Education, Inc. All Rights Reserved.68
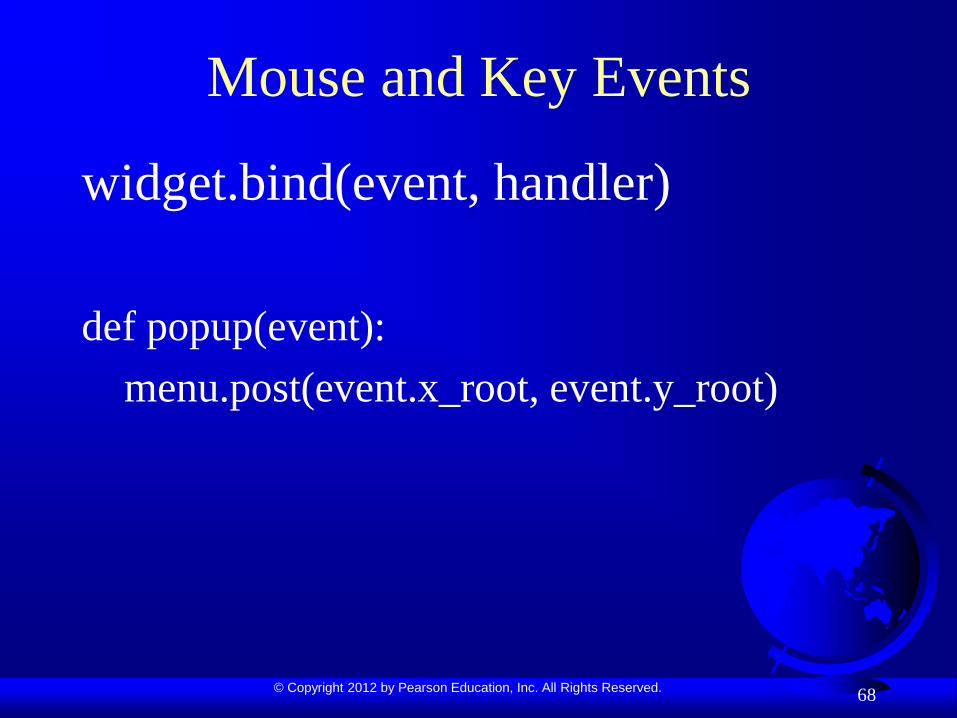
Mouse and Key Events
widget.bind(event, handler)
def popup(event):
menu.post(event.x_root, event.y_root)

© Copyright 2012 by Pearson Education, Inc. All Rights Reserved.69
Events Event Description
<Button-i> Button-1, Button-2, and Button-3 are for left, middle, or
right buttons. When a mouse button is pressed over the
widget, Tkinter automatically grabs the mouse pointer
location. ButtonPressed-i is synonymous to Button-i.
<Bi-Motion> An event occurs, when a mouse button is moved while being
held down on the widget.
<ButtonReleased-i> An event occurs, when a mouse button is released.
<Double-Button-i> An event occurs, when a mouse button is double-clicked.
<Triple-Button-i> An event occurs, when a mouse button is triple-clicked.
<Enter> An event occurs, when a mouse pointer enters the widget.
<Leave> An event occurs, when a mouse pointer leaves the widget.
<Return> An event occurs, when the Enter key is pressed. You can
bind any key such as <A>, <B>, <Up>, <Down>, <Left>,
<Right> in the keyboard with an event.
<Key> An event occurs, when a key is pressed.
<Shift-A> An event occurs, when the Shift+A keys are pressed. You
use Alt, Shift, and Control to combine with other keys.

© Copyright 2012 by Pearson Education, Inc. All Rights Reserved.70
Event Properties
Event Description
widget The widget object that fires this event.
x and y The current mouse location in the widget pixels.
x__root and y_root The current mouse position relative to the upper left
corner of the screen, in pixels.
num The button number (1, 2, 3), indicating which mouse
button was clicked.
char The char entered from the keyboard for key events.
keysym The key symbol for the key entered from the keyboard for
key events.
keycode The key code for the key entered from the keyboard for
key events.

© Copyright 2012 by Pearson Education, Inc. All Rights Reserved.71
Mouse Key Event Demo
MouseKeyEventDemo Run

© Copyright 2012 by Pearson Education, Inc. All Rights Reserved.72
Control Circle Demo
ControlCircle Run

© Copyright 2012 by Pearson Education, Inc. All Rights Reserved.73
Animations
Animation Demo Run

© Copyright 2012 by Pearson Education, Inc. All Rights Reserved.74
Control Animations
ControlAnimation Run

© Copyright 2012 by Pearson Education, Inc. All Rights Reserved.75
Scrollbar
ScrollText Run

© Copyright 2012 by Pearson Education, Inc. All Rights Reserved.76
Standard Dialogs
DialogDemo Run