cds cs configure - agilent
TRANSCRIPT

OpenLab CDS ChemStation Edition
Configuration Guide
ChemStation Edition Configuration

ChemStation Edition Configuration
NoticesManual Part NumberM8301-90060 EDITION 04/2019
Copyright© Agilent Technologies, Inc. 2010-2019
No part of this manual may be repro-duced in any form or by any means (including electronic storage and retrieval or translation into a foreign language) without prior agreement and written con-sent from Agilent Technologies, Inc. as governed by United States and interna-tional copyright laws.
Agilent TechnologiesHewlett-Packard-Strasse 8 76337 Waldbronn
WarrantyThe material contained in this document is provided “as is,” and is subject to being changed, without notice, in future edi-tions. Further, to the maximum extent permitted by applicable law, Agilent dis-claims all warranties, either express or implied, with regard to this manual and any information contained herein, includ-ing but not limited to the implied warran-ties of merchantability and fitness for a particular purpose. Agilent shall not be lia-ble for errors or for incidental or conse-quential damages in connection with the furnishing, use, or performance of this document or of any information con-tained herein. Should Agilent and the user have a separate written agreement with warranty terms covering the material in this document that conflict with these terms, the warranty terms in the separate agreement shall control.
Technology Licenses The hardware and/or software described in this document are furnished under a license and may be used or copied only in accordance with the terms of such license.
Restricted Rights LegendU.S. Government Restricted Rights. Soft-ware and technical data rights granted to the federal government include only those rights customarily provided to end user customers. Agilent provides this customary commercial license in Soft-ware and technical data pursuant to FAR 12.211 (Technical Data) and 12.212 (Computer Software) and, for the Depart-ment of Defense, DFARS 252.227-7015 (Technical Data - Commercial Items) and DFARS 227.7202-3 (Rights in Commer-cial Computer Software or Computer Software Documentation).
Safety Notices
CAUTIONA CAUTION notice denotes a hazard. It calls attention to an operating procedure, practice, or the like that, if not correctly per-formed or adhered to, could result in damage to the product or loss of important data. Do not proceed beyond a CAUTION notice until the indicated conditions are fully understood and met.
WARNINGA WARNING notice denotes a hazard. It calls attention to an operating procedure, practice, or the like that, if not correctly per-formed or adhered to, could result in personal injury or death. Do not proceed beyond a WARN-ING notice until the indicated conditions are fully understood and met.
Software Revision
This guide is valid for revision C.01.10 of the OpenLab CDS ChemStation Edition.

ChemStation Edition Configuration 3
In This Guide ...
This guide describes how to configure your OpenLab CDS ChemStation Edition using the OpenLab Control Panel. It describes how to configure instruments, users, security and authentication and licensing.
1 Licensing
Overview on OpenLab license management with the OpenLab Control Panel. For more information on OpenLab Licensing please see the OpenLab CDS ChemStation Edition System Topologies and Architectural Concepts guide (CDS_CS_Topologies.pdf).
2 Security
This section provides details on general ChemStation Security settings and on using the ChemStation Administration Tool. For more information on 21 CFR Part 11 requirements, refer to the OpenLab CDS ChemStation Edition with Central Data Storage Guide (CDS_CS_withCM-admin.pdf).
3 User Management
Once an authentication provider is set, you can configure users, groups and privileges with the OpenLab Control Panel.
Table 1 Terms and abbreviations used in this document
Term Description
AIC Agilent's Analytical Instrument Controller
CDS Chromatography Data System
ECM OpenLab ECM
ChemStation OpenLab CDS ChemStation Edition
Control Panel OpenLab Control Panel
Secure Workstation Secure Workstation for OpenLab CDS ChemStation Edition

ChemStation Edition Configuration 4
4 Diagnostic Information and Reports
This chapter describes the different types of information that are available via the OpenLab Control Panel.
5 Instruments
This chapter describes how to set up your instruments using the OpenLab Control Panel. It includes information on how to add and configure instrument modules.
6 Troubleshooting
This chapter summarizes helpful hints for troubleshooting potential problems you might see during the instrument configuration process.

ChemStation Edition Configuration 5
Contents
1 Licensing 7
License Management in the OpenLab Control Panel 8Install your License 9
2 Security 10
Authentication Provider 11Security Policy 14ChemStation Administration Tool 16
3 User Management 29
Users 30Groups 33Roles and Privileges 34Specific Roles for Individual Instruments 35
4 Diagnostic Information and Reports 36
System Activity Log 37Diagnostics 38Administrative Reports 39
5 Instruments 40
Instrument Management / Lab Status at a Glance 41Quick Instrument Configuration Guide 43Overview of Instrument Communications 47General Instrument Configuration Considerations 60Adding and Configuring Instruments 65Reconfigure Instruments Using Classic Drivers After Upgrade to ChemStation C.01.08 or Higher 113

ChemStation Edition Configuration 6
6 Troubleshooting 116
Troubleshooting the Network 117LC Instrument Start-up Problems 121ChemStation Troubleshooting 123
7 Appendix 124
Privileges in OpenLab Control Panel 125Sales and Support Assistance 132

ChemStation Edition Configuration 7
1 Licensing
License Management in the OpenLab Control Panel 8Install your License 9
Overview on OpenLab license management with the OpenLab Control Panel. For more information on OpenLab Licensing please see the OpenLab CDS ChemStation Edition System Topologies and Architectural Concepts guide (CDS_CS_Topologies.pdf).

ChemStation Edition Configuration 8
1 LicensingLicense Management in the OpenLab Control Panel
License Management in the OpenLab Control Panel
This service includes the administration of all licenses that are required for your system.
Before adding a license file, you must first purchase the license and generate the license file using SubscribeNet. For more information on generating new license files, refer to the Licensing chapter in the respective installation guide.
License Management in the Control Panel provides the following functions:• You can add license files to the license server.• You can navigate to the license monitor and view the properties of all licenses
installed on a given license server.• You can remove license files from the license server. This may be useful if an
invalid license file has been added.• You can view or change the license server.• You can view, copy, or save the MAC Address of the license server.• You can navigate to the Agilent Electronic Software and License Delivery web
page to obtain a license.
The following properties are shown for installed licenses:• Feature: This indicates the type of license used.• Version: If a license is versioned, you can see the version number. For licenses
that are not versioned, the version is always shown as 1.0.• In Use (Available): This indicates the number of licenses that are currently in
use and, in brackets, the total number of licenses. With the OpenLab CDS licensing strategy, a license is only in use as long as a software instance is running.
• Expiration: If the license is only valid for a certain period of time, the expiration date is displayed.
In the Alerts pane, you are informed if the number of available licenses has gone down to zero for a specific feature, or if you have started a software instance which requires a license that is unavailable.

ChemStation Edition Configuration 9
1 LicensingInstall your License
Install your License
The license must be added to your system using the Control Panel.1 Start the Control Panel shortcut on the desktop or go to Start > All Programs >
Agilent Technologies > OpenLab Shared Services > Control Panel.2 Navigate to Administration > Licenses.
3 In the ribbon, click Add License .
4 Choose to install the license by:• Using the license file option to browse to and open the license file (.lic)
saved from the license generation process in SubscribeNet.• Selecting the License Text option and copying the license text from a text
file received into the provided field.5 Click OK.
The Administration interface in the Control Panel will now display the status of installed licenses.

ChemStation Edition Configuration 10
2 Security
Authentication Provider 11Setting the Authentication Provider and Storage Location 12
Security Policy 14ChemStation Administration Tool 16About the ChemStation Administration Tool 16Enabling users to start the ChemStation Administration Tool 17Machine-dependent encryption 18ChemStation Session Locks 19Automatic Data Transfer Settings 21Transfer Management Settings 22Audit Trail Settings 23Configuration Profiles 23Folder Protection with Secure File I/O 25
This section provides details on general ChemStation Security settings and on using the ChemStation Administration Tool. For more information on 21 CFR Part 11 requirements, refer to the OpenLab CDS ChemStation Edition with Central Data Storage Guide (CDS_CS_withCM-admin.pdf).

ChemStation Edition Configuration 11
2 SecurityAuthentication Provider
Authentication Provider
Authentication providers are used to prove the identity of users that log into the system. OpenLab CDS Shared Services support the following Authentication providers:• None
In this mode, no login screen is shown when you access the Control Panel. The user is automatically logged in to the application with security disabled. All log entries record the user as "Anonymous". With the authentication provider None, the Security Policy and User Management nodes are unavailable in the Control Panel.
• InternalIn this mode, the user's credentials are created and stored in the Shared Services database. You are asked to create an administrator account for Shared Services before setting up other users. This is the only mode in which you can create new users within the system.
• Windows DomainYou import existing Windows users into OpenLab CDS Shared Services. The authentication is done either by a Windows Active Directory domain or NT 4.0 Domain within the Enterprise. Shared Services only use the identity and password of the mapped users; roles and privileges are still configured with the Shared Services.
• ECMIn this mode, an OpenLab ECM 3.x system is responsible for authentication. When you start the Control Panel, the application will prompt for ECM credentials to validate a user. You must choose an existing ECM user as an administrator for the Shared Services. The Search function helps you to find specific ECM users. The Shared Services only use the identity and password of the mapped users; roles and privileges for ChemStation Edition are still configured with the Shared Services.
NOTE With the authentication provider None, any activity logs will display a generic System operator with no additional identification. This is not recommended for regulated environments.

ChemStation Edition Configuration 12
2 SecurityAuthentication Provider
Setting the Authentication Provider and Storage Location1 Open the Control Panel from the desktop shortcut, or go to Start > All
Programs > Agilent Technologies > Control Panel.2 From the navigation pane, select Administration > System Configuration.3 In the System Configuration toolbar, select Edit System Settings.
Figure 1 Edit System Settings dialog in the OpenLab Control Panel
4 In the Edit System Settings window, select your authentication provider from the drop-down list.If you installed a server, the Internal authentication provider is automatically configured during the installation. If required, you can change the authentication provider to Windows domain.
5 Select your storage provider from the drop-down list.The storage type Content Management is available only if OpenLab Server/OpenLab ECM XT has been deployed.

ChemStation Edition Configuration 13
2 SecurityAuthentication Provider
6 Select Next.7 Select a user to administrate the system.
a If you selected Internal as an authentication provider:• Select Create Account.• In the Create Administrator Account dialog box, enter a Name and a
Password.b If you selected Windows Domain as an authentication provider:
• Select the check box to activate the input fields.• Enter a Domain, User, and Password.• Select Select Account.• Enter a search string.• In the Search Users dialog box, select Search to view a list of users.• Select a user.
c If you selected ECM as an authentication provider:• Provide the ECM Server URL and enter the ECM user credentials.• Select Select Account.• Enter a search string.• In the Search Users dialog box, select Search to view a list of users.• Select a user.
8 Select OK.9 Select Next.10 Review your settings and select Apply.

ChemStation Edition Configuration 14
2 SecuritySecurity Policy
Security Policy
Once an authentication provider is configured, security policy is enabled and allows you to configure, for example, an inactivity timeout or password policies.
With the authentication provider Internal, you can set all of the parameters described below in the OpenLab Control Panel. With an external authentication provider (e.g. Windows Domain), you can only set the inactivity time in the OpenLab Control Panel; all other parameters are defined by the external system.
For more information on 21 CFR Part 11 requirements for ChemStation, refer to the OpenLab CDS ChemStation Edition with Central Data Storage Guide.1 Launch the Control Panel and navigate to Administration.2 In the navigation pane, select Security Policy.3 In the ribbon, click Edit Security Policy.
Table 2 Security Policy settings
Setting Description 21 CFR Part 11 Requirements
Minimum password length If users change their passwords, they must choose a password with at least the given number of characters. The default setting is 5.Only available for authentication provider Internal.
At least 5 characters.
Password expiration period (days)
The default value is 30 days. When the user tries to log in after this period of time, the system will ask him to change the password. The expiration period starts with the last password change or with the creation of a user with a new default password.Only available for authentication provider Internal.
Expiration period 180 days or less.
Maximum unsuccessful login attempts before locking account
If a user tries to log in with invalid user credentials multi-ple times, the user is locked out of the system for a cer-tain period of time (Account lock time, see below). Login is impossible, even with valid user credentials. You can define the number of allowed login attempts. The default setting is 3.Only available for authentication provider Internal.
Number of allowed login attempts: Three.

ChemStation Edition Configuration 15
2 SecuritySecurity Policy
Account lock time (minutes) Once a user has exceeded the maximum number of allowed unsuccessful login attempts, this is the mini-mum time that must pass before he can try again. The default setting is 5 min.Only available for authentication provider Internal.
Inactivity time before locking the application
If the application is not used for this amount of time, the user interface will be locked.The default setting is 10 min. Set the value to zero to never lock.
Single Sign-On With Single Sign-On enabled, the user will not see the OpenLab Control Panel login screen.Only available for authentication provider Windows Domain.Note: Single Sign-On only applies to the OpenLab Control Panel. ChemStation will still require a login.
Table 2 Security Policy settings
Setting Description 21 CFR Part 11 Requirements

ChemStation Edition Configuration 16
2 SecurityChemStation Administration Tool
ChemStation Administration Tool
About the ChemStation Administration ToolThe ChemStation Administration Tool offers a number of functions related to the ChemStation configuration. One of these functions is to configure the data handling and audit trail settings per ChemStation instance (that is, per instrument and per online or offline instance). Alternatively, this function allows using the same settings for all instances running on a workstation, networked workstation, or Agilent Instrument Controller (AIC). Access to the ChemStation Administration Tool is therefore strictly limited:• The ChemStation Administration Tool can only be opened directly on the
ChemStation PC. In Distributed System installations, you must open the tool directly on the relevant AIC, not on a client.
• The ChemStation Administration Tool can only be started by users who are member of the local user group CSAdministrators (see “Enabling users to start the ChemStation Administration Tool” on page 17).
To start the ChemStation Administration Tool:1 From the Start menu in the Task Bar, select Start > All Programs > Agilent
Technologies > ChemStation Administration Tool.
Figure 2 ChemStation Administration Tool

ChemStation Edition Configuration 17
2 SecurityChemStation Administration Tool
Enabling users to start the ChemStation Administration ToolDuring the installation of OpenLab CDS ChemStation Edition, the local user group CSAdministrators is automatically created. Only members of this group are allowed to run the ChemStation Administration Tool. The user who installs ChemStation is automatically added to the CSAdministrators group.
To add a Windows user to the CSAdministrators group:
1 Go to Start > Control Panel > Administrative Tools1.2 Select Computer Management
Figure 3 Computer Management window
3 Under Groups, right-click the group CSAdministrator and select Add to Group... from the context menu.The Properties dialog shows the users who are currently members of the group.
1 View the items by icon to see a list of all items

ChemStation Edition Configuration 18
2 SecurityChemStation Administration Tool
4 Use the Add button to add the required users.After confirming with OK, the Properties dialog also contains the newly added users.
Machine-dependent encryptionWhen you call the ChemStation Administration Tool, it encrypts parts of the ChemStation application configuration file on the system. This encryption is machine-dependent.
NOTE If you want to create an image of a ChemStation installation that can be cloned and distributed to other PCs, you must not call the ChemStation Administration Tool prior to creating this image. ChemStation will not work on images with an encrypted ChemStation application configuration file.

ChemStation Edition Configuration 19
2 SecurityChemStation Administration Tool
ChemStation Session Locks
Concept of Session Locks
If you leave the ChemStation computer for a certain period of time, you can lock ChemStation so that no other user can access the application. This is a safety feature to ensure that there is no unauthorized access to ChemStation. When you activate the session lock, you or another user must first provide a valid login before continuing to work with ChemStation.
In ChemStation, there are the following options to activate the session lock:• Privately (User > Private Session Lock): Only the user who activated the session
lock, or a user with the ChemStation: Break session lock privilege, can log in. You can set this privilege in the OpenLab Control Panel. It is part of the project privileges (see section Specific Roles for Individual Instruments in the Agilent OpenLab CDS ChemStation Edition Configuration Guide (CDS_CS_configure.pdf)).
• Non-privately (User > Non Private Session Lock): Any valid user can log in. This is useful, for example, if there is a shift change, and the personnel ending their shift secure ChemStation until the personnel of the new shift start work.
• Toolbar lock button: The toolbar lock button can be configured to lock the ChemStation session privately or non privately.1
• Time-based: Depending on the configuration in OpenLab Control Panel, ChemStation is automatically locked after a given period of time without any user interaction (see Inactivity Timeout under Security Policy. For more information on settings in the OpenLab Control Panel, refer to the Agilent OpenLab CDS ChemStation Edition Configuration Guide (CDS_CS_configure.pdf)).The time-based session lock can be configured to lock the ChemStation session either privately or non-privately (see Figure 4 on page 20).
1 The toolbar lock button is only visible in the ChemStation if you use central data storage.

ChemStation Edition Configuration 20
2 SecurityChemStation Administration Tool
Session Lock Settings in the Administration Tool
In the ChemStation Administration Tool, you can set the following options for creating and breaking session locks:
Figure 4 ChemStation Administration Tool
Break Session Lock
If a ChemStation is currently locked and the authentication provider is unavailable, selecting this check box is the only way to regain access to the current ChemStation session.
Select the Break session lock check box during a fail over scenario. A locked ChemStation can then be accessed by any user just by clicking OK in the Login dialog. Login credentials are ignored. Users do not need the Break session lock privilege.
CAUTION Unlimited access
Be aware that, as a consequence, the user who regained access to ChemStation now has unlimited access to all ChemStation functions.
Do only use this option in emergency cases (for example, you use a Networked System, your Shared Services server is down, and authentication is no longer possible).
Note down when and by whom this option got activated.
Deactivate it immediately after use to avoid security issues.

ChemStation Edition Configuration 21
2 SecurityChemStation Administration Tool
Automatic Data Transfer SettingsYou can apply the following options either individually in each ChemStation instance, or globally across all instances of ChemStation on a workstation or AIC.
These settings override the settings in the Transfer Settings tab of the Preferences dialog box in the ChemStation.
After Acquisition
If you select this check box the data is automatically uploaded to the central repository after an acquisition. The raw data files are written to the local ChemStation file system while the sequence is still running. When the complete sequence is finished, the raw data files are packed in an SSIZip file which is then uploaded to the central repository.
After Any Data Modification
If you select this check box, the result set is automatically uploaded to the central repository after you changed the data analysis parameters for a sample and generated a report. The data is uploaded even if you do not reprocess the sequence.
After Reprocessing
If you select this check box, the result set is automatically uploaded to the central repository each time after you reprocessed the sequence.
Import after Reprocessing
If you select this check box, a sequence that is only stored locally is automatically uploaded to the central repository after reprocessing. This setting is useful, for example, if you reprocess data from an older version of ChemStation.

ChemStation Edition Configuration 22
2 SecurityChemStation Administration Tool
Transfer Management SettingsYou can apply the following options either individually in each ChemStation instance, or globally across all instances of ChemStation on a workstation or AIC.
These settings override the settings in the Transfer Settings tab of the Preferences dialog box in the ChemStation.
Manage queue on connect
If the connection to the central data storage is interrupted for any reason, a running data upload might be interrupted. In this case, the remaining data is written to an internal queue on the workstation or AIC.
If you select the Manage queue on connect check box, the queue is shown allowing the user with sufficient privileges to resume the data upload.
Cleanup data on shutdown
If you select the Cleanup data on shutdown check box, ChemStation checks the local file system at each shutdown. It deletes all local data and sequence files that have been stored in the central repository. Methods and sequence templates remain on the local file system.
NOTE Consider selecting the Cleanup data on shutdown check box when the system shall be compliant to 21 CFR Part 11.
CAUTION Inadequate check box selection
Loss of data
If you select the Cleanup data on shutdown check box, you should also select the Automatic data transfer settings After acquisition, After reprocessing, and After any data modification. Otherwise, if the users forget to upload the data to the central data storage before closing ChemStation, data might be lost.

ChemStation Edition Configuration 23
2 SecurityChemStation Administration Tool
Audit Trail Settings
Audit Trail
In the Audit Trail group, specify the conditions for the automatic audit trails for methods and results.
These settings override the settings in the Audit Trail tab of the Preferences dialog box in the ChemStation.
Configuration Profiles
Client Services Profile
By providing specific client services profiles, you activate specific functions and behaviors in ChemStation.• Olss
ChemStation communicates with the Shared Services; it sends status information to the Shared Services, and uses the settings defined in the Shared Services (for example, user authentication, roles and privileges, configuration settings, audit trail settings). Use this profile for ChemStation instances that are connected to the Shared Services, but have no connection to a central data storage system. The upload and download to the content management (CM) system is disabled.
• OlssEcmIn addition to communication with Shared Services, ChemStation allows transferring data files to and from OpenLab ECM 3.x. Use this profile for ChemStation instances that are connected to OpenLab Shared Services together with ECM 3.x. Do not use in combination with OpenLab ECM XT.In a fail over scenario, where the connection between the workstation and OpenLab ECM is interrupted, you can set the authentication provider in
Enable Method Audit Trail for all Methods
Mark this check box to switch on the Method Audit Trail for all methods.
Enable Results Audit Trail Mark this check box to switch on the Results Audit Trail for all results, and the Sequence Audit Trail for all sequences created with Unique folder Creation ON.

ChemStation Edition Configuration 24
2 SecurityChemStation Administration Tool
OpenLab Shared Service to None. This allows you to log on to ChemStation in the absence of OpenLab ECM.In this case, using the OlssEcm profile allows ChemStation to send the data files to the queue. Once the authentication provider in the Shared Services is set back to ECM, the upload can be resumed.
• OlssDataStoreIn addition to communication with Shared Services, ChemStation allows transferring data files to and from OpenLab Server or OpenLab ECM XT. Use this profile for ChemStation instances that are connected to OpenLab Server or ECM XT.
Diagnostics Profile
For each ChemStation instrument, the system creates two log files with information for diagnostic purposes:• Review.svclog for the offline instrument• Acquisition.svclog for the online instrument
With the Diagnostics profile setting, you can define the level of logging information that is written to these files. You can select a level of logging between None and Maximum; the normal amount is provided by the Default selection. With the ECM Troubleshoot selection, more of the ECM specific information is added to the log files. With the Troubleshoot selection, the system not only adds the information to the log files but also creates small memory dump files in case of critical errors.
NOTE Only change the Diagnostics profile setting if instructed to do so by an Agilent Support representative.

ChemStation Edition Configuration 25
2 SecurityChemStation Administration Tool
Folder Protection with Secure File I/OChemStation metadata such as validated master methods or sequences templates must be stored in secured locations in your content management system. For usage with your instruments these methods or sequence templates are also stored in various local folders. By default, the content of these folders is not protected against modification or deletion from local file browsers or from file dialogs within ChemStation.
To ensure data integrity, enable the Secure File I/O function for ChemStation. All relevant local paths will then be protected. The relevant paths are set by default, but can also be configured. The content of protected paths can no longer be modified by Windows file operations because access is denied for members of the Windows user group Interactive1. The protected folders can only be used inside ChemStation. If user authentication is enabled, only users with sufficient privileges can delete the locally stored data for housekeeping purposes. If those methods or sequences have been actively used with your instrument, copies are also stored along with results and their associated audit trails.
Prepare Secure File I/O in Windows
1 Ensure that all relevant ChemStation folders are on an NTFS file system.2 Do not use ChemStation folders on removable storage devices (for example,
external disks or USB media).3 Create a standard user account (local or domain) with the same or fewer
privileges than a normal ChemStation user. Do not grant administration or power user privileges. Make sure that this user is not a member of any group, especially not the Interactive group.This account will be used by the ChemStation for internal file operations. As the user is not supposed to log on interactively, do not use the option Change password at next logon.
1 In Windows, all users who log on interactively are automatically assigned to the Interactive group. The membership persists for the time the users remain logged in.
NOTE Consider using a password that never expires. If this is not possible due to your security policy, plan a downtime for ChemStation while updating the password.
As long as the password for this user account is expired, do not use the ChemStation. ChemStation will not work properly until you have updated the password in the ChemStation Administration Tool.

ChemStation Edition Configuration 26
2 SecurityChemStation Administration Tool
Enable Secure File I/O in ChemStation
1 Click Start > All Programs > Agilent Technologies > ChemStation Administration Tool to open the ChemStation Administration Tool.
2 In the ChemStation Administration Tool, select the enable secure file IO check box.
3 Provide the credentials of the special user account that you have prepared.4 Click Apply.5 A dialog lists all directories that are going to be protected. Click OK to confirm.
For all paths that are protected, a ProtectionInfo.xml file is stored in the root folder. This protection information file contains the time stamp and the Windows user who enabled protection - that is either the user who enabled the path from the ChemStation Administration tool, or the user who configured a new instrument.The Protection Information file provides proof for a given folder when the last activation was performed. Any period of time before that date is unspecified. The file can be used to demonstrate the uninterrupted protection status of a folder since it contains the date, time and user who last enabled protection.Enabling or disabling secure file I/O is not logged to the OpenLab Control Panel Activity Log or the Windows Event Logs (application or Security).When the folder is unprotected, the ProtectionInfo.xml file is deleted. Note, deleting this file will not unprotect the folder.
6 For administrative tasks, you can temporarily disable the protection of specific folders:a Shut down all ChemStation sessions.b In the ChemStation Administration Tool, click Manage Secure File System.c In the list of directories, find the relevant path and click Unprotect.
The protection information file is deleted to document the interruption of the protection state.
d After finishing your tasks, click Protect All to restore protection for all relevant folders.New protection information files are created.
e Start ChemStation again.ChemStation will only start if all folders are protected.

ChemStation Edition Configuration 27
2 SecurityChemStation Administration Tool
Check privileges for ChemStation users
In the OpenLab Control Panel, specific privileges can be configured. Several privileges are relevant for Secure File I/O. They handle occasions when data, methods, or sequences need to be loaded from unprotected locations (which are outside of the secure folders). These privileges are enabled in the default ChemStation Roles to maintain the current workflows.
To ensure data integrity, it is recommended to uncheck these privileges when Secure File I/O is enabled.
The relevant privileges are:• ChemStation: Data > Load data from not configured path
Required for loading data from unprotected paths, or adding data paths that are not empty to the ChemStation.
• ChemStation: Method > Load method from not configured pathRequired for loading a method from an unprotected path, saving a method to an unprotected path, or adding method paths to the ChemStation (Preferences dialog).
• ChemStation: Sequence > Load sequence template from not configured pathRequired for loading sequence templates from unprotected paths, saving sequence templates to unprotected paths, or adding paths that are to the ChemStation (Preferences dialog).
Important Notes for Working with Secure File I/O
When using Secure File I/O to protect your ChemStation folders:• Do not share protected folders. Sharing a folder will break the protection.
If your data resides within the public documents folder (default setting), do not turn on public sharing.
• Do not log in interactively with the user account provided in the ChemStation Administration Tool.If this user logs in interactively, you will not be able to save any changed data in ChemStation until the user logs out again.
• If the password for this user account has expired, do not use the ChemStation until you updated the password in the ChemStation Administration Tool. ChemStation will not work properly as long as the password is outdated.
ChemStation Edition Configuration 28
2 SecurityChemStation Administration Tool
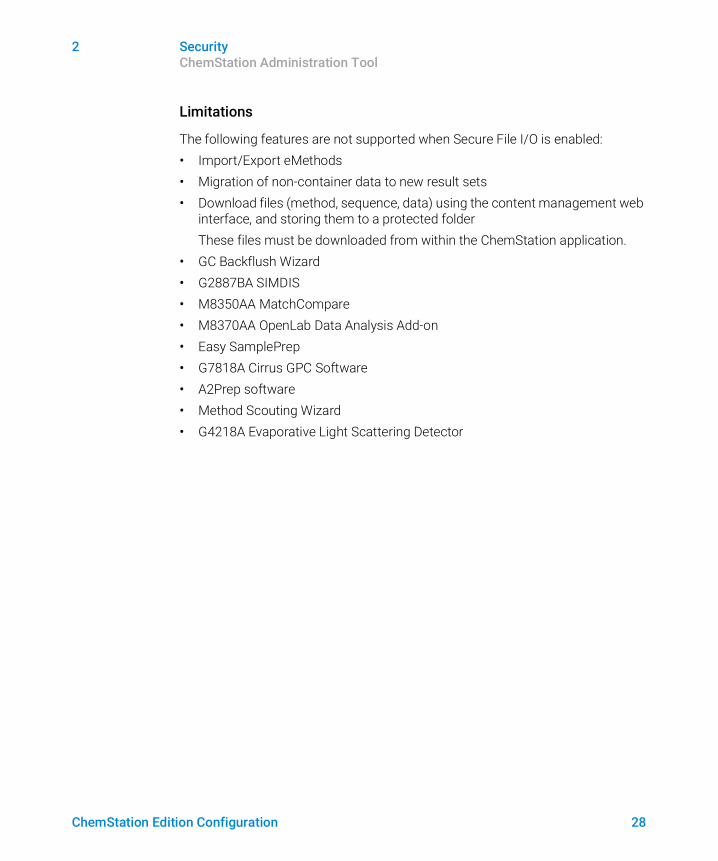
Limitations
The following features are not supported when Secure File I/O is enabled:• Import/Export eMethods• Migration of non-container data to new result sets• Download files (method, sequence, data) using the content management web
interface, and storing them to a protected folderThese files must be downloaded from within the ChemStation application.
• GC Backflush Wizard• G2887BA SIMDIS• M8350AA MatchCompare• M8370AA OpenLab Data Analysis Add-on• Easy SamplePrep• G7818A Cirrus GPC Software• A2Prep software• Method Scouting Wizard• G4218A Evaporative Light Scattering Detector

ChemStation Edition Configuration 29
3 User Management
Users 30Configure Users/Groups/Roles 30Create or import users 30
Groups 33Roles and Privileges 34Specific Roles for Individual Instruments 35
Once an authentication provider is set, you can configure users, groups and privileges with the OpenLab Control Panel.

ChemStation Edition Configuration 30
3 User ManagementUsers
Users
Configure Users/Groups/Roles1 Launch the OpenLab Control Panel and navigate to Administration2 Select Users in the Navigation Window. Import/Create Users that will have
access to the OpenLab CDS Workstation.3 Select Groups in the Navigation Window. Import or Create Groups that will
have access to the OpenLab CDS Workstation.4 Select Roles in the Navigation Window. Create/edit Roles and assign Users or
Groups to those Roles.
Only if you use OpenLab ECM 3.x for Content Management: There are relevant roles in both ECM and ChemStation Edition. Roles and privileges must be configured separately for ECM and ChemStation:• The privileges set in ECM define the accessible content and functions in ECM.• The privileges set in the OpenLab Control Panel define the instrument
privileges, the functions that are available in ChemStation, and also which administrative tasks can be carried out in the OpenLab Control Panel.
For details, refer to the Users, Roles, and Privileges Concept with ECM section in the OpenLab CDS ChemStation Edition with Central Data Storage Guide (CDS_CS_withCM-admin.pdf).
Create or import usersUse the OpenLab Control Panel to manage the roles and privileges. You can create custom roles, or assign one or more of the predefined roles to give users different access rights.
A good practice is to set up the system to have at least two administrators.
Add users (Internal Authentication only)1 From the navigation pane, click Administration > Users.2 In the Create User dialog, provide the relevant parameters:
• Enter the name and password for the new user.
ChemStation Edition Configuration 31
3 User ManagementUsers
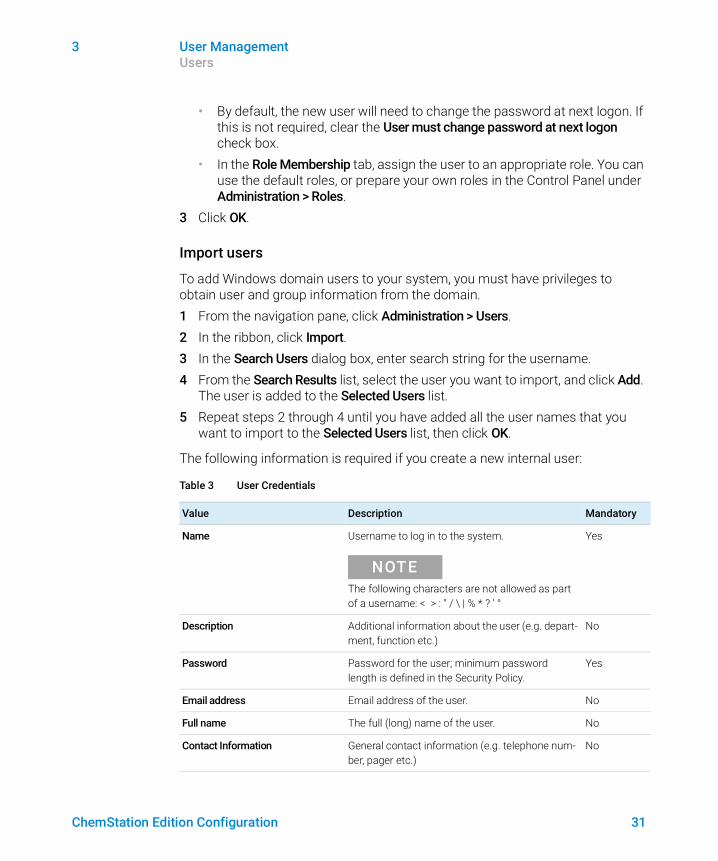
• By default, the new user will need to change the password at next logon. If this is not required, clear the User must change password at next logon check box.
• In the Role Membership tab, assign the user to an appropriate role. You can use the default roles, or prepare your own roles in the Control Panel under Administration > Roles.
3 Click OK.
Import users
To add Windows domain users to your system, you must have privileges to obtain user and group information from the domain.1 From the navigation pane, click Administration > Users.2 In the ribbon, click Import.3 In the Search Users dialog box, enter search string for the username.4 From the Search Results list, select the user you want to import, and click Add.
The user is added to the Selected Users list.5 Repeat steps 2 through 4 until you have added all the user names that you
want to import to the Selected Users list, then click OK.
The following information is required if you create a new internal user:
Table 3 User Credentials
Value Description Mandatory
Name Username to log in to the system.
NOTEThe following characters are not allowed as part of a username: < > : " / \ | % * ? ' °
Yes
Description Additional information about the user (e.g. depart-ment, function etc.)
No
Password Password for the user; minimum password length is defined in the Security Policy.
Yes
Email address Email address of the user. No
Full name The full (long) name of the user. No
Contact Information General contact information (e.g. telephone num-ber, pager etc.)
No

ChemStation Edition Configuration 32
3 User ManagementUsers
When using an external authentication provider (Windows Domain or ECM), the OpenLab Control Panel allows you to search and import the user into the application. In the OpenLab Control Panel, you can manage the roles for those external users, but not the actual user credentials such as user name and password. If you want to remove an external user, you delete the user in the OpenLab Control Panel. The user continues to exist in the external authentication system.
Password never expires The password will never expire, even if a pass-word expiration period is set in the security policy.
No
Account is disabled Select the check box to disable an account. Users with disabled accounts cannot log in any more. Accounts may be automatically disabled after too many failed login attempts.If an account is disabled, a corresponding mes-sage is displayed instead of the check box. After a given time (see Account lock time in the Security Policy settings), the account is automatically enabled again.
No
User cannot change password Flag that indicates whether the user can change his own password. The flag is false by default (that is, users CAN change their passwords).
No
User must change password at next login
If set to true, the user has to change his password at the next login. The flag is automatically set to false after the user has changed the password successfully. The flag is true by default for new users.
No
Group Membership Assign the user to the relevant groups.
Role Membership Assign roles directly to the user.
Table 3 User Credentials
Value Description Mandatory

ChemStation Edition Configuration 33
3 User ManagementGroups
Groups
Each user can be member of multiple groups. You must assign a specific role to each group. You can also assign roles to single users; however, for the sake of clarity, it is strongly recommended to assign roles only on the group level.
If you use an external authentication provider, you can either import the names of groups that exist in the external system, or create new internal groups. There is no limit on the number of groups that can be mapped or created.
Assign users to groups either in the external system or in the Control Panel. If you need additional user assignments that are relevant only for OpenLab CDS ChemStation Edition, create them in the Control Panel.
If you delete or unmap a group, the users who were members in this group remain unchanged.

ChemStation Edition Configuration 34
3 User ManagementRoles and Privileges
Roles and Privileges
Roles are used to assign privileges to a user or a user group globally or for a specific instrument or location. The system contains a list of predefined roles which are installed as part of the system installation (for example, Instrument Administrator, Instrument User, or Everything).
Each role has certain privileges assigned. Privileges define what the users are allowed to view or do in the Control Panel and in ChemStation.
Privileges are grouped according to the three main role types (Project role, Instrument role, and Administrative role). When you assign privileges to a role, you first select the required role type and then select the privileges related to this role type. Each role can only have privileges of one specific role type; the only exception is the predefined role Everything, which has all privileges of all role types. Users or groups may require multiple roles to perform system functions. For example, a user with the role Chemist may need another role such as Instrument User with the privilege to run an instrument.
You can create a tree of different locations in the Control Panel, and add instruments to the relevant locations. For each instrument or instrument group, you can assign different Instrument roles (see also “Specific Roles for Individual Instruments” on page 35). For example, a user can have the role Instrument Administrator for one instrument, and Instrument User for another instrument.
For details on the single privileges, see the Appendix.
Table 4 Description of role types
Role Type Description
Administrative privileges These privileges are globally assigned to a user or group and cannot be changed on the instrument/location level. They are the typical adminis-tration privileges such as Backup and restore, Manage security, Manage printers etc.
Instrument privileges These privileges can be assigned globally or on the instrument/location level. Privileges for instruments are, for example, View instrument or location and Run instrument.Users need the View instrument or location privilege on the global level to see the locations and instruments tree in the Control Panel.
Project privileges Privileges to control the available options inside the ChemStation appli-cation.

ChemStation Edition Configuration 35
3 User ManagementSpecific Roles for Individual Instruments
Specific Roles for Individual Instruments
By default, the roles of users or groups are globally set for all locations or instruments. The role settings are inherited from the root node Instruments. In order to assign a different role to a user or group for one specific node, you can deselect the Inherit privileges from parent check box in the Edit Privileges dialog for the required node. Afterwards, you can assign a different role that will be valid only for the specific node.
You can assign Instrument roles to individual locations or instruments.
Administrative roles are always set globally.

ChemStation Edition Configuration 36
4 Diagnostic Information and Reports
System Activity Log 37Enable the System Activity Log 37
Diagnostics 38Administrative Reports 39
This chapter describes the different types of information that are available via the OpenLab Control Panel.

ChemStation Edition Configuration 37
4 Diagnostic Information and ReportsSystem Activity Log
System Activity Log
The System Activity Log allows you to centrally access all system activities. It contains information on the various events associated with Shared Services or with specific instruments. You can filter the list in order to view events of a specific type, in a specific time range, created by a specific user, or containing a specific description only.
The following types of events are recorded:• System (e.g. Control Panel specific events)• Instrument Management (e.g. Adding instruments)• Instrument (e.g. instrument specific error messages)• Instrument Controller (e.g. adding a new Networked Workstation or AIC)• User (e.g. adding a new user or changing user privileges)• Group (e.g. adding a new user group or changing group privileges)• Security (e.g. successful and unsuccessful login events)• License (e.g adding a new license)
The messages can come from other components, such as the user management, or from an instrument module. Instrument messages include error messages, system messages or event messages. ChemStation records these events in its own environment but also sends the events to the System Activity Log. The System Activity Log records these events irrespective of whether you have been alerted to them or not. To get more information on an event, expand the line of interest in the activity logbook viewer.
Enable the System Activity Log1 In the OpenLab Control Panel, select the Administration > System Configuration
page.2 In the ribbon, click Activity Log Settings.3 In the Activity Log Settings dialog, select the Write activity log check box, and
confirm your settings.
NOTE By default, activity logging is disabled. To enable it in OpenLab Control Panel, you must have the Edit activity log properties privilege. Once enabled, activity logging cannot be disabled again.

ChemStation Edition Configuration 38
4 Diagnostic Information and ReportsDiagnostics
Diagnostics
The Diagnostics view allows you to access several reports and tools for diagnostic purposes:• Ping the server.• Create a report, either for the local system or for the server, with information
on the operation system, processors, disk drives, processes, network, and connections.
• Centrally access and download all the log files, trace files, etc. that are created by the registered modules.

ChemStation Edition Configuration 39
4 Diagnostic Information and ReportsAdministrative Reports
Administrative Reports
In the Administrative Reports view, you can additionally create and export various XML or PDF reports related to the system configuration:
Instrument Controllers Report
Detailed information of all Instrument Controllers. When this report is generated on a Workstation, the information presented relates to the local system. When this report is generated on a client-server system, all Instrument Controllers are included.
Instruments Report
Provides detailed information about configuration and access privileges for all instruments on the system. On client-server systems, this report includes all instruments on all Instrument Controllers.
Projects Report
Provides detailed information about configuration and access privileges for all projects on the system.
Roles and Privileges Report
Describes all roles defined on the system, including details of all privileges included in each role.
System Report
This report provides a consolidated view of the system, which includes all information about instrument controllers, instruments, projects, roles, users, and groups.
User's and Group's Role Assignment Report
This report provides an overview of all users and groups with their assigned roles.

ChemStation Edition Configuration 40
5 Instruments
Instrument Management / Lab Status at a Glance 41Quick Instrument Configuration Guide 43Overview of Instrument Communications 47Overview of Instrument Communications 47Network Communication 47Instrument Connections 57
General Instrument Configuration Considerations 60Adding Instruments to a ChemStation Installation 60Number of Instruments Supported 62Printer Configuration 64
Adding and Configuring Instruments 65Adding an LC System 65Configuring a Device Cluster 71Adding an ELSD to an LC System 76Adding an Agilent 7100 CE System 78Adding an Agilent GC System 82Adding an Agilent Micro GC 88Adding an Agilent Headspace Sampler 93Adding a Standalone ADC 94Adding a 35900E ADC to an LC or GC System 104Adding an Agilent PAL-xt or PAL3 Sampler 106Adding an LC/MS or CE/MS System 108
Reconfigure Instruments Using Classic Drivers After Upgrade to ChemStation C.01.08 or Higher 113
This chapter describes how to set up your instruments using the OpenLab Control Panel. It includes information on how to add and configure instrument modules.

ChemStation Edition Configuration 41
5 InstrumentsInstrument Management / Lab Status at a Glance
Instrument Management / Lab Status at a Glance
The Instruments view in OpenLab Control Panel offers an overview of all instruments in the network or on the workstation. You can see the following information for all instruments, summarized on one page:• Status of the instrument (including color-coded state, current run, and run
status)The status is stored and constantly updated in the Shared Services database in which the instrument is stored. It can be monitored by every OpenLab Control Panel connected the corresponding server.
• Instrument Name• Instrument location• Instrument type• Last change of configuration
Depending on the configuration, this information may be accessed only from a single PC or from multiple workstations in a network.
You can create a tree of different locations in the OpenLab Control Panel, and add instruments to these locations. Using locations, you can organize your instruments for example by department, by laboratory, or by lab bench. For each instrument, you can provide basic information such as the name, description, and instrument type.
Depending on your privileges, you can perform several operations on the instruments:• View instrument information (instrument status, instrument details, activity
log)• View the locations and instruments tree• Edit the instrument information• Configure the instrument
NOTE Mixed scenarios with ChemStation and EZChrom instruments are not supported.

ChemStation Edition Configuration 42
5 InstrumentsInstrument Management / Lab Status at a Glance
The instrument configuration is stored on the local PC or AIC, but you access the configuration tool from the OpenLab Control Panel.
• Launch the instrument online or offline.Workstation and Networked Workstation: As the instrument configuration is stored on the local PC, you only launch instruments that are configured on this PC.Distributed System: As the instrument configuration is stored on an AIC, you can launch all instruments remotely from any OpenLab CDS client in the network.
Your privileges can differ for the different locations and instruments (see “Specific Roles for Individual Instruments” on page 35).

ChemStation Edition Configuration 43
5 InstrumentsQuick Instrument Configuration Guide
Quick Instrument Configuration Guide
1 Open the Agilent OpenLab Control Panel:
2 Select the Instruments tab:
Figure 5 Control Panel, Instruments Tab
NOTE If you want the instruments allocated to a specific instrument number, you must configure the instruments in the required sequence. The first instrument you configure will be allocated to instrument 1 (..\Users\Public\Documents\ChemStation\1\), the second to instrument 2 (..\Users\Public\Documents\ChemStation\2\) and so on. However, the Control Panel lists the instruments in alphabetical order of their names.

ChemStation Edition Configuration 44
5 InstrumentsQuick Instrument Configuration Guide
3 Select the location of the new instrument:
4 Click Create > Create Instrument
Figure 6 Control Panel, Create Instrument
NOTE To create and edit locations, refer to the Control Panel online help.
NOTE You can also add instruments directly in the Instruments node.

ChemStation Edition Configuration 45
5 InstrumentsQuick Instrument Configuration Guide
5 Enter the instrument details and click OK.
Figure 7 Create Instrument panel
6 Navigate to the new instrument and click the Configure Instrument icon or right click on the instrument name and select Configure Instrument.
The Configure Instrument dialog box is displayed.7 Use Autoconfiguration if possible.
ORSelect the module(s) for the instrument configuration and click the > button.

ChemStation Edition Configuration 46
5 InstrumentsQuick Instrument Configuration Guide
8 Select any unconfigured modules and click Configure. Click OK when configuration is complete.
9 In the upper pane of the Configure Instrument dialog box, click the Method load on startup down-arrow and select which method to load when ChemStation is started.
10 Select the options you want to install from the Options section in the upper pane, then click OK to complete the configuration.
11 See “Adding Instruments to a ChemStation Installation” on page 60 for full details of installing and configuring additional options.

ChemStation Edition Configuration 47
5 InstrumentsOverview of Instrument Communications
Overview of Instrument Communications
This chapter describes the communication between ChemStation and the instruments.
Overview of Instrument CommunicationsFor standard communication with the instrument, ChemStation provides LAN communication using TCP/IP. For many Agilent instruments, you can set the IP address from the instrument's front panel, over telnet, or using the G4208A Instant Pilot (a handheld controller for Agilent LC devices that allows direct access to the settings of the devices). For other LAN instruments, you use the Agilent Bootp service to administer IP addresses.
Network CommunicationThe ChemStation software provides network-based instrument control and data acquisition for network-capable Agilent LCs, GCs, CEs and A/D controllers. You can easily control and monitor instruments by connecting them to the same network on which the ChemStation PC resides. This allows the ChemStation PC to be located anywhere within a TCP/IP-based environment.
ChemStation communication uses the TCP/IP version 4 protocol, which needs to be installed as a network protocol on your PC. The instrument and the PC controlling it (workstation or AIC) need to be in the same subnet. Consult the OpenLab CDS Requirements Guide on the installation media for more details.
The G1369A/B/C network cards used to connect an analytical instrument to a network require the bootstrap protocol (BootP). Agilent supports only the Agilent Bootp Service, provided on the installation media, for this use. For more information on instrument compatibility related to G1369A/B/C, see the Agilent G1369C LAN Interface Card, User Manual ( G1369-90002).
About Networks
Each device on the network requires a unique IP address, a subnet mask, and an optional gateway.

ChemStation Edition Configuration 48
5 InstrumentsOverview of Instrument Communications
If installing on a site network, contact the site network administrator. If installing on an isolated network, Agilent recommends the following addresses:
ChemStation supports instruments and PCs with self-assigned, or fixed addresses.
Upgrading to Network Communication
If you connect your instrument using a standard TCP/IP protocol, it needs to be installed as a network protocol on your PC. The current configuration of the LAN Assembly or G1369A/B/C network cards that are used to connect the analytical instrument to the network remains during the upgrade.
When upgrading from a GPIB control instrument to network connection, you must install the required network communication components and reconfigure your instrument.
Installing Network Communication
If you decide to connect your instrument using a standard network connection, you must ensure proper communication between the PC and the analytical instruments. The communication uses the TCP/IP protocol, which needs to be installed as a network protocol on your PC. For the configuration of the G1369A/B/C card that is used to connect the analytical instrument to the network, the bootstrap protocol is used, which requires a BootP Service.
The installation of the TCP/IP protocol on supported operating systems is outlined below. Instructions are also included for the Agilent Bootp Service program required to configure TCP/IP parameters for your instrument.1 From the Start menu in the Task Bar, select Start > Control Panel > Network and
Sharing Center.2 Click on Change Adapter Settings, select Local Area Connection and right-click
to access the properties.
Device Address
PC 10.1.1.100
GC, LC, CE or ADC 10.1.1.101 through 10.1.1.255
Subnet mask 255.255.255.0
Gateway 10.1.1.100

ChemStation Edition Configuration 49
5 InstrumentsOverview of Instrument Communications
3 In the General tab, select the internet protocol TCP/IP Version 4 and choose Properties.
4 Select Use the following IP address to ensure that the system does not use the DHCP address.
5 If your PC is connected to a site network, ask your IT department for a valid IP addresses, gateway, subnet mask, DNS and WINS server. If you are setting up your own internal network for instrument communication and are not connected to any other network, you may use the example settings from Table 5 on page 49.
Gateway, DNS, and WINS IP addresses do not need to be configured in this case, as you do not connect to any other part of a network. Figure 8 on page 50 shows an example of the TCP/IP configuration.
Table 5 Example IP addresses
PC or instruments IP address Subnet mask
PC 1 10.1.1.100 255.255.255.0
LC instrument module (1100/1200/1260/1290) 10.1.1.101 255.255.255.0
GC Instrument 10.1.1.102 255.255.255.0
Optional 35900E A/D converter 10.1.1.103 255.255.255.0
NOTE You need one IP address per device.

ChemStation Edition Configuration 50
5 InstrumentsOverview of Instrument Communications
Figure 8 TCP/IP Configuration Screen
6 Select OK to finish the configuration.
Configuring instruments using the Agilent Bootp service
Agilent BootP Service maintains association between a unique identification code (MAC address) provided with the LAN card installed in a given instrument and the specific IP address assigned to that instrument. Therefore, you must define, or redefine this association whenever you add a new instrument, exchange an instrument (or its LAN card), or change the IP address assigned to an instrument.1 Use the Agilent Bootp Service to determine the MAC address of the
instrument with the network card installed:a Power cycle the instrument.b After the instrument completes self-test, open the logfile of the BootP
Service using Notepad.
NOTE Use the IPCONFIG utility to verify the PC's TCP/IP settings by opening a command window and typing ipconfig /all
ChemStation Edition Configuration 51
5 InstrumentsOverview of Instrument Communications
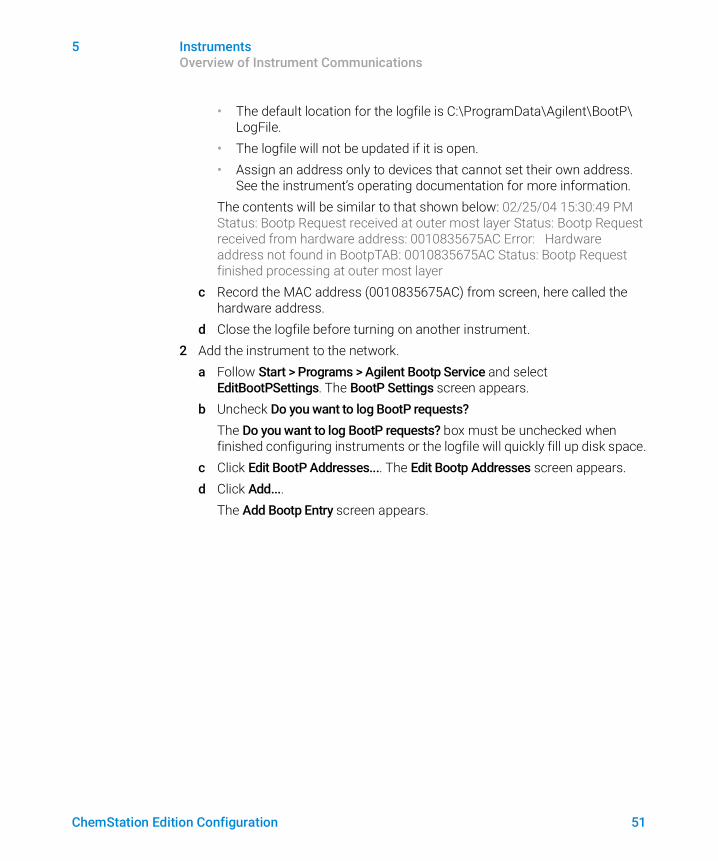
• The default location for the logfile is C:\ProgramData\Agilent\BootP\LogFile.
• The logfile will not be updated if it is open.• Assign an address only to devices that cannot set their own address.
See the instrument’s operating documentation for more information.The contents will be similar to that shown below: 02/25/04 15:30:49 PM Status: Bootp Request received at outer most layer Status: Bootp Request received from hardware address: 0010835675AC Error: Hardware address not found in BootpTAB: 0010835675AC Status: Bootp Request finished processing at outer most layer
c Record the MAC address (0010835675AC) from screen, here called the hardware address.
d Close the logfile before turning on another instrument.2 Add the instrument to the network.
a Follow Start > Programs > Agilent Bootp Service and select EditBootPSettings. The BootP Settings screen appears.
b Uncheck Do you want to log BootP requests?The Do you want to log BootP requests? box must be unchecked when finished configuring instruments or the logfile will quickly fill up disk space.
c Click Edit BootP Addresses.... The Edit Bootp Addresses screen appears.d Click Add....
The Add Bootp Entry screen appears.

ChemStation Edition Configuration 52
5 InstrumentsOverview of Instrument Communications
Figure 9 Add BootP Entry screen
e Make these entries:• MAC Address, as previously obtained and recorded• Host Name• IP Address• Comment, if desired• Subnet Mask• Gateway address (optional)
f Click OK.g Leave Edit BootP Addresses by pressing Close.

ChemStation Edition Configuration 53
5 InstrumentsOverview of Instrument Communications
h Use the PING utility to verify the LAN connectivity by opening a command window and typing ping <ip.adress> (e.g. ping 10.1.1.101) “Verify that the IP Address is correct” on page 119 .
i Exit BootP Settings by pressing OK and power cycle the instrument.If changing the IP address, it will be necessary to power cycle the instrument for the changes to take effect.
3 Add an additional instrument or device to the network.a Repeat step 2 on page 51 for each instrument or device on the network
that requires the Bootp service.b When finished, click Exit Manager.c Click OK.

ChemStation Edition Configuration 54
5 InstrumentsOverview of Instrument Communications
Configuring the Agilent BootP Service
Agilent BootP Service starts automatically when your PC reboots. To change Agilent BootP Service settings, you must stop the service, make the changes, and then restart the service. Follow the procedures below to configure your Agilent BootP Service.1 Stop the Agilent BootP service.
a From the Windows Control Panel, select Administrative Tools > Services. The Services screen appears.
b Right-click Agilent BootP Service.c Select Stop.d Close the Services and Administrative Tools screens.
2 Edit the settings.3 Follow Start > Programs > Agilent BootP Service and select EditBootPSettings.
The BootP Settings screen appears.The BootP Settings screen appears.
4 When the BootP Settings screen is first opened, it shows the default settings from installation.
5 Edit BootP Addresses.

ChemStation Edition Configuration 55
5 InstrumentsOverview of Instrument Communications
6 Press Edit BootP Addresses... to edit the existing tabfile.
Figure 10
A default TabFile was created at installation and is located at C:\ProgramData\Agilent\BootP\TabFile. It contains configuration information entered on this screen.
7 In the Edit BootP Addresses... screen press Add... to create a new entry or select an existing line from the table and press Modify... or Delete to change the TabFile.If you change the IP address, it will be necessary to power cycle the instrument for the changes to take effect.
8 Leave Edit BootP Addresses... by pressing Close.9 Exit BootP Settings by pressing OK.10 Configure logging.11 Do you want to log BootP requests?: Check to enable logging
ORUncheck to stop logging.A default log file was created at installation and is located at C:\ProgramData\Agilent\BootP\LogFile. It contains an entry for every time a device requests configuration information from Bootp.
12 Click OK to save the values or Cancel to discard them. The editing ends.13 Restart the Agilent BootP service.

ChemStation Edition Configuration 56
5 InstrumentsOverview of Instrument Communications
14 In the Windows Control Panel, select Administrative Tools > Services. The Services screen appears.
15 Right-click Agilent BootP Service and select Start.16 Close the Services and Administrative Tools screens.
This completes configuration.

ChemStation Edition Configuration 57
5 InstrumentsOverview of Instrument Communications
Instrument ConnectionsBe sure to set up the communication channel between the instrument and the PC prior to operating the system.
Connecting an Agilent GC system
Agilent GC systems and Headspace samplers connect to ChemStation via the network (LAN).
You can connect the GC system either directly to the computer running the ChemStation software using a crossover network cable (point-to-point), or to the local area network hub, using a standard network cable.
For details about configuring the GC system for network communications, see the GC system User Manual.
Connecting an Agilent LC system via the Network
Installation and interconnection of your Agilent Modular LC modules are described in more detail in the Agilent Modular LC module user manual supplied with each module.• Connect a controller-area network (CAN) cable between each of your
Agilent Modular LC modules except the vacuum degasser and a G1330 ALS cooler. One CAN cable is included with each Agilent Modular LC module.
• Connect a remote cable (part number 5061-3378) between the Vacuum Degasser and one other Agilent Modular LC module, preferably a pump.
• Connect the Agilent Modular LC module with the G1369A/B/C network card inserted into your network (LAN) component (use the detector), using the appropriate EtherTwist 10BaseT cable.
• Several modules have on-board network communication; use the appropriate EtherTwist 10BaseT cable.
NOTE We recommend that you connect the network (LAN) cable to an Agilent Modular LC detector (mandatory for DAD and MWD detectors). If no Agilent detector is used, please contact your Agilent representative for information about the insertion point of the communication card.

ChemStation Edition Configuration 58
5 InstrumentsOverview of Instrument Communications
Connecting an Agilent PAL
Connecting an Agilent Integrated LC System via the Network
The Agilent 1220 Infinity LC system connects to ChemStation via the network (LAN). You can connect the LC system either directly to the computer containing the ChemStation software, using a crossover network cable (point-to-point), or to the local area network hub, using a standard network cable. The network (LAN) connector is situated on the left side of the electronic box at the rear of the instrument.
For details about configuring the integrated LC system for network communications, see the system's User Manual.
Connecting an Agilent 35900E ADC
The Agilent 35900E ADC uses network (LAN) connection for communication.
All modules of an instrument that accept timetable entries or that go into run mode during an analysis must be included in the remote control loop. In general, each module must be connected to the other devices with a remote control cable (for APG or ERI interfaces).
The 35900E dual channel interface uses APG remote, but the two remote connectors are not pass-through connections. When you operate the 35900E with both channels simultaneously, only the A-channel remote is connected; the B-channel acts in synchronization with the A-channel and reacts to the remote signals from the A-channel remote connector. If you wish to operate the B-channel independently, you connect a remote cable to the B-channel remote connector. In this mode, one instrument may start and stop the A-channel while another instrument has control of the B-channel.
Table 6 Additional device communications
Device Supported communications
PAL-3 samplers Network (LAN)
PAL-xt samplers Network (LAN)RS232 (first generation only)
NOTE The independent control of two channels by separate instruments is possible beginning with the 35900 RC.Net software driver on AICs.

ChemStation Edition Configuration 59
5 InstrumentsOverview of Instrument Communications
Connecting an Agilent 7100 CE System
The Agilent 7100 CE System connects to ChemStation via the network (LAN). You can connect the 7100 CE System either directly to the computer with the ChemStation software, using a crossover network cable (point-to-point), or to the local area network hub, using a standard network cable. The network (LAN) connector is situated on the right side of the electronic box at the rear of the instrument.
For details about configuring the 7100 CE System for network (LAN) communications, see the Agilent 7100 Capillary Electrophoresis System User Manual.

ChemStation Edition Configuration 60
5 InstrumentsGeneral Instrument Configuration Considerations
General Instrument Configuration Considerations
This chapter contains information on instrument paths and on the number of supported instruments.
Adding Instruments to a ChemStation InstallationMuch of the Agilent Technologies analytical hardware is modular, and can be combined in various ways. Refer to the document ChemStation Supported Instruments guide (CDS_CS_Instrument-support.pdf) in the Docs/ENU folder on Disk 1 of the installation media for supported configurations.
Instrument types (for OpenLab CDS ChemStation Edition)
Instrument types with OpenLab CDS ChemStation Edition - Full License• Use the Agilent LC System instrument type for LC instrument configuration,
Agilent GC System for GC instrument configuration, or Agilent LC/MS System for configuration of a LC/MSD. This allows configuration and control of several instruments as indicated at “Number of Instruments Supported” on page 62.
• Additional instrument types are available for special instruments such as Agilent 7100 CE System, Agilent 7100 CE/MS System, Agilent ADC GC, Agilent ADC LC, or Agilent Micro GC System.
NOTE If you want the instruments allocated to a specific instrument number (for example, if you are upgrading from a previous ChemStation revision) you must configure the instruments in the required sequence. The first instrument you configure will be allocated to instrument 1 (..\Users\Public\Documents\ChemStation\1\), the second to instrument 2 (..\Users\Public\Documents\ChemStation\2\) and so on. However, the Control Panel lists the instruments in alphabetical order.

ChemStation Edition Configuration 61
5 InstrumentsGeneral Instrument Configuration Considerations
• Agilent 1220 Infinity LC system and 1120 Compact LC systems: Use instrument type Agilent 1220 LC System. For 1220 LC systems control of supplemental Agilent LC modules is supported except for modular pumps.
• Some additional instrument types are available to be used in an upgrade scenario.
Instrument types for use with OpenLab CDS ChemStation VL Licence (M8311AA)
An OpenLab CDS ChemStation VL license allows you to control one of the following instruments per workstation:• 1260 Isocratic Infinity LC system, or one 1260 Quaternary Infinity LC system:
Use instrument type Agilent LC Core System. Selected supplemental 1260 Infinity LC modules may be added.
• Agilent 1220 Infinity LC system and 1120 Compact LC systems: Use instrument type Agilent 1220 LC System. For 1220 LC systems control of supplemental Agilent LC modules is supported except for modular pumps.
• Agilent 8860 GC or 7820A GC: Use instrument type Agilent GC Core System (VL).
• Agilent Micro GCs: Use instrument type Agilent Micro GC System.

ChemStation Edition Configuration 62
5 InstrumentsGeneral Instrument Configuration Considerations
Number of Instruments SupportedThere is a limit to the number of instruments (for example, GCs, LC module stacks or CEs) that can be configured on a single ChemStation workstation or Agilent Instrument Controller (AIC), as shown in Table 7 on page 62.
When acquiring data in three- and four-instrument configurations, interactive data reprocessing is not recommended.
1100/1200 LC modules may be used in mixed configurations with Agilent gas chromatographs (GC). The configuration limits for these instrument combinations are:
Depending on the number of modules attached to the system, and the differences in the applications in use (for example, data rate), we recommend that you contact your Agilent Representative to identify the supported configuration for very complex systems. The following list outlines some considerations:• 1100/1200 chromatography instrument configurations that do not include
diode array detectors (DADs) on a single workstation are limited to a total of around 18 individual modules, configured as up to four instruments with a limit of four detectors per instrument.
Table 7 Maximum Number of Instruments
WorkStation AIC Secure Work-station
ChemStation Edition VL
GC, LC (2D)1
1 2D: no spectral acquisition
4 10 2 1
LC (3D)2, 3
2 3D: with spectral acquisition
3 for every installation, an additional license for each 3D instrument is required
2 5 2 1
CE 2 5 2 0
LC/MS, 7100 CE/MS 1 2 1 0
1100/1200 LC mixed-module combinations:
The 35900E Dual Channel Interface counts as the equivalent of one 1100/1200 module.
1100/1200 and GC combina-tions:
1100/1200 instrument without DAD: up to three Agilent GCs1100/1200 instruments with DAD: up to two Agilent GCs.

ChemStation Edition Configuration 63
5 InstrumentsGeneral Instrument Configuration Considerations
• The maximum number of 18 modules can consist of about 12 modules such as pumps, detectors and injectors, and about six can-slave modules such as valves and UIB interfaces. The maximum number depends on the exact module configuration and the LAN connection point.
• If detectors of the same type are used in one stack, two detectors of the same type are supported, or, in the case of the VWD, up to three. If DADs are included in the configuration, there is a limit of two DADs and about eight modules that may be configured as two separate instruments.
• When an instrument configuration includes an LC/MS, there is a limit of one LC/MS and one DAD on the instrument; no additional instruments are supported on the workstation.
• When an instrument configuration includes a CE/MS, there is a limit of one CE/MS including the DAD on the instrument. No additional instruments are supported on the CE/MS or CE ChemStation.
Analytical Instrument Controller (AIC)
Only instruments with a LAN connection can be controlled by an AIC. This excludes the ELSD detectors using RS232.
One AIC can control up to:
A 3D/DAD instrument is equivalent to two 2D instruments; therefore, an AIC can control, for example, three LCs with DAD and up to four Agilent GCs.
A single AIC can control two LC/MS Single Quad instruments and two 2D LC instruments.
There is no limit to the number of AICs in a distributed system.
GC, LC (2D): Ten instruments
LC (3D), CE: Five instruments
LC/MS, CE/MS: Two instruments
NOTE Interactive data reprocessing is not recommended when acquiring data in a three- or four-instrument configuration on a workstation or an AIC at full load (for example, 7–10 2D instruments).

ChemStation Edition Configuration 64
5 InstrumentsGeneral Instrument Configuration Considerations
Printer Configuration
Physical Default Printer
Make sure that a default printer is configured in Windows. Every Windows user who runs ChemStation needs a default printer configured in the user profile. The printer driver must be for a physical printer, even if the printer is not connected. Configuring a to-file printer such as a PDF or XPS writer is not sufficient.
This is done via the Microsoft Control Panel. If no default printer is configured the following problems may occur:• Printing of a report preview will fail• the Copy To Clipboard menu will have an error• the Custom Report View will have problems with new templates
PDF XChange printer
During the installation of ChemStation C.01.10, a PDF XChange 6 printer driver is installed (revision 6.0.317.1).
Print Limitations
The maximum number of pages for one print job is 1500; for example, a sequence summary report is one print job.
When printing Multi-Page chromatograms (specified in the Specify Reports dialog box), the maximum number of pages that can be printed properly depends on the resolution of the printer. 300 dpi allows ten pages per chromatogram, 600 dpi allows up to six pages per chromatogram.
Choose Specific Printer for an Instrument
1 Make sure that the required printer is set as a default printer in Windows. In a Distributed System, make sure this is done on the Analytical Instrument Controller (AIC).
2 In ChemStation, click File > Printer Setup... to choose this specific printer as the default printer for the current instrument. Your setting will apply also to other users working with the same instrument.

ChemStation Edition Configuration 65
5 InstrumentsAdding and Configuring Instruments
Adding and Configuring Instruments
This chapter describes how to add instruments using the Agilent OpenLab Control Panel.
Adding an LC System
NOTE The figures in this chapter show the Windows 7 user interface. If you have installed Windows 10, your user interface is different, but the instructions are still applicable.
NOTE The G1315C/D DAD and the G1365C/D MWD are equipped with on-board LAN communication, and require a LAN connection. These detectors must be the communication entry point to the PC when they are used in an 1100/1200 stack.

ChemStation Edition Configuration 66
5 InstrumentsAdding and Configuring Instruments
1 In the Navigation pane of the Agilent OpenLab Control Panel, select Instruments.
2 Select the location of the new instrument; if no locations are configured, select Instruments.
3 Click the Create tool in the top toolbar and select Create instrument from the menu.OR

ChemStation Edition Configuration 67
5 InstrumentsAdding and Configuring Instruments
Right-click Instrument and select Create instrument.
The Create Instrument panel is shown.
4 Enter the information for the new instrument.a Enter a name for the new instrument in the Name field.b Optionally enter a description of the new instrument in the Description field.c If you are working in a networked environment, display the Application
drop-down list and select the application. (Otherwise, the Application is selected automatically.)
d If you are working in a networked environment, display the Instrument controller drop-down list and select the computer that you are currently using as the instrument controller. (Otherwise, the Instrument Controller is selected automatically.)

ChemStation Edition Configuration 68
5 InstrumentsAdding and Configuring Instruments
e Display the Instrument type drop-down list and select one of the LC instrument types: Agilent LC System, Agilent LC Core System, or Agilent 1220 LC System.
f Optionally enter details of the contact person in the Contact field.5 Click OK.
The new instrument is created in the Instruments tree.6 In the Instruments tree, select the newly created instrument.
NOTE Be sure to make the correct selection.
Using the incorrect Instrument type may cause restrictions in instrument use.
• The Agilent LC System instrument type allows access to four LC instruments per Workstation using a combination of any Agilent LC modules and Integrated LC systems. Requires a full OpenLab CDS ChemStation Edition license.
• If you have a M8311AA ChemStation VL license, use Agilent LC Core System. The Agilent LC Core System instrument type restricts the configuration to one of the following instruments per workstation: One 1260 Isocratic Infinity LC system, or one 1260 Quaternary Infinity LC system with selected 1260 Infinity LC modules.
• The Agilent 1220 LC System instrument type may be used with Integrated 1220 Infinity LC systems, or for 1120 Compact LC systems.

ChemStation Edition Configuration 69
5 InstrumentsAdding and Configuring Instruments
7 Click Configure Instrument in the toolbar or right-click the instrument name and select Configure Instrument.
The Configure Instrument dialog opens.
8 If Auto Configuration is offered, accept it. Enter either the IP address of the LC or the Host name; all recognized modules will be copied from the Configurable Modules panel to the Selected Modules panel.
ORSelect the module(s) that you want to configure from the Configurable Modules panel and click > to copy them to the Selected Modules panel.
9 Specify the instrument's LAN access parameters either by IP address or by instrument Hostname.
NOTE Access to instrument configuration is disabled if the Instrument Type or the Agilent Instrument Controller are not specified.
NOTE Use Auto Configuration if possible. If you use manual configuration, you must enter all configuration parameters correctly; if the configuration does not match the module exactly, the module will not be recognized.

ChemStation Edition Configuration 70
5 InstrumentsAdding and Configuring Instruments
10 Complete the configuration dialog box(es) for the module(s) you have selected.If you skip this step, you will be asked to configure your new LC system the first time you launch it.
11 Add and configure any additional modules from the Generic Modules section of the Configurable Modules panel.
12 Click the Method load on startup down-arrow and select which method to load when ChemStation is started.
13 Mark the check box(es) for the Options that you want to install.
14 To specify the size of the software window, select Additional configuration > Initial screen window size and select the window size from the menu.
15 Click OK to complete the instrument configuration.When you expand the Details section of the instrument information in the OpenLab Control Panel, the new configuration data and details are shown.
NOTE For manual configuration of instruments with multiple modules, specify the LAN access parameters for each module.
NOTE Select Enable Intelligent Reporting to enable expanded reporting features. Clearing the check box will not install these features for this instrument and they will never be available.
If you enable Intelligent Reporting, the classic Report Layout will not be available for this instrument. However, existing classic reports can be used in parallel with Intelligent Reports.

ChemStation Edition Configuration 71
5 InstrumentsAdding and Configuring Instruments
Configuring a Device ClusterIf Autoconfiguration detects the presence of specific combinations of modules, it allows you to create clusters that work in concert as a single device. The following device clusters can be created:• Valve Thermostat Cluster• Pump Valve Cluster• Fraction Collector Cluster (multiple fraction collectors must always be
clustered)• Prep Pump Cluster• HDR-DAD Cluster• Column Comp Cluster (Legacy)• Fraction Collector Cluster (Legacy)1 In the Navigation pane of the OpenLab Control Panel, select the Instruments
tree.

ChemStation Edition Configuration 72
5 InstrumentsAdding and Configuring Instruments
2 Select the location of the new instrument; if no locations are configured, select Instruments.
3 Click the Create tool in the top toolbar and select Create instrument from the menu.ORRight-click Instrument and select Create instrument.
The Create Instrument panel is shown.

ChemStation Edition Configuration 73
5 InstrumentsAdding and Configuring Instruments
4 Enter the information for the new instrument.a Enter a name for the new instrument in the Name field.b Optionally enter a description of the new instrument in the Description field.c If you are working in a networked environment, display the Application
drop-down list and select the application. (Otherwise, the Application is selected automatically.)
d If you are working in a networked environment, display the Instrument controller drop-down list and select the computer that you are currently using as the instrument controller. (Otherwise, the Instrument Controller is selected automatically.)
e Display the Instrument type drop-down list and select Agilent LC System for modular LC systems, or Agilent 1220 LC System for Integrated LC systems (only HDR-DAD cluster is supported).
f Optionally enter details of the contact person in the Contact field.5 Click OK.
The new instrument is created in the Instruments tree.6 In the Instruments tree, select the newly created instrument.

ChemStation Edition Configuration 74
5 InstrumentsAdding and Configuring Instruments
7 Click Configure Instrument in the toolbar or right-click the instrument name and select Configure Instrument.
The Configure Instrument dialog opens.
8 If Auto Configuration is offered, accept it. Enter either the IP address of the LC or the Host name; all recognized modules will be copied from the Configurable Modules panel to the Selected Modules panel.
ORSelect the module(s) that you want to configure from the Configurable Modules panel and click > to copy them to the Selected Modules panel.
9 Specify the instrument's LAN access parameters either by IP address or by instrument Hostname.
NOTE Access to instrument configuration is disabled if the Instrument Type or the Agilent Instrument Controller are not specified.
NOTE Use Auto Configuration if possible. If you use manual configuration, you must enter all configuration parameters correctly; if the configuration does not match the module exactly, the module will not be recognized.

ChemStation Edition Configuration 75
5 InstrumentsAdding and Configuring Instruments
10 If modules that can be clustered are detected during Autoconfiguration, or such modules are configured manually, the Create Cluster dialog box is displayed.The Cluster Options panel shows the list of possible cluster types. All possible cluster types are listed, but only those that can be formed using the available modules are enabled.
11 Select the cluster that you want to create in the Cluster Options panel.All configured modules that can be used in the cluster are listed in the Available Modules panel on the right.
12 In the Available Modules panel, mark the check boxes against the modules that you want to include in the cluster.
13 Click Create Cluster.The cluster is created using the marked modules; the individual modules in the Available Modules panel are replaced by the cluster, and a configuration dialog box is displayed that allows you to configure the cluster.
NOTE For manual configuration of instruments with multiple modules, specify the LAN access parameters for each module.
NOTE You can decluster the cluster into its individual modules by right-clicking on the cluster and removing all components from the cluster. Note that declustered fraction collectors are not supported; only the last one may be used as a recovery collector).

ChemStation Edition Configuration 76
5 InstrumentsAdding and Configuring Instruments
Adding an ELSD to an LC SystemDepending on the module, the ELS detector is fitted with a LAN or standard RS232 3-wire serial interface.
An ELS Detector that is connected via LAN interface can be configured simularly as an LC module, see “Adding an LC System” on page 65.
Some older ELS detectors only have an RS232 serial interface though. Autoconfiguration does not detect these ELSDs. The device must be configured manually, since it has a separate network connection. This procedure describes how to add an Agilent ELSD to an LC instrument that has already been configured.
1 Create and configure the LC system to which the ELSD is connected. See “Adding an LC System” on page 65 for full details.
2 In the Instruments tree, select the newly created instrument.3 Click Configure Instrument in the toolbar or right-click the instrument name
and select Configure Instrument.
The Configure Instrument dialog opens.
NOTE Serial communication is not supported on an Agilent Instrument Controller (AIC) in a Distributed System.

ChemStation Edition Configuration 77
5 InstrumentsAdding and Configuring Instruments
4 In the Configurable Modules panel of the Configure Instrument dialog box, double-click ELSD.ORSelect ELSD in the left panel, then click > to copy it to the Selected Modules panel.
5 Select the ELSD in the Selected Modules panel and click ConfigureA configuration dialog box is displayed. The parameters required for configuration depend on the model of ELSD that is connected.
6 If the ELSD is connected to the system by a serial cable, select the COM port to which the ELSD is connected.ORIf the ELSD is connected to the system via LAN, enter the IP address.
7 Complete the configuration and click OK.The ELSD is now available in the instrument.
NOTE Access to instrument configuration is disabled if the Instrument Type or the Agilent Instrument Controller are not specified.

ChemStation Edition Configuration 78
5 InstrumentsAdding and Configuring Instruments
Adding an Agilent 7100 CE System1 In the Navigation pane of the Agilent OpenLab Control Panel, select the
Instruments tree.
2 Select the location of the new instrument; if no locations are configured, select Instruments.

ChemStation Edition Configuration 79
5 InstrumentsAdding and Configuring Instruments
3 Click the Create tool in the top toolbar and select Create instrument from the menu.ORRight-click Instrument and select Create instrument.
The Create Instrument panel is shown.
4 Enter the information for the new instrument.a Enter a name for the new instrument in the Name field.b Optionally enter a description of the new instrument in the Description field.c If you are working in a networked environment, display the Application
drop-down list and select the application. (Otherwise, the Application is selected automatically.)

ChemStation Edition Configuration 80
5 InstrumentsAdding and Configuring Instruments
d If you are working in a networked environment, display the Instrument controller drop-down list and select the computer that you are currently using as the instrument controller. (Otherwise, the Instrument Controller is selected automatically.)
e Display the Instrument type drop-down list and select Agilent 7100 CE System.
f Optionally enter details of the contact person in the Contact field.5 Click OK.
The new instrument is created in the Instruments tree.6 In the Instruments tree, select the newly created instrument.7 Click Configure Instrument in the toolbar or right-click the instrument name
and select Configure Instrument.
The Configure Instrument dialog opens.
8 If Auto Configuration is offered, accept it. Enter either the IP address of the LC or the Host name; all recognized modules will be copied from the Configurable Modules panel to the Selected Modules panel.
NOTE Access to instrument configuration is disabled if the Instrument Type or the Agilent Instrument Controller are not specified.
NOTE Use Auto Configuration if possible. If you use manual configuration, you must enter all configuration parameters correctly; if the configuration does not match the module exactly, the module will not be recognized.

ChemStation Edition Configuration 81
5 InstrumentsAdding and Configuring Instruments
ORSelect the module(s) that you want to configure from the Configurable Modules panel and click > to copy them to the Selected Modules panel.
9 Specify the instrument's LAN access parameters either by IP address or by instrument Hostname.
10 Complete the configuration dialog box(es) for the module(s) you have selected.If you skip this step, you will be asked to configure your new LC system the first time you launch it.
11 Add and configure any additional modules from the Generic Modules section of the Configurable Modules panel.
12 In the upper pane of the Configure Instrument dialog box, click the Method load on startup down-arrow and select which method to load when ChemStation is started.
13 In the Configure Instrument dialog box, mark the check box(es) for the Options that you want to install.
14 To specify the size of the software window, select Additional configuration > Initial screen window size and select the window size from the menu.
15 Click OK to complete the instrument configuration.When you expand the Details section of the instrument information in the OpenLab Control Panel, the new configuration data and details are shown.

ChemStation Edition Configuration 82
5 InstrumentsAdding and Configuring Instruments
Adding an Agilent GC SystemBeginning with ChemStation C.01.09, the instrument types used for a new installation are either Agilent GC System or Agilent GC Core System (VL). For Micro GC please see “Adding an Agilent Micro GC” on page 88.
For upgrade installations, the following instrument types, Agilent 9000, Agilent 78xx, or Agilent 68xx GC Systems are still available used.1 In the Navigation pane of the OpenLab Control Panel, select the Instruments
tree.

ChemStation Edition Configuration 83
5 InstrumentsAdding and Configuring Instruments
2 Select the location of the new instrument; if no locations are configured, select Instruments.
3 Click the Create tool in the top toolbar and select Create instrument from the menu.ORRight-click Instrument and select Create instrument.
The Create Instrument panel is shown.

ChemStation Edition Configuration 84
5 InstrumentsAdding and Configuring Instruments
4 Enter the information for the new instrument.a Enter a name for the new instrument in the Name field.b Optionally enter a description of the new instrument in the Description field.c If you are working in a networked environment, display the Application
drop-down list and select the application. (Otherwise, the Application is selected automatically.)
d If you are working in a networked environment, display the Instrument controller drop-down list and select the computer that you are currently using as the instrument controller. (Otherwise, the Instrument Controller is selected automatically.)
e Display the Instrument type drop-down list and select the correct type. Using the incorrect instrument type may cause restrictions in instrument use.• If you have a full license, use Agilent GC System. It allows access to up
to four GC instruments per workstation.• If you have a VL license, use Agilent GC Core System (VL). It restricts the
configuration to one 7820A, or 8860 GC per workstation.f Optionally enter details of the contact person in the Contact field.
5 Click OK.The new instrument is created in the Instruments tree.
6 In the Instruments tree, select the newly created instrument.

ChemStation Edition Configuration 85
5 InstrumentsAdding and Configuring Instruments
7 Click Configure Instrument in the toolbar or right-click the instrument name and select Configure Instrument.
The Configure Instrument dialog opens.
8 In the Configurable Modules panel of the Configure Instrument dialog box, double-click the GC's instrument type icon.ORSelect the GC's icon in the left panel, then click > to copy it to the Selected Modules panel. The format of the configuration window depends on the GC you are adding.
9 Enter configuration details as needed. The fields available depend on the GC type.• In the IP address field, enter either the IP address or the host name.• Select the Get GC Configuration button to connect to the GC and display
the Configuration tab.• Click the Keypad Lock down-arrow and make a selection from the
drop-down list.• Select the Prep Run on Manual Request check box if required.
10 Click OK.
NOTE Access to instrument configuration is disabled if the Instrument Type or the Agilent Instrument Controller are not specified.

ChemStation Edition Configuration 86
5 InstrumentsAdding and Configuring Instruments
The new instrument is shown in the Selected Modules panel of the Configure instrument dialog box.
11 In the upper pane of the Configure Instrument dialog box, click the Method load on startup down-arrow and select which method to load when ChemStation is started.
12 Mark the check box(es) for the Options that you want to install.
13 To specify the size of the software window, select Additional configuration > Initial screen window size and select the window size from the menu.
14 Click OK to complete the instrument configuration.When you expand the Details section of the instrument information in the OpenLab Control Panel, the new configuration data and details are shown.
NOTE Select Enable Intelligent Reporting to enable expanded reporting features. Clearing the check box will not install these features for this instrument and they will never be available.
If you enable Intelligent Reporting, the classic Report Layout will not be available for this instrument. However, existing classic reports can be used in parallel with Intelligent Reports.
NOTE For the 7890, if you use the 35900 for additional signals, it replaces two of the four native signals (the maximum number of signals is still four).

ChemStation Edition Configuration 87
5 InstrumentsAdding and Configuring Instruments
GC ChemStation demonstration methods and data files
When you install a GC instrument, several demonstration methods and data files are placed in the instrument's subdirectories. The methods are placed in the methods subdirectory (for example; ..\Users\Public\Documents\ChemStation\1\Methods). The data files are placed in a subdirectory called Demo in the data subdirectory (for example; ..\Users\Public\Documents\ChemStation\1\Data\Demo). Three of the methods have associated data files.
The following table explains the methods and datafiles:
Table 8 GC ChemStation demonstration methods and data files
Method Data File Purpose
ESTD_EX.M ESTD1.DESTD3.DESTD5.D
This is a calibrated external standard method with three lev-els of calibration for two peaks. The three ESTD data files are the calibration files.
ISTD_EX.M ISTD1.DISTD3.DISTD5.D
This is a calibrated internal standard method with three lev-els of calibration for two peaks. The three ISTD data files are the calibration files.
100FID.M This method can be used to display the three 100FID files.
100FID5.D100FID20.D100FID50.D
These are examples of the Ultra column test mix run on a 10m x 100µM id x 0.17µM film HP-5 column in an 6890 Series GC. They were collected at 5, 20, and 50 Hz data rates, respectively.

ChemStation Edition Configuration 88
5 InstrumentsAdding and Configuring Instruments
Adding an Agilent Micro GC1 In the Navigation pane of the Agilent OpenLab Control Panel, select
Instruments.
2 Select the location of the new instrument; if no locations are configured, select Instruments.

ChemStation Edition Configuration 89
5 InstrumentsAdding and Configuring Instruments
3 Click the Create tool in the top toolbar and select Create instrument from the menu.ORRight-click Instrument and select Create instrument.
The Create Instrument panel is shown.
4 Enter the information for the new instrument.a Enter a name for the new instrument in the Name field.b Optionally enter a description of the new instrument in the Description field.c If you are working in a networked environment, display the Application
drop-down list and select the application. (Otherwise, the Application is selected automatically.)

ChemStation Edition Configuration 90
5 InstrumentsAdding and Configuring Instruments
d If you are working in a networked environment, display the Instrument controller drop-down list and select the computer that you are currently using as the instrument controller. (Otherwise, the Instrument Controller is selected automatically.)
e Display the Instrument type drop-down list and select Agilent Micro GC System. Use for both the full and VL license.
f Optionally enter details of the contact person in the Contact field.5 Click OK.
The new instrument is created in the Instruments tree.6 In the Instruments tree, select the newly created instrument.7 Click Configure Instrument in the toolbar or right-click the instrument name
and select Configure Instrument.
The Configure Instrument dialog opens.
8 In the Configurable Modules panel of the Configure Instrument dialog box, double-click the icon of the Micro GC System that you want to configure.ORSelect the icon of the Micro GC System that you want to configure in the left panel, then click > to copy it to the Selected Modules panel.The GC’s configuration window opens.
NOTE Access to instrument configuration is disabled if the Instrument Type or the Agilent Instrument Controller are not specified.

ChemStation Edition Configuration 91
5 InstrumentsAdding and Configuring Instruments
9 In the IP address field, enter the IP address of the Micro GC and click Activate communication to register the system access parameters.The GC's details are added to the Instrument Information field.
10 Complete the instrument configuration.a Enter the hardware parameters in the Instrument Hardware tab.b Click the Instrument configuration tab and enter the configuration
parameters.c Click the Automation and remote control tab and specify the remote control
and automation parameters. You can also configure the VICI valve here.d Click OK to complete the Micro GC configuration.
11 Click the Method load on startup down-arrow and select which method to load when ChemStation is started.
12 Mark the check box(es) for the Options that you want to install.

ChemStation Edition Configuration 92
5 InstrumentsAdding and Configuring Instruments
13 To specify the size of the software window, select Additional configuration > Initial screen window size and select the window size from the menu.
14 Click OK to complete the instrument configuration.When you expand the Details section of the instrument information in the OpenLab Control Panel, the new configuration data and details are shown.
NOTE Select Enable Intelligent Reporting to enable expanded reporting features. Clearing the check box will not install these features for this instrument and they will never be available.
If you enable Intelligent Reporting, the classic Report Layout will not be available for this instrument. However, existing classic reports can be used in parallel with Intelligent Reports.

ChemStation Edition Configuration 93
5 InstrumentsAdding and Configuring Instruments
Adding an Agilent Headspace Sampler1 Install the headspace software.
2 In the Agilent OpenLab Control Panel, select the GC to which the headspace is to be configured.
3 Select Configure instrument by right-clicking on the GC.ORClick Configure Instrument in the toolbar.
4 Select the headspace module to configure from the Configurable Modules panel and click > to copy the module to the Selected Modules.The Agilent Headspace Sampler Configuration dialog box opens. If it does not open automatically, select Configure or double-click on the Configured module to open the Agilent Headspace Sampler Configuration dialog box.
5 Select the Preferences tab to specify Method Editor and Instrument Actuals for how information should appear when editing the method and reviewing headspace sampler (HS) status.
6 Enter the IP Address or Hostname on the Connection tab.7 Select OK.
This establishes a connection and uploads the Configuration.8 Select OK to complete configuration.
NOTE In a client/server environment, the headspace software must be installed on the Agilent Instrument Controller (AIC).

ChemStation Edition Configuration 94
5 InstrumentsAdding and Configuring Instruments
Adding a Standalone ADCThe Agilent 35900 is a dual-channel interface that connects analytical instruments to Agilent data systems. The 35900 is intended for use with both Agilent and non-Agilent laboratory instruments.
The 35900 can be configured for either single or dual channel operation from a single instrument. Also, the 35900 can operate as two independent single channel devices, each channel assigned to a different instrument.
Configuring the Agilent ADC Instrument - Dual Channel
In dual-channel operation, the Agilent 35900E provides two channels of data acquisition to a single device. A dual-channel configuration will have one common start/stop and one digital I/O port.1 In the Navigation pane of the OpenLab Control Panel, select the Instruments
tree.

ChemStation Edition Configuration 95
5 InstrumentsAdding and Configuring Instruments
2 Select the location of the new instrument; if no locations are configured, select Instruments.
3 Click the Create tool in the top toolbar and select Create instrument from the menu.ORRight-click Instrument and select Create instrument.
The Create Instrument panel is shown.

ChemStation Edition Configuration 96
5 InstrumentsAdding and Configuring Instruments
4 Enter the information for the new instrument.a Enter a name for the new instrument in the Name field.b Optionally enter a description of the new instrument in the Description field.c If you are working in a networked environment, display the Application
drop-down list and select the application. (Otherwise, the Application is selected automatically.)
d If you are working in a networked environment, display the Instrument controller drop-down list and select the computer that you are currently using as the instrument controller. (Otherwise, the Instrument Controller is selected automatically.)
e Display the Instrument type drop-down list and select either Agilent ADC LC System or Agilent ADC GC System.
f Optionally enter details of the contact person in the Contact field.5 Click OK.
The new instrument is created in the Instruments tree.6 In the Instruments tree, select the newly created instrument.

ChemStation Edition Configuration 97
5 InstrumentsAdding and Configuring Instruments
7 Select Configure instrument from the newly created instrument's context menu (right-click) or click Configure Instrument in the toolbar.
The Configure Instrument dialog box is displayed.
8 In the Configurable Modules panel of the Configure Instrument dialog box, double-click 35900E.ORSelect 35900E in the left panel, then click > to copy it to the Selected Modules panel.
NOTE Access to instrument configuration is disabled if the Instrument Type or the Agilent Instrument Controller are not specified.

ChemStation Edition Configuration 98
5 InstrumentsAdding and Configuring Instruments
The dialog box is displayed.9 Enter the IP address.

ChemStation Edition Configuration 99
5 InstrumentsAdding and Configuring Instruments
10 Select the Get Serial Number and Firmware button.
The serial number and firmware version are updated upon successful connection to the 35900E.
11 Mark the check box(es) for the channel(s) that you want to use.
NOTE Two channels can be assigned to different instruments.

ChemStation Edition Configuration 100
5 InstrumentsAdding and Configuring Instruments
12 Specify the start/stop conditions for external devices in the External Start/Stop.
13 Specify the actions of the 35900E buttons in the Front Panel Buttons.
14 Click the Events button for each channel to assign the TTL digital I/O states.15 Enter a unique descriptive label you want to use to define the instrument's
energized state (high) and de-energized state (low). You may use any combination of characters and numerals (maximum of 20). Refer to Help and the 35900 User's Guide for more information on the Digital I/O connection.
16 Click OK to return to the Device Configuration dialog box.17 Click OK to register the system access parameters and close the Configure
Selected Module dialog box.
NOTE For example, if you are going to control a normally closed valve (a valve that opens only when energy is applied), you could assign the events like the one shown in the figure. This event indicates that the valve is normally closed (Low state) and when energy is applied it goes to the opened state (High state).
You could also use the more descriptive labels, such as Open Nitrogen Valve and Close Nitrogen Valve, if you prefer.

ChemStation Edition Configuration 101
5 InstrumentsAdding and Configuring Instruments
18 In the upper pane of the Configure Instrument dialog box, click the Method load on startup down-arrow and select which method to load when ChemStation is started.
19 In the Configure Instrument dialog box, mark the check boxes for the Options that you want to install.
20 To specify the size of the software window, select Additional configuration > Initial screen window size and select the window size from the menu.
21 Click OK to complete the instrument configuration.
When you expand the Details section of the instrument information in the Agilent OpenLab Control Panel, the new configuration data and details are shown.
Configuring the Agilent ADC Instrument - Two Independent Channels
The Agilent 35900E can operate as two independent single channels, each channel assigned to a different instrument. For this configuration, the 35900 must be configured as two separate instruments using the same IP address. Channel A will be cabled to one device and channel B cabled to the second device.
Refer to the section “Configuring the Agilent ADC Instrument - Dual Channel” on page 94 for the full instructions for adding and configuring an ADC.Here is an example on how to configure the 35900E for two independent instruments:• Configure instrument 1 of the 35900E to use channel A• Configure instrument 2 of the 35900E to use channel B
For instrument 1:1 Create the instrument in Agilent OpenLab Control Panel.2 Select either Agilent ADC LC System or Agilent ADC GC System.3 Move the 35900E from Configurable to Selected.4 Click Configure.5 Enter the IP address.

ChemStation Edition Configuration 102
5 InstrumentsAdding and Configuring Instruments
6 Select only Channel A, then click OK.
For Instrument 2:1 Create the instrument in Agilent OpenLab Control Panel.2 Select either Agilent ADC LC System or Agilent ADC GC System.3 Move the 35900E from Configurable to Selected.4 Click Configure.5 Enter the same IP address as for Instrument 1.

ChemStation Edition Configuration 103
5 InstrumentsAdding and Configuring Instruments
6 Select only Channel B, then click OK.
Each channel will start and stop independently.

ChemStation Edition Configuration 104
5 InstrumentsAdding and Configuring Instruments
Adding a 35900E ADC to an LC or GC SystemThis procedure describes how to configure a 35900E ADC connected to an Agilent LC or GC system to acquire additional signals.1 Start the Agilent OpenLab Control Panel.2 Select the GC or LC instrument that is already configured in the Instruments
tree.3 In the Generic Modules section of the Configurable Modules panel of the
Configure Instrument dialog box, double-click 35900E.ORSelect 35900E in the left panel, then click > to copy it to the Selected Modules panel.The dialog box is displayed.
4 Enter the IP address.5 Select Get Serial Number and Firmware.
The serial number and firmware version are updated upon successful connection to the 35900E.

ChemStation Edition Configuration 105
5 InstrumentsAdding and Configuring Instruments
6 Mark the check boxes for the channel(s) that you want to use.7 Click OK to complete the instrument configuration.
When you expand the Details section of the instrument information in the Agilent OpenLab Control Panel, the new configuration data and details are shown.
NOTE When configured as part of a GC system, the 35900E adds two signals to a 68xx and replaces two signals for the 78xx.

ChemStation Edition Configuration 106
5 InstrumentsAdding and Configuring Instruments
Adding an Agilent PAL-xt or PAL3 SamplerThere are two different Agilent PAL Sampler models, PAL3 and PAL-xt. Ensure that you install the correct software driver and firmware for your instrument configuration.
Adding a PAL3 Sampler for GC
1 Install the PAL3 Sampler software. In a client/server environment, the PAL3 Sampler software must be installed on the Agilent Instrument Controller (AIC).
2 In the Agilent OpenLab Control Panel, select the GC to which the PAL3 is to be configured.
3 Click Configure Instrument in the toolbar or right-click on the GC and select Configure instrument.
4 Select the PAL3 Sampler module from the Configurable Modules panel and click > to copy it to the Selected Modules panel.The Agilent PAL3 Sampler Configuration dialog box should open automatically.
5 If the Agilent PAL3 Sampler Configuration dialog box does not open, double-click on the PAL3 module (or select Configure...) to open the PAL3 Sampler Configuration dialog box.
6 In the Connection tab of the Configuration dialog box, enter the IP address or Hostname of the PAL3, then select Update Configuration.Valid connection and configuration will be indicated by the text Configuration Loaded from Instrument, completion of the PAL3 Serial Number, firmware version information, and an updated Configuration Report for the PAL3.
7 Click OK to close the dialog box and save the configuration.8 Launch the instrument to view the user interface for the PAL.
Method development is based on the Tool Scripts configured within the instrument control module.The Tool Configuration and Tray Configuration tabs are now available in the PAL3 Configuration dialog box.
OpenLab CDS ChemStation Edition offers Script Manager, Tray Map, and PAL3 Configuration within an Online session.

ChemStation Edition Configuration 107
5 InstrumentsAdding and Configuring Instruments
Adding a PAL-xt Sampler
1 Install the PAL-xt Sampler software. In a client/server environment, the PAL-xt Sampler software must be installed on the Agilent Instrument Controller (AIC).
2 In the Agilent OpenLab Control Panel, select the instrument to which the PAL-xt is to be configured.
3 Click Configure Instrument in the toolbar or right-click on the instrument and select Configure instrument.
4 Select the PAL-xt Sampler module from the Configurable Modules panel and click > to copy it to the Selected Modules panel.The Agilent PAL-xt Sampler Configuration dialog box should open automatically.
5 If the Agilent PAL-xt Sampler Configuration dialog box does not open, double-click on the PAL-xt module (or select Configure...) to open the PAL Sampler Configuration dialog.
6 In the Configuration dialog box, enter the IP address or Hostname of the PAL-xt; then select Update Configuration.Valid connection and configuration will be indicated by the text PAL Configuration has been updated, completion of the PAL-xt Device ID, firmware version information, and presence of the new tabs Configuration and Tray Map.
7 Click OK to close the dialog box and save the configuration.8 Launch the instrument to view the user interface for the PAL.
Methods for the PAL-xt are based on installed or imported cycles and syringes that are configured within the control module of the instrument.
OpenLab CDS ChemStation Edition offers PAL Configuration, the ability to Import Cycle... and Reset PAL within an online session.
NOTE For Agilent Customer Engineers or Field Service Engineers, insertion of the FSE serial key at this point offers access to programmatic cycle modification for a single session ONLY.

ChemStation Edition Configuration 108
5 InstrumentsAdding and Configuring Instruments
Adding an LC/MS or CE/MS SystemThis task shows you how to add an LC/MS system or a CE/MS system to a standalone ChemStation workstation.
NOTE If you want to use an Agilent PAL Sampler with your LC/MS system, install the Agilent PAL Control software before you configure your LC/MS system. See Adding an Agilent PAL Sampler for details (“Adding an Agilent PAL-xt or PAL3 Sampler” on page 106).
NOTE When Secure File I/O is ON you can start the ChemStation of an MSD instrument only if the new MSD tune directory is protected.
To protect the MSD tune dir do the following:
1 Open the CSAdmin tool.
2 Look for the new MSTune directory for MS instruments.
3 Set the checkmark to protect this directory.
4 Close CSAdmin tool.

ChemStation Edition Configuration 109
5 InstrumentsAdding and Configuring Instruments
1 In the Navigation pane of the OpenLab Control Panel, select the Instruments tree.
2 Select the location of the new instrument; if no locations are configured, select Instruments.
3 Click the Create tool in the top toolbar and select Create instrument from the menu.OR

ChemStation Edition Configuration 110
5 InstrumentsAdding and Configuring Instruments
Right-click Instrument and select Create instrument.
The Create Instrument panel is shown.
4 Enter the information for the new instrument.a Enter a name for the new instrument in the Name field.b Optionally enter a description of the new instrument in the Description field.c If you are working in a networked environment, display the Instrument
controller drop-down list and select the computer that you are currently using as the instrument controller. (Otherwise, the Instrument Controller is selected automatically.)

ChemStation Edition Configuration 111
5 InstrumentsAdding and Configuring Instruments
d Display the Instrument type drop-down list and select the instrument that you want to create: Agilent LC/MS System or Agilent 7100 CE/MS System.
e Optionally enter details of the contact person in the Contact field.5 Click OK.
The new instrument is created in the Instruments tree.6 In the Instruments tree, select the newly created instrument.7 Click Configure Instrument in the toolbar or right-click the instrument name
and select Configure Instrument.
The Configure Instrument dialog opens.
8 Configure the LC or CE system as described in the appropriate instructions:• “Adding an LC System” on page 65• “Adding an Agilent 7100 CE System” on page 78
9 From the Generic Modules section of the Configurable Modules panel, add Single Quad MSD to the Selected Modules.The Configure Selected Module dialog box is displayed.
NOTE Access to instrument configuration is disabled if the Instrument Type or the Agilent Instrument Controller are not specified.
NOTE Do not click OK to close the Configure Instrument dialog box at this stage.

ChemStation Edition Configuration 112
5 InstrumentsAdding and Configuring Instruments
You can choose to set the LC/MS or CE/MS access by either the host name or the IP address.
10 To set the system access by host name:• Select the Identify by Host Name option.• Enter the network name of the LC/MS or CE/MS in the Host Name field.ORTo set the system access by IP address:• Select the Identify by IP Address option.• Enter the IP Address name of the LC/MS or CE/MS in the IP Address field.See the documentation that came with your LC/MS or CE/MS for more information about network parameters.
11 Add and configure any additional modules from the Generic Modules section of the Configurable Modules panel.
12 In the Configure Instrument dialog box, mark the check box(es) for the Options that you want to install.
13 Click OK to complete the instrument configuration.When you expand the Details section of the instrument information in the OpenLab Control Panel, the new configuration data and details are shown.

ChemStation Edition Configuration 113
5 InstrumentsReconfigure Instruments Using Classic Drivers After Upgrade to ChemStation C.01.08 or Higher
Reconfigure Instruments Using Classic Drivers After Upgrade to ChemStation C.01.08 or Higher
If you missed the recommendations from the driver preparation described in the OpenLab CDS ChemStation Edition Upgrade Guide (CDS_CS-Upgrade.pdf), ChemStation will start up, but instruments with the Classic driver will no longer be available. You will receive a notice that you need to reconfigure your instrument.
The classic driver instruments and methods are not updated to RC.NET automatically. To adjust them, perform the following steps.
To check if a classic method is used, go to Windows Explorer and view the contents of the corresponding method folder. The classic method will not have the Agilent folder listed.
1 Record the IP address for each classic driver instrument.2 Verify there is a backup of the methods and data to another location.3 To reconfigure the instrument, select the instrument in the OpenLab Control
Panel.4 In the ribbon, click Configure Instrument.
A message is displayed, requesting you to reconfigure your instrument.5 Click OK.
The Configure Instrument panel opens. The Use classic drivers check box is no longer shown.
Only with RC.NET driver methods

ChemStation Edition Configuration 114
5 InstrumentsReconfigure Instruments Using Classic Drivers After Upgrade to ChemStation C.01.08 or Higher
6 To update the instrument to use the RC.net driver, select the instrument in the Configurable Modules panel, then click the arrow to add it to the Selected Modules panel.
7 Enter the IP Address. Only for 35900E A/D instrument: Click Get Serial Number and Firmware to get the corresponding entries. For the example below the serial number and firmware version are updated upon successful connection to the 35900E A/D instrument.
This completes the setup of the instrument.8 Click OK to load the instrument configuration.9 Specify the Method Load on Startup option and select one of the following
options:a Always ask the user to choose an optionb Download method to instrument on start up (select this option to match the
behavior of the classic driver)c Upload method from instrumentd New method from instrument
10 Click OK to complete.11 Launch the newly configured instrument.

ChemStation Edition Configuration 115
5 InstrumentsReconfigure Instruments Using Classic Drivers After Upgrade to ChemStation C.01.08 or Higher
12 To convert a method to RC.NET driver, load the method. If a dialog like the following opens, click OK.
Review the method, and if no updates are needed, add a comment such as "Updated to RC.NET" to the method when saving it.Methods are converted to RC.NET when loaded. After saving to disk, converted methods have an additional Agilent folder and RapidControl.InstrumentConfig file.
Only with RC.NET driver methods

ChemStation Edition Configuration 116
6 Troubleshooting
Troubleshooting the Network 117Troubleshooting Network Connections 118Troubleshooting Network Communication 119
LC Instrument Start-up Problems 121System remains in a wait-state waiting for a module that has been taken out of the configuration 121Data File is empty (contains no signal) 121Devices report “Buffer Overflow” in the logbook 122
ChemStation Troubleshooting 123Review View and Report Layout View are disabled 123
This chapter summarizes helpful hints for troubleshooting potential problems you might see during the instrument configuration process.

ChemStation Edition Configuration 117
6 TroubleshootingTroubleshooting the Network
Troubleshooting the Network
This section provides information designed to help you resolve problems related to TCP/IP network (LAN) communications when running ChemStation. A basic knowledge of network communications (including the TCP/IP protocol), a basic understanding of networks and networking, and a basic understanding of the hardware and functions of networks (cabling types, hubs, switches, routers, static versus dynamic IP addresses, DNS servers, subnets, gateways) are assumed.Network-based communications problems can appear with any of the following symptoms:• Cannot connect to an instrument• Intermittent loss of communications with an instrument• Sudden loss of communications to an instrument
General Information
DHCP cannot be used to assign IP addresses to Agilent instruments used with ChemStation. The ChemStation computer and all connected instruments must use static IP addresses assigned at the PC, instrument front panel, or in the G1369 network card.
Each computer and instrument uses a Network Interface Card (NIC) to provide network communications. In some instruments, such as the 7890 Series GC, the NIC is built-in. For other instruments, the NIC is a separate accessory or “card” that is installed. In either case, the NIC provides communications programming and the physical connector for the network cable.

ChemStation Edition Configuration 118
6 TroubleshootingTroubleshooting the Network
Troubleshooting Network ConnectionsEnsure that all the network (LAN) cables are tightly plugged at both ends. Check the connection in the hub/switch and the one in the network card of the PC or instrument. When properly connected and working, network cards provide green and yellow LEDs as a visual indicator of network connectivity. Look on the back of the NIC adapter of the PC and the back of the instrument.• If there is no green LED, there is no connectivity. Look for a hardware problem
such as a disconnected cable, dead network, defective hub/switch, router, or defective NIC.
• If there is a red LED, there is a problem with the NIC.• If the green LED is lit, with a flashing yellow or orange LED, the network card is
properly connected and working. This condition indicates an active network, and verifies that the jack in the wall is working.
Disconnect the network cable and confirm that the PC reports that the network is disconnected. Reconnect the network cable and confirm that the PC reports the connection.
If you suspect a problem with the network cable or connectors, try the following:• Test the cable by plugging it into another socket that you know is working. If
this also fails, replace the cable.• Test the socket by plugging in another device with a working network
connection, such as a laptop. If this also fails, use a different socket.• Power-cycle the router.

ChemStation Edition Configuration 119
6 TroubleshootingTroubleshooting the Network
Troubleshooting Network CommunicationIf your ChemStation cannot connect to the analytical instrument configured using a network (LAN) communication, perform the following troubleshooting steps.
Verify that the IP Address is correct
1 Check the IP address and subnet mask of the Agilent 1100/1200 system by using the control module or Instant Pilot, if available. In the System view of the control module, select Configure > MIO for the module where the G1369A/B LAN card is inserted and scroll down to the IP address of the G1369A/B LAN card.
Verify that Basic Communication is possible
Use the ping command, to verify that the IP address is operational.1 Open a command prompt window on your PC.2 Type
ping 10.1.1.102 where 10.1.1.102 needs to be replaced by the appropriate IP address or by the selected host name; and press EnterThe command ping will send a request for reply to the IP address, bypassing part of the Windows TCP/IP settings. A successful ping would look like this: Reply from 10.1.1.102: bytes=32 time<10ms TTL=128If request timed out is displayed, the IP address can not be reached by the ping command.
3 If the ping request was answered successfully by the instrument, you need to verify that your Windows TCP/IP settings are correct for the selected network, especially the subnet mask and gateway settings should be checked.
4 Check that the IP address is not duplicated:a Disconnect the LAN cable from the instrument.b Repeat the ping command.If there is NO response, the IP address is unique (not duplicated) and you can reconnect the LAN cable.
NOTE When the MIO dialog box is opened on the Agilent 1100/1200 control module, ChemStation cannot communicate with the Agilent 1100/1200 system.

ChemStation Edition Configuration 120
6 TroubleshootingTroubleshooting the Network
Identify by host name
If you identify the Agilent 1100/1200 system by host name, ensure that the used host name and IP address are correctly set up in the DNS server or the corresponding entry in the HOSTS file exists. Try using the IP address in the Configuration Editor.

ChemStation Edition Configuration 121
6 TroubleshootingLC Instrument Start-up Problems
LC Instrument Start-up Problems
System remains in a wait-state waiting for a module that has been taken out of the configurationOn systems that are frequently reconfigured, i.e. devices are added or removed from the current configuration, the system may remain in a wait-state as long as the unused devices are still connected to the APG or ERI remote cable. The only possible work-around is to disconnect/connect the remote cable when deleting/adding the external module from/to the current configuration.
If a second detector is not needed for certain experiments, but for convenience reasons is not taken out of the configuration, selecting a very short run-time for the unneeded detector is not recommended.
For example, when acquiring data on an FLD while the DAD is configured with a short stop-time, it may happen that the DAD lamp is switched off before the LC analysis is finished. This produces a not ready condition so that the next analysis does not start. Alternatively, acquiring with the DAD and selecting a short stop time for the FLD does not produce this problem as a lamp off status is a perfectly valid operational mode with the FLD.
Data File is empty (contains no signal)Check the remote cabling of the detectors. A detector does not change into the run-status unless the start signal is transmitted over the remote line. Refer to the cabling diagrams in your instrument hardware manuals.

ChemStation Edition Configuration 122
6 TroubleshootingLC Instrument Start-up Problems
Devices report “Buffer Overflow” in the logbookThis message usually indicates a badly performing PC, when the data transfer from the instrument to the PC is not capable of handling the data stream. The bad performance can be caused by• Power save features of the PC.• Bad network performance.• Bad hard disk performance.• Other programs accessing the hard disk or using the computer's resources,
such as scheduled defragmentation, backup, or virus scanning.

ChemStation Edition Configuration 123
6 TroubleshootingChemStation Troubleshooting
ChemStation Troubleshooting
Review View and Report Layout View are disabledIf the system detects an excessive number of modules during Autoconfiguration, it switches automatically into resource optimization mode. This mode is indicated in the ChemStation status bar, and Review View and Report Layout View are not available during an on-line session.
You can switch off resource optimization mode by editing the chemstation.ini file as follows:
[PCS]
ResourceOptimizationMode=1
Possible values for the ResourceOptimizationMode key are:• -1 - auto-detected by module count (default)• 0 - always disabled• 1 = always enabled
NOTE Changes to the chemstation.ini file are only to be made by experienced users or support engineers, and are made at your own risk.

ChemStation Edition Configuration 124
7 Appendix
Privileges in OpenLab Control Panel 125Project Privileges 126Instrument Privileges 130Administrative Privileges 131
Sales and Support Assistance 132

ChemStation Edition Configuration 125
7 AppendixPrivileges in OpenLab Control Panel
Privileges in OpenLab Control Panel
The privileges described in the following can be associated with different roles in OpenLab Control Panel. By default, the following roles are available:• Everything• System Administrator• Instrument Administrator• Project Administrator• Instrument User
Additional default roles are available depending on the installed components. With an OpenLab CDS ChemStation Edition installation, the following additional default roles are available:• ChemStation Administrator• ChemStation Lab Manager• ChemStation Analyst• ChemStation Operator
In OpenLab Control Panel under Administration > Roles, you can view or change the associated privileges, or create your own roles.
NOTE Roles are only visible if user authentication is required.

ChemStation Edition Configuration 126
7 AppendixPrivileges in OpenLab Control Panel
Project PrivilegesTable 9 Project Management (for Content Management)
Name Description
View project or project group User can see a project and proj-ect details but cannot edit. With Content Management: User can view the content of the Content Management repository.Note:This privilege is required for all users.
Manage project or project group User can create, edit, or move projects but cannot access set-tings.
Edit content of project User can create new versions of documents in the Content Man-agement system.
Manage project or project group access
User can edit project access settings.
Access content using web client User with this privilege is able to open the Content Browser inter-face.
Table 10 E-Signature
Name Description
E-Signature Sign Data Files User can sign data files.
Table 11 ChemStation: Control
Privilege Description
Run Acquisition Start acquisition (single sample or sequence).

ChemStation Edition Configuration 127
7 AppendixPrivileges in OpenLab Control Panel
Table 12 ChemStation: Data
Privilege Description
Delete Data User can delete data files in the navigation table.
Load data using not configured path If Secure File IO is enabled, this privilege is required for...• loading data from unprotected paths• adding paths that are not empty to the
ChemStation (Preferences dialog)
Manual Integration User can perform manual integration.
Save data to storage Interactive saving of data to the central data stor-age system.
Table 13 ChemStation: Instrument
Privilege Description
Modify instrument configuration User can modify the instrument configuration parameters.
Table 14 ChemStation: Logbook
Privilege Description
Clear Logbook Clear the current logbook.
Save Logbook Save the current logbook.
Table 15 ChemStation: Method
Privilege Description
Edit calibration table Create and modify the calibration table; change calibration settings.
Delete method Delete a master method from the disk through the file menu.
Edit integration events Modify integration events and perform Auto Inte-gration.
Edit ion labels Edit options for ion labels (LC/MS only).
Edit system suitability Edit noise ranges and performance limits.
Enable audit trail Enable the audit trail for a specific method.

ChemStation Edition Configuration 128
7 AppendixPrivileges in OpenLab Control Panel
Load method from not configured path If Secure File IO is enabled, this privilege is required for...• loading a method from an unprotected path• saving a method to an unprotected path• adding paths that are not empty (Preferences
dialog)
Modify instrument method Modify instrument method parameters.
Modify method properties Modify Run Time Checklist and Method Informa-tion.
Perform method recalibration Perform interactive recalibration.
Save method changes Save method changes (includes Update Sequence/Master Method in Data Analysis view).
Table 16 ChemStation: Report
Privilege Description
Preview/print report User can preview/print a report.
Modify report User can modify report calculation/print style and can edit Instrument Curves dialog.
Lock/unlock report template items Only relevant with Intelligent Reporting: User can lock or unlock report items and composite groups in a report template.
Table 17 ChemStation: Security
Privilege Description
Break session lock Unlock a ChemStation session locked by other users.
Command line Turn on / off the command line
Manage transfer queue Access to the Transfer Queue and the Queue Management.
Table 15 ChemStation: Method
Privilege Description

ChemStation Edition Configuration 129
7 AppendixPrivileges in OpenLab Control Panel
Modify storage transfer preferences Modify transfer settings for data upload to the central data storage system.
Take over ChemStation Remote Session Only relevant for ChemStation in a Distributed System: User can take over a running remote session.
Table 18 ChemStation: Sequence
Name Description
Change priority in run queue User can submit samples or sequences to the front of the queue, and change the order of items in the run queue.
Delete entries from run queue User can remove queued samples or sequences from the run queue.
Delete sequence User can delete sequence templates from disk through the file menu
Edit sequence summary User can modify the classic sequence summary report and extended statistics settings.
Load sequence from not configured path If Secure File I/O is enabled, this privilege is required for...• loading sequence templates from unpro-
tected paths• saving sequence templates to unprotected
paths• adding paths that are not empty (Preferences
dialog)
Reprocess User can reprocess a sequence.
Save sequence template User can save sequence templates locally (on workstation or AIC).
Table 19 ChemStation: View Access
Privilege Description
Access Data Analysis view User has access to Data Analysis view.
Access Diagnostic view User has access to Diagnostic view.
Table 17 ChemStation: Security
Privilege Description

ChemStation Edition Configuration 130
7 AppendixPrivileges in OpenLab Control Panel
Instrument Privileges
Access Method & Run Control view User has access to Method and Run Control view.
Access retention time lock User has access to the Retention Time Lock menu (GC only).
Access retention time search User has access to Retention Time Search menu (GC only).
Access Review view User has access to Review view
Access Tune view User has access to Tune view (LC-MSD Chem-Station only).
Access Verification view User has access to Verification (OQ/PV) view.
Access Report Layout view User has access to Report Layout View, ability to create/edit/save report templates.
Enable Batch view Enables all operations in Batch view.
Table 20 Instrument Management
Name Description
View instrument or location User can view and access a location in the tree, but not edit access security, can view properties.
Manage Instrument or location User can create and move locations and edit properties (name, description, etc).
Manage instrument or location access User can view and edit the location access set-tings.
Run instrument User can start an instrument session.
Service instrument User can lock or unlock an instrument (to service it).
Table 19 ChemStation: View Access
Privilege Description

ChemStation Edition Configuration 131
7 AppendixPrivileges in OpenLab Control Panel
Administrative PrivilegesTable 21 System Administration
Name Description
Manage printers Can add/remove printers and print server.
Edit activity log properties Can change the Activity log Settings in OpenLab Control Panel (that is, can turn logging on for the System Activity Log).
Create administrative reports Can create any of the system admin reports.
Manage system components Can install/remove components (applications).
Manage Security Can change security settings.Can edit (add, change etc) users, groups and roles.Note: A user with this privilege can grant himself access to all settings in the OpenLab Control Panel. Be careful who you grant the Manage Security privilege.
Manage instrument controllers Can edit AIC configuration, manage the AICs in the Shared Services Maintenance tool.
Unlock any locked UI Can login into any locked portal or instrument session (will be a re-login), even if privately locked.
Table 22 Content Management
Name Description
Archive content User can archive the content of the data reposi-tory.

ChemStation Edition Configuration 132
7 AppendixSales and Support Assistance
Sales and Support Assistance
Please check the following web site for your local sales and support contact:
http://www.agilent.com/en-us/contact-us/page

www.agilent.comAgilent Technologies 2010-2019
Published in Germany 04/2019
M8301-90060*
M8301-90060
In This Book
This guide describes how to configure your OpenLab CDS ChemStation Edition using the OpenLab Control Panel. It describes how to configure instruments, users, security and authentication and licensing.