ccsd integrated technology workshop iii
TRANSCRIPT
CCSD Integrated Technology Workshop III Prepared by Allen Lanier and Tony Lescak, Technology Specialists
Outlook Web Access Email
In this workshop we will learn to log into Candler County School District’s new email software and use the functionality to create and delete folders, use the address book, create and use mailing lists, create contacts and
signatures, check spelling, filter junk mail, recover deleted items and more.
Overview: Microsoft Office Outlook Web Access is being implemented by CCSD in response to new FERPA rules concerning email archival. According to federal law all email accounts held by employees of school systems must be logged for a period of time. Previous email software used by CCSD did not have this functionality. Outlook Web Access (OWA) is accessed through a browser just like other web mail applications but it offers all the functionality of popular hard drive based applications (clients) such as Microsoft Outlook Express.
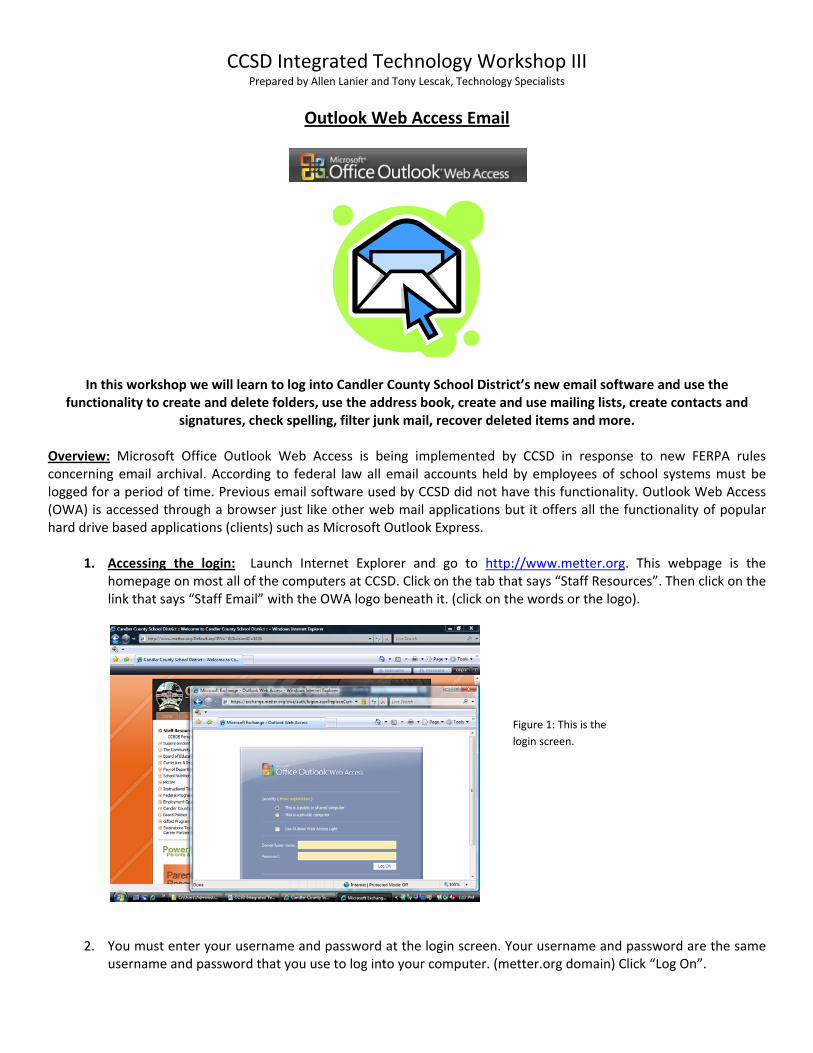
1. Accessing the login: Launch Internet Explorer and go to http://www.metter.org. This webpage is the
homepage on most all of the computers at CCSD. Click on the tab that says “Staff Resources”. Then click on the link that says “Staff Email” with the OWA logo beneath it. (click on the words or the logo).
Figure 1: This is the login screen.
2. You must enter your username and password at the login screen. Your username and password are the same username and password that you use to log into your computer. (metter.org domain) Click “Log On”.
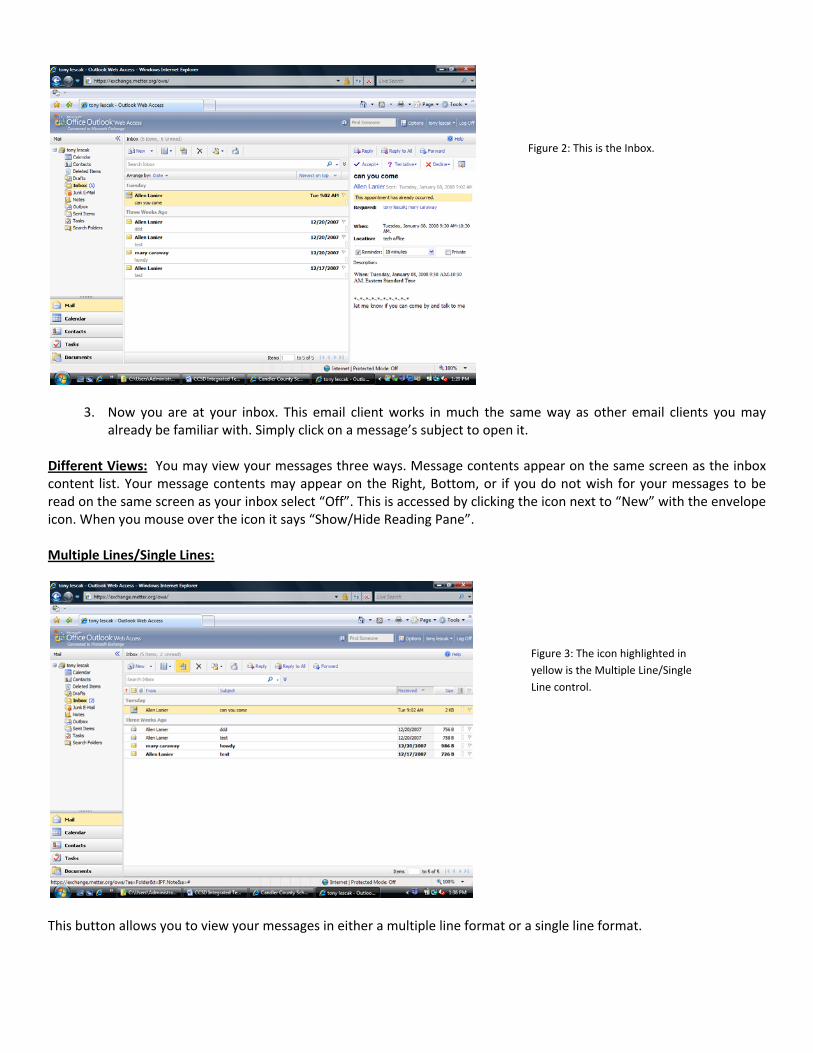
Figure 2: This is the Inbox.
3. Now you are at your inbox. This email client works in much the same way as other email clients you may already be familiar with. Simply click on a message’s subject to open it.
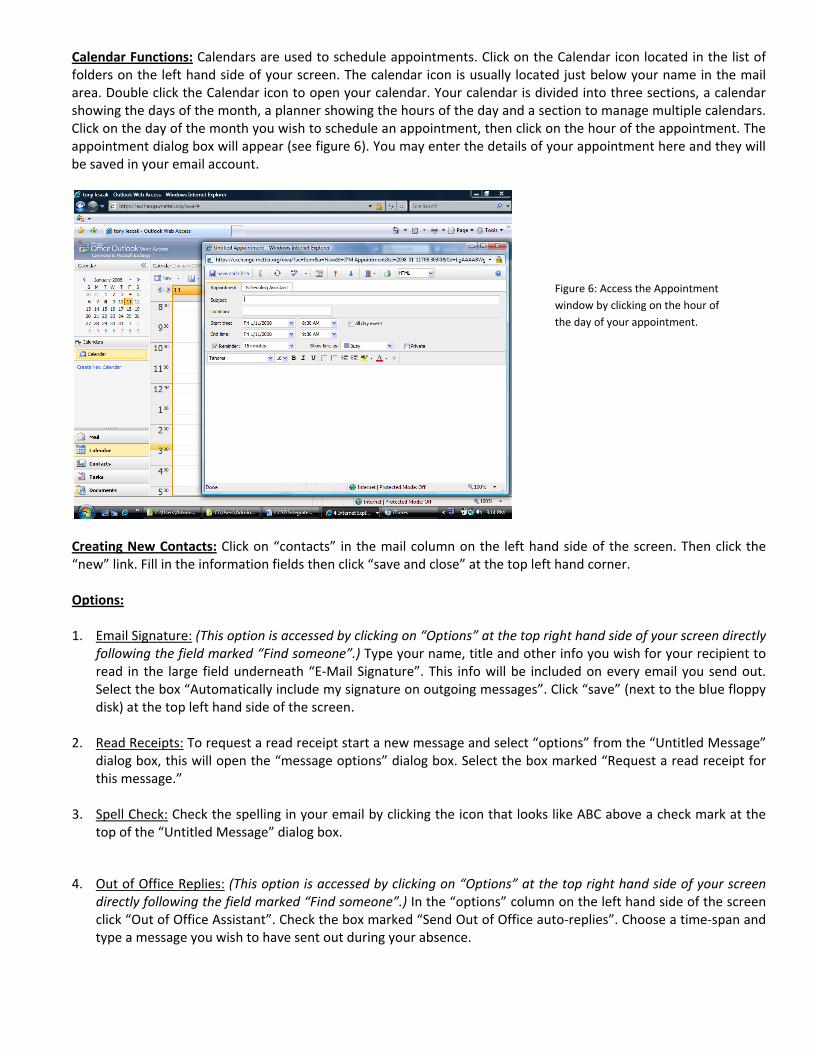
Different Views: You may view your messages three ways. Message contents appear on the same screen as the inbox content list. Your message contents may appear on the Right, Bottom, or if you do not wish for your messages to be read on the same screen as your inbox select “Off”. This is accessed by clicking the icon next to “New” with the envelope icon. When you mouse over the icon it says “Show/Hide Reading Pane”. Multiple Lines/Single Lines:
Figure 3: The icon highlighted in yellow is the Multiple Line/Single Line control.
This button allows you to view your messages in either a multiple line format or a single line format.

Creating and Deleting Folders: Important Note: Email will only stay in your inbox for 30 days. If you have important information in your email YOU NEED TO SAVE IT ON YOUR COMPUTER. You may do this by copying and pasting the content of your email into a word processing application (i.e. Microsoft Word, Notepad, WordPad, etc.) then save your file to your hard drive and backup on a jump drive, network directory, etc.
Figure 4: Right‐clicking your name under “Mail” drops down a menu that allows you to “Create New Folder”
To create a new folder (for organizational purposes) right click your name over on the left hand side of the screen underneath “mail” and select “Create New Folder” from the drop down menu. A new folder will be created in the list of folders. You may now name it and copy messages to it. There are three ways to copy a message to a folder: The first way to move a message to a folder is to click on the “Move or Copy to Folder” icon. This icon resides between the icon that looks like an X and the icon with the double envelopes. You will be prompted to Move or Copy the message. If you Move it, it will be removed from its original location, if you Copy it, it will be moved to the new location and a copy will remain in the original location. Once you make your selection, the “Copy to Folder” dialog box will appear. Select the target folder and click on “Move” or “Copy” in the lower right hand corner of the “Copy to Folder” dialog box. You may also create a folder from this dialog box. The second way to move a message to a folder is to simply right click on the message and select “Copy to Folder” or “Move to Folder”, this will open the Move to Folder dialog box. The third way to move a message to a folder is to open the message and click on the Move to Folder icon inside of the messages’ dialog box. It is next to the X icon. How to Create a Message: Click on “New” near the middle to right hand side of your screen. The “Untitled Message” dialog box will appear. Type the email address of the recipient in the field marked “To:”. If you wish to send your email to more than one recipient type the first email address then type a semicolon then a space, then the next recipient’s email address and so on (separate each email address with a semicolon and space). If you wish to send to a large number of recipients see the section on mailing lists. The “CC:” field (carbon copy) is used when you want to send a third party a copy of the email usually to validate that the email has been sent. Do not use the CC: field for mass mailing. In the “Subject:” field type a brief description of what the email is about. Type your message in the large field and click “Send”.

Figure 5: Click on “New” to open the “Untitled Message” dialog box.
Address Book: The address book already has the email addresses of everyone in the school district. You may add your own contacts as well. You can access the address book by clicking on “To:” in the “Untitled Message” dialog box (see figure 5) or by clicking on the icon at the top right‐hand‐middle corner of your screen that looks like an opened book right before the field that says “Find Someone”.
Figure 5: Click the icon right next to “Find Someone”
Mailing Lists: A mailing list is one email address that is preprogrammed to send to multiple designated recipients. These are the mailing lists currently available at CCSD.
1. [email protected] – sends your email to every employee at CCSD. 2. [email protected] – sends your email to every employee at the central board office. 3. [email protected] – sends your email to every employee at Metter High School. 4. [email protected] – sends your email to every employee at Metter Middle School. 5. [email protected] – sends your email to every employee at Metter Intermediate School. 6. [email protected] – sends your email to every employee at Metter Elementary School. 7. [email protected] – sends your email to every employee at the Performance Learning Center Academy.
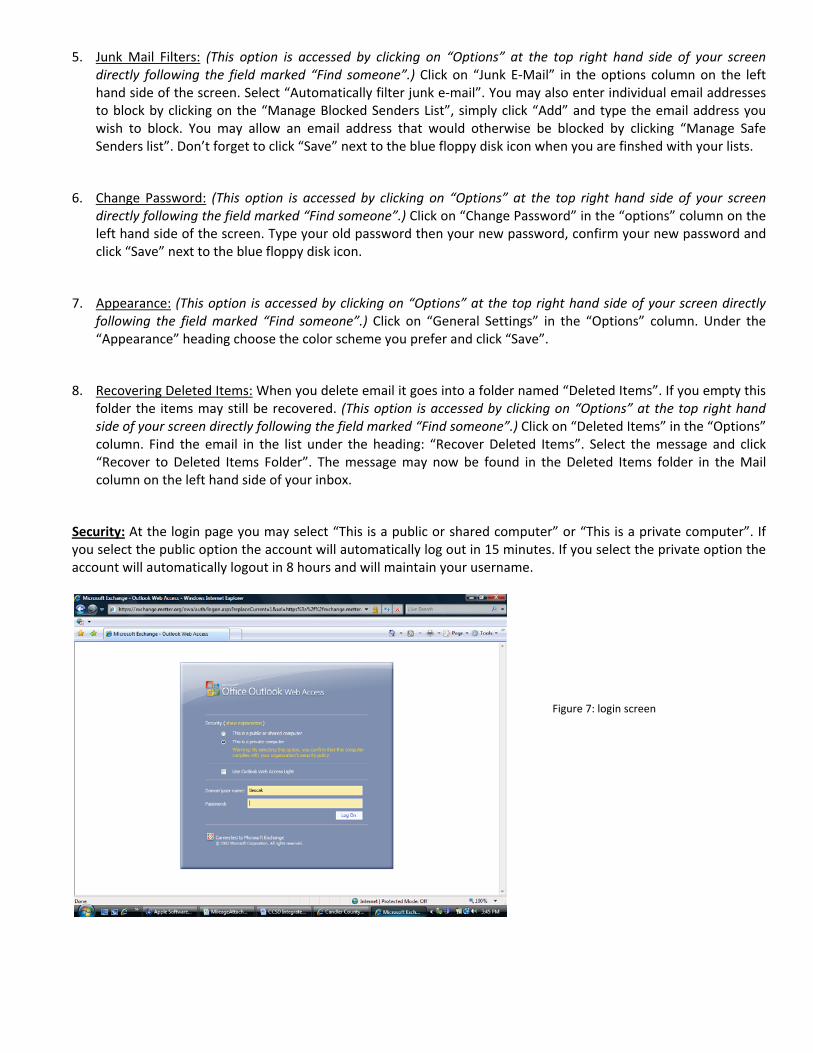
Calendar Functions: Calendars are used to schedule appointments. Click on the Calendar icon located in the list of folders on the left hand side of your screen. The calendar icon is usually located just below your name in the mail area. Double click the Calendar icon to open your calendar. Your calendar is divided into three sections, a calendar showing the days of the month, a planner showing the hours of the day and a section to manage multiple calendars. Click on the day of the month you wish to schedule an appointment, then click on the hour of the appointment. The appointment dialog box will appear (see figure 6). You may enter the details of your appointment here and they will be saved in your email account.
Figure 6: Access the Appointment window by clicking on the hour of the day of your appointment.
Creating New Contacts: Click on “contacts” in the mail column on the left hand side of the screen. Then click the “new” link. Fill in the information fields then click “save and close” at the top left hand corner. Options: 1. Email Signature: (This option is accessed by clicking on “Options” at the top right hand side of your screen directly
following the field marked “Find someone”.) Type your name, title and other info you wish for your recipient to read in the large field underneath “E‐Mail Signature”. This info will be included on every email you send out. Select the box “Automatically include my signature on outgoing messages”. Click “save” (next to the blue floppy disk) at the top left hand side of the screen.
2. Read Receipts: To request a read receipt start a new message and select “options” from the “Untitled Message” dialog box, this will open the “message options” dialog box. Select the box marked “Request a read receipt for this message.”
3. Spell Check: Check the spelling in your email by clicking the icon that looks like ABC above a check mark at the
top of the “Untitled Message” dialog box.
4. Out of Office Replies: (This option is accessed by clicking on “Options” at the top right hand side of your screen directly following the field marked “Find someone”.) In the “options” column on the left hand side of the screen click “Out of Office Assistant”. Check the box marked “Send Out of Office auto‐replies”. Choose a time‐span and type a message you wish to have sent out during your absence.
5. Junk Mail Filters: (This option is accessed by clicking on “Options” at the top right hand side of your screen directly following the field marked “Find someone”.) Click on “Junk E‐Mail” in the options column on the left hand side of the screen. Select “Automatically filter junk e‐mail”. You may also enter individual email addresses to block by clicking on the “Manage Blocked Senders List”, simply click “Add” and type the email address you wish to block. You may allow an email address that would otherwise be blocked by clicking “Manage Safe Senders list”. Don’t forget to click “Save” next to the blue floppy disk icon when you are finshed with your lists.
6. Change Password: (This option is accessed by clicking on “Options” at the top right hand side of your screen directly following the field marked “Find someone”.) Click on “Change Password” in the “options” column on the left hand side of the screen. Type your old password then your new password, confirm your new password and click “Save” next to the blue floppy disk icon.
7. Appearance: (This option is accessed by clicking on “Options” at the top right hand side of your screen directly following the field marked “Find someone”.) Click on “General Settings” in the “Options” column. Under the “Appearance” heading choose the color scheme you prefer and click “Save”.
8. Recovering Deleted Items: When you delete email it goes into a folder named “Deleted Items”. If you empty this folder the items may still be recovered. (This option is accessed by clicking on “Options” at the top right hand side of your screen directly following the field marked “Find someone”.) Click on “Deleted Items” in the “Options” column. Find the email in the list under the heading: “Recover Deleted Items”. Select the message and click “Recover to Deleted Items Folder”. The message may now be found in the Deleted Items folder in the Mail column on the left hand side of your inbox.
Security: At the login page you may select “This is a public or shared computer” or “This is a private computer”. If you select the public option the account will automatically log out in 15 minutes. If you select the private option the account will automatically logout in 8 hours and will maintain your username.
Figure 7: login screen