c++ notes
DESCRIPTION
it contains notes for C++TRANSCRIPT

Course notesC++ programming

C++ programming 2
An overview of C++
GENERALITY
Object Oriented Programming (OOP)Although structured programming has yielded excellent results when applied to moderately complex programs, even it fails at some point, after a program reaches a certain size. To allow more complex programs to be written, object-oriented programming has been invented. OOP takes the best of the ideas in structured programming and combines them with powerful new concepts that allow you to organise your programme more efficiently.
C++ is the object oriented extension of C. As for C there is an ANSI/ISO standard ( final draft 1998) for the C++ programming language. This will ensure that the C++ code is portable between computers.
The C++ programming language teach here is the Standard C++. This is the version of C++ created by the ANSI/ISO2 standardisation committee. The Standard C++ contains several enhancements not found in the traditional C++. Thus, Standard C++ is a superset of traditional C++.
Standard C++ is the one that is currently accepted by all major compilers. Therefore, you can be confident that what you learn here will also apply in the future.
However, if you are using an older compiler it might not support one or more of the features that are specific to Standard C++. This is important because two recent additions to the C++ language affect every program you will write. If you are using an older compiler that does not accept these knew features, don’t worry. There is an easy workaround, as you will in a later paragraph.
Since C++ was invented to support object-oriented programming. OOP concepts will be reminded. As you will see, many features of C++ are related to OOP in a way or another. In fact the theory of OOP permeates C++. However, it is important to understand that C++ can be used to write programs that are and are not object oriented. How you use C++ is completely up to you.
A few comments about the nature and form of C++ are in order. For most part C++ programs look like C programs. Like a C program, a C++ program begins execution at main( ) . To include command-line arguments, C++ uses the same argc , argv convention that C uses. Although C++ defines its own, object- oriented library. It also supports all the functions in the C standard library. C++ uses the same control structures as C. C++ includes all the build-in data types defined by C programming.
2 ANSI: American National Standards InstituteISO: International Standard Organisation
Object oriented programming encourage you to decompose a problem into its constituent parts.
Each component becomes a self-contained object that contains its own instructions and data that relate to that object. In this way, complexity is reduced and the programmer can manage larger program.
All OOP languages, including C++, share three common defining traits.
EncapsulationEncapsulation is the mechanism that binds together code and the data it manipulates, and keeps them both safe from outside. In an object-oriented language, code and data can be combined in such a way that a self-contained‘black box’ is created. When code and data are link together in this fashion , anobject is created:
OBJECT
Data
Methods: code
Within an object, code, data, or both may be private to that object or public. Private code or data is known to and accessible only by another part of the object (i.e. cannot be accessed by a piece of the program that exists outside the object. Public code or data can be accessed by other parts of the program even though it is defined within an object.Public parts of an object are used to provide a controlled interface to the private elements of the object.

C++ programming 3
An object is a variable of a user-defined type. Each time you define a new type of object, you are creating a new data type. Each specific instance of this data type is a compound variable.
PolymorphismPolymorphism is the quality that allows one name to be used for two or more related but technically different purposes.Polymorphism allows one name to specify a general class of actions. Within a general class of actions, the specific action to be applied is determined by the type of data. For example, in C, the absolute value action requires three distinct function names: abs( ) for integer, la bs( ) for long integer, and fabs( ) for floating-point value. However in C++, each function can be called by the same name, such as abs( ) . The type of data used to call the function determines which specific version of the function is actually executed.In C++ it is possible to use one function name for many different purposes. Thistype of polymorphism is called function overloading.Polymorphism can also be applied to operators. In that case it is called operator overloading.More generally the concept of polymorphism is characterised by the idea ‘one interface, multiple methods’. The key point to remember about polymorphism is that it allows you to handle greater complexity by allowing the creation of standard interfaces to related activities.
InheritanceInheritance is the process by which one object can acquire the properties of another. An object can inherit a general set of properties to which it can add those features that are specific only to itself.Inheritance is important because it allows an object to support the concept of hierarchical classification. Most information is made manageable by hierarchical classification.The child class inherits all those qualities associated with the parent and adds to them its own defining characteristics.
Differences between C and C++Although C++ is a subset of C, there are some small differences between the two, and few are worth knowing from the start.First, in C, when a function takes no parameters, its prototype has the word voi d inside its function parameter list. For example if a function f1( ) takes no parameters (and returns a char ), its prototype will look like this:
char f1(void); /* C version */
In C++, the void is optional. Therefore the prototype for f1( ) is usually written as:
char f1( ); //C++ version
this means that the function has no parameters. The use of voi d in C++ is not illegal; it is just redundant. Remember these two declarations are equivalent.
Another difference between C and C++ is that in a C++ program, all functions must be prototyped. Remember in C prototypes are recommended but technically optional. As an example from the previous section show, a member function’s prototype contained in a class also serves as its general prototype, and no other separate prototype is required.
A third difference between C and C++ is that in C++, if a function is declared as returning a value, it must return a value. That is, if a function has a return type other than voi d , any return statement within the function must contain a value. In C, a non voi d function is not required to actually return a value. If it doesn’t, a garbage value is ‘returned’.In C++, you must explicitly declare the return type of all functions.
Another difference is that in C, local variables can be declared only at the start of a block, prior to any ‘action’ statement. In C++, local variables can be declared anywhere. Thus, local variables can be declared close to where they are first use to prevent unwanted side effects.
C++ defines the bool date type, which is used to store Boolean values. C++ also defines the keywords true and false , which are the only values that a value of type bool can have.
In C, a character constant is automatically elevated to an integer, whereas in C++it is not.
In C, it is not an error to declare a global variable several times, even though it is bad programming practice. In C++, this is an error.
In C an identifier will have at least 31 significant characters. In C++, all characters are considered significant. However, from practical point of view, extremely long identifiers are unwieldy and seldom needed.
In C, you can call main( ) from within the program. In C++, this is not allowed.

C++ programming 4
In C, you cannot take the address of a register variable. In C++, you can.
In C, the type wcha r_ t is defined with a typedef . In C++, wcha r_ t is a keyword.
Differences between C++ and Standard C++The traditional C++ and the Standard C++ are very similar. The differences between the old-style and the modern style codes involve two new features: new- style headers and the namespace statement. Here an example of a do-nothing program that uses the old style,
/* A traditional-style C++ program */#include < iostream.h >int main( ) {
/* program code */return 0;
}
New headersSince C++ is build on C, the skeleton should be familiar, but pay attention to the#include statement. This statement includes the file iostream.h , which provides support for C++’s I/O system. It is to C++ what stdio .h is to C.Here the second version that uses the modern style,
/*A modern-style C++ program that usesthe new-style headers and namespace
*/#include < iostream>using namespace std;int main( ) {
/* program code */return 0;
}
First in the #include statement, there is no .h after the name iostream. And second, the next line, specifying a namespace is new.
The only difference is that in C or traditional C++, the #include statement includes a file (file-name.h ). While the Standard C++ do not specify filenames. Instead the new style headers simply specify standard identifiers that might be map to files by the compiler, but they need not be. New headers are abstractions that simply guaranty that the appropriate prototypes and definitions required by
the C++ library have been declared.Since the new-style header is not a filename, it does not have a .h extension. Such header consists only of the header name between angle brackets:
< iostream >< fstream >< vector >< string >
Standard C++ supports the entire C function library, it still supports the C-style header files associated with the library. That is, header files such as stdio .h and ctype.h are still available. However Standard C++ also defines new-style headers that you can use in place of these header files. For example,
Old style header files Standard C++ headers< math.h > < cmath >< string.h > < cstring >
Remember, while still common in existing C++ code, old-style headers are obsolete.
NamespaceWhen you include a new-style header in your program, the contents of that header are contained in the std namespace. The namespace is simply a declarative region. The purpose of a namespace is to localise the names of identifiers to avoid name collision. Traditionally, the names of library functions and other such items were simply placed into the global namespace (as they are in C). However, the contents of new-style headers are place in the std namespace. Using the statement,
using namespace std;
brings the std namespace into visibility. After this statement has been compiled, there is no difference working with an old-style header and a new-style one.
Working with an old compilerIf you work with an old compiler that does not support new standards: simply use the old-style header and delete the namespace statement, i.e.
replace: by:
#include < iostream> #include < iostream.h >
C++ programming 5
using namespace std;
C++ CONSOLE I/O
Since C++ is a superset of C, all elements of the C language are also contained in the C++ language. Therefore, it is possible to write C++ programs that look just like C programs. There is nothing wrong with this, but to take maximum benefit from C++, you must write C++-style programs.
This means using a coding style and features that are unique to C++.
The most common C++-specific feature used is its approach to console I/O. While you still can use functions such as printf ( ) and scanf( ) , C++ I/O is performed using I/O operators instead of I/O functions.
The output operator is << . To output to the console, use this form of the<< operator:
cout << expression;
where expression can be any valid C++ expression, including another output expression.
cout << "This string is output to the screen.\n";cout << 236.99;
The input operator is >>. To input values from keyboard, use
cin >> variables;
Example:#include < iostream > using namespace std; int main( ) {
// local variablesint i;float f;
cout << "i= " << i << " f= " << f << "\n";// output i then f and newline
return 0;}
You can input any items as you like in one input statement. As in C, individual data items must be separated by whitespace characters (spaces, tabs, or newlines). When a string is read, input will stop when the first whitespace character is encountered.
C AND C++ COMMENTS
/*This is a C-like comment.The program determines whetheran integer is odd or even.
*/
#include < iostream >using namespace std;
int main( ) {int num; // This is a C++ single-line comment.
// read the numbercout << "Enter number to be tested: ";cin >> num;
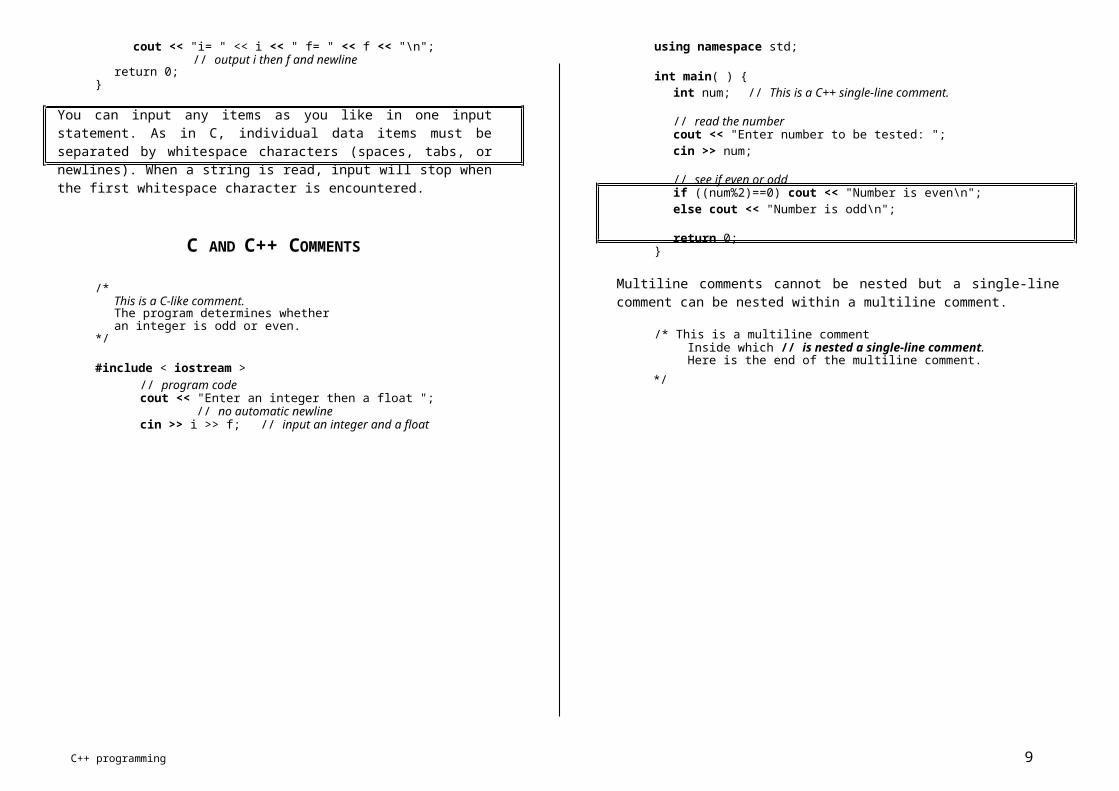
// see if even or oddif ((num%2)==0) cout << "Number is even\n";else cout << "Number is odd\n";
return 0;}
Multiline comments cannot be nested but a single-line comment can be nested within a multiline comment.
/* This is a multiline commentInside which // is nested a single-line comment.Here is the end of the multiline comment.
// program code */cout << "Enter an integer then a float ";
// no automatic newlinecin >> i >> f; // input an integer and a float

C++ programming 6
CLASSES
In C++, a class is declared using the class keyword. The syntax of a class declaration is similar to that of a structure. Its general form is,
class class-name {// private functions and variablespublic:
// public functions and variables} object-list;
Since a is private it is not accessible by any code outside myclass . However since set_a( ) and get_a( ) are member of myclass , they have access to a and as they are declared as public member of myclass , they can be called by any part of the program that contains myclass .
The member functions need to be defined. You do this by preceding the function name with the class name followed by two colons (:: are called scope resolution operator). For example, after the class declaration, you can declare the member function as
// member functions declarationvoid myclass::set_a(int num) {
a=num;In a class declaration the object-list is optional.The class-name is technically optional. From a practical point of view it is virtually always needed. The reason is that the class-name becomes a new type name that is used to declare objects of the class.
Functions and variables declared inside the class declaration are said to bemembers of the class.By default, all member functions and variables are private to that class. This means that they are accessible by other members of that class.
To declare public class members, the public keyword is used, followed by a colon. All functions and variables declared after the public specifier are accessible both by other members of the class and by any part of the program that contains the class.
#include < iostream >using namespace std;
// class declarationclass myclass {
// private members to myclassint a;
public:// public members to myclassvoid set_a(int num);int get_a( );
}int myclass::get_a( ) {
return a;}
In general to declare a member function, you use this form:
return-type class-name::func-name(parameter- list){
// body of function}
Here the class-name is the name of the class to which the function belongs.
The declaration of a class does not define any objects of the type myclass . It only defines the type of object that will be created when one is actually declared. To create an object, use the class name as type specifier. For example,
// from previous examplesvoid main( ) {
myclass ob1, ob2;//these are object of type myclass
// ... program code}
Remember that an object declaration creates a physical entity of that type. That is, an object occupies memory space, but a type definition does not.
};
This class has one private variable, called a , and two public functions set_a( ) and get_a( ) . Notice that the functions are declared within a class using their prototype forms. The functions that are declared to be part of a class are called member functions.
Once an object of a class has been created, your program can reference its public members by using the dot operator in much the same way that structure members are accessed. Assuming the preceding object declaration, here some examples,
...

C++ programming 7
ob1.set_a(10); // set ob1’s version of a to 10ob2.set_a(99); // set ob2’s version of a to 99
cout << ob1.get_a( ); << "\n";cout << ob2.get_a( ); << "\n";
ob1.a=20; // error cannot access private memberob2.a=80; // by non-member functions....
There can be public variables, for example
#include < iostream >using namespace std;
// class declarationclass myclass {
public:int a; //a is now public// and there is no need for set_a( ), get_a( )
};
int main( ) {myclass ob1, ob2;
// here a is accessed directlyob1.a = 10;ob2.a = 99;
cout << ob1.a << "\n"; cout << ob1.a << "\n"; return 0;
}
It is important to remember that although all objects of a class share their functions, each object creates and maintains its own data.
FUNCTION OVERLOADING: AN INTRODUCTION
After classes, perhaps the next most important feature of C++ is function overloading. As mentioned before, two or more functions can share the same name as long as either the type of their arguments differs or the number of their arguments differs - or both. When two or more functions share the same name, they are said overloaded. Overloaded functions can help reduce the complexity of a program by allowing related operations to be referred to by the same name.
To overload a function, simply declare and define all required versions. The compiler will automatically select the correct version based upon the number and/or type of the arguments used to call the function.It is also possible in C++ to overload operators. This will be seen later.
The following example illustrates the overloading of the absolute value function:
#include < iostream >using namespace std;
// overload abs three waysint abs (int n);long abs (long n);double abs (double n);
int main( ) {cout<< "Abs value of -10: "<< abs(-10)<< "\n"; cout<< "Abs value of -10L: "<< abs(-10L)<< "\n"; cout<<"Abs value of -10.01:"<<abs(-10.01)<<"\n"; return 0;
}
// abs( ) for intsint abs (int n) {
cout << "In integer abs( )\n";return n<0 ? -n : n;
}
// abs( ) for longlong abs (long n) {
cout << "In long abs( )\n";return n<0 ? -n : n;
}

C++ programming 8
// abs( ) for doubledouble abs (double n) {
cout << "In double abs( )\n";return n<0 ? -n : n;
}
The compiler automatically calls the correct version of the function based upon the type of data used as an argument.
Overloaded functions can also differ in the number of arguments. But, you must remember that the return type alone is not sufficient to allow function overloading. If two functions differ only in the type of data they return, the compiler will not always be able to select the proper one to call. For example, the following fragment is incorrect,
// This is incorrect and will not compileint f1 (int a);double f1 (int a);...
f1(10); // which function does the compiler call???
CONSTRUCTORS AND DESTRUCTORS FUNCTIONS
ConstructorsWhen applied to real problems, virtually every object you create will require some sort of initialisation. C++ allows a constructor function to be included in a class declaration. A class’s constructor is called each time an object of that class is created. Thus, any initialisation to be performed on an object can be done automatically by the constructor function.
A constructor function has the same name as the class of which it is a part a part and has not return type. Here is a short example,
#include < iostream >using namespace std;
myclass( ); //constructorvoid show( );
};
myclass::myclass( ) {cout << "In constructor\n";a=10;
}
myclass::show( ) {cout << a;
}
int main( ) {int ob; // automatic call to constructor
ob.show( );return 0;
}
In this simple example the constructor is called when the object is created, and the constructor initialises the private variable a to 10.
For a global object, its constructor is called once, when the program first begins execution.For local objects, the constructor is called each time the declaration statement is executed.
DestructorsThe complement of a constructor is the destructor. This function is called when an object is destroyed. For example, an object that allocates memory when it is created will want to free that memory when it is destroyed.The name of a destructor is the name of its class preceded by a ∼. For example,
#include < iostream >using namespace std;// class declarationclass myclass {
int a;public:
myclass( ); //constructor∼myclass( ); //destructorvoid show( );
// class declarationclass myclass {
int a;public:
};
myclass::myclass( ) {cout << "In constructor\n";
C++ programming 9
a=10;}
return 0;}
myclass::∼myclass( ) {cout << "Destructing...\n";
} // ...
A class’s destructor is called when an object is destroyed.
Local objects are destroyed when they go out of scope. Global objects are destroyed when the program ends.
It is not possible to take the address of either a constructor or a destructor.
Note that having a constructor or a destructor perform actions not directly related to initialisation or orderly destruction of an object makes for very poor programming style and should be avoided.
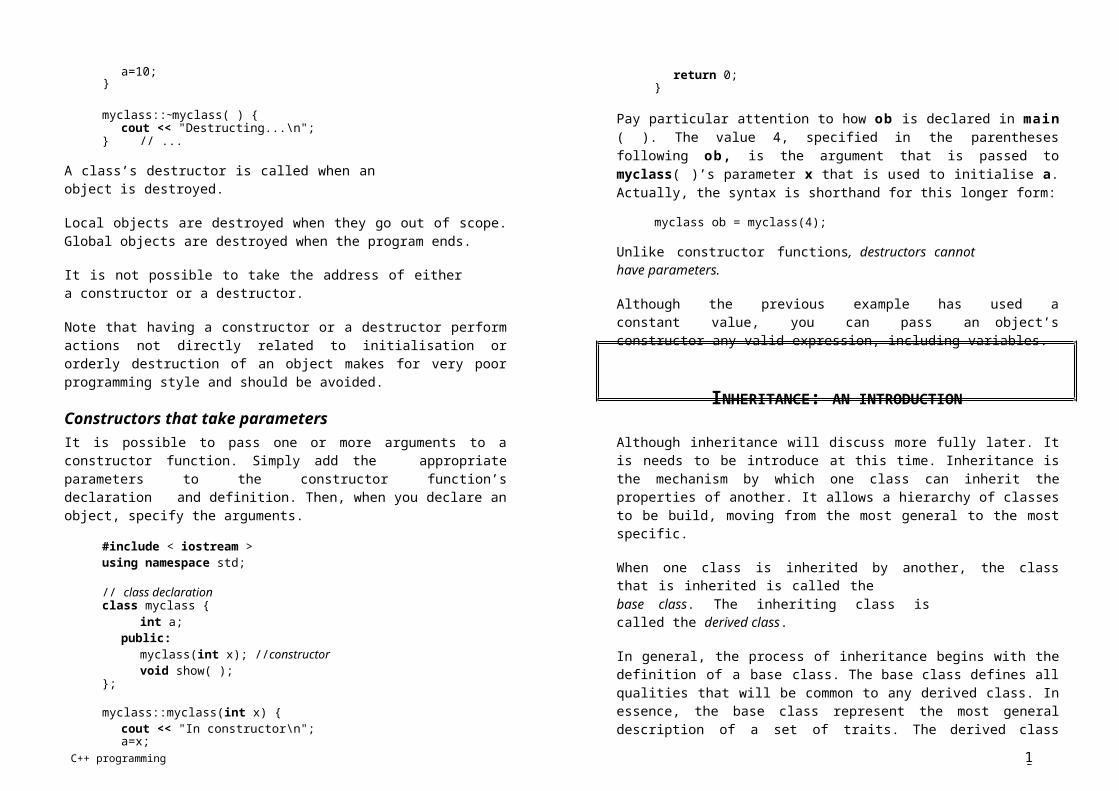
Constructors that take parametersIt is possible to pass one or more arguments to a constructor function. Simply add the appropriate parameters to the constructor function’s declaration and definition. Then, when you declare an object, specify the arguments.
#include < iostream >using namespace std;
// class declarationclass myclass {
int a;public:
myclass(int x); //constructorvoid show( );
};
myclass::myclass(int x) {cout << "In constructor\n";a=x;
Pay particular attention to how ob is declared in main ( ). The value 4, specified in the parentheses following ob, is the argument that is passed to myclass( )’s parameter x that is used to initialise a. Actually, the syntax is shorthand for this longer form:
myclass ob = myclass(4);
Unlike constructor functions, destructors cannot have parameters.
Although the previous example has used a constant value, you can pass an object’s constructor any valid expression, including variables.
INHERITANCE: AN INTRODUCTION
Although inheritance will discuss more fully later. It is needs to be introduce at this time. Inheritance is the mechanism by which one class can inherit the properties of another. It allows a hierarchy of classes to be build, moving from the most general to the most specific.
When one class is inherited by another, the class that is inherited is called thebase class. The inheriting class is called the derived class.
In general, the process of inheritance begins with the definition of a base class. The base class defines all qualities that will be common to any derived class. In essence, the base class represent the most general description of a set of traits. The derived class inherits those general traits and adds properties that are specific to that class.
Let’s see a simple example that illustrates many key-features of inheritance. To start, here the declaration for the base class:
}
void myclass::show( ) {cout << a <<"\n";
}
int main( ) {myclass ob(4);
ob.show( );
// Define base classclass B {
int i;public:
void set_i(int n);int get_i( );
};

C++ programming 10
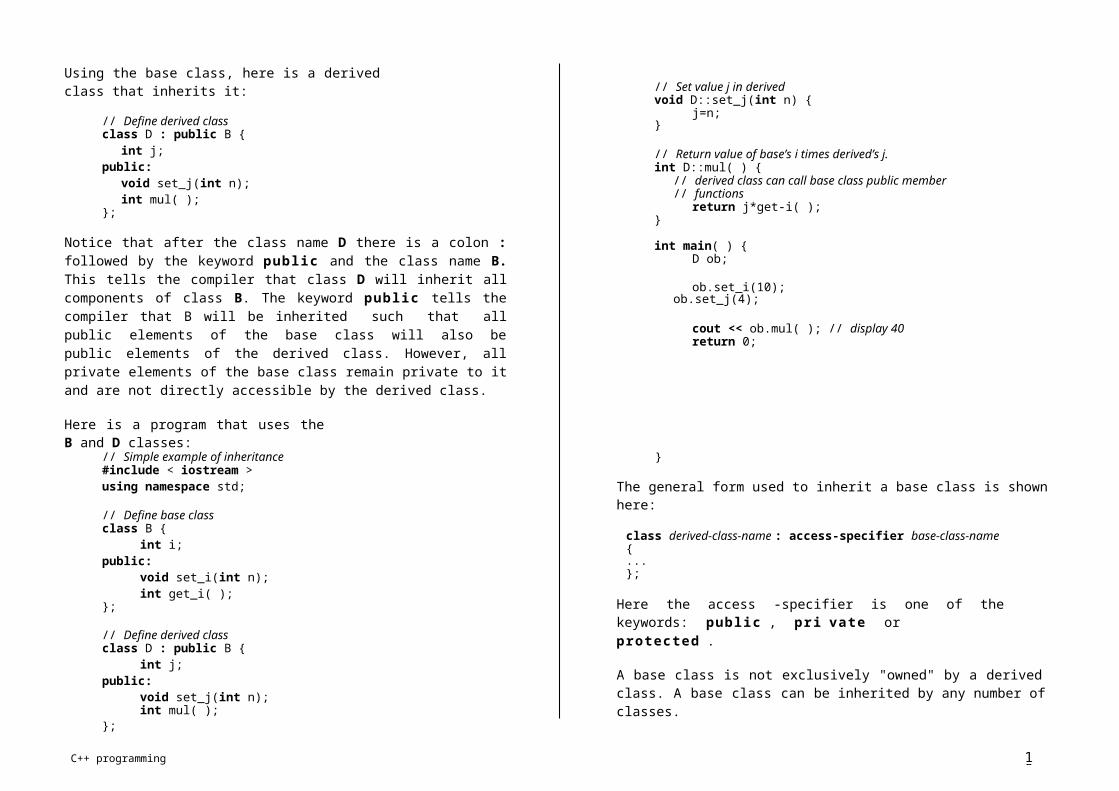
Using the base class, here is a derived class that inherits it:
// Define derived classclass D : public B {
int j;public:
void set_j(int n);int mul( );
};
Notice that after the class name D there is a colon : followed by the keyword public and the class name B. This tells the compiler that class D will inherit all components of class B. The keyword public tells the compiler that B will be inherited such that all public elements of the base class will also be public elements of the derived class. However, all private elements of the base class remain private to it and are not directly accessible by the derived class.
Here is a program that uses the B and D classes:
// Set value j in derivedvoid D::set_j(int n) {
j=n;}
// Return value of base’s i times derived’s j.int D::mul( ) {
// derived class can call base class public member// functions
return j*get-i( );}
int main( ) { D ob;
ob.set_i(10);ob.set_j(4);
cout << ob.mul( ); // display 40return 0;
// Simple example of inheritance#include < iostream >using namespace std;
// Define base classclass B {
int i;public:
void set_i(int n);int get_i( );
};
// Define derived classclass D : public B {
int j;public:
void set_j(int n);int mul( );
}
The general form used to inherit a base class is shown here:
class derived-class-name : access-specifier base-class-name{...};
Here the access -specifier is one of the keywords: public , pri vate orprotected .
A base class is not exclusively "owned" by a derived class. A base class can be inherited by any number of classes.
};
// Set value i in basevoid B::set_i(int n) {
i=n;}
// Return value of i in baseint B::get_i( ) {
return i;}
C++ programming 11
}
OBJECT POINTERS
So far, you have been accessing members of an object by using the dot operator. This is the correct method when you are working with an object. However, it is also possible to access a member of an object via a pointer to that object. When a pointer is used, the arrow operator (->) rather than the dot operator is employed. You declare an object pointer just as you declare a pointer to any other type of variable. Specify its class name, and then precede the variable name with an asterisk.
To obtain the address of an object, precede the object with the & operator, just as you do when taking the address of any other type of variable.
Just as pointers to other types, an object pointer, when incremented, will point to the next object of its type. Here a simple example,
#include < iostream >using namespace std;
class myclass {int a;
public:myclass(int x); //constructorint get( );
};
myclass::myclass(int x) {a=x;
Notice how the declaration
myclass *p;
creates a pointer to an object of myclass. It is important to understand that creation of an object pointer does not create an object. It creates just a pointer to one. The address of ob is put into p by using the statement:
p=&ob;
Finally, the program shows how the members of an object can be accessed through a pointer.
We will come back to object pointer later. For the moment, here are several special features that relate to them.
IN-LINE FUNCTIONS
In C++, it is possible to define functions that are not actually called but, rather, are expanded in line, at the point of each call. This is much the same way that a C-like parameterised macro works.
The advantage of in-line functions is that they can be executed much faster than normal functions.
The disadvantage of in-line functions is that if they are too large and called to often, your program grows larger. For this reason, in general only short functions}
int myclass::get( ) {return a;
}
int main( ) {myclass ob(120); //create objectmyclass *p; //create pointer to object
p=&ob; //put address of ob into pcout << "value using object: " << ob.get( );cout << "\n";cout << "value using pointer: " << p->get( );return 0;
are declared as in-line functions.
To declare an in-line function, simply precede the function’s definition with theinl ine specifier. For example,
//example of an in-line function#include < iostream >using namespace std;
inline int even(int x) {return !(x%2);
}int main( ) {
if (even(10)) cout << "10 is even\n";

C++ programming 12
if (even(11)) cout << "11 is even\n";return 0;
}
In this example the function even( ) which return true if its argument is even, is declared as being in-line. This means that the line
if (even(10)) cout << "10 is even\n";
is functionally equivalent to
if (!(10%2)) cout << "10 is even\n";
This example also points out another important feature of using inl ine : an in- line function must be define before it is first called. If it is not, the compiler has no way to know that it is supposed to be expanded in-line. This is why even( ) was defined before main( ) .
Depending upon the compiler, several restrictions to in-line functions may apply. If any in-line restriction is violated the compiler is free to generate a normal function.
Automatic in-liningIf a member function’s definition is short enough, the definition can be included inside the class declaration. Doing so causes the function to automatically become an in-line function, if possible. When a function is defined within a class declaration, the inl ine keyword is no longer necessary. However, it is not an error to use it in this situation.
//example of the divisible function#include < iostream >using namespace std;
class samp {int i, j;
public:samp(int a, int b);
//divisible is defined here and//automatically in-lined
int divisible( ) { return !(i%j); }};
samp::samp(int a, int b){i = a;j = b;
}
int main( ) {samp ob1(10, 2), ob2(10, 3);//this is trueif(ob1.divisible( )) cout<< "10 divisible by 2\n";
//this is falseif (ob2.divisible( )) cout << "10 divisible by 3\n";return 0;
}
Perhaps the most common use of in-line functions defined within a class is to define constructor and destructor functions. The samp class can more efficiently be defined like this:
//...class samp {
int i, j;public:
//inline constructorsamp(int a, int b) { i = a; j = b; }int divisible( ) { return !(i%j); }
};//...
MORE ABOUT CLASSES
Assigning objectOne object can be assigned to another provided that both are of the same type. By default, when one object is assigned to another, a bitwise copy of all the data members is made. For example, when an object called o1 is assigned to an object called o2 , the contents of all o1’ s data are copied into the equivalent members of o2.
//an example of object assignment.//...class myclass {
int a, b;public:
void set(int i, int j) { a = i; b = j; };void show( ) { cout << a << " " << b << "\n"; }
};
int main( ) {

C++ programming 13
myclass o1, o2;
o1.set(10, 4);
//assign o1 to o2o2 = o1;
o1.show( );o2.show( );
return 0;}
Thus, when run this program displays
10 410 4
Remember that assignment between two objects simply makes the data, in those objects, identical. The two objects are still completely separate.Only object of the same type can by assign. Further it is not sufficient that the types just be physically similar - their type names must be the same:
// This program has an error// ...class myclass {
int a, b;public:
void set(int i, int j) { a = i; b = j; };void show( ) { cout << a << " " << b << "\n"; }
};
/* This class is similar to myclass but uses a different
type name and thus appears as a different type to the compiler
*/class yourclass {
int a, b;public:
void set(int i, int j) { a = i; b = j; };void show( ) { cout << a << " " << b << "\n"; }
};
int main( ) { myclass o1; yourclass o2;
o1.set(10, 4);
o2 = o1; //ERROR objects not of same type
o1.show( );o2.show( );
return 0;}
It is important to understand that all data members of one object are assigned to another when assignment is performed. This included compound data such as arrays. But be careful not to destroy any information that may be needed later.
Passing object to functionsObjects can be passed to functions as arguments in just the same way that other types of data are passed. Simply declare the function’s parameter as a class type and then use an object of that class as an argument when calling the function. As with other types of data, by default all objects are passed by value to a function.
// ...class samp {
int i;public:
samp(int n) { i = n; }int get_i( ) { return i; }
};// Return square of o.iint sqr_it(samp o) {
return o.get_i( )* o.get_i( );}
int main( ) {samp a(10), b(2);
cout << sqr_it(a) << "\n"; cout << sqr_it(b) << "\n"; return 0;
}
As stated, the default method of parameter passing in C++, including objects, is by value. This means that a bitwise copy of the argument is made and it is this copy that is used by the function. Therefore, changes to the object inside the function do not affect the object in the call.
As with other types of variables the address of an object can be passed to a function so that the argument used in the call can be modify by the function.
// ...

C++ programming 14
// Set o.i to its square.// This affect the calling argumentvoid sqr_it(samp *o) {
o->set(o->get_i( )*o->get_i( ));}// ...int main( ) {
samp a(10);
sqr_it(&a); // pass a’s address to sqr_it// ...}
Notice that when a copy of an object is created because it is used as an argument to a function, the constructor function is not called. However when the copy is destroyed (usually by going out of scope when the function returns), the destructor function is called.
Be careful, the fact that the destructor for the object that is a copy of the argument is executed when the function terminates can be a source of problems. Particularly, if the object uses as argument allocates dynamic memory and frees that that memory when destroyed, its copy will free the same memory when its destructor is called.
One way around this problem of a parameter’s destructor function destroying data needed by the calling argument is to pass the address of the object and not the object itself. When an address is passed no new object is created and therefore no destructor is called when the function returns.
A better solution is to use a special type of constructor called copy constructor,which we will see later on.
Returning object from functionsFunctions can return objects. First, declare the function as returning a class type. Second, return an object of that type using the normal return statement.
Remember that when an object is returned by a function, a temporary object is automatically created which holds the return value. It is this object that is actually returned by the function. After the value is returned, this object is destroyed. The destruction of the temporary object might cause unexpected side effects in some situations (e.g. when freeing dynamically allocated memory).
//Returning an object// ...class samp {
char s[80];public:
void show( ) { cout << s << "\n"; }void set(char *str) { strcpy(s, str); }
};
//Return an object of type sampsamp input( ) {
char s[80];samp str;
cout << "Enter a string: ";cin >> s; str.set(s); return str;
}
int main( ) {samp ob;
//assign returned object to obob = input( );ob.show( );return 0;
}
Friend functions: an introductionThere will be time when you want a function to have access to the private members of a class without that function actually being a member of that class. Towards this, C++ supports friend functions. A friend function is not a member of a class but still has access to its private elements.
Friend functions are useful with operator overloading and the creation of certain types of I/O functions.
A friend function is defined as a regular, nonmember function. However, inside the class declaration for which it will be a friend, its prototype is also included, prefaced by the keyword fr iend. To understand how this works, here a short example:
//Example of a friend function// ...class myclass {
int n, d;public:
myclass(int i, int j) { n = i; d = j; }//declare a friend of myclass

C++ programming 15
friend int isfactor(myclass ob);};/* Here is friend function definition. It returns true
if d is a factor of n. Notice that the keyword friendis not used in the definition of isfactor( ).
*/int isfactor(myclass ob) {
if ( !(ob.n % ob.d) ) return 1;else return 0;
class truck; //This is a forward declaration
class car {int passengers;int speed;
public:car(int p, int s) { passengers = p; speed =s; }friend int sp_greater(car c, truck t);
};}
int main( ) {myclass ob1(10, 2), ob2(13, 3);
if (isfactor(ob1)) cout << "2 is a factor of10\n";
else cout << "2 is not a factor of 10\n";
if (isfactor(ob2)) cout << "3 is a factor of13\n";
else cout << "3 is not a factor of 13\n";return 0;
}
It is important to understand that a friend function is not a member of the class for which it is a friend. Thus, it is not possible to call a friend function by using an object name and a class member access operator (dot or arrow). For example, what follows is wrong.
ob1.isfactor( ); //wrong isfactor is not a member//function
Instead friend functions are called just like regular functions.
Because friends are not members of a class, they will typically be passed one or more objects of the class for which they are friends. This is the case with i s factor( ) . It is passed an object of myclass , called ob . However, because i s factor( ) is a friend of myclass, it can access ob ’s private members. If i s factor( ) had not been made a friend of myclass it would not have access to ob.d or ob.n since n and d are private members of myclass .
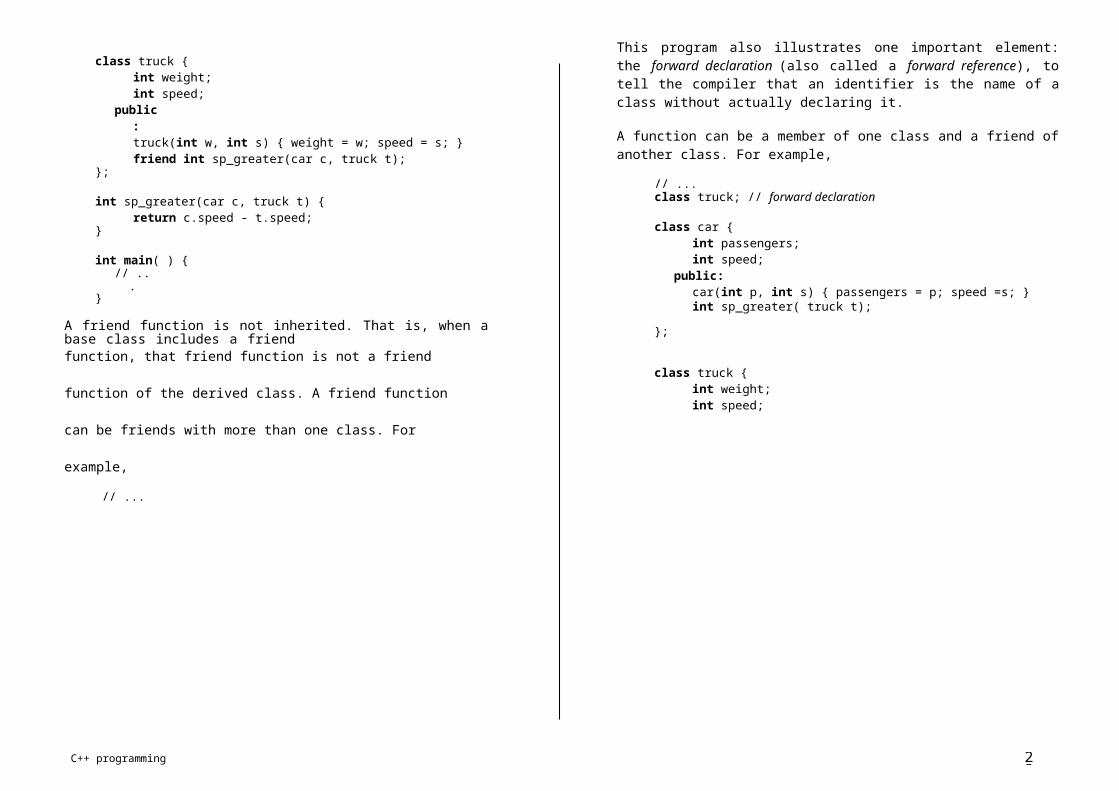
class truck {int weight;int speed;
public:truck(int w, int s) { weight = w; speed = s; }friend int sp_greater(car c, truck t);
};
int sp_greater(car c, truck t) {return c.speed - t.speed;
}
int main( ) {// ...
}
This program also illustrates one important element: the forward declaration (also called a forward reference), to tell the compiler that an identifier is the name of a class without actually declaring it.
A function can be a member of one class and a friend of another class. For example,
// ...class truck; // forward declaration
class car {int passengers;int speed;
public:car(int p, int s) { passengers = p; speed =s; }int sp_greater( truck t);
A friend function is not inherited. That is, when a base class includes a friendfunction, that friend function is not a friend function of the derived class.
A friend function can be friends with more than one class. For example,
// ...
};
class truck {int weight;int speed;
C++ programming 16
public:truck(int w, int s) { weight = w; speed = s; }//note new use of the scope resolution operatorfriend int car::sp_greater( truck t);
};
int car::sp_greater( truck t) {return speed - t.speed;
}
int main( ) {// ...
}
One easy way to remember how to use the scope resolution operation it is never wrong to fully specify its name as above in class truck ,
friend int car::sp_greater( truck t);
However, when an object is used to call a member function or access a member variable, the full name is redundant and seldom used. For example,
// ...int main( ) {
int t;
The syntax for declaring an array of objects is exactly as that used to declare an array of any other type of variable. Further, arrays of objects are accessed just like arrays of other types of variables.
#include < iostream >using namespace std;
class samp {int a;
public:void set_a(int n) {a = n;}int get_a( ) { return a; }
};
int main( ) {samp ob[4]; //array of 4 objectsint i;
for (i=0; i<4; i++) ob[i].set_a(i);for (i=0; i<4; i++) cout << ob[i].get_a( ) << "
";cout << "\n";return 0;
}
//...}
car c1(6, 55);truck t1(10000, 55);
t = c1.sp_greater(t1); //can be written using the//redundant scope as
t = c1.car::sp_greater(t1);
If the class type include a constructor, an array of objects can be initialised,
// Initialise an array#include < iostream >using namespace std;
class samp {int a;
public:However, since c1 is an object of type car the compiler already knows thatsp_greater ( ) is a member of the car class, making the full class specification unnecessary.
ARRAYS, POINTERS, AND REFERENCES
Arrays of objectsObjects are variables and have the same capabilities and attributes as any other type of variables. Therefore, it is perfectly acceptable for objects to be arrayed.
samp(int n) {a = n; }int get_a( ) { return a; }
};
int main( ) {samp ob[4] = {-1, -2, -3, -4};int i;
for (i=0; i<4; i++) cout << ob[i].get_a( ) << " ";
cout << "\n"return 0;
}

C++ programming 17
You can also have multidimensional arrays of objects. Here an example,
// Create a two-dimensional array of objects// ...class samp {
int a;// ...
samp(5, 6), samp(7, 8), samp(9, 10), samp(11, 12), samp(13, 14), samp(15, 16)};
public:samp(int n) {a = n; }int get_a( ) { return a; }
};
Note you can always the long form of initialisation even if the object takes onlyone argument. It is just that the short form is more convenient in this case.
Using pointers to objectsint main( ) {
samp ob[4][2] = {
int i;
1, 2,3, 4,5, 6,7, 8 };
As you know, when a pointer is used, the object’s members are referenced using the arrow (- >) operator instead of the dot (.) operator.
Pointer arithmetic using an object pointer is the same as it is for any other data type: it is performed relative to the type of the object. For example, when an object pointer is incremented, it points to the next object. When an object pointer is decremented, it points to the previous object.for (i=0; i<4; i++) {
cout << ob[i][0].get_a( ) << " ";cout << ob[i][1].get_a( ) << "\n";
}
cout << "\n";return 0;
}
// Pointer to objects// ...class samp {
int a, b;public:
samp(int n, int m) {a = n; b = m; }int get_a( ) { return a; }int get_b( ) { return b; }
This program displays,
1 23 45 67 8
When a constructor uses more than one argument, you must use the alternative format,
// ...class samp {
};
int main( ) {samp ob[4] = {
};int i;samp *p;
samp(1, 2), samp(3, 4), samp(5, 6), samp(7, 8)
int a, b;public:
samp(int n, int m) {a = n; b = m; }int get_a( ) { return a; }int get_b( ) { return b; }
};
p = ob; // get starting address of array
for (i=0; i<4; i++) {cout << p->get_a( ) << " "; cout << p->get_b( ) << "\n"; p++; // advance to next object}
int main( ) {samp ob[4][2] = {
samp(1, 2), samp(3, 4),
// ...
C++ programming 18
The THIS pointerC++ contains a special pointer that is called this . this is a pointer that is automatically passed to any member function when it is called, and it points to the object that generates the call. For example, this statement,
ob.f1( ); // assume that ob is an object
the function f1( ) is automatically passed as a pointer to ob, which is the object that invokes the call. This pointer is referred to as this . It is important to understand that only member functions are passed a this pointer. For example a friend does not have a this pointer.
// Demonstrate the this pointer#include < iostream >#include < cstring >using namespace std;
class inventory { char item[20]; double cost; int on_hand;
public:inventory(char *i, double c, int o) {
//access members through//the this pointerstrcpy(this->item, i);this->cost = c;this->on_hand = o;
}void show( );
};
void inventory::show( ) {cout << this->item; //use this to access memberscout << ": £" << this->cost;cout << "On hand: " << this->on_hand <<"\n";
In fact the first form is a shorthand for the second. Though the second form is usually not used for such simple case, it helps understand what the shorthand implies.
The this pointer has several uses, including aiding in overloading operators (see later).
By default, all member functions are automatically passed a pointer to the invoking object.
Using NEW and DELETEWhen memory needed to be allocated, you have been using malloc( ) and free( ) for freeing the allocated memory. Of course the standard C dynamic allocation functions are available in C++, however C++ provides a safer and more convenient way to allocate and free memory. In C++, you can allocate memory using new and release it using delete . These operator take the general form,
p-var = new type;delete p-var;
Here type is the type of the object for which you want to allocate memory and p- var is a pointer to that type. new is an operator that returns a pointer to dynamically allocated memory that is large enough to hold an object of type type. delete releases that memory when it is no longer needed. delete can be called only with a pointer previously allocated with new. If you call delete with an invalid pointer, the allocation system will be destroyed, possibly crashing your program.
If there is insufficient memory to fill an allocation request, one of two actions will occur. Either new will return a null pointer or it will generate an exception. In standard C++, the default behaviour of new is to generate an exception. If theexception is not handle by your program, your program will be terminated. The}
int main( ) {// ...
}
Here the member variables are accessed explicitly through the this pointer. Thus, within show ( ) , these two statements are equivalent:
cost = 123.23;this->cost = 123.23;
trouble is that your compiler may not implement new as in defined by StandardC++.
Although new and delete perform action similar to malloc( ) and free( ) , they have several advantages. First, new automatically allocates enough memory to hold an object of the specified type. You do not need to use s iz e of . Second, new automatically returns a pointer of the specified type. You do not need to use an explicit type cast the way you did when you allocate memory using malloc( ) . Third, both new and delete can be overloaded, enabling you to easily

C++ programming 19
implement your own custom allocation system. Fourth, it is possible to initialise a dynamically allocated object. Finally, you no longer need to include < cstdl ib > with your program.
// A simple example of new and delete#include < iostream >using namespace std;
int main( ) {int *p;
p = new int; //allocate room for an integerif (!p) {
cout << "Allocation error\n";return 1;
}*p = 1000;cout << "Here is integer at p: " << *p << "\n";delete p; // release memoryreturn 0;
}
// Allocating dynamic objects#include < iostream >using namespace std;
class samp {int i, j;
public:void set_ij(int a, int b) { i=a; j=b; }int get_product( ) { return i*j; }
};
int main( ) {samp *p;
p = new samp;//allocate objectif (!p) {
cout << "Allocation error\n";return 1;
}p- >set_ij(4, 5);cout<< "product is: "<< p- >get_product( ) <<
"\n";delete p; // release memoryreturn 0;
}
More about new and deleteDynamically allocated objects can be given initial values by using this form of statement:
p-var = new type (initial-value);
To dynamically allocate a one-dimensional array, use
p-var = new type [size];
After execution of the statement, p-var will point to the start of an array of sizeelements of the type specified.Note, it is not possible to initialise an array that is dynamically allocated
To delete a dynamically allocated array, use
delete [ ] p-var;
This statement causes the compiler to call the destructor function for each element in the array. It does not cause p-var to be freed multiple time. p-var is still freed only once.
// Example of initialising a dynamic variable#include < iostream >using namespace std;
int main( ) {int *p;
p = new int(9); //allocate and give initial valueif (!p) {
cout << "Allocation error\n";return 1;
}*p = 1000;cout << "Here is integer at p: " << *p << "\n";delete p; // release memoryreturn 0;
}
// Allocating dynamic objects#include < iostream >using namespace std;
class samp {int i, j;
public:

C++ programming 20
samp(int a, int b) { i=a; j=b; }int get_product( ) { return i*j; }
};int main( ) {
samp *p;
p = new samp(6, 5); //allocate object// with initialisation
if (!p) {cout << "Allocation error\n";return 1;
}cout<< "product is: "<< p- >get_product( ) <<
"\n";delete p; // release memoryreturn 0;
}
Example of array allocation
// Allocating dynamic objects#include < iostream >using namespace std;
class samp {int i, j;
public:void set_ij(int a, int b) { i=a; j=b; }∼samp( ) { cout << "Destroying...\n"; }int get_product( ) { return i*j; }
};
}
ReferencesC++ contains a feature that is related to pointer: the reference. A reference is an implicit pointer that for all intents and purposes acts like another name for a variable. There are three ways that a reference can be used: a reference can be passed to a function; a reference can be return by a function, an independent reference can be created.
The most important use of a reference is as a parameter to a function.To help you understand what a reference parameter is and how it works, let's first start with a program the uses a pointer (not a reference) as parameter.
#include < iostream >using namespace std;
void f(int *n); // use a pointer parameter
int main( ) {int i=0;
f(&i);cout << "Here is i's new value: " << i << "\n";return 0;
}
// function definitionvoid f(int *n) {
*n = 100; // put 100 into the argument// pointed to by n
int main( ) { samp *p; int i;
p = new samp [10]; //allocate object arrayif (!p) {
cout << "Allocation error\n";return 1;
}for (i=0; i<10; i++) p[i].set_ij(i, i);for (i=0; i<10; i++) {
cout << "product [" << i << "] is: ";cout << p[i].get_product( ) << "\n";
}
Here f ( ) loads the value 100 into the integer pointed to by n. In this program, f ( ) is called with the address of i in main( ) . Thus, after f ( ) returns, i contains the value 100.
This program demonstrates how pointer is used as a parameter to manually create a call-by-reference parameter-passing mechanism.
In C++, you can completely automate this process by using a reference parameter. To see how, let's rework the previous program,
}delete [ ] p;// release memory the destructor
// should be called 10 timesreturn 0;
#include < iostream >using namespace std;
void f(int &n); // declare a reference parameter

C++ programming 21
int main( ) {int i=0;
f(i);cout << "Here is i's new value: " << i << "\n";return 0;
}
// f( ) now use a reference parametervoid f(int &n) {
// note that no * is needed in the following//statement
n = 100; // put 100 into the argument// used to call f( )
}
First to declare a reference variable or parameter, you precede the variable's name with the &.
This is how n is declared as a parameter to f ( ) . Now that n is a reference, it is no longer necessary - even legal- to apply the * operator. Instead, n is automatically treated as a pointer to the argument used to call f ( ) . This means that the statement n=100 directly puts the value 100 in the variable i used as argument to call f ( ) .
Further, as f ( ) is declared as taking a reference parameter, the address of the argument is automatically passed to the function (statement: f(i) ). There is no need to manually generate the address of the argument by preceding it with an & (in fact it is not allowed).
It is important to understand that you cannot change what a reference is pointing to. For example, if the statement, n++, was put inside f ( ) , n would still be pointing to i in the main. Instead, this statement increments the value of the variable being reference, in this case i .
// Classic example of a swap function that exchanges the// values of the two arguments with which it is called#include < iostream >using namespace std;
void swapargs(int &x, int &y); //function prototype
int main( ) { int i, j; i = 10;
j = 19;
cout << "i: " << i <<", ";cout << "j: " << j << "\n";
swapargs(i, j);
cout << "After swapping: "; cout << "i: " << i <<", "; cout << "j: " << j << "\n"; return 0;
}
// function declarationvoid swapargs(int &x, int &y) { // x, y reference
int t;
t = x; x = y; y = t;
}
If sw apargs ( ) had been written using pointer instead of references, it would have looked like this:
void swapargs(int *x, int *y) { // x, y pointerint t;
t = *x;*x = *y;*y = t;
}
Passing references to objectsRemember that when an object is passed to a function by value (default mechanism), a copy of that object is made. Although the parameter's constructor function is not called, its destructor function is called when the function returns. As you should recall, this can cause serious problems in some case when the destructor frees dynamic memory.
One solution to this problem is to pass an object by reference (the other solution involves the use of copy constructors, see later).
When you pass an object by reference, no copy is made, and therefore its destructor function is not called when the function returns. Remember, however, that changes made to the object inside the function affect the object used as argument.

C++ programming 22
It is critical to understand that a reference is not a pointer. Therefore, when an object is passed by reference, the member access operator remains the dot operator.
The following example shows the usefulness of passing an object by reference. First, here the version that passes an object of myclass by value to a function called f () :
#include < iostream >using namespace std;
class myclass {int who;
public:myclass(int i) {
who = i;cout << "Constructing " << who << "\n";
}∼myclass( ) { cout<< "Destructing "<< who<< "\n";}int id( ) { return who; }
};
// o is passed by valuevoid f(myclass o) {
cout << "Received " << o.id( ) << "\n";}int main( ) {
myclass x(1);
f(x);return 0;
// ...class myclass {
int who;public:
myclass(int i) {who = i;cout << "Constructing " << who << "\n";
}∼myclass( ) { cout<< "Destructing "<< who<< "\n";}int id( ) { return who; }
};
// Now o is passed by referencevoid f(myclass &o) {
// note that . operator is still used !!!cout << "Received " << o.id( ) << "\n";
}int main( ) {
myclass x(1);
f(x);return 0;
}
This version displays:
Constructing 1Received 1Destructing 1
Remember, when accessing members of an object by using a reference, use the dot operator not the arrow.
}
This program displays the following:
Constructing 1Received 1Destructing 1Destructing 1
The destructor function is called twice. First, when the copy of object 1 is destroyed when f ( ) terminates and again when the program finishes.
However, if the program is change so that f ( ) uses a reference parameter, no copy is made and, therefore, no destructor is called when f ( ) returns:
Returning referencesA function can return a reference. You will see later that returning a reference can be very useful when you are overloading certain type of operators. However, it also can be employed to allow a function to be used on the left hand side of an assignment statement. Here, a very simple program that contains a function that returns a reference:
// ...int &f( ); // prototype of a function
// that returns a reference.int x; // x is a global variable
int main( ) {

C++ programming 23
f( ) = 100; // assign 100 to the reference// returned by f( ).
cout << x << "\n";return 0;
}
// return an int referenceint &f( ) {
return x; // return a reference to x}
Here, f ( ) is declared as returning a reference to an integer. Inside the body of the function, the statement
return x;
does not return the value of the global variable x, but rather, it automatically returns address of x (in the form of a reference). Thus, inside main( ) the statement
f( ) = 100;
put the value 100 into x because f ( ) has returned a reference to it.
Independent references and restrictionsThe independent reference is another type of reference that is available in C++. An independent reference is a reference variable that is simply another name for another variable. Because references cannot be assigned new values, an independent reference must be initialised when it is declared.
Further independent references exist in C++ largely because there was no compelling reason to disallow them. But for most part their use should be avoided.
// program that contains an independent reference// ...int main( ) {
int x;int &ref = x;// create an independent reference
x = 10; // these two statements areref = 10; // functionally equivalent
ref = 100;// this print the number 100 twicecout << x << " " << ref << "\n";return 0;
To review, function f ( ) returns a reference. Thus, when f ( ) is used on the left side of the assignment statement, it is this reference, returned by f ( ) , that is being assigned. Since f ( ) returns a reference to x (in this example), it is x that receives the value 100.
You must be careful when returning a reference that the object you refer to does not go out of scope. For example,
// return an int referenceint &f( ) {
int x; // x is now a local variablereturn x; // returns a reference to x
}
In this case, x is now local to f ( ) and it will go out of scope when f ( ) returns. This means that the reference returned by f ( ) is useless.
Some C++ compilers will not allow you to return a reference to a local variable. However, this type of problem can manifest itself on other ways, such as when objects are allocated dynamically.
}
There are a number of restrictions that apply to all types of references:• You cannot reference another reference.• You cannot obtain the address of a reference.• You cannot create arrays of reference.• You cannot reference a bit-field.• References must be initialised unless they are members of a class, or
are function parameters.
FUNCTION OVERLOADING
Overloading constructor functionsIt is possible to overload a class's constructor function. However, it is not possible to overload destructor functions. You will want to overload a constructor:- to gain flexibility,- to support arrays,

C++ programming 24
- to create copy constructors (see next section)
One thing to keep in mind, as you study the examples, is that there must be a constructor function for each way that an object of a class will be created. If a program attempts to create an object for which no matching constructor is found, a compiler-time error occurs. This is why overloaded constructor functions are so common to C++ program.
Perhaps the most frequent use of overloaded constructor functions is to provide the option of either giving an object an initialisation or not giving it one. For example, in the following program, o1 is given an initial value, but o2 is not. If you remove the constructor that has the empty argument list, the program will not compile because there is no constructor that matches the non-initialised object of type myclass .
// ...class myclass {
int x;public:
// overload constructor two waysmyclass( ) { x = 0; } // no initialisermyclass(int n ) { x = n; } // initialiserint getx( ) { return x; }
// ...class myclass {
int x;public:
// overload constructor two waysmyclass( ) { x = 0; } // no initialisermyclass(int n ) { x = n; } // initialiserint getx( ) { return x; }
};
int main( ) {// declare array without initialisersmyclass o1[10];
// declare with initialisersmyclass o2[10] = {1, 2, 3, 4, 5, 6, 7, 8, 9, 10};
int i;for (i=0; i<10; i++) {cout<< "o1["<< i << "]: "<< o1[i].getx( )<< "\n";cout<< "o2["<< i << "]: "<< o2[i].getx( )<< "\n";}return 0;
}
In this example, all elements of o1 are set to 0 by the constructor. The elements};
int main( ) {myclass o1(10); // declare with initial valuemyclass o2; // declare without initialiser
cout << "o1: " << o1.getx( ) << "\n"; cout << "o2: " << o2.getx( ) << "\n"; return 0;
of o2 are initialised as shown in the program.
Another situation is when you want to be allowed to select the most convenient method of initialising an object:
#include < iostream >#include < cstdio > // included for sscanf( )using namespace std;
}
Another reason to overload constructor functions, is to allow both individual objects and arrays of objects to occur with the program. For example, assuming the class myclass from the previous example, both of the declarations are valid:
myclass ob(10);myclass ob[10];
class date {int day, month, year;
public:date(char *str);//accept date as character stringdate(int m, int d, int y) {// passed as three ints
day = d; month = m; year = y;
By providing both a parameterised and a parameterless constructor, your program allows the creation of objects that are either initialised or not as needed. Of course, once you have defined both types of constructor you can use them to
}void show( ) {
cout << day << "/" << month << "/" << year;cout << "\n";
initialise or not arrays. }};

C++ programming 25
date::date(char *str) {sscanf(str,"%d%*c%d%*c%d", &day, &month, &year);
}int main( ) {
// construct date object using stringdate sdate("31/12/99");// construct date object using integerdate idate(12, 31, 99);
sdate.show( ); idate.show( ); return 0;
}
Without the overloaded version of myclass ( ) that has no initialiser, the new statement would have generated a compile-time error and the program would not have been compiled.
Creating and using a copy constructorOne of the more important forms of an overloaded constructor is the copy constructor. Recall, problems can occur when an object is passed to or returned from a function. One way to avoid these problems, is to define a copy constructor.
}
Another situation in which you need to overload a class's constructor function is when a dynamic array of that class will be allocated. As you should recall, a dynamic array cannot be initialised. Thus, if the class contains a constructor that takes an initialiser, you must include an overloaded version that takes no initialiser.
// ...class myclass {
int x;public:
// overload constructor two waysmyclass( ) { x = 0; } // no initialisermyclass(int n ) { x = n; } // initialiserint getx( ) { return x; }void setx(int x) { x = n; }
};
int main( ) {myclass *p;myclass ob(10); // initialise single variable
p = new myclass[10]; // can't use initialiser hereif (!p) {
cout << "Allocation error\n";return 1;
Remember when an object is passed to a function, a bitwise copy of that object is made and given to the function parameter that receives the object. However, there are cases in which this identical copy is not desirable. For example, if the object contains a pointer to allocated memory, the copy will point to the same memory as does the original object. Therefore, if the copy makes a change to the contents of this memory, it will be changed for the original object too! Also, when the function terminates, the copy will be destroyed, causing its destructor to be called. This might lead to undesired side effects that further affect the original object (as the copy points to the same memory).
Similar situation occurs when an object is returned by a function. The compiler will commonly generate a temporary object that holds a copy of the value returned by the function (this is done automatically and is beyond your control). This temporary object goes out of scope once the value is returned to the calling routine, causing the temporary object's destructor to be called. However, if the destructor destroys something needed by the calling routine (for example, if it frees dynamically allocated memory), trouble will follow.
At the core of these problems is the fact that a bitwise copy of the object is made. To prevent these problems, you, the programmer, need to define precisely what occurs when a copy of an object is made so that you can avoid undesired side effects. By defining a copy constructor, you can fully specify exactly what occurs when a copy of an object is made.
"\n";
}
int i;// initialise all elements of obfor (i=0; i<10; i++) p[i]= ob;for (i=0; i<10; i++)
cout<< "p["<< i << "]: "<< p[i].getx( ) <<
return 0;
It is important to understand that C++ defines two distinct types of situations in which the value of an object is given to another. The first situation is assignment.
The second situation is initialisation, which can occur three ways:• when an object is used to initialised another in a declaration statement,• when an object is passed as a parameter to a function, and• when a temporary object is created for use as a return value by a function.

C++ programming 26
A copy constructor only applies to initialisation. It does not apply to assignments.By default, when an initialisation occurs, the compiler will automatically provide a bitwise copy (that is, C++ automatically provides a default copy constructor that simply duplicates the object.) However, it is possible to specify precisely how one object will initialise another by defining a copy constructor. Once defined, the copy constructor is called whenever an object is used to initialise another.
The most common form of copy constructor is shown here:
class-name(const class-name &obj) {// body of constructor
}
Here obj is a reference to an object that is being used to initialise another object. For example, assuming a class called myclass , and that y is an object of type myclass , the following statements would invoke the myclass copy constructor:
myclass x = y; // y explicitly initialising xfunc1(y); // y passed as a parametery = func2( ); // y receiving a returned object
In the first two cases, a reference to y would be passed to the copy constructor. In the third, a reference to the object returned by func2( ) is passed to the copy constructor.
/* This program creates a 'safe' array class. Since space for the array is dynamically allocated, a copy constructor is provided to allocate memory when one array object is used to initialise another*/#include < iostream >#include < cstdlib >using namespace std;
class array { int *p; int size;
public:array(int sz) { // constructor
p = new int[sz]; if (!p) exit(1); size = sz;cout << "Using normal constructor\n";
∼array( ) { delete [ ] p; } //destructor
// copy constructorarray(const array &a); //prototypevoid put(int i, int j) {
if (i>=0 && i<size) p[i] = j;}int get(int i) { return p[i]; }
};
// Copy constructor:// In the following, memory is allocated specifically// for the copy, and the address of this memory is// assigned to p.Therefore, p is not pointing to the// same dynamically allocated memory as the original// objectarray::array(const array &a) {
int i;
size = a.size;p = new int[a.size]; // allocate memory for copyif (!p) exit(1);
// copy contentfor(i=0; i<a.size; i++) p[i] = a.p[i];cout << "Using copy constructor\n";
}
int main( ) {array num(10); // this call normal constructorint i;// put some value into the arrayfor (i=0; i<10; i++) num.put(i, j);// display numfor (i=9; i>=0; i--) cout << num.get(i);cout << "\n";// create another array and initialise with numarray x = num; // this invokes the copy
constructor// display xfor (i=0; i<10; i++) cout << x.get(i);return 0;
}
When num is used to initialise x the copy constructor is called, memory for the new array is allocated and store in x.p and the contents of num are copied to x' s array. In this way, x and num have arrays that have the same values, but each array is separated and distinct. That is, num.p and x.p do not point to the same piece of memory.
}

C++ programming 27
A copy constructor is only for initialisation. The following sequence does not call the copy constructor defined in the preceding program.
array a(10);array b(10);
b = a; // does not call the copy constructor. It performs
// the assignment operation.
A copy constructor also helps prevent some of the problems associated with passed certain types of objects to function. Here, a copy constructor is defined for the strtype class that allocates memory for the copy when the copy is created.
// This program uses a copy constructor to allow strtype// objects to be passed to functions#include <iostream>#include <cstring>#include <cstdlib>using namespace std;
class strtype {char *p;
public:strtype(char *s); // constructorstrtype(const strtype &o); // copy constructor∼strtype( ) { delete [ ] p; }// destructorchar *get( ) { return p; }
p = new char [l]; // allocate memory for new copyif (!p) {
cout << "Allocation error\n";exit(1);
}strcpy(p, o.p); // copy string into copy
}
void show(strtype x) {char *s;
s = x.get( );cout << s << "\n";
}
int main( ) {strtype a("Hello"), b("There");
show(a); show(b); return 0;
}
Here, when show( ) terminates and x goes out of scope, the memory pointed to by x.p (which will be freed) is not the same as the memory still in use by the object passed to the function.
Using default arguments};
// Constructorstrtype::strtype(char *s) {
int l;
l = strlen(s) + 1; p = new char [l]; if (!p) {
cout << "Allocation error\n";exit(1);
}strcpy(p, s);
}
// Copy constructorstrtype::strtype(const strtype &o) {
int l;
l = strlen(o.p) + 1;
There is a feature of C++ that is related to function overloading. This feature is called default argument, and it allows you to give a parameter a default value when no corresponding argument is specified when the function is called. Using default arguments is essentially a shorthand form of function overloading.
To give a parameter a default argument, simply follow that parameter with an equal sign and the value you want it to default to if no corresponding argument is present when the function is called. For example, this function gives two parameters default values of 0:
void f(nit a=0, nit b=0);
Notice that this syntax is similar to variable initialisation. This function can now be called three different ways:• It can be called with both arguments specified.• It can be called with only the first argument specified (in this case b
will default to 0).

C++ programming 28
• It can be called with no arguments (both a and b default to
0). That is the following calls to the function f are valid,
f( ); // a and b default to 0f(10); // a is 10 and b defaults to 0f(10, 99); // a is 10 and b is 99
When you create a function that has one or more default arguments, those arguments must be specified only once: either in the function's prototype or in the function's definition if the definition precedes the function's first use. The defaults cannot be specified in both the prototype and the definition. This rule applies even if you simply duplicate the same defaults.
All default parameters must be to the right of any parameters that don't have defaults. Further, once you begin define default parameters, you cannot specify any parameters that have no defaults.
Default arguments must be constants or global variables. They cannot be local variables or other parameters.
Default arguments often provide a simple alternative to function overloading. Of course there are many situations in which function overloading is required.
It is not only legal to give constructor functions default arguments, it is also common. Many times a constructor is overloaded simply to allow both initialised and uninitialised objects to be created. In many cases, you can avoid overloading constructor by giving it one or more default arguments:
#include <iostream>using namespace std;
class myclass {int x;
public:// Use default argument instead of overloading// myclass constructor.myclass(int n = 0) { x = n; }int getx( ) { return x; }
};
int main( ) {myclass o1(10); // declare with initial valuemyclass o2; // declare without initialiser
cout << "o1: " << o1.getx( ) << "\n";
cout << "o2: " << o2.getx( ) << "\n";return 0;
}
Another good application for default argument is found when a parameter is used to select an option. It is possible to give that parameter a default value that is used as a flag that tells the function to continue to use a previously selected option.
Copy constructors can take default arguments, as long as the additional arguments have default value. The following is also an accepted form of a copy constructor:
myclass(const myclass &obj, nit x = 0) {// body of constructor
}
As long as the first argument is a reference to the object being copied, and all other arguments default, the function qualifies as a copy constructor. This flexibility allows you to create copy constructors that have other uses.
As with function overloading, part of becoming an excellent C++ programmer is knowing when use a default argument and when not to.
Overloading and ambiguityWhen you are overloading functions, it is possible to introduce ambiguity into your program. Overloading-caused ambiguity can be introduce through type conversions, reference parameters, and default arguments. Further, some types of ambiguity are caused by the overloaded functions themselves. Other types occur in the manner in which an overloaded function is called. Ambiguity must be removed before your program will compile without error.
Finding the address of an overloaded functionJust as in C, you can assign the address of a function (that is, its entry point) to a pointer and access that function via that pointer. A function's address is obtained by putting its name on the right side of an assignment statement without any parentheses or argument. For example, if za p ( ) is a function, assuming proper declarations, this is a valid way to assign p the address of za p ( ) :
p = zap;
In C, any type of pointer can be used to point to a function because there is only one function that can point to. However, in C++ it is a bit more complex because a function can be overloaded.
C++ programming 29
The solution is both elegant and effective. When obtaining the address of an overloaded function, it is the way the pointer is declared that determines which overloaded function's address will be obtained. In essence, the pointer's declaration is matched against those of the overloaded functions. The function whose declaration matches is the one whose address is used.
Here is a program that contains two versions of a function called space( ) . The first version outputs count number of spaces to the screen. The second version outputs count number of whatever type of character is passed to ch . In main( ) two function pointers are declared. The first one is specified as a pointer to a function having only one integer parameter. The second is declared as a pointer to a function taking two parameters.
// Illustrate assigning function pointers// to overloaded functions#include <iostream>using namespace std;
// output count number of spacesvoid space(int count) {
for ( ; count; count--) cout << " ";
OPERATOR OVERLOADING
The basics of operator overloadingOperator overloading resembles function overloading. In fact, operator overloading is really just a type of function overloading. However, some additional rules apply. For example, an operator is always overloaded relatively to a user defined type, such as a class. Other difference will be discussed as needed.
When an operator is overloaded, that operator loses none of its original meaning. Instead, it gains additional meaning relative to the class for which it is defined.
To overload an operator, you create an operator function. Most often an operator function is a member or a friend of the class for which it is defined. However, there is a slight difference between a member operator function and a friend operator function.
}
// output count number of chsvoid space(int count, char ch) {
for ( ; count; count--) cout << ch;}
int main( ) {// create a pointer to void function with// one int parametervoid (*fp1) (int);
// create a pointer to void function with// one int parameter and one charactervoid (*fp2) (int, char);
fp1 = space; // gets address of space(int)fp2 = space; // gets address of space(int, char)
fp1(22); // output 22 spacescout <<"⏐\n";fp2(30, 'x');// output 30 x'scout <<"⏐\n";return 0;
The general form of a member operator function is shown here:
return-type class-name::operator#(arg-list){
// operation to be performed}
The return type of an operator function is often the class for which it is defined (however, operator function is free to return any type). The operator being overloaded is substituted for #. For example, if the operator + is being overloaded, the operator function name would be operator+. The contents of arg- l i s t vary depending upon how the operator function is implemented and the type of operator being overloaded.
There are two important restrictions to remember when you are overloading an operator:• The precedence of the operator cannot be change.• The number of operands that an operator takes cannot be altered.
Most C++ operators can be overloaded. The following operators cannot be overload:
}. :: .* ?
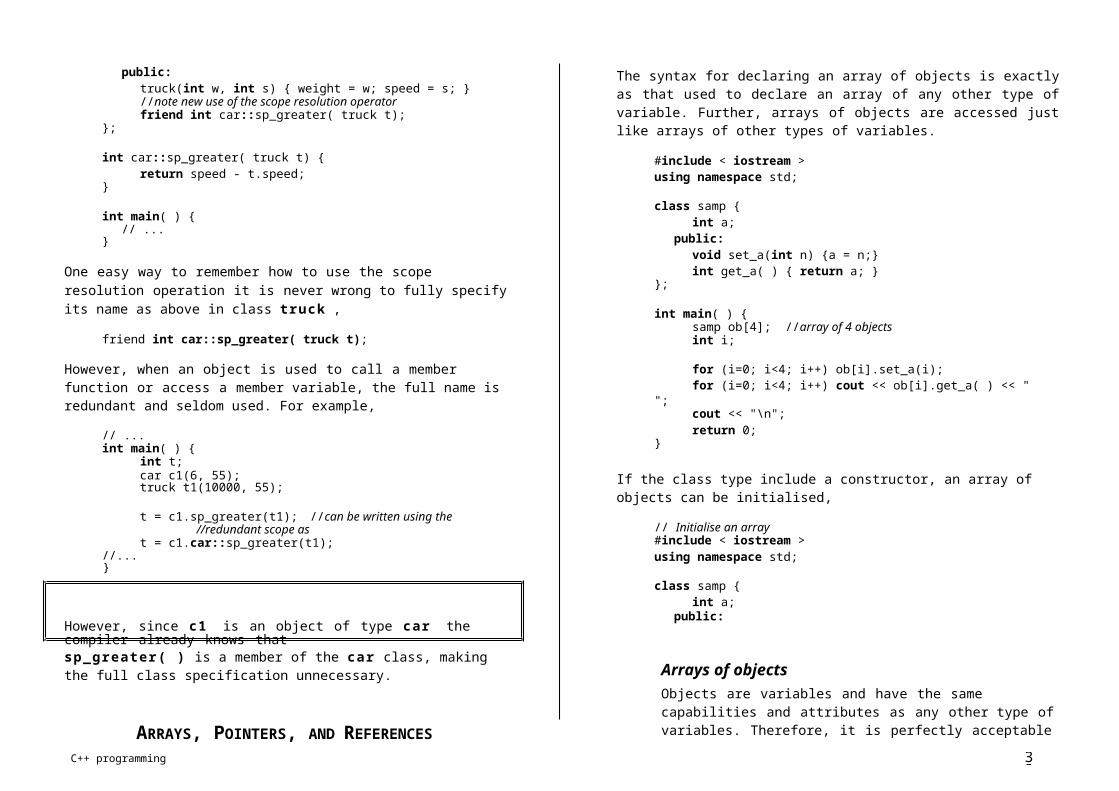
C++ programming 30
Also, you cannot overload the pre-processor operators (.* is highly specialised and is beyond the scope of this course).
Remember that C++ defines operators very broadly, including such things as the [] subscript operator, the ( ) function call operators, new and delete , and the dot and arrow operator. However, we will concentrate on overloading the most commonly used operators.
Except for the =, operator functions are inherited by any derived class. However, a derived class is free to overload any operator it chooses (including those overloaded by the base class) relative to itself.
coord operator+(coord ob2);};// Overload + relative to coord class.coord coord::operator+(coord ob2) {
coord temp;temp.x = x + ob2.x;temp.y = y + ob2.y;return temp;
}int main( ) {
coord o1(10, 10), o2(5, 3), o3;int x, y;
o3 = o1 + o2; //add to objects,// this calls operator+()
Note, you have been using two overloaded operators: << and >>. These operators have been overloaded to perform console I/O. As mentioned, overloading these operators does not prevent them from performing their traditional jobs of left shift and right shift.
"\n";
}
o3.get_xy(x, y);cout << "(o1+o2) X: " << x << ", Y: " << y <<
return 0;
While it is permissible for you to have an operator function perform any activity, it is best to have an overloaded operator's actions stay within the spirit of the operator's traditional use.
Overloading binary operatorsWhen a member operator function overloads a binary operator, the function will have only one parameter. This parameter will receive the object that is on the right side of the operator. The object on the left side is the object that generates the call to the operator function and is passed implicitly by this .
It important to understand that operator functions can be written with many variations. The examples given illustrate several of the most common techniques.
The following program overloads the + operator relative to the coord class. This class is used to maintain X, Y co-ordinates.
// overload the + relative to coord class#include <iostream>using namespace std;class coord {
int x, y; // coordinate valuespublic:
coord( ) { x = 0; y = 0; }coord(int i, int j) { x = i; y = j; }void get_xy(int &i, int &j) { i = x; j = y; }
The reason the operator+ function returns an object of type coord is that it allows the result of the addition of coord objects to be used in larger expressions. For example,
o3 = o1 + o2;o3 = o1 + o2 + o1 + o3;(o1+o2).get_xy(x, y);
In the last statement the temporary object returned by operator+( ) is used directly. Of course, after this statement has executed, the temporary object is destroyed.
The following version of the preceding program overloads the - and the =operators relative to the coord class.
// overload the +, - and = relative to coord class#include <iostream>using namespace std;class coord {
int x, y; // coordinate valuespublic:
coord( ) { x = 0; y = 0; }coord(int i, int j) { x = i; y = j; }void get_xy(int &i, int &j) { i = x; j = y; }coord operator+(coord ob2); coord operator-(coord ob2); coord operator=(coord ob2);
};

C++ programming 31
// Overload + relative to coord class.coord coord::operator+(coord ob2) {
coord temp;temp.x = x + ob2.x;temp.y = y + ob2.y;return temp;
Here another example where the + operator is overloaded to add an integer value to a coord object.
// overload the + for obj+int and as well as obj+obj#include <iostream>using namespace std;}
// Overload - relative to coord class.coord coord::operator-(coord ob2) {
coord temp;temp.x = x - ob2.x;temp.y = y - ob2.y;return temp;
}// Overload = relative to coord class.coord coord::operator=(coord ob2) {
x = ob2.x;y = ob2.y;return *this;// return the object that is assigned
}int main( ) {
coord o1(10, 10), o2(5, 3), o3;int x, y;
o3 = o1 + o2; // add two objects,// this calls operator+()
o3.get_xy(x, y);cout << "(o1+o2) X: " << x << ", Y: " << y <<
"\n";o3 = o1 - o2; //subtract two objectso3.get_xy(x, y);cout << "(o1-o2) X: " << x << ", Y: " << y <<
"\n";o3 = o1; //assign an objecto3.get_xy(x, y);cout << "(o3=o1) X: " << x << ", Y: " << y <<
"\n";return 0;
}
Notice that to correctly overload the subtraction operator, it is necessary to subtract the operand on the right from the operand on the left. The second thing you should notice is that the function returns *thi s . That is, the operator= function returns the object that is being assigned to. The reason for this is to allow a series of assignment to be made. By returning *thi s the overloaded assignment operator allows objects of type coord to be used in a series of assignment,
o3 = o2 = o1;
class coord {int x, y; // coordinate values
public:coord( ) { x = 0; y = 0; }coord(int i, int j) { x = i; y = j; }void get_xy(int &i, int &j) { i = x; j = y; } coord operator+(coord ob2); // obj + obj coord operator+(int i); // obj + int
};// Overload + relative to coord class.coord coord::operator+(coord ob2) {
coord temp;temp.x = x + ob2.x;temp.y = y + ob2.y;return temp;
}// Overload + for obj + int.coord coord::operator+(int i) {
coord temp; temp.x = x + i; temp.y = y + i;return temp;
}int main( ) {
coord o1(10, 10), o2(5, 3), o3;int x, y;
o3 = o1 + o2; // add two objects,// calls operator+(coord)
o3.get_xy(x, y);cout << "(o1+o2) X: " << x << ", Y: " << y << "\n";o3 = o1 + 100; // add object + int
// calls operator+(int)o3.get_xy(x, y);cout<< "(o1+100) X: "<< x << ", Y: "<< y << "\n";return 0;
}
You can use a reference parameter in an operator function. For example,
// Overload + relative to coord class using reference. coord coord::operator+(coord &ob2) {
coord temp;temp.x = x + ob2.x;

C++ programming 32
temp.y = y + ob2.y;return temp;
}
One reason for using a reference in an operator function is efficiency. Another reason is to avoid the trouble caused when a copy of an operand is destroyed. There are many other variations of operator function overloading.
Overloading the relational and logical operatorsIt is possible to overload the relational and logical operators. When you overload the relational and logical operators so that they behave in their traditional manner, you will not want the operator functions to return an object of the class for which they are defined. Instead, they will return an integer that indicates either true or false. This not only allows the operators to return a true/false value, it also allows the operators to be integrated into larger relational and logical expressions that involves other type of data.
Note if you are using a modern C++ compiler, you can also have an overloaded relational or logical operator function return a value of type bool , although there is no advantage to doing so.
The following program overloads the operators == and && :
// overload the == and && relative to coord class#include <iostream>using namespace std;class coord {
int x, y; // coordinate valuespublic:
coord( ) { x = 0; y = 0; }coord(int i, int j) { x = i; y = j; }void get_xy(int &i, int &j) { i = x; j = y; }int operator==(coord ob2);int operator&&(int i);
};// Overload the operator == for coordint coord::operator==(coord ob2) {
return (x==ob2.x) && (y==ob2.y);}// Overload the operator && for coordint coord::operator&&(coord ob2) {
return (x && ob2.x) && (y && ob2.y);}int main( ) {
coord o1(10, 10), o2(5, 3), o3(10, 10), o4(0, 0);
if (o1==o2) cout << "o1 same as o2\n";else cout << "o1 and o2 differ\n";
if (o1==o3) cout << "o1 same as o3\n";else cout << "o1 and o3 differ\n";
if (o1&&o2) cout << "o1 && o2 is true\n";else cout << "o1 && o2 is false\n";
if (o1&&o4) cout << "o1 && o4 is true\n";else cout << "o1 && o4 is false\n";
return 0;}
Overloading a unary operatorOverloading a unary operator is similar to overloading a binary operator except that there is one operand to deal with. When you overload a unary operator using a member function, the function has no parameters. Since, there is only one operand, it is this operand that generates the call to the operator function. There is no need for another parameter.
The following program overloads the increment operator ++ relative to the class coord.
// overload the ++ relative to coord class#include <iostream>using namespace std;class coord {
int x, y; // coordinate valuespublic:
coord( ) { x = 0; y = 0; }coord(int i, int j) { x = i; y = j; }void get_xy(int &i, int &j) { i = x; j = y; }coord operator++( );
};// Overload ++ operator for coord classcoord coord::operator++( ) {
x++;y++;return *this;
}int main( ) {
coord o1(10, 10);int x, y;++o1; //increment an objecto1.get_xy(x, y);cout << "(++o1) X: " << x << ", Y: " << y << "\n";return 0;
}
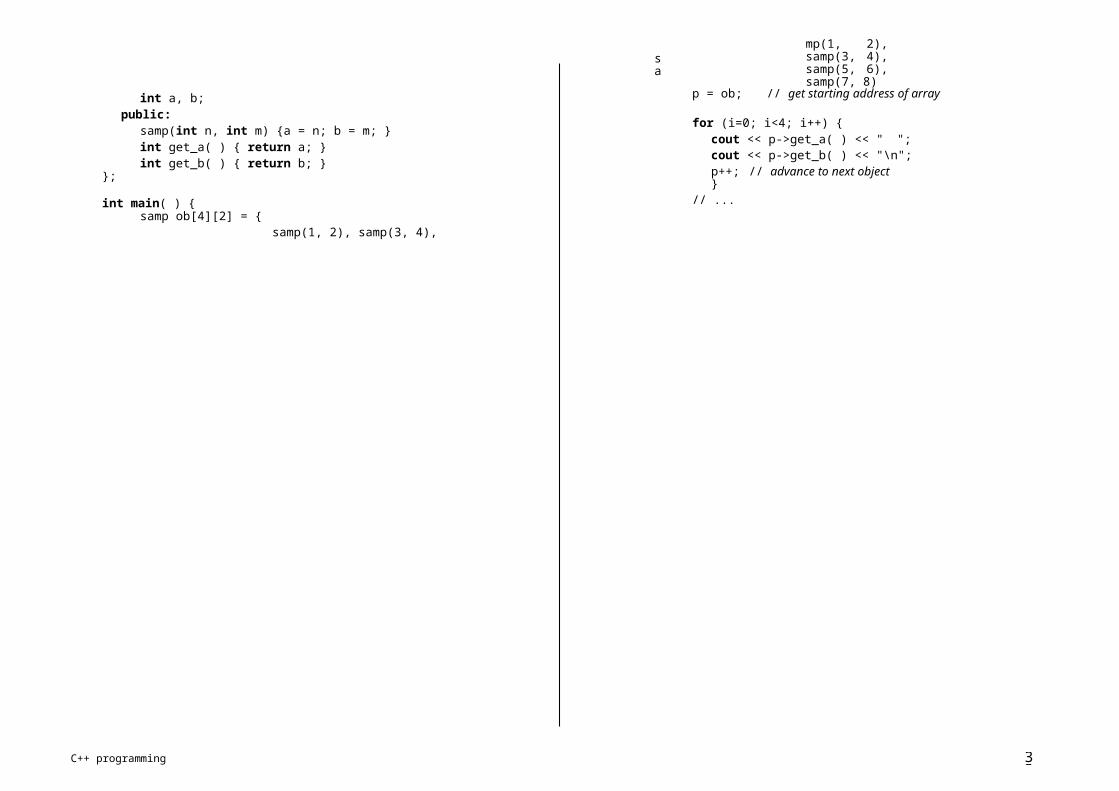
C++ programming 33
In early versions of C++ when increment or decrement operator was overloaded, there was no way to determine whether an overloaded ++ or - - preceded or followed its operand (i.e. ++o1; or o1++; statements). However in modern C++, if the difference between prefix and postfix increment or decrement is important for you class objects, you will need to implement two versions of operator++( ) . The first is defined as in the preceding example. The second would be declared like this:
coord coord::operator++(int notused);
If ++ precedes its operand the operator++( ) function is called. However, if++ follows its operand the operator++(in t notused) function is used. In
"\n";
}
int x, y;o1 = o1 - o2; // subtraction
// call operator-(coord)o1.get_xy(x, y);cout << "(o1-o2) X: " << x << ", Y: " << y <<
o1 = -o1; // negation// call operator-(int notused)
o1.get_xy(x, y);cout << "(-o1) X: " << x << ", Y: " << y << "\n";return 0;
this case, notused will always be passed the value 0. Therefore, the difference between prefix and postfix increment or decrement can be made.
In C++, the minus sign operator is both a binary and a unary operator. To overload it so that it retains both of these uses relative to a class that you create: simple overload it twice, once as binary operator and once as unary operator. For example,
// overload the - relative to coord class#include <iostream>using namespace std;class coord {
int x, y; // coordinate valuespublic:
coord( ) { x = 0; y = 0; }coord(int i, int j) { x = i; y = j; }void get_xy(int &i, int &j) { i = x; j = y; } coord operator-(coord ob2); // binary minus coord operator-( ); // unary minus
};// Overload binary - relative to coord class.coord coord::operator-(coord ob2) {
coord temp;temp.x = x - ob2.x;temp.y = y - ob2.y;return temp;
}// Overload unary - for coord class.coord coord::operator+( ) {
x = -x;y = -y;return *this;
}int main( ) {
coord o1(10, 10), o2(5, 7);
Using friend operator functionsAs mentioned before, it is possible to overload an operator relative to a class by using a friend rather than a member function. As you know, a friend function does not have a this pointer. In the case of a binary operator, this means that a friend operator function is passed both operands explicitly. For unary operators, the single operand is passed. All other things being equal, there is no reason to use a friend rather than a member operator function, with one important exception, which is discussed in the examples.
Remember, you cannot use a friend to overload the assignment operator. The assignment operator can be overloaded only by a member operator function.
Here operator+( ) is overloaded for the coord class by using a friend function:
//Overload the + relative to coord class using a friend.#include <iostream>using namespace std;
class coord {int x, y; // coordinate values
public:coord( ) { x = 0; y = 0; }coord(int i, int j) { x = i; y = j; }void get_xy(int &i, int &j) { i = x; j = y; }friend coord operator+(coord ob1, coord ob2);
};
// Overload + using a friend.coord operator+(coord ob1, coord ob2) {
coord temp;
temp.x = ob1.x + ob2.x;

C++ programming 34
temp.y = ob1.y + ob2.y;return temp;
}
friend coord operator+(int i, coord ob1);};
int main( ) {coord o1(10, 10), o2(5, 3), o3;int x, y;
o3 = o1 + o2; //add to objects// this calls operator+( )
o3.get_xy(x, y);cout << "(o1+o2) X: " << x << ", Y: " << y <<
"\n";return 0;
}
Note that the left operand is passed to the first parameter and the right operand is passed to the second parameter.
Overloading an operator by using a friend provides one very important feature that member functions do not. Using a friend operator function, you can allow objects to be used in operations involving build-in types in which the built-in type is on the left side of the operator:
ob1 = ob2 + 10; // legalob1 = 10 + ob2; // illegal
The solution is to make the overloaded operator functions, friend and define both possible situations.
As you know, a friend operator function is explicitly passed both operands. Thus, it is possible to define one overloaded friend function so that the left operand is an object and the right operand is the other type. Then you could overload the operator again with the left operand being the built-in type and the right operand being the object. For example,
// Use friend operator functions to add flexibility.#include <iostream>using namespace std;
class coord {int x, y; // coordinate values
public:coord( ) { x = 0; y = 0; }coord(int i, int j) { x = i; y = j; }void get_xy(int &i, int &j) { i = x; j = y; }friend coord operator+(coord ob1, int i);
// Overload for obj + int.coord operator+(coord ob1, int i) {
coord temp;
temp.x = ob1.x + i; temp.y = ob1.y + i; return temp;
}// Overload for int + obj.coord operator+(int i, coord ob1) {
coord temp;temp.x = ob1.x + i;temp.y = ob1.y + i;return temp;
}
int main( ) {coord o1(10, 10);int x, y;
o1 = o1 + 10; // object + integero1.get_xy(x, y);cout << "(o1+10) X: " << x << ", Y: " << y <<
"\n";
o1 = 99 + o1; // integer + objecto1.get_xy(x, y);cout << "(99+o1) X: " << x << ", Y: " << y <<
"\n";return 0;
}
As a result of overloading friend operator functions both of these statements are now valid:
o1 = o1 + 10;o1 = 99 + o1;
If you want to use friend operator function to overload either ++ or - - unary operator, you must pass the operand to the function as a reference parameter. This is because friend functions do not have this pointers. Remember that the increment or decrement operators imply that the operand will be modified. If you pass the operand to the friend as a reference parameter, changes that occur inside the friend function affect the object that generates the call. Here an example,
// Overload the ++ relative to coord class using a
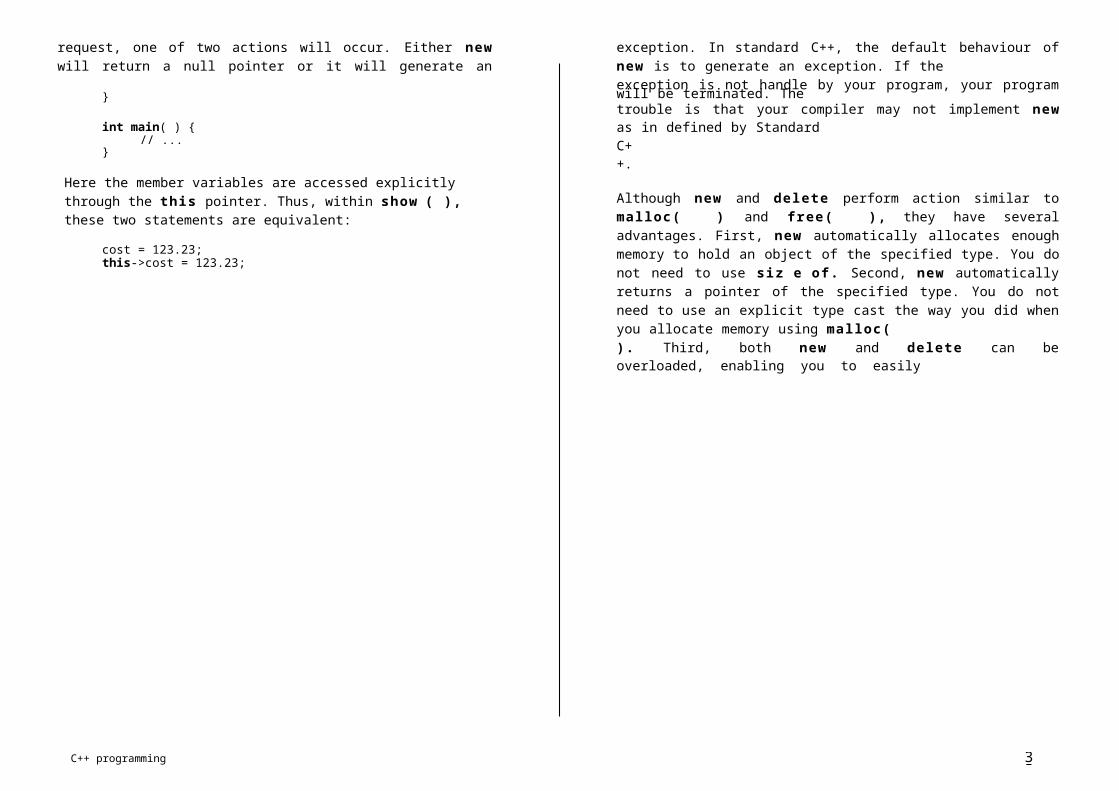
C++ programming 35
// friend.#include <iostream>using namespace std;
class coord {int x, y; // coordinate values
public:coord( ) { x = 0; y = 0; }coord(int i, int j) { x = i; y = j; }void get_xy(int &i, int &j) { i = x; j = y; }friend coord operator++(coord &ob);
};
// Overload ++ using a friend.coord operator++(coord &ob) {
ob.x++;ob.y++;return ob;
}
int main( ) {coord o1(10, 10);int x, y;
++o1; //o1 is passed by referenceo1.get_xy(x, y);cout << "(++o1) X: " << x << ", Y: " << y << "\n";return 0;
}
With modern compiler, you can also distinguish between the prefix and the postfix form of the increment or decrement operators when using a friend operator function in much the same way you did when using member functions. For example, here are the prototypes for both versions of the increment operator relative to coord class:
coord operator++(coord &ob); // prefixcoord operator++(coord &ob, int notused); // postfix
A closer look at the assignment operatorAs you have seen, it is possible to overload the assignment operator relative to a class. By default, when the assignment operator is applied to an object, a bitwise copy of the object on the right side is put into the object on the left. If this is what you want there is no reason to provide your own operator=( ) function. However, there are cases in which a strict bitwise copy is not desirable (e.g. cases in which object allocates memory). In these types of situations, you will want to
provide a special assignment operator. Here is another version of strtype class that overload the = operator so that the point p is not overwritten by the assignment operation.
#include <iostream>#include <cstring>#include <cstdlib>using namespace std;
class strtype { char *p; int len;
public:strtype(char *s); // constructor∼strtype( ) { // destructor
cout << "Freeing " << (unsigned) p << "\n";delete [ ] p;
}char *get( ) { return p; }strtype &operator=(strtype &ob);
};
// Constructorstrtype::strtype(char *s) {
int l;
l = strlen(s) + 1; p = new char [l]; if (!p) {
cout << "Allocation error\n";exit(1);
}len = 1;strcpy(p, s);
}
// Assign an objectstrtype &strtype::operator=(strtype &ob) {
// see if more memory is neededif (len < ob.len) {// need to allocate more memory
delete [ ] p;p = new char [ob.len];if (!p) {
cout << "Allocation error\n";exit(1);
}}len = ob.len;strcpy(p, ob.p);
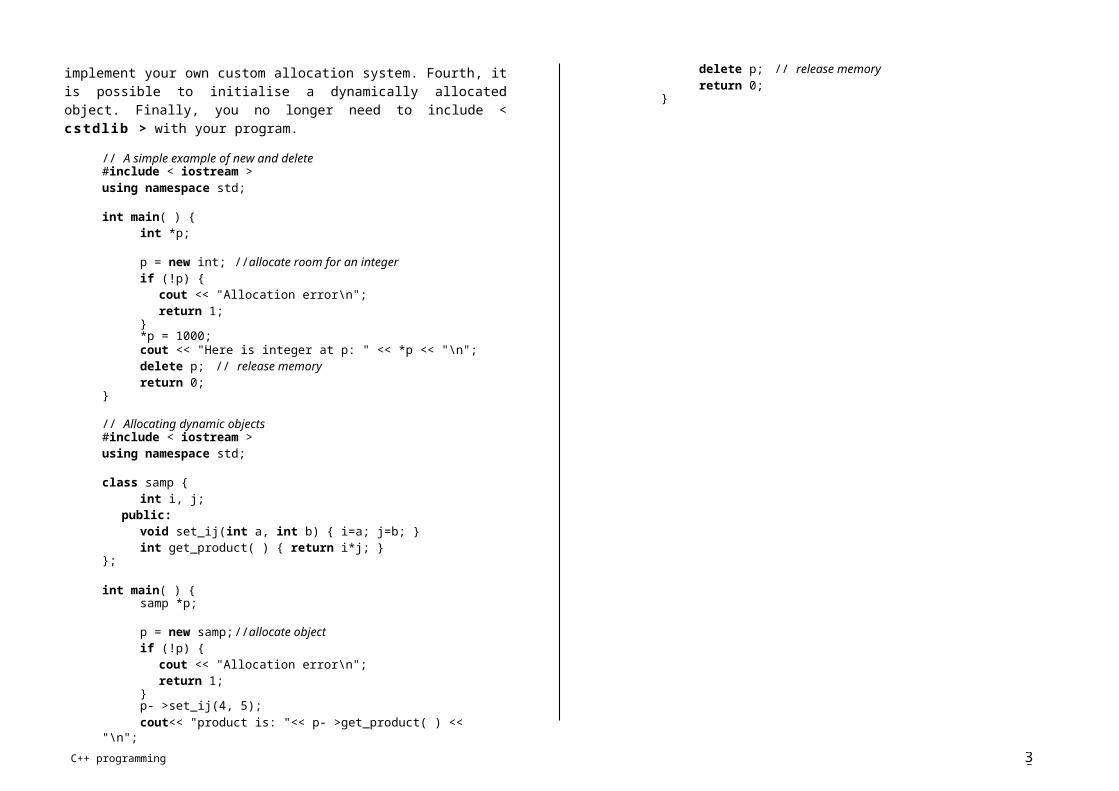
C++ programming 36
return *this;}
int main( ) {strtype a("Hello"), b("there");
cout << a.get( ) << "\n";cout << b.get( ) << "\n";
a = b; // now p is not overwritten
cout << a.get( ) << "\n"; cout << b.get( ) << "\n"; return 0;
}
Notice two important features about the operator=( ) function:• It takes a reference parameter (prevent a copy of the object on the right
side from being made).• It returns a reference, not an object (prevent a temporary object from being
created).
That is, the value of the expression within the subscript operator is passed to the operator[ ] ( ) function in its explicit parameter. The this pointer will point to O, the object that generates the call.
In the following program, arraytype declares an array of five integers. Its constructor function initialises each member of the array. The overloaded operator[ ] ( ) function returns the value of the element specified by its parameter.
#include <iostream>using namespace std;
const int SIZE = 5;
class arraytype {int a[SIZE];
public:arraytype( ) {
int i;for (i=0;i<SIZE; i++) a[i] = i;
}int operator[ ] (int i) { return a[i]; }
Overloading the [ ] subscript operatorThe last operator that we will overload is the [ ] array subscript operator. In C++, the [ ] is considered a binary operator for the overloading purposes. The [ ] can be overloaded only by a member function. Therefore the general form of a member operator[ ] ( ) function is as shown here
type class-name::operator[ ](int index){
// body ...}
Technically, the parameter does not have to be of type int , but operator[ ] ( ) function is typically used to provide array subscript and as such an integer value is generally used.
To understand how the [ ] operator works, assume that an object colled O is indexed as shown here:
O[9]
This index will translate into the following call to the operator[ ] ( ) function:
O.operator[ ](9)
};
int main( ) { arraytype ob; int i;
for (i=0; i<SIZE; i++) cout << ob[i] << " ";return 0;
}
This program displays the following output:
0 1 2 3 4
It is possible to design the operator[ ] ( ) function in such a way that the [ ] can be used on both the left and right sides of an assignment statement. To do this return a reference to the element being indexed,
#include <iostream>using namespace std;
const int SIZE = 5;
class arraytype {int a[SIZE];
public:
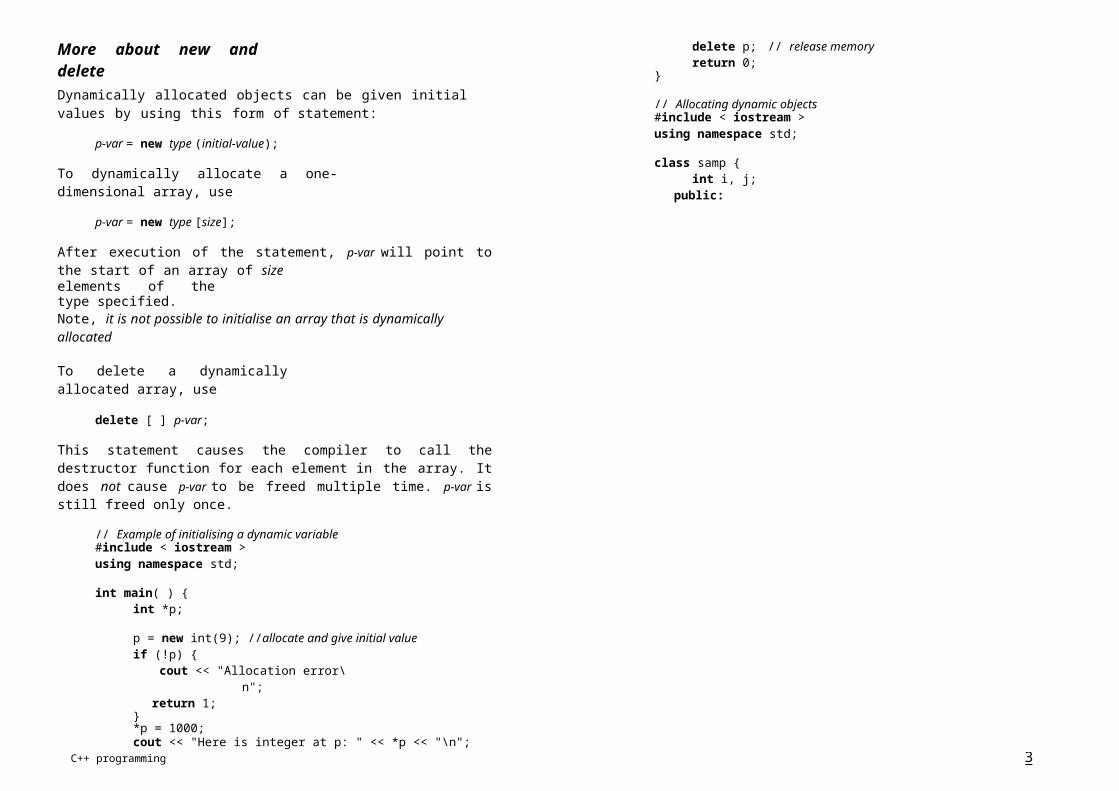
derived ob;
ob.setx(10); // access member of base classob.sety(20); // access member of derived classob.showx( ); // access member of base classob.showy( ); // access member of derived classreturn 0;
}
C++ programming 37
arraytype( ) {int i;for (i=0;i<SIZE; i++) a[i] = i;
}int &operator[ ] (int i) { return a[i]; }
};
int main( ) { arraytype ob; int i;
for (i=0; i<SIZE; i++) cout << ob[i] << " ";cout << "\n";
// add 10 to each element in the arrayfor (i=0; i<SIZE; i++)
ob[i] = ob[i] + 10; // [ ] on left of =
for (i=0; i<SIZE; i++) cout << ob[i] << " ";return 0;
}
This program displays:
0 1 2 3 410 11 12 13 14
the derived class.
When the access specifier for the inherited base class is public all public members of the base class become public members of the derived class.If the access specifier is pri vate all public members of the base class become private members of the derived class.
In either case, any private members of the base class remain private to it and are inaccessible by the derived class.
It is important to understand that if the access specifier is pri vate public members of the base become private members of the derived class, but these are still accessible by member functions of the derived class.If the access specifier is not present, it is private by default if the derived class is a class. If the derived class is a struct, public is the default access.Here is a short base class and derived class the inherits it (as public):
#include <iostream>using namespace std;
class base {int x;
public:void setx(int n) { x = n; }void showx( ) { cout << x << "\n"; }
As you can see this makes objects of arraytype act like normal arrays.
INHERITANCE
};
// Inherit as publicclass derived : public base {
int y;public:
void sety(int n) { y = n; }void showy( ) { cout << y << "\n"; }
Base class access controlWhen one class inherits another, it uses this general form:
class derived-class-name : access base-class-name {// ...
};
int main( ) {
}
Here access is one of the three keywords: public , pri vate , or protected . A discussion of the protected access specifier is deferred until later. The other two are discussed here.The access specifier determines how elements of the base class are inherited by Here the variation of the program, this time derived inherits base as pri vate ,
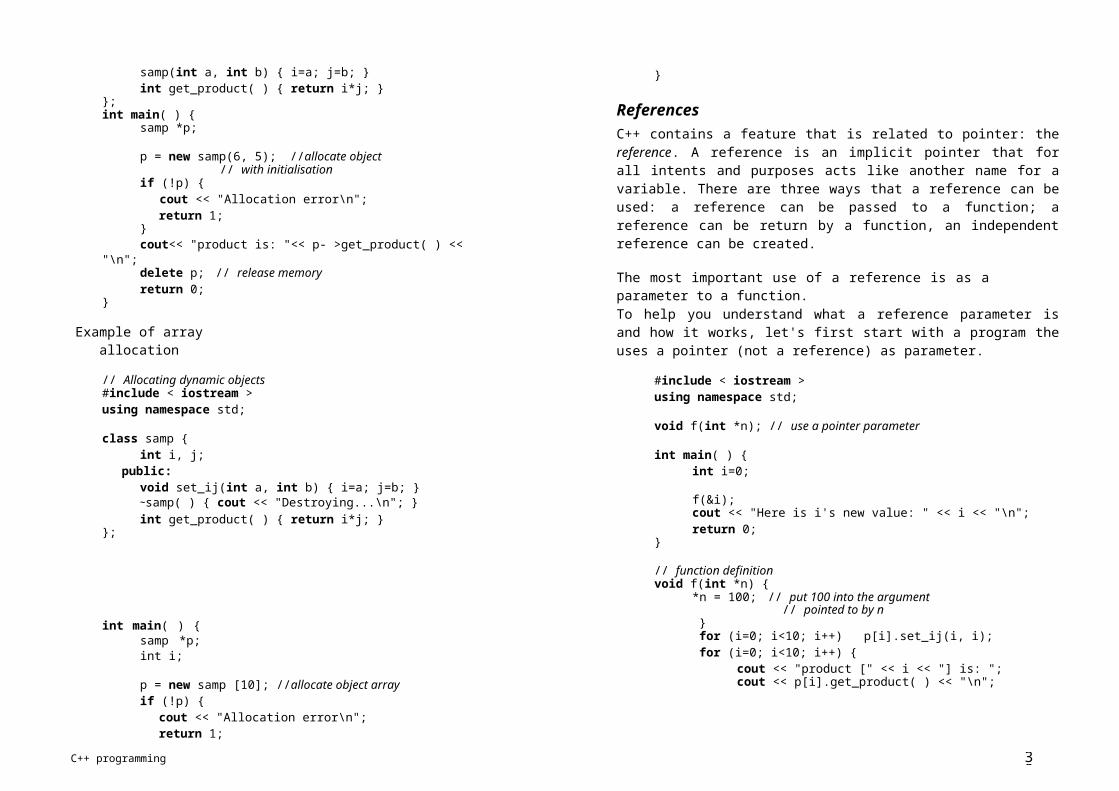
C++ programming 38
which causes error.
// This program contains an error#include <iostream>using namespace std;
class base {int x;
public:void setx(int n) { x = n; }void showx( ) { cout << x << "\n"; }
};
The protected access specifier can occur any where in the class declaration, although typically it occurs after the (default) private members are declared and before the public members. The full general form of a class declaration is shown here:
class class-name {// private members
protected: //optional// protected members
public://public members
// Inherit base as privateclass derived : private base {
int y;public:
void sety(int n) { y = n; }void showy( ) { cout << y << "\n"; }
};int main( ) {
derived ob;
ob.setx(10); // ERROR now private to derived class ob.sety(20); // access member of derived class - OK ob.showx( ); // ERROR now private to derived class ob.showy( ); // access member of derived class - OK return 0;}
As the comments in this (incorrect) program illustrates, both show x( ) and setx( ) become private to derived and are not accessible outside it. In other words, they are accessible from within the derived class.Keep in mind that show x( ) and setx( ) are still public within base , no matter how they are inherited by some derived class. This means that an object of type base could access these functions anywhere.
Using protected membersAs you know from the preceding section, a derived class does not have access to the private members of the base class. However, there will be times when you want to keep a member of a base class private but still allow a derived class access to it. To accomplish this, C++ includes the protected access specifier.
};
When a protected member of a base class is inherited as public by the derived class, it becomes a protected member of the derived class.
If the base class is inherited as private, a protected member of the base becomes a private member of the derived class
A base class can also be inherited as protected by a derived class. When this is the case, public and protected members of the base class become protected members of the derived class (of course, private members of the base remain private to it and are not accessible by the derived class).
The protected access specifier can also be used with structures.
// This program illustrate how public, private and// protected members of a class can be accessed#include <iostream>using namespace std;
class samp {// private by defaultint a;
protected: //still private relative to sampint b;
public:int c;samp(int n, int m) { a = n; b = m; }int geta( ) { return a; }int getb( ) { return b; }
The protected access specifier is equivalent to the pri vate specifier with the sole exception that protected members of a base class are accessible to members of any class derived from that base. Outside the base or derived classes, protected members are not accessible.
};
int main( ) {samp ob(10, 20);

C++ programming 39
ob.b = 99; // ERROR! b is protected,i.e. privateob.c = 30; // OK, c is publiccout << ob.geta( ) << "\n";cout << ob.getb( ) << ob.c << "\n";return 0;
}
The following program illustrates what occurs when protected members are inherited as public:
#include <iostream>using namespace std;
class base {protected: // private to base
int a, b; // but still accessible by derivedpublic:
void setab(int n, int m) { a = n; b = m; }};
// Inherit as publicclass derived : public base {
int c;public:
void setc(int n) { c = n; }// this function has access to a and b from basevoid showabc( ) {
cout << a << " " << b << " " << c << "\n";}
};
int main( ) {derived ob;
// a and b are not accessible here because they are
// private to both base and derived.ob.setab(1, 2);ob.setc(3);ob.showabc( );return 0;
}
If base is inherited as protected, its public and protected members become protected members of derived and therefore are not accessible within the main( ) , i.e. the statement:
ob.setab(1, 2);// would create a compile-time error.
Constructors, destructors, and inheritanceIt is possible for the base class, the derived class, or both to have constructor and/or destructor functions.
When a base class and a derived class both have constructor and destructor functions, the constructor functions are executed in order of derivation. The destructor functions are executed in reverse order. That is, the base constructor is executed before the constructor in the derived class. The reverse is true for destructor functions: the destructor in the derived class is executed before the base class destructor.
So far, you have passed arguments to either the derived class or base class constructor. When only the derived class takes an initialisation, arguments are passed to the derived class constructor in the normal fashion.However, if you need to pass an argument to the constructor of the base class, a little more effort is needed:1. all necessary arguments to both the base class and derived class are passed to
the derived class constructor.2. using an expanded form of the derived class' constructor declaration, you then
pass the appropriate arguments along to the base class.
The syntax for passing an argument from the derived class to the base class is as
derived-constructor(arg-list) : base(arg-list) {// body of the derived class constructor
}
Here base is the name of the base class. It is permissible for both the derived class and the base class to use the same argument. It is also possible for the derived class to ignore all arguments and just pass them along to the base.
// Illustrates when base class and derived class// constructor and destructor functions are executed#include <iostream>using namespace std;
class base {public:
base( ) { cout << "Constructing base\n"; }∼base( ) { cout << "Destructing base\n"; }
};
class derived : public base {public:
derived( ) { cout << "Constructing derived\n"; }

C++ programming 40
∼derived( ) { cout << "Destructing derived\n; }};
int main( ) { derived obj; return 0;
}
This program displays:
Constructing base Constructing derived Destructing derived Destructing base
The following program shows how to pass an argument to a derived class' constructor.
#include <iostream>using namespace std;
class base {public:
base( ) { cout << "Constructing base\n"; }∼base( ) { cout << "Destructing base\n"; }
};
class derived : public base {int j;
public:derived(int n) {
cout << "Constructing derived\n";j = n;
}∼derived( ) { cout << "Destructing derived\n; }void showj( ) { cout << j << "\n"; }
};
int main( ) {derived o(10);// 10 is passed in the normal
fashion
o.showj( );return 0;
}
In the following example both the derived class and the base class take arguments:
#include <iostream>using namespace std;
class base {int i;
public:base(int n) {
cout << "Constructing base\n";i = n;
}∼base( ) { cout << "Destructing base\n"; }void showi( ) { cout << i << "\n"; }
};
class derived : public base {int j;
public:derived(int n) : base(n) {// pass argument to
// the base classcout << "Constructing derived\n";j = n;
}∼derived( ) { cout << "Destructing derived\n; }void showj( ) { cout << j << "\n"; }
};
int main( ) {derived o(10);
o.showi( ); o.showj( ); return 0;
}
Pay special attention to the declaration of the derived class constructor. Notice how the parameter n (which receives the initialisation argument) is both used by derived( ) and base( ) .
In most cases, the constructor functions for the derived class and the base class will not used the same argument. When this is the case, you need to pass one or more arguments to each, you must pass to the derived class constructor all arguments needed by both the derived class and the base class. Then, the derived class simply passes along to the base class those arguments required by it. Here an example that passes an argument to the derived class constructor and another one to the base class:
#include <iostream>using namespace std;

C++ programming 41
class base {int i;
public:base(int n) {
cout << "Constructing base\n";i = n;
}∼base( ) { cout << "Destructing base\n"; }void showi( ) { cout << i << "\n"; }
};
class derived : public base {int j;
public:derived(int n, int m) : base(m) {//pass argument
// to the base classcout << "Constructing derived\n";j = n;
}∼derived( ) { cout << "Destructing derived\n; }void showj( ) { cout << j << "\n"; }
};
int main( ) {derived o(10, 20); // 20 is pass to base()
o.showi( ); o.showj( ); return 0;
}
It is not necessary for the derived class' constructor to actually use an argument in order to pass one to the base:
class base {int i;
public:base(int n) {
cout << "Constructing base\n";i = n;
}∼base( ) { cout << "Destructing base\n"; }void showi( ) { cout << i << "\n"; }
};
class derived : public base {int j;
public:
derived(int n) : base(n) { // n is passed// to the base class
cout << "Constructing derived\n";j = 0; // n is not used here
}∼derived( ) { cout << "Destructing derived\n; }void showj( ) { cout << j << "\n"; }
};
Multiple inheritanceThere are two ways that a derived class can inherit more than one base class.
First, a derived class can be used as a base class for another derived class, creating a multilevel class hierarchy. In this case, the original base class is said to be an indirect base class of the second derived class.
Second, a derived class can directly inherit more than one base class. In this situation, two or more base class are combined to help create the derived class. There several issues that arise when multiple base classes are involved. Those will be discussed in this section.
If a class B1 is inherited by a class D1, and D1 is inherited by a class D2, the constructor functions of all the three classes are called in order of derivation. Also the destructor functions are called in reverse order.
When a derived class inherits multiple base classes, it uses the expanded declaration:
class derived-class-name : access base1, access base2,..., access baseN
{// ... body of class
};
Here base1 through baseN are the base class names and access the access specifier, which can be different for each base class. When multiple base classes are inherited, constructors are executed in the order, left to right that the base classes are specified. Destructors are executed in reverse order.When a class inherits multiple base classes that have constructors that requires arguments, the derived class pass the necessary arguments to them by using this expanded form class constructor function:
derived-constructor(arg-list) : base1(arg-list),...,baseN(arg-list)
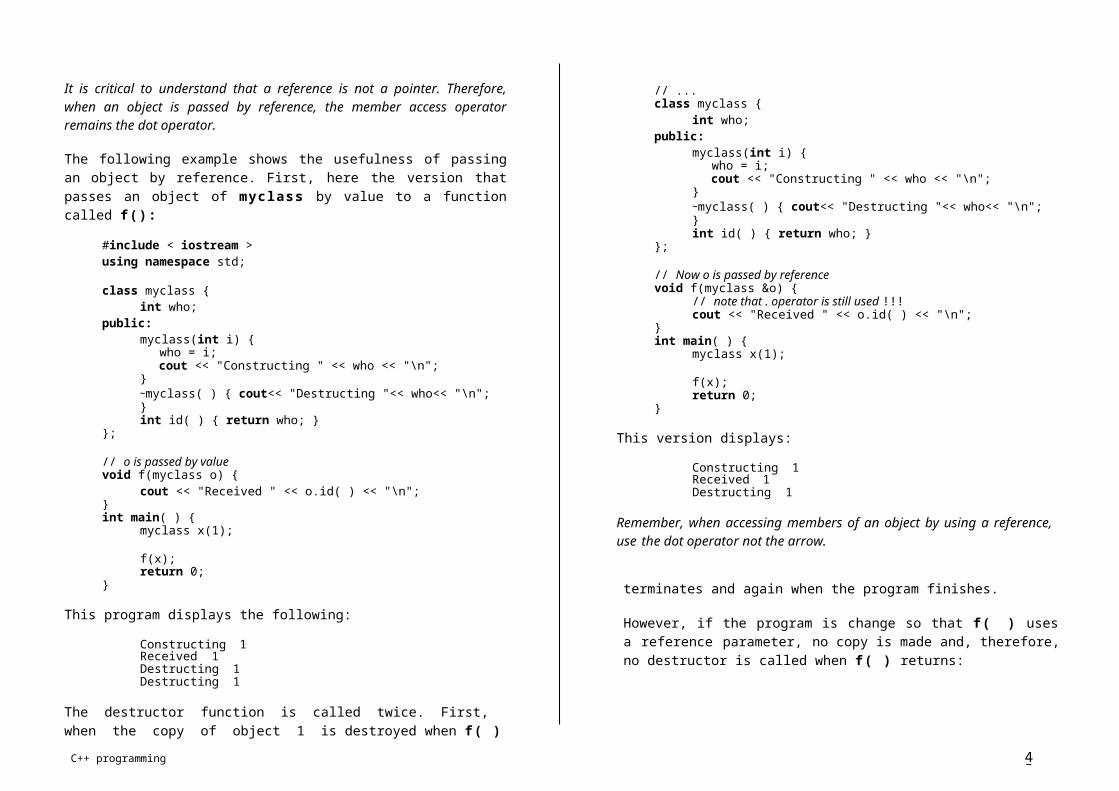
C++ programming 42
{// body of derived class constructor
}
Here base1 through baseN are the names of the classes.
When derived class inherits a hierarchy of classes, each derived class in the chain must pass back to its preceding base any arguments it needs. The hierarchy of class created in the following program is illustrated here:
int c;public:
D2(int x, int y, int z) : D1(y, z){//pass args to D1
c = z;}// Because bases inherited as public, D2 has
access// to public members of both D1 and B1void show( ) {
cout << geta( ) << " " << getb( ) << " ";cout << c << "\n";
} B1};
int main( ) {D2 ob(1, 2,D31);
ob.show( );// geta( ) and getb( ) are still public herecout << ob.gDe2ta( ) << ob.getb( ) << "\n";return 0;
}
// Multiple inheritance#include <iostream>using namespace std;
class B1 {int a;
public:B1(int x) { a = x; }int geta( ){ return a; }
};
The call to ob.show ( ) displays 3 2 1. In this example, B1 is an indirect base class of D2. Notice that D2 has access to the public members of both D1 and B1 . As you remember, when public members of a base class are inherited as public, they become public members of the derived class. Therefore, when D1 inherits B1 , geta( ) becomes a public member of D1, which becomes a public member of D2 .As the program illustrates, each class in a hierarchy of class must pass allarguments required by each preceding base class. Failure to do so will generate compile-time error.
//class
B1 B2 Inherit direct baseHere, another example in which a derived class inherits two base classes:
class D1 : public B1 { int b; public:D1(int x, int
y) : B1(y) { // pass y toB1 D
b = x;}int getb( ) { return b; }
};
// Inherit a derived class and an indirect baseclass D2 : public D1 {
#include <iostream>using namespace std;

C++ programming 43
class base { int i; public: base(int n) { cout << "Constructing base\n"; i = n; } ∼base( ) { cout << "Destructing base\n"; } void showi( ) { cout << i << "\n"; } }; class derived : public base { int j; public: derived(int n, int m) : base(m) {//pass argument // to the base class cout << "Constructing derived\n"; j = n; } ∼derived( ) { cout << "Destructing derived\n; } void showj( ) { cout << j << "\n"; } }; int main( ) { derived o(10, 20); // 20 is pass to base() o.showi( ); o.showj( ); return 0; }
It is not necessary for the derived class' constructor to actually use an argument in order to pass one to the base:
class base { int i; public: base(int n) { cout << "Constructing base\n"; i = n; } ∼base( ) { cout << "Destructing base\n"; } void showi( ) { cout << i << "\n"; } }; class derived : public base { int j;
public:
derived(int n) : base(n) { // n is passed // to the base class cout << "Constructing derived\n";
j = 0; // n is not used here } ∼derived( ) { cout << "Destructing derived\n; } void showj( ) { cout << j << "\n"; } };
Multiple inheritance There are two ways that a derived class can inherit more than one base class. First, a derived class can be used as a base class for another derived class, creating a multilevel class hierarchy. In this case, the original base class is said to be an indirect base class of the second derived class. Second, a derived class can directly inherit more than one base class. In this situation, two or more base class are combined to help create the derived class. There several issues that arise when multiple base classes are involved. Those will be discussed in this section. If a class B1 is inherited by a class D1, and D1 is inherited by a class D2, the constructor functions of all the three classes are called in order of derivation. Also the destructor functions are called in reverse order. When a derived class inherits multiple base classes, it uses the expanded declaration:
class derived-class-name : access base1, access base2,
..., access baseN { // ... body of class };
Here base1 through baseN are the base class names and access the access specifier, which can be different for each base class. When multiple base classes are inherited, constructors are executed in the order, left to right that the base classes are specified. Destructors are executed in reverse order. When a class inherits multiple base classes that have constructors that requires arguments, the derived class pass the necessary arguments to them by using this expanded form class constructor function:
derived-constructor(arg-list) : base1(arg-list),..., baseN(arg-list)
{
// body of derived class constructor
}
Here base1 through baseN are the names of the classes.

C++ programming 44
When derived class inherits a hierarchy of classes, each derived class in the chain
must pass back to its preceding base any arguments it needs. The hierarchy of class
created in the following program is illustrated here:
// Multiple inheritance
#include <iostream> using namespace std; class B1 { int a; public: B1(int x) { a = x; } int geta( ){ return a; } };
// Inherit direct base class
class D1 : public B1 { int b; public: D1(int x, int y) : B1(y) { // pass y to B1 b = x;
}
int getb( ) { return b; } };
// Inherit a derived class and an indirect base
class D2 : public D1 {
public: D2(int x, int y, int z) : D1(y, z){ //pass args to D1
c = z;
}
// Because bases inherited as public, D2 has access
// to public members of both D1 and B1
void show( ) { cout << geta( ) << " " << getb( ) << " "; cout << c << "\n"; }
};
int main( ) { D2 ob(1, 2, 3);
ob.show( );
// geta( ) and getb( ) are still public here
cout << ob.geta( ) << ob.getb( ) << "\n"; return 0; }
The call to ob.show( ) displays 3 2 1. In this example, B1 is an indirect base
class of D2. Notice that D2 has access to the public members of both D1 and
B1. As you remember, when public members of a base class are inherited as
public, they become public members of the derived class. Therefore, when
D1 inherits B1, geta( ) becomes a public member of D1, which becomes a
public member of D2.
As the program illustrates, each class in a hierarchy of class must pass all
arguments required by each preceding base class. Failure to do so will
generate compile-time error.
Here, another example in which a derived class inherits two base classes:
// Create first base class class B1 { int a; public: B1(int x) { a = x; } int geta( ){ return a; } }; // Create second base class class B2 { int b; public: B2(int x) { b = x; } int getb( ) { return b; } };

C++ programming 45
// Directly inherit two base classes class D : public B1, public B2 { int c; public: D(int x, int y, int z) : B1(z), B2(y) { // here z and y are passed directly to B1 and B2 c = x; } // Because bases inherited as public, D has access // to public members of both B1 and B2 void show( ) { cout << geta( ) << " " << getb( ) << " "; cout << c << "\n"; } }; int main( ) { D ob(1, 2, 3); ob.show( ); return 0; }
Virtual base classes A potential problem exists when multiple base classes are directly inherited
by a derived class. To understand what this problem is, consider the following class
hierarchy:
Here the base class Base is inherited by both Derived1 and Derived2. Derived3 directly inherits both Derived1 and Derived2. However, this implies that Base is actually inherited twice by Derived3. First it is inherited through Derived1, and then again through Derived2. This causes ambiguity when a member of Base is used by Derived3. Since two copies of Base are included in Derived3, is a reference to a member of Base referring to the Base inherited indirectly through Derived1 or to the Base inherited indirectly through Derived2? To resolve this ambiguity, C++ includes a mechanism by which only one copy of Base will be included in Derived3. This feature is called a virtual base class. In situations like this, in which a derived class indirectly inherits the same base class more than once, it is possible to prevent multiple copies of the base from being present in the derived class by having that base class inherited as virtual by any derived classes. Doing this prevents two or more copies of the base from being present in any subsequent derived class that inherits the base class indirectly. The virtual keyword precedes the base class access specifier when it is inherited by a derived class.
// This program uses a virtual base class. #include <iostream> using namespace std; class Base { public: int i; }; // Inherit Base as virtual class Derived1 : virtual public Base { public: int j; }; // Inherit Base as virtual here, too
class Derived2 : virtual public Base {
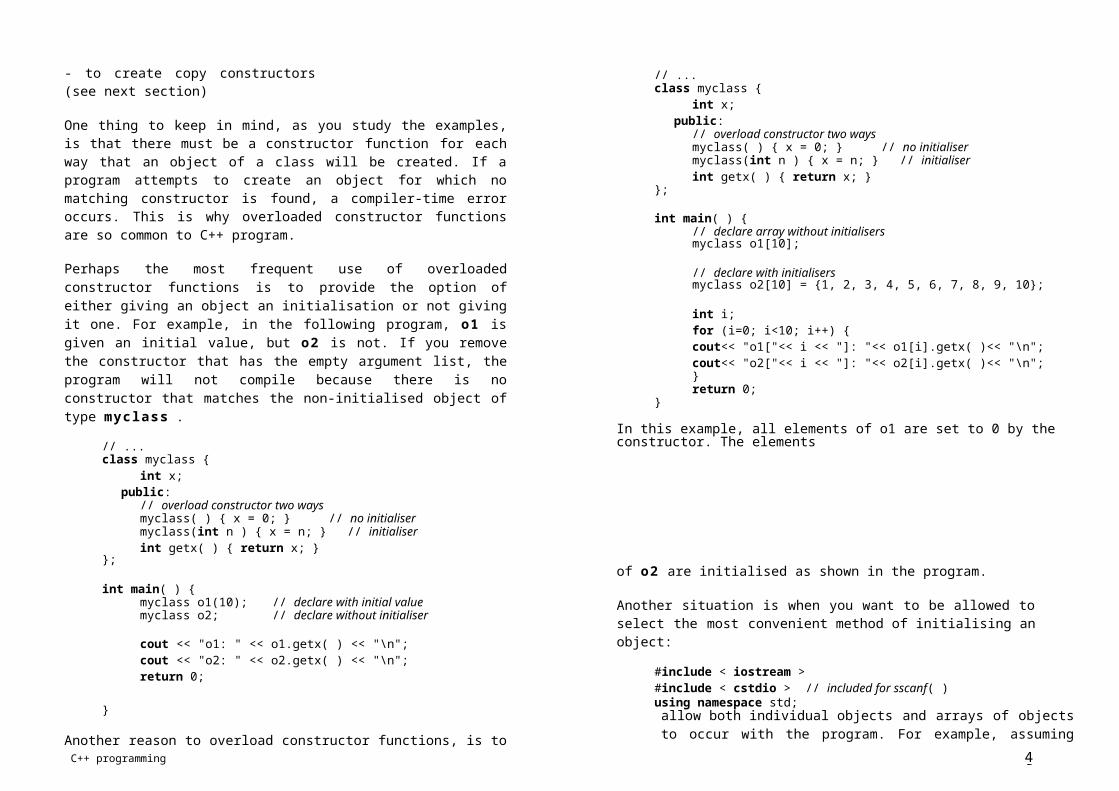
C++ programming 46
public:int k;
};
// Here Derived3 inherits both Derived1 and Derived2.// However, only one copy of base is inherited.class Derived3 : public Derived1, public Derived2 {
public:int product( ) { return i*j*k; }
Given this situation, the following statements are correct:
base *p; // base class pointer
base base_ob; // object of type basederived derived_ob; // object of type derived
// p can, of course, points to base objectsp = &base_ob; // p points to base object
};
int main( ) { Derived3 ob;
ob.i = 10; // unambiguous because virtual Baseob.j = 3;ob.k = 5;cout << "Product is: " << ob.product( ) << "\n";return 0;
}
If Derived1 and Derived2 had not inherited Ba se as virtual, the statement ob. i =10 would have been ambiguous and a compile-time error would have resulted.
It is important to understand that when a base class is inherited as virtual by a derived class, that base class still exists within that derived class. For example, assuming the preceding program, this fragment is perfectly valid:
Derived1 ob;ob.i = 100;
The only difference between a normal base class and a virtual one occurs when an object inherits the base more than once. If virtual base classes are used, only one base class is present in the object. Otherwise, multiple copies found.
// p can also points to derived objects without errorp = &derived_ob; // p points to derived object
Although you can use a base pointer to point to a derived object, you can access only those members of the derived object that were inherited from the base. This is because the base pointer has knowledge only of the base class. It knows nothing about the members added by the derived class.
While it is permissible for a base pointer to point to a derived object, the reverse is not true.
One final point: remember that pointer arithmetic is relative to the data type the pointer is declared as pointing to. Thus, if you point a base pointer to a derived object and then increment that pointer, it will not be pointing to the next derived object. It will be pointing to (what it thinks is) the next base object. Be careful about this.
// Demonstrate pointer to derived class#include <iostream>using namespace std;
class base {int x;
public:void setx(int i) { x = i; }int getx( ) { return x; }
VIRTUAL FUNCTIONS
Pointers to derived class
};
class derived : public base {int y;
public:void sety(int i) { y = i; }int gety( ) { return y; }
Although we have discussed pointers at some length, one special aspect relates specifically to virtual functions. This feature is: a pointer declared as a pointer to a base class can also be used to point to any derived from that base. For example, assume two classes called base and derived, where derived inherits base .
};
int main( ) {base *p; // pointer to base typebase b_ob; // object of base
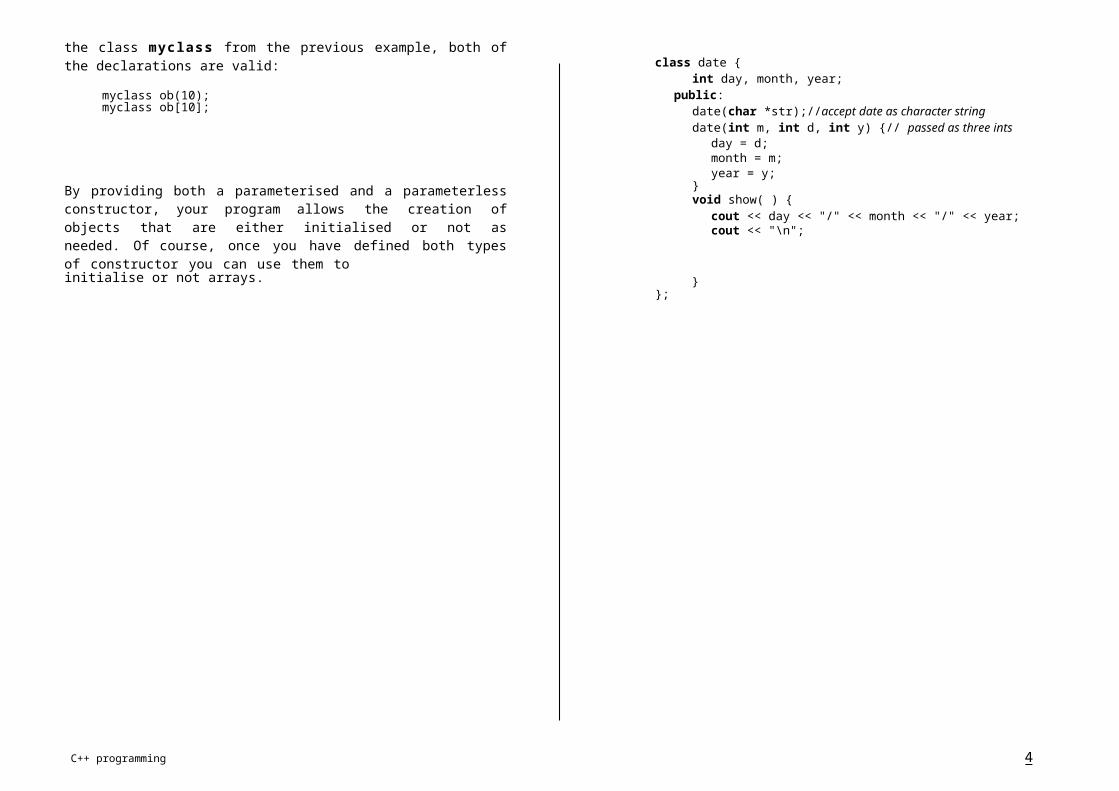
C++ programming 47
derived d_ob; // object of derived
// use p to access base objectp = &b_ob;p- >setx(10); // access base objectcout << "Base object x: " << p- >getx( ) << "\n";
Therefore, of two or more different classes are derived from a base class that contains a virtual function, then when different objects are pointed to by a base pointer, different versions of the virtual function are executed. This process is that way that run-time polymorphism is achieved. In fact, a class that contains a virtual function is referred to as a polymorphic class.
"\n";
"\n";
}
// use p to access derived objectp = &d_ob; // point to derived objectp- >setx(99); // access derived object
// cannot use p to set y, so do it directlyd_ob.sety(88);cout << "Derived object x: "<< p- >getx( ) <<
cout << "Derived object y: "<< d_ob.gety( )<<
return 0;
// A simple example using a virtual function.#include <iostream>using namespace std;
class base {public:
int i;base(int x) { i = x; }virtual void func( ) {
cout << "Using base version of func(): ";cout << i << "\n";
}}
Aside from illustrating pointers to derived classes, there is value in using a basepointer in the way shown in this example. However, in the next section you will see why base class pointers to derived objects are so important.
Introduction to virtual functionsA virtual function is a member function that is declare within a base class and redefined by a derived class. To create a virtual function, precedes the function declaration with the keyword vi rtual . When a class containing a virtual function is inherited, the derived class redefines the virtual function relative to the derived class. In essence, virtual functions implement the 'one interface, multiple methods' philosophy that underlies polymorphism. The virtual function within the base class defines the form of the interface to that function. Each redefinition of the virtual function by a derived class implements its operation as it relates specifically to the derived class. That is, the redefinition creates a specific method.
class derived1 : public base {public:
derived1(int x) : base(x) { }void func( ) {
cout << "Using derived1's version of func(): ";cout << i*i << "\n";
}};
class derived2 : public base {public:
derived2(int x) : base(x) { }void func( ) {
cout << "Using derived2's version of func(): ";cout << i+i << "\n";
}When a virtual function is redefined by a derived class, the keyword vi rtual isnot needed.
A virtual function can be called just like any member function. However, what makes a virtual function interesting, and capable of supporting run-time polymorphism, is what happens when a virtual function is called through a pointer. When a base pointer points to a derived object that contains a virtual function and that virtual function is called through that pointer, C++ determines which version of that function will be executed based upon the type of object being pointed to by the pointer. And this determination is made at run time.
};
int main( ) {base *p;base ob(10);derived1 d_ob1(10);derived2 d_ob2(10);
p = &ob;p- >func( ); // use base's func( )
p = &d_ob1;p- >func( ); // use derived1's func( )

C++ programming 48
p = &d_ob2;p- >func( ); // use derived2's func( )return 0;
}
void func( ) {cout << "Using derived1's version of func(): ";cout << i*i << "\n";
}};
This program displays the following output:
Using base version of func( ): 10Using derived1's version of func( ): 100Using derived2's version of func( ): 20
The redefinition of a virtual function inside a derived class might seem somewhat similar to function overloading. However, the two processes are different. First, a redefined virtual function must have precisely the same type and number of parameters and the same return type. Second, virtual functions must be class members. This is not the case for overloaded functions. Also, while destructor functions can be virtual, constructors cannot. Because of these differences between overloaded functions and redefined virtual functions, the term overriding is used to describe virtual function redefinition.
The key points to understand from the preceding example are that the type of the object being pointed to, determines which version of an overridden virtual function will be executed via a base class pointer, and that that this decision is made at run time.
Virtual functions are hierarchical in order of inheritance. Further, when a derived class does not override a virtual function, the function defined within its base class is used. Here is a slightly different version of the previous example:
// Virtual function are hierarchical.#include <iostream>using namespace std;
class base {public:
int i;base(int x) { i = x; }virtual void func( ) {
cout << "Using base version of func(): ";cout << i << "\n";
class derived2 : public base {public:
derived2(int x) : base(x) { }// derived2 does not override func( )
};
int main( ) {base *p;base ob(10);derived1 d_ob1(10);derived2 d_ob2(10);p = &ob;p- >func( ); // use base's func( )p = &d_ob1;p- >func( ); // use derived1's func( )
p = &d_ob2;p- >func( ); // use base's func( )return 0;
}
This program displays the following output:
Using base version of func( ): 10Using derived1's version of func( ): 100Using base version of func( ): 20
Here is a more practical example of how a virtual function can be used. This program creates a generic base class called area that holds two dimensions of a figure. It also declares a virtual function called getarea( ) that, when overridden by derived classes, returns the area of the type of figure defined by the derived class. In this example, the area of a triangle and rectangle are computed.
#include < iostream >using namespace std;
class area {double dim1, dim2; // dimensions of figure} public:}void setarea(double d1, double d2) {
class derived1 : public base {public:
derived1(int x) : base(x) { }
dim1 = d1;dim2 = d2;
}

C++ programming 49
void getdim(double &d1, double &d2) {d1 = dim1;d2 = dim2;
}virtual double getarea( ) {
cout << "You must override this function\n";return 0.0;
}};class rectangle : public area {public:
double getarea( ) { double d1, d2; getdim(d1, d2); return d1*d2,
}
More about virtual functionsAs in the previous section, sometimes when a virtual function is declared in the base class there is no meaningful operation for it to perform. This situation is common because often a base class does not define a complete class by itself. Instead, it simply supplies a core set of member functions and variables to which the derived class supplies the remainder. When there is no meaningful action for a base class virtual function to perform, the implication is that any derived class must override this function. To ensure that this will occur, C++ supports pure virtual functions.
A pure virtual function has no definition relative to the base class. Only the function prototype is included. To make a pure virtual function, use this general form:
};
class triangle : public area {public:
double getarea( ) { double d1, d2; getdim(d1, d2); return 0.5*d1*d2;
}};
int main( ) { area *p; rectangle r; triangle t;
r.setarea(3.3, 4.5);t.setarea(4.0, 5.0);
p = &r;cout << "Rectangle area: "<< p- >getarea( )
<<"\n";
p = &t;cout << "Triangle area: "<< t- >getarea( ) <<
"\n";return 0;
}
Notice that the definition of getarea( ) inside area is just a placeholder and performs no real function.
vi rtual type func-name(parameter-list) = 0;
The key part of this declaration is the setting of the function equal to 0. This tells the compiler that no body exists for this function relative to the base class. When a virtual function is made pure, it forces any derived class to override it. If a derived class does not, a compile-time error results. Thus, making a virtual function pure is a way to guaranty that a derived class will provide its own redefinition.
When a class contains at least one pure virtual function, it is referred to as an abstract class. Since, an abstract class contains at least one function for which no body exists, it is, technically, an incomplete type, and no objects of that class can be created. Thus, abstract classes exist only to be inherited. They are neither intended nor able to stand alone. It is important to understand, however, that you can still create a pointer to an abstract class, since it is through the use of base class pointers that run-time polymorphism is achieved. (It is also possible to have a reference to an abstract class.)
When a virtual function is inherited, so is its virtual nature. This means that when a derived class inherits a virtual function from a base class and then the derived class is used as a base for yet another derived class, the virtual function can be overridden by the final derived class (as well as the first derived class). For example, if base class B contains a virtual function called f ( ) , and D1 inherits B and D2 inherits D1 , both D1 and D2 can override f ( ) relative to their respective classes.
Here is an improve version of the area program:

C++ programming 50
#include < iostream >using namespace std;
class area {double dim1, dim2; // dimensions of figure
public:void setarea(double d1, double d2) {
dim1 = d1;dim2 = d2;
}void getdim(double &d1, double &d2) {
d1 = dim1;d2 = dim2;
}virtual double getarea( ) = 0;
// pure virtual function};class rectangle : public area {public:
double getarea( ) { double d1, d2; getdim(d1, d2); return d1*d2,
}};
class triangle : public area {public:
double getarea( ) { double d1, d2; getdim(d1, d2); return 0.5*d1*d2;
return 0;}
Now that getarea( ) is pure, it ensures that each derived class will override it.
The following program illustrates how the virtual nature of a function ispreserved when it is inherited:
#include <iostream>using namespace std;
class base {public:
virtual void func( ) {cout << "Using base version of func()\n";
}}
class derived1 : public base {public:
void func( ) {cout << "Using derived1's version of func()\n";
}};
// derived2 inherits derived1class derived2 : public derived1 {public:
void func( ) {cout << "Using derived2's version of func()\n";
}}
}; };
int main( ) { area *p; rectangle r; triangle t;
r.setarea(3.3, 4.5);t.setarea(4.0, 5.0);
p = &r;cout << "Rectangle area: "<< p- >getarea( )
<<"\n";
p = &t;cout << "Triangle area: "<< t- >getarea( ) <<
"\n";
int main( ) { base *p; base ob;derived1 d_ob1;derived2 d_ob2;
p = &ob;p- >func( ); // use base's func( )
p = &d_ob1;p- >func( ); // use derived1's func( )
p = &d_ob2;p- >func( ); // use derived2's func( )return 0;
}

C++ programming 51
Because virtual function are hierarchical, if derived2 did not override func() , when d_ob2 was accessed, derived1 's func( ) would have been used. it neither derived1 nor derived2 had overridden func( ) all references to it would have routed to the one defined in base .
Applying polymorphismNow that you know how to use a virtual function to achieve run-time polymorphism, it is time to consider how and why to use it. As state many times, polymorphism is the process by which a common interface is applied to two or more similar (but technically different) situations, thus implementing the 'one interface, multiple methods' philosophy. Polymorphism is important because it can greatly simplify complex systems. A single, well-defined interface is used to access a number of different but related actions, and artificial complexity is removed. In essence, polymorphism allows the logical relationship of similar actions to become apparent; thus, the program is easier to understand and maintain. When related actions are accessed through a common interface, you have less to remember.
There are two terms that are often linked to OOP in general and to C++ specifically. They are early binding and late binding. It is important to know what they mean. Early binding essentially refers to those function calls that can be known at compile time. Specifically, it refers to those function calls that can be resolved during compilation. Early bound entities include 'normal' functions, overloaded functions and non virtual member and friend functions. When these types of functions are compiled, all address information necessary to call them is known at compile time. The main advantage of early binding (and the reason that it is so widely used) is that it is efficient. Calls to functions bound at compile time are the fastest types of function calls. The main disadvantage is lack of flexibility.
Late binding refers to events that must occur at run time. A late bound function call is one in which the address of the function to be called is not known until the program runs. In C++, a virtual function is a late bound object. When a virtual function is accessed via a base class pointer, the program must determine at run time what type of object is being pointed to, and then select which version of the overridden function of execute. The main advantage of late binding is flexibility at run time. Your program is free to respond to random events without having to contain large amount of 'contingency code'. Its primary disadvantage is that there is more overhead associated with a function call. This generally makes such calls slower than those that occur with early binding.
Because of the potential efficiency trade-offs, you must decide when it is
appropriate to use early binding and when to use late binding.
Here is a program that illustrates 'one interface, multiple methods'. It defines an abstract list class for integer values. The interface to the list is defined by the pure virtual functions store ( ) and retr ieve( ) . To store a value, call the store( ) function. To retrieve a value from the list, call retr ieve() . The base class l is t does not define any default methods for these actions. Instead, each derived class defines exactly what type of list will be maintained. In this program, two types of lists are implemented: a queue and a stack. Although the two lists operate completely differently, each is accessed using the same interface. You should study this program carefully.
// Demonstrate virtual function.#include < iostream >#include < cstdlib >#include < cctype >using namespace std;
class list {public:
list *head; // pointer to start of list list *tail; // pointer to end of list list *next; // pointer to next itemint num; // value to be stored
list( ) { head = tail = next = NULL }virtual void store(int i) = 0;virtual int retrieve( ) = 0;
};
// Create a queue-type list class queue : public list public:
void store(int i);int retrieve( );
};
void queue::store(int i) {list *item;
item = new queue;if (!item) {
cout << "Allocation error\n";exit(1);
}
// put on end of listif (tail) tail- >next = item;
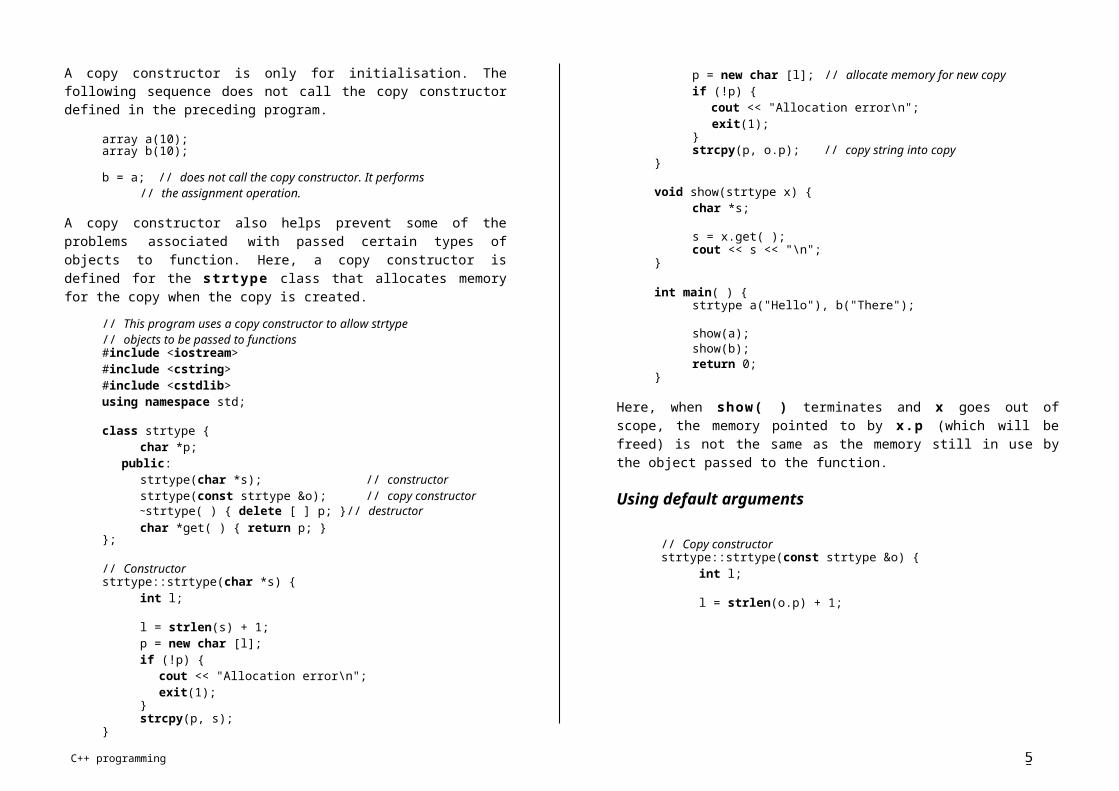
C++ programming 52
tail = item;item- >next = NULL;if (!head) head = tail;
}
int queue::retrieve( ) {int i;list *p;
if (!head) {cout << "List empty.\n";return 0;
}
// remove from start if listi = head- >num;p = head;head = head- >next;delete p;
return i;}
// Create a stack-type list. class stack : public list { public:
void store(int i);int retrieve( );
};
void stack::store(int i) {list *item;
item = new stack;if (!item) {
cout << "Allocation error\n";exit(1);
}item- >num = i;
// put on front of list for stack-like operationif (head) item- >next = head;head = item;if (!tail) tail = head;
}
int stack::retrieve( ) {int i;list *p;
if (!head) {cout << "List empty.\n";return 0;
}
// remove from start of listi = head- >num;p = head;head = head- >next;delete p;
return i;}
int main( ) {list *p;
// demonstrate queuequeue q_ob;p = &q_ob; // point to queue
p- >store(1); p- >store(2); p- >store(3);
cout "Queue: ";cout << p- >retrieve( ); cout << p- >retrieve( ); cout << p- >retrieve( ); cout << "\n";
// demonstrate stackstack s_ob;p = &s_ob; // point to stack
p- >store(1); p- >store(2); p- >store(3);
cout "Queue: ";cout << p- >retrieve( ); cout << p- >retrieve( ); cout << p- >retrieve( ); cout << "\n";
return 0;}
The above main function in the list program just illustrates that the list classes do work. However, to begin to see why run-time polymorphism is so powerful, try

Stream Meaning Default Devicecin Standard input Keyboardcout Standard output Screencerr Standard error Screenclog Buffer version of cerr Screen
C++ programming 53
using this main function instead:
int main( ) { list *p; stack s_ob; queue q_ob; char ch;int i;
for (i=0; i<10; i++) {cout << "Stack or Queue? (S/Q): ";cin << ch;ch = tolower(ch);if (ch=='q') p = &q_ob;
else p = &s_ob;p- >store(i);
}
cout << "Enter T to terminate\n";for (;;) {
cout << "Remove from Stack or Queue? (S/Q): ";
cin << ch;ch = tolower(ch);if (ch=='t') break;if (ch=='q') p = &q_ob;
else p = &s_ob;cout << p- >retrieve( ) << "\n";
}
cout << "\n";return 0;
}
C++ I/O SYSTEM
C++ still supports the entire C I/O system. However, C++ supplies a complete set of object oriented I/O routines. The major advantage of the C++ I/O system is that it can be overloaded relative to classes that you create.
Like the C I/O system, the C++ object oriented I/O system makes little distinction between console and file I/O. File and console I/O are really just different perspectives on the same mechanism. The examples in this chapter use console I/O, but the information presented is applicable to file I/O as well. (File I/O is examined in detail in chapter Advanced C++ I/O.)
Some C++ I/O basicsThe C++ I/O system like the C I/O system, operates through streams. You should already know know that a stream is logical device that either produces or consumes information. A stream is linked to a physical device by the C++ I/O system. All streams behave in the same manner, even if the actual physical devices they are linked to differ. Because all streams act the same, the I/O system presents the programmer with a consistent interface.
As you know, when a C program begins execution, three pre-defined streams are automatically opened: stdin , stdout , and stderr . A similar thing happens when a C++ program starts running. When a C++ program begins, these four streams are automatically opened:
This main function illustrate how random events that occur at run time can be easily handled by the virtual functions and run-time polymorphism. The program executes a for loop running from 0 to 9. Each iteration through the loop, you are asked to choose into which type of list (stack or queue) you want to put a value. According to your answer, the base pointer p is set to point to the correct object and the current value of i is stored. Once the loop is finished, another loop begins that prompts you to indicate from which list to remove a value. Once again, it is your response that determines which list is selected.
While this example is trivial, you should be able to see how run-time polymorphism can simplify a program that must respond to random events.
C++ provides supports for its I/O system in the header file < iostream >. In this file, a rather complicated set of class hierarchies is defined that supports I/O operations. The I/O classes begin with a system of template classes. Template classes also called generic classes, will be discussed later.; briefly, a template class defines the form of a class without fully specifying the data upon which it will operate. Once a template class has been defined, specific instances of it can be created. As it relates to the I/O library, Standard C++ creates two specific versions of the I/O template classes: one for 8-bit characters and another for wide characters (16-bit).

C++ programming 54
Creating your own insertersThe advantage of the C++ I/O system is that you can overload the I/O operators for classes that you create. In this section you learn how to overload the C++ output operator <<.
In C++ language, the output operation is called an insertion and the << is called the insertion operator. When you overload the << for output, you are creating an inserter function, or inserter for short. The rationale for these terms comes from the fact that an output operator inserts information into the stream.
All inserter functions have this general form:
ostream &operator<<(ostream &stream, class-name ob){
// body of inserterreturn stream;
}
The first parameter is a reference to an object of type ostream. This means that stream must be an output stream. The second parameter receives the object that will be output (can also be a reference parameter, if that is more suitable to your application). Notice that the inserter function returns a reference to stream that is of type ostream. This is required if the overloaded << is going to be used in a series of I/O expressions, such as
cout << ob1 << ob2 << ob3;
Within an inserter you can perform any type of procedure. What an inserter does is up to you. However, for the inserter to be consistent with good programming practices, you should limit its operations to outputting to a stream.
Though inserters cannot be members of the class on which it is designed to operate, they can be friends of the class.
ostream &operator<<(ostream &st, coord ob) { st << ob.x << ", " << ob.y << "\n"; return st;
}
int main( ) {coord a(1, 1), b(10, 23);
cout << a << b;return 0;
}
This program displays
1, 110, 23
Here is a revised version of the program where the inserter is not a friend of the class coord. Because the inserter does not have access to the private parts of coord, the variables x and y have to be made public.
// Use a non-friend inserter for objects of type coord#include <iostream>using namespace std;
class coord {public:
int x, y; // must be public
coord( ) { x= 0; y = 0; }coord(int i, int j) { x = i; y = j; }
};
// an inserter for the coord classostream &operator<<(ostream &st, coord ob) {
st << ob.x << ", " << ob.y << "\n";return st;
// Use a friend inserter for objects of type coord#include <iostream>using namespace std;
class coord {int x, y;
public:coord( ) { x= 0; y = 0; }coord(int i, int j) { x = i; y = j; }friend ostream &operator<<(ostream &st, coord ob);
};
}
int main( ) {coord a(1, 1), b(10, 23);
cout << a << b;return 0;
}
An inserter is not limited to display only textual information. An inserter can perform any operation or conversion necessary to output information in a form

C++ programming 55
needed by a particular device or situation. The following program create a class triangle that stores the width and height of a right triangle. The inserter for this class displays the triangle on the screen.
// This program draw right triangle#include <iostream>using namespace std;
class triangle {int height, base;
public:triangle(int h, int b) { height = h; base = b; }friend ostream &operator<<(ostream &st, triangle ob);
* ** *
*****
**** ** *
* ** *
* ** ** *
**********};
// Draw a triangleostream &operator<<(ostream &st, triangle ob) {
int i, j, h, k;
i = j = ob.base-1;
for (h=ob.height-1; h; h--) {for (k=i; k; k--) st << " ";st << "*";
if (j!=i) {for (k=j-i-1; k; k--) st << " ";st << "*";
}
i--;st << "\n";}
return st;}
int main( ) {triangle t1(5, 5), t2(10, 10), t3(12, 12);
cout t1;cout << endl << t2 << endl << t3;return 0;
}
This program displays the following:
***
***
* ** *
* ** *
* ** *
* ** ** *
************
Creating extractorsJust as you can overload the << output operator, you can overload the >> input operator. In C++, the >> is referred to as the extraction operator and a function that overloads it is called an extractor. The reason for this is that the act of inputting information from a stream removes (that is, extracts) data from it.
The general for of an extractor function is:
istream &operator>>(istream &stream, class-name &ob){
// body of extractorreturn stream;
}
Extractors returns a reference to istream, which is an input stream. The first parameter must be a reference to an input stream. The second parameter must be a reference to the object that is receiving input.
An extractor cannot be a member function. Although, you can perform any

C++ programming 56
operation within an extractor, it is best to limit its activity to inputting information.
// Add a friend extractor for objects of type coord#include <iostream>using namespace std;
int onhand; // number on handdouble cost; // cost of item
public:inventory(char *i, int o, double c) {
strcpy(item, i);onhand = o;cost = c;
class coord {int x, y;
public:coord( ) { x= 0; y = 0; }coord(int i, int j) { x = i; y = j; }friend ostream &operator<<(ostream &st, coord ob);friend istream &operator>>(istream &st, coord
&ob);};
}friend ostream &operator<<(ostream &st, inventory
ob);friend istream &operator>>(istream &st,inventory
&ob);};
ostream &operator<<(ostream &st, inventory ob) {st << ob.item << ": " << ob.onhand;st << "on hand at £" << ob.cost << "\n";
ostream &operator<<(ostream &st, coord ob) { st << ob.x << ", " << ob.y << "\n"; return st;
}
istream &operator>>(istream &st, coord &ob) {
cout << "Enter co-ordinates: ";st >> ob.x >> ob.y;return st;
}
}
istream &operator>>(istream &st, inventory &ob) {cout << "Enter item name: ";st >> ob.item;
cout << "Enter number on hand: ";st >> ob.onhand;
cout << "Enter cost: ";st >> ob.cost;
return st;int main( ) {
coord a(1, 1), b(10, 23);
cout << a << b;cin >> a;cout << a;
return 0;}
Here an inventory class is created that stores the name of an item, the number on hand and its cost. The program includes both an inserter and an extractor.
#include <iostream>#include <cstring>using namespace std;
class inventory {char item[40]; // name of item
}
int main( ) {inventory ob("hammer", 4, 12.55);
cout << ob; cin >> ob; cout << ob; return 0;
}
More C++ I/O BasicsThe C++ I/O system is built upon two related, but different, template class hierarchies. The first derived from the low level input I/O class called basic_streambuf. This class supplies the basic, low level input and output operations and provides the underlying support for the entire C++ I/O system. Unless you are doing advance I/O programming, you will not need to use the

C++ programming 57
basic_streambuf directly. The class hierarchy that you will most commonly working with is derived from basic_ios. This is the high-level I/O class that provides formatting, error checking and status information related to stream I/O. basic_ios is used as a base for several derived classes, including basic_istream, basic_ostream, and basic_iostream. These classes are used to create streams capable of input, output and input/output, respectively.
Template Class 8-bit Character-Based Classbasic_streambuf streambufbasic_ios iosbasic_istream istreambasic_ostream ostreambasic_iostream iostreambasic_fstream fstreambasic_ifstream ifstreambasic_ofstream ofstream
The character-based names will be used, since they are the names that you will use in your programs.The ios class contains many member functions and variables that control or monitor the fundamental operation of a stream. Just remember that if you include<iostream> in your program, you will have access to these important classes.
Formatted I/OUntil now, we have only used to displayed information to the screen, the C++default formats.Each stream has associated with it a set of format flags that control the way information is formatted. The ios class declares a bitmask enumeration called fmtflags, in which the following values are defined:
adjustfield floatfield right skipwsbasefield hex scientific unitbufboolalpha internal showbase uppercasedec left showpointfixed oct showpos
These values are used to set or clear the format flags and are defined in the ios.• skipws: if set, the leading whitespaces (spaces, tabs, newlines) are discarded
when input is being performed on a stream. If clear, whitespace characters are not discarded.
• left: if set, output is left justified. If clear output is right justified by default• right: if set, output right
justified.

C++ programming 58
• internal: if set, a numeric value is padded to fill a field by inserting spaces between any sign or base character.
• oct: if set, numeric values are output in octal. To return to output decimal setdec.
• hex: if set, numeric values are output in hexadecimal. Set dec to return to decimal.
• showbase: if set, causes the base of numeric values to be shown (e.g. if the conversion base is hexadecimal, the value 1F will be displayed as 0x1F).
• showpos: if set, causes a leading plus sign to be displayed before positive values.
• showpoint: causes a decimal point and trailing zeros to be displayed for all floating-point output.
• scientific: if set, floating-point numeric values are displayed using scientific notation.
• fixed: if set, floating-point values are displayed using normal notation.• unitbuf: if set, the buffer is flushed after each insertion operation.• boolalpha: Booleans can be input and output using keyword true and false.
Since, it is common to refer to the oct, hex and dec fields, they can be collectively referred to as basefield. Similarly, left, right and internal fields can be referred to as adjustfield. Finally, the scientific and fixed can be referred as floatfield.
To set a format flag, use the setf ( ) function. This function is a member of io s . Its most common form is:
fmtflags setf(fmtflags flags);
This function returns the previous settings of the format flags and turns on those flags specified by flags (other flags are unaffected). For example, to turn on the showpos flag you can use this statement:
stream.setf(ios::showpos);
Here stream is the stream you want to affect (e.g. cout, cin, ...). It is possible to set more than one flag, e.g.
cout.setf(ios::showbase ⏐ ios::hex);Remember the format flags are defined within the ios class, you must access their values by using ios and the scope resolution operator.
The complement of setf ( ) is unsetf ( ) . This member function of io s clears

C++ programming 59
one or more format flags. Its most common prototype is,
void unsetf(fmtflags flags);
Flags specified by flags are cleared.
The member function that only returns the current format settings is f lags( ) . Its prototype is,
fmtflags flags( );
Here is a simple example that shows how to set several of the format flags
#include <iostream>using namespace std;
int main( ) {// display the default settingscout << 123.23 << " hello " << 100 << "\n";cout << 10 << " " << -10 << "\n";cout << 100.0 << "\n\n";
// now change formatscout.unsetf(ios::dec);
// not required by all compilers
cout.setf(ios::hex ⏐ ios::scientific);cout << 123.23 << " hello " << 100 << "\n";
cout.setf(ios::showpos);cout << 10 << " " << -10 << "\n";
cout.setf(ios::showpoint ⏐ ios::fixed);cout << 100.0;
return 0;
streamsize width(streamsize w);
Here w becomes the field width, and the previous field width is returned. The streamsize type is defined by <iostream> as some form of integer. In some implementations, each time an output is performed, the field width returns to its default setting, so it might be necessary to set the minimum field width before each output statement.
After you set a minimum field width, when a value uses less than the specified width, the field is padded with the current fill character (the space, by default) so that the field width is reached. However, keep in mind that if the size of the output value exceeds the minimum field width, the field will be overrun. No value is truncated.
By default, six digits of precision are used. You can set this number by using theprecision( ) function. Its prototype is
streamsize precision(streamsize p);
Here the precision is set to p and the old value is returned.
By default, when a field needs to be filled, it is filled with spaces. You can specify the fill character by using the fill( ) function. Its prototype is
char fill(char ch);
After a call to fill( ), ch becomes the new fill character, and the old one is returned.
Here an example that illustrates the format functions
#include <iostream>using namespace std;}
Using width( ), precision( ), and fill( )In addition to the formatting flags, there are three member functions defined by the ios class that set these format parameters: the field width, the precision and the fill character, respectively.
By default, when a value is output, it occupies only as much space as the number of characters it takes to display it. However, you can specify a minimum field width by using the width( ) function. Its prototype is
int main( ) {cout.width(10); // set minimum field widthcout << "hello "<<"\n"; // right justify be
default
cout.fill('%'); // set fill charactercout.width(10); // set widthcout << "hello"<<"\n"; // right justify by
default
cout.setf(ios::left);// left justify
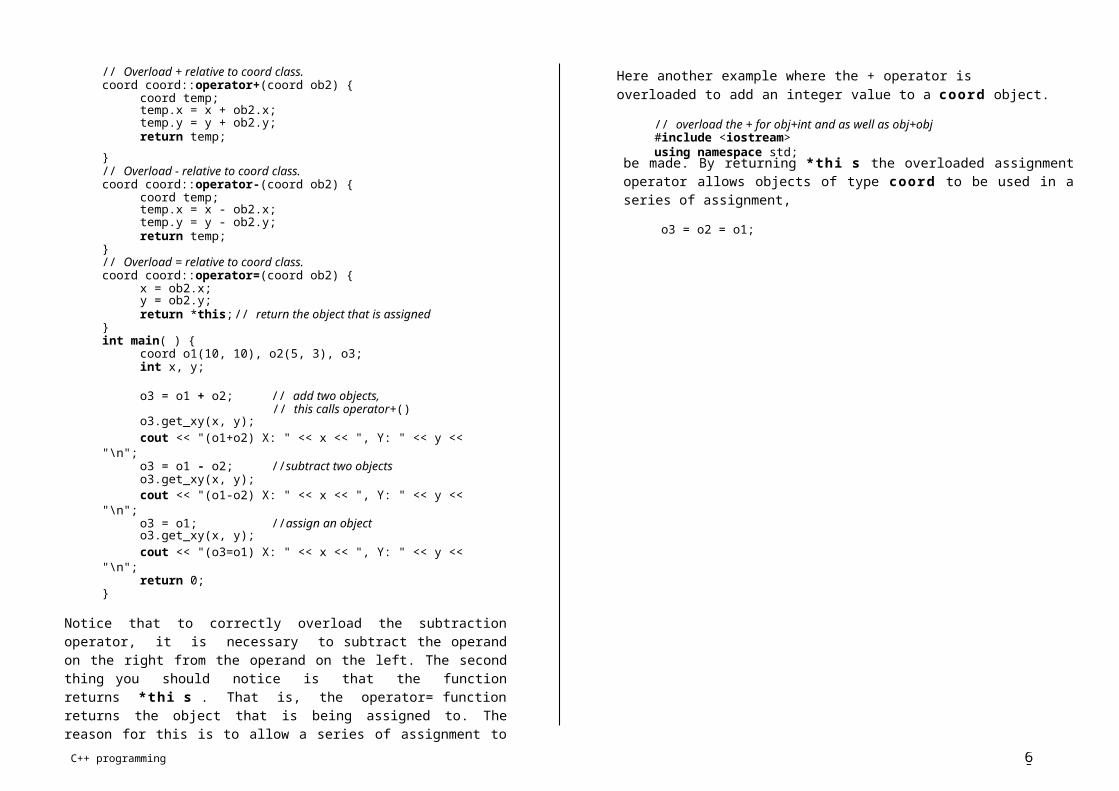
C++ programming 60
cout.width(10); // set widthcout << "hello"<<"\n"; // output left justified
cout.width(10); // set widthcout.precision(10); //set 10 digits of
precisioncout << 123.234567 << "\n";
cout.width(10); // set widthcout.precision(6); // set 6 digits of
precisioncout << 123.234567 << "\n";
return 0;}
fixed Turns on fixed flag Output flush Flushes a stream Outputhex Turns on hex flag Input/Output internal Turns on internal flag Outputleft Turns on left flag Output noboolalpha Turns off boolalpha flag Input/Output noshowbase Turns off showbase flag Output noshowpoint Turns off showpoint flag Output noshowpos Turns off showpos flag Output noskipws Turns off skipws flag Input nounitbuf Turns off unitbuf flag Output nouppercase Turns off uppercase flag Outputoct Turns on oct flag Input/Output
This program displays the following output: resetiosflags(fmtflads f) Turns off the flags specified in f
Input/Output
hello%%%%%hellohello%%%%%123.234567123.235%%%
right Turns on right flag Output scientific Turns on scientific flag Output setbase(int base) Sets the number base to base Input/Output setfill(int ch) Sets the fill char ch Output
Using I/O manipulatorsThere is a second way that you can format information using C++ I/O system.
setiosflags(fmtflags f) Turns on the flags specifiedby f
setprecision(int p) Sets the number of digits of precision
Input/Output
Output
The method uses special functions called I/O manipulators. I/O manipulators are, in some situations, easier to use than the ios format flags and functions.
I/O manipulators are special I/O format functions that can occur within an I/O statement, instead of separate from it. The standard manipulators are shown in the next table. Many manipulators parallel member functions of the ios class. Many of the manipulators shown in the table were added recently to Standard C++ and will be supported only by modern compiler.
To access manipulators that takes parameters, such as setw( ), you must include<iomanip> in your program. This is not necessary when you are using manipulator that does not require argument.
Manipulator Purpose Input/Ouput boolalpha Turns on boolapha flag Input/Output dec Turns on dec flag Input/Output
setw(int w) Sets the field width to w Outputshowbase Turns on showbase flag Output showpoint Turns on showpoint flag Output showpos Turns on showpos flag Output skipws Turns on skipws flag Input unitbuf Turns on unitbuf Output uppercase Turns on uppercase flag Output ws Skips leading white space Input
Keep in mind that an I/O manipulator affects only the stream of which the I/O expression is a part. I/O manipulators do not affect all streams currently opened for use.
The following program demonstrates several of the I/O manipulators:
#include <iostream>#include <iomanip>
endl Outputs a newline characterand flushes the stream
Output using namespace std;
ends Outputs a null Output int main( ) {

C++ programming 61
cout << hex << 100 << endl;cout << oct << 10 << endl;
cout << setfill('X') << setw(10);cout << 100 << " hi " << endl;
return 0;}
This program displays the following:
6413XXXXXXX144 hi
ADVANCE C++ I/O
Creating your own manipulatorsIn addition to overloading inserters and extractors, you can further customise I/Osystem by creating manipulator functions.As you know there are two basic types of manipulators: those that operate on input streams and those that operate on output streams. In addition to these two broad categories, there is a secondary division: those manipulators that take an argument and that that do not.
Writing you own parameterless manipulators is quite easy.All parameterless manipulator output functions have this form:
ostream &manip-name(ostream &stream){
// your codereturn stream;
}
Here manip-name is the name of the manipulator and stream is a reference to the invoking stream. A reference to the stream is returned. This is necessary if a manipulator is used as part of a larger I/O expression.
All parameterless input manipulator functions have the form:
istream &manip-name(istream &stream)
{// your codereturn stream;
}
Remember it is crucial that your manipulator receives a reference to the invoking stream. If this is not done, your manipulators cannot be used in a sequence of input or output operations.
// A simple example#include <iostream>using namespace std;
ostream &setup(ostream &stream) { stream.width(10); stream.precision(4); stream.fill('*');
return stream;}int main( ) {
cout << setup << 123.123456;return 0;
}
File I/O basicsFile I/O and console I/O are closely related. In fact, the same class hierarchy that supports console I/O also supports the file I/O.
To perform file I/O, you must include <fstream> in your program. It defines several classes, including ifstream, ofstream and fstream. These classes are derived from ios, so ifstream, ofstream and fstream have access to all operations defined by ios.
In C++, a file is opened by linking it to a stream. There are three types of streams: input, output and input/output. Before you can open a file, you must first obtain a stream.
To create an input stream, declare an object of type ifstream. To create an output stream, declare an object of type ofstream.To create an input/output stream, declare an object of type fstream.For example, this fragment creates one input stream, one output stream and one stream capable of both input and output:
ifstream in: // input;
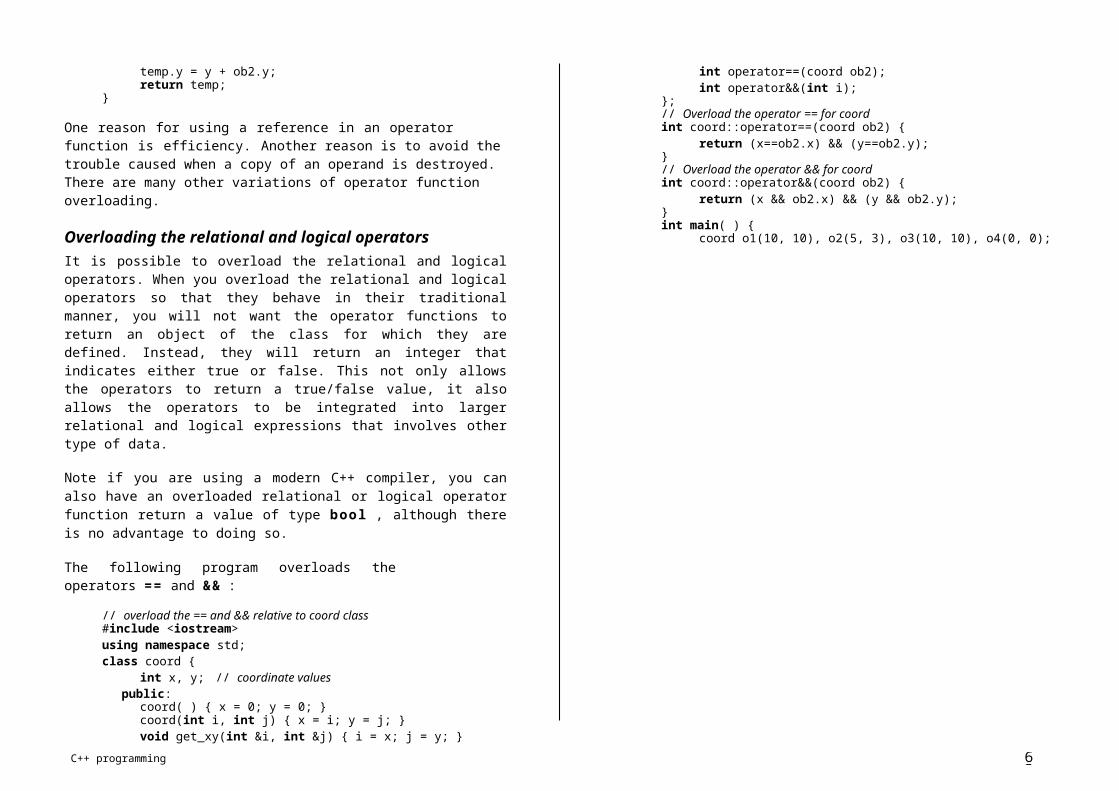
C++ programming 62
ofstream out; // output;fstream io; // input ad output
Once you have created a stream, one way to associate it with a file is by using the function open( ). This function is a member function of each of the three stream classes. The prototype for each is shown here:
void ifstream::open(const char *filename,openmode mode=ios::in);
void ofstream::open(const char *filename,openmode mode=ios::out ⏐ ios::trunc);
void fstream::open(const char *filename,openmode mode=ios::in ⏐ ios::out);
Here filename is the name of the file, which can include a path specifier. The value of the mode determines how the file is opened. It must be a value of type openmode, which is an enumeration defined by ios that contains the following value:
ios::app ios::ate ios::binary ios::in ios::out ios::trunc
You can combine two or more of these values.• ios::app: causes all output to that file to be appended to the end. Only
with files capable of output.• ios::ate: causes a seek to the end of the file to occur when the file is opened.• ios::out: specify that the file is capable of output.• ios::in: specify that the file is capable of input.• ios::binary: causes the file to be opened in binary mode. By default, all
files are opened in text mode. In text mode, various character translations might take place, such as carriage return/linefeed sequences being converted into newlines. However, when a file is opened in binary mode, no such character translations will occur. Keep in mind that any file, whether it contains formatted text or raw data, can be opened in either binary or text mode. The only difference is whether character translations take place.
• ios::trunc: causes the contents of a pre-existing file by the same name to be destroyed and the file to be truncated to zero length. When you create anoutput stream using ofstream, any pre-existing file is automatically truncated.
The following fragment opens an output file called test:
ofstream mystream;mystream.open("test");
Since the mode parameter to open( ) defaults to a value appropriate to the type of stream being opened, there is no need to specify its value in the preceding example.
If open( ) fails, the stream will evaluate to false when used in a Boolean expression. You can make sure of this fact to co,firm that the open operation succeeded by using a statement like this:
if (!mystream) {cout << "Cannot open file.\n";// handle error
}
In general, you should always check the result of a call to open( ) before attempting to access the file.
You can also check to see if you have successfully opened a file by using the is_open( ) function, which is a member of fstream, ifstream and ofstream. It has a prototype as:
bool is_open( );
It returns true if the stream is linked to an open file and false otherwise. For example, the following check if mystream is currently opened:
if (!mystream.is_open())cout << "File is not open.\n";
// ...
Although it is entirely proper to open a file by using the open( ) function, most of the time you will not do so because the ifstream, ofstream and fstream classes have constructor functions that automatically open files. The constructor functions have the same parameters and defaults as the open( ) function. Therefore, the most common way you will see a file opened is shown in this example:
ifstream mystream("myfile"); // open a file
Whether you use a constructor function to open a file or an explicit call to open(), you will want to confirm that the file has been opened by testing the value of

C++ programming 63
the stream.
To close a file use the member function close( ). For example, to close the file linked to a stream called mystream, use this statement,
mystream.close( );
The close( ) function takes no parameters and returns no value.
You can detect when the end of an input file has been reached by using the eof( )member function of ios. It has a prototype:
bool eof( );
It returns true when the end of the file has been encountered and false otherwise.
Once a file has been opened, it is very easy to read textual data from it or writformatted textual data to it. simply use the << and >> operators the same way youdo when performing console I/O, except that instead of using cin and cout, substitute a stream that is linked to a file.
A file produced by using << is a formatted text file, and any file read by >> must be a formatted text file.
Here an example that creates an output file, writes information to it, closes the file and opens it again as an input file, and reads in the information:
#include <iostream>#include <fstream>using namespace std;
int main( ) {ifstream fout("test"); // create output file
if (!fout) {cout << "Cannot open output file.\n";return 1;
}
fout << "Hello"!\n";fout << 100 << " " << hex << 100 << endl;
fout.close( );
ifstream fin("test"); // open input file
if (!fin) {cout << "Cannot open input file.\n";return 1;
}
char str[80];int i;
fin >> str >> i;cout << str << " " << i << endl;
fin.close( );return 0;
}
Another example that reads strings entered at the keyboard and writes them to disk. To use the program, specify the name of the output file on the command line.
#include <iostream>#include <fstream>using namespace std;
int main( int argc, char *argv[]) {if (argc!=2) {
cout << "Usage: WRITE <filename>\n";return 1;
}
ofstream out(arg[1]); // output fileif (!out) {
cout << "Cannot open output file.\n";return 1;
}
char str[80];cout << "Write strings to disk, '$' to stop\n";
do {cout << ": ";cin >> str;out << str << endl;
} while (*str !='$');
out.close( );return 0;
}
In Standard C++ the open( ) does not support the parameter that specified the
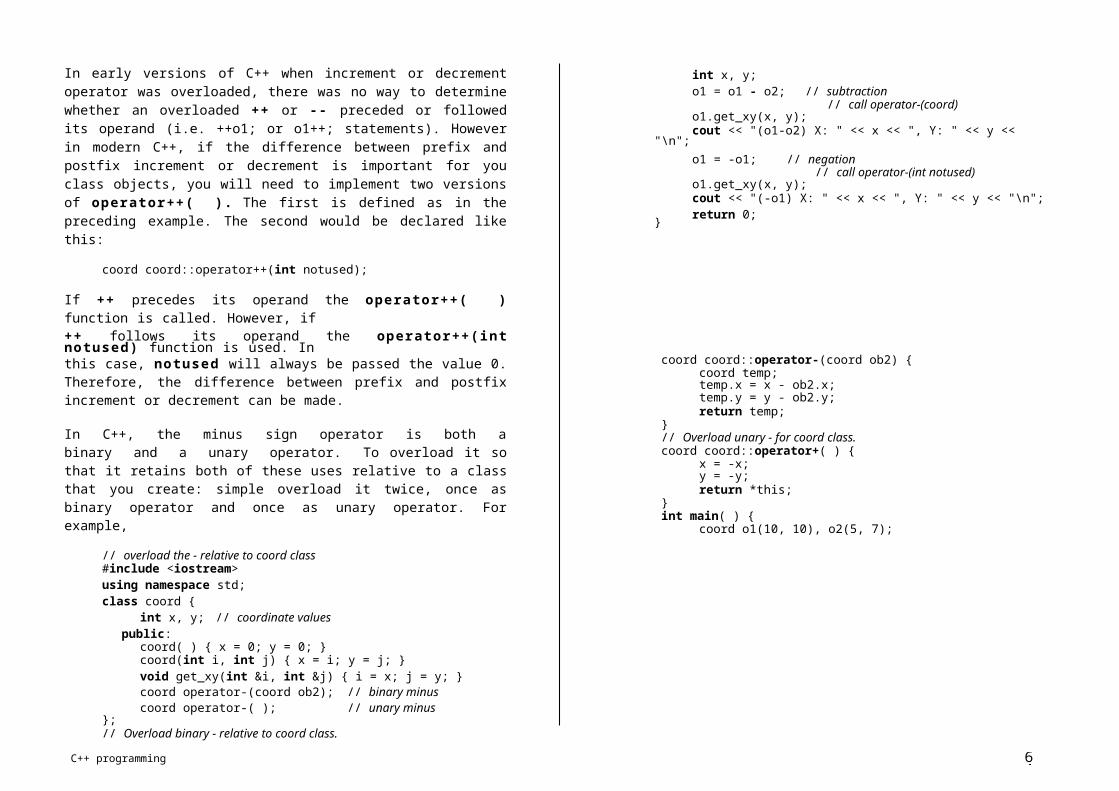
C++ programming 64
file's protection mode that is supported by old C++.
When using an old C++ library, you must explicitly specify both the ios::in and the ios::out mode values.Finally, in the old I/O system, the mode parameter could also include eitherios::nocreate or ios::moreplace. These values are not supported by StandardC++.
Unformatted, binary I/OC++ supports a wide range of unformatted file I/O functions. The unformatted functions give you detailed control over how files are written and read.
The lowest-level unformatted I/O functions are get( ) and put( ). You can read a byte by using get( ) and write a byte by using put( ). These functions are member functions of all input and output stream classes, respectively. The get( ) function has many forms, but the most commonly used version is shown here, along with put( ):
istream &get(char &ch);ostream &put(char &ch);
When you are using the unformatted file functions, most often you will open a file for binary rather than text operations. The reason for this is easy to understand: specifying ios::binary prevents any character translations from occurring. This is important when the binary representations of data such as integers, floats and pointers are stored in the file. However, it is perfectly acceptable to use the unformatted functions on a file opened in text mode, as long as that the file actually contains only text. But remember, some character translation may occur.
Here some very simple examples:
// Display the content of any file on screen#include <iostream>#include <fstream>using namespace std;
int main(int argc, char *argv[]) {char ch;
if (argc!=2) {cout << "Usage: PR <filename>\n";return 1;
To read and write blocks of data, use read( ) and write( ) functions, which arealso member functions of the input and output stream classes, respectively. Their prototypes are:
istream &read(char *buf, streamsize num);ostream &write(const char *buf, streamsize num);
The read( ) function reads num bytes from the stream and puts them in the buffer pointed to by buf. The write( ) function writes num bytes to the associated stream from the buffer pointed by buf.The streamsize type is some form of integer. An object of type streamsize is capable of holding the largest number of bytes that will be transferred in any I/O operation.
If the end of file is reached before num characters have been read, read( ) stops and the buffer contains as many characters as were available. You can find out how many characters have been read by using the member function gcount( ), which has this prototype:
streamsize gcount( );
It returns the number of characters read by the last unformatted input operation.
}
ifstream in(arg[1], ios::in | ios::binary);if (!in) {
cout << "Cannot open file\n";return 1;
}
while (!in.eof( )) {in.get(ch);cout << ch;
}in.close( );return 0;
}
// Write character to a file until user enters $ sign#include <iostream>#include <fstream>using namespace std;
int main(int argc, char *argv[]) {
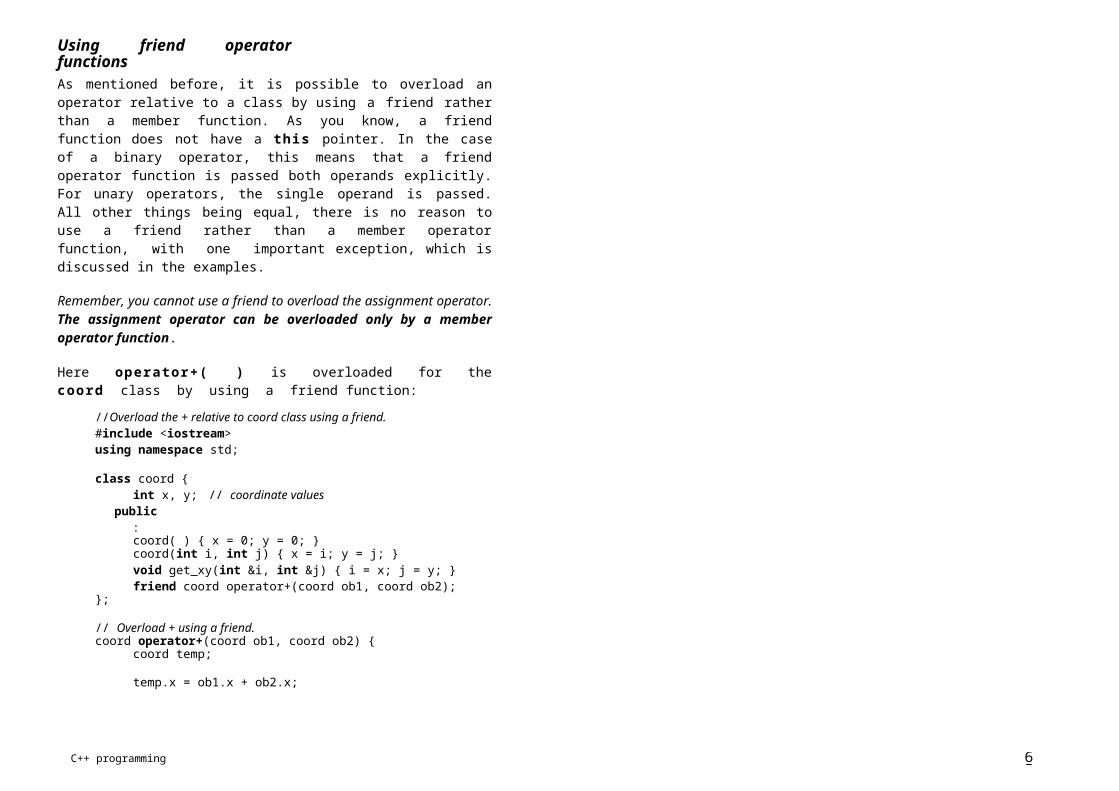
C++ programming 65
char ch;
if (argc!=2) {cout << "Usage: WRITE <filename>\n";return 1;
}
ofstream out(arg[1], ios::out | ios::binary);if (!out) {
cout << "Cannot open file\n";return 1;
}
cout << "Enter a $ to stop\n";do {
cout << ": ";cin.get(ch);out.put(ch);
} while (ch!='$')
out.close( );return 0;
}
Notice that the program uses get( ) to read characters from cin. This prevents leading spaces from being discarded.
// Use write( ) to write a double and a string to// a file called test#include <iostream>#include <fstream>#include <cstring>using namespace std;
int main( ) {ofstream out("test", ios::out | ios::binary);if (!out) {
cout << "Cannot open file\n";return 1;
}double num = 100.45;char str[] = "This a test";
out.write((char *) &num, sizeof(double));out.write(str, strlen(str));
out.close( );return 0;
}
Note that the type cast (char *) inside the call to write( ) is necessary when outputting a buffer that is not defined as a character array. Because of C++ strong type checking, a pointer of one type will not automatically be converted into a pointer of another type. The same applies to read( ).
// Use read( ) to read a file by the previous program#include <iostream>#include <fstream>using namespace std;
int main( ) {ifstream in("test", ios::in | ios::binary);if (!in) {
cout << "Cannot open input file\n";return 1;
}
double num;char str[80];
in.read((char *) &num, sizeof(double));in.read(str, 14);str[14] = '\0'; // null terminate str
cout << num << " " << str;in.close( );return 0;
}
More unformatted I/O functionsIn addition to the form shown earlier, there are several different ways in which the get( ) function is overloaded. The prototypes for the three most commonly used overloaded forms are:
istream &get(char *buf, streamsize num);istream &get(char *buf, streamsize num, char delim);int get( );
The first form reads characters into the array pointed to by buf, until either num-l characters have been read, a new line is found, or the end of the file has been encountered. The array pointed to by buf, will be null terminated by get( ). If the newline character is encountered in the input stream, it is not extracted. Instead, it remains in the stream until the next input operation.
The second form reads characters into the array pointed to by buf, until either

C++ programming 66
num-l characters have been read, the character specified by delim has been found, or the end of file has been encountered. The array pointed to by buf, will be null terminated by get( ). If the delimiter character is encountered in the input stream, it is not extracted. Instead, it remains in the stream until the next input operation.
The third overloaded form of get( ) returns the next character from the stream. It returns EOF if the end of file is encountered. This form of get( ) is similar to the C getc( ) function.
Another function that performs input is getline( ). It is a member function of each input stream class. Its prototypes are:
istream &getline(char *buf, streamsize num); istream &getline(char *buf, streamsize num, char delim);
The first form reads characters into the array pointed to by buf until either num-l characters have been read, a newline character is found, or the end of the file has been encountered. The array pointed to by buf will be null terminated by getline(). If the newline character is encountered in the input stream, it is extracted, but it is not put into buf.
The second form reads characters into the array pointed to by buf until either num-l characters have been read, the character specified by delim has been found, or the end of file has been encountered. The array pointed to by buf will be null terminated by getline( ). If the newline character is encountered in the input stream, it is extracted, but it is not put into buf.
The difference between get( ) and getline( ) is that getline( ) reads and removes the delimiter from the input stream; get( ) does not.
You can obtain the next character in the input stream without removing it from that stream by using peek( ). This function is a member function of the input stream classes and its prototype is
int peek( );
It returns the next character in the stream; it returns EOF if the end of file is encountered.
You can return the last character read from a stream to that stream by using putback( ), which is a member function of the input stream classes. Its prototype is as shown:
istream &putback(char c);
where c is the last character read.
When output is performed, data are not immediately written to the physical device linked to the stream. Instead, information is stored in an internal buffer until the buffer is full. Only, then are the contents of that buffer written to disk. However, you can force the information to be physically written to disk before the buffer is full by calling flush( ). flush( ) is a member function of the output stream classes and has a prototype:
ostream &flush( );
Random accessIn C++ I/O system, you perform random access by using the seekg( ) and seekp() functions, which are members of the input and output stream classes, respectively. Their most common forms are:
istream &seekg(off_type offset, seekdir origin);ostream &seekp(off_type offset, seekdir origin);
Here off_type is an integer type defined by the ios that is capable of containing the largest valid value that offset can have. seekdir is an enumeration defined by ios that has these values:
Value Meaningios::beg Seek from beginningios::cur Seek from current locationios::end Seek from end
The C++ I/O system manages two pointers associated with a file. One is the get pointer, which specifies where in the file the next input operation will occur. The other is the put pointer, which specifies where in the file the next output operation will occur. Each time an input or output operation takes place, the appropriate pointer is automatically sequentially Advanced. However, by using the seekg( ) and the seekp( ) functions, it is possible to access the file in a nonsequential fashion.
The seekg( ) function moves the associated file's current get pointer offset number of bytes from the specified origin.The seekp( ) function moves the associated file's current put pointer offset
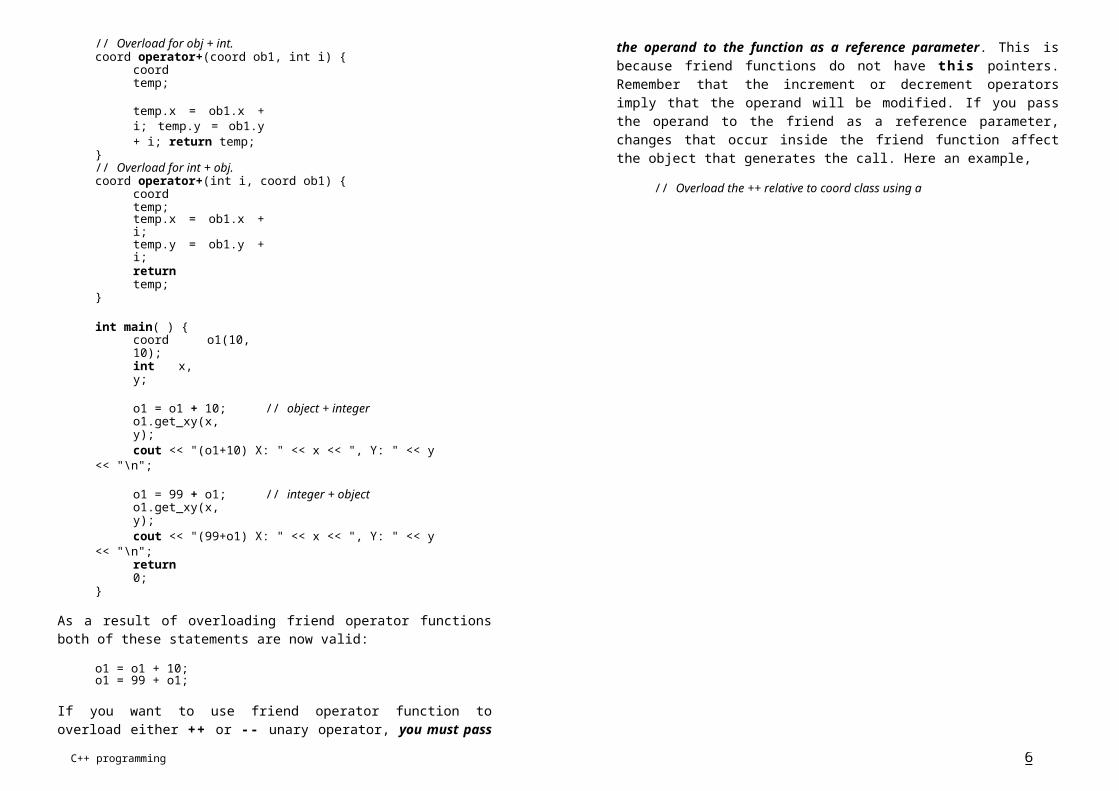
Name Meaninggoodbit No errors occurredeofbit End of file has been encounteredfailbit A non fatal I/O error has occurred
C++ programming 67
number of bytes from the specified origin.
In general, files that will be accessed via seekg( ) and seekp( ) should be opened for binary operations. This prevents character translations from occurring, which may affect the apparent position of an item within the file.
You can determine the current position of each file pointer by using these member functions:
pos_type tellg( );pos_type tellp( );
Here pos_type is an integer type defined by the ios that is capable of holding the largest value that defines a file position.
There are overloaded versions of seekg( ) and seekp( ) that move the file pointers to the location specified by the returned value of tellg( ) and tellp( ). Their prototypes are:
istream &seekg(pos_type position);ostream &seekp(pos_type position);
The following program allows you to change a specific character in a file. Specify a file name on the command line, filled by the number of the byte in the file you want to change, followed by the new character. The file is opened for read/write operations.
#include <iostream>#include <fstream>#include <cstdlib>using namespace std;
int main(int argc, char *argv[ ] ) {if (argc!=4) {cout <<"Usage: CHANGE <filename> <byte> <char>\n;return 1;}fstream out(argv[1], ios::out | ios::binary);if (!out) {
cout << "Cannot open file\n";return 1;
out.close( );return 0;
}
The next program position the get pointer into the middle of the file and then displays the contents of that file from that point.
#include <iostream>#include <fstream>#include <cstdlib>using namespace std;
int main(int argc, char *argv[ ] ) {char ch;
if (argc!=3) {cout <<"Usage: LOCATE <filename> <loc>\n";return 1;
}istream in(argv[1], ios::in | ios::binary);if (!in) {
cout << "Cannot open file\n";return 1;
}
in.seekg(atoi(argv[2]),ios::beg);
while (!in.eof( )) {in.get(ch);cout << ch;
}
in.close( );return 0;
}
Checking the I/O statusThe C++ I/O system maintains status information about the outcome of each I/O operation. The current I/O status of an I/O stream is described in an object of type iostate, which is an enumeration defined by ios that includes the members:
}
out.seekp(atoi(argv[2]),ios::beg);out.put(*argv[3]);

C++ programming 68
badbit A fatal error has occurred
For older compilers, the I/O status flags are held in an int rather than an object of type iostate.
There are two ways in which you can obtain the I/O status information. First, you call the rdstate( ) function, which is a member of ios. It has this prototype:
iostate rdstate( );
It returns the current status of the error flags. rdstate( ) returns goodbit when no error has occurred. Otherwise, an error flag is returned.
The other way you can determine whether an error has occurred is by using one of these ios member functions:
bool bad( ); bool eof( ); bool fail( ); bool good( );
The eof( ) function was discussed earlier. The bad( ) function returns true if badbit is set. The fail( ) function returns true if failbit is set. The good( ) function returns true if there are no errors. Otherwise, they return false.
Once an error has occurred, it might need to be cleared before your program continues. To do this, use the ios member function clear( ), whose prototype is
void clear(iostate flags = ios::goodbit);
If flags is goodbit (as it is by default), all error flags are cleared. Otherwise, setflags to the settings you desire.
Customised I/O and filesAs stated in the previously, overloaded inserters and extractors, as well as I/O manipulators, can be used with any stream as long as they are written in a general manner. If you 'hard-code' a specific stream into an I/O function, its use is, of course, limited to only that stream. This is why you were recommended to generalised your I/O functions whenever possible.
In the following program, the coord class overloads the << and >> operators. Notice you can use the operator functions to write both to the screen and to file.
#include <iostream>#include <fstream>using namespace std;
class coord {int x, y;
public:coord(int i, int j) { x=i; y=j; }friend ostream &operator<<(ostream &stream,
coord ob);friend istream &operator>>(istream &stream,
coord &ob);};ostream &operator<<(ostream &stream, coord ob) {
stream << ob.x << " " << ob.y << "\n";return stream;
}istream &operator>>(istream &stream, coord &ob) {
stream >> ob.x >> ob.y;return stream;
}
int main( ) {coord o1(1, 2) o2(3, 4);ofstream out( "test" );
if( !out ) {cout << "Cannot open file\n";return 1;
}cout << o1 << o2;out.close( );
ifstream in( "test" );if ( !in ) {
cout << "Cannot open file\n";return 1;
}
coord o3(0, 0), o4(0, 0);in >> o3 >> o4;
cout << o3 << o4;
in.close( );return 0;
}
Remember that all the I/O manipulators can be used with files.

C++ programming 69
TEMPLATES AND EXCEPTION HANDLING
Two of C++ most important high-level features are the templates and exception handling. They are supported by all modern compilers.
Using templates, it is possible to create generic functions and classes. In generic functions or classes, the type of data that is operated upon is specified as a parameter. This allows you to use one function or class with several different types of data without having to explicitly recode a specific version for each type of data type. Thus, templates allow you to create reusable code.
Exception handling is a subsystem of C++ that allows you to handle errors that occur at run time in a structured and controlled manner. With C++ exception handling, you program can automatically invoke an error handling routine when an error occurs. The principle advantage of exception handling is that it automates much of the error handling code that previously had to be coded 'by hand' in any large program. The proper use of exception handling helps you to create resilient code.
Generic functionsA generic function defines a general set of operations that will be applied to various types of data. A generic function has the type of data that it will operate upon passed to it as a parameter. Using this mechanism, the same general procedure can be applied to a wide range of data. For example the Quicksort algorithm is the same whether it is applied to an array of integers or an array of floats. It is just that the type of data being sorted is different. By creating a generic function, you can define, independent of any data, the nature of the algorithm. Once this is done, the compiler automatically generates the correct code for the type of data that is actually used when you execute the function. In essence, when you create a generic function you are creating a function that can automatically overload itself.
A generic function is created by using the keyword template. The general form of a template function definition is as
template <class Ttype> ret-type-name(parameter list){
// body of function}
Here Ttype is a placeholder name for a data type used by the function. This name can be used within the function definition. However, it is only a placeholder; the compiler will automatically replace this placeholder with an actual data type when it creates a specific version of the function.Although the use of the keyword class to specify a generic type in a template declaration is traditional, you can also use the keyword typename.
The following example creates a generic function the swaps the values of the two variables it is called with.
// Function template example#include <iostream>using namespace std;
// This is a function templatetemplate <class X> void swapargs(X &a, X &b) {
X temp;
temp = a;a = b;b = temp;
}
int main( ) {int i=10, j=20;float x=10.1, y=23.3;
cout << "Original i, j: " << i << j <<endl;cout << "Original x, y: " << x << y <<endl;
swapargs(i, j); // swap integersswapargs(x, y); // swap floats
cout << "Swapped i, j: " << i << j <<endl;cout << "Swapped x, y: " << x << y <<endl;
return 0;}
The keyword template is used to define a generic function. The line
template <class X> void swapargs(X &a, X &b)
tells the compiler two things: that a template is being creates and that a generic function is beginning.. Here X is a generic type that is used as a placeholder. After the template the template portion, the function swapargs( ) is declared, using X as a data type of the values that will be swapped. In main( ), the

C++ programming 70
swapargs( ) function is called using two different types of data: integers and floats. Because swapargs( ) is a generic function, the compiler automatically creates two versions of swapargs( ); one that will exchange integer values and one that will exchange floating-point values.
Here are some other terms that are sometimes used when templates are discussed and that you might encounter in other C++ literature. First, a generic function is also called a template function. When the compiler creates a specific version of the function, it is said to have created a generated function. The act of generating a function is referred to as instantiating it. Put differently, a generated function is a specific instance of a template function.
The template portion of a generic function does not have to be on the same line as the function's name. For example, the following is also a common way to format the swapargs( ) function:
// Use typenametemplate <typename X> void swapargs(X &a, X &b) {
X temp;
temp = a;a = b;b = temp;
}
You can define more than one generic data type with the template statement. Here an example that creates a generic function that has two generic types:
#include <iostream>using namespace std;
template <class type1, type2>void myfunct(type1 x, type2 y) {
cout << x << " " << y << endl;template <class X>void swapargs(X &a, X &b) {
X temp;
temp = a;a = b;b = temp;
}
If you use this form, it is important to understand that no other statement can occur between the template statement and the start of the generic function definition.
// This will not compiletemplate <class X>int i; // this is an error!void swapargs(X &a, X &b) {
X temp;
temp = a;a = b;b = temp;
}
As the comments imply, the template specification must directly precede the rest of the function definition.
As mentioned before, instead of using the keyword class, you can use the keyword typename:
}
int main( ) { myfunct(10, "hi"); myfunct(0.23, 10L); return 0;
}
Generic functions are similar to overloaded functions except the they are more restrictive. When functions are overloaded, you can have different actions performed with the body of each function. But generic functions must perform the same general action for all versions.
Even though a template function overloads itself as needed, you can explicitly overload one, too. If you overload a generic function, that overloaded function overrides (or 'hides') the generic function relative to that specific version.
// Function template example#include <iostream>using namespace std;
// Overriding a template functiontemplate <class X> void swapargs(X &a, X &b) {
X temp;
temp = a;a = b;b = temp;
}// This overrides the generic version of swapargs( )

C++ programming 71
void swapargs(int a, int b) {cout << "this is inside swapargs(int, int)\n";
}
int main( ) {int i=10, j=20;float x=10.1, y=23.3;
cout << "Original i, j: " << i << j <<endl;cout << "Original x, y: " << x << y <<endl;
swapargs(i, j); // calls overloaded swapargs( )swapargs(x, y); // swap floats
cout << "Swapped i, j: " << i << j <<endl;cout << "Swapped x, y: " << x << y <<endl;
return 0;}
Manual overloading of template, as shown in this example, allows you to tailor a version of a generic function to accommodate a special situation. However, in general, if you need to have different versions of a function for different data types, you should use overloaded functions rather than templates.
Generic classesYou can also define generic classes. When you do this, you create a class that defines all algorithms used by that class, but the actual type of data being manipulated will be specified as a parameter when objects of that class are created.
Generic classes are useful when a class contains generalisable logic. For example, the same algorithm that maintains a queue of integers will also work for a queue of characters. Also, the same mechanism that maintains a linked list of mailing addresses will also maintain a linked of auto part information. By using a generic class, you can create a class that will maintain a queue, a linked list, and so on for
Here Ttype is the placeholder type name that will be specified when a class is instantiated. If necessary, you can define more than one generic data type by using a comma-separated list.
Once you have created a generic class, you create a specific instance of that class by using the using the following general form:
class-name<type> ob;
Here type is the type name of the data that the class will bee operating upon.
Member functions of a generic class are, themselves, automatically generic. Theyneed not be explicitly specified as such using template.C++ provides a library that is built upon template classes. This library is usually referred to as the Standard Template Library, or STL for short. It provides generic versions of the most commonly used algorithms and data structures. If you want to use STL effectively, you will need a solid understanding of template classes and their syntax.
// Simple generic linked list class.#include <iostream>using namespace std;
template <class data_t> class list {data_t data;list *next;
public:list(data_t d);
void add(list *node) { node- >next = this; next =0 }list *getnext( ) { return next; }data_t getdata( ) { return data; }};
template <data_t> list<data_t>::list(data_t d) {data = d;next = 0;
any type of data. The compiler will automatically generate the correct type ofobject based upon the type you specify when the object is created.
The general form of a generic class declaration is as shown
template <class Ttype> class class-name {...};
}
int main( ) {list<char> start('a'); list<char> *p, *last; int i;
// build a listlast = &start;for (i=0; i<26; i++) {

C++ programming 72
p = new list<char> ('a'+ i);p- >add(last);last = p;
}
// follow the listp = &start;while (p) {
cout << p- >getdata( );p = p- >getnext( );
}return 0;
}
As you can see, the actual type of data stored by the list is generic in the class declaration. It is not until an object of the list is declared that the actual data type is determined. In this example, objects and pointers are created inside main( ), that specify that the data type of the list will be char. Pay attention to this declaration
list<char> start('a');
Note how the desired type is passed inside angle brackets. You could create another object that stores integers by using:
list<int> start(1);
You could also use list to store data types that you create. For example, to store address information, you could use this structure:
struct addr { char name[40]; char street[40]; char city[40];char postcode[40];
}
Then to use list to generate objects that will store objects of type addr, use a declaration like this (assuming that structvar contains a valid addr structure):
list<addr> obj(structvar);
Here is another example, the stack class is a template class. It can be used to store any type of object. In the example a character stack and a floating-point stack are created.
#include <iostream>
using namespace std;
#define SIZE 10
// Create a generic stack classtemplate <class StackType> class stack {
StackType stck[SIZE];// hold the stackint tos; // index of top of stack
public:void init( ) { tos = 0; } // initialise stackvoid push(StackType ch); // push object on stackStackType pop( ); // pop object from stack
};
// Push an objecttemplate <class StackType>void stack<StackType>::push(StackType ob) {
if (tos==SIZE) {cout << "Stack is full\n";return;
}stck[tos] = ob;tos++;
}
// Pop an objecttemplate <StackType>StackType stack<StackType>::pop( ) {
if (tos==0) {cout << "Stack is empty\n";return O; // return null on empty stack
}tos--;return stck[tos];
}
int main( ) {// Demonstrate character stackstack <char> s1, s2; // create two stacksint i;
// initialise the stackss1.init( );s2.init( );
s1.push('a'); s2.push('x'); s1.push('b'); s2.push('y'); s1.push('c');
C++ programming 73
s2.push('z');
for (i=0; i<3; i++)cout << "Pop s1: " << s1.pop( ) << "\n";
for (i=0; i<3; i++)cout << "Pop s2: " << s2.pop( ) << "\n";
// demonstrate double stacksstack<double> ds1, ds2;
// initialise stacks ds1.init( ); ds2.init( );
ds1.push(1.1); ds2.push(2.2); ds1.push(3.3); ds2.push(4.4); ds1.push(5.5); ds2.push(6.6);
for (i=0; i<3; i++)cout << "Pop ds1: " << ds1.pop( ) << "\n";
for (i=0; i<3; i++)cout << "Pop ds2: " << ds2.pop( ) << "\n";
return 0;}
As generic functions, a template class can have more than one generic data type. Simply declare all the data types required by the class in a comma-separated list within the template specification.
ob1.show( ); // show int, doubleob2.show( ); // show char, char *
return 0;}
For both cases, the compiler automatically generates the appropriate data and functions to accommodate the way the objects are created.
Exception handlingC++ provides a build-in error handling mechanism that is called exception handling. Using exception handling, you can more easily manage and respond to run-time errors. C++ exception handling is built upon three keywords: try, catch and throw. In the most general terms, program statements that you want to monitor for exceptions are contained in a try block. If an exception (i.e. an error) occurs within the try block, it is thrown (using throw). The exception is caught, using catch, and processed.
As stated, any statement that throws an exception must have been executed from within a try block (a function called from within a try block can also throw exception.) Any exception must be caught by a catch statement that immediately follows the try statement that throws the exception. The general form if try and catch are as shown:
try {// try block
}catch(type1 arg) {
// catch block
// This example uses two generic data type// in a class definition#include <iostream>using namespace std;
template <class Type1, class Type1> class myclass { Type1 i;Type2 j;
public:myclass(Type1 a, Type2 b) { i = a; j = b; }void show( ) { cout << i << " " << j << "\n";
};
int main( ) {myclass<int, double> ob1(10, 0.23);myclass<char, char *> ob2('X', "This a test");
}catch(type2 arg) {
// catch block}...catch(typeN arg) {
// catch block}
The try block must contain the portion of your program that you want to monitor for errors. This can be as specific as monitoring a few statements within one function or as all encompassing as enclosing the main( ) function code within the try block (which effectively causes the entire program to be monitored).
When an exception is thrown, it is caught by its corresponding catch statement, which processes the exception. There can be more than one catch statement

C++ programming 74
associated with a try. The catch statement that is used is determined by the type of the exception. That is, if the data type specified by a catch, matches that of the exception, that catch statement is executed (all other are bypassed). When an exception is caught, arg will receive its value. If you don't need access to the exception itself, specify only type in the catch clause (arg is optional). Any type of data can be caught, including classes that you create. In fact, class types are frequently used as exceptions.
The general form of a throw statement is
throw exception;
throw must be executed either from within the try block or from any function that the code within the block calls (directly or indirectly). exception is the value thrown.
If you throw an exception for which there is no applicable catch statement, an abnormal program termination might occur. If your compiler complies with Standard C++, throwing an unhandled exception causes the standard library function terminate( ) to be invoked. By default, terminate( ) calls abort( ) to stop your program, but you can specify your own termination handler, if you like. You will need to refer to your compiler's library reference for details.
// A simple exception handling example#include <iostream>using namespace std;
int main( ) {cout << "Start\n";
try { // start a try blockcout << "Inside try block\n";throw 10; // throw an errorcout << "This will not execute\n";
}
catch( int i) { // catch an errorcout << "Caught One! Number is: ";cout << i << "\n";
}
cout << "end";return 0;
}
startInside try blockCaught One! Number is: 10end
As you can see, once an exception has been thrown, control passes to the catch expression and the try block is terminated. That is catch is not called. Rather, program execution is transferred to it. (The stack is automatically reset as needed to accomplish this) Thus, the cout statement following the throw will never execute.
After the catch statement executes, program control continues with the statements following the catch. Often, however, a catch block will end with a call to exit( ) or abort( ), or some other function that causes program termination because exception handling is frequently used to handle catastrophic errors.Remember that the type of the exception must match the type specified in a catchstatement.
An exception can be thrown from a statement that is outside the try block as long as the statement is within a function that is called from within the try block.
// Throwing an exception from a function outside// the try block#include <iostream>using namespace std;
void Xtest(int test) {cout << "Inside Xtest, test is: " << test << \n";if (test) throw test;
}
int main( ) {cout << "start\n";
try { // start a try blockcout << "Inside try block\n"; Xtest(0);Xtest(1);Xtest(2);
}
catch (int i) { // catch an errorcout << "Caught one! Number is: ";cout << i << "\n";
}This program displays the following:
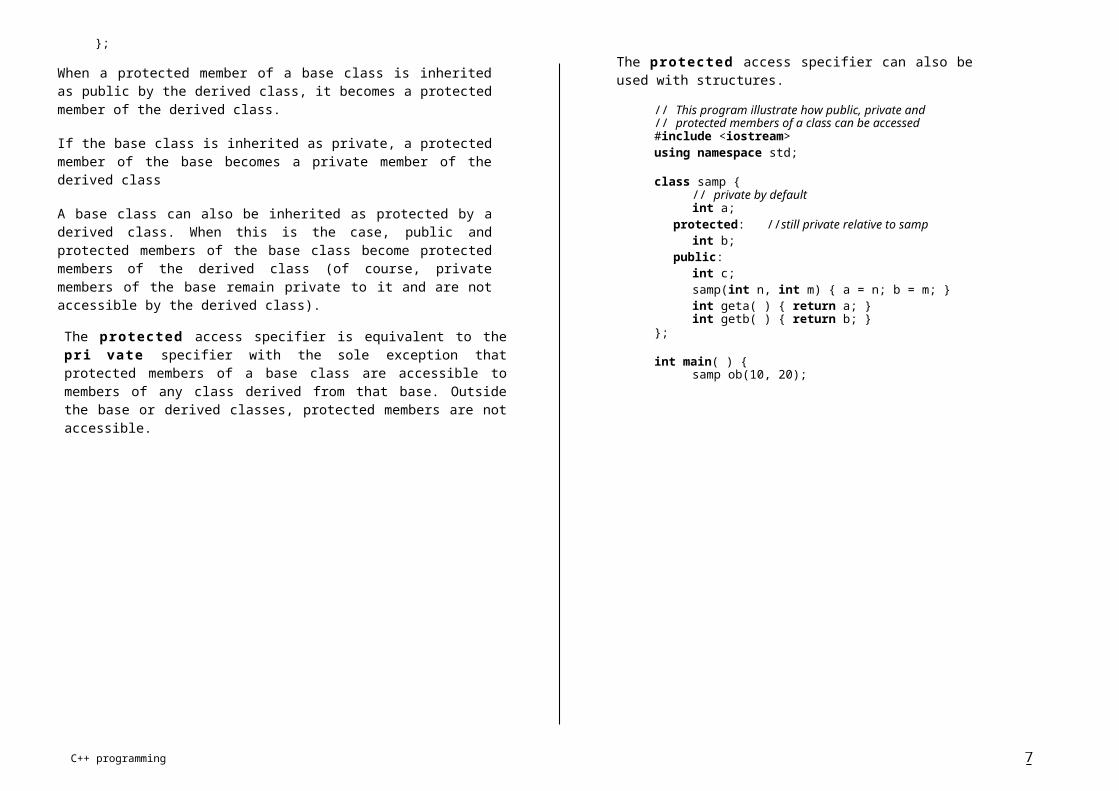
C++ programming 75
cout << "end";return 0;
}
This program displays:
startInside try blockInside Xtest, test is: 0Inside Xtest, test is: 1Caught one! Number is: 1end
A try block can be localised in a function. When this is the case, each time the function is entered, the exception handling relative to that function is reset. Here is an example:
#include <iostream>using namespace std;
// A try/catch can be handle inside a function// other than main( ).void Xhandler(int test) {
try {if (test) throw test;
}catch(int i) {
cout << "Caught one! Ex. #: " << i << "\n";}
}int main( ) {
cout << "start";
Xhandler(1); Xhandler(2); Xhandler(0); Xhandler(3);
cout << "end";return 0;
}
This program displays:
startCaught one! Ex. #: 1Caught one! Ex. #: 2Caught one! Ex. #: 3end
As you can see, three exceptions are thrown. After each exception, the function returns. When the function is called again, the exception handling is reset.
As stated before, you can have more than one catch associated with a try. In fact, it is common to do so. However each catch must catch a different type of exception. For example,
#include <iostream>using namespace std;
// Different type of exception can be caught.void Xhandler(int test) {
try {if (test) throw test;
else throw "Value is zero";}catch(int i) {
cout << "Caught one! Ex. #: " << i << "\n";}catch(char *str) {
cout << "Caught a string: " << str << "\n";}
}int main( ) {
cout << "start";
Xhandler(1); Xhandler(2); Xhandler(0); Xhandler(3);
cout << "end";return 0;
}
This program displays:
startCaught one! Ex. #: 1Caught one! Ex. #: 2Caught one! Ex. #: 3end
More about exception handlingIn some circumstances you will want an exception handler to catch all exceptions instead of just a certain type. Simply use this form of catch:
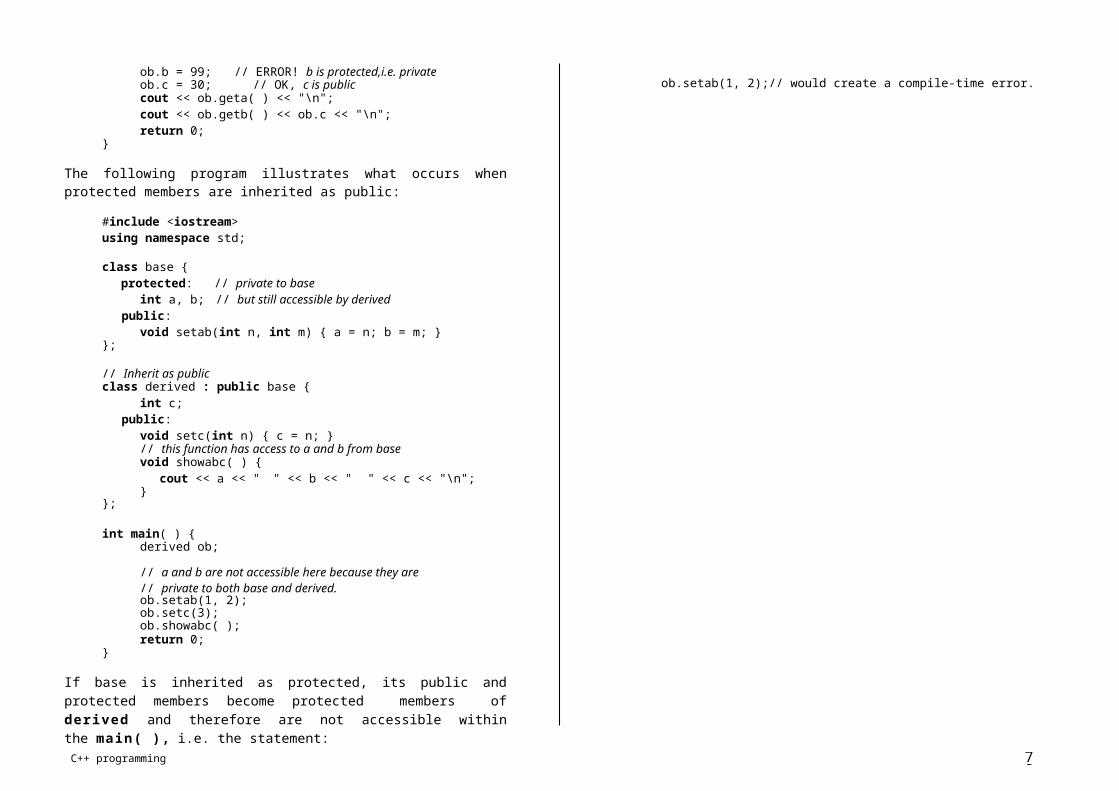
C++ programming 76
catch(...) {// process all exception
}
Also, you can control what type of exceptions a function can throw outside itself. In fact, you can also prevent a function from throwing any exceptions whatsoever. To apply these restrictions, you must add a throw clause to the function definition. The general form is as follows,
ret-type-func-name(arg-list) throw(type-list){
// ....}
Here only those data types contained in the comma-separated list type-list may bethrown by the function. Throwing any other type of expression will cause the program termination. If you don't want a function to be able to throw any exceptions, use an empty list.
If your compiler complies with Standard C++, when a function attempts to throw a disallowed exception the standard library function unexpected( ) is called. By default, this causes the terminate( ) function to be called, which causes abnormal program termination. However, you can specify your own termination handler, if you like. You will need to refer to your compiler documentation for directions.
If you wish to rethrow an exception from within an exception handler, you can do
Xhandler(1); Xhandler(2); cout << "end"; return 0;
}
This program displays:
startCaught one!Caught one!Caught one!end
One very good use for catch(...) is as last catch of a cluster of catches.
// Uses catch(...) as default#include <iostream>using namespace std;
void Xhandler(int test) {try {
if (test==0) throw test; // throw int if (test==1) throw 'a'; // throw char if (test==2) throw 123.23;// throw double
}
catch(int i) { // catch an int exceptioncout << "Caught " << i << "\n";
so by simply calling thrown, by itself, with no exception. This causes the currentexception to be passed on to an outer try/catch sequence.
}catch(...) { // catch all other exceptions
cout << "Caught one!\n";// Catches all exceptions }#include <iostream> }using namespace std;
void Xhandler(int test) {try {
if (test==0) throw test; // throw int if (test==1) throw 'a'; // throw char if (test==2) throw 123.23;// throw double
}catch(...) { // catch all exceptions
cout << "Caught one!\n";}
int main( ) {cout << "start\n";
Xhandler(0); Xhandler(1); Xhandler(2); cout << "end"; return 0;
}
This program displays:}int main( ) {
cout << "start\n";
Xhandler(0);
startCaught 0Caught one!Caught one!

C++ programming 77
Caught one!end
The following program shows how to restrict the types of exceptions that can be thrown from a function:
// Restricting function throw types#include <iostream>using namespace std;
// can only throw ints, chars and doublesvoid Xhandler(int test) throw(int, char, double) {
if (test==0) throw test; // throw int if (test==1) throw 'a'; // throw char if (test==2) throw 123.23;// throw double
}
int main( ) {cout << "start\n";
try {Xhandler(0); // also try passing 1 and
// 2 to Xhandler( )}catch(int i) {
cout << "Caught int\n";
throw "hello"; // throw char *catch(char *) { // catch a char *
cout << "Caught char * inside Xhandler\n";throw ; // rethrow char * out of function
}}
int main( ) {cout << "start\n";
try {Xhandler( );
}catch(char *) {
cout << "Caught char * inside main\n";}cout << "end";return 0;
}
This program displays:
startCaught char * inside XhandlerCaught char * inside mainend
}catch(char c) {
cout << "Caught char\n"; Handling exceptions thrown by new}catch(double c) {
cout << "Caught double\n";}cout << "end";return 0;
}
Finally, here is an example of rethrowing an exception. An exception can only be rethrown from within a catch block. When you rethrow an exception, it will not be recaught by the same catch statement. It will propagate to an outer catch statement.
// Rethrowing an exception#include <iostream>using namespace std;
void Xhandler( ) {try {
As you know, the modern specification for the new operator states that it will throw an exception of an allocation request fails.
In Standard C++, when an allocation request is not honoured, new throws a bad_alloc exception. If you don't catch this exception, your program will be terminated. Although this behaviour is fine for short sample program, in real applications you must catch this exception and process it in some rational manner. To have access to this exception, you must include the header <new> in your program.
Note that originally this exception was called xalloc, and many old compilers still use the older name. However, bad_alloc is the name specified by Standard C++, and it is the name that will be used in future.
In Standard C++, it is also possible to have new return null instead of throwing an exception when an allocation failure occurs. This form of new is most useful when you are compiling older code with a modern C++ compiler. It is also

C++ programming 78
valuable when you are replacing calls to malloc( ) with new. This form of new is shown here:
p-var = new(nothrow) type;
Here p-var is a pointer variable of type. The nothrow from new works like the original version of new, from years ago. Since, it returns null on failure, it can be'dropped into' older code and you won't have to add exception handling.However, for new code, exceptions provide a better alternative.
// Example of new that uses a try/catch to// monitor for allocation failure#include <iostream>#include <new>using namespace std;
int main( ) {int *p;
p = new double(100000);}catch (bad_alloc xa) {
cout << "Allocation failure\n";return 1;
}cout << "Allocation OK.\n";
} while (p);
return 0;}
The following program shows how to use the new(nothrow) alternative.
// Demonstrate the new(nothrow) alternative and// force a failure#include <iostream>#include <new>using namespace std;
try {
}p = new int; // allocate memory for int
int main( ) {int *p;
catch (bad_alloc xa) {cout << "Allocation failure\n";return 1;
}for (*p=0; *p<10; (*p)++)
cout << *p << " ";
delete p; // free memoryreturn 0;
}
// this will eventually run out of memorydo {
p = new(nothrow) double(100000);if (p) cout << "Allocation OK.\n";
else cout << "Allocation Error.\n";} while (p);
return 0;}
Since the the above program is unlikely to fail under normal circumstances, the following program forces an allocation failure. It does this by allocating memory until it is exhausted.
// Force an allocation failure#include <iostream>#include <new>using namespace std;
int main( ) {int *p;
// this will eventually run out of memorydo {
As shown here, when you use nothrow approach, you must check the pointer returned by new after each allocation request.
try {