build your own ruby on rails web applications
TRANSCRIPT
Summary of ContentsPreface ........................................................................................................ xi1. Introducing Ruby on Rails ........................................................................ 12. Getting Started ...................................................................................... 153. Introducing Ruby ................................................................................... 514. Rails Revealed ........................................................................................ 895. Models, Views, and Controllers ............................................................ 1176. Helpers, Forms, and Layouts ................................................................ 1497. Ajax and Web 2.0 ................................................................................. 1858. Protective Measures ............................................................................. 2339. Advanced Topics .................................................................................. 28110. Rails Plugins ...................................................................................... 32311. Debugging, Testing, and Benchmarking .............................................. 34712. Deployment and Production Use ........................................................ 377Index ....................................................................................................... 403

Build Your Own Ruby On RailsWeb Applications
by Patrick Lenz

Build Your Own Ruby On Rails Web Applicationsby Patrick Lenz
Copyright © 2007 SitePoint Pty. Ltd.
Editor: Georgina LaidlawExpert Reviewer: Luke RedpathIndex Editor: Max McMasterManaging Editor: Simon MackieCover Design: Alex WalkerTechnical Editor: Matthew Magain
Technical Director: Kevin YankPrinting History:
First Edition: January 2007
Notice of Rights
All rights reserved. No part of this book may be reproduced, stored in a retrieval system or transmittedin any form or by any means, without the prior written permission of the publisher, except in thecase of brief quotations embedded in critical articles or reviews.
Notice of Liability
The author and publisher have made every effort to ensure the accuracy of the information herein.However, the information contained in this book is sold without warranty, either express or implied.Neither the authors and SitePoint Pty. Ltd., nor its dealers or distributors will be held liable for anydamages to be caused either directly or indirectly by the instructions contained in this book, or bythe software or hardware products described herein.
Trademark Notice
Rather than indicating every occurrence of a trademarked name as such, this book uses the namesonly in an editorial fashion and to the benefit of the trademark owner with no intention of infringe-ment of the trademark.
Published by SitePoint Pty. Ltd.
424 Smith Street CollingwoodVIC Australia 3066
Web: www.sitepoint.comEmail: [email protected]
ISBN 978-0-9758419-5-2Printed and bound in the United States of America

About the Author
Patrick Lenz has been developing web applications for ten years. Founder and lead de-veloper of the freshmeat.net software portal, he and his Rails consultancy and applicationdevelopment company, limited overload,1 were responsible for a major relaunch of eins.de,Germany’s biggest infotainment community, which is now one of the most popular Rubyon Rails sites in Europe.
Patrick lives in Wiesbaden, Germany, with his wife Alice and his daughter Gwendolyn.
When not working in front of a computer, he can often be seen with a camera in his hand,either taking artsy pictures or documenting the progress of his baby girl conquering theworld.2 He also enjoys cars, music, and extended weekend brunches with friends.
His weblog can be found at http://poocs.net/.
About the Expert Reviewer
Luke Redpath is a programmer with over seven years’ experience in the web design anddevelopment field. A recovering PHP and ASP developer, Luke has been using Ruby andRails professionally for nearly two years and has released and contributed to several Rubylibraries and Rails plugins, including UJS—the Rails unobtrusive JavaScript plugin.3 Hecurrently resides in North London, UK with his long-term partner Julie.
About the Technical Editor
Before joining the SitePoint team as a technical editor, Matthew Magain worked as asoftware developer for IBM and also spent several years teaching English in Japan. He isthe organizer for Melbourne’s Web Standards Group,4 and enjoys swimming, listeningto classical jazz, and drinking Coopers Pale Ale, though not all at the same time. Matthewlives with his wife Kimberley and their daughter Sophia.
About the Technical Director
As Technical Director for SitePoint, Kevin Yank oversees all of its technical publica-tions—books, articles, newsletters, and blogs. He has written over 50 articles for SitePoint,but is best known for his book, Build Your Own Database Driven Website Using PHP &MySQL.5 Kevin lives in Melbourne, Australia, and enjoys performing improvised comedytheater and flying light aircraft.
1 http://limited-overload.de/2 His pictures are regularly published to Flickr and are available at http://flickr.com/photos/scoop/3 http://www.ujs4rails.com/4 http://webstandardsgroup.org/5 http://www.sitepoint.com/books/phpmysql1/

About SitePoint
SitePoint specializes in publishing fun, practical, and easy-to-understand content for webprofessionals. Visit http://www.sitepoint.com/ to access our books, newsletters, articles,and community forums.

To my daughter Gwendolynand my wife Alice.


Table of ContentsPreface ..................................................................................................... xi
Who Should Read this Book? .............................................................. xiWhat you’ll Learn .............................................................................. xiiWhat’s in this Book? .......................................................................... xiiThe Book’s Web Site ......................................................................... xiv
The Code Archive ...................................................................... xivUpdates and Errata .................................................................... xiv
The SitePoint Forums ......................................................................... xvThe SitePoint Newsletters ................................................................... xvYour Feedback .................................................................................... xvAcknowledgements ............................................................................. xv
1. Introducing Ruby on Rails ...................................................................... 1History ................................................................................................ 3Development Principles ........................................................................ 5
Convention Over Configuration ................................................... 5Don’t Repeat Yourself .................................................................. 7Agile Development ....................................................................... 7
Building the Example Web Application ................................................. 9What is digg? ............................................................................... 9Features of the Example Application ........................................... 11
Summary ........................................................................................... 13
2. Getting Started .................................................................................... 15What Does All this Cost? ................................................................... 16Installing on Windows ....................................................................... 17Installing on Mac OS X ...................................................................... 19
Mac OS X 10.5 (Leopard) .......................................................... 20Mac OS X 10.4 (Tiger) and Earlier ............................................. 20
Installing on Linux ............................................................................. 31Using a Package Manager ........................................................... 31Prerequisites .............................................................................. 32Installing Ruby on Linux ............................................................ 33Installing RubyGems on Linux ................................................... 34Installing Rails on Linux ............................................................. 35Installing MySQL on Linux ........................................................ 36
Building a Foundation ........................................................................ 40One Directory Structure to Rule them All ................................... 40Creating the Standard Directory Structure ................................. 41
Starting our Application ..................................................................... 43

Which Text Editor? ............................................................................ 45Windows Text Editors ................................................................ 46Mac OS X Text Editors ............................................................... 47Linux and Cross-platform Editors ............................................... 49
Summary ........................................................................................... 49
3. Introducing Ruby ................................................................................. 51Ruby is a Scripting Language .............................................................. 51
Compiled Languages .................................................................. 52Scripting Languages ................................................................... 52The Great Performance Debate .................................................. 52
Ruby is an Object Oriented Language ................................................. 53Reading and Writing Ruby Code ........................................................ 57
The Interactive Ruby Shell (irb) ................................................. 57Interacting with Ruby Objects .................................................... 58Punctuation in Ruby .................................................................. 60
Object Oriented Programming in Ruby ............................................... 63Classes and Objects .................................................................... 63Object-level Functionality ........................................................... 64Class-level Functionality ............................................................. 67Inheritance ................................................................................ 69Return Values ............................................................................. 70
Standard Output ................................................................................ 71Ruby Core Classes .............................................................................. 72
Arrays ........................................................................................ 72Hashes ....................................................................................... 74Strings ....................................................................................... 75Numerics ................................................................................... 77Symbols ..................................................................................... 78nil .............................................................................................. 78
Running Ruby Files ............................................................................ 79Control Structures ............................................................................. 79
Conditionals .............................................................................. 80Loops ........................................................................................ 83Blocks ........................................................................................ 85
Summary ........................................................................................... 87
4. Rails Revealed ..................................................................................... 89Three Environments ........................................................................... 89Database Configuration ..................................................................... 91
The Database Configuration File ................................................ 91Creating the Databases .............................................................. 93
iv
Build Your Own Ruby On Rails Web Applications

The Model-view-controller Architecture .............................................. 94MVC in Theory ......................................................................... 95MVC the Rails Way ................................................................... 96ActiveRecord (the Model) ......................................................... 97The ActionPack Module .......................................................... 103
Code Generation .............................................................................. 107ActionMailer .................................................................................... 109Testing and Debugging ..................................................................... 109
Testing ..................................................................................... 109Debugging ............................................................................... 110
A GUI Tool for MySQL .................................................................... 111Summary ......................................................................................... 114
5. Models, Views, and Controllers .......................................................... 117Generating a Model ......................................................................... 117
The Model Generator ............................................................... 117Modifying the Schema Using Migrations .................................. 122Managing Data Using the Rails Console ................................... 127Where’s the SQL? .................................................................... 132
Generating a Controller .................................................................... 134Running the generate Script ................................................... 134Understanding the Output ....................................................... 136Starting our Application … Again ............................................. 137
Creating a View ................................................................................ 139Generating Views with Scaffolding ........................................... 139Creating Static Pages ................................................................ 142Creating Dynamic Pages ........................................................... 142Passing Data Back and Forth .................................................... 143Pulling in a Model .................................................................... 144
Summary ......................................................................................... 146
6. Helpers, Forms, and Layouts .............................................................. 149Calling Upon our Trusty Helpers ...................................................... 149Story Submission ............................................................................. 150
Creating a Form ....................................................................... 151Saving Data to the Database .................................................... 156Creating a Layout .................................................................... 158User Feedback and the Flash .................................................... 161
Testing the Form .............................................................................. 167Testing the Model .................................................................... 168Testing the Controller ............................................................... 173Revisiting the Logs ................................................................... 181
v

Summary ......................................................................................... 183
7. Ajax and Web 2.0 .............................................................................. 185Generating a Vote Model ................................................................. 185
Creating the Model .................................................................. 186Creating the Migration ............................................................. 186Applying the Migration ............................................................ 187
An Introduction to Relationships ...................................................... 188Introducing the has_many Clause .............................................. 188Introducing the belongs_to Clause .......................................... 191How’s our Schema Looking? .................................................... 192
Clean URLs and Permalinks ............................................................. 193Implementing Clean URLs ....................................................... 193Adding Permalinks to Stories .................................................... 196Showing off our Stories ............................................................ 198
Ajax and Rails .................................................................................. 201What is Ajax? .......................................................................... 202Remote Scripting with Prototype .............................................. 203Visual Effects with script.aculo.us ............................................. 203Making Stories Shove-able ....................................................... 205
Introducing Partials .......................................................................... 215Adding Voting History ............................................................. 216Creating the Partial .................................................................. 217Styling the Voting History ........................................................ 217Tweaking the Voting History .................................................... 220
Testing the Voting Functionality ....................................................... 222Testing the Model .................................................................... 222Testing the Controller ............................................................... 226Running the Full Test Suite ...................................................... 231
Summary ......................................................................................... 232
8. Protective Measures .......................................................................... 233Sessions and Cookies ....................................................................... 233
Identifying Individual Users ..................................................... 234What’s a Cookie? ..................................................................... 234What’s a Session? .................................................................... 236Sessions in Rails ....................................................................... 237
Modeling the User ........................................................................... 238Generating a User Model ......................................................... 238Adding Relationships for the User Class ................................... 240Creating a User ........................................................................ 241
Developing Login Functionality ........................................................ 242
vi
Build Your Own Ruby On Rails Web Applications

Creating the Controller ............................................................ 242Creating the View .................................................................... 243Adding Functionality to the Controller ..................................... 245
Filters .............................................................................................. 247Before Filters ............................................................................ 247After Filters .............................................................................. 248Around Filters .......................................................................... 248A Word on Filter Methods ........................................................ 248
Managing User Logins ...................................................................... 250Retrieving the Current User ..................................................... 250Displaying the Name of the Current User ................................. 252Allowing Users to Log Out ....................................................... 254
Adding a Navigation Menu .............................................................. 255Restricting the Application ............................................................... 257
Protecting the Form ................................................................. 257Restricting Access to Story Submission ..................................... 259Associating Stories with Users .................................................. 261
Testing User Authentication ............................................................. 263Testing the Model .................................................................... 263Testing the Controllers ............................................................. 268
Summary ......................................................................................... 279
9. Advanced Topics ................................................................................ 281Promoting Popular Stories ................................................................ 281
Using a Counter Cache ............................................................ 282Implementing the Front Page .................................................... 285Implementing the Voting Bin ................................................... 289Abstracting Presentation Logic ................................................. 292Requiring that Users Log In to Vote .......................................... 296Adding Story Attributes ........................................................... 298
Auto-generating Permalinks .............................................................. 300Introducing Model Callbacks .................................................... 300Adding a Callback .................................................................... 302
Expanding the Submission Form ...................................................... 303Adding User Pages ............................................................................ 305
Introducing the Join Model Relationship .................................. 306Introducing the has_many :through Association ...................... 306Modifying the Controller ......................................................... 307Creating the View .................................................................... 308
Testing the New Functionality .......................................................... 310Testing the Model .................................................................... 310Testing the StoryController ...................................................... 315
vii

Testing the AccountController .................................................. 320Running the Complete Test Suite ............................................. 321
Summary ......................................................................................... 321
10. Rails Plugins .................................................................................... 323What is a Plugin? ............................................................................. 323Adding Tagging to Shovell ................................................................ 325
Introducing the acts_as_taggable Plugin ................................ 326Enabling Tag Submission .......................................................... 333Enabling Tag Display ................................................................ 335Assigning our First Tags ............................................................ 337Viewing Stories by Tag ............................................................. 339
Testing the Tagging Functionality ..................................................... 340Testing the Model .................................................................... 341Testing the Controller ............................................................... 342Running the Test Suite ... Again! .............................................. 345
Summary ......................................................................................... 346
11. Debugging, Testing, and Benchmarking ........................................... 347Debugging your Application ............................................................. 347
Debugging within Templates .................................................... 348Debugging Using Breakpoints .................................................. 355Using the Rails Logging Tool .................................................... 360Overcoming Problems in Debugging ......................................... 363
Testing your Application .................................................................. 363Integration Tests ...................................................................... 363Using Breakpoints in a Test ...................................................... 366Revisiting the Rails Console ..................................................... 369
Benchmarking your Application ....................................................... 371Taking Benchmarks from Log Files ........................................... 372Manual Benchmarking ............................................................. 375
Summary ......................................................................................... 376
12. Deployment and Production Use ...................................................... 377The Implications of “Production” ..................................................... 377Choosing a Production Environment ................................................ 379
Web Server Options ................................................................. 380Back-end Options .................................................................... 382
Deploying Shovell ............................................................................ 384Step 1: Installing Mongrel ........................................................ 384Step 2: Moving to the Production System ................................. 387Step 3: Setting Up Apache ....................................................... 393
Alternatives for Session Storage ........................................................ 395
viii
Build Your Own Ruby On Rails Web Applications

The ActiveRecord Store Session Container ............................ 396The MemCached Store Session Container ................................. 397
Further Reading ............................................................................... 398Caching ................................................................................... 398Version Control and Deployment Management ........................ 399Errors by Email ........................................................................ 400
Summary ......................................................................................... 400Index ....................................................................................................... 403
ix

x

PrefaceRuby on Rails has shaken up the web development industry in a huge way—es-pecially when you consider that version 1.0 of Rails was only released inDecember 2005. The huge waves of enthusiasm for the new framework, originallyin weblogs and later in the more traditional media, are probably the reason whythis book is in your hands.
This book will lead you through the components that make up the Rails frame-work by building a clone of the popular story-sharing web site digg.com. Thiswill give you a chance to get your feet wet building a simple, yet comprehensiveweb application using Ruby on Rails.
Does this book cover Ajax? Absolutely! Rails has tight integration with the latestweb technologies including Ajax, as well as pretty animations, and features suchas auto-completion and in-line editing. If that’s all Greek to you, don’t worry.I’ll get you started, and by the time you finish this book, you’ll be able to discussall things Web 2.0 with your friends and coworkers, and impress your grandpar-ents with geeky vocabulary.
Who Should Read this Book?This book is intended for anyone who’s eager to learn more about Ruby on Railsin a practical sense. It’s equally well suited to design-oriented people looking tobuild web applications as it is to people who are unhappy with the range of pro-gramming languages or frameworks that they’re using, and are looking for altern-atives that bring the fun back into programming.
I don’t expect you to be an expert programmer—this isn’t a pro-level book. It’swritten specifically for beginning to intermediate web developers who, thoughthey’re familiar with HTML and CSS, aren’t necessarily fond of—or experiencedwith—any server-side technologies such as PHP or Perl.
As we go along, you’ll get an understanding of the components that make up theRuby on Rails framework, learn the basics of the Ruby programming language,and come to grips with the tools recommended for use in Ruby on Rails develop-ment. All these topics are covered within the context of building a robust applic-ation that addresses real-world problems.

In terms of software installation, I’ll cover the installation basics of Ruby, Rubyon Rails, and the MySQL database server on Mac OS X, Windows, and Linux.All you need to have pre-installed on your system are your favorite text editorand a web browser.
What you’ll LearnWeb development has never been easier, or as much fun as it is using Ruby onRails. In this book, you’ll learn to make use of the latest Web 2.0 techniques,and the concise Ruby programming language, to build interactive, databasedriven web sites that are a pleasure to build, use, and maintain.
Also, as web sites tend to evolve over time, I’ll teach you how to make sure youdon’t wreak havoc with a careless change to your application code—we’ll imple-ment automated testing facilities and learn how to debug problems that arisewithin your application.
What’s in this Book?Chapter 1: Introducing Ruby on Rails
This chapter touches on the history of the Rails framework, which—believeit or not—is actually rather interesting! I’ll explain some of the key conceptsbehind Rails and shed some light on the features that we’re planning to buildinto our example application.
Chapter 2: Getting StartedHere’s where the real action starts! In this chapter, I’ll walk you through theinstallation of the various pieces of software required to turn your Mac orPC into a powerful Ruby on Rails development machine. I’ll also show youhow to set up the database for our example application, so that you can startyour application for the first time, in all its naked glory.
Chapter 3: Introducing RubyRuby on Rails is built on the object oriented programming language Ruby,so it helps to know a bit about both object oriented programming and theRuby syntax. This chapter will give you a solid grounding in both—and ifyou’d like to get your hands dirty, you can play along at home using the in-teractive Ruby console.
xii
Preface

Chapter 4: Rails RevealedIn this chapter, we start to peel back the layers of the Rails framework. I’lltalk about the separation of environments in each of the application’s lifecycles, and introduce you to the model-view-controller architecture that formsthe basis of a Rails application’s organization. I’ll also help you to establisha database connection so that your application can begin storing and retrievingdata, and I’ll show you some GUI tools that can be used to manage yourdatabase content outside Rails.
Chapter 5: Models, Views, and ControllersIn this chapter, we’ll generate our first few lines of code. We’ll create a classfor storing data, a view for displaying the data, and a controller to handlethe interaction between the two.
Chapter 6: Helpers, Forms, and LayoutsThis chapter starts off by looking at how Rails’s built-in helpers can reducethe amount of code required to create functionality for your application. I’llshow you how to use one of the helpers to create a fully functioning form,and we’ll style the end result with some CSS so that it looks good! I’ll thenshow you how to write unit and functional tests to verify that the applicationis working as expected.
Chapter 7: Ajax and Web 2.0Let’s face it, this chapter is the reason you bought this book! Well, it won’tfail to disappoint. I’ll walk you through the steps involved in adding to ourapp some nifty effects that use Ajax to update parts of a page without reload-ing the entire page. Along the way, I’ll explain the different relationships thatyou can establish between your objects, and we’ll make sure that our applic-ation uses clean URLs.
Chapter 8: Protective MeasuresIn this chapter, I’ll show you how to keep out the bad guys by adding simpleuser authentication to our application. We’ll cover sessions and cookies, andwe’ll see first-hand how database migrations allow for the iterative evolutionof a database schema.
Chapter 9: Advanced TopicsThis chapter will give our example application a chance to shine. We’ll adda stack of functionality, and in the process, we’ll learn about model callbacksand join models.
xiii
What’s in this Book?

Chapter 10: PluginsIn this chapter, I’ll show you how to add a plugin—a component that providesfeatures that expand the functionality of your application—to the exampleapplication. We’ll also talk about some of the more advanced associationsthat are available to your models.
Chapter 11: Debugging, Testing and BenchmarkingThis chapter will cover testing and benchmarking, as well as the reasons be-hind completing comprehensive testing of all your code. We’ll also walkthrough a couple of examples that show how to debug your application whensomething goes wrong.
Chapter 12: DeploymentNow that you’ve developed a feature-packed, fully functional application,you’ll want to deploy it so that other people can use it. In this chapter, I’llintroduce you to the options available for deploying your application to aproduction server, and walk you through the steps involved in taking yourapplication to the world.
The Book’s Web SiteHead over to http://www.sitepoint.com/books/rails1/ for easy access to variousresources supporting this book.
The Code ArchiveThe code archive for this book, which can be downloaded fromhttp://www.sitepoint.com/books/rails1/archive/, contains each and every line ofexample source code that’s printed in this book. If you want to cheat (or saveyourself from carpal tunnel syndrome), go ahead and download the code to yourhard drive.
Updates and ErrataWhile everyone involved in producing a technical book like this goes to anenormous amount of effort to ensure the accuracy of its content, books tend tohave errors. Fortunately, the Corrections and Typos page located athttp://www.sitepoint.com/books/rails1/errata.php is the most current, comprehens-ive reference for spelling and code-related errors that observant readers have re-ported to us.
xiv
Preface

The SitePoint ForumsIf you have a problem understanding any of the discussion or examples in thisbook, try asking your question in the SitePoint Forums, athttp://www.sitepoint.com/forums/. There, the enthusiastic and friendly communitywill be able to help you with all things Rails.
The SitePoint NewslettersIn addition to books like this one, SitePoint publishes free email newsletters in-cluding The SitePoint Tribune and The SitePoint Tech Times. In them, you’ll readabout the latest news, product releases, trends, tips, and techniques for all aspectsof web development.
You can count on gaining some useful Rails articles and tips from these resources,but if you’re interested in learning other technologies, or aspects of web develop-ment and business, you’ll find them especially valuable. Sign up to one or moreSitePoint newsletters at http://www.sitepoint.com/newsletter/.
Your FeedbackIf you can’t find your answer through the forums, or if you wish to contact usfor any other reason, write to [email protected]. We have a well-mannedemail support system set up to track your inquiries, and if our support staffmembers are unable to answer your question, they’ll send it straight to me. Sug-gestions for improvements, as well as notices of any mistakes you may find, areespecially welcome.
AcknowledgementsThanks to SitePoint for giving me the chance to write this book. I’m pretty con-fident that the old “build a house, get a child, plant a tree” phrase could also beinterpreted as “rent a house, get a child, write a book on tree leaves,” so I’m trulygrateful for this opportunity.
In particular, thanks to Technical Editor Matthew Magain for his crisp, sharpcommentary, and Managing Editor Simon Mackie for applying an appropriatemeasure of brute force to me and my drafts—dedication that ensured that thisbook is in the best shape possible.
xv
The SitePoint Forums

To the Rails Core team, for making my developer life enjoyable again by puttingtogether this amazing framework in almost no time, and laying the foundationon which this book could be written, thank you.
Finally, thanks must go to my family, especially Alice and Gwen, for giving meso much strength, motivation, and confidence in what I’m doing. Thank you forbearing the fact that I was barely seen away from a computer for so many months.
xvi
Preface

Introducing Ruby on Rails1Though it hasn’t been long since Ruby on Rails was first released, it’s alreadybecome a household name (well, in developers’ households, anyway). Withinthat time, hundreds of thousands of developers the world over have adopted—andadored—this new framework, and I hope that, through the course of this book,you’ll come to understand the reasons why. Before we jump into writing anycode, let’s take a stroll down memory lane, as we meet Ruby on Rails and explorea little of its history.
First, what exactly is Ruby on Rails?
The short—and fairly technical—answer is that Ruby on Rails (often abbreviatedto Rails) is a full-stack web application framework, written in Ruby. However, dependingon your previous programming experience (and your mastery of techno-jargon),that answer might not make a whole lot of sense to you. Besides, the Ruby onRails movement really needs to be viewed in the context of web development ingeneral if it is to be fully appreciated.
So, let me define a few of those terms, and give you a brief history lesson alongthe way. Then we’ll tackle the question of why learning Rails is one of the smartestthings you could do for your career as a web developer.
❑ A web application is a software application that’s accessed using a webbrowser over a network. In most cases, that network is the Internet, but it

could also be a corporate intranet. A big buzz has sprung up around web ap-plications recently, due mostly to the increased availability of broadband In-ternet access and the proliferation of faster desktop machines in people’shomes. We can only assume that you’re interested in writing such a web ap-plication, because you’ve bought this book!
❑ A framework can be viewed as the foundation of a web application. It takescare of many of the low-level details that can become repetitive and boringto code, allowing the developer to focus on building the application’s function-ality.
A framework gives the developer classes that implement common functionsused in every web application, including:
❑ database abstraction (ensuring that queries work regardless of whether thedatabase is MySQL, Oracle, DB2, or something else)
❑ templating (reusing presentational code throughout the application)
❑ management of user sessions
❑ generation of “clean” URLs
A framework also defines the architecture of an application—something thatcan be useful for those of us who constantly fret over which file is best storedin which folder.
In a sense, a framework is an application that has been started for you—anda well-designed one at that. The structure, plus the code that takes care ofthe boring stuff, has already been written, and it’s up to us to finish it off!
❑ Full-stack refers to the extent of the functionality the Rails frameworkprovides. You see, there are frameworks, and then there are frameworks. Someprovide great functionality on the server, but leave you high and dry on theclient side; others are terrific at enhancing the user experience on the clientmachine, but don’t extend to the business logic and database interactions onthe server.
If you’ve ever used a framework before, chances are that you’re familiar withthe model-view-controller (MVC) architecture (if you’re not, don’t worry—we’lldiscuss it in Chapter 5). Rails covers everything in the MVC paradigm, fromdatabase abstraction to template rendering, and everything in between.
2
Chapter 1: Introducing Ruby on Rails

❑ Ruby is an open source, object oriented scripting language that YukihiroMatsumoto invented in the early 1990s. We’ll be learning both Ruby andRails as we progress through the book (remember, Rails is written in Ruby).
Ruby makes programming flexible and intuitive, and with it, we can writecode that’s readable by both humans and machines. Matsumoto clearly envi-sioned Ruby to be a programming language that would entail very littlemental overhead for humans, which is why Ruby programmers tend to behappy programmers.
What Does Ruby Look Like?
If you’re experienced in programming with other languages, such as PHPor Java, you can probably make some sense of the following Ruby code,although some parts of it may look new:
File: 01-ruby-sample.rb (excerpt)
>> "What does Ruby syntax look like?".reverse=> "?ekil kool xatnys ybuR seod tahW">> 8 * 5=> 40>> 3.times { puts "cheer!" }cheer!cheer!cheer!>> %w(one two three).each { |word| puts word.upcase }ONETWOTHREE
Don’t worry too much about the details of programming in Ruby fornow—we’ll cover all of the Ruby basics in Chapter 3.
HistoryRuby on Rails originated as an application named Basecamp,1 a hosted project-management solution created by Danish web developer David HeinemeierHansson for former design shop 37signals.2 Due largely to Basecamp’s success,37signals has since moved into application development and production, andHeinemeier Hansson has become a partner in the company.
1 http://www.basecamphq.com/2 http://www.37signals.com/
3
History

When I say “originated,” I mean that Rails wasn’t initially created as a stand-alone framework. It was extracted from a real application that was already in use,so that it could be used to build other applications that 37signals had in mind.3
Heinemeier Hansson saw the potential to make his job (and life) easier by extract-ing common functionality such as database abstraction and templating into whatlater became the first public release of Ruby on Rails.
He decided to release Rails as open source software to “fundamentally remakethe way web sites are built.”4 The first beta version of Rails was initially releasedin July 2004, with the 1.0 release following on December 13, 2005. At the timeof writing, more than 300,000 copies of Rails have been downloaded, and thatnumber is climbing.
The fact that the Rails framework was extracted from Basecamp is considered bythe lively Rails community to represent one of the framework’s inherent strengths:Rails was already solving real problems when it was released. Rails wasn’t builtin isolation, so its success wasn’t a result of developers taking the framework,building applications with it, and then finding—and resolving—its shortcomings.Rails had already proven itself to be a useful, coherent, and comprehensiveframework.
While Heinemeier Hansson pioneered Rails and still leads the Rails-related pro-gramming efforts, the framework has benefited greatly from being released asopen source software. Over time, developers working with Rails have submittedthousands of extensions and bug fixes to the Rails development repository.5 Therepository is closely guarded by the Rails core team, which consists of abouttwelve highly skilled, professional developers chosen from the crowd of contrib-utors, and led, by Heinemeier Hansson.
So, now you know what Rails is, and how it came about. But why would youinvest your precious time in learning how to use it?
I’m glad you asked.
3 Backpack [http://www.backpackit.com/], Ta-da List [http://www.tadalist.com/], Campfire[http://www.campfirenow.com/], and Writeboard [http://www.writeboard.com/] are other hosted ap-plications written in Rails by 37signals.4 http://www.wired.com/wired/archive/14.04/start.html?pg=35 The Rails repository, located at http://dev.rubyonrails.org/, is used to track bugs and enhancementrequests.
4
Chapter 1: Introducing Ruby on Rails

Development PrinciplesRails supports several software principles that make it stand out over other webdevelopment frameworks. Those principles are:
❑ convention over configuration
❑ don’t repeat yourself
❑ agile development
Because of these principles, Ruby on Rails is a framework that really does savedevelopers time and effort. Let’s look at each of those principles in turn to under-stand how.
Convention Over ConfigurationThe concept of convention over configuration refers to the fact that Rails as-sumes a number of defaults for the way one should build a typical web application.
You see, many other frameworks (such as the Java-based Struts or the Python-based Zope) require you to step through a lengthy configuration process beforeyou can get started with even the simplest of applications. The configuration in-formation is usually stored in a handful of XML files, and these files can becomequite large and cumbersome to maintain. In many cases, you’re forced to repeatthe entire configuration process whenever you start a new project.
While Rails was originally extracted from an existing application, excessive archi-tectural work went into the framework later on. Heinemeier Hansson purposelycreated Rails in such a way that it doesn’t need excessive configuration, as longas some standard conventions are followed. The result is that no lengthy config-uration files are required. In fact, if you have no need to change these defaults,Rails really only needs a single (and short) configuration file in order to run yourapplication. The file is used to establish a database connection: it supplies Railswith the necessary database server type, server name, user name, and passwordfor each environment, and that’s it. An example of a configuration file is shownon the following page. (We’ll talk more about the contents of this configurationfile in Chapter 4.)
5
Development Principles

Other conventions that are prescribed by Rails include the naming of database-related items, and the process by which controllers find their correspondingmodels and views.
File: 02-database.yml
development: adapter: mysql database: rails_development username: root password: host: localhosttest: adapter: mysql database: rails_test username: root password: host: localhostproduction: adapter: mysql database: rails_production username: root password: host: localhost
Controllers? Models? Views? Huh?
Model-view-controller (MVC) is a software architecture (also referred toas a design pattern) that separates an application’s data model (model), userinterface (view), and control logic (controller) into three distinct components.
Here’s an example: when your browser requests a web page from an MVC-architected application, it’s talking exclusively to the controller. The controllergathers the required data from one or more models and renders the responseto your request through a view. This separation of components means thatany change that’s made to one component has a minimal effect on the othertwo.
We’ll talk at length about the MVC architecture and the benefits it yieldsto Rails applications in Chapter 5.
Rails is also considered to be opinionated software, a term that has been coined torefer to software that isn’t everything to everyone. Heinemeier Hansson and hiscore team ruthlessly reject contributions to the framework that don’t complywith their vision of where Rails is headed, or aren’t sufficiently applicable to beuseful for the majority of Rails developers. This is a good way to fight a phenomen-
6
Chapter 1: Introducing Ruby on Rails

on that is known among software developers as bloat—the tendency for a softwarepackage to implement extraneous features just for the sake of including them.
Don’t Repeat YourselfRails supports the principles of DRY (Don’t Repeat Yourself) programming.When you decide to change the behavior of an application that’s based on theDRY principle, you shouldn’t need to modify application code in more than oneauthoritative location.
While this might sound complicated at first, it’s actually pretty simple. For ex-ample, instead of copying and pasting code with a similar or even identicalfunctionality, you develop your application in such a way that this functionalityis stored once, in a central location, and is referenced from each portion of theapplication that needs to use it. This way, if the original behavior needs to change,you need only make modifications in one location, rather than in various placesthroughout your application (some of which you may easily overlook).
One example of how Rails supports the DRY principle is that, unlike Java, itdoesn’t force you to repeat your database schema definition within your applic-ation.6 Rails considers your database to be the authoritative source of informationabout data storage, and is clever enough to ask the database for any informationit might need to ensure that it treats your data correctly.
Rails also adheres to the DRY principle when it comes to implementing cutting-edge techniques such as Ajax (Asynchronous JavaScript and XML). Ajax is anapproach that allows your web application to replace content in the user’s browserdynamically, or to exchange form data with the server without reloading the page.Developers often find themselves duplicating code while creating Ajax applications:after all, the web site should function in browsers that don’t support Ajax, as wellas those that do, and the code required to display the results to both types ofbrowser is, for the most part, identical. Rails makes it easy to treat each browsergeneration appropriately without duplicating any code.
Agile DevelopmentMore traditional approaches to software development (such as iterative develop-ment and the waterfall model) usually attempt to sketch out a long-running and
6 A database schema definition describes how the storage of an application’s data is structured. Thinkof it as a number of spreadsheets, each of which contains rows and columns that define the variouspieces of data, and identify where each data item is stored.
7
Don’t Repeat Yourself
rather static plan for an application’s goals and needs using predictive methods.These development models usually approach applications from the bottom-up(that is, by working on the data first).
In contrast, Agile development methods use an adaptive approach. Small teams(typically consisting of fewer than ten developers) iteratively complete small unitsof the project. Before starting an iteration, the team re-evaluates the prioritiesfor the application that’s being built (these priorities may have shifted duringthe previous iteration, so they may need adjustment). Agile developers also archi-tect their applications from the top-down, starting with the design (which maybe as simple as a sketch of the interface on a sheet of paper).
When an application is built using Agile methods, it’s less likely to veer out ofcontrol during the development cycle, due to the ongoing efforts of the team toadjust priorities. By spending less time creating functional specifications andlong-running schedules, developers using Agile methodologies can really jump-start an application’s development.
Here are a few examples that illustrate how Rails lends itself to Agile developmentpractices:
❑ You can start to work on the layout of your Rails application before makingany decisions about data storage (even though these decisions might changeat a later stage). You don’t have to repeat this layout work when you startadding functionality to your screen designs—everything evolves dynamicallywith your requirements.
❑ Unlike code written in C or Java, Rails applications don’t need to go througha compilation step in order to be executable. Ruby code is interpreted on thefly, so it doesn’t need any form of binary compilation to make it executable.Changing code during development provides developers with immediatefeedback, which can significantly boost the speed of application development.
❑ Rails provides a comprehensive framework for the automated testing of ap-plication code. Developers who make use of this testing framework can beconfident that they’re not causing functionality to break when they changeexisting code—even if they weren’t the ones who originally developed it.
❑ Refactoring (rewriting code with an emphasis on optimization) existing Railsapplication code to better cope with changed priorities, or to implement newfeatures for a development project, can be done much more easily when de-velopers adhere to the DRY principles we discussed above. This is because far
8
Chapter 1: Introducing Ruby on Rails
fewer changes are required when a certain functionality is implemented justonce, and is then reused elsewhere as required.
If your head is spinning from trying to digest these principles, don’t worry—we’regoing to reinforce them continually throughout this book, as we step throughbuilding our very own web application in Ruby on Rails!
Building the Example Web ApplicationAs you read this book, I expect you’ll be itching to put the techniques we discussinto practice. For this reason, I’ve planned a fully functional web application thatwe’ll build together through the ensuing chapters. The key concepts, approaches,and methodologies we’ll discuss will have a role to play in the sample application,and we’ll implement them progressively as your skills improve over the course ofthis book.
The application we’ll build will be a functional clone of the popular story-sharingweb site, digg.com, and I’ve included all necessary files for this application in thisbook’s code archive.
What is digg?digg.com (or just “digg”) describes itself as follows:7
Digg is a user-driven social content web site. OK, so what theheck does that mean? Well, everything on digg is submitted bythe digg user community (that would be you). After you submitcontent, other digg users read your submission and digg whatthey like best.
If your story rocks and receives enough diggs, it is promoted tothe front page for the millions of digg visitors to see.
Basically, if you want to tell the world about something interesting you foundon the Internet—be it your own weblog post or a news story from a major pub-lication—you can submit its URL to digg, along with a short summary of theitem. Your story sits in a queue, waiting for other users to “digg” it (give youritem a positive vote). As well as voting for a story, users can comment on thestory, creating lively discussions within digg.
7 http://digg.com/about/
9
Building the Example Web Application

As soon as the number of “diggs” for a story crosses a certain threshold, it’sautomatically promoted to the digg homepage, where it attracts a far greaternumber of readers than the story-queuing area receives. Figure 1.1 shows asnapshot of the digg homepage.
Figure 1.1. The original digg.com
The digg Effect
Due to the huge number of visitors that digg receives, web sites that are listedon the front page may suffer from what is known as the “digg effect”—manysites’ servers cannot cope with the sudden surge in traffic, and become inac-cessible until the number of simultaneous visitors dies down (or the hostingcompany boosts the site’s capacity to deal with the increase in traffic).
digg was launched in December 2004, and has since been listed in the Alexatraffic rankings as one of the top 200 web sites on the Internet.8
8 http://www.alexa.com/data/details/traffic_details?url=digg.com
10
Chapter 1: Introducing Ruby on Rails

I didn’t decide to show you how to develop your own digg clone just because thesite is popular with Internet users, though; digg’s feature set is not particularlycomplicated, but it’s sufficient to let us gain first-hand experience with the mostimportant and useful facets of the Ruby on Rails framework.
And while your application might not be able to compete with the original site,reusing this sample project to share links within your family, company, or collegeclass is perfectly conceivable, and hopefully you’ll learn enough along the way tobranch out and build other types of applications, too.
Features of the Example ApplicationAs I mentioned, we want our application to accept user-submitted links to storieson the Web. We also want to allow other users to vote on the submitted items.In order to meet these objectives, we’ll implement the following features as wework through this book:
❑ We’ll build a database back end that permanently stores every story, user,vote, etc. (This way, nothing is lost when you close your browser and shutthe application down.)
❑ We’ll build a story submission interface, which is a form that’s available onlyto users who have registered and logged in.
❑ We’ll develop a simplistic layout, as is typical for "Web 2.0" applications.We’ll style it with Cascading Style Sheets (CSS) and enhance it with visualeffects.
❑ We’ll create clean URLs for all the pages on our site. Clean URLs (also knownas search engine friendly URLs) are usually brief and easily read when theyappear in the browser status bar. (An example of a clean URL ishttp://del.icio.us/popular/software, which I’m sure you’ll agree is a lot nicerthan http://www.amazon.com/gp/homepage.html/103-0615814-1415024/.)
❑ We’ll create a user registration system that allows users to log in with theirusernames and passwords.
❑ We’ll create two different views: the homepage of our application, and thestory queue containing stories that haven’t yet received enough votes to appearon the homepage.
11
Features of the Example Application

❑ We’ll give users the ability to check voting history on per-user and per-storybases.
❑ We’ll facilitate the tagging of stories, and give users the ability to view onlythose stories that relate to “programming” or “food,” for example (for adefinition of tagging, see the note below).
It’s quite a list, and the result will be one slick web application! Some of thefeatures rely upon others being in place, and we’ll implement each feature as apractical example when we look at a new aspect of Rails.
What is Tagging?
Tagging can be thought of as a free-form categorization method. Instead ofthe site’s owners creating a fixed content categorization scheme (often rep-resented as a tree), users are allowed to enter one or more keywords to de-scribe a content item. Resources that share one or more identical tags canbe linked together easily—the more overlap between tags, the more the re-sources are likely to have in common.
Figure 1.2. Tags on flickr.com
12
Chapter 1: Introducing Ruby on Rails

Instead of displaying a hierarchical category tree, the tags used in an applic-ation are commonly displayed as a “tag cloud” in which each of the tags isrepresented in a font-size that corresponds to how often that tag has beenapplied to content items within the system.
Tags are used extensively on sites such as the Flickr photo-sharing web siteshown in Figure 1.2,9 the del.icio.us bookmark-sharing site,10 and theTechnorati weblog search engine.11
SummaryWe’ve explored a bit of history in this chapter. Along the way, we learned whereboth the Ruby language and the Rails framework have come from, and lookedin some detail at the niche that they’ve carved out for themselves in the web de-velopment world. I also explained the philosophy behind the Ruby programminglanguage and showed you a snippet of Ruby code. We’ll cover much more ofRuby’s inner workings in Chapter 3.
We also talked briefly about some of the basic principles that drive Rails devel-opment, and saw how Rails supports Agile development methods. Now thatyou’re aware of the possibilities, perhaps some of these ideas and principles willinfluence your own work with Rails.
Finally, we created a brief specification for the web application we’re going tobuild throughout this book. We described what our application will do, andidentified the list of features that we’re going to implement. We’ll develop a cloneof the story-sharing web site digg.com iteratively, taking advantage of some ofthe Agile development practices that Rails supports.
In the next chapter, we’ll install Ruby, Rails, and the MySQL database serversoftware in order to set up a development environment for the upcoming devel-opment tasks.
Are you ready to join the fun? If so, turn the page.
9 http://flickr.com/10 http://del.icio.us/11 http://www.technorati.com/
13
Summary

14

Getting Started2To get started with Ruby on Rails, we first need to install some developmentsoftware on our systems. The packages we’ll be installing are:
the Ruby language interpreterThe Ruby interpreter translates our Ruby code (or any Ruby code, for thatmatter, including Rails itself) into something the computer can understandand execute. When this book was being written, Ruby 1.8.4 was recommendedfor use with Rails, so that’s what I’ve used here.
the Ruby on Rails frameworkOnce we’ve downloaded Ruby, we can install the Rails framework itself. AsI mentioned in Chapter 1, Rails is written in Ruby. At the time of writing,version 1.2 Release Candidate 2 had been released, and a stable 1.2 releasewas imminent.
the MySQL database serverThe MySQL database server is developed by a company called MySQL AB.1
MySQL is one of several cross-platform, open-source database servers thatare available. While Rails supports plenty of other database servers (such asPostgreSQL, Microsoft SQL Server, and Oracle, to name a few), MySQL iseasy to install and set up, sports many advanced features, and is basically the
1 http://www.mysql.com/
only database server you can use with Rails without installing further databaseconnection adapter software. Oh, and it’s free!
At the time of writing, the most recent stable release of the MySQL GeneralRelease was version 5.0.27.
Instructions for installing Rails differ ever so slightly between operating systems.You may also need to install some additional tools as part of the process, depend-ing on the platform that you use. Here, I’ll provide installation instructions forWindows, Mac OS X, and Linux.
Watch your Version Numbers!
It’s possible that by the time you read this, a more recent version of Ruby,MySQL, or one of the other packages mentioned here will have been released.Beware! Don’t just assume that because a package is newer, it can reliablybe used for Rails development. While, in theory, everything should be com-patible and these instructions should still apply, sometimes the latest is notthe greatest.
If you download a more recent version of one of the components listed here,there’s a chance that it may not have been as thoroughly tested for compat-ibility as you might hope. For example, if you choose to use Ruby 1.8.5 ratherthan 1.8.4, you’ll find that elements of the section covering breakpoints inChapter 11 simply won’t work! The problem is caused by the fact that theproper working of the breakpoint library packaged with Rails is reliant ona bug in Ruby. This bug was patched in Ruby 1.8.5, so breakpoint stoppedworking. We hope that the problem will be resolved soon, but in the mean-time you’ll be fine if you stick with Ruby 1.8.4.
Feel free to skip the sections that relate to operating systems other than yours,and to focus on those that address your specific needs.
What Does All this Cost?Everything we need is available for download from the Web, and is licensed underfree software licenses. This basically means that everything you’ll be installing isfree for you to use in both personal and commercial applications. Please refer tothe individual license file for each package (they’re included in the downloads)if you’re curious about the differences between each license.
16
Chapter 2: Getting Started
Installing on WindowsFor some reason, the Windows folks have the easiest install procedure. A veryhelpful fellow by the name of Curt Hibbs sat down and packaged everything re-quired to develop Rails applications on a Windows machine.2 He now offers thepackage as an easy-to-install, easy-to-run, single file download called InstantRails.InstantRails ships with the following software:
❑ the Ruby interpreter
❑ the MySQL database server
❑ the Apache web server (although we won’t be using it in this book)
❑ Ruby on Rails
That’s everything we need in one handy package—how convenient!
To install InstantRails, download the InstantRails 1.3a zip3 archive from the In-stantRails project file list4 on RubyForge and extract its contents to a folder ofyour choice.5 Be careful, though—InstantRails doesn’t support folders whosenames contain spaces, so unfortunately the obvious choice of C:\Program Files\is not a good one. I’d recommend using C:\InstantRails\ instead.
After you’ve extracted the .zip file (it has approximately 18,000 items in packageddocumentation, so if you’re using the Windows built-in file compression tool, itcould take up to an hour to unzip everything), navigate to the InstantRailsfolder and double-click the InstantRails.exe file. You’ll be prompted with adialog like the one shown in Figure 2.1—click OK to continue.
2 Hibbs also published the very early ONLamp.com series of tutorials for Rails entitled Rolling withRuby on Rails [http://www.onlamp.com/pub/a/onlamp/2005/01/20/rails.html].3 http://rubyforge.org/frs/download.php/9957/InstantRails-1.3a-win.zip4 http://rubyforge.org/frs/?group_id=9045 I’m recommending you use InstantRails 1.3a, rather than 1.4 or newer, due to the previouslymentioned problem with Ruby 1.8.5 and Rails’s included breakpoint library. The newer versions ofInstantRails ship with Ruby 1.8.5, and the Ruby on Rails download page recommends Ruby 1.8.5.However, if you choose to install Ruby 1.8.5, you won’t be able to use the breakpoint client introducedin Chapter 11 of this book.
17
Installing on Windows

Figure 2.1. Configuring InstantRails doesn’t get much easier …
If you’re on Windows XP Service Pack 2 or later, you’ll also be greeted with thealert message in Figure 2.2 from the Windows internal firewall (or any additionalpersonal firewall software that you might have installed). Of course, the Apacheweb server isn’t trying to do anything malicious—InstantRails just fires it up aspart of its initialization process. Go ahead and click Unblock to allow it to start.
Figure 2.2. Allowing Apache to run
You should now see the InstantRails control panel, which, as Figure 2.3 illustrates,should report that everything has started up successfully.
18
Chapter 2: Getting Started

Figure 2.3. The InstantRails control panel
The final step is to update Rails. To do that, right-click on the red I icon in theSystem Tray to bring up the InstantRails menu. From this menu, select Rails Ap-plications > Open Ruby Console. Once the console opens, enter the followingcommand:
C:\InstantRails> gem install rails --include-dependencies
Don’t Use Other Installations of MySQL
Be careful if you already have MySQL installed and running on your ma-chine—it’s not safe to assume that the version you have is compatible withInstantRails. I’d recommend shutting down your existing instance and lettingInstantRails start its own version of MySQL instead.
That’s it! Everything you need is installed and configured. Feel free to skip theinstructions for Mac and Linux, and start building your application!
Installing on Mac OS XOkay, so the Windows guys had it easy. For the rest of us, though, things aren’tquite so simple. While Mac OS X isn’t a platform that makes life unnecessarilydifficult, installing Rails on OS X is just a tad harder than installing a regularMac application.6
6 There is an all-in-one installer available for Mac OS X, called Locomotive[http://locomotive.raaum.org/]. Unfortunately, it ships with the SQLite database server, instead ofMySQL. It’s not that I have anything against SQLite as a database, but in a book that’s alreadycovering all operating systems, there’s only so far one can go to cater for possible combinations oftechnologies. For this reason, I don’t recommend that you use Locomotive to work through this book.
19
Installing on Mac OS X
Mac OS X 10.5 (Leopard)If your Mac is a relatively recent purchase, you may be running OS X version10.5 (Leopard) or later. If this is the case, then you’ve got much less to do, becauseyour machine comes pre-installed with both Ruby and Rails—congratulations!
Unfortunately, this doesn’t mean you can skip the rest of these installation in-structions: you still need to install MySQL, so tread carefully if you decide toskip any steps. In fact, it wouldn’t do you any harm to work through all of thesteps anyway, just to make sure that you’re running the appropriate versions ofeverything.
Mac OS X 10.4 (Tiger) and Earlier“But wait!” I hear you cry. “My (slightly older) Mac comes with Ruby prein-stalled!” Yes, that may indeed be true. However, the version of Ruby that shippedwith OS X prior to version 10.5 is a slimmed-down version that’s incompatiblewith Rails, and is therefore unsuited to our needs. Packages like MacPorts7 domake the installation of Ruby easier, but unfortunately MacPorts currently installsRuby 1.8.5, which at the time of writing, was incompatible with the Railsbreakpoint client (despite the Rails Core team advocating Ruby 1.8.5 as thepreferred version to use with Rails).
For the purposes of this book, we’ll need to build Ruby on our machine fromscratch.8 Don’t worry. I know it sounds intimidating, but it’s actually relativelypainless—and you’ll only need to do it once!
Let’s get installing then, shall we?
Installing Xcode
The first step in the process is to make sure we have everything we need for theinstallation to go smoothly. The only prerequisite for this process is Xcode, theApple Developer Tools that come on a separate CD with Mac OS X. If youhaven’t installed the tools yet, and don’t have your installation CD handy, you
7 http://www.macports.org/8 A tip of the hat is in order for Dan Benjamin, who did a lot of the heavy lifting in the early daysof documenting the installation of Rails on OS X. Parts of these installation instructions are heavilyinfluenced by his article “Building Ruby, Rails, LightTPD, and MySQL on Tiger”[http://hivelogic.com/articles/2005/12/01/ruby_rails_lighttpd_mysql_tiger/].
20
Chapter 2: Getting Started
can download the Xcode package for free from http://developer.apple.com/ (al-though at more than 900MB, it’s a hefty download!).
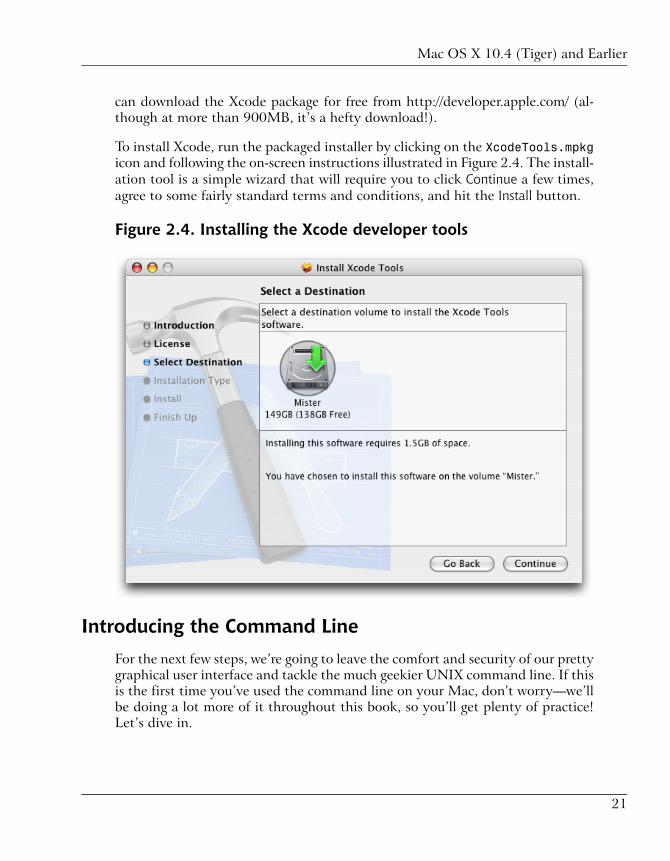
To install Xcode, run the packaged installer by clicking on the XcodeTools.mpkgicon and following the on-screen instructions illustrated in Figure 2.4. The install-ation tool is a simple wizard that will require you to click Continue a few times,agree to some fairly standard terms and conditions, and hit the Install button.
Figure 2.4. Installing the Xcode developer tools
Introducing the Command Line
For the next few steps, we’re going to leave the comfort and security of our prettygraphical user interface and tackle the much geekier UNIX command line. If thisis the first time you’ve used the command line on your Mac, don’t worry—we’llbe doing a lot more of it throughout this book, so you’ll get plenty of practice!Let’s dive in.
21
Mac OS X 10.4 (Tiger) and Earlier

First, open up a UNIX session in OS X using the Terminal utility. Launch Ter-minal by selecting Go > Utilities from the Finder menu bar, and double-clickingthe Terminal icon. Your Terminal window should look something like Figure 2.5.
Figure 2.5. A Terminal window on Mac OS X
Let’s dissect these crazy command line shenanigans. The collection of charactersto the left of the cursor is called the prompt. By default, it displays:
❑ the name of your Mac
❑ the current directory
❑ the name of the user who’s currently logged in
In my case, this is:
Core:~ scoop$
So, what’s what here?
❑ Core is the name of my Mac
❑ scoop is the name of the user who is currently logged in.
But what the heck is this sign: ~? It’s called a tilde, and it’s shorthand notationfor the path to the current user’s home directory. Take another look at Figure 2.5,and you’ll see I’ve used the pwd command to print the working directory. Theresult is /Users/scoop, which just happens to be my home directory. For futurecommand line instructions, though, I’ll simply display the prompt as $, to avoidtaking up valuable real estate on the page.
22
Chapter 2: Getting Started
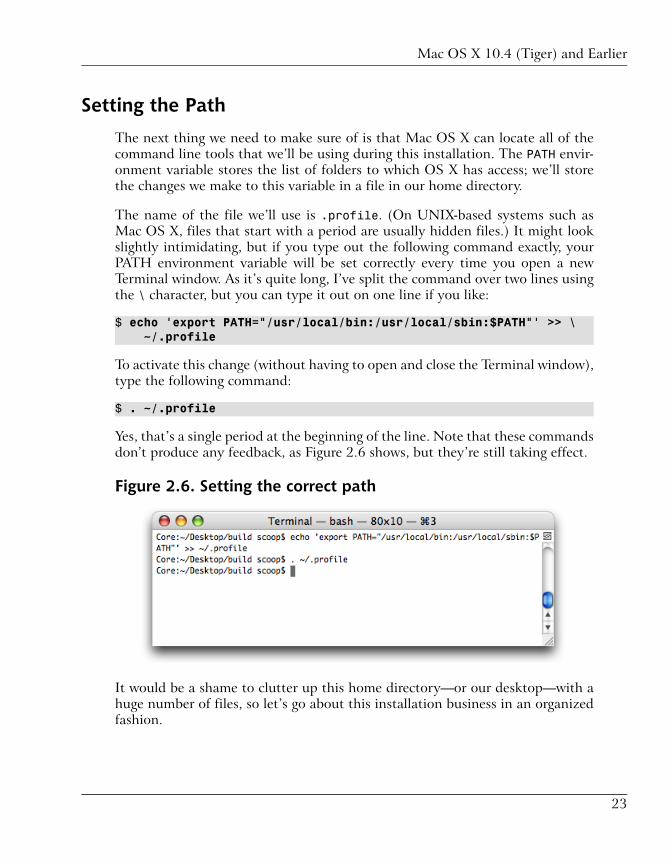
Setting the Path
The next thing we need to make sure of is that Mac OS X can locate all of thecommand line tools that we’ll be using during this installation. The PATH envir-onment variable stores the list of folders to which OS X has access; we’ll storethe changes we make to this variable in a file in our home directory.
The name of the file we’ll use is .profile. (On UNIX-based systems such asMac OS X, files that start with a period are usually hidden files.) It might lookslightly intimidating, but if you type out the following command exactly, yourPATH environment variable will be set correctly every time you open a newTerminal window. As it’s quite long, I’ve split the command over two lines usingthe \ character, but you can type it out on one line if you like:
$ echo 'export PATH="/usr/local/bin:/usr/local/sbin:$PATH"' >> \~/.profile
To activate this change (without having to open and close the Terminal window),type the following command:
$ . ~/.profile
Yes, that’s a single period at the beginning of the line. Note that these commandsdon’t produce any feedback, as Figure 2.6 shows, but they’re still taking effect.
Figure 2.6. Setting the correct path
It would be a shame to clutter up this home directory—or our desktop—with ahuge number of files, so let’s go about this installation business in an organizedfashion.
23
Mac OS X 10.4 (Tiger) and Earlier
Staying Organized
The process of extracting, configuring, and compiling the source code for all ofthe packages that we’ll be downloading will take up a decent amount of spaceon your hard drive. To keep things organized, we’ll operate within a single folderrather than making a mess of our desktop.
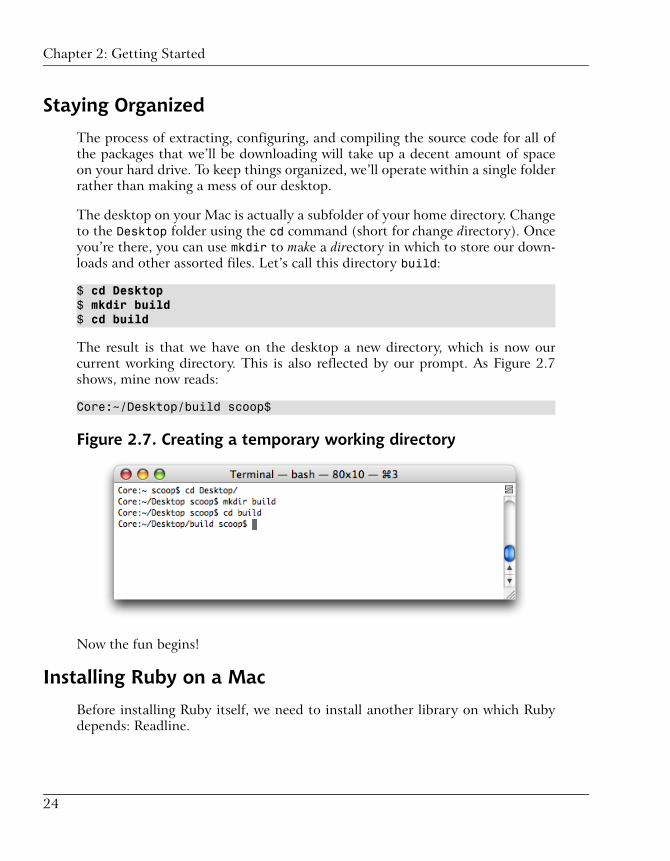
The desktop on your Mac is actually a subfolder of your home directory. Changeto the Desktop folder using the cd command (short for change directory). Onceyou’re there, you can use mkdir to make a directory in which to store our down-loads and other assorted files. Let’s call this directory build:
$ cd Desktop$ mkdir build$ cd build
The result is that we have on the desktop a new directory, which is now ourcurrent working directory. This is also reflected by our prompt. As Figure 2.7shows, mine now reads:
Core:~/Desktop/build scoop$
Figure 2.7. Creating a temporary working directory
Now the fun begins!
Installing Ruby on a Mac
Before installing Ruby itself, we need to install another library on which Rubydepends: Readline.
24
Chapter 2: Getting Started
Here’s the sequence of (somewhat convoluted) commands for installing theReadline library. It’s a fairly small library, so the installation shouldn’t take toolong:
$ curl ftp://ftp.gnu.org/gnu/readline/readline-5.1.tar.gz | tar xz$ cd readline-5.1$ ./configure --prefix=/usr/local$ make$ sudo make install$ cd ..
With Readline in place, we’re now able to install Ruby itself. Type out the follow-ing series of commands, exactly as you see them here. It’s not important that youunderstand every line, but it is important that you don’t make any typos. Thisstep might also test your patience somewhat, as the configuration step may takehalf an hour or more to complete, depending on the speed of your system andyour network connection.
$ curl ftp://ftp.ruby-lang.org/pub/ruby/1.8/ruby-1.8.4.tar.gz \ | tar xz$ cd ruby-1.8.4$ ./configure --prefix=/usr/local --enable-pthread \ --with-readline-dir=/usr/local$ make$ sudo make install$ sudo make install-doc$ cd ..
How did you go? It might be prudent at this point to run some checks, to determ-ine whether our installation is on track so far. The simplest and safest way to tellwhether our Ruby installation is working is to type the following command intothe Terminal window:
$ ruby -v
The version that you should see displayed is ruby 1.8.4 (2005-12-24), as shownin Figure 2.8. If anything else is displayed here (such as ruby 1.8.2 (2004-12-25)), something has gone wrong. You should carefully repeat the instructions upto this point.9
9 Remember—if you get stuck, you can always try asking for help on SitePoint’s Ruby forum[http://www.sitepoint.com/launch/rubyforum/].
25
Mac OS X 10.4 (Tiger) and Earlier

Be a Super User for a Day
sudo is a way for “regular” computer users to perform system-wide installations that arenormally reserved for system administrators. You’ll need to enter your account passwordbefore you’ll be allowed to execute this command. To use sudo, the user account musthave Allow user to administer this computer setting checked. This can be changed inthe Accounts section of the Apple System Preferences window.
Figure 2.8. Checking the Ruby version
Next up is the installation of RubyGems.
Installing RubyGems on a Mac
“What is RubyGems?” I hear you ask. RubyGems is a utility for managing theadditions to the Ruby programming language that other people have developedand made available as free downloads. Think of it as pre-packaged functionalitythat you can install on your machine so you don’t have to reinvent the wheelover and over again while you’re working on your own projects.10 Rails is releasedand published through the RubyGems system.
The following sequence of commands will download and install RubyGems onyour Mac. It should be a relatively quick procedure:
$ curl -L \ http://rubyforge.org/frs/download.php/11289/rubygems-0.9.0.tgz \ | tar xz$ cd rubygems-0.9.0
10 The RubyGems web site [http://gems.rubyforge.org/] has additional documentation for the gemcommand that we’ll use in this section.
26
Chapter 2: Getting Started

$ sudo ruby setup.rb$ cd ..
Figure 2.9. Confirmation of a successful RubyGems installation
Are you getting the hang of this command line thing? Good! We now have anothernew command at our fingertips: gem. The gem command is used to install andmanage Ruby packages on your machine—enter the following to check thatRubyGems is working properly:
$ gem -v
The output should identify the version of RubyGems that you installed, as Fig-ure 2.9 shows. We’ll use the gem command to install Rails.
Installing Rails on a Mac
Whew! After eight pages of installation instructions, we’re finally here: the install-ation of the Rails framework. Don’t despair—it’s all been worth it. Plus, in contrastto the Windows users, you’ll have a much easier upgrade path the next time anew version of Ruby or Rails is released (which I’ll explain later).
Without further ado, enter this command to install Rails:
$ sudo gem install rails --include-dependencies
What’s happening here is that RubyGems system is downloading Rails and thepackages on which it depends, before installing the necessary files and document-ation. This process may take ten minutes or more to complete, but it’ll get therein the end.
27
Mac OS X 10.4 (Tiger) and Earlier

While you’re waiting for Rails to install, I’ll let you in on a little secret: thecommand that we just entered is the same command that you can use to stay up-to-date with future Rails releases. Whenever you want to upgrade Rails, just enterthat command again, and your system will be updated. Cool, huh?
Once the installation has finished, you can verify the version of Rails you justinstalled by running the following command in your Terminal window.
$ rails -v
This should give you the version number of Rails, as illustrated in Figure 2.10.
Figure 2.10. Installing Rails on Mac OS X via RubyGems
Phew, we got there in the end. Don’t break out the champagne just yet,though—we still need a database server!
28
Chapter 2: Getting Started

Installing MySQL on a Mac
If you’ve been feeling nervous about all of these command line instructions, thenyou can breathe easily for a moment. We’re going to head back into familiarterritory for a moment—close your Terminal window, point your browser athttp://dev.mysql.com/downloads/, and download the mysql-standard-ver-sion-osxversion-platform.dmg (at the time of writing, the current stable versionof MySQL was 5.0.24). Double-click the disk image to mount it, double-clickthe installer, and get installing!
The MySQL installer is shown in Figure 2.11. You’ve clicked your way througha few of these wizards now, so it should be second nature to you!
Figure 2.11. Installing MySQL on Mac OS X
Excellent. Next, we need to start the server—we’ll do this manually for now.Open a Terminal window and enter the following command:
$ sudo /usr/local/bin/mysqld_safe5
29
Mac OS X 10.4 (Tiger) and Earlier
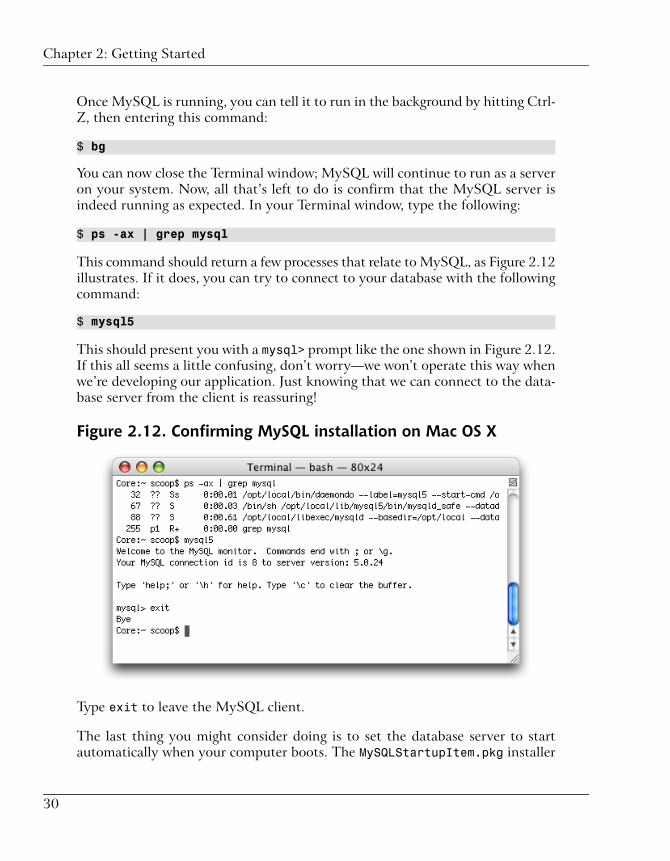
Once MySQL is running, you can tell it to run in the background by hitting Ctrl-Z, then entering this command:
$ bg
You can now close the Terminal window; MySQL will continue to run as a serveron your system. Now, all that’s left to do is confirm that the MySQL server isindeed running as expected. In your Terminal window, type the following:
$ ps -ax | grep mysql
This command should return a few processes that relate to MySQL, as Figure 2.12illustrates. If it does, you can try to connect to your database with the followingcommand:
$ mysql5
This should present you with a mysql> prompt like the one shown in Figure 2.12.If this all seems a little confusing, don’t worry—we won’t operate this way whenwe’re developing our application. Just knowing that we can connect to the data-base server from the client is reassuring!
Figure 2.12. Confirming MySQL installation on Mac OS X
Type exit to leave the MySQL client.
The last thing you might consider doing is to set the database server to startautomatically when your computer boots. The MySQLStartupItem.pkg installer
30
Chapter 2: Getting Started
that came with the MySQL download will set this up for you. Once this packagehas been installed, you can safely remove the mounted disk image by draggingit to the Trash, and delete the .dmg file.
Congratulations, you’re all done!
Installing on LinuxI bet you Linux folks smirked when the Mac OS X guys had to use the commandline (possibly for the first time), didn’t you?
Well, if you’re running Linux, I’m going to assume that you’re used to the com-mand line, so I won’t feel bad throwing you an archaic series of commands toinstall all the software you need to get up and running with Rails.
One Size Fits All?
There are literally thousands of different distributions of Linux—more thanany other operating system. Each distribution has its own quirks and pitfalls,its own package manager, and different permissions settings, and installationsare often tweaked and customized over time. So while I’ve put every effortinto ensuring that these instructions are sound, it would be impossible tooffer an absolute guarantee that they will work on any possible installationof Linux without individual tweaking.
If you do run into any problems installing Rails or its constituents on yourmachine, I’d recommend you ask for assistance on the friendly SitePointRuby forum.11 Chances are that someone else has experienced the sameproblem, and will be happy to help you out.
Using a Package ManagerAs I mentioned, many Linux distributions come with their own package managers,including apt-get , yum, and rpm, among others.
Of course, you’re free to use the package manager that’s bundled with your Linuxdistribution to install Ruby, and if you get stuck with these instructions forwhatever reason, it might be a good option for you. However, I’m afraid you’reon your own if you go down that path.
11 http://www.sitepoint.com/launch/rubyforum/
31
Installing on Linux

Rather than attempt to cover all of the different package managers that areavailable, I’ll show you how to install Ruby the manual way.
PrerequisitesThe only prerequisite for installing Ruby on Linux is that you have the gcccompiler installed on your machine. gcc ships with most Linux distributions bydefault, but if it’s not on your system, you’ll either need to use your system’spackage management system to install it (look for “build essential” or “basiccompiler”), or to download a native binary for your system.12
Enter the following instructions at the command line to confirm that your com-piler is in place:
$ gcc -v
If the version number for the compiler is displayed, as shown in Figure 2.13, thenyou’re ready to install Ruby.
Figure 2.13. Confirming the gcc compiler is installed
12 http://gcc.gnu.org/install/binaries.html
32
Chapter 2: Getting Started
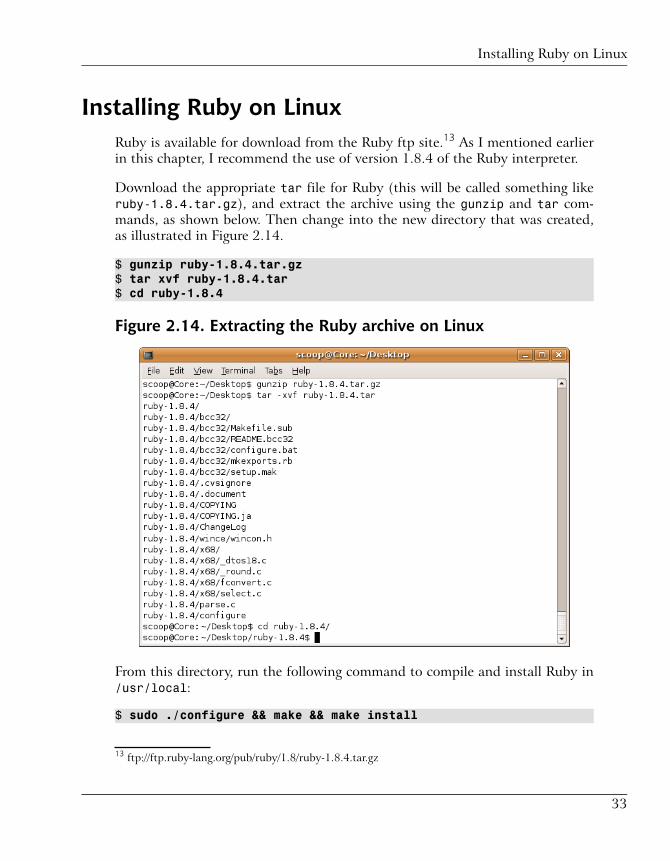
Installing Ruby on LinuxRuby is available for download from the Ruby ftp site.13 As I mentioned earlierin this chapter, I recommend the use of version 1.8.4 of the Ruby interpreter.
Download the appropriate tar file for Ruby (this will be called something likeruby-1.8.4.tar.gz), and extract the archive using the gunzip and tar com-mands, as shown below. Then change into the new directory that was created,as illustrated in Figure 2.14.
$ gunzip ruby-1.8.4.tar.gz$ tar xvf ruby-1.8.4.tar$ cd ruby-1.8.4
Figure 2.14. Extracting the Ruby archive on Linux
From this directory, run the following command to compile and install Ruby in/usr/local:
$ sudo ./configure && make && make install
13 ftp://ftp.ruby-lang.org/pub/ruby/1.8/ruby-1.8.4.tar.gz
33
Installing Ruby on Linux
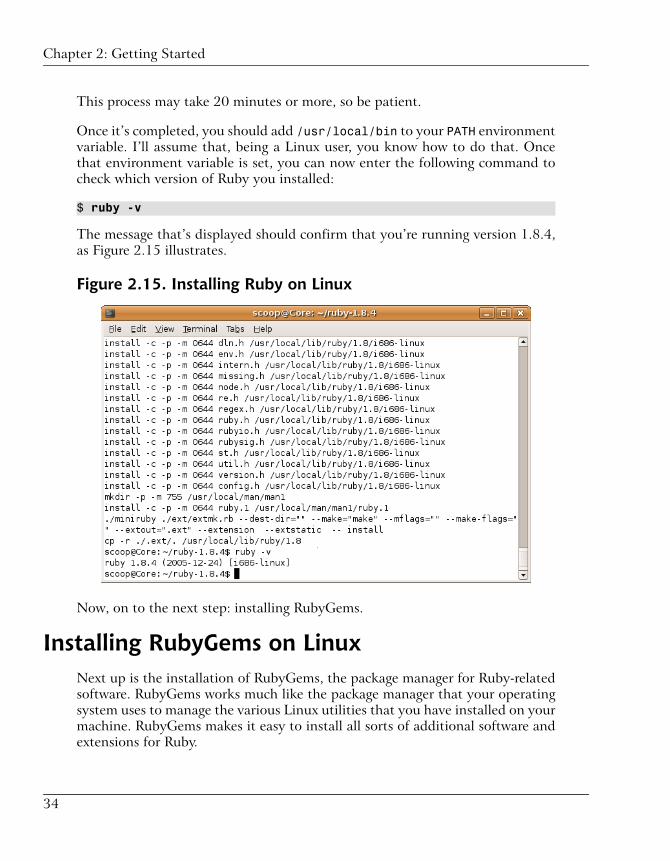
This process may take 20 minutes or more, so be patient.
Once it’s completed, you should add /usr/local/bin to your PATH environmentvariable. I’ll assume that, being a Linux user, you know how to do that. Oncethat environment variable is set, you can now enter the following command tocheck which version of Ruby you installed:
$ ruby -v
The message that’s displayed should confirm that you’re running version 1.8.4,as Figure 2.15 illustrates.
Figure 2.15. Installing Ruby on Linux
Now, on to the next step: installing RubyGems.
Installing RubyGems on LinuxNext up is the installation of RubyGems, the package manager for Ruby-relatedsoftware. RubyGems works much like the package manager that your operatingsystem uses to manage the various Linux utilities that you have installed on yourmachine. RubyGems makes it easy to install all sorts of additional software andextensions for Ruby.
34
Chapter 2: Getting Started

RubyGems is available for download from http://rubyforge.org/projects/rubygems/.Once you’ve downloaded and extracted it, change to the rubygems directory andrun the following command:
$ sudo ruby setup.rb
This will setup and install RubyGems for use on your system, and also make thegem command available for you to use—the gem command is what we’ll use toinstall Rails itself. It shouldn’t take long, and once it completes, you can executethe gem command to confirm that your installation was successful. The outputshould look something like that in Figure 2.16.
Figure 2.16. Installing RubyGems on Linux
We have successfully installed RubyGems. Now we can finally install the Railsframework!
Installing Rails on LinuxUsing RubyGems, the installation of Rails itself is a breeze. To install Rails, typethe following input at the command prompt as the root user (or using sudo ifit’s installed on your system):
35
Installing Rails on Linux

$ sudo gem install rails --include-dependencies
The process may take ten minutes or so, depending on your Internet connection,but that’s all you need to do! And as an added bonus, RubyGems gives us aneasy way to stay up-to-date with future Rails releases—whenever we want to up-grade Rails, we just need to type this command!
To confirm that your Rails installation was successful, type the following commandto display the version of Rails that was installed:
$ rails -v
The result that you see should be the same as that shown in Figure 2.17.
Figure 2.17. Installing Rails via RubyGems on Linux
All that’s left now is to install a database—then we can get to work!
Installing MySQL on LinuxAlthough it’s not quite as crucial as it was with the installation of Ruby, I’d stillrecommended that you use the official MySQL binaries that are available fordownload from http://dev.mysql.com/ instead of the pre-packaged versions thatmay already have been installed with your version of Linux.
36
Chapter 2: Getting Started

1. Download and extract the file.
Download the current stable release of MySQL fromhttp://dev.mysql.com/downloads/. There are a number of packages for eachflavor of Linux, but the one you’re after is the Standard version for Linux(x86, glibc-2.2, “standard is static”, gcc) under the Linux (non RPM package)downloads heading. I used version 5.0.24a, which was about 44MB.
Once you’ve downloaded the file, log in as the root user to ensure that youhave sufficient permissions to install it on your machine. Extract the down-loaded file to /usr/local, which will create a directory called mysql-standard-version-linux-i686.
$ cd /usr/local$ tar xvf mysql-standard-version-linux-i686.tar.gz
2. Create symbolic links.
It’s a good idea to create a symbolic link called mysql in the /usr/localdirectory. This will make accessing the directory containing the databaseserver much easier.
$ ln -s mysql-standard-version-linux-i686 mysql$ cd mysql
There are also a few command line tools that it’s convenient for us to beable to access readily. Let’s create a few links for those as well, so we haveeasy access to them when we need them.
$ ln -s /usr/local/mysql/bin/mysql /usr/local/bin/mysql$ ln -s /usr/local/mysql/bin/mysqladmin /usr/local/bin/mysqladmin$ ln -s /usr/local/mysql/bin/mysqldump /usr/local/bin/mysqldump$ ln -s /usr/local/mysql/bin/mysqld_safe /usr/local/bin/mysqld_safe
3. Set groups and permissions.
It’s possible to run the MySQL database server as the root user, but for se-curity reasons you’re better off creating a special user that is dedicated torunning this process. We’ll name the user mysql.
37
Installing MySQL on Linux

To create this user, enter the following commands:
$ groupadd mysql$ useradd -g mysql mysql
From the mysql directory, run the following script, which will install thedefault databases for MySQL to use:
$ scripts/mysql_install_db --user=mysql
Finally, we should secure the data directory in which our precious databaseinformation will reside. It’s best to make it only accessible to our new mysqluser; the following instructions will achieve this for us:
$ chown -R root .$ chown -R mysql data$ chgrp -R mysql
The database server has now been installed. Let’s start it up!
4. Start the server.
Everything’s in place, so let’s see what happens when we launch our server.Enter the following command:
$ mysqld_safe --user=mysql &
If the MySQL server started without throwing any errors, everything hasworked as planned. Good job! If it didn’t, check the hostname.err file thatis created whenever an error occurs—it should give you some insight as towhat went wrong.
You can now try connecting to your database! Log in to the mysql clientusing the following command:
$ mysql
You should see a mysql> prompt, like the one shown in Figure 2.18. If thisall seems a little confusing, don’t worry—we won’t operate this way whendeveloping our application. Just knowing that we can log in to the databaseserver is reassuring enough.
38
Chapter 2: Getting Started
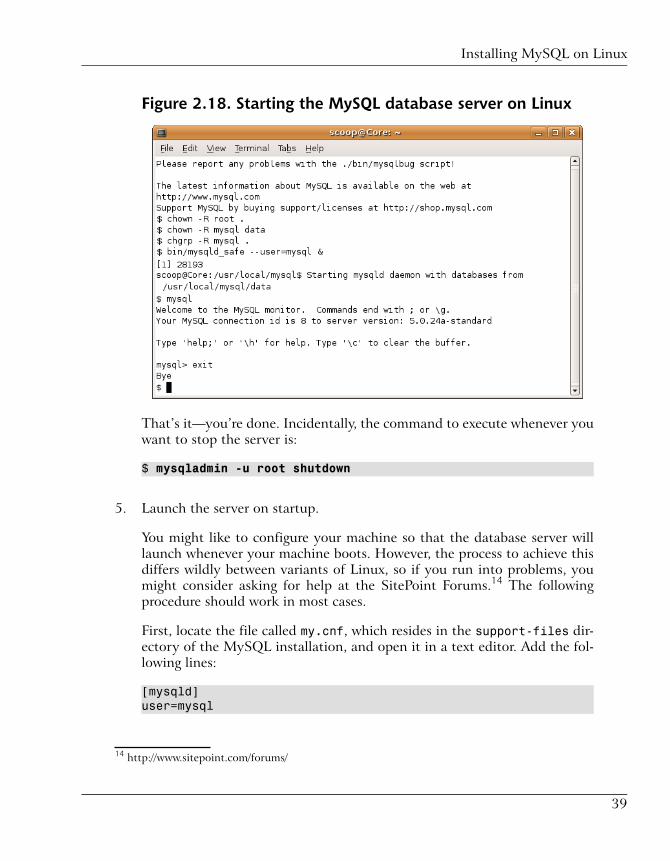
Figure 2.18. Starting the MySQL database server on Linux
That’s it—you’re done. Incidentally, the command to execute whenever youwant to stop the server is:
$ mysqladmin -u root shutdown
5. Launch the server on startup.
You might like to configure your machine so that the database server willlaunch whenever your machine boots. However, the process to achieve thisdiffers wildly between variants of Linux, so if you run into problems, youmight consider asking for help at the SitePoint Forums.14 The followingprocedure should work in most cases.
First, locate the file called my.cnf, which resides in the support-files dir-ectory of the MySQL installation, and open it in a text editor. Add the fol-lowing lines:
[mysqld]user=mysql
14 http://www.sitepoint.com/forums/
39
Installing MySQL on Linux
This will ensure that the user that launches the process will be our specialmysql user. Now start the server again, but this time use the following com-mand:
$ support-files/mysql.server start
Login to the mysql client to check that you are able to establish a connection.If so, you’re in good shape to add that startup command to your launch se-quence. Here are the commands to do that:
$ cp /usr/local/mysql/support-files/mysql.server /etc/init.d/$ cd /etc/rc2.d$ ln -s ../init.d/mysql.server S99mysql$ cd /etc/rc3.d$ ln -s ../init.d/mysql.server S99mysql$ cd /etc/rc5.d$ ln -s ../init.d/mysql.server S99mysql$ cd /etc/rc0.d$ ln -s ../init.d/mysql.server K01mysql
Once you’ve completed these steps, reboot your machine. Then connect tothe database server using the mysql client, as before, to confirm that theserver started up as expected.
Building a FoundationIs everyone prepared? Good! Now that you’ve put your workstation on Rails,let’s do something with it. In this section, we’ll build the foundations of the ap-plication that we’ll develop throughout the rest of this book.
One Directory Structure to Rule them AllIn Chapter 1, I mentioned that Rails applications follow certain conventions.One of these conventions is that an application that’s written in Rails always hasthe same directory structure—one in which everything has its designated place.By gently forcing this directory structure upon developers, Rails ensures thatyour work is semi-automatically organized “the Rails way.”
Figure 2.19 shows what the structure looks like. We’ll create this directorystructure for our application in just a moment.
40
Chapter 2: Getting Started

Figure 2.19. The default directory structure for a Rails application
As you can see, this standard directory structure consists of quite a few subdirect-ories (and I’m not even showing their subdirectories yet!). This wealth of subdir-ectories can be overwhelming at first, but we’ll explore them one by one. A lotof thought has gone into establishing and naming the folders, and the result isan application whose file system is well structured.
Before you go and manually create all these directories yourself, let me show youhow to set up that pretty directory structure using just one command—I toldyou that Rails allows us to do less typing!
Creating the Standard Directory StructureIt’s easy to generate the default directory structure shown in Figure 2.19 for anew Rails application using the rails command.
Before we start, I’d like to introduce you to the secret, under-the-hood projectname we’ll give to our digg clone: Shovell. Yes, it’s cheeky, but it’ll work.
Now, let’s go ahead and create the directory structure to hold our application.
A Regular Console Window Just Won’t Do!
If you’re a Windows user, you might be tempted to fire up a regular DOSconsole for your command line work. This won’t do, I’m afraid—instead,launch a Ruby console by starting InstantRails, then clicking on the I buttonin the top-left of the control panel. From the menu that appears, select RailsApplications > Open Ruby Console Window, as Figure 2.20 illustrates.
The Ruby console must be used because InstantRails doesn’t modify anythingin your regular Windows environment when it installs; by launching a consolefrom the InstantRails control panel, your console will be loaded with all ofthe environment settings that Rails needs. The Windows Ruby console isdepicted in Figure 2.21.
41
Creating the Standard Directory Structure
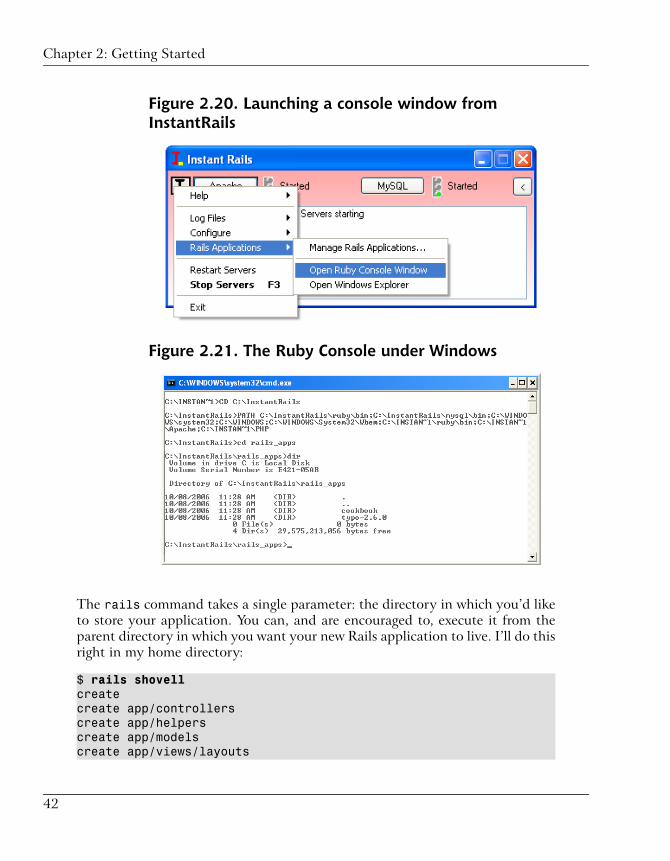
Figure 2.20. Launching a console window fromInstantRails
Figure 2.21. The Ruby Console under Windows
The rails command takes a single parameter: the directory in which you’d liketo store your application. You can, and are encouraged to, execute it from theparent directory in which you want your new Rails application to live. I’ll do thisright in my home directory:
$ rails shovellcreatecreate app/controllerscreate app/helperscreate app/modelscreate app/views/layouts
42
Chapter 2: Getting Started

create config/environmentscreate componentscreate dbcreate log/server.logcreate log/production.logcreate log/development.logcreate log/test.log
Congratulations, your directory structure has been created!
Starting our ApplicationEven before we write any code, it’s possible to start up our application environ-ment to check that our setup is working correctly. This should give us a niceboost of confidence before we progress any further.
What we’ll do is launch WEBrick, a small web server written in Ruby. WEBrickis included with the Ruby installation that we stepped through earlier in thischapter, so it’s installed on our machine and ready to use.
To start up WEBrick—and the rest of the Rails environment for our applica-tion—we return once again to the command line. Change into the Shovell sub-directory that was created when we executed the rails command in the previoussection. From the Shovell directory, enter the command ruby script/server.
This will fire up the WEBrick web server, which will then begin listening for re-quests on TCP port 3000 of your local machine.
$ cd shovell$ ruby script/server=> Booting WEBrick…=> Rails application started on http://0.0.0.0:3000=> Ctrl-C to shutdown server; call with --help for options[2006-05-07 14:29:51] INFO WEBrick 1.3.1[2006-05-07 14:29:51] INFO ruby 1.8.4 (2005-12-24) [i686-darwin8.6[2006-05-07 14:29:51] INFO WEBrick::HTTPServer#start: pid=468 port
Well done—you just started up your application for the first time! Okay, so it’snot going to be doing a whole lot (we haven’t written any lines of code yet, afterall), but you can now connect to your application by enteringhttp://localhost:3000/ into your web browser’s address bar; you should seesomething similar to Figure 2.22.
43
Starting our Application

Figure 2.22. Welcome aboard: the Rails welcome screen
This welcome screen provides us with a few items, including some steps for gettingstarted with Rails application development. Don’t mind these just yet; we’ll getthere soon enough. You’ll also notice in the sidebar some links to sites such asthe Rails wiki and the mailing list archives, which you can browse through atyour leisure. And there are some links to documentation for Rails and for Ruby;you’ll find these resources useful once you’ve progressed further with Rails devel-opment.
If you’re interested to see the version numbers of each of the components we’veinstalled, click on the link labeled About your application’s environment. You’llsee a nicely animated information box, like the one in Figure 2.23. This dialogcontains all the version information you should ever need. If you’ve followed theinstallation instructions in this book, you should have the latest versions ofeverything.
44
Chapter 2: Getting Started

Figure 2.23. Viewing version information
Okay, so you’re finally ready to write some code. But wait! Which text editorwill you be using?
Which Text Editor?The question of which text editor is best for web development has spawned argu-ments that border on religious fanaticism. However, while it’s certainly possibleto develop Rails applications using the default text editor that comes bundledwith your operating system, I wouldn’t recommend it—the benefits provided bya specifically designed programmer’s editor can prevent typing errors and increaseyour productivity immeasurably.
In this section, I’ve suggested a couple of alternatives for each operating system,and I’ll let you make a choice that suits your personal preferences and budget.
45
Which Text Editor?
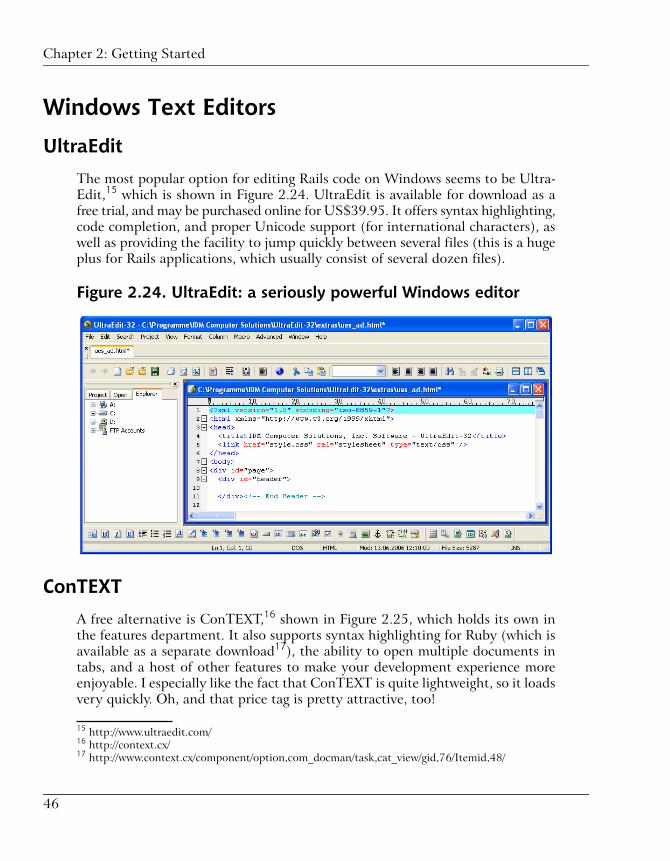
Windows Text Editors
UltraEdit
The most popular option for editing Rails code on Windows seems to be Ultra-Edit,15 which is shown in Figure 2.24. UltraEdit is available for download as afree trial, and may be purchased online for US$39.95. It offers syntax highlighting,code completion, and proper Unicode support (for international characters), aswell as providing the facility to jump quickly between several files (this is a hugeplus for Rails applications, which usually consist of several dozen files).
Figure 2.24. UltraEdit: a seriously powerful Windows editor
ConTEXT
A free alternative is ConTEXT,16 shown in Figure 2.25, which holds its own inthe features department. It also supports syntax highlighting for Ruby (which isavailable as a separate download17), the ability to open multiple documents intabs, and a host of other features to make your development experience moreenjoyable. I especially like the fact that ConTEXT is quite lightweight, so it loadsvery quickly. Oh, and that price tag is pretty attractive, too!
15 http://www.ultraedit.com/16 http://context.cx/17 http://www.context.cx/component/option,com_docman/task,cat_view/gid,76/Itemid,48/
46
Chapter 2: Getting Started

Figure 2.25. ConTEXT: a free, feature-rich text editor for Windows
Mac OS X Text Editors
TextMate
For Mac OS X users, the hands-down winner in the Rails code editor popularitycontest is TextMate,18 which is shown in Figure 2.26. TextMate is the editor youcan see in action in numerous screen casts19 available from the Rails web site.It’s available for download as a free, 30-day trial, and the full version of theproduct costs €39.
TextMate boasts terrific project management support, amazing macro record-ing/code completion functionality, and one of the most complete syntax highlight-ing implementations for Rails code. As you can probably tell, I’m a big fan, andrecommend it heartily. But this is beginning to sound like a television commercial,so I’ll leave it at that.
18 http://www.macromates.com/19 http://www.rubyonrails.org/screencasts/
47
Mac OS X Text Editors
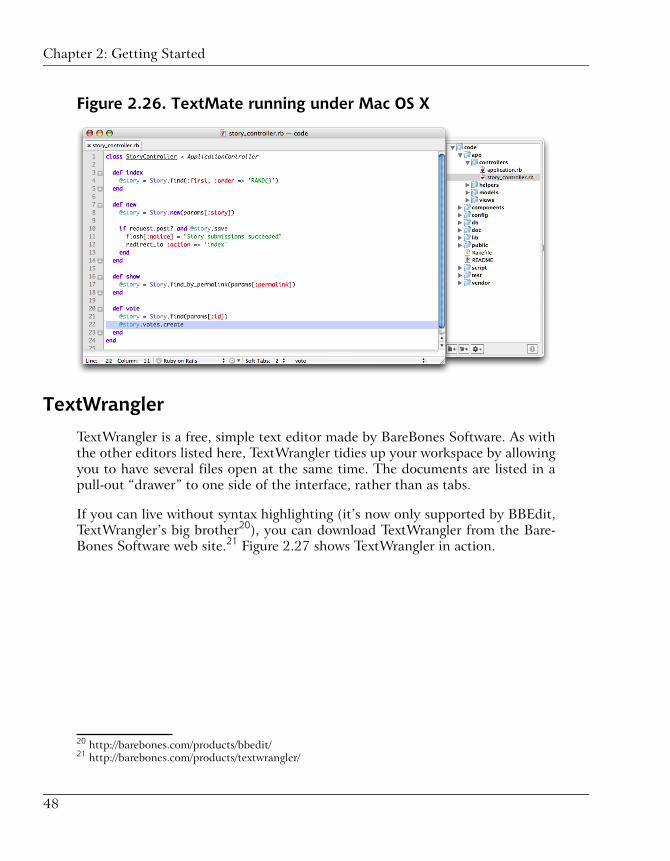
Figure 2.26. TextMate running under Mac OS X
TextWrangler
TextWrangler is a free, simple text editor made by BareBones Software. As withthe other editors listed here, TextWrangler tidies up your workspace by allowingyou to have several files open at the same time. The documents are listed in apull-out “drawer” to one side of the interface, rather than as tabs.
If you can live without syntax highlighting (it’s now only supported by BBEdit,TextWrangler’s big brother20), you can download TextWrangler from the Bare-Bones Software web site.21 Figure 2.27 shows TextWrangler in action.
20 http://barebones.com/products/bbedit/21 http://barebones.com/products/textwrangler/
48
Chapter 2: Getting Started
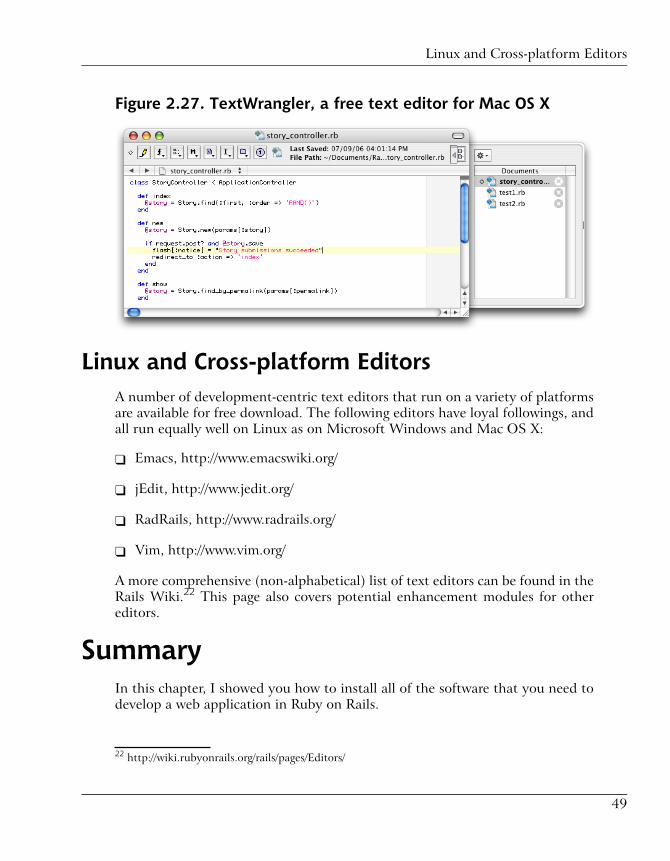
Figure 2.27. TextWrangler, a free text editor for Mac OS X
Linux and Cross-platform EditorsA number of development-centric text editors that run on a variety of platformsare available for free download. The following editors have loyal followings, andall run equally well on Linux as on Microsoft Windows and Mac OS X:
❑ Emacs, http://www.emacswiki.org/
❑ jEdit, http://www.jedit.org/
❑ RadRails, http://www.radrails.org/
❑ Vim, http://www.vim.org/
A more comprehensive (non-alphabetical) list of text editors can be found in theRails Wiki.22 This page also covers potential enhancement modules for othereditors.
SummaryIn this chapter, I showed you how to install all of the software that you need todevelop a web application in Ruby on Rails.
22 http://wiki.rubyonrails.org/rails/pages/Editors/
49
Linux and Cross-platform Editors

We installed Ruby, Rails, and MySQL, and set up the standard directory structurefor our application, which we’ve named “Shovell.” We even launched the applic-ation for the first time, which enabled us to check which versions we were runningof the components involved. And finally, I gave you some options for text editorsyou can use to build the application.
All this work has been completed in preparation for Chapter 4, where we’ll beginto write our first lines of application code. But first, we’ve got some theory to getthrough—hold on tight, we’ll get coding soon enough!
50
Chapter 2: Getting Started

Introducing Ruby3While it certainly makes no attempt to constitute a complete guide to the Rubylanguage, this chapter will introduce you to some of the basics of Ruby. We’llpower through a crash-course in object oriented programming, covering the morecommon features of the language along the way, and leaving the more obscureaspects of Ruby for a dedicated reference guide.1 I’ll also point out some of theadvantages that Ruby has over other languages when it comes to developing ap-plications for the Web.
Some Rails developers suggest that it’s possible to learn and use Rails withoutlearning the Ruby basics first, but as far as I’m concerned, it’s extremely beneficialto know even a little Ruby before diving into the guts of Rails. In fact, if you takethe time to learn the Ruby basics first, you’ll automatically become a better Railsprogrammer.
Ruby is a Scripting LanguageIn general, programming languages fall into one of two categories: they’re eithercompiled languages or scripting languages. Let’s explore what each of those termsmeans, and understand the differences between them.
1 http://www.ruby-doc.org/stdlib/

Compiled LanguagesThe language in which you write an application is not actually something thatyour computer understands. Your code needs to be translated into bits and bytesthat can be executed by your computer. This process of translation is calledcompilation, and any language that requires compilation is referred to as acompiled language. Examples of compiled languages include C, C#, and Java.
For a compiled language, the actual compilation is the final step in the develop-ment process. You invoke a compiler—the software program that translates yourfinal hand-written, human-readable code into machine-readable code—and thecompiler creates an executable file. This final product is then able to execute in-dependently of the original source code.
Thus, if you make changes to your code, and you want those changes to be incor-porated into the application, you must stop the running application, recompileit, then start the application again.
Scripting LanguagesOn the other hand, a scripting language such as Ruby, PHP, or Python, reliesupon an application’s source code all of the time. Scripting languages don’thave a compiler or a compilation phase per se; instead, they use an interpreter—aprogram that runs on the web server—to translate hand-written code into machine-executable code on the fly. The link between the running application and yourhand-crafted code is never severed, because that scripting code is translated everytime it is invoked—in other words, for every web page that your applicationrenders.
As you might have gathered from the name, the use of an interpreter rather thana compiler is the major difference between a scripting language and a compiledlanguage.
The Great Performance DebateIf you’ve come from a compiled-language background, you might be concernedby all this talk of translating code on the fly—how does it affect the application’sperformance?
These concerns are valid—translating code on the web server every time it’sneeded is certainly more expensive, performance-wise, than executing pre-compiled
52
Chapter 3: Introducing Ruby

code, as it requires more effort on the part of your machine’s processor. The goodnews is that there are ways to speed up scripted languages, including techniquessuch as code caching and persistent interpreters. However, both topics are beyondthe scope of this book.
There’s also an upside to scripted languages in terms of performance—namely,your performance while developing an application.
Imagine that you’ve just compiled a shiny new Java application, and launched itfor the first time … and then you notice a typo on the welcome screen. To fix it,you have to stop your application, go back to the source code, fix the typo, waitfor the code to recompile, and restart your application to confirm that it is fixed.And if you find another typo, you’ll need to repeat that process again. Lather,rinse, repeat.
In a scripting language, you can fix the typo and just reload the page in yourbrowser—no restart, no recompile, no nothing. It’s as simple as that.
Ruby is an Object Oriented LanguageRuby, from its very beginnings, was built as a programming language that adheresto the principles of object oriented programming (OOP). Before getting intoRuby specifics, I’d like to introduce you to some fundamental concepts of OOP.Now I know that theory can seem a bit dry to those who are itching to startcoding, but we’ll cover a lot of ground in this short section, so don’t skip it. Thisdiscussion will hold you in good stead—trust me.
OOP is a programming paradigm that first surfaced in the 1960s, but didn’t gaintraction until the 1980s with C++. The core idea behind it is that programsshould be composed of individual entities, or objects, each of which has theability to communicate with other objects around it. Additionally, each objectmay have the facility to store data internally, as depicted in Figure 3.1.
53
Ruby is an Object Oriented Language

Figure 3.1. Communication between objects
Objects in an OOP application are often modeled on real-world objects, so evennon-programmers can usually recognize the basic role that an object plays.
And, just like the real world, OOP defines objects with similar characteristics asbelonging to the same class. A class is a construct for defining properties for ob-jects that are alike, and equipping them with functionality. For example, a classnamed Car might define the attributes color and mileage for its objects, andassign them functionality—actions such as “open the trunk,” “start the engine,”and “change gears.” These different actions are known as methods, althoughyou’ll often see Rails enthusiasts refer to the methods of a controller as “ac-tions”—you can safely consider the two terms to be interchangeable.
Understanding the relationship between a class and its objects is integral to un-derstanding how OOP works. For instance, one object can invoke functionalityon another object, and can do so without affecting other objects of the same class.So, if one car object was instructed to open its trunk (think of KITT, the talkingcar from the classic 80s television show “Knight Rider,” if it helps with themetaphor),2 then its trunk would open, but the trunk of other cars would remain
2 “Knight Rider” [http://en.wikipedia.org/wiki/Knight_rider/] was a popular series in the 1980s thatfeatured modern-day cowboy Michael Knight (played by David Hasselhoff) and his opinionated,talking, black Pontiac Firebird named KITT. Having seen the show is not critical to understandingobject oriented programming—just knowing that the car could talk will suffice!
54
Chapter 3: Introducing Ruby

closed. Similarly, if our high-tech talking car were instructed to change color tored, then it would do so, but other cars would not.
When we create a new object in OOP, we base it on an existing class. The processof creating new objects from a class is called instantiation. Figure 3.2 illustratesthe concept.
Figure 3.2. Classes and objects
As I mentioned, objects can communicate with each other and invoke function-ality (methods) on other objects. Invoking an object’s methods can be thoughtof as asking the object a question, and getting an answer in return.
Consider the example of our famous talking car again. Let’s say we ask the talkingcar object to report its current mileage. This question is not ambiguous—the an-swer that the object gives is called a return value, and is shown in Figure 3.3.
Figure 3.3. Asking a simple question
In some cases, the question and answer analogy doesn’t quite fit. In these situ-ations, we might rephrase the analogy to consider the question to be an instruc-tion, and the answer a status report indicating whether or not the instructionwas executed successfully. This might look something like the diagram in Fig-ure 3.4.
55
Ruby is an Object Oriented Language

Figure 3.4. Sending instructions
Sometimes we need a bit more flexibility with our instructions. For example, ifwe wanted to tell our car to change gear, we need to tell it not only to changegear, but also which gear to change to. The process of asking these kinds ofquestions is referred to as passing an argument to the method.
An argument is an input value that’s provided to a method. An argument canbe used in two ways:
❑ to influence how a method operates
❑ to influence which object a method operates on
An example is shown in Figure 3.5, where the method is “change gear,” and thenumber of the gear to which the car must change (two) is the argument.
Figure 3.5. Passing arguments
A more general view of all of these different types of communication betweenobjects is this: invoking an object’s methods is accomplished by sending messagesto it. As one might expect, the object sending the message is called the sender,and the object receiving the message is called the receiver.
Armed with this basic knowledge about object oriented programming, let’s lookat some Ruby specifics.
56
Chapter 3: Introducing Ruby
Reading and Writing Ruby CodeLearning the syntax of a new language has the potential to induce the occasionalyawn. So, to make things more interesting, I’ll present it to you in a practicalway that lets you play along at home: we’ll use the interactive Ruby shell.
The Interactive Ruby Shell (irb)You can fire up the interactive Ruby shell by entering irb into a terminal window.
Not the Standard DOS Box!
Windows users, don’t forget to use the Open Ruby Console option fromthe Instant Rails control panel, to make sure the environment you’re usingcontains the right settings.
irb allows you to issue Ruby commands interactively, one line at a time. This isgreat for playing with the language, and it’s also great for debugging, as we’ll seein Chapter 11.
A couple of points about the irb output you’ll see in this chapter:
❑ Lines beginning with the Ruby shell prompt (irb>) are typed in by you (andme).
❑ Lines beginning with => show the return value of the command that has beenentered.
We’ll start with a really brief example:
irb> 1=> 1
In this example, I’ve simply thrown the number 1 at the Ruby shell, and got backwhat appears to be the very same number.
Looks can be deceiving, though—it’s actually not the very same number. Whatwe were handed back is in fact a fully-featured Ruby object.
Remember our discussion about object oriented programming in the previoussection? Well, in Ruby, absolutely everything is treated as an object with which
57
Reading and Writing Ruby Code

we can interact—each object belongs to a certain class, therefore each object isable to store data and functionality in the form of methods.
To find the class to which our number belongs, we call the number’s classmethod:
irb> 1.class=> Fixnum
We touched on senders and receivers earlier. In this example, we’ve sent theclass message to the 1 object, so the 1 object is the receiver (there’s no sender,as we’re sending the message from the interactive command line rather than fromanother object). The value that’s returned by the method we’ve invoked is Fixnum,which is the Ruby class that represents integer values.
Since everything in Ruby (including a class) is an object, we can actually send thevery same message to the Fixnum class. The result is different, as we’d expect:
irb> Fixnum.class=> Class
This time, the return value is Class, which is somewhat reassuring—we did invokeit on a class name, after all.
Note that the method class is all lowercase, yet the return value Class beginswith a capital letter. A method in Ruby is always written in lowercase, whereasthe first letter of a class is always capitalized.
Interacting with Ruby ObjectsGetting used to thinking in terms of objects can take some time. Let’s look at afew different types of objects, and see how we can interact with them.
Literal Objects
Literal objects are character strings or numbers that appear directly in the code,as did the number 1 that was returned in the previous section. We’ve seen num-bers in action; next, let’s look at a string literal.
A string literal is an object that contains a string of characters, such as a name,an address, or an especially witty phrase. In the same way that we created the 1literal object in the previous example, we can easily create a new string literal
58
Chapter 3: Introducing Ruby
object, then send it a message. A string literal is created by enclosing the charactersthat make up the string in single or double quotes, like this:
irb> "The quick brown fox"=> "The quick brown fox"
First, we’ll confirm that our string literal indeed belongs to class String:
irb> "The quick brown fox".class=> String
This String object has a wealth of embedded functionality. For example, we canascertain the number of characters that our string literal comprises by sending itthe length message:
irb> "The quick brown fox".length=> 19
Easy stuff, eh?
Variables and Constants
Every application needs a way to store information. Enter: variables and constants.As their names imply, these two data containers have their own unique roles toplay.
A constant is an object that’s assigned a value once, and once only (usually whenthe application starts up). Constants are therefore used to store information thatdoesn’t need to change within a running application. As an example, a constantmight be used to store the version number for an application. Constants in Rubyare always written using uppercase letters, as shown below:
irb> CONSTANT = "The quick brown fox in a constant"=> "The quick brown fox in a constant"irb> APP_VERSION = 5.04=> 5.04
Variables, in contrast, are objects that are able to change at any time. They caneven be reset to nothing, which frees up the memory space that they previouslyoccupied. Variables in Ruby always start with a lowercase character:
irb> variable = "The quick brown fox in a variable"=> "The quick brown fox in a variable"
59
Interacting with Ruby Objects

There’s one more special (and, one might say, evil) thing about a variable—itsscope. The scope of a variable is the part of the program to which a variable isvisible. If you try to access a variable from outside its scope (i.e. from a part ofan application to which that variable is not visible), you generally won’t be ableto.
The notable exception to the rules defining a variable’s scope are global variables.As the name implies, a global variable is accessible from any part of the program.While this might sound convenient at first, usage of global variables is discour-aged—the fact that they can be written to and read from any part of the programintroduces security concerns.
Let’s return to the string literal example we saw earlier. Assigning a String to avariable allows us to invoke on that variable the same methods we invoked onthe string literal earlier:
irb> fox = "The quick brown fox"=> "The quick brown fox"irb> fox.class=> Stringirb> fox.length=> 19
Punctuation in RubyThe use of punctuation in Ruby code differs greatly from other languages suchas Perl and PHP, so it can seem confusing at first if you’re used to programmingin those languages. However, once you have a few basics under your belt, punc-tuation in Ruby begins to feel quite intuitive and can greatly enhance the readab-ility of your code.
Dot Notation
One of the most common punctuation characters in Ruby is the period (.). Aswe’ve seen, Ruby uses the period to separate the receiver from the message that’sbeing sent to it, in the form Object.receiver.
If you need to comment a line, either for documentation purposes or to tempor-arily take a line of code out of the program flow, use a hash mark (#). Commentsmay start at the beginning of a line, or they may appear further along, after someRuby code:
60
Chapter 3: Introducing Ruby

irb> # This is a comment. It doesn't actually do anything.irb> 1 # So is this, but this one comes after a statement.=> 1irb> fox = "The quick brown fox" # Assign to a variable=> "The quick brown fox"irb> fox.class # Display a variable's class=> Stringirb> fox.length # Display a variable's length=> 19
Chaining Statements Together
Ruby doesn’t require us to use any character to separate commands, unless wewant to chain multiple statements together on a single line. In this case, a semi-colon (;) is used as the separator. However, if you put every statement on its ownline (as we’ve been doing until now), the semicolon is completely optional.
If you chain multiple statements together in the interactive shell, only the outputof the last command that was executed will be displayed to the screen:
irb> fox.class; fox.length; fox.upcase=> "THE QUICK BROWN FOX"
Use of Parentheses
If you’ve ever delved into the source code of one of the many JavaScript librariesout there, you might have run screaming from your computer when you saw allthe parentheses that are involved in the passing of arguments to methods.3
In Ruby, the use of parentheses for method calls is optional in cases in which noarguments are passed to the method. The following statements are thereforeequal:
irb> fox.class()=> Stringirb> fox.class=> String
It’s common practice to include parentheses for method calls with multiple argu-ments, such as the insert method of the String class:
3 http://www.sitepoint.com/article/javascript-library/
61
Punctuation in Ruby

irb> "jumps over the lazy dog".insert(0, 'The quick brown fox ')=> "The quick brown fox jumps over the lazy dog"
This call inserts the second argument passed to the insert object ("The quickbrown fox ") at position 0 of the receiving String object ("jumps over thelazy dog"). Position 0 refers to the very beginning of the string.
Method Notation
Until now, we’ve looked at cases where Ruby uses less punctuation than itscompetitors. In fact, Ruby makes heavy use of expressive punctuation when itcomes to the naming of methods.
A regular method name, as we’ve seen, is a simple, alphanumeric string of char-acters. If a method has a potentially destructive nature (for example, it directlymodifies the receiving object rather than changing a copy of it), it’s commonlysuffixed with an exclamation mark (!).
The following example uses the upcase method to illustrate this point:
irb> fox.upcase=> "THE QUICK BROWN FOX"irb> fox=> "The quick brown fox"irb> fox.upcase!=> "THE QUICK BROWN FOX"irb> fox=> "THE QUICK BROWN FOX"
Here, the contents of the fox variable have been modified by the upcase!method.
Punctuation is also used in the names of methods that return boolean values.A boolean value is a value that’s either true or false; these values are commonlyused as return values for methods that ask yes/no questions. Such methods endin a question mark, which nicely reflects the fact that they have yes/no answers:
irb> fox.empty?=> falseirb> fox.is_a? String=> true
These naming conventions make it easy to recognize methods that are destructive,and those that return boolean values, making your Ruby code more readable.
62
Chapter 3: Introducing Ruby

Object Oriented Programming in RubyLet’s build on the theory that we covered at the start of this chapter as we takea look at Ruby’s implementation of OOP.
As we already know, the structure of an application based on OOP principles isfocused on interaction with objects. These objects are often representations ofreal-world objects, like a Car. Interaction with an object occurs when we send ita message or ask it a question. If we really did have a Car object called kitt (wedon’t—yet), starting the car might be as simple as:
irb> kitt.start
This short line of Ruby code sends the message start to the object kitt. UsingOOP terminology, we would say that this code statement calls the start methodof the kitt object.
As I mentioned before, in contrast to other object oriented programming languagessuch as Python and PHP, in Ruby, everything is an object. Especially when com-pared with PHP, Ruby’s OOP doesn’t feel like a “tacked-on” afterthought—itwas clearly intended to be a core feature of the language from the beginning,which makes using the OOP features in Ruby a real pleasure.
As we saw in the previous section, even the simplest of elements in Ruby (likeliteral strings and numbers) are objects to which you can send messages.
Classes and ObjectsAs in any other OOP language, in Ruby, each object belongs to a certain class(for example, PontiacFirebird might be an object of class Car). As we saw inthe discussion at the beginning of this chapter, a class can group objects of acertain kind, and equip those objects with common functionality. This function-ality comes in the form of methods, and in the object’s ability to store information.For example, a PontiacFirebird object might need to store its mileage, as mightany other object of the class Car.
In Ruby, the instantiation of a new object that’s based on an existing class is ac-complished by sending that class the new message. The result is a new object ofthat class. The following few lines of code show an extremely basic class definitioninto Ruby—the third line is where we create an instance of the class that we justdefined.
63
Object Oriented Programming in Ruby

irb> class Carirb> end=> nilirb> kitt = Car.new=> #<Car:0x75e54>
Another basic principle in OOP is encapsulation. According to this principle,objects should be treated as independent entities, each taking care of its own in-ternal data and functionality. If we need to access an object’s information—forinstance, its internal variables—we make use of the object’s interface, which isthe subset of the object’s methods that are made available for other objects tocall.
Ruby provides objects with functionality at two levels—the object level, and classlevel—and it adheres to the principle of encapsulation while it’s at it! Let’s digdeeper.
Object-level FunctionalityAt the object level, data storage is handled by instance variables (a name that’sderived from the instantiation process mentioned above). Think of instancevariables as storage containers that are attached to the object, but to which otherobjects do not have direct access.
To store or retrieve data from these variables, another object must call an accessormethod on the object. An accessor method has the ability to set (and get) thevalue of the object’s instance variables.
Let’s look at how instance variables and accessor methods relate to each other,and how they’re implemented in Ruby.
Instance Variables
Instance variables are bound to an object, and contain values for that object only.
Revisiting our cars example, the mileage values for a number of different Carobjects are likely to differ, as each car will have a different mileage. Therefore,mileage is held in an instance variable.
An instance variable can be recognized by its prefix: a single “at” sign (@). Andwhat’s more, instance variables don’t even need to be declared! There’s only one
64
Chapter 3: Introducing Ruby
problem: we don’t have any way to retrieve or change them from outside theobject once they do exist. This is where instance methods come into play.
Instance Methods
Data storage and retrieval is not the only capability that can be bound to a spe-cific object—functionality, too, can be bound to objects. We achieve this bindingthrough the use of instance methods, which are specific to an object. Invokingan instance method (in other words, sending a message that contains the methodname to an object) will invoke that functionality on the receiving object only.
Instance methods are defined using the def keyword, and end with the endkeyword. Enter the following example into a new Ruby shell:
$ irbirb> class Carirb> def open_trunkirb> # code to open trunk goes hereirb> endirb> end=> nilirb> kitt = Car.new=> #<Car:0x75e54>
What you’ve done is define a class called Car, which has an instance methodwith the name open_trunk. A Car object instantiated from this class will (possiblyusing some fancy robotics connected to our Ruby program) open its trunk whenits open_trunk method is called. (Ignore that nil return value for the moment;we’ll look at nil values in the next section.)
Indenting your Code
While the indentation of code is a key element of the syntax of languagessuch as Python, in Ruby, indentation is purely cosmetic—it aids readability,but does not affect the code in any way. In fact, while we’re experimentingwith the Ruby shell, you needn’t be too worried about indenting any of thecode. However, when we’re saving files that will be edited later, you’ll wantthe readability benefits that come from indenting nested lines.
The Ruby community has agreed upon two spaces as being optimum for in-denting blocks of code such as class or method definitions. We’ll adhere tothis indentation scheme throughout this book.
With our class in place, we can make use of this method:
65
Object-level Functionality

irb> kitt.open_trunk=> nil
Since we don’t want the trunks of all cars to open at once, we’ve made thisfunctionality available as an instance method.
I know, I know: we still haven’t modified any data. We use accessor methods forthis task.
Accessor Methods
An accessor method is a special type of instance method, and is used to read orwrite to an instance variable. There are two types: readers (sometimes called“getters”) and writers (or “setters”).
A reader method will look inside the object, fetch the value of an instance variable,and hand this value back to us. A writer method, on the other hand, will lookinside the object, find an instance variable, and assign the variable the value thatit was passed.
Let’s add some methods for getting and setting the @mileage attribute of ourCar objects. Once again, exit from the Ruby shell so that we can create an entirelynew Car class definition. Our class definition is getting a bit longer now, so entereach line carefully. If you make a typing mistake, exit the shell and start over.
$ irbirb> class Carirb> def set_mileage(x)irb> @mileage = xirb> endirb> def get_mileageirb> @mileageirb> endirb> end=> nilirb> kitt = Car.new=> #<Car:0x75e54>
Now, we can finally modify and retrieve the mileage of our Car objects!
irb> kitt.set_mileage(5667)=> 5667irb> kitt.get_mileage=> 5667
66
Chapter 3: Introducing Ruby

This is still a bit awkward. Wouldn’t it be nice if we could give our accessormethods exactly the same names as the attributes that they read from or writeto? Luckily, Ruby contains shorthand notation for this very task. We can rewriteour class definition as follows:
$ irbirb> class Carirb> def mileage=(x)irb> @mileage = xirb> endirb> def mileageirb> @mileageirb> endirb> end=> nilirb> kitt = Car.new=> #<Car:0x75e54>
With these accessor methods in place, we can read to and write from our instancevariable as if it were available from outside the object.
irb> kitt.mileage = 6032=> 6032irb> kitt.mileage=> 6032
These accessor methods form part of the object’s interface.
Class-level FunctionalityAt the class level, class variables handle data storage. They’re commonly usedto store state information, or as a means of configuring default values for newobjects. Class variables are typically set in the body of a class, and can be recog-nized by their prefix: a double “at” sign (@@).
First, enter the following class definition into a new Ruby shell.
$ irbirb> class Carirb> @@number_of_cars = 0irb> def initializeirb> @@number_of_cars = @@number_of_cars + 1irb> endirb> end=> nil
67
Class-level Functionality

The class definition for the class Car above has an internal counter for the totalnumber of Car objects that have been created. Using the special instance methodinitialize, which is invoked automatically every time an object is instantiated,this counter is incremented for each new Car object.
By the way, we have actually already used a class method. Do you like how Isnuck it in there? The new method is an example of a class method that shipswith Ruby and is available to all classes—whether they’re defined by you, or formpart of the Ruby Standard Library.4
Custom class methods are commonly used to create objects with special properties(such as a default color for our Car objects), or to gather statistics about theclass’s usage.
Extending the earlier example, we could use a class method called count to returnthe value of the @@number_of_cars class variable. Remember that this is a variablethat’s incremented for every new Car object that’s created. Class methods aredefined identically to instance methods: using the def and end keywords. Theonly difference is that class method names are prefixed with self. Enter this codeinto a new Ruby shell:
$ irbirb> class Carirb> @@number_of_cars = 0irb> def self.countirb> @@number_of_carsirb> endirb> def initializeirb> @@number_of_cars+=1irb> endirb> end=> nil
The following code instantiates some new Car objects, then makes use of ournew class method:
irb> kitt = Car.new # Michael Knight's talking car=> #<0xba8c>irb> herbie = Car.new # The famous VolksWagen love bug!=> #<0x8cd20>irb> batmobile = Car.new # Batman's sleek automobile
4 The Ruby Standard Library is a large collection of classes that’s included with every Ruby installation.The classes facilitate a wide range of common functionality, such as accessing web sites, date calcula-tions, file operations, and more.
68
Chapter 3: Introducing Ruby
=> #<0x872e4>irb> Car.count=> 3
The method tells us that three instances of the Car class have been created. Notethat we can’t call a class method on an object:5
irb> kitt.countNoMethodError: undefined method 'count' for #<Car:0x89da0>
As implied by the name, the count class method is available only to the Car class,not to any objects instantiated from that class.
I sneakily introduced something else in there. Did you spot it? In many languages,including PHP and Java, the ++ and -- operators are used to increment a variableby one. Ruby doesn’t support this notation; instead, when working with Ruby,we need to use the += operator. Therefore, the shorthand notation for increment-ing our counter in the class definition is:
irb> @@number_of_cars+=1
This code is identical to the following:
irb> @@number_of_cars = @@number of cars + 1
Both of these lines can be read as “my_variable becomes equal to my_variableplus one.”
InheritanceIf your application deals with more than the flat hierarchy we’ve explored so far,you might want to construct a scenario whereby some classes inherit from otherclasses. Continuing with the car analogy, let’s suppose that we had a green lim-ousine named Larry (this assigning of names to cars might feel a bit strange, butit’s important for this example, so bear with me). In Ruby, the larry object wouldprobably descend from a StretchLimo class, which could in turn descend fromthe class Car. Let’s implement that, to see how it works:
$ irbirb> class Carirb> @@wheels = 4
5 Ruby actually does provide a way to invoke some class methods on an object, using the :: operator,but we won’t worry about that for now. We’ll see the :: operator in use in Chapter 4.
69
Inheritance

irb> end=> nilirb> class StretchLimo < Carirb> @@wheels = 6irb> def turn_on_televisionirb> # Invoke code for switching on on-board TV hereirb> endirb> end=> nil
Now, if we were to instantiate an object of class StretchLimo, we’d end up witha different kind of car. Instead of the regular four wheels that standard Car objectshave, this one would have six wheels (stored in the class variable @@wheels). Itwould also have extra functionality, made possible by an extra meth-od—turn_on_television— which would be available to be called by other ob-jects.
However, if we were to instantiate a regular Car object, the car would have onlyfour wheels, and there would be no instance method for turning on an on-boardtelevision. Think of inheritance as a way for the functionality of a class to becomemore specialized the further we move down the inheritance path.
Don’t worry if you’re struggling to wrap your head around all the aspects ofOOP—you’ll automatically become accustomed to them as you work throughthis book. You might find it useful to come back to this section, though, especiallyif you need a reminder about a certain term later on.
Return ValuesIt’s always great to receive feedback. Remember our talk about passing argumentsto methods? Well, regardless of whether or not a method accepts arguments, in-voking a method in Ruby always results in feedback—it comes in the form of areturn value, which is returned either explicitly or implicitly.
To return a value explicitly, use the return statement in the body of a method:
irb> def toot_hornirb> return "toooot!"irb> end=> nil
Calling the toot_horn method in this case would produce the following:
70
Chapter 3: Introducing Ruby

irb> toot_horn=> "toooot!"
However, if no return statement is used, the result of the last statement that wasexecuted is used as the return value. This behavior is quite unique to Ruby:
irb> def toot_loud_hornirb> "toooot!".upcaseirb> end=> nil
Calling the toot_loud_horn method in this case would produce:
irb> toot_loud_horn=> "TOOOOT!"
Standard OutputWhen you need to show output to the users of your application, use the printand puts (“put string”) statements. Both methods will display the argumentspassed to them as Strings; puts also inserts a carriage return at the end of itsoutput. Therefore, in a Ruby program the following lines:
print "The quick "print "brown fox"
would produce this output:
The quick brown fox
However, using puts like so:
puts "jumps over"puts "the lazy dog"
would produce this output:
jumps overthe lazy dog
At this stage, you might be wondering why all of the trial-and-error code snippetsthat we’ve typed into the Ruby shell actually produced output, given that wehaven’t been making use of the print or puts methods. The reason is that irbautomatically writes the return value of the last statement it executes to the screenbefore displaying the irb prompt. This means that using a print or puts from
71
Standard Output
within the Ruby shell might in fact produce two lines of output—the output thatyou specify should be displayed, and the return value of the last command thatwas executed, as in the following example:
irb> puts "The quick brown fox""The quick brown fox"=> nil
Here, nil is actually the return value of the puts statement. Looking back atprevious examples, you will have encountered nil as the return value for classand method definitions, and you’ll have received a hexadecimal address, such as<#Car:0x89da0>, as the return value for object definitions. This hexadecimalvalue showed the location in memory that the object we instantiated occupied,but luckily we won’t need to bother with such geeky details any further.
Having met the print and puts statements, you should be aware that a Railsapplication actually has a completely different approach to displaying output,called templates. We’ll look at templates in Chapter 4.
Ruby Core ClassesWe’ve already talked briefly about the String and Fixnum classes in the previoussections, but Ruby has a lot more under its hood. Let’s explore!
ArraysWe use Ruby’s Arrays to store collections of objects. Each individual object that’sstored in an Array has a unique numeric key, which we can use to reference it.As with many languages, the first element in an Array is stored at position 0(zero).
To create a new Array, simply instantiate a new object of class Array (using theArray.new construct). You can also use a shortcut approach, which is to enclosethe objects you want to place inside the Array in square brackets.
For example, an Array containing the mileage at which a car is due for its regularservice might look something like this:
irb> service_mileage = [5000, 15000, 30000, 60000, 100000]=> [5000, 15000, 30000, 60000, 100000]
72
Chapter 3: Introducing Ruby

To retrieve individual elements from an Array, we specify the numeric key insquare brackets.
irb> service_mileage[0]=> 5000irb> service_mileage[2]=> 30000
Ruby has another shortcut, which allows us to create an Array from a list ofStrings: the %w( ) syntax. Using this shortcut saves us from having to type alot of double-quote characters:
irb> available_colors = %w( red green blue black )=> ["red", "green", "blue", "black"]irb> available_colors[0]=> "red"irb> available_colors[3]=> "black"
In addition to facilitating simple element retrieval, Arrays come with an extensiveset of class methods and instance methods that ease data management tasks tre-mendously.
❑ empty? returns true if the receiving Array doesn’t contain any elements:
irb> available_colors.empty?=> false
❑ size returns the number of elements in an Array:
irb> available_colors.size=> 4
❑ first and last return an Array’s first and last elements, respectively:
irb> available_colors.first=> "red"irb> available_colors.last=> "black"
❑ delete removes the named element from the Array and returns it:
irb> available_colors.delete "red"=> "red"
73
Arrays

irb> available_colors=> ["green", "blue", "black"]
The complete list of class methods and instance methods provided by the Arrayclass is available via the Ruby reference documentation, which you can access byentering the ri command into the terminal window (for your operating system,not the Ruby shell), followed by the class name you’d like to look up:
$ ri Array
Oh, and ri stands for ruby interactive, in case you’re wondering. Don’t confuseit with irb.
HashesA Hash is another kind of data storage container. Hashes are similar, conceptually,to dictionaries: they map one object (the key—for example, a word) to anotherobject (the value—for example, a word’s definition) in a one-to-one relationship.
New Hashes can be created either by instantiating a new object of class Hash(using the Hash.new construct) or by using the curly brace shortcut shown below.When we define a Hash, we must specify each entry using the key => valuesyntax.
For example, the following Hash maps car names to a color:
irb> car_colors = {irb> 'kitt' => 'black',irb> 'herbie' => 'white',irb> 'batmobile' => 'black',irb> 'larry' => 'green'irb> }=> {"kitt"=>"black", "herbie"=>"white", "batmobile"=>"black", "larry"=>"green"}
To query this newly built Hash, we pass the key of the entry we want to look upin square brackets, like so:
irb> car_colors['kitt']=> "black"
All sorts of useful functionality is built into Hashes, including the followingmethods:
74
Chapter 3: Introducing Ruby

❑ empty? returns true if the receiving Hash doesn’t contain any elements:
irb> car_colors.empty?=> false
❑ size returns the number of elements in a Hash:
irb> car_colors.size=> 4
❑ keys returns all keys of a Hash as an Array:
irb> car_colors.keys=> ["kitt", "herbie", "larry", "batmobile"]
❑ values returns all values of a Hash as an Array, although care should be takenwith regards to the order of the elements (keys in a Hash are ordered for op-timal storage and retrieval; this order does not necessarily reflect the order inwhich they were entered):
irb> car_colors.values=> ["black", "white", "green", "black"]
There are lots more—for the complete list of class methods and instance methodsprovided by the Hash class, consult the Ruby reference documentation.
StringsThe typical Ruby String object—yep, that very object we’ve been using in thepast few sections—holds and manipulates sequences of characters. Most of thetime, new String objects are created using string literals that are enclosed insingle or double quotes. The literal can then be stored in a variable for later use:
irb> a_phrase = "The quick brown fox"=> "The quick brown fox"irb> a_phrase.class=> String
If the string literal includes the quote character used to enclose the string itself,it must be escaped with a backslash character (\):
75
Strings

irb> 'I\'m a quick brown fox'=> "I'm a quick brown fox"irb> "Arnie said, \"I'm back!\""=> "Arnie said, \"I'm back!\""
An easier way to specify string literals that contain quotes is to use the %Q shortcut,like this:
irb> %Q(Arnie said, "I'm back!")=> "Arnie said, \"I'm back!\""
String objects also support the substitution of Ruby code into a string literal viathe Ruby expression #{}:
irb> "The current time is: #{Time.now}"=> "The current time is: Wed Aug 02 21:15:19 CEST 2006"
The String class also has rich embedded functionality for modifying Stringobjects. Here are some of the most useful methods:
❑ gsub substitutes a given pattern within a String:
irb> "The quick brown fox".gsub('fox', 'dog')=> "The quick brown dog"
❑ include? returns true if a String contains another specific String:
irb> "The quick brown fox".include?('fox')=> true
❑ length returns the length of a String in characters:
irb> "The quick brown fox".length=> 19
❑ slice returns a portion of a String:
irb> "The quick brown fox".slice(0, 3)=> "The"
The complete method reference is available using the ri command-line tool:
$ ri String
76
Chapter 3: Introducing Ruby

NumericsSince there are so many different types of numbers, Ruby has a separate classfor each, the popular Float, Fixnum, and Bignum classes among them. In fact,they’re all subclasses of Numeric, which provides the basic functionality.
Just like Strings, numbers are usually created from literals:
irb> 123.class=> Fixnumirb> 12.5.class=> Float
Each of the specific Numeric subclasses comes with features that are relevant tothe type of number it’s designed to deal with. However, the following functionalityis shared between all Numeric subclasses:
❑ integer? returns true if the object is a whole integer:
irb> 123.integer?=> trueirb> 12.5.integer?=> false
❑ round rounds a number to the nearest integer:
irb> 12.3.round=> 12irb> 38.8.round=> 39
❑ zero? returns true if the number is equal to zero:
irb> 0.zero?=> trueirb> 8.zero?=> false
Additionally, there are ways to convert numbers between the Numeric subclasses.to_f converts a value to a Float, and to_i converts a value to an Integer:
irb> 12.to_f=> 12.0
77
Numerics

irb> 11.3.to_i=> 11
SymbolsIn Ruby, a Symbol is a simple textual identifier. Like a String, a Symbol is createdusing literals; the difference is that a Symbol is prefixed with a colon:
irb> :fox=> :foxirb> :fox.class=> Symbol
The main benefit of using a Symbol instead of a String is that a Symbol containsless functionality. This can be an advantage in certain situations. For example,the car_colors Hash that we looked at earlier could be rewritten as follows:
car_colors = :kitt => 'black', :herbie => 'white', :larry => 'green', :batmobile => 'black'}
Objects of class String can be converted to Symbols, and vice-versa:
irb> "fox".to_sym=> :foxirb> :fox.to_s=> "fox"
We’ll use Symbols frequently as we deal with Rails functionality in successivechapters of this book.
nil
I promised earlier that I’d explain nil values—now’s the time!
All programming languages have a value that they can use when they actuallymean nothing. Some use undef; others use NULL. Ruby uses nil. A nil value, likeeverything in Ruby, is also an object. It therefore has its own class: NilClass.
Basically, if a method doesn’t return anything, it is, in fact, returning the valuenil. And if you assign nil to a variable, you effectively make it empty. nil shows
78
Chapter 3: Introducing Ruby

up in a couple of additional places, but we’ll cross those bridges when we cometo them.
Running Ruby FilesFor the simple Ruby basics that we’ve experimented with so far, the interactiveRuby shell (irb) has been our tool of choice. I’m sure you’ll agree that experi-menting in a shell-like environment, where we can see immediate results, is agreat way to learn the language.
However, we’re going to be talking about control structures next, and for tasksof such complexity, you’ll want to work in a text editor. This environment willallow you to run a chunk of code many times without having to retype it.
In general, Ruby scripts are simple text files containing Ruby code and have a.rb extension. These files are passed to the Ruby interpreter, which executesyour code, like this:
$ ruby myscript.rb
To work with the examples that follow, I’d recommend that you open a new textfile in your favorite text editor (which might be one of those I recommended backin Chapter 2) and type the code out as you go—this really is the best way tolearn. However, I acknowledge that some people aren’t interested in typingeverything out, and just want to cut to the chase. These more impatient readerscan download the code archive for this book, which contains all of these examples.6
You can execute this code in the Ruby interpreter straight away.
As demonstrated above, to run the files from the command line, you simply needto type ruby, followed by the filename.
Control StructuresRuby has a rich set of features for controlling the flow of your application. Con-ditionals are key words that are used to decide whether or not certain statementsare executed based on the evaluation of one or more conditions; loops are con-structs that execute statements more than once; blocks are a means of encapsu-lating functionality (for example, to be executed in a loop).
6 http://www.sitepoint.com/books/rails1/code.php
79
Running Ruby Files

To demonstrate these control structures, let’s utilize some of the Car classes thatwe defined earlier. Type out the following class definition and save the file (orload it from the code archive); we’ll build on it in this section as we explore somecontrol structures.
File: 01-car-classes.rb
class Car @@wheels = 4 # class variable @@number_of_cars = 0 # class variable def initialize @@number_of_cars = @@number_of_cars + 1 end def self.count @@number_of_cars end def mileage=(x) # instance variable writer @mileage = x end def mileage # instance variable reader @mileage endend
class StretchLimo < Car @@wheels = 6 # class variable @@televisions = 1 # class variable def turn_on_television # Invoke code for switching on on-board TV here endend
class PontiacFirebird < Carend
class VolksWagen < Carend
ConditionalsThere are two basic conditional constructs in Ruby: if and unless. Each of theseconstructs can be used to execute a group of statements on the basis of a givencondition.
80
Chapter 3: Introducing Ruby

The if Construct
An if construct wraps statements that are to be executed only if a certain condi-tion is met. The keyword end defines the end of the if construct. The statementscontained between the condition and the end keyword are executed only if thecondition is met.
File: 02-if-construct.rb (excerpt)
if Car.count.zero? puts "No cars have been produced yet."end
You can provide a second condition by adding an else block: when the conditionis met, the first block is executed; otherwise, the else block is executed. Thiskind of control flow will probably be familiar to you. Here it is in action:
File: 03-if-else-construct.rb (excerpt)
if Car.count.zero? puts "No cars have been produced yet."else puts "New cars can still be produced."end
The most complicated example involves an alternative condition. If the firstcondition is not met, then a second condition is evaluated. If neither conditionsare met, the else block is executed:
File: 04-if-elsif-else.rb (excerpt)
if Car.count.zero? puts "No cars have been produced yet."elsif Car.count >= 10 puts "Production capacity has been reached."else puts "New cars can still be produced."end
If the count method returned 5, the code above would produce the followingoutput:
New cars can still be produced.
An alternative to the traditional if condition is the if statement modifier. Astatement modifier does just that—it modifies the statement of which it is part.
81
Conditionals

The if statement modifier works exactly like a regular if condition, but it sitsat the end of the line that’s affected, rather than before a block of code:
File: 05-if-statement-modifier.rb (excerpt)
puts "No cars have been produced yet." if Car.count.zero?
This version of the if condition is often used when the code that’s to be executedconditionally comprises just a single line. Having the ability to create conditionslike this results in code that’s a lot more like English than other programminglanguages with more rigid structures.
The unless Construct
The unless condition is a negative version of the if condition. It’s useful forsituations in which you want to execute a group of statements when a certaincondition is not met.
Let’s create a few instances to work with:7
File: 06-unless-construct.rb (excerpt)
kitt = PontiacFirebird.newkitt.mileage = 5667
herbie = VolksWagen.newherbie.mileage = 33014
batmobile = PontiacFirebird.newbatmobile.mileage = 4623
larry = StretchLimo.newlarry.mileage = 20140
Now if we wanted to find out how many Knight Rider fans KITT could take fora joy-ride, we could check which class the kitt object was. As with the if expres-sion, the end keyword defines the end of the statement.
7 Aficionados of comics will notice that I’ve created the BatMobile as a Pontiac Firebird—in fact, thecaped crusader’s choice of transport has varied over the years, taking in many of the automobile in-dustry’s less common innovations, and including everything from a 1966 Lincoln Futura to an am-phibious tank. But we’ll stick with a Pontiac for this example.
82
Chapter 3: Introducing Ruby

File: 06-unless-construct.rb (excerpt)
unless kitt.is_a?(StretchLimo) puts "This car is only licensed to seat two people."end
Like the if condition, the unless condition may have an optional else block ofstatements, which is executed when the condition is met:
File: 07-unless-else.rb (excerpt)
unless kitt.is_a?(StretchLimo) puts "This car only has room for two people."else puts "This car is licensed to carry up to 10 passengers."end
Since KITT is definitely not a stretch limousine, this code would return:
This car only has room for two people.
Unlike if conditions, unless conditions do not support a second condition.However, like the if condition, the unless condition is also available as a state-ment modifier. The following code shows an example of this. Here, the messagewill not display if KITT’s mileage is less than 25000:
File: 08-unless-statement-modifier.rb (excerpt)
puts "Service due!" unless kitt.mileage < 25000
LoopsRuby provides the while and for constructs for looping through code (i.e. execut-ing a group of statements a specified number of times, or until a certain conditionis met). Also, a number of instance methods are available for looping over theelements of an Array or Hash; we’ll cover these in the next section.
while and until Loops
A while loop executes the statements it encloses repeatedly, as long as the spe-cified condition is met.
File: 09-while-loop.rb (excerpt)
while Car.count < 10 Car.new
83
Loops

puts "A new car instance was created."end
This simple while loop executes the Car.new statement repeatedly, as long asthe total number of cars is below ten. It exits the loop when the number reachesten.
Like the relationship between if and unless, the while loop also has a comple-ment: the until construct. If we use until, the code within the loop is executeduntil the condition is met. We could rewrite the loop above using until like so:
File: 10-until-loop.rb (excerpt)
until Car.count == 10 Car.new puts "A new car instance was created."end
The Difference Between = and ==
It’s important to note the difference between the assignment operator (asingle equal sign) and the equation operator (a double equal sign) whenusing them within a condition.
If you’re comparing two values, use the equation operator:
if Car.count == 10 …end
If you’re assigning a value to a variable, use the assignment operator:
my_new_car = Car.new
If you confuse the two, you might modify a value that you were hoping onlyto inspect, with potentially disastrous consequences!
for Loops
for loops allow us to iterate over the elements of a collection—such as anArray—and execute a group of statements once for each element. Here’s an ex-ample:
84
Chapter 3: Introducing Ruby

File: 11-for-loop.rb (excerpt)
for car in [ kitt, herbie, batmobile, larry ] puts car.mileageend
The code above would produce the following output:
566733014462320140
This simple for loop iterates over an Array of Car objects and outputs themileage for each car. For each iteration, the car variable is set to the currentelement of the Array. The first iteration has car set to the equivalent oflincoln_towncar, the second iteration has it set to chrysler_voyager, and soforth.
In practice, the traditional while and for loops covered here are little used. In-stead, most people tend to use the instance methods provided by the Array andHash classes, which we’ll cover next.
BlocksBlocks are probably the single most attractive feature of Ruby. However, they’realso one of those things that take a while to “click” for Ruby newcomers. Beforewe dig deeper into creating blocks, let’s take a look at some of the core featuresof Ruby that use blocks.
We looked at some loop constructs in the previous section, and this was a usefulway to explore the tools that are available to us. However, you’ll probably neveractually come across many of these constructs in your work with other Rubyscripts, simply because it’s almost always much easier to use a block to performthe same task. A block, in conjunction with the each method that is provided bythe Array and Hash classes, is a very powerful way to loop through your data.
Let me illustrate this point with an example. Consider the for loop we used amoment ago. We could rewrite that code to use the each method, which is aninstance method of the Array class, like so:
85
Blocks

File: 12-simple-block.rb (excerpt)
[ kitt, herbie, batmobile, larry ].each do |car_name| puts car_name.mileageend
Let’s analyze this: the block comprises the code between the do and end keywords.A block is able to receive parameters, which are placed between vertical bars (|)at the beginning of the block. Multiple parameters are separated by commas.Therefore, this code performs an identical operation to the for loop we saw before,but in a much more succinct manner.
Let’s take another example. To loop through the elements of a Hash, we use theeach method, and pass two parameters to the block—the key (car_name) andthe value (color)—like this:
File: 13-block-with-params.rb (excerpt)
car_colors = { 'kitt' => 'black', 'herbie' => 'white', 'batmobile' => 'black', 'larry' => 'green'}car_colors.each do |car_name, color| puts "#{car_name} is #{color}"end
This code produces the following output:
kitt is blackherbie is whitebatmobile is blacklarry is green
The Integer class also sports a number of methods that use blocks. The timesmethod of an Integer object, for example, executes a block exactly n times, wheren is the value of the object.
File: 14-block-integer.rb (excerpt)
10.times { Car.new }puts "#{Car.count} cars have been produced."
The code above produces this output:
10 cars have been produced.
86
Chapter 3: Introducing Ruby

One final point to note here is the alternate block syntax of curly braces. Insteadof the do…end keywords that we used in previous examples, curly braces are thepreferred syntax for blocks that are very short, as in the previous example.
Here’s another method of the Integer class—in the spirit of times, the uptomethod counts from the value of the object up to the argument passed to themethod.
File: 15-block-upto.rb
5.upto(7) { |i| puts i }
This code produces the output shown here:
567
In Ruby parlance, the object i is a parameter of the block. Parameters for blocksare enclosed in vertical bars, and are usually available only from within the block.If we have more than one parameter, we separate them using commas, like so:|parameter1, parameter2|. In the example above, we would no longer haveaccess to i once the block had finished executing.
As we work through this book, we’ll explore many more uses of blocks in combin-ation with the Rails core classes.
SummaryWow, we covered a lot in this chapter! First, we swept through a stack of objectoriented programming theory—probably the equivalent of an introductory com-puter science course! This gave us a good grounding for exploring the basics ofthe Ruby programming language, and the Interactive Ruby Shell (irb) was a funway to do this exploration.
We also investigated many of the Ruby core classes, such as String, Array, andHash, from within the Ruby shell. We then moved from the shell to create andsave proper Ruby files, and using these files, we experimented with controlstructures such as conditionals, loops, and blocks.
In the next chapter, we’ll look at the major cornerstones that make up the Railsframework—the integrated testing facilities—as well as the roles that the devel-opment, testing, and production environments play.
87
Summary

88

Rails Revealed4As you might have gathered from Chapter 1, quite a bit of thought has been putinto the code base that makes up the Rails framework. Over time, many of theinternals have been rewritten, which has improved their speed and efficiency,and allowed the implementation of additional features, but the original architec-ture remains largely unchanged. This chapter will shed some light on the innerworkings of Rails.
Three EnvironmentsRails encourages the use of a different environment for each of the stages in anapplication’s lifecycle—development, testing, and production. If you’ve beendeveloping Web applications for a while, this is probably how you operate anyway;Rails just formalizes these environments.
development In the development environment, changes to an application’ssource code are immediately visible; all we need to do is reloadthe corresponding page in a web browser. Speed is not a criticalfactor in this environment; instead, the focus is on providingthe developer with as much insight as possible into the compon-ents involved in displaying each page. When an error occurs inthe development environment, the developer is able to tell at aglance which line of code is responsible for the error, and how

that particular line was invoked. This capability is provided bythe stack trace (a comprehensive list of all the method callsleading up to the error), which is displayed when an unexpectederror occurs.
test In testing, we usually refresh the database with a baseline ofdummy data each time a test is repeated—this ensures that theresults of the tests are consistent, and that behavior is reprodu-cible. Unit and functional testing procedures are fully automatedin Rails.
When we test a Rails application, we don’t view it using a tradi-tional web browser. Instead, tests are invoked from the commandline, and can be run as background processes. The testing envir-onment provides a dedicated environment in which these pro-cesses can operate.
production By the time your application finally goes live, it should be welltested, so that all (or at least most) of the bugs have been elim-inated. As a result, updates to the code base should be infre-quent, which means that the production environments can beoptimized to focus on performance. Tasks such as writing extens-ive logs for debugging purposes should be unnecessary at thisstage. Besides, if an error does occur, you don’t want to scareyour visitors away with a cryptic stack trace—that’s best keptfor the development environment.
As the requirements of each of the three environments are quite different, Railsstores the data for each environment in entirely separate databases. So at anygiven time, you might have:
❑ live data with which real users are interacting in the production environment
❑ a partial copy of this live data that you’re using to debug an error or developnew features in the development environment
❑ a set of testing data that’s constantly being reloaded into the testing environ-ment
Let’s look at how we can configure our database for each of these environments.
90
Chapter 4: Rails Revealed

Database ConfigurationConfiguring the database for a Rails application is frighteningly easy—all of thecritical information is contained in just one file. We’ll take a look at it now, thencreate some databases for our application to use.
The Database Configuration FileThe separation of environments is reflected in the Rails database configurationfile database.yml. We saw a sample of this file back in Chapter 1, and in factwe created our very own configuration file in Chapter 2, when we used the railscommand. Go take a look! It lives in the config subdirectory of our Shovell ap-plication.
With the comments removed, the file should look like this:1
File: 01-database.yml
development: adapter: mysql database: shovell_development username: root password: host: localhosttest: adapter: mysql database: shovell_test username: root password: host: localhostproduction: adapter: mysql database: shovell_production username: root password: host: localhost
This file lists the minimum amount of information we need in order to connectto the database server for each of our environments (development, test, andproduction). With the default setup of MySQL that we installed in Chapter 2,we can be confident to proceed with our development using the root user and
1 Depending on your MySQL configuration, you may need to use 127.0.0.1 as your host value,instead of localhost.
91
Database Configuration

an empty password for the time being—all of our development should take placeon a local machine, so we needn’t be concerned about someone accessing oursuper-secret Shovell application.
The parameter database sets the name of the database that’s to be used in eachenvironment. As the configuration file suggests, Rails is able to support multipledatabases in parallel. Note that we’re actually talking about different databaseshere, not just different tables—each database can host an arbitrary number ofdifferent tables in parallel. Figure 4.1 shows a graphical representation of thisarchitecture.
Figure 4.1. The database architecture of a Rails application
However, there’s one vital aspect missing from our current configuration: thedatabases referenced in our configuration file don’t exist yet! Let’s create themnow.
We can create these databases using one of the many graphical front ends thatare available for MySQL, or we can just jump into the command line. Becausethe commands are fairly simple, let’s create the databases from the commandline for now; we’ll look at graphical database clients later in this chapter.
92
Chapter 4: Rails Revealed

Creating the DatabasesTo launch the MySQL command line interface, type mysql -u root at thecommand prompt. (On a Mac, the command is called mysql5 instead ofmysql—Mac users like to be different.)
$ mysql -u rootmysql>
The command to create a new database is simple enough: create databasenewdatabasename.
We’ll use it to create three databases—one for each of our environments—asshown in Figure 4.2.
File: 02-create-databases.sql
CREATE DATABASE shovell_development;CREATE DATABASE shovell_test;CREATE DATABASE shovell_production;
Database Security and the root User
If you have any experience with databases, you might be feeling a little un-comfortable that we’re developing our application using the root user,without even setting a password. The reasoning behind this advice is as fol-lows:
1. The default configuration of MySQL is such that connections to thedatabase server can only be made from the same machine. This meansthat nobody—whether they’re sitting next to you, or working from theother side of the world—will be able to wreak havoc in your Rails devel-opment environment.
2. The MySQL command line and permissions system are complex andpowerful tools, and database security is a topic that’s definitely beyondthe scope of this book.
Of course, this is not a configuration that I would recommend for your pro-duction environment, but we’ll get into that in Chapter 12. If you’re inter-ested in securing the database in your development environment, the MySQLmanual contains some post-installation instructions that should serve youwell.2
2 http://dev.mysql.com/doc/refman/5.0/en/post-installation.html
93
Creating the Databases

Figure 4.2. Creating a database for each environment
Now that our databases exist, we can use them to store data for our application!
development is the Default Database
By default, all Rails applications use the development environment unlessspecified otherwise. So any Rails commands that you execute from thecommand line will, for the time being, only affect the data in the developmentdatabase. In Chapter 12, we’ll learn how to switch to the production envir-onment.
The Model-view-controller ArchitectureThe model-view-controller (MVC) architecture that we first encountered inChapter 1 is not unique to Rails. In fact, it pre-dates both Rails and the Rubylanguage by many years. However, Rails really takes the idea of separating anapplication’s data, user interface, and control logic to a whole new level.
Let’s take a look at the concepts behind building an application using the MVCarchitecture. Once we have the theory in place, we’ll see how it translates to ourRails code.
94
Chapter 4: Rails Revealed

MVC in TheoryMVC is a pattern for the architecture of a software application. It separates anapplication into the following three components:
❑ models, for handling data and business logic
❑ controllers, for handling the user interface and application logic
❑ views, for handling graphical user interface objects and presentation logic
This separation results in user requests being processed as follows:
1. The browser, on the client, sends a request for a page to the controller onthe server.
2. The controller retrieves the data it needs from the model in order to respondto the request.
3. The controller renders the page and sends it to the view.
4. The view sends the page back to the client for the browser to display.
This process is illustrated in Figure 4.3.
Figure 4.3. Processing a page request in an MVC architecture
Separating a software application into these three distinct components is a goodidea for a number of reasons, including the following:
95
MVC in Theory
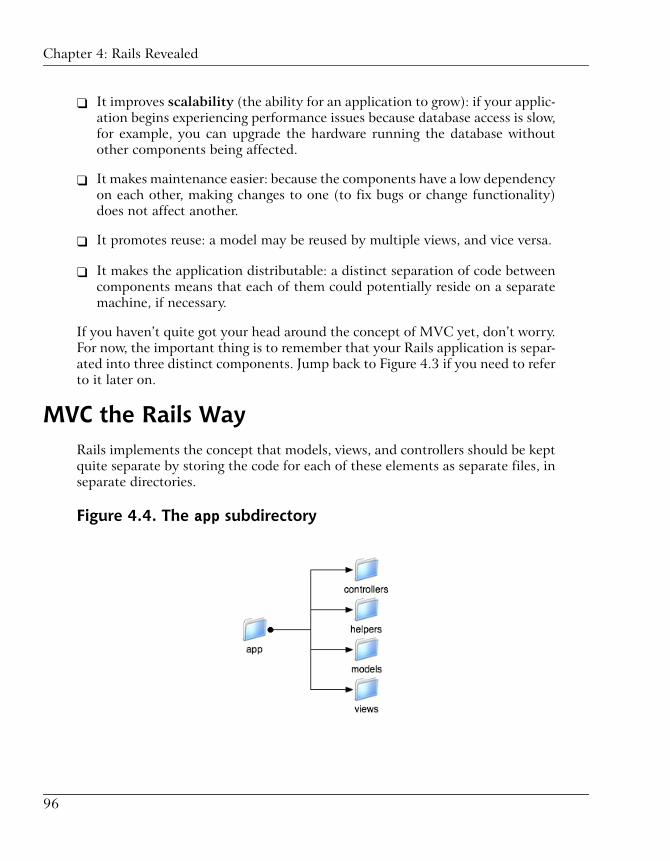
❑ It improves scalability (the ability for an application to grow): if your applic-ation begins experiencing performance issues because database access is slow,for example, you can upgrade the hardware running the database withoutother components being affected.
❑ It makes maintenance easier: because the components have a low dependencyon each other, making changes to one (to fix bugs or change functionality)does not affect another.
❑ It promotes reuse: a model may be reused by multiple views, and vice versa.
❑ It makes the application distributable: a distinct separation of code betweencomponents means that each of them could potentially reside on a separatemachine, if necessary.
If you haven’t quite got your head around the concept of MVC yet, don’t worry.For now, the important thing is to remember that your Rails application is separ-ated into three distinct components. Jump back to Figure 4.3 if you need to referto it later on.
MVC the Rails WayRails implements the concept that models, views, and controllers should be keptquite separate by storing the code for each of these elements as separate files, inseparate directories.
Figure 4.4. The app subdirectory
96
Chapter 4: Rails Revealed

This is where the Rails directory structure that we created back in Chapter 2comes into play. The time has come for us to poke around a bit within thatstructure. If you take a look inside the app directory, which is depicted in Fig-ure 4.4, you’ll see some folders whose names might be starting to sound familiar.
As you can see, each component of the model-view-controller architecture hasits place within the app subdirectory—the models, views, and controllerssubdirectories, respectively. (We’ll talk about that helpers directory inChapter 6.)
This separation continues within the code that comprises the framework itself.The classes that form the core functionality of Rails reside within the followingmodules:
ActiveRecordActiveRecord is the module for handling business logic and database com-munication. It plays the role of model in our MVC architecture.3
ActionControllerActionController is the component that handles browser requests and fa-cilitates communication between the model and the view. Your controllers willinherit from this class. It forms part of the ActionPack library, a collectionof Rails components that we’ll explore in depth in Chapter 5.
ActionViewActionView is the component that handles the presentation of pages returnedto the client. Views inherit from this class, which is also part of the ActionPacklibrary.
Let’s take a closer look at each of these components in turn.
ActiveRecord (the Model)ActiveRecord is designed to handle all of an application’s tasks that relate tothe database, including:
❑ establishing a connection to the database server
3 While it might seem odd that ActiveRecord doesn’t have the word “model” in its name, thereis a reason for this: Active Record is also the name of a famous design pattern—one that this compon-ent implements in order to perform its role in the MVC world. Besides, if it had been calledActionModel then it would have sounded more like an overpaid Hollywood star than a softwarecomponent …
97
ActiveRecord (the Model)

❑ retrieving data from a table
❑ storing new data in the database
It also has a few other neat tricks up its sleeve. Let’s look at some of them now.
Database Abstraction
ActiveRecord ships with a large number of database adapters to connect to avariety of popular database server packages, such as MySQL, PostgreSQL, Oracle,and Microsoft SQL Server.
The ActiveRecord module is based on the concept of database abstraction. Aswe mentioned in Chapter 1, database abstraction is a way of coding an applicationso that it isn’t dependent upon any one database. Code that’s specific to a partic-ular database server is hidden safely in ActiveRecord, and invoked as needed.The result is that a Rails application is not bound to any specific database serversoftware. Should you need to change the underlying database server at a latertime, no changes to your application code should be required.
Examples of code that differs greatly between vendors, and which ActiveRecordabstracts, include:
❑ the process of logging into the database server
❑ date calculations
❑ handling of boolean (true/false) data
Before I can show you the magic of ActiveRecord in action, though, we need todo a little housekeeping.
Database Tables
We’ve already created a database for each of our environments (development,testing, production), but there aren’t any tables in those databases yet. Tablesare the containers within a database that store our data in a structured manner,and they’re made up of rows and columns. The rows map to individual objects,and the columns map to the attributes of those objects. The collection of all thetables in a database, and the relationships between those tables, is called thedatabase schema.
98
Chapter 4: Rails Revealed

Figure 4.5. The structure of a typical database table, includingrows and columns
An example of a table is shown in Figure 4.5.
In Rails, the naming of Ruby classes and database tables follows an intuitivepattern: if we have a table called stories that consists of five rows, then thattable will store the data for five Story objects. The nice thing about the mappingbetween classes and tables is that it’s not something that you need to write codeto achieve—it just happens, because ActiveRecord infers the name of the tablefrom the name of the class. Note that the name of our class in Ruby is a singularnoun (Story), but the name of the table is plural (stories).
This relationship makes sense if you think about it: when we refer to a Storyobject in Ruby, we’re dealing with a single story. But the MySQL table holds amultitude of stories, so its name should be plural. While it’s possible to overridethese conventions (as is sometimes necessary when dealing with legacy databases),it’s much easier to adhere to them.
The close relationship between tables and objects extends even further: if ourstories table were to have a link column, as our example in Figure 4.5 does,then the data in this column would automatically be mapped to the link attributein a Story object. And adding a new column to a table would cause an attributeof the same name to become available in all of that table’s corresponding objects.
So, let’s create some tables to hold the stories we create.
For the time being, we’ll create a table using the old-fashioned approach of enter-ing SQL into the MySQL command line. You could type out the following SQLcommands, although I acknowledge that typing out SQL isn’t much fun. Instead,I’d encourage you to download the following script from the code archive, andcopy and paste it straight into your MySQL console.
99
ActiveRecord (the Model)

File: 03-create-stories-table.sql
USE shovell_development;CREATE TABLE `stories` ( `id` int(11) NOT NULL auto_increment, `name` varchar(255) default NULL, `link` varchar(255) default NULL, PRIMARY KEY (`id`));
You needn’t worry about remembering these SQL commands to use in your ownprojects; instead, take heart in knowing that in Chapter 5 we’ll look at somethingcalled migrations, which are special Ruby classes that we can write to createdatabase tables for our application without using any SQL at all.
Using the Rails Console
Now that we have our stories table in place, let’s exit the MySQL console andopen up a Rails console. A Rails console is just like the interactive Ruby console(irb) that we used in Chapter 3, but with one key difference: in a Rails console,you have access to all of the environment variables and classes that are availableto your application while it is running. These are not available from within astandard irb console.
To enter a Rails console, change to your shovell folder, and enter the commandruby script/console, as shown below. The >> prompt is ready to accept yourcommands:
$ cd shovell$ ruby script/consoleLoading development environment.>>
Saving an Object
To start using ActiveRecord, simply define a class that inherits from theActiveRecord::Base class. (We touched on the :: operator very briefly inChapter 3, where we used it to refer to constants. It can also be used to refer toclasses that exist within a module, which is what we’re doing here.) Flip back tothe section on object oriented programming (OOP) in Chapter 3 if you need arefresher on inheritance.
Consider the following code snippet:
100
Chapter 4: Rails Revealed
class Story < ActiveRecord::Baseend
These two lines of code define a seemingly empty class called Story. However,this class is far from empty, as we’ll soon see.
From the Rails console, let’s create this Story class, and an instance of the classcalled story, by entering these commands:
>> class Story < ActiveRecord::Base; end=> nil>> story = Story.new=> #<Story:0x2642900 @attributes={"link"=>nil, "name"=>nil},@new_record=true>>> story.class=> Story
As you can see, the syntax for creating a new ActiveRecord object is identicalto the syntax we used to create other Ruby objects in Chapter 3. At this point,we’ve created a new Story object. However, this object exists in memory only—wehaven’t stored it in our database yet.
We can confirm the fact that it hasn’t been saved yet by checking the value ofthe new_record attribute, using the object’s accessor method:
>> story.new_record?=> true
Because the object has not been saved yet, it will be lost when we exit the Railsconsole. To save it to the database, we need to invoke the object’s save method:
>> story.save=> true
Now that we’ve saved our object (a return value of true indicates that the savemethod was successful) our story is no longer a new record. It’s even been assigneda unique ID, as shown below:
>> story.new_record?=> false>> story.id=> 1
101
ActiveRecord (the Model)
Defining Relationships Between Objects
As well as the basic functionality that we’ve just seen, ActiveRecord makes theprocess of defining relationships (or associations) between objects as easy aspossible. Of course, it’s possible with some database servers to define such rela-tionships entirely within the database schema. However, in order to put Act-iveRecord through its paces, let’s look at the way it defines these relationshipswithin Rails.
Object relationships can be defined in a variety of ways; the main differencebetween these relationships is the number of records that are specified in the re-lationship. The primary types of database associations are:
❑ one-to-one associations
❑ one-to-many associations
❑ many-to-many associations
Let’s look at some examples of each of these associations. Feel free to type theminto the Rails console if you like, for practice. Remember that your class definitionswon’t be saved, though—I’ll show you how to define associations in a file later.
Suppose our application has the following associations:
❑ An Author can have one Weblog:
class Author < ActiveRecord::Base has_one :weblogend
❑ An Author can submit many Stories:
class Author < ActiveRecord::Base has_many :storiesend
❑ A Story belongs to an Author:
class Story < ActiveRecord::Base belongs_to :authorend
102
Chapter 4: Rails Revealed

❑ A Story has, and belongs to, many different Topics:
class Story < ActiveRecord::Base has_and_belongs_to_many :topicsendclass Topic < ActiveRecord::Base has_and_belongs_to_many :storiesend
You’re no doubt growing tired of typing class definitions into a console, only tohave them disappear the moment you exit the console. For this reason, we won’tgo any further with the associations between our objects—we’ll delve into theActiveRecord module in more detail in Chapter 5.
The ActionPack ModuleActionPack is the name of the library that contains the view and controller partsof the MVC architecture. Unlike the ActiveRecord module, these modules area little more intuitively named: ActionController and ActionView.
Exploring application logic and presentation logic on the command line doesn’tmake a whole lot of sense (views and controllers are designed to interact with aweb browser, after all!). Instead, I’ll just give you a brief overview of the Action-Pack components, and we’ll cover the hands-on stuff in Chapter 5.
ActionController (the Controller)
The controller handles the application logic of your program, acting as a gluebetween the application’s data, the presentation layer, and the web browser. Inthis role, a controller performs a number of tasks, including:
❑ deciding how to handle a particular request (for example, whether to rendera full page or just one part of it)
❑ retrieving data from the model to be passed to the view
❑ gathering information from a browser request, and using it to create or updatedata in the model
When we introduced the MVC diagram in Figure 4.3 earlier in this chapter, itmight not have occurred to you that a Rails application can consist of a number
103
The ActionPack Module

of different controllers. Well, it can! Each controller is responsible for a specificpart of the application.
For our Shovell application, we’ll create:
❑ one controller for displaying story links, which we’ll name StoryController
❑ another controller for handling user authentication, called AccountController
Both controllers will inherit from the ActionController::Base class,4 but they’llhave different functionality, implemented as instance methods. Here’s a sampleclass definition for the StoryController class:
class StoryController < ActionController::Base def index end def show endend
This simple class definition sets up our StoryController with two emptymethods—the index method, and the show method—both of which we’ll expandupon in later chapters.
Naming Classes and Files
You’ll have noticed by now that the names of classes and files follow differentconventions:
❑ Class names are written in CamelCase (each word beginning with acapital letter, with no spaces between words).
❑ Filenames are written in lowercase, with underscores separating eachword.
This is important! If this convention is not followed, Rails will have a hardtime locating your files. Luckily, you won’t need to name your files manuallyvery often, if ever, as you’ll see when we look at generated code in Chapter 5.
Each controller resides in its own Ruby file (with a .rb extension), which liveswithin the app/controllers directory. The StoryController class that we just
4 There will actually be an intermediate class between this class and theActionController::Base class; we’ll cover the creation of the StoryController class inmore detail in Chapter 5. However, this doesn’t change the fact that ActionController::Baseis the base class from which every controller inherits.
104
Chapter 4: Rails Revealed
defined, for example, would live in the file app/controllers/story_control-ler.rb.
ActionView (the View)
As we discussed earlier, one of the principles of MVC is that a view should containpresentation logic only. This means that the code in a view should only performactions that relate to displaying pages in the application—none of the code in aview should perform any complicated application logic, nor should it store orretrieve any data from the database. In Rails, everything that is sent to the webbrowser is handled by a view.
Predictably, views are stored in the app/views folder of our application.
A view need not actually contain any Ruby code at all—it may be that one ofyour views is a simple HTML file. However, it’s more likely that your views willcontain a combination of HTML and Ruby code, making the page more dynamic.The Ruby code is embedded in HTML using embedded Ruby (ERb) syntax.
ERb is similar to PHP or JSP, in that it allows server-side code to be scatteredthroughout an HTML file by wrapping that code in special tags. For example, inPHP you might do something like this:
<strong><?php echo 'Hello World from PHP!' ?></strong>
The equivalent in ERb would be the following:
<strong><%= 'Hello World from Ruby!' %></strong>
There are two forms of the ERb tag pair: one that includes the equal sign, andone that does not:
<%= … %>This tag pair is for regular output. The output of a Ruby expression betweenthese tags will be displayed in the browser.
<% … %>This tag pair is for code that is not intended to be displayed, such as calcula-tions, loops, or variable assignments.
An example of each is shown below:
<%= 'This line is displayed in the browser' %><% 'This line executes silently, without displaying any output' %>
105
The ActionPack Module

You can place any Ruby code—be it simple or complex—between these tags.
Creating an instance of a view is a little different to that of a model or a controller.While ActionView::Base (the parent class for all views) is one of the base classesfor views in Rails, the instantiation of a view is handled completely by the Action-View module. The only thing a Rails developer needs to modify is the template,which is the file that contains the presentation code for the view. As you mighthave guessed, these templates are stored in the app/views folder.
As with most things in Rails, a strict convention applies to the naming and storageof template files:
❑ A template has a one-to-one mapping to the action (method) of a controller.The name of the template file matches the name of the action to which itmaps.
❑ The folder that stores the template is named after the controller.
❑ The extension of the template file varies on the basis of the template’s type.By default there are three types of template in Rails:
rhtmlThis is the extension for standard HTML templates that are sprinkledwith ERb tags.
rxmlThis extension is used for templates that output XML (for example, togenerate RSS feeds for your application).
rjsThis extension is used for templates that return JavaScript instructions.This type of template might be used, for example, to modify an existingpage (via Ajax) to update the contents of a <div> tag.
This convention may sound complicated, but it’s actually quite intuitive. Forexample, consider the StoryController class that we defined earlier. Invokingthe read method for this controller would, by default, attempt to display theActionView template that lived in the app/views/story directory. Assumingthe page was a standard HTML page (containing some ERb code), the name ofthis template would be read.rhtml.
Rails also comes with special templates such as layouts and partials. Layoutsare templates that control the global layout of an application, such as structures
106
Chapter 4: Rails Revealed
that remain unchanged between pages (the primary navigation menu, for instance).Partials are special subtemplates (the result of a template being split into separatefiles, such as a secondary navigation menu or a form) that can be used multipletimes within the application. We’ll cover both layouts and partials in Chapter 7.
Communication between controllers and views occurs via instance variables thatare populated from within the controller’s action. Let’s expand upon our sampleStoryController class to illustrate this point (there’s no need to type any ofthis out just yet):
class StoryController < ActionController::Base def index
@variable = 'Value being passed to a view' endend
As you can see, the instance variable @variable is being assigned a string valuewithin the controller’s action. Through the magic of ActionView, this variablecan now be referenced directly from the corresponding view, as shown in thecode below:
<p>The instance variable @variable contains: <%= @variable %></p>
This approach allows more complex computations to be performed outside theview (remember, it should only contain presentational logic), leaving the view todisplay just the end result of the computation.
Rails also provides access to special containers, such as the params and sessionhashes. These contain information including the current page request and theuser’s session. We’ll make use of these hashes in the chapters that follow.
Code GenerationRather than having us create all of our application code from scratch, Rails givesus the facility to generate an application’s basic structure with considerable ease.In the same way that we created our application’s entire directory structure, wecan create new models, controllers, and views using a single command.
To generate code in Rails, we use the generate script, which lives in the scriptfolder. Give it a try now: type ruby generate without any command line para-meters. Rails displays an overview of the available parameters for the command,and lists the generators from which we can choose, as Figure 4.6 illustrates.
107
Code Generation
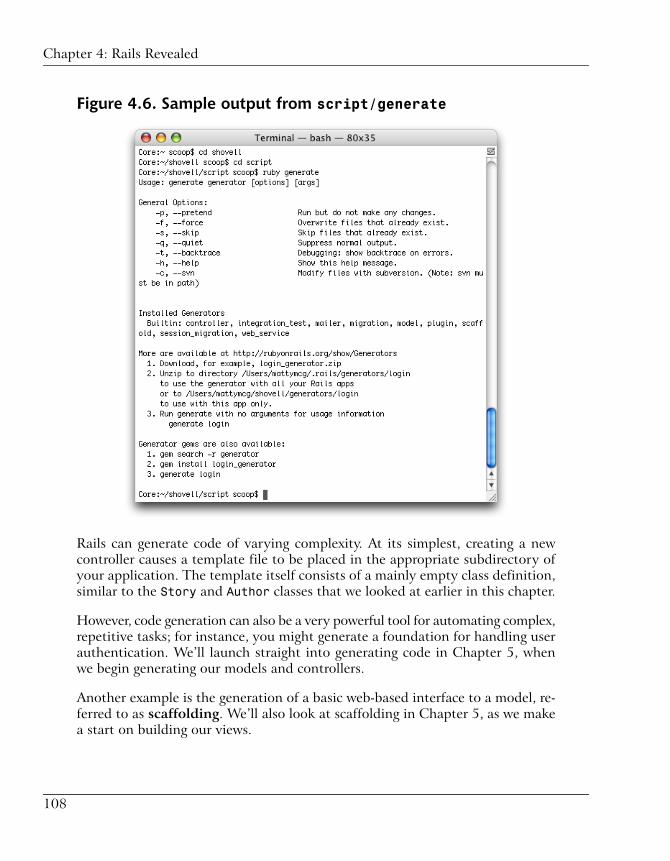
Figure 4.6. Sample output from script/generate
Rails can generate code of varying complexity. At its simplest, creating a newcontroller causes a template file to be placed in the appropriate subdirectory ofyour application. The template itself consists of a mainly empty class definition,similar to the Story and Author classes that we looked at earlier in this chapter.
However, code generation can also be a very powerful tool for automating complex,repetitive tasks; for instance, you might generate a foundation for handling userauthentication. We’ll launch straight into generating code in Chapter 5, whenwe begin generating our models and controllers.
Another example is the generation of a basic web-based interface to a model, re-ferred to as scaffolding. We’ll also look at scaffolding in Chapter 5, as we makea start on building our views.
108
Chapter 4: Rails Revealed

ActionMailerWhile not strictly part of the Web, email is a big part of our online experience,and Rails’s integrated support for email is worth a mention. Web applicationsfrequently make use of email for tasks like sending sign-up confirmations to newusers and resetting a user’s password.
ActionMailer is the Rails component that makes it easy to incorporate thesending and receiving of email into your application. ActionMailer is structuredin a similar way to ActionPack in that it consists of controllers and actions withtemplates.
While the creation of emails, and the processing of incoming email, are complextasks, ActionMailer hides these complexities and handles the tasks for you. Thismeans that creating an outgoing email is simply a matter of supplying the subject,body, and recipients of the email using templates and a little Ruby code. Likewise,ActionMailer processes incoming email for you, providing you with a Ruby objectthat encapsulates the entire message in a way that’s easy to access.
Adding email functionality to a web application is beyond the scope of this book,but you can read more about ActionMailer on the Ruby on Rails wiki.5
Testing and Debugging
TestingA number of different types of testing are supported by Rails, including automatedand integration testing.
Automated Testing
The concept of automated testing isn’t new to the world traditional softwaredevelopment, but it’s fairly uncommon in web application development. Whilemost Java-based web applications make use of comprehensive testing facilities,a large number of PHP and Perl web applications go live after only some manualtests have been performed (and sometimes without any testing at all!). Althoughperforming automated tests may be an option, developers may decide not to usethem for reasons ranging from the complexity of the task to time constraints.
5 http://wiki.rubyonrails.com/rails/pages/ActionMailer/
109
ActionMailer

We touched on this briefly in Chapter 1, but it’s worth stressing again: the factthat comprehensive automated testing is built into Rails, and is dead easy toimplement, means there’s no longer a question about whether or not you shouldtest your apps: just do it!
The generate command that we introduced a moment ago can automaticallycreate testing templates that you can use with your controllers, views, and models.(Note that Rails just assists you in doing your job, it’s not replacing you—yet!)
The extent to which you want to implement automated testing is up to you. Itmay suit your needs to wait until something breaks, then write a test that provesthe problem exists. Once you’ve fixed the problem so that the test no longer fails,you’ll never get a bug report for that particular problem again.
If, on the other hand, you’d like to embrace automated testing completely, youcan write tests to ensure that a specific HTML tag exists at a precise positionwithin a page’s hierarchy.6 Yes, automated tests can be that precise.
Integration Testing
Rails’s testing capabilities also include integration testing.
Integration testing refers to the testing of several web site components in succes-sion—typically, the order of the components resembles the path that a user wouldfollow when using the application. You could, for example, construct an integrationtest that reconstructs the actions of a user clicking on a link, registering for a useraccount, confirming the registration email you send, and visiting a page that’srestricted to registered users.
We’ll look at both automated testing and integration testing in more detail inlater chapters.
DebuggingWhen you’re fixing problems, the first step is to identify the source of the problem.Like many languages, Rails assists this process by providing the developer (that’syou!) with a full stack trace of the code. As we saw earlier, a stack trace is a listof all of the methods that were called up to the point at which an exception was
6 The hierarchy referred to here is the Document Object Model (DOM), a W3C standard for describingthe hierarchy of an (X)HTML page.
110
Chapter 4: Rails Revealed
raised. The list includes not only the name of each method, but also the classesto which those methods belong, and the names of the files in which they reside.
Using the information contained in the stack trace, you can go back to your codeto determine the problem. There are a few different ways to approach this, de-pending on the nature of the problem itself:
❑ If you have a rough idea of what the problem might be, and are able to isolateit to your application’s model (either a particular class or aspect of your data),your best bet is to use the Rails console that we looked at earlier in thischapter. Type console from the script directory to launch the console. Onceinside, you can load the particular model that you’re interested in, and pokeat it to reproduce and fix the problem.
❑ If the problem leans more towards something related to the user’s browser orsession, you can add a breakpoint statement around the spot at which theproblem occurs. With this in place, you can reload the browser and stepthrough your application’s code using the breakpointer command line toolto explore variable content or to execute Ruby statements manually.
We’ll be covering all the gory details of debugging in Chapter 11.
A GUI Tool for MySQLThe MySQL command line that we’ve been using in this chapter is one way tomaintain your database structure and the data that it contains. But working ina command line client can definitely be overwhelming, complex, and tedious—es-pecially when you’re just taking your first steps with databases and don’t knowyour way around!
A GUI tool available for use with MySQL that’s worth a mention is the MySQLQuery Browser. Published by MySQL AB (the makers of MySQL), the MySQLQuery Browser is a free, cross-platform tool that is currently available for Win-dows, Linux, and Mac OS X.7
Installing MySQL Query Browser is a straightforward process on most platforms:
7 The MySQL Query Browser is available for download fromhttp://dev.mysql.com/downloads/query-browser/. Unfortunately there is no binary install package forOS X 10.3 or earlier; CocoaMySQL [http://cocoamysql.sourceforge.net/] is a good alternative.
111
A GUI Tool for MySQL
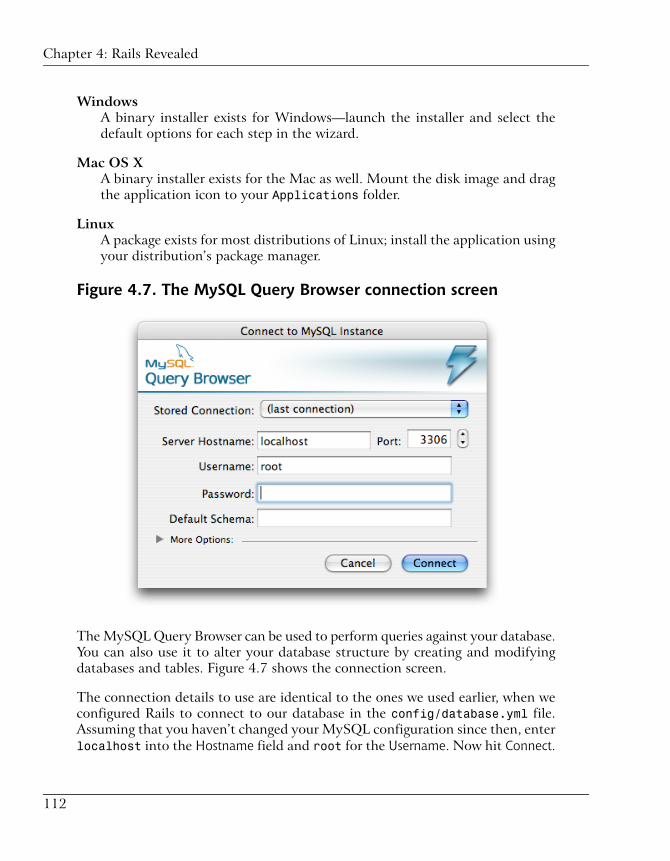
WindowsA binary installer exists for Windows—launch the installer and select thedefault options for each step in the wizard.
Mac OS XA binary installer exists for the Mac as well. Mount the disk image and dragthe application icon to your Applications folder.
LinuxA package exists for most distributions of Linux; install the application usingyour distribution’s package manager.
Figure 4.7. The MySQL Query Browser connection screen
The MySQL Query Browser can be used to perform queries against your database.You can also use it to alter your database structure by creating and modifyingdatabases and tables. Figure 4.7 shows the connection screen.
The connection details to use are identical to the ones we used earlier, when weconfigured Rails to connect to our database in the config/database.yml file.Assuming that you haven’t changed your MySQL configuration since then, enterlocalhost into the Hostname field and root for the Username. Now hit Connect.
112
Chapter 4: Rails Revealed

Once you’re connected, you should be greeted by a window similar to the oneshown in Figure 4.8.
Figure 4.8. MySQL Query Browser’s Query window
At the top of the main window is a text field in which you can type databasequeries. The pull-out tab on the right-hand side lists the databases to which youcan connect. There’s even a function and syntax reference.
The MySQL Query Browser displays the table schema of the stories table exactlyas we’ve created it, with the added benefit that we can alter it with just a mouseclick. By clicking the + button at the bottom of the column list, you can add acolumn; clicking the - button removes the currently selected column. Prettysimple, isn’t it?
Exploring every feature of the query browser is definitely beyond the scope ofthis book, but there is one more thing I’d like to show you: the Table Editor,which is shown in Figure 4.9.
To launch the Table Editor, first expand the shovell_development database byclicking on the triangle next to the database’s name. This will list all of the tablesin the database. Currently, there should only be one: the stories table that wecreated earlier. Now right-click (Control-click on a Mac) on the table that youwant to edit, and select Edit Table from the menu that appears.
113
A GUI Tool for MySQL

Figure 4.9. The MySQL Table Editor
The Table Editor allows you to edit existing tables and add new tables, all usinga nice GUI interface. I’m sure you’ll agree this is a much friendlier experiencethan having to battle with the cryptic command line tool.
That’s it for the MySQL Query Browser—we’ll revisit it briefly in Chapter 5, butfeel free to close the application now.
SummaryIn this chapter, we peeled back some of the layers that comprise the Ruby onRails framework. By now you should have a good understanding of which partsof Rails perform particular roles in the context of an MVC architecture. It shouldalso be reasonably clear how a request that’s made by a web browser is processedby a Rails application.
We looked at the different environments that Rails provides to address the dif-ferent stages in the lifecycle of an application, and we created databases to supportthese environments. We also provided Rails with the necessary details to connectto our database.
114
Chapter 4: Rails Revealed

We also had our first contact with real code, as we looked at the ActiveRecordmodels, ActionController controllers, and ActionView templates for ourShovell application. We explored the topics of code generation, testing, and de-bugging, and we took a brief look at a GUI client that makes interacting withour MySQL database more convenient.
In the next chapter, we’ll build on all of this knowledge as we use the code gen-eration tools to create actual models, controllers, and views for our Shovell ap-plication. It’s going to be a big one!
115
Summary

116
Models, Views, and Controllers5In Chapter 4, we introduced the principles behind the model-view-controller ar-chitectural pattern, and saw how each of the components is implemented withinthe Rails framework. In this chapter, we’ll put this knowledge to good use as weuse Rails’s code generation techniques to create these components for our Shovellapplication.
Generating a ModelAs our application will be used to share links to stories on the Web, a Story isthe fundamental object around which our application should evolve. Here, we’lluse the Rails model generator to create a Story model, and then build everythingelse around it.
The Model GeneratorThe model generator is actually driven by a command line script that we en-countered back in Chapter 4: the generate script. It lives in the script directory,and makes generating a Story model very simple.
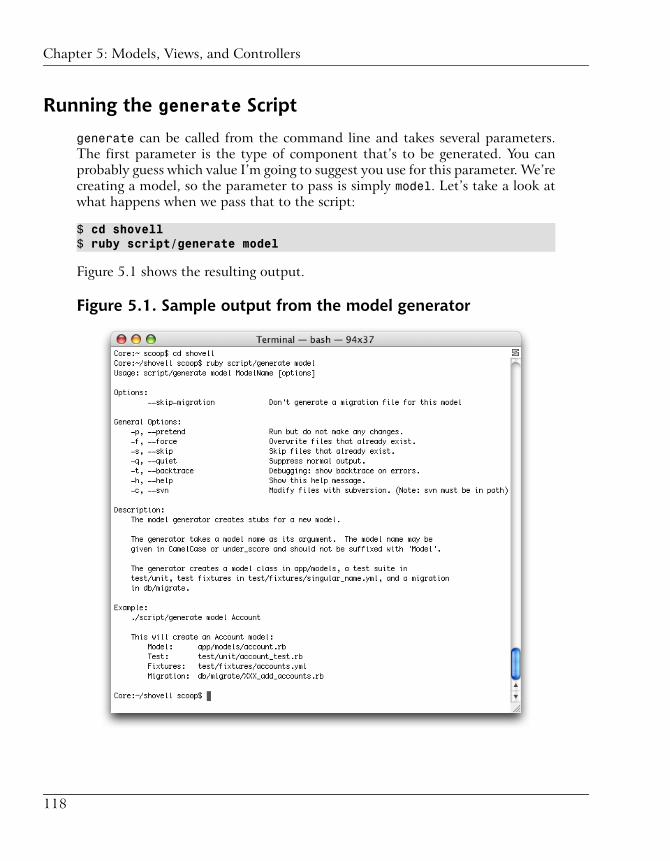
Running the generate Script
generate can be called from the command line and takes several parameters.The first parameter is the type of component that’s to be generated. You canprobably guess which value I’m going to suggest you use for this parameter. We’recreating a model, so the parameter to pass is simply model. Let’s take a look atwhat happens when we pass that to the script:
$ cd shovell$ ruby script/generate model
Figure 5.1 shows the resulting output.
Figure 5.1. Sample output from the model generator
118
Chapter 5: Models, Views, and Controllers

On reading this output, we can deduce that using generate to create a newmodel for our application won’t actually do very much—some “stubs” (emptyfiles) will be created in the appropriate directories, but that’s about it.
Let’s go ahead and try it anyway. We’ll create a Story model, then we’ll examineeach of the generated files in turn.
From the shovell folder, enter the following:
$ ruby script/generate model Story
The output of this command will list exactly what has been done; it’s shown inFigure 5.2.
Figure 5.2. Generating a Story model
Let’s take a closer look at what the generate script has done here.
Understanding the Output
To begin with, generate skipped over three folders that already exist. The scriptindicates that it’s skipping a folder by displaying the word exists, followed by thename of the folder. The folders that were skipped in Figure 5.2 were those thatwere generated when we ran the rails command back in Chapter 2.
119
The Model Generator

Next, generate actually created some files (indicated by the word create, followedby the name of the file that was created) and a folder. Let’s look at each of thefiles in turn:
story.rbThis file contains the actual class definition for the Story model. Locate thefile (it’s in the app/models folder) and examine its contents in your text ed-itor—the class definition is absolutely identical to the one that we typed outin Chapter 4:
File: 01-story.rb
class Story < ActiveRecord::Baseend
Okay, being able to generate these two lines of code isn’t exactly ground-breaking. But stay with me here!
story_test.rbThis file is much more exciting; it’s an automatically generated unit test forour model. We’ll look at it in detail in Chapter 6, but briefly, by building upthe contents of this file, we can ensure that all of the code in our model iscovered by a unit test. As we mentioned back in Chapter 1, once we have allour unit tests in place, we can automate the process of checking that our codebehaves as intended.
stories.ymlTo help with our unit test, a file called stories.yml is created. This file isreferred to as a fixture. Fixtures are files that contain sample data for unittesting purposes—when we run the test suite, Rails will wipe the databaseand populate our tables using the fixtures. In this way, fixtures allow us toensure that every unit test of a given application is run against a consistentbaseline.
By default, the stories.yml fixture file will insert two rows in our storiestable. The .yml extension for that file indicates that it is a YAML file. We’lllook at what this means in the next section.
001_create_stories.rbThis file is what’s known as a migration file. We’ll be exploring migrationsin a moment.
120
Chapter 5: Models, Views, and Controllers

What’s YAML?
YAML (a tongue-in-cheek recursive acronym that stands for YAML Ain’t MarkupLanguage) is a lightweight format for representing data. YAML files have the ex-tension .yml. As they employ none of the confusing tags that XML uses, YAMLfiles are much easier for humans to read, and are just as efficiently read by com-puters.
Rails uses YAML files extensively to specify fixtures. We’ve seen a couple of ex-amples of YAML files so far: the database.yml file that we used to configure ourdatabase connection was one; the stories.yml file that we just created with thegenerate script is another.
Let’s dissect the stories.yml file—open it up in a text editor (it’s in thetest/fixtures directory), and you’ll see the following code:
File: 02-stories.yml
first: id: 1another: id: 2
This YAML file represents two separate records (first, and another). Each recordcontains a single data field: a column called id. This id field maps to the idcolumn of our stories table.
Let’s expand on each of these records by adding name and link fields. Edit thefile so that it looks like this:
File: 03-stories.yml
first: id: 1 name: My shiny weblog link: http://poocs.net/another: id: 2 name: SitePoint Forums link: http://www.sitepoint.com/forums/
As you can see, each record in a YAML file begins with a unique name, which isnot indented. This name is not the name of the record, or of any of the fields inthe database; it’s simply used to identify the record within the file. (It’s also
121
The Model Generator

utilized in testing, as we’ll see in Chapter 11.) In our expanded stories.yml file,first and another are these identifying names.
After the unique name, we see a series of key/value pairs, each of which is indentedby one or more spaces (we’ll use two spaces, to keep consistent with our conven-tion for Rails code). In each case, the key is separated from its value by a colon.
Now, let’s take a look at the last file that was generated—the migration file. Ifyour experience with modifying databases has been limited to writing SQL, thenthis next section is sure to be an eye-opener, so buckle up! This is going to be anexciting ride.
Modifying the Schema Using MigrationsAs we mentioned earlier, the last of the four files that our generate script cre-ated—001_create_stories.rb—is a migration file. A migration file is a specialfile that can be used to adjust the database schema in a variety of ways (eachchange that’s defined in the file is referred to as a migration).
Migrations can be a handy way to make alterations to your database as your ap-plication evolves. Not only do they provide you with a means to change yourdatabase schema in an iterative manner, but they let you do so using Ruby code,rather than SQL. As you may have gathered by now, I’m not a big fan of writinglots of SQL, and migrations are a great way to avoid it.
Migration files are numbered so that they can be executed sequentially. In ourcase, the file for creating stories is the first migration file, so our migration filehas the number 001 in its name.
Like SQL scripts, migrations can be built on top of each other, which reinforcesthe need for these files to be executed in order. Sequential execution removesthe possibility that, for example, an attempt is made to add a new column to atable that does not yet exist.
Let’s examine the migration file that was generated for us.
Creating a Skeleton Migration File
Open the file 001_create_stories.rb in your text editor (it lives in db/migrate).It should look like this:
122
Chapter 5: Models, Views, and Controllers

File: 04-001_create_stories.rb
class CreateStories < ActiveRecord::Migration def self.up create_table :stories do |t| # t.column :name, :string end end
def self.down drop_table :stories end endend
As you can see, a migration file contains a class definition that inherits from theActiveRecord::Migration class. The class that’s defined in the migration fileis assigned a name by the generate script, based on the parameters that arepassed to it. In this case, our migration has been given the name CreateStories,which is a fairly accurate description of the task that it will perform—we’re gen-erating a new model (a Story), so the code in the migration file creates a storiestable in which to store our stories.
The class contains two class methods:
❑ self.up is called when the migration is applied (when we’re setting up ourschema).
❑ self.down is called when the migration is reversed (when we’re tearing itdown).
These methods are complementary—the task performed by the down method ina migration file should be the exact opposite of that performed by the up method.
Luckily, our down method is complete and needs no tweaking. Its purpose is toundo the changes that are applied in the up method; all it needs to do to achievethat is to drop the database table, which is exactly what this method does.
The up method, on the other hand, needs some work. It doesn’t achieve an awfullot at the moment—it creates a table for us, but that table has no fields (yet). Italso contains a block (jump back to Chapter 3 if you need a refresher on blocks),but the only line of code inside that block is commented out! The code in thiscomment gives us a hint about what we need to add—Rails has provided us witha skeleton, and it’s up to us to flesh out the detail. Let’s do that now!
123
Modifying the Schema Using Migrations

Filling in the Gaps
What’s missing from our migration file is code that specifies the details of thecolumns that our stories table should contain. Like an SQL script, each columnin our migration file should have a name and a type of data storage (such as astring, number, or date).
In addition to creating completely new tables, migrations can be used to alterexisting tables. If you were to decide tomorrow that your stories table neededto store the time and date at which each story is added, it would be a painfultask to have to recreate the whole table just to add the extra column. Once again,good old SQL can be used to perform this job efficiently, but to use it, we’d haveto learn yet another awkward SQL command. Using migrations, you can add thiscolumn to an existing table without losing any of the data that the table contains.
We’ll use migrations to alter the stories table in Chapter 6. For now, let’s expandthe up method as follows:1
File: 05-001_create_stories.rb (excerpt)
def self.up create_table :stories, :force => true do |t| t.column :name, :string t.column :link, :string endend
This code will create a stories table that has three columns:
❑ name, for storing the name of the story, of type string
❑ link, for storing the URL of the story, of type string
❑ id, an automatically generated column that will serve as the primary identifierfor each row in the table
This approach reflects the “pure” Rails method of creating and altering databasetables that we talked about back in Chapter 4.
1 The :force => true at the beginning of the block isn’t usually required—we’ve included it inthis case to counter the fact that we created a table for this model back in Chapter 4, using raw SQL.Without it, our create_table call would fail, because the table already exists.
124
Chapter 5: Models, Views, and Controllers

Now that we have a migration file complete with methods for setting up andtearing down our schema, we just need to make the migration take place. Weuse the rake tool to achieve this task.
Using rake to Migrate our Data
rake is a tool for executing a set of tasks that are specific to your project.
If you’ve ever written or compiled a C program, you’ll have come across the maketool. Well, rake is to Ruby code as make is to C code. Written by Jim Weirich,the rake package borrows its naming conventions and basic functionality frommake, but that’s where the similarities end.2
You can define the tasks that you want rake to execute in a file named Rakefile,which is written purely in Ruby code. In fact, Rails itself uses its own Rakefileto supply you with a number of handy tasks (check your shovell folder—you’llfind it there). Alternatively, you can access the entire list of tasks available to aRails application by typing rake --tasks from the application’s root folder (inour case, the shovell directory). Some of those tasks are shown in Figure 5.3.
Figure 5.3. Some of the tasks that are available using rake
A rake task can also accept a namespace, which is a conceptual container thatallows us to group related tasks together.
2 Jim maintains a blog about Ruby and Rails at http://onestepback.org/.
125
Modifying the Schema Using Migrations

One example is the db namespace, which groups all tasks that are related to thedatabase. Namespaces are designated by the use of a colon, so tasks within thedb namespace are addressed using the prefix db:.
Common tasks that you might use in your day-to-day Rails work include:
❑ db:migrate, for applying new migrations
❑ db:test:clone_structure, for recreating your test database using thestructure in your development environment
❑ test, for running your test suite
As the last of these examples demonstrates, not every task belongs to anamespace—some tasks stand alone.
As we saw in Figure 5.3, the default Rakefile for our application comes with aboatload of predefined tasks, each of which offers unique functionality. For now,we’re only interested in the db:migrate task (that is, the migrate task from thedb namespace). We’ll explore some other rake tasks in later chapters.
The rake command accepts a number of options (type rake --help to see themall). At its simplest, it takes the following format:
$ rake namespace:task
For example, to apply the migrations in the migration file that we created earlier,we’d type the following:
$ rake db:migrate
When executed without any other arguments, this command achieves the follow-ing tasks:
1. It checks the database for the unique number of the migration that was mostrecently applied.
2. It steps through the migrations that have not yet been applied, one by one.
3. For each migration, it executes the up method for that migration class, tobring the database in line with the structure specified in the migration files.
Go ahead and execute our database migration task from the shovell folder now.Figure 5.4 shows the output you should receive.
126
Chapter 5: Models, Views, and Controllers
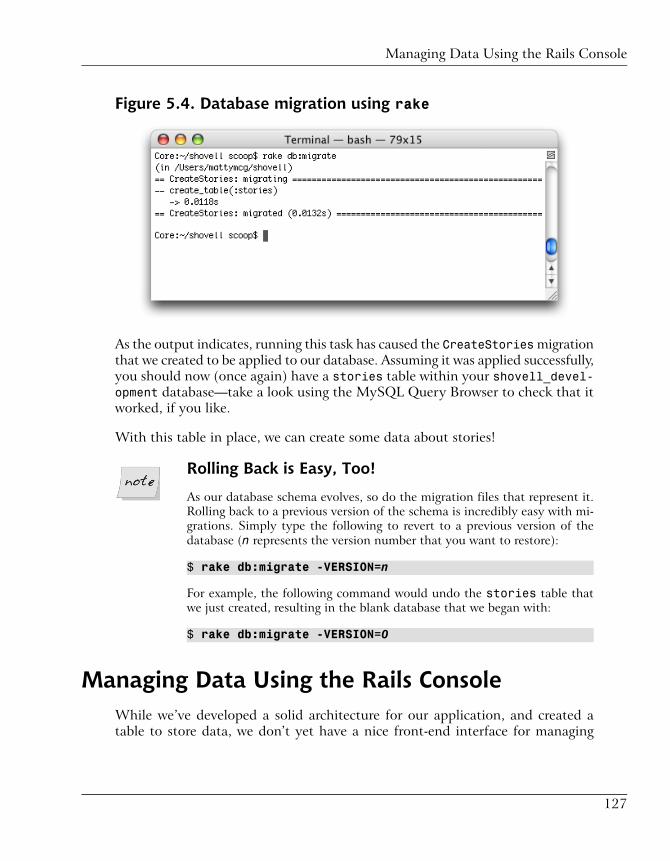
Figure 5.4. Database migration using rake
As the output indicates, running this task has caused the CreateStories migrationthat we created to be applied to our database. Assuming it was applied successfully,you should now (once again) have a stories table within your shovell_devel-opment database—take a look using the MySQL Query Browser to check that itworked, if you like.
With this table in place, we can create some data about stories!
Rolling Back is Easy, Too!
As our database schema evolves, so do the migration files that represent it.Rolling back to a previous version of the schema is incredibly easy with mi-grations. Simply type the following to revert to a previous version of thedatabase (n represents the version number that you want to restore):
$ rake db:migrate -VERSION=n
For example, the following command would undo the stories table thatwe just created, resulting in the blank database that we began with:
$ rake db:migrate -VERSION=0
Managing Data Using the Rails ConsoleWhile we’ve developed a solid architecture for our application, and created atable to store data, we don’t yet have a nice front-end interface for managing
127
Managing Data Using the Rails Console
that data. We’ll start to build that interface in Chapter 6, but in the meantime,we need to find a way to add stories to our table.
That’s right—it’s the Rails console to the rescue once again!
Creating Records
We can use two approaches to create records from the console. The long-windedapproach is to create the object, then populate each of its attributes one by one,as follows:
$ ruby script/consoleLoading development environment.>> s = Story.new=> #<Story:0x285718c @new_record=true,@attributes={"name"=>nil, "link"=>nil}>>> s.name = 'My shiny weblog'=> "My shiny weblog">> s.link = 'http://poocs.net/'=> "http://poocs.net/">> s.save=> true
Let’s step through what we’ve done here.
After loading the Rails console, we created a new Story object. We assigned thisobject to a variable named s (the s is for Story—I know, it won’t win any awardsfor creativity). We then assigned values to each of the columns that exist on aStory object. Finally, we called the save method, and our Story was stored inthe database.
How can we be sure that the data was written successfully? We could look at theraw data using our trusty MySQL Query Browser, but we’re trying to keep ourdistance from SQL. Instead, we can confirm that our story saved correctly bychecking its id (the unique identifier that the database generates automaticallywhen an object is saved). We can do so from within the Rails console:
>> s.id=> 1
Our object’s id is not nil, so we know that the save was successful. Of course,there’s another way to ensure that the data was written successfully, and that isto use the new_record? method, which you may remember from Chapter 4.
128
Chapter 5: Models, Views, and Controllers

>> s.new_record?=> false
Hooray! As this method returns false, we know for certain that the object waswritten to the database. Just in case you need even more convincing, there’s onemore check that we can use: the count class method of the Story class. Thismethod allows us to query the database for the number of stories it currentlycontains.
>> Story.count=> 1
Okay, that makes sense. Let’s create another Story now, this time using ashortcut technique:
>> Story.create(:name => 'SitePoint Forums',:link => 'http://www.sitepoint.com/forums/')=> #<Story:0x279d474 @new_record=false, @errors=#<ActiveRecord::Errors:0x279c72c @errors={}, @base=#<Story:0x279d474 …>>, @attributes={"name"=>"SitePoint Forums", "id"=>2, "link"=>"http://www.sitepoint.com/forums/"}>
The create class method achieves the same task as the long-winded approachwe just saw, but it only uses one line (not counting word wrapping). This methodalso (very conveniently) saves the record to the database once the object has beencreated. And it allows us to assign values to the columns of the record (in thiscase, in the columns name and link) at the same time as the record is created.
Hang on—we forgot to assign the object to a variable! How can we query it foradditional information?
Retrieving Records
It’s all very well to be able to create and save new information, but what good isthat information if we can’t retrieve it? One approach to retrieving a story fromour database would be to guess its id—the ids are auto-incremented, so we couldanticipate the number of the record that we’re after. We could then use the findclass method to retrieve a row based on its id:
>> Story.find(2)=> #<Story:0x2796ca0 @attributes={"name"=>"SitePoint Forums", "id"=>"2", "link"=>"http://www.sitepoint.com/forums/"}>
129
Managing Data Using the Rails Console

This approach might be fine for our testing setup, but once our application hasdeleted and created more than a handful of records, it won’t work.
Another approach is to retrieve every row in the table. We can do this by passing:all as the argument to the find method:
>> Story.find(:all)=> [#<Story:0x2788f9c @attributes={"name"=>"My shiny weblog", "id"=>"1", "link"=>"http://poocs.net/"}>, #<Story:0x2788e70 @attributes={"name"=>"SitePoint Forums", "id"=>"2", "link"=>"http://www.sitepoint.com/forums/"}>]
This returns an object of class Array containing all rows of the stories table.
Arrays also have first and last methods to retrieve (surprise!) the first and lastelements of the array:
>> Story.find(:all).last=> #<Story:0x277f80c @attributes={"name"=>"SitePoint Forums", "id"=>"2", "link"=>"http://www.sitepoint.com/forums/"}>
Making use of the :all argument and the first and last methods gives us someadditional flexibility, but this approach isn’t exactly resource-friendly—especiallyif we’re working with larger sets of data. As its name suggests, using :all has theeffect of transferring all database records from the database into Ruby’s memory.This may not be the most efficient solution—especially if your application is onlylooking for a single record.
A better approach would be to let the record selection process be handled by thedatabase itself. To facilitate this goal, we can pass two arguments to the findmethod:
:firstThis argument retrieves the first element from the set of retrieved records.
:orderThis argument allows us to specify the sort order of the returned objects.
The :order argument should contain a tiny bit of SQL that tells the databasehow the records should be ordered. To get the last element, for example, we wouldassign :order a value of id DESC, which specifies that the records should besorted by the id column in descending order.
130
Chapter 5: Models, Views, and Controllers
>> Story.find(:first, :order => 'id DESC')=> #<Story:0x2779100 @attributes={"name"=>"SitePoint Forums", "id"=>"2", "link"=>"http://www.sitepoint.com/forums/"}>
The object that’s returned is identical to the one we retrieved using :all inconjunction with our object’s last attribute, but this approach is much moreresource-friendly.
Now, while all of these retrieval techniques have worked for us so far, any ap-proach that retrieves an object on the basis of its id is fundamentally flawed. Itassumes that no-one else is using the database, which certainly will not be a validassumption when our social news application goes live!
What we need is a more reliable method of retrieving records—one that retrievesobjects based on a column other than the id. What if we were to retrieve a Storyby its name? That’s easy:
>> Story.find_by_name('My shiny weblog')=> #<Story:0x2773bd8 @attributes={"name"=>"My shiny weblog", "id"=>"1", "link"=>"http://poocs.net/"}>
In fact, we can even query by the link column, or any other column in ourstories table! Rails automatically creates these dynamic finder methods byprefixing the column name in question with find_by_. In this case, the Storyclass has the dynamic finders find_by_name and find_by_link (find_by_idwould be redundant, as a simple find does the same thing).
Pretty cool, huh?
Updating Records
We know how to add stories to our database, but what happens when someonesubmits to our Shovell application a story riddled with typos or (gasp!) factualerrors? We need to be able to update existing stories, to ensure the integrity andquality of the information on Shovell, and the continuation of the site’s glowingreputation.
Before we can update an object, we need to retrieve it. For this example, we’llretrieve a Story from the database using its name, but any of the techniquesoutlined in the previous section would suffice.
>> s = Story.find_by_name('My shiny weblog')=> #<Story:0x272965c …>>> s.name
131
Managing Data Using the Rails Console
=> "My shiny weblog">> s.name = 'A weblog about Ruby on Rails'=> "A weblog about Ruby on Rails"
As you can see, the task of changing the value of an attribute (name, in this case)is as straightforward as assigning a new value to it. Of course, this change is notyet permanent—we’ve simply changed the attribute of an object in memory. Tosave the change to the database, we need to call the save method, just as we didwhen we learned how to create new objects earlier in this chapter.
>> s.save=> true
Once again, there’s a shortcut—update_attribute—that allows us to updatethe attribute and save the object to the database in one fell swoop:
>> s.update_attribute :name, 'A weblog about Ruby on Rails'=> true
This is straightforward stuff. Just one more command, then we’ll leave the consolefor good. (Well, for this chapter, anyway!)
Deleting Records
To destroy a database record, simply call the destroy method of the Act-iveRecord object. This will remove the record from the database immediately:
>> s.destroy=> #<Story:0x272965c …>
If you try to use the find method to locate an object that has been destroyed (ordidn’t exist in the first place), Rails will throw an error:
>> Story.find(1)=> ActiveRecord::RecordNotFound: Couldn't find Story with ID=1
As you can see, deleting records is a cinch—at least, for Rails developers! In fact,SQL is doing a good deal of work behind the scenes. Let’s pull back the curtainand take a closer look at the SQL statements that result from our commands.
Where’s the SQL?For all of the creating, updating, and deleting of records that we’ve done in thissection, we haven’t seen a lot of SQL.
132
Chapter 5: Models, Views, and Controllers

If you’d like to peek at the SQL statements that Rails has saved you from havingto type, take a look at the log files located in the log folder. In it, you’ll find filesnamed after each of the environments. We’ve been working in the developmentenvironment, so have a look at development.log. Figure 5.5 shows the contentsof the log file on my computer.
Figure 5.5. The log file for the development environment
The contents of the log file vary greatly between environments, and for goodreason: the development log file contains every SQL statement that’s sent to thedatabase server, including the details of how long it took to process each state-ment. This information can be very useful if you’re debugging an error or lookingfor some additional insight into what is going on. However, it’s not appropriatein a production environment—a large number of queries might be executing atany one time, which would result in an enormous log file.
We’ll revisit these log files in Chapter 6, when we examine the entries written tothem by the ActionController and ActionView modules.
133
Where’s the SQL?
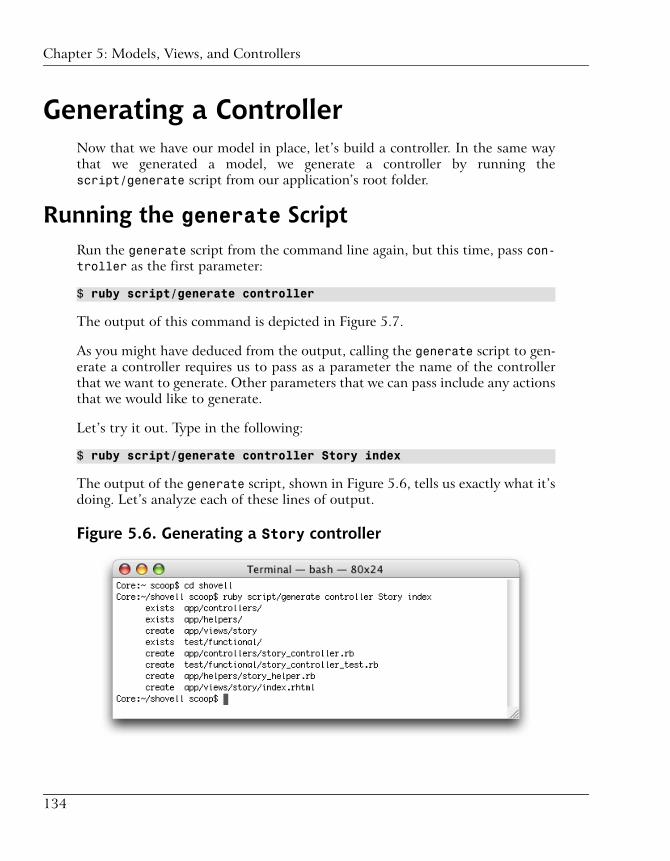
Generating a ControllerNow that we have our model in place, let’s build a controller. In the same waythat we generated a model, we generate a controller by running thescript/generate script from our application’s root folder.
Running the generate ScriptRun the generate script from the command line again, but this time, pass con-troller as the first parameter:
$ ruby script/generate controller
The output of this command is depicted in Figure 5.7.
As you might have deduced from the output, calling the generate script to gen-erate a controller requires us to pass as a parameter the name of the controllerthat we want to generate. Other parameters that we can pass include any actionsthat we would like to generate.
Let’s try it out. Type in the following:
$ ruby script/generate controller Story index
The output of the generate script, shown in Figure 5.6, tells us exactly what it’sdoing. Let’s analyze each of these lines of output.
Figure 5.6. Generating a Story controller
134
Chapter 5: Models, Views, and Controllers

Figure 5.7. Sample output from the controller generator
135
Running the generate Script
Understanding the OutputThe meaning of the messages the controller generator output should be quitefamiliar to you by now.
❑ First, the generate script skipped over the creation of a couple of folders,because they already exist in our project.
❑ Next, the app/views/story folder was created. As I mentioned when we firstlooked at ActionView in Chapter 4, the templates for our newly-createdStoryController will be stored in this folder.
❑ After skipping over one more folder, generate created four new files:
story_controller.rbThis file houses the actual class definition for our StoryController. It’smostly empty, though—all it comes with is a method definition for the indexaction, which, admittedly, is empty as well. Don’t worry—we’ll expand itsoon!
File: 06-story_controller.rb
class StoryController < ApplicationController def index endend
More astute readers will notice that our StoryController doesn’t inheritfrom the ActionController::Base class in the way we’d expect. TheApplicationController class that we see here is actually an empty classthat inherits directly from ActionController::Base. The class is defined inthe application.rb file, which lives in the app/controllers folder, if you’recurious. The resulting StoryController has exactly the same attributes andmethods as if it had inherited directly from ActionController::Base. Usingan intermediary class like this provides a location for storing variables andpieces of functionality that are common to all controllers.
story_controller_test.rbThis file contains the functional test for our controller. We’ll skip over it fornow, but we’ll expand the test cases that this file contains in the section called“Testing the StoryController” in Chapter 9.
136
Chapter 5: Models, Views, and Controllers

story_helper.rbThis is the empty helper class for the controller (helpers are chunks of codethat can be reused throughout your application). We’ll look at helpers inmore detail in Chapter 6.
index.rhtmlThis file is the template that corresponds to the index action that we passedas a parameter to the generate script. For the moment, it’s the only one inthe app/views/story directory, but as we create others, they’ll be storedalongside index.rhtml and given names that match their actions (for example,the read action will end up with a template named read.rhtml).
With this knowledge under our belts, we’re finally in a position to breathe lifeinto our little Rails monster, in the true spirit of Frankenstein.
Watch your Controller Class Names!
You’ll notice the controller class that was created by the generate script iscalled StoryController, though the first parameter that we specified onthe command line was simply Story. If our parameter had beenStoryController, we’d have ended up with a class name ofStoryControllerController!
Starting our Application … AgainIt’s time to fire up our application again. While our previous experience withWEBrick was somewhat uneventful, this time, our application should do a littlemore.
Start up the web server using the following command:
$ ruby script/server
Once the server has completed its startup sequence, type the following addressinto your web browser: http://localhost:3000/story
If everything goes to plan, you should be looking at a page similar to the one inFigure 5.8.
137
Starting our Application … Again
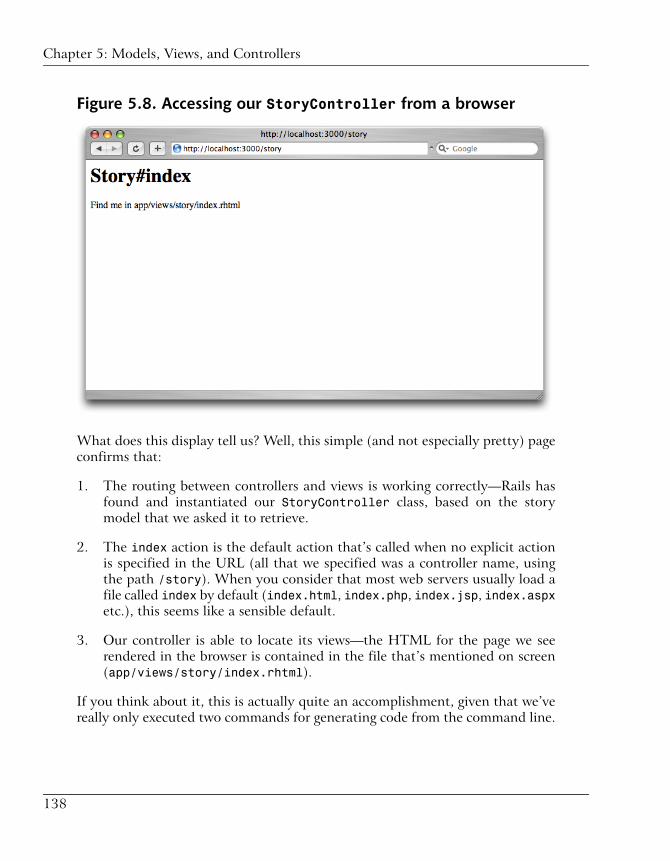
Figure 5.8. Accessing our StoryController from a browser
What does this display tell us? Well, this simple (and not especially pretty) pageconfirms that:
1. The routing between controllers and views is working correctly—Rails hasfound and instantiated our StoryController class, based on the storymodel that we asked it to retrieve.
2. The index action is the default action that’s called when no explicit actionis specified in the URL (all that we specified was a controller name, usingthe path /story). When you consider that most web servers usually load afile called index by default (index.html, index.php, index.jsp, index.aspxetc.), this seems like a sensible default.
3. Our controller is able to locate its views—the HTML for the page we seerendered in the browser is contained in the file that’s mentioned on screen(app/views/story/index.rhtml).
If you think about it, this is actually quite an accomplishment, given that we’vereally only executed two commands for generating code from the command line.
138
Chapter 5: Models, Views, and Controllers

So that we can complete the picture, let’s pull some data from our model intoour index action.
Creating a ViewWe can use two approaches to build views for our Rails application. One is tomake use of scaffolding; the other is to “go it alone.”
We’ll look at scaffolding very briefly, but we won’t be using it much in the devel-opment of our Shovell application. I’ll introduce just enough to give you a tasteof this topic, then leave it up to you to decide whether or not you find it worth-while in your own projects.
After that, we’ll roll up our sleeves and build some views from scratch.
Generating Views with ScaffoldingIn the early days of Rails, scaffolding was one of the features that the Railscommunity used as a selling point when promoting the framework. Ironically,this feature also received a considerable amount of criticism, though this waslargely due to critics failing to understand fully the intended uses of scaffolding.
So what is scaffolding, anyway?
Scaffolding is a tool that quickly creates a web interface for interacting with yourmodel data. The interface lists the existing data in a table, and provides an easyway to add new records and manipulate or delete existing ones.
There are two approaches to using scaffolding:
temporary scaffoldingTemporary scaffolding, which is simply a one-line addition to one of yourcontrollers, is a technique for generating code that’s not intended to be builtupon. Much like its construction namesake, temporary scaffolding is intendedto support a primary structure, not form part of it. Once the primary structurehas been completed, the scaffolding is taken away.
We’ll be utilizing this type of scaffolding to interact with the data for ourShovell application.
139
Creating a View
permanent scaffoldingPermanent scaffolding, as you might have guessed, is intended to be extended,modified, and built upon. It uses the generate script which we’ve experi-mented with in this chapter to create fully working template code that canbe modified over time. Features provided by the template code can then betweaked or implemented in a different manner, and code that doesn’t suityour project can be removed.
We won’t be generating any permanent scaffolding in this project, but I doencourage you to experiment with this approach in your own projects, asthere may be cases in which you’ll find it useful.
Regardless of which approach you use, you should keep in mind that scaffoldingis a tool designed for quick interaction with models, and should only be used assuch. It is by no means intended to be a fully automated tool for generating webapplications (or even administration interfaces).
Let’s return to our example. Edit the story_controller.rb file, which lives inthe app/controllers folder, so that it looks like this:
File: 07-story_controller.rb
class StoryController < ApplicationController scaffold :storyend
These edits will temporarily remove our precious index action, which so faithfullyserved up the page in the previous section. Don’t worry, we’ll add that actionback later.
For now, the command scaffold :story provides a hook for Rails to equip ourStoryController with the functionality necessary to create, update, and deletestories. Reload the page located at http://localhost:3000/story, and this time youshould see something similar to the display shown in Figure 5.9.
140
Chapter 5: Models, Views, and Controllers

Figure 5.9. Scaffolding provides a quick administration interface
Feel free to play with the interface—edit the existing story, create some newstories using the New story link at the bottom of the page, and then destroy thenewly created story. You get the idea.
As you can see, scaffolding can be a fast track to working with model data. Youcan also take advantage of the interface to create some dummy records in yourdatabase, to make further development easier.
However, scaffolding does have its limits, as I mentioned earlier. For example, itcan’t cope with ActiveRecord associations such as “a Story belongs to a User,”which we saw in Chapter 4. Additionally, since most applications end up requiringa fully fledged administrative interface, you’re often better off just creating thereal thing rather than fiddling around with a dummy interface.
Scaffolding is certainly a powerful feature of Rails, and it’s rewarding to get theinstant visual feedback that comes with having some views created for us. How-ever, it’s now time for us to create some views of our own.
141
Generating Views with Scaffolding
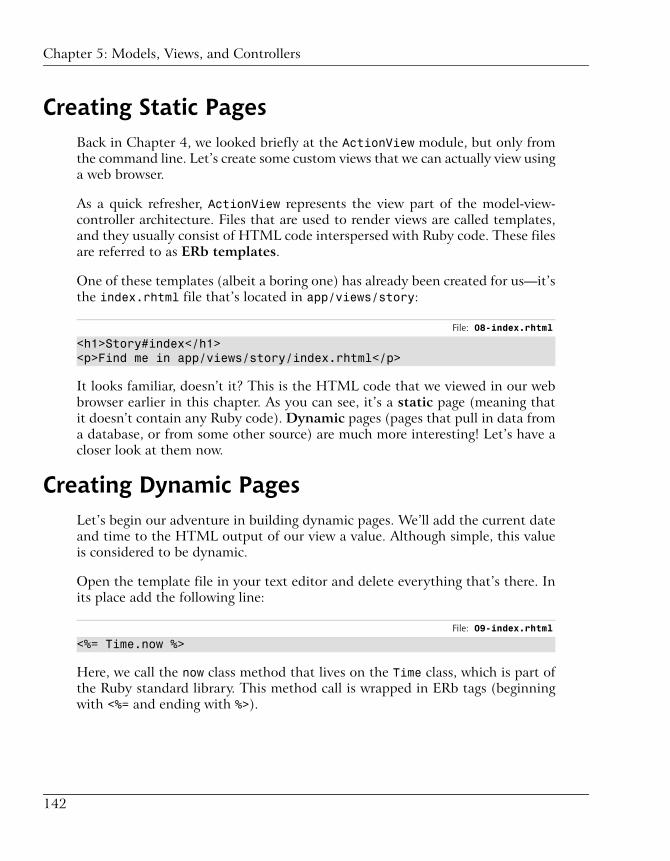
Creating Static PagesBack in Chapter 4, we looked briefly at the ActionView module, but only fromthe command line. Let’s create some custom views that we can actually view usinga web browser.
As a quick refresher, ActionView represents the view part of the model-view-controller architecture. Files that are used to render views are called templates,and they usually consist of HTML code interspersed with Ruby code. These filesare referred to as ERb templates.
One of these templates (albeit a boring one) has already been created for us—it’sthe index.rhtml file that’s located in app/views/story:
File: 08-index.rhtml
<h1>Story#index</h1><p>Find me in app/views/story/index.rhtml</p>
It looks familiar, doesn’t it? This is the HTML code that we viewed in our webbrowser earlier in this chapter. As you can see, it’s a static page (meaning thatit doesn’t contain any Ruby code). Dynamic pages (pages that pull in data froma database, or from some other source) are much more interesting! Let’s have acloser look at them now.
Creating Dynamic PagesLet’s begin our adventure in building dynamic pages. We’ll add the current dateand time to the HTML output of our view a value. Although simple, this valueis considered to be dynamic.
Open the template file in your text editor and delete everything that’s there. Inits place add the following line:
File: 09-index.rhtml
<%= Time.now %>
Here, we call the now class method that lives on the Time class, which is part ofthe Ruby standard library. This method call is wrapped in ERb tags (beginningwith <%= and ending with %>).
142
Chapter 5: Models, Views, and Controllers

You may remember from Chapter 4 that the equal sign attached to the openingERb tag will cause the return value of Time.now to be output to the web page(rather than executing silently).
As we altered our controller code to use scaffolding in the last section, we needto reverse this change so that Rails renders regular views once more. Open thefile app/controllers/story_controller.rb, and change it to the following:
File: 10-story_controller.rb
class StoryController < ApplicationController def index endend
If you refresh your browser now, the page should display the current time, asshown in Figure 5.10. Just to confirm that this value is indeed dynamic, reloadyour page a few times—you’ll notice that the value does indeed change.
Figure 5.10. Our first dynamic page: displaying the current time
Passing Data Back and ForthThere’s one fundamental problem with what we’ve done here. Can you spot it?
In order to adhere to the model-view-controller architecture, we want to avoidperforming any hefty calculations from within any of our views—that’s the jobof the controller. Strictly speaking, our call to Time.now is one such calculation,so it should really occur within the controller. But what good is the result of acalculation if we can’t display it?
143
Passing Data Back and Forth

We introduced the concept of passing variables between controllers and viewsbriefly in Chapter 4, but at that point, we didn’t have any views that we coulduse to demonstrate it in action. Now’s our chance!
As we learned in Chapter 4, any instance variable that’s declared in the controllerautomatically becomes available to the view as an instance variable. Let’s takeadvantage of that fact: edit /app/controllers/story_controller.rb again sothat it contains the following code:
File: 11-story_controller.rb
class StoryController < ApplicationController def index @current_time = Time.now endend
Next, replace the contents of app/views/story/index.rhtml with the following:
File: 12-index.rhtml
<%= @current_time %>
I’m sure you can guess what’s happened here:
1. We’ve moved the “calculation” of the current time from the view to thecontroller.
2. The result of the calculation is stored in the instance variable @current_time.
3. The contents of this instance variable are then automatically made availableto the view.
The result is that the job of the view has been reduced to simply displaying thecontents of this instance variable, rather than executing the calculation itself.
Voila! Our application logic and our presentation logic are kept neatly separated.
Pulling in a ModelAll we need to do now is pull some data into our view, and we’ll have the entireMVC stack covered!
144
Chapter 5: Models, Views, and Controllers

In case you deleted all of your model records when we experimented with scaf-folding earlier, make sure you create at least one story—type the following intoa Rails console:
>> Story.create(:name => 'SitePoint Forums',:link => 'http://www.sitepoint.com/forums/')
To display this model data within a view, we need to retrieve it from within thecontroller, like so:
File: 13-story_controller.rb
class StoryController < ApplicationController def index @story = Story.find_by_name('SitePoint Forums') endend
We’ll also change our view accordingly:
File: 14-index.rhtml
A random link:<a href="<%= @story.link %>"><%= @story.name %></a>
Reload the page to see the result—it should look like Figure 5.11.
Figure 5.11. MVC in action: a view displaying model data via thecontroller
145
Pulling in a Model

Of course, Rails wouldn’t be doing its job of saving you effort if it required youto manually create links the way we just did. Instead of typing out the HTMLfor a link, you can use the link_to function, which is much easier to rememberand achieves the same thing. Try it for yourself:
File: 15-index.rhtml (excerpt)
<%= link_to @story.name, @story.link %>
One other point: I’ll be the first to admit that the text on the page is a littlemisleading. Our link is not exactly random—it simply retrieves the same linkfrom the database over and over again.
It’s actually quite easy to make our application retrieve random stories, though.Simply modify the part of the controller that fetches the story so that it lookslike this:
File: 16-story_controller.rb (excerpt)
@story = Story.find(:first, :order => 'RAND()')
This selects a single story, just like before (using the :first parameter). However,this time, the database is being instructed to shuffle its records before pickingone. Now when you reload your page, random stories should appear (assumingyou have more than one story in your database, that is!).
There we have it: the beginnings of our story-sharing application. Admittedly,displaying a random story from our database is only a small achievement, buthey—it’s a start!
SummaryThis chapter saw us create some real code for each of the components of an MVCapplication. We generated a model to handle the storage of our stories, and createda corresponding migration; we generated a controller to handle communicationbetween the models and the views; and we created a view that dynamically renderscontent supplied by our controller.
With the functionality provided by ActiveRecord, we’ve been creating, updating,and deleting data from our SQL database without touching any SQL.
I also introduced you to the rake tool, which can be used to run migrations andother tasks. And we learned about the YAML data representation language that’sused to store test fixture data for our application.
146
Chapter 5: Models, Views, and Controllers

In Chapter 6, we’ll add a layout to our application using HTML and CSS; we’lltalk about associations between models; and we’ll extend the functionality of ourapplication.
What are you waiting for? Let’s get into it!
147
Summary

148

Helpers, Forms, and Layouts6In Chapter 5, we put in place some basic architecture for our application—amodel, a view, and a controller—and were able to display links to stories that arestored in the database. Though the foundation of our application is sound, userscan’t really interact with it yet.
In this chapter, we’ll use some helpers to implement the basic functionality forour application—the capability that allows users to submit stories to the site.
We’ll also make a start on building our test suite. In this chapter, we’ll createsome functional tests to confirm that the form is working as intended. We’ll ex-pand on this suite of tests in the coming chapters.
Calling Upon our Trusty HelpersNo, we’re not talking about Santa’s little helpers. Let me explain.
In Chapter 5, we discussed the importance of keeping application logic in acontroller, so that our views contain only presentational code. While it hasn’tbeen apparent in the simple examples that we’ve looked at so far, extracting codefrom a view and moving it into a controller often causes clumsy code to be addedto an application’s controllers.
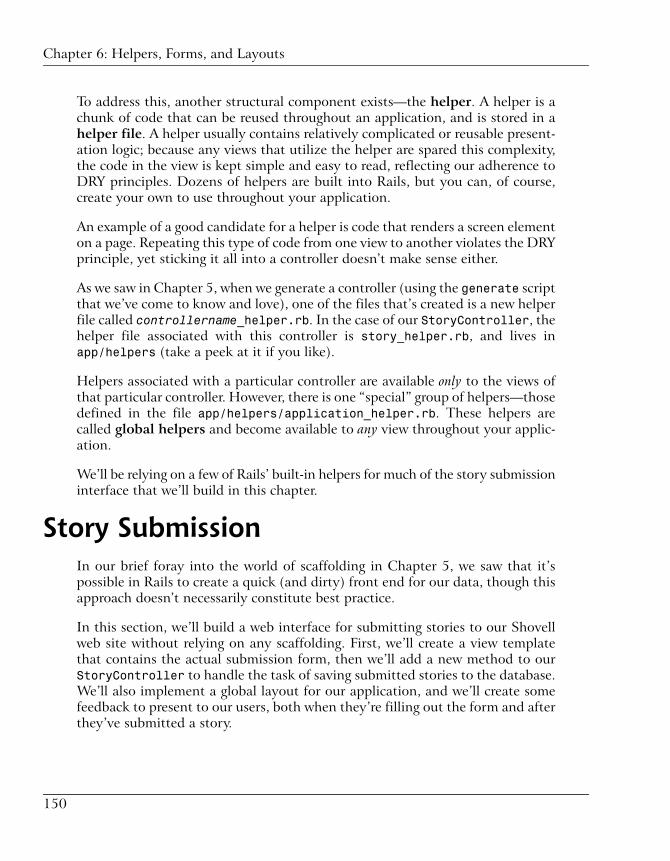
To address this, another structural component exists—the helper. A helper is achunk of code that can be reused throughout an application, and is stored in ahelper file. A helper usually contains relatively complicated or reusable present-ation logic; because any views that utilize the helper are spared this complexity,the code in the view is kept simple and easy to read, reflecting our adherence toDRY principles. Dozens of helpers are built into Rails, but you can, of course,create your own to use throughout your application.
An example of a good candidate for a helper is code that renders a screen elementon a page. Repeating this type of code from one view to another violates the DRYprinciple, yet sticking it all into a controller doesn’t make sense either.
As we saw in Chapter 5, when we generate a controller (using the generate scriptthat we’ve come to know and love), one of the files that’s created is a new helperfile called controllername_helper.rb. In the case of our StoryController, thehelper file associated with this controller is story_helper.rb, and lives inapp/helpers (take a peek at it if you like).
Helpers associated with a particular controller are available only to the views ofthat particular controller. However, there is one “special” group of helpers—thosedefined in the file app/helpers/application_helper.rb. These helpers arecalled global helpers and become available to any view throughout your applic-ation.
We’ll be relying on a few of Rails’ built-in helpers for much of the story submissioninterface that we’ll build in this chapter.
Story SubmissionIn our brief foray into the world of scaffolding in Chapter 5, we saw that it’spossible in Rails to create a quick (and dirty) front end for our data, though thisapproach doesn’t necessarily constitute best practice.
In this section, we’ll build a web interface for submitting stories to our Shovellweb site without relying on any scaffolding. First, we’ll create a view templatethat contains the actual submission form, then we’ll add a new method to ourStoryController to handle the task of saving submitted stories to the database.We’ll also implement a global layout for our application, and we’ll create somefeedback to present to our users, both when they’re filling out the form and afterthey’ve submitted a story.
150
Chapter 6: Helpers, Forms, and Layouts
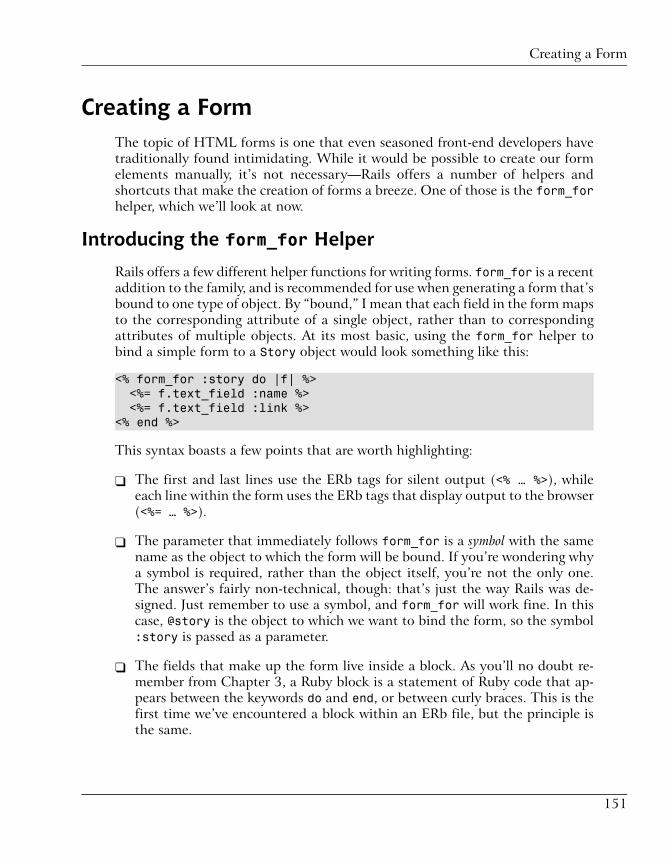
Creating a FormThe topic of HTML forms is one that even seasoned front-end developers havetraditionally found intimidating. While it would be possible to create our formelements manually, it’s not necessary—Rails offers a number of helpers andshortcuts that make the creation of forms a breeze. One of those is the form_forhelper, which we’ll look at now.
Introducing the form_for Helper
Rails offers a few different helper functions for writing forms. form_for is a recentaddition to the family, and is recommended for use when generating a form that’sbound to one type of object. By “bound,” I mean that each field in the form mapsto the corresponding attribute of a single object, rather than to correspondingattributes of multiple objects. At its most basic, using the form_for helper tobind a simple form to a Story object would look something like this:
<% form_for :story do |f| %> <%= f.text_field :name %> <%= f.text_field :link %><% end %>
This syntax boasts a few points that are worth highlighting:
❑ The first and last lines use the ERb tags for silent output (<% … %>), whileeach line within the form uses the ERb tags that display output to the browser(<%= … %>).
❑ The parameter that immediately follows form_for is a symbol with the samename as the object to which the form will be bound. If you’re wondering whya symbol is required, rather than the object itself, you’re not the only one.The answer’s fairly non-technical, though: that’s just the way Rails was de-signed. Just remember to use a symbol, and form_for will work fine. In thiscase, @story is the object to which we want to bind the form, so the symbol:story is passed as a parameter.
❑ The fields that make up the form live inside a block. As you’ll no doubt re-member from Chapter 3, a Ruby block is a statement of Ruby code that ap-pears between the keywords do and end, or between curly braces. This is thefirst time we’ve encountered a block within an ERb file, but the principle isthe same.
151
Creating a Form
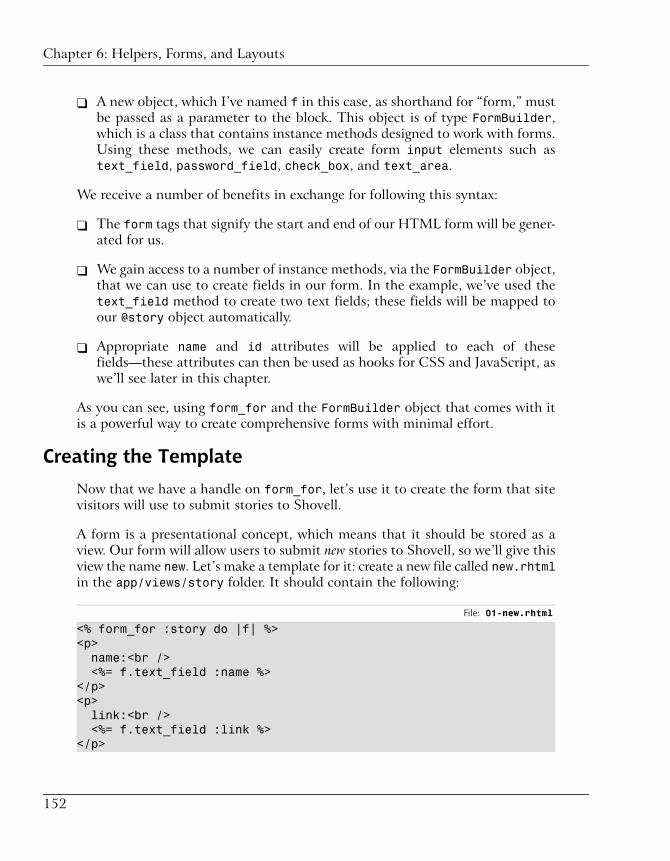
❑ A new object, which I’ve named f in this case, as shorthand for “form,” mustbe passed as a parameter to the block. This object is of type FormBuilder,which is a class that contains instance methods designed to work with forms.Using these methods, we can easily create form input elements such astext_field, password_field, check_box, and text_area.
We receive a number of benefits in exchange for following this syntax:
❑ The form tags that signify the start and end of our HTML form will be gener-ated for us.
❑ We gain access to a number of instance methods, via the FormBuilder object,that we can use to create fields in our form. In the example, we’ve used thetext_field method to create two text fields; these fields will be mapped toour @story object automatically.
❑ Appropriate name and id attributes will be applied to each of thesefields—these attributes can then be used as hooks for CSS and JavaScript, aswe’ll see later in this chapter.
As you can see, using form_for and the FormBuilder object that comes with itis a powerful way to create comprehensive forms with minimal effort.
Creating the Template
Now that we have a handle on form_for, let’s use it to create the form that sitevisitors will use to submit stories to Shovell.
A form is a presentational concept, which means that it should be stored as aview. Our form will allow users to submit new stories to Shovell, so we’ll give thisview the name new. Let’s make a template for it: create a new file called new.rhtmlin the app/views/story folder. It should contain the following:
File: 01-new.rhtml
<% form_for :story do |f| %><p> name:<br /> <%= f.text_field :name %></p><p> link:<br /> <%= f.text_field :link %></p>
152
Chapter 6: Helpers, Forms, and Layouts

<p> <%= submit_tag %></p><% end %>
Let’s break down the ERb code here:
<% form_for :story do |f| %>
As we just discussed, the form_for helper creates a form that’s bound to a specificobject—in this case, it’s bound to the @story instance variable, as indicated bythe inclusion of the :story symbol at the beginning of the block.
<%= f.text_field :name %>
This line creates a text field called name, which is mapped to our @story object.It will display a text field in which the user can enter the name of the story heor she is submitting.
<%= f.text_field :link %>
This line creates another text field, this time named link, which is also mappedto our @story object. It will display a text field in which the user can enter theURL of the story he or she is submitting.
<%= submit_tag %>
This helper generates the HTML code for a Submit button to be displayed in ourform. This is a stand-alone helper—it’s not part of the form_for helper.
Next, make sure that your WEBrick server is running (refer to Chapter 2 if youneed a refresher on starting the server). Open your web browser and type thefollowing URL into the address bar: http://localhost:3000/story/new. You shouldsee a page that looks something like Figure 6.1.
153
Creating a Form
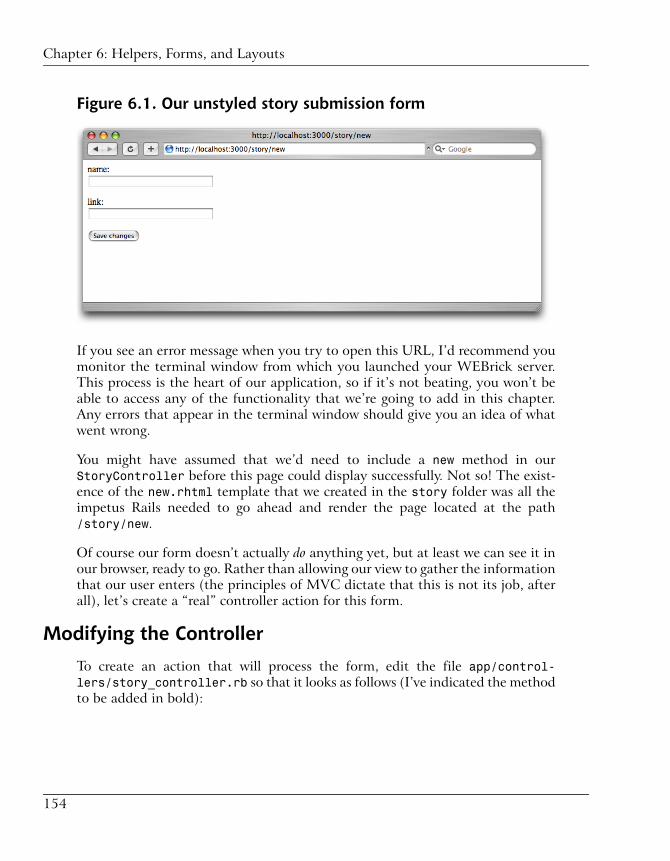
Figure 6.1. Our unstyled story submission form
If you see an error message when you try to open this URL, I’d recommend youmonitor the terminal window from which you launched your WEBrick server.This process is the heart of our application, so if it’s not beating, you won’t beable to access any of the functionality that we’re going to add in this chapter.Any errors that appear in the terminal window should give you an idea of whatwent wrong.
You might have assumed that we’d need to include a new method in ourStoryController before this page could display successfully. Not so! The exist-ence of the new.rhtml template that we created in the story folder was all theimpetus Rails needed to go ahead and render the page located at the path/story/new.
Of course our form doesn’t actually do anything yet, but at least we can see it inour browser, ready to go. Rather than allowing our view to gather the informationthat our user enters (the principles of MVC dictate that this is not its job, afterall), let’s create a “real” controller action for this form.
Modifying the Controller
To create an action that will process the form, edit the file app/control-lers/story_controller.rb so that it looks as follows (I’ve indicated the methodto be added in bold):
154
Chapter 6: Helpers, Forms, and Layouts

File: 02-story_controller.rb
class StoryController < ApplicationController def index @story = Story.find(:first, :order => 'RAND()') enddef new@story = Story.new
endend
It doesn’t matter whether you place this new method above or below the existingindex method. Some people prefer to sort their methods alphabetically, whileothers group their methods by purpose; the decision is entirely up to you andhas no impact on the functionality of your application.
The code that we’ve added to our new method simply instantiates a new Storyobject and stores it in the @story instance variable. As it’s an instance variable,@story will now be available to our view. That’s a good start!
Analyzing the HTML
The time has come to find out what kind of HTML the Rails helpers have gener-ated. If you check the HTML for this page (using your browser’s View Sourceoption) you should see something that looks like this:
<form action="/story/new" method="post"><p> name:<br /> <input id="story_name" name="story[name]" size="30" type="text" /></p><p> link:<br /> <input id="story_link" name="story[link]" size="30" type="text" /></p><p> <input name="commit" type="submit" value="Save changes" /></p></form>
This markup is basically what we would expect: two text fields and a Submitbutton have been created for us, and everything has been wrapped up in a formelement. What is interesting is that the target URL (the action attribute of the
155
Creating a Form
form element) points to the address of the form itself: /story/new. This techniqueis known as postback.
Using postback, we can ensure that if we find an error in user data submittedthrough the form, that form will simply redisplay for the user, its values intact.It does so without us having to duplicate any code.
Okay, so our markup looks fine. But if you were to submit the form in its currentstate, you wouldn’t be too thrilled with the results: the form is redisplayed, butnothing has been saved—the values you entered have simply disappeared! (Goon, try it!) Let’s add some code to save the user’s data to the database.
Saving Data to the DatabaseWe’re using a single controller action to manage both the display of the formand the storage of submissions in the database, so we need to find a way to dis-tinguish between the two.
In order to do this, we’ll use the HTTP request method to request the page.1
Form display is handled by HTTP GET, and form submission is handled byHTTP POST. As the form we’re building is being used to submit information,we’ll use POST in this case.
In order to check whether a user’s browser is in the process of GETting orPOSTing information, we might be tempted to look at the raw HTTP headers.However, the built-in Rails request object provides a much easier way to determ-ine whether we’re in POST mode or not.
The request object can be used in any controller action. It contains every bit ofinformation about a request issued by a user’s browser, including the type ofHTTP request method used. To determine whether a browser request is a POSTor not, we check the request.post? method. If it is indeed a POST request, we’llneed to assign the values submitted via the form to our @story object.
Modify the new method in our StoryController class definition so that it lookslike this:
1 The HTTP protocol defines a number of methods for communicating between a web browser anda web server, the most common being GET and POST. GET is used to request information from aweb site (for example, a page that requires only a minimal amount of information to be supplied bythe browser). POST, on the other hand, is used to submit information to the web site (for example,the contents of a form).
156
Chapter 6: Helpers, Forms, and Layouts

File: 03-story_controller.rb (excerpt)
def new @story = Story.new(params[:story]) if request.post? @story.save endend
The params object in the first line of our method is a hash that contains all ofthe content that the user submitted (read up on hashes in Chapter 3 if you needa refresher).
If you look once more at the HTML source of the submission form, you’ll noticethat the input elements all have a story[] prefix. As each field has this prefix,the form data passed to Rails will be added to the params hash.
We can access this data by passing the hash a symbol that has the same nameas our base object, such as params[:story]. We can then reference individualelements within the hash by passing the name of the attribute (also a symbol)to the hash. For example, the value of the name attribute could be accessed asparams[:story][:name]. You get the idea.
The result of all this is that user data submitted via the form can be assigned toan object very easily. All we need to do is pass the params[:story] hash to theStory.new method, and we have ourselves a populated @story object.
Not coincidentally, this is exactly what we’ve done in the first line of our method:
@story = Story.new(params[:story])
Now, if you enter some data into your form and click Save changes, you shouldsee a different result: the form is displayed again, and the values you entered arestill there. There’s a good chance that the data has also been saved to the database,but because the page is rather uninformative, we don’t really know.
To remedy this situation, let’s tell the form to redirect the user to the index actionimmediately after the object is saved:
File: 04-story_controller.rb (excerpt)
if request.post? @story.saveredirect_to :action => 'index'
end
157
Saving Data to the Database

The line that performs the redirection, highlighted in bold, is an example ofRuby’s shorthand notation. Here’s a verbose version of the same method call:
redirect_to({:action => 'index'});
Because parentheses, semicolons and curly braces are often optional in Ruby,these two lines of code perform the same thing, although I’m sure you’ll agreethat the first version is much more readable. You’ll see other examples of thisshorthand notation throughout this book.
Test the form again. This time you should be redirected to the random story se-lector that we created in Chapter 5, located within the index action. That’s alittle better! However, our application does look a little sparse. Let’s make itpretty.
Creating a LayoutIn Rails, a layout is a specialized form of a view template. Layouts allow pageelements that are repeated globally across a site to be applied to every view. Ex-amples of such elements include HTML headers and footers, CSS files, andJavaScript includes.
Layouts can also be applied at the controller level. This can be useful if, for ex-ample, you want to apply different layouts to a page depending on whether it’sbeing viewed by an administrator or a regular user.
We’ll begin our foray into layouts by creating a global layout for the entire ap-plication.
Establishing Structure
Layouts should be stored in the app/views/layouts folder. A layout templatecan basically be given any name, as long as the file ends in .rhtml. If the filenameis application.rhtml, Rails will adopt this as the default layout.
Let’s take advantage of that convention: create a file named application.rhtmlin the app/views/layouts folder, and populate it with this code:
File: 05-application.rhtml
<!DOCTYPE html PUBLIC "-//W3C//DTD XHTML 1.0 Strict//EN" "http://www.w3.org/TR/xhtml1/DTD/xhtml1-strict.dtd"><html xmlns="http://www.w3.org/1999/xhtml" xml:lang="en" lang="en">
158
Chapter 6: Helpers, Forms, and Layouts

<head> <meta http-equiv="Content-type" content="text/html; charset=utf-8" /> <title>Shovell</title><%= stylesheet_link_tag 'style' %>
</head><body> <div id="content"> <h1>Shovell</h1><%= yield %>
</div></body></html>
There’s nothing too radical going on here—we’ve created a regular XHTMLdocument, and it includes a proper DOCTYPE declaration. However, a couple ofERb calls here warrant some explanation.
<%= stylesheet_link_tag 'style' %>This code generates the HTML that includes an external style sheet in thepage.2 By passing the string style, we ensure that the <link> element that’sgenerated will point to the URL /stylesheets/style.css. We’ll create thisstyle sheet in a minute.
<%= yield %>This line is the point at which the content for our specific view is displayed.Now, telling our layout to “yield” might not seem the most intuitive thingto do here, but it does actually make sense. Let me explain.
Remember that our layout will be used by many different view templates,each of which is responsible for displaying the output of a specific action.When the layout receives the command yield, control is handed to the actualview template being rendered—that is, the layout yields to the view template.Once that template has been rendered, control returns to the layout, andrendering is resumed for the rest of the page.
Seeing as we’ve linked a style sheet, we’d better make use of it.
2 Rails ships with a number of helpers that are similar to stylesheet_link_tag, in that theymake generating HTML pages easy. They mostly save tedious typing (and thus potential errors).Similar helpers include image_tag and javascript_include_tag.
159
Creating a Layout

Adding some Style
We’ll use CSS to make our page look good.3 To apply a style sheet to your ap-plication, create a file called style.css in the public/stylesheets folder, anddrop in the following code:
File: 06-style.css
body { background-color: #666; margin: 15px 25px; font-family: Helvetica, Arial, sans-serif;}#content { background-color: #fff; border: 10px solid #ccc; padding: 10px 10px 20px 10px;}
Figure 6.2. The new story form with a layout
3 Don’t worry if CSS is not your forte—all you need to do for this project is type out the CSS rulesexactly as you see them (or, even better, simply copy and paste them from the code archive). If you’reinterested in improving your CSS skills, Rachel Andrew and Dan Shafer’s book HTML Utopia:Designing Without Tables Using CSS [http://www.sitepoint.com/books/css2/] is a good place to start.
160
Chapter 6: Helpers, Forms, and Layouts

Reload the page in your browser. You should see a slightly prettier version of theform, as shown in Figure 6.2.
Excellent! We now have a form that functions correctly, is well structured underthe hood, and looks good on the outside.
However, our app doesn’t deliver any feedback to the user to let them knowwhether a story submission was successful or not. Enter: the flash!
User Feedback and the FlashYes, you read that correctly: flash.
No, we’re not going to be switching to Adobe’s Flash technology to provide sub-mission feedback. “Flash” also happens to be the name for the internal storagecontainer (actually a kind of hash) that Rails uses for temporary data. In thissection, we’ll use the flash to pass temporary objects between actions. We’ll thenapply some validation to the data that is entered.
Adding to the Flash
When I say that the flash is used to store temporary items, I’m not talking aboutitems that exist in memory and aren’t saved to the database. Items stored in theflash exist for the duration of exactly one action, and then they’re gone.
What good is this? Well, using the flash allows us to conveniently communicateinformation between successive actions without having to save information inthe user’s browser or the database. The flash is well positioned to store shortstatus messages, such as notifications that inform the user whether or not a formsubmission or login attempt was successful.
Flash content is usually populated from within a controller action. Using theflash is very easy: to place a message in the flash, simply pass it an identifyingsymbol (the flash area) and a corresponding message. Here’s an example:
flash[:error] = 'Login unsuccessful.'
In our story-sharing application, we want to put a message into the flash imme-diately after the story is saved, to let the user know that his or her submissionwas successful. Add the following line to the new action of your StoryController:
161
User Feedback and the Flash

File: 07-story_controller.rb (excerpt)
def new @story = Story.new(params[:story]) if request.post? @story.save
flash[:notice] = 'Story submission succeeded' redirect_to :action => 'index' endend
Conventions for Flash Areas
In general, Rails applications use flash areas named after common UNIXlogging levels to indicate the level of severity of a message. The common areanames are :notice, :warning, and :error.
In this case, the message is not critical, so we’ve chosen to use :notice.However, the name of the flash area is entirely up to you.
Retrieving Data from the Flash
To retrieve contents from the flash (usually done in the successive action), justaccess the flash from a view in the same way that you would access any otherhash in Rails. You don’t need to explicitly populate it in the controller, nor doyou have to purge the Flash once the view has been rendered—Rails takes careof this for you.
Since flash content is universally applicable, we’ll change our layout file (whichis located at app/views/layouts/application.rhtml) so that it always rendersa notification box, unless there is no content available to render. Modify yourlayout file as follows:
File: 08-application.rhtml (excerpt)
<div id="content"> <h1>Shovell</h1><% unless flash[:notice].blank? %><div id="notification"><%= flash[:notice] %></div><% end %>
<%= yield %></div>
The condition that we’ve added here checks whether the flash[:notice] variableis blank; if not, the code renders a simple HTML div element to which an id is
162
Chapter 6: Helpers, Forms, and Layouts

attached. Rails considers an object to be “blank” if it’s either nil or an emptystring.
Before we switch to the browser to test this addition, let’s add a few rules to ourstyle sheet to display our notification:
File: 09-style.css (excerpt)
#notification { border: 5px solid #9c9; background-color: #cfc; padding: 5px; margin: 10px 0;}
If you submit another story now, you should see a nice green box on the sub-sequent page informing you that the submission succeeded, as shown in Figure 6.3.If you’re curious, reload the landing page to make sure the contents of the flashdisappear.
Figure 6.3. Providing feedback after story submission
However, our form submission process is still flawed—it’s possible for a user tosubmit stories without entering a name. Or a link. Or both!
163
User Feedback and the Flash
Applying Validations
To be sure that all the stories submitted to Shovell contain both a name and alink before they’re saved, we’ll make use of the ActiveRecord functionality calledvalidations.
Validations come in a variety of flavors: the simplest flavor says, “Check that thisattribute (or form input) is not empty.” A more complex validation, for example,might be, “Make sure this attribute (or form input) matches the following regularexpression.”4 There are varying degrees of complexity in between. A more complexvalidation might be used, for example, to validate an email address.
Validations are defined in the model. This ensures that the validation is alwaysapplied, and, therefore, that an object is always valid, before its data is saved tothe database.
Let’s look at a simple validation. To add validations to our Story model, edit themodel class in app/models/story.rb so that it looks like this:
File: 10-story.rb (excerpt)
class Story < ActiveRecord::Basevalidates_presence_of :name, :link
end
You’ll notice that the line we’ve added here is fairly verbose, so it’s quite readableby humans. This line makes sure that the name and link attributes have a valuebefore the model is saved.
Tweaking the Redirection Logic
We want to ensure that the user can only be redirected to the index action ifthe model passes its validation checks. To do so, we need to modify the new actionin our controller as follows:
File: 11-story_controller.rb (excerpt)
def new @story = Story.new(params[:story])if request.post? and @story.save
4 A regular expression is a string of characters that can be used to match another string of characters.The syntax of regular expressions can be confusing, with particularly long expressions looking muchlike random characters to a newcomer to the syntax. One of the most common uses of regular expres-sions is validating whether or not an email address is in the correct format.
164
Chapter 6: Helpers, Forms, and Layouts

flash[:notice] = "Story submission succeeded" redirect_to :action => 'index' endend
As you can see, we’ve modified the if clause so that it checks two conditions:first, we check to see if our page request is a POST request. If it is, we then checkto see whether @story.save returns true.
These validations will be called before the save method writes the object to thedatabase. If the validations fail, this method will return false—the object willnot be saved, and the user will not be redirected.
It’s quite common to use Ruby statements directly within conditions, as we’vedone with the save method here. In general, many of the methods provided byRails core classes return true or false, which makes them an excellent choicefor use in conditions.
Fantastic—our logic for processing the form is sound. If you were to try to submita blank name or link now, our app would not allow the object to be saved, andthe redirect would not occur. However, we still need to give the user some guid-ance for correcting any errors that result from a failed validation.
Improving the User Experience
Looking at the generated HTML of the submitted form gives us a hint as to howwe might implement some additional feedback for the user when a validationerror occurs:
<div class="fieldWithErrors"> <input id="story_name" name="story[name]" size="30" type="text" value="" /></div>
As you can see, using the Rails form_for helper has paid off—it has wrapped ourtext field in a div element, and assigned it a class called fieldWithErrors. Wecould style this div with a red border, for example, to indicate that this fieldthrew an error. In fact, let’s do just that. Add the following rule to the style.cssfile:
File: 12-style.css (excerpt)
.fieldWithErrors { border: 5px solid #f66;}
165
User Feedback and the Flash
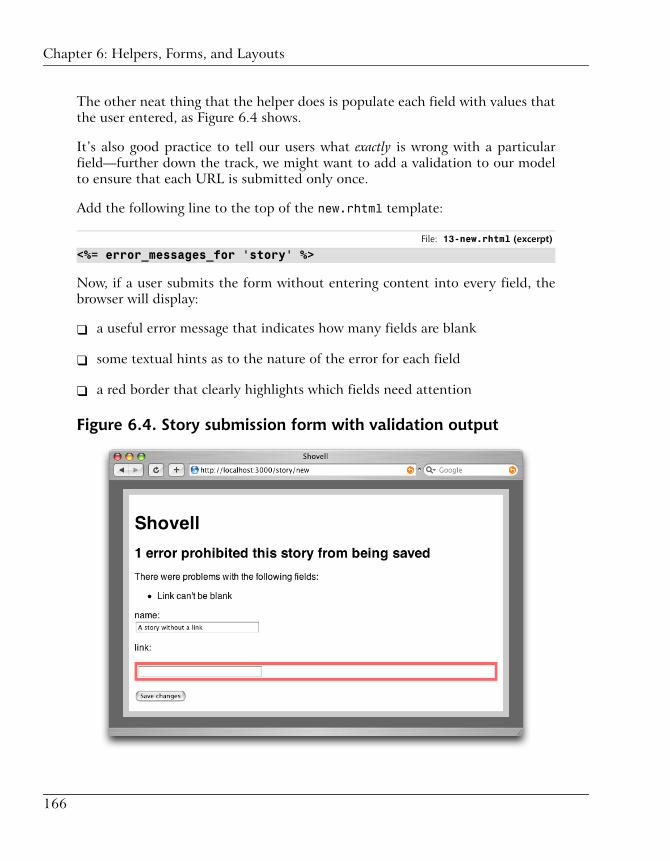
The other neat thing that the helper does is populate each field with values thatthe user entered, as Figure 6.4 shows.
It’s also good practice to tell our users what exactly is wrong with a particularfield—further down the track, we might want to add a validation to our modelto ensure that each URL is submitted only once.
Add the following line to the top of the new.rhtml template:
File: 13-new.rhtml (excerpt)
<%= error_messages_for 'story' %>
Now, if a user submits the form without entering content into every field, thebrowser will display:
❑ a useful error message that indicates how many fields are blank
❑ some textual hints as to the nature of the error for each field
❑ a red border that clearly highlights which fields need attention
Figure 6.4. Story submission form with validation output
166
Chapter 6: Helpers, Forms, and Layouts

See Figure 6.4 for an example.
That seems like a pretty functional form submission process to me. And it doesn’tlook too shabby, either.
However, before we begin loading our application with additional features, weshould add some unit and functional test coverage, to make sure that futuremodifications don’t break any of our existing functionality.
Testing the FormGetting into the habit of writing tests for newly added code is more than just agood idea—it may save your hide in the future!
As I’ve mentioned before, by writing tests for all of your code, you can evolve asuite of automated testing facilities as your application evolves. This suite canthen be run periodically or on demand to reveal errors in your application.
You can take a couple of approaches to creating a test suite for your application.One of them—the more radical, in fact—is referred to as test-driven development(TDD). When adhering to TDD principles, you first write a test, make sure itfails, then fill in the code that causes the test to pass. This approach works bestwhen you’ve had some experience with the programming language you want totest.
The opposite approach is to write the code first, and make sure it passes you (thehuman testing engine). Once this preliminary test has been passed, you writesome automated testing code, then run your application against the automatedtest. We’ll be using this second approach for the rest of the development of ourstory-sharing application.
A Rails test suite can be split into three fundamental parts:
unit tests Unit tests cover model-level functionality, which gener-ally encompasses an application’s core business logic.Unit tests can test validations, associations (which we’llbe covering in Chapter 7), and generic methods that areattached to models.
functional tests Functional tests in Rails cover controller-level function-ality and the accompanying views. A functional test canbe quite specific—for example, making sure that a certain
167
Testing the Form

HTML element is present in a view, that a variable ispopulated properly, or that the proper redirection takesplace after a form has been submitted.
integration tests Integration testing goes beyond the relatively isolatedapproaches of functional and unit testing. An integrationtest allows you to test complete stages of user interactionwith your application. The registration of a new user,and the story submission process as a whole, are goodcandidates for integration testing.
In this chapter, we’ll look at functional and unit testing; we’ll cover integrationtesting in Chapter 11.
Generally speaking, test cases in Rails exist as classes that descend fromTest::Unit::TestCase. However, when we generated our models and controllersin Chapter 5, the generate script created some skeleton files for us. These arelocated in the test folder, which is where all of the files that make up our testingsuite reside.
Testing the ModelWhile our Story model doesn’t have a great deal of functionality yet, it doeshave some validations, and we should definitely make sure that they operate asexpected. We’ll add them to the skeleton test file, then run the test to confirmthat our validations are behaving themselves!
Analyzing the Skeleton File
The skeleton test file for our Story model is located at test/unit/story_test.rb.When you open it, you should see the following code:
File: 14-story_test.rb (excerpt)
require File.dirname(__FILE__) + '/../test_helper'
class StoryTest < Test::Unit::TestCase fixtures :stories
# Replace this with your real tests. def test_truth assert true endend
168
Chapter 6: Helpers, Forms, and Layouts

That first line aside, what we have here is a basic class definition by the name ofStoryTest. The name of this class, which was created when the file was generated,suggests that its purpose is for testing our Story model—and so it is. The fix-tures :stories line makes sure that the dummy data for our test is loaded intothe database before the test begins. (We looked at dummy data that we can usefor testing in Chapter 5.)
That require command at the top of the file is a simple example of one filegaining access to the functionality of another file; the external file in such arrange-ments is known as an include file. By including this file, we gain access to a largeamount of testing-related functionality.
Of course, Rails includes other files all the time, but we don’t see dozens of re-quire commands littered throughout our code. Why not? The Rails conventionsallow it to deduce what is needed, when it is needed, and where it can be found.And this is one reason why following Rails conventions is so important.
Using Assertions
Code is tested in Rails using assertions. Assertions are tiny functions that confirmthat something is in a certain state. A simple assertion may just compare twovalues to make sure that they’re identical. A more complex assertion may matcha value against a regular expression, or scan an HTML template for the presenceof a certain HTML element. We’ll look at various types of assertions in this sec-tion.
Once they have been written, assertions are grouped into tests. A test is an in-stance method that is prefixed with test_. An example of a test is the test_truthmethod in the previous code listing. These tests are executed one by one usingthe rake command that we looked at in Chapter 5. If one of the assertions in atest fails, the test is immediately aborted and the test suite moves on to the nextone.
Now that we know what assertions are, and how they work, let’s write one!
Writing a Unit Test
The test_truth method in our unit test is just a stub that was created by thegenerate script. Let’s replace it with a real test:
169
Testing the Model

File: 15-story_test.rb (excerpt)
def test_should_require_name s = Story.create(:name => nil) assert s.errors.on(:name)end
We’ve named our method test_should_require_name. As you might’ve guessed,this method will test the validation of the name. Let’s examine each line withinthe method:
s = Story.create(:name => nil)
This line creates a new Story object—something that we might do in a regularcontroller action. Note, however, that this time we’ve purposely left the requiredname attribute blank (nil). As the create method will attempt to save the newobject immediately, the validations that we defined in the model will be checkedat the same time.
At this point, we can check the result of the validation by reading the errorsattribute of our newly created object.
assert s.errors.on(:name)
Every model object in Rails has an errors attribute. This attribute contains theresults of any validations that have been applied to it—if the validation failed,errors will exist “on” that attribute. In this case, we deliberately left the name at-tribute empty; passing a symbol to errors.on should therefore return true, andour assert statement confirms exactly that.
The name attribute is not the only required attribute for our Story model,though—the link attribute must be assigned a value before a story can be saved.We’ve already added one test, so adding a second should be fairly straightforward.Let’s add a test that covers the validation of the link attribute:
File: 16-story_test.rb (excerpt)
def test_should_require_link s = Story.create(:link => nil) assert s.errors.on(:link)end
Easy, huh?
170
Chapter 6: Helpers, Forms, and Layouts

Lastly, to complete our first batch of tests, we’ll add a test that checks whetheror not a new Story object can be successfully created and saved, thereby passingall of our validations:
File: 17-story_test.rb (excerpt)
def test_should_create_user s = Story.create( :name => 'My test submission', :link => 'http://www.testsubmission.com/') assert s.valid?end
In this test, a new Story object is created, and all mandatory attributes are as-signed a value. The assertion then confirms that the created object has indeedpassed all validations by calling its valid? method—this method returns true ifno validation errors are present.
Running a Unit Test
With this testing code in place, let’s run our small unit test suite. From the ap-plications root folder, execute the following command:
$ rake test:units
This command will execute all of the test cases located in the test/unit folderone by one, and alert us to any assertions that fail. The output of a successfultest execution should look something like Figure 6.5.
171
Testing the Model

Figure 6.5. Running a successful suite of unit tests
As you can see, rake gives us a nice summary of our test execution. The resultssuggest that a total of three test cases and three assertions were executed, whichis exactly what our test suite contains at the moment.
You’ll notice some dots between the Started and the Finished lines of the test suiteoutput—one dot for each test passed. Whenever an assertion fails, an uppercaseF will be displayed, and if one of your tests contains an error, an uppercase E willbe displayed, followed by details of the error that occurred.
Instead of just boldly assuming that our tests work correctly, let’s change a testso that we know it’s going to fail. In our test_should_create_user method,modify the last line so that its output is reversed:
assert ! s.valid?
Save the file and run the unit testing suite again:
$ rake test:units
Your output should display an F, indicating test failure, as shown in Figure 6.6.A description of the assertions that may have caused the test to fail is also dis-played.
172
Chapter 6: Helpers, Forms, and Layouts

Figure 6.6. Unit testing with a failed test
Armed with this information, locating and fixing an error is easy. We’re providedwith the name of the test that failed (test_should_create_user), the test caseto which it belongs (StoryTest), and the line on which it failed (line 18). Thus,the (admittedly forged) culprit is easily located and fixed.
For now, undo the change you made to the last line of test_should_create_user,so that the test will again pass:
assert s.valid?
That’s it—we’ve tested the model. We’ll add more tests in later chapters as weadd more functionality to the model.
Testing the ControllerThe functional testing of controllers is, at first glance, not very different fromtesting models—it’s just a different part of the MVC stack. However, there issome extra housekeeping involved in getting the environment properly set up.
173
Testing the Controller

Analyzing the Skeleton File
Once again, a skeleton functional test was created as a result of our generatingthe StoryController. This skeleton file resides in test/functional/story_con-troller_test.rb:
File: 18-story_controller_test.rb (excerpt)
require File.dirname(__FILE__) + '/../test_helper'require 'story_controller'
# Re-raise errors caught by the controller.class StoryController; def rescue_action(e) raise e end; end
class StoryControllerTest < Test::Unit::TestCase def setup @controller = StoryController.new @request = ActionController::TestRequest.new @response = ActionController::TestResponse.new end # Replace this with your real tests. def test_truth assert true endend
On first inspection, this looks similar to the StoryTest class that we saw in theprevious section, with a couple of exceptions—the most notable being the existenceof a setup method.
The setup method is called automatically before every functional test case. It’sresponsible for setting up a “clean” environment, which is what the creation ofnew @controller, @request, and @response objects achieves.
We also have a test_truth dummy test, which we’ll overwrite once again.
Writing a Functional Test
To add the first test for our StoryController, replace the test_truth methodin the skeleton functional test file with the following code:
File: 19-story_controller_test.rb (excerpt)
def test_should_show_index get :index assert_response :success
174
Chapter 6: Helpers, Forms, and Layouts

assert_template 'index' assert_not_nil assigns(:story)end
Let’s look at each line in this method.
def test_should_show_index
As you might have deduced from the name of the method, what we’re checkinghere is that the index action is correctly displayed in the user’s browser whenthe /index path is requested.
get :index
This line simulates a user requesting the index action of the StoryControllerclass that we instantiated in the setup method. It uses the HTTP request methodGET; the post function call is the one to use for testing POST requests.
assert_response :success
The assert_response assertion checks that the HTTP response code we receiveis the code that we expect.5
assert_template 'index'
By invoking assert_template, we ensure that the request we made is actuallyrendered with the template that we expect—not a template with a different name.
Shortcuts for Cryptic HTTP Codes
HTTP codes are numeric, so sometimes they’re hard to remember. As a result,Rails has implemented a few aliases for the more common codes. In this ex-ample we’ve used the :success symbol, which maps internally to the 200OK response code that is returned when a page request is successful. Othermappings that can be used with the assert_response function include:redirect for HTTP redirect headers and :missing for the all-too-common“404 Not Found” error that occurs when a request is made for a file thatdoesn’t exist.
assert_not_nil assigns(:story)
This final assertion is not as intuitive as the others, but it’s actually quitestraightforward. assert_not_nil tests whether or not the instance variable
5 A complete list of HTTP response codes can be found athttp://en.wikipedia.org/wiki/List_of_HTTP_status_codes.
175
Testing the Controller

@story is set to nil (that’s the easy bit). The assigns(:story) construct makesavailable to the functional test all of the instance variables that have been declaredwithin the controller’s actions. The @story object is one such variable, so passingthe :story symbol to the test allows the @story variable to be used as part ofthe test.
We also need some fixtures for this test. As we learned in Chapter 5, fixtures aredummy model objects that provide a consistent data set against which our testscan run. Fixtures are model based, so there’s a fixture file for every model classin our application. This means that we need to specify explicitly which fixtureswe want to load for each test.
We can do so by adding the line that’s highlighted here to the top of the func-tional test class definition:
File: 20-story_controller_test.rb (excerpt)
class StoryControllerTest < Test::Unit::TestCasefixtures :stories
def setup …
end
Running a Functional Test
Now that we’ve created our test case, we can invoke the functional test suite.Once again, we turn to the trusty rake tool:
$ rake test:functionals
The output that results from the successful execution of our test suite is shownin Figure 6.7.
176
Chapter 6: Helpers, Forms, and Layouts

Figure 6.7. Running a successful functional test suite
More Functional Tests
There’s one action for which we haven’t yet written a test—the new action. We’llwant to create a few different tests for this page. Let’s do that now.
To test the inner workings of our new action in GET mode, we’ll use a test casethat we’ll name test_should_show_new. Add the following method below thetest_should_show_index test that we created previously:
File: 21-story_controller_test.rb (excerpt)
def test_should_show_new get :new assert_response :success assert_template 'new' assert_not_nil assigns(:story)end
This is quite straightforward—apart from a few textual differences, this test isalmost identical to that for test_should_show_index. However, our work isn’tdone yet!
There’s a form element in the new template, and we should certainly test that itappears correctly. Here’s another test to do just that:
177
Testing the Controller
File: 22-story_controller_test.rb (excerpt)
def test_should_show_new_form get :new assert_select 'form p', :count => 3end
The assert_select helper function that we’ve used here is a very flexible andpowerful tool for verifying that a certain HTML element is present in the docu-ment that’s returned from a request.6 assert_select can even verify the hierarchyof the HTML element, regardless of how deeply it is nested; it can also test theelement’s attributes (for example, the value of its class or id). In fact, it’s soflexible that we could potentially devote an entire chapter to its features alone.7
But now we’re getting sidetracked. Back to this line! assert_select checks forthe existence of one form element in which five p elements are nested (the countis supplied using the :count argument). These five paragraphs contain the fieldsthat comprise our story submission form.
How do we specify an element in this hierarchy? Easy—by following the simplerules of CSS selectors.
In this example, we want to reference a paragraph element that resides within aform element. Now, if we were writing a CSS rule to style these paragraph ele-ments to be bold, it would look like this:
form p { font-weight: bold;}
In the same way that we reference paragraphs in CSS, the parameter that we usewith assert_select is simply 'form p'. We’ll look at a few more of the CSSselector features of assert_select in the tests we write in later chapters.
Lastly, to test the posting of a new story, we’ll write a few more short tests:
File: 23-story_controller_test.rb (excerpt)
def test_should_add_story post :new, :story => { :name => 'test story',
6 assert_select, originally available as a plugin only, is the successor to assert_tag, andwas introduced in Rails 1.2.7 An assert_select cheat sheet is available at the web site of the tool’s author:http://labnotes.org/svn/public/ruby/rails_plugins/assert_select/cheat/assert_select.html
178
Chapter 6: Helpers, Forms, and Layouts

:link => 'http://www.test.com/' } assert ! assigns(:story).new_record? assert_redirected_to :action => 'index' assert_not_nil flash[:notice]end
Let’s break this test down line by line.
post :new, :story => { :name => 'test story', :link => 'http://www.test.com/' }
As I mentioned earlier in this chapter, post is another way to invoke an HTTPrequest programmatically from a test. post takes a few parameters: in this case,we’re simulating the submission of a story. To do this, we need to pass a hashthat contains values for the required attributes of a story—symbols representingthe name and link attributes.
Immediately after our post call has been issued, the following line checks theresults:
assert ! assigns(:story).new_record?
Here, we’re using the new_record? method of the @story instance variable toconfirm that the record has actually been saved to the database. Since we wantthe assertion to tell us if it hasn’t been saved at this point, we use the exclamationmark (!) to reverse the return value of the new_record? call.
When a story submission has been successful, our application issues a redirection.We can test that this redirection occurs using assert_redirected_to:
assert_redirected_to :action => 'index'
Lastly, we assert that the contents of the notice flash area is not nil:
assert_not_nil flash[:notice]
Whew! Our rapidly-expanding test suite is evolving to the point where we canbe very confident that the story submission process is functioning correctly.
The final test case we’ll add covers the situation in which posting a new storyfails. We’ll cause the submission to fail by omitting one of the required fields:
179
Testing the Controller
File: 24-story_controller_test.rb (excerpt)
def test_should_reject_missing_story_attribute post :new, :story => { :name => 'story without a link' } assert assigns(:story).errors.on(:link)end
In the first line of this code, we attempt to post a story without a link:
post :new, :story => { :name => 'story without a link' }
After this submission attempt, we use the errors attribute to verify that there’san error condition on the link attribute, just as we did in the unit test earlier inthe chapter:
assert assigns(:story).errors.on(:link)
That’s it! We’ve written all the tests we need for the time being. Now, let’s runthe suite.
Running the Complete Test Suite
Now that we have these additional tests in place, we’ll need to run all of our testsagain. However, this time, we’ll use a slightly different approach: instead of in-voking our unit and functional tests separately, we’ll use a rake task to run thesetest suites successively:
$ rake test
The output of a successful test run should look like Figure 6.8.
180
Chapter 6: Helpers, Forms, and Layouts

Figure 6.8. Running the complete test suite
Congratulations! Not only have you created a full test suite, but, on running it,you’ve found that your application is error-free—a discovery that should makeeven the most seasoned developer a little proud. To finish up, let’s turn ourthoughts to the application’s performance as we inspect the log files generatedby ActionPack.
Revisiting the LogsWe took a brief look at the extensive logging functionality that ActiveRecordprovides in Chapter 5—this gave us a glimpse into the kind of automation, interms of SQL generation, that happens behind the scenes in Rails.
If you liked what you saw back then, you’ll be glad to learn that ActionPack isalso a prolific logger. An example of some of the entries that ActionPack wroteto the development log file are shown in Figure 6.9.
181
Revisiting the Logs

Figure 6.9. Contents of the development log file showingActionPack entries
As you look at these entries, you’ll notice a full record of your activities withinthe application has been logged, complete with SQL statements, page redirections,page requests, templates rendered, and more.
The level of detail in Rails’ log files is of real benefit when you’re hunting downa problem with your code—the logs provide real insight into what’s actuallyhappening as a page is requested. The same level of detail is captured for unitand functional tests in the test log file, which is located in log/test.log.
The timing values that are written to the log file are particularly interesting.Consider the following snippet:
Completed in 0.03430 (29 reqs/sec) | Rendering: 0.00515 (15%) | DB: 0.02469 (71%) | 200 OK [http://localhost/story]
From this log entry, we can conclude that:
182
Chapter 6: Helpers, Forms, and Layouts

❑ 71% of the time it took Rails to pump out this page was spent talking to thedatabase
❑ only 15% of the total time was spent in actually assembling the page
While 71% might sound like a large portion of the total time—which it is—bylooking at the actual number of seconds involved in the process, we see thatcommunications with the database took just 0.02 seconds.
Rails also provides us with a rough estimate of how many instances of this partic-ular page could potentially be served per second (in this case, it estimates 29 pagerequests per second). Note, though, that this is a very rough estimate—we’rerunning our app in the development environment, which is certainly not optimizedfor speed. The application is also unlikely to be located on the same server as theone that will be running the application in production. As such, the real numbersfor this statistic may vary greatly.
We won’t dig any deeper into the logs, but be aware that it’s worth keeping aneye on your log files. Incidentally, this is the same information that has beenflying past in the terminal window from which you launched your WEBrickserver, too. This is another way that you can check your application’s log entriesin real time, although you’ll probably find using a text editor more practical.
We’ll revisit the log files once more in Chapter 11.
SummaryWe certainly increased the functionality of our application in this chapter—weeven made it look a little prettier. We used the Rails form helpers to create afully functional web interface for submitting stories, and we added a global layoutto our application, complete with style sheets.
Along the way, we looked briefly at the flash—Rails’s short-term memory containerthat can be used to pass messages between successive actions. We also addedsome validations to our Story model, to make sure that our story submissionsadhere to our own high standards (or that, at the very least, that each story hasa title and a URL!).
Finally, we wrote our first unit and functional test cases, which we used to auto-mate the testing of our models, controllers, and views. We also took a scrollthrough the Rails log files to see what kind of logging the ActionPack moduleperforms, and how those log entries are useful when we debug our application.
183
Summary

In the next chapter, we’ll add the much-anticipated voting feature to our story-sharing application—and we’ll do it using cutting-edge Ajax technology, spicedup with some Web 2.0 visual effects. Yes—it’s going to be one good-lookingchapter! On with the show!
184
Chapter 6: Helpers, Forms, and Layouts

Ajax and Web 2.07The success of a social bookmarking or content-sharing application doesn’t restsolely on the submission of stories by users; there must also be some way for sitevisitors to get an idea of the value of each content item. Now, in the world of socialbookmarking, popular opinion rules. So on our Shovell site, the value of eachstory will be gauged by its popularity as indicated by the number of votes thestory receives from Shovell users.
In this chapter, we’re going to expand the feature set of our story-sharing applic-ation to include this crucial voting functionality. And what better way to do sothan with the technology behind some of Web 2.0’s biggest buzzwords: Ajax,Prototype, and script.aculo.us? We’ll cover them all in the coming pages. Let’sdive in!
Generating a Vote ModelAt the core of our app’s voting functionality lies a data model—a Vote—whichwe’ll need to create. Once that’s in place, we’ll create and apply the necessarychanges to our database schema. We learned how to do this using migrations inChapter 6, so there’s no reason to go back to the old ways now!
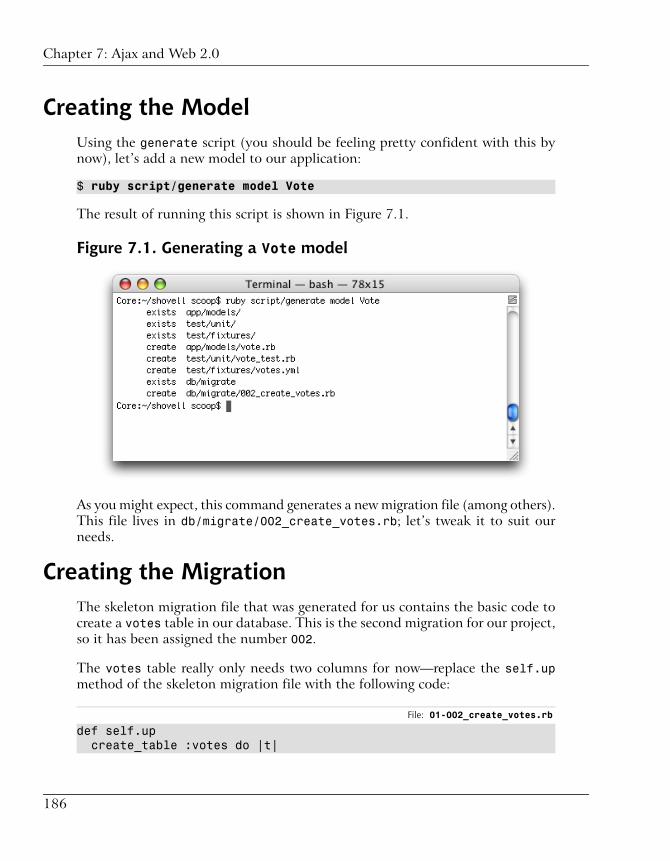
Creating the ModelUsing the generate script (you should be feeling pretty confident with this bynow), let’s add a new model to our application:
$ ruby script/generate model Vote
The result of running this script is shown in Figure 7.1.
Figure 7.1. Generating a Vote model
As you might expect, this command generates a new migration file (among others).This file lives in db/migrate/002_create_votes.rb; let’s tweak it to suit ourneeds.
Creating the MigrationThe skeleton migration file that was generated for us contains the basic code tocreate a votes table in our database. This is the second migration for our project,so it has been assigned the number 002.
The votes table really only needs two columns for now—replace the self.upmethod of the skeleton migration file with the following code:
File: 01-002_create_votes.rb
def self.up create_table :votes do |t|
186
Chapter 7: Ajax and Web 2.0

t.column :story_id, :integer t.column :created_at, :datetime endend
As you can see, to create the schema, we’re following the format we used inChapter 5, but this time, the column types are different. Let’s look at them briefly:
t.column :story_id, :integer
This line creates a story_id column of type integer. It’s going to be used tostore the numerical ID of a story that has received a vote from a user. This columnwill be populated using associations, which we’ll talk about in the next section.
Rails has a handful of “magical” column names, one of which is created_at oftype datetime. The next line in our migration shows an example:
t.column :created_at, :datetime
Whenever a new model is saved to the database using the save method, Railswill automatically populate the column called :created_at with the current dateand time.
Its companion, updated_at, operates in a similar manner—it automaticallypopulates the column with the current date and time of any successive call tothe save method—although we won’t be making use of this column in our applic-ation.
As with the last migration we created, the self.down method is fine as is—revers-ing this migration simply gets rid of the whole table.
Applying the MigrationOur migration is in place, so let’s apply it using the rake tool once more:
$ rake db:migrate
The result of applying the migration is shown in Figure 7.2.
187
Applying the Migration

Figure 7.2. Applying the second migration
Excellent! Now, I suggest you sit down before we begin the next topic, becausethings could get a little heavy. It’s time for you and me to have an in-depth talkabout relationships.
An Introduction to RelationshipsContrary to popular belief, relationships don’t have to be hard work.
No, I’m not talking about human relationships—I’m talking about the relation-ships between objects in our model (also commonly referred to as associations).We touched on some of this stuff back in Chapter 4, when we talked about thefeatures of ActiveRecord. Now we finally have a practical use for all that theory.
The Vote model that we just created needs to be associated with our Storymodel. After all, what good is a vote if you don’t know which story it’s for?
As we saw back in Chapter 4, Rails can cater for a variety of associations betweenmodels. One of the more popular associations is the one-to-many relationship,which we’ll add to our model now.
Introducing the has_many ClauseA one-to-many relationship exists when a single record of type A is associatedwith many records of type B.
In our application, a single story is likely to be associated with many votes. Thisrelationship is shown in Figure 7.3.
188
Chapter 7: Ajax and Web 2.0

Figure 7.3. The one-to-many relationship between stories andvotes
Relationships are usually declared bidirectionally, so that the relationship can beutilized from both sides. Let’s begin by examining the Story model’s relationshipto a Vote; we’ll look at the reverse relationship later in the chapter.
To define the first aspect of the relationship, edit the Story class, located inapp/models/story.rb, adding the line in bold below:
File: 02-story.rb (excerpt)
class Story < ActiveRecord::Base validates_presence_of :name, :linkhas_many :votes
end
The addition of this one line has ignited a flurry of activity behind the scenes—fireup a Rails console, and I’ll show you what I mean. First, retrieve an existing Storyrecord from our database:
$ ruby script/console>> s = Story.find :first=> #<Story:0x27482a0..>
Next, invoke this object’s newly acquired votes method:
>> s.votes=> []
The name of this method is derived directly from the has_many :votes relation-ship that we defined in our class definition (we’ll talk more about declaring asso-
189
Introducing the has_many Clause

ciations in Chapter 9). Invoking the method grabs all votes for the Story andreturns them in an Array (which, obviously, is empty right now).
So, how would we go about adding some votes to this story?
The easiest way is to call the create method of the object returned bystory.votes, like so:
>> s.votes.create=> #<Vote:0x273d954..>
This approach instantiates a new Vote object, and saves the object to the databaseimmediately. It works because we haven’t specified any validations for the Votemodel yet, so there’s nothing to prevent empty fields from being saved. However,if you assume that the record we just saved to the database is completely empty,you couldn’t be more wrong.
Let’s take a look at the number of votes that have been created. Call the sizemethod for our Story’s associated votes, like so:
>> s.votes.size=> 1
This is another method to which we gained access by defining the has_many rela-tionship. An alternative syntax that achieves the same result combines the nameof an associated table (in this case, votes) with _count, like so:1
>> s.votes_count=> 1
This Ruby code also instructs Rails to calculate the number of records associatedwith the current model object. A result of 1 indicates that the Vote object thatwe just created does indeed contain some information, since a Vote is associatedwith the Story we retrieved.
To find out more, let’s retrieve the same Vote object independently from theStory with which it’s been associated, and inspect its attributes:
>> v = Vote.find(:first)=> #<Vote:0x2732360..>
1 This technique for counting records is in fact deprecated, meaning that it should no longer be usedas it will cease to be available in future versions of Rails. However, I’ve included it here for a reas-on—we’ll be overriding this method with a database table column of the same name in Chapter 9,so we need to create it now.
190
Chapter 7: Ajax and Web 2.0

>> v.attributes=> {"story_id"=>2, "id"=>1,#"created_at"=>Thu Jul 20 11:20:24 CEST 2006}
As you can see, not only has our Vote object automatically been populated witha creation date, but a value has been assigned in its story_id field. This valuewas obtained from the id attribute of the Story object that was used to createthe vote. (In this case, the value is equal to 2, as that’s the id of the first Storyin my database.) Figure 7.4 shows this relationship.
Figure 7.4. A Story has many Votes
To complete our relationship definition, let’s add its counterpart—the belongs_toclause—to the Vote model.
Introducing the belongs_to ClauseAs we learned in the previous section, when it comes to relationships, there areusually two sides to the, ahem, story.
In this section, we’ll add the second part of our one-to-many relationship. First,edit the Vote model class (in app/models/vote.rb) so that it looks as follows:
File: 03-vote.rb
class Vote < ActiveRecord::Basebelongs_to :story
end
191
Introducing the belongs_to Clause

Now that we’ve defined the relationship within both models that are affected byit, not only can we access the votes of a Story, we can also access the story ofa Vote. And I’m sure you can guess how we’d do the latter—back to the Railsconsole!
>> v = Vote.find(:first)=> #<Vote:0x272a7a0..>>> v.story=> #<Story:0x2725570..>
With the addition of just one line to our Vote class definition, we’ve gained accessto the associated Story object. As the code listing above shows, access to thisobject is possible via a new instance method (story) on the model—this methodis available as a direct result of the relationship clause that we put in place, andattains its name from the first parameter of the association call (belongs_to:story).
Figure 7.5 shows how this relationship works.
Figure 7.5. A Vote belongs to a Story
How’s our Schema Looking?Now that we’ve established both sides of our one-to-many relationship, let’s lookat how the information representing this relationship is stored in the database.
If you recall each of the migrations that we’ve created and applied so far, you’llnotice that, although the Vote model contains a story_id column, the Storymodel doesn’t contain a corresponding vote_id column.
192
Chapter 7: Ajax and Web 2.0

In fact, this column isn’t necessary—there’s no need to store association inform-ation in both models when defining a one-to-many relationship. The informationis always stored on the “many” side of the relationship. With this informationin place, Rails is intelligent enough to query the correct table when we instructit to find objects between which there is an association.
Also note how the terminology used to define the relationship is an accurate re-flection of what’s going on—the Votes belong to the Story (hence the belongs_tocall). And the Vote model represents the “many” side of the relationship, so eachVote stores its own reference to its associated Story.
Now that we understand the data structures that underlie it, let’s jump to theuser interaction part of our voting functionality.
Clean URLs and PermalinksIn terms of viewing stories that have been submitted to Shovell, our users currentlyonly have access to a page that displays a random story. To address this issue,we’ll add a new action that displays a single story, along with all of its details,before we implement the voting actions themselves. The story page will serve asa reference point for any given story on the Shovell site, as it will contain a rangeof information—voting actions, voting history, and so on—about the story.
Before we dive into the creation of our story page, let’s take a quick—but import-ant—detour. The development of a story page such as this provides the perfectopportunity for a discussion about clean URLs.
Implementing Clean URLsIf you cast your mind back to Chapter 4, you’ll recall that Rails translates URLsof a certain format into actions that are invoked on a controller class. Thetranslation, known as routing, is performed by the Rails Routing module.
Consider a URL that has the following format:
http://domain.com/story/show/1
Since most web applications operate on a single domain, we can ignore the domainpart of the URL for now. That leaves us with a path that contains several com-ponents, separated by forward slashes:
/story/show/1
193
Clean URLs and Permalinks

By default, the Routing module operates as follows:
❑ The first part of the URL is mapped to the corresponding controller. In thisexample, /story would route to our StoryController controller.
❑ The second part of the URL routes to the action name. In this case, the showaction would be invoked.
❑ The third part is used to populate the id entry in the params hash. In ourexample, the value of params[:id] would be set to 1.
The end result of this routing is that the show action of the StoryControllerclass would be called, and params[:id] would receive a value of 1.
This is all well and good, and such a URL structure is certainly neater than manyof the more complicated URLs out there on the Web. But an id of 1 isn’t exactlymeaningful to our users—they’re more likely to remember the title of a story.Even if the title was slightly modified (with special characters removed, escaped,or replaced), it would still make for a more usable URL.
So, in referring to a story titled “My Shiny Weblog,” the following URL wouldbe ideal:
/story/show/my-shiny-weblog
As I mentioned, converting a title to a URL like this will require a little work onour behalf (setting all characters to lowercase, and replacing spaces with dashes,in this case). But from a usability perspective, it’s quite obvious that the URLrelates to the story, so this idea is definitely worth implementing.
To do so, we’ll modify the configuration of the Rails Routing module to supportclean URLs like the one above. The routing configuration is stored in the fileconfig/routes.rb, and (once all of the comments are stripped out) looks likethis:
File: 04-routes.rb
ActionController::Routing::Routes.draw do |map| map.connect ':controller/service.wsdl', :action => 'wsdl' map.connect ':controller/:action/:id'end
The two calls to map.connect are Rails routes—rules that specify how a URLshould be mapped. Routes are read from top to bottom; the route with the lowestpriority is the one at the very bottom of the list. In almost all cases, this will be
194
Chapter 7: Ajax and Web 2.0

the default route, which, as we learned above, is responsible for mapping a con-troller name, an action name, and an id:
map.connect ':controller/:action/:id'
To implement clean URLs for stories, we’ll insert the following line between thetwo existing routes:
File: 05-routes.rb (excerpt)
map.story 'story/show/:permalink', :controller => 'story', :action => 'show'
This newly added route will match any URLs of the following form:
/story/show/my-shiny-weblog
In this route, we’ve explicitly named the controller and the specific action thatshould handle a URL in this format. As a result, a URL of this form will alwaysbe handled by the show action of our StoryController. The permalink (an ab-breviation of permanent link) that appears at the end of the route is the partof the URL that will be placed in the params[:permalink] hash area.
The syntax for matching the URL is absolutely identical to that used in the defaultroute: any string prefixed with a colon (with the exception of the :controllerand :action reserved words) ends up as a value in the params hash, thus becomingavailable to both the controller and its views.
But why are we using map.story instead of the default, map.connect? Well, be-cause we can—what we’re defining here is a named route. A named route is acustom alias for matching an incoming request’s URL. Requests with a URL thatmatches the defined pattern are directed to a specific page within our application(in this instance, the show action for our StoryController). Assigning the namestory to this route makes sense, because we’re directing requests that relate toStory objects. Named routes are available from both controllers and views, andprovide an easy way to direct requests to common pages within our application.We’ll look at how to take advantage of this later in this chapter.
Now, all we need is a permalink value.
195
Implementing Clean URLs
Adding Permalinks to StoriesAs we discussed in the previous section, our aim is for stories submitted toShovell to have a permalink that’s derived from a story title, with characters suchas spaces being removed or replaced with dashes. For now, we’ll let the user createthe permalink manually, and we’ll leave the automatic generation of permalinksfor Chapter 9.
A permalink is an attribute of a Story, so we’ll need to modify our schema sothat one can be stored for each story. We’ve already seen migrations in ac-tion—each of our existing migrations was generated when we created a newmodel. Now we need to expand an existing model, so that we can add a permalinkattribute to the Story model.
To add a migration without adding a new model, we use the generate script,passing migration as the first parameter:
$ ruby script/generate migration AddPermalinkToStories
This code generates a single migration file by the name of db/mi-grate/003_add_permalink_to_stories.rb. Edit this file so that its contentsreflect the following:
File: 06-003_add_permalink_to_stories.rb
class AddPermalinkToStories < ActiveRecord::Migration def self.up
add_column :stories, :permalink, :string end def self.down
remove_column :stories, :permalink endend
Unlike our previous migrations, here we’re modifying the structure of an existingtable, rather than creating a brand new one. The add_column function fills thisrole nicely:
add_column :story, :permalink, :string
The syntax of the add_column function is almost identical to that of the cre-ate_table function we’ve used before—we just need to pass it the name of thetable we want to modify, and the name and type of the column we want to add.
196
Chapter 7: Ajax and Web 2.0

In this case, we’re adding a column with the name permalink, of type string,to the stories table.
In previous migrations, we haven’t needed to modify the self.down method, butthis time we’ve added a line to it:
remove_column :stories, :permalink
When this migration is reversed, we want to remove a single column, rather thandrop the entire table (which would be extremely bad news). As with add_column,remove_column takes symbols as its parameters. These symbols represent thetable that’s being modified, and the name of the column that we’re removing.We don’t need to specify the column type when we’re removing a column, sothis isn’t included as a parameter.
Go ahead and apply this migration using the rake tool:
$ rake db:migrate
This will add the new column to the stories table, the output of which is shownin Figure 7.6.
Figure 7.6. Adding and executing our third migration
To finish off this little exercise in altering our app’s infrastructure, we need topopulate our newly added permalink column with a value for each of the storiesthat have already been added to our database. I’ll show you how to do this for asingle story, and leave it to you to update the rest of your stories. As I mentioned,though, we’ll look at how to automate this step in Chapter 9.
197
Adding Permalinks to Stories

From the Rails console, fetch a single Story. Update its permalink attribute usingthe update_attribute method:
>> s = Story.find(:first)=> #<Story:0x27c7be0..>>> s.name=> "My shiny weblog">> s.update_attribute :permalink, 'my-shiny-weblog'=> true>> s.permalink=> "my-shiny-weblog"
As you can see, the permalink I created for this entry is loosely adapted from thename of the Story: spaces have been replaced with dashes, and uppercase letterswith lowercase letters.
Right, now we’re ready to implement the show action of our StoryController.
Showing off our StoriesThe next step in displaying our stories is to implement the show action of ourStoryController. At the moment, in line with the routing rules that we’ve putin place, the Routing module would try to invoke the show method, which doesn’tyet exist.
Before we write this method, let’s think for a moment about what it’s going todo. We told the Routing module to extract the permalink from the URL andhand it to the controller via the hash entry params[:permalink]. Now our con-troller action needs to go ahead and retrieve a story with this permalink fromthe database, and hand the object it finds to the view, which is in turn responsiblefor displaying it.
We’ll start by adding the following method to our StoryController class. Onceagain, the order of the method definitions within the class definition is not im-portant:
File: 07-story_controller.rb (excerpt)
def show @story = Story.find_by_permalink(params[:permalink])end
As we saw in Chapter 5, Rails automatically adds some dynamic find methodsto the attributes of a model. Now, for our Story model, Rails has also defined a
198
Chapter 7: Ajax and Web 2.0

find_by_permalink method, even though this attribute was added after the tableitself was created (using a migration). We didn’t need specifically to tell Rails toreprocess everything that it knew about our database structure in order for thisnew method to become available—Rails just knew. This certainly makes our jobsas developers easier!
The single line of code in our show method executes this dynamic finder bypassing the value of params[:permalink] to it. By doing so, we’re instructingActiveRecord to retrieve from the database all columns that have a permalinkthat’s equal to the value in the URL requested by the user (there should only beone in each case!).
Lastly, we need a template with which to display a story. Create a new templatefile at app/views/story/show.rhtml, and fill it with the following simple HTMLand ERb code:
File: 08-show.rhtml
<h2><%= @story.name %></h2><p><%= link_to @story.link, @story.link %></p>
All this does is display the name of the Story, wrapped in <h2> tags. It also addsa link to the URL that’s stored as part of the story.
Let’s check that this functionality works as expected. Open the following URLin your browser (if you used a different permalink for your story, substitute ithere): http://localhost:3000/story/show/my-shiny-weblog.
As you can see in Figure 7.7, our story has its own page—complete with its ownpermalink—that displays its name and a link to the story content.
Make Sure your Server is Running!
As with our other examples, connecting to your application requires theWEBrick server to be running. If you need a refresher on how to launch it,flip back to Chapter 2.
199
Showing off our Stories
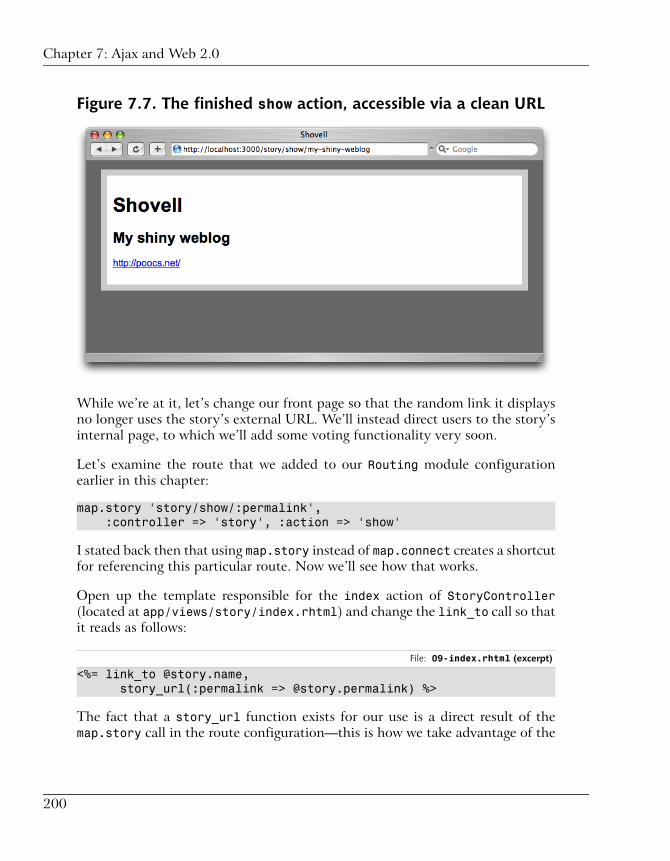
Figure 7.7. The finished show action, accessible via a clean URL
While we’re at it, let’s change our front page so that the random link it displaysno longer uses the story’s external URL. We’ll instead direct users to the story’sinternal page, to which we’ll add some voting functionality very soon.
Let’s examine the route that we added to our Routing module configurationearlier in this chapter:
map.story 'story/show/:permalink', :controller => 'story', :action => 'show'
I stated back then that using map.story instead of map.connect creates a shortcutfor referencing this particular route. Now we’ll see how that works.
Open up the template responsible for the index action of StoryController(located at app/views/story/index.rhtml) and change the link_to call so thatit reads as follows:
File: 09-index.rhtml (excerpt)
<%= link_to @story.name, story_url(:permalink => @story.permalink) %>
The fact that a story_url function exists for our use is a direct result of themap.story call in the route configuration—this is how we take advantage of the
200
Chapter 7: Ajax and Web 2.0

named route that we defined earlier. The story_url function accepts a hash ofvalues that’s used dynamically to generate the URL we’re looking for.
In this case, our named route takes only a single parameter—the permalink. Thevalue of the permalink of the randomly picked Story is passed using the:permalink symbol.
Reload the index page at http://localhost:3000/story—it should now link to theinternal story page, as demonstrated in Figure 7.8.
Figure 7.8. The index page linking to the story page
This completes our implementation of a page for each story, and the formationof links to each story page.
At this point, we’re ready to start implementing the app’s voting functionality.However, as we’re going to do this using Ajax techniques, we’ll take another slightdetour to learn a bit about Ajax and see how it’s implemented in Rails.
Ajax and RailsWe mentioned back in Chapter 1 that Rails is a full-stack framework, encom-passing code on the client, the server, and everything in between. Ajax is a tech-nique for communicating between client and server, so the Rails implementationof Ajax is therefore one of the key parts that makes up this “full-stack.”
201
Ajax and Rails

What is Ajax?Ajax stands for Asynchronous JavaScript and XML, but represents a techniquethat encompasses more than just these specific technologies. You’ve no doubtheard the term, which has become one of the prime buzzwords behind the so-called Web 2.0 movement. Strictly speaking, though, Ajax isn’t a new inven-tion—it’s actually existed for quite some time.
Basically, Ajax enables a web browser to continue to communicate with a webserver without reloading the entirety of the page it’s showing—a technique that’salso known as remote scripting. This communication may include the exchangeof form data, or the requesting of additional data to be incorporated into a pagethat has already been displayed. The end result is that a web application thatuses Ajax has the potential to compete with more traditional desktop applicationsby providing the user with a more dynamic experience.
At the heart of Ajax is the XmlHttpRequest object. XmlHttpRequest was origin-ally invented by Microsoft in the late 1990s for Internet Explorer 5, to improveand enhance the user experience of Microsoft’s web-based email interface. It hassince been implemented in all modern browsers. In 2005, a user-experience de-signer named Jesse James Garrett invented the term Ajax to describe the approachof using the XmlHttpRequest object, along with XHTML, CSS, and the DocumentObject Model (DOM), to create interactive web sites that feel like desktop applic-ations.
While compatibility with certain web browsers was lacking when the first applic-ations that used Ajax hit the Web, this is no longer as much of an issue—allpopular web browsers support the XmlHttpRequest object, including InternetExplorer, Firefox, Safari, and Opera.
Ajax has been used in many popular web applications, such as digg, Flickr,2
del.icio.us,3 GMail,4 and the 37signals applications that we talked about inChapter 1.
As we’ll soon see, implementing Ajax in Rails is as easy as implementing a regularlink.
2 http://flickr.com/3 http://del.icio.us/4 http://mail.google.com/
202
Chapter 7: Ajax and Web 2.0

Remote Scripting with PrototypeBeing an early adopter of new technologies usually means diving into otherpeople’s code—code that usually does not represent best practice—as well aspersisting with debugging tools, if such a tool even exists. Not so with Ajax andRails.
Rails was one of the first—if not the first—frameworks to ship with (and evenencourage) the use of Ajax in web applications. Rails comes bundled with thePrototype JavaScript library,5 which is responsible for all of the dynamic inter-action between browser and application. As it’s so easy to use, many Rails-poweredweb applications were Ajax-enabled from day one.
Visual Effects with script.aculo.usWhen web developers first embraced Ajax, it introduced a number of new user-interface problems (interaction designers are still searching to find the best solu-tion for several of these!). These challenges arose from the fact that the way inwhich users interact with a web application that utilizes Ajax is fundamentallydifferent from the way they use an app that does not. Back in the Web 1.0 days(before Ajax), most users were able to anticipate when communication was occur-ring between client and server, and when it was not. The interaction was verystart-stop in nature, because each back-and-forth transmission resulted in thedelivery of a new page to the client.
With Ajax, the web browser might never really stop communicating with theserver. We’re therefore faced with a problem: how do we let the user know thatcommunication has taken place?
Let me illustrate this point with an example. When users click on an element,such as a link or a button, on a web page that uses Ajax, they expect a new pageto load, because this is what’s happened with every other link that they’ve clickedon the Web in the past. Instead, a small amount of content on the page is updated,while everything else stays in place, unchanged. The change that takes place isso minor, though, that the users don’t notice it; they begin to wonder whetherthey might have missed the link when they clicked it, so they try clicking it again.Figure 7.9 shows a hypothetical example of this kind of confusion in action.
5 Although Prototype is bundled with Rails, it can be downloaded as a stand-alone JavaScript libraryfrom the Prototype web site [http://prototype.conio.net/], and used independently.
203
Remote Scripting with Prototype
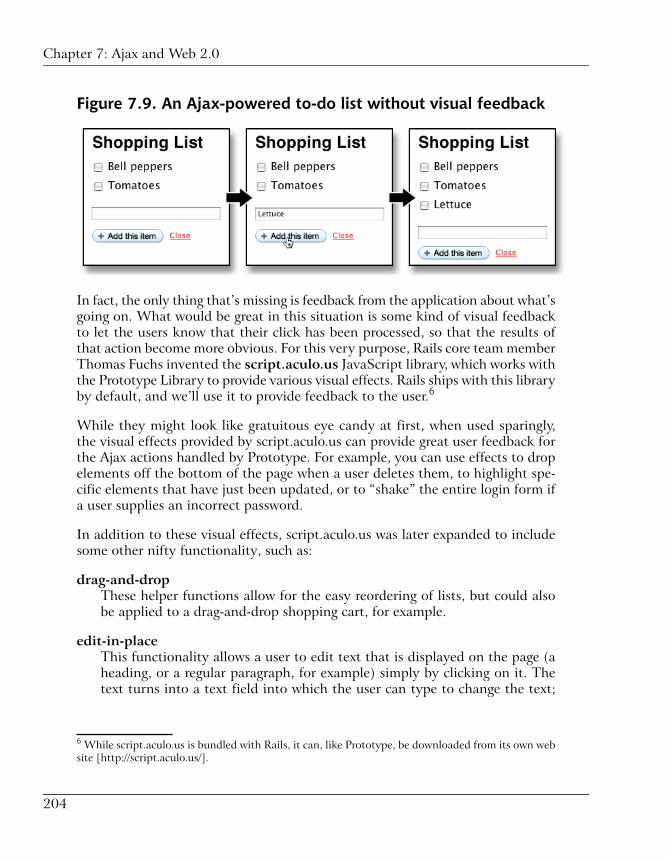
Figure 7.9. An Ajax-powered to-do list without visual feedback
In fact, the only thing that’s missing is feedback from the application about what’sgoing on. What would be great in this situation is some kind of visual feedbackto let the users know that their click has been processed, so that the results ofthat action become more obvious. For this very purpose, Rails core team memberThomas Fuchs invented the script.aculo.us JavaScript library, which works withthe Prototype Library to provide various visual effects. Rails ships with this libraryby default, and we’ll use it to provide feedback to the user.6
While they might look like gratuitous eye candy at first, when used sparingly,the visual effects provided by script.aculo.us can provide great user feedback forthe Ajax actions handled by Prototype. For example, you can use effects to dropelements off the bottom of the page when a user deletes them, to highlight spe-cific elements that have just been updated, or to “shake” the entire login form ifa user supplies an incorrect password.
In addition to these visual effects, script.aculo.us was later expanded to includesome other nifty functionality, such as:
drag-and-dropThese helper functions allow for the easy reordering of lists, but could alsobe applied to a drag-and-drop shopping cart, for example.
edit-in-placeThis functionality allows a user to edit text that is displayed on the page (aheading, or a regular paragraph, for example) simply by clicking on it. Thetext turns into a text field into which the user can type to change the text;
6 While script.aculo.us is bundled with Rails, it can, like Prototype, be downloaded from its own website [http://script.aculo.us/].
204
Chapter 7: Ajax and Web 2.0

the edits are saved without the page having to be reloaded. You might alreadyhave used this functionality on Flickr, for example.7
auto-completion of stringsThis functionality allows your web application to perform a database lookupas users type text into a form field. This capability could be used to completepath names on a remote server or to suggest search terms—an implementationpioneered by Google Suggest.8
An additional benefit of using Rails’ built-in helpers to enable Ajax functionalityin your application (compared with writing all of the Ajax code from scratch) isthat they make it easy to provide a fallback option for browsers that don’t supportAjax—a concept known as graceful degradation. The browsers that fall into thiscategory include older versions of web browsers, some browsers on newer platformssuch as mobile phones or PDAs, and browsers for which the user has deliberatelydisabled JavaScript. Visitors using these browsers will still be able to use yourweb application—it won’t be as dynamic as it is for other users, but at least theywon’t be faced with an application that doesn’t work at all (a scenario that’s al-most guaranteed to drive them away from your site).
Armed with this knowledge of Prototype and script.aculo.us, we’ll make use ofthe Rails Ajax helpers to implement functionality that allows users to vote onstories in our Shovell application without waiting for page reloads, and we’llprovide those users with a nice visual effect to highlight the altered element aftertheir vote actions are successful.
Making Stories Shove-ableOkay, we’ve walked through the ins and outs of Ajax. We’ve discussed the cap-abilities of the two JavaScript libraries that are bundled with Rails, and exploredthe role that each of them plays. We’re now in a good position to add votingfunctionality to our application, and to indicate to users that their votes havebeen recorded. We’ll also provide a fallback option for users whose browsersdon’t support Ajax.
Just to be extra-cheeky, we’ll refer to each story’s vote as a shove, rather than adigg—users can then “shove” stories that they think are worthy of publicationon the site’s homepage.
7 http://flickr.com/8 http://labs.google.com/suggest/
205
Making Stories Shove-able

Including the JavaScript Libraries
As both of the helpers that we’re going to use—Prototype, for dealing with theXmlHttpRequest object, and script.aculo.us, for displaying visual effects—areimplemented in JavaScript, we need to include the appropriate JavaScript filesinto our application’s layout. To do so, add the following line to theapp/views/layouts/application.rhtml file, somewhere in the head section:
File: 10-application.rhtml (excerpt)
<%= javascript_include_tag :defaults %>
This line calls the javascript_include_tag Rails helper, passing it the :defaultparameter. It causes a total of five JavaScript include files to be added to ourapplication:
prototype.js This file contains the entire Prototype library, which providesour Ajax functionality.
effects.js This is the visual effects part of the script.aculo.us library.
dragdrop.js This file contains the JavaScript methods required for addingdrag-and-drop functionality, also from the script.aculo.uslibrary.
controls.js The auto-completion methods are contained within this partof the script.aculo.us library.
application.js This is an empty file that we can use to store our own customJavaScript functions. It’s located in the public/javascriptsfolder of our application.
To confirm that the helper is indeed doing its job, take a look at the source ofany of the pages that exist in our application right now. Remember, since weadded these files to the application’s layout template, this change will be visibleon every page. In the header of the page source, you should find <script> tagsthat closely resemble the following:9
9 If you’re curious about that weird numerical suffix that follows each of the JavaScript files, don’tbe: this number simply represents the amount of time in seconds between January 1, 1970 (the “Unixepoch”), and the time at which the file was last modified. This information is included in order toforce browsers to reload the file in question whenever the file is modified. Normally browsers cachesupplementary files such as style sheets and JavaScript files, so this is a good way to force the browserto discard the cached version and apply the new file.
206
Chapter 7: Ajax and Web 2.0

It’s Not All or Nothing!
If you like, you can be more selective about what you include in your ownapplication, depending on whether you plan to use all of the functionalityprovided in the JavaScript files that ship with Rails. This might save somedownload time for your users, since their browsers won’t have to loadJavaScript files that your app doesn’t use anyway.
<script src="/javascripts/prototype.js?1152710301" type="text/javascript"></script><script src="/javascripts/effects.js?1152710301" type="text/javascript"></script><script src="/javascripts/dragdrop.js?1152710301" type="text/javascript"></script><script src="/javascripts/controls.js?1152710301" type="text/javascript"></script><script src="/javascripts/application.js?1152710301" type="text/javascript"></script>
Giving Stories a Shove
The next step is to change our existing show view (located atapp/views/story/show.rhtml) to display the current number of votes that thestory has received; we also need to add a link that allows users to vote on stories.Modify your view so that it looks like this:
File: 11-show.rhtml
<h2><span id="vote_score">Score: <%= @story.votes_count %>
</span> <%= @story.name %></h2><p> <%= link_to @story.link, @story.link %></p><div id="vote_link"><%= link_to_remote 'shove it',:url => { :action => 'vote', :id => @story } %>
</div>
Let’s take a look at what’s new here:
<h2> <span id="vote_score">
207
Making Stories Shove-able

Score: <%= @story.votes_count %> </span> <%= @story.name %></h2>
The heading that previously displayed just the name of the story now also containsa <span> tag that holds its vote score. To calculate this number, we simply usethe votes_count method to add up the number of votes submitted for that story.We’ve also given the span element a unique id, which we’ll use later as a hookto update the score when a user casts a vote. We’ll also add some CSS to floatthis span to the right of the page:
<div id="vote_link"> <%= link_to_remote 'shove it', :url => { :action => 'vote', :id => @story } %></div>
This is where the magic happens! The extra div houses a relative of our much-loved link_to helper: a function called link_to_remote. This function generatesthe bits of HTML and CSS that are necessary to invoke the specified action(vote) using Ajax, rather than display it as a regular page-loading link.
Using Models in URLs
Readers with an eagle eye might have noticed that the .id part of the @storyvariable is not included when the variable is passed in as a parameter. Yetthe URL that Rails assembles from this function call will contain exactlythat—the value of @story.id.
How is this possible? Every ActiveRecord model has an instance methodcalled to_params, which defaults to the value of id. If you’d prefer to usea different identifier in your URLs, you can override this method in yourmodel class (in this case, Story) with another column—for example,permalink:
class Story < ActiveRecord::Base def to_params; permalink; endend
We’ll stick with the default to_params value for our Shovell application.
Styling the Scoreboard
Next let’s expand our CSS (it lives in the file located at pub-lic/stylesheets/style.css), to style and position our new elements.
208
Chapter 7: Ajax and Web 2.0

File: 12-style.css (excerpt)
#vote_score { float: right; color: #9c9;}#vote_link a { padding: 3px 5px; border: 3px solid #393; background-color: #cfc; text-decoration: none; color: #393;}#vote_link a:hover { background-color: #aea;}
There’s nothing too mysterious happening here—it’s all cosmetic stuff. But whosaid cosmetics weren’t important?
If you access one of your stories through your browser (using the link to a randomstory on http://localhost:3000/story, for example) you should see a pagesimilar to the one in Figure 7.10. However, clicking the shove it link won’t domuch right now (except that your application may spit out some weird warningsand error messages).
Figure 7.10. Showing a story with voting score and vote link
209
Making Stories Shove-able

Storing the Votes
To store the votes that have been submitted, we’ll add a vote method to ourStoryController. If you recall the link_to_remote helper call from above, you’llnotice that it refers to a method called vote. Here it is:
File: 13-story_controller.rb (excerpt)
…def vote
@story = Story.find(params[:id]) @story.votes.create endend
This new method doesn’t contain anything we haven’t seen before. In the firstline of the method, we find the appropriate story record using the unique ID ofStory for which a vote has been cast. The second line creates and saves a newVote—it only contains auto-generated values, such as the creation date, and theIDs that receive a value because of the Vote’s association with a Story.
If you were to try clicking the shove it link on your story page now, it would storeyour vote. But nothing on the page would change yet—even in Rails-land we canonly perform so much magic at once.
To update the voting score that’s displayed on the page and highlight it with avisual effect, we’ll use a new kind of Rails template: an RJS template.
Introducing RJS Templates
While the regular .rhtml templates with which we’re so familiar deal with awhole page (or partial pages, as we’ll see later), templates with an .rjs extension(short for Rails JavaScript) are used to modify parts of an existing page. Whenwe use RJS templates, the information that’s transferred to the user’s browser isa series of JavaScript instructions that modify, extend, and apply visual effectsto HTML elements. In contrast, .rhtml templates transfer HTML elementsthemselves.
You don’t need to add anything special to your controllers or actions in order tohave them use .rjs templates; simply place a template that has the extension.rjs right alongside all your other regular views, and it will be ready for use.
Let’s create an RJS template for our vote action now. It’ll handle the updatingof a story’s voting score (the number of “shoves”), and it’ll highlight the score
210
Chapter 7: Ajax and Web 2.0

after the update, using a visual effect. We’ll store this new template inapp/views/story/vote.rjs. Create the template like so:
File: 14-vote.rjs
page.replace_html 'vote_score', "Score: #{@story.votes_count}"page[:vote_score].visual_effect :highlight
That’s all: just two lines of code! Let’s look at what each line does.
First of all, you’ll notice that the window to the world of RJS is the page object.This object provides us with two different approaches for using RJS templates:
❑ The first approach focuses on what you do to an element on the page—“replacethe content of an HTML element,” for example, or “show this visual effect.”This approach involves calling a specific instance method on the page object;the method usually takes as a parameter the HTML element to be modified(referenced by its id attribute).
❑ The second approach revolves around the question of which element you wantto work with first. We can access the HTML element in question—once againidentified by its id attribute (well, a Ruby symbol of the same name as its id,anyway)—by treating the page object like a hash that contains all the elementson the page. The actual functionality is then invoked as an instance methodon the element.
The two lines of code I showed above purposely use the two different approaches,because I wanted to demonstrate each in an example. You could just as easily(and probably should) choose one approach and use that consistently. We’ll leaveour RJS template as is, but as an exercise, you might like to try modifying thecode so that your approach to using RJS templates is consistent.
The first line is responsible for updating the story’s score after a new vote hasbeen cast:
page.replace_html 'vote_score', "#Score: {@story.votes_count}"
The replace_html method of the page object takes two arguments: the id ofthe element whose contents you’d like to replace (vote_score, this time as astring, not a symbol), and the actual text that you want to assign to the element.
One new thing here is the #{} syntax that we’ve used between the quotes of thelast argument. Using this syntax gives us the ability to add dynamic values toour strings—in this case, we’re adding the value of @story.votes_count, which,
211
Making Stories Shove-able

if you recall, returns the number of votes that the story has received. To use thisfunctionality, you must use double quotes instead of single quotes—the #{}syntax does not work with single quotes.10
In this example, the code between the parentheses is a simple method call.However, it is possible to put any Ruby code in there. Be mindful, though, notto violate the MVC terms and conditions by placing any complex calculationswithin your views—that stuff really belongs in your controller code.
page[:vote_score].visual_effect :highlight
Figure 7.11. The “yellow fade” visual effect
This second line of our RJS Template uses the second syntax that we discussedfor the page object. It asks for the element with the id of vote_score, and appliesthe visual effect highlight to it. By default, this effect will highlight the back-
10 For performance reasons, it’s generally a good idea to use single quotes whenever you don’t needto replace values in a string dynamically.
212
Chapter 7: Ajax and Web 2.0
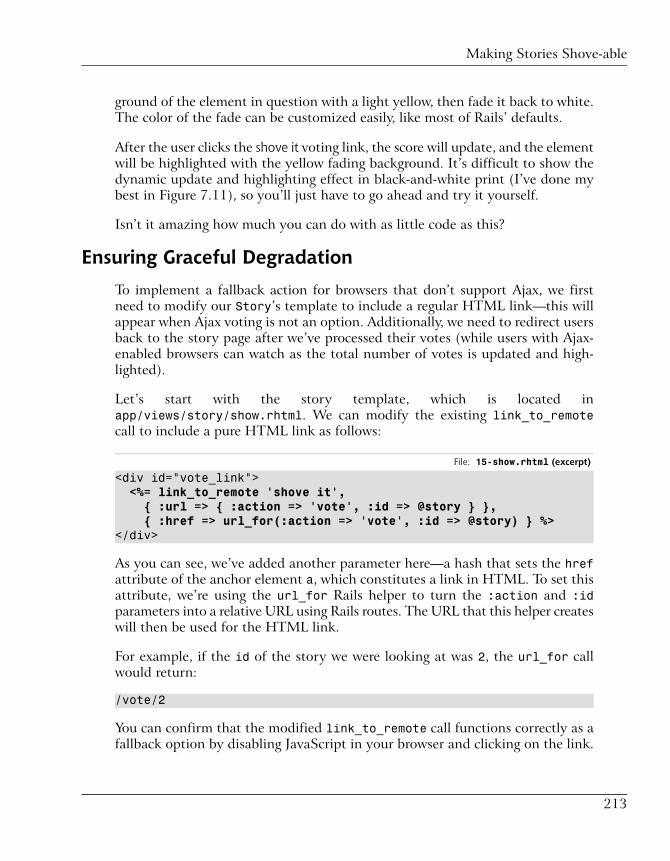
ground of the element in question with a light yellow, then fade it back to white.The color of the fade can be customized easily, like most of Rails’ defaults.
After the user clicks the shove it voting link, the score will update, and the elementwill be highlighted with the yellow fading background. It’s difficult to show thedynamic update and highlighting effect in black-and-white print (I’ve done mybest in Figure 7.11), so you’ll just have to go ahead and try it yourself.
Isn’t it amazing how much you can do with as little code as this?
Ensuring Graceful Degradation
To implement a fallback action for browsers that don’t support Ajax, we firstneed to modify our Story’s template to include a regular HTML link—this willappear when Ajax voting is not an option. Additionally, we need to redirect usersback to the story page after we’ve processed their votes (while users with Ajax-enabled browsers can watch as the total number of votes is updated and high-lighted).
Let’s start with the story template, which is located inapp/views/story/show.rhtml. We can modify the existing link_to_remotecall to include a pure HTML link as follows:
File: 15-show.rhtml (excerpt)
<div id="vote_link"><%= link_to_remote 'shove it',{ :url => { :action => 'vote', :id => @story } },{ :href => url_for(:action => 'vote', :id => @story) } %>
</div>
As you can see, we’ve added another parameter here—a hash that sets the hrefattribute of the anchor element a, which constitutes a link in HTML. To set thisattribute, we’re using the url_for Rails helper to turn the :action and :idparameters into a relative URL using Rails routes. The URL that this helper createswill then be used for the HTML link.
For example, if the id of the story we were looking at was 2, the url_for callwould return:
/vote/2
You can confirm that the modified link_to_remote call functions correctly as afallback option by disabling JavaScript in your browser and clicking on the link.
213
Making Stories Shove-able
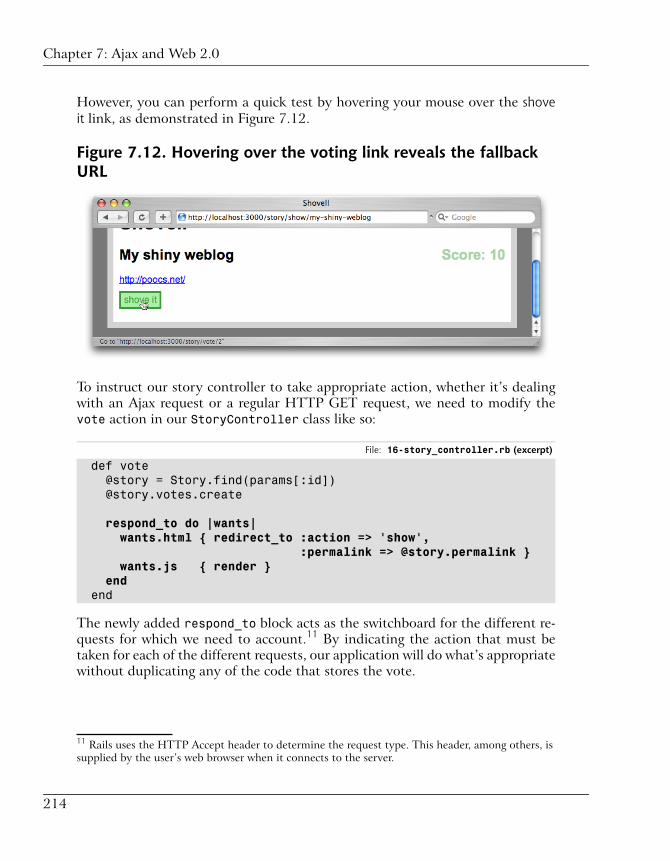
However, you can perform a quick test by hovering your mouse over the shoveit link, as demonstrated in Figure 7.12.
Figure 7.12. Hovering over the voting link reveals the fallbackURL
To instruct our story controller to take appropriate action, whether it’s dealingwith an Ajax request or a regular HTTP GET request, we need to modify thevote action in our StoryController class like so:
File: 16-story_controller.rb (excerpt)
def vote @story = Story.find(params[:id]) @story.votes.create
respond_to do |wants|wants.html { redirect_to :action => 'show',
:permalink => @story.permalink }wants.js { render }
end end
The newly added respond_to block acts as the switchboard for the different re-quests for which we need to account.11 By indicating the action that must betaken for each of the different requests, our application will do what’s appropriatewithout duplicating any of the code that stores the vote.
11 Rails uses the HTTP Accept header to determine the request type. This header, among others, issupplied by the user’s web browser when it connects to the server.
214
Chapter 7: Ajax and Web 2.0

In the code block that’s passed to the respond_to clause, we list the alternativesthat we intend to support in our modified show action. Note that the alternativeslisted here (wants.html and wants.js) are not filenames—wants is an objectthat’s provided to the code block in order to find out “what the client wants.”For each supported request type, a corresponding instance method is defined;each line can be read as “if the client wants this, do that.” Let’s look at each ofthem:
wants.html { redirect_to :action => 'show', :permalink => @story.permalink }
If we’re dealing with a regular HTTP GET request, we want to redirect the userback to the story page. The redirect_to function should be familiar to you fromChapter 6.
Our former Ajax-only show action implicitly called render after the vote hadbeen processed. However, since we’ve introduced a decision into the mix, weneed explicitly to tell Rails to render the RJS template, in case we’re dealing withan Ajax request. That’s what the second parameter in the block does:
wants.js { render }
Having made the necessary modifications to both the controller and the view,we’re now able to cater to users with—and those without—Ajax support in theirbrowsers.
Note, though, that given the app’s current state, a search engine crawler wouldbe able to vote on Shovell stories. This is something to keep in mind when you’reimplementing fallback functionality for your Ajax flourishes. In Chapter 8, we’llremedy this situation by requiring users to log in in order to vote.
Introducing PartialsI’ve mentioned before that templates ending in .rhtml can be used to displaycertain pieces of the page independently of the rest of the page. When used inthis way, these files are called partials. Partials can be helpful for dealing withparts of a page that are constantly being reused (such as a navigation menu), orfor retrieving and formatting the items in a collection (such as a list).
In this section, we’ll use partials to implement a voting history box for our storypage. The history box will show the dates and times at which each vote for a storywas submitted.
215
Introducing Partials

Adding Voting HistoryWe’ll implement the voting history as a list, using the HTML elements for anunordered list (ul). Each vote will be represented as a list item (li) that showsthe voting timestamp. The list items themselves will be rendered as partials, soa single template that contains a single list item will be rendered as often as thereare votes for a given story.
To begin with, we’ll modify the show template located atapp/views/story/show.rhtml to render an unordered list of the votes a storyhas received. To accomplish this, we’ll add to the template code right above theparagraph container that houses the story link, like so:
File: 17-show.rhtml (excerpt)
<ul id="vote_history"> <% if @story.votes.size.zero? %> <em>No shoves yet!</em> <% else %> <%= render :partial => 'vote', :collection => @story.votes %> <% end %></ul><p> <%= link_to @story.link, @story.link %></p>
In this code we’ve started out with a very straightforward ul element that has aunique id, and we’ve added a condition using an unless … else … end construct.This causes the message No shoves yet! to be displayed whenever a story that hasnot received any votes is rendered.
<% if @story.votes.size.zero? %> … <% else %> … <% end %>
While the if construct is familiar to us from Chapter 3, the votes.size.zero?part is new—it’s yet another method to which we have access as a result of spe-cifying the association between our two models. In this case, the zero? methodwill return empty if a story has associated votes, and true if not.
<%= render :partial => 'vote', :collection => @story.votes %>
216
Chapter 7: Ajax and Web 2.0

It’s in this call to render that we add the partial to our page—we instruct Railsto render a template for every Vote that has been added to a story. The render:partial syntax can be used to render a partial once or many times (as in thiscase)—it’s the addition of the :collection argument that indicates we’ll berendering the partial multiple times.
Creating the PartialPartials, like regular full-page templates, have a .rhtml extension and are storedright alongside their full-page cousins in an application’s directory structure. Apartial is identified by an underscore (_) prefix in its filename. Let’s create a newpartial at app/views/story/_vote.rhtml, and populate it with the followingline of code:
File: 18-_vote.rhtml
<li><%= vote.created_at.to_formatted_s(:short) %></li>
That’s all there is to it! This line simply wraps the date on which a vote was made(the value of which is stored in the created_at attribute) in a pair of <li> tags.
Note that we have access to an object named vote. Rails has created this objectfor us—it does so for every partial—and the object takes the name of the partial(vote, in this case). This object is automatically set to the current element of thecollection that’s being rendered.
The upshot of all this is that a partial needn’t concern itself with determiningwhich Vote it’s currently processing, or where that Vote sits within the largercollection of votes. The partial simply operates on a single vote object and letsRails take care of the rest.
Styling the Voting HistoryIf we printed the date and time exactly as they appear in the database, we’dproduce something rather awkward-looking:
2006-09-01 11:47:55
To address this issue, we’ve made use of Rails’ date-formatting helper. Thishelper, appropriately named to_formatted_s, is available as an instance methodfor objects of the classes Date and Time. The helper takes a single argument: oneof several pre-defined symbols representing the format that should be applied to
217
Creating the Partial
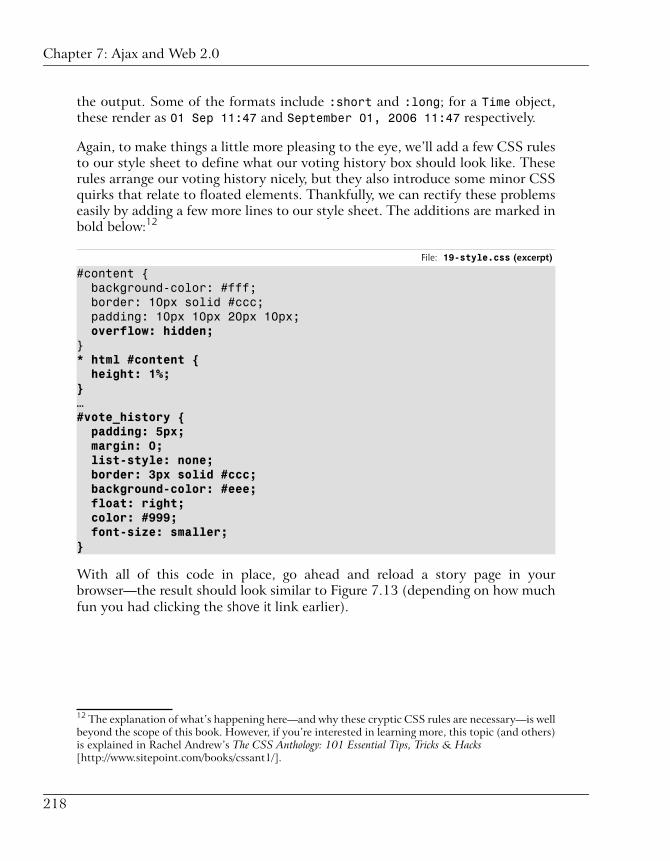
the output. Some of the formats include :short and :long; for a Time object,these render as 01 Sep 11:47 and September 01, 2006 11:47 respectively.
Again, to make things a little more pleasing to the eye, we’ll add a few CSS rulesto our style sheet to define what our voting history box should look like. Theserules arrange our voting history nicely, but they also introduce some minor CSSquirks that relate to floated elements. Thankfully, we can rectify these problemseasily by adding a few more lines to our style sheet. The additions are marked inbold below:12
File: 19-style.css (excerpt)
#content { background-color: #fff; border: 10px solid #ccc; padding: 10px 10px 20px 10px;overflow: hidden;
}* html #content { height: 1%;}…#vote_history { padding: 5px; margin: 0; list-style: none; border: 3px solid #ccc; background-color: #eee; float: right; color: #999; font-size: smaller;}
With all of this code in place, go ahead and reload a story page in yourbrowser—the result should look similar to Figure 7.13 (depending on how muchfun you had clicking the shove it link earlier).
12 The explanation of what’s happening here—and why these cryptic CSS rules are necessary—is wellbeyond the scope of this book. However, if you’re interested in learning more, this topic (and others)is explained in Rachel Andrew’s The CSS Anthology: 101 Essential Tips, Tricks & Hacks[http://www.sitepoint.com/books/cssant1/].
218
Chapter 7: Ajax and Web 2.0
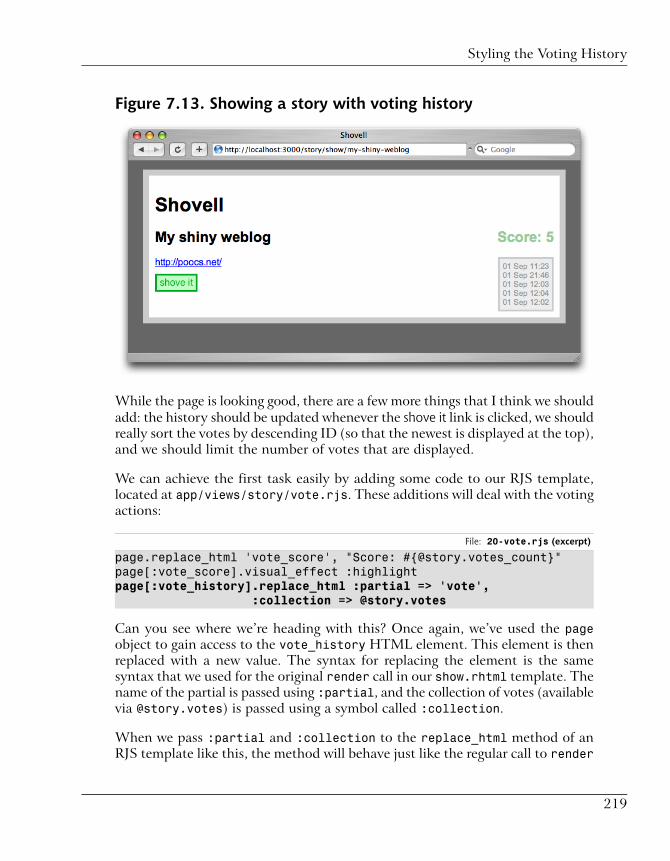
Figure 7.13. Showing a story with voting history
While the page is looking good, there are a few more things that I think we shouldadd: the history should be updated whenever the shove it link is clicked, we shouldreally sort the votes by descending ID (so that the newest is displayed at the top),and we should limit the number of votes that are displayed.
We can achieve the first task easily by adding some code to our RJS template,located at app/views/story/vote.rjs. These additions will deal with the votingactions:
File: 20-vote.rjs (excerpt)
page.replace_html 'vote_score', "Score: #{@story.votes_count}"page[:vote_score].visual_effect :highlightpage[:vote_history].replace_html :partial => 'vote',
:collection => @story.votes
Can you see where we’re heading with this? Once again, we’ve used the pageobject to gain access to the vote_history HTML element. This element is thenreplaced with a new value. The syntax for replacing the element is the samesyntax that we used for the original render call in our show.rhtml template. Thename of the partial is passed using :partial, and the collection of votes (availablevia @story.votes) is passed using a symbol called :collection.
When we pass :partial and :collection to the replace_html method of anRJS template like this, the method will behave just like the regular call to render
219
Styling the Voting History

that we used in show.rhtml. In this case, it will render the exact same collectionof partials that our view displays. Using the partial in more than one location isa nice way to avoid writing duplicate code.
Tweaking the Voting HistoryLastly, we’ll add an instance method to the Story model to return a limitednumber of votes sorted by descending ID. Why would we write an instancemethod, and not just retrieve the data from within the view? Well, for a coupleof reasons. For one, MVC principles state that we shouldn’t be retrieving anydata from our view. But the fact that we’ll be calling this method from a coupleof separate places means that moving it to the model makes even more sense.
Let’s create the method first, then we’ll add the references to it. Edit the Storyclass so that it looks like this:
File: 21-story.rb (excerpt)
class Story < ActiveRecord::Base validates_presence_of :name, :link has_many :votesdef latest_votes
votes.find(:all, :order => 'id DESC', :limit => 3)end
end
This latest_votes method will take advantage of the story’s association withthe Vote model, and will use a regular find call to retrieve the records we want,up to a total of three records (as specified by the :limit => 3 parameter). The:order => ‘id DESC’ argument will ensure that they’re ordered so that thenewest vote is located at the top.13
Ordering Records in Rails
In case you’re curious, the :order argument is actually a tiny piece of SQL.DESC, quite obviously, stands for descending; there’s also ASC for ascending,which is often left off as it’s the default.
The rest of the :order argument constitutes a column name by which therecords will be ordered (or multiple column names separated by commas—ifyou want to order by multiple columns—like so: :order => ‘id, cre-
13 Even though :all is passed as the first argument, this find call will not retrieve all the votesfrom the database. The :order and :limit arguments will be used in the database query, so amaximum of three votes will be returned to our application.
220
Chapter 7: Ajax and Web 2.0

ated_at’). Rails itself currently offers no way to specify the ordering ofrecords.
Having added this new instance method to the Story class, you can go aheadand replace the two occurrences of @story.votes that are present in our viewswith @story.latest_votes. The first occurrence is the render call in show.rhtml:
File: 22-show.rhtml (excerpt)
<%= render :partial => 'vote', :collection => @story.latest_votes %>
The second occurrence is the last line of the RJS template vote.rjs.
File: 23-vote.rjs (excerpt)
page[:vote_history].replace_html :partial => 'vote', :collection => @story.latest_votes
Excellent. Reloading the story page should produce the expected results, with thenumber of votes being limited to three, and the votes ordered by descending ID.Hitting the shove it link will update the voting history and place the new vote atthe top of the list. Have a look at Figure 7.14 to see how the updated page looks.
Figure 7.14. The final story page with voting history
221
Tweaking the Voting History
Testing the Voting FunctionalityIn Chapter 6, we mentioned that our plan is to provide test coverage for all ofthe functionality in our application. Let’s expand our growing test suite now byadding some unit and functional tests.
Testing the ModelWhile most of the work in this chapter has been on the controller side, we stillmade some changes to the model—we modified our Story model, we added aVote model, and we defined an association between the two. We also added aninstance method called latest_votes to retrieve the most recent votes of a givenStory. All of these features can be tested programmatically, so let’s write someunit tests to cover them.
Preparing the Fixtures
Before we write any tests, we’ll add some test data to the fixtures for our Votemodel, which resides in test/fixtures/votes.yml:
File: 24-votes.yml
first: id: 1 story_id: 1 created_at: <%= Time.now.to_s(:db) %>second: id: 2 story_id: 1 created_at: <%= Time.now.to_s(:db) %>
We generated the original contents of this file using the generate script earlierin this chapter, but I’ve made some enhancements here. First, I’ve altered thename of the second record from another to second to better reflect the order inwhich the votes were received. I’ve also incorporated the relationship informationfor both votes by adding a story_id field to the fixture file. Both story_idspoint to the first Story, illustrating the point that one Story can have multipleVotes.
Additionally, you’ll notice some ERb tags in the fixture file. These should befairly self-explanatory—we’re setting the created_at attribute of each vote tothe current date and time, using the now method of the Time class. The to_s(:db)
222
Chapter 7: Ajax and Web 2.0

method call then transforms the Time object into a format that’s expected by thedatabase. The value returned by this method will look something like this:
Fri Sep 01 20:41:44 CEST 2006
We need to set the created_at attribute manually because, unfortunately, theautomatic population of “magic” columns such as created_at and updated_atdoesn’t work within fixtures.
Testing a Story’s Relationship to a Vote
At this stage, we’re ready to add a test that covers the Story’s relationship to theVote model. To do this, open the file test/unit/vote_test.rb and change theVoteTest class to read as follows:
File: 25-vote_test.rb (excerpt)
class VoteTest < Test::Unit::TestCasefixtures :votes, :stories
def test_story_association assert_equal stories(:first), votes(:first).story endend
The first line specifies a second fixture file to use in the test:
fixtures :votes, :stories
We use a comma-separated list of symbols to instruct the test suite to load mul-tiple fixtures into multiple tables. In this case, we’re loading the votes.yml filethat we just modified, as well as our trusty stories.yml file from Chapter 5.
The new test_story_association test undertakes the testing of the Story’srelationship to the Vote model. While the underlying Rails association has verygood test coverage internally, it’s good practice to test all associations that youcreate as you test your application’s behaviour.
assert_equal stories(:first), votes(:first).story
The assert_equal assertion, as the name implies, confirms that two expressionsare absolutely equal. In this case, we’re simply comparing the return values oftwo methods.
What’s new on this line is the stories(:first) and votes(:first) syntax,which references our fixture data by name. Making use of a fixture file in a test
223
Testing the Model
(using the fixtures method) doesn’t just load the contents of the file into thedatabase—it also gives us a convenient way to access each record in the fixturefile, without having to resort to manual retrieval methods (for example, usingVote.find(1) to retrieve the first vote). The records we defined in the votes.ymlfixture file above are named first and second. Simply passing these identifiersas symbols to the votes method returns the corresponding record.
To give an example, take a look at these two calls—they’d be equal, given thevotes.yml fixture we created earlier:
Vote.find(1)votes(:first)
Incidentally, a method whose name is identical to the name of the fixture file(minus the .yml extension) is made available for every fixture we include in atest case. As we’ve included two fixtures, we have access to both the votes andstories methods.
In our assertion line, we compare the Story named first with the Story objectthat’s associated with the Vote named first. We know that this assertion shouldbe true, because we associated both votes in the fixture file with the first story.
Testing a Vote’s Relationship to a Story
To test the complementary part of the relationship between our models, edit thetest/unit/story_test.rb file. Once again, we need to expand the fixturescall at the top of the class definition to include the votes fixture. If we didn’t doso, we wouldn’t be able to access the fixture data stored in votes.yml. And tocover the association with a test, we’ll add the following method just below theexisting tests:
File: 26-story_test.rb (excerpt)
class StoryTest < Test::Unit::TestCase fixtures :stories, :votes …def test_votes_association
assert_equal [ votes(:first), votes(:second) ], stories(:first).votes endend
This assertion confirms that the votes associated with the Story are indeed thevotes that we named first and second. Here, we’re manually assembling an array
224
Chapter 7: Ajax and Web 2.0

of votes in the order in which we expect them to appear, and comparing that arraywith the votes that are returned by the votes method. If the two arrays match,we know our code works!
Testing the Voting History Order
To test the functionality provided by the latest_votes method we added, we’lladd two more tests to the story_test.rb file, below the others:
File: 27-story_test.rb (excerpt)
def test_should_return_highest_vote_id_first assert_equal votes(:second), stories(:first).latest_votes.first end
def test_should_return_3_latest_votes 10.times { stories(:first).votes.create } assert_equal 3, stories(:first).latest_votes.size end
Let’s look at these tests line by line.
The test_should_return_highest_vote_id_first test confirms that the :orderpart of the latest_votes method is indeed operating correctly.
assert_equal votes(:second), stories(:first).latest_votes.first
The assertion compares the first element of the array returned by thelatest_votes method with the Vote object to which we expect it to be equal(the fixture with the highest id attribute).
To test whether the :limit part of our latest_votes method does indeed doits job, we need to add a few more votes to the database, as our fixture file cur-rently contains only two votes. However, because it’s unlikely that we’ll be usinga large number of votes in any other test, we’ll create the additional votes rightthere in the test, using a simple block of Ruby code:
10.times { stories(:first).votes.create }
This line programmatically creates ten votes on the fly by calling the createmethod on the votes association of the first Story.
These dynamically created votes will automatically be wiped from the databasebefore the next test starts, so they won’t affect any other tests.
225
Testing the Model

The assertion then goes ahead and compares the size of the array returned bylatest_votes with the expected number of three, which is the maximum numberof votes that latest_votes should return.
Running the Unit Tests
At this point, we’re ready to run our unit tests with all of the newly added cover-age. You remember how to do that, right? With the rake tool:
$ rake test:units
The output should look similar to Figure 7.15.
Figure 7.15. Running unit tests
Testing the ControllerNow that we’ve created tests that cover all of the extra functionality we addedto our model in this chapter, we’ll do the same for the new controller actions,show and vote, and their accompanying views. All these additions will be madeto the functional test file located in test/functional/story_control-ler_test.rb.
226
Chapter 7: Ajax and Web 2.0

Testing Page Rendering
As with our unit tests, the first thing we need to do here is expand the fixturesthat the tests utilize to include the votes fixtures. Add the following to the filetest/functional/story_test_controller.rb:
File: 28-story_controller_test.rb (excerpt)
fixtures :stories, :votes
Next, we’ll add two tests for the show action; the first will be a test that dealswith the basics of displaying a story. Let’s add some permalink values for thetwo stories on which we’re basing all this testing. Edit the stories.yml file asfollows:
File: 29-stories.yml (excerpt)
first: id: 1 name: My shiny weblog link: http://poocs.net/ permalink: my-shiny-webloganother: id: 2 name: SitePoint Forums link: http://www.sitepoint.com/forums/ permalink: sitepoint-forums
Now that we have some reliable test data in place, we can write the tests. Thecode for the first test looks like this:
File: 30-story_controller_test.rb (excerpt)
def test_should_show_story get :show, :permalink => 'my-shiny-weblog' assert_response :success assert_template 'show' assert_equal stories(:first), assigns(:story) end
This code doesn’t do anything we haven’t seen before—we request a page (the“show story” page) using HTTP GET, and make sure that the page returns a codeindicating that it displayed successfully. We then check that the template nameis correct, and make sure that the story we’ve requested via the permalink is in-deed the story we expected.
227
Testing the Controller

The next test we’ll create will cover the new HTML elements that we added tothe story page—specifically those relating to the voting functionality. The test isas follows:
File: 31-story_controller_test.rb (excerpt)
def test_should_show_story_vote_elements get :show, :permalink => 'my-shiny-weblog' assert_select 'h2 span#vote_score' assert_select 'ul#vote_history li', :count => 2 assert_select 'div#vote_link' end
This is a pretty comprehensive test that checks for the presence of correctly nestedHTML tags on the rendered page, as well as proper element attributes. Let’s ex-amine it one line at a time:
assert_select 'h2 span#vote_score'
This assertion introduces more of the CSS selector syntax that can be used withassert_select, which we first encountered in Chapter 6. Just as you wouldregularly style an element on a page by referring to its ID, assert_select allowsus to test for the presence of an element with a given ID using the exact samesyntax we’d apply to style an element on the page.
Here, we’re checking for a span tag with an id of vote_score nested within anh2 element. This test actually confirms that we have a proper story header inplace, and that the current voting score appears beneath it.
The next assertion also uses assert_select:
assert_select 'ul#vote_history li', :count => 2
Here, we check for the presence of a ul element that has a unique id ofvote_history and a specific number of li elements nested within it (these reflectthe entries of the voting history for this particular story).
Our final check confirms the presence of a div element with a unique id ofvote_link:
assert_select 'div#vote_link'
We now have a high level of confidence that our pages are displaying everythingwe expect them to! Now, let’s add some tests for our voting functionality.
228
Chapter 7: Ajax and Web 2.0
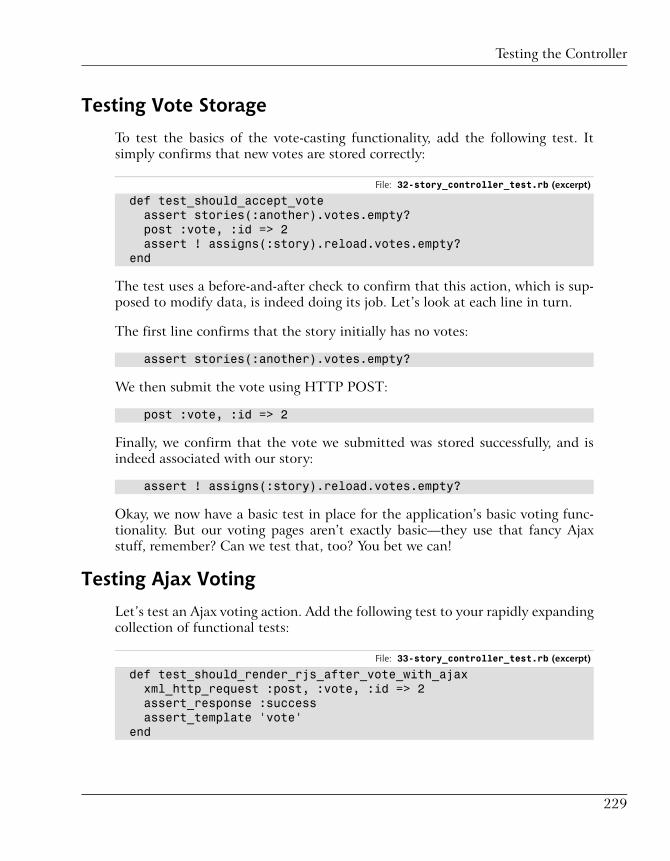
Testing Vote Storage
To test the basics of the vote-casting functionality, add the following test. Itsimply confirms that new votes are stored correctly:
File: 32-story_controller_test.rb (excerpt)
def test_should_accept_vote assert stories(:another).votes.empty? post :vote, :id => 2 assert ! assigns(:story).reload.votes.empty? end
The test uses a before-and-after check to confirm that this action, which is sup-posed to modify data, is indeed doing its job. Let’s look at each line in turn.
The first line confirms that the story initially has no votes:
assert stories(:another).votes.empty?
We then submit the vote using HTTP POST:
post :vote, :id => 2
Finally, we confirm that the vote we submitted was stored successfully, and isindeed associated with our story:
assert ! assigns(:story).reload.votes.empty?
Okay, we now have a basic test in place for the application’s basic voting func-tionality. But our voting pages aren’t exactly basic—they use that fancy Ajaxstuff, remember? Can we test that, too? You bet we can!
Testing Ajax Voting
Let’s test an Ajax voting action. Add the following test to your rapidly expandingcollection of functional tests:
File: 33-story_controller_test.rb (excerpt)
def test_should_render_rjs_after_vote_with_ajax xml_http_request :post, :vote, :id => 2 assert_response :success assert_template 'vote' end
229
Testing the Controller

Let’s walk through each line of this test.
The first line is our test’s way of pretending to perform an actual Ajax request:
xml_http_request :post, :vote, :id => 2
Obviously this isn’t really an Ajax request—it doesn’t make use of a browser, andthere’s no XmlHttpRequest object in sight. But, by prefixing the regular post callwith the xml_http_request method, our request receives a header that fools theapplication into thinking that this is a real Ajax request.
Setup statements like these can be extracted from specific tests into smaller, moresuccinct helper methods, which can then be used by all tests.
The next block of statements submits the vote itself using HTTP POST, checksfor a proper response, and confirms that the correct template was rendered:
post :vote, :id => stories(:another).id assert_response :success assert_template 'vote'
There’s nothing here that we haven’t seen before, so let’s move on to our lasttest.
Testing Regular HTTP Voting
We still need to test the process of vote submission using regular HTTP GET(that is, without Ajax). To do so, we’ll add one more test to the story_control-ler_test.rb file:
File: 34-story_controller_test.rb (excerpt)
def test_should_redirect_after_vote_with_get get :vote, :id => 2 assert_redirected_to :action => 'show', :permalink => 'sitepoint-forums' end
Let’s examine each line in this test. The first line casts the vote with a simpleHTTP GET:
get :vote, :id => 2
230
Chapter 7: Ajax and Web 2.0

After the vote has been submitted, we just need to check whether the user isproperly redirected to the story page. This is accomplished with an assert_re-directed_to assertion:
assert_redirected_to :action => 'show', :permalink => 'sitepoint-forums'
Excellent! All of our new functionality is covered. Time to run the tests!
Running the Full Test SuiteInvoking the full test suite (using the rake test command) will run through atotal of 26 assertions contained in ten tests. The results of a successful test suiteexecution should look something like Figure 7.16.
Figure 7.16. Running the full test suite
231
Running the Full Test Suite

SummaryIn this chapter we’ve equipped Shovell with some fully fledged voting function-ality, and we’ve done it using cutting-edge technologies such as Ajax combinedwith some good-looking Web 2.0 effects.
Along the way, we covered the principles of the Rails routing module, and weadded to our application a page that shows the details of a story that has alreadybeen submitted.
We also looked at using RJS templates to modify the contents of pages that havealready been rendered, and discussed how we can use visual effects to enhancethe usability of our application. We even covered partials—mini page templatesthat help reduce the amount of template code required to get the job done.
Finally, we established test coverage for all the functionality that we added toour Shovell application in this chapter, so that we’ll know immediately if anyfuture change to the application code breaks our existing functionality.
In the next chapter, we’ll implement some protective measures in Shovell withuser authentication. Our objective will be to let only logged-in users post newstory links to the application. The additional benefit that comes with having auser account bound to a story’s submission is that we can then implement a per-user history of submissions. Things are looking good!
232
Chapter 7: Ajax and Web 2.0

Protective Measures8Over the last few chapters, we’ve spent a good deal of time implementing newfeatures for our story-sharing application. However, we’ve yet to put any effortinto preventing those features from being misused.
In this chapter, we’ll implement some user authentication techniques that willallow us to protect certain actions from use by individuals who have not registeredwith, and logged into, the site.
Sessions and CookiesBefore we write any code, let’s learn a bit more about the technology behind userlogins, including sessions and cookies.
If you already have some experience with sessions and cookies, you might wantto skim through this section, or jump forward a few pages to the section called“Modeling the User”, where we’ll get back into writing the code that will bringthese concepts to life.

Identifying Individual UsersGenerally speaking, HTTP—the protocol that a web browser uses to talk to anapplication—is a stateless protocol. This means that it doesn’t make any assump-tions about, or rely upon, previous requests between the client and the server.
This is the crucial difference between stateless protocols and other protocols, in-cluding instant messaging systems such as AIM or ICQ: when you start up aninstant messenger client, it logs in to the instant messaging server, and remainsconnected for the time that you use the service. Stateless protocols, such as HTTP,request only a single item—a web page, an image, a style sheet, or a Flash movie,for example—during each connection. Once the item has been requested, theconnection is closed. If the requested item is a web page, it is impossible for theapplication to tell what the users are doing—they may still be reading the page,they may have followed a link to another site, or they may have shut down themachine altogether.
In the world of HTTP, it’s also impossible to tell whether two pages requestedin succession were actually requested by the same user. We can’t rely on the IPaddress of the user’s computer,1 as that computer might sit behind a proxy serveror firewall, in which case it’s entirely possible that thousands of other users sharethe IP address displayed by that machine.
Obviously, we need to use another technique to identify individual visitors.Without it, we’d have to force every user to log in to each and every page of ourShovell application, and that’s just not cool. This is where sessions and cookiescome into play.
What’s a Cookie?A cookie is a tiny snippet of information that a web site places on a user’s com-puter. The cookie is bound to the web site that placed it there—no other site isable to access the cookie. You’ve probably encountered cookies when using theWeb in the past, possibly without even knowing it.
A cookie consists of a name/value pair. For example, a cookie with the namecolor might have the value green. Additionally, the cookie’s name must beunique—if a cookie is set with the same name as one that already exists, the oldercookie will be overwritten.
1 An IP address is a number that uniquely identifies a computer connected to the Internet. You’veno doubt encountered them before; here’s an example: 123.45.67.123.
234
Chapter 8: Protective Measures

All web browsers give users control over the cookies that web sites set on theirmachines (although some make cookie management easier than others). Firefox,for example, provides a handy tool for inspecting—and removing—the cookiesthat have been set on a machine. To display the Firefox cookie manager shownin Figure 8.1, select Tools > Options (Firefox > Preferences on a Mac), click Privacy,select the Cookies tab, and click View Cookies. Go take a look—chances are thatmany of the sites you have visited have left a cookie, without even telling youabout it!
Figure 8.1. The Firefox cookie manager
Cookies usually have an expiration date; a browser will delete a cookie automat-ically once its expiration date has passed. It makes sense for sites to set expirationdates on cookies, because they occupy space on the user’s computer. Also, oncea cookie is set, it can’t be modified by the application that set it, so a cookie thathad no expiration date could wind up sitting on the user’s hard drive forever!
235
What’s a Cookie?

A site can set the expiration date of a cookie in two ways:
❑ by setting an explicit date (for example, December 31, 2006)
❑ by setting the cookie to expire when the user closes the browser
The latter is the default behavior for Rails’ session cookies … which brings us tothe next topic: sessions.
What’s a Session?Sessions are just what we need to identify returning visitors. A session is like asmall container that’s stored on the server for each user; it can be used as a tem-porary storage location for everything that needs to be remembered betweensuccessive page views made by the user. Though a session is a less permanentstorage solution, the data stored in the session shouldn’t be treated any differentlyfrom data stored in the application’s database.
As an added bonus, the processes of creating sessions and retrieving informationfrom them occurs without us having to write any code, or provide specific instruc-tions.
For our Shovell application, we’ll use a session to store information about wherea user has come from; we’ll use that information when the user attempts to accesspages or functionality, to determine whether we should allow the user access, orredirect him or her to the login form. Sessions can also be used to store shoppingcart content, custom user preferences, and other information that allows us toenhance and customize users’ experiences of a site.
Rails uses a session cookie to identify the session of a returning visitor. A sessioncookie does not contain the actual session content—it’s just an identifier that ourapplication uses to retrieve the session content from its storage location on theserver. By default, session content is stored in the file system on the server.
In fact, if you’ve been following the code in this book, you may notice that asession cookie has been set by our application already—check your browser’scookie manager for a cookie set by localhost or localhost.local, with thename _session_id. This is a cookie that Rails sets for us automatically, to provideus with a session that we can use within our application.
236
Chapter 8: Protective Measures

Sessions in RailsIn Rails, a session is automatically created for each of your application’s users,and can be used to store and retrieve data without requiring any special code.
The session container for a user is accessed just like any other hash—to add anew value to the session, simply assign the value that you wish to store to a hashkey that doesn’t yet exist in the session:
session[:page] = 'Index page'
The result of this assignment is that a cookie will be written to the user’s machineas shown in Figure 8.2 (in this case, the session name is _session_id). Thiscookie is what ties a user to the session container. With the cookie in place, anydata stored in the session becomes available for all successive pages that this uservisits.
Figure 8.2. A cookie set by our Rails application
The retrieval of session values is equally simple. To access the value we stored inthe previous code snippet, and display it in a view, we’d use the following syntax:
237
Sessions in Rails

<%= session[:page] %>
It’s actually possible to store data other than strings in a session container—youcan use a session to store any type of data you like. The only prerequisite for thestorage of such objects is that your application has access to the class definitionof the object that’s stored. However, in practice, sessions should only be used tostore simple objects, such as String and Fixnum objects.
The Physical Location of a Session
I mentioned that there are multiple locations in which we can store thecontents of a session on the server, the default being the server’s file system.The actual directory in which session contents are stored is the tmp (shortfor temporary) folder within your application’s directory structure. One fileis created per session, and is populated with a textual representation of thesession data, which is readable by Rails.
While this solution is fine for local development, it might not work quite sowell in a production environment in which many visitors are using the ap-plication. The number of files that an operating system can manage withina single directory is limited. Additionally, this approach might not be wellsuited to a production environment that involves multiple servers.
Although an in-depth discussion on the different session storage options isbeyond the scope of this book, we’ll briefly explore some of the alternativesin Chapter 12.
Modeling the UserRight! Now that we’ve stepped through the theory, let’s get back to the topic athand—protective measures. In this section, we’re going to lay an architecturalfoundation for implementing user authentication in Shovell.
The first step is to generate a new model named User. Since we’ve covered thegeneration of models before, I’m not going to dwell on this step. Let’s go!
Generating a User ModelFrom the shovell folder, run the generate script shown below to generate thebase class of the User model, along with its migration files, unit tests, and fixtures.The output of this script is shown in Figure 8.3:
$ ruby script/generate model User
238
Chapter 8: Protective Measures

Figure 8.3. Generating the User model
To create the database table for this model, modify the migration file located atdb/migrate/004_create_user.rb to look like this:
File: 01-004_create_user.rb
class CreateUsers < ActiveRecord::Migration def self.up
create_table :users do |t|t.column :login, :stringt.column :password, :stringt.column :name, :stringt.column :email, :string
endadd_column :stories, :user_id, :integeradd_column :votes, :user_id, :integer
end def self.down drop_table :users
remove_column :stories, :user_idremove_column :votes, :user_id
endend
We’ll use this migration to create a brand new users table. Its four columns willhold users’ personal information: usernames, passwords, names, and email ad-dresses. Well, the table actually has five columns if you include the automaticallycreated id column.
239
Generating a User Model

In addition to creating this new table, we’ll insert into each of the existing storiesand votes tables a new column, which will store the id of the user who createda particular story or vote, respectively.
While we would normally split migrations into the components that handle small,isolated changes, in this case, it makes sense to group the creation of the userstable with the modification of the two other tables. We’ll keep our schema changestogether as one migration, as they’re so closely related.
We use the good old rake tool to apply the migration we’ve just written:
$ rake db:migrate
Figure 8.4 shows the result of a successful migration. We now have in place thedatabase structure necessary to begin writing some code for our User model.
Figure 8.4. Applying the migration
Adding Relationships for the User ClassAs you’ve probably gathered from our past endeavors with ActiveRecord, amodel doesn’t require a whole lot of code in order to be functional.
The User class is no exception; the only changes we’ll make to it now are tospecify the relationship between it and our two other models. This will help uskeep track of which user submitted a particular story or vote.
Open the User class definition, located at app/models/user.rb, and modify itas follows:
240
Chapter 8: Protective Measures
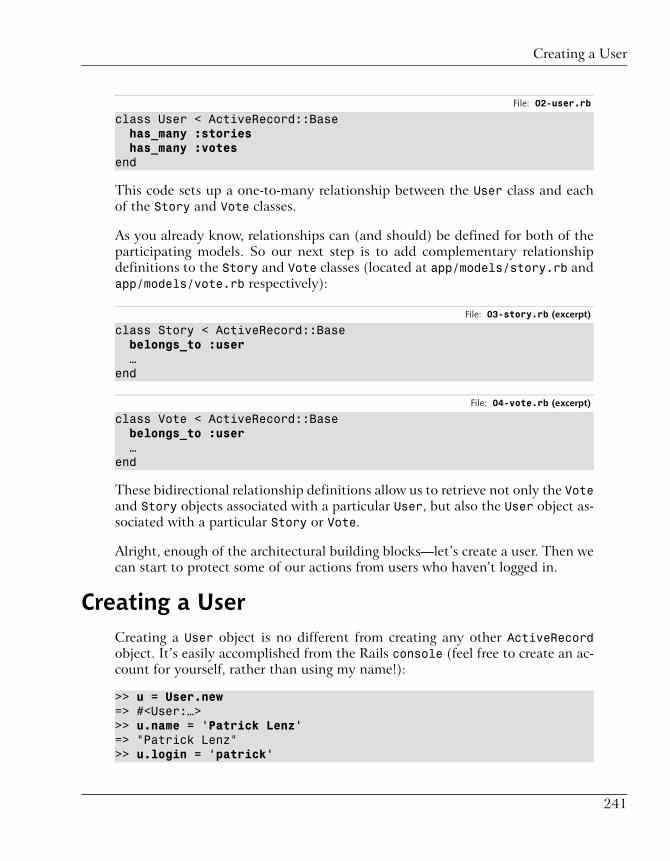
File: 02-user.rb
class User < ActiveRecord::Basehas_many :storieshas_many :votes
end
This code sets up a one-to-many relationship between the User class and eachof the Story and Vote classes.
As you already know, relationships can (and should) be defined for both of theparticipating models. So our next step is to add complementary relationshipdefinitions to the Story and Vote classes (located at app/models/story.rb andapp/models/vote.rb respectively):
File: 03-story.rb (excerpt)
class Story < ActiveRecord::Basebelongs_to :user
…end
File: 04-vote.rb (excerpt)
class Vote < ActiveRecord::Basebelongs_to :user
…end
These bidirectional relationship definitions allow us to retrieve not only the Voteand Story objects associated with a particular User, but also the User object as-sociated with a particular Story or Vote.
Alright, enough of the architectural building blocks—let’s create a user. Then wecan start to protect some of our actions from users who haven’t logged in.
Creating a UserCreating a User object is no different from creating any other ActiveRecordobject. It’s easily accomplished from the Rails console (feel free to create an ac-count for yourself, rather than using my name!):
>> u = User.new=> #<User:…>>> u.name = 'Patrick Lenz'=> "Patrick Lenz">> u.login = 'patrick'
241
Creating a User

=> "patrick">> u.password = 'sekrit'=> "sekrit">> u.email = '[email protected]'=> "[email protected]">> u.save=> true
Implementing Hashed Password Storage
Yes, we are using plaintext passwords here. Be sure to implement hashedpassword storage for yourself before you launch your application to the worldthough; the Digest module2 that comes bundled with Ruby has the toolsfor the job.
Developing Login FunctionalityIn order to handle login and logout actions (and cater for new user registrationsdown the track), we’ll need a second controller to complement ourStoryController. Once that’s in place, we can create some functionality to letusers log in and out. It’s exciting stuff!
Creating the ControllerWe’ll name this new controller AccountController, and generate it using thegenerate script, as usual:
$ ruby script/generate controller Account login logout
Passing the additional login and logout parameters as arguments to the generatescript will automatically create blank login and logout actions in our newAccountController. It will also create empty ActionView templates in theapp/views/account/ folder, with the names login.rhtml and logout.rhtml,which saves us a few lines of typing. Figure 8.5 shows the output of the abovecode.
2 http://www.ruby-doc.org/stdlib/libdoc/digest/rdoc/
242
Chapter 8: Protective Measures

Figure 8.5. Generating an AccountController class
Creating the ViewTo better understand what happens when we use extra parameters to generateActionView templates, type http://localhost:3000/account/login into your webbrowser.
Figure 8.6. The generated login template
The result you see should be similar to Figure 8.6—it’s basically a friendly messagethat lets us know where we can find the template that’s being displayed in thebrowser.
243
Creating the View

Remember to Start your Server!
As always, to use our Shovell application, you must have the WEBrick webserver running. Flip back to Chapter 2 if you need a refresher on this.
Let’s modify this template and turn it into an actual login form. As Rails indicatesin the browser, the template’s located at app/views/account/login.rhtml:
File: 05-login.rhtml
<% form_tag do %> <p>Please log in.</p> <p> <label>Username:</label> <%= text_field_tag 'login' %> </p> <p> <label>Password:</label> <%= password_field_tag 'password' %> </p> <p><%= submit_tag 'login' %></p><% end_form %>
Once again, we’ve created a form using simple HTML markup and a few of theRails form helpers. This time, our form doesn’t deal with a specific model object,so we can’t use the form_for helper that we used back in Chapter 6. Instead, weuse the standard form_tag helper that defines the surrounding form with a doand end block:
<% form_tag do %> …<% end %>
This generates the all-important <form> and </form> HTML tags. To check thatthey’re being created correctly, reload the modified page in your browser andview the source of the page.
The text_field_tag and password_field_tag helpers generate HTML inputelements with type="text" and type="password" attributes, respectively. Theseelements will render the text fields into which our visitors will enter their user-names and passwords. The login and password parameters that we’re passingto each of these helpers assigns a name to the HTML tag that’s generated; it alsocauses this value to show up in the params hash, which, as we’ll see later on, willprove to be very useful.
244
Chapter 8: Protective Measures

<%= text_field_tag 'login' %> … <%= password_field_tag 'password' %>
Now that we’ve put our form in place, we can establish some functionality behindit.
Adding Functionality to the ControllerWe’re ready to implement the actual login functionality within the login con-troller action. You’ll find the controller class in the file app/controllers/ac-count_controller.rb. Add the following method to this class:
File: 06-account_controller.rb
class AccountController < ApplicationController def login if request.post? @current_user = User.find_by_login_and_password( params[:login], params[:password]) unless @current_user.nil? session[:user_id] = @current_user.id redirect_to :controller => 'story' end end endend
As Figure 8.7 overleaf shows, we’ve expanded the previously empty login actionto handle circumstances where the user posts information using HTTPPOST—which is how a user goes about logging in:
if request.post? … end
When handling an HTTP POST request, we attempt to fetch a user using thelogin and password values that the visitor provided. Notice that we use one ofthe ActiveRecord dynamic finder methods to do this:
@current_user = User.find_by_login_and_password( params[:login], params[:password])
245
Adding Functionality to the Controller

Figure 8.7. The completed login form
Once we’re able to locate a user whose record matches the visitor-entered user-name and password combination, we store within the current visitor’s sessionthe id of the User object that was retrieved. The user is then redirected to theindex page of the StoryController:
unless @current_user.nil? session[:user_id] = @current_user.id redirect_to :controller => 'story' end
ActiveRecord Objects and the Session Container
Be careful when you’re storing ActiveRecord objects in the session contain-er. ActiveRecord objects may change at any time, but the session containerwon’t necessarily be updated to reflect the changes. For example, in ourShovell application, a story object might be viewed by one user, and modifiedby a second user immediately afterwards. If the entire story was stored inthe session container, the first user’s session would contain a version of thestory that was out of date (and out of sync with the database).
To ensure that this scenario doesn’t eventuate, it’s best to store only theprimary key of the record in question—the value of the id column—in thesession container. Here’s an example:
session[:user_id] = myCurrentUser.id
246
Chapter 8: Protective Measures

On successive page loads, we retrieve the ActiveRecord object using theregular Model.find method, and pass in the key that was stored in thesession container:
current_user = User.find session[:user_id]
This is all well and good, and if you were to try logging in athttp://localhost:3000/account/login using the initial user that we created a fewpages back, you would indeed be redirected to the story page. Go on, try it out—itworks! Well … sort of.
Since we’ve stored only the user’s id in the session container, we need to makesure that we fetch the User object for that user before we hand execution controlto another controller action. If we failed to fetch the rest of the user’s details, wewouldn’t be able to display the username of the currently logged-in user—some-thing that we aim to do on every page in our application.
So, before we proceed too much further, let’s look at some of the theory behindone of the features of Rails that allows us to execute code globally: filters.
FiltersA filter is a function that defines code to be run either before or after a controller’saction is executed. Using a filter, we can ensure that a specific chunk of code isrendered no matter which page the user’s looking at.
Once we’ve discussed how filters work, I’ll show you how to use one to fetch aUser object from the database when a user logs in. We’ll use another filter toredirect to the login page any anonymous visitors who attempt to access a protec-ted page.
Before FiltersThe first type of filter we’ll look at is the before filter. As you might expect, abefore filter executes before the code in the controller action is executed.
Like all filters, a before filter is defined in the head of the controller class thatcalls it. Calling a before filter is as simple as invoking the before_filter methodand passing it a symbol that represents the method to be executed. The filter canalso accept as a parameter a snippet of Ruby code; this code is used as the filter
247
Filters

code. However, this practice is discouraged, as it makes for code that is difficultto maintain.
Here’s a hypothetical example in which a controller method is called using asymbol:
class FooController < ApplicationController before_filter :fetch_password def fetch_password … endend
After FiltersLike a before filter, an after filter is defined in the controller class from whichit is called. The method to use is appropriately named after_filter and, notsurprisingly, these filters are executed after the controller’s action code has beenexecuted. Here’s an example:
class FooController < ApplicationController after_filter :gzip_compression def gzip_compression … endend
Around FiltersA combination of before and after filters, the around filter executes both beforeand after the controller’s action code.
In a nutshell, around filters are separate objects that have before and aftermethods. These methods are automatically called by the filter framework. Despitebeing a combination of its simpler siblings, the around filter is significantly moreadvanced, hence we won’t cover it in this book.
A Word on Filter MethodsAs we’ve learned, filters take as a parameter a symbol that represents the controllermethod to be executed. Consider the hypothetical example of our FooControlleronce more:
248
Chapter 8: Protective Measures

class FooController < ApplicationController before_filter :fetch_password def fetch_password … endend
This all seems fine, until you realize that every method that you implement in acontroller can actually be executed directly by a user, using a web browser. Forexample, in the code listing above, a user would be able to execute thefetch_password method of FooController simply by visitinghttp://localhost:3000/foo/fetch_password.
Wait a minute—that’s not what we want! The security implications of such animplementation are potentially disastrous, so we definitely want to hide thesekinds of methods from the general public.
When we discussed object oriented programming back in Chapter 3, we talkedabout the interface that an object provides to the outside world—the interfacewith which other objects can interact. All of the class and instance methods thatan object shares this way are called public methods, and this is, in fact, the onlytype of method we’ve used up to this point.
However, Ruby has two types of methods that are not public: private methodsand protected methods.
❑ Private methods are available only from within the classes in which they’restored, period. These methods cannot be accessed in any way from anotherobject. In the following example, the keyword private signals that all methodsthat follow it are implemented as private methods.
class Formula1Car private def secret_tuning_option … endend
❑ Protected methods, like private methods, are unavailable to the outsideworld. However, a protected method remains available to classes that inheritfrom the class in which the protected method is defined. For example, in thefollowing code listing, objects of class FerrariF1 would have access to the
249
A Word on Filter Methods

protected method launch_control, which is defined in the parent classFormula1Car.
class Formula1Car protected def launch_control … endendclass FerrariF1 < Formula1Carend
The point of all this is that you should always implement filter methods as non-public methods, in order to protect them from being executed independentlyfrom the filtering role for which they were intended. This is exactly what we’lldo now.
Managing User LoginsOkay, we’ve covered filter theory, so let’s modify our application to fetch thecurrently logged-in User from our database. Once we’ve done that, we’ll displaythe user’s name on the page, and provide the ability for the user to log out again.
Retrieving the Current UserWe’re going to use filters to fetch the current user for each and every page of theShovell site. That phrase—“each and every page”—should give you a hint as towhere we’ll apply the filter. Filters can be inherited from parent classes and, aswe don’t want to write numerous filter declarations, we’ll stick our filter in theparent class for all of our controllers: ApplicationController.
Methods and filters that are defined in this class are available to all classes thatinherit from ApplicationController (located at app/controllers/applica-tion.rb)—which is just what we want:
File: 07-application.rb
class ApplicationController < ActionController::Base before_filter :fetch_logged_in_user protected def fetch_logged_in_user return if session[:user_id].blank? @current_user = User.find_by_id(session[:user_id])
250
Chapter 8: Protective Measures

endend
Let’s take a look at each of the lines that make up the fetch_logged_in_usermethod:
return if session[:user_id].blank?
This line is fairly straightforward. There’s no point retrieving a User object if theuser hasn’t logged in yet—we can simply exit the filter method without executingthe rest of the code.
The next line tries to fetch from the database a User object with an id that’sequal to the id stored in the visitor’s session container:
@current_user = User.find_by_id session[:user_id]
The fetched object will be assigned to the instance variable @current_user, whichwill then become available to actions in our controller as well as our views.
We’ve purposely used the find_by_id method here, rather than find, eventhough on the surface it appears that the two would produce the same results.In fact, find displays an error if it can’t retrieve a record that matches the idthat’s passed to it, while find_by_id exits more gracefully. It’s conceivable thata user may revisit our site after his or her account has been deleted (perhaps be-cause the user submitted the same boring stories over and over again), so we needto make sure the application will handle these cases in a user-friendly manner.Spitting out a bunch of technical-looking errors is not the solution we’re lookingfor—hence our use of find_by_id.
Session Security Revisited
As we saw earlier, the value of session[:user_id] is not stored in theuser’s web browser. This means that a user can’t, for example, impersonateanother user by simply changing the contents of his or her session.
The only way that a user could circumvent the security measures that we’veput in place so far would be either to guess the session ID, or to identify itusing a brute force attack3 … that is, apart from grabbing another user’slaptop while he’s in the bathroom!
3 A brute force attack involves looping through a list of every possible combination of alphanumericcharacters (or sometimes a list of dictionary-based passwords) until a matching phrase is found.
251
Retrieving the Current User
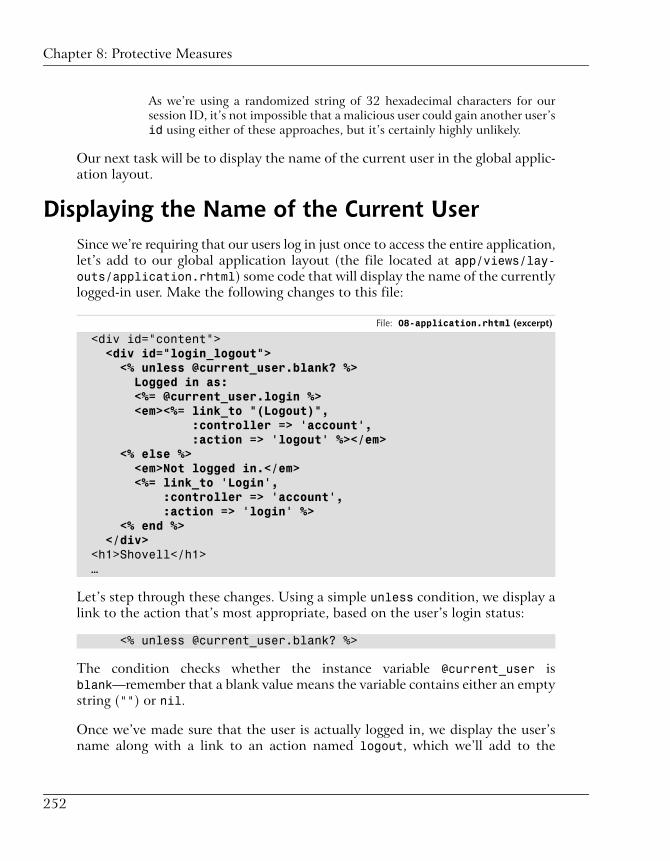
As we’re using a randomized string of 32 hexadecimal characters for oursession ID, it’s not impossible that a malicious user could gain another user’sid using either of these approaches, but it’s certainly highly unlikely.
Our next task will be to display the name of the current user in the global applic-ation layout.
Displaying the Name of the Current UserSince we’re requiring that our users log in just once to access the entire application,let’s add to our global application layout (the file located at app/views/lay-outs/application.rhtml) some code that will display the name of the currentlylogged-in user. Make the following changes to this file:
File: 08-application.rhtml (excerpt)
<div id="content"><div id="login_logout">
<% unless @current_user.blank? %> Logged in as: <%= @current_user.login %> <em><%= link_to "(Logout)", :controller => 'account', :action => 'logout' %></em> <% else %> <em>Not logged in.</em> <%= link_to 'Login', :controller => 'account', :action => 'login' %> <% end %> </div> <h1>Shovell</h1> …
Let’s step through these changes. Using a simple unless condition, we display alink to the action that’s most appropriate, based on the user’s login status:
<% unless @current_user.blank? %>
The condition checks whether the instance variable @current_user isblank—remember that a blank value means the variable contains either an emptystring ("") or nil.
Once we’ve made sure that the user is actually logged in, we display the user’sname along with a link to an action named logout, which we’ll add to the
252
Chapter 8: Protective Measures

AccountController in a moment. We wrap the link in an <em> tag to make itstand out a little:
Logged in as: <%= @current_user.login %> <em><%= link_to "(Logout)", :controller => 'account', :action => 'logout' %></em>
If a visitor is not logged in, we display a link that the user can follow to the loginform:
<%= link_to 'Login', :controller => 'account', :action => 'login' %>
To make the page look a little nicer, let’s add a snippet of CSS to the global stylesheet that’s located at public/stylesheets/style.css:
File: 09-style.css (excerpt)
#login_logout { float: right; color: #999; font-size: smaller;}
This code dims the text colors a little, floats the container to the right, and makesthe font size a little smaller. If you reload the page after logging in, you shouldsee the results shown in Figure 8.8. That’s much better!
Figure 8.8. Displaying the current user
Next, we’ll implement the logout functionality.
253
Displaying the Name of the Current User

Allowing Users to Log OutProviding our users with a manual logout function is much more user-friendlythan forcing them to close their browsers to log out. We’ll add this method toour AccountController class, located in app/controllers/account_control-ler.rb:
File: 10-account_controller.rb (excerpt)
class AccountController < ApplicationController … def logout session[:user_id] = @current_user = nil endend
Logging a user out of the application is a matter of setting two variables to nil:
❑ the user_id that’s stored in the user’s session
❑ the instance variable that holds the current user
session[:user_id] = @current_user = nil
This line of code prevents our before filter (the fetch_logged_in_user method)from retrieving anything from the database. As we’re setting both the currentuser and the user id stored in the session to nil, no more User objects for thisuser remain in memory. The user has therefore been logged out of the system.
I’ve taken this opportunity to introduce another piece of shorthand syntax that’sused often in Ruby code: what we’ve done here is assign nil to two variables atonce. Strictly speaking, we’re assigning the result of the statement @current_user= nil (which happens to be nil) to session[:user_id].
With that code in place, adding a simple message to app/views/ac-count/logout.rhtml will confirm for the user that the logout was successful:
File: 11-logout.rhtml
<h2>Logout successful</h2><%= link_to 'Back to the story index', :controller => 'story' %>
Let’s check that this all works as we expect. Click that (Logout) link in the topright-hand corner of the page—if everything goes to plan you should be loggedout of the application and presented with a page like the one shown in Figure 8.9.
254
Chapter 8: Protective Measures

Additionally, the username that was previously displayed in the upper right-handcorner should not be present on any successive page that you visit—you shouldsee a Login link instead.
Figure 8.9. Successfully logging out of the application
Now that users are able to log in and out of the application, we’re in a positionto make certain actions available only to logged in users. However, before webegin to make these additions, let’s add to our site an element that has beensorely lacking so far: navigation.
Adding a Navigation MenuYou’re probably getting a little tired of typing http://localhost:3000/story/newover and over again. Let’s create a little navigation menu at the bottom of everypage, so that we can move easily between the different pages we’ve created.
To do so, modify the file app/views/layouts/application.rhtml. Right abovethe closing </body> tag at the bottom of the file, place the following unorderedlist, which contains our navigation menu:
File: 12-application.rhtml (excerpt)
… <ul id="navigation"> <li><%= link_to 'Front page stories', :controller => 'story' %></li> <li><%= link_to 'Submit a new story!', :controller => 'story', :action => 'new' %></li> </ul>
255
Adding a Navigation Menu

</body></html>
We’ve got two links in our menu at this point:
❑ a link to the story index (which currently displays a random story from thepool)
❑ a link to the story submission form
As usual, we’ll also expand our style sheet to make the menu look pretty. Theresults of these additions are shown in Figure 8.10:
File: 13-style.css (excerpt)
#navigation { list-style: none; padding: 5px 0; margin: 0; text-align: center;}#navigation li { display: inline; padding: 0 5px;}#navigation li a { color: #fff;}
Figure 8.10. Story index with navigation
256
Chapter 8: Protective Measures

That’s much better. With the navigation in place, moving around within ourapplication becomes a lot easier.
Restricting the ApplicationAll this login functionality would be wasted if a guest to our site had access tothe same feature set enjoyed by our registered users—what would be the pointin logging in?
Now that our login functionality is working, we can restrict certain parts of theapplication from use by anonymous guests and users who have not logged in.
Protecting the FormThe first action that will benefit from protection is the submission of stories.While we’re adding this protection, we’ll also check that when a new story issubmitted, the application correctly saves the reference to the User who submittedit (as we defined in the relationship between a User and a Story).
The first step we need to take is to figure out how to intercept a request thatcomes from a user who’s not currently logged in to our application. Once we’veachieved this, we can direct the visitor to a login form instead of the story sub-mission form. This sounds like a perfect job for a before filter, doesn’t it?
Ultimately, our application is likely to consist of more controllers than the twowe’ve created so far, so we’ll add our new filter code to the globalApplicationController class. This will mean that the filter is available for useby any of the controllers in our application.
The filter will be called login_required, which is suitably descriptive. As we’regoing to check from a few different places in our application whether or not auser is logged in, we’ll extract this code into a separate controller method beforewe create our new filter. (Writing @current_user.blank? is becoming a bit tedi-ous, anyway.)
Abstracting Code Using helper_method
The reason we’re placing this functionality into a controller method (rather thancreating a regular helper for it) is that the functionality it provides is useful toboth controllers and views. However, regular helpers are available only to views,
257
Restricting the Application

and controller methods are available only to controllers. We need some sort ofmagic bridge to make this controller method available to our views.
This magic bridge happens to be the helper_method statement, which makesregular controller methods available to views as if they were regular helpermethods. We’ll add this snippet to the protected area of ourApplicationController (in app/controllers/application.rb):
File: 14-application.rb (excerpt)
… protected def fetch_logged_in_user … enddef logged_in?
! @current_user.blank? end helper_method :logged_in?end
Here, we’ve pulled our check of the current user’s login status into a new methodcalled logged_in?. With the additional call to helper_method, we can now uselogged_in? throughout our application to replace any usage of @cur-rent_user.blank?.
Requiring Users to Log In
While we’re looking at our ApplicationController, let’s add thelogin_required filter to it—this marks the first use of our new logged_in?helper method:
File: 15-application.rb (excerpt)
def login_required return true if logged_in? session[:return_to] = request.request_uri redirect_to :controller => "/account", :action => "login" and return false end
Let’s break this code down. The first line of the filter exits the method with thevalue true if the user is already logged in:
return true if logged_in?
258
Chapter 8: Protective Measures
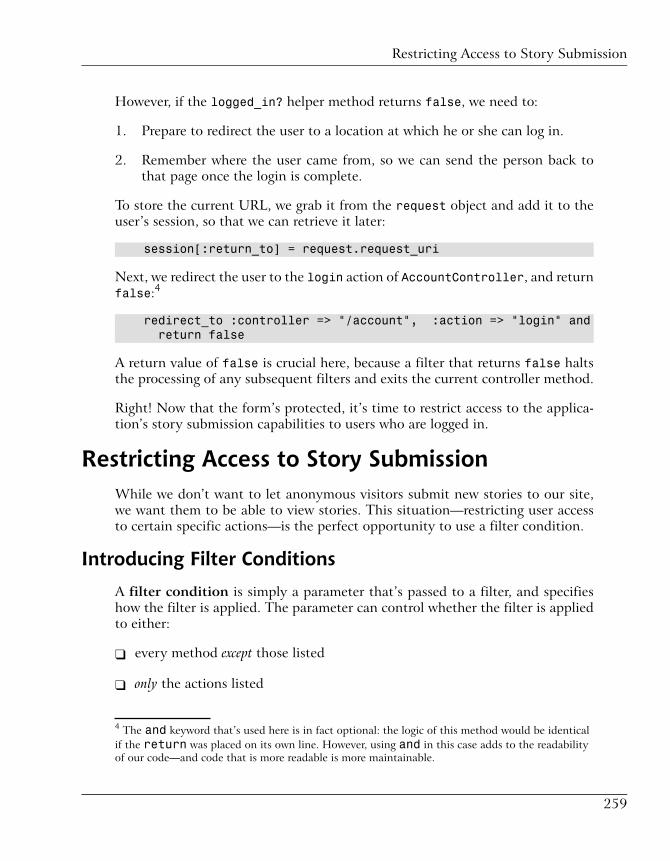
However, if the logged_in? helper method returns false, we need to:
1. Prepare to redirect the user to a location at which he or she can log in.
2. Remember where the user came from, so we can send the person back tothat page once the login is complete.
To store the current URL, we grab it from the request object and add it to theuser’s session, so that we can retrieve it later:
session[:return_to] = request.request_uri
Next, we redirect the user to the login action of AccountController, and returnfalse:4
redirect_to :controller => "/account", :action => "login" and return false
A return value of false is crucial here, because a filter that returns false haltsthe processing of any subsequent filters and exits the current controller method.
Right! Now that the form’s protected, it’s time to restrict access to the applica-tion’s story submission capabilities to users who are logged in.
Restricting Access to Story SubmissionWhile we don’t want to let anonymous visitors submit new stories to our site,we want them to be able to view stories. This situation—restricting user accessto certain specific actions—is the perfect opportunity to use a filter condition.
Introducing Filter Conditions
A filter condition is simply a parameter that’s passed to a filter, and specifieshow the filter is applied. The parameter can control whether the filter is appliedto either:
❑ every method except those listed
❑ only the actions listed
4 The and keyword that’s used here is in fact optional: the logic of this method would be identicalif the return was placed on its own line. However, using and in this case adds to the readabilityof our code—and code that is more readable is more maintainable.
259
Restricting Access to Story Submission

In this case, the :only parameter is the best way for us to restrict a single action.
Let’s apply the login_required filter to the top of our StoryController class,which is located at app/controllers/story_controller.rb. The :only para-meter accepts a symbol (or list of symbols) that represents the methods to whichit should be applied.
File: 16-story_controller.rb (excerpt)
class StoryController < ApplicationControllerbefore_filter :login_required, :only => :new
def index …
There, that was easy! However, we’ve yet to make use of that :return_to URLthat we stored in the user’s session on the previous page. Let’s put it to worknext.
Redirecting the User
The part of our application that redirects users after they’ve successfully loggedin is the login method of the AccountController class, which is located inapp/controllers/account_controller.rb.
Let’s modify the redirection code to specify the location to which a user is redir-ected based on whether or not the user’s session actually contains a :return_toURL. The changes that you’ll need to make are listed in bold:
File: 17-account_controller.rb (excerpt)
def login … unless @current_user.nil? session[:user_id] = @current_user.nil?
unless session[:return_to].blank? redirect_to session[:return_to] session[:return_to] = nil else redirect_to :controller => 'story'
end end …
The aspect of this code that’s really worth a mention is the fact that we’re resettingthe :return_to URL to nil after a successful redirect—there’s no point in carryingaround old baggage.
260
Chapter 8: Protective Measures

Now, fire up your web browser and execute the following steps to test out thisnew feature:
1. Log out of the application if you’re currently logged in.
2. Click the Submit a new story! link, and confirm in your browser’s address barthat you are redirected to /account/login.
3. Log in using the login form, and verify that you’re redirected back to thestory submission form.
All good? Great!
Associating Stories with UsersThe last enhancement that we’ll add in this chapter is to associate a story withthe ID of the user who submitted it. This will give us a record of who submittedwhat to Shovell.
Storing the Submitter
As we established the association between stories and user ids at the beginningof this chapter, we simply need to tell Rails what we want to store. Add the fol-lowing line to the new action of the StoryController, located at app/control-lers/story_controller.rb:
File: 18-story_controller.rb (excerpt)
def new @story = Story.new(params[:story])
@story.user = @current_user … end
It’s as simple as that! We know that the currently logged-in user is stored in@current_user, because we set it using the fetch_logged_in_user before filter.And I hope you’ll remember from Chapter 7 that referencing an associated objectis as simple as treating the referenced object like an attribute, just as we’ve donehere:
@story.user = @current_user
But what good is storing information if we’re not going to display it somewhere?You guessed it—displaying the submitter’s details is our next task.
261
Associating Stories with Users
Displaying the Submitter
Lastly, we’ll modify each story’s display page to show the name of the user whosubmitted it. This page corresponds to the show action of our StoryControllerclass, the template for which is located at app/views/story/show.rhtml:
File: 19-show.rhtml (excerpt)
<ul id="vote_history"> … </ul> <p class="submitted_by"> Submitted by: <span><%= @story.user.login %></span> </p>
Here we’re using @story.user to fetch the user object that’s associated with thecurrently displayed story. We then display the value of the user’s login attributeto produce the result shown in Figure 8.11:
<span><%= @story.user.login %></span>
Data Integrity in Development
One of the down-sides of using an iterative approach to development is thatour data is not necessarily complete at each stage of the development process.For example, unless you’ve specifically added values of user_id andpermalink to every Story object in your database, you’re probably seeingthe odd page error. You could use any of three approaches to rectify this issue:
1. Manually add the missing values to your objects from the Rails console,remembering to use the save method so that the value is stored perman-ently.
2. If you’re comfortable writing basic SQL commands, update the valuesusing the MySQL Query Browser.
3. Delete all data in your database (either via the Rails console or theMySQL Query Browser), and begin to add your data from scratch viathe application.
We need only two or three objects at this stage of development, so none ofthese options should be too onerous for you.
262
Chapter 8: Protective Measures

Figure 8.11. The name of a story’s submitter displays with thestory
We’ve accomplished quite a lot in this chapter, both in theory and in code. Beingprofessional Rails coders, our next step is to add tests for all of these cool features.
Testing User AuthenticationTo develop our testing suite, we’ll create unit tests to cover changes to the applic-ation’s model, followed by functional tests for each of our controllers.
Testing the ModelWe haven’t extended our models much in this chapter, so our unit tests will befairly straightforward. Basically, all we’ve done is:
❑ Create a new model (User).
❑ Add a relationship between the User and Story model.
263
Testing User Authentication

❑ Add a relationship between the User and Vote model.
Before we can write any tests, though, we need to make sure that our test datais up to date.
Preparing the Fixtures
The User model didn’t come with very meaningful fixture data, so let’s addressthat now. Replace the contents of the model’s fixture file (located at test/fix-tures/users.yml) with the following data:
File: 20-users.yml
patrick: id: 1 login: patrick password: sekrit name: Patrick Lenz email: [email protected]: id: 2 login: john password: gh752px name: John Doe email: [email protected]
To test the associations between the three models properly, we’ll also need tomodify the fixtures for both our Story and Vote models. Only a small change isrequired—the addition of some data for the user_id attribute that we insertedat the start of this chapter.
Make the following changes in test/fixtures/stories.yml:
File: 21-stories.yml (excerpt)
first: …user_id: 1
second: …user_id: 1
And make these alterations in test/fixtures/votes.yml:
264
Chapter 8: Protective Measures

File: 22-votes.yml (excerpt)
first: …user_id: 1
second: …user_id: 2
Now that our fixtures contain appropriate data, we can start writing some unittests.
Testing a User’s Relationship to a Story
The unit tests for our User belong in test/unit/user_test.rb. First we’ll testthe relationship between a User and a Story. Make the following changes to thisfile:
File: 23-user_test.rb (excerpt)
class UserTest < Test::Unit::TestCase fixtures :users, :stories, :votes def test_stories_association assert_equal 2, users(:patrick).stories.size assert_equal stories(:first), users(:patrick).stories.first endend
The first thing that we’re doing here is incorporating all of the fixtures that arerequired for our tests, including the users and stories fixtures, as well as thevotes fixture data that we just created.
fixtures :users, :stories, :votes
We use two assertions to test the association between the Story and User models.The first assertion confirms that the total number of Story objects associatedwith the user patrick is indeed 2:
assert_equal 2, users(:patrick).stories.size
The second assertion identifies whether or not the first Story associated withpatrick is the first Story object in our fixture file.
assert_equal stories(:first), users(:patrick).stories.first
With this test in place, let’s add a test for the inverse of this relationship.
265
Testing the Model
Testing a Story’s Relationship to a User
By now, you’re no doubt very familiar with the directory and file naming conven-tions we’re using. The complementary unit test for the relationship between aUser and a Story tests the Story’s relationship to a User, and belongs intest/unit/story_test.rb. Make the following changes to this file:
File: 24-story_test.rb (excerpt)
class StoryTest < Test::Unit::TestCase fixtures :stories, :votes, :users … def test_user_association assert_equal users(:patrick), stories(:first).user endend
The assertion we’ve written here simply confirms that the user associated withthe first story is the user we expect, based on our fixture data (that is, patrick):
assert_equal users(:patrick), stories(:first).user
Let’s add some similar tests for the other relationship that our User model has—itsrelationship with a Vote.
Testing a User’s Relationship to a Vote
While we haven’t yet added anything to our application’s user interface to storeor display the details of users associated with votes, we’ve put the infrastructurein place to do so. For this reason, we can test the relationship between a Userand a Vote using a very similar approach to that which we took with the unittests we created for the relationship between a Story and a User.
To test a User’s relationship to a Vote, add the following test totest/unit/user_test.rb:
File: 25-user_test.rb (excerpt)
… def test_votes_association assert_equal 1, users(:patrick).votes.size assert_equal votes(:second), users(:john).votes.first endend
266
Chapter 8: Protective Measures

The first assertion compares the number of Vote objects associated with a testuser with the number of votes that the same user was assigned in our fixture data:
assert_equal 1, users(:patrick).votes.size
The second assertion makes sure that the first Vote object associated with theuser john matches our fixture data:
assert_equal votes(:second), users(:john).votes.first
Excellent! Only one more unit test to write: a test for the inverse of this relation-ship.
Testing a Vote’s Relationship to a User
The test that confirms a Vote’s relationship to a User belongs intest/unit/vote_test.rb. Add the following test to this file:
File: 26-vote_test.rb (excerpt)
class VoteTest < Test::Unit::TestCase fixtures :votes, :stories, :users … def test_user_association assert_equal users(:john), votes(:second).user endend
This last test confirms that the user associated with the second vote of a story isindeed the second user who voted for the story, as defined by our fixture data.
Keeping the Test Schema up to Date
You might be wondering how migrations are applied to the test database onwhich we’re running our tests (as you’ll recall, this database is quite separatefrom the development database to which our migrations are applied).
Rails is smart enough to figure out that testing should occur on a databasewith a structure that’s identical to the one used for development. So Railsclones the structure of your development database, and applies it to the testdatabase every time you execute your unit or functional tests.
Should you ever need to complete this cloning process manually, use thisrake task:
$ rake db:test:clone_structure
267
Testing the Model

Running the Unit Tests
We can now run our updated suite of unit tests using the following code, theresults of which are shown in Figure 8.12:
$ rake test:units
Figure 8.12. Results expected from execution of the unit tests
Testing the ControllersThe majority of the functional code that we wrote in this chapter was in theAccountController, although we also made a few changes to theStoryController. Consequently, we have quite a few tests to write to ensurethat all of this new functionality is covered.
Testing the Display of the Login Form
The first test we’ll add to our functional test file (test/functional/account_con-troller_test.rb) is a simple HTTP GET operation that looks for the displayof our login form:
File: account_controller_test.rb (excerpt)
class AccountControllerTest < Test::Unit::TestCasefixtures :users
…def test_should_show_login_form
268
Chapter 8: Protective Measures

get :login assert_response :success assert_template 'login' assert_select 'form p', 4 endend
There’s not too much here that we haven’t encountered before: the addition ofthe users fixture ensures that we have proper sample data located in the testdatabase when the tests are run. The test itself asserts that:
❑ The page request was successful.
❑ The page is rendered with the template we expect.
❑ A form tag is contained in the result, with four <p> tags nested below it.
Testing a Successful Login
The following test, to be added to the same file, will attempt an actual login:
File: 27-account_controller_test.rb (excerpt)
…def test_should_perform_user_login
post :login, :login => 'patrick', :password => 'sekrit' assert_redirected_to :controller => 'story' assert_equal users(:patrick).id, session[:user_id] assert_equal users(:patrick), assigns(:current_user) endend
Let’s look at each line of this test in more detail.
As was the case when we tested the submission of stories, in this test, we needto pass additional arguments to the login action—values for the login andpassword parameters.
post :login, :login => 'patrick', :password => 'sekrit'
The values we’ve used here match the values in our users.yml fixture file—ifyou added your own user to that file, you’ll need to change this test accordingly.
If you think about how our login method works, you’ll recall that we redirectusers after they’ve logged in successfully. However, the URL to which a user is
269
Testing the Controllers

redirected varies depending on whether or not the user’s session contains a URL.In this test, the user’s session is empty, so we expect the user to be sent to thestory page. The assert_redirected_to method comes in handy here:
assert_redirected_to :controller => 'story'
Lastly, a successful login means that:
❑ The id of the user will be stored in the user’s session.
❑ The instance variable @current_user will be set.
Within the test, we have access to the session of the hypothetical user who justlogged in, so we can compare both the session value and the instance variablewith the corresponding details that we set for the user in our fixture data:
assert_equal users(:patrick).id, session[:user_id] assert_equal users(:patrick), assigns(:current_user)
In a perfect world, this would be the last of the tests that we need to write.However, in the real world, not every login attempt is successful.
Testing a Failed Login
Login attempts fail for various reasons—users may type their passwords incor-rectly, or try to guess someone else’s login details. When a login attempt fails,the application should not reveal any content that’s intended for users who havelogged in. As such, login failures need to be tested too!
Here’s the test:
File: 28-account_controller_test.rb (excerpt)
def test_should_fail_user_login post :login, :login => 'no such', :password => 'user' assert_response :success assert_template 'login' assert_nil session[:user_id] end
If a user tries to log in to our application using a non-existent user name, the loginform should redisplay. Our first assertion confirms that the page loads correctly,while the second assertion verifies that the page uses the login template:
270
Chapter 8: Protective Measures

assert_response :success assert_template 'login'
The last assertion checks the user_id value that’s stored in the user’s session, tomake sure it’s nil:
assert_nil session[:user_id]
Okay, we’ve tested all our code that relates to our login procedures. But whathappens after a user logs in?
Testing Redirection After Login
To trial the redirection of a user who logs in to his or her original destination,we’ll add a test that populates the return_to value within the user’s session beforehe or she logs in.
File: 29-account_controller_test.rb (excerpt)
def test_should_redirect_after_login_with_return_url post :login, { :login => 'patrick', :password => 'sekrit' }, :return_to => '/story/new' assert_redirected_to '/story/new' end
Aside from the fact that we explicitly test for redirection to the story submissionURL, this test is identical to the regular login test that we wrote earlier.
Testing a Logout
The last part of the AccountController that we need to test is the logout action.To emulate a user logging out, we actually need to create something that resemblesan integration test. Why? Because before we can log out, we need to log in:
File: 30-account_controller_test.rb (excerpt)
def test_should_logout_and_clear_session post :login, :login => 'patrick', :password => 'sekrit' assert_not_nil assigns(:current_user) assert_not_nil session[:user_id]
get :logout assert_response :success assert_template 'logout' assert_select 'h2', 'Logout successful'
271
Testing the Controllers

assert_nil assigns(:current_user) assert_nil session[:user_id] end
This test is longer than most of our previous tests, but with the number of teststhat you have under your belt at this stage, you should be able to comprehendeach line without much trouble.
The first thing we do is make sure that variables such as the @current_user in-stance variable and the user_id stored in the session are populated before theuser logs out:
assert_not_nil assigns(:current_user) assert_not_nil session[:user_id]
If we don’t take this step, we can’t guarantee that the logout action is reallydoing its job.
The crux of this test lies in its last two lines:
assert_nil session[:user_id] assert_nil assigns(:current_user)
Here we’re confirming that the all-important variables that we populated whenthe user logged in are set to nil once the user has logged out.
Whew, that was quite a number of tests! We’re not done with functional testingjust yet, though. Grab a cup of coffee before tackling the rest of the functionaltests, in which we’ll be testing the changes we’ve made to our StoryControllerand ApplicationController classes.
Testing the Display of the Story Submitter
To test that the name of the user who submitted a story is displayed correctlyon a story’s page, we first require a user to be logged in. The following test shoulddo the trick—add it to test/functional/story_controller_test.rb (anddon’t forget to add a call to our new fixture file at the top of the class definitionwhile you’re at it):
File: 31-story_controller_test.rb (excerpt)
class StoryControllerTest < Test::Unit::TestCase fixtures :stories, :votes, :users …def test_should_show_story_submitter
272
Chapter 8: Protective Measures

get :show, :permalink => 'my-shiny-weblog' assert_select 'p.submitted_by span', 'patrick' endend
We’ve seen all this before—confirming that an element that contains our submit-ter’s name is present is simply a matter of scanning the HTML code for a p ele-ment of class submitted_by, which contains the name of the submitter inside aspan.
Testing the Display of Global Elements
To test the global elements that we added to the application.rhtml layout file,we’ll add two tests. For the sake of convenience, both tests will utilize the indexaction of our StoryController:
File: 32-story_controller_test.rb (excerpt)
def test_should_indicate_not_logged_in get :index assert_select 'div#login_logout em', 'Not logged in.' end
def test_should_show_navigation_menu get :index assert_select 'ul#navigation li', 2 end
We’ve covered these assert_select statements several times already, so I won’tbore you by going through them again. Instead, let’s move on to test that ourShovell application displays the name of the logged-in user at the top of everypage.
Testing Display of the Username
The div element in the top right of the browser window displays the name ofthe user who’s currently logged in. We’ve checked the contents of this elementwhen a user hasn’t logged in; we still need to add a test to check whether the loginhas been successful.
Before we do so, though, let’s add to our test case two methods that will makethe authoring of this test (and others related to it) a whole lot easier:
273
Testing the Controllers
File: 33-story_controller_test.rb (excerpt)
class StoryControllerTest < Test::Unit::TestCase …protected
def get_with_user(action, parameters = nil, session = nil, flash = nil) get action, parameters, :user_id => users(:patrick).id end def post_with_user(action, parameters = nil, session = nil, flash = nil) post action, parameters, :user_id => users(:patrick).id endend
As you can see above, the utility methods wrap get or post calls with a sessioncontainer that contains the id of a logged-in user. Using this approach, we cantest an action that was previously only available to users who were logged in, justby calling get_with_user or post_with_user. Using these methods will eliminatethe need to worry about parameters each time we call get or post.
These utility methods take the same arguments as the original get and postmethods provided by Rails, so they replace our original methods seamlessly. Itis, of course, possible to make these utilities much more sophisticated than we’vedone here, but they’ll serve us well for now.
Let’s see them in action! Before that little detour, we were on the way to writinga test that confirms the contents of the login_logout div. These contents shouldinclude a (Logout) link as well as the user’s name, which is set by our before filter,fetch_logged_in_user:
File: 34-story_controller_test.rb (excerpt)
def test_should_indicate_logged_in_user get_with_user :index assert_equal users(:patrick), assigns(:current_user) assert_select 'div#login_logout em a', '(Logout)' end
Using our new utility method, get_with_user, to simulate a logged in user, re-questing the index action of our StoryController class is a no-brainer:
get_with_user :index
274
Chapter 8: Protective Measures

Once we’ve gained access to the index page, it’s easy to use some assertions (ofwhich we’re now absolute masters!) to confirm that the contents of the div areas we expected.
Testing Redirection After Logout
Our next few tests will cover the changes that we made to the new action of ourStoryController.
First, we’ll check that a user who isn’t logged in is correctly redirected to the loginpage if he or she tries to access our story submission form:
File: 35-story_controller_test.rb (excerpt)
def test_should_redirect_if_not_logged_in get :new assert_response :redirect assert_redirected_to '/account/login' end
This is a pretty straightforward test—the get statement tries to request the storysubmission form without logging in first:
get :new
The remainder of the test confirms that the request results in the user being re-directed to the login action of our AccountController:
assert_response :redirect assert_redirected_to '/account/login'
Our test suite is certainly expanding. We have just two more tests to write in thischapter!
Testing Story Submission
If you’ve been particularly eager, and tried executing your functional test suiteprematurely, you’ll have noticed that a few tests that worked previously now fail.These failures occur because we modified our story submission form—it requiresthat a user_id is present in the session before a page request can be successful.Our old tests didn’t account for this change, so they now fail.
We need to modify the four tests that are affected, so that each of them includesa user id in the session. At this point, it should become obvious that it was well
275
Testing the Controllers

worth the effort for us to create the get_with_user and post_with_user utilitymethods:
File: 36-story_controller_test.rb (excerpt)
class StoryControllerTest < Test::Unit::TestCase … def test_should_show_new
get_with_user :new … end
def test_should_show_new_formget_with_user :new
… end
def test_should_add_storypost_with_user :new, :story => {
… } … end def test_should_reject_missing_story_attribute
post_with_user :new, :story => { … } … end end
As you can see, the changes are very small—the method that performs the requestin each of the tests is modified from get and post to get_with_user andpost_with_user, respectively.
Testing Storage of the Submitter
The last test we’ll add checks that the user who’s currently logged in is correctlyassociated with any stories that he or she submits:
File: 37-story_controller_test.rb (excerpt)
def test_should_store_user_with_story post_with_user :new, :story => { :name => 'story with user', :link => 'http://www.story-with-user.com/' }
276
Chapter 8: Protective Measures

assert_equal users(:patrick), assigns(:story).user end
Excellent. If you’ve made it this far, you’re probably itching to see the results ofexecuting our rapidly expanding test suite.
Running the Full Test Suite
Run the full test suite with our trusty rake tool. If everything has gone well, youshould see results similar to Figure 8.13:
$ rake test
Figure 8.13. Running the test suite
If any of your tests failed, the error message that’s displayed should help you todetermine where things went wrong. The error will direct you to the location ofthe erroneous class and method, and the exact line number within that method.And before you pull your hair out, remember that you can double-check your
277
Testing the Controllers

code against the code archive for this book—it went through considerable testingbefore release, so you can count on the code in it to work!
Even more rewarding than seeing the number of tests and assertions that our testsuite now covers is to take a look at the output of the stats task. This commanddisplays a number of statistics relating to the architecture of our application, in-cluding the ratio of lines of application code to lines of test code. We’ve beenextremely busy writing tests in this chapter, so let’s see the results:
$ rake stats
My application reports a ratio of 1:2.4, as Figure 8.14 indicates.
Figure 8.14. The current test-to-code ratio
Wow! That means we’ve written more than twice the amount of code to test ourapplication than we’ve written for Shovell itself. This is a good thing! It meansthat we can be confident that our application is high quality.
278
Chapter 8: Protective Measures

SummaryIn this chapter, we explored an approach for sectioning off the parts of a Railsapplication, so that some features are available to everyone and others are availableonly to users who have logged in.
First, we discussed some theory about sessions and cookies. We then created anew model—the User—and built a login form that allows users to log in toShovell. We stored the login functionality in a new AccountController class,which made extensive use of the session container. The end result was that wewere able to restrict access to the story submission form to users who were loggedin, and direct other visitors to the login form. And to top things off, we verifiedthat the changes to our code are free of bugs by writing a number of tests.
The next chapter, in which we’ll add the last of the features to our Shovell applic-ation, will cover more complex ActiveRecord associations. Though things aregetting more advanced, we’ll keep moving through each task step by step, sodon’t be nervous. Let’s add the finishing touches to Shovell!
279
Summary

280
Advanced Topics9As we enter the final section of this book, we’ll implement the last of the featuresthat we listed back in Chapter 1, in preparation for Shovell’s much-anticipatedfirst release.
Along the way, we’ll cover some of the more advanced topics that are involvedin developing web applications with Ruby on Rails, such as writing your ownhelpers, using callbacks, and creating complex associations.
Promoting Popular StoriesTo start this chapter, we’ll make a change to the way our users view our applica-tion. We’ll separate the display of our stories into two pages: one for stories witha score above a certain threshold, and one for stories with a score below thethreshold. This will encourage readers to “shove” stories to the front page byvoting for them. This functionality will replace the story randomizer that currentlyappears on the index page of our StoryController—it’s getting a little boringand doesn’t really meet the needs of our application.
However, before we can start hacking away at these new pages, we need to refineour existing models a little. In particular, we need an easy way to select storieson the basis of their voting scores.

Using a Counter CacheWe’ve already seen how we can count the number of votes associated with agiven story by calling the size method on the associated Vote object:
>> Story.find(:first).votes.size=> 3
Behind the scenes, this snippet performs two separate SQL queries. The firstquery fetches the first story from the stories table; the second query counts thenumber of Votes whose story_id attributes are equal to the id of the Storyobject in question.
This approach to counting records isn’t usually a problem in small applicationsthat deal with only a handful of records. However, when an application needs todeal with several thousand records or more, these double queries can significantlyimpede the application’s performance.
One option for tackling this issue is to use some more advanced SQL commands,such as JOIN and GROUP BY. However, like you, I don’t really enjoy writing SQLqueries. Instead, I’ll introduce you to another funky Rails feature: the countercache.
Introducing the Counter Cache
The counter cache is an optional feature of ActiveRecord associations thatmakes counting records fast and easy. The use of the word counter here is as in“bean counter,” not as in “counter-terrorism.” The name “counter cache” is in-tended to reflect the caching of a value that counts records. You can enable thecounter cache by including the parameter :counter_cache => true when defininga belongs_to association.
From a performance point of view, the counter cache is superior to an SQL-basedsolution. When we’re using SQL, the number of records for an object associatedwith the current object needs to be computed by the database every time thatobject is requested. The counter cache, on the other hand, stores the number ofrecords of each associated object in its own column in the database. This valuecan be retrieved as often as is needed, without requiring potentially expensivecomputation to take place.
282
Chapter 9: Advanced Topics

The Counter Cache doesn’t Actually Count!
The counter cache doesn’t actually go through the database to calculate thenumber of associated records every time an object is added or removed, ef-fective from the point at which it was turned on. Instead, it increases thecounter for every object that’s added to the association, and decreases it forevery object that’s removed from the association, from the point at whichit’s enabled.
As the counter cache needs to be stored somewhere, we’ll create room for it inour Story model with the help of a migration.
Making Room for the Cache
We’ll generate a new migration template using the generate script. Figure 9.1shows the results of this task:
$ ruby script/generate migration AddCounterCacheToStories
Figure 9.1. Generating a migration to add the counter cache
As expected, our new migration template is stored in the file db/mi-grate/005_add_counter_cache_to_stories.rb. This migration will be used toadd a new column to the stories table—the column will store a value that rep-resents the number of Vote objects associated with each Story. The name of thecolumn should match the method that we would normally call to retrieve theobject count, so we’ll call it votes_count:
File: 01-005_add_counter_cache_to_stories.rb
class AddCounterCacheToStories < ActiveRecord::Migration def self.up
283
Using a Counter Cache

add_column :stories, :votes_count, :integer, :default => 0 Story.find(:all).each do |s| s.update_attribute :votes_count, s.votes.length end end def self.down remove_column :stories, :votes_count endend
Let me explain what’s going on here. Columns that store the counter cache needa default value of 0 in order to operate properly. This default value can be providedto add_column using the :default argument, as we’ve done in the first line ofour self.up method:
add_column :stories, :votes_count, :integer, :default => 0
In the past, we’ve used migrations to make schema changes, but migrations canalso be used to migrate data. As I mentioned earlier in this chapter, the numberof objects associated with the model using the counter cache is never actuallycalculated by Rails—values are just incremented and decremented as records aremodified. Consequently, the next line in our migration loops through the Storyobjects in the database, and manually calculates each Story’s initial voting score:
Story.find(:all).each do |s| s.update_attribute :votes_count, s.votes.length end
Story.find(:all) returns an array of all stories in the database. We then usethe each method to pass each of the Story objects, one after another, to theblock of Ruby code that follows. The block calculates the voting score for thecurrent story (which is held in the variable s) by calling the length method onthe votes association—this is effectively the same as counting all of the Voteobjects associated with the current Story. The result of the votes.length calcu-lation is then stored in the newly added votes_count attribute of the currentStory, using the update_attribute method.
As usual, we reverse the changes that we made in self.up in the self.downmethod:
def self.down remove_column :stories, :votes_count end
Right, let’s make use of this migration.
284
Chapter 9: Advanced Topics

Applying the Migration
Go ahead and apply this migration using the rake tool:
$ rake db:migrate
Once that’s completed, there’s just one more small change we need to make toensure that our association between a Vote and a Story uses the counter cachethat we’ve just set up. Change the belongs_to association in app/models/vote.rbto the following:
File: 02-vote.rb (excerpt)
belongs_to :story, :counter_cache => true
Excellent. Let’s get that new front page happening!
Updating the RJS Template
One side-effect of using a counter cache is that the cached values are not refreshedwhen the number of votes associated with a story changes via an Ajax call. Thisis easily rectified by forcing a reload of the object after we cast our vote, like so:
File: 03-vote.rjs (excerpt)
page.replace_html 'vote_score', "Score: #{@story.reload.votes_count}"…
Implementing the Front PageThe core concept of social news sites like digg is that they’re user-moderated.Stories that have yet to receive a certain number of votes don’t appear on thesite’s front page—instead, they reside in a “voting area,” where they can be viewedand voted upon by the site’s users.
The story promotion system that digg uses is actually rather complicated. It takesinto account a range of factors other than the number of votes a story receives,including the amount of activity the site was experiencing at the time the votewas cast, and the rate at which a story receives votes. However, we’ll implementa much simpler algorithm for Shovell: stories with a voting score above a certainthreshold will appear on the front page, while stories with a score below thatthreshold will be displayed on the voting page, ready to be “shoved.”
285
Implementing the Front Page
First, we’ll make all the changes required to get our front page running smoothly,utilizing standard templates and partials. We can then make use of these templatesto implement our voting bin.
Modifying the Controller
The first change that we’ll make is to our StoryController. We need to replacethe current index action (which displays a random story) with one that retrievesthe list of stories that have received enough votes to appear on the front page.Modify the StoryController class located in app/controllers/story_control-ler.rb so that it looks like this:
File: 04-story_controller.rb (excerpt)
class StoryController < ApplicationController …def index
@stories = Story.find :all, :order => 'id DESC', :conditions => 'votes_count >= 5' end …end
Let’s take a look at this code.
Story.find :all, as you already know, fetches from the database all stories thatmatch an optional criterion. We’re specifying that our records be ordered bydescending id here, which will ensure that the newest stories appear at the topof the results, and older ones show at the bottom.
To implement the voting threshold, we’ve specified a condition that the totalvotes_count must be greater than or equal to five, using the counter cache thatwe created in the previous section. The result of the find operation will then bestored in the @stories instance variable.
Modifying the View
Now that we’ve retired the story randomizer, we also have to rip apart the in-dex.rhtml template, which was formerly responsible for rendering a single storylink. Our new template will render a collection of stories, each displaying itscurrent voting score and the name of the user who submitted it.
286
Chapter 9: Advanced Topics

Modify the corresponding index template (located at app/views/story/in-dex.rhtml) so that it looks like this:
File: 05-index.rhtml
<h2> <%= "Showing #{ pluralize(@stories.size, 'story') }" %></h2><%= render :partial => 'story', :collection => @stories %>
The first line of ERb code outputs the number of stories being displayed.
<%= "Showing #{ pluralize(@stories.size, 'story') }" %>
To display this value, we’re making use of the pluralize helper provided byRails. pluralize displays the noun that’s passed in as an argument, either insingular or in plural form. If there’s only one story to show, the header will readShowing 1 story; in all other cases it will read Showing x stories, where x is thenumber of stories available.
Most of the time, Rails is smart enough to correctly pluralize the most commonEnglish nouns automatically. If this doesn’t work for some reason, you have theoption of passing both singular and plural forms, like so:1
<%= "Showing #{ pluralize(@stories.size, 'story', 'stories') } %>
To render each story in the collection we retrieved, we’re using a partial—some-thing that we first encountered when displaying voting history back in Chapter 7:
<%= render :partial => 'story', :collection => @stories %>
The next item on our list is the creation of the partial.
Modifying the Partial
Create the file app/views/story/_story.rhtml, and edit it to appear as follows:
File: 06-_story.rhtml (excerpt)
<div class="story"> <h3><%= link_to story.name, story_url(:permalink => story.permalink) %></h3> <p>
1 If you need to “train” Rails to correctly pluralize a noun in more than one spot, it might be worthadding your own pluralization rules to the Rails Inflector. See the bottom of config/environ-ment.rb for an example.
287
Implementing the Front Page

Submitted by: <%= story.user.login %> | Score: <%= story.votes_count %> </p> </div>
This partial is responsible for displaying the core facts of a story in the listingson the application’s front page (and, as you’ll see later, in the voting bin). It’s afairly straightforward template that you should have no trouble understanding:the title of the story is displayed in an h3 element, which links directly to thestory page, and the original submitter of the story and current voting score aredisplayed underneath. The whole story is then wrapped in <div> tags, with aclass attribute of story, which we’ll use to apply some CSS styling.
Styling the Front Page
Now that we have some new elements on the front page, let’s add style rules forthose elements to our style sheet, which is located at pub-lic/stylesheets/style.css:
File: 07-style.css (excerpt)
.story { float: left; width: 50%;}.story h3 { margin-bottom: 0; }.story p { color: #666; }
While we’re giving our front page an overhaul, let’s also get rid of the defaultRails welcome page that’s displayed when a user accesses http://localhost:3000/,and make our new front page the default page instead.
Setting the Default Page
To set the default page, we once again need to alter Rails’s routing configuration,which is located in the file config/routes.rb. If you look closely, you’ll noticea commented line like this (if you deleted it earlier, don’t worry—you can justtype out the line you need in a moment):
# map.connect '', :controller => "welcome"
By removing the # character and making a slight change to the route, we can setthe destination for requests for the address http://localhost:3000/ to be the indexaction for our StoryController:
288
Chapter 9: Advanced Topics
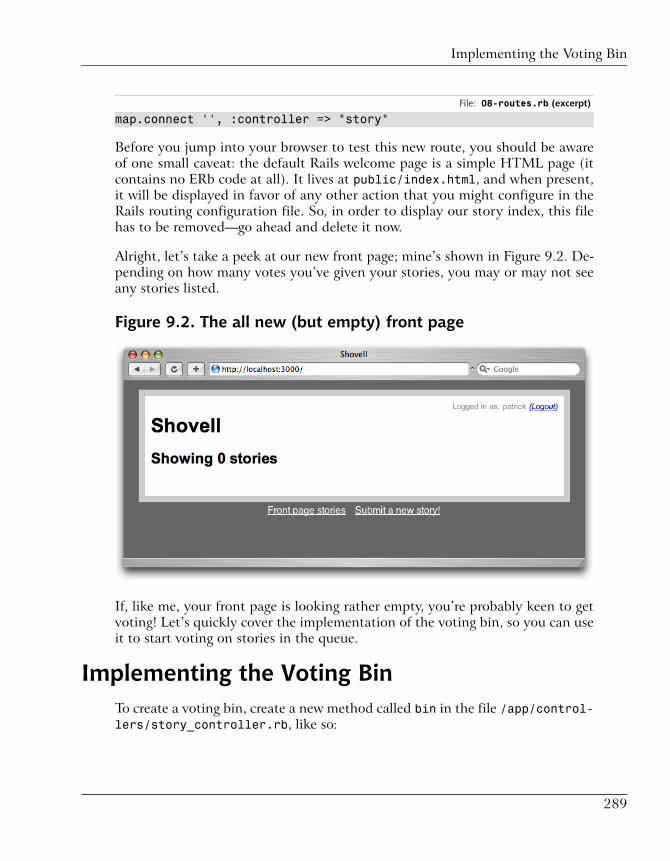
File: 08-routes.rb (excerpt)
map.connect '', :controller => "story"
Before you jump into your browser to test this new route, you should be awareof one small caveat: the default Rails welcome page is a simple HTML page (itcontains no ERb code at all). It lives at public/index.html, and when present,it will be displayed in favor of any other action that you might configure in theRails routing configuration file. So, in order to display our story index, this filehas to be removed—go ahead and delete it now.
Alright, let’s take a peek at our new front page; mine’s shown in Figure 9.2. De-pending on how many votes you’ve given your stories, you may or may not seeany stories listed.
Figure 9.2. The all new (but empty) front page
If, like me, your front page is looking rather empty, you’re probably keen to getvoting! Let’s quickly cover the implementation of the voting bin, so you can useit to start voting on stories in the queue.
Implementing the Voting BinTo create a voting bin, create a new method called bin in the file /app/control-lers/story_controller.rb, like so:
289
Implementing the Voting Bin

File: 09-story_controller.rb (excerpt)
class StoryController < ApplicationController …def bin
@stories = Story.find :all, :order => 'id DESC', :conditions => 'votes_count < 5' render :action => 'index' endend
Most of that code probably looks straightforward enough—but what about thatrender call that’s hiding in there?
Well, before I explain that line of code, let me point something out to you, incase you haven’t spotted it already: this code is almost identical to the code wewrote for our index action—it just applies a different condition to the collectionof stories.
That fact should trigger the realization that this is a good opportunity to reusesome code. Let’s extract most of the code that’s used in these two controllermethods (index and bin) and place it in a protected controller method calledfetch_stories, which we’ll then use from both locations within our code.
As we discussed earlier, protected methods are only accessible from within a classand its subclasses; they’re not accessible from anywhere outside the class. If wewere to make fetch_stories a publicly accessible method, it would be exposedvia the URL http://localhost:3000/story/fetch_stories, which is certainly not whatwe want.
Here’s that extracted method:
def fetch_stories(conditions) @stories = Story.find :all, :order => 'id DESC', :conditions => conditions end
As the only part that differs between the index and bin actions is the condition,we’ll allow the condition to be passed to the new protected method as an argu-ment.
Our StoryController should now look a bit like this (only the code relevant tothis section is shown):
290
Chapter 9: Advanced Topics
File: 10-story_controller.rb (excerpt)
class StoryController < ApplicationController …def index
fetch_stories 'votes_count >= 5' end
def bin fetch_stories 'votes_count < 5' render :action => 'index' end …protected
def fetch_stories(conditions) @stories = Story.find :all, :order => 'id', :conditions => conditions endend
Now, back to that peculiar render call in the bin action:
render :action => 'index'
I mentioned earlier that the two actions we have for listing stories (index andbin) are almost identical; well, another thing that they have in common is thetemplate that they use. The above line of code makes sure of that. It specifiesthat the view template for the index action should also be used by the bin action.As such, we’re rendering the exact same template for a slightly different set ofstories.
For this very reason, we don’t have to add much more to our code in order tocomplete our story voting bin. However, the two pages currently lack sufficientvisual distinction—they need headings that read something like Showing 3 upcom-ing stories or Showing 7 front-page stories. At the moment, our users would havea difficult time determining which page of the application they’re looking at.
We’ll rectify this problem now by adding these headings with a little assistancefrom some ActionView helpers.
291
Implementing the Voting Bin

Abstracting Presentation LogicIn this section, we’ll look at a way to abstract any presentation logic that youfind yourself adding to your view templates. First, let’s look at why we need tobother extracting Ruby code from our views.
Avoiding Presentation Logic Spaghetti
Recall that our intention is to display in the index template a heading that’s ap-propriate, depending on whether the list of stories being displayed contains front-page stories or upcoming stories.
Of course, we could implement this functionality by adding the logic directly tothe app/views/story/index.rhtml template (don’t do this just yet!):
<h2> <% if controller.action_name == 'index' %> <%= "Showing #{pluralize(@stories.size,'front page story')}" %> <% else %> <%= "Showing #{pluralize(@stories.size,'upcoming story')}" %> <% end %></h2>
However, you’ll notice that this solution entails a fair amount of duplication—allwe’re changing in the else block is a single word! Additionally, the fact that inview templates Ruby code is always wrapped in ERb tags (<% %> and <%= %>)means that these templates can sometimes begin to look like a dish of spaghetti,containing chained method calls, nested levels of parentheses, if clauses, andother complexities.
When your own code starts to look like spaghetti, it might be time to considerextracting some of that code into an ActionView helper.
Introducing ActionView Helpers
As you’ve heard countless times now, a view should contain presentational codeonly. To adhere to the MVC paradigm as strictly as possible, you should aim toplace all logic outside the views—in a controller (for application logic) or amodel (for business logic). There’s a third option for any presentation-relatedlogic that doesn’t quite belong in a controller or a model: the ActionView helper.
292
Chapter 9: Advanced Topics

We talked about making helper methods available to views in Chapter 8, whenwe implemented the logged_in? method. However, back then, we implementedthis functionality as a protected controller method, which was then made availableto our views using the helper_method statement.
Native ActionView helpers differ from protected helper methods in that they’renot available to controllers—hence the name. An ActionView helper is a functionthat helps to reduce the clutter in your view templates.
Writing an ActionView Helper
ActionView helpers are available in two basic forms.
The first is the global helper, which is stored in the file app/helpers/applica-tion_helper.rb. You can think of a global ActionView helper as being the “view”equivalent to the ApplicationController class in the “controller” world. Anyhelper that you add to this file will be available from every view of every controller.
The second form of ActionView helper is one that’s specific to the views of aparticular controller. We’ll use this approach for our ActionView helper—we’llcreate a new helper method for our StoryController in the file app/help-ers/story_helper.rb. That way, it will be available to every view ofStoryController, but no other views.
Here’s the helper method you’ll need to add:
File: 11-story_helper.rb
module StoryHelperdef story_list_heading
story_type = case controller.action_name when 'index': 'front page story' when 'bin': 'upcoming story' end "Showing #{ pluralize(@stories.size, story_type) }" endend
Let’s step through this code. The first thing it does is populate a variablestory_type using a Ruby case statement:
story_type = case controller.action_name when 'index': 'front page story' when 'bin': 'upcoming story' end
293
Abstracting Presentation Logic

This statement compares the value of controller.action_name (which containsthe text value of the controller action that’s being executed, exactly as it appearsin the URL) with a couple of pre-defined values (namely, the values 'index' and'bin').
Next, we display the same Showing … string with the pluralize helper that weused in our previous attempt at writing this view:
"Showing #{ pluralize(@stories.size, story_type) }"
However, this time, we’re passing story_type as the part of the string that’s beingpluralized. This string is either set to front page story or upcoming story.2
While this isn’t necessarily a shorter solution than the previous one, it certainlyremoves a lot of clutter from our view, which we can now reduce to a single line!
File: 12-index.rhtml
<h2><%= story_list_heading %></h2><%= render :partial => 'story', :collection => @stories %>
Now we just need to add our voting bin page to the navigation menu in thefooter of each page, and we’re done!
Expanding the Navigation Menu
To add a link to our navigation menu, we simply add another list item to theunordered list at the bottom of the application layout. The layout is stored inapp/views/layouts/application.rhtml:
File: 13-application.rhtml (excerpt)
<ul id="navigation"> <li><%= link_to 'Front page stories', :controller => 'story' %></li><li><%= link_to 'Upcoming stories',
:controller => 'story', :action => 'bin' %></li> <li><%= link_to 'Submit a new story!', :controller => 'story', :action => 'new' %></li></ul>
2 If we wanted to be extra pedantic about reducing code duplication, we could even extract the word“story” from that string, and simply set the story_type variable to “front page” or “upcoming.”But you have to draw the line somewhere!
294
Chapter 9: Advanced Topics
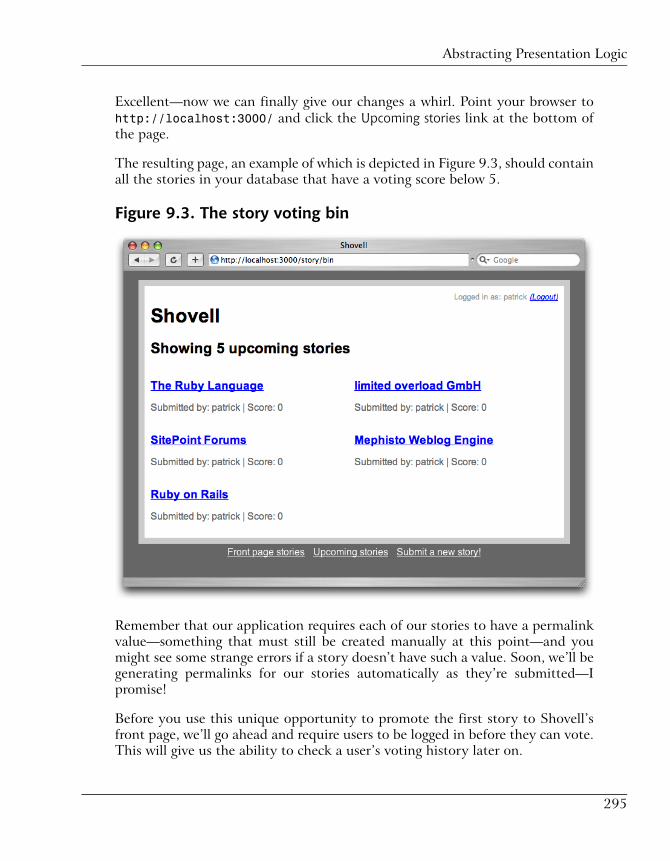
Excellent—now we can finally give our changes a whirl. Point your browser tohttp://localhost:3000/ and click the Upcoming stories link at the bottom ofthe page.
The resulting page, an example of which is depicted in Figure 9.3, should containall the stories in your database that have a voting score below 5.
Figure 9.3. The story voting bin
Remember that our application requires each of our stories to have a permalinkvalue—something that must still be created manually at this point—and youmight see some strange errors if a story doesn’t have such a value. Soon, we’ll begenerating permalinks for our stories automatically as they’re submitted—Ipromise!
Before you use this unique opportunity to promote the first story to Shovell’sfront page, we’ll go ahead and require users to be logged in before they can vote.This will give us the ability to check a user’s voting history later on.
295
Abstracting Presentation Logic

Our application is looking much more like a story-sharing site. On to the nextfeature!
Requiring that Users Log In to VoteThe next enhancement we’ll make will ensure that users log in before they areable to vote. First, we need to modify StoryController so that the vote methodresponds only to users who are logged in; we then need to store the id of thecurrent user as part of the new vote.
The first step is to modify the existing before_filter in app/control-lers/story_controller.rb, like so:
File: 14-story_controller.rb (excerpt)
class StoryController < ApplicationController before_filter :login_required, :only => [ :new, :vote ] …end
By changing the :only option of the before_filter call to include an array oftwo action names, we ensure that the filter is applied to both of them.
Now, it doesn’t make much sense to display a feature to visitors if they can’tmake use of it. Let’s add a little login teaser to the story page, to suggest thatvisitors might like to log in if they want to vote for stories. Make the followingchanges to app/views/story/show.rhtml:
File: 15-show.rhtml (excerpt)
<% if logged_in? %> <div id="vote_link"> <%= link_to_remote 'shove it', { :url => { :action => 'vote', :id => @story } }, { :href => url_for(:action => 'vote', :id => @story) } %> </div><% else %> <p> <em> You would be able to vote for this story if you were <%= link_to 'logged in', :controller => 'account', :action => 'login' %>! </em> </p><% end %>
296
Chapter 9: Advanced Topics

This if clause decides whether or not to display the shove it link to the visitor,depending on his or her login status. If the user isn’t logged in, That person ispresented with a teaser and a link to the login action, as shown in Figure 9.4.
Figure 9.4. Hiding the voting link from visitors
To complete this feature addition, we need to modify the vote action of ourStoryController so that it stores the current user with each vote:
File: 16-story_controller.rb (excerpt)
class StoryController < ApplicationController … def vote @story = Story.find(params[:id]) @story.votes.create(:user => @current_user) … endend
This new line saves the reference to the current user with each vote.
Excellent! Now it’s time to create some additional stories and start submittingsome votes, if you haven’t done so already.
297
Requiring that Users Log In to Vote
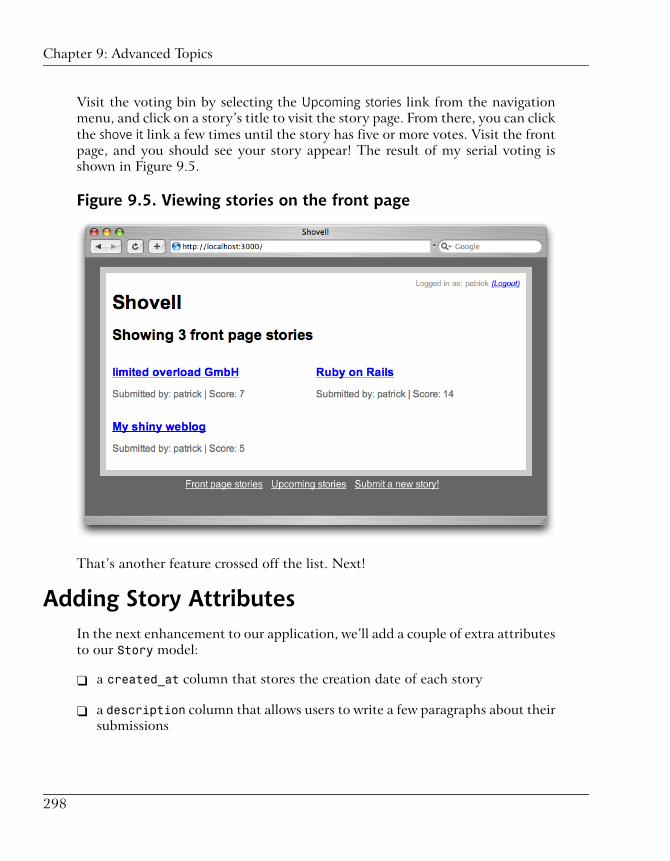
Visit the voting bin by selecting the Upcoming stories link from the navigationmenu, and click on a story’s title to visit the story page. From there, you can clickthe shove it link a few times until the story has five or more votes. Visit the frontpage, and you should see your story appear! The result of my serial voting isshown in Figure 9.5.
Figure 9.5. Viewing stories on the front page
That’s another feature crossed off the list. Next!
Adding Story AttributesIn the next enhancement to our application, we’ll add a couple of extra attributesto our Story model:
❑ a created_at column that stores the creation date of each story
❑ a description column that allows users to write a few paragraphs about theirsubmissions
298
Chapter 9: Advanced Topics

Since we’re talking about adding attributes, you might expect that there’s a newmigration ahead—and indeed there is. Let’s generate the migration file that willstore the code we’ll use to add these new attributes:
$ ruby script/generate migration AddStoryCreationDateAndDescription
The contents of this migration (stored in db/migrate/006_add_story_cre-ation_date_and_description.rb) are very straightforward, so they won’t needmuch explanation:
File: 17-006_add_story_creation_date_and_description.rb (excerpt)
class AddStoryCreationDateAndDescription < ActiveRecord::Migration def self.up add_column :stories, :created_at, :datetime add_column :stories, :description, :text end def self.down remove_column :stories, :created_at remove_column :stories, :description endend
As you can see, we’re adding two columns to the stories table. In order for thecreated_at column to work its magic, we’ve created it as a column of type dat-etime. We’ve specified that the description column must be of type text, be-cause a column of type string can only store up to 255 characters, and it’s pos-sible that story descriptions may exceed this limit.
The final step is to apply this migration using the rake task. The output of thismigration is shown in Figure 9.6:
$ rake db:migrate
The next thing we’ll do is hop into the Story model to remedy a piece of func-tionality that has no doubt become quite tedious for you by now: the fact thatwe have to manually generate permalinks for newly submitted stories throughthe console. As the permalink resembles the story name, let’s generate it automat-ically—this functionality is long overdue!
299
Adding Story Attributes

Figure 9.6. Adding and applying our sixth migration
Auto-generating PermalinksTo implement this feature, I’ll introduce you to a feature of Rails models thatwe haven’t touched on yet: callbacks. Callbacks are little snippets of code thatare triggered by model events—for example, they’re triggered when a model iscreated, updated, or destroyed.
Introducing Model CallbacksCallbacks in models can be prefixed or appended to certain actions, such as thecreating, updating, or destroying of a model. The concept of a callback mightsound similar to the filters we applied to our controllers in Chapter 8—and theycertainly are similar.
In fact, we’ve already encountered a callback in our application—it was used toapply the validation we implemented in Chapter 6. Internally, ActiveRecordprefixes validations to the save method that writes a model to the database. Ifthe callback result allows the request to continue (meaning that the request haspassed the defined validations), the save operation is executed.
300
Chapter 9: Advanced Topics

The names of the available callback methods are fairly intuitive: before_create,before_save, and before_delete are called before the model in question iscreated, saved, and deleted, respectively. There are also a number of after_callbacks that, as expected, are called after the operation.
Like filters in controllers, callbacks in models are usually defined as protectedmethods. The callback resides in a model class, and is referred to by the classmethod via a symbol—here’s an example:
class MyModel < ActiveRecord::Base before_create :generate_permalink .. protected def generate_permalink … endend
We can use either of two callbacks to hook into our Story model and generatethe permalink: before_save or before_create. We’ll use before_create, becausepermalinks should be, well, permanent. If we were to use before_save, thepermalink would change whenever the name of the story changed, for whateverreason.
An Alternative Callback Syntax
In your experimentation with Rails you might come across the followingsyntax for model callbacks. In this syntax, the code that’s to be executedwhen an event occurs is defined as an instance method named after thecallback:
class MyModel < ActiveRecord::Base def before_save … endend
While this approach is technically correct, I prefer to define my callbacksusing descriptive method names, and to refer to them using the before_save:my_method syntax instead.3 This way, it’s much easier to see what’s goingon, because you can glance at the header of the model class, in which thecallbacks are declared, then look at each of the callback methods separately.
3 The after_find callback actually needs to be defined using this alternative syntax, due to per-formance implications associated with defining it using the preferred syntax.
301
Introducing Model Callbacks

The reason why we’re using before_create instead of after_create should beobvious: if we were to set the permalink after the model itself had already beensaved to the database, we’d either lose the generated permalink, or have to savethe model again, neither of which options makes much sense.
Adding a CallbackLet’s add a callback to our Story model. Add the following code to the fileapp/models/story.rb:
File: 18-story.rb (excerpt)
class Story < ActiveRecord::Basebefore_create :generate_permalink
…protected
def generate_permalink self.permalink = name.downcase.gsub(/\W/, '-') endend
Once again, just one line of Ruby code is enough to accomplish the task at hand.Let’s dissect what this line actually does, and why things are the way they are.
First, you’ll notice that we’re using two different approaches to access the attrib-utes of the model: self.permalink and name.
self.permalink = name.downcase.gsub(/\W/, '-')
When you’re assigning a value to a model attribute, you should use theself.my_attribute syntax (self refers to the current class) to prevent potentialvariable scope issues. However, the self prefix can be omitted safely from theright-hand side of the expression—it’s not necessary for the name attribute becauseRails automatically defines a shortcut, known as an attribute reader, for thisattribute. All attributes that map to a database column can be accessed in thisway.
The permalink is generated by removing “special” characters from the story nameand replacing them with a hyphen. The story name is first converted to lowercaseusing the downcase method of the String class (which, unlike the downcase!method, doesn’t change the story name). The output of that method is thenpassed through a regular expression replacement pattern.
self.permalink = name.downcase.gsub(/\W/, '-')
302
Chapter 9: Advanced Topics

As we discussed briefly in Chapter 6, regular expressions allow us to comparestrings against a set of rules that match characters, numbers, word boundaries,and more. Regular expressions (often shortened to regex) are very powerful tools,but they can take a while to fully comprehend.4
In Ruby, regular expressions are either wrapped between two forward slashes (aswe’ve done in the above code listing) or applied as an instance of the Regexpclass. More complex regular expressions can also be declared using the %r()syntax.
In this case, the regular expression we’re applying is very simple—it uses thepattern \W. This pattern matches all “non-word characters,” which includeseverything except the alphanumeric characters a to z, the numbers 0 to 9, andthe underscore character (_).
Lastly, we use the gsub (short for “global substitution”) method provided by theString class to replace with a hyphen (-) all the characters that are matched bythe regular expression. The result is then stored in the permalink attribute.
Here are a few examples of this code in action, as viewed from the Rails console:
>> "My shiny weblog".downcase.gsub(/\W/, '-')=> "my-shiny-weblog">> "Rails: A success story".downcase.gsub(/\W/, '-')=> "rails--a-success-story">> "The good (old) Ruby Idiom".downcase.gsub(/\W/, '-')=> "the-good--old--ruby-idiom"
As you can see, it’s not perfect (we end up with a double-hyphen when the storytitle contains two successive non-alphanumeric characters), but it’ll do the trick.
Expanding the Submission FormOne last change we’ll make before we test our permalink generation code is toadd another field to the story submission form—a field for the description columnthat we added earlier in the chapter. The form lives in the fileapp/views/story/new.rhtml:
4 If you’re eager to master regular expressions, the book Mastering Regular Expressions[http://www.oreilly.com/catalog/regex3/], from O’Reilly Media, is the definitive reference. You mayalso find Harry Fuecks’ four-part tutorial on sitepoint.com useful:http://www.sitepoint.com/blogs/2006/09/26/the-joy-of-regular-expressions-1/.
303
Expanding the Submission Form

File: 19-new.rhtml (excerpt)
<% form_for :story do |f| %> …<p> description:<br /> <%= f.text_area :description %></p><p><%= submit_tag %></p><% end %>
Figure 9.7 shows the form after we apply this change.
Figure 9.7. Allowing users to add a story description
To accommodate a larger story description (remember that we’ve given our usersplenty of room by making the description column of type text), we’re using atextarea instead of a one-line input field:
<%= f.text_area :description %>
304
Chapter 9: Advanced Topics

We also need to display the story’s description on the story’s page, just abovethe submitted_by paragraph in the file /app/views/story/show.rhtml:
File: 20-show.rhtml (excerpt)
…<p> <%= @story.description %></p><p class="submitted_by">…
Right! Let’s hop over to our browser and submit a new story to see whether theautomated generation of the permalink works as expected. (It sure does—as Fig-ure 9.8 shows!)
Figure 9.8. A story with an auto-generated permalink
Adding User PagesIn order to track the history of our site’s usage on a per-user basis, we’ll need tocreate a place where this information can be displayed.
We’ll add a user page, which will list the six stories most recently submitted bythe logged-in user and the six stories for which that person most recently voted.
305
Adding User Pages

To select the most recently voted-for stories, we’ll make use of another type ofrelationship: the join model.
Introducing the Join Model RelationshipA join model relationship is a relationship between two models that relies upona third—there’s no direct relationship between the two models that are beinglinked. This relationship is illustrated in Figure 9.9.
Figure 9.9. A join model relationship
In our Shovell application, an association only exists between our Story andUser models when we’re talking about who submitted each story—we don’t cur-rently have the ability to find out who voted for each story. This is where the joinmodel comes into play: the Vote model is already associated with both the Userand the Story models; with the addition of the has_many :through statement,the Vote can serve as the connecting element in this new relationship.
The Vote model is the join model because it joins the User and the Story models.
Introducing the has_many :through AssociationThe code that implements a join model relationship is the line has_many:through. Let’s use it to add a join model relationship to our User model. Openthe file app/models/user.rb and make the changes in bold below:
File: 21-user.rb (excerpt)
class User < ActiveRecord::Base has_many :stories
306
Chapter 9: Advanced Topics
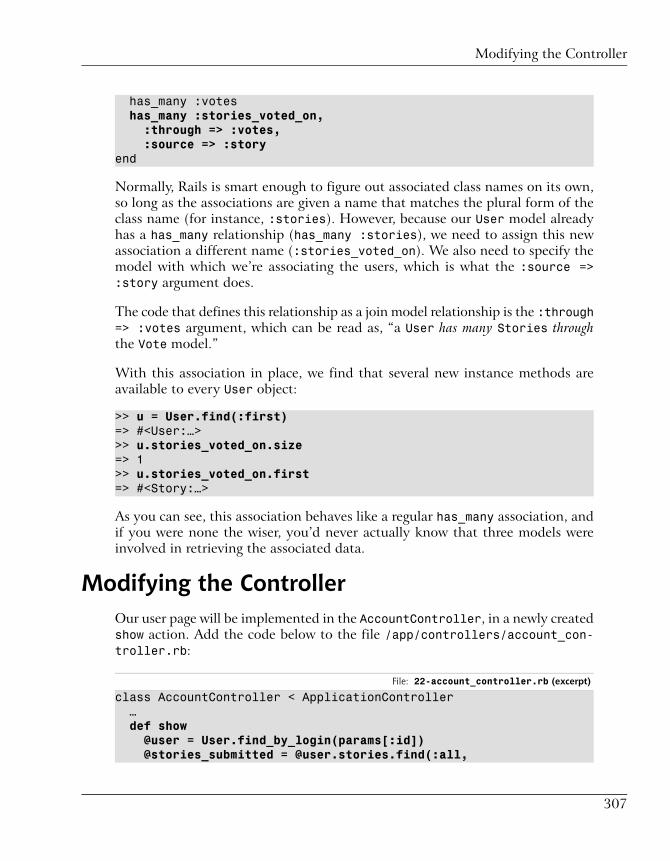
has_many :votes has_many :stories_voted_on, :through => :votes, :source => :storyend
Normally, Rails is smart enough to figure out associated class names on its own,so long as the associations are given a name that matches the plural form of theclass name (for instance, :stories). However, because our User model alreadyhas a has_many relationship (has_many :stories), we need to assign this newassociation a different name (:stories_voted_on). We also need to specify themodel with which we’re associating the users, which is what the :source =>:story argument does.
The code that defines this relationship as a join model relationship is the :through=> :votes argument, which can be read as, “a User has many Stories throughthe Vote model.”
With this association in place, we find that several new instance methods areavailable to every User object:
>> u = User.find(:first)=> #<User:…>>> u.stories_voted_on.size=> 1>> u.stories_voted_on.first=> #<Story:…>
As you can see, this association behaves like a regular has_many association, andif you were none the wiser, you’d never actually know that three models wereinvolved in retrieving the associated data.
Modifying the ControllerOur user page will be implemented in the AccountController, in a newly createdshow action. Add the code below to the file /app/controllers/account_con-troller.rb:
File: 22-account_controller.rb (excerpt)
class AccountController < ApplicationController … def show @user = User.find_by_login(params[:id]) @stories_submitted = @user.stories.find(:all,
307
Modifying the Controller
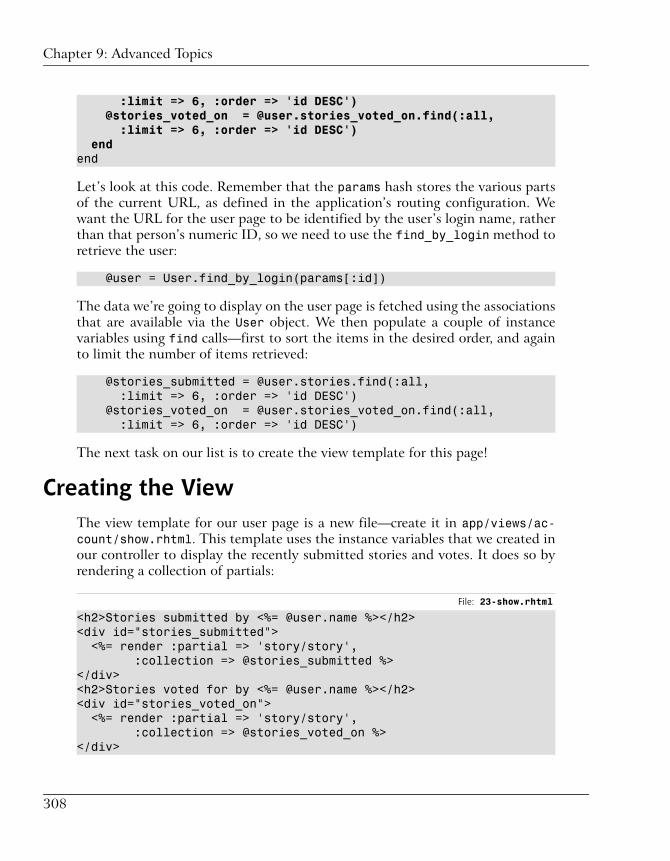
:limit => 6, :order => 'id DESC') @stories_voted_on = @user.stories_voted_on.find(:all, :limit => 6, :order => 'id DESC') endend
Let’s look at this code. Remember that the params hash stores the various partsof the current URL, as defined in the application’s routing configuration. Wewant the URL for the user page to be identified by the user’s login name, ratherthan that person’s numeric ID, so we need to use the find_by_login method toretrieve the user:
@user = User.find_by_login(params[:id])
The data we’re going to display on the user page is fetched using the associationsthat are available via the User object. We then populate a couple of instancevariables using find calls—first to sort the items in the desired order, and againto limit the number of items retrieved:
@stories_submitted = @user.stories.find(:all, :limit => 6, :order => 'id DESC') @stories_voted_on = @user.stories_voted_on.find(:all, :limit => 6, :order => 'id DESC')
The next task on our list is to create the view template for this page!
Creating the ViewThe view template for our user page is a new file—create it in app/views/ac-count/show.rhtml. This template uses the instance variables that we created inour controller to display the recently submitted stories and votes. It does so byrendering a collection of partials:
File: 23-show.rhtml
<h2>Stories submitted by <%= @user.name %></h2><div id="stories_submitted"> <%= render :partial => 'story/story', :collection => @stories_submitted %></div><h2>Stories voted for by <%= @user.name %></h2><div id="stories_voted_on"> <%= render :partial => 'story/story', :collection => @stories_voted_on %></div>
308
Chapter 9: Advanced Topics
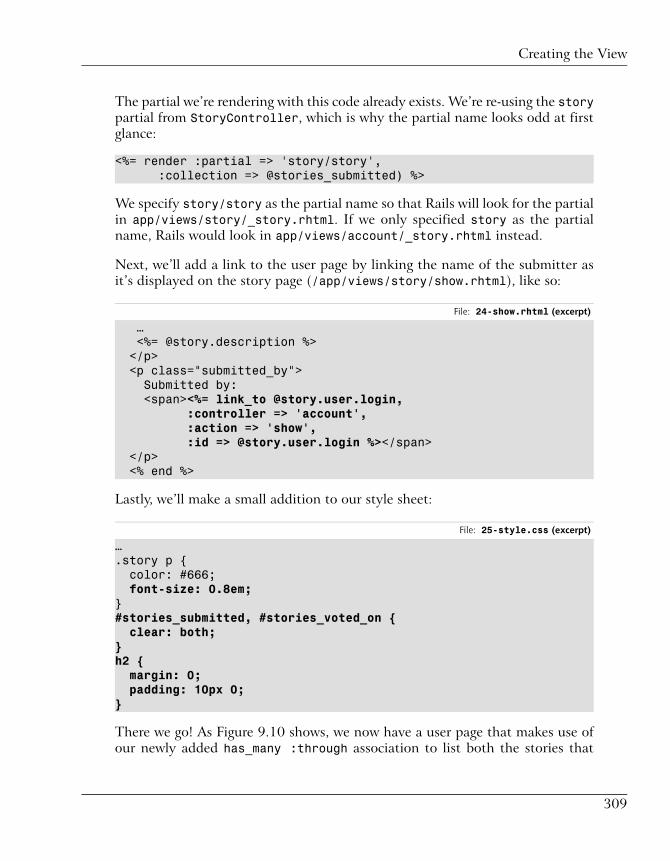
The partial we’re rendering with this code already exists. We’re re-using the storypartial from StoryController, which is why the partial name looks odd at firstglance:
<%= render :partial => 'story/story', :collection => @stories_submitted) %>
We specify story/story as the partial name so that Rails will look for the partialin app/views/story/_story.rhtml. If we only specified story as the partialname, Rails would look in app/views/account/_story.rhtml instead.
Next, we’ll add a link to the user page by linking the name of the submitter asit’s displayed on the story page (/app/views/story/show.rhtml), like so:
File: 24-show.rhtml (excerpt)
… <%= @story.description %> </p> <p class="submitted_by"> Submitted by: <span><%= link_to @story.user.login, :controller => 'account', :action => 'show', :id => @story.user.login %></span> </p> <% end %>
Lastly, we’ll make a small addition to our style sheet:
File: 25-style.css (excerpt)
….story p { color: #666;font-size: 0.8em;
}#stories_submitted, #stories_voted_on { clear: both;}h2 { margin: 0; padding: 10px 0;}
There we go! As Figure 9.10 shows, we now have a user page that makes use ofour newly added has_many :through association to list both the stories that
309
Creating the View
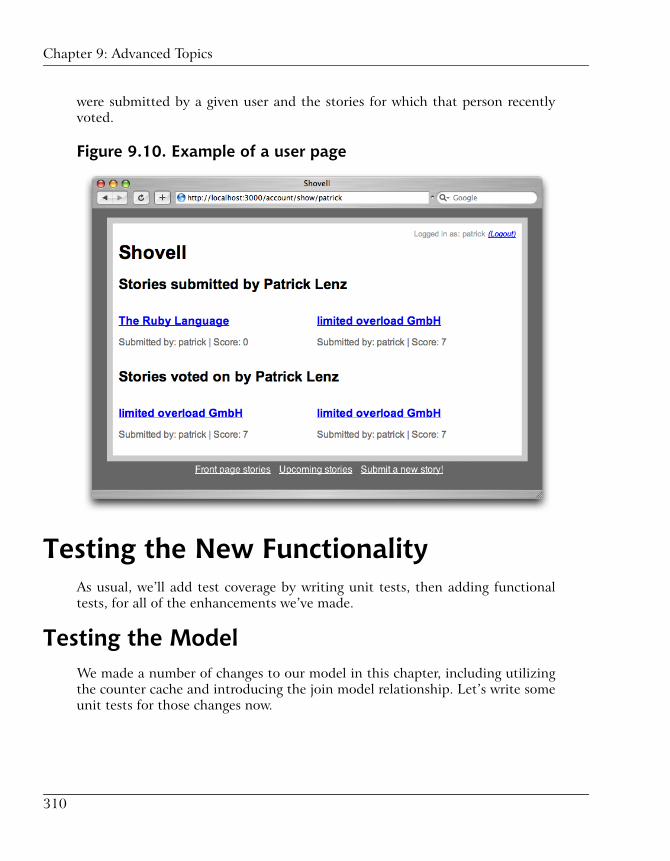
were submitted by a given user and the stories for which that person recentlyvoted.
Figure 9.10. Example of a user page
Testing the New FunctionalityAs usual, we’ll add test coverage by writing unit tests, then adding functionaltests, for all of the enhancements we’ve made.
Testing the ModelWe made a number of changes to our model in this chapter, including utilizingthe counter cache and introducing the join model relationship. Let’s write someunit tests for those changes now.
310
Chapter 9: Advanced Topics

Testing Additions to the Counter Cache
The first change we made in this chapter was to modify the Story model so thatit uses the counter cache to track the number of votes associated with any givenStory. To test this feature, we have to pull a few tricks out of our sleeves, as thereare numerous conditions to take into account.
To begin with, let’s add a test to the test case for the scenario in which a vote iscast. The test case is located in test/unit/story_test.rb:
File: 26-story_test.rb (excerpt)
class StoryTest < Test::Unit::TestCase …def test_should_increment_votes_counter_cache
stories(:another).votes.create stories(:another).reload assert_equal 1, stories(:another).attributes['votes_count'] endend
We haven’t encountered a couple of these methods before, so let’s dissect thiscode.
The purpose of this test is to verify that the cached votes count is properly incre-mented when a new vote is added. Therefore, the first thing we need to do is tocreate a new vote:
stories(:another).votes.create
The second line is where things get interesting—we’re forcibly reloading themodel from the database.
stories(:another).reload
We do this because once a new vote has been added, the number of stories thatare cached in each model’s attributes is suddenly out of sync with the database.
If we were to check the log file when we come to run our tests later on, we’d findlines like the following:
UPDATE stories SET votes_count = votes_count + 1 WHERE (id = 2)
This is the SQL statement that Rails generates to update the counter cache. You’llnotice that the statement doesn’t bother to check the current value of
311
Testing the Model

votes_count—it just tells the database to increment votes_count by one. Andwith good reason! You see, in a live application, many users may be using thesite at the same time, and some of them might even be casting votes in parallel.The value of votes_count would be totally negated if the SQL for each votesubmission relied upon its own copy of votes_count at the time the statementwas executed.
As such, you need to reload the model if you ever require access to the currentnumber of votes immediately after a new vote is added. This isn’t likely to occurvery often—normally you’d redirect your user to a new page anyway. But whenwe’re writing tests that simulate user behavior, it’s important to be mindful ofthis issue.
There’s also something special about the assertion in this test: instead of compar-ing the return value of the votes_count instance method, we’re accessing the“raw” attribute as it comes out of the database:
assert_equal 1, stories(:another).attributes['votes_count']
If we had used the instance method, we wouldn’t have had to enable countercaching at all in order for our test to pass—votes_count would simply have issueda second database query to count the votes. By using the attribute itself, we’reasserting that the counter cache is doing its job.
Testing Deletions from the Counter Cache
With that first test out the way, this second test, which covers the deletion ofvotes, should be fairly straightforward. Our application doesn’t yet allow usersto delete votes, but we’ll include this test anyway, for the sake of completeness:
File: 27-story_test.rb (excerpt)
class StoryTest < Test::Unit::TestCase …def test_should_decrement_votes_counter_cache
stories(:first).votes.first.destroy stories(:first).reload assert_equal 1, stories(:first).attributes['votes_count'] endend
Here, we’re basically doing the opposite to the previous test. First, we destroythe first vote from the first story:
stories(:first).votes.first.destroy
312
Chapter 9: Advanced Topics

Once again, we need to reload the model to reflect this change:
stories(:first).reload
Finally, we compare the cached votes_count value to the value we expect it tohave:
assert_equal 1, stories(:first).attributes['votes_count']
Preparing the Fixtures
As if those tests didn’t contain enough work-arounds, we also need to set theinitial votes_count value for each story in our fixture file. Like the “magical”auto-populating column names that we first encountered in Chapter 7, the countercache is not properly populated when fixtures are transferred to the database.Add the following values into the fixture file at test/fixtures/stories.yml toreflect the way in which the vote fixtures are associated with the story fixtures;while we’re changing this file, we’ll add an all-new story to our fixture data. We’llmake use of this in the functional tests that we’ll write later on:
File: 28-stories.yml (excerpt)
first: …votes_count: 2
another: …votes_count: 0
promoted: id: 3 permalink: promoted-story user_id: 2 votes_count: 5
Testing the Generation of Permalinks
The next test covers the new functionality that we added to our model for gener-ating permalinks:
File: 29-story_test.rb (excerpt)
class StoryTest < Test::Unit::TestCase …def test_should_generate_permalink
s = Story.create( :name => 'This#title*is&full/of:special;characters',
313
Testing the Model

:link => 'http://example.com/' ) assert_equal 'this-title-is-full-of-special-characters', s.permalink end
You should be able to follow this test quite easily. To test the simple regular ex-pression that we used to convert special characters to hyphens, we’re creating astory whose name is sprinkled with special characters:
s = Story.create( :name => 'This#title*is&full/of:special;characters', :link => 'http://example.com/' )
The assertion of this test confirms that our regex substitution performs its jobproperly, by comparing the value that our before_create filter produced withthe value that we expect:
assert_equal 'this-title-is-full-of-special-characters', s.permalink
Testing the Join Model Relationship
Lastly, we need to add a test to deal with the new has_many :through associationthat we added to our User model. Expand the test cases (located intest/unit/user_test.rb) as follows:
File: 30-user_test.rb (excerpt)
class UserTest < Test::Unit::TestCase …def test_stories_voted_on_association
assert_equal [ stories(:first) ], users(:patrick).stories_voted_on endend
This test relies on fixture data. Therefore, we can assert immediately that the listof stories for which our test user voted is equal to the list that we expect:
assert_equal [ stories(:first) ], users(:patrick).stories_voted_on
Next, we’ve got some functional tests to write.
314
Chapter 9: Advanced Topics

Testing the StoryControllerIn this chapter, we’ve added to StoryController quite a bit of functionality thatneeds testing. The functionality that we’ve added is a little more complicatedthan in previous chapters, so the corresponding tests will also be more complex.
Testing the Rendering of Templates
We’ll start by adding a few basic tests that cover correct template rendering:
File: 31-story_controller_test.rb (excerpt)
class StoryControllerTest < Test::Unit::TestCase …def test_should_show_index
get :index assert_response :success assert_template 'index' end
def test_should_show_bin get :bin assert_response :success assert_template 'index' end
protected …end
Both tests are very similar in nature and neither exposes any new functionality.Each calls its respective action, checks that the request was responded to success-fully, and confirms that the proper template is rendered (remember, we’re usingexactly the same template for both the index and bin actions).
Testing the Story Index Pages
As a next step, we’re confirming that each of the story-listing actions (index andbin) picks the proper records from the database. One list shows only “promoted”stories, which have a voting score of at least 5; the other shows the remainingstories:
315
Testing the StoryController
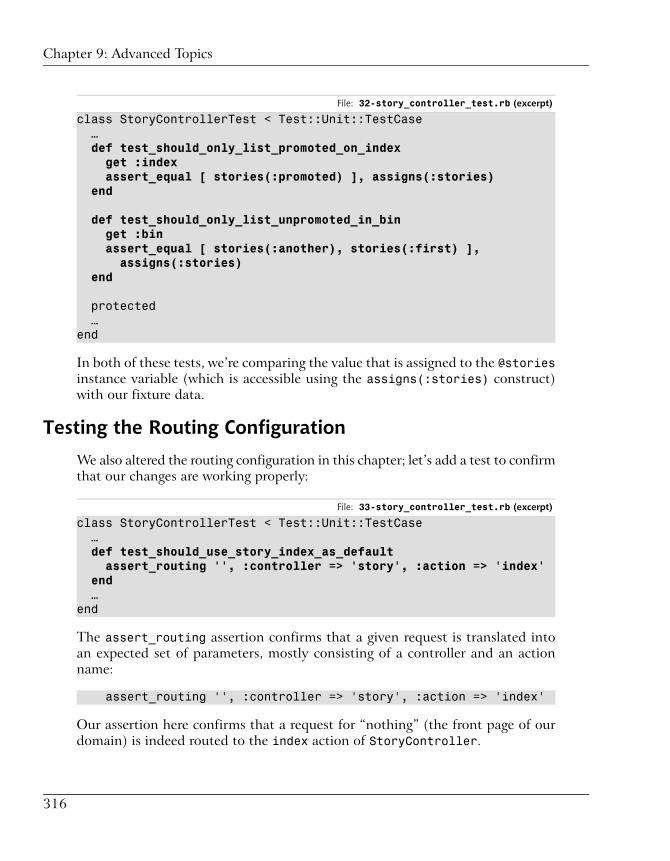
File: 32-story_controller_test.rb (excerpt)
class StoryControllerTest < Test::Unit::TestCase …def test_should_only_list_promoted_on_index
get :index assert_equal [ stories(:promoted) ], assigns(:stories) end
def test_should_only_list_unpromoted_in_bin get :bin assert_equal [ stories(:another), stories(:first) ], assigns(:stories) end
protected …end
In both of these tests, we’re comparing the value that is assigned to the @storiesinstance variable (which is accessible using the assigns(:stories) construct)with our fixture data.
Testing the Routing Configuration
We also altered the routing configuration in this chapter; let’s add a test to confirmthat our changes are working properly:
File: 33-story_controller_test.rb (excerpt)
class StoryControllerTest < Test::Unit::TestCase …def test_should_use_story_index_as_default
assert_routing '', :controller => 'story', :action => 'index' end …end
The assert_routing assertion confirms that a given request is translated intoan expected set of parameters, mostly consisting of a controller and an actionname:
assert_routing '', :controller => 'story', :action => 'index'
Our assertion here confirms that a request for “nothing” (the front page of ourdomain) is indeed routed to the index action of StoryController.
316
Chapter 9: Advanced Topics

Testing Page Headings
The next pair of tests deals with the view side of the index and bin actions andconfirms that the header tag contains a proper heading, complete with the expec-ted number of stories:
File: 34-story_controller_test.rb (excerpt)
class StoryControllerTest < Test::Unit::TestCase …def test_should_show_story_on_index
get :index assert_select 'h2', 'Showing 1 front page story' assert_select 'div#content div.story', :count => 1 end
def test_should_show_stories_in_bin get :bin assert_select 'h2', 'Showing 2 upcoming stories' assert_select 'div#content div.story', :count => 2 end …end
The second assert_select assertion tests for an appropriate number of divelements with a class attribute of story. These divs come out of the_story.rhtml partial and, as such, we’re looking for one div per story. Eachstory div is contained in the all-encompassing div that has an id of content.
Testing the Story Submission Form
This chapter also saw us add to the story submission form a new field that allowsusers to submit story descriptions. To test this functionality, change the existingtest_should_show_new_form test to match the following:
File: 35-story_controller_test.rb (excerpt)
class StoryControllerTest < Test::Unit::TestCase def test_should_show_new_form get_with_user :new assert_select 'form p', :count => 4 endend
317
Testing the StoryController
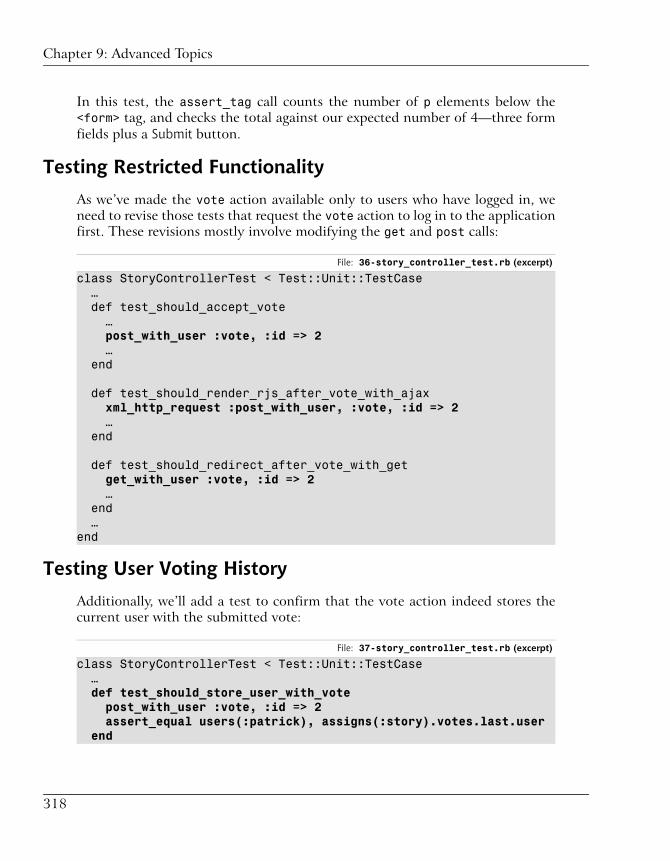
In this test, the assert_tag call counts the number of p elements below the<form> tag, and checks the total against our expected number of 4—three formfields plus a Submit button.
Testing Restricted Functionality
As we’ve made the vote action available only to users who have logged in, weneed to revise those tests that request the vote action to log in to the applicationfirst. These revisions mostly involve modifying the get and post calls:
File: 36-story_controller_test.rb (excerpt)
class StoryControllerTest < Test::Unit::TestCase … def test_should_accept_vote …
post_with_user :vote, :id => 2 … end
def test_should_render_rjs_after_vote_with_ajaxxml_http_request :post_with_user, :vote, :id => 2
… end
def test_should_redirect_after_vote_with_getget_with_user :vote, :id => 2
… end …end
Testing User Voting History
Additionally, we’ll add a test to confirm that the vote action indeed stores thecurrent user with the submitted vote:
File: 37-story_controller_test.rb (excerpt)
class StoryControllerTest < Test::Unit::TestCase …def test_should_store_user_with_vote
post_with_user :vote, :id => 2 assert_equal users(:patrick), assigns(:story).votes.last.user end
318
Chapter 9: Advanced Topics

…end
Testing the Story Display Page
Since users who are not logged in no longer see the shove it button, we need torevise an existing test and add a new one:
File: 38-story_controller_test.rb (excerpt)
class StoryControllerTest < Test::Unit::TestCase … def test_should_show_story_vote_elements
get_with_user :show, :permalink => 'my-shiny-weblog' … end
def test_should_not_show_vote_button_if_not_logged_in get :show, :permalink => 'my-shiny-weblog' assert_select 'div#vote_link', false endend
We pass false to assert_select to confirm that there are no elements on thepage that match the given CSS selector.
Testing the Navigation Menu
We added an item to our navigation menu, so we need to increase the numberof list items that we check for in the following test from two to three:
File: 39-story_controller_test.rb (excerpt)
def test_should_show_navigation_menu get :index assert_select 'ul#navigation li', 3 end
Testing the Story Submitter Link Text
Lastly, let’s add a test to confirm that the link to the story submitter’s user pageis displayed on the story page:
319
Testing the StoryController

File: 40-story_controller_test.rb (excerpt)
class StoryControllerTest < Test::Unit::TestCase …def test_should_show_story_submitter
get :show, :permalink => 'my-first-story' assert_select 'p.submitted_by a', 'patrick' endend
Whew! That was quite a litany of tests. Let’s now turn our thoughts to one finaltest of the workings of our controller.
Testing the AccountControllerWithout further ado, we’ll add three tests to cover the functionality encapsulatedwithin the user page we added to AccountController:
File: 41-account_controller_test.rb (excerpt)
class AccountControllerTest < Test::Unit::TestCase fixtures :users, :stories, :votes …def test_should_show_user
get :show, :id => 'patrick' assert_response :success assert_template 'show' assert_equal users(:patrick), assigns(:user) end
def test_should_show_submitted_stories get :show, :id => 'patrick' assert_select 'div#stories_submitted div.story', :count => 2 end
def test_should_show_stories_voted_on get :show, :id => 'patrick' assert_select 'div#stories_voted_on div.story', :count => 1 endend
All three tests use basic assertions to confirm that the proper user is found bythe show action, and that that user’s story submissions and story votes are dis-played properly on the page.
320
Chapter 9: Advanced Topics

Running the Complete Test SuiteWe’ve made a massive number of additions to our suite of tests in this chapter,so it should be especially rewarding to run the full suite now, using:
$ rake test
Figure 9.11 shows the results of all of our tests.
Figure 9.11. Running the test suite
SummaryWow, what a journey! In this chapter, we’ve added a stack of features to Shovell,such as the display of popular story listings on the front page and the implement-ation of a voting bin containing stories that people can vote on.
Along the way, we learned that the counter cache is an easy way to store thenumber of records associated with any given model, and used ActiveRecord
321
Running the Complete Test Suite

callbacks as a means to hook into certain events that are occurring on our models.We used a before_create callback to implement the auto-generation ofpermalinks, and we also tackled ActionView helpers to reduce clutter in ourshared view.
Lastly, we covered an additional type of association: the join model relationship.It was used to implement a user page to show the story submissions and votinghistory of each registered user.
Some 45 tests and 93 assertions later we can attest that, indeed, Shovell is inreally good shape. Of course, there are countless enhancements that we couldmake to our little application; some of the functionality that comes to mind in-cludes:
❑ creating a form that allows new users to register
❑ sending an email to new users to inform them of their passwords
❑ encrypting user passwords in the database
❑ allowing users to comment on stories
❑ restricting users to vote for each story only once
I’m sure your mind is racing with ideas for a number of killer features that youcould use to set your application apart from the pack! While the addition of allof these features is more than we could possibly cover in this book, I’ve givenyou a solid grounding—both in theory and in practice—that you can build on tofurther develop Shovell on your own. Don’t forget to keep expanding your testsuite to include all the cool new features that you add!
In the next chapter, we’ll take a quick look at the Rails plugin architecture, anduse one of the existing plugins to expand Shovell’s feature set—implementingtagging functionality for our story submissions.
322
Chapter 9: Advanced Topics

Rails Plugins10While this book is unable to cover all of the built-in functionality that ships withRails (there’s plenty remaining for you to discover and experiment with onceyou’ve finished this book), the plugins architecture of Rails warrants our attention.
What is a Plugin?A plugin is a component that you can add to your application to extend itsfunctionality. While you can certainly write your own plugins, we’ll limit ourdiscussion here to using existing plugins. Plugins have been developed for variousparts of the Rails framework, and add functionality in a range of areas, including:
❑ extensions to ActiveRecord functionality
❑ helper methods
❑ completely new template engines (for coding a view using an alternate tem-plating language)
Compared with the rest of the Rails core framework, plugins are still a fairly newaddition. For this reason, at the time of writing, no official, easily browsableplugin repository has been developed, nor has an easy-to-use plugin managerbeen created to simplify the installation and management of plugins. Various

efforts are being made to address these needs, but nothing has been set in stoneas yet. The original list of plugins is located in the Rails wiki; each entry simplylinks to the plugin code that various people have contributed and published.1
Plugins are installed using a command line script that’s available in the scriptsubdirectory of every Rails application. By default, this script will only install theplugins contained in the official Rails repository. To install a plugin from a differ-ent location, you must know the exact URL from which the plugin is available—in-formation that’s usually provided by the plugin developer.
Let’s explore what the plugin script can do for us.
Invoke the script from the command line, without arguments, so that we canview its usage instructions:
$ ruby script/plugin
You should be presented with a set of usage instructions that numbers severalpages, and even includes examples. An excerpt of this output can be seen in Fig-ure 10.1.
Using the plugin script, plugins can be installed, removed, and even updatedshould a newer version than the one you originally installed become available.The other commands listed in Figure 10.1 relate to adding, listing, and removingadditional plugin repositories; we won’t cover them in this book.
Plugins you’ve installed for your application usually reside in the vendor/pluginsfolder within your application’s root folder. Each plugin resides in its own subdir-ectory, where it will be automatically found and loaded by Rails. The upshot ofthis is that you don’t have to tell Rails “load plugin A from location B.”
Every Rails plugin ships with a README file that contains instructions for usingthe plugin. Many plugins also ship with test cases that assert their proper func-tioning.2
Okay, enough theory! Let’s go ahead and install our first plugin.
1 http://wiki.rubyonrails.org/rails/pages/HowTosPlugins2 Sadly, the plugin we’re going to install does not, so we’ll be writing our own tests.
324
Chapter 10: Rails Plugins

Figure 10.1. Usage instructions for script/plugin
Adding Tagging to ShovellThe Web 2.0 craze that we mentioned at the start of Chapter 7 not only encour-ages the (mindful) use of Ajax functionality, it almost dictates that a web applic-ation must have “tagging” to be classified as a Web 2.0 application. And Shovellis no exception!
Tagging is the process by which content creators attach simple, textual labels totheir data—be it a photo, a link, a story, or a restaurant review. These tags varywidely in their nature—they may be location-related, content-related, and so on.The result is that everyone seems to have a unique system for tagging the datahe or she deals with.
Tags are definitely more flexible than a simple category tree—they let you assignas many or as few tags as you like to any item of data. The convention that hasevolved around this functionality is for the user to enter tags for a content iteminto a text field. Multiple tags should be separated by a space or a comma.
325
Adding Tagging to Shovell

Introducing the acts_as_taggable PluginInstead of reinventing the wheel and implementing our own tagging system forShovell, we’ll use one of the available Rails plugins for this job: acts_as_taggable.
What acts_as_taggable Does
As this isn’t the most obvious name for a plugin, allow me to explain a little bitabout the history of the acts_as_* naming convention.
Rails already ships with a number of acts, which are functional extensions to anActiveRecord model. These acts equip models with certain functionality thatusually can be enabled using a single line of code.
As this functionality typically enables models to “act as something else,” theconvention of calling these functional additions “acts” arose, and the code thatenables the functionality acts_as_something shortly followed.
At the time of writing, Rails ships with three related acts: acts_as_list,acts_as_tree, and acts_as_nested_set. While some are more complex thanothers, each of these acts applies a hierarchy to a set of model objects. In the caseof acts_as_list, objects are positioned in a flat list; with acts_as_nested_set,the resulting hierarchy is a sophisticated tree system, such as that used in athreaded forum, for example.
But what about acts_as_taggable? As the name suggests, this plugin providesa simple yet effective means by which you can make your models taggable. Itships with its own ActiveRecord model class called Tag, as well as functionalityfor parsing a list of tags separated by spaces into separate model objects of classTag.
Of course, before we can play with this plugin, we’ll need to install it.
Installing the acts_as_taggable Plugin
To install the plugin, change directory to the application root folder, and executethe following command:
$ ruby script/plugin install acts_as_taggable
In the output of the plugin script you’ll see all the files that were added to yourvendor/plugins/ directory. The six files that make up the acts_as_taggable
326
Chapter 10: Rails Plugins

plugin are placed in a folder that has the same name as the plugin, as Figure 10.2shows.
Figure 10.2. Installing the acts_as_taggable plugin
Removing Deprecated Code from acts_as_taggable
Unfortunately, the version of acts_as_taggable that resided in the officialRails repository at the time of writing contained deprecated code that threwwarnings with Rails 1.2. I’ve made an updated version available for you inthis book’s code archive, but the change that’s necessary to update this plugin(thus preventing warning messages from occurring when you run your testsuite) is actually quite small, so let’s go ahead and make it now.
Edit the file vendor/plugins/acts_as_taggable/lib/acts_as_tag-gable.rb and modify the last word on line 17, as shown in bold below:
module ClassMethods … has_many :taggings, :as => :taggable, :dependent => :destroy …end
As I mentioned, you don’t have to load this plugin explicitly, so here’s where theinstallation instructions end!
Creating a Migration for the Plugin
Our plan is to allow users of our application to add tags to stories that are sub-mitted to Shovell, so we’ll need to make our Story model “taggable.” As both
327
Introducing the acts_as_taggable Plugin

the tags themselves and the relationships between tags and stories need to bestored somewhere—you guessed it!—we need to use a migration to create newtables. And while this plugin makes use of a new model (the Tag model providedby the acts_as_taggable plugin), the model wasn’t created by the generatescript, so we don’t yet have a migration to go with it—let’s create a skeleton mi-gration file now:
$ ruby script/generate migration AddTags
The acts_as_taggable plugin uses two tables:
❑ The tags table stores the Tag model, which is just a regular ActiveRecordmodel. This table contains one entry for each tag. So, for example, if youtagged two or more Story models with the tag book, only one Tag object(book) would be stored in the database. This approach makes it easy for ourapplication’s users to find content: if a user was interested in finding storiesabout books, he or she could browse through all of the stories to which thebook tag was applied.
❑ The taggings table stores the actual mappings between the Tag model andthose models that make use of the acts_as_taggable functionality.
Add the following migration code to the db/migrate/007_add_tags.rb file:
File: 01-007_add_tags.rb
class AddTags < ActiveRecord::Migrationdef self.up
create_table :tags do |t| t.column :name, :string end
create_table :taggings do |t| t.column :tag_id, :integer t.column :taggable_id, :integer t.column :taggable_type, :string end end def self.down drop_table :tags drop_table :taggings endend
328
Chapter 10: Rails Plugins
We’re starting out simple here: we create the tags table that contains just onecolumn: name (in addition to the id column that every table has).
While it may appear simple on the surface, the taggings table is a little morecomplex than a mere list of objects and their tags. As I mentioned, it’s possibleto make more than one model in your application taggable. However, the map-pings between the Tag model and those models to which tagging functionalityhas been added use a single table.
acts_as_taggable uses each of the columns created in the taggable table asfollows:
❑ tag_id stores the id of the Tag model.
❑ taggable_id stores the id of the object that is being tagged (for example, theid of a Story).
❑ taggable_type stores the class of the object that is being tagged (for exampleStory).
Before we can give our Story model a little acts_as_taggable goodness, weneed to apply the migration we just completed:
$ rake db:migrate
Figure 10.3 shows the outputs that result when this migration is created, andthen applied.
329
Introducing the acts_as_taggable Plugin
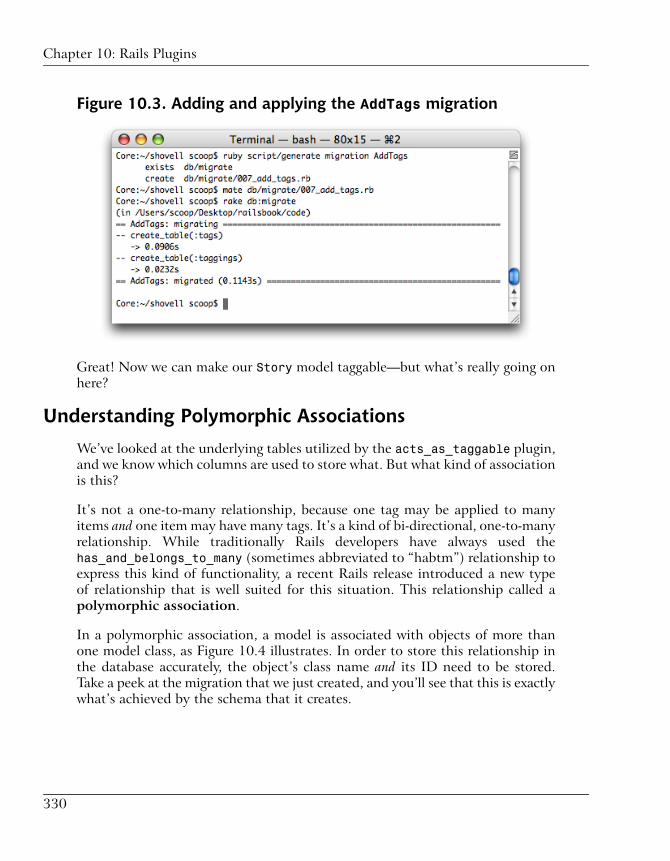
Figure 10.3. Adding and applying the AddTags migration
Great! Now we can make our Story model taggable—but what’s really going onhere?
Understanding Polymorphic Associations
We’ve looked at the underlying tables utilized by the acts_as_taggable plugin,and we know which columns are used to store what. But what kind of associationis this?
It’s not a one-to-many relationship, because one tag may be applied to manyitems and one item may have many tags. It’s a kind of bi-directional, one-to-manyrelationship. While traditionally Rails developers have always used thehas_and_belongs_to_many (sometimes abbreviated to “habtm”) relationship toexpress this kind of functionality, a recent Rails release introduced a new typeof relationship that is well suited for this situation. This relationship called apolymorphic association.
In a polymorphic association, a model is associated with objects of more thanone model class, as Figure 10.4 illustrates. In order to store this relationship inthe database accurately, the object’s class name and its ID need to be stored.Take a peek at the migration that we just created, and you’ll see that this is exactlywhat’s achieved by the schema that it creates.
330
Chapter 10: Rails Plugins

Figure 10.4. Two models are assigned the same tag
If the schema didn’t save both the class name and ID of the object, we couldpotentially be faced by a situation in which a tag was applied to both a User objectwith an id of 1 and a Story object that also had an id of 1. What chaos thatwould be!
Fortunately, Rails handles most of the details that implement this relationshipautomatically and transparently for you.
Making a Model Taggable
To use acts_as_taggable, modify the Story class definition located inapp/models/story.rb as follows:
File: 02-story.rb (excerpt)
class Story < ActiveRecord::Baseacts_as_taggable
…end
Yes, that is it! With the plugin in place, it takes just 16 characters to make amodel taggable.
Next, we’ll hop into the Rails console to play with our Story model’s new func-tionality. The acts_as_taggable plugin has added a variety of extra methodsto our model—let’s take a look at some of them.
First, retrieve a story from the database:
331
Introducing the acts_as_taggable Plugin

>> s = Story.find(:first)=> #<Story:..>
We can look at the tags already assigned to this story by using the tag_list in-stance method:
>> s.tag_list=> ""
The plugin provides us with the tag_with instance method to tag an object. Thismethod simply takes a space-separated list of tags to apply:
>> s.tag_with 'sitepoint forum community'=> ["sitepoint", "forum", "community"]
To refresh the list of tags that we’ve assigned, be sure to reload the model fromthe database. Then use the tag_list instance method to request the list of tagsassigned to the model.
>> s.reload=> #<Story:…>>> s.tag_list=> "sitepoint forum community"
The tag_list method is in fact a shortcut to the association data, which isavailable through the tags instance method. This method provides access to anarray of the Tag objects with which this particular story is associated:
>> s.tags.size=> 3
As I mentioned earlier in the chapter, we can also use methods of the Tag classto retrieve a list of stories that are tagged with a particular word. Below, we loadup an existing tag (which we’ve just created through the tag_with instancemethod of the Story model) using a standard ActiveRecord dynamic findermethod:
>> t = Tag.find_by_name("sitepoint")=> #<Tag:…>
Each Tag instance collects a list of all the objects to which it has been assigned—in-formation that’s available through the tagged instance method. Let’s request thesize of the array:
>> t.tagged.size=> 1
332
Chapter 10: Rails Plugins

Based on the value returned by the size method, we can hazard a guess that theobject available in this array is the Story object that we tagged earlier. Let’s usethe first method to be sure:
>> t.tagged.first=> #<Story:…>
Yes, we were right!
The objects contained in this tagged array are the fully functional model objectsto which our tag has been applied. We can therefore invoke the same methodsand access the same attributes that we would when dealing with a regular Storyobject. Let’s request the name of the story that we’ve tagged with the sitepointtag:
>> t.tagged.first.name=> "SitePoint Forums"
Pretty straightforward stuff, eh?
One last thing—because it’s conceivable that a tag may be applied to more thanone type of model, each model is equipped with a new dynamic finder that fetchesonly objects of that object’s class that have been assigned a certain tag. That dy-namic finder is find_tagged_with:
>> s = Story.find_tagged_with "sitepoint"=> [#<Story:..>]>> s.size=> 1>> s.first.name=> "SitePoint Forums"
Okay, enough with the console! Let’s give users the ability to tag stories throughour application’s Web interface.
Enabling Tag SubmissionBefore we get all fancy about displaying tags all over our site, we need to add away for users to submit tags with a new story. Let’s add a new form field to thestory submission form.
333
Enabling Tag Submission

Modifying the View
To add the form field, modify the submission form that’s located in the fileapp/views/story/new.rhtml:
File: 03-new.rhtml (excerpt)
<% form_for :story do |f| %> … <p> Tags:<br /> <%= text_field_tag 'tags', params[:tags] %> </p> <p><%= submit_tag %></p><% end %>
Users will be separating each tag with a space, so a simple text field for tag entrywill do the job nicely:
<%= text_field_tag 'tags', params[:tags] %>
The only tricky thing about this line is the use of text_field_tag (rather thanthe regular text_field method that we normally use in conjunction with theform_for helper). This is because form_for is restricted to dealing with the actualattributes of a model, and tags isn’t one of the Story model’s attributes.
The text_field_tag helper takes two arguments: the name of the form field,and the destination of the final submitted value. For our application, we’re passingtext_field_tag the parameter params[:tags], which is the location at whichthe submitted value will be stored. Therefore, the input HTML element that’screated looks like this:
<input id="tags" name="tags" type="text" />
By storing the submitted value in params[:tags], we ensure that any tags thatthe user entered during the submission process will be retained if an error occurs,and re-presented in the submission form when the user is returned there to correctthe error.
Modifying the Controller
To assign the submitted tags to the new story, modify the new action of theStoryController class. While, in the past, we could add a regular attribute such
334
Chapter 10: Rails Plugins
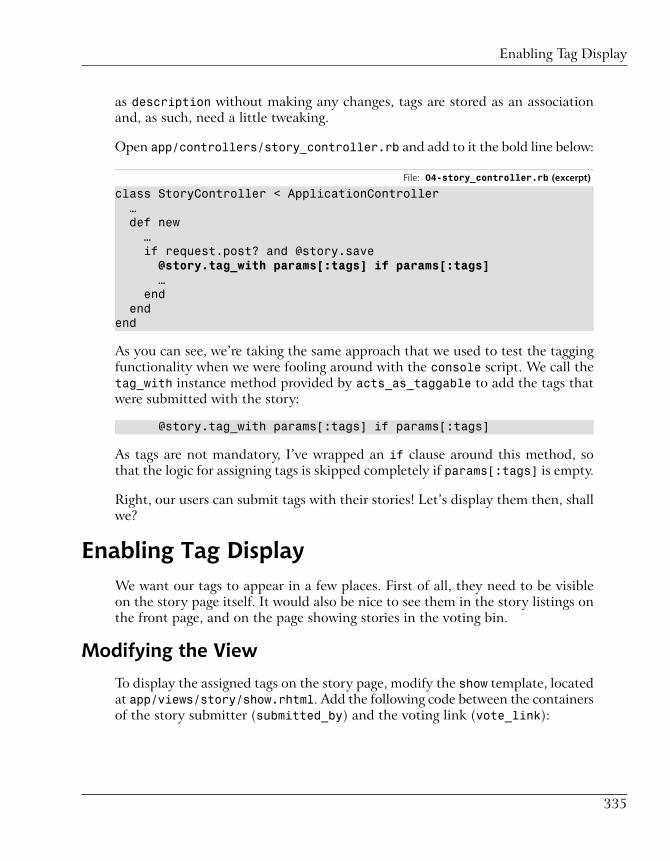
as description without making any changes, tags are stored as an associationand, as such, need a little tweaking.
Open app/controllers/story_controller.rb and add to it the bold line below:
File: 04-story_controller.rb (excerpt)
class StoryController < ApplicationController … def new … if request.post? and @story.save
@story.tag_with params[:tags] if params[:tags] … end endend
As you can see, we’re taking the same approach that we used to test the taggingfunctionality when we were fooling around with the console script. We call thetag_with instance method provided by acts_as_taggable to add the tags thatwere submitted with the story:
@story.tag_with params[:tags] if params[:tags]
As tags are not mandatory, I’ve wrapped an if clause around this method, sothat the logic for assigning tags is skipped completely if params[:tags] is empty.
Right, our users can submit tags with their stories! Let’s display them then, shallwe?
Enabling Tag DisplayWe want our tags to appear in a few places. First of all, they need to be visibleon the story page itself. It would also be nice to see them in the story listings onthe front page, and on the page showing stories in the voting bin.
Modifying the View
To display the assigned tags on the story page, modify the show template, locatedat app/views/story/show.rhtml. Add the following code between the containersof the story submitter (submitted_by) and the voting link (vote_link):
335
Enabling Tag Display

File: 05-show.rhtml (excerpt)
…</p><% if @story.tags.size.nonzero? %> <p class="tags"> <strong>Tags:</strong> <%= render :partial => 'tag', :collection => @story.tags %> </p><% end %><% if logged_in? %> …
Once again, if a story doesn’t have tags, we don’t bother to list them, so we wrapthe logic in an if clause:
<% if @story.tags.size.zero? %> …<% end %>
If tags are associated with a story, we go ahead and render a partial for every as-signed tag:
<%= render :partial => 'tag', :collection => @story.tags %>
Hang on—we’ve just instructed our application to render a partial that doesn’texist! We’d better create it now.
Creating a tag Partial
To render a collection of tags assigned to a story, we need a tag partial. Createthe file app/views/story/_tag.rhtml, and edit the contents to contain the fol-lowing single line:
File: 06-_tag.rhtml (excerpt)
<%= link_to tag.name, :action => 'tag', :id => tag.name %>
The new partial links each tag name to a new tag page, which we’ll create in amoment. That page will list all stories that have been assigned a given tag.
Updating the story Partial
Last of all, we’ll display tags for each story that appears in the story listings onthe front page and in the voting bin. To add this information to the display, we’llmodify the app/views/story/_story.rhtml partial like so:
336
Chapter 10: Rails Plugins

File: 07-_story.rhtml (excerpt)
<div class="story"> … <p> Submitted by: <%= story.user.login %> | Score: <%= story.votes_count %><br /> Tags: <%= story.tag_list %> </p></div>
This code prints a simple, space-separated list of the tags assigned to a story usingthe tag_list instance method.
Updating the Style Sheet
To give our tag links a little room to breathe on the page, let’s add the followingsnippet of CSS to our style sheet, located at public/stylesheets/style.css:
File: 08-style.css (excerpt)
.tags a { padding: 0 3px; }
Excellent. Let’s see how things look then, shall we?
Assigning our First TagsWith a solid foundation in place for the assignment and display of tags in theapplication, you can now start experimenting with this exciting new piece offunctionality. Submit a new story from your browser using the story submissionform, and this time include a few tags, as I’ve done in Figure 10.5.
337
Assigning our First Tags
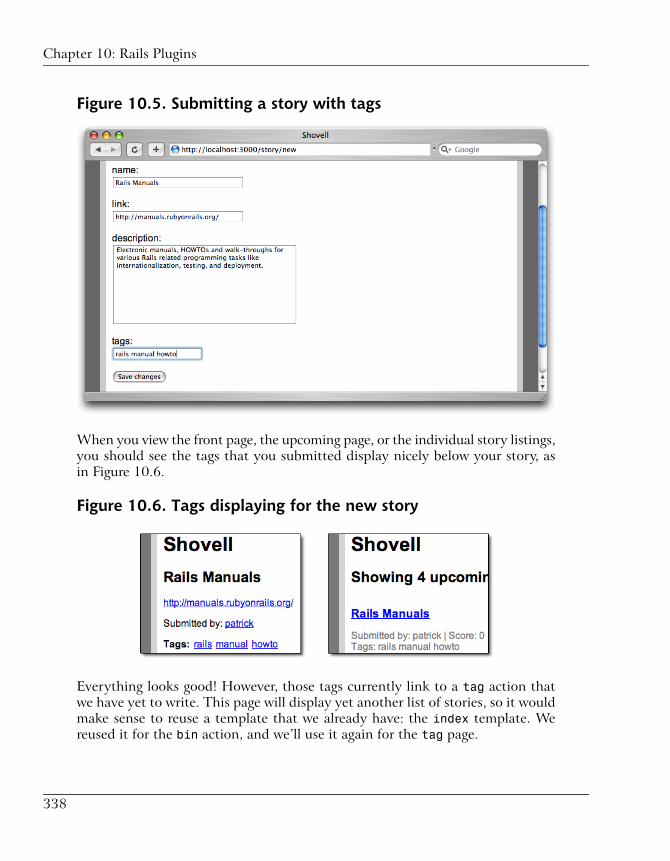
Figure 10.5. Submitting a story with tags
When you view the front page, the upcoming page, or the individual story listings,you should see the tags that you submitted display nicely below your story, asin Figure 10.6.
Figure 10.6. Tags displaying for the new story
Everything looks good! However, those tags currently link to a tag action thatwe have yet to write. This page will display yet another list of stories, so it wouldmake sense to reuse a template that we already have: the index template. Wereused it for the bin action, and we’ll use it again for the tag page.
338
Chapter 10: Rails Plugins

Viewing Stories by TagAt this stage, creating a page that allows users to view stories by tag should bequite easy for you. Try implementing it yourself, before reading ahead to see howI’ve gone about it.
Modifying the Controller
The new tag action of our StoryController should look like this:
File: 09-story_controller.rb (excerpt)
class StoryController < ApplicationController …def tag
@stories = Story.find_tagged_with(params[:id]) render :action => 'index' end …end
There’s nothing too taxing here; first we retrieve all of the stories that are taggedwith a particular tag using a method that we played with in the console scriptearlier in this chapter—find_tagged_with:
@stories = Story.find_tagged_with(params[:id])
Then, as we did in the bin action, we render the index template, which alreadycontains everything necessary for us to render a list of stories:
render :action => 'index'
The last thing this page needs is an appropriate heading to distinguish it fromour other story lists.
Displaying Tagged Stories
To show an appropriate heading for our newly added tag action, add the followingline to the story_list_heading helper, located in the file app/help-ers/story_helper.rb:
File: 10-story_helper.rb (excerpt)
… def story_list_heading
339
Viewing Stories by Tag

story_type = case controller.action_name when 'index': 'frontpage story' when 'bin': 'upcoming story'
when 'tag': 'tagged story' end "Showing #{ pluralize(@stories.size, story_type) }" endend
Clicking one of the tag links from an individual story page now takes the user toa page similar to the one in Figure 10.7. The page lists all of the stories that havebeen given that particular tag. Lovely!
Figure 10.7. Listing all stories tagged with “rails”
Testing the Tagging FunctionalitySome plugins come bundled with complete test coverage; others do not. Unfor-tunately acts_as_taggable does not have any such coverage. However, even ifit did, it’s good practice to add tests to your test suite to ensure that you’re testingyour usage of the plugin, which definitely isn’t covered by the standard test suitefor the plugin.
340
Chapter 10: Rails Plugins

Testing the ModelTo test the tagging functionality that our Story model has inherited, we’re goingto add two more unit tests to the StoryTest test case.
Testing the Assignment of Tags
The first test we’ll add to the /test/story_test.rb file follows:
File: 11-story_test.rb (excerpt)
class StoryTest < Test::Unit::TestCase …def test_should_act_as_taggable
stories(:first).tag_with 'book english' stories(:first).reload assert_equal 2, stories(:first).tags.size assert_equal 'book english', stories(:first).tag_list endend
This test uses the tag_with method to apply two tags to the first story in ourfixture data:
stories(:first).tag_with 'book english'
To reflect the newly added tags, we need to reload the object in question:
stories(:first).reload
The two assertions in this test confirm that the number of tags assigned to thestory is as expected, and that the list of tags returned by the tag_list methodcontains the correct tags, each separated from its neighbors by a space:
assert_equal 2, stories(:first).tags.size assert_equal 'book english', stories(:first).tag_list
Testing the Finding of a Story by Tag
The next unit test we need to add for our Story model is as follows:
File: 12-story_test.rb (excerpt)
class StoryTest < Test::Unit::TestCase …def test_should_find_tagged_with
341
Testing the Model
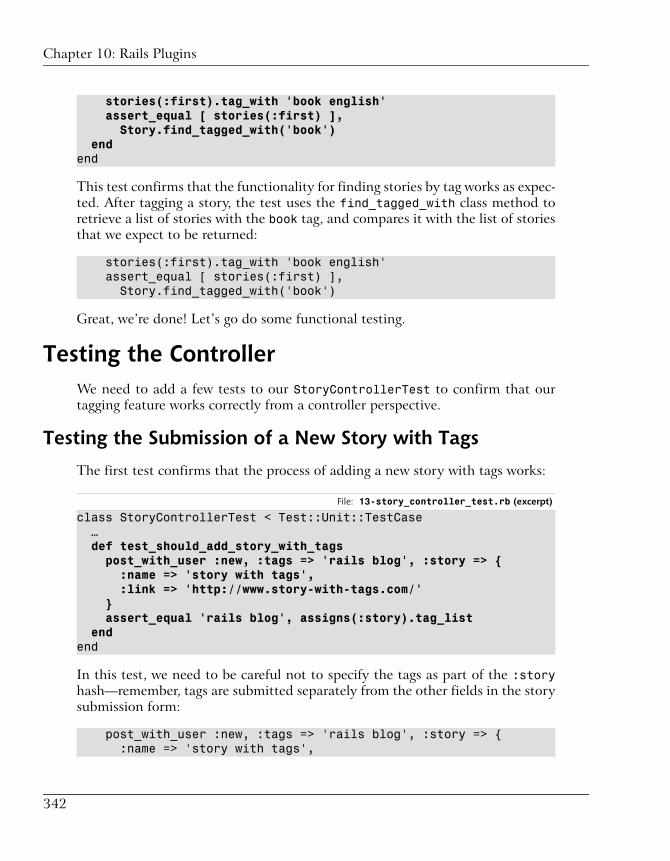
stories(:first).tag_with 'book english' assert_equal [ stories(:first) ], Story.find_tagged_with('book') endend
This test confirms that the functionality for finding stories by tag works as expec-ted. After tagging a story, the test uses the find_tagged_with class method toretrieve a list of stories with the book tag, and compares it with the list of storiesthat we expect to be returned:
stories(:first).tag_with 'book english' assert_equal [ stories(:first) ], Story.find_tagged_with('book')
Great, we’re done! Let’s go do some functional testing.
Testing the ControllerWe need to add a few tests to our StoryControllerTest to confirm that ourtagging feature works correctly from a controller perspective.
Testing the Submission of a New Story with Tags
The first test confirms that the process of adding a new story with tags works:
File: 13-story_controller_test.rb (excerpt)
class StoryControllerTest < Test::Unit::TestCase …def test_should_add_story_with_tags
post_with_user :new, :tags => 'rails blog', :story => { :name => 'story with tags', :link => 'http://www.story-with-tags.com/' } assert_equal 'rails blog', assigns(:story).tag_list endend
In this test, we need to be careful not to specify the tags as part of the :storyhash—remember, tags are submitted separately from the other fields in the storysubmission form:
post_with_user :new, :tags => 'rails blog', :story => { :name => 'story with tags',
342
Chapter 10: Rails Plugins

:link => 'http://www.story-with-tags.com/' }
The assertion then makes sure that the tag_list method of the newly addedStory returns the tags that we submitted:
assert_equal 'rails blog', assigns(:story).tag_list
Testing the Display of Tags on a Story Page
The next test checks whether a story’s individual page displays its tags properly:
File: 14-story_controller_test.rb (excerpt)
class StoryControllerTest < Test::Unit::TestCase …def test_should_show_story_with_tags
stories(:promoted).tag_with 'apple music' get :show, :permalink => 'promoted-story' assert_select 'p.tags a', 2 endend
In this test, we confirm that the container element on the story page contains anappropriate number of elements. We do this by counting the number of linkswithin the p element that has a class of tags:
assert_select 'p.tags a', 2
Testing the tag Action for Listing Tagged Stories
To test our new tag action, add the following test to our StoryController testcase:
File: 15-story_controller_test.rb (excerpt)
class StoryControllerTest < Test::Unit::TestCase …def test_should_find_tagged_stories
stories(:first).tag_with 'book english' get :tag, :id => 'book' assert_equal [ stories(:first) ], assigns(:stories) endend
343
Testing the Controller

We start this test by assigning some tags to one of our stories, then call the tagmethod to find all stories tagged with book:
stories(:first).tag_with 'book english' get :tag, :id => 'book'
The assertion then confirms that the @stories instance variable actually containsall the stories we expect it to:
assert_equal [ stories(:first) ], assigns(:stories)
Testing the Display of Stories by Tag
The next test we need to add to our StoryControllerTest is the following:
File: 16-story_controller_test.rb (excerpt)
class StoryControllerTest < Test::Unit::TestCase …def test_should_render_tagged_stories
stories(:first).tag_with 'book english' get :tag, :id => 'english' assert_response :success assert_template 'index' assert_select 'div#content div.story', :count => 1 endend
In this test, we put the template code through its paces. The assert_select callconfirms that the resulting page contains the expected number of div elementswith a class of story:
assert_select 'div#content div.story', :count => 1
Testing the Display of the Story Submission Form
As we added a new field to the story submission form, we have to edit ourStoryControllerTest class so that the test_should_show_new_form test countsan additional paragraph element:
File: 17-story_controller_test.rb (excerpt)
class StoryControllerTest < Test::Unit::TestCase … def test_should_show_new_form get_with_user :new
344
Chapter 10: Rails Plugins

assert_select 'form p', :count => 5 endend
And that, dear reader, is the last test that I’ll make you write! Well, for thischapter, anyway.
Running the Test Suite ... Again!To assure ourselves that all of these new tests (and our existing ones) pass, we’llrun the whole suite again using rake, as illustrated in Figure 10.8.
Figure 10.8. Running the test suite
$ rake test
If all of your tests passed, give yourself a congratulatory pat on the back for a jobwell done! And if there are any errors or failures, double-check your code againstthe code in the book and the book’s code archive to see where you might havegone wrong—the error messages displayed in your console will of course help
345
Running the Test Suite ... Again!

(and if you get truly stuck, you might want to jump ahead to Chapter 11 to readabout debugging your Rails application).
SummaryIn this chapter, we briefly looked at using an existing Rails plugin to extend ourapplication’s functionality without reinventing the wheel. After installing theplugin and applying the necessary migration, we only had to add a single line ofcode to make use of the rich functionality provided by the plugin. When we’dascertained how the plugin worked, we expanded the story submission form totake a space-separated list of tags, and expanded several views to display the tagdata.
Our work is not done yet, though—we still have a bit to learn about debuggingour application, running integration tests, and configuring our environment forproduction; these topics will be the focus of the coming chapters.
346
Chapter 10: Rails Plugins
Debugging, Testing, andBenchmarking11
Welcome to a chapter full of topics nobody likes to talk about—errors, bugs,flaws and exceptions. These are all things that other hands-on technical booksrarely address—they prefer to pretend that development is easy and results inperfect, error-free code.
However, once you begin developing applications on your own, the first thingyou’ll learn—probably the hard way—is that bugs arise all the time, regardlessof how proficient you are as a developer. It’s your job to find and fix them, soyou’d better be good at it!
Of course, the fun doesn’t stop at bugs and errors. It may be that your finishedapplication is not as speedy as you’d like. If this is the case, you’ll need tools onhand to profile your application, so you can locate the bottlenecks that are re-sponsible for slowing things down.
In this chapter, we’ll explore all three topics.
Debugging your ApplicationWhen you’re building a web application, there are times when you know exactlyand immediately the cause of a problem and how to fix it. For example, if younotice a broken image on your web site, you’ll instantly realize that you’ve for-
gotten to upload it, or that the path to the image is incorrect. With other bugs,however, you’ll have no idea what’s happened. It’s at times like these thatknowing how to debug your code comes in very handy.
There are various approaches to debugging. The simplest involves printing outthe values of some of the variables that your application uses while it runs, toget a better idea of what’s going on at each step in your code. A more complexapproach involves complicated but powerful techniques—setting breakpoints,hooking into the running application, and executing code in the context in whichyou suspect it’s misbehaving.
We’ll begin our discussion with something simple: we’ll look at the debug state-ment that’s available for use within ActionView templates. Over the course ofthe next two sections, we’ll work to squash a real, live bug in our Shovell applic-ation—I’ve deliberately introduced problems into our existing, perfectly workingapplication code so we can get our hands dirty with a practical application. Asyou follow along, try to think of the potential causes for the problems we en-counter.
Are you ready? Let’s try our hands at a little debugging.
Debugging within TemplatesI’ve deliberately broken our application by removing a specific line of code (obvi-ously, I won’t tell you which—that’s the whole point of this section!). The resultof this code removal is that the story page for a newly submitted story throws anexception and no longer displays the story. Figure 11.1 shows how this bug appearsin the browser.
To complete this exercise, you’ll first need to follow these steps to set up thepurposefully buggy version of Shovell:
1. Copy the folder named shovell-debug-01 from the code archive, and placeit alongside your existing shovell application folder.
2. Ensure that shovell-debug-01/config/database.yml is configured to pointto your existing shovell_development and shovell_test databases.
3. Start up your broken version of the Shovell application using the now famil-iar ruby script/server command.
348
Chapter 11: Debugging, Testing, and Benchmarking

4. Log in and add a new story to Shovell; I’ve given my story the name All AboutDebuggers.
5. Once you’ve submitted your new story, point your browser tohttp://localhost:3000/story/show/all-about-debuggers.
When your browser has finished loading the page, you should see something verysimilar to Figure 11.1. Don’t worry if the line number doesn’t match exactly; aslong as the error is the same, everything’s working as expected.
Figure 11.1. A mystery bug causing an error to display when weview a story
Where do we go from here? How should we approach such an error? Let’s beginby taking a closer look at the error message:
Showing app/views/story/show.rhtml where line #22 raised:You have a nil object when you didn't expect it!The error occurred while evaluating nil.login
The obvious deduction here is that our application tried to call the login methodon a nil object in our show.rhtml template. Understandably, Rails could notperform such an action, as the object nil certainly doesn’t have a login method.
349
Debugging within Templates

The error message also includes an excerpt of the code that Rails believes wasresponsible for the exception:
Extracted source (around line #22):20: <p class="submitted_by">21: Submitted by:22: <span><%= link_to @story.user.login,23: :controller => 'account',24: :action => 'show',25: :id => @story.user.login %></span>
The error message directs us to line 22 of the template, which is where thelink_to helper tries to assemble a link to the user page associated with the userwho originally submitted the story. This line also contains the call to the loginmethod that raised the exception. We’re calling the login method on the userobject associated with the story that’s currently being viewed:
22: <span><%= link_to @story.user.login %>
Re-reading the error message, we get the impression that @story.user must ac-tually must be nil. But what good are impressions in web application program-ming? No good at all. We need cold, hard facts!
Let’s put two tasks on our to-do list:
❑ Confirm that @story.user is indeed nil.
❑ Find out why it is nil.
To tackle the first item on our list, let’s change the parts of the template thatraised the exception, in order to inspect the contents of @story.user. To do so,open the app/views/story/show.rhtml template and change the following sec-tions:
File: 01-show.rhtml (excerpt)
…<p class="submitted_by"> Submitted by:<%= @story.user.class %>
<span><%# link_to @story.user.login, :controller => 'account', :action => 'show', :id => @story.user.login %></span></p>…
350
Chapter 11: Debugging, Testing, and Benchmarking
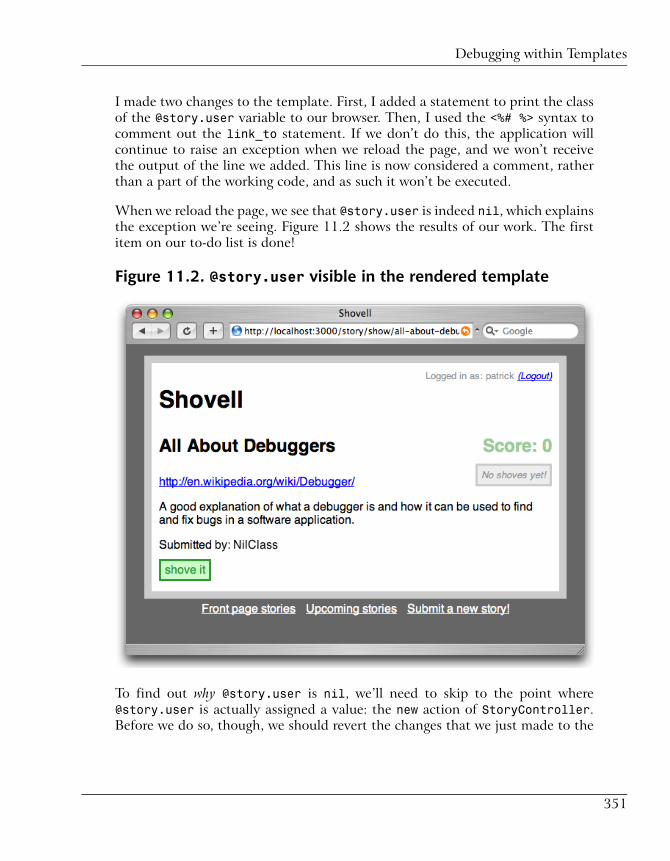
I made two changes to the template. First, I added a statement to print the classof the @story.user variable to our browser. Then, I used the <%# %> syntax tocomment out the link_to statement. If we don’t do this, the application willcontinue to raise an exception when we reload the page, and we won’t receivethe output of the line we added. This line is now considered a comment, ratherthan a part of the working code, and as such it won’t be executed.
When we reload the page, we see that @story.user is indeed nil, which explainsthe exception we’re seeing. Figure 11.2 shows the results of our work. The firstitem on our to-do list is done!
Figure 11.2. @story.user visible in the rendered template
To find out why @story.user is nil, we’ll need to skip to the point [email protected] is actually assigned a value: the new action of StoryController.Before we do so, though, we should revert the changes that we just made to the
351
Debugging within Templates

show.rhtml template. Remove the statement that prints the class name, andmake the link_to statement active again:
File: 02-show.rhtml (excerpt)
…<p class="submitted_by"> Submitted by: <span><%= link_to @story.user.login, … %></span></p>…
When we implemented user authentication in Chapter 8, we started to populatethis variable with the currently logged-in user. Let’s check this functionality inthe template that’s being rendered for the new action—it’s located inapp/views/story/new.rhtml:
File: 03-new.rhtml (excerpt)
<%= error_messages_for 'story' %><%= debug @story %><% form_for :story do |f| %> …<% end %>
The code I added between the error_messages_for and form_for statementsis the debug helper provided by Rails:
<%= debug @story %>
The debug statement instructs Rails to output a YAML representation of theobject that we pass as a parameter. In this case, because we’re working from aview template, this output will be sent directly to the browser. Load the storysubmission form in your browser with this debugging code in place, and youshould see something that resembles Figure 11.3.
The output should remind you of our test fixtures—it’s formatted in YAML, afterall. The debugging content that’s shown in addition to our regular templateoutput is a representation of @story that contains a new, unsaved Story object.
The debug helper automatically wraps its output in a pre element. By default,the contents of a pre element are displayed by the browser as pre-formatted textin a monospace font.
352
Chapter 11: Debugging, Testing, and Benchmarking

Figure 11.3. Looking at a YAML representation of @story
Within the YAML representation, you can spot that the user_id attribute lacksa value (in contrast to the votes_count attribute, for example, which has a valueof 0). This means that the attribute isn’t being set properly in the controller action,before the new template is rendered.
Time for me to come clean: here’s the modified controller action that causes thisproblem:
File: shovell-debug-01/app/controllers/story_controller.rb (excerpt)
def new @story = Story.new(params[:story])#@story.user = @current_user
if request.post? and @story.save … endend
As you can see, the line that sets the user attribute of the new Story object hasbeen commented out. Asa result, no user will be assigned to the newly submittedstory.
353
Debugging within Templates

“But wait!” you might be thinking. “Wouldn’t a test have caught this problem?”
Of course it would have.
Running the functional tests (using rake test:functionals) with [email protected] = @current_user line commented out, as it is above, would reveala test failure, as Figure 11.4 shows.
The test that fails is the one that verifies that the submission of a new story storesthe current user—obviously, it doesn’t. The error message from the test even tellsus that it expected a User object with a login of patrick; instead, it got a nilobject.
Figure 11.4. Functional tests failing and revealing the broken code
What lesson can we take from this exercise? Well, if you equip your code withproper test coverage from the beginning, you’ll have an easy and efficient way tospot an error in your code later.
354
Chapter 11: Debugging, Testing, and Benchmarking

If you’ve been following along (you have been following along, right?), you’llneed to either remove the story with the broken user association, or fix the userassociation through the console by changing its user_id to 1.
Debugging Using BreakpointsIn the next example, we’ll take a look at another problem that I’ve secretly intro-duced to our existing code. If you take a look at Figure 11.5, you’ll notice thatalthough we’ve provided a description for the new story we submitted, it doesn’tshow up on the final story page.
Figure 11.5. Story description missing from a newly submittedstory
If you’d like to follow along with this example, copy the shovell-debug-2 folderfrom the code archive, and set it up using the same steps as we used for shovell-debug-1 (I’ll even wait for you!).
“Ha!” I hear you laugh. “I learned in the last section that I just need to run thetest suite and it’ll tell me what’s wrong!”
While that’s a great idea, the reality is that when we run the full test suite withrake test from the application root, every single test passes, as if nothing werewrong; Figure 11.6 shows the results of running the test suite.
355
Debugging Using Breakpoints

Figure 11.6. Running the test suite without errors
What happened here? We’ll need to find out. While we used statements to in-vestigate specific objects and attributes in the previous example, in this case, wedon’t really know where to begin.
One tool that proves extremely useful as we explore the working environment ofan application is the breakpoint client. You can use the breakpoint client, whichoperates a lot like the console script, to jump into your running application andinspect variables, run other code, step through your code line by line, and more.You can even use it to change objects and variables while the application is in themiddle of executing.
To use the breakpoint client, we need to insert breakpoints in our applicationcode. Execution of the application code stops as soon as one of these breakpointstatements is encountered. A breakpoint statement can be placed anywhere,including within any of our models, controllers, and views.
While you’re in the breakpoint client, you can step through your code, one lineat a time, and make whatever changes you need to figure out the cause of the
356
Chapter 11: Debugging, Testing, and Benchmarking

problem. Once you’re finished debugging, and exit the breakpoint client, executionof the application resumes as if nothing had interrupted it.
Be careful when changing code from the breakpoint client, though, since yourchanges will persist when your application resumes execution. It’s like MartyMcFly risking his birth by changing the past in Back to the Future…
Let’s use the breakpoint client to find out a bit more about the misbehavior ofour story submission form. To do so, add a breakpoint statement to the newaction of StoryController, which is located at app/controllers/story_con-troller.rb, like so:
File: shovell-debug-02/app/controllers/story_controller.rb (excerpt)
def new @story = Story.new(params[:story]) @story.user = @current_user if request.post? and @story.save
breakpoint flash[:notice] = "Story submission succeeded" @story.tag_with params[:tags] if params[:tags] redirect_to :action => 'index' endend
As soon as you submit the story submission form, you’ll notice that your browserhangs. Your breakpoint is in action, and Rails is waiting for you to connect to itusing the breakpoint client.
Use the following command from the application root to fire up the breakpointclient:
$ ruby script/breakpointer
You’ll end up seeing a command prompt similar to that of the Rails console. Butas the prompt prefix suggests, you’re not looking at your application from theoutside, as you do when using the Rails console—you’re looking out from the insideof StoryController, as Figure 11.7 shows.
357
Debugging Using Breakpoints

Figure 11.7. The breakpoint client
At this point, you can examine parts of the working environment, such as the@story instance variable or the params hash. First up, we’ll take a look at thenew story object that’s stored in the @story variable:
>> @story.description=> nil
As you can see, even through we’ve entered a beautifully phrased story descriptioninto the form, the relevant description attribute of the new story object is nil,or empty.
Since each of the form fields ends up in the params hash, this will be the nextstop on our debugging journey. As params[:story] contains all the submittedattributes for our new story object, we’ll ask directly for the description attribute,like so:
>> params[:story][:description]=> nil
Hmm, that attribute’s empty as well. But the contents of that form field have toend up somewhere! Let’s take a look at the params hash as a whole:
>> params=> {"commit"=>"Save changes", "controller"=>"story", "action"=>"new", "story"=>{"name"=>"What is a Debugger?", "link"=>"http://en.wikipedia.org/wiki/Debugger"}, "description"=>{"rows10"=>"A debugger is a computer program that is used to test and debug other programs."}, }
There it is—it’s sitting at params[:description] for some reason. This indicatesthat the element names in our form must be incorrect.
358
Chapter 11: Debugging, Testing, and Benchmarking

Checking the form in app/views/story/new.rhtml reveals the cause of theproblem:
File: shovell-debug-02/app/views/story/new.rhtml (excerpt)
<% form_for :story do |f| %> … <p> description:<br />
<%= text_area :description, :rows => 10 %> </p> …<% end %>
Instead of using the FormBuilder object provided by form_for, I altered thehelper that generates the text area for the story’s description, so that it uses thetext_area helper directly. The change messed up the element name, and brokethe application’s ability to store the submitted story description.
Changing that line to the following fixes the error:
<%= f.text_area :description, :rows => 10 %>
To exit the breakpoint client for the current breakpoint, you can use the exitcommand or use the Ctrl-D keyboard shortcut. To exit the breakpoint clientcompletely, press Ctrl-C. If you don’t, Rails will keep on trying to connect to thenext breakpoint in our application, even though we don’t currently have one.
Now that that problem’s solved, you can go ahead and remove the breakpointstatement from the StoryController.
Okay, so we’ve squashed the bug. Great. But why didn’t our test suite report anyerrors? Well, first of all, description is not a required attribute according to thevalidations that we defined—we only specify that a name and a link are necessaryfor a story to be submitted successfully. Additionally, our test only checks forthe presence of a specific number of form fields in the story submission form—itdoesn’t check individual attributes and element names. That’s why our testsdidn’t reveal the error.
Armed with this knowledge, we can expand the test case for StoryControllerby adding one more test to test/functional/story_controller_test.rb:
File: 04-story_controller_test.rb (excerpt)
class StoryControllerTest < Test::Unit::TestCase …
359
Debugging Using Breakpoints

def test_should_include_description_field_on_new_form get_with_user :new assert_select 'form p textarea#story_description' endend
This test confirms that a textarea element exists on the page, is properly nested,and has an element id of story_description.
Running our test suite with the error still in place now produces the expectedtest failure. And correcting the error allows the test to pass, as Figure 11.8 illus-trates.
Figure 11.8. Expanding functional test coverage for the problemwe found
Using the Rails Logging ToolRails comes with an internal logging tool for writing custom entries, triggered byspecific events, to your application’s log file.
While logging events can certainly be useful for debugging purposes (especiallyin a production environment, where you don’t want to scare your users with theoutput of debugging code), event logging can also be of general interest. For in-
360
Chapter 11: Debugging, Testing, and Benchmarking

stance, log entries can reveal usage patterns for your application, such as thetimes at which maintenance jobs start and end, or the frequency with which ex-ternal services are accessed.
We’ll use the Rails logging tool to implement an access log for our application—alog of the pages requested by users who are logged in. While web server logs allowfor comprehensive analysis, they don’t contain any details of the specific userthat requested the page—this information can be particularly useful, either tothe marketing department, or when you’re trying to diagnose a problem that wasreported by a particular user.
To implement the access log, we need to:
1. Create a call to the Rails internal logging system.
2. Place this call in an appropriate location in our application code so that it’sexecuted for every page. This location must allow the code to determinewhether or not a user is logged in.
We have a location that meets both of these requirements: thefetch_logged_in_user before filter, which lives in the ApplicationControllerclass.
To document the page requests of our users, we use the logger object, which isavailable at any point in a Rails application. logger is used to write a new entryto the environment-specific log file. By default, we operate in the developmentenvironment, so the logger object will write new entries to the bottom of thelog file log/development.log.
Like logging functionality in Java or other platforms, Rails logging can deal witha variety of severity levels. When you log an entry, it’s up to you to decide howsevere the event you’re logging really is. The most common severity levels aredebug, info, warn, and error.
Each of the Rails environments has different default settings for the severity levelsthat are written to the log file. In the production environment, which we’ll coverin depth in Chapter 12, the default is the info level; in the development andtesting environments, events of every level of severity are logged.
Here’s the fetch_logged_in_user action in app/controllers/application.rbwith an added logger statement:
361
Using the Rails Logging Tool

File: 05-application.rb (excerpt)
def fetch_logged_in_user return if session[:user_id].blank? @current_user = User.find_by_id(session[:user_id])logger.info "#{@current_user.login} requested
#{request.request_uri} on #{Time.now}"end
As you can see in the logger call above, we’re using the info severity level tolog these statements in all environments, including production. Specifying theseverity level is simply a matter of calling the appropriately named instancemethod of the logger object.
The string that’s written to the log file is actually a composite of three Rubystatements. First, we’re logging the value of the login attribute for the currentuser:
logger.info "#{@current_user.login} requested #{request.request_uri} on #{Time.now}"
Then, we add the URL that the user requested (without the host and port; you’llsee an example in a second), which is available from the request object that Railsprovides:
logger.info "#{@current_user.login} requested #{request.request_uri} on #{Time.now}"
Lastly, the current date and time are added to the string:
logger.info "#{@current_user.login} requested #{request.request_uri} on #{Time.now}"
With these details in place, every page in our application will make an entry tothe application log file. Here’s a sample session:
patrick requested /story/new on Sun Oct 22 15:46:50 CEST 2006patrick requested / on Sun Oct 22 15:47:24 CEST 2006patrick requested /story/bin on Sun Oct 22 15:47:26 CEST 2006patrick requested /story/show/my-shiny-weblog on Sun Oct 22 15:47:29 CEST 2006patrick requested /story/vote/5 on Sun Oct 22 15:47:38 CEST 2006
The fetch_logged_in_user method exits immediately if the current user hasn’tlogged in, so our log file displays only log entries from pages requested by userswho were logged in when they used Shovell. Of course, you can customize log
362
Chapter 11: Debugging, Testing, and Benchmarking

output to your heart’s content, so if this format doesn’t suit your needs, youcould modify it to be more readable for humans, or more easily parsed by a Rubyscript, for example.
Overcoming Problems in DebuggingWhile we’ve added a considerable number of tests to our application code so far,we certainly haven’t covered every aspect of the application.
Whenever you fix a problem during the development of your application, takea moment to add a test to your test suite that verifies that the problem has beenfixed—just like we did in the last section. Following this approach will ensurethat you never receive another bug report for the same problem.
Another approach is to write a test to verify the problem before you attempt tofix it—this way, you can be sure that as long as your test fails, the problem stillexists. It’s entirely up to you to determine your own approach to the task of de-bugging, but try to not move on from any problem without having added a newtest for it to your test suite.
Testing your ApplicationThe test code that we’ve written so far has dealt mostly with the isolated testingof controller actions and model functionality. To test scenarios that involvemultiple controllers and multiple models, Version 1.1 of Rails introduced a featurecalled integration testing.
Integration TestsAn integration test verifies the behavior of a number of controllers and modelsas a user interacts with the application. Integration tests tell a story about a ficti-tious user of our application—the user’s login process, the links that person fol-lows, and the actions that he or she takes.
When to Use an Integration Test
Some example scenarios that are ideally suited to testing via an integration testinclude:
363
Overcoming Problems in Debugging

❑ A visitor wants to submit a story, so he tries to access the story submissionform. He is redirected to the login form because he hasn’t logged in yet. Afterlogging in using the login form, he’s sent back to the submission form andsubmits a story.
❑ A given user is the fifth user to vote on a particular story. She knows that thethreshold for stories to appear on the front page is five votes, so once she’svoted, she visits the front page to check that the story she voted for appearsthere.
❑ A user submits a new story with a number of tags. After sending in her sub-mission, she proceeds to the tag page for one of the tags she used on hersubmission, and checks that the story does indeed appear in the list.
As you can see, integration tests can be quite specific and detailed; writing Rubytest code to match the level of detail specified by the above scenarios is perfectlyachievable.
Integration tests are highly dependent upon an application’s business logic, soRails doesn’t offer a facility to automatically generate test templates like thosewe created for unit and functional tests. Let’s begin writing our first integrationtest from scratch.
Creating our First Integration Test
First, we’ll create a new file in which to store the test. Then, we’ll set up a testcase to implement the first of the scenarios that we just discussed—a user whois not logged in tries to submit a story. This scenario will be translated into Rubycode.
Every integration test class is stored in the test/integration/ directory. Createa new file named stories_test.rb in this directory, and edit it to appear asfollows:
File: 06-stories_test.rb
require "#{File.dirname(__FILE__)}/../test_helper"class StoriesTest < ActionController::IntegrationTest fixtures :stories, :votes, :users def test_story_submission_with_login get '/story/new' assert_response :redirect follow_redirect! assert_response :success
364
Chapter 11: Debugging, Testing, and Benchmarking

assert_template 'account/login' post '/account/login', :login => 'patrick', :password => 'sekrit' assert_response :redirect follow_redirect! assert_response :success assert_template 'story/new' post 'story/new', :story => { :name => 'Submission from Integration Test', :link => 'http://test.com/' } assert_response :redirect follow_redirect! assert_response :success assert_template 'story/index' endend
On the surface, this test resembles a regular functional test—the test performsan action, then asserts that the results of that action are as expected. In this case,the first action is to request a page; the test then verifies that the response codeand the template used to render the page are as expected; it then continues withthe rest of its actions.
However, instead of the get and post calls being based on specific controllersand their respective actions, page requests in an integration test take standardURLs (from which the domain is omitted, if appropriate). Why? Well, an integ-ration test doesn’t test a controller in complete isolation from its environment—itviews the application as a whole, so other elements of the application, such asrouting and the handover of control from one controller to another, are testedas well.
get '/story/new'
Another new tidbit in this test code is the follow_redirect! statement. At thispoint, the test assumes that a redirect was issued after the last get or post call(which we’re asserting using assert_response, by the way). It also assumes thatthe URL to which a user is redirected—the story submission page—is followedin the test, hence the test’s name.
follow_redirect!
Additionally, when we’re verifying that an action renders the view template weexpected, we must specify the path relative to the app/views/ directory. Remem-ber, we’re not testing in isolation, so there’s no “default” view directory:
365
Integration Tests
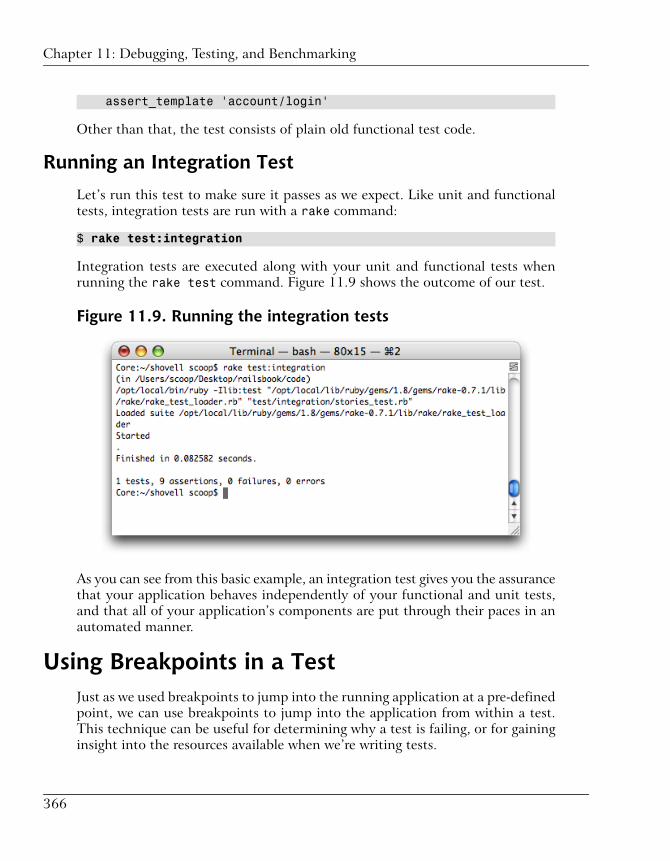
assert_template 'account/login'
Other than that, the test consists of plain old functional test code.
Running an Integration Test
Let’s run this test to make sure it passes as we expect. Like unit and functionaltests, integration tests are run with a rake command:
$ rake test:integration
Integration tests are executed along with your unit and functional tests whenrunning the rake test command. Figure 11.9 shows the outcome of our test.
Figure 11.9. Running the integration tests
As you can see from this basic example, an integration test gives you the assurancethat your application behaves independently of your functional and unit tests,and that all of your application’s components are put through their paces in anautomated manner.
Using Breakpoints in a TestJust as we used breakpoints to jump into the running application at a pre-definedpoint, we can use breakpoints to jump into the application from within a test.This technique can be useful for determining why a test is failing, or for gaininginsight into the resources available when we’re writing tests.
366
Chapter 11: Debugging, Testing, and Benchmarking

Using breakpoints in tests is just as straightforward as using them in regular de-velopment mode: place the breakpoint statement at the point at which you wantexecution to halt. Contrary to the approach we used in development mode,however, you don’t need to use the separate breakpoint client to “connect” toyour application. When you’re using breakpoints in tests, Rails presents you withthe Rails console as soon as the breakpoint statement is encountered.
Here’s an example of a breakpoint in action. I added a breakpoint to the integra-tion test that we built in the previous section (as a reminder, this integration testis stored in test/integration/stories_test.rb):
File: 07-stories_test.rb (excerpt)
class StoriesTest < ActionController::IntegrationTest … def test_story_submission_with_login get '/story/new'
breakpoint … endend
Let’s run our suite of integration tests using the command rake test:integra-tion. We’re presented with the Rails console immediately after the new sessionhas been created—just after the test requests the submission form for the firsttime. At this point, we’re free to explore the environment—below are examplesof the characteristics of our code that can be revealed using the console.
First, let’s look at the cookies that have been set for the user that the test is im-personating:
>> cookies=> {"_session_id"=>"19be51e81372877994bba056d20f671d"}
At the point at which the breakpoint appears, the user has not yet logged in, sono user_id value has been stored in the user’s session:
>> session[:user_id]=> nil
We can log in using the same statement that our test uses a few lines down—thereturn value shown here is the numeric HTTP response code for a redirect (whichhappens to be 302). Enter this all on one line.
367
Using Breakpoints in a Test

>> post '/account/login', :login => 'patrick', :password => 'sekrit'=> 302
The user’s session now contains a user_id value, as this code and Figure 11.10show:
>> session[:user_id]=> 1
Figure 11.10. A breakpoint used in a test
Breakpoints can be a great timesaver if you need to explore the environmentsurrounding an action in order to write better, more comprehensive tests. Withoutusing breakpoints, exploring the environment would only be possible in a limitedfashion—for example, by placing lots of puts statements in your tests and re-running them countless times to get the information you need.
With breakpoints, however, you can interact with your models right there, withoutmodifying huge chunks of code. This process is as easy as possible, which meansthe barriers to writing tests are reduced even further.
368
Chapter 11: Debugging, Testing, and Benchmarking

Revisiting the Rails ConsoleWe’ve used the console script frequently in previous chapters, mainly to explorefeatures as they were being introduced.
The console can also be used to play with your application in headless mode,in which you can interact with your application from the console just as a browserwould interact with it. In conjunction with breakpoints in tests, which we talkedabout in the last section, this technique can be a good way to play around withyour application in anticipation of creating a new integration test once you’veworked out exactly what you want to do.
With integration tests in Rails 1.1 came a new object that’s available by defaultin the console script: the app object. This object can be thought of as providingyou access to an empty integration test. You’re able to get and post to URLs,you have access to the session and cookies containers, and so on—just like aregular integration test.
Let’s have a go at using the app object from the console script. You should re-cognize a lot of the methods that we’re using here from the integration test thatwe built earlier in this chapter.
Initially, we’re interested to know what kind of object app really is:
>> app.class=> ActionController::Integration::Session
Next, let’s fetch the front page of our application using the get action:
>> app.get '/'=> 200
The return value is the HTTP response code that indicates a successful page re-quest. We’ve been using the :successful symbol in its place in most of our testsuntil now.
Next, we’ll use the assigns action to check the instance variable assignmentsthat are made in the action we requested. In this case, we’re looking at thenumber of elements in the @stories array:
>> app.assigns(:stories).size=> 1
369
Revisiting the Rails Console

If we try to fetch the story submission form, we receive a redirect (HTTP code302) as we’re not yet logged in:
>> app.get '/story/new'=> 302
When we receive the redirect, we can look at the URL to which the redirect ispointing using the following construct:
>> app.response.redirect_url=> "http://www.example.com/account/login"
It’s easy to follow the redirect that was just issued using the follow_redirect!method:
>> app.follow_redirect!=> 200
We can also use the post method to log in with a username and password, andfollow the resulting redirect:
>> app.post '/account/login', :login => 'patrick', :password => 'sekrit'=> 302>> app.follow_redirect!=> 200
Note that we didn’t look at the app.response.redirect_url before we acceptedthe redirection. Here’s how you can check the last URL you requested:
>> app.request.request_uri=> "/story/new"
As it is, after all, an integration test, headless mode also provides you with accessto the session and cookies variables:
>> app.cookies=> {"_session_id"=>"c8302c71ec9329174a00a53273a53b8d"}>> app.session[:user_id]=> 1
Figure 11.11 shows a sample session in which the console is used in headlessmode.
370
Chapter 11: Debugging, Testing, and Benchmarking

Figure 11.11. The console in headless mode
As you can see, headless mode is a great tool for checking out the possible waysin which you might develop an integration test. Once you’re satisfied with yourfindings, you can open up your text editor and transform your console resultsinto an automated test. Easy!
Benchmarking your ApplicationAs software developers, it’s our job to know which part of our application is doingwhat—if an error arises, we can jump right in and fix it. However, knowing howlong each part of our application is taking to perform its job is a completely dif-ferent story.
Benchmarking, in software terms, is the process of measuring an application’sperformance, and taking steps to improve it based on that initial measurement.The benchmarking process usually involves profiling the application—monitoringit to determine where bottlenecks are occurring—before any changes are madeto improve the application’s performance.
371
Benchmarking your Application
While I won’t cover the profiling and benchmarking of a Rails application inevery gory detail (it’s a topic to which an entire book could easily be devoted),I’ll give you an introduction to the tools that are available for the job. Keep inmind that your first Rails application is unlikely to have performance problemsin its early stages—the objective with your first application (or at least the firstversion of your application) should be to get the functionality right the first time;then you can worry about making it fast.
Taking Benchmarks from Log FilesWhen it’s running in development and testing modes, Rails provides a varietyof benchmarking information in its log files, as we saw briefly in Chapter 5. Foreach request that’s served by the application, Rails notes all of the templatesrendered, database queries performed, and the total time that it took to servethe request.
Let’s examine a sample request to understand what each of the log entries means.This example deals with a request for the Shovell homepage:
Processing StoryController#index (for 127.0.0.1 at 2006-09-13 12:03:52) [GET]
This line represents the start of the block of logging for a single page request. Itincludes:
❑ the names of the controller and action
❑ the IP address of the client requesting the page (127.0.0.1 being the equival-ent of localhost)
❑ the time the request came in
❑ the request method that was used (GET in this case)
Rails also logs the session ID of the request, as well as the parameters that theuser’s browser provided with the request:
Session ID: c8302c71ec9329174a00a53273a53b8dParameters: {"action"=>"index", "controller"=>"story"}
Each of the next three entries in our sample log file corresponds to a databasequery issued by the application. Each entry lists the time (in seconds) that theapplication took to execute the query:
372
Chapter 11: Debugging, Testing, and Benchmarking

Story Columns (0.001504) SHOW FIELDS FROM storiesSQL (0.000659) SELECT count(*) AS count_all FROM stories WHERE (votes_count >= 5) Story Load (0.000224) SELECT * FROM stories WHERE (votes_count >= 5) ORDER BY id DESC LIMIT 0, 10
In the first of these log entries, Rails has asked the database for the column in-formation of the stories table. The second query represents a request made bythe Rails pagination helper, which simplifies the handling of large result sets. Thefinal line is a simple query to display Story data.
Each of the following lines corresponds to a rendered template; when Rails rendersa layout template, it explicitly says so by logging Rendering within:
Rendering within layouts/applicationRendering story/index
A summary entry appears at the end of each page request:
Completed in 0.05800 (17 reqs/sec) | Rendering: 0.00893 (15%) | DB: 0.00468 (8%) | 200 OK [http://www.example.com/]
This summary contains totals for the time spent by each of the areas of the ap-plication that were responsible for serving the request. The total time that wastaken to serve the request is mentioned along with the potential number of requeststo this particular action that your application might be able to handle per second:
Completed in 0.05800 (17 reqs/sec) | Rendering: 0.00893 (15%) | DB: 0.00468 (8%) | 200 OK [http://www.example.com/]
This value should be taken with a grain of salt, however—in reality, calculatingan accurate estimate of the number of requests that an application can handlein parallel involves more than simply dividing 60 seconds by the time it takes toserve a single request.
Additionally, Rails tells us the amount of time that was spent rendering templatesand talking to the database—these figures are listed both in seconds, and as per-centages of the total time that was spent completing the task:
Completed in 0.05800 (17 reqs/sec) | Rendering: 0.00893 (15%) |DB: 0.00468 (8%) | 200 OK [http://www.example.com/]
You don’t need to be a mathematician to figure out that a whopping 77% ismissing from these numbers! One of the reasons for this difference is that serving
373
Taking Benchmarks from Log Files

the request took only a couple of milliseconds. These numbers come from myversion of Shovell, which is quite a small application, and the benchmark calcu-lation gets a little wacky when it calculates time information using such smallnumbers. In the meantime, Figure 11.12 shows the log file from a complete pagerequest:
Figure 11.12. Benchmarking information in the log file
For all the comfort and speed that Rails provides developers, it does have itsdrawbacks. The framework certainly requires a large amount of CPU time in orderto do its job of making your life easy, which is another explanation for the missingmilliseconds in the timing calculation above. However, the overhead used by theframework won’t necessarily increase greatly as your code becomes more complic-ated, so with a larger application, these numbers become more accurate.
In any case, it’s important to take a look at your log files every now and then toget an idea of your application’s performance. As I mentioned, take these numberswith a grain of salt—learn to interpret them by changing your code and comparingthe new numbers with previous incarnations of the code. This will help you gain
374
Chapter 11: Debugging, Testing, and Benchmarking

a feel for how your changes affect the speed of your application. You should not,however, use them as absolute measures.
Manual BenchmarkingWhile the default information presented by the Rails log files is great forproviding an overview of how long a certain action takes, the log files can’t providetiming information for a specific group of code statements. For this purpose, Railsprovides the benchmark class method, which you can wrap around any block ofcode that you’d like to benchmark.
As an example, let’s add benchmarking information for the story fetcher imple-mented in the fetch_stories method of our StoryController, which is locatedin app/controllers/story_controller.rb:
File: 08-story_controller.rb (excerpt)
class StoryController < ApplicationController … def fetch_stories(conditions)
self.class.benchmark('Fetching stories') do @stories = Story.find :all, :order => 'id DESC', :conditions => conditions
end endend
As you can see, the benchmark class method simply wraps around the Story.findstatement. As benchmark is a class method, rather than an instance method, wehave to call it with a prefix of self.class:
self.class.benchmark('Fetching stories') do … end
The textual argument provided to benchmark is the text that Rails writes to thelog file, along with the timing information:
self.class.benchmark('Fetching stories') do … end
When you request Shovell’s front page or upcoming stories queue now (bothpages make use of the fetch_stories method we just modified), you should see
375
Manual Benchmarking

that the corresponding benchmark entries are added to the log file at log/devel-opment.log. The sample log file in Figure 11.13 shows how this looks.
Figure 11.13. The output from manual benchmarking
Using manual benchmarks in this way can give you a feel for the amount of timerequired to execute certain parts of your code. Additionally, benchmark logs eventswith a severity of debug by default—as production mode does not log statementsthat have a severity of debug, benchmark statements in your code will not becalculated and won’t slow your production application down.
SummaryIn this chapter, we’ve dealt with some of the less-glamorous—but very helpful—as-pects of software development. We used debug statements to inspect certainobjects in our views, we used the log files written by Rails to document certainoccurrences in Shovell, and we used breakpoints to explore our application atrun-time.
We also covered the topic of integration tests—broad, scenario-based tests thathave the ability to go beyond the isolated testing of models and controllers.
Finally, we talked briefly about the benchmarks that Rails provides by default,and explored a manual approach to benchmarking a specific group of statements.
In the next (and final!) chapter, we’ll take Shovell into production mode anddiscuss the options available for deploying a Rails application for the whole worldto use!
376
Chapter 11: Debugging, Testing, and Benchmarking
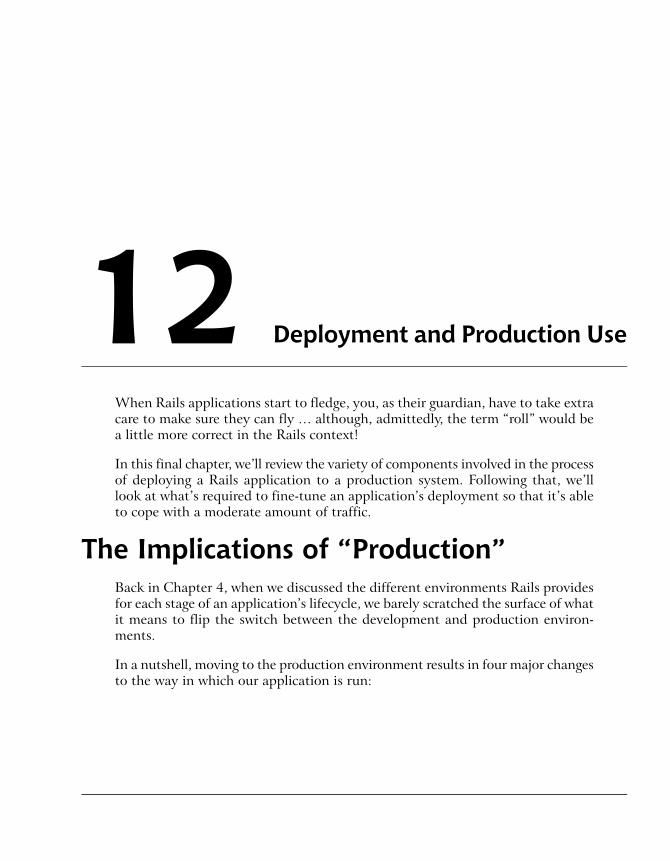
Deployment and Production Use12When Rails applications start to fledge, you, as their guardian, have to take extracare to make sure they can fly … although, admittedly, the term “roll” would bea little more correct in the Rails context!
In this final chapter, we’ll review the variety of components involved in the processof deploying a Rails application to a production system. Following that, we’lllook at what’s required to fine-tune an application’s deployment so that it’s ableto cope with a moderate amount of traffic.
The Implications of “Production”Back in Chapter 4, when we discussed the different environments Rails providesfor each stage of an application’s lifecycle, we barely scratched the surface of whatit means to flip the switch between the development and production environ-ments.
In a nutshell, moving to the production environment results in four major changesto the way in which our application is run:

The Ruby classes that make up your application are no longer reloaded oneach request.
Ruby’s reloading of each class on each request is a nice feature of the devel-opment environment, because it allows you to make rapid changes to yourapplication code and see the effects immediately. However, when your applic-ation’s in production mode, the primary requirement is that it’s fast, whichisn’t a goal that can be accomplished by reloading Ruby classes over and overagain. To gain the effects of any changes you make to code while the applic-ation’s in production mode, you’ll need to restart the application. The onlyexceptions to this rule are view templates, which are just that—templates foroutputting your application’s data. You don’t need to restart your applicationin order to gain the effects of the changes you make to templates.
The production environment doesn’t log every single database communic-ation that’s executed by your application.
This restriction was put in place for performance reasons, and to save youfrom buying new hard drives just to store your log files. In the productionenvironment, Rails logs items with a severity level of info or higher by default(skipping those with a severity of debug). While it might make sense to skipitems with a severity of info later on, when our application first enters pro-duction we’re still at a point at which the inner workings of our applicationare of interest, so we’ll leave the default level of reporting unchanged for now.
Your application’s users receive short, helpful error messages; they’re notpresented with the stack trace.
Obviously, the beautifully detailed stack trace that you investigate when youfind an error in your code is not something you want users of your applicationto see. Fear not! Rails never throws stack traces at users while it’s in produc-tion mode. Instead, you can use the Exception Notification plugin to dispatchan email to the administrators of the system to notify them of a potentialproblem in the code.1 The email includes the same detailed stack trace you’dsee in your browser if you were still in development, as Figure 12.1 illustrates.With the error notification taken care of, you can simply use a generic errorpage within your application to let users know that an error has occurred andthe administrators have been notified.
1 http://dev.rubyonrails.org/browser/plugins/exception_notification
378
Chapter 12: Deployment and Production Use

Figure 12.1. An example email resulting from the ExceptionNotification plugin
Caching is available for pages, actions, and page fragments.To improve the performance of your application, you can cache its pages,actions, and even fragments of pages. This means that the fully rendered page(or fragment) is written to the file system as well as being displayed in theuser’s browser. The next request that’s responded to by this page, action, orfragment is served without the data that it contains needing to be recalculated.Rails’s caching features are especially useful in situations in which your pagesdon’t contain user-specific content, and everyone sees the same pages.
In the following sections, we’ll talk about the server software components thatare well suited for production use and take a look at what we can do to makeShovell happy and healthy in a production environment.
Choosing a Production EnvironmentUntil now, we’ve trusted WEBrick to serve up our application. So why wouldn’twe just stick with it as we move Shovell to our production system?
There are a couple of reasons: first of all, WEBrick is only capable of serving asingle request at a time. If multiple users simultaneously access a Rails applicationserved by WEBrick, their requests will be queued and dealt with one at a time,in turn. Sooner or later, this queue will become a huge performance problem.
Additionally, WEBrick isn’t the best option for serving static content such asCSS, JavaScript, or images. Each of these static elements would have to go throughthe same processing chain (and suffer the same single-request-at-a-time limitation)as would a request to your Rails application for a dynamically generated page.These limitations render WEBrick unsuitable for production use.
379
Choosing a Production Environment
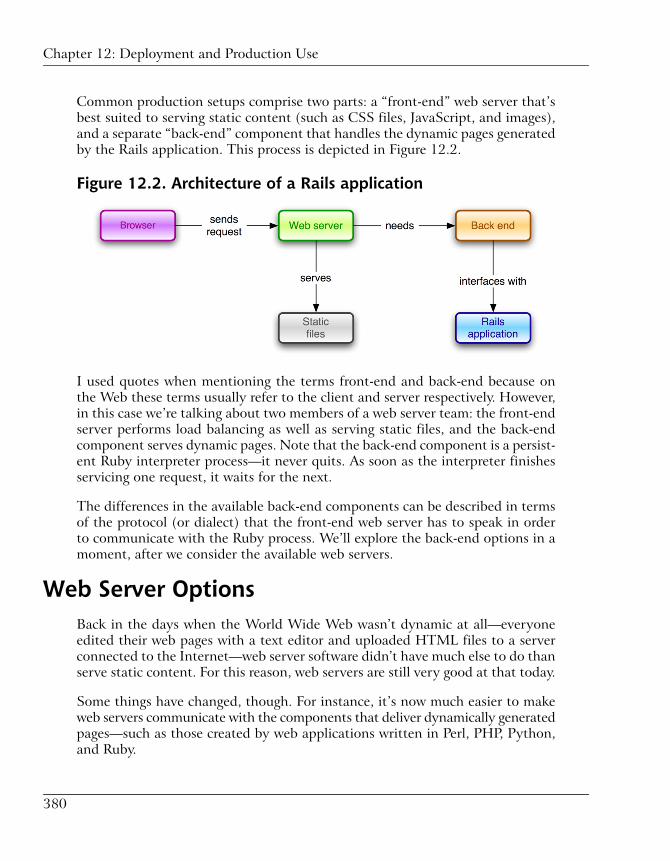
Common production setups comprise two parts: a “front-end” web server that’sbest suited to serving static content (such as CSS files, JavaScript, and images),and a separate “back-end” component that handles the dynamic pages generatedby the Rails application. This process is depicted in Figure 12.2.
Figure 12.2. Architecture of a Rails application
I used quotes when mentioning the terms front-end and back-end because onthe Web these terms usually refer to the client and server respectively. However,in this case we’re talking about two members of a web server team: the front-endserver performs load balancing as well as serving static files, and the back-endcomponent serves dynamic pages. Note that the back-end component is a persist-ent Ruby interpreter process—it never quits. As soon as the interpreter finishesservicing one request, it waits for the next.
The differences in the available back-end components can be described in termsof the protocol (or dialect) that the front-end web server has to speak in orderto communicate with the Ruby process. We’ll explore the back-end options in amoment, after we consider the available web servers.
Web Server OptionsBack in the days when the World Wide Web wasn’t dynamic at all—everyoneedited their web pages with a text editor and uploaded HTML files to a serverconnected to the Internet—web server software didn’t have much else to do thanserve static content. For this reason, web servers are still very good at that today.
Some things have changed, though. For instance, it’s now much easier to makeweb servers communicate with the components that deliver dynamically generatedpages—such as those created by web applications written in Perl, PHP, Python,and Ruby.
380
Chapter 12: Deployment and Production Use

Let’s take a look at three web server software packages that are available to usewith Rails applications under the terms of various free software licenses.2 Severalcommercial web servers that support Rails applications are also available, but forthe sake of simplicity and relevance, we’ll only be looking at open source options.
Apache
With 62.5% market share, the free Apache web server written and maintainedby the Apache Software Foundation is certainly the de-facto standard on the webserver software market.3 Apache is a good all-purpose, cross-platform web server.It’s used by most web hosting providers, and therefore will be the focus of thehands-on part of this chapter.
Apache has many strengths, one of which is the huge number of extensions thatare available to expand its feature set. It also has a robust interface for back-endservices, a useful URL rewriter, and extensive logging capabilities. It’s availableas free software under the Apache license4.
lightTPD
Often abbreviated to “lighty” to keep tongues intact, lightTPD is one of the morerecent arrivals in the ever-expanding web server software market.5 It was firstcreated in 2003 by Jan Kneschke as a proof-of-concept that web servers could besecure and fast while treating kindly the resources of the hosting server. Sincethen, lightTPD has become a very popular choice among Rails developers whorun it on their own servers; hosting companies, on the other hand, haven’t yetembraced it for use in shared hosting environments.
lightTPD is free software under the BSD (Berkeley Software Distribution) license.6
Apart from needing very little memory and CPU to do its job, lightTPD has ex-cellent support for SSL, a flexible configuration file, and virtual-hosting capabil-ities.
2 When we say “free software,” we’re referring to free software as defined by the Free SoftwareFoundation [http://www.fsf.org/licensing/essays/free-sw.html].3 http://httpd.apache.org/4 http://www.apache.org/licenses/5 http://www.lighttpd.net/6 http://www.opensource.org/licenses/bsd-license.php
381
Web Server Options

nginx
Another relatively new player in this market is nginx (pronounced “engine x”),a high-performance HTTP and proxy server that was originally developed by IgorSysoev to power several high-traffic sites in Russia.7 Due to the fact that it onlyrecently appeared on the radar outside of Russia, English documentation is sparseat the time of writing. However, many translation efforts have commenced.
Recent performance evaluations have revealed that nginx is indeed the leader ofthe pack in terms of raw speed, with Apache and lightTPD scoring second andthird place, respectively. However, due to the lack of English documentation,many developers and hosting companies may not consider a switch to nginx forsome time to come.
Apart from outstanding performance, nginx also offers excellent proxy and cachingcapabilities, SSL support, and flexible configuration options. nginx is also availableunder the BSD license.
Back-end OptionsAs we’ve already discussed, regular web servers excel at serving static files. How-ever, in order to interface with our Rails application and handle dynamicallygenerated pages, they need a server software component that’s specifically designedfor the task. This may be a software module that’s shipped with the web server,or it may be one that’s available as a third-party extension. Here’s a list of theback-end component options that are currently available for Rails applications.
The mod_ruby Extension
Exclusively available for use on the Apache web server, the mod_ruby extensionprovides an embedded Ruby interpreter that executes Ruby (and Rails) scripts,which, in turn, serve dynamically generated content to the outside world.8
mod_ruby has never really been used as a production-quality back end for Railsapplications because its architecture entails some major drawbacks that preventmultiple Rails applications from being run on the same server. This makes it anespecially poor choice for shared hosting environments.
7 http://nginx.net/8 http://www.modruby.net/
382
Chapter 12: Deployment and Production Use

The SCGI Protocol
An abbreviation for Simple Common Gateway Interface, the SCGI protocol iscommonly used to serve dynamic content provided by Python web applications.9
It can also be used to serve content provided by Rails applications, but hasn’tbeen widely adopted for this purpose.
Implementations of SCGI are available as a third-party extension for the Apacheweb server and support for the protocol is built into the lightTPD web server.
The FastCGI Protocol
Until recently, FastCGI was the de-facto standard for deploying Rails applica-tions.10 FastCGI, a variation of the Common Gateway Interface (CGI), operatesby starting one or more persistent processes of the language interpreter (in ourcase, Ruby) when the application in question is started up. The web server thencommunicates with these processes through the FastCGI protocol to serve dynamicpages.
FastCGI is often used when the machine the web server is running on is separatefrom the machines running the application. The FastCGI processes are startedon the application servers, and the web server is instructed to connect to thoseprocesses using TCP/IP.
Support for FastCGI is provided by third-party extensions for the Apache webserver and is built into the lightTPD web server, among others. Due to limitationsthat are present in the Apache extensions, FastCGI and Apache don’t get alongvery well at times. Despite its excellent performance, FastCGI has been the victimof a number of stability problems, and is definitely a configuration headache.
Mongrel
The new kid on the block is Mongrel, created by Zed A. Shaw.11 Mongrel usesa different approach to interface with the web server. Unlike options such asSCGI and FastCGI, both of which use a rather complex communication protocol,Mongrel uses plain HTTP.
9 http://python.ca/nas/scgi/10 http://www.fastcgi.com/11 http://mongrel.rubyforge.org/
383
Back-end Options

Due to Mongrel’s pure-HTTP nature, many have used it to replace WEBrick intheir development setups. While its performance isn’t quite on par with that ofFastCGI, it definitely outperforms WEBrick, boasts production-level robustness,and is really easy to use for Rails deployment.
Mongrel is compatible with every web server that’s equipped with a proxy moduleto pass incoming HTTP requests on to other services. Apache, lightTPD, andnginx all have this capability.
Because Mongrel’s so easy to install and use, and doesn’t require complex proto-cols to interface with your preferred web server, it’s an ideal choice for the hands-on part of this chapter. So, let’s learn how to deploy Shovell using Apache andMongrel!
Deploying ShovellAs you’ve seen, Rails applications can be deployed using various combinationsof web servers and back-end services. Since most hosting providers use the Apacheweb server, and Mongrel is the simplest solution with decent performance (itdefinitely has the best speed to complexity ratio, bar none), we’ll use this com-bination to deploy the Shovell application.
The hands-on part of this chapter will consist of a process that contains manysteps. Initially, we’ll install Mongrel using RubyGems, and use Mongrel insteadof WEBrick in development mode. This will give us an initial impression of whatusing Mongrel is all about.
Our next task will be to configure Apache as a proxy to Mongrel to serve ourapplication in production mode. This setup will be sufficient to handle a moderateamount of traffic to our application.
Step 1: Installing MongrelThe simplest of all the steps in the deployment process is the installation ofMongrel using the RubyGems system. As I mentioned above, we’ll begin byswitching over to Mongrel on our local machine, replacing WEBrick as the devel-opment application server.12
12 You might be wondering why we haven’t been using Mongrel instead of WEBrick from the verybeginning of this book. The reason is that, at the time of writing, Mongrel is a separate install and Ididn’t want to make matters more complicated than they needed to be when you were just findingyour feet with Ruby.
384
Chapter 12: Deployment and Production Use

Execute the following command to install the Mongrel gem. It downloads thegem from the RubyForge servers, then installs it on your system along with itsdependencies:
$ gem install mongrel --include-dependencies
Mac OS X users: You might need to use the sudo command to gain admin-istrative privileges when running the command above (sudogem install mongrel).
Windows users: Make sure you start the Ruby console from the InstantRails application—otherwise, the gem executable will notbe within your search path.
Unfortunately, the gem installation will throw a huge list at you. The list containstwo entries for every version of Mongrel that was ever released: one for Windows(labeled “win32”) and one for all other operating systems (labeled “ruby”). I en-courage you to choose the most recent release that’s appropriate for your platform.If you use a Mac, your screen will appear similar to the display in Figure 12.3.
Figure 12.3. Installing Mongrel
385
Step 1: Installing Mongrel

After you enter the number that’s appropriate to the release you want, and hitthe Enter key, the RubyGems system will download the requested packages fromthe RubyForge site. If yours is a Windows system, the download will comprise asingle package that contains a ready-to-use version of Mongrel. For all other op-erating systems, Mongrel will be freshly compiled for your computer; two addi-tional packages on which Mongrel depends will also be installed. The completedinstallation will appear as shown in Figure 12.4.
Figure 12.4. Completing the Mongrel installation
At this point, a new command is available on your system: mongrel_rails. We’lluse this command to start and stop the Mongrel server. It can be viewed as a re-placement for ruby script/server, which we’ve been using to start the WEBrickserver.
Make sure that no WEBrick processes continue to lurk on your system, thennavigate to the application root in your console window. Execute the followingcommand to start Mongrel for Shovell in development mode:
$ mongrel_rails start -B
386
Chapter 12: Deployment and Production Use
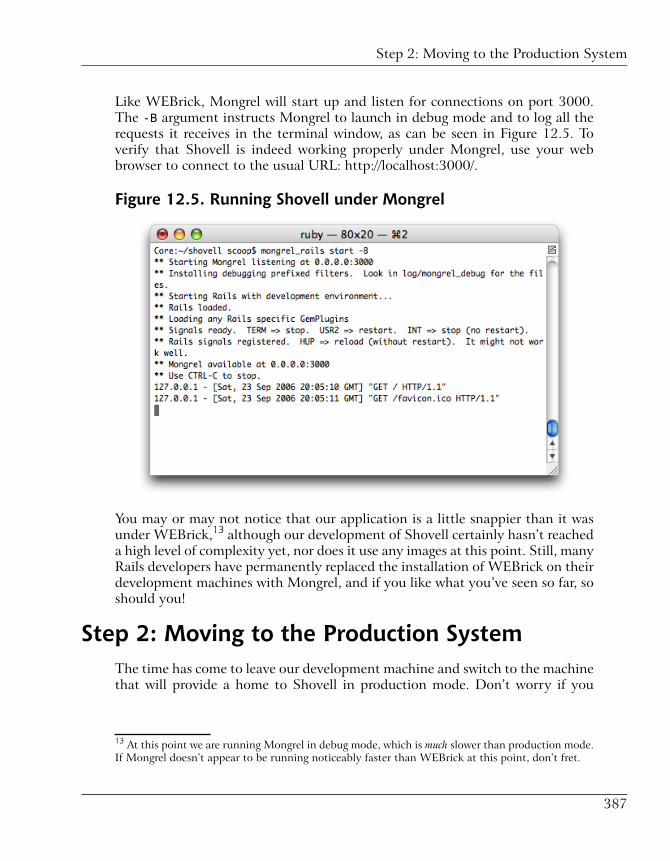
Like WEBrick, Mongrel will start up and listen for connections on port 3000.The -B argument instructs Mongrel to launch in debug mode and to log all therequests it receives in the terminal window, as can be seen in Figure 12.5. Toverify that Shovell is indeed working properly under Mongrel, use your webbrowser to connect to the usual URL: http://localhost:3000/.
Figure 12.5. Running Shovell under Mongrel
You may or may not notice that our application is a little snappier than it wasunder WEBrick,13 although our development of Shovell certainly hasn’t reacheda high level of complexity yet, nor does it use any images at this point. Still, manyRails developers have permanently replaced the installation of WEBrick on theirdevelopment machines with Mongrel, and if you like what you’ve seen so far, soshould you!
Step 2: Moving to the Production SystemThe time has come to leave our development machine and switch to the machinethat will provide a home to Shovell in production mode. Don’t worry if you
13 At this point we are running Mongrel in debug mode, which is much slower than production mode.If Mongrel doesn’t appear to be running noticeably faster than WEBrick at this point, don’t fret.
387
Step 2: Moving to the Production System

haven’t found a hosting provider to host your Rails applications yet—you canjust keep this section in mind for later reference.
Due to the fact that there are countless variations of server setups, we’ll have toassume a few things for the sake of this walk-through introduction, including thefollowing:
❑ The operating system of the server is Linux.
❑ You either have superuser privileges (root) on the system, or know someonewho does (even if that’s the tech support guy from your hosting provider).
❑ Ruby and Rails have been installed on the server using a similar process tothat outlined in the Linux section of Chapter 3.
❑ Mongrel has been installed using the gem install mongrel command de-scribed earlier in this chapter.
❑ MySQL has been installed and your databases (at least, the one configuredfor the production environment in config/database.yml) have been created.
❑ Apache Version 2.2 is installed and running.14
❑ The Apache configuration is stored in the directory /etc/httpd/ (if it’s locatedelsewhere, you’ll need to adapt the pathnames I mention).
❑ The Apache installation has the following extension modules available andenabled: mod_proxy, mod_proxy_balancer, mod_deflate, and mod_rewrite.
❑ You have access to the production system through a remote shell, preferablySecure Shell (SSH).
❑ You have the ability to upload files to the production system through eitherFTP or SSH.
❑ You have an available Internet domain name or a subdomain15 on which tohost your application.
14 Versions 1.3 and 2.0 should work to a certain extent. However, the proxy_balance extension isonly available in Version 2.2. Even the Apache Foundation recommends Version 2.2 as the best youcan get, so why bother with anything else?15 Assuming domain.com is your domain name, shovell.domain.com would be a subdomainof it.
388
Chapter 12: Deployment and Production Use

Okay, now that we have our assumptions clear, we can begin.
As we’re starting out with a totally empty database on the production system,we need to recreate the database structure we’ve established on our developmentmachine; you’ll find it in the file db/schema.rb. Just to be sure that this file isup to date, run the following rake task on your development machine before youstart to copy the files:
$ rake db:schema:dump
Assuming you see no errors when executing this command, your schema.rb fileshould now be up to date.
At this point, we need to transfer our application code to the production system.As I mentioned, we can achieve this task in a variety of ways. I’ll use the filetransfer capabilities provided by the SSH protocol to transfer the files; anothercommon option would involve the use of FTP.
In any case, you need to copy the full directory structure that houses Shovell tothe production system (minus the files from the log and tmp subdirectories,which contain output from the application in development mode; that outputisn’t required to run the application in production mode). Where you place theapplication’s directory structure doesn’t really matter, either. I’ve put mine intothe subdirectory rails in my user account’s home directory, as depicted in Fig-ure 12.6, so the full path to my application is /home/scoop/rails/shovell.
Once we’ve finished transferring the application code, we need to set up thedatabase structure on the production system. Again, this can be accomplishedwith a rake task. However, this time, we need to prepare the production part ofthe environment, instead of the development and test parts.
389
Step 2: Moving to the Production System

Figure 12.6. Transferring Shovell to the production system
All Rails scripts (in the script subdirectory) and all available rake tasks in yourapplication will check whether an environment has been specified; if it hasn’t,these scripts and tasks will assume you’re using the development environment.To identify explicitly the environment in which you’d like to work, you mustdeclare the RAILS_ENV environment variable, as illustrated in Figure 12.7.
Let’s set up the database structure in the production database (which is shov-ell_production, as configured in config/database.yml). Log into the productionsystem through a remote shell like SSH, and execute the following command:16
$ rake db:schema:load RAILS_ENV=production
16 If you’re wondering why we’re not using the rake db:migrate command that we used duringdevelopment to bring our database up to date, the reason is that once the total number of migrationsbecomes sizeable, iterating over every one to deploy an application can take quite a long time!
390
Chapter 12: Deployment and Production Use

Figure 12.7. Creating the database structure
By specifying RAILS_ENV=production on the rake command line, we’re instructingrake to operate on the production database (and environment) instead of thedevelopment equivalents.
This environment variable is an application-wide, but slightly tedious, methodof specifying the desired environment. A few of the common Rails commands—forexample, ruby script/console—also take the environment name as a directargument. Let’s use the Rails console now to create an initial user for the produc-tion version of Shovell:
$ ruby script/console production
The message Loading production environment, which displays when we executethis command, indicates that the console session is connecting to the productiondatabase. Next, let’s create a new User object; the results of this command areshown in Figure 12.8:
>> User.create :login => 'patrick', :password => 'sekrit'=> #<User:…>
391
Step 2: Moving to the Production System

Figure 12.8. Creating a first production user
Armed with a ready-made production database, we can now launch Mongrelsimilarly to the way we launched it on our development machine in the sectioncalled “Step 1: Installing Mongrel”. This will ensure that both Mongrel and theapplication behind it are working on the production system.
Move to the application root (/home/scoop/rails/shovell, in my case) andexecute the following command:
$ mongrel_rails start -e production
Yes, that’s yet another syntax for specifying the environment we want to be in!
Mongrel will fire up and wait for requests on port 3000, just as it did on the de-velopment machine. However, now our application is running in the productionenvironment, and will be quite a bit faster than it was in the development envir-onment.
Depending on the firewall configurations employed by your hosting provider,you may or may not be able to connect to this port from the Internet. On a sharedhost, you might not even be able to start Mongrel on port 3000—it might be re-served for another user. In this case, you’ll need to ask your web host’s techsupport team for a port number on which you can run your Rails application,then pass this port number to Mongrel using the -p argument:
$ mongrel_rails start -e production -p 3333
Let’s see how your application looks in production mode. Fire up a web browserand open http://<hostname>:3000/, where hostname is the fully qualified domainname of the production system. In my case, for example, I’ll connect tohttp://poocs.net:3000/.
392
Chapter 12: Deployment and Production Use
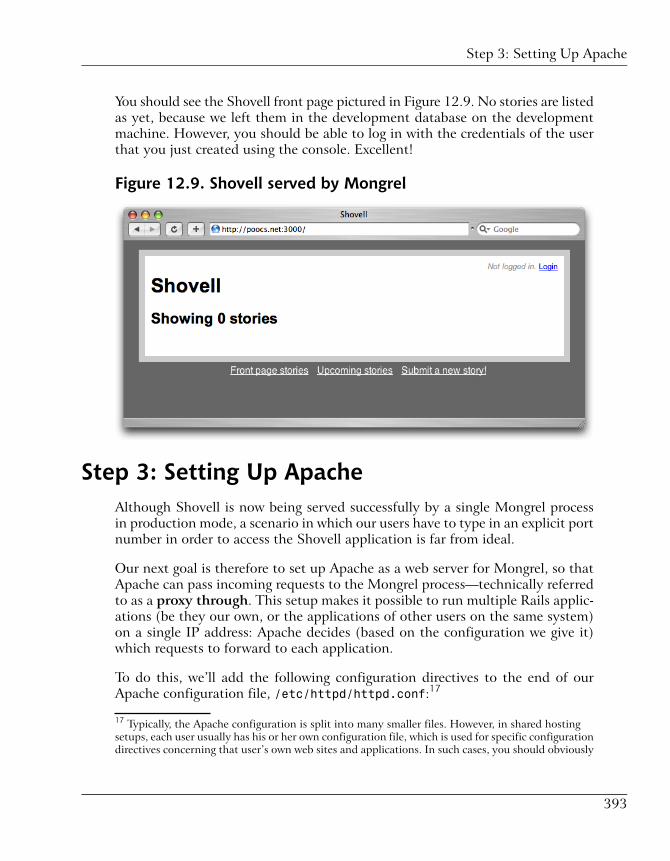
You should see the Shovell front page pictured in Figure 12.9. No stories are listedas yet, because we left them in the development database on the developmentmachine. However, you should be able to log in with the credentials of the userthat you just created using the console. Excellent!
Figure 12.9. Shovell served by Mongrel
Step 3: Setting Up ApacheAlthough Shovell is now being served successfully by a single Mongrel processin production mode, a scenario in which our users have to type in an explicit portnumber in order to access the Shovell application is far from ideal.
Our next goal is therefore to set up Apache as a web server for Mongrel, so thatApache can pass incoming requests to the Mongrel process—technically referredto as a proxy through. This setup makes it possible to run multiple Rails applic-ations (be they our own, or the applications of other users on the same system)on a single IP address: Apache decides (based on the configuration we give it)which requests to forward to each application.
To do this, we’ll add the following configuration directives to the end of ourApache configuration file, /etc/httpd/httpd.conf:17
17 Typically, the Apache configuration is split into many smaller files. However, in shared hostingsetups, each user usually has his or her own configuration file, which is used for specific configurationdirectives concerning that user’s own web sites and applications. In such cases, you should obviously
393
Step 3: Setting Up Apache

File: httpd.conf (excerpt)
<VirtualHost *:80> ServerName shovell.poocs.net ProxyRequests Off <Proxy *> Order deny,allow Allow from all </Proxy> ProxyPass / http://localhost:3000/ ProxyPassReverse / http://localhost:3000/</VirtualHost>
This is the simplest of all possible proxy configurations. Assuming that we’re usingthe shovell subdomain of poocs.net, we instruct Apache to forward every requestthat comes in directly to the Mongrel process running on port 3000.
Don’t be confused by the ProxyRequests Off directive. Apache’s proxy modulecan be used as a forward and as a reverse proxy. A forwarding proxy acts as amiddleman for your web browser when it connects to sites on the Internet(something you might have used in a corporate environment). The proxy answersonly those requests that originate from a known group of browsers (usuallyidentified by their IP addresses) and forwards them on to an arbitrary numberof web servers. A reverse proxy, on the other hand, serves as a front-end to aknown service, such as our Mongrel process. It handles incoming requests froman arbitrary number of browsers that might be scattered all over the planet.
The ProxyRequests Off directive turns off the forwarding proxy capabilities,while the ProxyPass and ProxyPassReverse directives turn the reverse proxycapabilities on.
To activate these configuration changes, we need to instruct Apache to reload itsconfiguration file, which we usually achieve using the command apachectl re-load.
For this setup to work flawlessly, we need to make sure the Mongrel processcontinues to run at all times, without us having to keep the terminal windowopen. Before the Linux and Unix folks scream “Use screen!,” let me tell you thatwe can run Mongrel as a background process by invoking the mongrel_railscommand with the -d argument, like so:
$ mongrel_rails start -d -e production
put the directives mentioned in this section into the appropriate configuration file, rather than usingthe global one.
394
Chapter 12: Deployment and Production Use

Now that this has been executed, Mongrel is happily sitting in the background,waiting for requests to reach it. If you need to stop or restart your Mongrel process(restarting is especially useful if you made changes to the application code, whicha Rails application in production mode can’t reload on the fly), use the appropriatevariant of the mongrel_rails command:
$ mongrel_rails stop$ mongrel_rails restart
Sure enough, connecting to http://shovell.poocs.net/ with a browser displays theShovell front page shown in Figure 12.10. Well done: you’ve successfully deployedyour application!
Figure 12.10. Shovell proxied through Apache
Alternatives for Session StorageWhen you start thinking about performance and load distribution, the next lo-gical step is to consider the performance of the session container.
As we discussed in Chapter 9, Rails creates a new session for every visitor, loggedin or not, by default. Each session is stored in a single file (one file is created persession) in the application’s tmp subdirectory.
395
Alternatives for Session Storage

However, the situation becomes awkward when multiple processes write to thesame file at the same time—a problem that’s encountered when requests thatuse the same session are processed simultaneously by separate Mongrel processes.
For this reason, Rails supports alternative session storage containers, two of whichwe’ll look at in this section.
The ActiveRecord Store Session ContainerThe most popular option after the file-based default, the ActiveRecord Storesession container stores all session data safely within a table in your database.While this is not as fast as other options, using ActiveRecord Store takes careof the problems that arise when multiple processes attempt to access a single file.It also allows sessions to be accessed from multiple machines—an essential featurefor applications that are large enough to require multiple servers. These abilitiesmake ActiveRecord Store the preferred option for applications that attract low-to-medium levels of traffic, so let’s configure Shovell to use it now.
First, we need to make room in our database for the session data. Rails providesa shortcut for this job in the form of a rake task, and in so doing removes anyneed for manual table creation. As we’re still on the production system, we needto include the production environment option explicitly:
$ rake db:sessions:create RAILS_ENV=production
This command will create a new migration file that contains the Ruby code ne-cessary to create an appropriate sessions table that will hold our session data.The migration can then be applied using the regular rake task db:migrate:
$ rake db:migrate RAILS_ENV=production
Figure 12.11 shows the output of these migrations being applied.
Next, we need to let Rails know that we want to use the ActiveRecord Storeinstead of the default file-based session container. We can tell it the good newsvia the config/environment.rb file; simply remove the comment mark in frontof the following line:
config.action_controller.session_store = :active_record_store
396
Chapter 12: Deployment and Production Use

Figure 12.11. Creating the sessions table
As soon as you restart the application (using mongrel_rails restart), sessionswill be stored in the SQL database.
Be aware that the changes you make to config/environment.rb will have globaleffects. If you want to limit this configuration change to a specific environment(for example, you want it to affect the production environment only), add theline above to the environment-specific configuration file located at config/en-vironments/production.rb. If you make the change on your development ma-chine (or copy the application code back and forth between it and your productionserver), be sure to run the migration in order to add the sessions table to yourdevelopment database.
The MemCached Store Session ContainerAnother popular option for session storage is the MemCached Store session storagecontainer.18 With MemCached, a piece of software originally developed by DangaInteractive for the LiveJournal blog-hosting service, sessions are stored in theavailable memory on your server—nothing is ever written to disk.
This approach is obviously a lot faster than writing each session to the hard diskor to a database (which will eventually be written to a hard disk as well). However,the setup instructions for MemCached are slightly more complicated than the
18 http://www.danga.com/memcached/
397
The MemCached Store Session Container

ActiveRecord Store option we saw above, and the software provides little extravalue for an application the size of Shovell. I’ll leave you to review the setup in-structions on the Ruby on Rails Wiki.19
Further ReadingWe’ve done it! Our application is ready for initial public consumption, and thehands-on parts of this book have come to an end. However, I’d like to alert youto a few additional Rails features and extensions that may come in handy in yourfuture encounters with Rails applications.
CachingDepending on the project budget and the availability of hardware, every Railsapplication can only serve so many dynamic pages at any given time. If your apphappens to receive traffic numbers that exceed these limits, you’ll have to consideryour options for tackling this problem.
Rails’ built-in caching options vary in their levels of granularity. The simplest ofall possibilities is to cache whole pages in the form of HTML files. What Railsdoes in such cases is to take the output that’s sent to the browser, and store itin a file on the server’s hard disk. This file can then be served directly by Apachewithout even bothering Mongrel (provided that your setup is configured appro-priately). This saves Rails from re-generating page content over and over againeven though the content may not have changed between successive requests forthe same page. Another option allows you to cache the outputs of single actionsand even fragments of views (a sidebar, for example).
Caching can do wonders to improve your application’s performance. However,take care to ensure that the relevant sections of the cache are flushed when pageschange, otherwise your users will receive outdated content. Additionally, usingcached pages may not be feasible if your application depends on a lot of user-specific content—for instance, in an application whose page content changesdepending on who’s using it.
The Rails documentation for the caching feature is available online.20
19 http://wiki.rubyonrails.com/rails/pages/HowtoChangeSessionStore20 http://ap.rubyonrails.com/classes/ActionController/Caching.html
398
Chapter 12: Deployment and Production Use

Version Control and Deployment ManagementSoftware development projects usually progress at a rapid pace—a truth that’seven more relevant in the case of web applications. There are no strict versionnumbers; new features are continuously being implemented while, at the sametime, bugs are fixed. Updated source code must be deployed easily and quickly.Developer resources typically need to be distributed across projects in a flexiblemanner.
And developers make mistakes. Not on purpose, of course—but we’re all human.
Version control and deployment systems have been developed to address theseissues; popular options include Subversion21 and Capistrano.22
Subversion
Subversion is a general-purpose version control (or source control) system that’savailable for free under an open source license. This package is highly recommen-ded for use in any software development project.
Using Subversion, you can access the project code at any point in time and youcan view any code revision that was made to your project. All changes are tracked,and no modification is irreversible or destructive. Subversion also allows for theeasy updating of a given copy of the project's code (for example, the copy thatresides on the production system) with changes that were made elsewhere (onyour development machine, perhaps).
Capistrano
Capistrano is a deployment and management system that was written in Rubyby Jamis Buck, one of the Rails core members. Capistrano can be used only withprojects that are version controlled through a system such as Subversion.
Capistrano is designed to assist you in a number of ways:
❑ It facilitates the deployment of application code to your production server,along with the necessary maintenance tasks (such as restarting the Mongrelprocesses after the code has been updated).
21 http://subversion.tigris.org/22 http://manuals.rubyonrails.com/read/book/17
399
Version Control and Deployment Management

❑ It provides a means by which you can revert to the last “known good” codebase if errors appear, or put up a maintenance banner when you need to per-form database repairs.
❑ It supports the deployment of application code to multiple servers simultan-eously.
Errors by EmailWe’ve talked briefly about the fact that Rails will never annoy your users withextensive stack traces if an error occurs in your application. Instead, it will displaya polite message to inform the user that the request couldn’t be processed success-fully.23
But what if you want to fix such errors instead of silently ignoring them? Youcould certainly comb through your log files every day, checking for unusualactivity. Better yet, you could install the exception_notification plugin, whichhooks into your application and sends you an email whenever something unusualhappens.
The plugin can be installed using the script/plugin utility. Documentationthat explains how to customize its behaviour is available online.24
SummaryIn this final chapter, we’ve plowed through the variety of options available fordeploying Rails applications to production systems.
We opted to use the combination of Apache and Mongrel to deploy Shovell. Inthree simple steps, we took the Shovell application code to the production system,initialized the production database, and started serving requests with a singleMongrel process. It doesn’t get much easier than that!
Once Shovell was running happily in its new environment, we looked at somealternative session storage containers and found that the ActiveRecord Storesuited our needs by storing session data in our SQL database.
23 The default templates for these messages can be found in public/404.html and pub-lic/500.html.24 http://dev.rubyonrails.org/svn/rails/plugins/exception_notification/README
400
Chapter 12: Deployment and Production Use

Finally, I provided a few pointers to more advanced information on some partic-ularly relevant aspects of Rails application development and deployment.
I hope you’ve found value in the time you’ve spent with this book, and thatyou’re now able to go forth and build upon what you’ve learned. Now’s the timeto get out there and use your knowledge to build an application that changes theInternet!
401
Summary

402

IndexAaccess log, 361accessor methods, 64, 66–67, 101
types of, 66AccountController, 242, 268, 271,
275, 307testing, 320
action (see method)ActionController module, 97, 103–104
function, 103ActionController::Base class, 104, 136ActionMailer, 109ActionPack library, 97ActionPack module, 103–107
log files, 181–183ActionView helpers, 292
forms of, 293writing, 293–294
ActionView module, 97, 105–107, 142ActionView templates, 243ActionView::Base, 106ActiveRecord dynamic finder method,
332ActiveRecord module, 97–103, 199
applications, 97counter cache, 282database abstraction, 98database tables, 98–100defining relationships between ob-
jects, 102logging functionality, 181saving an object, 100–101validations, 164
ActiveRecord objectcreating, 241storing in session container, 246syntax for creating, 101
ActiveRecord prefixes, 300
ActiveRecord Store session container,396–397
ActiveRecord::Base class, 100acts, 326acts_as_list, 326acts_as_nested_set, 326acts_as_taggable plugin, 326–333
columns in taggable table, 329creating a migration for, 327–330installing, 326–327making a model taggable, 331–333polymorphic associations, 330–331removing deprecated code from, 327tables, 328what it does, 326
acts_as_tree, 326add_column function, 196, 284
syntax, 196administrative interface, 141after filters, 248after_ callbacks, 301after_create, 302after_filter method, 248Agile development methods, 8Agile development practices, 8Ajax, 7
and Rails, 203applications, 202function, 202what is it?, 201XmlHttpRequest object, 202
Ajax-powered to-do list without visualfeedback, 204
Ajax votingtesting, 229–230
:all argument, 130–131Apache web server, 17–18, 381–382,
388proxy module, 394

setting up for Mongrel, 393–395apachect1 reload, 394app object, 369–370app subdirectory, 96application.js (file), 206ApplicationController class, 136, 257–
258, 361application’s performance
monitoring by checking log files,372–374
architecture of Rails application, 380argument, 56around filters, 248Array (class), 72–74, 130
creating from a list of Strings, 73creating new, shortcut, 72first element in, 72retrieving elements from, 73use in data management, 73use with blocks, 85use with for loops, 84
assert_equal assertion, 223, 265–267, 314
assert_nil assertion, 271–272assert_not_nil assertion, 175, 272assert_redirected_to assertion, 231assert_redirected_to method, 270, 275assert_response assertion, 175, 271,
275assert_routing assertion, 316assert_select assertion, 178, 228, 317,
319, 344assert_template assertion, 175, 271assertions, 169assigning our first tags, 337–338assignment operator (=), 84associating stories with users, 261–262
displaying the submitter, 262storing the submitter, 261
associations, 188, 306class names, 307has_many :through, 306–307
associations between objects, 102@ sign, 64attribute reader, 302attributes
adding to stories, 298–299changing the value of, 132
auto-completion of strings, 205auto-generating permalinks
adding a callback, 302–303model callbacks, 300–302testing, 313–314
automated testing, 109
Bback-end component options, 380,
382–384backslash character (\), 75Basecamp, 3before-and-after check, 229before filters, 247, 254, 261, 361before_create, 301–302, 314before_delete, 301before_filter method, 247, 296before_save, 301belongs_to clause, 191–192benchmark class method, 375benchmarking, 371–376
definition, 371information from log files, 372–375manual, 375–376
Bignum (class), 77bin action, 290–291, 317bloat, 7blocks, 79, 85–87
parameters for, 86–87boolean values, 62breakpoint client
and InstantRails, 20and Ruby 1.8.5, 16exiting from, 359for debugging, 355–360
404
Index

for testing, 366–368functionality, 356
breakpoint library, 16breakpoint statements, 111, 356breakpointer command, 111building a foundation, 40
creating the standard directorystructure, 41–43
standard directory structure, 40building the example web application,
9–13
Ccaching, 398
available for pages, actions and pagefragments, 379
callback methods, 301callbacks, 300
adding, 302–303alternative syntax, 301in models, 300–302
CamelCase, 104Capistrano (deployment and manage-
ment system), 399cd command (change directory), 24chaining statements together, 61class definition, 120, 123, 136class method, 58, 68class names, 104class variables, 67classes
(see also Ruby classes)and objects, 54–55naming, 104
class-level functionality, 67–69clean URLs, 11
implementing, 193–195syntax, 195
code generation, 107–108:collection, 219
colon (:)use before Symbols, 78
columnsadding to stories table, 299
comments in line of code, 60compilation, 52compiled languages, 52
performance against scripting lan-guages, 52
compiler, 52conditionals, 79–87
if construct, 81–82unless construct, 82–83
configuration files, 5console script, 356, 369constants, 59ConTEXT (text editor), 46control structures, 79–87
blocks, 79, 85–87conditionals, 79–83loops, 79, 83–85
controller class names, 137controller generator, 134–139
running the generate Script, 134starting our application again, 137–
139understanding the output, 136–137
controllers, 95(see also ActionController module)adding functionality to, 245–247communication with views via in-
stance variables, 107for login functionality, 242models and views, 6modifying, 154, 286, 307–308, 334,
339testing, 173–181
tagging functionality, 342–345user authentication, 268–278voting functionality, 226–231
controls.js (file), 206convention over configuration, 5–7
405

cookies, 367expiration date, 235session, 236setting expiration date, 236what are they?, 234–236
cost of software, 16count (class method), 68–69_count clause, 190counter cache, 282–285
applying the migration, 285function, 282making room for the cache, 283–284testing additions to, 311–312testing deletions from, 312–313updating the RJS template, 285
counting votes, 282–285using counter cache, 282–285
create (files), 120create class method, 129create method, 225create stories file (example), 120, 122,
129columns, 124migration using rake, 127
create-table function, 196:created_at, 187created_at attribute, 222created_at column, 298creating a layout, 158–161creating databases, 93–94creating dynamic pages, 142–143creating partials, 217creating records, 128–129creating static pages, 142creating the database structure (produc-
tion environment), 391creating the template, 152–154creating views, 139–146current test-to-code ratio, 278current user,
displaying name of, 252–253retrieving, 250–252
custom class methods, 68
Ddata integrity in development, 262data management
using Arrays, 73database abstraction (ActiveRecord),
98database architecture of a Rails applica-
tion, 92database associations, 102
applications, 102database configuration, 91–94database configuration file, 91–92database migrations (see migrations)database relationships, 188–193database schema, 98database schema definition, 7database security
and the root user, 93database structure
creating (production environment),391
database tables, 98–100creating for user model, 239naming, 99typical structure, 99
databasescreating, 93–94creating for each environment, 94
date-formatting helper, 217db namespace, 126debugging, 57, 110, 347–363
overcoming problems in, 363using breakpoints, 355–360using Rails logging tool, 360within templates, 348–355
def keyword, 65:default argument, 284default database, 94default directory structure, 40
406
Index

creating, 41–43default page, 288–289default Rails welcome page, 289default route, 195delete
use with Arrays, 73deleting records, 132deploying Shovell, 384–395
step 1: installing Mongrel, 384–387step 2: moving to the production
system, 387–393step 3: setting up Apache, 393–395
deployment management systems, 399description column, 298destroy method, 132development database
as default, 94development environment
SQL statements, 133development environment (Rails), 89
default database, 94digg, 41
what is it?, 9–11digg effect, 10digg homepage, 10<div> tags, 288do keyword, 86don’t repeat yourself (see DRY program-
ming)dot notation, 60down method, 123drag-and-drop, 204dragdrop.js (file), 206DRY programming, 7dynamic finder methods, 131dynamic pages, 142
creating, 142–143
Eeach method, 85, 284edit-in-place, 204
effects.js (file), 206else block, 81, 83<em> tag, 253Emacs (text editor), 49email
for error notification, 378, 400handled via ActionMailer, 109resulting from Exception Notification
plugin, 379embedded Ruby (see ERb)empty?
use in Arrays, 73use with Hash, 75
encapsulation, 64end keyword, 65, 81, 86equation operator (==), 84ERb syntax, 105ERb tags, 105, 142, 151, 222, 292ERb templates, 142error messages, 350
by email, 378, 400seen in production environment, 378
errors attribute, 170, 180example web application
building, 9–13features, 11–13using digg, 9–11
Exception Notification plugin, 378, 400exists (folders), 119exit command, 359
Ffailed login, 270FastCGI protocol, 383fetch_logged_in_user method, 251,
254, 261, 274, 361–362fetch_stories method, 290, 375filenames, 104files
naming, 104filter conditions, 259
407

filter methods, 248–250filters, 247–250
after filters, 248around filters, 248before filters, 247
find (class method), 129find calls, 308find operation, 286find_by_, 131find_by_id method, 251find_by_link, 131find_by_login method, 308find_by_name, 131find_by_permalink method, 199find_tagged_with class method, 333,
342Firefox cookie manager, 235firewall, 18first
use with Arrays, 73:first argument, 130, 146first method, 130first tags
assigning, 337–338Fixnum (class), 58, 77fixtures, 120, 176, 223, 352
loading multiple fixtures, 223preparing, 222–223, 313user model, 264–265
fixtures method, 224flash, 161
adding to, 161–162retrieving data from, 162–163
flash areas, 161, 179naming conventions, 162
flash content, 161–162nil or blank, 162
Float (class), 77follow_redirect! statement, 365, 370for loop, 84form creation, 151–156
analyzing the HTML, 155–156
creating the template, 152–154modifying the controller, 154using form_for helper, 151–152
form element, 177–178form tags, 152form_for, 334form_for helper, 151–153, 165, 244,
359syntax, 151
form_tag helper, 244FormBuilder object, 152, 359framework
applications, 2definition, 2
free software licences, 16front-end server platform, 380front page, 285–289
modifying the controller, 286modifying the partial, 287modifying the view, 286–287setting the default page, 288–289styling, 288
full-stackdefinition, 2
functional tests, 167comparison to integration tests, 365for the new action, 177–180revealing test failures, 354running, 176writing, 174–176
Ggcc compiler
confirming installation, 32gem command, 27, 35generate command, 107, 110generate Script, 107, 186, 196, 238
running, 118–119, 134sample output, 108
generating a controller, 134–139generating a model, 117–133
408
Index

managing data using the Rails Con-sole, 127–132
model generator, 117–122modifying the schema using migra-
tions, 122–127SQL statements, 132–133
generating a user model, 238–240generating a vote model, 185–188generating permalinks
testing, 313–314generating views with scaffolding, 139–
141GET, 156, 175, 214–215, 227, 230,
268, 369get_with_user, 274, 276getters, 66global elements
testing, 273global helpers, 150, 293global variables, 60graceful degradation, 205, 213–215gsub, 303
use with Strings, 76GUI tool for MySQL, 111–114gunzip command, 33
Hhas_and_belongs_to_many relationship,
330has_many :through association, 306–
307, 314has_many clause, 188–191Hash (class), 74–75, 157
methods, 74use with blocks, 86
#{ } syntax, 211hash entry params, 195, 198hash mark (#), 60#( ), 76hashed password storage, 242headless mode, 369, 371
Heinemeier Hansson, David, 3, 5–6helper class, 137helper files, 150helper_method statement, 257helpers, 149
form_for, 151–152hexadecimal address, 72highlighting effect, 213HTML
in forms, 155link to, 213
HTTPas stateless protocol, 234
HTTP codesshortcuts, 175
HTTP GET, 156, 175, 214–215, 227, 230, 268, 369
HTTP POST, 156, 165, 175, 179, 229–230, 245, 370
HTTP request method, 156HTTP voting
testing, 230hyphen (-), 303
Iid
for retrieval, 129, 131identifying individual users, 234if clause, 297if construct, 81–82if statement modifier, 81include file, 169include?
use with Strings, 76incrementing a variable (+=), 69indentation of code, 65index action, 137–138, 140, 164, 175,
290–291, 316–317index.rhtml (file), 137individual users
identifying, 234
409

inheritance, 69, 100initialize (method), 68instance methods, 65–66, 208, 217,
221, 249, 312, 332, 335, 337instance variables, 64, 107, 144instant messaging systems, 234InstantRails
and breakpoint client, 16, 20control panel, 18, 57installing, 17software components, 17starting, 41
InstantRails menu, 19Integer (class), 77, 86–87Integer object
times method, 86upto method, 87
integer values, 58integer?
use with Numeric subclasses, 77integration tests, 110, 168, 363–366
creating the first test, 364–366functions, 363how they work, 365in headless mode, 369–371running, 366when to use?, 363
interactive Ruby shell, 57–58, 79interface, 64interpreter, 52
(see also Ruby interpreter)irb (see interactive Ruby shell)irb output, 57
JJavaScript include files, 206JavaScript libraries
including in applications layout,206–207
Prototype, 203–204script.aculo.us, 203–205
functionality, 204jEdit (text editor), 49join model relationship, 306
has_many :through association, 306–307
testing, 314
Kkeys
use with Hash, 75
Llast
use with Arrays, 73last method, 130latest_votes method, 220, 225–226layout creation, 158–161
adding style, 160–161establishing structure, 158–159
layouts (templates), 106, 158length
use with strings, 76lightTPD web server, 381link attribute, 170link column, 131link_to function, 146link_to helper, 208link_to_remote function, 208, 210, 213Linux
text editors, 49Linux installation, 31–40
installing MySQL, 36–40installing MySQL Query Browser,
112installing Rails, 35–36installing Ruby, 33–34installing RubyGems, 34prerequisites, 32Standard version, 37using a package manager, 31
literal objects, 58
410
Index

log files, 181–183taking benchmarks from, 372–375to monitor application’s perform-
ance, 372–374log out (see logout)logged_in? helper method, 258, 293logger, 361–362logger object, 361–362logging tool (Rails), 360–363login
testing failed, 270testing redirection after, 271testing successful, 269–270
login form, 244, 246testing display of, 268
login functionality, 242–247adding functionality to the control-
ler, 245–247creating the controller, 242creating the view, 243–245
Login link, 255login method, 260, 269login parameter, 242, 244login template, 243login values, 245, 269
logging, 362login_logout div, 274login_reguired filter, 257–258logout, 254–255
testing, 271–272logout function, 254–255Logout link, 254logout parameter, 242loops, 79, 83–85
for loop, 84while and until loops, 83–84
MMac OS X
installing Mongrel, 385
installing MySQL Query Browser,112
Mac OS X 10.4 (Tiger) and earlier in-stallation, 20
command line, 21installing MySQL, 29–31installing Rails, 27–28installing Ruby, 24–26installing RubyGems, 26installing Xcode, 20prerequisites, 20setting the path, 23staying organized, 24terminal window, 22
Mac OS X 10.5 (Leopard) installation,20
Mac OS X installation, 19–31Mac OS X text editors, 47–49
TextMate, 47TextWrangler, 48
MacPorts, 20make tool (C program), 125manual benchmarking, 375–376many-to-many associations, 102map.connect, 194–195, 200map.story, 195, 200MemCached Store session container,
397method calls
parentheses in, 61method notation, 62methods, 54, 64
in Ruby, 58migration files, 120, 122
class definition in, 123class methods, 123creating a skeleton, 122–123filling in the gaps, 124–125name and type of data storage, 124
migrations, 100, 122creating for Vote model, 186–187to alter existing tables, 124
411

to generate the counter cache, 283–284
to make alterations to your database,122
using rake to migrate data, 125–127, 187, 240, 267, 285, 299
mkdir command (make directory), 24mod_ruby extension, 382model callbacks, 300–302model generator, 117–122
running the generate Script, 118–119
sample output, 118understanding the output, 119–120YAML, 121–122
model testing (see testing the model)Model.find method, 247modeling the user, 238–242models, 95
generating, 117–133model-view-controller (MVC) architec-
ture, 2, 6, 94–107ActionController module, 103–104ActionPack library, 103–107ActionView module, 105–107ActiveRecord module, 97–103app subdirectory, 96in theory, 95–96processing a page request, 95reasons for separating software applic-
ation components, 95software application components, 95the Rails way, 96–97
Mongrel, 383installing, 384–387setting up Apache as web server for,
393–395use on production database, 392
mongrel_rails command, 386, 392, 394mongrel_rails restart, 397multiple fixtures
loading, 223
MVC (see model-view-controller (MVC)architecture)
MySQL command linelaunching, 93
MySQL database server, 15confirming installation on Mac OS
X, 30default configuration, 93installing on Linux, 36–40
creating symbolic links, 37downloading and extracting the
file, 37launching the server on startup,
39setting groups and permissions,
37starting the server, 38
installing on Mac OS X, 29–31launching the server on startup,
30installing on Windows, 17
MySQL Query Browser, 111–114applications, 112connection screen, 112installing, 111Query window, 113Table Editor, 113
mysql> prompt, 38
Nnamed route, 195namespace
acceptance by rake task, 125naming classes and files, 104naming template files, 106navigation menu, 255–257, 294–296
testing, 319new action
functional tests, 177–180new_record? method, 179nginx web server, 382
412
Index

nil (return value), 72, 78Nil Class, 78now method, 222Numeric (class), 77–78Numeric subclasses, 77
converting a value to a Float, 77converting a value to an Integer, 77functionality, 77
Oobject level functionality, 64–67
accessor methods, 66–67instance methods, 65–66instance variables, 64
object oriented programming, 53–56asking a simple question, 55passing arguments, 56sending instructions, 56
object oriented programming in Ruby,63–71
classes and objects, 63class-level functionality, 67–69inheritance, 69object-level functionality, 64–67return values, 70–71
object receiver, 60objects, 53
(see also Ruby objects)and classes, 54–55and methods, 54, 64and tables, 99communication between, 54in Ruby, 57instance variables, 64interface, 64relationships between, 102
one-to-many associations, 102one-to-many relationship, 188–189,
191, 330information storage in the database,
192
one-to-one association, 102:only option, 296:only parameter, 260OOP (see object oriented programming)Open Ruby Console, 57operators
assignment operator (=), 84equation operator (==), 84to increment a variable (+=), 69
opinionated software, 6:order argument, 130, 220ordering records in Rails, 220output
from Ruby, 71–72
Ppackage manager
apt-get, 31for Linux, 31for Ruby software, 34rpm, 31yum, 31
page headingstesting, 317
page object, 211, 219page rendering
testing, 227–228paragraph element, 178parameters for blocks, 86–87params, 107, 194–195, 198params hash, 157, 308, 358params object, 157parentheses, 61:partial, 219partials (templates), 106, 215–221, 287
adding voting history, 216–217creating, 217modifying, 287rendering, 308styling the voting history, 217–220
413

tweaking the voting history, 220–221
passing data back and forth, 143passing variables between controllers
and views, 144password, 11, 246password template, 244password values, 245, 269password_field_tag helper, 244PATH environment variable, 23period (.), 60permalink attribute, 303:permalink symbol, 201permalinks, 195–196, 201
adding to stories, 196–198auto-generating, 300–303
permanent links (see permalinks)permanent scaffolding, 140plugin script, 324
usage instructions, 325plugins
acts_as_taggable, 326–333functions, 323installation, 324README file, 324what are they?, 323–324
pluralize helper, 287, 294+= operator, 69polymorphic associations, 330–331POST, 156, 165, 175, 179, 229–230,
245, 370post_with_user, 274, 276postback, 156presentation logic, 105, 292–296
ActionView helpers, 292–294avoiding spaghetti, 292
print statement, 71private methods, 249production environment, 90
choosing, 379–384back-end options, 382–384web server options, 380–382
creating the database structure, 391does not log every database commu-
nication, 378implications, 377–379moving Shovell to, 387–393
protected controller methods, 290, 293, 301
protected methods, 249protecting the form, 257–259
abstracting code using helper_meth-od, 257
requiring users to log in, 258–259protective measures, 233, 238
generating a user model, 238–240login functionality, 242–247managing user logins, 250–255restricting the application, 257–262testing user authentication, 263–278
Prototype JavaScript library, 203–204prototype.js (file), 206proxy through, 393ProxyRequests Off directive, 394public methods, 249punctuation in Ruby code, 60–62
chaining statements together, 61dot notation, 60method notation, 62use of parentheses, 61
puts statement, 71pwd command, 22
RRadRails (text editor), 49Rails, 15
as opinionated software, 6built-in Ajax helpers, 205code generation, 107–108configuration files, 5conventions, 5–6debugging, 110, 347–363default welcome page, 289
414
Index
history, 3installing on Linux, 35–36installing on Mac OS X, 27–28installing on Mac OS X 10.5 (Leo-
pard), 20installing on Windows, 17–19integrated support for email, 109log files, 181–183logging tool, 360–363Prototype Javascript library, 203sessions in, 237–238supporting multiple databases in
parallel, 92testing, 109–110use of Ajax in web applications, 203use of MVC architecture, 96–97visual effects with script.aculo.us,
204what is it?, 1–3, 201
Rails applicationsarchitecture, 380database architecture, 92standard directory structure, 40
rails command, 41–43, 119Rails Console, 100, 369–371
creating records, 128–129deleting records, 132headless mode, 369, 371retrieving records, 129–131to manage data, 127–132updating records, 131–132
Rails development principles, 5Agile development, 7convention over configuration, 5–7don’t repeat yourself, 7
Rails development repository, 4Rails environments, 89
development, 89production, 90testing, 90
Rails framework, 2, 4, 15, 89Rails plugins, 323–346
Rails welcome screen, 44rake command, 389
accepting a namespace, 125options accepted, 126tasks available, 125to create sessions table, 396to execute functional tests, 176to execute unit tests, 171, 226to migrate data, 125–127, 187, 197,
240, 267, 285, 299to revert to the previous version of
the database, 127to run integration tests, 366to run the complete test suite, 180,
277–278, 355use in production environment, 391,
396rake test command, 366rake test:integration command, 367random stories
retrieving, 146read method, 106readers, 66Readline, 24receiver, 56, 58redirect_to function, 215redirecting the user, 260–261, 269
testing, 271redirection after logout
testing, 275redirection logic, 164regular expressions, 303relationships between objects, 188–193
belongs_to clause, 191–192has_many clause, 188–191
remote scripting with Prototype, 203render, 215, 217, 219render :partial syntax, 217replace_html method, 211request method, 156request object, 156request.post? method, 156
415
require command, 169respond_to clause, 214restricted functionality
testing, 318restricting access to story submission,
259–261filter conditions, 259redirecting the user, 260–261
restricting the application, 257–262associating stories with users, 261–
262protecting the form, 257–259restricting access to story submission,
259–261retrieving records, 129–131return values, 55, 58, 70–72:return_to URL, 260return_to value, 271.rhtml file extension, 106.rhtml templates, 210, 215ri command, 74.rjs file extension, 106, 210RJS templates, 210–213, 215, 219
approaches to, 211updating, 285
root userand database security, 93
rounduse with Numeric subclasses, 77
routes, 194default, 195named, 195
routing, 193routing configuration, 288–289, 308
testing, 316Routing module, 193, 198
configuring to support clean URLs,194, 200
operation, 194Ruby, 51
as object oriented language, 53–56
as open source, object orientedscripted language, 3
as scripting language, 51–53checking version installed on Linux,
34installing on Linux, 33–34installing on Mac OS X 10.4 (Tiger)
and earlier installation, 24–26installing on Mac OS X 10.5 (Leo-
pard), 20installing on Windows, 17method in, 58object oriented programming in, 63–
71standard output, 71–72variables in, 59version numbers, 16
Ruby classes, 58, 63, 72–79Array, 72–74Bignum, 77Fixnum, 58, 77Float, 77Hash, 74–75Integer, 77, 86–87naming, 99not reloaded on each request in the
production environment, 378Numeric, 77–78String, 59, 75–76Symbols, 78
Ruby code, 3embedding in HTML using ERb
syntax, 105indentation of, 65punctuation in, 60–62reading and writing, 57–62
Ruby console (see interactive Rubyshell)
Ruby control structures, 79–87Ruby files
running, 79
416
Index

ruby interactive (see ri command)Ruby interpreter, 15, 79Ruby objects, 57, 63
interacting with, 58–60literal objects, 58variables and constants, 59
Ruby on Rails (see Rails)Ruby shell (see interactive Ruby shell)RubyGems
installing Mongrel, 384–386installing on Linux, 34installing on Mac OS X, 26
confirmation of successful install-ation, 27
.rxml file extension, 106
SSave changes, 157save method, 101, 165, 187, 300saving an object, 100–101saving data to the database, 156–158scaffold command, 140scaffolding, 108
approaches to using, 139limitations, 141to generate views, 139–141to provide an administration inter-
face, 141what is it?, 139
scalability, 96SCGI protocol, 383schema, 98scope of variables, 60scoreboard styling, 208–209script folder, 107script.aculo.us JavaScript library, 203–
205functionality, 204
scripting languages, 52performance against compiled lan-
guages, 52
search engine friendly URLs, 11self.down (class method), 123, 187,
197, 284self.my_attribute syntax, 302self.permalink, 302self.up (class method), 123, 186, 284semicolon (;), 61sender, 56, 58session container, 238
storing ActiveRecord objects, 246session contents, 236, 238session cookies, 236session hashes, 107session name, 237session security, 251session storage containers, 395–398
ActiveRecord Store, 396–397MemCached Store, 397
session valuesretrieval, 237
sessionsin Rails, 237–238physical location of, 238what are they?, 236
sessions table, 396setters, 66setup method, 174shove it link, 209–210, 213, 218–219,
221, 297–298"Shovell" project, 41, 100, 119
adding tagging to, 325–340allowing users to add a story descrip-
tion, 304completed login form, 246controllers, 104creating the database structure, 391deploying, 384–395displaying the current user, 253empty front page, 289example of user page, 310final story page with voting history,
221
417
finished show action, 200hiding the voting link from visitors,
297index page linking to story page, 201listing all stories tagged with “rails”,
340login template, 243making a template for, 152moving to the production system,
387–393name of story’s submitter displayed
with the story, 263new story form with a layout, 160providing feedback after story sub-
mission, 163proxied through Apache, 395running under Mongrel, 387served by Mongrel, 393showing a story with voting history,
219showing a story with voting score
and vote link, 209story index with navigation, 256story submission form with valida-
tion output, 166story voting bin, 295story with auto-generated permalink,
305successfully logging out of the applic-
ation, 255tags display for the new story, 338transferring to production system,
390viewing stories on the front page,
298show action, 227show method, 198show template, 216show view
changing, 207Showing ... string, 294showing off our stories, 198–201
Simple Common Gateway Interface(SCGI) protocol, 383
sizeuse with Arrays, 73use with Hash, 75
size method, 282skeleton file
analyzingcontroller test, 174model test, 168–169
sliceuse with Strings, 76
software cost, 16<span> tag, 208SQL statements
for development environment, 133stack traces, 90, 378, 400stand-alone helper, 153standard directory structure, 40
creating, 41–43subdirectories, 41
starting our application, 43–45stateless protocol, 234statement modifiers
if, 81unless, 83
static pagescreating, 142
storiesabstracting presentation logic, 292–
296adding attributes to, 298–299adding user pages, 305–310auto-generating permalinks, 300–303giving a shove, 207–208implementing the front page, 285–
289implementing the voting bin, 289–
291requiring that users log in to vote,
296–298
418
Index

selecting on basis of voting scores,281–299
testing advanced functionality, 310–321
testing display of by tag, 344testing finding of by tag, 341viewing by tag, 339–340with auto-generated permalink, 305
stories.yml (fixture file), 120storing the votes, 210Story class
adding relationship definitions to,241
Story controlleraccessing from a browser, 138generating, 134
story display pagetesting, 319
story index pagestesting, 315
@story instance variable, 153, 155Story Model, 119
adding a callback, 302–303auto-generating permalinks, 300–303making it taggable, 331–333testing, 168–173
@story object, 152–153story page
testing display of tags on, 343story partial, 309
updating, 336story submission, 150–167
creating a form, 151–156creating a layout, 158–161providing feedback after, 163saving data to the database, 156–158testing, 275–276user feedback and the flash, 161–167
story submission formallowing users to add a story descrip-
tion, 304
debugging using breakpoint client,357–360
debugging within templates, 352–354
expanding, 303–305testing, 317testing the display, 344with tags, 338
testing, 342with validation output, 166
story submitterdisplaying, 262storing, 261testing display of, 272testing storage of, 276
story submitter link texttesting, 319
:story symbol, 153story.controller.rb (file), 136, 140Story.find :all, 284, 286story.rb (file), [email protected], 262story_controller_test.rb (file), 136story_helper.rb (file), 137story_test.rb (file), 120story_type, 294story_url function, 200StoryController
modifying, 286, 297testing, 315–320
StoryController class, 138, 140, 154, 175, 194, 198, 214, 261–262, 268, 274–275
fetch_stories method, 375sample class definition, 104show method, 198
StoryController class definition, 156StoryTest class, 174Story’s relationship to Vote model,
223–224String class, 59, 75–76, 303
converting to Symbols, 78
419

methods, 76string literal, 58, 60, 75
specifying using %Q shortcut, 76String object, 59, 75–76style (layouts), 160–161style sheet, 159, 309
applying to an application, 160updating, 337
stylingfront page, 288voting history, 217–220
Submit button, 153, 155submitter (see story submitter)Subversion (version control system),
399:success symbol, 175successful login, 269–270sudo, 26, 35, 385Symbols (class), 78
advantages over Strings, 78converting to Strings, 78
TTable Editor (MySQL Query Browser),
113tables, 98
(see also database tables)relationship with objects, 99
Tag class, 332tag display, 335–337
creating a tag partial, 336modifying the view, 335–336updating the story partial, 336updating the style sheet, 337
tag partial, 336tag submission, 333–335
modifying controller, 334–335modifying the view, 334
tag_id, 329tag_list, 332, 337, 343tag_with, 332, 335
taggable_id, 329taggable_type, 329tagged stories
displaying, 339testing tag action for listing, 343
tagging, 12, 325adding to Shovell, 325–340
tagging functionalityrunning the test suite, 345testing, 340–346testing the controller, 342–345testing the model, 341–342
taggings table, 328–329tags
assigning first, 337–338testing display of on story page, 343testing display of stories by tag, 344testing finding of stories by tag, 341viewing stories by tag, 339–340
tags table, 328–329tar command, 33template creation, 152–154template files, 199
extensions, 106naming and storage, 106
template rendering, 308testing, 315
templatesdebugging within, 348–355layouts, 106partials, 106
temporary scaffolding, 139temporary working directory, 24test-driven development (TDD), 167test types, 167test_should_show_index test, 175, 177test_should_show_new_form, 344test_truth method, 169, 174testing a failed login, 270testing a logout, 271–272testing a story’s relationship to a vote,
223–224
420
Index

testing a successful login, 269–270testing a vote’s relationship to a story,
224testing additions to the counter cache,
311–312testing advanced functionality, 310–
321running the complete test suite, 321testing the AccountController, 320testing the model, 310–314testing the StoryController, 315–320
testing Ajax voting, 229–230testing deletions from the counter
cache, 312testing display of the username, 273–
275testing environment (Rails), 90testing page headings, 317testing page rendering, 227–228testing redirection after login, 271testing redirection after logout, 275testing regular HTTP voting, 230testing restricted functionality, 318testing storage of the submitter, 276testing story submission, 275–276testing the AccountController, 320testing the assignment of tags, 341testing the controller, 173–181
analyzing the skeleton file, 174functional tests for new action, 177–
180running a functional test, 176writing a functional test, 174–176
testing the controller (tagging function-ality), 342–345
testing the display of stories by tag,344
testing the display of tags on a storypage, 343
testing the display of the story sub-mission form, 344
testing the submission of a new storywith tags, 342–343
testing the tag action for listingtagged stories, 343
testing the controller (user authentica-tion), 268–278
testing a failed login, 270testing a logout, 271–272testing a successful login, 269–270testing display of the username, 273–
275testing redirection after login, 271testing redirection after logout, 275testing storage of the submitter, 276testing story submission, 275–276testing the display of global ele-
ments, 273testing the display of the login form,
268testing the display of the story sub-
mitter, 272testing the controller (voting function-
ality), 226–231testing Ajax voting, 229–230testing page rendering, 227–228testing regular HTTP voting, 230testing vote storage, 229
testing the display of global elements,273
testing the display of stories by tag, 344testing the display of tags on a story
page, 343testing the display of the login form,
268testing the display of the story submis-
sion form, 344testing the display of the story submit-
ter, 272testing the finding of a story by tag,
341testing the form, 167–183
controller testing, 173–181
421

model testing, 168–173running the complete test suite, 180–
181testing the generation of permalinks,
313–314testing the join model relationship, 314testing the model, 168–173
analyzing the skeleton file, 168–169new functionality, 310–314running a unit test, 171–173user authentication, 263–268using assertions, 169writing a unit test, 169–171
testing the model (tagging functional-ity), 341–342
testing the assignment of tags, 341testing the finding of a story by tag,
341testing the model (voting functionality),
222–226preparing the fixtures, 222–223running the unit tests, 226testing a story’s relationship to a
vote, 223–224testing a vote’s relationship to a
story, 224testing the voting history order, 225–
226testing the navigation menu, 319testing the rendering of templates, 315testing the routing configuration, 316testing the story display page, 319testing the story index pages, 315testing the story submission form, 317testing the story submitter link text,
319testing the StoryController, 315–320testing the submission of a new story
with tags, 342–343testing the tag action for listing tagged
stories, 343
testing the tagging functionality, 340–346
testing the voting functionality, 222–231
controller testing, 226–231model testing, 222–226running the full test suite, 231
testing the voting history order, 225–226
testing user authentication, 263–278testing user voting history, 318testing vote storage, 229testing your application, 363–371
integration tests, 363–366using breakpoints, 366–368
tests (of assertions), 169text editors, 45
ConTEXT, 46cross-platform, 49Emacs, 49jEdit, 49Linux, 49Mac OS X, 47–49RadRails, 49TextMate, 47TextWrangler, 48UltraEdit, 46Vim, 49Windows, 46–47
text_area helper, 304, 359text_field method, 152text_field_tag, 244, 334
arguments, 334textarea element, 304, 360TextMate (text editor), 47textual identifiers, 78TextWrangler (text editor), 4837signals, 3tilde, 22Time class, 222Time object, 223times method of an Integer object, 86
422
Index

timing values (log files), 182title of the story, 288to_formatted_s, 217to_params, 208to_s(:db) method, 223
UUltraEdit (text editor), 46unit tests, 167
error information, 173failed test, 173running, 171–173, 226, 268successful test, 172writing, 169–171
unless condition, 252unless construct, 82–83unless statement modifier, 83until, 84up method, 123upcase method, 62update_attribute method, 132, 198,
284:updated_at, 187updating records, 131–132upto method of an Integer object, 87URLs
implementing clean, 193–195using models in, 208
user authentication, 263–278running the full test suite, 277–278testing the controllers, 268–278testing the model, 263–268
User class, 240adding relationships to, 240
user feedback, 165–167information on type and place of er-
ror, 166validation errors, 165
user log out, 254–255user logins, 250–255
allowing users to log out, 254–255
displaying the name of the currentuser, 252–253
retrieving the current user, 250–252user model, 307
adding relationships to the Userclass, 240–241
creating a User, 241database table creation, 239generating, 238–240testing authentication, 263–268
preparing the fixtures, 264–265running the unit tests, 268testing a story’s relationship to a
user, 266testing a user’s relationship to a
story, 265testing a user’s relationship to a
vote, 266testing a vote’s relationship to a
user, 267User object, 246, 308
creating, 241user pages
adding, 305–310creating the view, 308–310has_many :through association, 306–
307join model relationship, 306modifying the controller, 307–308
user registration system, 11user voting history
testing, 318username, 11, 244, 246
testing display of, 273–275users
associating stories with, 261–262necessity to log in to vote, 296–298redirecting, 260–261requiring them to log in, 258–259
users fixture, 269
423

Vvalidation errors, 165validations, 165
and redirection logic, 164applying, 164
valuesuse with Hash, 75
variables, 59class, 67global, 60instance, 64scope of, 60
version control systems, 399version numbers of installed compon-
ents, 44vertical bars (|)
placement before blocks, 86viewing stories by tag, 339–340
displaying tagged stories, 339modifying the controller, 339
views, 95communication with controllers via
instance variables, 107creating, 139–146, 308–310creating dynamic pages, 142–143creating static pages, 142generating with scaffolding, 139–141modifying, 286–287, 334–336passing data back and forth, 143–
144pulling in a model, 144–146
Vim (text editor), 49visual effects with script.aculo.us, 203–
205Vote class
adding relationship definitions to,241
Vote class definition, 192Vote model, 220
applying the migration, 187
association with Story model, 188–192
creating the migration, 186–187creating the model, 186generating, 185–188relationship to a story, 224
Vote object, 190, 225, 282–283vote storage
testing, 229votes
counting, 282–285incremented when a new vote is ad-
ded, 311need to reload database when votes
added, 311–312storing, 210
votes method, 189, 224, 296votes table, 186votes_count, 283, 286, 312–313
set initial value, 313votes_count method, 208voting bin, 289–291voting functionality
testing, 222–231testing the controller, 226–231testing the model, 222–226
voting historyadding, 216–217styling, 217–220testing the order, 225–226tweaking, 220–221
voting scoresselecting stories on basis of, 281–299
WWeb 2.0, 185, 325
and Ajax, 202web application
definition, 1web browsers
not supporting Ajax, 205, 213–215
424
Index

web server options, 380–382WEBrick web server, 43, 379while loops, 83
use with until, 84Windows
installing Mongrel, 385installing MySQL Query Browser,
112Windows firewall, 18Windows installation, 17–19Windows text editors, 46–47
ConTEXT, 46UltraEdit, 46
writers, 66
XXcode, 20
installing, 21XcodeTools.mpkg, 21xml_http_request method, 230XmlHttpRequest object, 202
YYAML, 121–122, 352YAML file, 121yield command, 159
Zzero?
use with Numeric subclasses, 77
425