buffalo chicken dip procedure -...
TRANSCRIPT

Buffalo Chicken Dip Procedure
You will use the following items and food products:
Cutting Chicken Fingerz for Buffalo Chicken Dip
1. Wash hands and put on non-latex disposable food safe gloves.
2. Bring the supplies and food items to the clean prep table. Remove and discard plastic wrap.
3. Place a cooled Chicken Finger on the tan cutting board.
Use a chef’s knife to cut a Chicken Finger in half lengthwise. Then, cut each half in half lengthwise again, creating a total of 4 slices.
Push the 4 slices together, and finely cut them crosswise into ¼-½” pieces (the smaller, the better).
Use a dough scraper to place the finely cut Chicken Finger pieces into a half pan.
7. Repeat cutting steps until all of the Chicken Finger pieces (approximately 32 oz.) are in the half pan.
© 2016 Zaxby’s Franchising LLC Revised October 2016 Version 3.1
Mixing Buffalo Chicken Dip:• Non-latex disposable food safe gloves • Clear half pan with food grade plastic wrap • Food scale• Protein-dedicated cutting board (tan)• Chef’s knife• Metal measuring scoop• Mayonnaise spreader• Measuring pitcher• Dough scraper• Spatula • Labels and pen• Ranch sauce• Mayonnaise• Tongue Torch® sauce• Full pan of approx. 32 oz. Chicken Fingerz™ (cooled)
To ensure Buffalo Chicken Dip reaches a food safe temperature in the time specified, never use warm or hot Fingerz to prepare it.
6
4
5
Re-Mixing & Portioning Buffalo Chicken Dip:• Non-latex disposable food safe gloves • Clear half or 1/3 pans• Spatula • #10 disher• Labels and pen • 3.75 oz., 8 oz., and/or 16 oz. bowls, lids • Zalad take-out container, labeled lid• Buffalo Chicken Dip chilled 4 hours minimum
Note: This guide is for making a single batch of Buffalo Chicken Dip. To reduce waste and maximize product quality, it is recommended that double/triple batches be made for large catering orders only.
Refer to the Chicken Cooling procedure guide for cooling instructions.
6
4
5
Finely cutting the Chicken Fingerz ensures optimal consistency of the
dip for scooping and eating.

Buff DipPrep datePrep time
Initials
© 2016 Zaxby’s Franchising LLC Revised October 2016 Version 3.1
Mixing Buffalo Chicken Dip
Use a measuring pitcher to measure 16 oz. Tongue Torch sauce, and pour it into the half pan of cut Chicken Fingerz.
Use the same measuring pitcher to measure 8 oz. Ranch sauce, and pour it into the pan of cut Chicken Fingerz and sauce.
Use a metal measuring scoop to measure 1 cup mayonnaise, and use a mayonnaise spreader to add it to the pan of cut Chicken Fingerz and sauces.
Use a spatula to thoroughly mix the cut Chicken Fingerz, sauces, and mayonnaise.
• Be sure to mix in the ingredients at the bottom and in the corners of the pan.
• Individual pieces of cut chicken should be evenly distributed, not clumped together.
5. Cover with loose plastic wrap, and label the pan.
6. Place the loosely covered and labeled pan of Buffalo Chicken Dip in the walk-in cooler for at least 4 hours before portioning.
7. Remove gloves and wash hands before beginning new task.
Total refrigerated shelf life for Buffalo Chicken Dip is 48 hours (2 days) --
including mix time plus portioned hold time
1
2
4
3
3
1
2
4
Buffalo Chicken Dip Procedure
Using loose plastic wrap to cover Buffalo Chicken Dip allows the heat to escape as it cools to below 41ºF. Do not use a pan lid.

Use a #10 disher to scoop up re-mixed Buffalo Chicken Dip, and fill 3.75 oz. bowls for individual sides. • Scrape the disher against the inside wall of the pan to level the scoops of Buffalo Chicken Dip.
Cover each bowl with lid and securely snap it into place, while pressing the lid center to allow air to escape.
3. Stack covered 3.75 oz. bowls in half or 1/3 pans, below their refrigeration lines.
Label the pans. Include the prep date and time when the Buffalo Chicken Dip was first mixed.
5. Store the filled and labeled pans in the walk-in cooler.
6. Remove gloves and wash hands before beginning new task.
To ensure the proper flavor profile, refrigerate Buffalo Chicken Dip for at least 4 hours
before re-mixing and portioning.
© 2016 Zaxby’s Franchising LLC Revised October 2016 Version 3.1
Re-mixing Buffalo Chicken Dip
1. After at least 4 hours: A) Wash hands and put on non-latex disposable food safe gloves.
B) Remove the half pan of prepared Buffalo Chicken Dip from the walk-in cooler. Bring it and the supplies to the clean prep table.
2. Remove and discard the plastic wrap.
3. Use a spatula to thoroughly mix the Buffalo Chicken Dip before portioning.
4. Immediately portion Buffalo Chicken Dip into the appropriate packaging as outlined in the following sections.
Buffalo Chicken Dip Procedure
Buff DipPrep datePrep date
Initials
4
2
1
Portioning Buffalo Chicken Dip – Individual Sides
1
2
4
Yield per batch:(15) 3.75 oz. bowls
Buffalo Chicken Dip Procedure
© 2016 Zaxby’s Franchising LLC Revised October 2016 Version 3.1
Yield per batch:(15) 3.75 oz. bowls
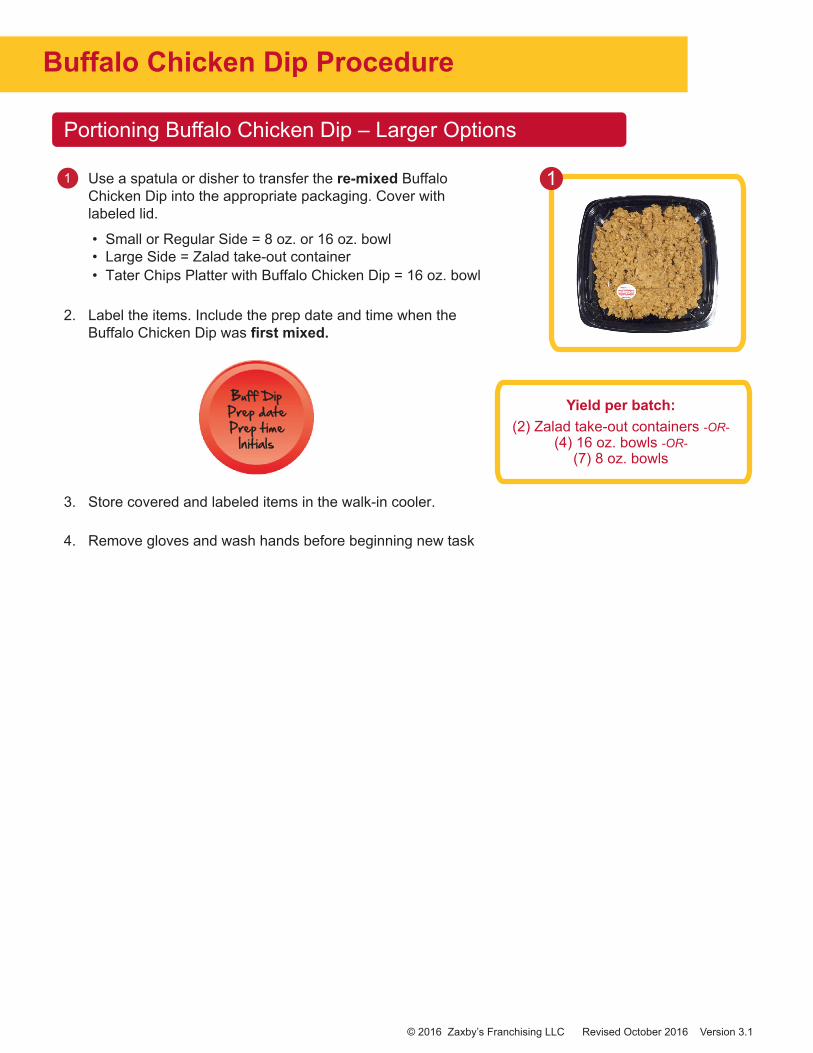
Portioning Buffalo Chicken Dip – Larger Options
Use a spatula or disher to transfer the re-mixed Buffalo Chicken Dip into the appropriate packaging. Cover with labeled lid.
• Small or Regular Side = 8 oz. or 16 oz. bowl • Large Side = Zalad take-out container • Tater Chips Platter with Buffalo Chicken Dip = 16 oz. bowl
2. Label the items. Include the prep date and time when the Buffalo Chicken Dip was first mixed.
3. Store covered and labeled items in the walk-in cooler.
4. Remove gloves and wash hands before beginning new task
Yield per batch:(2) Zalad take-out containers -OR-
(4) 16 oz. bowls -OR-(7) 8 oz. bowls
1
Buff DipPrep datePrep time
Initials
1