bucket drip irrigation - afghan...
TRANSCRIPT

This training was prepared by the U.S. Department of Agriculture (USDA) team of Otto Gonzalez-USDA Foreign Agricultural Service (Team Leader), Jon Fripp (Civil Engineer) and Chris Hoag (Wetland Plant Ecologist)-USDA Natural Resources Conservation Service (Civil Engineers). Fripp and Hoag were the primary authors of this material. The U.S. AID provided funding support for the USDA team.
Bucket Drip Irrigation

Bucket Drip Irrigation• For Flower Crops
• For Vegetable Crops• Can be constructed in
any zone

Water into bucket and drips out of the drip lines onto the plants
Water into bucket once or twice a day. This depends on:•Type of plants•Soils•Temperature•Recent Weather•Wind

Bucket drip irrigation is simple irrigation:•Been Used Worldwide•Not Expensive•Low Pressure•Saves Water•Fertilizer Application
Photo from Chapin Living Waters Foundation
700 pounds of tomatoes from one kit in one year (100 plants)

Chapin Bucket Drip Irrigation Kits•Filter screen•Water Supply Line•Drip Line
Bucket
Water Supply Lines
Filter
Stand
Drip Lines
Need to add:•Bucket•Stand•Plants

We will look at the steps to build and use a bucket drip
Remember the basics of irrigation

The first step is to drill a hole in the bottom of a clean bucket

•Be sure the filter screen is clean•You will need to clean it periodically•Clean by washing it, not by rubbing it with fingers

•Examine the fittings•Notice how they will be assembled into the bucket•They must be tight
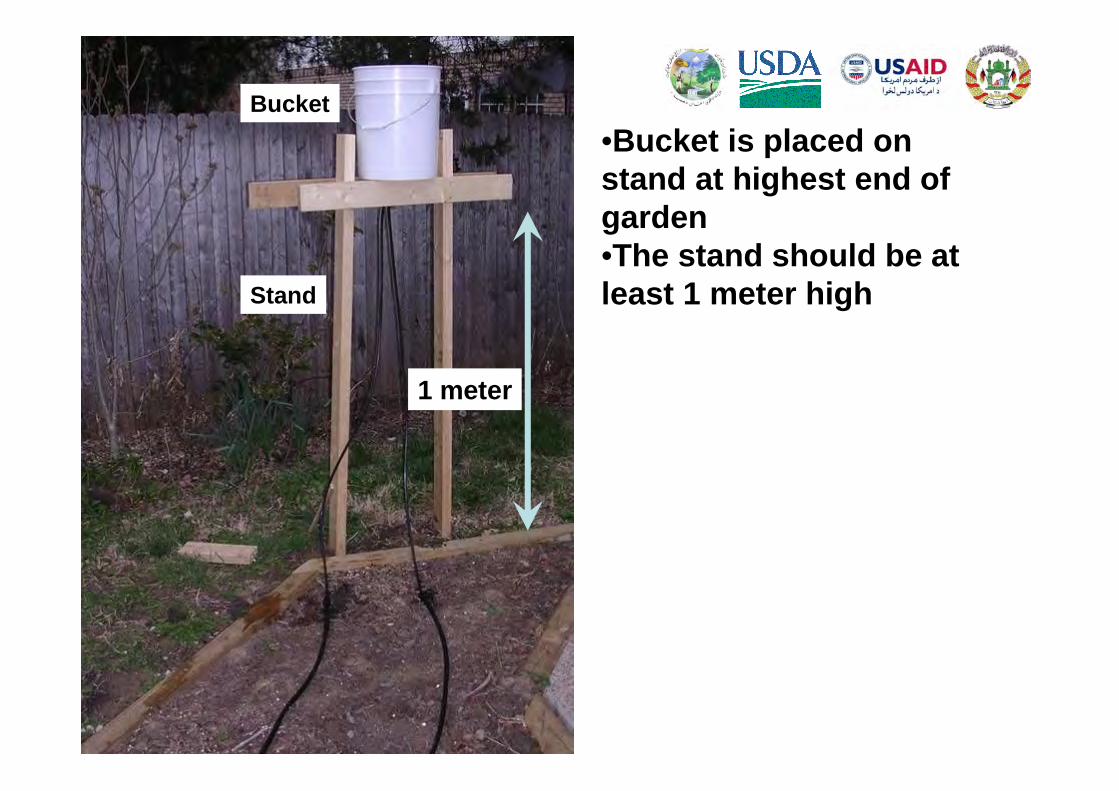
•Bucket is placed on stand at highest end of garden•The stand should be at least 1 meter high
1 meter
Bucket
Stand

The water supply lines go into the rubber stopper

Connect the water supply line to the drip line

•Stretch the drip line across the garden•Avoid folds or creases•Do not vary elevation by more than 1 foot•Drip line should be in contact with the soil•Weight the drip line down with rocks•The drip opening should be on top of the line

•Close end of drip line•Fold over twice and put in sleeve•Can also tie with string

Carefully pour clean water into the bucket

•Look for wet spots•Mark them •Place plants where there is a drip

Notice that the drip should be on top of the drip line

•Plants should go where the drip will be•Try to avoid getting soil on the drip line•Can place mulch over line to reduce evaporation loss of water

Plants should be down slope of the drip

Clogging can be a problem.
May need to cover the bucket top to keep dust and sand from blowing to bucket
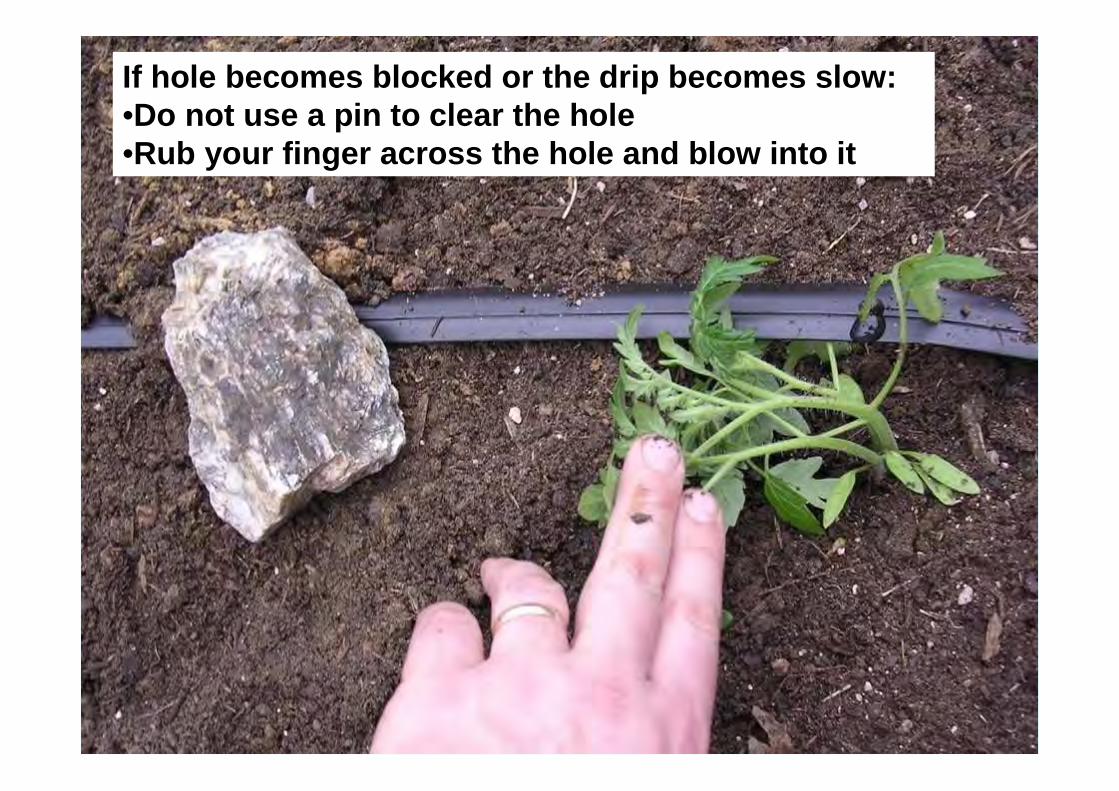
If hole becomes blocked or the drip becomes slow:•Do not use a pin to clear the hole•Rub your finger across the hole and blow into it

Can also flush the lines
This is done by opening the ends of the drip lines and pouring clean water through it.

Photo from John Tiedeman
The Chapin bucket drip irrigation kits should last 5 to 7 years with proper care

If stored•Flush clean water thru the opened drip lines.•Clean the filter screen•Carefully roll the drip lines•Do not fold the drip lines

•Can apply fertilizer to the irrigation water.•The fertilizer will go straight to the plant

•If you are using a compost tea for fertilizer, be sure to pour it through a heavy cloth
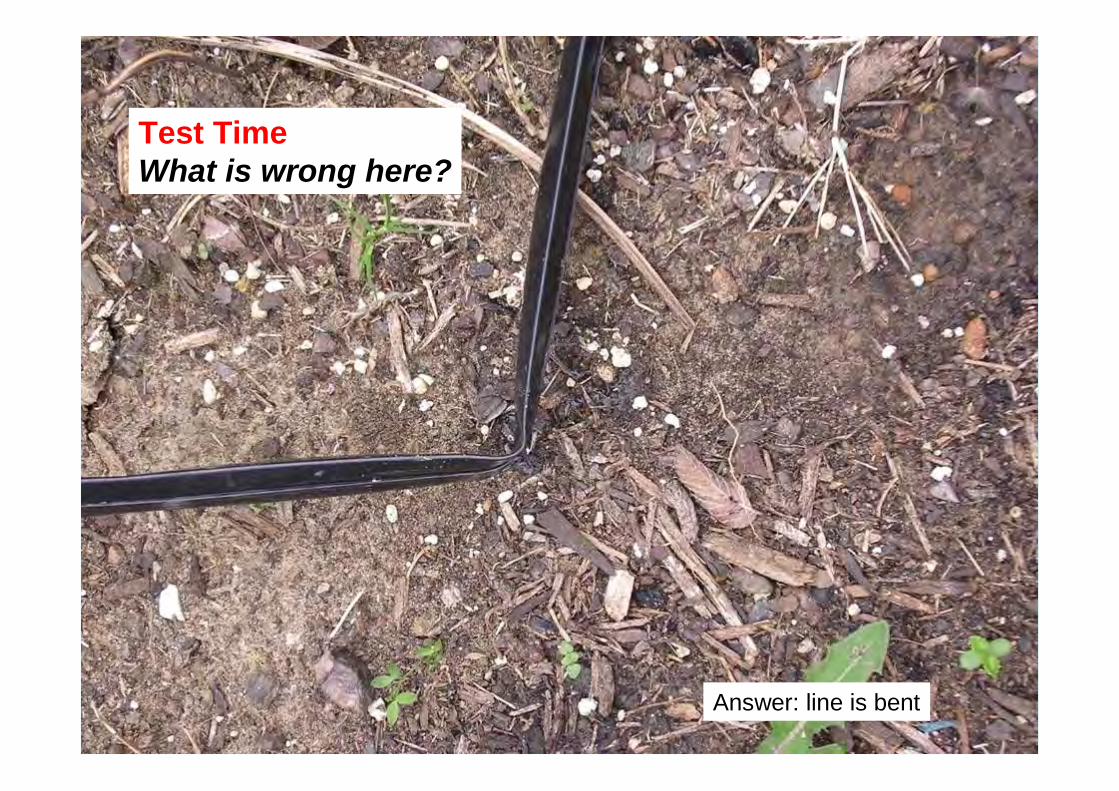
Test TimeWhat is wrong here?
Answer: line is bent

Test TimeWhat is wrong here?
Answer: line is not flat

Test TimeWhat is wrong here?
Answer: water is too dirty. The irrigation water needs to be cleaner. Dirty water can clog the openings
Hint: this is the inside of the drip bucket.

Questions?