brooklyn college drjavagoetz/java/drjava.pdfthe first time you start drjava, you will be asked if...
TRANSCRIPT
Brooklyn College
DrJava A Beginner’s Guide
Lawrence Goetz 9/7/2018
Contents Installation of Java JDK .................................................................................................................................. 1
Installation of DrJava .................................................................................................................................... 5
First Program using DrJava............................................................................................................................ 7
Using the Debugger .................................................................................................................................... 19
Printing ........................................................................................................................................................ 28
P a g e | 1
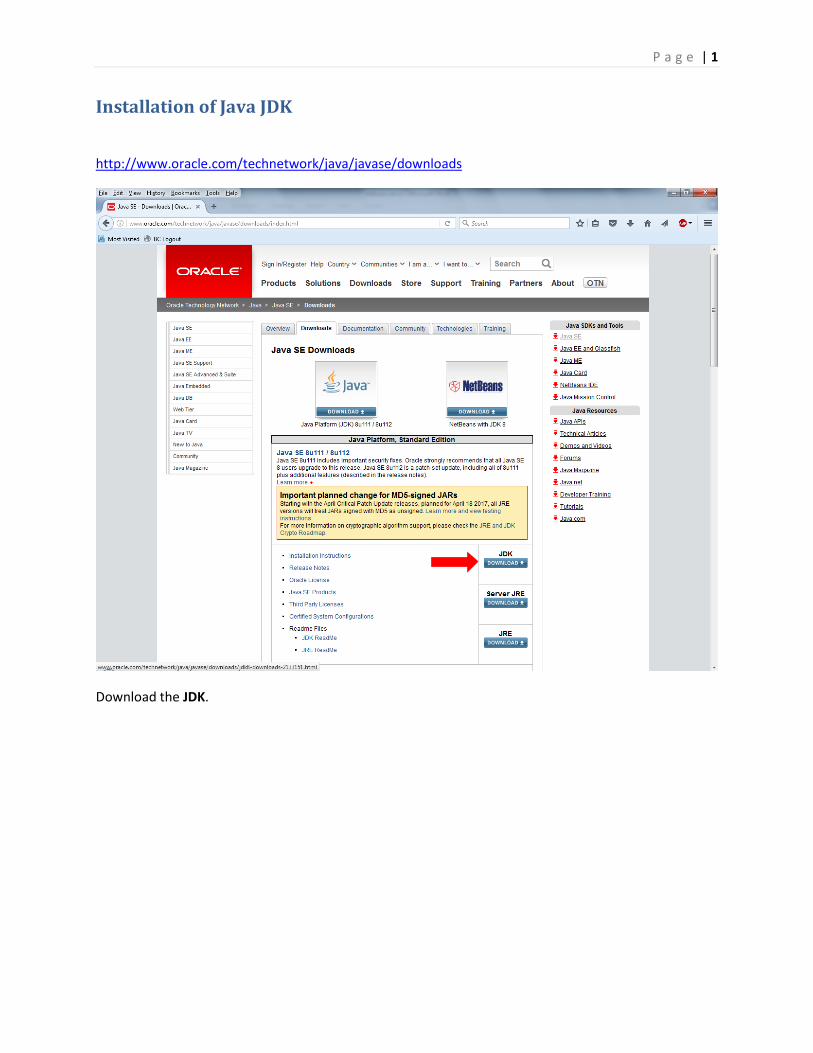
Installation of Java JDK
http://www.oracle.com/technetwork/java/javase/downloads
Download the JDK.
P a g e | 2
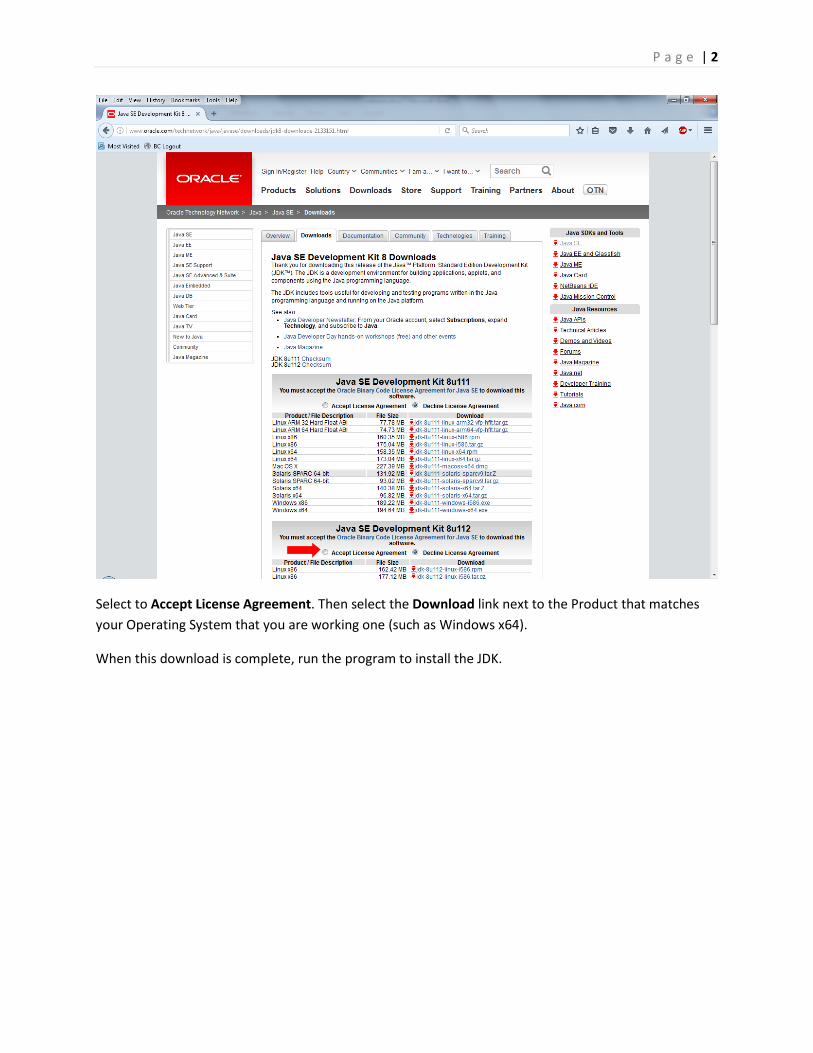
Select to Accept License Agreement. Then select the Download link next to the Product that matches your Operating System that you are working one (such as Windows x64).
When this download is complete, run the program to install the JDK.
P a g e | 3
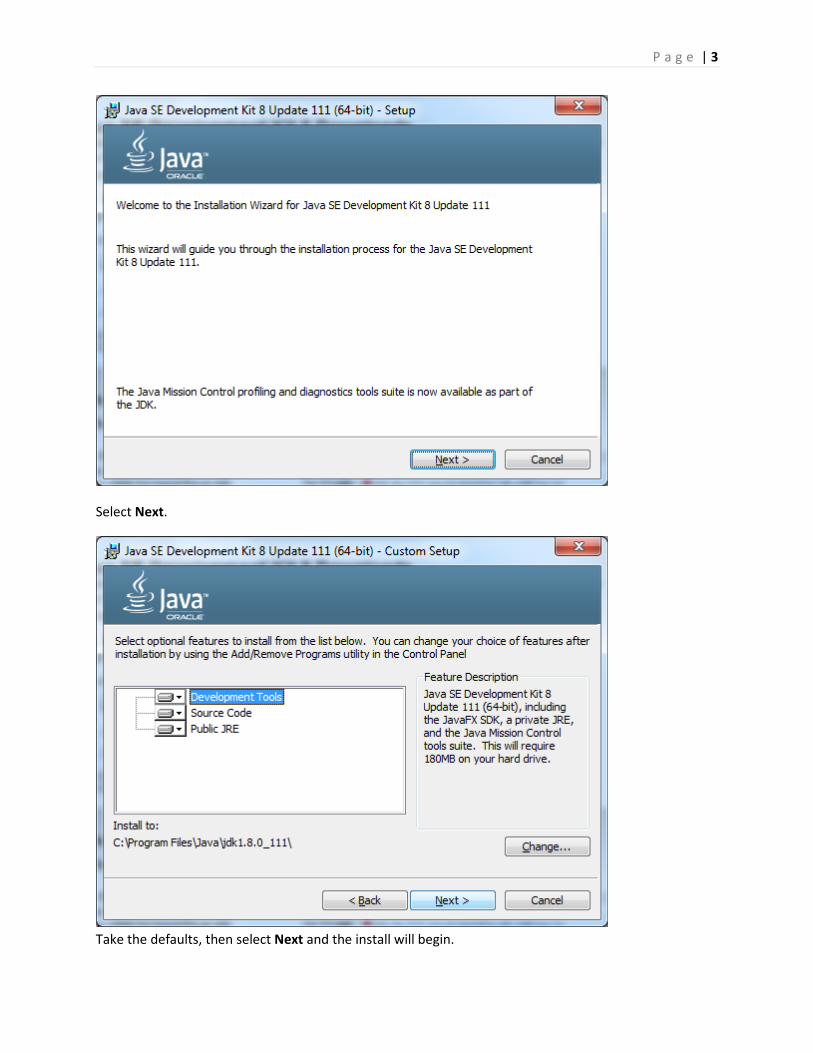
Select Next.
Take the defaults, then select Next and the install will begin.
P a g e | 4
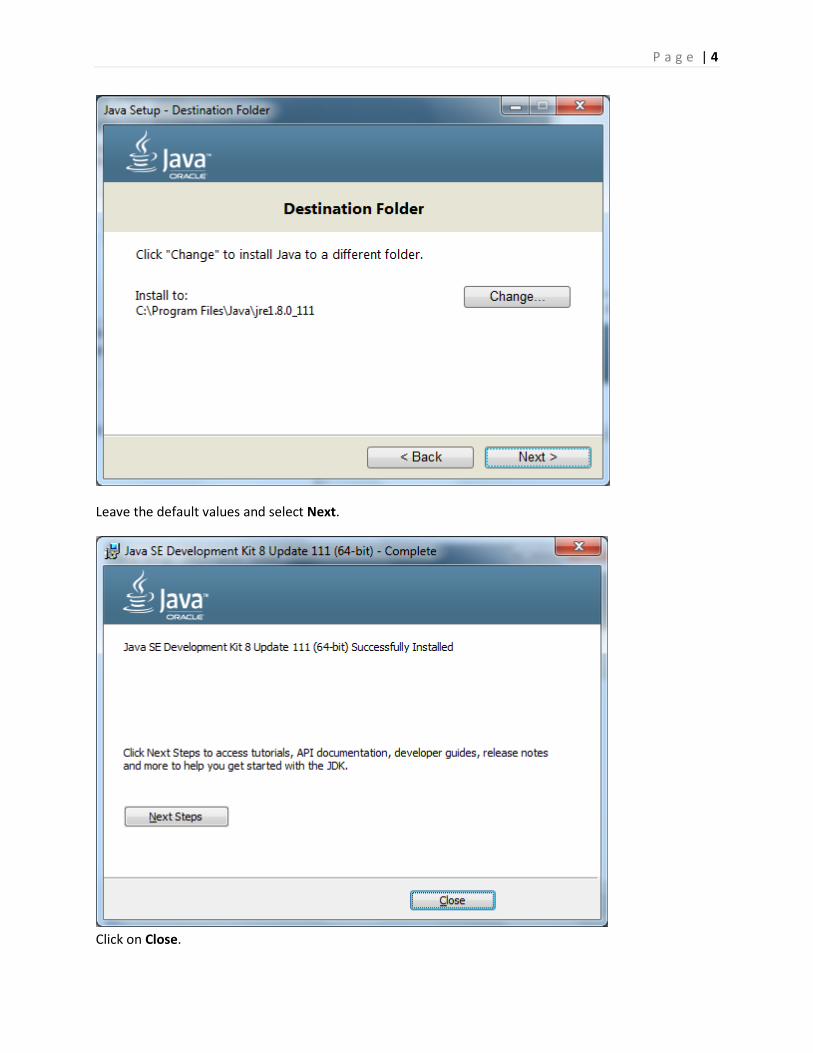
Leave the default values and select Next.
Click on Close.
P a g e | 5
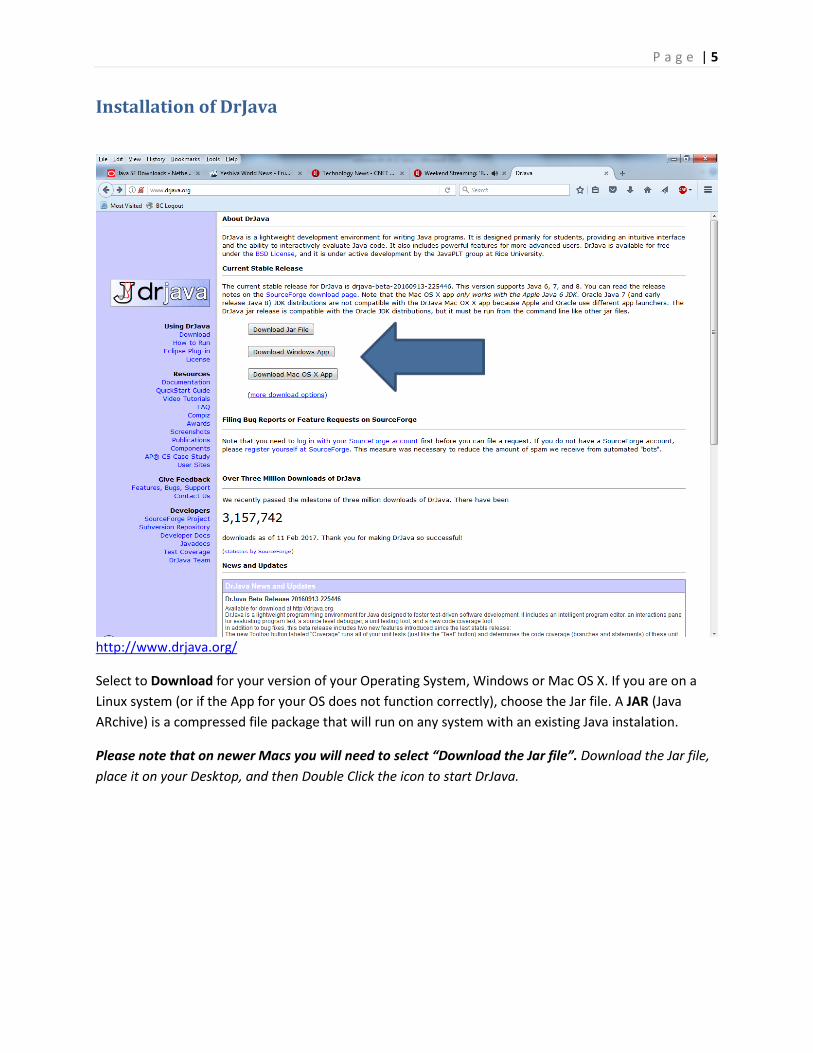
Installation of DrJava
http://www.drjava.org/
Select to Download for your version of your Operating System, Windows or Mac OS X. If you are on a Linux system (or if the App for your OS does not function correctly), choose the Jar file. A JAR (Java ARchive) is a compressed file package that will run on any system with an existing Java instalation.
Please note that on newer Macs you will need to select “Download the Jar file”. Download the Jar file, place it on your Desktop, and then Double Click the icon to start DrJava.
P a g e | 6
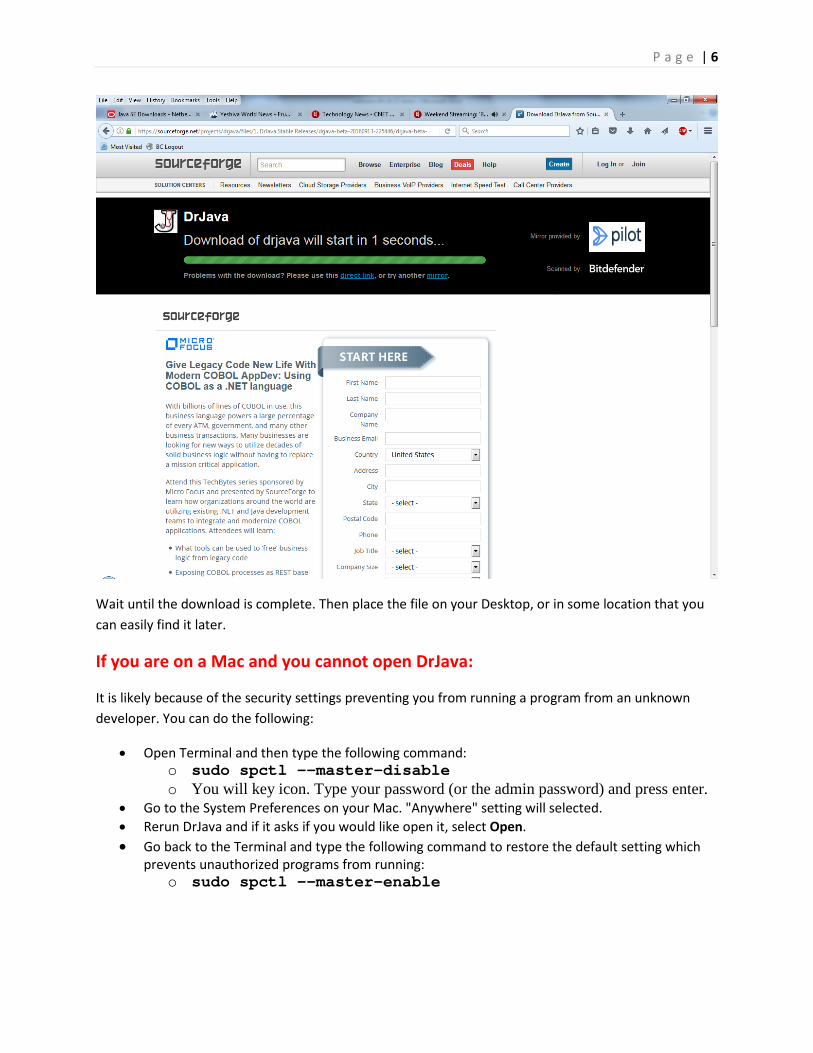
Wait until the download is complete. Then place the file on your Desktop, or in some location that you can easily find it later.
If you are on a Mac and you cannot open DrJava:
It is likely because of the security settings preventing you from running a program from an unknown developer. You can do the following:
• Open Terminal and then type the following command: o sudo spctl --master-disable o You will key icon. Type your password (or the admin password) and press enter.
• Go to the System Preferences on your Mac. "Anywhere" setting will selected. • Rerun DrJava and if it asks if you would like open it, select Open. • Go back to the Terminal and type the following command to restore the default setting which
prevents unauthorized programs from running: o sudo spctl --master-enable
P a g e | 7
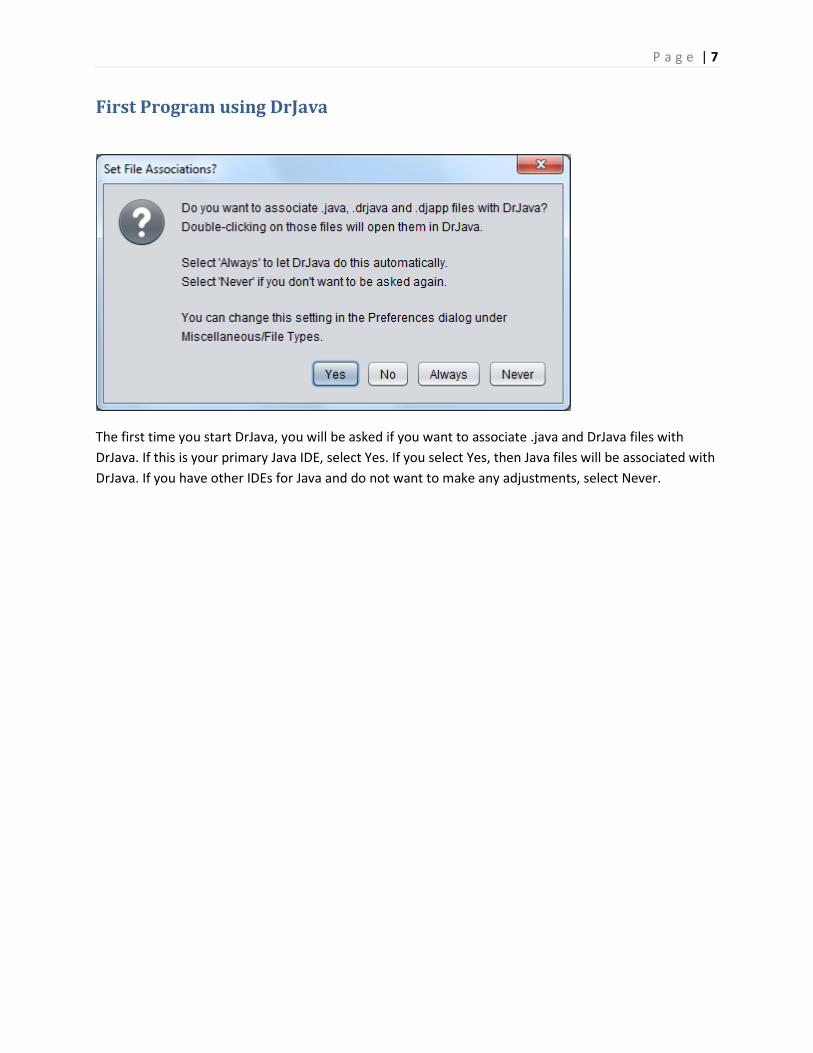
First Program using DrJava
The first time you start DrJava, you will be asked if you want to associate .java and DrJava files with DrJava. If this is your primary Java IDE, select Yes. If you select Yes, then Java files will be associated with DrJava. If you have other IDEs for Java and do not want to make any adjustments, select Never.
P a g e | 8
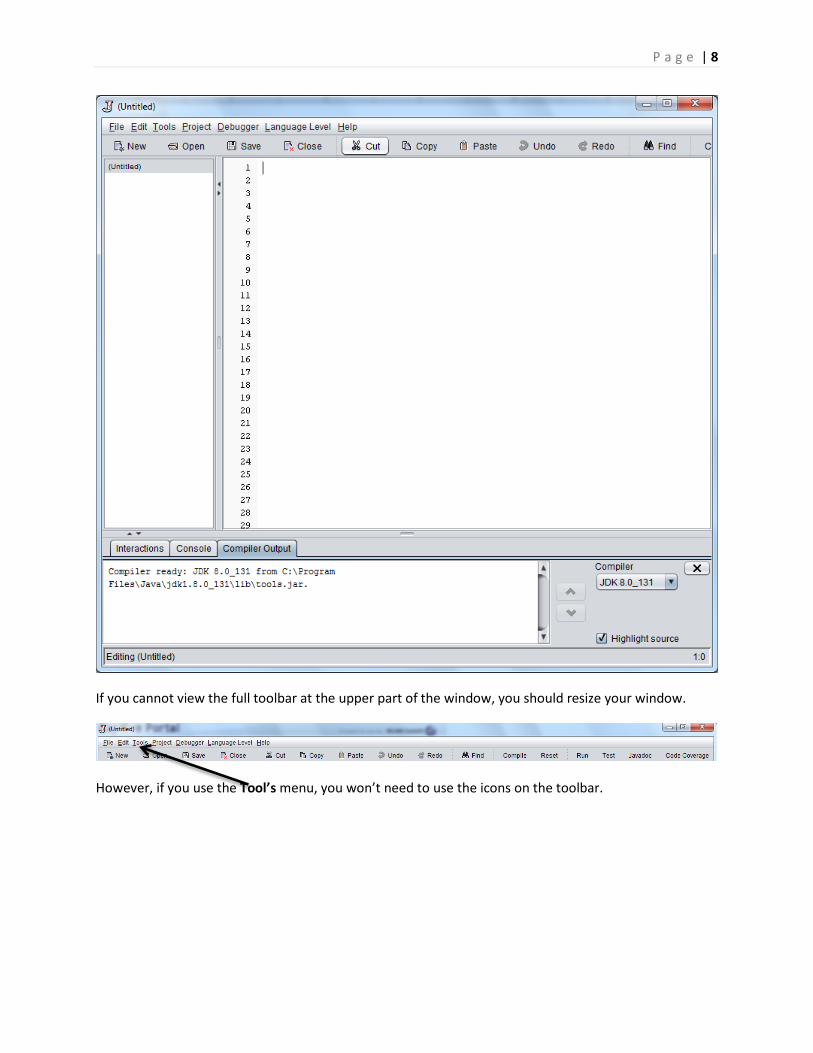
If you cannot view the full toolbar at the upper part of the window, you should resize your window.
However, if you use the Tool’s menu, you won’t need to use the icons on the toolbar.
P a g e | 9
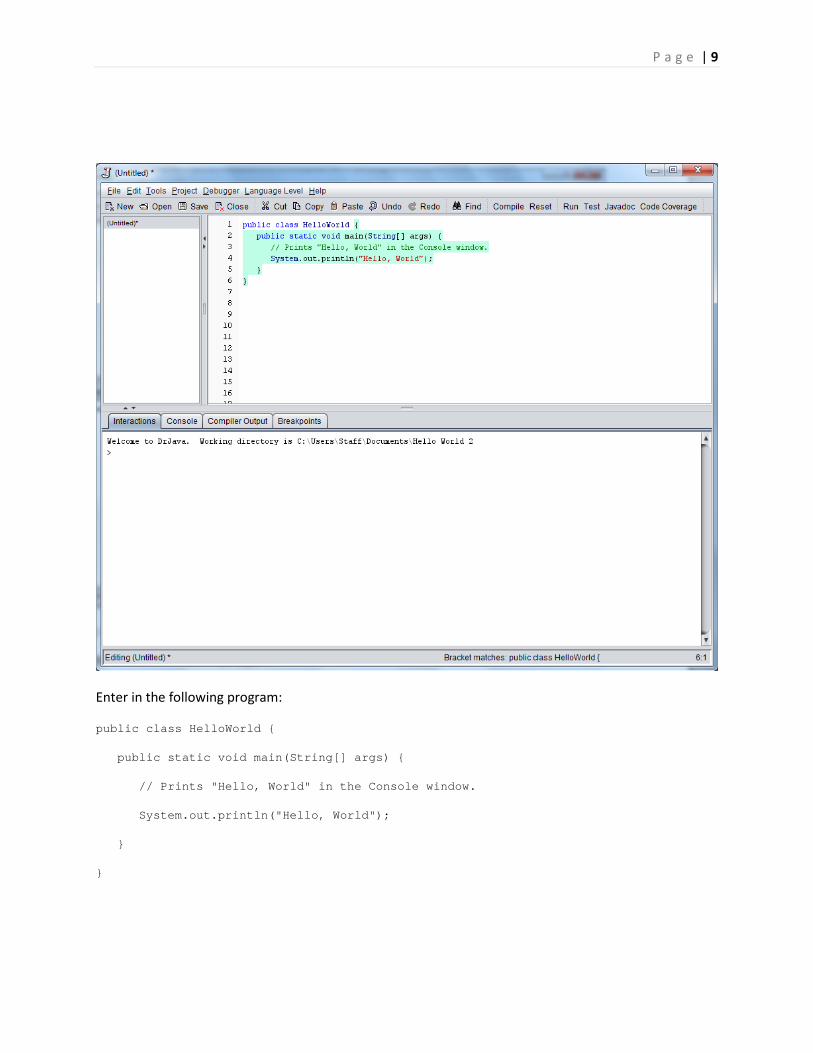
Enter in the following program:
public class HelloWorld {
public static void main(String[] args) {
// Prints "Hello, World" in the Console window.
System.out.println("Hello, World");
}
}
P a g e | 10
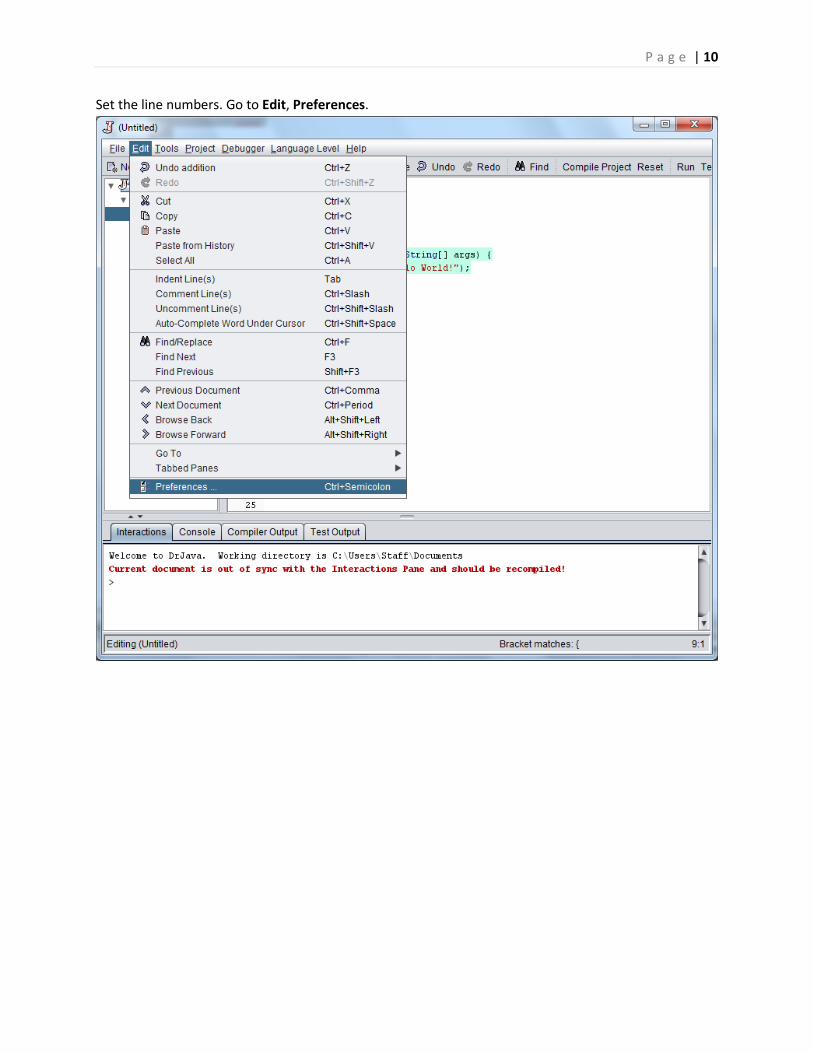
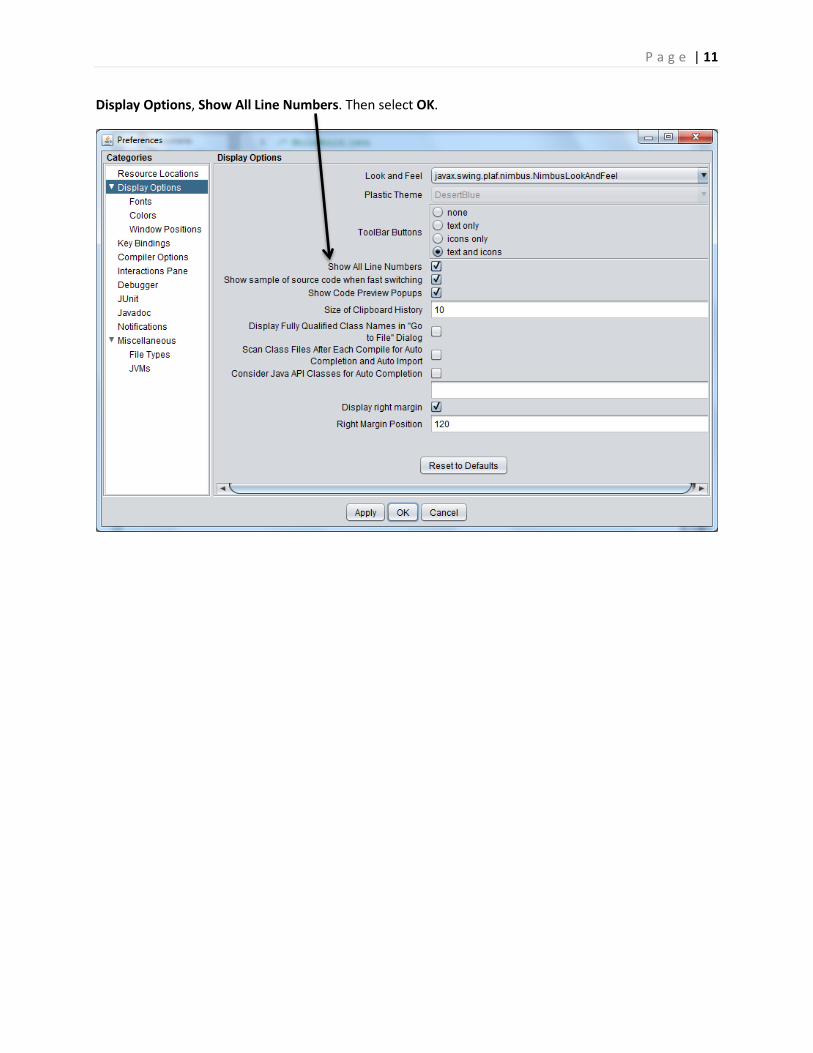
Set the line numbers. Go to Edit, Preferences.
P a g e | 11
Display Options, Show All Line Numbers. Then select OK.
P a g e | 12
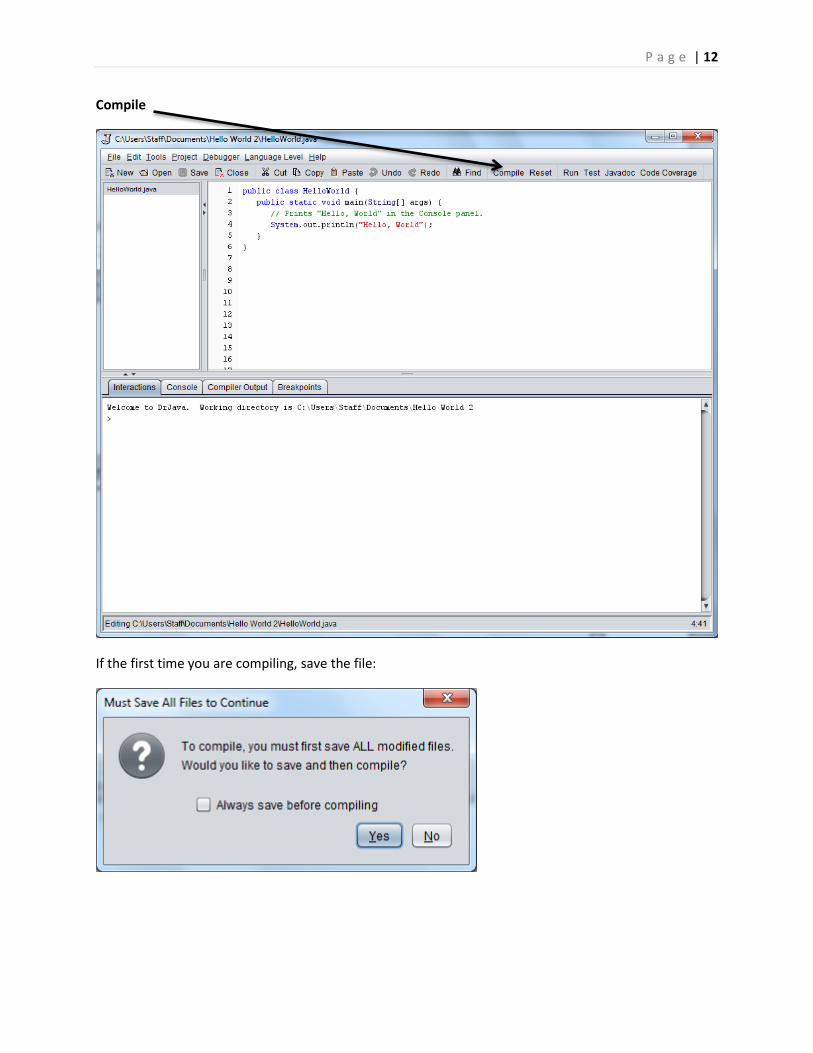
Compile
If the first time you are compiling, save the file:
P a g e | 13
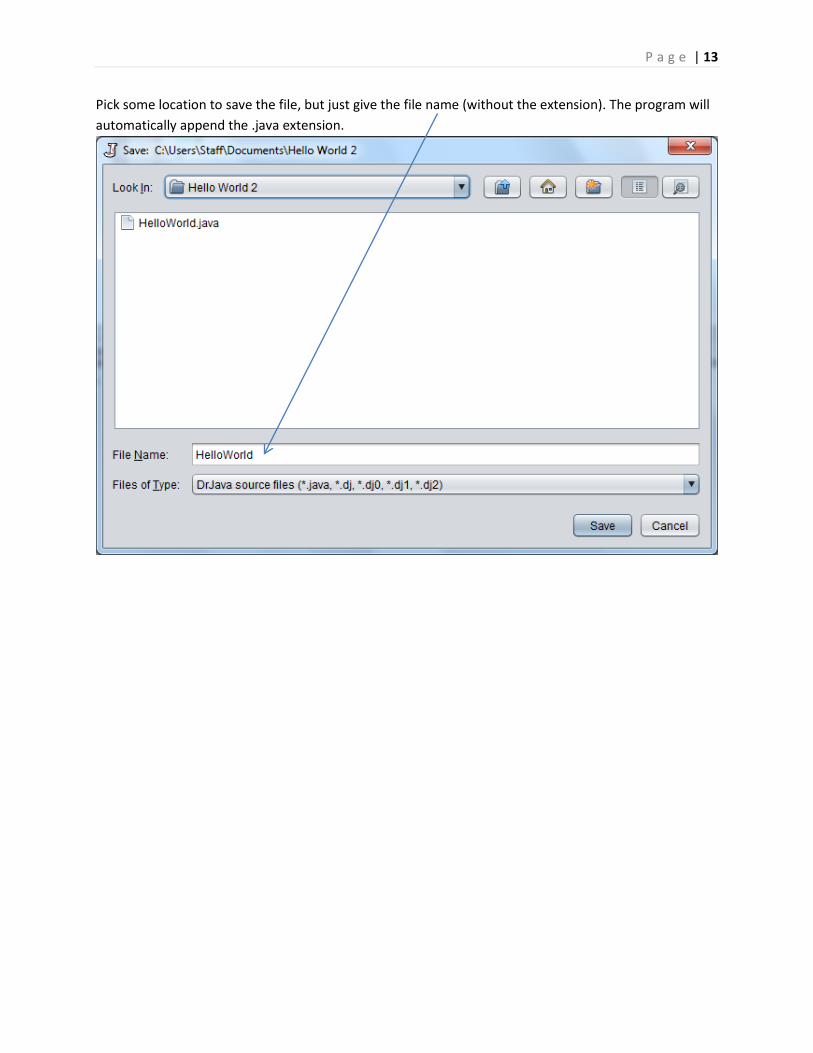
Pick some location to save the file, but just give the file name (without the extension). The program will automatically append the .java extension.

P a g e | 14
You will get a Compilation completed message if no errors are found.
P a g e | 15
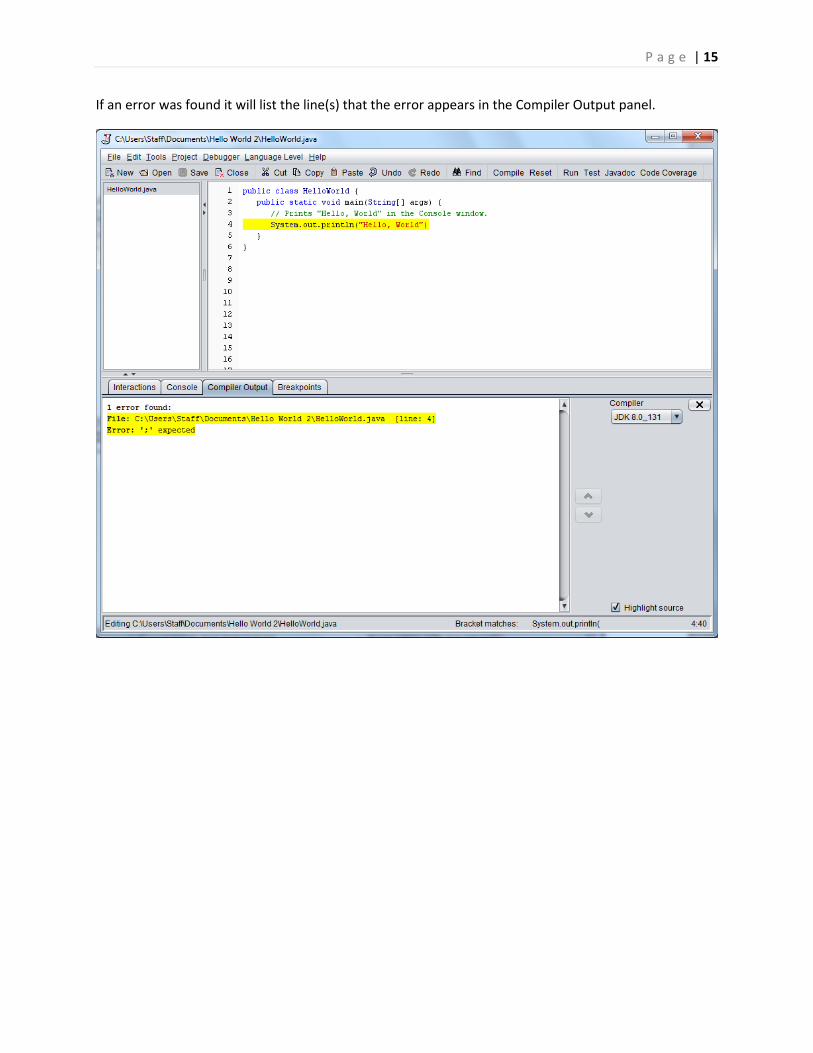
If an error was found it will list the line(s) that the error appears in the Compiler Output panel.
P a g e | 16
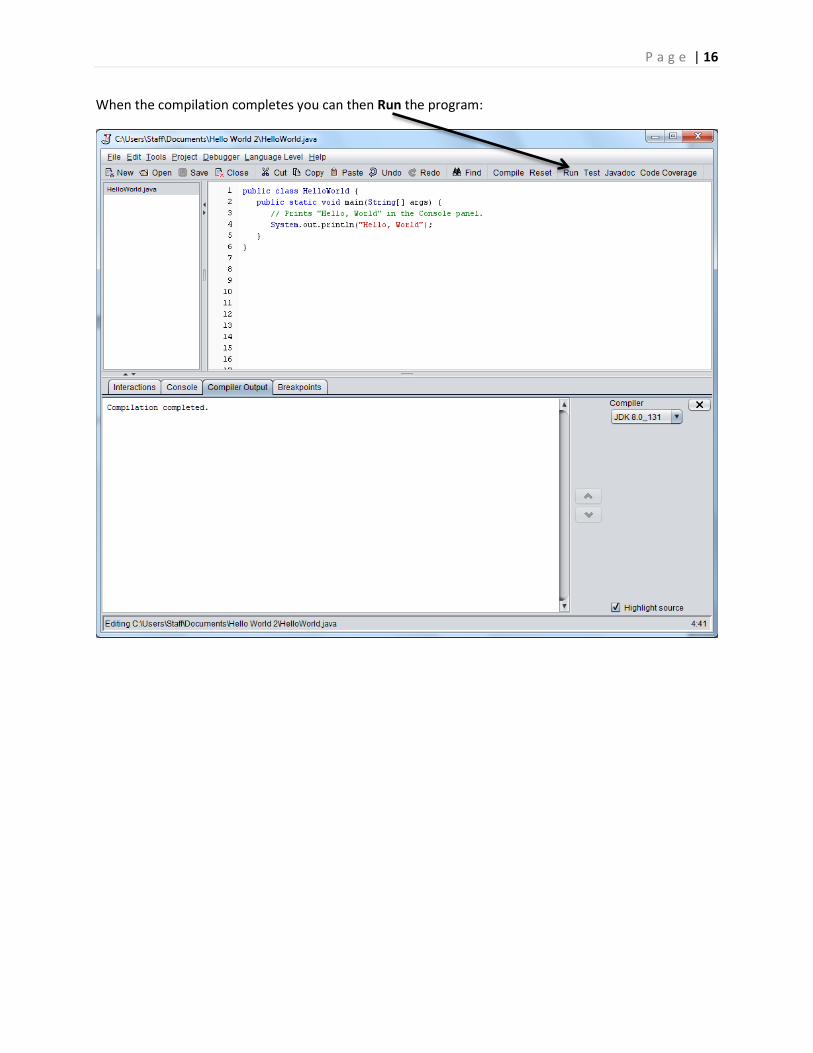
When the compilation completes you can then Run the program:
P a g e | 17
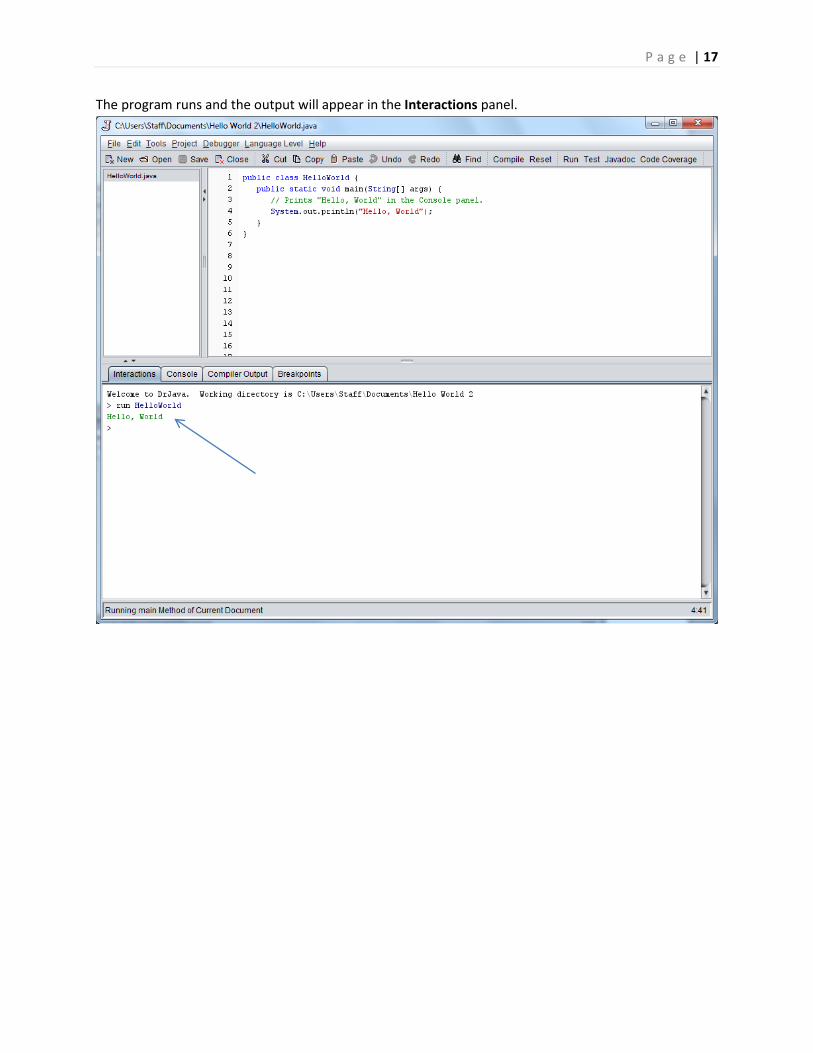
The program runs and the output will appear in the Interactions panel.
P a g e | 18
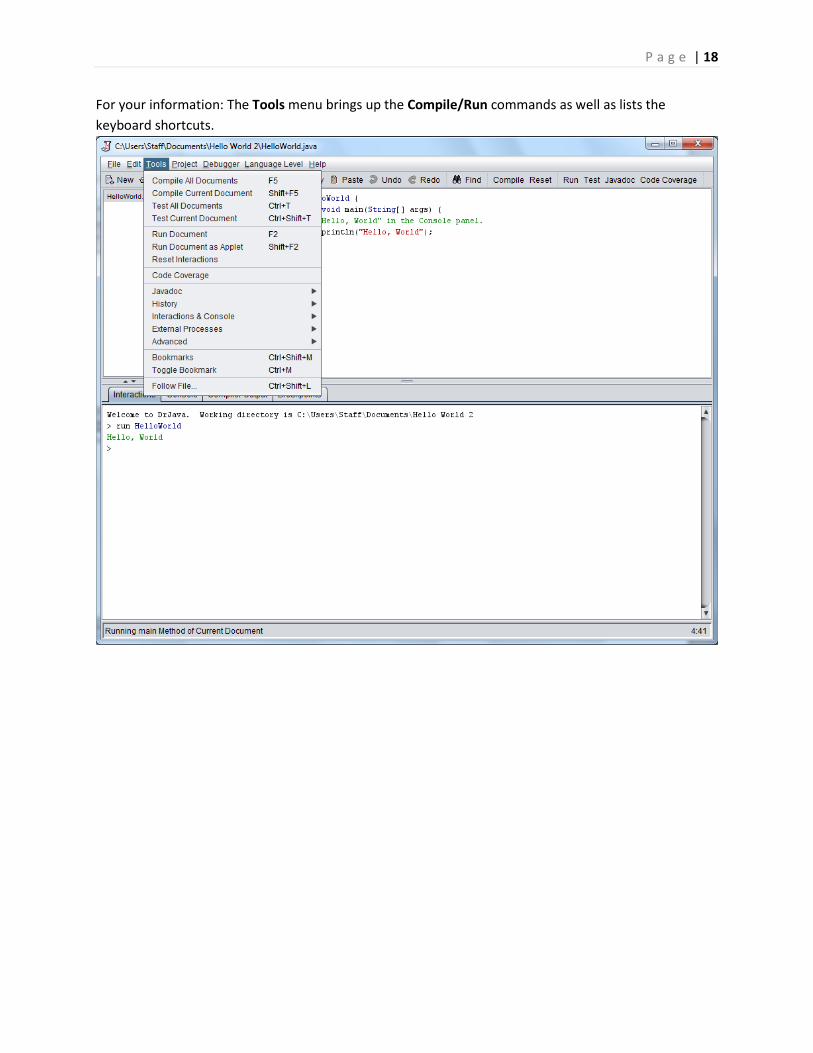
For your information: The Tools menu brings up the Compile/Run commands as well as lists the keyboard shortcuts.
P a g e | 19
Using the Debugger
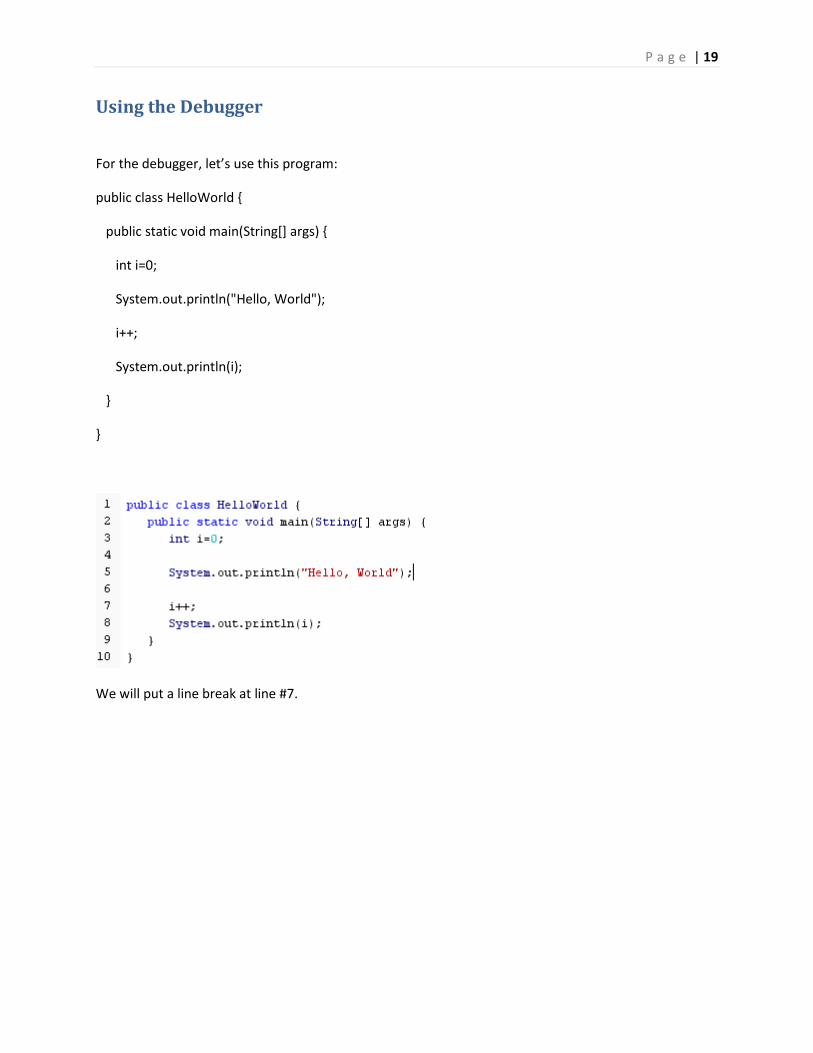
For the debugger, let’s use this program:
public class HelloWorld {
public static void main(String[] args) {
int i=0;
System.out.println("Hello, World");
i++;
System.out.println(i);
}
}
We will put a line break at line #7.
P a g e | 20
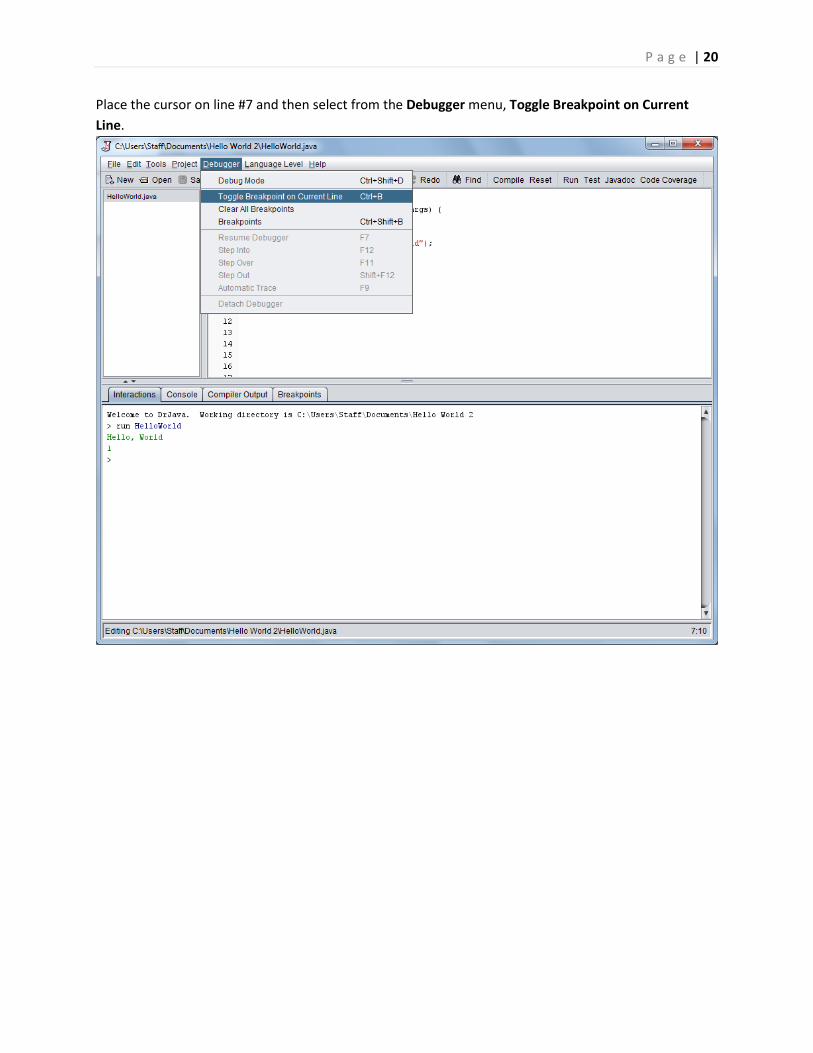
Place the cursor on line #7 and then select from the Debugger menu, Toggle Breakpoint on Current Line.
P a g e | 21
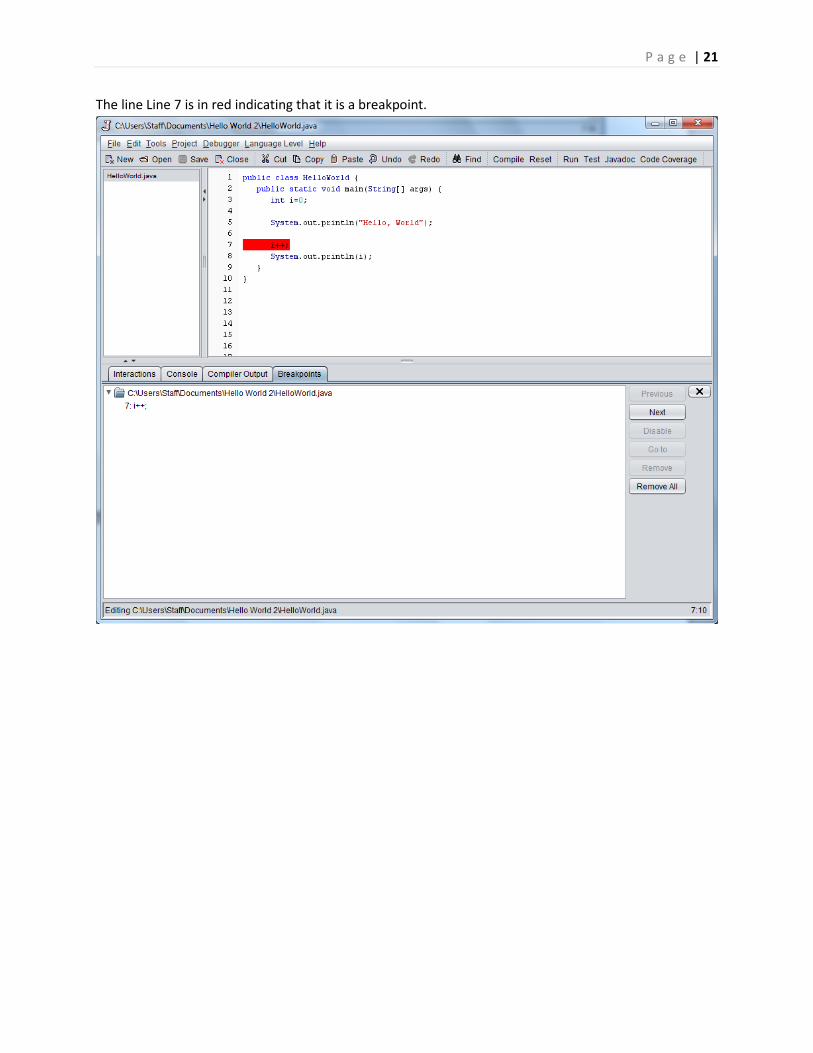
The line Line 7 is in red indicating that it is a breakpoint.
P a g e | 22
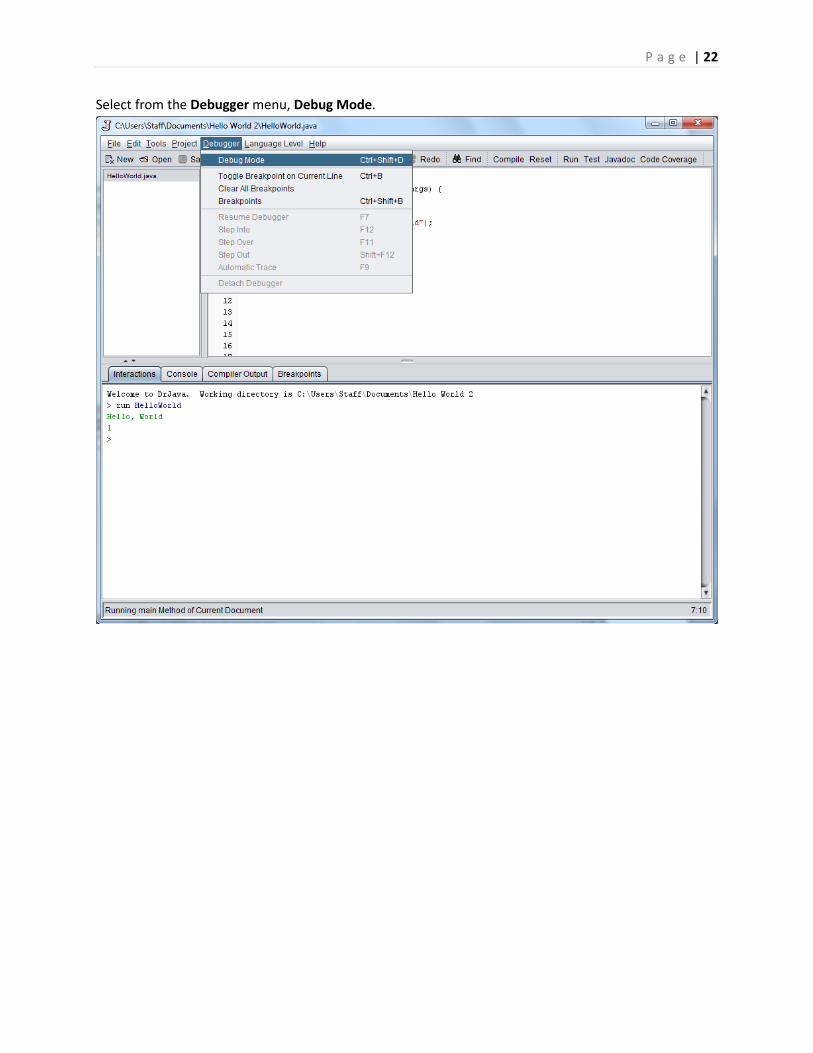
Select from the Debugger menu, Debug Mode.
P a g e | 23
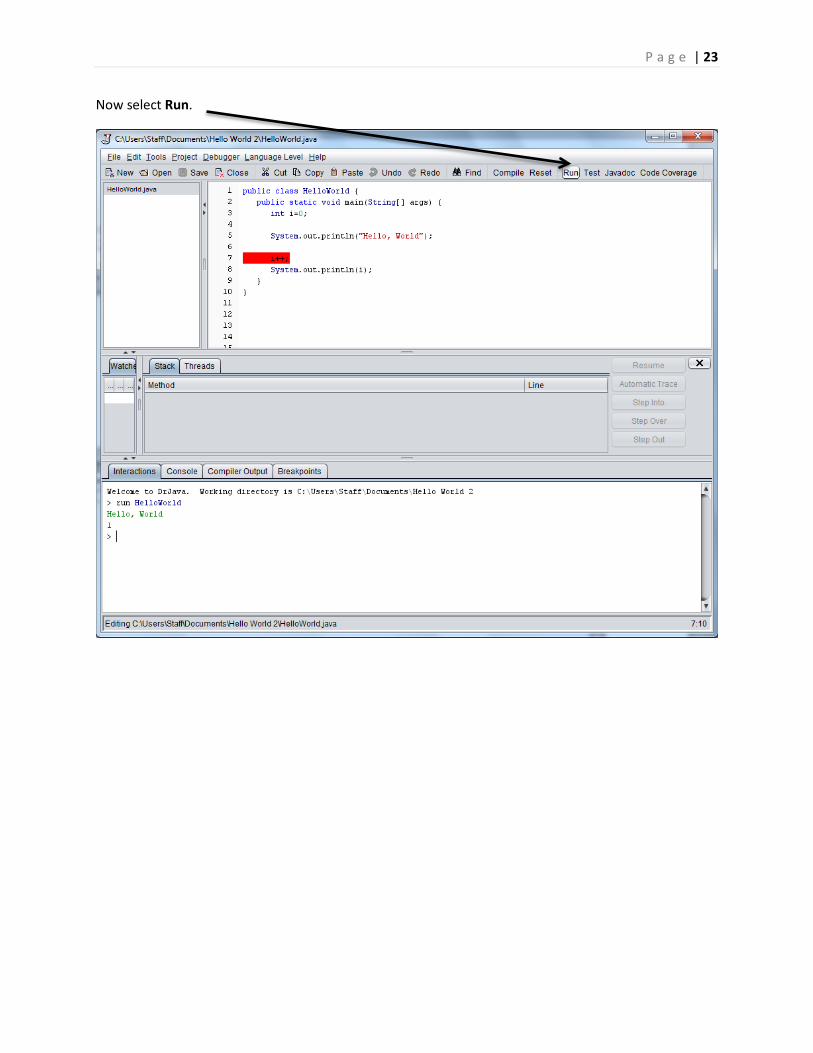
Now select Run.
P a g e | 24
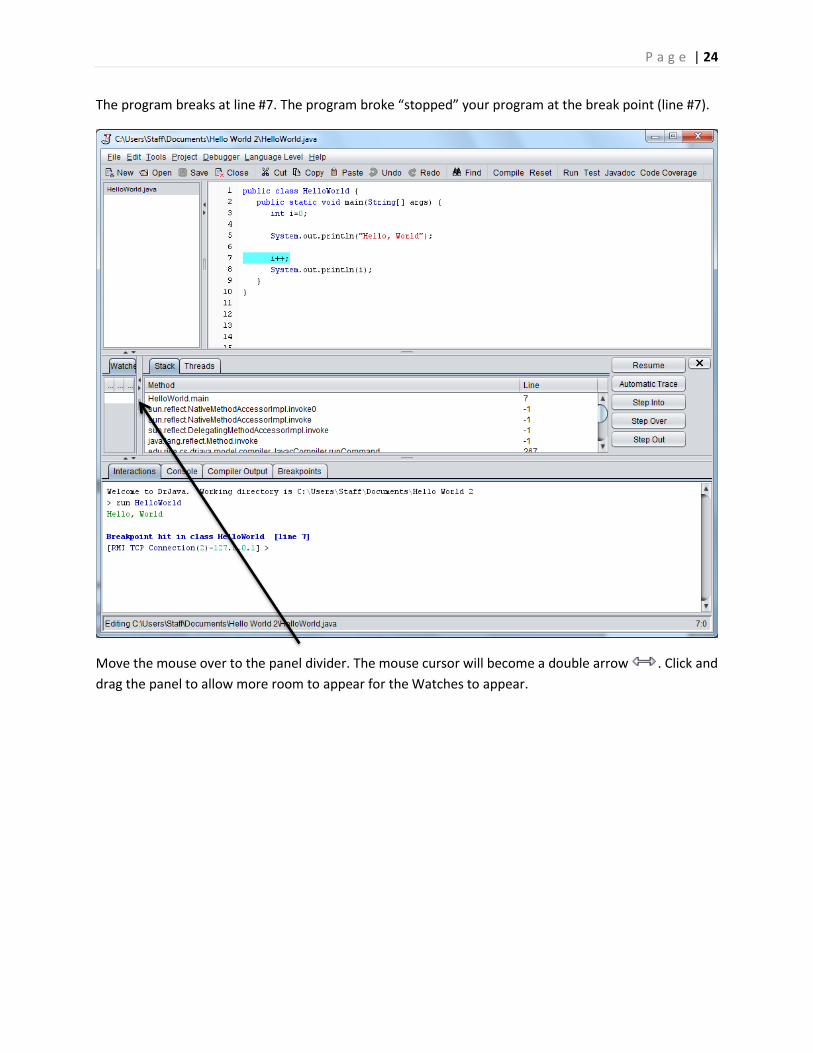
The program breaks at line #7. The program broke “stopped” your program at the break point (line #7).
Move the mouse over to the panel divider. The mouse cursor will become a double arrow . Click and drag the panel to allow more room to appear for the Watches to appear.
P a g e | 25
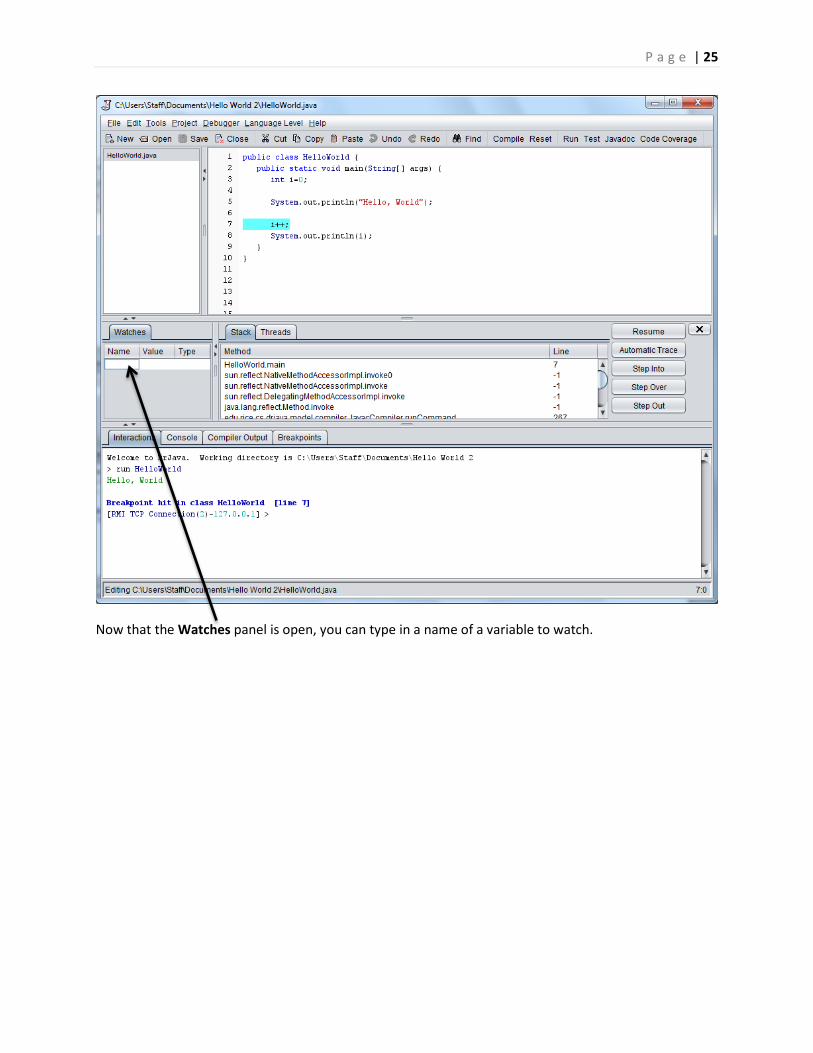
Now that the Watches panel is open, you can type in a name of a variable to watch.
P a g e | 26
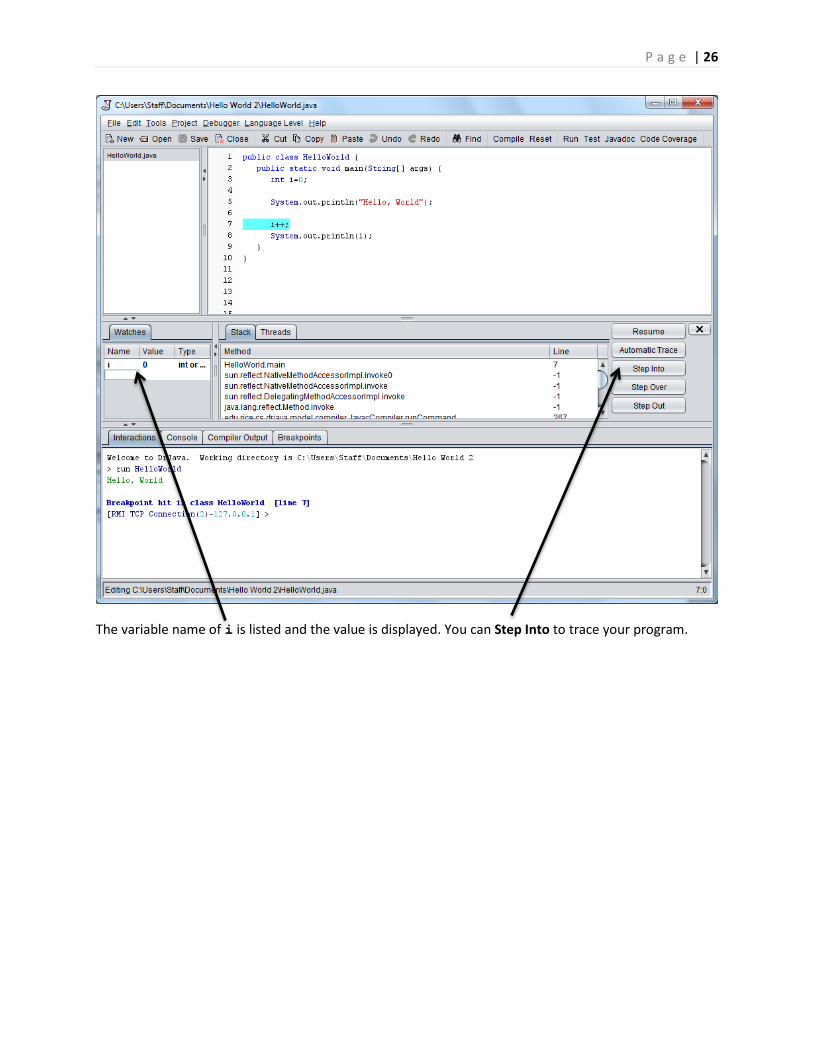
The variable name of i is listed and the value is displayed. You can Step Into to trace your program.
P a g e | 27
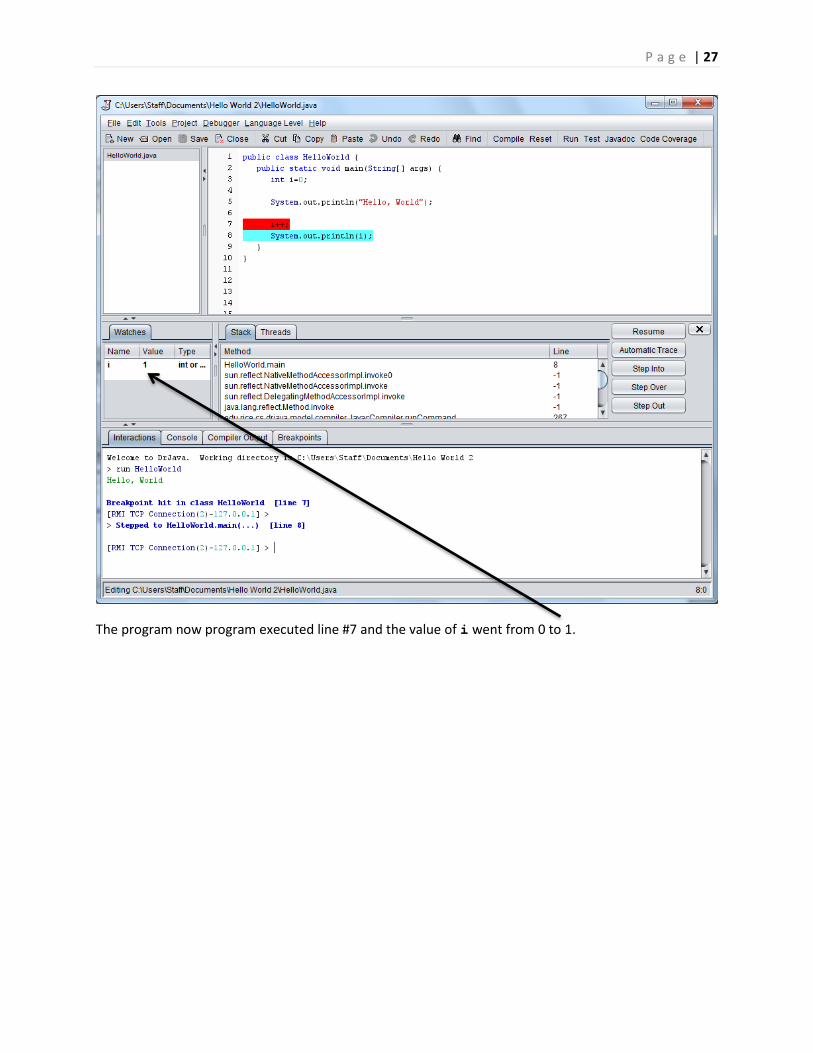
The program now program executed line #7 and the value of i went from 0 to 1.
P a g e | 28
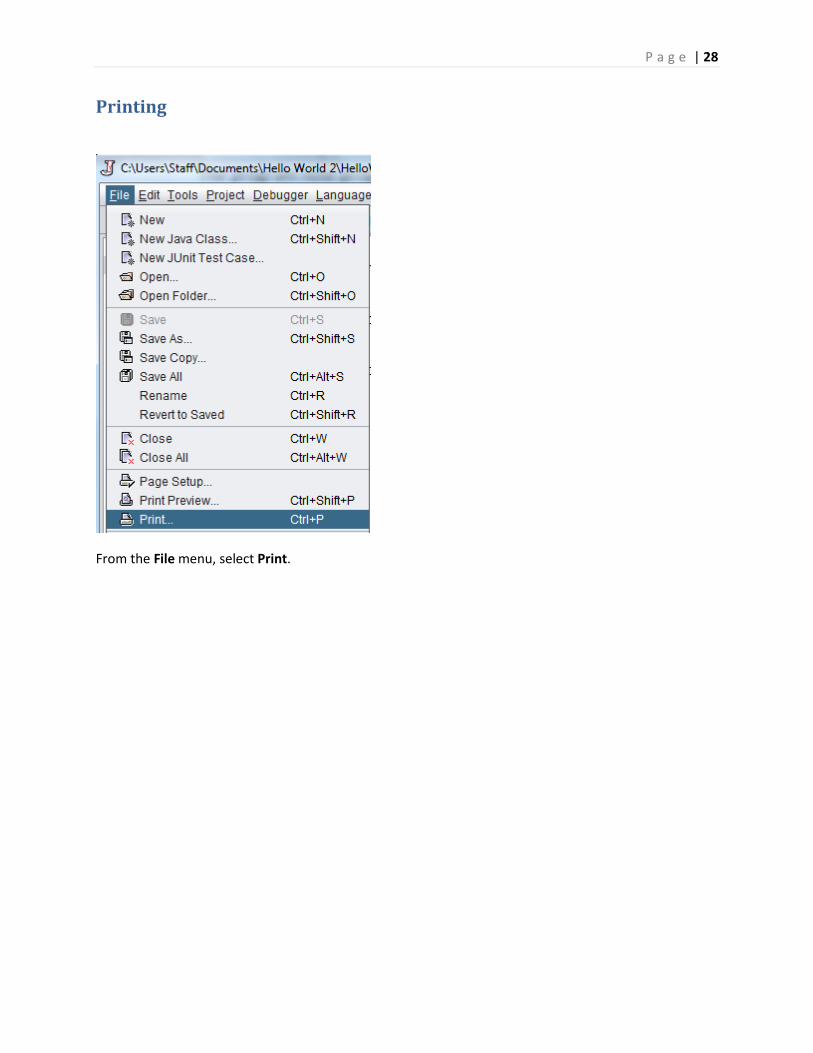
Printing
From the File menu, select Print.