brooding fundamentals guide - nextekci en brooding_guide.pdf · weight at 7 days is an excellent...
TRANSCRIPT

cccccccccccccccccccccccccccccccccccccccccccccooooooooooooooooooooooooobbbbbbbbbbbbbbbbbbbbbbbbbbbbbbbbbbbbbbbbbbbbbbbbbbbbbbbbbbbbbbbbbbbbbbbbbb--------------------------------vvvvvvvvvvvvvvvvvvvvvvvvvvvvvvvvvvvvvvvvvvvvvvvvvvaaaaaaaaaaaaaaaaaaaaaaaaaaaaaaaaaaaaaaaaaaaaaaaaaannnnnnnnnnnnnnntttttttttttttrrrrrrrrrrrreeeeeeeeeeeeeeeeeeeeeeeeeeeeeeeeeeeeeeeeeeeeeeeeeeeeesssssssssssssssssssssssssssssssssssssssssssssssssssssssssssssssssssssssssssssssssssssssssssssssss................cccccccccccccccccccccccccccccccccccoooooooooooooooooooooooooooooooooooooooooooooooooooooooooooooooooommmmmmmmmmmmmmmmmmmmmmmmmmmmmmmmmmmmmmmmmmmmmmmmmmmmmmm
BroodingFundamentals
Guide
broo
ding
BroodingGuide.indd 1BroodingGuide.indd 1 3/20/08 1:42:58 PM3/20/08 1:42:58 PM

COBB Brooding Fundamentals Guide
INTRODUCTION
The brooding period, generally considered as the period of time from placement through 14days, is perhaps the most important time in a bird’s life. Survival of the newly hatched chick islargely dependant on how quickly and efficiently the transition is made from the Hatcher to thefarm environment. At no other time during the flock’s life is a service person’s and producer’sjob more important. Mistakes made during this critical time may be irreversible and negativelyimpact performance for the entire life of the flock.
COBB
BroodingGuide.indd 3BroodingGuide.indd 3 3/20/08 1:43:02 PM3/20/08 1:43:02 PM

COBB Brooding Fundamentals Guide
COBB 1
•
•
Immune system
An understanding of the physiological changes that occur in the chick during the first 2 weeks of life makes it easier to fully appreciate the importance of this developmental phase. These changes include development of the:
Passive immunity is occurring as a result of the transfer of antibodies from thebreeder hen through yolk absorption to the developing chick (~2-3 weeks)Active immunity is developing from in-ovo & day old vaccinations, field vaccinations and exposure to field pathogens.
•
•
Digestive systemRapid internal organ growth required for digestion (liver, intestines, pancreas, spleen and bursa).Feed conversion & growth rate are more efficient during this time than at any other time in the bird’s life.
•Skeletal system
Rapid growth and thickening of long bones required for leg strength and mineralmetabolism later in life.
•Thermoregulation
Chicks do not have the ability to regulate body temperature for the first 5 days andthermo regulation is not fully developed until 2 weeks of age. Chick survival is highly dependant on the grower to provide the proper environmental temperature.
Feather Developement
Improper brooding practices can result in poor livability, poor flock uniformity and overall poor performance in the pullet and hen house leading to a higher chick cost. Obtaining a body weight at 7 days is an excellent indictor of how successful brooding management has been. This weight can be used as a “tool” to help illustrate the difference between well managed and poorly managed farms. The target body weight at 7 days is approximately 4 times the day old chick weight. If this level of performance is not achieved, pre-placement and brooding management techniques should be critically evaluated.
The effects of early stress may not be seen until much later in life and may negatively affectthe subsequent reproductive performance of the flock. The main reason for insufficient weight gain is low feed consumption. Feed presentation in the form of a good quality, small crumble is necessary to obtain adequate feed intake during the first week. An insufficient feed amount and/or insufficient feeder space will negatively affect feed intake, weight gain and flock uniformity. Research has shown that early protein intake has an effect on 4 week weight, flockuniformity and ultimately egg production.
The 6 Brooding Fundamentals to maximizing performance and minimizing cost include:••••••
Pre-Placement PreparationFeed ManagementLight Management Water ManagementTemperature ManagementAir Quality & Ventilation
BroodingGuide.indd 4BroodingGuide.indd 4 3/20/08 1:43:05 PM3/20/08 1:43:05 PM

COBB Brooding Fundamentals Guide
COBB2
The key to successful rearing lies in an effective management program starting well beforechicks arrive at the farm. Rearing facilities should be clean, disease free and biosecure before placing the flock. Detailed cleaning and hygiene procedures are described in the CobbBreeder Management Guide. Biosecurity regulations should be enforced year round even when the farm is empty between placements.
The entire floor should be covered with 3-4” (7.5- 10.0 cm.) of a good quality litter material to prevent heat loss. Litter should be spread as evenly as possible throughout the house to help ensure an even floor temperature. Uneven floor temperatures can cause chicks to huddle in pockets or under equipment. In addition to this, uneven litter can impede chick mobility and restrict access to feed and water due to the uneven height of feed and water lines.
Water lines should be cleaned, sanitized and thoroughly flushed prior to flock placement. Water line pressure should be readjusted from the previous flock to a pressure suitable for the baby chick.
Stocking density should take into consideration environmental/ local climatic conditions and the type of equipment being used. Males should be given proportionately more floor space than females to help ensure they achieve target body weight goals.
The Pre-Placement period is the ideal time to prepare the “Chick Comfort Zone”; the areasurrounding the edge of the brooder where the baby chick does not have to make a choicebetween feed, water or heat. Equipment placement is critical to accomplish this objective.
PRE-PLACEMENT PREPARATION
Females10.81.05.02.020
20-301.50.6
10-1280-100
10.81.07.53.020
20-301.50.61080
Floor
Feeder
Water
Litter (birds/ m)Litter (ft./ bird )Chain (cm./ bird)Chain (in./ bird)Pan Feeder (birds/ pan)Tube Feeder (birds/ tube)Trough (cm./ bird)Trough (in./ bird)Nipples (birds/ nipple)Bell Drinker (birds/ bell)
Males
Sex Separate Brooding Space Requirements (0-4 weeks)
BroodingGuide.indd 5BroodingGuide.indd 5 3/20/08 1:43:05 PM3/20/08 1:43:05 PM
COBB Brooding Fundamentals Guide
COBB 3
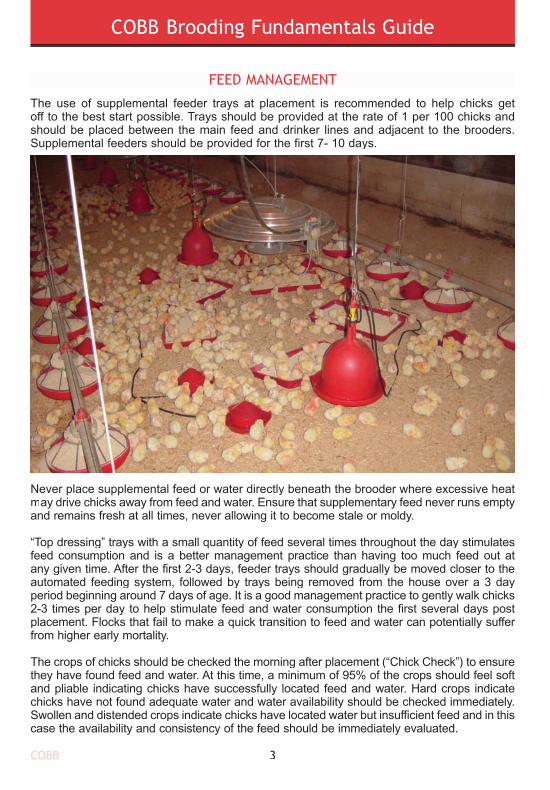
The use of supplemental feeder trays at placement is recommended to help chicks getoff to the best start possible. Trays should be provided at the rate of 1 per 100 chicks andshould be placed between the main feed and drinker lines and adjacent to the brooders.Supplemental feeders should be provided for the first 7- 10 days.
Never place supplemental feed or water directly beneath the brooder where excessive heatmay drive chicks away from feed and water. Ensure that supplementary feed never runs emptyand remains fresh at all times, never allowing it to become stale or moldy.
“Top dressing” trays with a small quantity of feed several times throughout the day stimulatesfeed consumption and is a better management practice than having too much feed out atany given time. After the first 2-3 days, feeder trays should gradually be moved closer to theautomated feeding system, followed by trays being removed from the house over a 3 dayperiod beginning around 7 days of age. It is a good management practice to gently walk chicks2-3 times per day to help stimulate feed and water consumption the first several days postplacement. Flocks that fail to make a quick transition to feed and water can potentially suffer from higher early mortality.
The crops of chicks should be checked the morning after placement (“Chick Check”) to ensurethey have found feed and water. At this time, a minimum of 95% of the crops should feel softand pliable indicating chicks have successfully located feed and water. Hard crops indicatechicks have not found adequate water and water availability should be checked immediately.Swollen and distended crops indicate chicks have located water but insufficient feed and in thiscase the availability and consistency of the feed should be immediately evaluated.
FEED MANAGEMENT
BroodingGuide.indd 6BroodingGuide.indd 6 3/20/08 1:43:06 PM3/20/08 1:43:06 PM

COBB Brooding Fundamentals Guide
COBB4
Starter feed should be fed during this period in either a mash or fine crumb form. Males andfemales should be fed ad libitum for a minimum of the first 7 days. Thereafter, the feed quantitygiven should be measured to ensure the target weight at 4 weeks is not exceeded. Achievinga uniform body weight and frame size at 4 weeks of age is an essential component to gettingthe flock off to the best possible start during this start-up period. Males need to achieve thebody weight standard each week for the first 4 weeks of age. A longer ad libitum feedingperiod is recommended for males if they fail to achieve the desired body weight at 28 days.Males should be grown separately from females for at least the first 6 weeks of age, however complete sex-separate rearing to housing between 140-147 days is recommended for bestresults.
Provide adequate feeder space for males and females at all times taking into consideration theflock age. Ideally, pullets should be reared with a minimum of 4.5” (11.50 cm.) of feeder spaceand males with a minimum of 6.0” (15.0 cm.) from 4 weeks of age up to housing.
The feed time should be consistent from day to day and feed should be distributed evenly to allbirds throughout the house in less than 3 minutes from the time the feeder starts. Adjust feedhopper gates or feeder run times so that feed makes it around the house, or as far as possible,to provide the most feeder space per bird. The feed trough or pan height should be adjustedso that they rest on the litter the first 14 days to ensure all birds can easily access feed withouthaving to climb into the feeder. Thereafter, feeders should be raised incrementally throughoutthe growing period so that the lip of the trough or pan is level with the birds back at all times.Weekly feed increases should be based on body weight targets.
Continuous lighting should be provided for the first 48-72 hours post placement. Provide anintensity of 20-60 lux (~2.0- 6.0 ft. candles) for the first 7 days to help chicks find feed andwater more easily. It is highly recommended that all rearing houses be light tight with all flocksgrown under blackout conditions.
LIGHTING MANAGEMENT
0-34-78-1414-28
2316128
2.0-6.02.01.00.5
20-6020105
Age Light IntensityFC Lux
Hoursof Light
Blackout RearingLighting Program (0-4 weeks)
*Males may remain on 12 hrs. of light from 14- 28 days to ensure their weekly weight goals are met.
BroodingGuide.indd 7BroodingGuide.indd 7 3/20/08 1:43:07 PM3/20/08 1:43:07 PM
COBB Brooding Fundamentals Guide
COBB 5
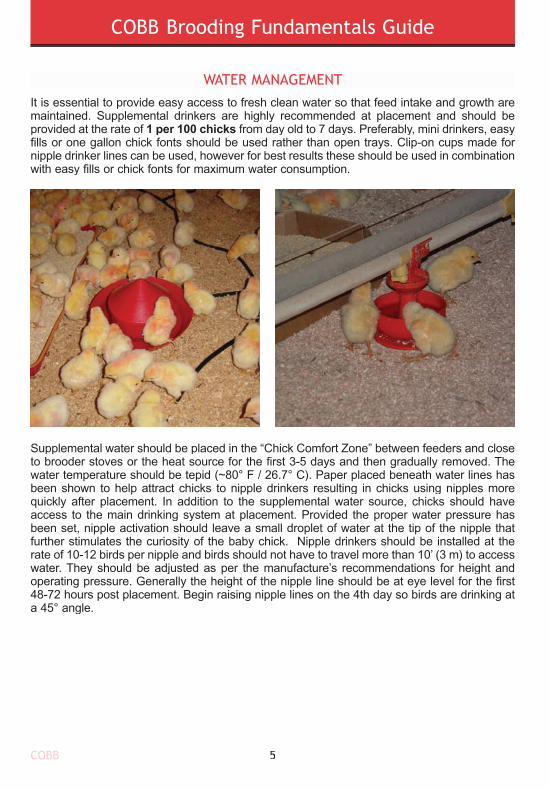
It is essential to provide easy access to fresh clean water so that feed intake and growth aremaintained. Supplemental drinkers are highly recommended at placement and should beprovided at the rate of 1 per 100 chicks from day old to 7 days. Preferably, mini drinkers, easyfills or one gallon chick fonts should be used rather than open trays. Clip-on cups made for nipple drinker lines can be used, however for best results these should be used in combinationwith easy fills or chick fonts for maximum water consumption.
Supplemental water should be placed in the “Chick Comfort Zone” between feeders and closeto brooder stoves or the heat source for the first 3-5 days and then gradually removed. Thewater temperature should be tepid (~80° F / 26.7° C). Paper placed beneath water lines hasbeen shown to help attract chicks to nipple drinkers resulting in chicks using nipples morequickly after placement. In addition to the supplemental water source, chicks should haveaccess to the main drinking system at placement. Provided the proper water pressure hasbeen set, nipple activation should leave a small droplet of water at the tip of the nipple thatfurther stimulates the curiosity of the baby chick. Nipple drinkers should be installed at therate of 10-12 birds per nipple and birds should not have to travel more than 10’ (3 m) to accesswater. They should be adjusted as per the manufacture’s recommendations for height andoperating pressure. Generally the height of the nipple line should be at eye level for the first48-72 hours post placement. Begin raising nipple lines on the 4th day so birds are drinking ata 45° angle.
WATER MANAGEMENT
BroodingGuide.indd 8BroodingGuide.indd 8 3/20/08 1:43:07 PM3/20/08 1:43:07 PM

COBB Brooding Fundamentals Guide
COBB6
From this time on raise lines up gradually so birds are drinking straight up by the 10th day.While drinking, a bird’s feet should remain flat on the floor at all times.
Litter conditions are an excellent means of assessing the effectiveness of water systemsettings. Damp litter under the water source indicates drinkers are set too low or pressure istoo high. Excessively dry litter under drinkers may indicate water pressure is too low or thenipple line is too high for easy access. Nipple water line sight tubes should be kept clean at alltimes and pressure adjustments should be made in small increments.
Monitoring water consumption through the use of water meters can be an excellent meansof gauging feed as there is a high correlation between feed and water consumption. Water meters should be sized the same as the incoming water supply line to ensure adequate flowrate. Water consumption should be evaluated at the same time each day to best determinegeneral performance trends and bird well-being. Any substantial change in water usage shouldbe investigated as this may indicate a water leak, health change or feed issue. A drop in water consumption is often the first indicator of a flock problem.
Water consumption should equal approximately 1.6- 2.0 times the feed intake by mass on adaily basis at 70° F (21.1°C). Intake will vary based on environmental temperature, feed qualityand bird health. Erratic water intake fluctuations should be investigated before restricting water availability, which should not be a standard practice.
BroodingGuide.indd 9BroodingGuide.indd 9 3/20/08 1:43:08 PM3/20/08 1:43:08 PM

COBB Brooding Fundamentals Guide
COBB 7
TEMPERATURE MANAGEMENTPrior to chick placement, brooders and space heaters should be checked regularly to ensure they are working correctly. House pre-heating should commence 24 to 48 hours prior to placement depending on climatic conditions. Pre-heating ensures that the fl oor and litter temperature is ideal for baby chick placement. In addition to this, pre-heating warms the air and water, helps to remove ammonia (built-up litter) and removes litter moisture.
With whole-house space heating, the ideal fl oor temperature should be at least 90° F (32° C). With pancake type brooders, the ideal fl oor temperature directly under the brooder is 105° F (40.5° C), approximately the same temperature as the internal temperature of a brooding hen.The fl oor temperature at the brooder edge should be in the range of 85- 90° F (32° C).
Observe chicks and adjust for their comfort, making sure not to overheat. Chicks that become overheated or chilled will experience problems such as pasting, unabsorbed yolks, stressand dehydration. Good performance requires close monitoring and adjustment of brooder temperatures and house ventilation to prevent these conditions from occurring. An excellent indicator of fl oor temperature is the temperature of the chick’s feet. If the feet are cold, re-evaluate the heating system and litter temperature. If they are comfortably warm, the chicks should be actively moving around the brooding area.
The use of a brooder guard is recommended for the fi rst 5-7 days to confi ne chicks to the “Chick Comfort Zone”. Guards should be 14-18” high and made of 1” mesh wire. Brooder guards generally run the full length of the house and should be removed after the 7th day.
Pancake (jet) BroodersInfrared (radiant) Brooders
Forced Air Furnaces
Maximum Density- Brooding400-600 birds/ brooder
750- 1000 birds/ brooder21 birds/ m (0.5 ft./ bird)
BroodingGuide.indd 10BroodingGuide.indd 10 3/20/08 1:43:09 PM3/20/08 1:43:09 PM

COBB Brooding Fundamentals Guide
COBB8
Ambient Brooding temperature profile for Cobb 500 parent breeders
34.0
32.0
30.0
28.0
26.0
24.0
22.0
20.0
18.0
16.0
93.2
89.6
86.0
82.4
78.8
75.2
71.6
68.0
64.4
60.80
Deg
rees
Cel
cius
Degrees Fahrenheit
AGE (DAYS)
7 14 21 28 35
Temperature GuideAge
(weeks)Temperature at Brooder Edge
(2” above the litter)Floor Temperatureat Brooder Edge
90°F (32°C)85°F (29°C)80°F (27°C)75°F (24°C)
95°F (35°C)90°F (32°C)85°F (29°C)80°F (27°C)
1234
BroodingGuide.indd 11BroodingGuide.indd 11 3/20/08 1:43:10 PM3/20/08 1:43:10 PM

COBB Brooding Fundamentals Guide
COBB 9
AIR QUALITY AND VENTILATIONIn addition to proper temperature regulation, air quality and ventilation needs to be considered. Ventilation distributes heat evenly throughout the house and maintains optimum air quality in the brooding area. “Minimum ventilation” should begin with house preheating 24-48 hours prior to placement to remove waste gases and moisture. Young birds are very susceptible to drafts and air speeds as slow as 100’/ min. (0.5 m/sec.) can create a signifi cant wind-chill effect on day old birds. Minimum ventilation practices should be employed to circumvent inadvertent chilling up to 14 days of age. Ammonia levels should be closely monitored in houses with built up litter.
Defi nition of Good Air QualityOxygen > 19.6 %Carbon dioxide < 0.3%/3000 ppmCarbon monoxide < 10 ppmAmmonia < 10 ppmInspirable Dust < 3.4mg/m3Relative Humidity >< 45-65%
> No less than< No more than>< In between
**Minimum ventilation must beincreased if these parametersare not being met.
EFFECTS ON AIR QUALITY WHEN MINIMUM VENTILATION FANS DO NOT RUNMinimum ventilation fans should be programmed to run on cycle timers (5 or 10 minute cycles) with a thermostat override. They should be set to operate a minimum of 20% of the total fan run time. As fan volume increases (or decreases), the inlet volume must react to pressure changes in the same proportion as the fan capacity. Poor air quality during rearing negatively affects pullet/ cockerel health and performance and can also have an adverse effect on overall fl ock productivity in terms of egg production, livability, fertility and hatchability.
10 minutesAmmonia 15 PPM 35 PPM 50 PPM 80 PPMCarbon Dioxide 300 PPM 1500 PPM 2600 PPM 3500 PPMHumidity 68 % 78 % 86 % 97 %Temperature 68 ºF 75 ºF 82 ºF 88 ºF
15 minutes5 minutes0 minutesFan off time:
Air Quality
Air quality decreases rapidly when fans are off. This can potentially result in damage to the respiratory and immune systems.
BroodingGuide.indd 12BroodingGuide.indd 12 3/20/08 1:43:11 PM3/20/08 1:43:11 PM
COBB Brooding Fundamentals Guide
COBB10
VENTILATION GUIDELINES
Tunnel ventilation should never be used prior to 28 days of age. Birds are never fully feathered until after 28 days of age.
Air speed across the birds should be maintained as low as possible (< 40 fpm) for the first 14 days. The “actual air temperature” should be the primary consideration in determining the correct temperature setting.
From 15- 21 days of age, air speed should not exceed 100 fpm. A “transitional” ventilation system can be used and the “effective air temperature” should be the primary consideration in determining the correct temperature setting.
From 22- 28 days of age, air speed should not exceed 200 fpm. Again, a “transitional” ventilation system can be used and the “effective air temperature” should be the primary consideration in determining the correct temperature setting.
After 29 days of age, air speed does not have to be restricted and evaporative cooling can be used if needed. The “effective temperature & the relative humidity” should be the primary consideration in determining the correct temperature setting.
Chicken houses should never be ventilated to suit the grower.
1.
2.
3.
4.
5.
6.
For more detailed Air Quality & Ventilation information, refer to the Cobb Breeder Management Guide.
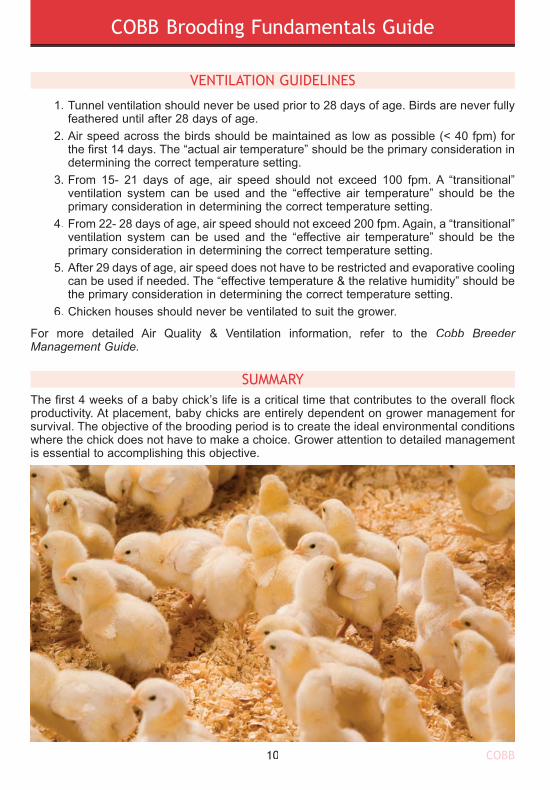
The first 4 weeks of a baby chick’s life is a critical time that contributes to the overall flockproductivity. At placement, baby chicks are entirely dependent on grower management for survival. The objective of the brooding period is to create the ideal environmental conditionswhere the chick does not have to make a choice. Grower attention to detailed managementis essential to accomplishing this objective.
SUMMARY
BroodingGuide.indd 13BroodingGuide.indd 13 3/20/08 1:43:11 PM3/20/08 1:43:11 PM

COBB Brooding Fundamentals Guide
COBB 11
NOTES
BroodingGuide.indd 14BroodingGuide.indd 14 3/20/08 1:43:12 PM3/20/08 1:43:12 PM

Cobb-VantressVV Inc.PO Box 1030, Siloam Springs
Arkansas 72761, US
Tel: TT +1 479 524 3166
Email: [email protected]
Cobb Europe LtdOyster House, Severalls Lane, Colchester
Essex CO4 9PD, UK
Tel:TT +44 1206 835835
Email: [email protected]
Cobb-Vantress VV Brasil, Ltda.RodoviaRR Assis Chateaubriand, Km 10
Cep: 15110-000/Caixa Postal 2
Guapiaçu-SP-Brasil
Tel: TT +55 (17)3267 9999
Email: [email protected]
L-1060-01January 5, 2008
BroodingGuide.indd 16BroodingGuide.indd 16 3/20/08 1:43:13 PM3/20/08 1:43:13 PM