broadsword exercises - hroarrhroarr.com/manuals/sabre-cutlass-broadsword-rapier/(ebook)_sword... ·...
TRANSCRIPT

BROADSWORD EXERCISES
During the Flanders campaign against the French (1793-94) John Gaspard Le Marchant ,
The principle distinction between the broadsword and the rapier is, that the latter is formed only for thrusting, while the former is adapted for cutting also. Indeed, those who use the broadsword are too apt to neglect the use of the point, and focus their attention almost exclusively to the cuts. The first lesson in the sword exercise is necessarily to know how to stand. The learner should be instructed to perform the different movement by word of command, remembering to consider the first parts of the word as a caution, and not to stir until the last syllable is uttered. At the last syllable, the movement should be performed smartly. In giving the word, the instructor always makes a slight pause, in order to give his pupils time to remember what they must do. For example, the words Draw Swords is given thus, Draw ……. Swords - the word swords being spoken smartly, in order that the movement may correspond.
POSITIONS
Before a sword is even placed in the learner's hand, he must firstly acquaint himself with the correct positions.
First Position

The learner stands perfectly upright opposite the target, with his right side towards it, his heels close together, his right toe pointing to the target, and his left foot at right angles with the right. His arms must be clasped behind his back, his right palm supporting the left elbow, and his left hand grasping the right arm just above the elbow. In this position he must bend both knees and sink down as far as possible. This will not be very far at first, but he will soon sink down quite easily.

Second Position
This is accomplished by placing the right foot smartly in front, about sixteen or fourteen inches before the left. He must accustom himself to balance himself so perfectly on his left foot, that he can place the right either before or behind it, without losing his balance.

Third Position
The third position must then be learned. This consists in stepping well forward with the right foot, until the left knee is quite straight, and the right knee exactly perpendicularly placed over the right foot. Great care must be taken to keep the heels exactly in the same line, and the body perfectly upright.

To begin the Sword Exercises
The Learner begins by taking the sword in his right hand, having its edge toward the target and its back resting on his shoulder. His right arm is bent at right angles, and the elbow against his side. The left hand must rest upon the hip, the thumb being to the rear.
These preliminaries having been settled, the learner stands upright before the target,
as in figure 1, and the target is explained as follows:

TARGET
Make the target (as shown below) about fourteen inches in diameter, and place it on the wall, having its centre about four feet from the ground. Draw a perpendicular line from the spot at the bottom of the target to the ground, and continue it on the floor, in order to ensure the proper position of the heels. The interior lines represent the cuts. Cut one being directed from No. 1 diagonally through the target, coming out at 4. Cut two is the same, only from left to right. Three is made upwards diagonally, and four is the same, only in the opposite direction. Cut five is horizontally through the target, from right to left, and six from left to right. Cut seven is perpendicularly downwards. Care must be taken that the cuts are fairly given with the edge. The swords drawn on the target represent the guards. The seventh guard ought, however, not to be made directly across, but must have the point directed rather forwards and downwards, as a cut 7 glides off the blade, and can he instantly answered either by a thrust or by cut l. The two dark circles represent the places where the thrusts take effect.


CUTS AND GUARDS
CUTS
Cut l. - The young swordsman extends his right arm, and makes the cut clear through the target. When the point has cleared the target, continue the sweep of the sword, and by a turn of the wrist bring it with its back on the left shoulder, its edge towards the left. The arm is then ready for: Cut 2. - Bring the sword from 2 to 3, continue the movement of the sword, and turn the wrist so that the point is below the right hip and the edge towards the ground. Cut 3. - Cut through the target diagonally, bringing the sword from No. 3 to No. 2, and bring the sword onwards, so that it rests with the edge downwards, and points below the left hip. At: Cut 4. - Cut from 4 to 1, and bring the sword round until its point is over the right shoulder, and its edge well to the right. Cut 5. - At the word Five, make a horizontal cut from 5 to 6, and sweep the sword round until it rests on the left shoulder, with its edge to the left; and its point well over the shoulder. Cut 5: Cut horizontally through the target, from 6 to 5, and bring the sword over the head, with its edge upwards, and its point hanging over the back. From this position: Cut 7. - Make a downward stroke until the sword reaches the centre of the target. Arrest it there. and remain with the arm extended, waiting for the word:

POINTS
First Point
Draw back the sword until the right wrist is against the right temple, the edge of the sword being upwards. Make a slight pause, and then thrust smartly forward towards the centre of the target, raising the right wrist as high as No. l, and pressing the left shoulder well back.

Second Point
Turn the wrist round to the left, so that the edge comes upwards, draw the hand back until it rests on the breast and give the point forwards; to the centre of the target, raising the hand as before.
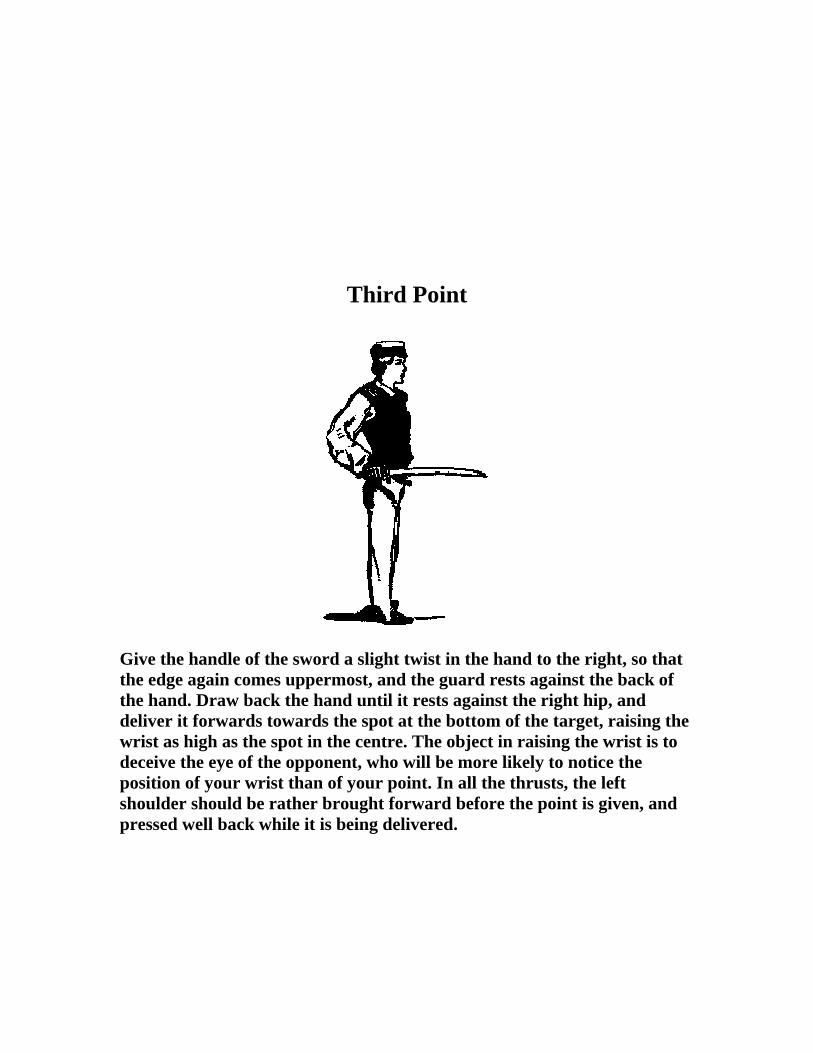
Third Point
Give the handle of the sword a slight twist in the hand to the right, so that the edge again comes uppermost, and the guard rests against the back of the hand. Draw back the hand until it rests against the right hip, and deliver it forwards towards the spot at the bottom of the target, raising the wrist as high as the spot in the centre. The object in raising the wrist is to deceive the eye of the opponent, who will be more likely to notice the position of your wrist than of your point. In all the thrusts, the left shoulder should be rather brought forward before the point is given, and pressed well back while it is being delivered.

GUARDS
Wait after the third point has been delivered for the word: Defend - At this word draw up the hand smartly, and form the first guard. Make the other guards in succession as they are named, while the instructor proves their accuracy by giving the corresponding cuts. The guards must be learned from the target, by placing the sword in exactly the same position as those delineated. The guards are these:
A First guard. E Fifth B Second. F Sixth. C Third. G Seventh. D Fourth.
The two spots H and I mark the places towards which the points are made, H for the first and second point, I for the third.
PARRY
The parry or parade of a thrust is executed with the back of the sword. The firmest way of parrying is to hold the sword perpendicular, with its edge to the right and its hilt about the height of and close to the right shoulder; then, by sweeping the sword round from left to right, any thrust within its sweep is thrown wide of the body. The parry is executed with the wrist and not with the arm, which must not move.
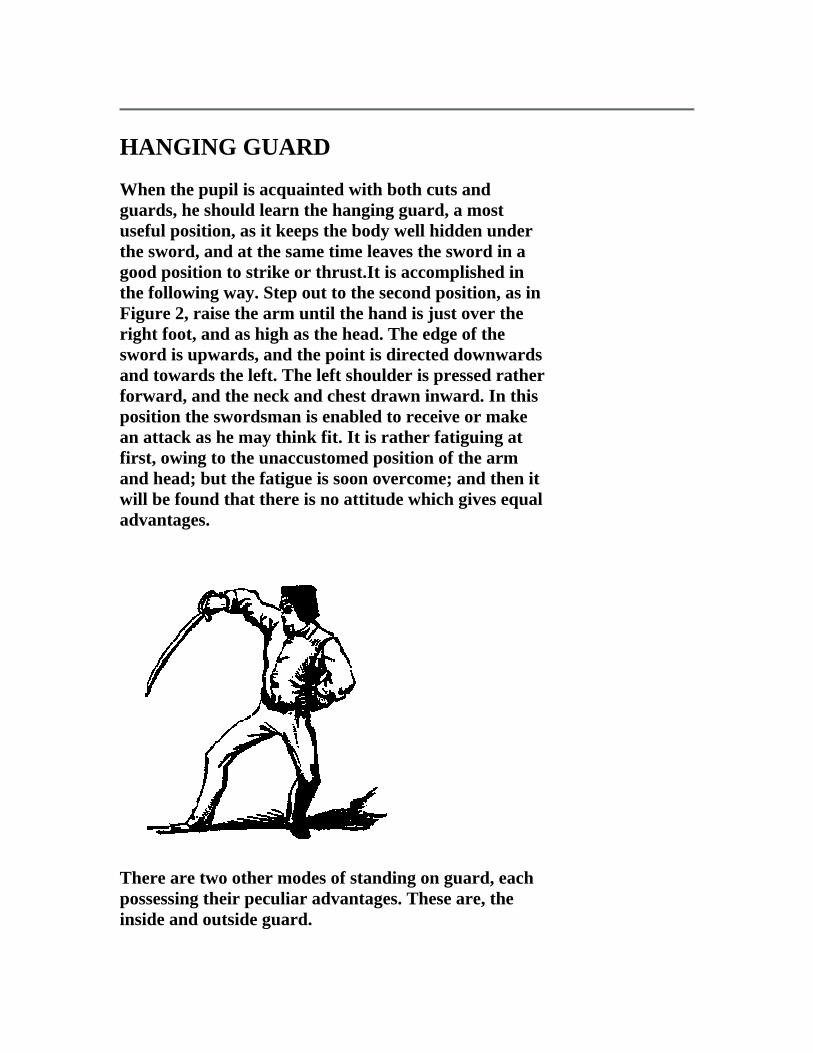
HANGING GUARD
When the pupil is acquainted with both cuts and guards, he should learn the hanging guard, a most useful position, as it keeps the body well hidden under the sword, and at the same time leaves the sword in a good position to strike or thrust.It is accomplished in the following way. Step out to the second position, as in Figure 2, raise the arm until the hand is just over the right foot, and as high as the head. The edge of the sword is upwards, and the point is directed downwards and towards the left. The left shoulder is pressed rather forward, and the neck and chest drawn inward. In this position the swordsman is enabled to receive or make an attack as he may think fit. It is rather fatiguing at first, owing to the unaccustomed position of the arm and head; but the fatigue is soon overcome; and then it will be found that there is no attitude which gives equal advantages.
There are two other modes of standing on guard, each possessing their peculiar advantages. These are, the inside and outside guard.

INSIDE GUARD
Stand in the second position, having the wrist of the right hand nearly as low as the waist, the hand being exactly over the right foot. The point of the sword is raised as high as the eyes, and the edge is turned inwards, as will be seen from the accompanying engraving.

OUTSIDE GUARD
The outside guard is formed in the same manner as the inside, with the exception that the edge of the sword is turned well outwards.
To get to the hanging guard, the words are given as follows;- inside guard - outside guard - guard.
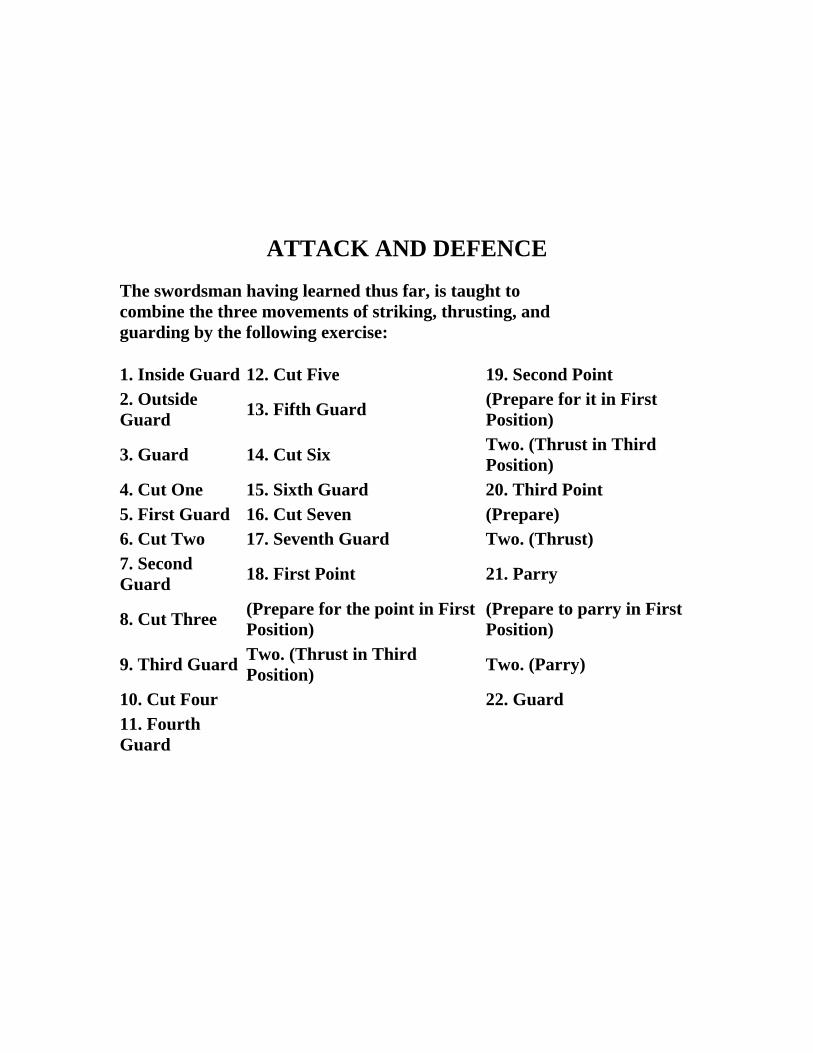
ATTACK AND DEFENCE
The swordsman having learned thus far, is taught to combine the three movements of striking, thrusting, and guarding by the following exercise:
1. Inside Guard 12. Cut Five 19. Second Point 2. Outside Guard 13. Fifth Guard (Prepare for it in First
Position)
3. Guard 14. Cut Six Two. (Thrust in Third Position)
4. Cut One 15. Sixth Guard 20. Third Point 5. First Guard 16. Cut Seven (Prepare) 6. Cut Two 17. Seventh Guard Two. (Thrust) 7. Second Guard 18. First Point 21. Parry
8. Cut Three (Prepare for the point in First Position)
(Prepare to parry in First Position)
9. Third Guard Two. (Thrust in Third Position) Two. (Parry)
10. Cut Four 22. Guard 11. Fourth Guard

The young swordsman must remember that in this, as in all the exercises, the cuts and points must be given in the third position, as in the accompanying illustration, which shows the swordsman just as he has delivered the seventh cut, and is waiting for the next word before he resumes the first position.

The guards, on the contrary, are given in the first position, as is seen in the figure above which illustrates the seventh guard. These exercises are always learned with the single-stick, or basket-hilted cudgel, in order to avoid the dangers which would be inevitable if the sword were used. But as the single-stick is only an imitation of the sword, I will give the method of getting the sword out of the sheath into any position required.
DRAW SWORDS
The first word of command is draw swords. At the word draw, seize the sheath just below the hilt, with the left hand, and raise the hilt as high as the hip, at the same time grasping the hilt with the right hand, turning the edge of the sword to the rear, and drawing it partially from the sheath, to ensure its easy removal. At the word swords draw the blade smartly out of the scabbard, throwing the point upwards, at the full extent of the arm, the edge being still to the rear.

RECOVER SWORDS
The wrist is now smartly lowered until it is level with the chin, the blade upright, and the edge to the left. This is the position of recover swords. The elbow must be close to the body, as in the cut.
CARRY SWORDS
The wrist is now sharply lowered until the arm hangs at its full length, the wrist being in line with the hip, the edge of the sword to the front, and its back resting in the hollow of the shoulder, the fingers lightly holding the hilt. The left hand hangs at the side until the word inside guard, when it is placed on the left hip.

SLOPE SWORDS
At the word swords, raise the right hand smartly, until it forms a right angle at the elbow.
RETURN SWORDS
At the word, raise the blade until it is perpendicular, move the hilt to the hollow of the left shoulder, drop the point of the sword into the scabbard (which has been grasped by the left hand and slightly raised), at the same time turning the edge to the rear. Pause an instant, and send the sword smartly into the sheath removing both hands as the hilt strikes against the mouth of the scabbard: drop them to the side, with the palms outwards, and stand in the first position.
PRACTICES
There are many exercises with the broadsword, called Practices. I have given one of them, which is to be practised alone ; but when the pupil has attained some confidence in the use of his weapon, he must be placed opposite another pupil, and they must go through them; each taking the attack and defence in turn. The young swordsman must be provided with a very stout wire mask, which defends the face and part of the neck, and which should be worked in a kind of helmet, to guard against the disastrous consequences of receiving the seventh guard. No practices, loose or otherwise should be permitted without the masks, as neither party would be able to cut or thrust with proper confidence.

SECOND PRACTICE
This is very useful in teaching the point and parry, as well as giving steadiness on the feet. Two boys are placed opposite each other, at just such a distance that when perfectly erect they can touch the hilt of their adversary's sword with the point of their own. The one who gives the first point is called Front Rank (there may be a dozen in each rank, each having tried the distance to his right by extending his sword), and the one who gives first parry is called Rear Rank.
WORD OF COMMAND FRONT RANK REAR RANK
Guard Hanging Guard. Hanging Guard Third Point Prepare to give Third Point Prepare to Parry
Point
Give Third Point and when parried, spring back to the First Position and prepare to parry.
Parry Third Point and prepare to give Third Point.
Point Parry Third Point and prepare for Third Point.
Give Third Point and prepare to Parry.
This should be continued until both are weary. Both swordsmen should learn to do it more rapidly every time they practise. Next time of going through it, front rank and rear rank change places, as they must do in all the practices.

THIRD PRACTICE
WORD OF COMMAND FRONT RANK REAR RANK
Guard Hanging Guard Hanging Guard Leg Cut Four Cut Seven Inside Guard Inside Guard Inside Guard Leg Cut Six (at leg) Cut Six (at neck) Outside Guard Outside Guard Outside Guard Leg Cut Five (at leg) Cut Five (at neck) Guard Hanging Guard Hanging Guard Slope Swords Slope Swords Slope Swords
In this and the other practices, the cuts must be delivered in the third position, and the guards in the first. In the third and fourth practices, the cuts must be given lightly, as many of them are not intended to be guarded, but merely to show the power of the sword in various positions.

FOURTH PRACTICE
WORD OF COMMAND FRONT RANK REAR RANK Guard Hanging Guard Hanging Guard Head Seventh Cut Seventh Guard Head Seventh Guard Cut Seventh Leg Fourth Cut Seventh Guard Leg Seventh Guard Fourth Cut Head Seventh Cut Seventh Guard Head Seventh Guard Seventh Cut Guard Hanging Guard Hanging Guard Slope Swords Slope Swords Slope Guards
In this and the preceding exercise, the power of shifting the leg is shown. If two swordsmen attack each other, and No. l strikes at the leg of No 2, it will be better for No 2 not to oppose the cut by the third or fourth guard, but to draw back the leg smartly, and cut six or seven at the adversary's head or neck. In loose play, as it is called, i.e., when two parties engage with swords without following any word of command; but strike and guard as they can, both players stand in the second position, because they can either advance or retreat as they choose, and can lunge out to the third position for a thrust or a cut, or spring up to the first position for a guard with equal ease.It is often a kind of trap to put the right leg more forward than usual, in order to induce the adversary to make a cut at it When he does so, the leg is drawn back, the stroke passes harmless, and the deceived striker gets the stick of his opponent on his head or shoulders. We now come to a very complicated exercise, called the
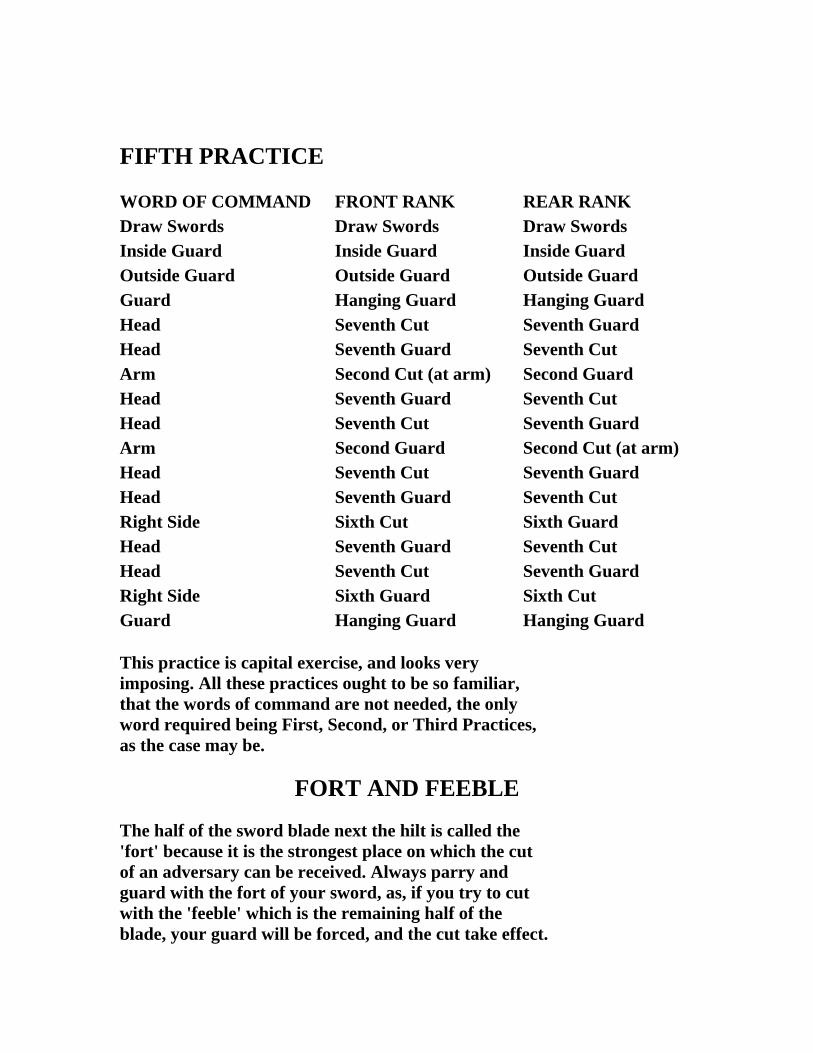
FIFTH PRACTICE
WORD OF COMMAND FRONT RANK REAR RANK Draw Swords Draw Swords Draw Swords Inside Guard Inside Guard Inside Guard Outside Guard Outside Guard Outside Guard Guard Hanging Guard Hanging Guard Head Seventh Cut Seventh Guard Head Seventh Guard Seventh Cut Arm Second Cut (at arm) Second Guard Head Seventh Guard Seventh Cut Head Seventh Cut Seventh Guard Arm Second Guard Second Cut (at arm) Head Seventh Cut Seventh Guard Head Seventh Guard Seventh Cut Right Side Sixth Cut Sixth Guard Head Seventh Guard Seventh Cut Head Seventh Cut Seventh Guard Right Side Sixth Guard Sixth Cut Guard Hanging Guard Hanging Guard
This practice is capital exercise, and looks very imposing. All these practices ought to be so familiar, that the words of command are not needed, the only word required being First, Second, or Third Practices, as the case may be.
FORT AND FEEBLE
The half of the sword blade next the hilt is called the 'fort' because it is the strongest place on which the cut of an adversary can be received. Always parry and guard with the fort of your sword, as, if you try to cut with the 'feeble' which is the remaining half of the blade, your guard will be forced, and the cut take effect.

DRAWING CUT
The drawing cut is made best with a curved sword, and is executed by placing the edge of the sword on the object, and drawing it over it until it is severed. A good large mangel-wurzel is capital practice. Place the root loose on a table, stand at arm's length from it, lay the edge of the sword lightly on it, and slice the root by repeatedly drawing the sword over it. This is very difficult, although it looks easy enough, and is sure to jar the arm from the wrist to the shoulder the first time or two, while the sword glides off as if the root were cased in polished steel. However, a little practice will soon overcome the difficulty. This cut is much used among the Sikhs.
GENERAL ADVICE
Never look at your own sword, but watch the eye and sword wrist of your opponent.Remember that the great point in this exercise is to gain time. Endeavour, therefore, to advance your point nearer your adversary than his is to you. Begin the assault out of distance, so that neither party can complain of being taken by surprise. If the two parties exchange a cut or a thrust at the same moment, the one who gave his cut or thrust in the third position is victorious. When a cut or thrust is made, the one who receives it passes his sword, i.e., stick, into his left hand, and his opponent comes to inside guard. Always spring back to the second position after delivering a cut or thrust. Keep the line of direction carefully, or you will leave an open space for the adversary to get his sword into. Last and most important - Don't lose your temper.