beadmaking, glassblowing, fusing and glass kiln manual
TRANSCRIPT


IntroductionThank you for choosing this kiln! We have designed it togive you many years of reliable service.
Please read this manual. It will help you gain the maximumenjoyment from your kiln. It will show you how to avoid damag-ing the kiln and will answer many questions. Your instructionpacket also includes a separate digital controller manual. Pleasesave both manuals.
Inspect the kiln. When you receive your kiln, check the cartonfor damage (crushed, holes, etc.). Check the kiln for both inte-rior and exterior damage. If the kiln is damaged, you can refusethe shipment and have it returned, or accept the shipment afterhaving the driver note the damage on the Bill of Lading.
Check the Bill of Lading to insure that you received the correctnumber of packages. Note any shortages on the Bill of Lading,and have the driver sign the copy.
If there were no signs of visible kiln damage and you discover itafter the driver has left, notify the shipper immediately.
Save the shipping carton. It was carefully designed to pro-vide maximum protection during shipping. Use the carton totake the kiln to seminars or on vacation, or to return the kiln tothe factory for repairs.
Needless worries. Tremendous stresses are generatedwithin the kiln. The ceramic fiber firing chamber actually ex-pands and contracts with each firing. Do not be concerned ifsmall cracks appear in the fiber. This is normal. These are sur-face cracks that close tightly when the heated fiber expands. Youmay find a small pin hole in the center of the firing chamber. Itis from the manufacturing process and will not affect the kiln’sperformance.
The paint around the door will eventually discolor from heat.This, again, will not affect the kiln’s performance.
During firing, you will hear an intermittent, distinct clicking.This is the sound of the relay(s) sending power to the heatingelements. Do not be concerned with this sound.
The Electrical data plate. Im-portant information about yourkiln is recorded on its electricaldata plate. Please include this in-formation when ordering parts orcalling your dealer or the factoryabout your kiln.
2
ContentsSafety 3
Setting Up the Kiln 4Electrical Installation. . . . . . . . . . . . . . . . . . 4Where to Locate the Kiln . . . . . . . . . . . . . . 4Transporting the Kiln . . . . . . . . . . . . . . . . . 4
Basic Operation 5Accessories . . . . . . . . . . . . . . . . . . . . . . . . 5Important Guidelines . . . . . . . . . . . . . . . . . 5Loading the Kiln . . . . . . . . . . . . . . . . . . . . . 7Venting the Kiln . . . . . . . . . . . . . . . . . . . . . 8
Silver & Gold Clay 8Drying Time . . . . . . . . . . . . . . . . . . . . . . . . 8Loading the Kiln . . . . . . . . . . . . . . . . . . . . . 8Venting the Kiln . . . . . . . . . . . . . . . . . . . . . 9Rate, Temperature and Hold . . . . . . . . . . . 9Cooling Time . . . . . . . . . . . . . . . . . . . . . . . 9Combining Silver ClayWith Other Materials . . . . . . . . . . . . . . . . . . 9
Glass Fusing & Slumping 10How to Cut Glass . . . . . . . . . . . . . . . . . . . 10Fusing Compatibility of Glass . . . . . . . . . . 10The Annealing Range . . . . . . . . . . . . . . . . 10Cleaning and Gluing the Glass . . . . . . . . . 11Loading the Kiln . . . . . . . . . . . . . . . . . . . . 11Firing the Glass . . . . . . . . . . . . . . . . . . . . . 11
Enameling on Metal 12Preparing the Copper . . . . . . . . . . . . . . . . 12Decorating the Copper . . . . . . . . . . . . . . . 12Firing Enamel . . . . . . . . . . . . . . . . . . . . . . 13
Ceramic Overglaze 13Pyrometric Cones . . . . . . . . . . . . . . . . . . . 13Loading and Firing Overglaze. . . . . . . . . . 13
Lost Wax Burnout 14Overview . . . . . . . . . . . . . . . . . . . . . . . . . . 14A Sample Program . . . . . . . . . . . . . . . . . . 14Burnout Instructions . . . . . . . . . . . . . . . . . 15
Firing Mistakes 15Silver Clay . . . . . . . . . . . . . . . . . . . . . . . . . 15Glass . . . . . . . . . . . . . . . . . . . . . . . . . . . . . 15Ceramic Overglaze . . . . . . . . . . . . . . . . . . 16
Kiln Maintenance 17Trouble-Shooter . . . . . . . . . . . . . . . . . . . . 17Door Latch Adjustment . . . . . . . . . . . . . . . 17Ceramic Fiber Repair . . . . . . . . . . . . . . . . 17Cleaning or Replacing Glass View Port . . 17Replacing the Thermocouple . . . . . . . . . . 18Replacing a Relay or Transformer . . . . . . 18Replacing the Temperature Controller . . . 19Replacing the Firing Chamber(testing the element) . . . . . . . . . . . . . . . . . 19
©2001, IM-164/1-02

SafetyOverfiring
The warranty on your kiln doesnot cover damage from overfiring,regardless of the circumstances. It is theoperator’s responsibility to make surethe kiln turns off at the proper time.
The Ceramic FiberAvoid touching the firing chambersurface with sharp or pointed objects.They can damage the fiber surface.Touching the embedded heatingelement with sharp or pointed objects isa shock hazard.
Read the Manual!Read each page of this manual in detailbefore operating your kiln. Warrantydoes not cover damage caused byfailure to follow instructions.
Food or Drink SurfacesSome decorative materials may beunsafe and toxic when used for surfacesthat will be in contact with food or drink.When you make food or drinkcontainers, select a glaze or glass thathas been formulated, tested and labeledas approved for surfaces that will be incontact with food or drink. Follow theglaze or glass manufacturer’sinstructions exactly, without anyvariations.
Important Safety RulesAn electric kiln is extremely safe to operate provided you
follow these basic safety rules:
� Unplug kiln when not in use.
� Do not touch hot sides.
� Keep unsupervised children away.
� Place kiln on a non-combustible surface.
� Do not install closer than 12” from any wallor combustible surface.
� Fire only in a well ventilated, covered andprotected area.
� Keep cordset away from hot sides of kiln.
� DANGEROUS VOLTAGE: Do not touchheating elements with anything.
� Disconnect kiln before servicing.
� Do not leave kiln unattended while firing.
� Wear safety glasses when cutting glass.
� Wear firing safety glasses when looking intoa hot kiln.
� Keep food away from your work area.
� Never fire tempered glass inside a kiln. Itcould explode.
� Avoid firing toxic materials inside the kiln,such as styrofoam (used as a core for hollowbeads).
� Kilns with the glass view port: do not fire thekiln hotter than 1700°F/926°C. Firing hotterwill damage the glass.
3

Setting Up the KilnElectrical Installation
You must plug your kiln into a circuit that no other appli-ance uses while the kiln is firing. Turn off the circuit breakeror unscrew the fuse for the circuit that your kiln will beplugged into. Check to seeif other appliances shut offtoo. If that circuit powersappliances that must re-main on while the kiln isfiring, plug your kiln into adifferent circuit.
Note: 120 volt kilns:avoid extension cordsif possible. If youmust use one, neveruse one smaller than12 gauge and longerthan 20 feet. Neverplug it into a ceilingoutlet!
Voltage fluctuation can vary firing time from as little ashalf to more than twice the average time. If the voltage is toolow, the kiln may never reach full temperature.
The receptacle must have a separate safety groundingwire. This protects you from serious electrical shock.Changing the cord plug will void your warranty!
Where to Locate the Kiln
1 Place your kiln in a well ventilated, covered and pro-tected area such as the garage, basement, utility orhobby room.
Note: Some people keep their kiln outside on a cov-ered patio. This is okay so long as the kiln is not sub-jected to excessive humidity. We recommend goodventilation. However, some materials, such as silverclay, may not need special ventilation.
2 Remove gasoline, paint, and other flammablematerials from the kiln room.
3 Provide a minimum of 12 inches clearance betweenkiln and the closest wall.
4 Never allow the room temperature of your firingroom to exceed 100 - 110° F. Measure the tempera-ture about 3 feet from the kiln. If necessary, use fansto lower room temperature.
5 Keep the kiln away from curtains or other combusti-ble materials.
6 Position kiln on a level, fire-proof surface. We rec-ommend an 18” x 18” piece of sheet metal or a largeceramic kiln shelf.
Note: If you are with the kiln at all times during fir-ing, you can place it directly onto a workbench orkitchen table. A fire-proof surface is ideal, though,because it provides a safe place to lay hot shelves re-moved from the kiln.
7 Keep unsupervised children away.
8 Keep the power supply cord away from the kiln case.
There is little danger of serious burn from accidentalcontact if you exercise the same caution you would use withan electric iron.
Transporting the Kiln
Some people take their kilns to seminars or on vacation.The easiest way to transport the kiln is to use the originalpacking materials.
If you no longer have the packing materials, transport thekiln on its back with the door facing up. Place a thin sheet offoam cushioning between the door and the firing chamber toprevent rubbing. Avoid subjecting the kiln to excessive vi-bration during travel.
4
Place the kiln on a fire-proof surface, such as a large ceramic kiln shelf.

Basic OperationAccessoriesCeramic Fiber Shelves
The soft ceramic fi-ber shelf, which comesstandard with the kiln,cradles gold and silverclay pieces. Theseshelves are not suitablefor firing glass or ce-ramics.
Ceramic Fireclay Shelves & PostsCeramic f ireclay
shelves, available fromSundance are hard ce-ramic surfaces onwhich to fire ceramicsand glass. Firing glass,enameling, and ceramicglazes directly on thefiring chamber bottomwould ruin the bottom.Shelves can be stackedusing posts.
Glass Separator & Kiln WashGlass separator and
kiln wash are mixtures offinely ground mineralsthat will not melt andfuse together at hightemperatures. They pre-vent glass and ceramicglaze from sticking tofireclay shelves. Themain difference betweenglass separator and kilnwash is that the separator is ground more finely to leave asmooth back to glass pieces laid on the shelf.
As powders, glass separator and kiln wash have an unlim-ited shelf life. Do not breathe the powder when mixing.
Caution: If glass separator or kiln wash contact aheating element, that element will burn out in thenext firing. NEVER apply glass separator or kilnwash to the ceramic fiber firing chamber.
Haik BrushThe haik brush is used to apply
glass separator to the kiln shelf in asmooth, thin layer. The smootherthe glass separator, the smootherthe underside of the glass.
Alumina HydrateDelicate silver or gold clay shapes may need extra support
during firing to prevent warping. Place these shapes in a thinlayer of alumina hydrate inside a small ceramic bisque bowl.Do not breathe alumina hydrate.
StiltsStilts are points embedded in a ceramic base. The points
separate enameling and glazed ceramics from the shelf.
Enameling RacksEnameling is the art of firing glass onto metal. The metal
shapes are loaded onto a high temperature wire rack. Theenameled pieces and wire rack are loaded into a hot kiln,fired for just a few minutes, and removed red hot. To loadand unload the racks safely, use an enameling fork.
The heating element under power is dangerous. Do nottouch the element with anything! Turn the kiln switch offbefore inserting an enameling fork into the firing chamber.
Fiber Repair FillerThis is a permanent, high temperature refractory cement
used to repair holes or cracks in the ceramic fiber firingchamber.
Safety GlassesWear clear safety glasses
when cutting or chipping glass.Wear firing safety glasses whenlooking into a hot kiln, such aswhen checking the progress ofglass.
Caution: Always wear fir-ing glasses when viewingthe interior through the optional glass view port.
5
The wire mesh above is referred to as an enameling rack. An enamelingfork lifts the rack out of the kiln. A stilt separates the piece from the rack.

Important GuidelinesThe Embedded Heating Element
The heating elements of your kiln are embedded into theceramic fiber firing chamber. The firing chamber surface ishardened to a depth of ¼”. This makes the fiber more dura-ble. It is important that you do not touch the firing chamberwith sharp objects. These can penetrate the fiber surfaceand contact the heating element, which is a shock hazard.
Note: The heating element under power is danger-ous. Do not touch the element with anything! Turnthe kiln switch off before inserting an enamelingfork into the firing chamber to remove a shelf.
The Clicking NoiseDo not be concerned if your kiln makes a clicking sound
during firing. Your kiln contains a relay, which sends powerto the element. The relay clicks as it cycles on and off tomaintain the correct temperature.
Check ThermocoupleYou will find a small rod, called the thermocouple, ex-
tending into the firing chamber. The digital controllersenses temperature by reading a voltage from the thermo-couple. If this rod is pushed out of the firing chamber, thekiln will assume that the firing chamber is cold. This will re-sult in an over-fire. Be sure the rod extends into the firingchamber by ½” - ¾” before firing the kiln.
Vacuum the KilnClean the kiln before firing glass, enameling, or ceramic
glaze. (Cleaning is not necessary when firing silver or goldclay). Use a soft brush nozzle on a vacuum cleaner to removedust from inside the kiln.
Removing Hot WareTo remove hot ware
from the kiln, turn offthe kiln. Carefully slidean enameling fork un-der the shelf. Place thehot shelf on a large ce-ramic kiln shelf in frontof the kiln. Wear thickwork gloves.
Firing Log BookRecord the following information in a firing log book:
� Date� Firing temperature, speed and hold; or Ramp/Hold pro-
gram� Starting time� Total firing time� Type of pieces� Firing results
As you gain experience, you will find a wealth of informa-tion in your firing logs.
Low Temperature HoldsA low temperature hold (i.e. 200° - 300°F) is more diffi-
cult to maintain than higher temperature holds (1400° -1700°F). At low temperatures, turning on the heating ele-ment affects firing temperature to a larger degree than athigh temperatures.
When holding at a low temperature, heat the kiln slowly.Otherwise the temperature may overshoot the hold temper-ature before the element turns off.
Avoid Contaminating the Heating ElementContact with silica or
si l ica bearing com-pounds, such as kilnwash, glass separator,alumina hydrate, glass,enameling powder, andceramic glaze, will ruinthe heating element.Never fire glazed ceramicware, glass, or enamelingdirectly on the firing chamber bottom. Use a ceramic shelfon short posts to protect the bottom from glaze drips, glassand enameling powder.
Caution: Some kilns contain a heating elementembedded in the bottom of the firing chamber. Ma-terials such as glass and glaze, if absorbed into thefiber firing chamber, can ruin the element. Thistype of damage is not covered by warranty. Preventglass separator, kiln wash, and alumina hydratefrom falling from a shelf onto the firing chamber.These materials can destroy the element.
Note: If a contami-nant such as drippingglass or glaze embedsinto the firing cham-ber, unplug the kiln.Gently scrape off thecontaminant with aknife, being carefulnot to damage theheating element. Vac-uum the kiln.
The Effect of Silver Residue on GlassFiring silver clay leaves traces of silver in the pores of the
firing chamber. Sometimes there is enough silver residue inthe kiln to affect colors of glass. For instance, green mightturn yellow.
Note: Before firing an important glass piece in akiln used for silver clay, perform color tests. Firesmall samples of each glass color on a base sheet ofclear glass. Place the glass on a fireclay shelf (not thesoft fiber shelf).
6

The OptionalGlass View Port
Caution: Wear fir-ing safety glasseswhenever lookinginto the optionalview port.
Maximum tempera-ture for a kiln with viewport is 1700°F/926°C.Firing hotter will damage the glass. See page 17 for glass portmaintenance instructions.
Loading the KilnPlace Ware on a Protective Shelf
Always protect the firing chamber by firing your pieces ona shelf or in a bowl. Do not place the pieces directly on thebottom of the firing chamber.
Types of shelves and containers:
Fiber ShelfPlace the standard fi-
ber shelf directly onto thekiln bottom. This shelf isused to support silver andgold clay.
Note: Fire only silveror gold clay on the fi-ber shelf—never ce-ramics, enameling or glass. Do not coat the fibershelf with glass separator or kiln wash.
Fireclay ShelfCeramic f ireclay
shelves, available fromSundance protect the fir-
ing chamber bottom andprovide a smooth surface.Use a ceramic shelf inyour jewelry kiln to fire ce-ramics, glass, and enameling.
Insulating FirebrickPiece
Insulating firebricksare porous, light-weight,and can be shaped to sup-port delicate silver claydesigns. Carve the fire-brick with a knife or hack-saw.
Ceramic BowlYou can purchase an unglazed, small ceramic bisque
bowl from a ceramic supply store. The bowl will last throughmany firings. Use it to hold alumina hydrate. You can alsoshape hot glass by slumping it into the bowl.
Note: Ceramic shelves and bowls and insulatingfirebricks may slow the firing. They absorb moreheat than the ceramic fiber shelf. They also coolmore slowly than the fiber shelf.
Applying Glass Separator or Kiln WashGlass and ceramics are fired on a fireclay kiln shelf and
not directly on the kiln bottom. You can also slump glass overa mold, such as a bowl. The kiln shelf and sagging mold mustbe coated with glass separator to keep glass or ceramic glazefrom sticking to them.
A coat of glass separator orkiln wash will usually lastthrough several firings. Whenthe shelf coating begins tocrack or chip, apply a freshcoat.
When recoating a shelf, re-move most of the old coatingwith grit cloth (available fromsundance). This is an abra-sive-coated mesh that allowsresidue to pass through. Removing the old coating gives youa smooth surface to start with. Then recoat the shelf usingthe following directions. (Both glass separator and kiln washwill be referred to as “separator.”)
Caution: Do not apply glass separator or kiln washto the ceramic fiber firing chamber or to the bottomof the shelf! Contact with glass separator or kilnwash can ruin the embedded heating element.
Note: Do not coat the soft ceramic fiber shelf withseparator. If you are firing only silver or gold clay,you do not need separator. When firing silver claywith glass, however, fire the piece on a hard fireclayshelf coated with separator.
1 Mix the separator with water following the directionson the bag. Stir.
2 Use a haik brush or a softpaint brush to apply theseparator to the shelf.(The haik brush is easierto use because it laysdown a more even coat-ing.) Each time you dipyour brush into the sepa-rator mixture, swirl thebrush around the bottomof the container. This isbecause the separator settles quickly. Use two orthree thin coats changing the direction of the brushstroke 90° with each coat.
3 Dry the shelf before firing. To speed drying, place theshelf on three ½” posts inside the kiln. Heat at fullrate to 300°F/148°C and hold for five minutes. Thenturn off the kiln and leave the shelf inside.
7
Separator lasts through severalglass firings. Apply new separatorwhen the old coat begins to flake.

4 After the separator has dried and your shelf is cool,you can smoothen the separator further by rubbingyour hand lightly over the shelf. The smoother theseparator, the smoother the back side of the glass.
A coat of glass separator will usually last several firings.The lower the fusing temperature, the more firings you canget from one application of separator.
Using Ceramic Fireclay PostsCeramic posts support ceramic fireclay shelves inside a
kiln.� Do not use posts under the ceramic fiber soft shelf. Place
the fiber shelf directly onto the bottom of the firingchamber.
� Place three ½” posts under the ceramic hard fireclayshelf. This aids air circulation, preventing heat built-upunder the shelf.
� You can fire two or more ceramic fireclay shelves in a Par-agon jewelry kiln. Support the bottom shelf on three ½”posts. Separate the shelves with taller posts. The lengthof the posts and the number of shelves you can fire de-pends on the size of the kiln. When you load multipleshelves, fire at a slower rate. This aids heat distribution.
Venting the KilnSome types of ware, such as glass and ceramics, contain
impurities that burn off during firing. These impuritiesmust be released from the kiln. Otherwise they can affect thequality of the ware.
Silver and gold clay need no venting unless you are firingthem with a material that burns out for a hollow shape, or youare combining them with another material such as glass.
If the kiln has a vent hole, open the vent. If it does not havea vent hole, open the door about ½”. Venting will be ex-plained in greater detail in sections on glass and ceramics.
Silver & Gold ClayWith silver clay, it is possible to shape intricate, free-form
silver jewelry in minutes—even as a beginner. (The clay isalso available in gold; for simplicity we will refer to both met-als as “silver clay.”) At the time of printing, the silver claybrands available were Art Clay Silver and Precious MetalsClay.
Silver clay looks and feels like modeling clay. It is formedwith simple tools such as a tooth pick, small knife, and razorblade. Its surface is pliable and accepts impressions fromobjects such as leaves, coins, and coarse fabrics. After the sil-ver clay is formed, it is fired in a kiln. The recommendedtemperature and hold time is included with the silver clay.
Forming and firing silver clay is simple. There is nothingmysterious about making silver clay jewelry. The silver clayis made of micron-size silver (or gold) particles held in anorganic binder. During firing, the binder burns away. Thesilver particles then fuse together forming real silver. Sincethe binder disappears, there is a certain amount of shrinkageduring firing. Shrinkage varies depending on the type of sil-ver clay you use.
Drying TimeSmall, thin silver clay pieces can be placed into the kiln
while still moist, and fired. Thicker pieces need time to dry.Otherwise they may warp during firing.
To be on the safe side, give the silver clay plenty of time todry. As you gain experience, you will know just how muchdrying time each type of piece needs. You can speed dryingwith a hair dryer.
Loading the KilnSilver clay pieces that have a flat side can be placed inside
the kiln directly onto a shelf. Use the soft ceramic fiber typeshelf. It cushions the clay silver.� Silver clay pieces can be close together, but they must not
touch.� The soft ceramic fiber shelf can be placed directly onto
the firing chamber bottom. It is not necessary to supportthe fiber shelf with posts, since the heat transfers easilythrough the fiber shelf.
� Do not coat the ceramicfiber shelf with kilnwash or glass separator.
� You can also place thesilver clay on a piece ofceramic fiber batting.
Alumina HydrateRounded, hollow, or
other delicate shapes mayneed support to prevent collapsing. You can lay these piecesonto a mound of alumina hydrate.
8
If the piece needs only shallow support of ¼” depth orless, pour the alumina hydrate onto a ceramic fireclay shelf.Support the fireclay shelf on three ½” posts to aid heat flowunder the shelf.
If the silver clay shape needs deeper support, pour thealumina hydrate into an unglazed ceramic bisque bowl.These are available at ceramic supply stores.� Place the ceramic bowl directly onto the kiln bottom.� NEVER use a glazed bowl to hold the alumina hydrate. If
the glaze runs, it can embed into the firing chamber.
Caution: Avoid breathing alumina hydrate dust.
Caution: Alumina hydrate can destroy the heatingelement on contact. If it spills onto the firing cham-ber, remove with a vacuum cleaner.
Venting the KilnSilver clay by itself needs no venting. Load the kiln, close
the door, and leave it closed until the clay silver is ready to re-move.
The kiln needs venting if you fire ceramics or glass withthe clay silver, or if you make hollow objects that contain acore of organic materials.
Paper maché and paper clay are good core materials. Donot use wax or styrofoam as a core. They emit harmfulfumes.
Rate, Temperature, HoldEach brand of silver clay fires to a specific temperature
and hold time. This information is available from your silverclay supplier.
Note: Hold time is the length of time that the rec-ommended temperature is maintained in the kiln.Do not fire longer than the recommended hold, orthe silver will begin to overfire.
Besides selecting a temperature and hold time on yourkiln’s digital controller, you will also need a firing rate. (Seethe separate digital controller instruction booklet.) Select aFull Power rate if you are firing silver clay alone. If you fireglass or ceramics with the silver clay, select a rate best suitedfor the glass or ceramics.
Note: Do not place silver clay into a kiln that is al-ready hot unless the clay is completely dry. The kilnshould be no hotter than 500°F/260°C when insert-ing the silver clay.
After the kiln begins firing, leave the door closed. Do notopen the door until it is time to remove the clay. Visual in-spection of the clay is unnecessary.
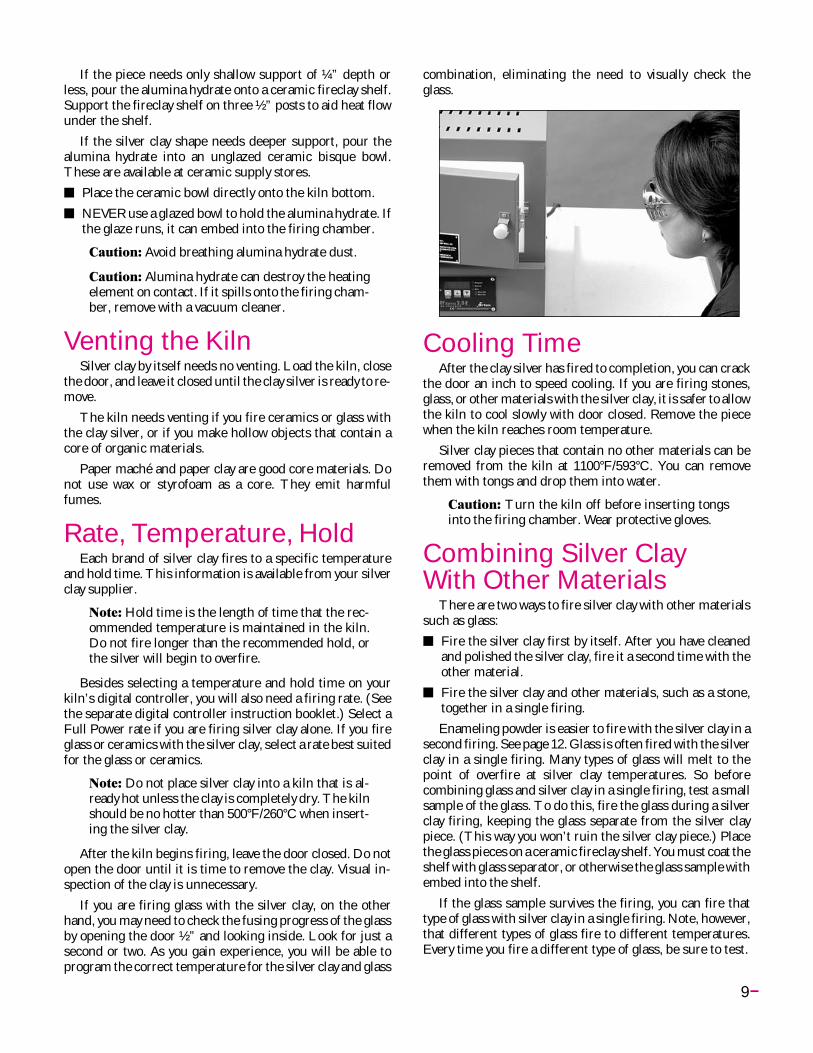
If you are firing glass with the silver clay, on the otherhand, you may need to check the fusing progress of the glassby opening the door ½” and looking inside. Look for just asecond or two. As you gain experience, you will be able toprogram the correct temperature for the silver clay and glass
combination, eliminating the need to visually check theglass.
Cooling TimeAfter the clay silver has fired to completion, you can crack
the door an inch to speed cooling. If you are firing stones,glass, or other materials with the silver clay, it is safer to allowthe kiln to cool slowly with door closed. Remove the piecewhen the kiln reaches room temperature.
Silver clay pieces that contain no other materials can beremoved from the kiln at 1100°F/593°C. You can removethem with tongs and drop them into water.
Caution: Turn the kiln off before inserting tongsinto the firing chamber. Wear protective gloves.
Combining Silver ClayWith Other Materials
There are two ways to fire silver clay with other materialssuch as glass:� Fire the silver clay first by itself. After you have cleaned
and polished the silver clay, fire it a second time with theother material.
� Fire the silver clay and other materials, such as a stone,together in a single firing.
Enameling powder is easier to fire with the silver clay in asecond firing. See page 12. Glass is often fired with the silverclay in a single firing. Many types of glass will melt to thepoint of overfire at silver clay temperatures. So beforecombining glass and silver clay in a single firing, test a smallsample of the glass. To do this, fire the glass during a silverclay firing, keeping the glass separate from the silver claypiece. (This way you won’t ruin the silver clay piece.) Placethe glass pieces on a ceramic fireclay shelf. You must coat theshelf with glass separator, or otherwise the glass sample withembed into the shelf.
If the glass sample survives the firing, you can fire thattype of glass with silver clay in a single firing. Note, however,that different types of glass fire to different temperatures.Every time you fire a different type of glass, be sure to test.
9

Glass Fusing &Slumping
You will probably fire mostly stained glass, but you canalso fire standard float (window) glass. Some types of floatglass devitrify (form a dull, frosty surface) when fired.
Caution: Never fire tempered glass. It could ex-plode if heated inside a kiln.
Basic Glass ToolsReservoir Glass Cutter uses a reservoir of oil to lu-
bricate the cutter wheel.
Running Pliers are for cutting large pieces of glass.
Breaking Pliers are for cutting small strips.
Grozing Pliers shape the glass by chipping away theedges. They are often used when the score line doesn’t breakcleanly. Note that rough edges will become smooth whenfired to fusing temperature.
How to Cut GlassNote: IMPORTANT! Wear safety glasses whencutting or chipping glass.
1 Lay the glass on a clean surface. Mark off the cutwith a grease pencil or felt-tip pen. A small mark oneach end of the glass will do. Lay a wooden straightedge over the glass and line it up with the marks youjust made.
2 Hold the straight edge firmly and score the glasswith the glass cutter. Press just hard enough so thatthe scoring noise sounds steady and unbroken.
3 Place the straight edge under the glass so that anedge is lined up with the score line you just made.Press down on the glass. It will break cleanly.
Fusing Compatibilityof Glass
When glass changes temperature, it expands and con-tracts. The rate at which glass changes size is called the coef-ficient of thermal expansion. If you fuse two glass pieces to-gether and one changes size faster or slower than the other,the fused piece may crack—even several months after fus-ing.
When different glasses have a close enough coefficient ofexpansion to fuse successfully, they’re called fusing compati-ble. Buy glass labeled fusing compatible. Or fuse glass thathas been cut from the same sheet, which guarantees com-patibility.
Fusing Compatibility Test1 To test glass for compatibility, fuse small ½” square
sample pieces of different glasses onto a larger basepiece of clear transparent. It should extend beyondthe small sample pieces by half an inch on each side.One of the sample pieces should be cut from thebase piece.
2 Heat the glass to a temperature that completelyrounds the edges of the small sample pieces.
3 After the glass cools, place a polarizing filter underthe glass and another filter over the glass. Look atthe glass with light shining through it (hold it over alamp). Turn one of the filters until the filters are attheir darkest.
Results of the TestIf you see a halo around the edges of the small glass sam-
ples, this usually means the glass is not compatible. If you seeno halo, the glass is fusing compatible.
Why did we include a sample square cut from the basetransparent glass? It tests for annealing. A halo around thatpiece means the glass was not annealed properly. Performthe test again, this time cooling more slowly through the an-nealing range.
The Annealing RangeEach type of glass has a temperature range that it must
pass through slowly when it cools. This is called the anneal-ing range. This slow cooling gives hot glass time to releasethe stress of cooling. If you cool the glass too fast through theannealing range, it will break.
The larger and thicker the glass, the slower it must passthrough its annealing range. You cannot over-anneal, so err
10

on the side of caution if you aren’t sure how long to anneal.Small projects such as earrings rarely need annealing time asthey cool.
Cleaning andGluing the Glass
Grease, dirt, andfingerprints etch per-manently into theglass during firing.Clean the glass withglass cleaner (the typewithout silicones),rubbing alcohol, oreven plain water justbefore assemblingthe pieces on the kilnshelf.
Use white glue,such as Elmer’sdiluted 1:1 with water,to hold the glasspieces together afteryou place them on thekiln shelf. Use theglue sparingly. Glue isespecially importantwhen fusing wire into the glass. The glue prevents the glassor wire from moving out of place before they fuse. The gluedisappears during firing.
Avoid using glue on the coated side of dichroic glass. Ifyou lay dichroic glass carefully onto the piece, glue is unnec-essary, so avoid it altogether if you do not know which side ofthe dichroic is coated.
Loading the KilnAir should circulate
between the shelf andthe bottom of the kiln,so place three or four1/2” posts in the kiln.Lay the shelf over theposts.
Firing the Glass1 Vent kiln by opening the door ½” and leaving the vent
hole (if your kiln has one) open. Venting allows thegases released to escape. When the kiln reaches 500 -800° F / 260 - 426°C, close the door.
2 The first time you fire a particular brand or type ofglass, program the controller for a higher tempera-
ture than the estimated fusing temperature. Watchthe glass by opening the door ½” for several secondsat a time. Shut the kiln off when the glass fuses theway you want. Make a note of the shut-off tempera-ture. For future firings, program the kiln for thattemperature and rate.
Note: With every firing, be sure you are near the kilnbefore the expected shut-off time.
3 After you shut the kiln off, vent the kiln for five min-utes by opening the door 1”. Then close the door.
Note: Some glass artists flash cool the glass after itfuses. They vent the kiln until the temperaturedrops to 1000° F. Then they close the door again.This speeds up cooling.
4 The annealing range for most glasses is between950°/510°C and 700°F/371°C. Cool slowly throughthis annealing range. Leaving the door closed willslow the cooling enough for most projects. If youneed even slower cooling, program a separate seg-ment for cooling. See the kiln’s digital controllermanual.
Note: For safest cooling, leave the ware inside thekiln until the kiln reaches room temperature. If youremove the ware too soon, the sudden temperaturechange can crack the piece.
To remove smallpieces, such as glassjewelry, before theyhave cooled com-pletely, remove theshelf also. Leave thepieces on the shelfuntil they reach roomtemperature. Theheat in the shelf willhelp prevent themfrom cooling too quickly.
Caution: Before removing a shelf, turn off power tothe kiln.
11
Looking at the glass during firing. Open the door about ½”. Alwayswear firing safety glasses when looking at the hot glass.

Enamelingon MetalPreparing the Copper
Enamels come in transparent or opaque. They can bepurchased directly from Thompson Enamel, P.O. Box 310,Newport, Kentucky 41072. Their Lead Free Enamels comeready to use. No enamel washing is required for these enam-els.
Start with one of the many pre-shaped copper forms avail-able, or shape and trim the copper to your own design.
1 Heat the copper on an enameling rack to about1400°F/760°C to burn off oil or grease. Heat thecopper to just until smoke from oil or grease stopscoming off the metal and its color has changed to apurple-red-pale green iridescence that movesacross the copper. This indicates that the greasehas vaporized. Do not fire the copper any longer thanthis point. Otherwise excess fire scale will form,making the next cleaning step difficult.
2 After the copper cools, brush any loose scale fromthe copper. Use a brush or paper towel, being surethat you do not put any grease or oil onto the copper,
such as fingerprints. Clean the copper with a 3MScotch-Brite® pad. This pad does such a good jobthat in most cases no further cleaning will be re-quired. Additional copper cleaning products areavailable in the Thompson Enamel Catalog, includ-ing Sparex No. 2.
It is best to clean the copper just before you decorate it. Ifyou wait too long to decorate after cleaning, the copper couldget dirty again.
Decorating the CopperCounter Enameling
Most enameled pieces should be counter enameled onthe back side. This gives the piece a much more finishedlook, it eliminates a great deal of fire-scale cleaning, and itcontrols the chipping and cracking that can result from thedifferent rates of expansion and contraction in copper andenamel after the enamel has been fired.
Counter or backing enamel, a mixture that gives a mot-tled effect, can be used for counter enameling. Or you canuse regular enamel. Counter enamel is applied by the siftingmethod described below.
When firing counter enamel, underfire it so that the firescale on the front of the piece isn’t too difficult to remove.You can purchase a masking preparation from your supplierto help prevent fire scale. You must place the piece on a stiltwhen firing the other (front) side of the piece. The stilt pre-vents the back of the counter enameled piece from stickingto the enameling rack.
Applying EnamelsApply enamel over a clean sheet of paper so you can pour
the excess back into the bottle for reuse. Transparent enam-els should be applied in several thin coats. Transparentenamels can be mixed with fairly good results. If opaqueenamels are mixed, however, a grainy effect results. The twobasic methods of applying enamels are sifting and spatula.
Sifting EnamelSpray or brush Thompson holding agent onto the copper.
Then sift a 1/32” layer of enamel onto the copper. Use a #60mesh sifter. If the coat is too thin, you can easily add anothercoat after firing. But a coat that is too thick will bubble andcrack. The enamel must dry completely before firing.
Spatula or Inlaid MethodYou can use this method to decorate a small area with
many different colors. Using a diluted solution of Thompsonholding agent, dampen the enamels just to the saturationpoint, and maintain this moisture while working with theenamels. Apply the enamels onto the copper with a smallspatula, and spread them out with a spreader to a coat ofabout 1/32” thick. Lines of contact can be formed by thespatula blade. Then spray the enamels with the holding
12

agent to keep the grains of enamel in place. Allow the enamelto dry completely before firing.
Firing Enamel1 Heat the kiln to 1450°F/787°C for most enameling.
Use a Single Segment. (Please see your digital con-troller instruction manual.)
Rate Temp.Segment °F/°C °F/°C Hold
1 1799/999 1450/787 01.00
Note: Hold time should be the length of time youwill be inserting enameling into the kiln. In theabove example, hold time is for a one hour.
2 Lay the copper shape on an enameling rack. If thepart that touches the rack is enameled, place a stiltunder the copper. Some bowls or other shapes haveenameled sides that might run during firing. Theseshould be fired with a stilt even if the piece has a plainbottom. Use an enameling fork or, if the rack is small,a 6” putty knife, to place the rack into the kiln on topof ½” ceramic posts.
Note: Firing the piece at enameling temperatureshould take about three minutes and requires undi-vided attention!
3 Look at your piece every 15 seconds by cracking openthe door. Remove the rack when the copper piece ap-pears a rosy red and the enamel is smooth. Place therack on a steel pad or large ceramic kiln shelf and let itcool completely.
4 After counter enameling, you will need to clean thefire scale off the front of the piece. A 3M ScotchBrite® pad works well for this. Then clean it withThompson Sparex No. 2.
Ceramic OverglazePyrometric Cones
Pyrometric cones are small pyramids of clay and mineraloxide that soften and bendwhen exposed to heat. Theyindicate when ceramic warehas fired to maturity.
Pyrometric cones comein 1 1/8" and 2 ½" lengths.Use the 2½” cones. Conesmounted on the kiln shelfmust be slanted 8° from ver-tical. They will not bend ac-curately if they are slantedto the wrong angle.Self-support ing largecones have the correct slantbuilt into the base. Stan-dard cones must bemounted in a clay or wireplaque.
The chart on page 14shows the temperatures ofpyrometric cones. Programyour controller to the conerecommended for the ce-ramic ware that you arefiring.
For small ceramicpieces, such as figurines,program a rate of400°F/222°C. Fire to thetemperature shown in the108°F column of the Tem-perature Equivalents chartfor the cone number youare firing.
Before deciding on thefiring speed of important pieces, test fire sample clay pieces.
Note: Do not fire beyond your kiln’s maximumtemperature. Firing hotter will void your warranty.Kilns with glass view port: do not fire hotter than1700°F/926°C.
Loading and FiringOverglaze
Overglaze is decoration applied over fired glaze or pol-ished porcelain bisque. Overglazes include china paints,gold, and luster, which fire from cone 022 to 014.
Load overglazed ware the same way you would load ce-ramic glaze. Use stilts and make sure ware is not touchingother ware. Ware must be completely dry before firing.
13
A self-supporting cone fired to matu-rity. Do not be concerned if the tip isslightly higher or lower than shown.
A “puddled” over-fired cone.
Under-fired cone.

China paints willcrack or peel if ap-plied heavily. Applyseveral light coats in-stead, firing betweeneach, until you get theshade you want. Notall china paint colorsreach maximumcolor saturation at thesame temperatureeven when fired onthe same ware. So youmust know which col-ors you should firefirst at higher tem-peratures to prevent burning out the original colors in laterfirings. For example, reds mature at a lower temperaturethan other colors and are fired after the other colors havebeen fired. Reds and yellows should not be fired side by side.Colors also mature at a lower temperature on ceramic piecesthan on porcelain or hard china. Check the overglaze manu-facturer’s literature for information on which cone to usewith each color and type of ware.
Vent the door during the first hour of firing. If your kilnhas a vent hole, leave it open during the entire firing. Allowkiln to cool to room temperature before opening the door.
Lost Wax BurnoutCaution: Only kilns with vent holes are designedfor lost wax burnout. However, you can use a kilnwithout the vent hole provided that you open thedoor ½” during venting.
Caution: Always use a wax tray.
Caution: If your kiln’s heating element is embed-ded in the floor of the firing chamber, place themetal wax tray on 3 or 4 - ½” posts inside the kiln.This prevents the element from possibly shortingout against the tray.
Note: These instructions apply to injection wax thatmelts at 200°F, not pattern waxes and plastics thatmelt at higher temperatures. If smoke appears dur-ing wax elimination, turn off the kiln. Smoking waxmeans the kiln fired hotter than 300°/148°C.
OverviewLost wax casting is the process of carving a shape in wax ,
and then casting that shape in metal. After the wax has beencarved, a mold is made of the wax shape. The mold is a nega-tive image of the wax. The wax is later melted out of the moldthrough hollow channels called sprues.
Lost wax burnout is the process of preparing a castingmold for the melted metal that will be poured into it. Thesteps in lost wax burnout:
1 Melt the wax from the mold.
2 Remove wax from the kiln before raising the tem-perature higher than 300°F/148°C.
3 Harden the mold at high temperature.
4 Maintain the mold at the casting temperature rec-ommended for the type of metal that will be pouredinto the mold.
Caution: Prevent wax or carbon from contactingthe kiln’s walls and elements. Carbon build-up in-side a kiln ruins the interior. Carbon conducts elec-tricity and causes elements to short circuit. Damageto elements from contact with foreign materials isnot covered by warranty.
A Sample ProgramSee your digital controller instruction manual to enter
this program:Rate Temp.
Segment °F/°C °F/°C Hold
1 500/277 300/148 01.00
2 500/277 1350/732 01.00
3 450/250 800/426 02.00
14
Open the door ½” to vent the kiln if your kilndoes not have vent holes.
Temperature Equivalents For OrtonSelf-Supporting Pyrometric Cones
ConeCone Self-Supporting Cones Pre-Fire
Number ColorHeated at: 27° F 108° F 270° F
Per Hour* Per Hour* Per Hour*022 — 1087 1094 Green
021 — 1112 1143 Fuschia
020 — 1159 1180 Orange
019 1213 1252 1283 Yellow
018 1267 1319 1353 White
017 1301 1360 1405 Pink
016 1368 1422 1465 Light Blue
015 1382 1456 1504 Violet
014 1395 1485 1540 Gray
013 1485 1539 1582 Green
012 1549 1582 1620 Fuschia
*Rate of temperature increase during last 90 - 120minutes of firing. Tables by courtesy of the EdwardOrton, Jr. Ceramic Foundation.

Segment 1 heats the wax to 300°F/148°C and holds it forone hour, allowing it to drip from the mold.
Segment 2 hardens the mold.
Segment 3 lowers temperature to 800°F/426°C, the typi-cal casting temperature for silver. (Most types of gold cast at900°F/482°C.)
Note: Casting temperature depends on the size ofthe mold. The temperatures above are only a guide.See your jewelry supply dealer for temperaturerecommendations.
Burnout Instructions1 Place a metal tray inside the kiln on three ½” posts.
Place the mold on a wire mesh screen on top of thetray. The mold’s sprue hole should be down. The traywill catch melting wax as it drips from the sprue hole.
2 Keep the kiln’s vent hole(s), if any, open during waxelimination. If the kiln has no vent hole, leave thedoor open ½”. This allows fumes to escape from thekiln. Heat the kiln to 300°F/148°C and hold it at thattemperature for at least one hour.
Note: Do NOT heat the wax above 300°F/148°C.Hold at 300°F/148°C for at least one hour. Duringthis hour, the wax will melt from the mold and dripinto the tray. If the kiln gets hotter than300°F/148°C, the wax may smoke and deposit car-bon inside your kiln, causing expensive damage.
3 After one hour at 300°F/148°C, open the kiln. Removethe mold and wax tray. Pour the wax from the tray andleave the tray out of the kiln until your next wax elimi-nation. (Do not leave the tray in the kiln!)
4 Heat the mold to the temperature recommended byyour jewelers’ supply house where you purchased themold material. This is usually around 1350°F/732°C.
5 Lower the temperature to the casting temperature ofthe metal. Hold at that temperature until you areready to begin casting. Remove the mold with tongs.Wear protective gloves and safety glasses.
Saving a Carbon-Damaged KilnIf you follow the above directions, your kiln should be safe
from wax damage. In some cases, a small amount of carbonmay form on the walls over a period of time. This is due to theburning of wax residue that was left in the mold. For this rea-son we recommend that you periodically fire the kiln to1500°F/815°C as follows:
1 Open the vent cover(s) or leave the door ajar ½”.
2 Fire the kiln empty to 1500°F/815°C at a rate of300°F/166°C with a one hour hold (01.00).
Firing MistakesSilver ClayCracks
Cracks that appear in fired silver clay may be due to toomuch water in the silver clay before it was fired. Anothercause is careless handling of a dried, unfired piece. To re-pair, fill the crack with silver clay and fire again.
BrittleSilver clay will not reach full strength if underfired. You
may be able to save the piece by firing again to the correcttemperature and hold.
Too Much ShrinkageWhen silver clay is overfired, it shrinks too much and
loses detail. If the kiln is firing hotter than the temperatureprogrammed, check the position of the thermocouple (seepage 17, bottom left column). Replace the thermocouple if itis old.
GlassGlass Cracking
Probable Causes:� Heating the Kiln Too Fast� Cooling the Kiln Too Fast� Fusing Incompatible Glass� Not Enough Glass Separator on Shelf
Most problems in fusing are caused by rushing the firing.The glass must change temperature slowly during the criti-cal temperature range of 100° - 500° F / 37° - 260°C. Thiscritical range applies to both heating and cooling.
The second critical temperature range is annealing,which is the cooling range of 950° - 700° F / 510° - 371°C aver-age. Cool the glass slowly during this range so the stress inthe glass will have time to dissipate.
If you become im-patient after the glasshas fused and youcrack open the door ofthe kiln for a few sec-onds to peek inside,you may hear a “ping,”which is the sound ofglass cracking. Avoidthe temptation to openthe door. Wait until thekiln has cooled to roomtemperature. Someartists schedule theirfusing so that it is com-pleted before they go tobed. That way they will
15
Flaking glass separator can cause theglass to crack. This is because the glasssticks to the shelf.

be asleep while the glass cools and they won’t be tempted toopen the door.
After each firing, examine the shelf. Recoat if the kilnwash is chipped. When glass sticks to a bare section of shelf,the glass cracks.
Glass BubblesProbable Causes:
� Heating the Kiln Too Fast� Air Trapped Between Layers of Glass� Grease or Dirt Between Layers of Glass� Uneven Glass Volume� Moisture or trapped Air Between the Glass and Shelf
Make sure the shelf is completely dry before firing. If youhave applied fresh glass separator, leave the shelf in the kilnat 300°F/148°C for 20 minutes before placing glass on it.
One way to eliminate bubbles is to hold the temperatureat 100°F/55°C below fusing temperature for 15 minutes.This gives the shelf time to heat up to match the tempera-ture of the glass.
Glass Devitrification (Frosty Surface)Probable Causes:
� Impurities in Glass� Kiln Not Vented Long Enough During Initial Heating
Devitrification is a frosty surface on the glass caused byimpurities. With some glasses, it is unavoidable. To lessendevitrification, some artists vent the door of the kiln slightlyafter fusing is completed. They close the door when the glassreaches 1000°F/537°C.
Glass Separator Sticks To GlassProbable Causes:
� Firing Too Hot� Overglaze On the Back of the Piece
Instead of firing to a full fuse temperature, try firing50°F/28°C cooler and holding at that temperature for severalminutes.
Ceramic OverglazeBreaking in Overglaze Firing
Can be caused by poorly fired bisque. A slow bisque fire isalways better for ware that is to be china painted. Thegreenware should be completely dry before being placed inthe kiln.
Purple Spots in GoldUsually due to a thin application of gold or too much thin-
ner. If gold is applied accidentally to an area it will show pur-ple after being fired unless cleaned with a good gold re-mover.
Broken Lines in GoldCan be caused by overfiring or too heavy an application.
However, this can be very attractive when gold is crackledover a dark color of fired glaze.
Peeling China PaintCan be caused by the paint being applied too heavily.
Loss of Color in China PaintsUsually a result of overfiring or thinning your paint with
too much medium when applying.
Faded Colors in Overglaze DecalsThis is the result of either underfiring or overfiring. If
pinks and reds are drab, refire to a hotter cone. When usedwith a china paint background, apply and fire the decals first,then china paint and fire again. Check the recommendationsof decal supplier. If decal was underfired, refire to proper fir-ing cone. If decal was overfired, the design may be repaintedin china paints and refired.
Weakening of Luster ColorsThis can be caused by overfiring.
White Spots in Lusters or MetalsCan be caused by moisture on the ware before it was
placed in the kiln or from having been fired at the same timeas other overglazes.
Note: Apply lusters only on a dry day.
Powdering of Luster ColorsThis can be caused by too heavy an application.
16
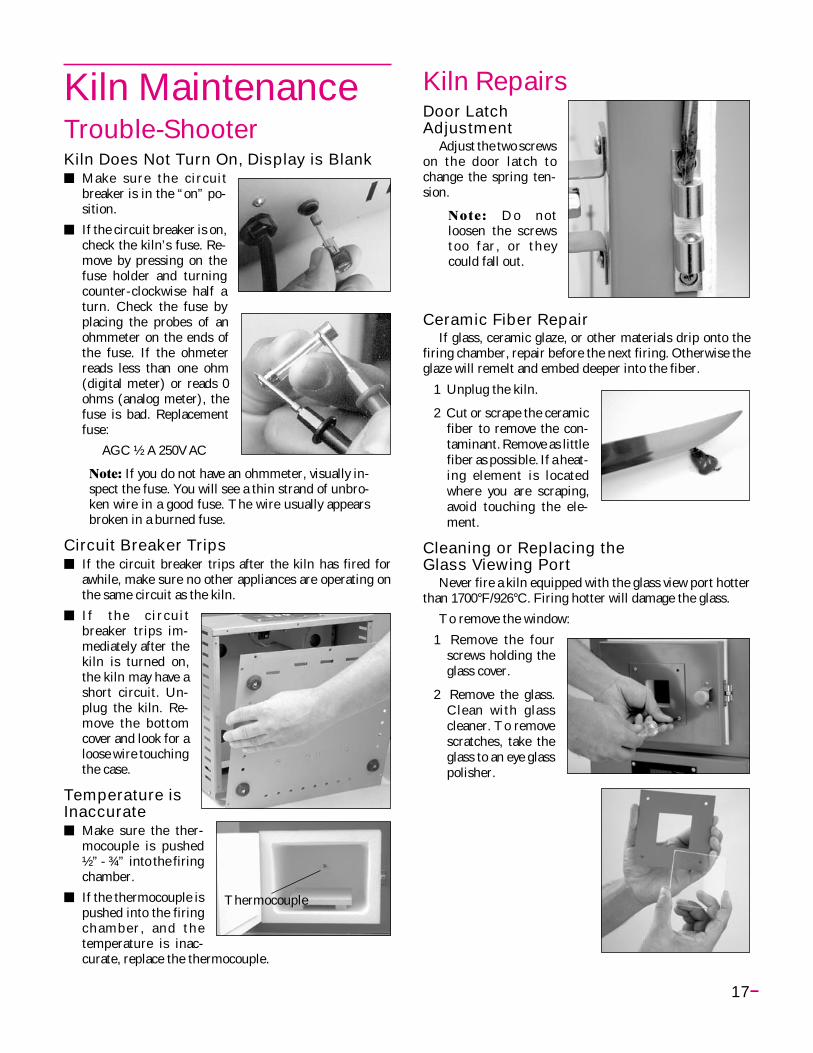
Kiln MaintenanceTrouble-ShooterKiln Does Not Turn On, Display is Blank� Make sure the circuit
breaker is in the “on” po-sition.
� If the circuit breaker is on,check the kiln’s fuse. Re-move by pressing on thefuse holder and turningcounter-clockwise half aturn. Check the fuse byplacing the probes of anohmmeter on the ends ofthe fuse. If the ohmeterreads less than one ohm(digital meter) or reads 0ohms (analog meter), thefuse is bad. Replacementfuse:
AGC ½ A 250V AC
Note: If you do not have an ohmmeter, visually in-spect the fuse. You will see a thin strand of unbro-ken wire in a good fuse. The wire usually appearsbroken in a burned fuse.
Circuit Breaker Trips� If the circuit breaker trips after the kiln has fired for
awhile, make sure no other appliances are operating onthe same circuit as the kiln.
� I f the circuitbreaker trips im-mediately after thekiln is turned on,the kiln may have ashort circuit. Un-plug the kiln. Re-move the bottomcover and look for aloose wire touchingthe case.
Temperature isInaccurate� Make sure the ther-
mocouple is pushed½” - ¾” into the firingchamber.
� If the thermocouple ispushed into the firingchamber, and thetemperature is inac-curate, replace the thermocouple.
Kiln RepairsDoor LatchAdjustment
Adjust the two screwson the door latch tochange the spring ten-sion.
Note: Do notloosen the screwstoo far , or theycould fall out.
Ceramic Fiber RepairIf glass, ceramic glaze, or other materials drip onto the
firing chamber, repair before the next firing. Otherwise theglaze will remelt and embed deeper into the fiber.
1 Unplug the kiln.
2 Cut or scrape the ceramicfiber to remove the con-taminant. Remove as littlefiber as possible. If a heat-ing element is locatedwhere you are scraping,avoid touching the ele-ment.
Cleaning or Replacing theGlass Viewing Port
Never fire a kiln equipped with the glass view port hotterthan 1700°F/926°C. Firing hotter will damage the glass.
To remove the window:
1 Remove the fourscrews holding theglass cover.
2 Remove the glass.Clean with glasscleaner. To removescratches, take theglass to an eye glasspolisher.
17
Thermocouple

Replacing the Thermocouple1 Unplug the kiln.
2 Remove the four screws holding the controller tothe front of the kiln. Carefully remove the control-ler.
3 Remove the two thermocouple wires from the backof the controller. They are held in place by button orlever type connectors. To remove the wires, lift thelevers (or press down on the connector buttons)and pull the wires out.
4 Remove the back cover of the kiln.
5 The thermocouple is located in the back of the fir-ing chamber, held in place by a metal band. Removethe thermocouple from the kiln.
6 Bend the new thermocouple between porcelain in-sulators. The thermocouple end should be two in-sulators long after bending.
7 Push the new ther-mocouple into thehole in the firingchamber. Thetwisted end mustextend into the fir-ing chamber by ½”- ¾”. Make surethe band holds thet h e r m o c o u p l e .Otherwise, thethermocouple canbe pushed out, re-sulting in an overfire.
8 Thread the thermocouple wires down to the con-troller opening at the front of the kiln. Keep thethermocouple wires away from electrical compo-nents and other wires.
9 Strip ½” of insulation from the ends of the thermo-couple wires.
10 Attach the wires to the back of the controller. Onewire is yellow, the other red. Make sure the wiresconnect to the correct terminals, which are colorcoded.
11 Install the controller and back cover of the kiln.
Replacing a Relay or Transformer1 Unplug the kiln.
2 Place the kiln on its back.
3 Remove the screws holding the sheet metal bottomto the kiln. Tilt the bottom forward to gain access tothe transformer and relay.
18
The band must secure the thermocou-ple. Otherwise the kiln could overfire.
Removing the thermocouple.

4 Hold the new part next to the one you are replacing,aligned in the same direction. Remove and transferone wire at a time from the old part to the new one.Make sure each connection is tight.
5 Replace push-onconnectors andwires damaged byheat from a burnedterminal. If wireconnectors do not fitsnugly on terminals,gently squeeze theend of the terminalwith pliers.
6 As you move the sheet metal bottom back into place,make sure the thermocouple wire attached to theback of the board is away from the other wires.
7 Install the screws holding the bottom to the kiln.
Replacing the Temperature Controller1 Unplug kiln.
2 Remove the 4 corner screws holding the control-
ler faceplate to the switch box. Carefully lift out face-plate.
3 Disconnect the wiresfrom the back of theboard. You will findtwo plugs and two sin-gle wires.
4 Connect the wires tothe new board. Rein-stall faceplate.
Replacing the Firing ChamberWhen the element burns out, the ceramic fiber firing
chamber must be replaced.
To test for a burned out element, you will need an ohm-meter:
1 Unplug the kiln.
2 Remove the back of the kiln (page 18, left column).
3 Place ohmmeter leads against the element connec-tors. A no-needle-movement reading on an analogmeter, or OPEN on a digital meter, indicates aburned out element.
Replacing the firing chamber is a factory repair.
19
Place the new part next to the old one, aligned in the same direction. Re-move and replace one wire at a time. In the photo, the relay is being re-placed. The transformer is the part in the foreground.